# Autonomous Soil Monitoring and Obstacle Avoidance Robot
by devkrishnavhora in Circuits > Arduino
38 Views, 0 Favorites, 0 Comments
# Autonomous Soil Monitoring and Obstacle Avoidance Robot
Introduction
Agriculture is becoming increasingly dependent on technology to improve efficiency and reduce manual work. Monitoring soil conditions and moving through agricultural areas manually can be time-consuming, especially over large areas. Robotics and sensors can help automate these tasks by collecting environmental data while moving autonomously.
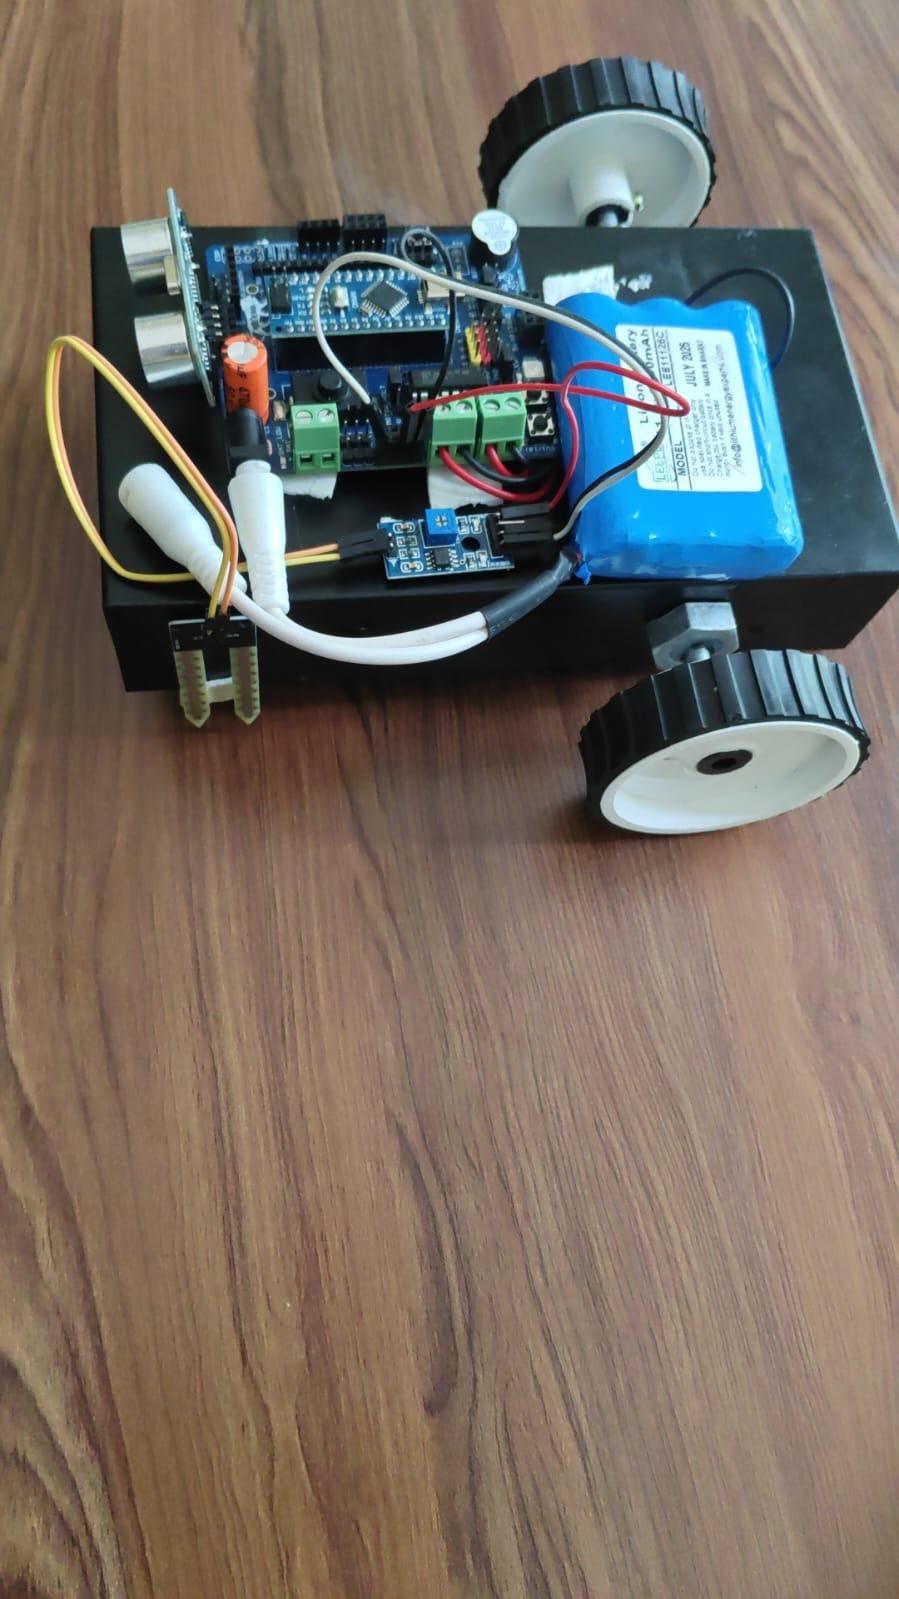
This project presents an Autonomous Soil Monitoring and Obstacle Avoidance Robot based on an Arduino Uno/Nano and a DeshBot motor driver shield. The robot uses an ultrasonic sensor to continuously detect obstacles in its path and avoid collisions. When an obstacle is detected within a specified distance, the robot can stop and change its direction before continuing its movement.
A soil moisture sensor is also connected to the Arduino to continuously collect soil moisture values while the robot moves. This allows the system to monitor soil conditions at different locations. The collected sensor values can be used for soil analysis and can support future smart agriculture or automated irrigation applications.
This project combines autonomous movement, obstacle detection, and continuous soil monitoring in a single robotic system. It demonstrates how Arduino, sensors, and motor control can be used to develop a simple and useful prototype for smart farming and agricultural automation.
Supplies
Component List
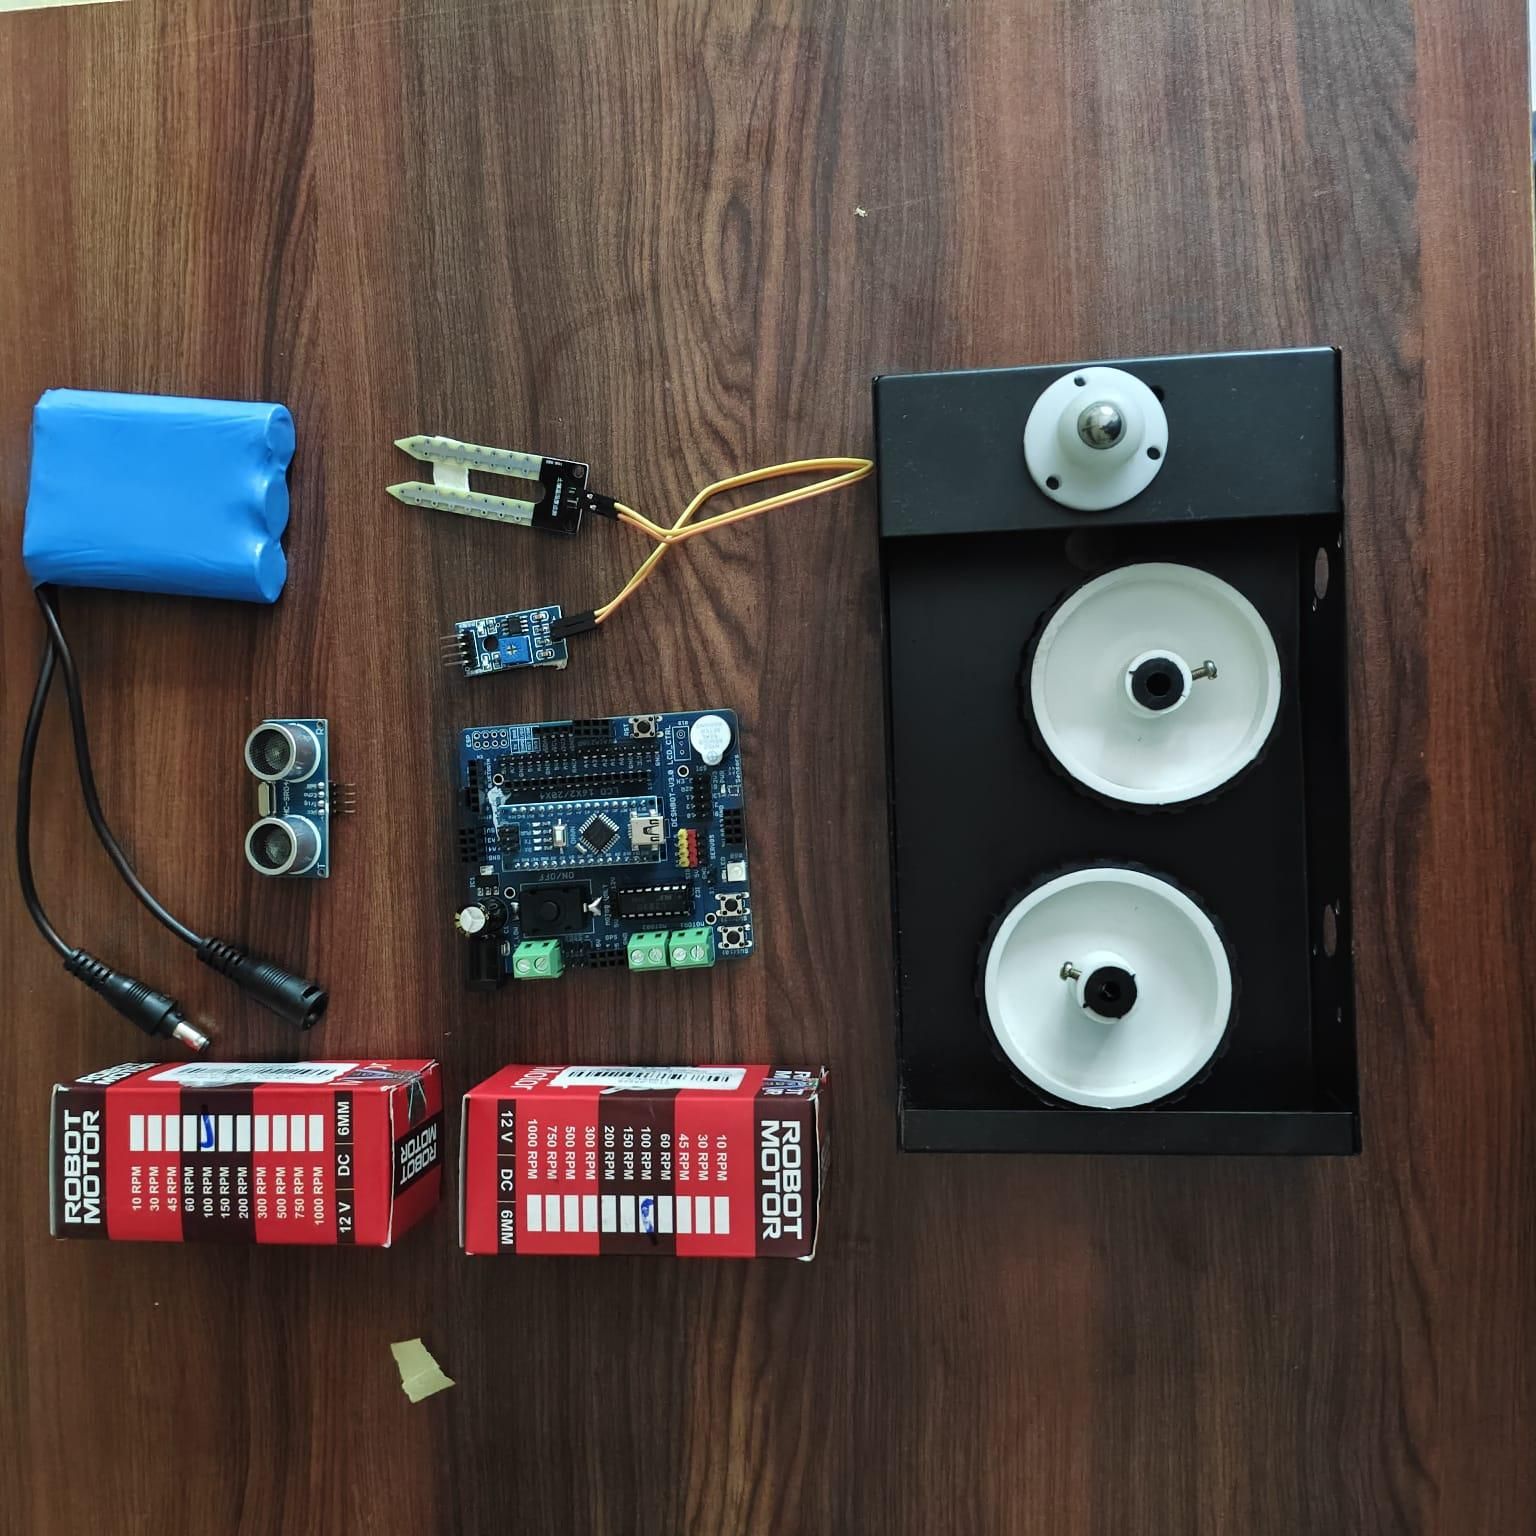
Based on the project image, the main components are:
- Arduino Nano – Used as the main microcontroller to control the robot and process sensor data.
- DeshBot Motor Driver Shield – Used to control the DC motors and provide motor movement functions.
- Ultrasonic Sensor (HC-SR04) – Used to detect obstacles and measure the distance in front of the robot.
- Soil Moisture Sensor Probe – Used to measure the moisture level of the soil.
- Soil Moisture Sensor Module – Connected with the soil probe and Arduino to provide the soil moisture reading.
- Two DC Gear Motors – Used to move the robot forward, backward, left, and right.
- Robot Wheels – Attached to the DC motors for movement.
- Robot Chassis – Used to mount and hold all the components of the robot.
- Rechargeable Battery Pack – Used to provide power to the Arduino, motor shield, and motors.
- DC Power Connector – Used for connecting the battery power supply to the robot.
- Jumper Wires and Connecting Cables – Used to connect the soil sensor .
Understand the DESHBOT Shield
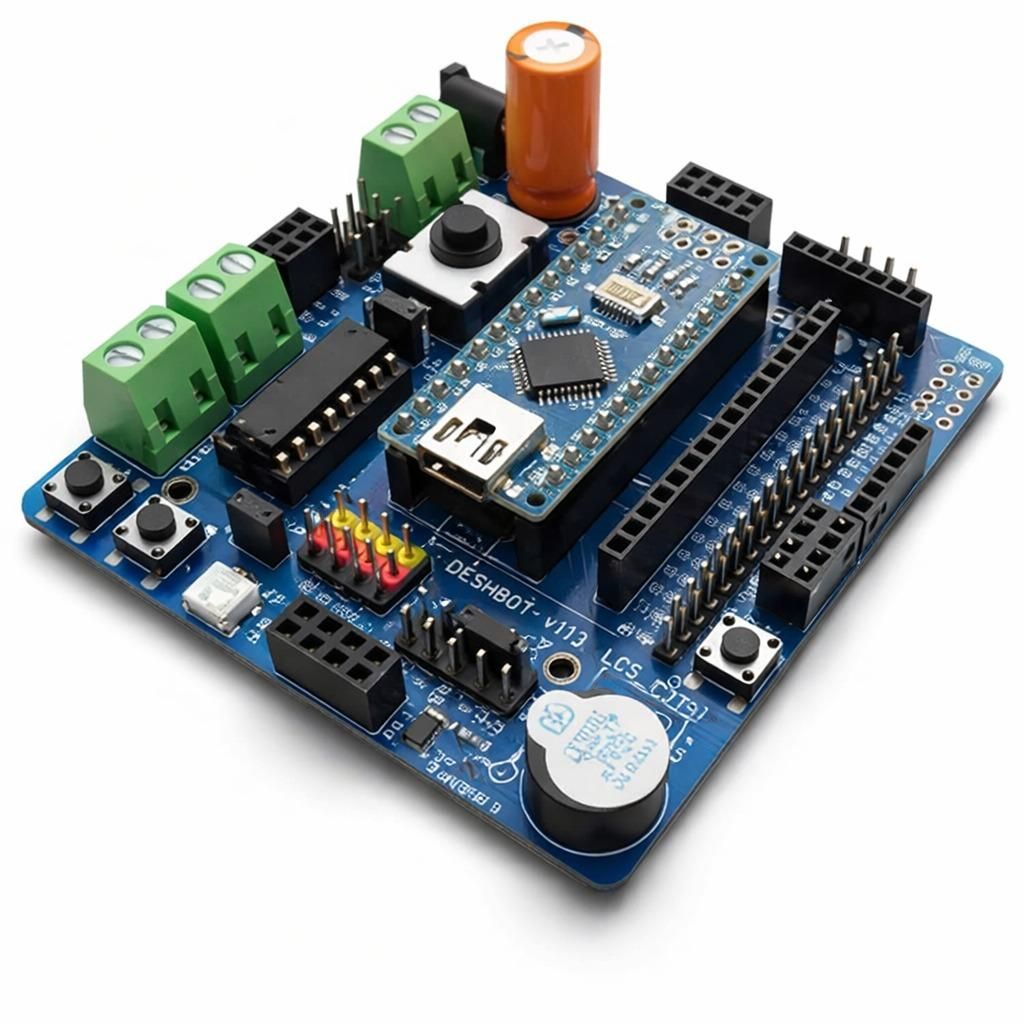
The DESHBOT Shield is the main connection board used in this robot.
The Arduino Nano is mounted directly onto the shield. Instead of connecting every component directly to the small Nano pins, the shield provides convenient connection points for the motors, power supply, and sensors.
The shield is mainly used for:
- Connecting the two DC motors
- Providing power connections
- Connecting the ultrasonic sensor
- Connecting the soil moisture sensor
- Providing additional Arduino connections
Before connecting any component, carefully check the labels printed on the DESHBOT Shield. Make sure that the correct pins and terminals are being used.
Insert the Arduino Nano
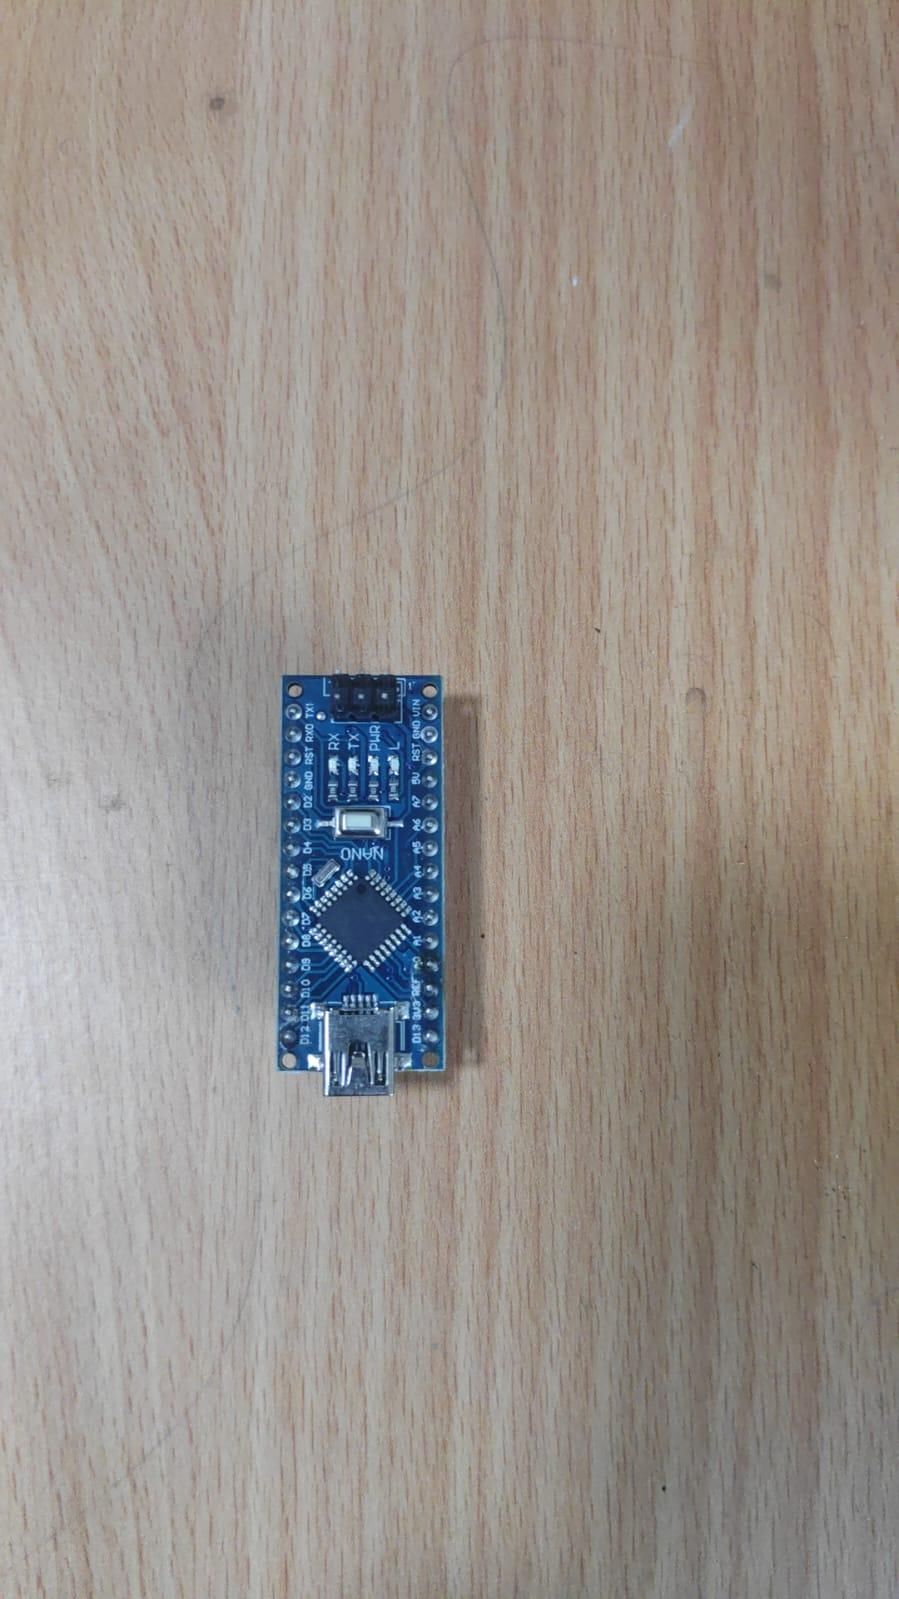
first, place the Arduino Nano onto the Nano headers provided on the DESHBOT Shield.
Carefully align the pins of the Arduino Nano with the corresponding headers on the shield.
Make sure the pins are straight and correctly positioned before pressing the Nano into place.
Do not apply excessive force. If the pins do not align properly, remove the Nano and check the alignment again.
The USB connector of the Arduino Nano should remain accessible after installation. This is important because the USB cable will be used to upload the program and make changes to the robot.
Once the Nano is correctly installed, the shield and Arduino can be treated as the main control section of the robot.
Connect the Two Motors
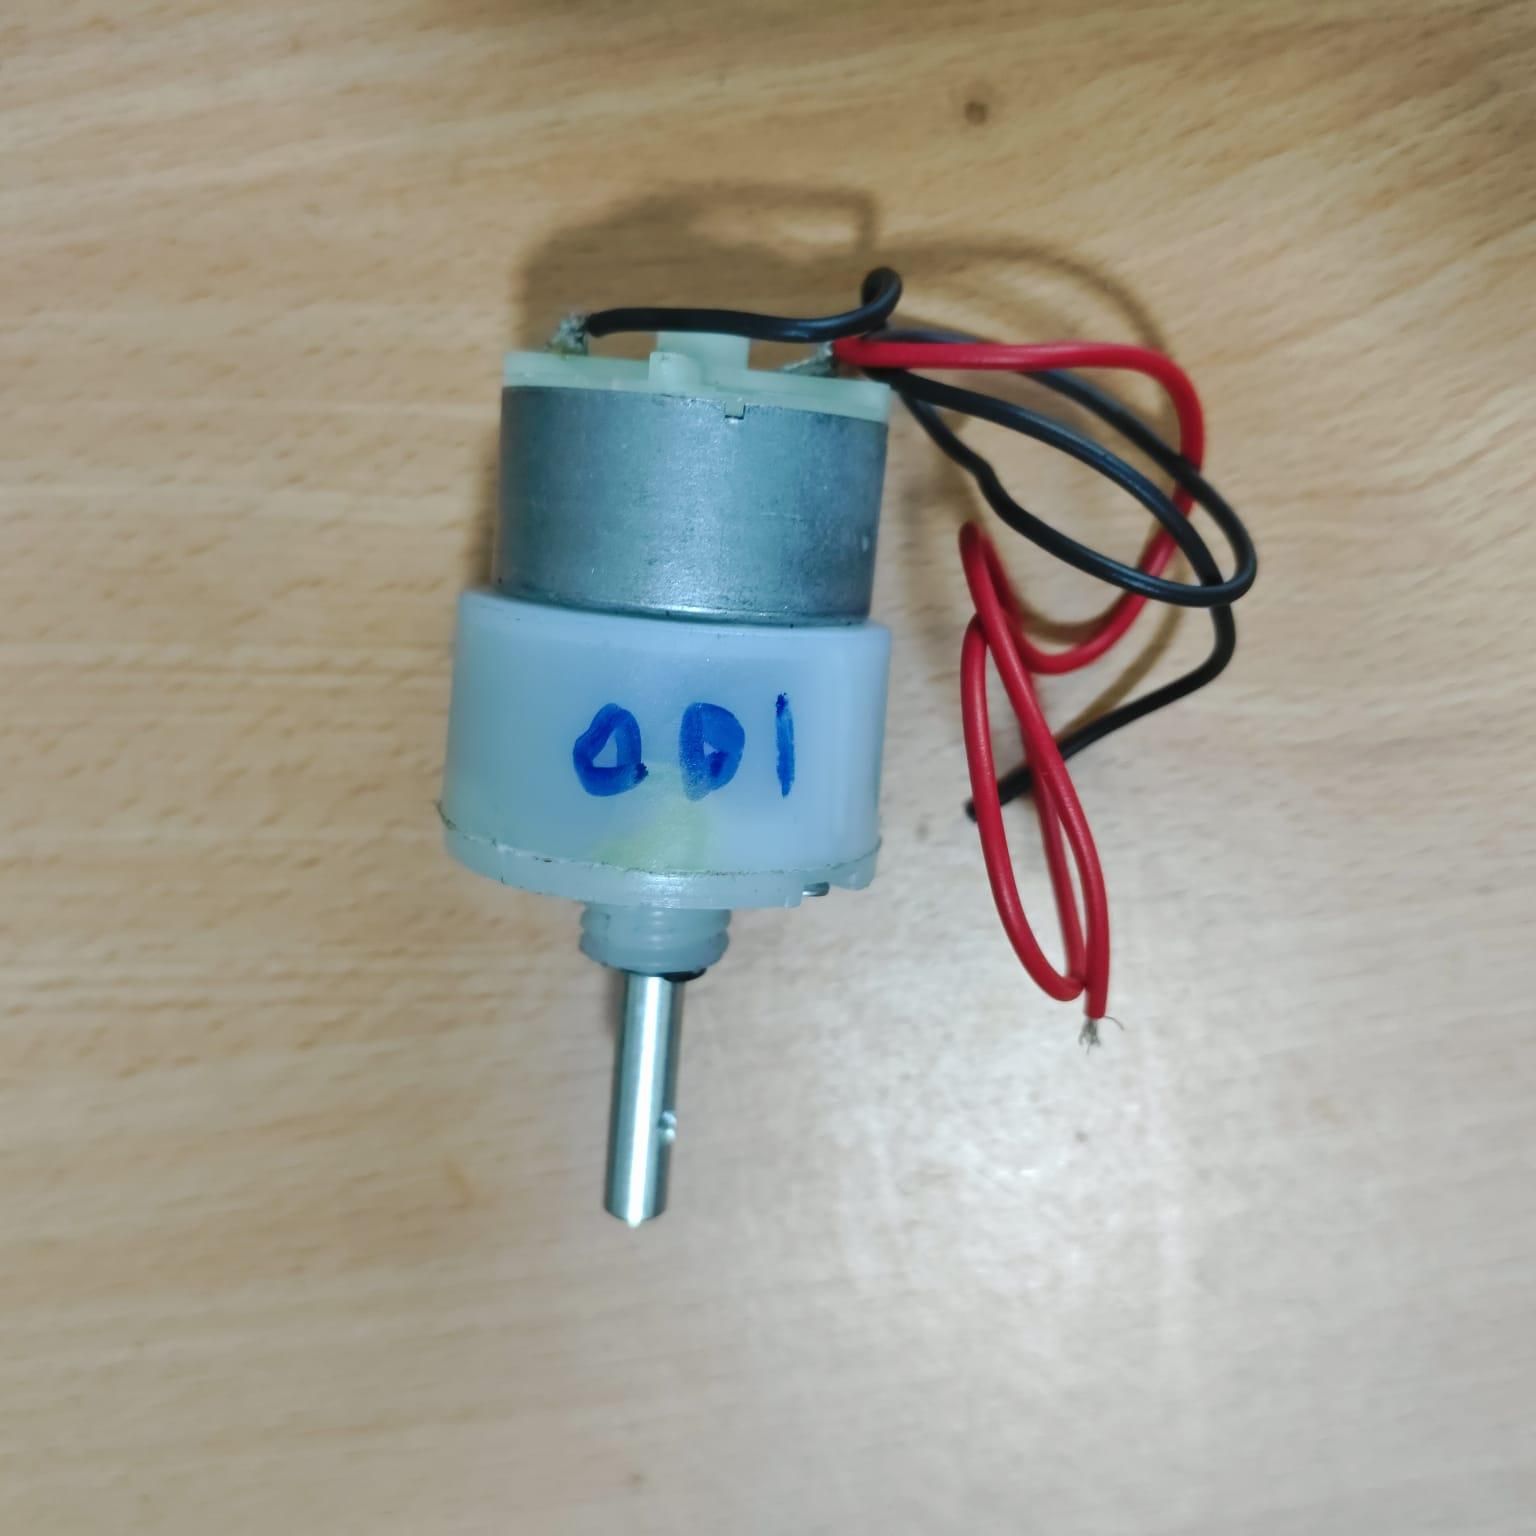
The robot uses two DC geared motors to move.
The two motors are connected to the motor terminals provided on the DESHBOT Shield.
We can identify the motors as:
- Motor 1 – M1
- Motor 2 – M2
Connect the first motor to the M1 terminals on the shield.
Connect the second motor to the M2 terminals.
The DESHBOT Shield allows the Arduino Nano to control the motors and change their direction.
The motors are responsible for moving the robot forward, backward, and turning left or right.
If one motor rotates in the opposite direction from what is required, the two wires of that motor can be reversed.
Before testing the robot on the floor, it is recommended to briefly test the motors and make sure both wheels rotate correctly.
HC-SR04 Ultrasonic Sensor
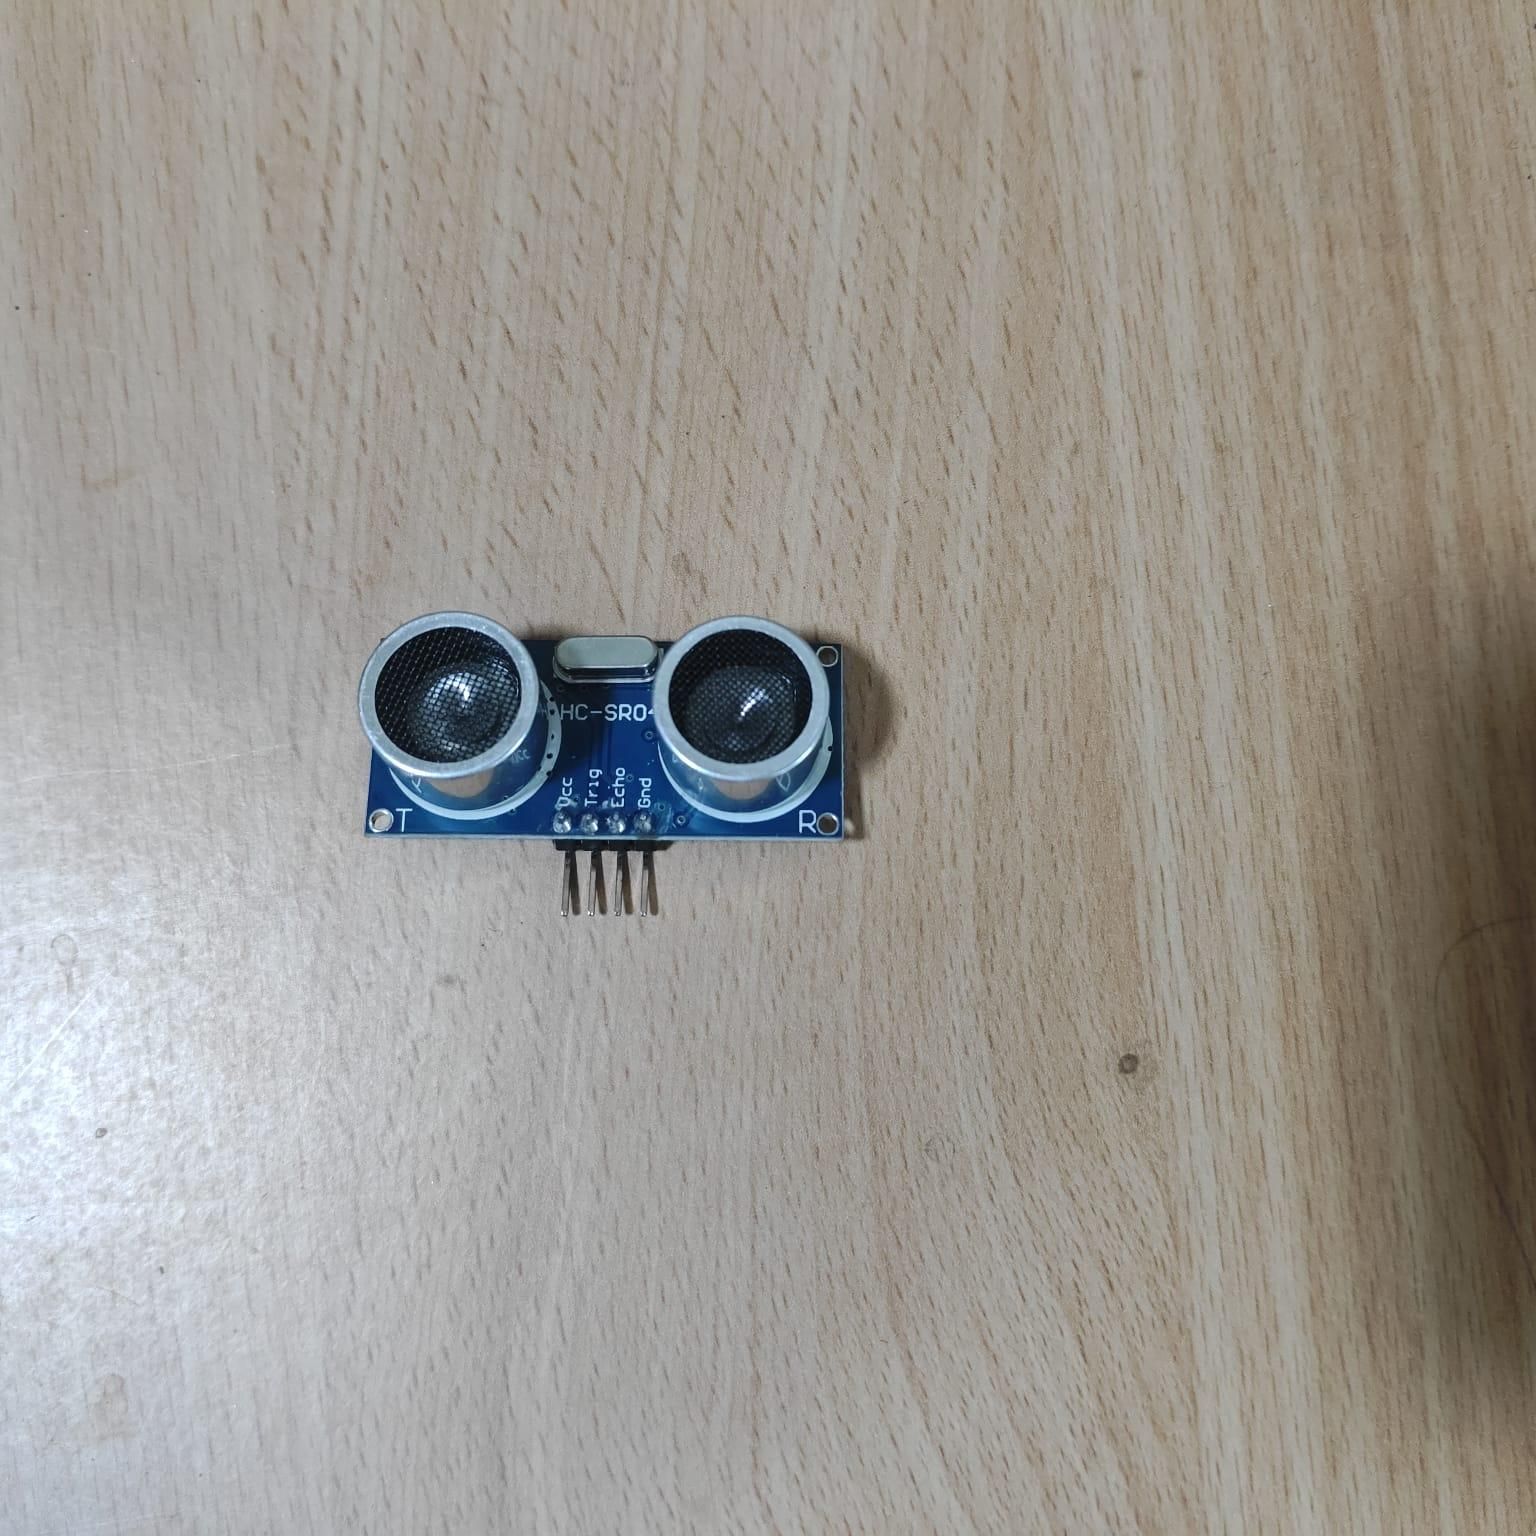
The HC-SR04 ultrasonic sensor is used to detect obstacles in front of the robot.
The sensor has four main pins:
- VCC
- TRIG
- ECHO
- GND
For this project, the ultrasonic sensor is connected as follows:
HC-SR04 PinArduino Nano
VCC - 5V
TRIG - A0
ECHO - D13
GND - GND
The TRIG pin is used by the Arduino to send a trigger signal to the ultrasonic sensor.
The sensor then sends an ultrasonic sound wave toward the object.
When the sound wave hits an object, it is reflected back toward the sensor. The ECHO pin receives the returning signal.
The Arduino measures the time taken by the signal to return and calculates the approximate distance of the object.
This allows the robot to know whether there is an obstacle in front of it
Connect the Soil Moisture Sensor
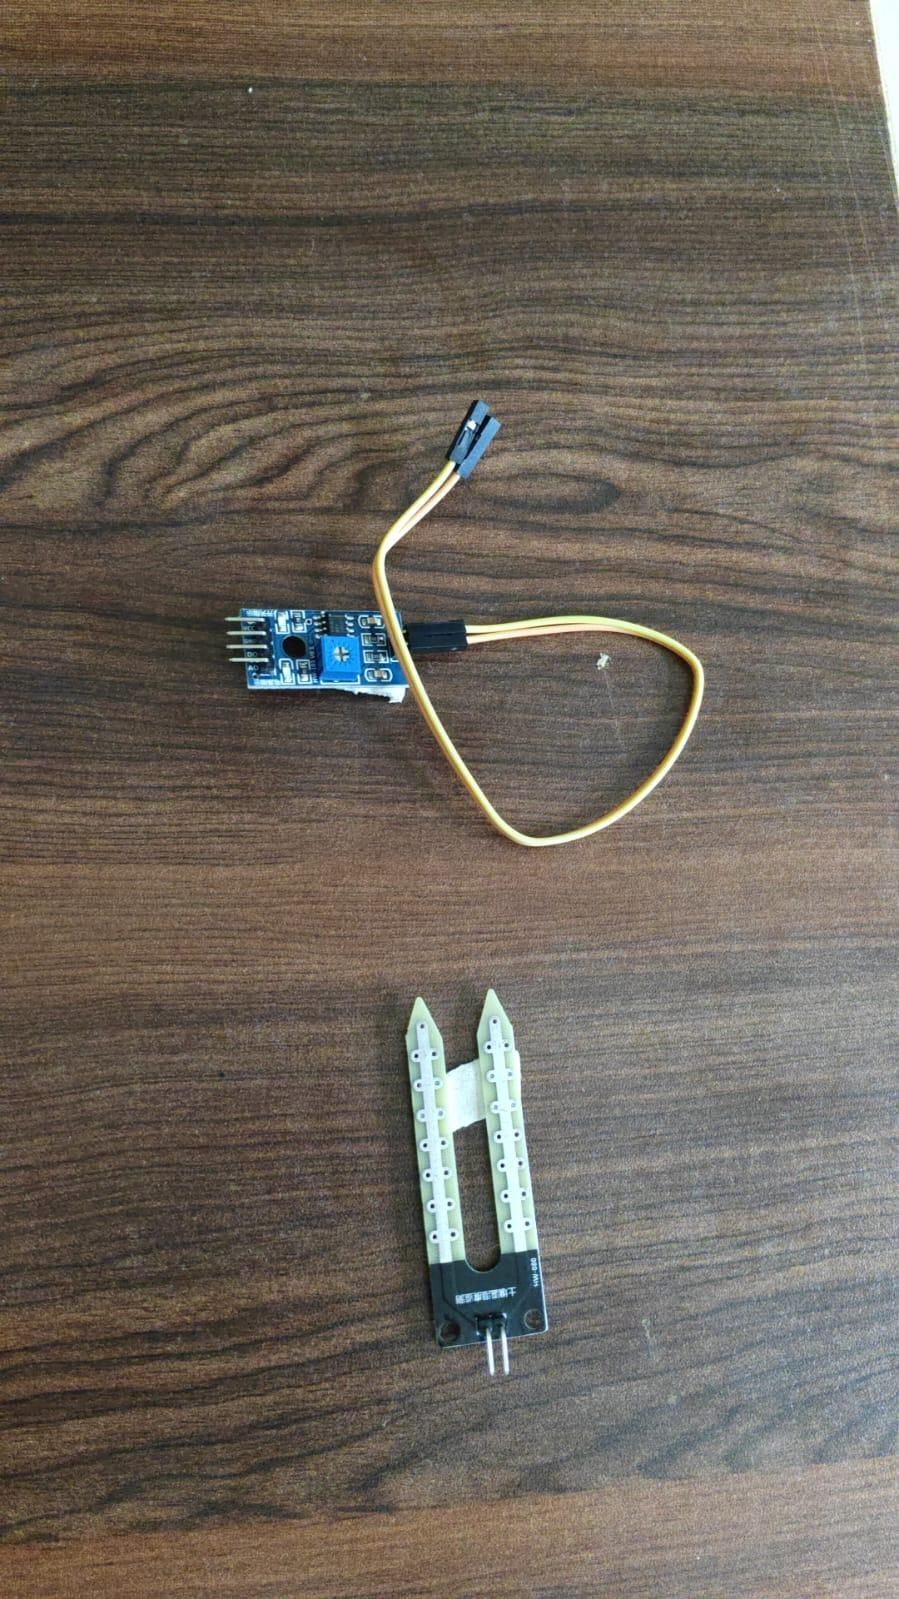
The second important sensor in this project is the soil moisture sensor.
The purpose of this sensor is to continuously measure the moisture condition of the soil.
The sensor generally has:
- VCC
- GND
- Analog Output (AO)
Connect the sensor according to the pin used in the Arduino program.
A typical connection is:
Soil Moisture Sensor
Arduino
VCC - 5V
GND - GND
AO - Analog input
The analog output of the sensor produces a changing electrical value depending on the condition of the soil.
When the sensor is inserted into dry soil, the reading will be different from the reading obtained from wet or moist soil.
The Arduino continuously reads this value and can use it to determine the approximate moisture condition.
Note: The exact analog input pin can be selected according to the Arduino program and the available connections on the DESHBOT Shield.
Understand the Soil Sensor Reading
the soil moisture sensor works by detecting changes in the electrical characteristics of the soil.
When the soil contains more moisture, the sensor reading changes compared with dry soil.
The Arduino receives this information as an analog value.
The program can then use different ranges of values to identify conditions such as:
- Dry soil
- Normal or moist soil
- Wet soil
The exact values depend on the type of soil sensor, the soil being tested, and the calibration of the sensor.
Therefore, it is useful to test the sensor in known dry and wet conditions before using it for actual measurements.
The main advantage of placing the soil sensor on a moving robot is that the robot can collect soil information from different locations instead of checking only one fixed point.
Connect the Battery
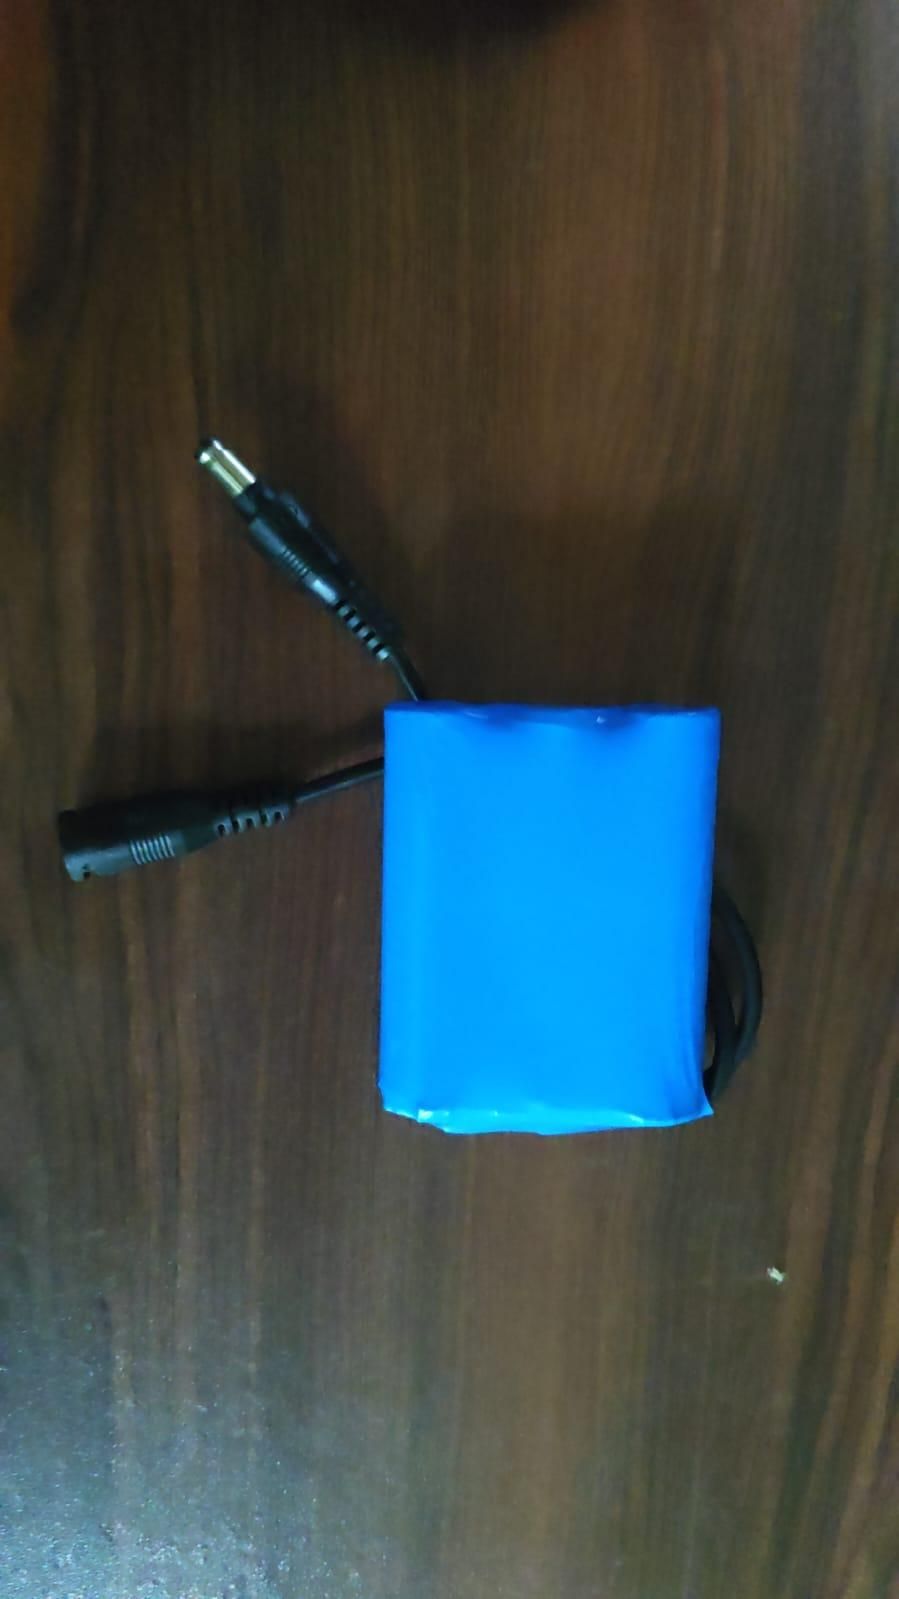
The battery is used to provide power to the robot.
Connect the battery to the power input of the DESHBOT Shield.
Carefully check the positive (+) and negative (–) terminals before making the connection.
The battery provides the required power for the motors and electronic components through the shield.
⚠️ Safety: Always check the battery voltage before connecting it. Using an incorrect voltage or reversing the polarity can damage the Arduino Nano, DESHBOT Shield, sensors, or motors.
Keep the battery securely mounted on the chassis so that it does not move while the robot is operating.
Check All Connections
Before turning on the robot, carefully inspect all the wiring.
Check the following:
- Arduino Nano is correctly installed on the DESHBOT Shield.
- Motor 1 is connected to the M1 terminals.
- Motor 2 is connected to the M2 terminals.
- Ultrasonic VCC is connected to 5V.
- Ultrasonic GND is connected to GND.
- Ultrasonic TRIG is connected to A0.
- Ultrasonic ECHO is connected to D13.
- Soil sensor VCC is connected to 5V.
- Soil sensor GND is connected to GND.
- Soil sensor analog output is connected to the correct analog input.
- Battery polarity is correct.
- No wires are loose.
- No wires are touching each other and creating a short circuit.
- Wires are away from the wheels and motors.
Install the Arduino IDE
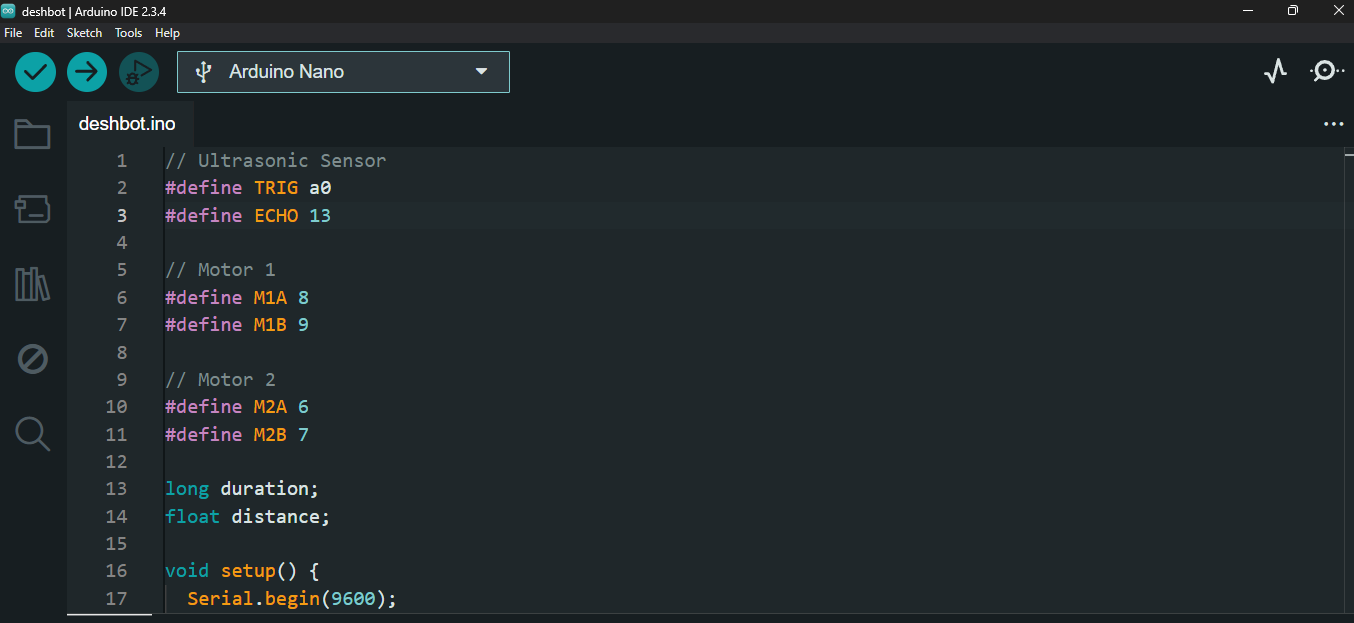
To program the Arduino Nano, install the Arduino IDE on your computer.
Connect the Arduino Nano to the computer using a suitable USB cable.
Open the Arduino IDE and select the appropriate settings.
Select:
Board: Arduino Nano
Processor: ATmega328P
Port: The COM port connected to the Arduino Nano
If your Nano uses a different USB-to-serial chip, the correct processor option may need to be selected according to the board.
Once the board and port are selected correctly, the Arduino Nano is ready to receive the robot program.
Upload the Program
Open the obstacle-avoiding and soil-monitoring robot program in the Arduino IDE.
Before uploading the program, check that the pin numbers in the code match the actual wiring.
For example, the ultrasonic sensor in this project uses:
- TRIG → A0
- ECHO → D13
The motor pins should also match the connections used by the DESHBOT Shield.
After checking the program, connect the Arduino Nano to the computer and click the Upload button.
Wait until the Arduino IDE shows that the upload has completed successfully.
After the program is uploaded, the robot can be disconnected from the computer and powered using its battery.
Downloads
How the Ultrasonic Sensor Work
The ultrasonic sensor continuously checks the area in front of the robot.
The Arduino sends a trigger signal to the HC-SR04.
The sensor sends an ultrasonic pulse and waits for the reflected signal.
The Arduino measures the time taken for the echo to return and calculates the distance.
The robot can then compare this distance with a programmed obstacle-detection limit.
For example:
- The robot starts moving forward.
- The ultrasonic sensor measures the distance.
- If there is enough space, the robot continues forward.
- If an obstacle comes within the programmed distance, the robot stops.
- The robot performs the programmed movement to avoid the obstacle.
- The ultrasonic sensor checks the path again.
- When the path is clear, the robot continues moving.
This allows the robot to move without continuously hitting objects in its path.
How the Soil Moisture Sensor Works
While the robot is moving, the soil moisture sensor can continuously collect soil readings.
The probe is placed into the soil, and the sensor produces an analog output.
The Arduino reads this output repeatedly.
The reading changes depending on the moisture condition of the soil.
For example, the program can be designed to identify:
Dry: Low moisture condition
Moist: Suitable moisture condition
Wet: High moisture condition
The exact sensor values should be calibrated because different soil types and sensor modules can produce different readings.
The important feature of this project is that the robot can collect soil moisture information continuously as it moves from one location to another
Test the Robot
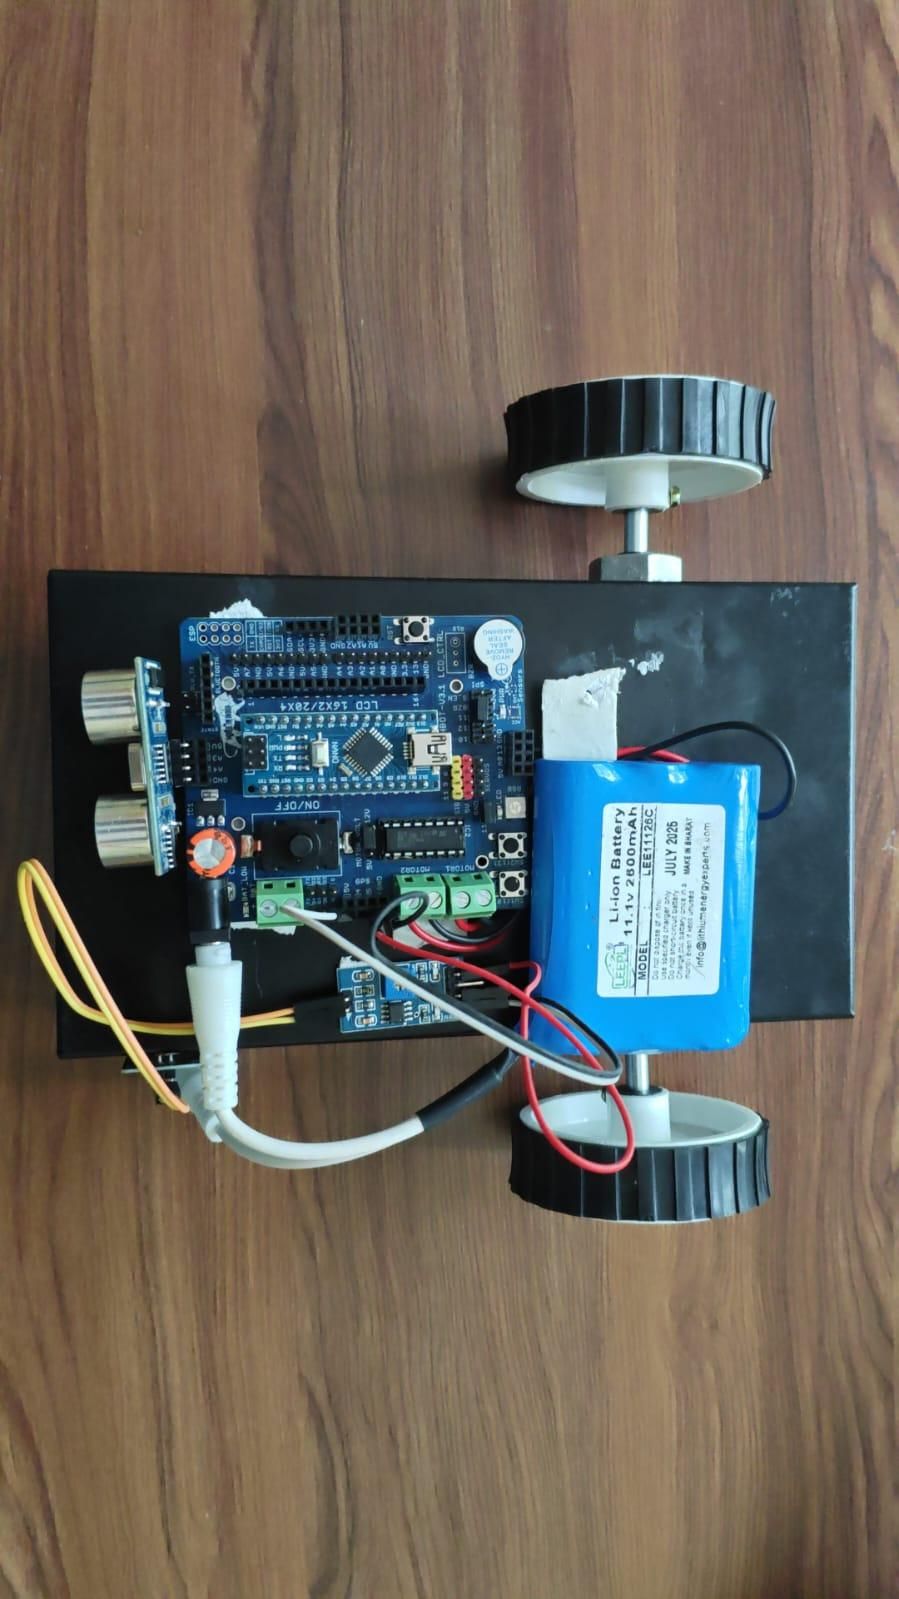
Place the robot on a flat surface with enough open space around it.
Turn on the battery and observe the robot.
First, check the motor movement. Both motors should rotate correctly and the robot should move in the expected direction.
Next, place an object in front of the robot.
The HC-SR04 should detect the obstacle and the robot should perform the programmed obstacle-avoidance action.
After testing the ultrasonic sensor, place the soil moisture probe into dry soil and note the sensor value.
Then place the probe into moist soil and compare the reading.
The readings should change when the soil condition changes.
If the readings do not change, check the sensor wiring, power supply, analog pin, and program.
Final Result
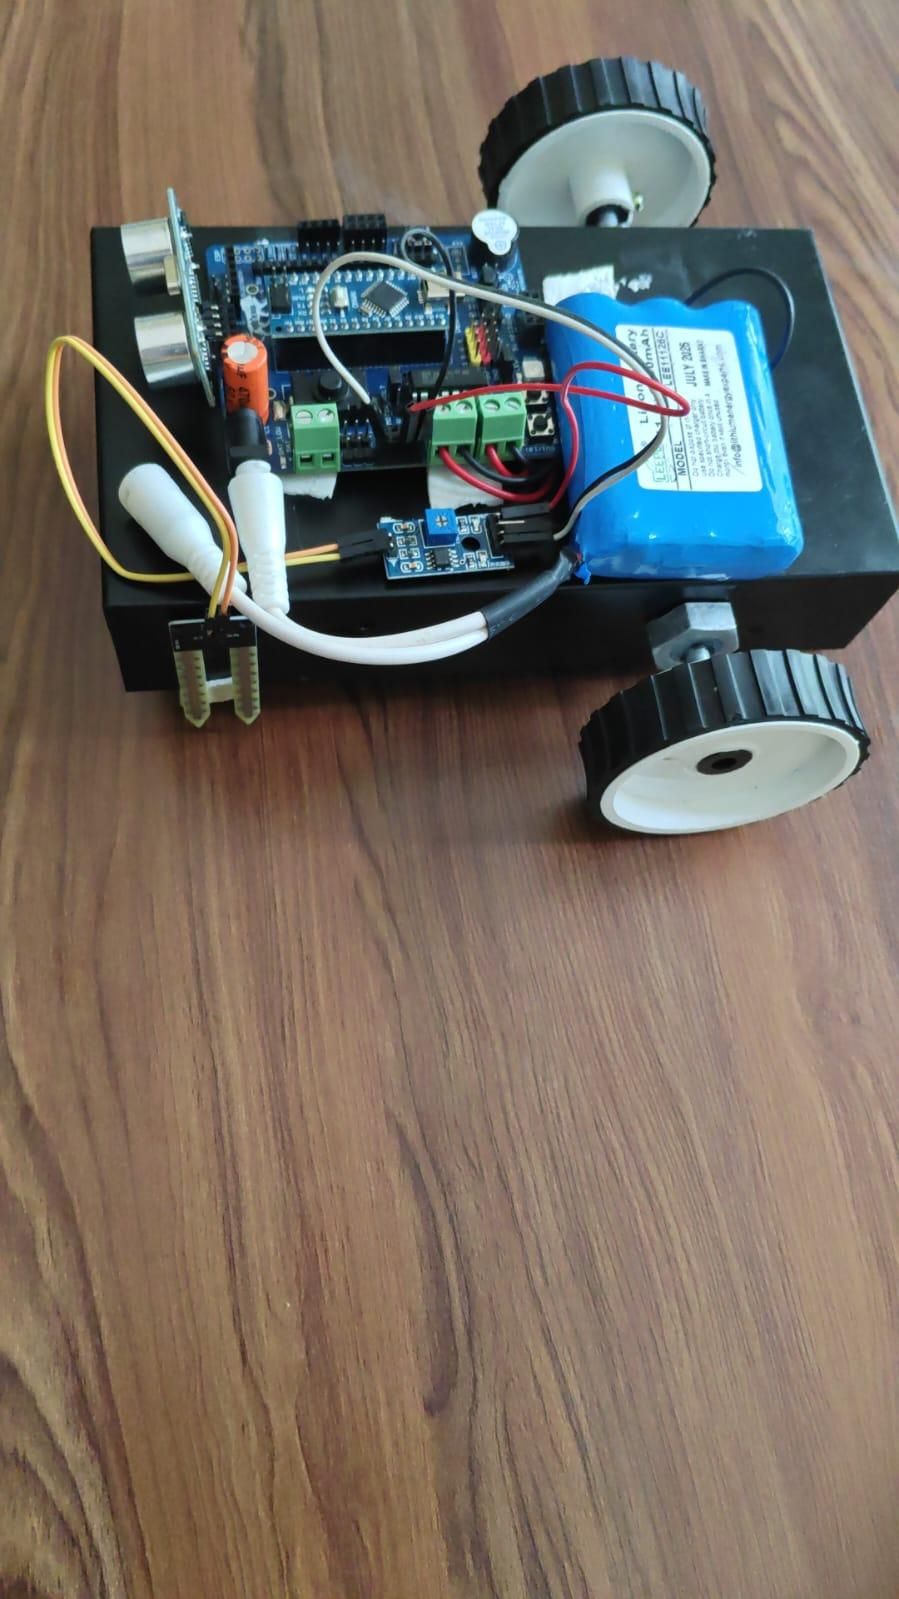
Congratulations! 🎉 Your DESHBOT Shield Soil Monitoring and Obstacle-Avoiding Robot is now complete.
The robot uses an Arduino Nano as its main controller and a DESHBOT Shield to make the connections between the Arduino, motors, sensors, and battery easier.
The two DC motors allow the robot to move around.
The HC-SR04 ultrasonic sensor detects obstacles in front of the robot and helps it avoid collisions.
The soil moisture sensor continuously collects information about the moisture level of the soil.
Together, these components create a simple mobile robot that can move through an area while monitoring soil conditions.
Future Amd Improvment
- soil moisture and distance values directly on the robot.
- Bluetooth Control – Control the robot wirelessly using a smartphone.
- Wi-Fi Monitoring – Send soil readings to an online dashboard.
- GPS Module – Record the location where each soil reading was collected.
- Multiple Soil Sensors – Measure soil conditions at different points.
- Temperature Sensor – Measure the temperature of the environment.
- Humidity Sensor – Monitor air humidity along with soil moisture.
- Automatic Water Pump – Automatically water dry soil.
- Data Logging – Save soil readings for later analysis.
- Mobile Application – Display sensor readings and robot status on a phone.
- Solar Charging – Use a solar panel to help charge the battery.
- Automatic Soil Mapping – Combine GPS and soil readings to create a moisture map.
Conclusion
This project demonstrates how a simple Arduino-based robot can be used for both obstacle avoidance and soil monitoring.
The Arduino Nano acts as the brain of the system, processing the information received from the sensors and controlling the motors. The DESHBOT Shield makes it easier to connect the motors, battery, and sensors to the Arduino.
The ultrasonic sensor allows the robot to detect obstacles and navigate around them, while the soil moisture sensor continuously collects information about the soil.
This project is a useful starting point for learning about robotics, embedded systems, sensors, motor control, and smart agriculture. With additional sensors and communication modules, the same platform can be developed into a more advanced agricultural monitoring robot.