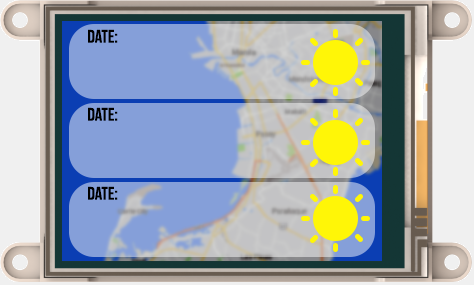
3-Day Weather Forecast Feed
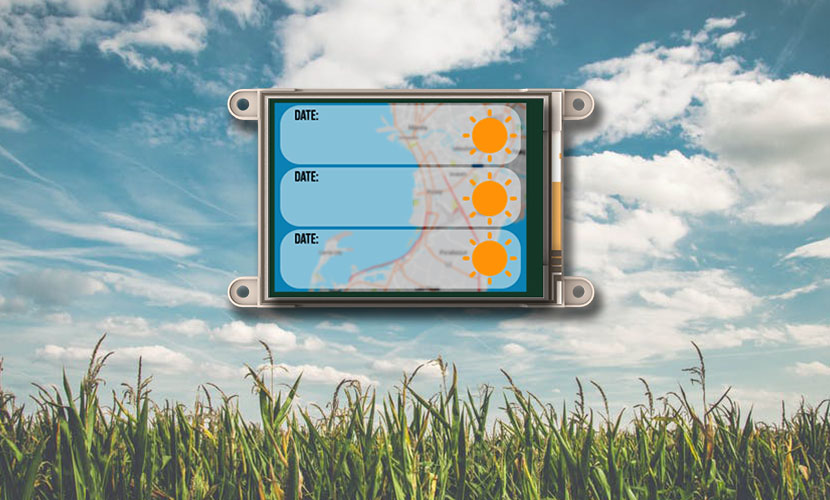
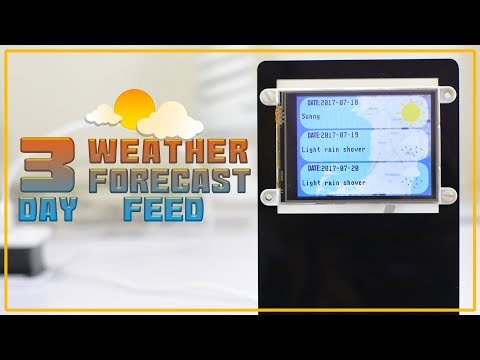
The 3-Day Weather Forecast Feed provides a comprehensive 3-day weather forecast in your desired location or based on the location of your IP address. The project uses the Wunderground Weather API service that provides JSON format responses whenever you provide a GET request. The weather forecast includes the forecast for the day it was requested and the succeeding 3 days.
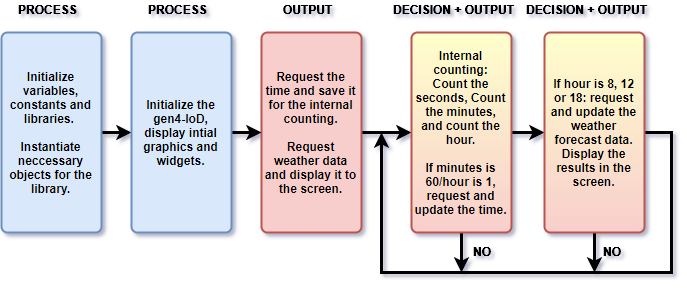
To be able to autonomously request and update the weather forecast, we added an NTP time requesting function that uses UDP connection. The time information that was requested is used internally by the code to automatically perform a time request every hour. Then, based on the hour information, the project automatically request for a weather update every 6AM, 12PM, and 6PM.
How It Works
Build
Components
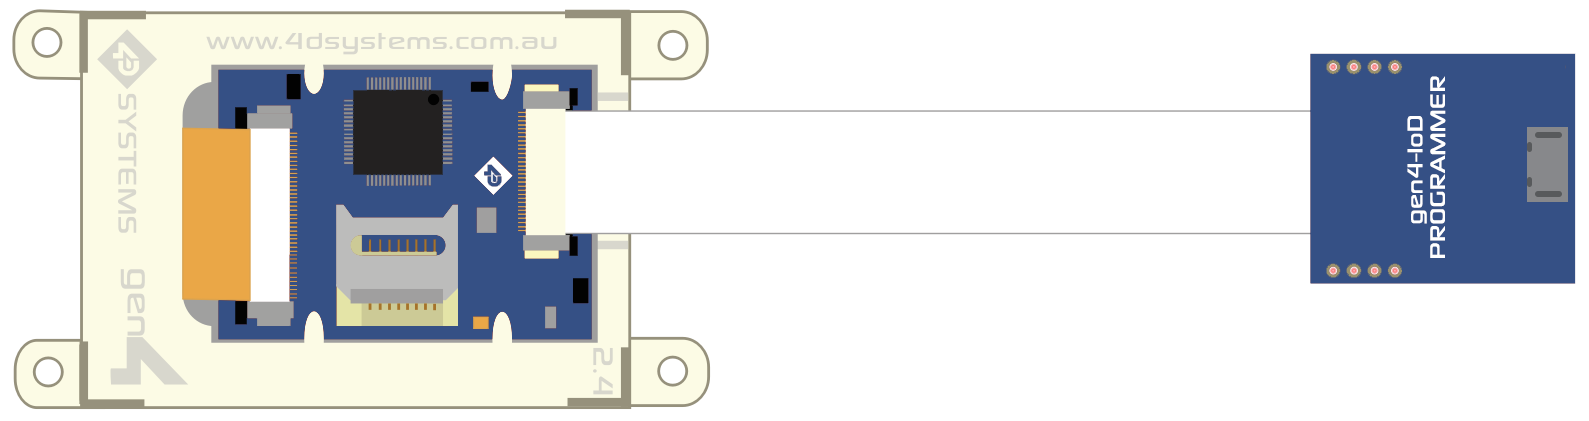
- gen4-IoD-32T
- gen4-IoD Programmer
- 10 Way Flat Flex Cable
- uSD Card
- uUSB Cable
- External Power Supply
Connect the components as shown in the diagram
Program
- For the preparation of gen4-IoD Display with Arduino IDE please refer to this steps under the Implemention section.
- Program the gen4-IoD-32T. Download the code here.
- Open the Visi project using Workshop 4. This project uses the Visi Environment.You can modify the properties of each widgets and buttons.
- Click on the “Compile” button. Note: This step could be skipped. However, compiling is essential for debugging purposes.
- Connect the display to the microUSB cable. Make sure that you are connected to the right port.
- Now click on the “(Build) Copy/Load” button.
- Workshop 4 will prompt you to select a drive to copy the image files to a uSD Card. After selecting the correct drive, click OK.
- Mount uSD Card The module will prompt you to insert the uSD card.Unmount the uSD Card properly from the PC and insert it to the uSD Card slot of the display module.After inserting your uSD card to the gen4 display, the graphics will be immediately loaded.
Click here for more gen4-IoD Projects.
APIXU WEather Code
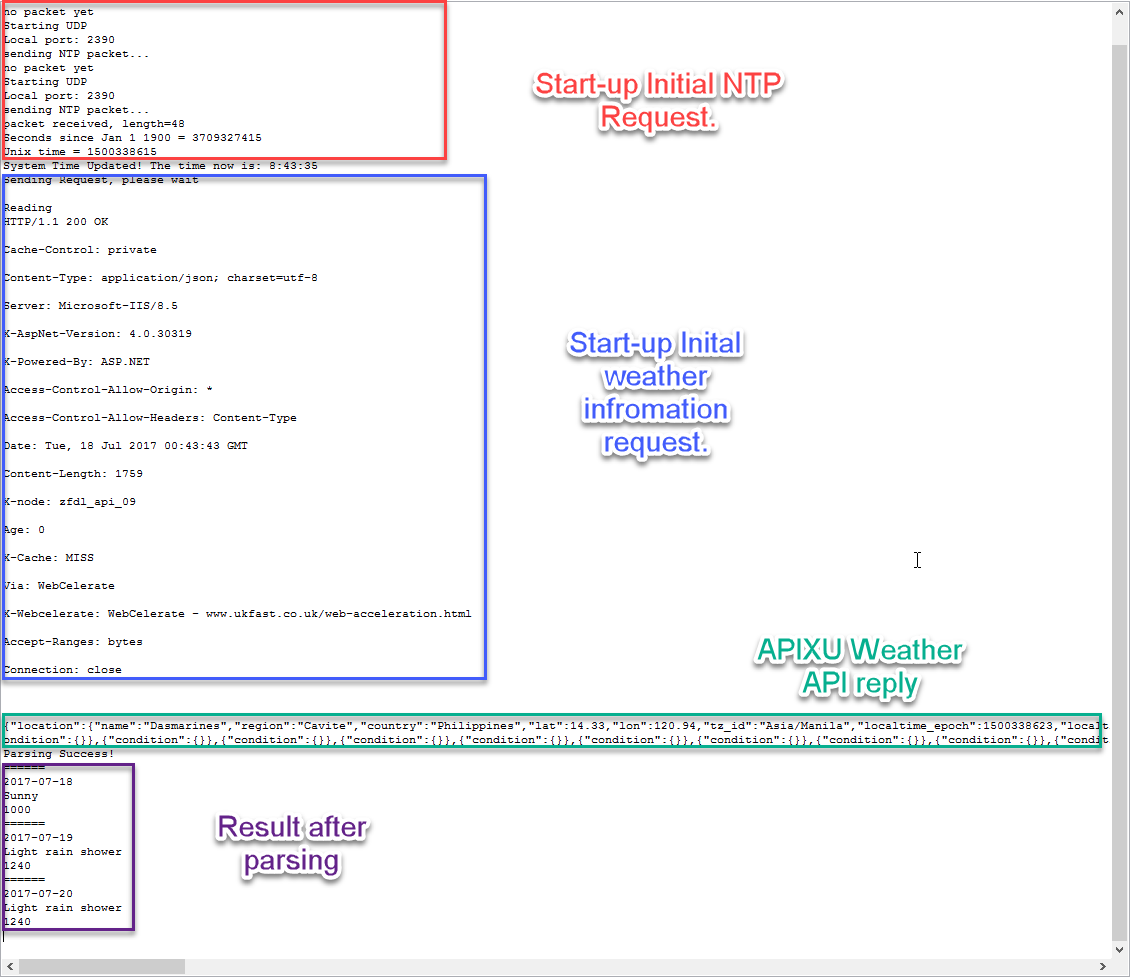
This weather information code can be downloaded in this link:http://www.apixu.com/doc/Apixu_weather_conditions.json
Please note that in the project, we removed some of the codes as they are not applicable in our location/country.