3D Printed AI Robot: Building Linguo From the Simpsons !
by carlos3dprint in Circuits > Raspberry Pi
1772 Views, 12 Favorites, 0 Comments
3D Printed AI Robot: Building Linguo From the Simpsons !
.JPEG)

I built Linguo from The Simpsons as a real 3D printed robot with AI.
In the episode, Linguo is the grammar robot Lisa Simpson builds for the school science fair. His job is to listen to people and correct their language mistakes.
I wanted to see if I could make a real version that could move, talk, listen, and correct my English.
This project combines 3D modeling, 3D printing, servos, Raspberry Pi, electronics, and AI. It is not a perfect tutorial because the build changed a lot during the process, but I wanted to share the general approach, the main challenges, and what I learned.
Watch the Full Build Video 🎥
The video shows the full process, including the 3D modeling, printing, mechanisms, wiring, AI tests, and final interaction with Linguo.
Supplies
Here are the main tools and components I used for the project:
- 3D printer
- PLA filament
- SolidWorks for the 3D modeling
- Raspberry Pi
- Servo motors
- Servo controller / PWM board
- Microphone
- Speaker
- Batteries / power bank
- Voltage converter
- Wires and connectors
- Screws and small hardware
- Magnets for removable panels
- Basic electronics tools
- AI tools for coding and voice interaction (Claude)
Choosing the Character

I have been building real versions of objects and inventions from The Simpsons, and Linguo felt like a perfect challenge.
At first, he looks like a simple robot. But once I started planning the real version, I realized he needed more than just a printed body.
To feel like Linguo, he needed moving eyes, eyelids, a moving jaw, head movement, and a voice that could correct language mistakes.
That made the project much more interesting.
Modeling Linguo in 3D
.jpg)
.jpg)
.jpg)
.jpg)
.jpg)
The first challenge was turning a 2D cartoon design into a real 3D object.
Cartoon proportions are not always consistent, so I used reference images to create a version that looked close to the original character but still had enough space inside for electronics and mechanisms.
I modeled the main parts in SolidWorks:
- the cylindrical head
- the body
- the arms
- the legs
- the feet
- the front panel
- the internal supports
- removable access panels
The body and head were designed hollow so I could place the Raspberry Pi, wires, servo controller, speaker, and other components inside.
I also designed the back of the head as a removable cover, because I knew I would need access to the eye mechanism during testing.
Designing the Eyes and Eyelids
.jpg)
.jpg)
.jpg)
.jpg)
.jpg)
.jpg)
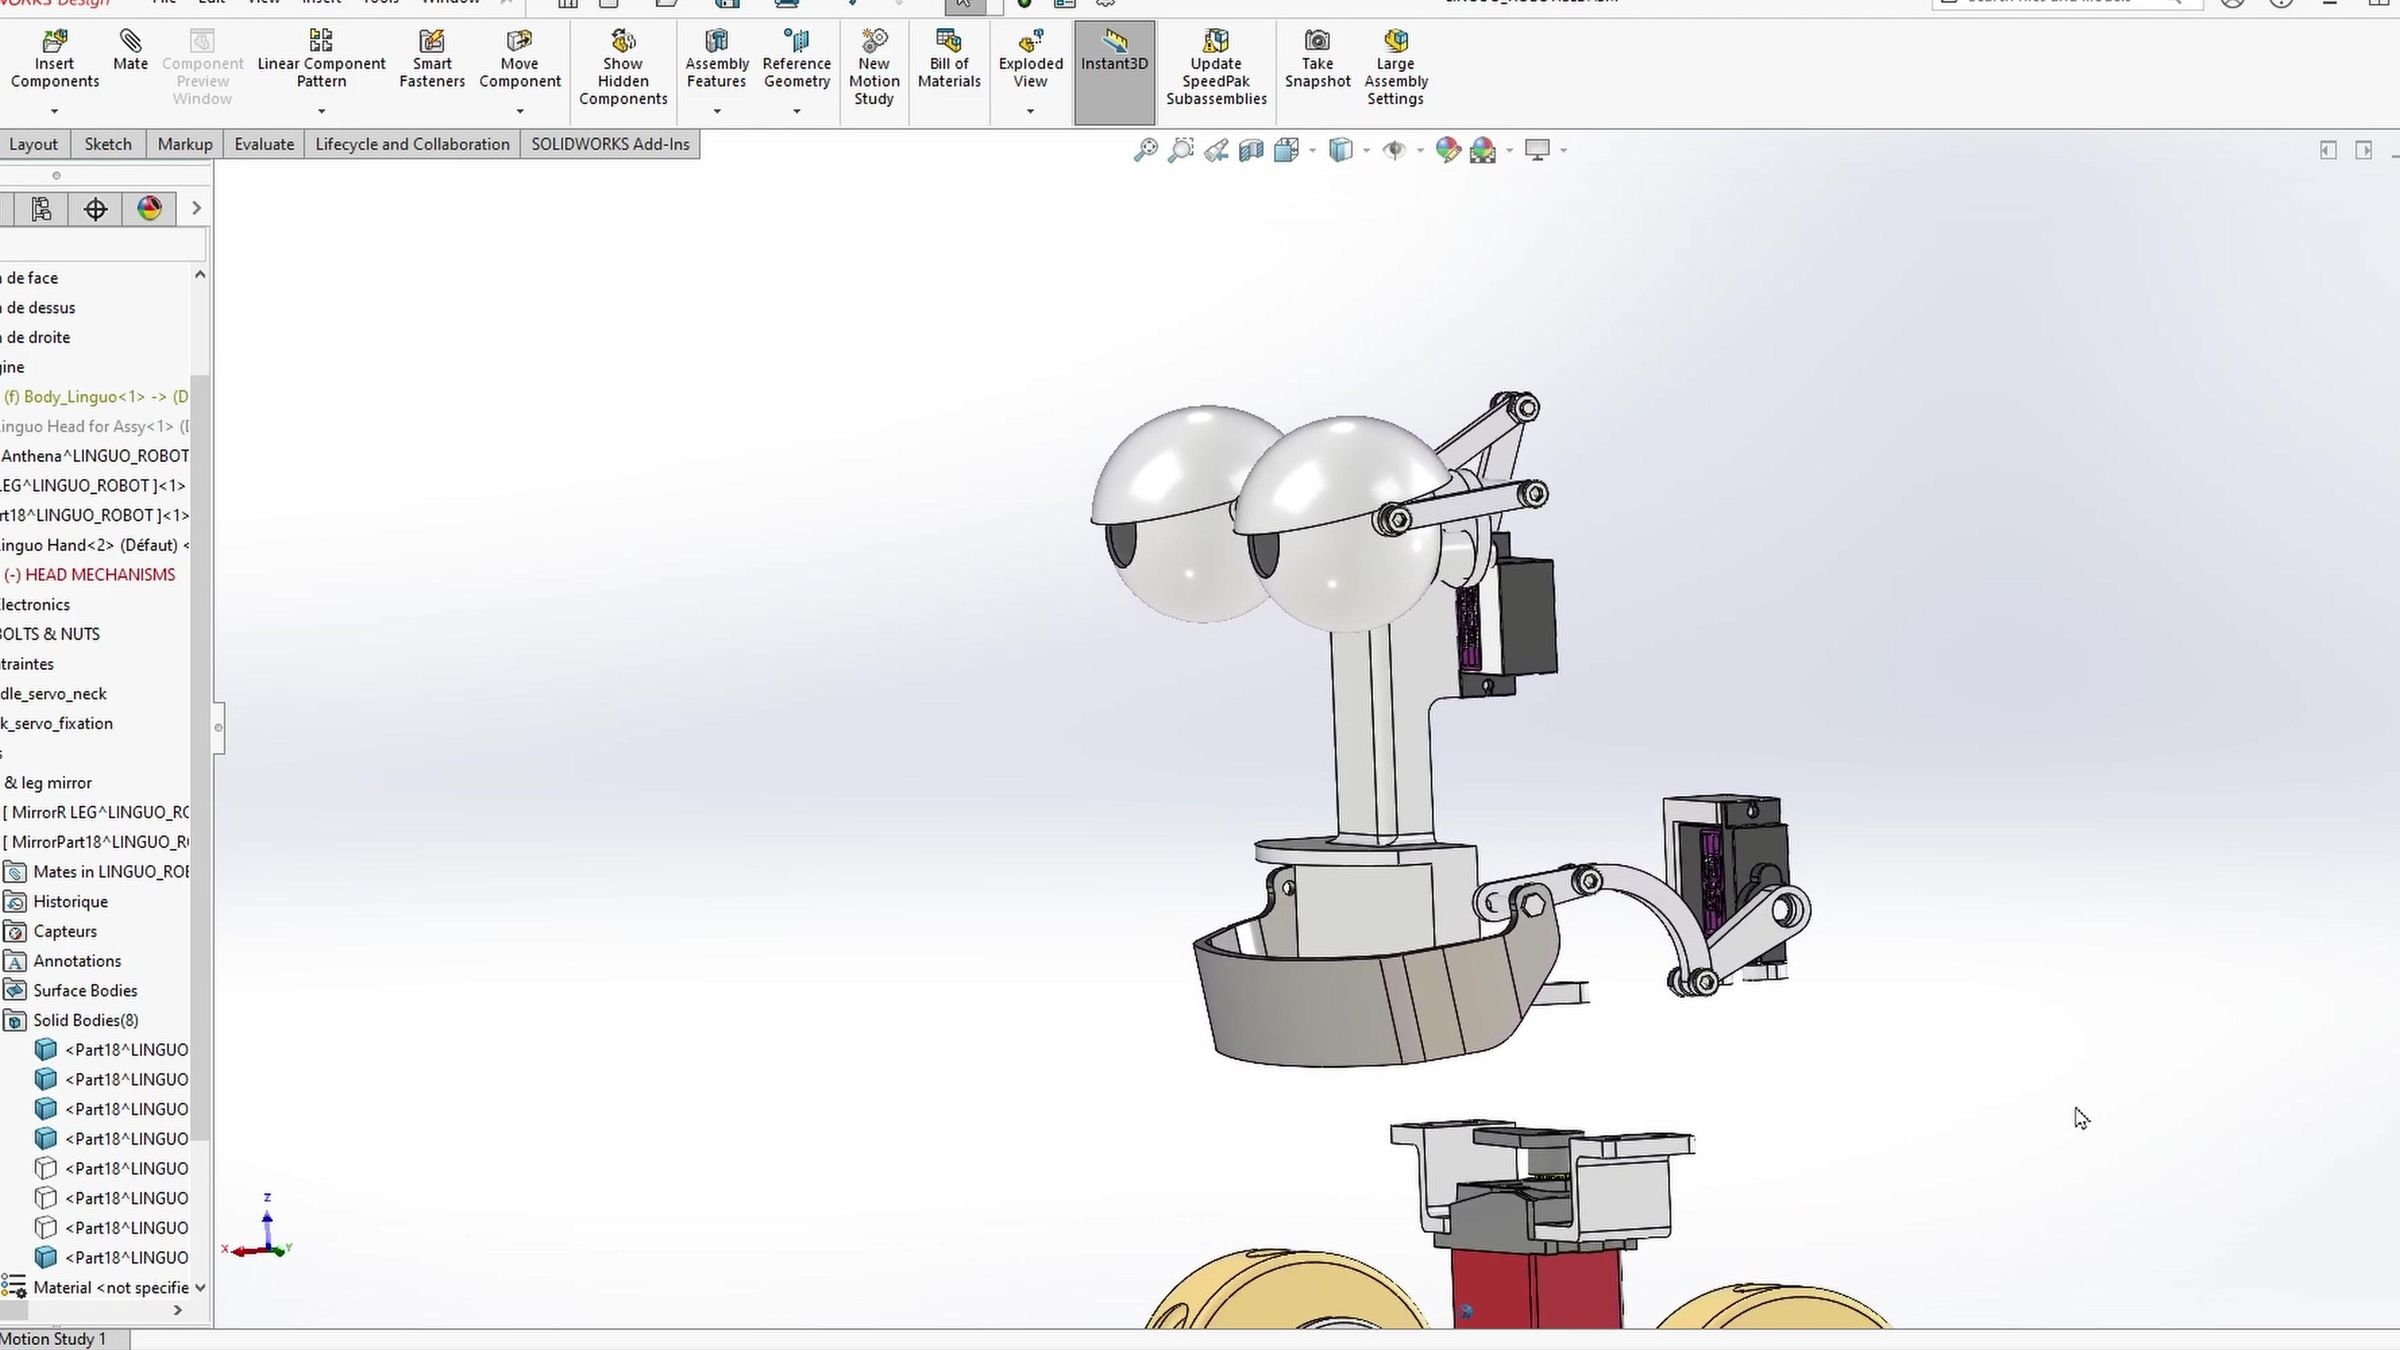
The eyes were one of the most important parts of the build.
Linguo has a very specific expression: tired, judgmental, and slightly annoyed. If the eyes were wrong, the whole robot would feel wrong.
I designed a simplified eye mechanism with moving eyelids controlled by servos. I did not try to make a super complex animatronic eye system. The goal was to create enough movement to make the character feel alive without making the mechanism impossible to fit inside the head.
Before installing the mechanism, I tested the movement outside the robot to find the right angles.
After the eyes, I worked on the jaw and neck. The jaw uses a simple servo and linkage system so the mouth can open and close while Linguo speaks.
The neck movement helps the robot feel more like a character instead of a static prop. Even small movements make a big difference.
This part was tricky because all the mechanisms had to fit inside a small head and still leave enough room for wires and assembly.
A mechanism can work perfectly on the table, but once it has to fit inside the robot, everything becomes more complicated.
Giving Linguo an AI Brain
.jpg)

.jpg)
.jpg)
.jpg)
The next challenge was making Linguo actually talk and correct my English.
For this, I used a Raspberry Pi connected to an AI system. The idea was:
- I say something wrong in English.
- Linguo listens.
- The AI understands the sentence.
- Linguo responds with a correction.
To make this work, I needed to connect the microphone, speaker, Raspberry Pi, servo controller, lights, and motors.
This was probably the most difficult part of the project.
The code took a lot of testing, and I used AI tools to help me write and debug parts of the program. Even with that help, there were still many problems to fix.
Once the AI and servos were working, I had another problem: fitting everything inside Linguo.
The inside of the robot had to hold:
- Raspberry Pi
- speaker
- microphone
- servo controller
- batteries
- voltage converter
- wires
- connectors
To make the assembly cleaner, I designed and 3D printed an internal mounting plate.
This helped hold the components in place and made the wiring less chaotic.
It is not the most visible part of the project, but it is one of the most useful parts. Good internal organization makes the robot easier to assemble, repair, and improve later.
Final Assembly
.JPEG)
.jpg)
.JPEG)
.jpg)
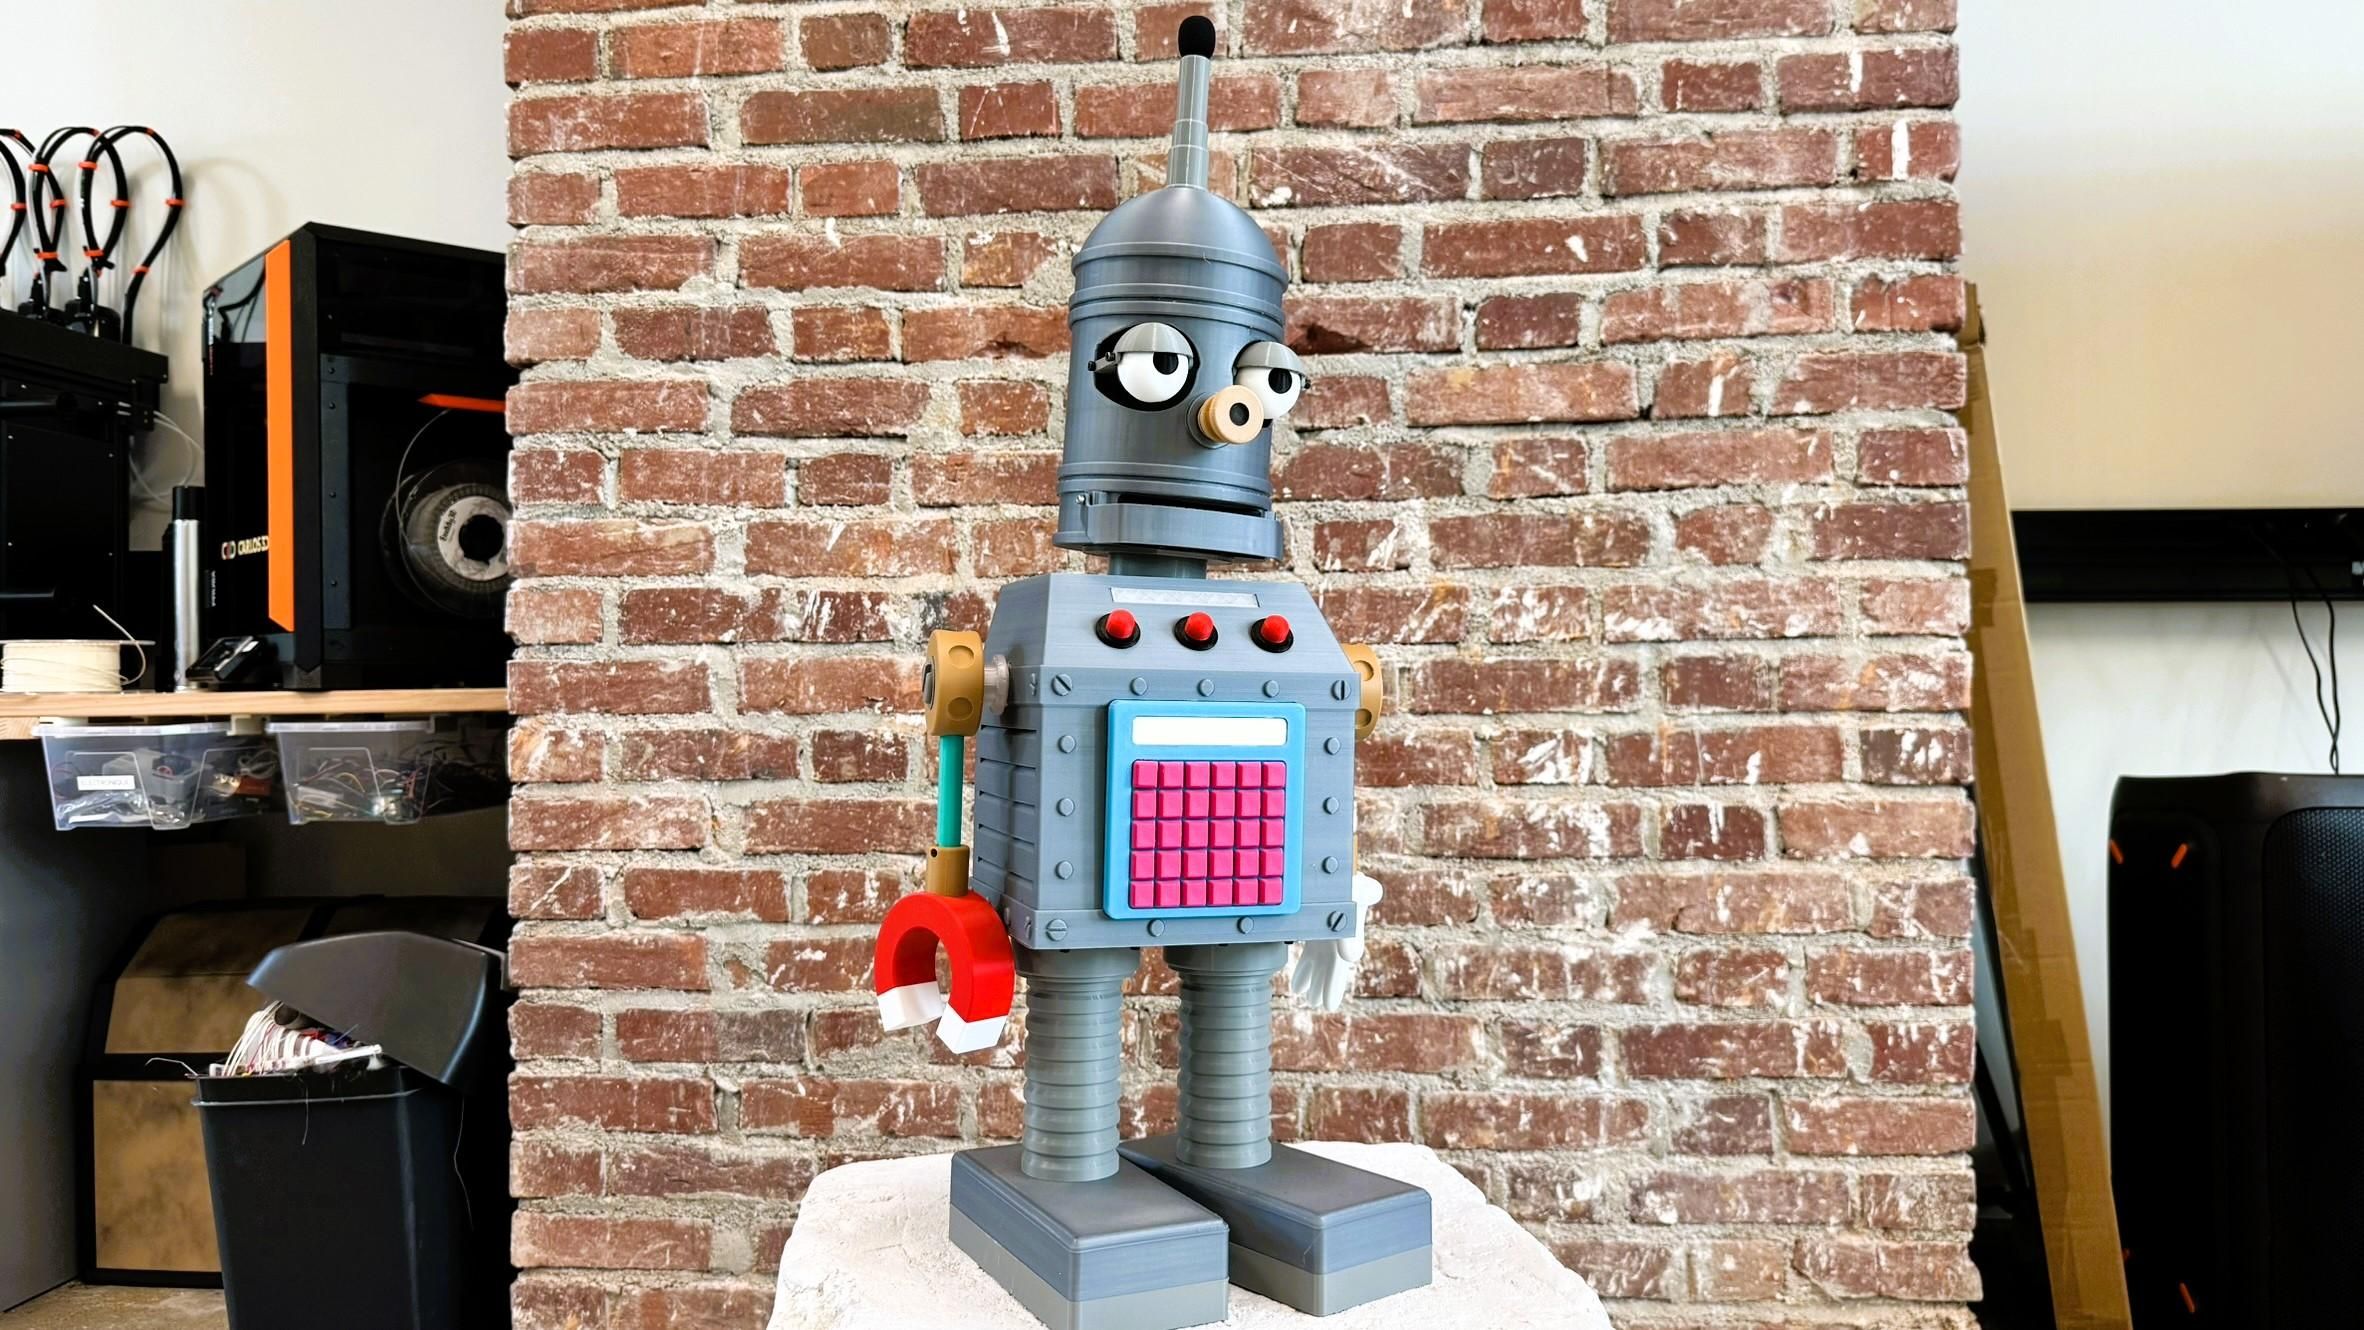
After printing, testing, wiring, and programming, I assembled the final robot.
This is always the moment where small problems appear. Parts that worked separately do not always work perfectly together.
I had to adjust the wiring, check the movement, close the body, and make sure the robot could still move without cables blocking the mechanisms.
Once everything was in place, Linguo finally started to feel alive.
What I Would Improve Next
This version works, but there are still things I would like to improve:
- better voice quality
- faster response time
- cleaner wiring
- more natural movement
- better synchronization between jaw movement and speech
- more expressive animations
- a stronger internal power system
But as a first working version, I am really happy with the result.
This project was not just about making a prop. It was about turning a cartoon idea into a real physical robot with movement, electronics, and AI interaction.
Final Thoughts
This was one of the most complex 3D printed projects I have built so far.
It combined design, mechanics, electronics, programming, and storytelling. It also reminded me that simple cartoon designs are not always simple in real life.
If you want to see the full build process, you can watch the video above.
And if you have a sentence Linguo should correct next, leave me a comment 😉