3D Printed Fan - Optimized for Heat Transfer
by Keatyn Sander in Workshop > 3D Printing
75 Views, 0 Favorites, 0 Comments
3D Printed Fan - Optimized for Heat Transfer
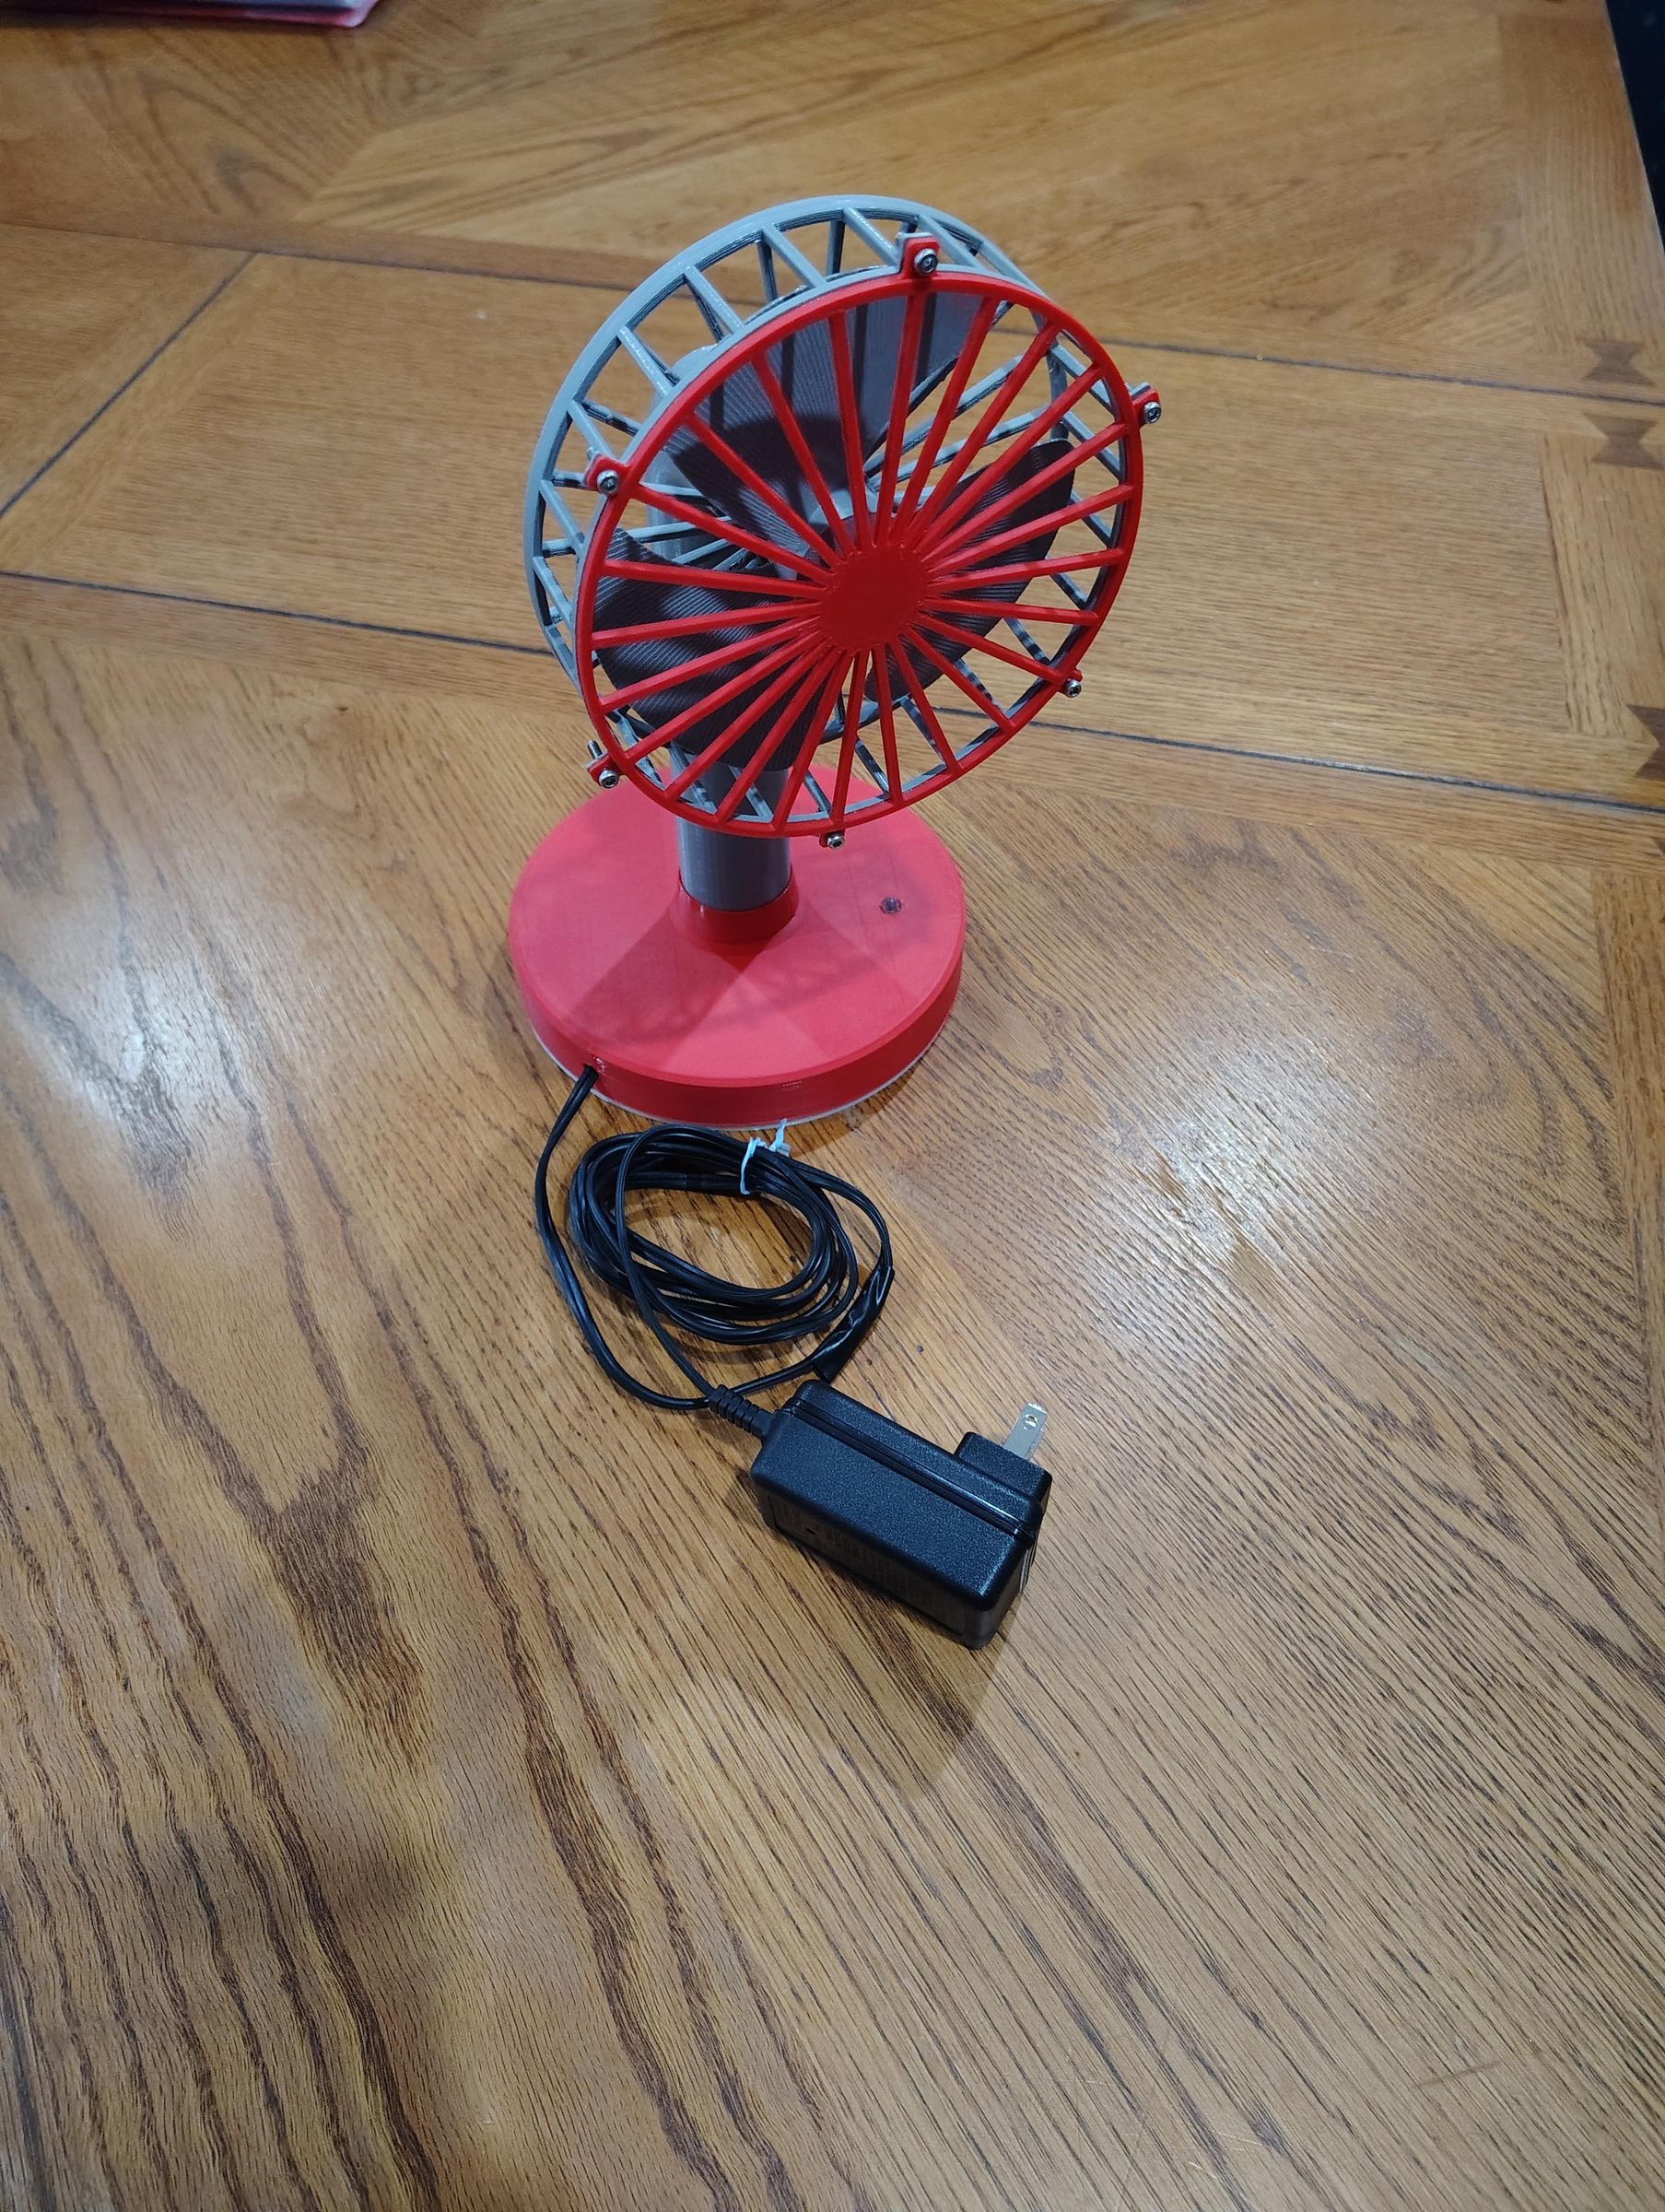
As temperatures rise during the summer, fans are one of the simplest ways to stay comfortable. But I wanted to see if a fan could be made more effective simply by changing the design of the front grill. For this project, I designed and 3D printed a small desktop fan and several different grill designs, each designed to affect the airflow in a different way.
The goal of this project was to determine which grill design provided the best cooling performance while keeping the rest of the fan the same. I tested the different designs under controlled conditions and compared the results to see which design performed best. Along the way, I got to experiment with CAD, 3D printing, airflow, and real-world engineering testing.
Supplies
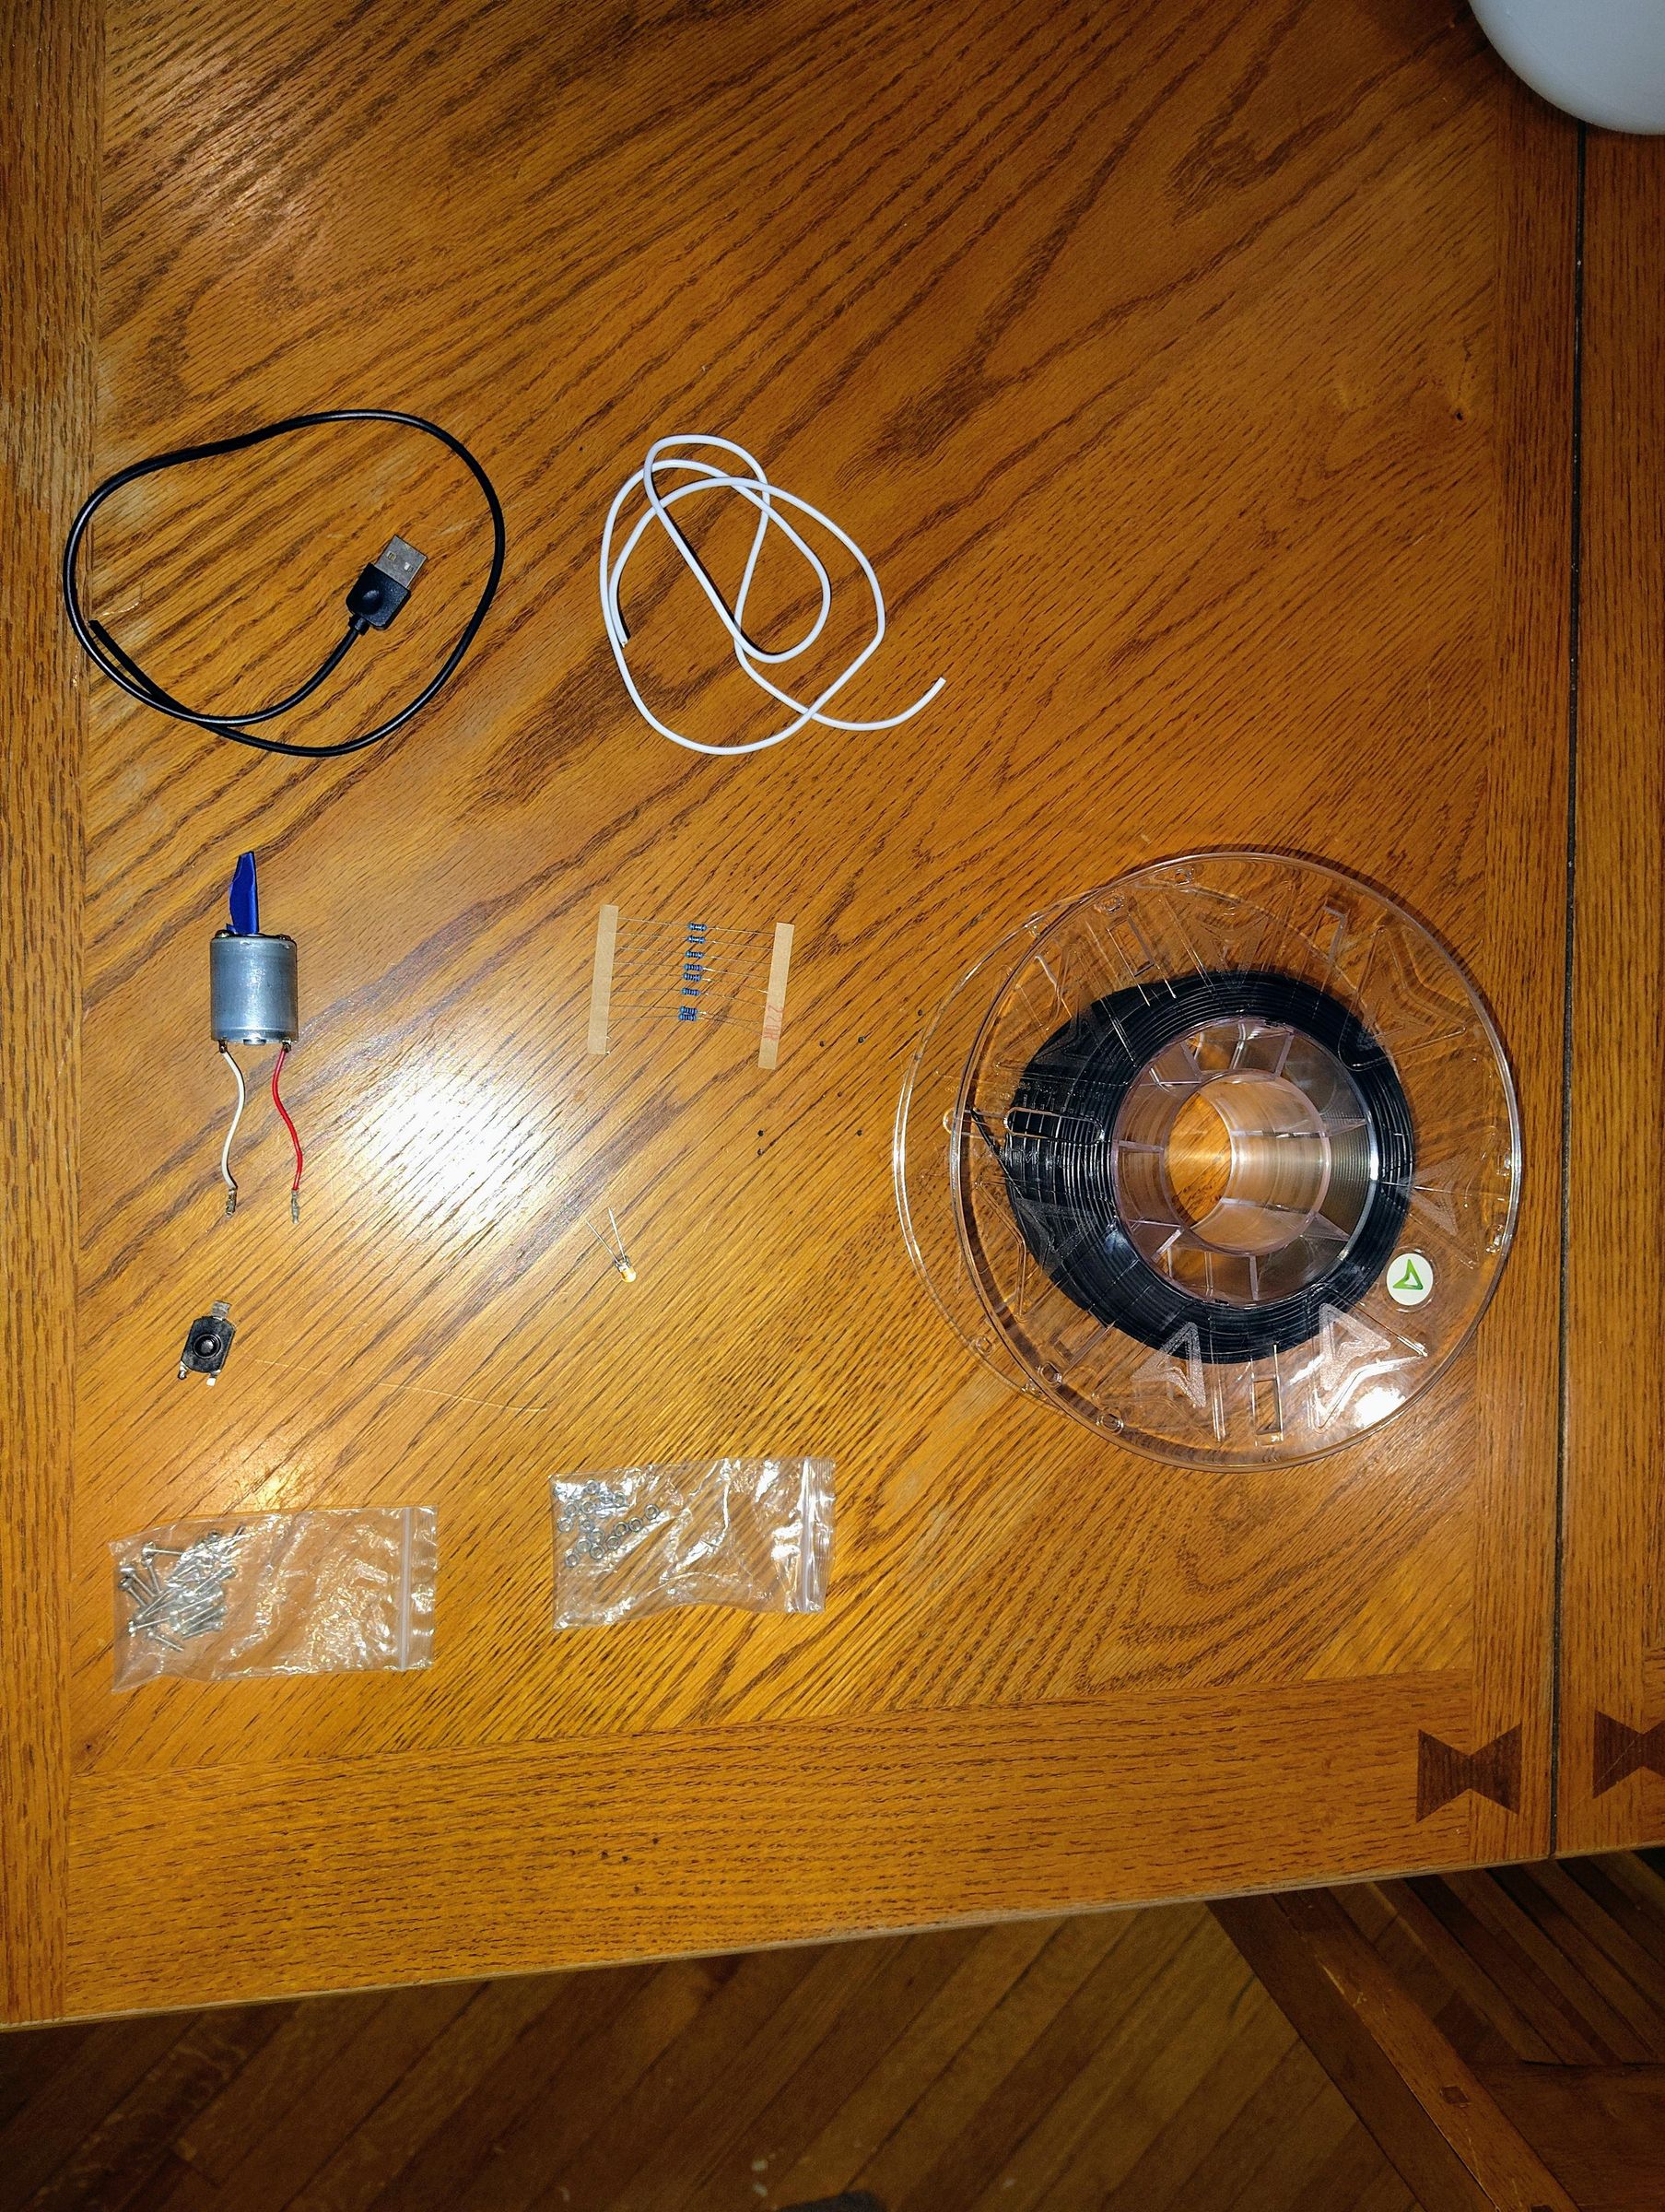
Hardware
Small DC motor (I used a random one I had available.)
12v Wall Adapter
14-gauge braided wire
Solder
Small PCB Board
220 Ohm Resistor
5mm LED
Small toggle switch
3D Printing Filament
300g Filament (Color and material do not matter; I used PLA)
50g Filament TPU (can be any material, but TPU is grippier)
Tools
Soldering Iron
3D Printer
Needlenose Pliers
Most of the parts I used were things I found in my basement that had been salvaged from old devices. Because of that, I can't give many specifics about what I used or give links to websites to get them. Sorry.
Planning and Designing the Parts in Fusion 360
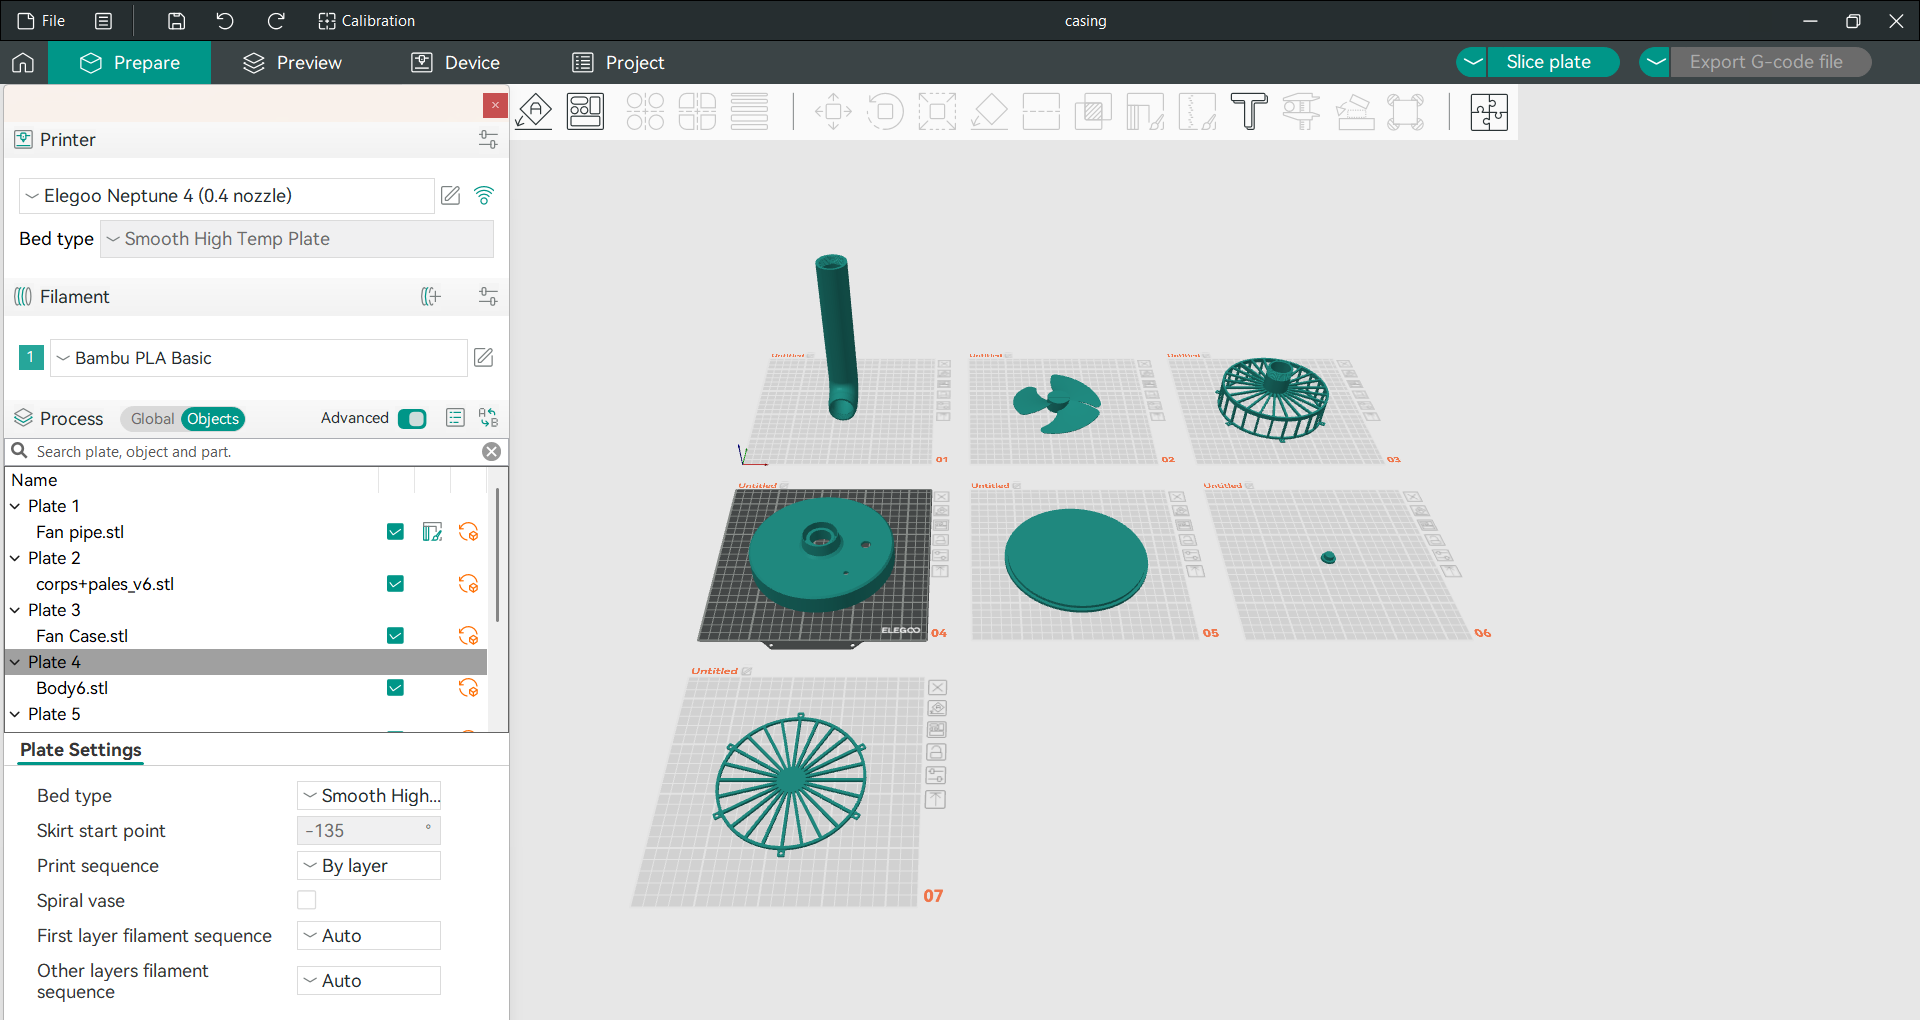
Since I wanted to start this project from scratch, I began designing the fan in Fusion 360. This was my first major project using Fusion 360, so I wanted to keep a relatively simple design. I wanted it to have a wide base, a light to show when it was on, and a small switch so I would not have to unplug it every time I wanted to turn it off.
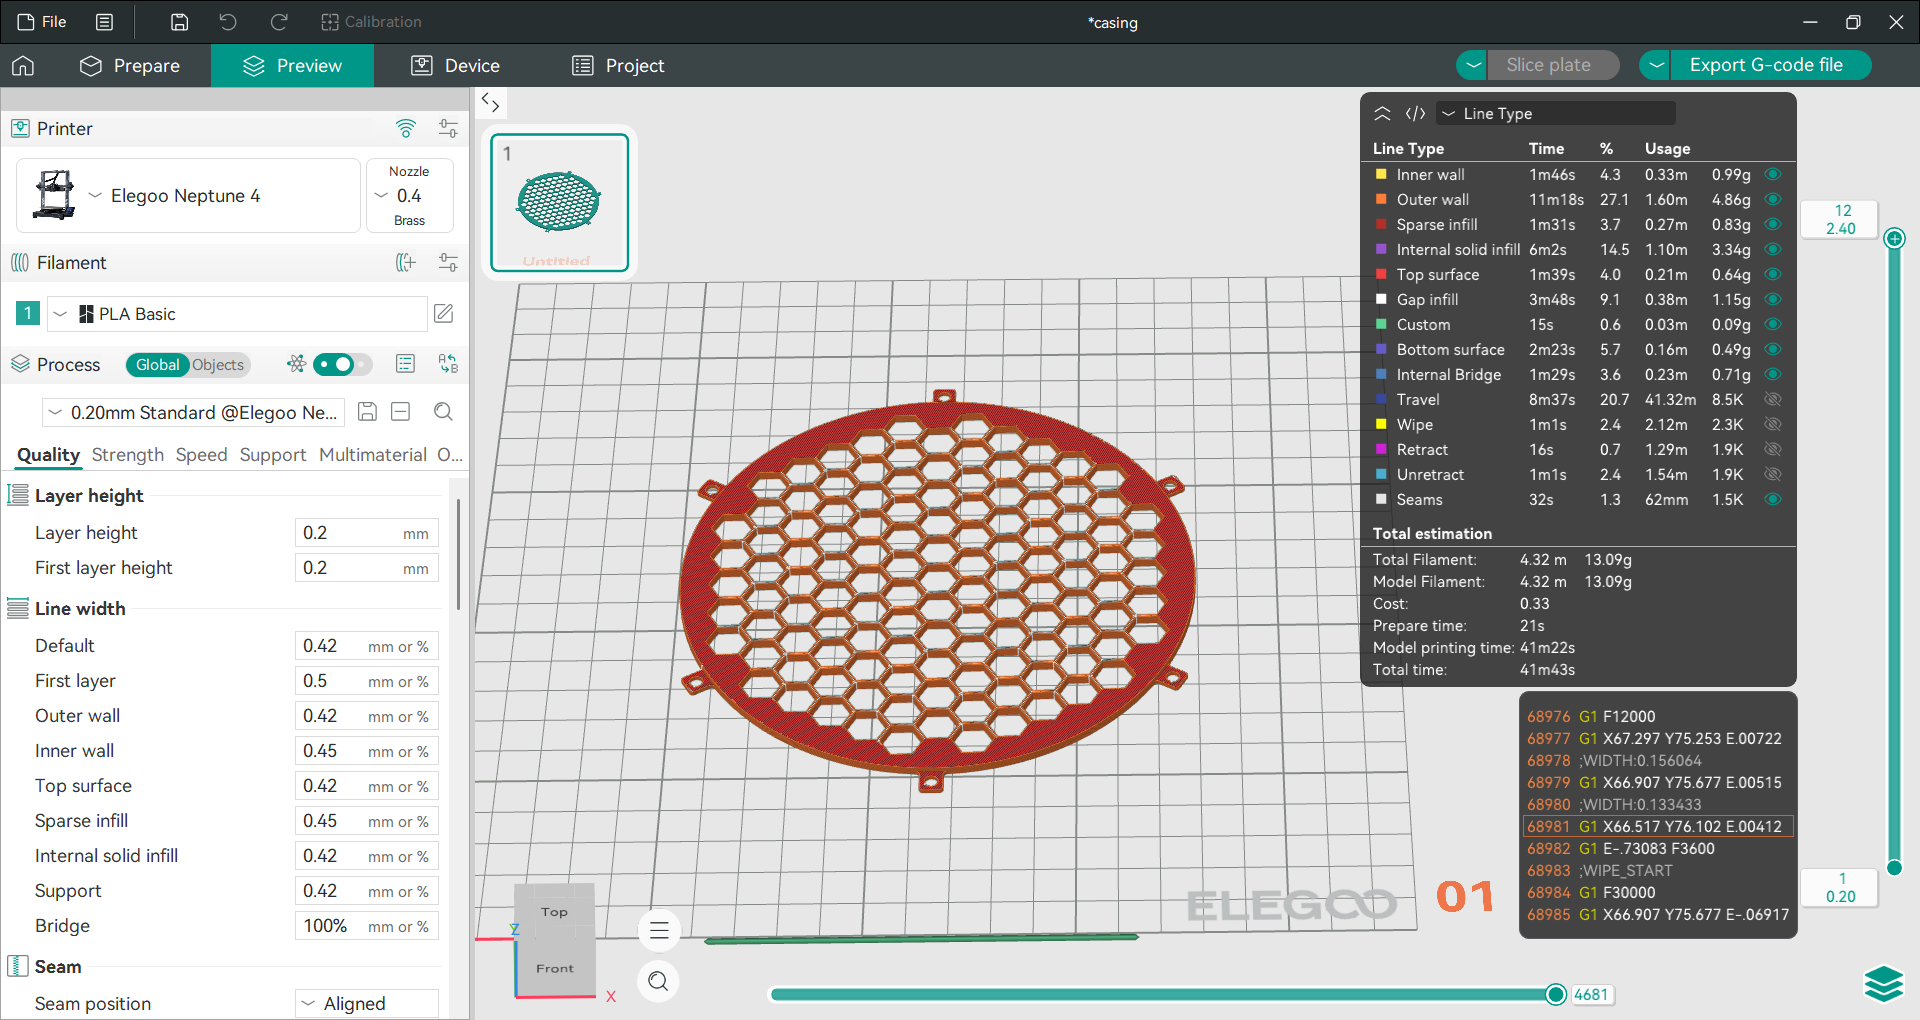
I also wanted to test whether the shape of the front grill affected the cooling performance of the fan, so I made it easy to change out the front grill. There were four main grill designs that I chose to test: Lines, Concentric Rings, Honeycomb, and Cubic. I made them as similar as I could. I kept the mounting holes the same and the thickness of the lines close to the same.
Wiring and Assembling the Circuit
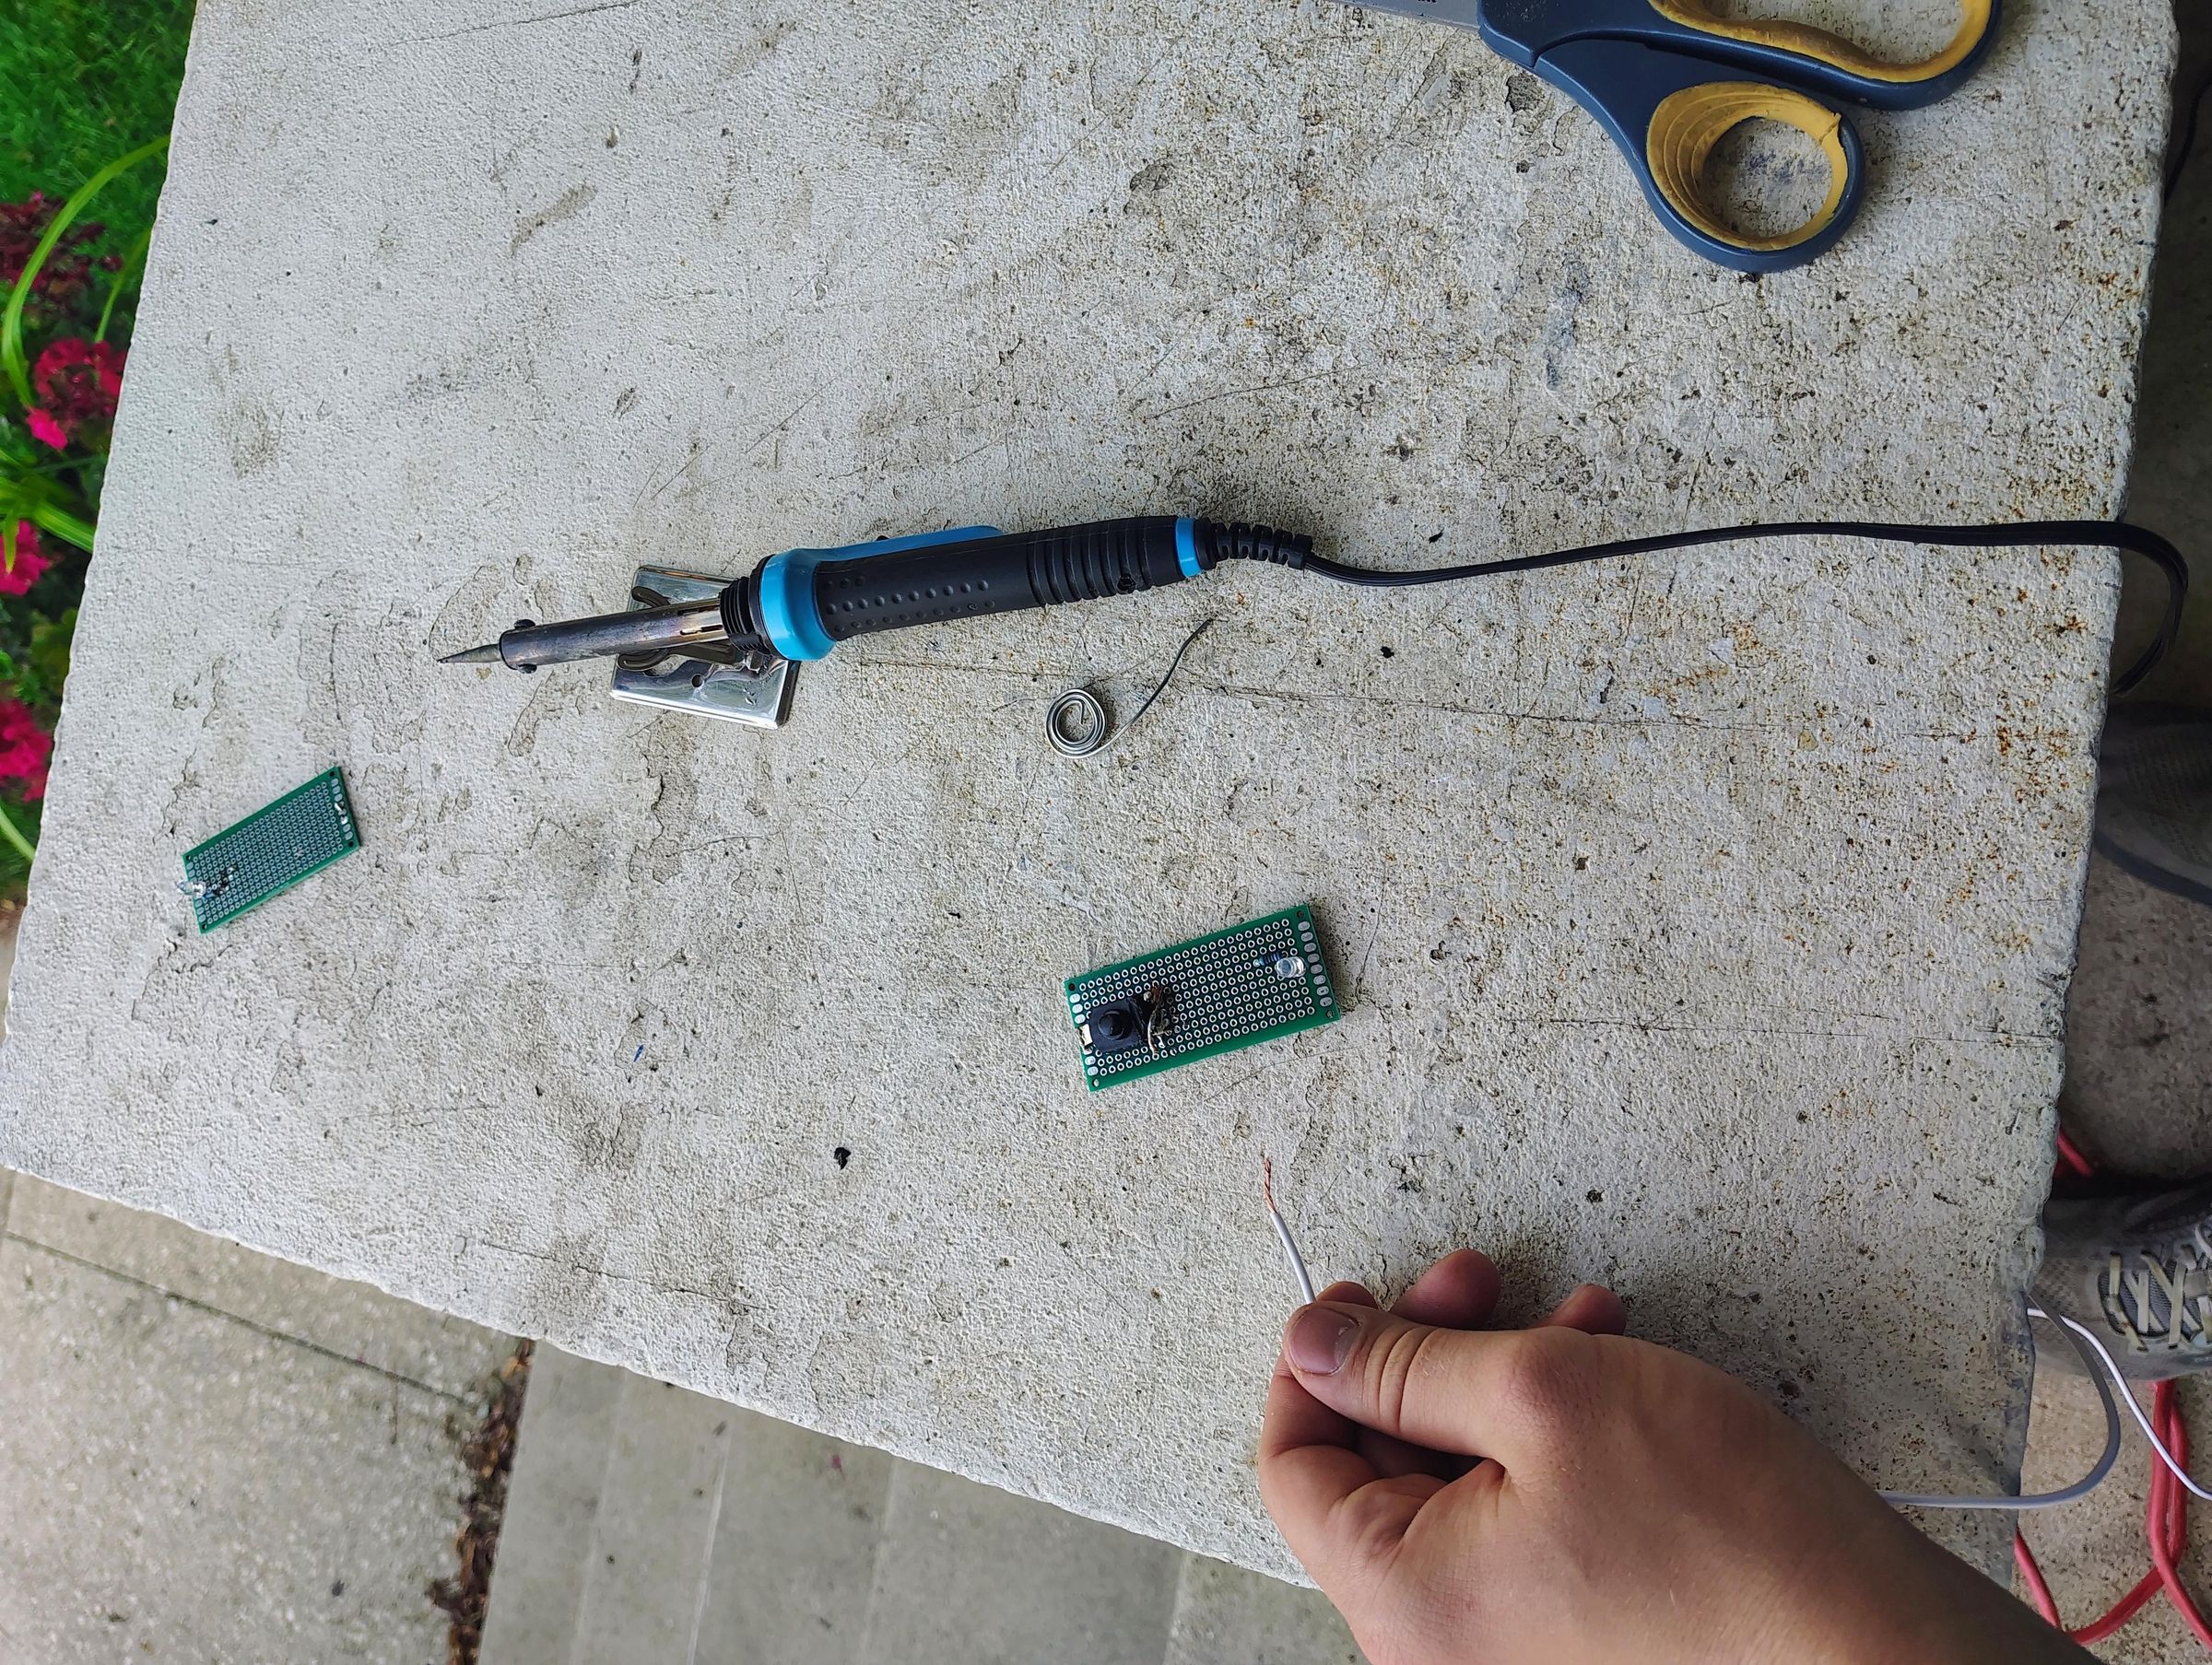
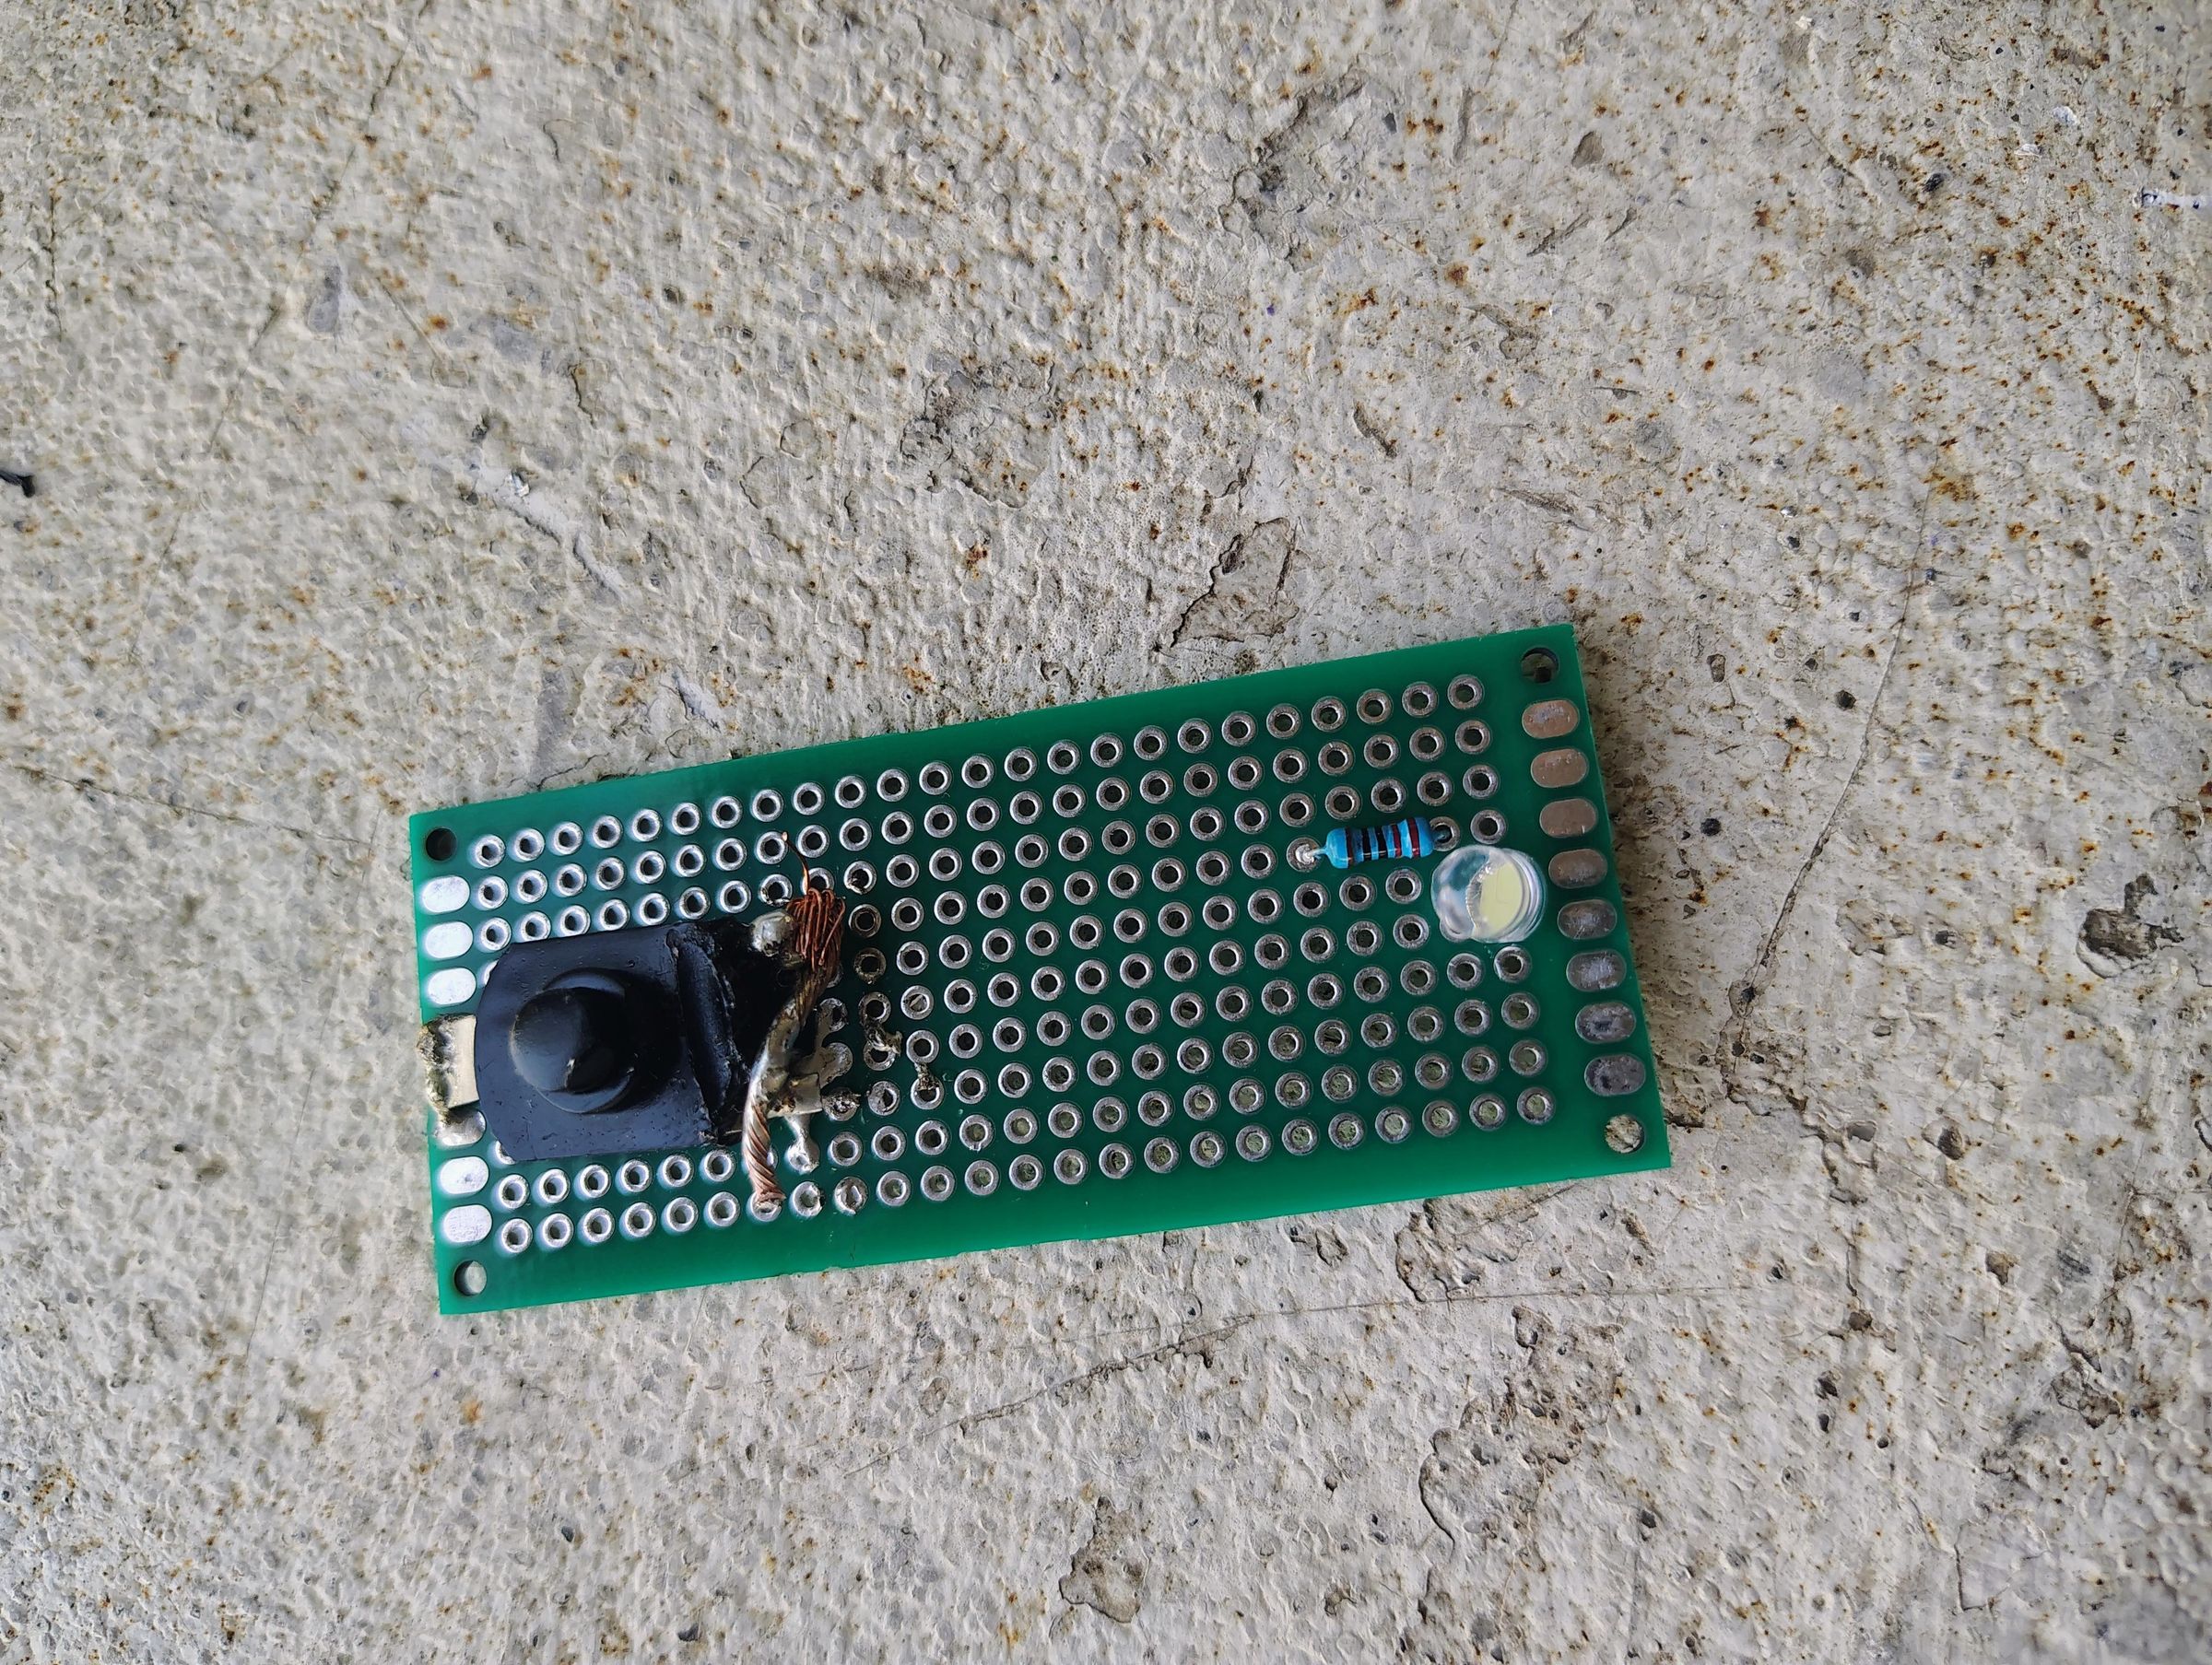
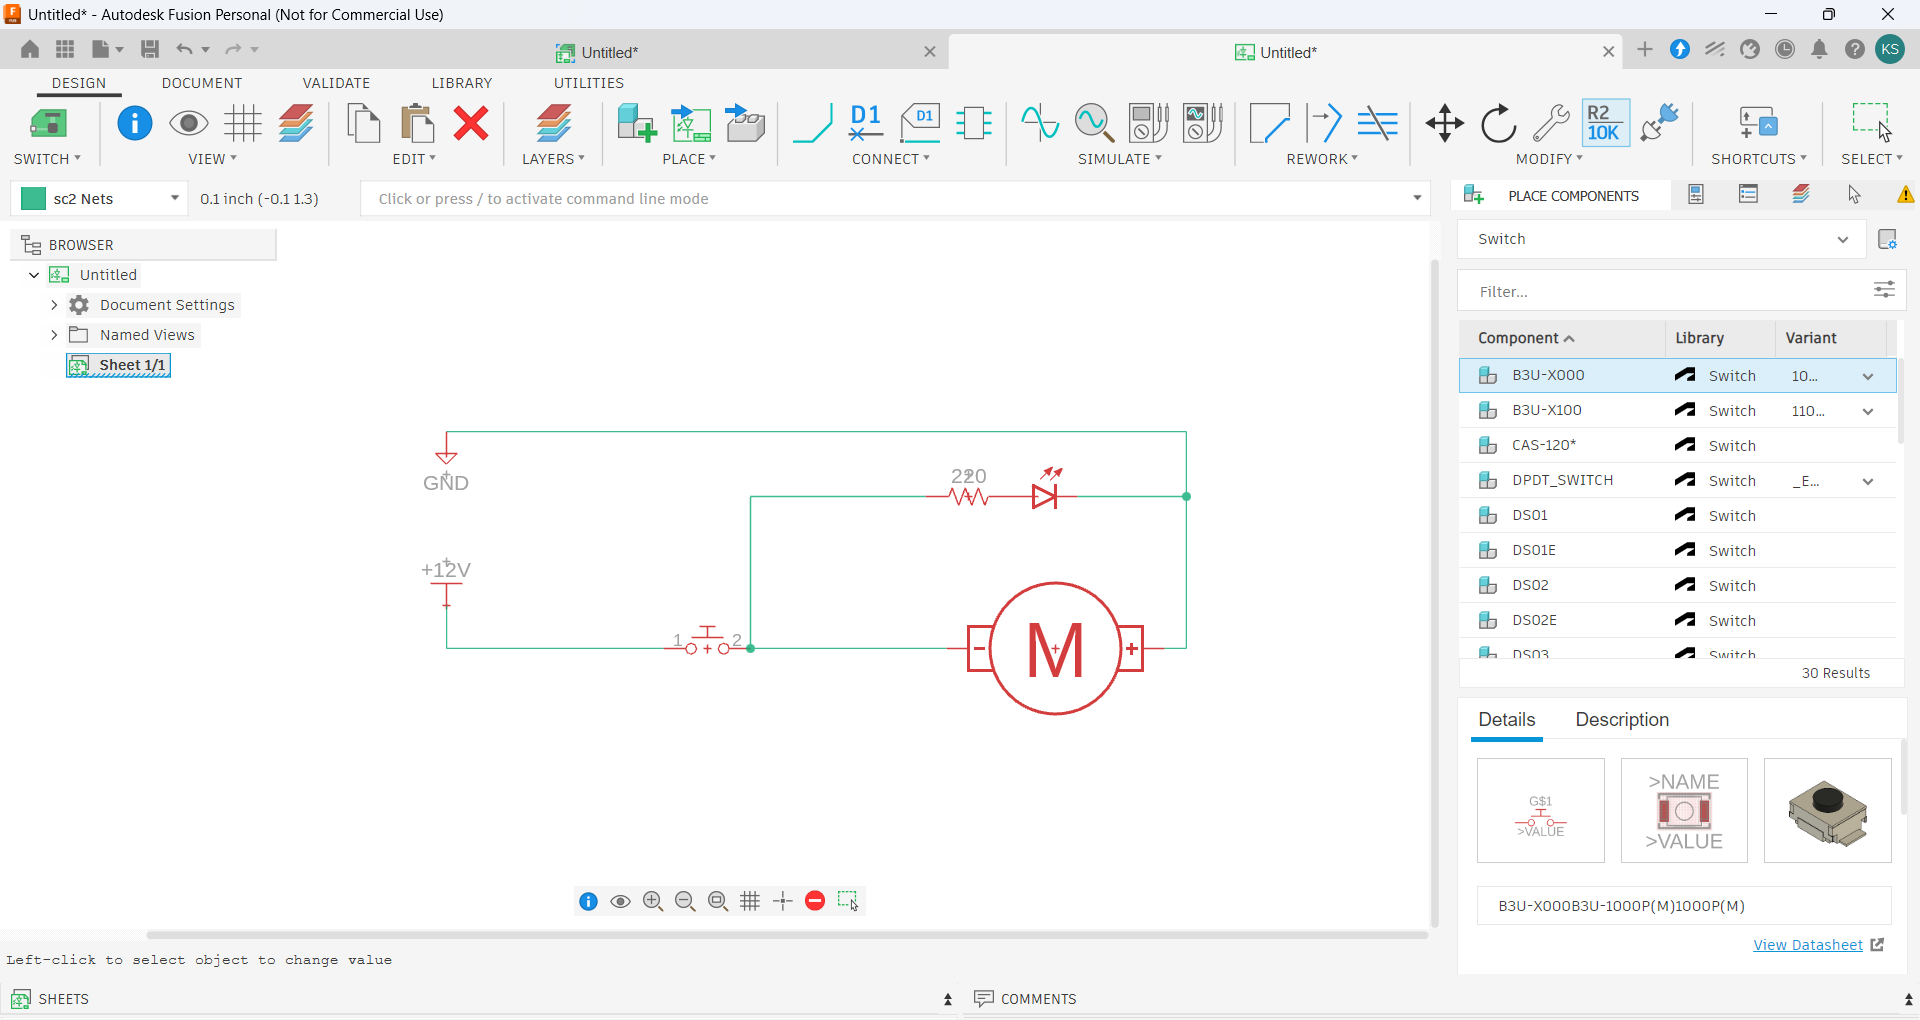
The circuit for this project is very simple and only has two main functions. The LED turns on, and the motor turns as well. I attached the parts to a small PCB board I had. It is important to have the two systems separate because of the resistor. The LED needs a resistor to limit the current flowing through it and prevent it from being damaged. The motor does not need this resistor, so I wired the motor separately from the LED.
First, lay the parts out on the board and cut wire to the specific lengths you need, then solder the connections together. If you can, I recommend covering the wires with electrical tape or heat shrink tubing to prevent short circuits.
Printing and Assembling the Fan
The fan should be easy to assemble; my slicing settings were very simple, and I only rarely used supports for the pieces. The main parts will all screw together nicely, and only one part needs super glue. Only one part requires super glue: the flexible TPU base for the fan.
First, attach the motor to the fan case, and then add the fan blades to the enclosure. Then attach the wires to the motor and put them through the pipe. Now, attach the pipe to the motor assembly, and wire and attach it to the base as well. At this point, attach the other electrical components to the main assembly. Then attach the wires to the board and put them through the hole in the back of the base, and attach the last piece: the TPU base.
Now the fan is ready to be plugged in and used.
Designing and Testing the Grills
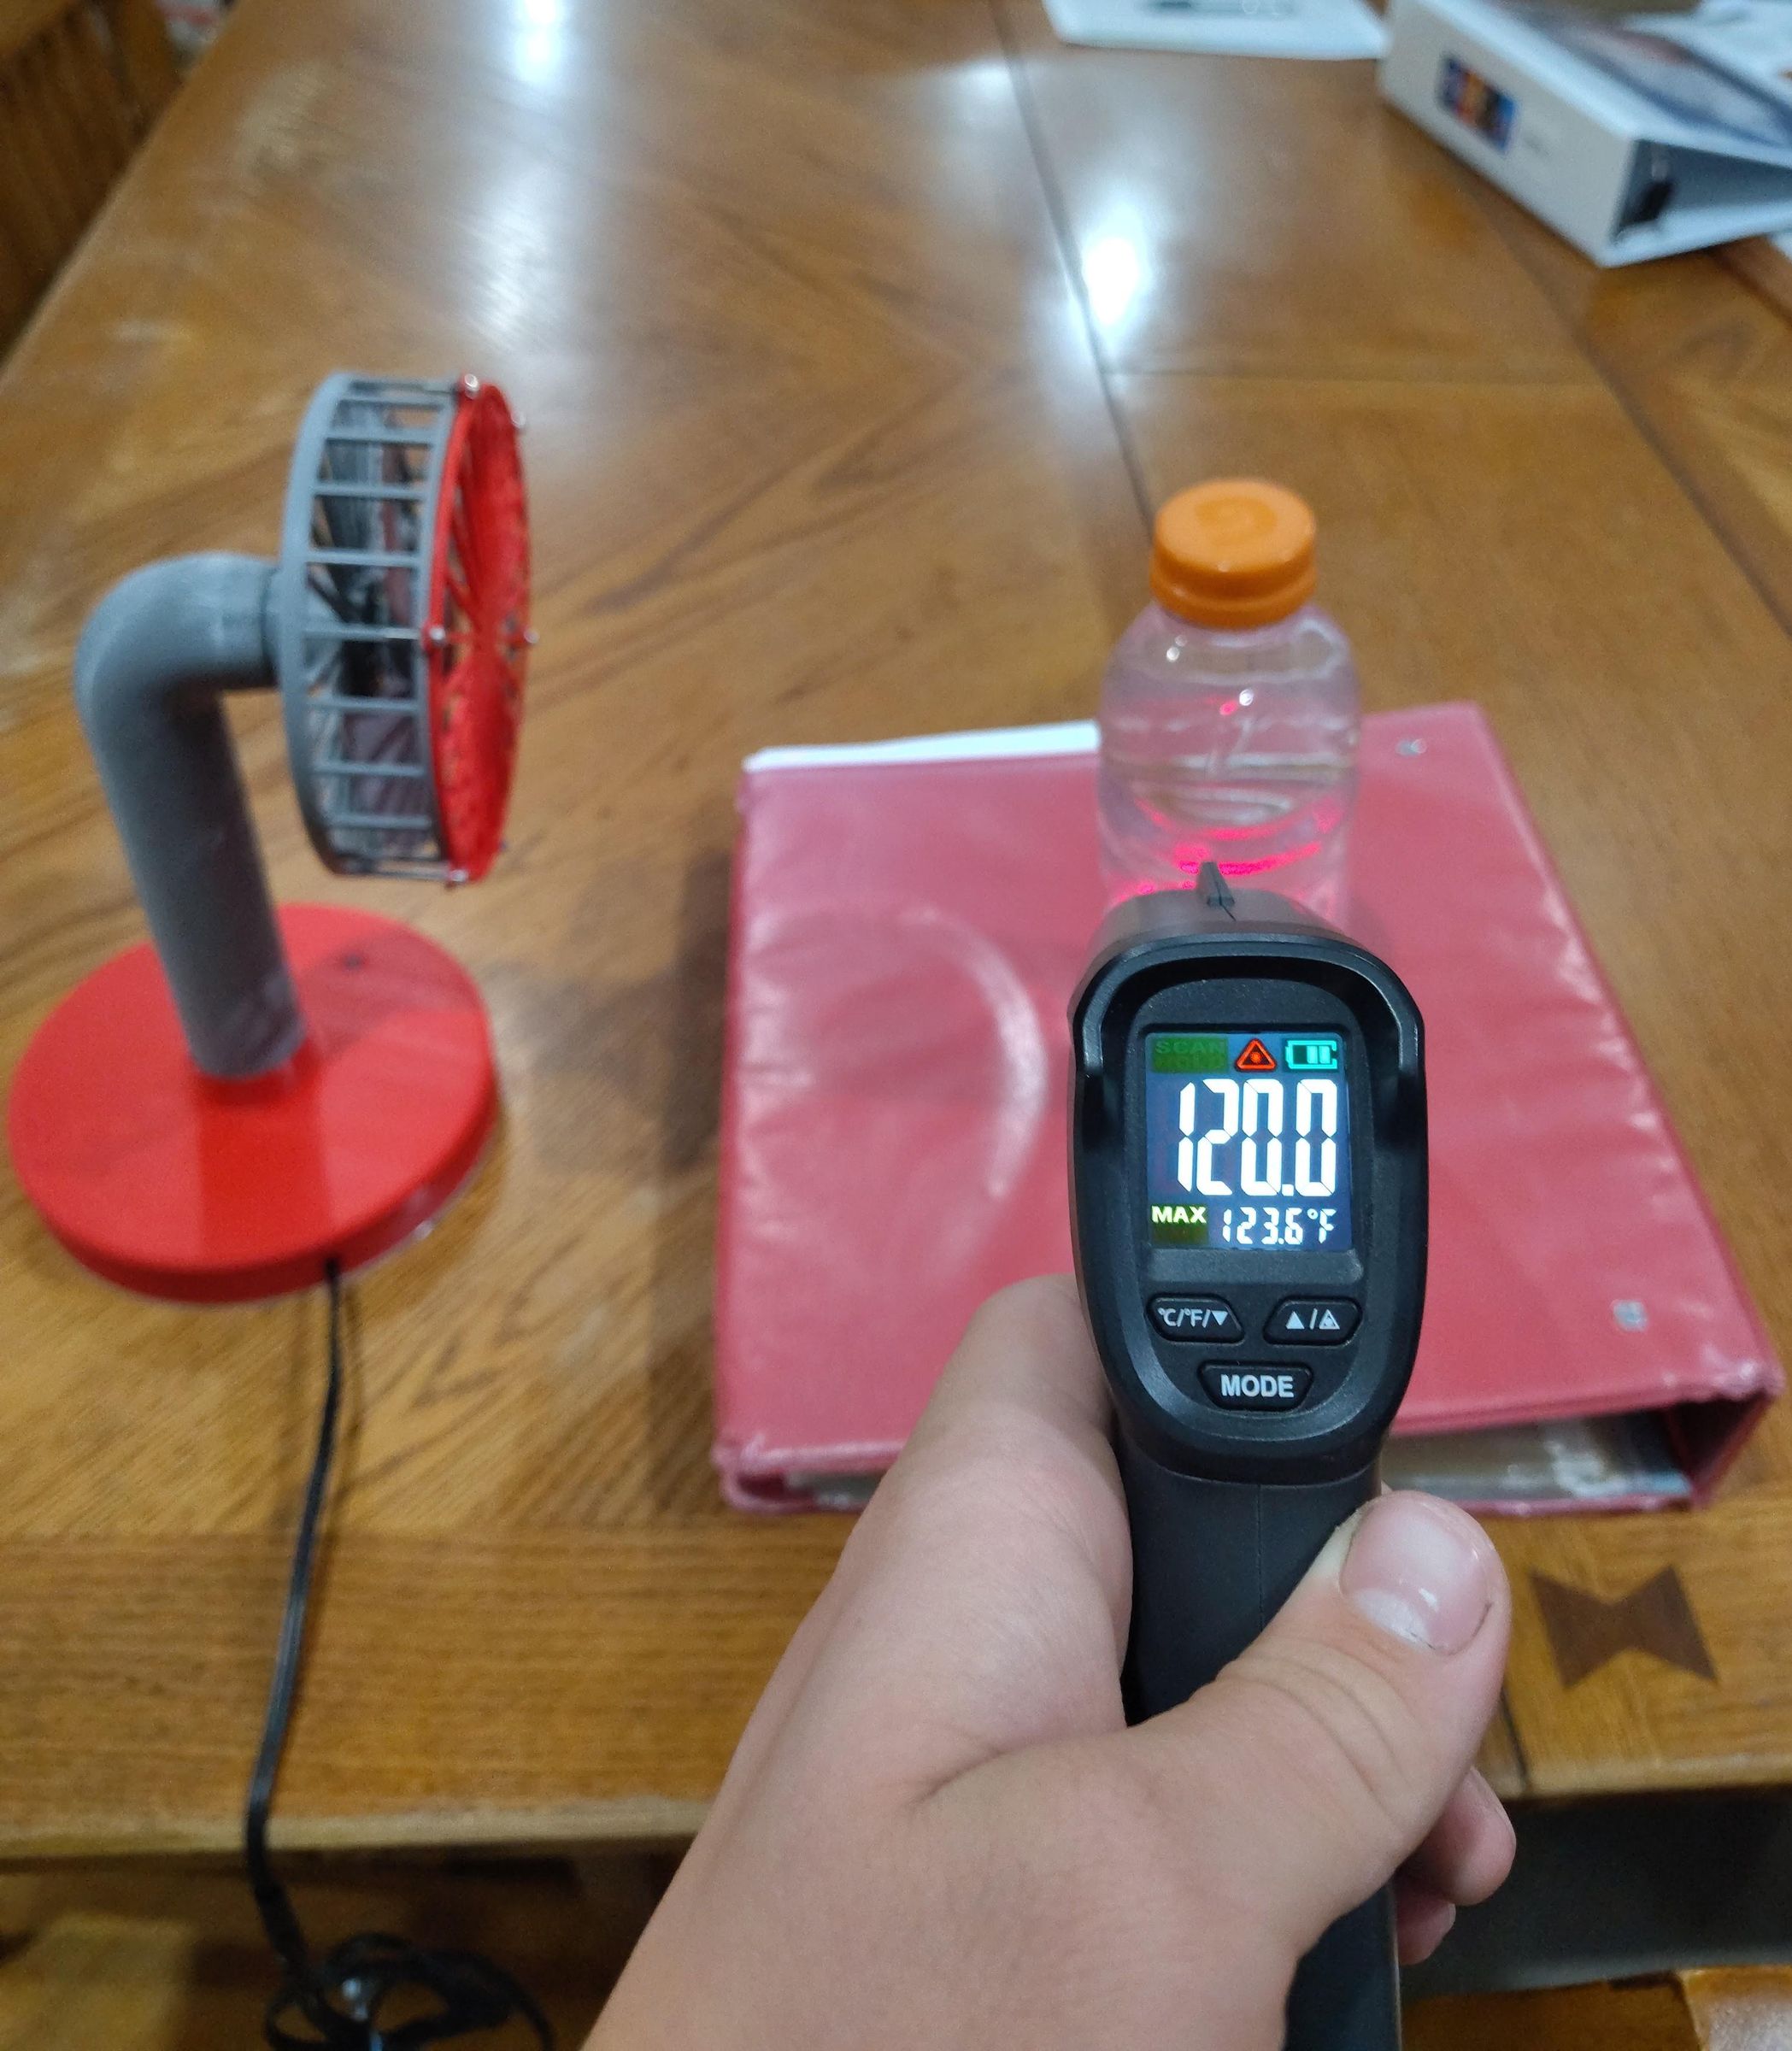
The main focus of this project was to determine how the design of a fan grill affects cooling performance. I wanted each grill to have a different geometry while keeping the overall size and mounting points the same. This allowed me to compare the designs without changing the rest of the fan.
I designed several different grills in Fusion 360, including Lines, Concentric Rings, Honeycomb, and Cubic patterns. I also tested the fan with no front grill to provide a comparison. Each design was printed and installed on the same fan, using the same motor, fan blade, power supply, and test setup.
When designing the grills, I considered factors such as the amount of open area, the thickness and shape of the material blocking the airflow, and how each pattern might affect the direction and turbulence of the air. Rather than assuming that the grill with the most open space would perform best, I wanted to test whether a more carefully designed pattern could actually improve the cooling performance.
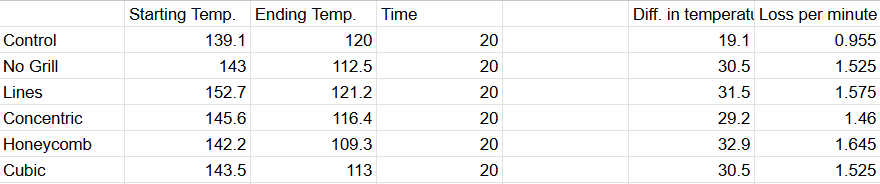
After printing the grills, I tested each design using the same procedure and recorded the starting temperature, ending temperature, and temperature change over 20 minutes. These results allowed me to compare the designs and determine which grill performed best in the actual experiment.
To give myself a baseline for comparison, I also tested a bottle of water at the same temperature without using a fan. This served as my control.
I started each test with a standard 20 fl. oz. bottle of water heated to approximately 140°F. I used water at a relatively high temperature so that the effects of different airflow patterns would be easier to measure. The starting temperatures were not the same for every test, so I recorded the starting temperature for each one. I then waited and recorded the temperatures. I kept the fan, power supply, outlet, distance from the bottle, and general room conditions the same for each test. Keeping these conditions consistent helped make the results as comparable as possible.
Data Collected
Best Grill Design
After testing all of the grill designs, the Honeycomb grill performed the best. It reduced the temperature of the test object by 32.9°F over 20 minutes, giving it an average cooling rate of 1.645°F per minute. This was the highest cooling rate of any of the designs I tested.
Interestingly, the Honeycomb grill also performed slightly better than running the fan with no front grill, which had a cooling rate of 1.525°F per minute. This was an unexpected result because I initially thought removing the grill completely would provide the best airflow. The Honeycomb design may have helped organize the airflow while still allowing a large amount of air to pass through. It is also possible that the geometry of the Honeycomb grill affected the velocity and direction of the air in a way that improved heat transfer from the bottle. However, I did not directly measure the airflow velocity, so this is only a possible explanation for the results
Based on my testing, the Honeycomb grill was the best-performing design for this fan and test setup. However, these results only represent my specific testing conditions, and different fan designs, speeds, or grill dimensions could produce different results.
Conclusion
Overall, I am happy with how this project turned out. My goal was to design a desktop fan and determine whether changing the front grill could affect its cooling performance. After testing several designs, the Honeycomb grill performed the best, cooling my test object by 32.9°F over 20 minutes. This showed me that small changes in geometry can have a noticeable effect on how air moves through a system.
One of the biggest things I learned from this project was how much there is to consider when designing a part for 3D printing. I am still new to 3D design and Fusion 360, so designing the fan and creating the different grill patterns was a learning experience. I learned more about creating precise dimensions, making parts fit together, designing parts that can actually be printed, and changing a design based on testing. I also learned that the first design isn't always the best one, and that testing and making improvements is an important part of engineering.
This project gave me more experience with CAD / Fusion 360, 3D printing, electronics, airflow, and experimental testing, and it showed me how these different skills can be combined to solve a real-world problem. Most importantly, I learned that sometimes the results aren't what you expect. I originally thought that having no grill would provide the best cooling, but my Honeycomb design actually performed better. That made the testing process much more interesting and showed me the value of testing an idea instead of simply assuming it will work.