3D-Printed Smart Fun Hard Hat Fan Interactive Microbit AI Controlled With Arduino Nano and Temperature Sensor DHT11
by Charles Projects in Design > 3D Design
76 Views, 0 Favorites, 0 Comments
3D-Printed Smart Fun Hard Hat Fan Interactive Microbit AI Controlled With Arduino Nano and Temperature Sensor DHT11
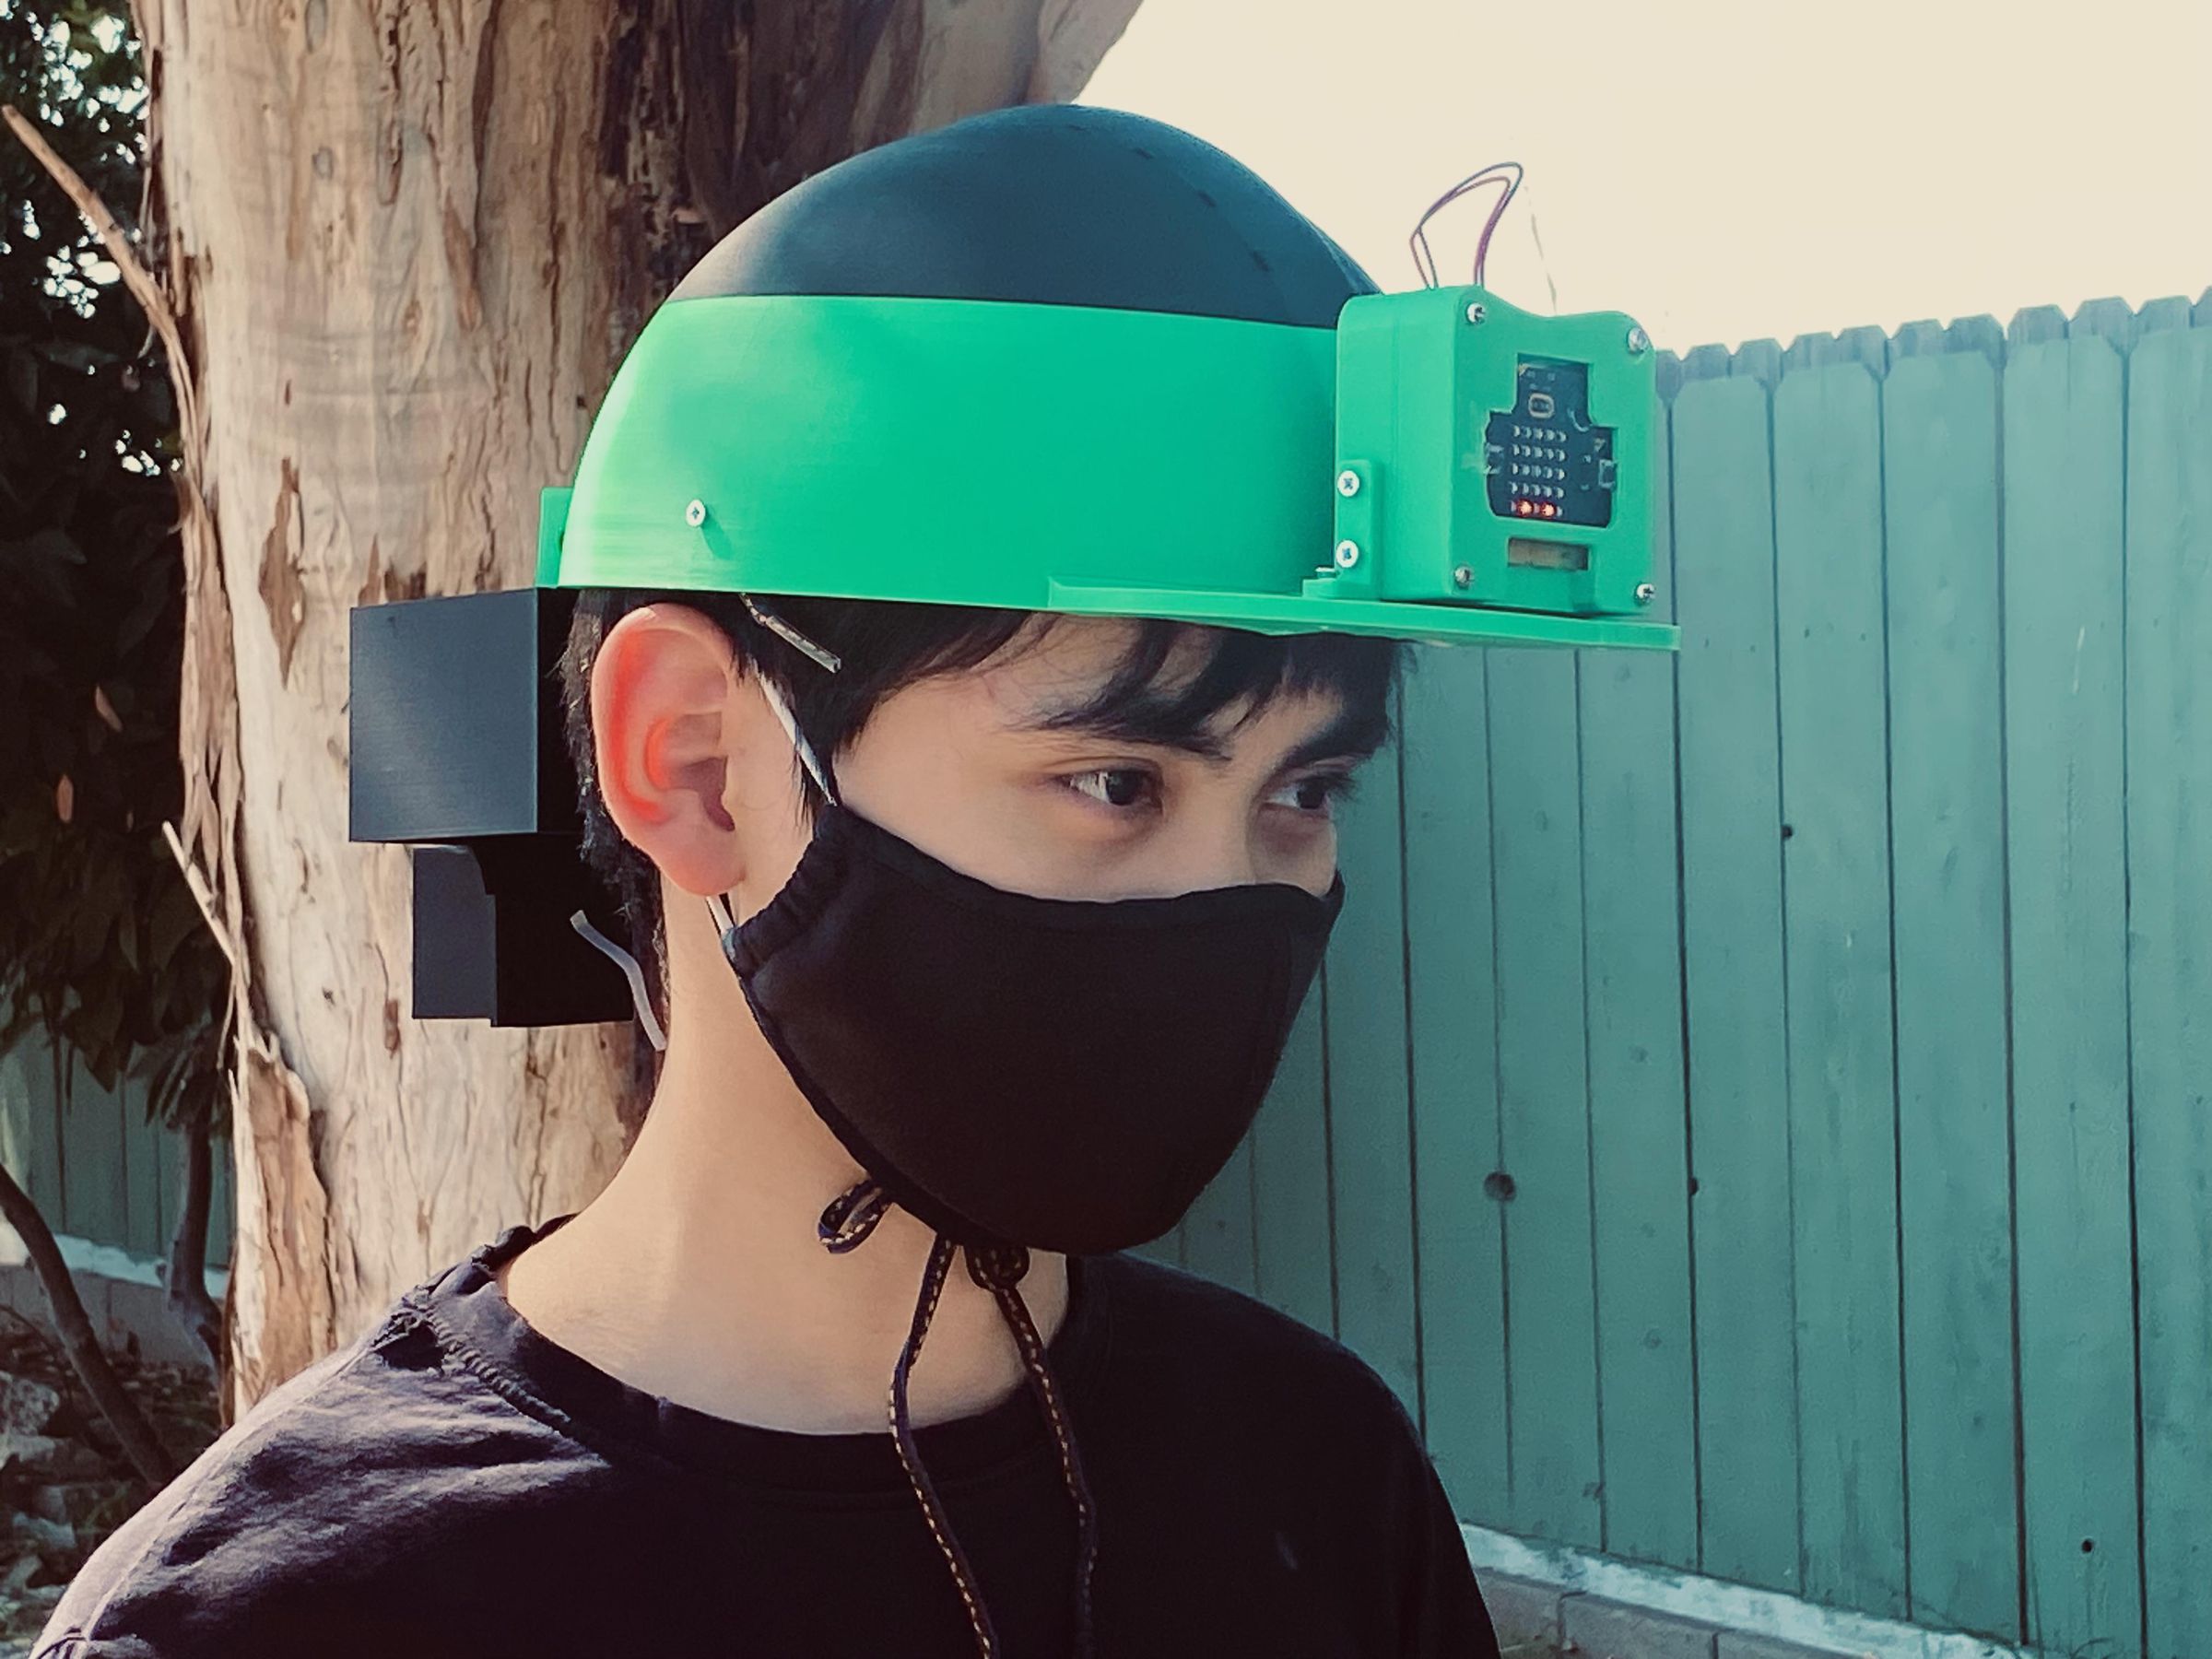

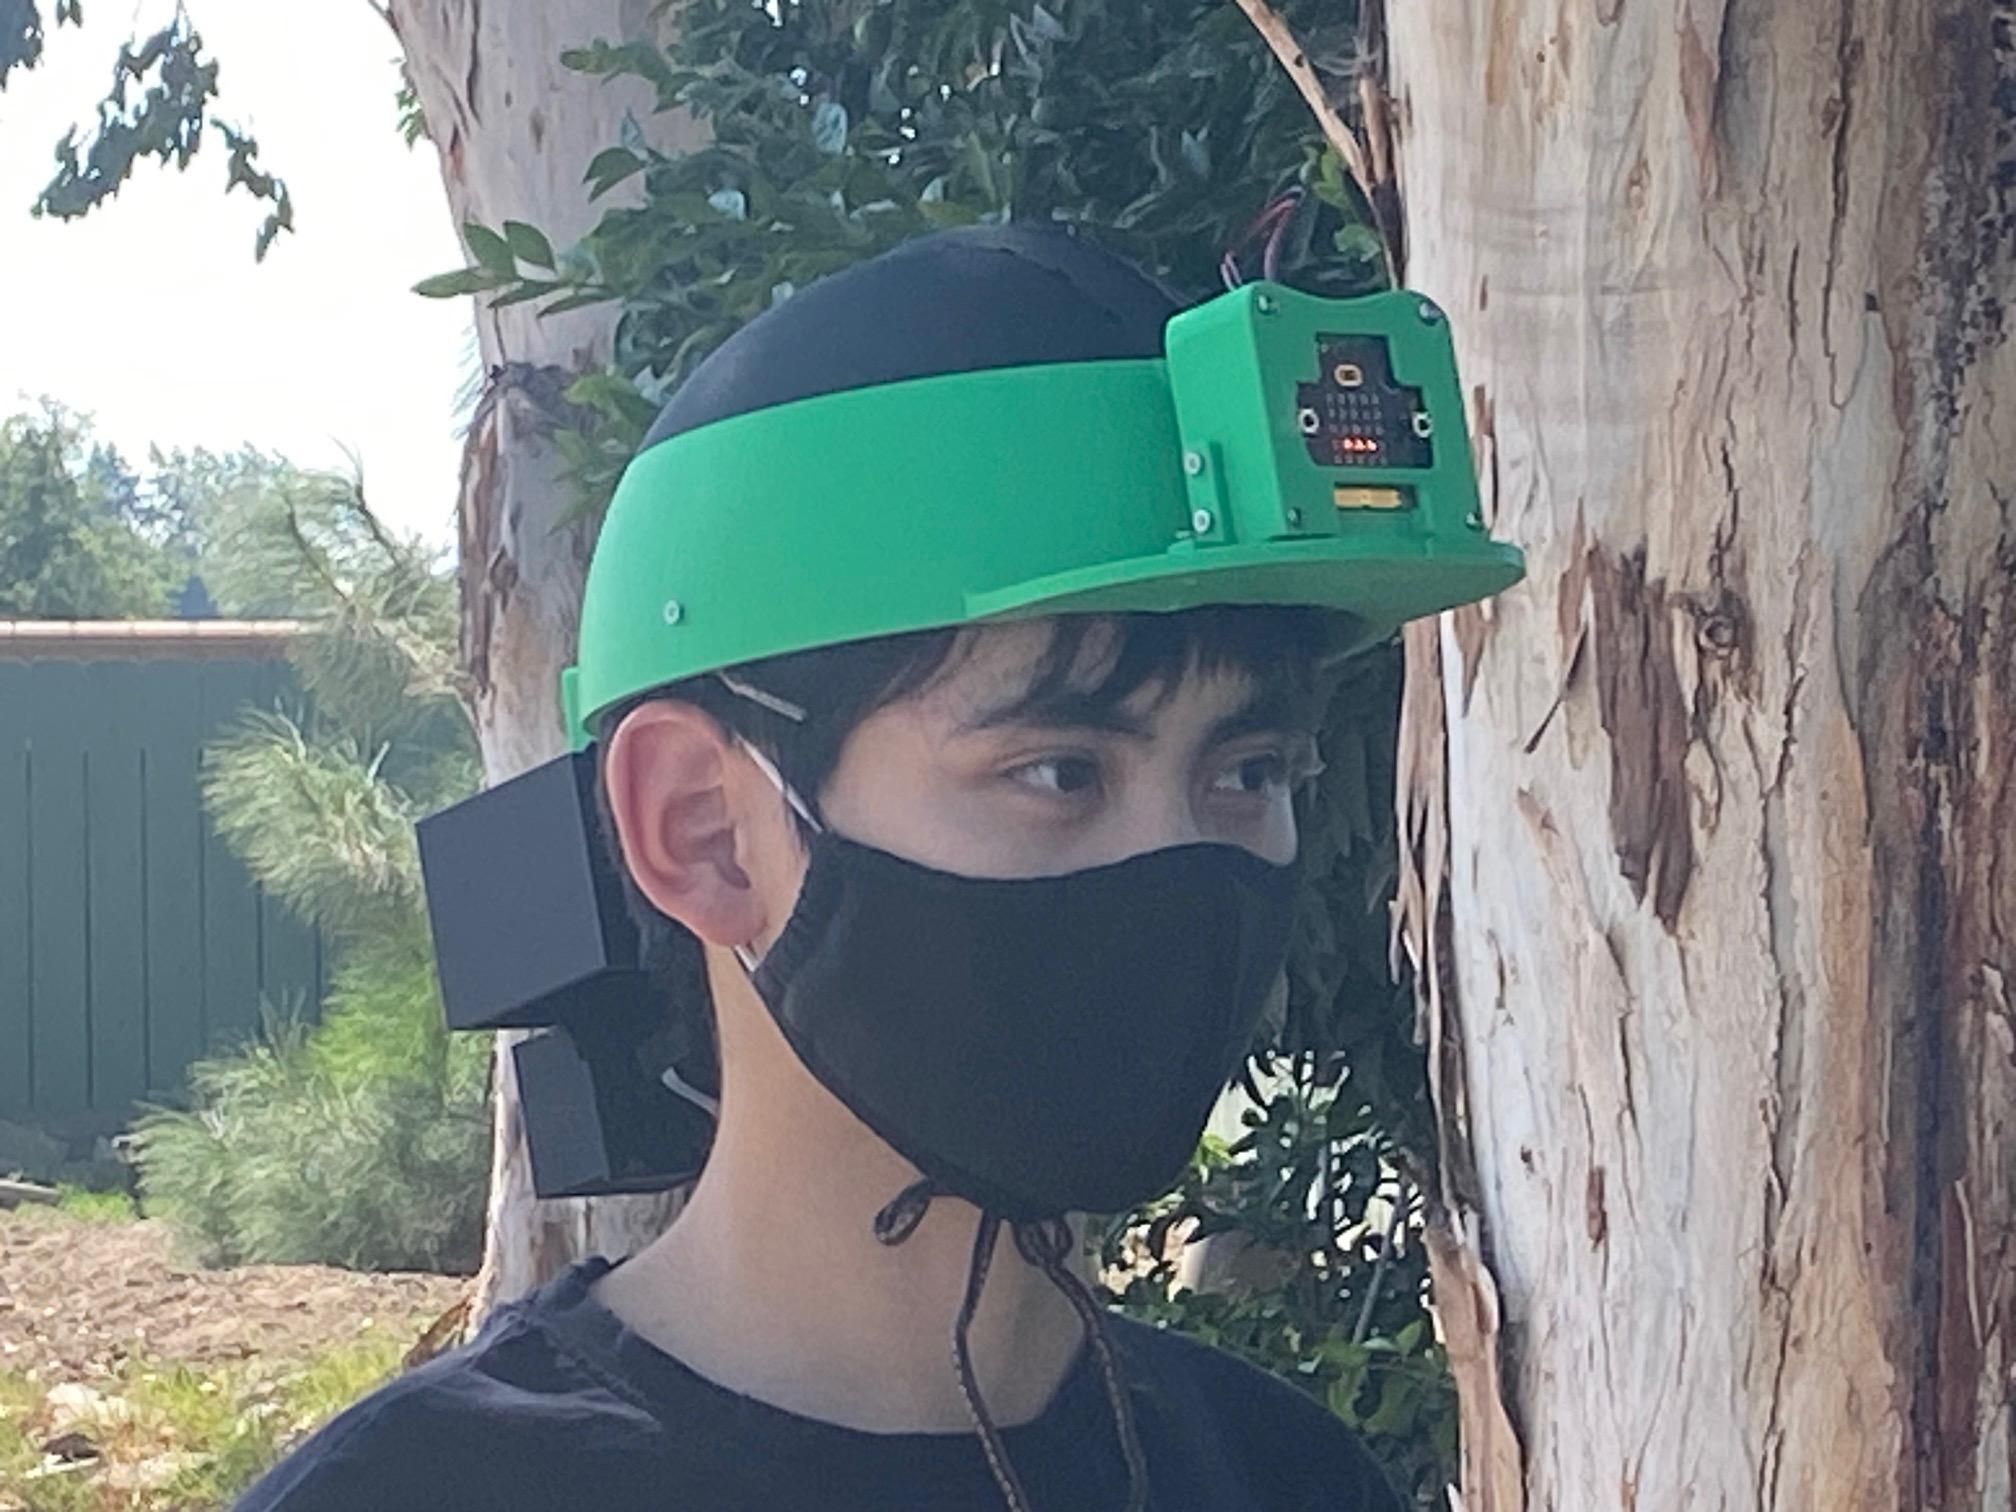

It is a hard hat with an automatically controlled ventilation fan. An Arduino Nano reads the temperature from a temperature sensor. When the temperature rises above 75°F (23.9°C), the fan turns on. When the temperature returns to 75°F or below, the fan turns off. The goal is to provide better airflow for people working outdoors in hot conditions while demonstrating Arduino programming, electronics, 3D design, and Fusion 360 enclosure design.
This smart hard hat combines automatic temperature-controlled ventilation with an interactive Microbit CreateAI system. While the Arduino Nano monitors the temperature and controls the cooling fan, the Microbit uses motion data to recognize the user's head movements. When the user nods their head, CreateAI detects the learned movement pattern and triggers a short background music effect while simultaneously creating a programmed LED light pattern on the hard hat. This makes the cooling system more engaging while demonstrating how AI and wearable electronics can work together.
The interaction also works in reverse. On the contrary, when the user performs the programmed head movement of shaking head, the music will change and the LED pattern switches to another pattern. The result is a hard hat that responds to heat and also the user head's movement, combining temperature sensing, automatic fan control, AI motion recognition, music, and LED pattern visual into one innovative Beat the Heat project.
Disclaimer:
This 3D-printed smart hard hat is a prototype created for demonstration and competition purposes only. It is not a certified safety helmet and should not replace approved protective headgear. The Arduino, AI motion recognition, music, and LED features are experimental interactive functions designed to demonstrate wearable technology and do not provide safety protection or monitoring.
Supplies
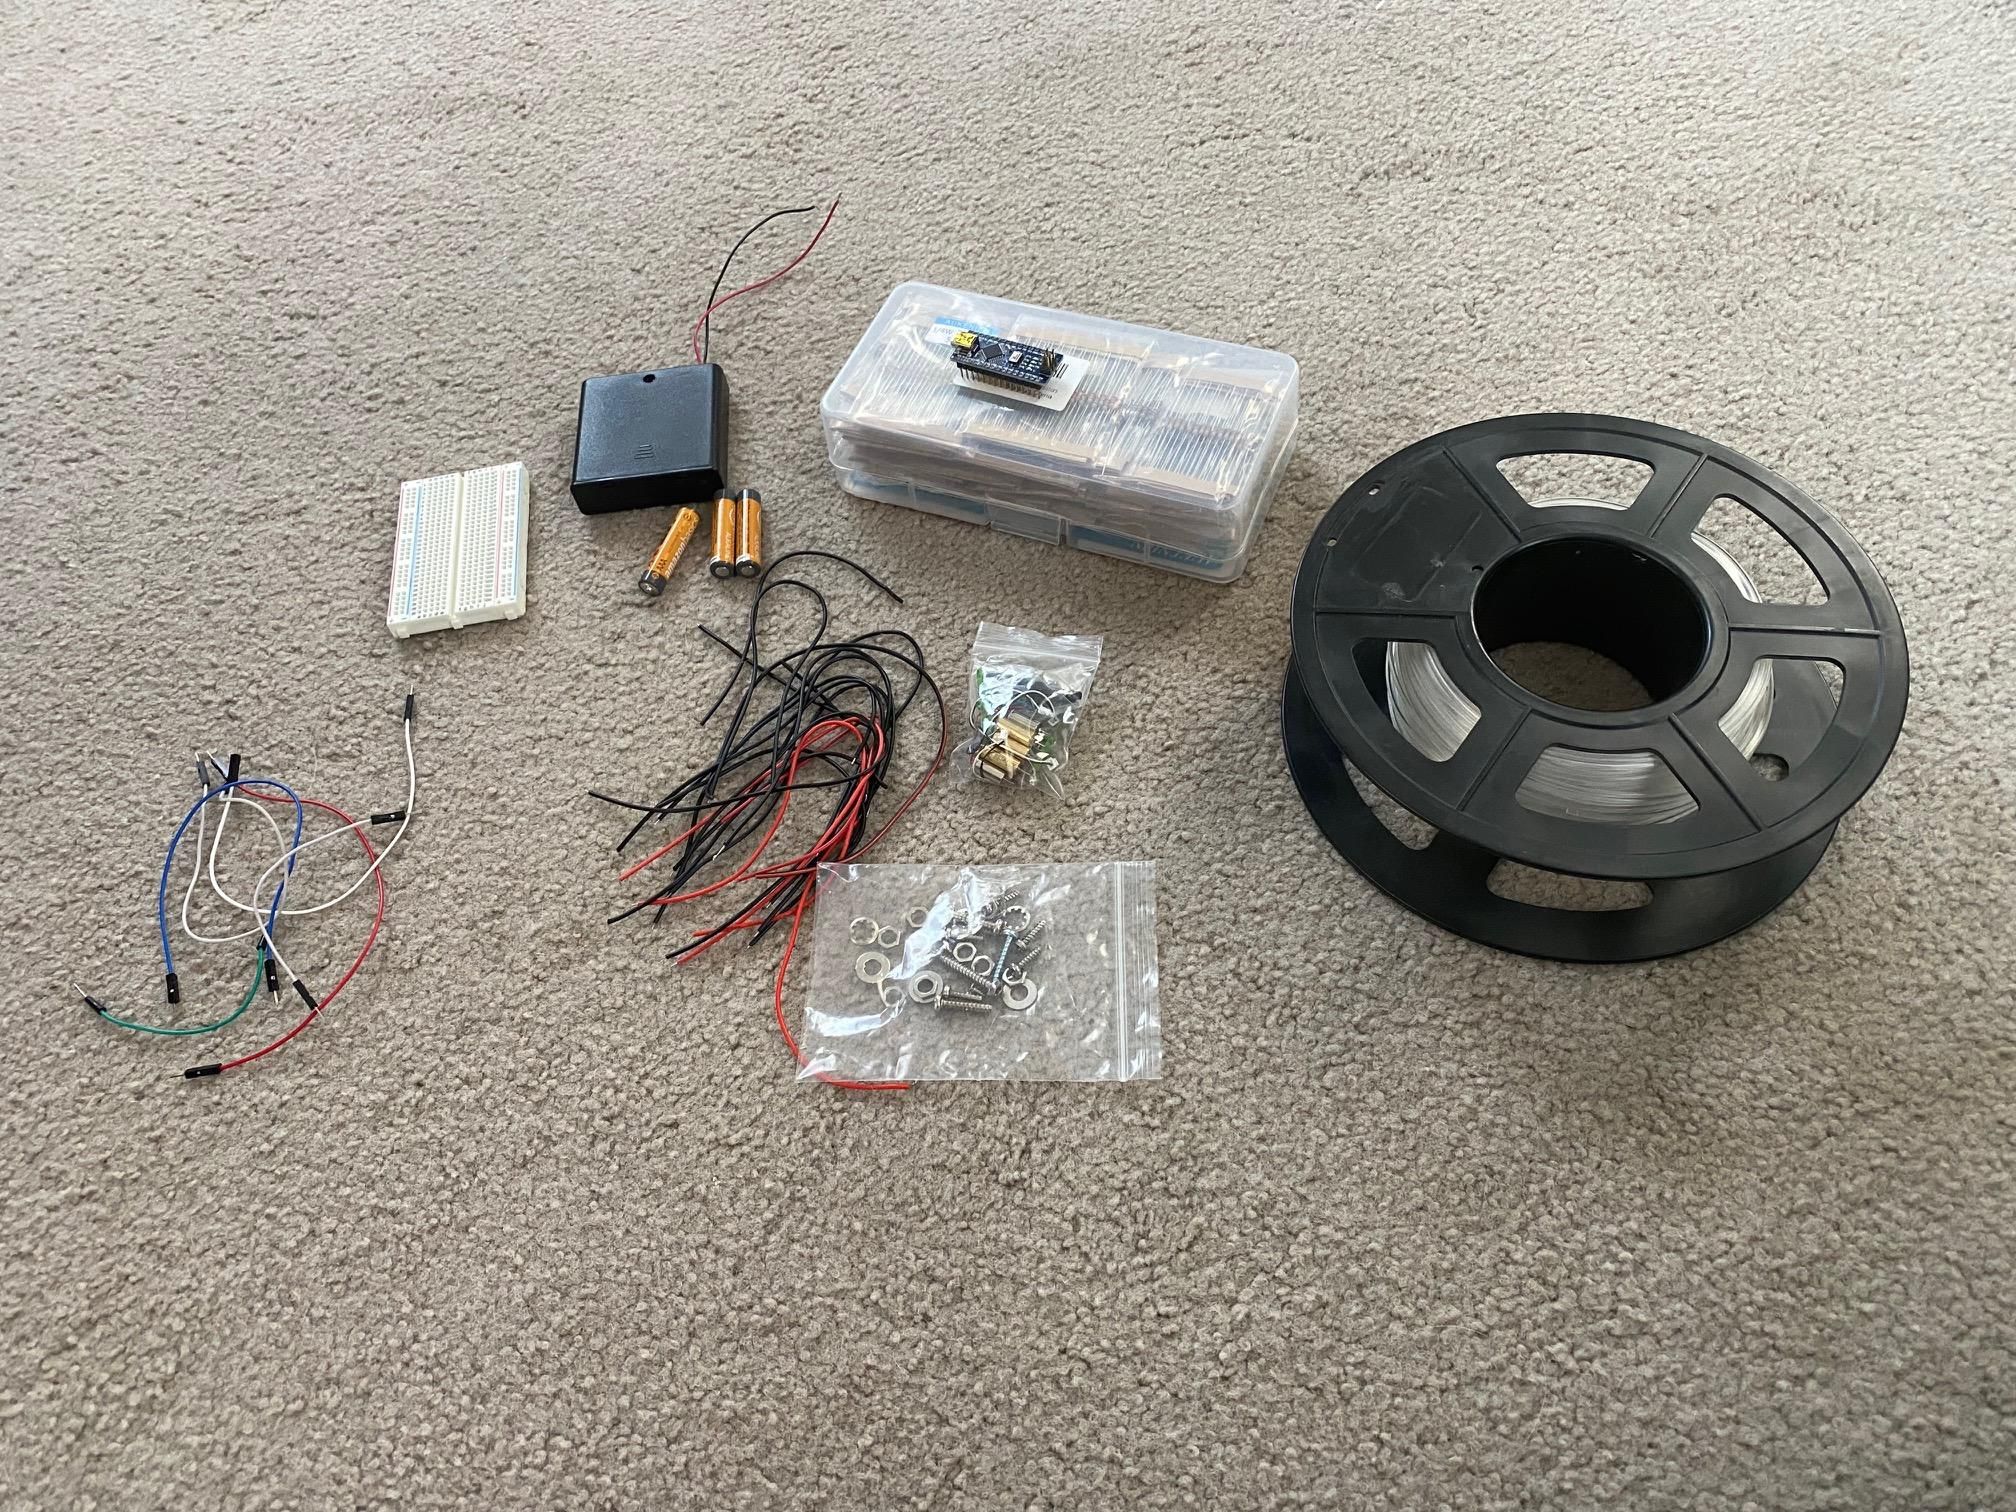
Arduino Nano
Microbit V2
Temperature sensor DHT11
1 Inductrix FPV motor
10 kΩ resistor
3 AAA Battery and battery holder for Arduino Nano
2 AAA Battery and battery holder for Microbit
Wires
Breadboard and jumper wires
3D-printed Hard Hat (includes Fan guard, Microbit and Arduino Nano Holder, Mounting bracket)
Small Screws
PLA for Hard Hat
3D printer
Arduino IDE
Fusion 360
Microsoft MakeCode
Wiring and Schematic
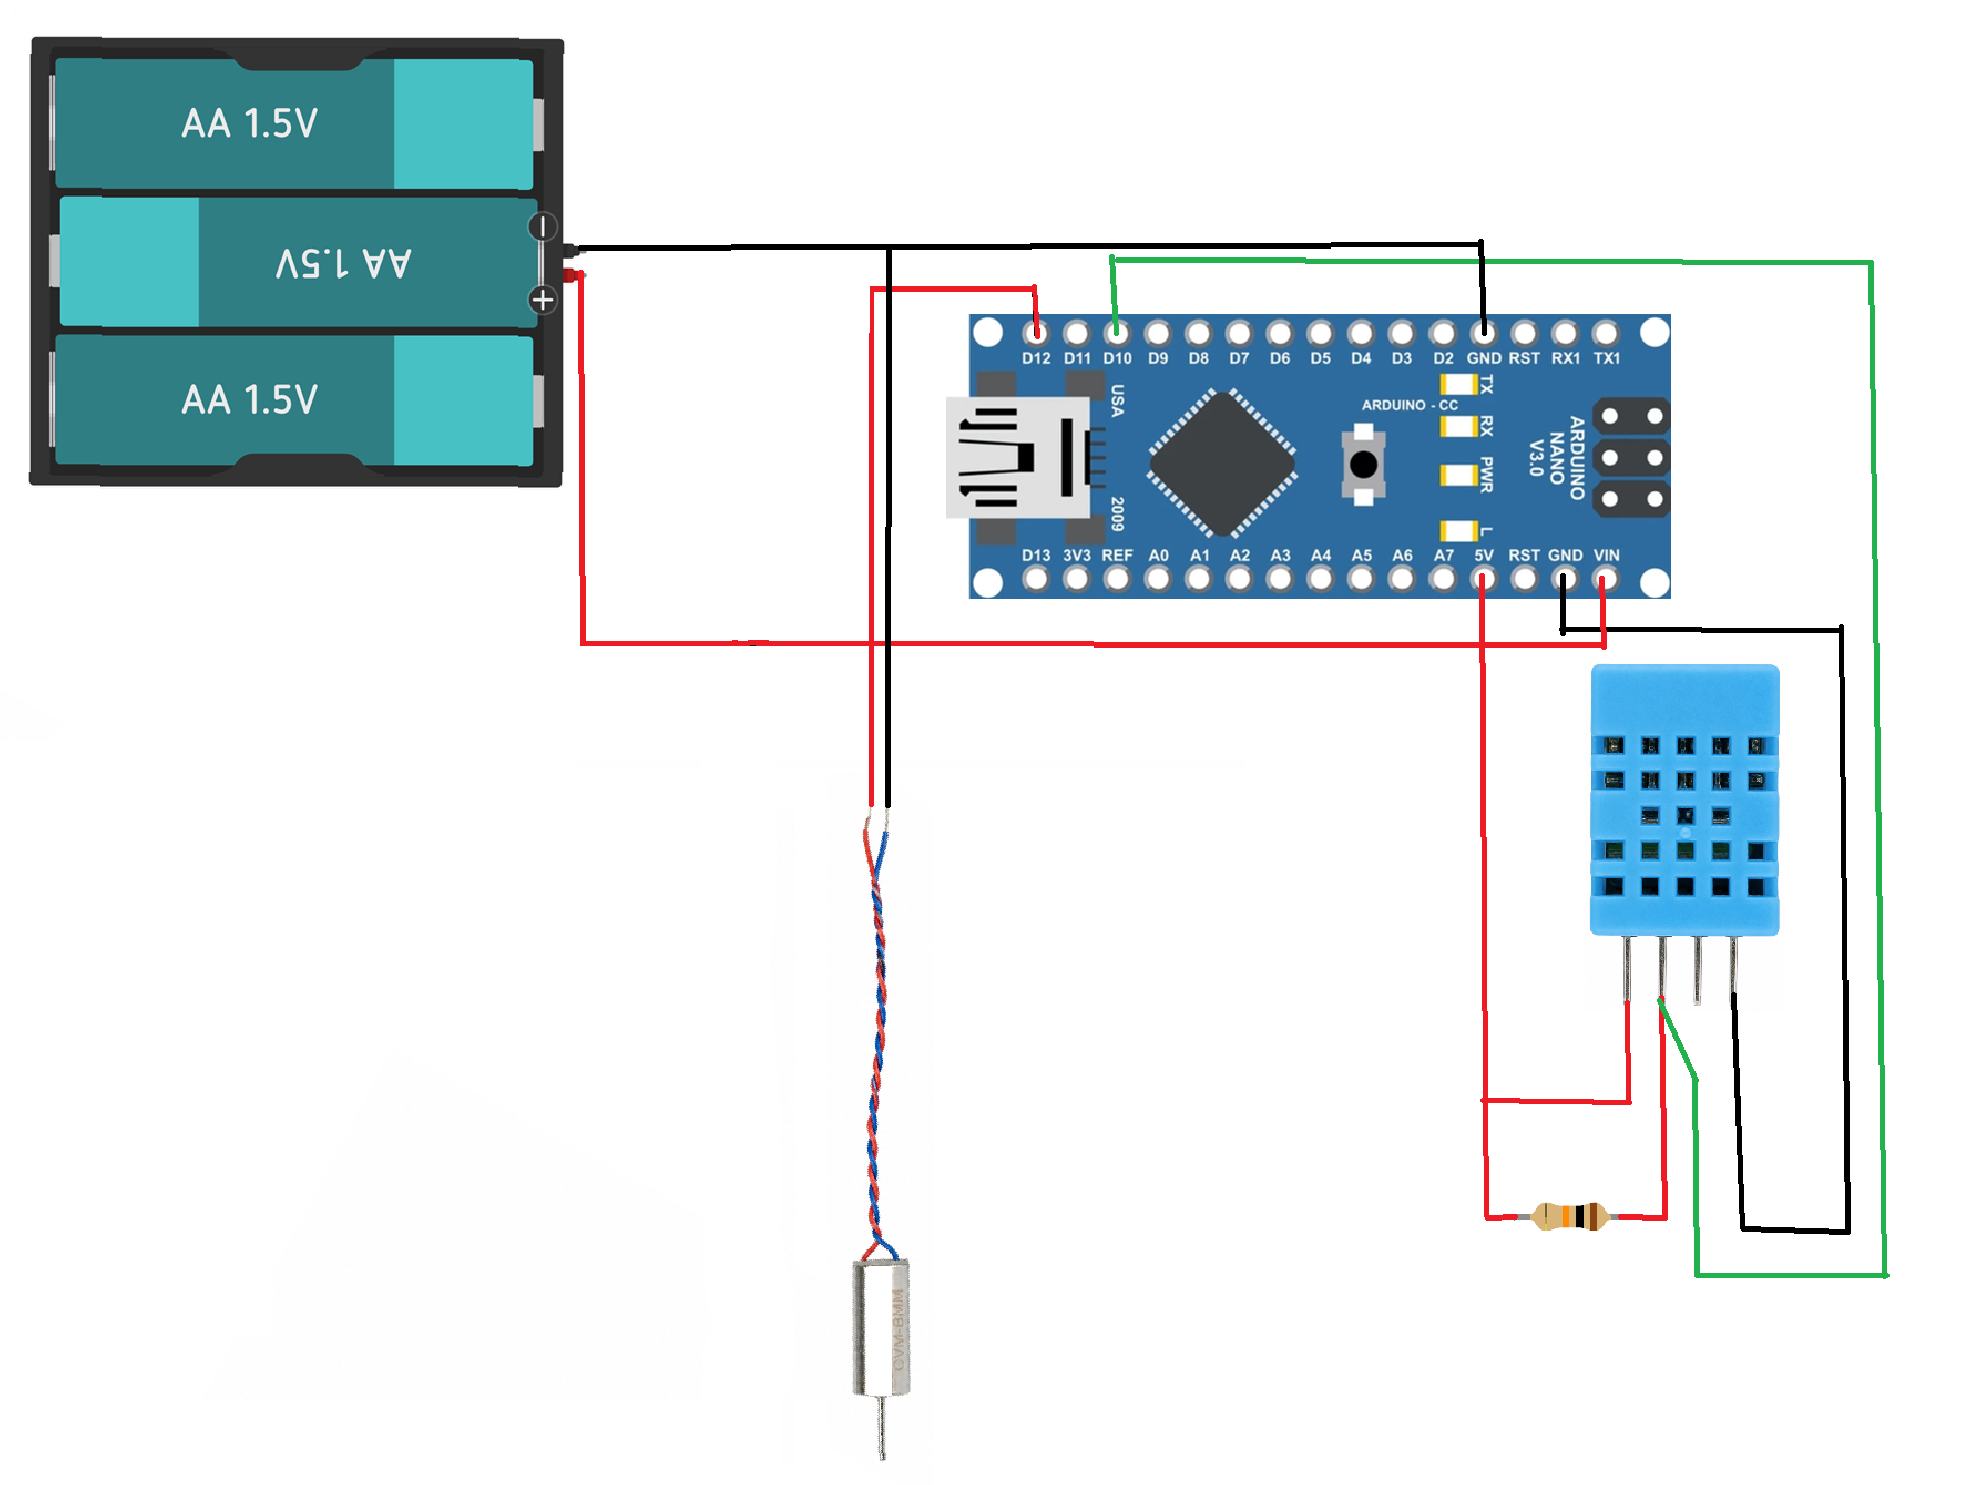
Connect Arduino Nano with a temperature sensor and battery holder as power source. For temperature sensor, VCC pin#1 connects to 5V Arduino Nano. #2 SDA connects to D10 pin Arduino Nano. Gnd pin #4 connects to the Ground pin in Arduino Nano. Motor positive goes to D12 and negative to negative battery.
Understanding Code
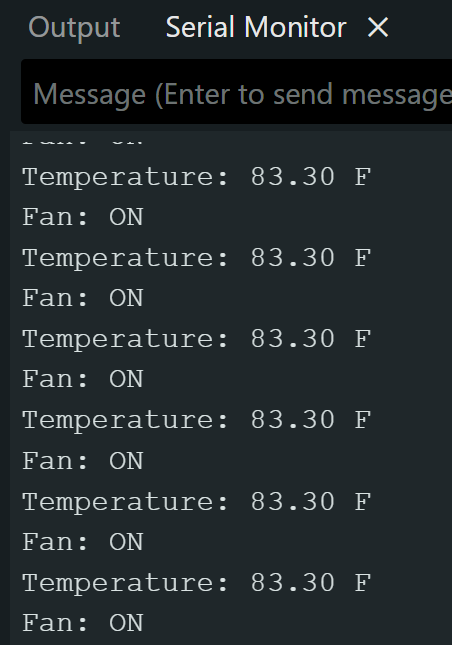
The Arduino repeatedly reads the temperature from the sensor and converts the temperature into Fahrenheit. Then, it compares to the 75°F threshold. If the temperature is above 75°F, the Arduino turns the fan on, and if the temperature is 75°F or below, it turns the fan off. The Arduino also displays the current temperature through the Serial Monitor, allowing the temperature and fan status to be monitored during testing.
Here is the code:
#include <DHT.h>
#define DHTPIN 10
#define DHTTYPE DHT11
#define FAN_PIN 12
DHT dht(DHTPIN, DHTTYPE);
void setup() {
Serial.begin(9600);
dht.begin();
pinMode(FAN_PIN, OUTPUT);
digitalWrite(FAN_PIN, LOW);
}
void loop() {
float temperatureF = dht.readTemperature(true);
if (isnan(temperatureF)) {
Serial.println("Sensor error");
return;
}
Serial.print("Temperature: ");
Serial.print(temperatureF);
Serial.println(" F");
if (temperatureF > 75.0) {
digitalWrite(FAN_PIN, HIGH);
Serial.println("Fan: ON");
} else {
digitalWrite(FAN_PIN, LOW);
Serial.println("Fan: OFF");
}
delay(2000);
}
For the actual prototype, it is better to improve this with hysteresis, so the fan doesn't rapidly switch on and off when the temperature is hovering around 75°F.
Downloads
Project Prototype and How It Works
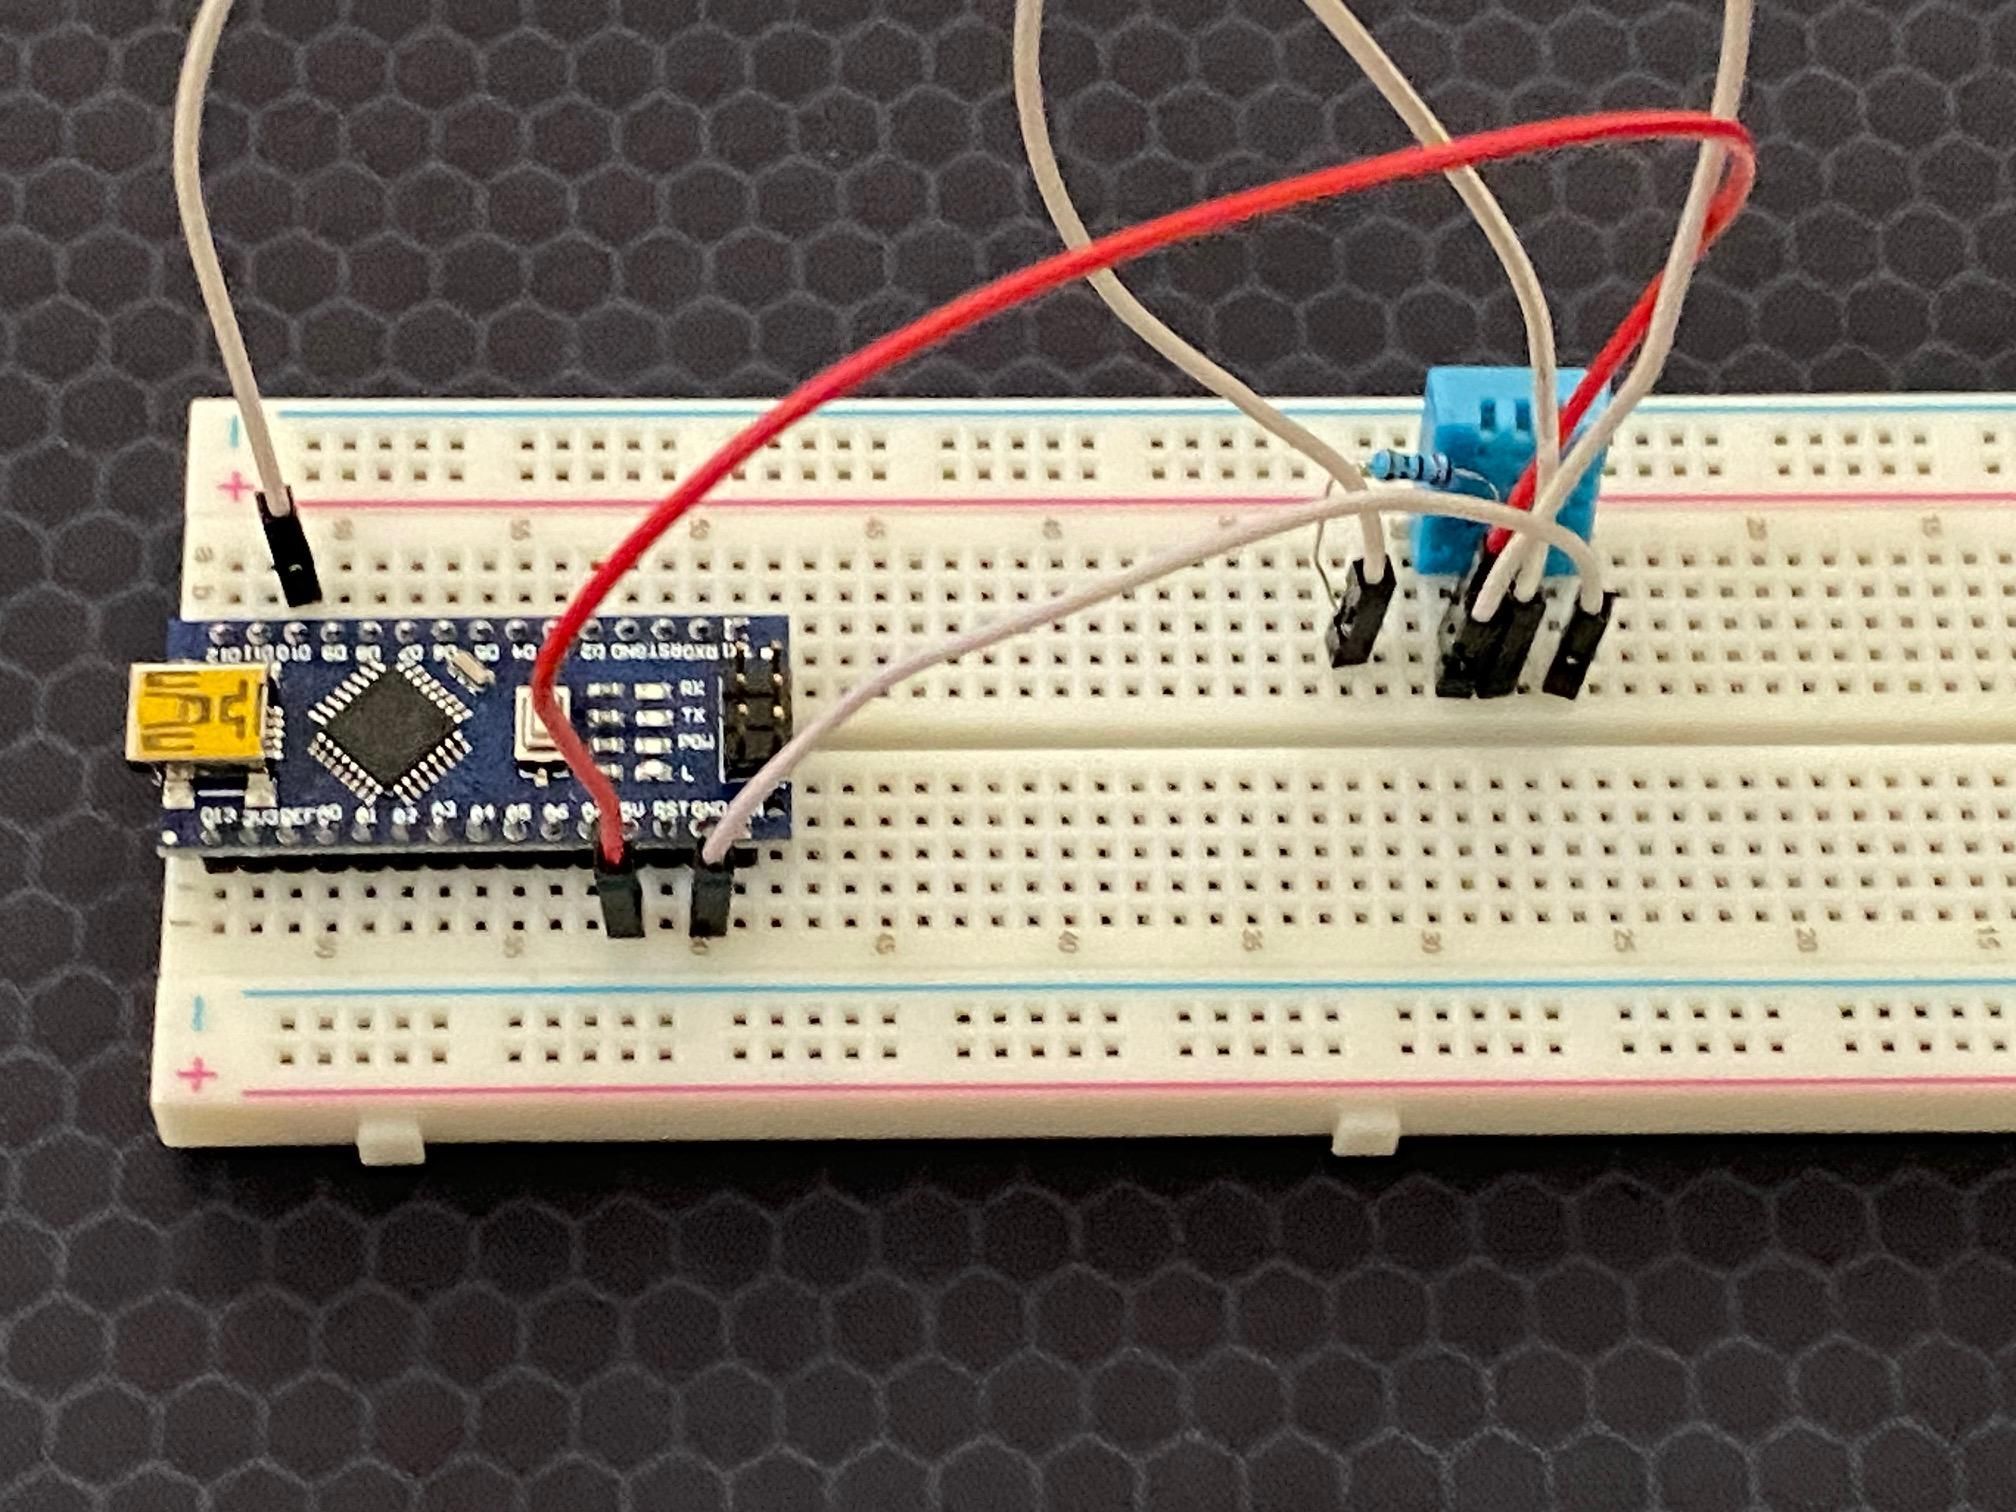
Before building the final product, it is important to create a prototype to make sure everything works properly. I used a large breadboard and male-to-male jumper wires to connect the Arduino Nano to the other electronic components. This method makes it easy to assemble, test, and modify the circuit without soldering.
Before powering the prototype with a battery, it is safer and more convenient to use a computer as the initial power source. Connect the Arduino Nano to the computer using a USB cable, then upload the program to the Arduino. Once the code is uploaded, the prototype can be tested to make sure the sensors, fan, and other components operate as expected.
The temperature sensor continuously measures the environment around the hard hat. For normal conditions with temperatures less than or equal to 75°F, Arduino will detect a comfortable temperature, fan remains OFF and saves battery. In hot conditions with temperatures above 75°F, Arduino detects increased temperature, turns on the fan, and air circulates around the head and neck.
Enclosure- 3D Printing
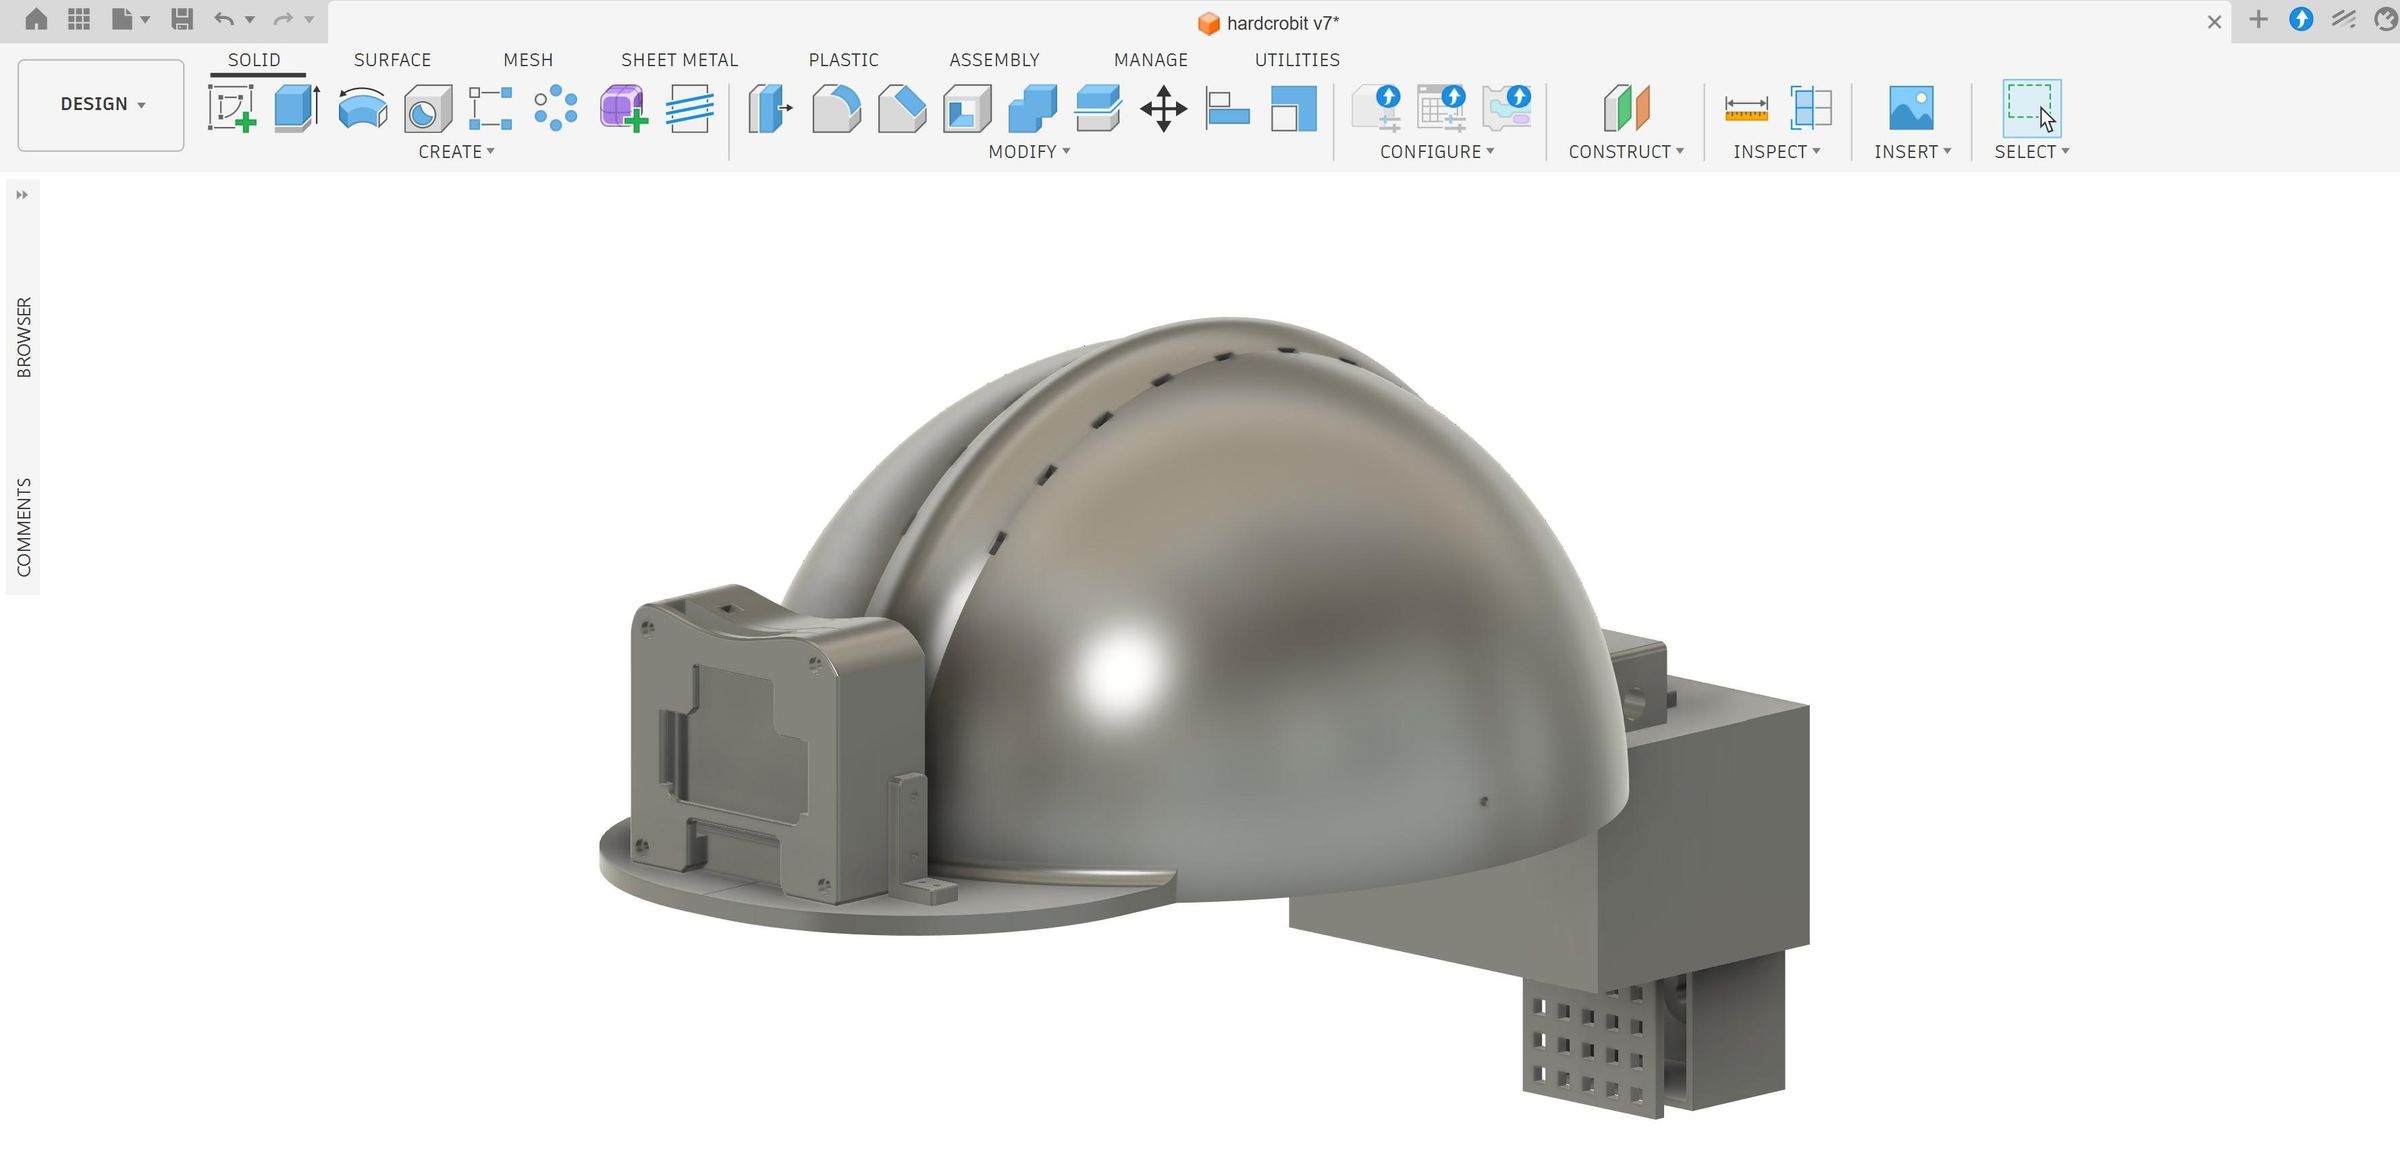
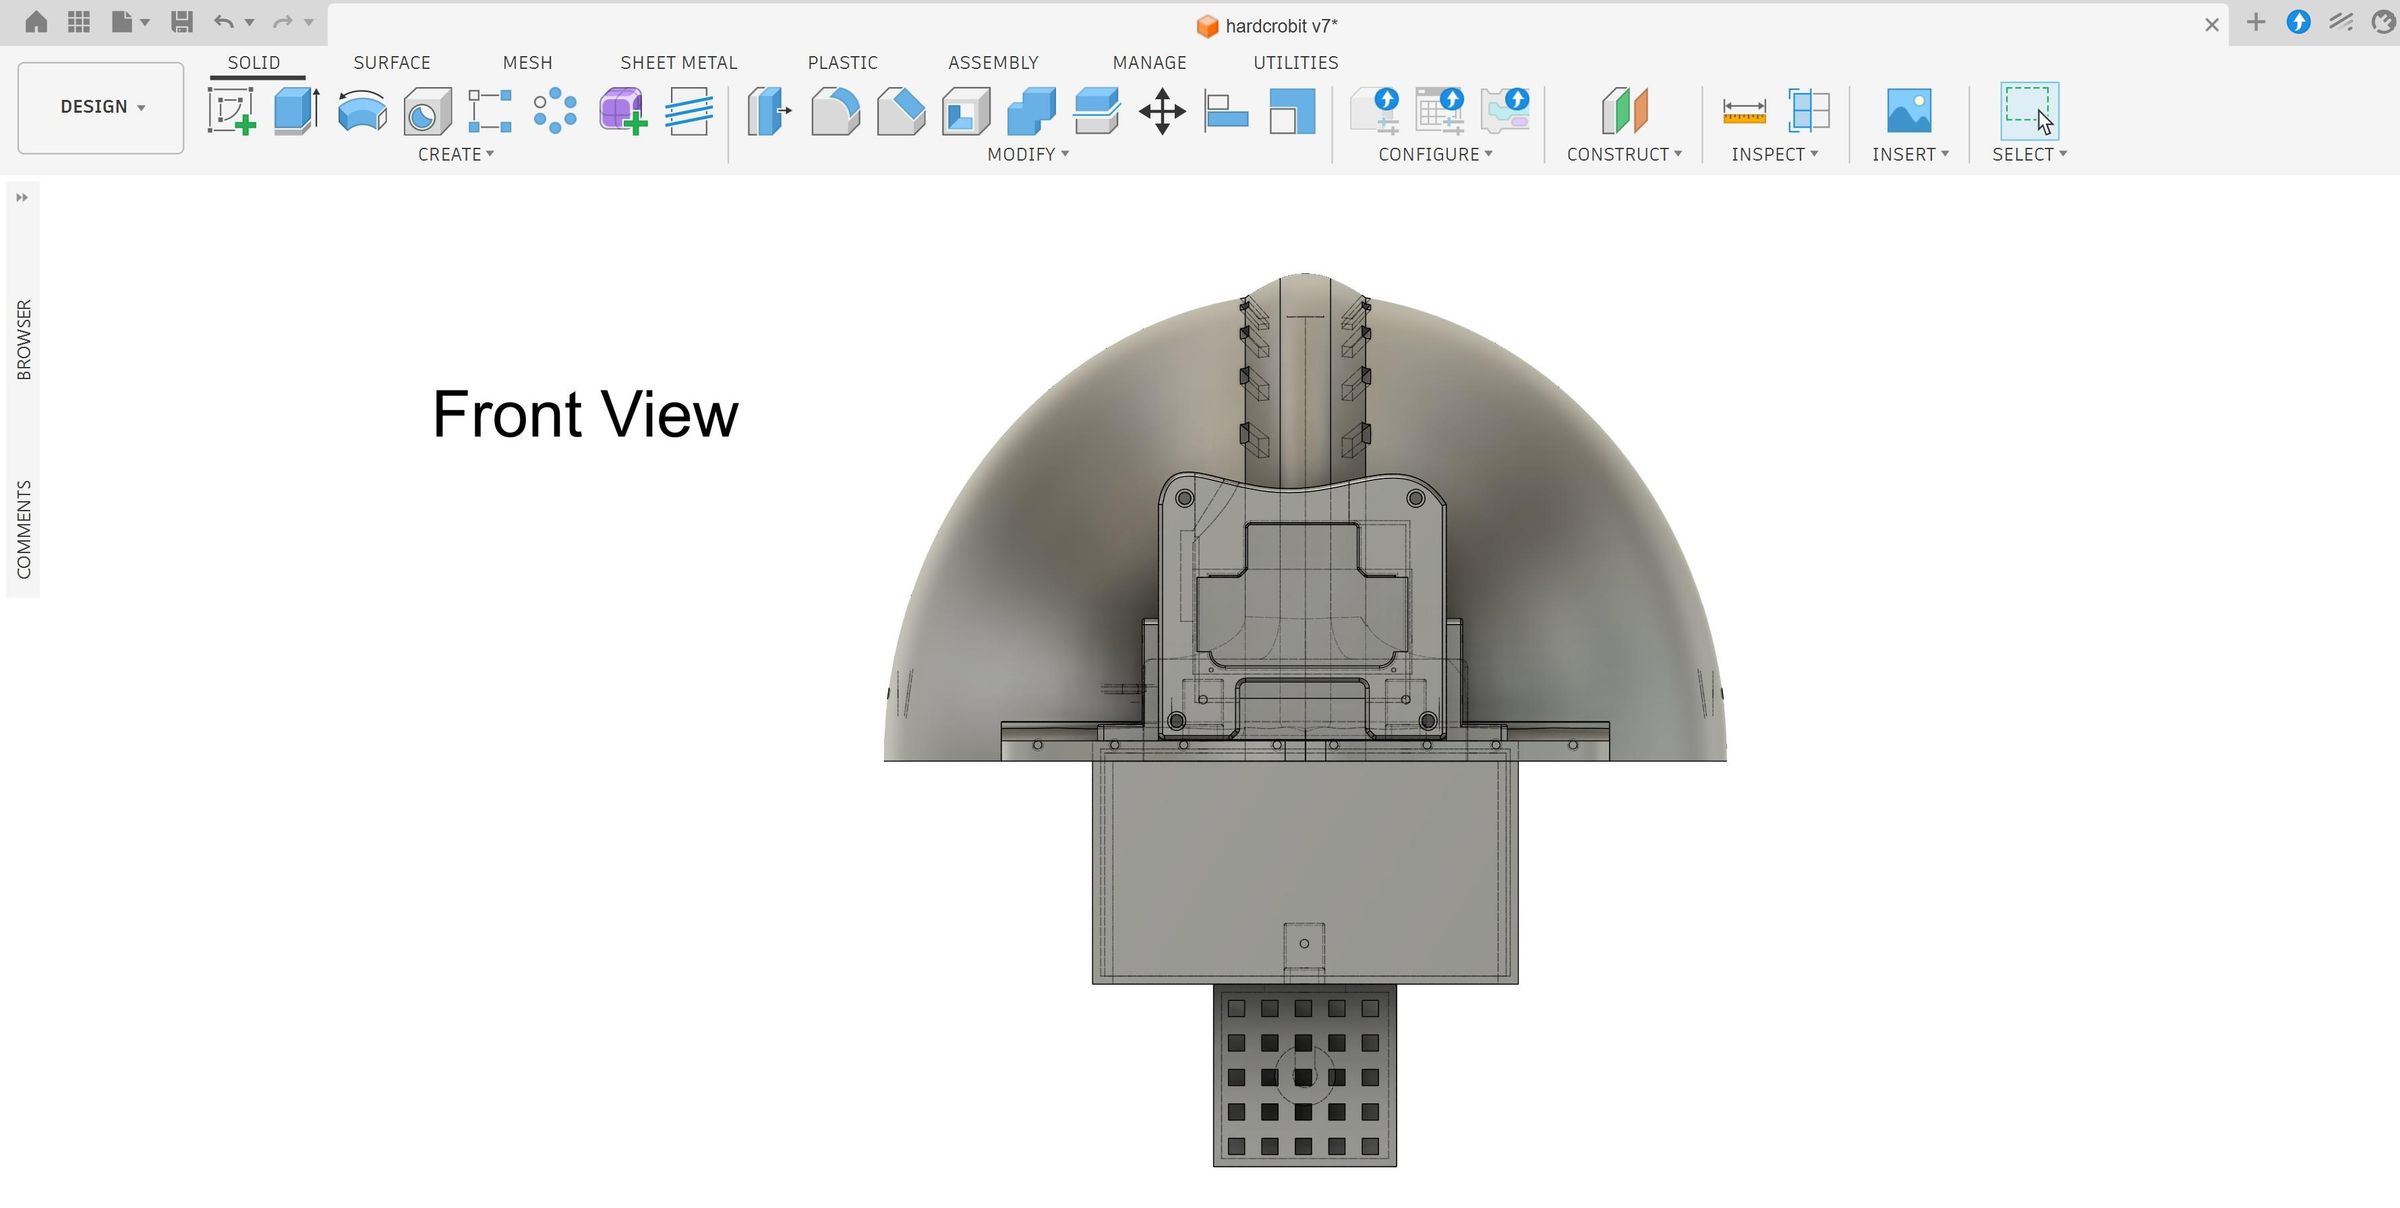
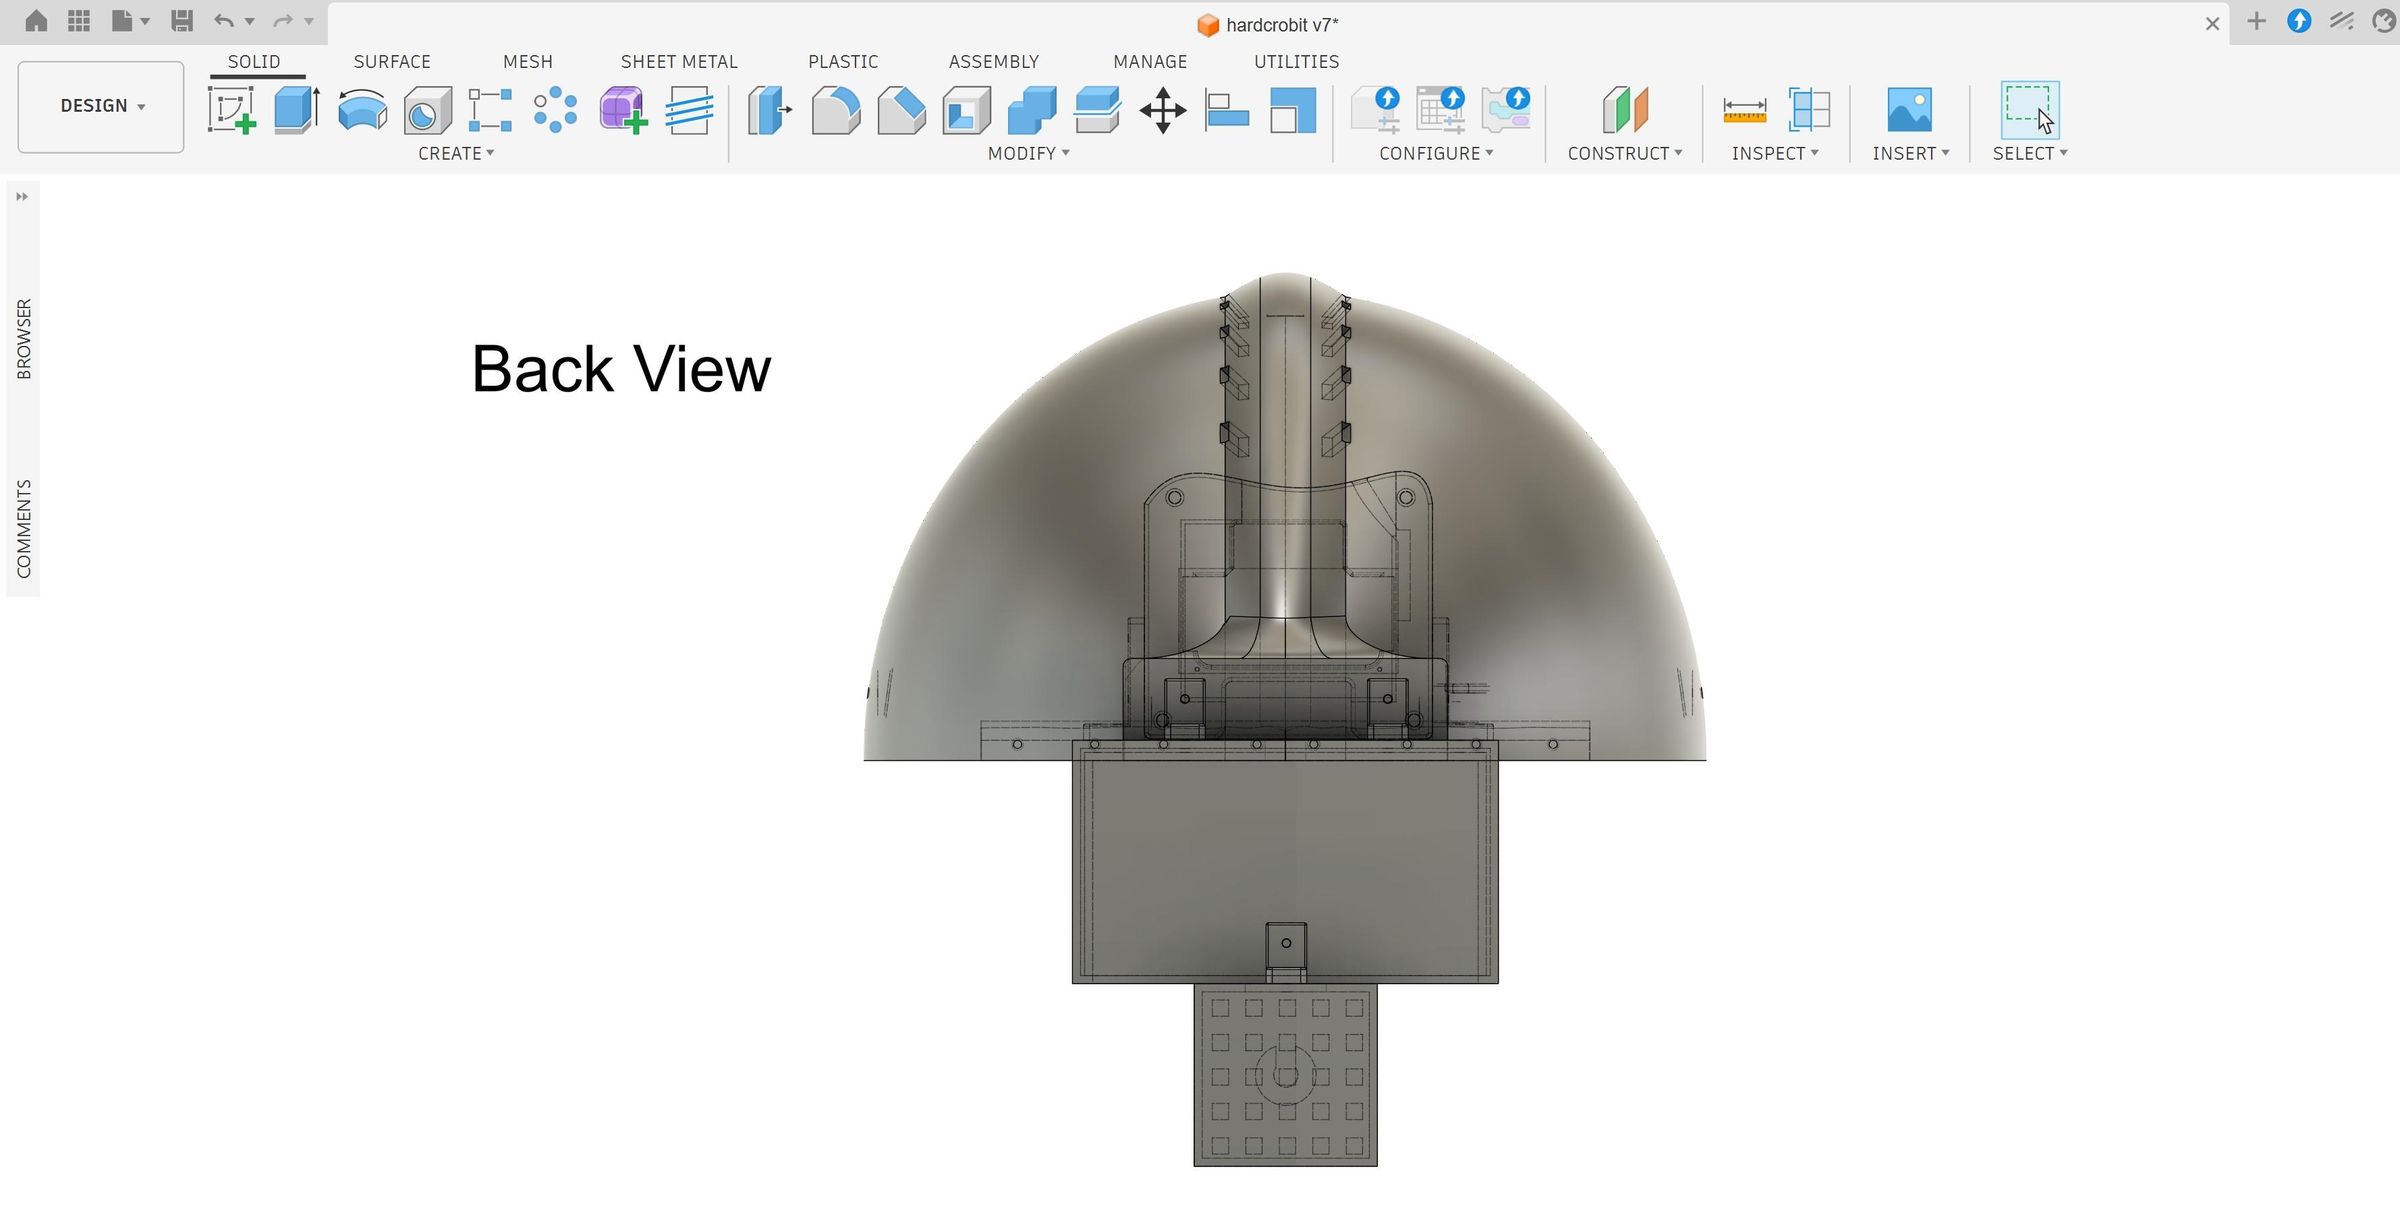
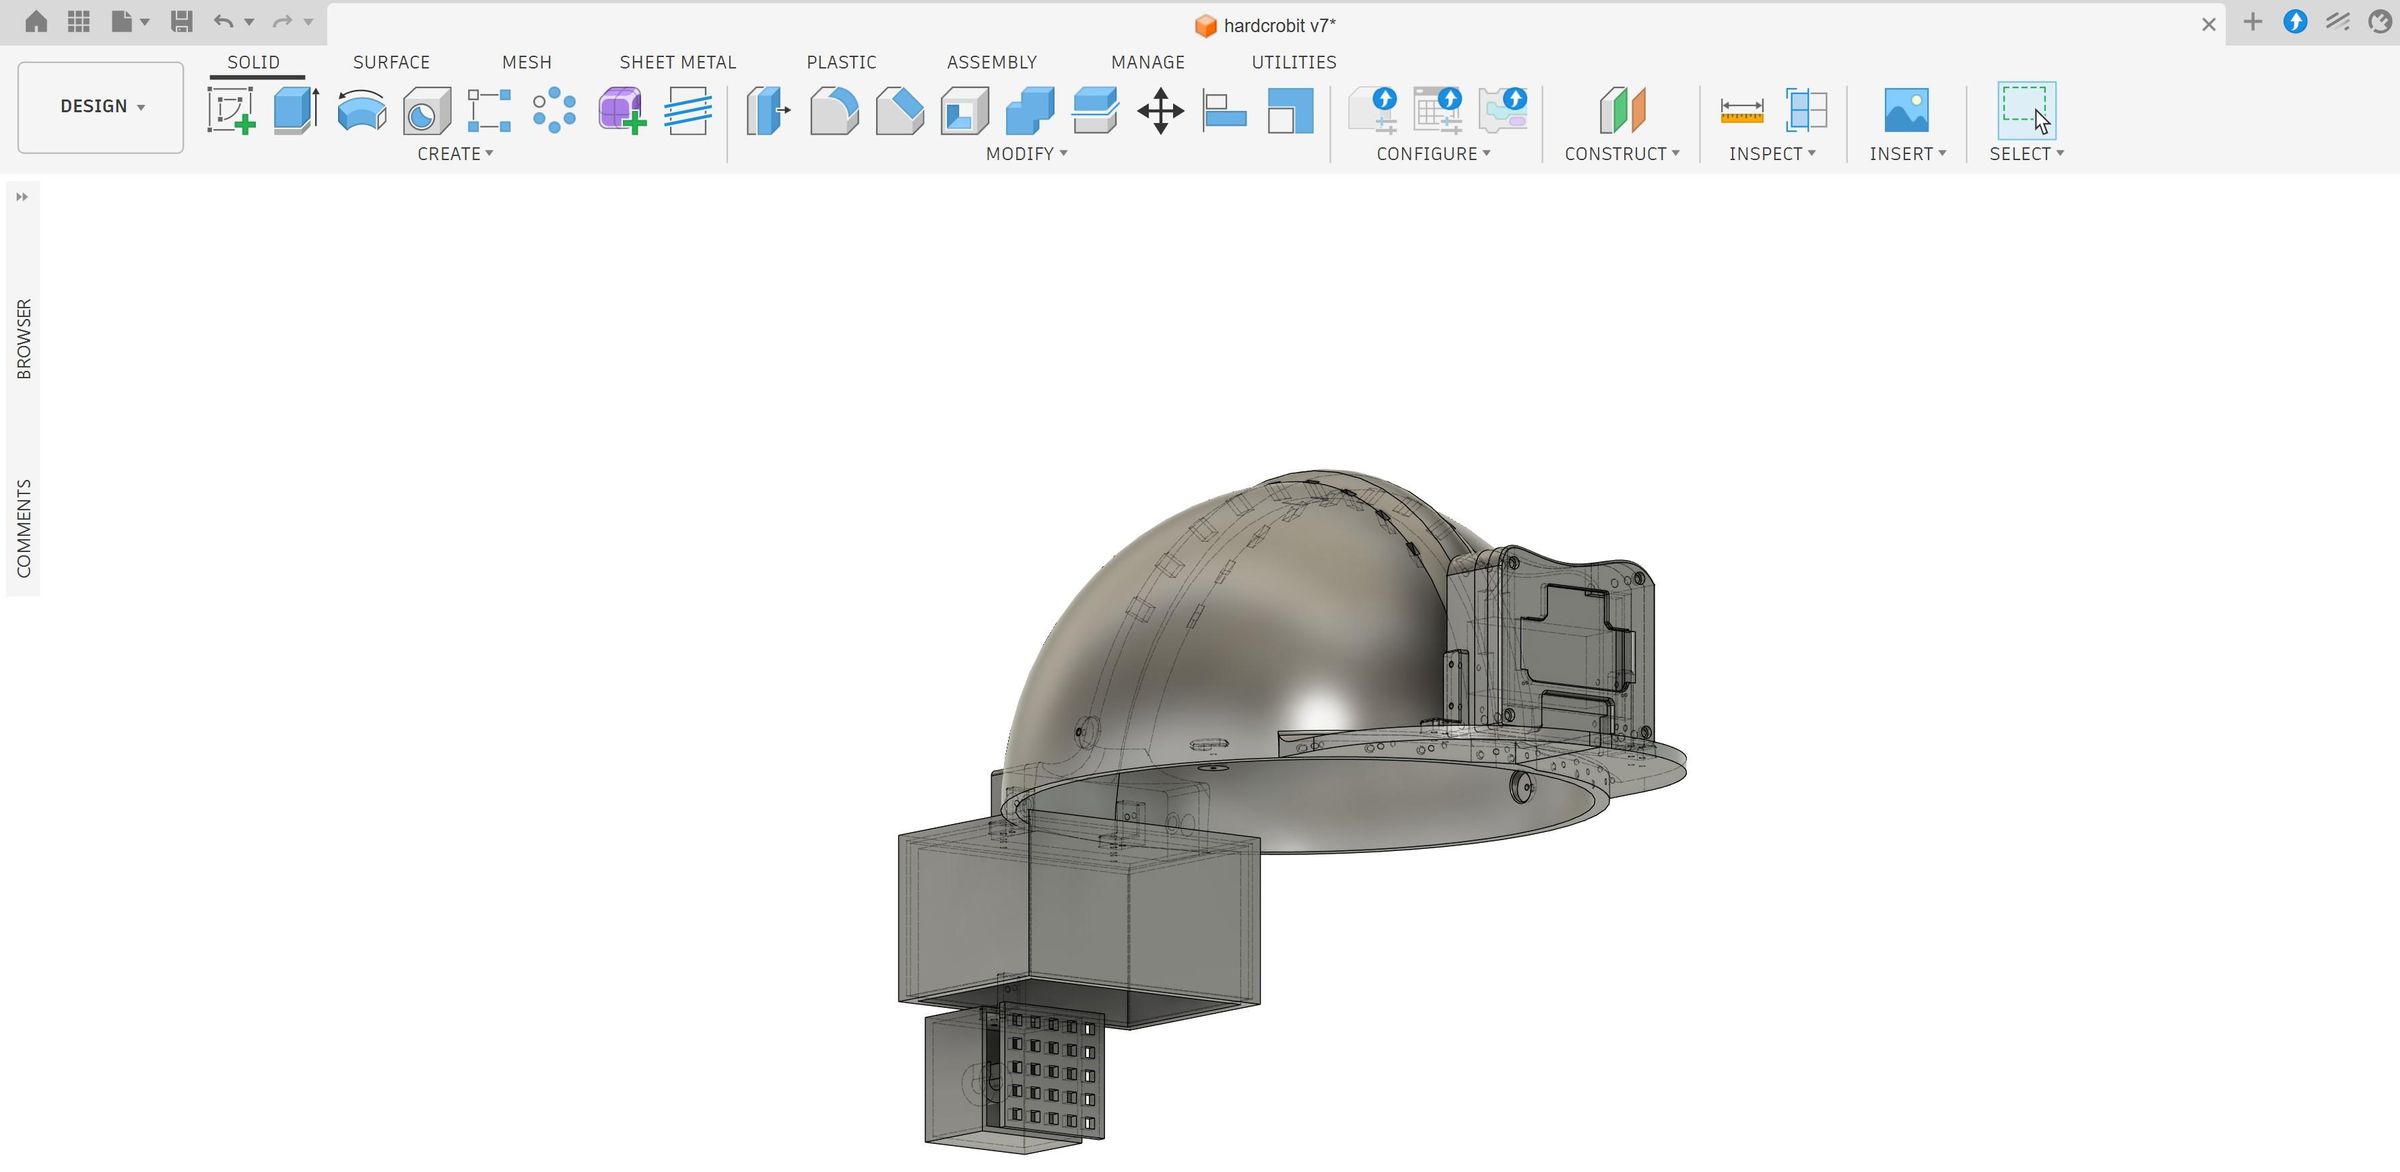
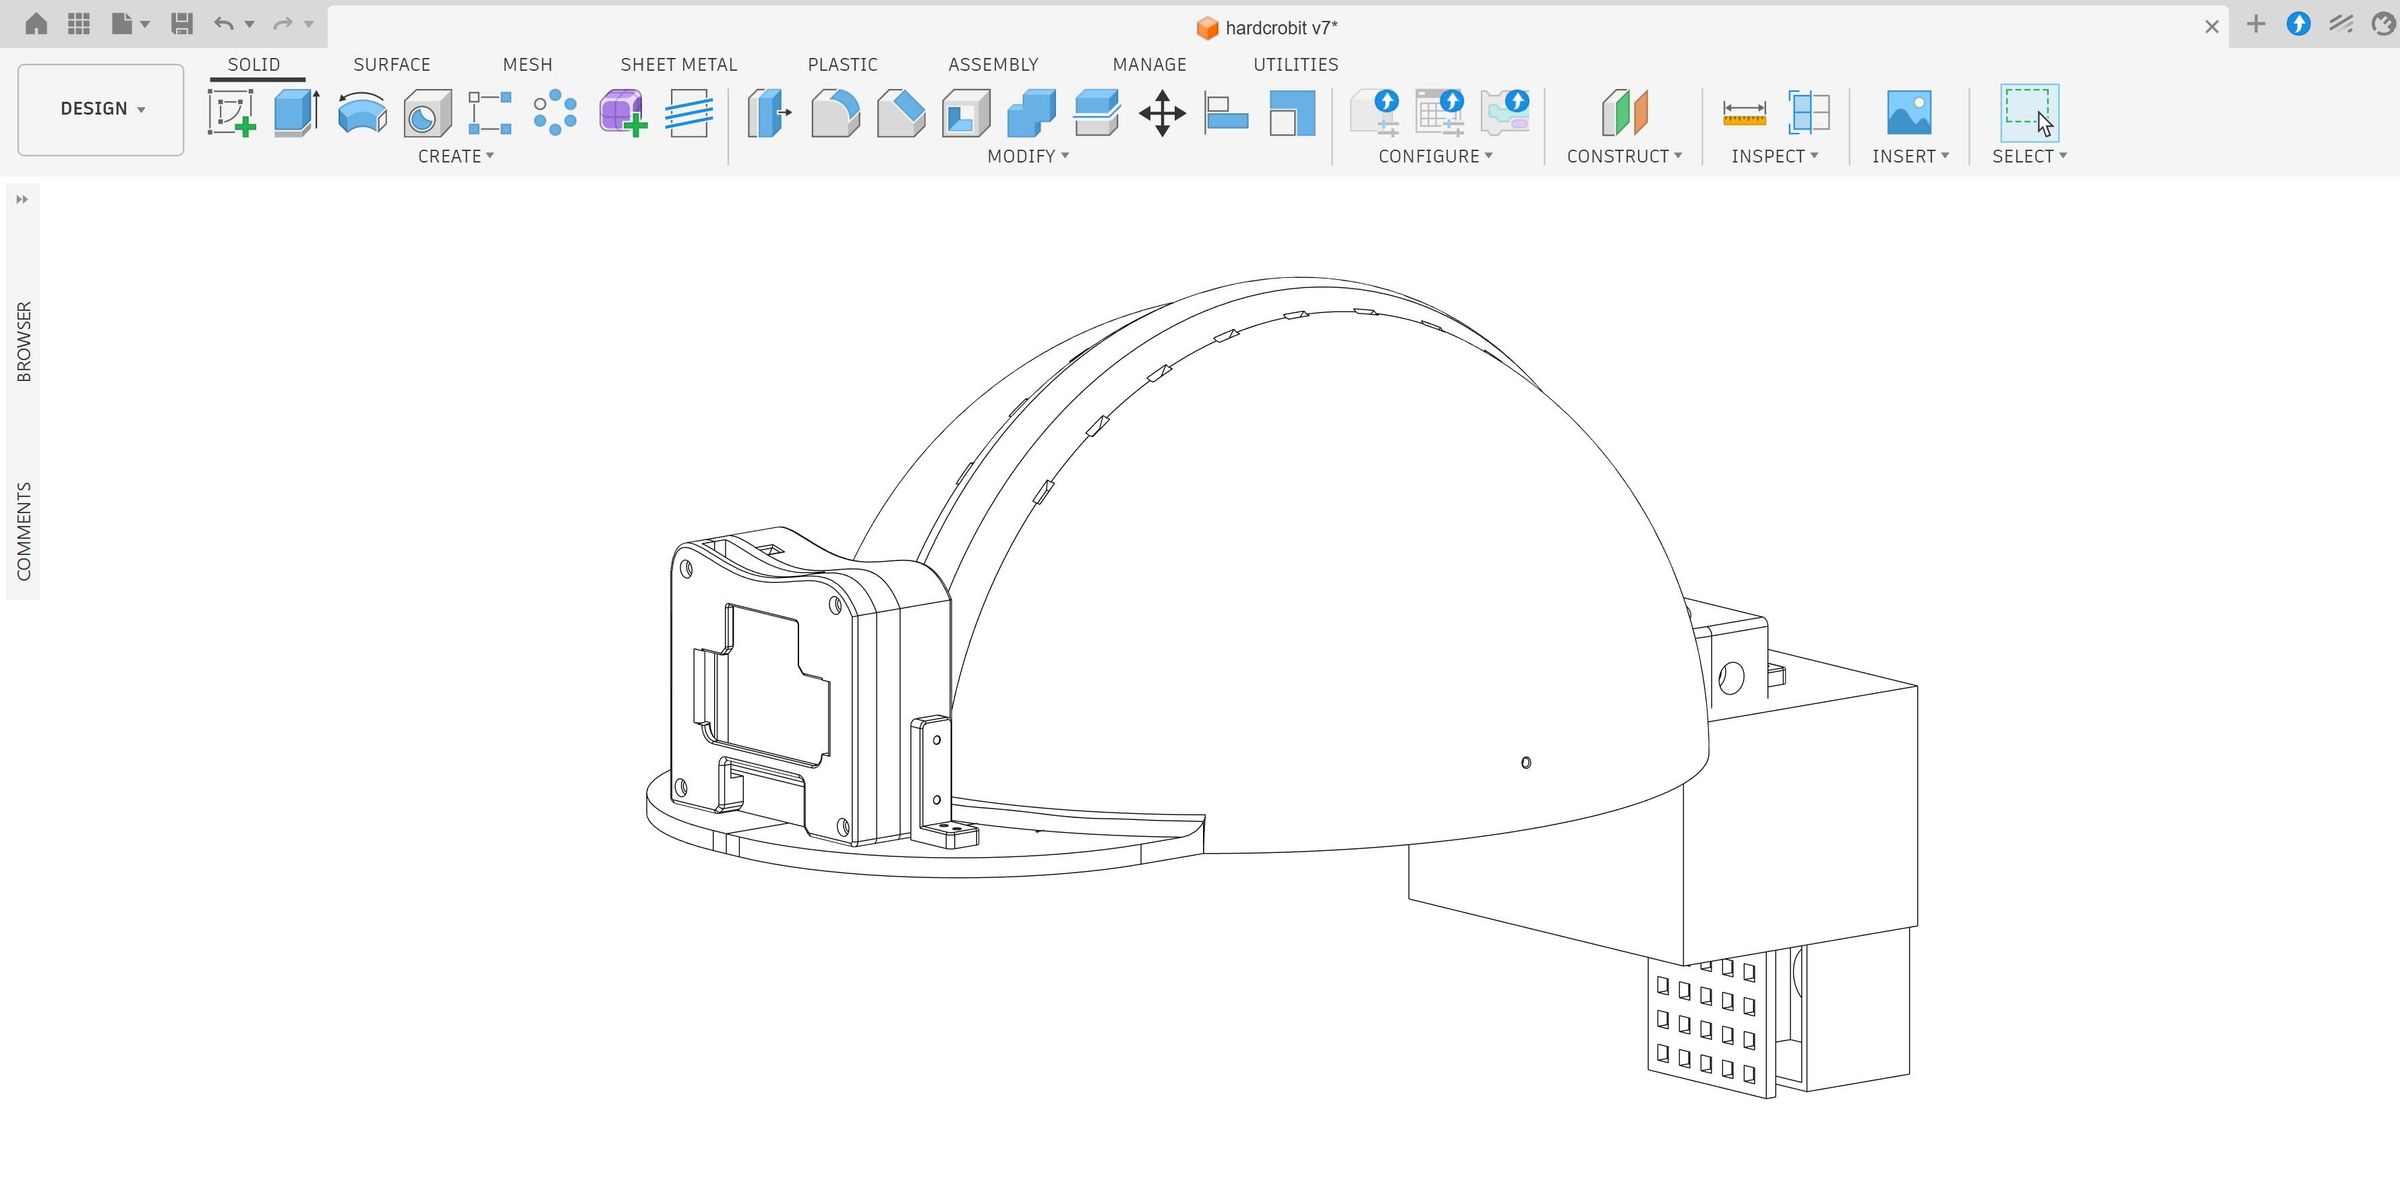
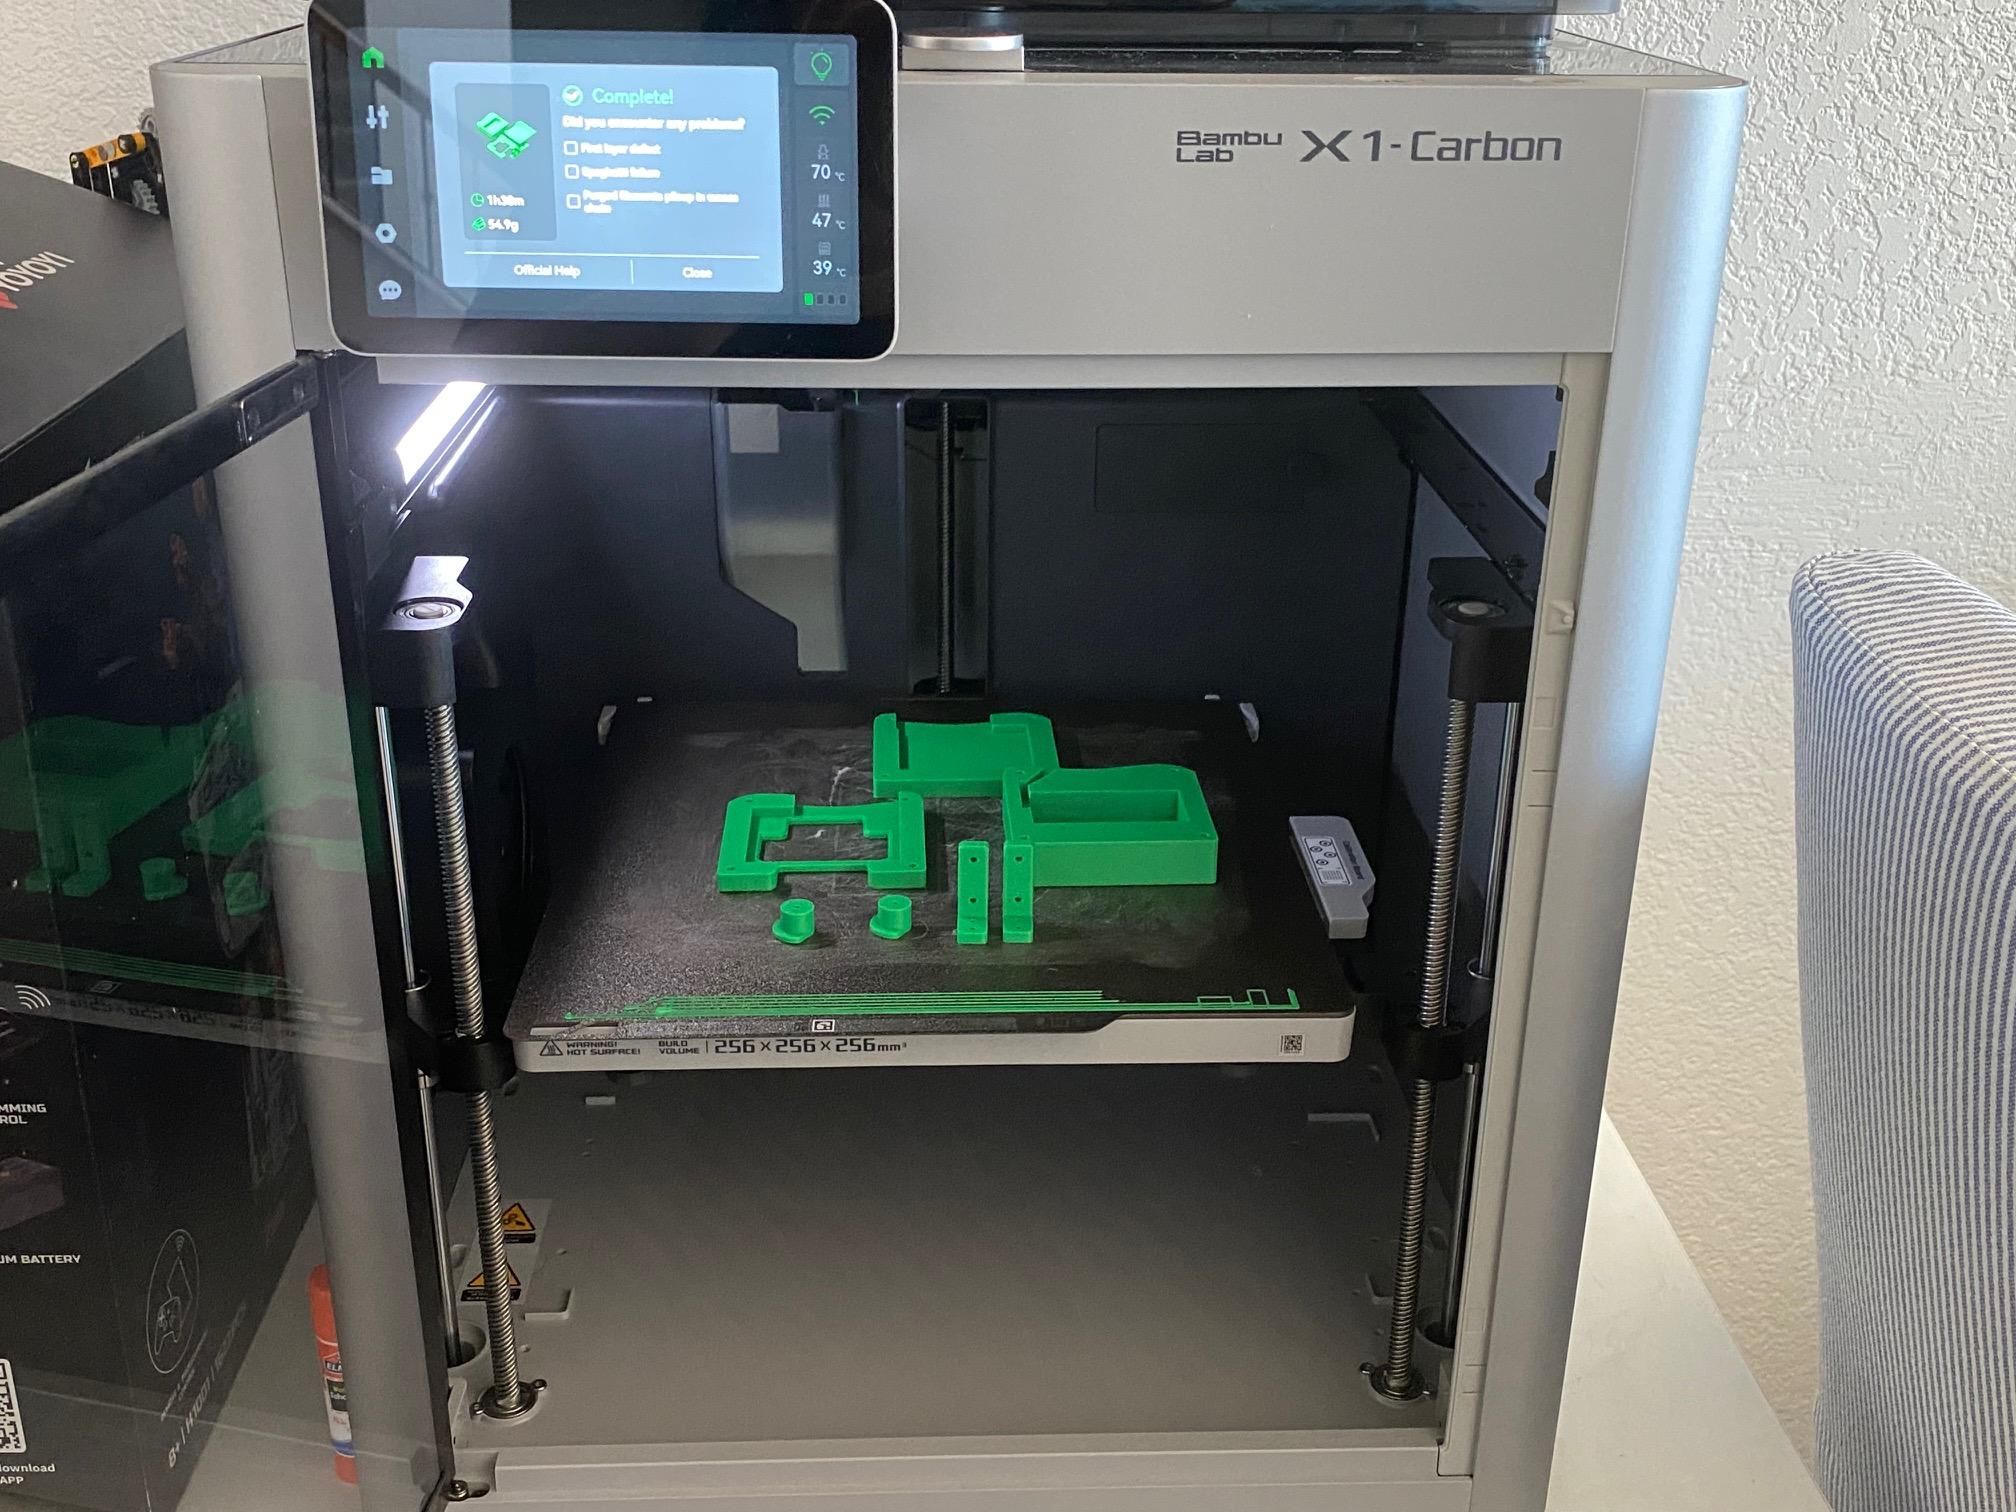
This time, I designed a small enclosure by using Autodesk Fusion 360 that contains Arduino Nano, temperature sensor connection, wiring and battery connection. The Fusion 360 features that I used are Extrude, Shell, Fillet, Chamfer, Hole tool, Construction planes, Parametric dimensions, and Ventilation slots. Design the enclosure with vent openings around the temperature sensor so the sensor can measure surrounding air rather than the temperature inside the electronics box.
Polishing and Assembly
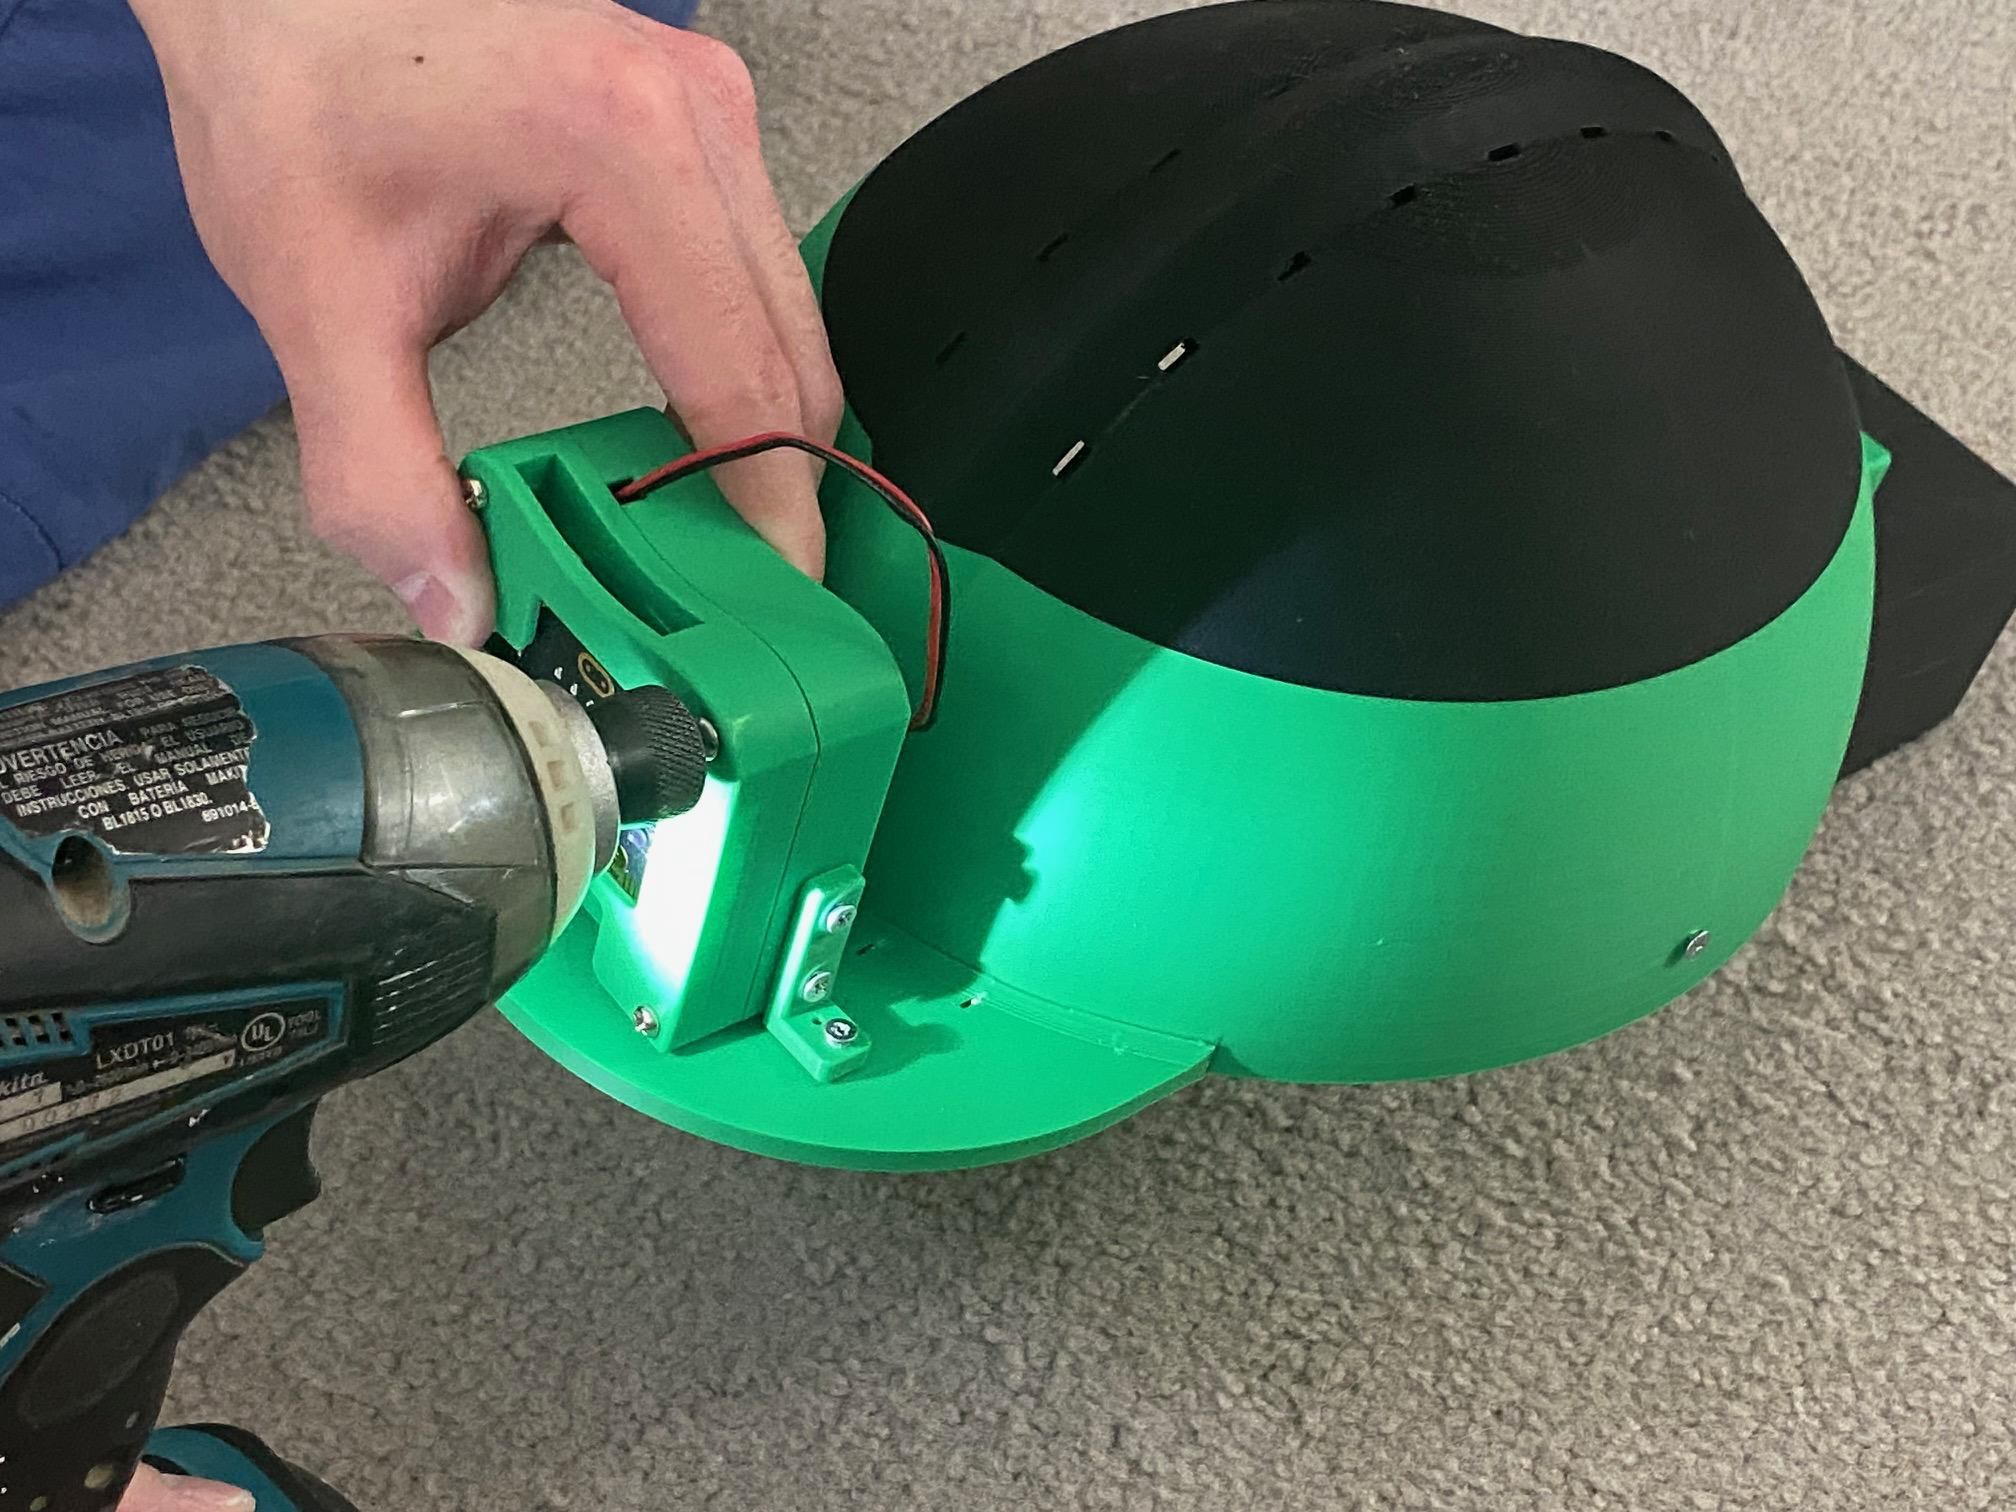
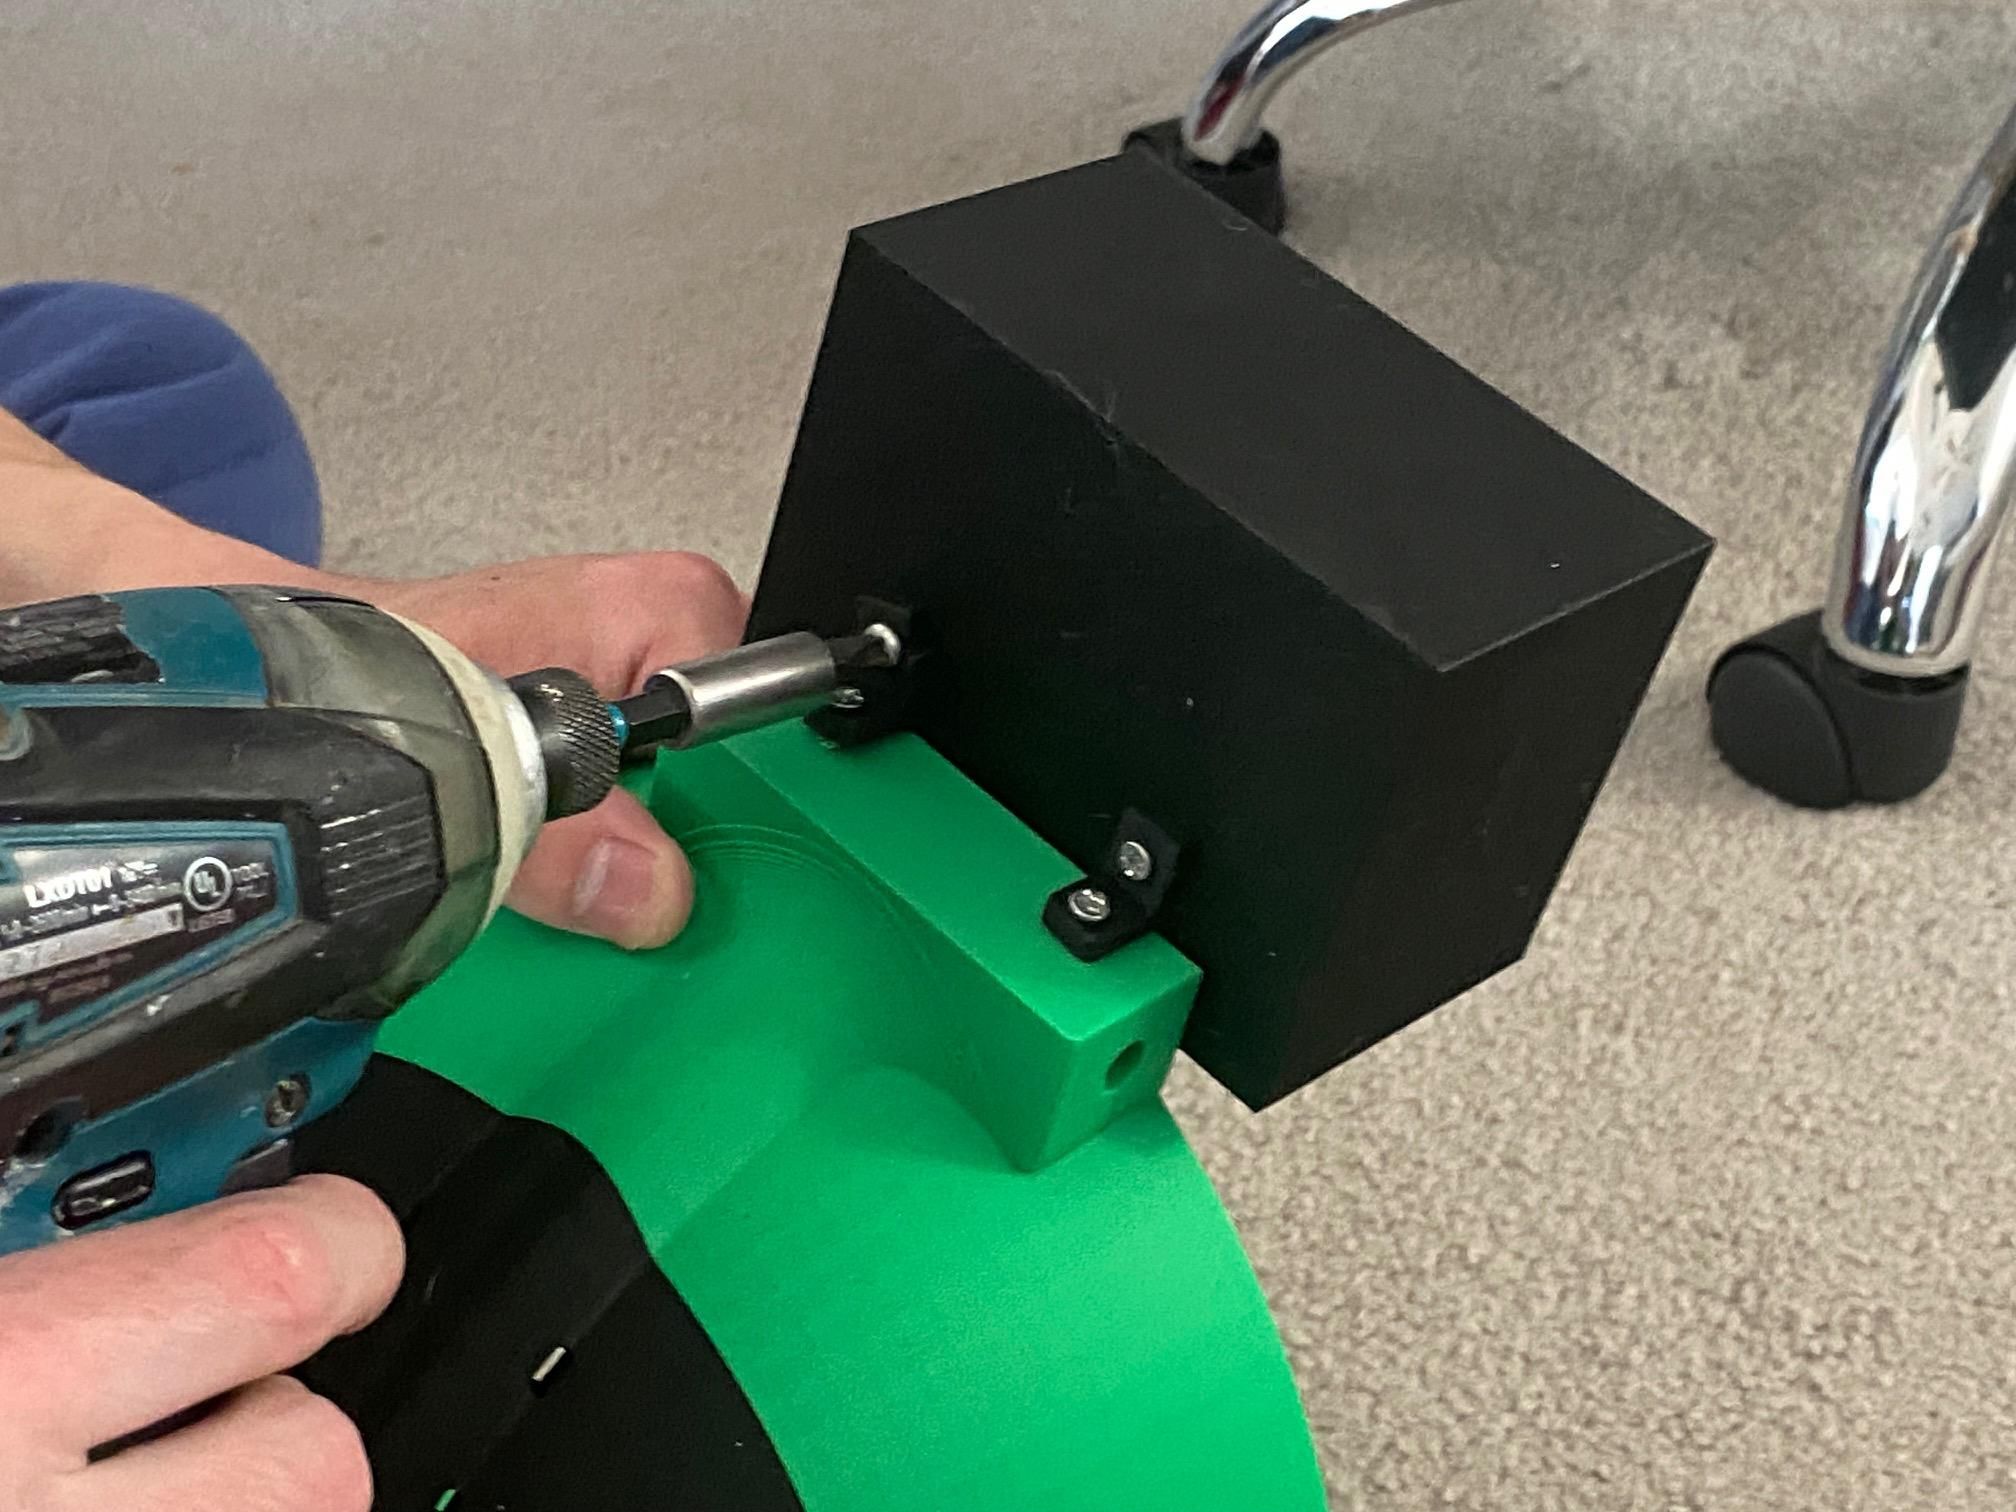
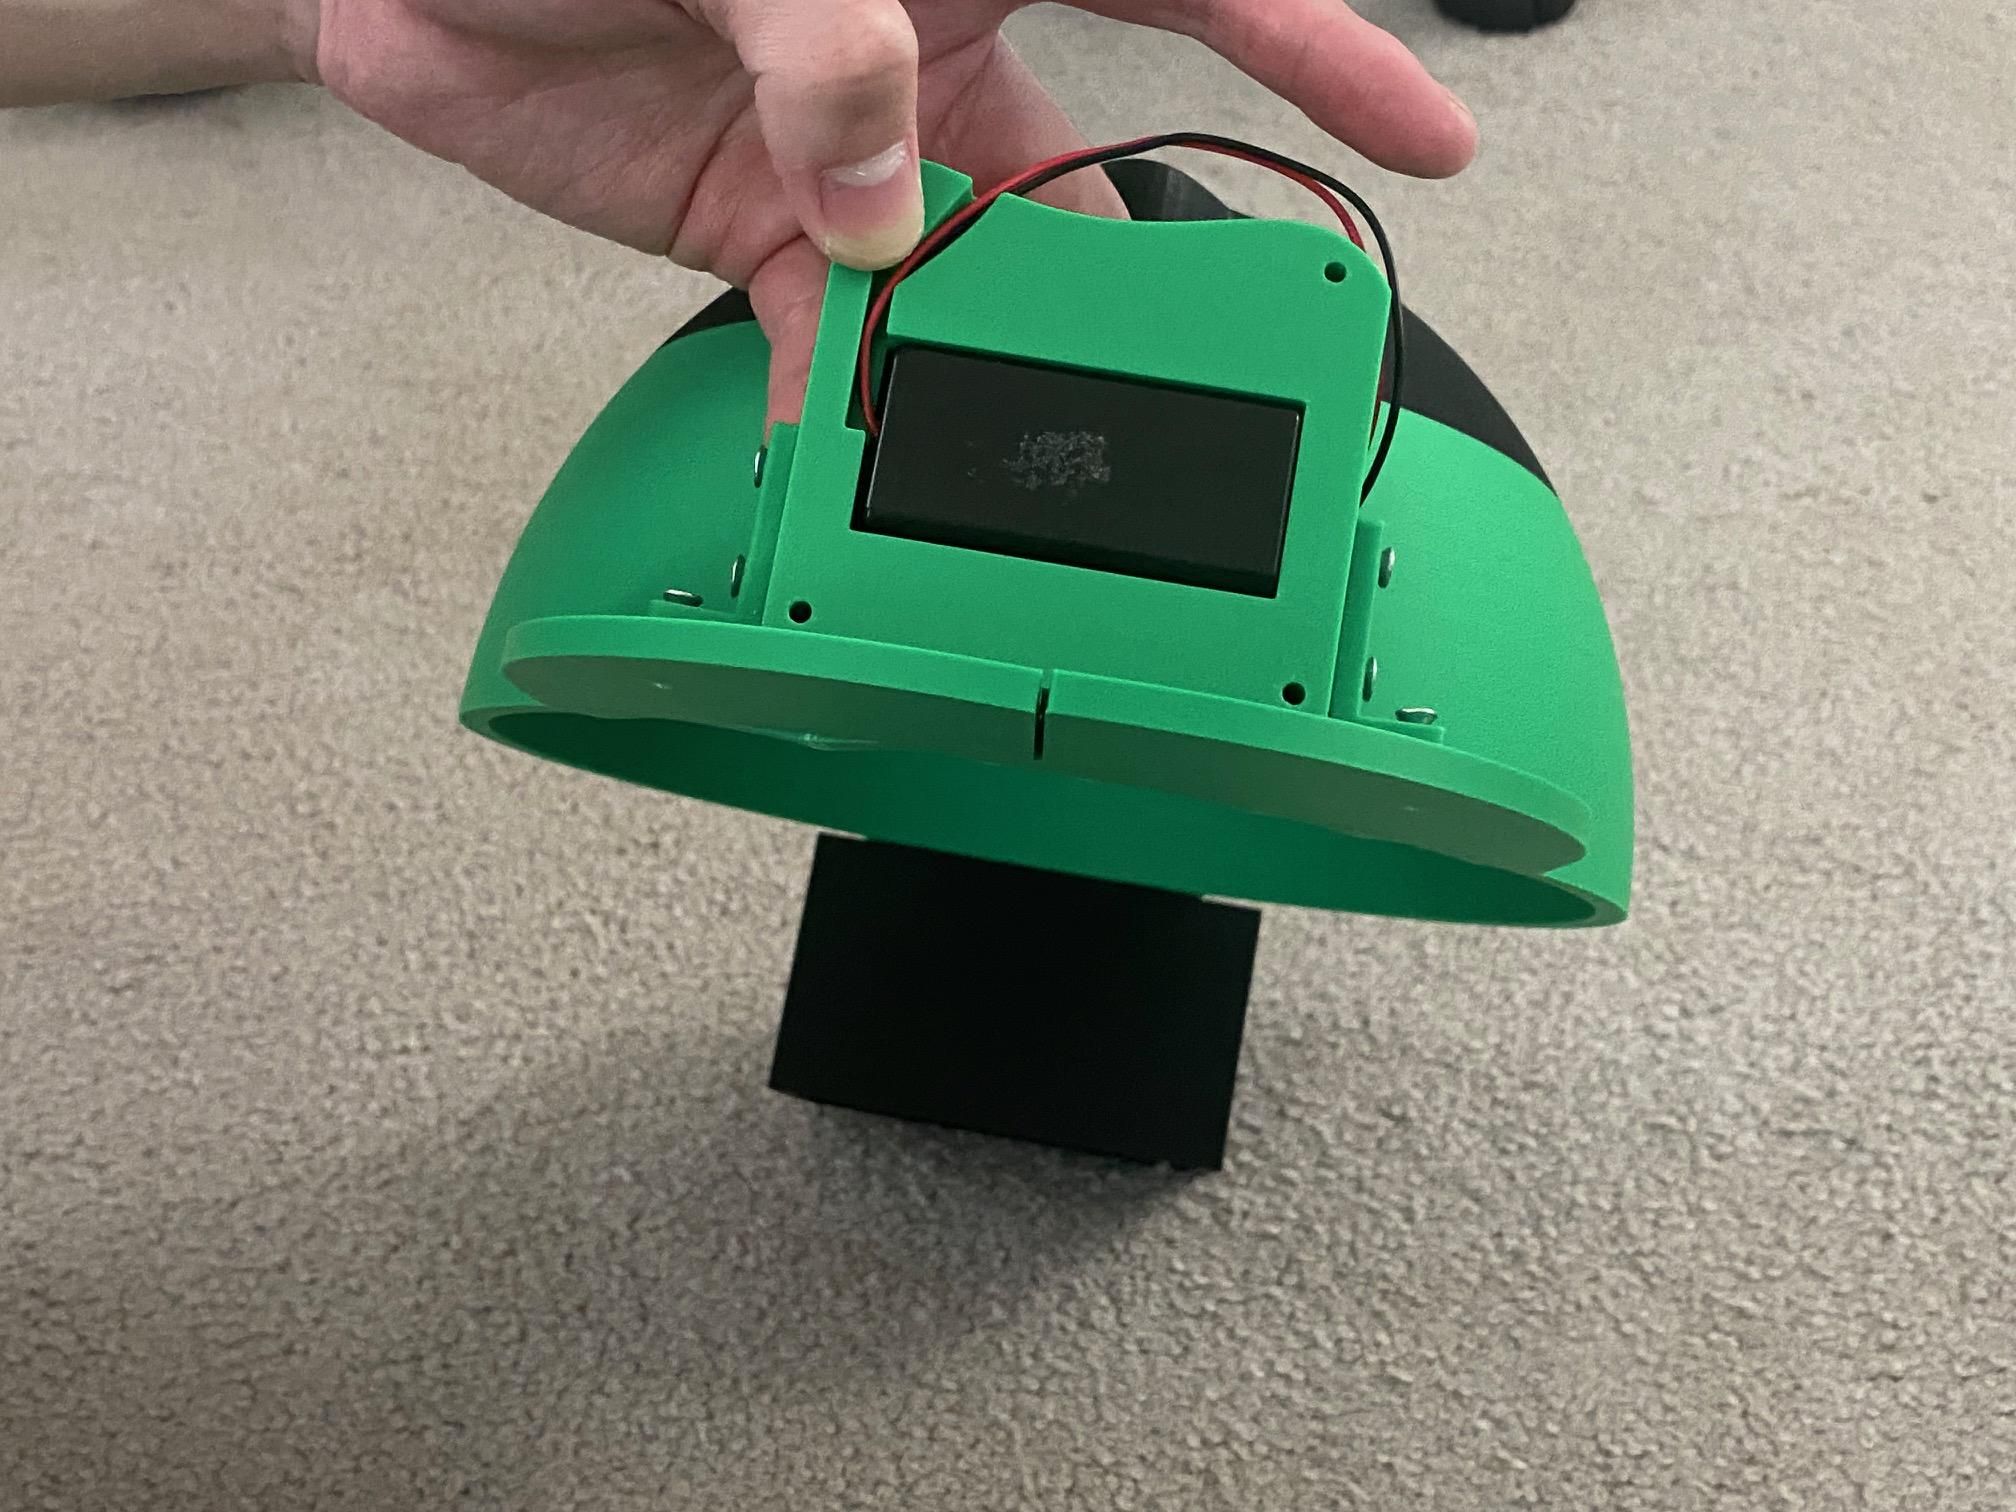
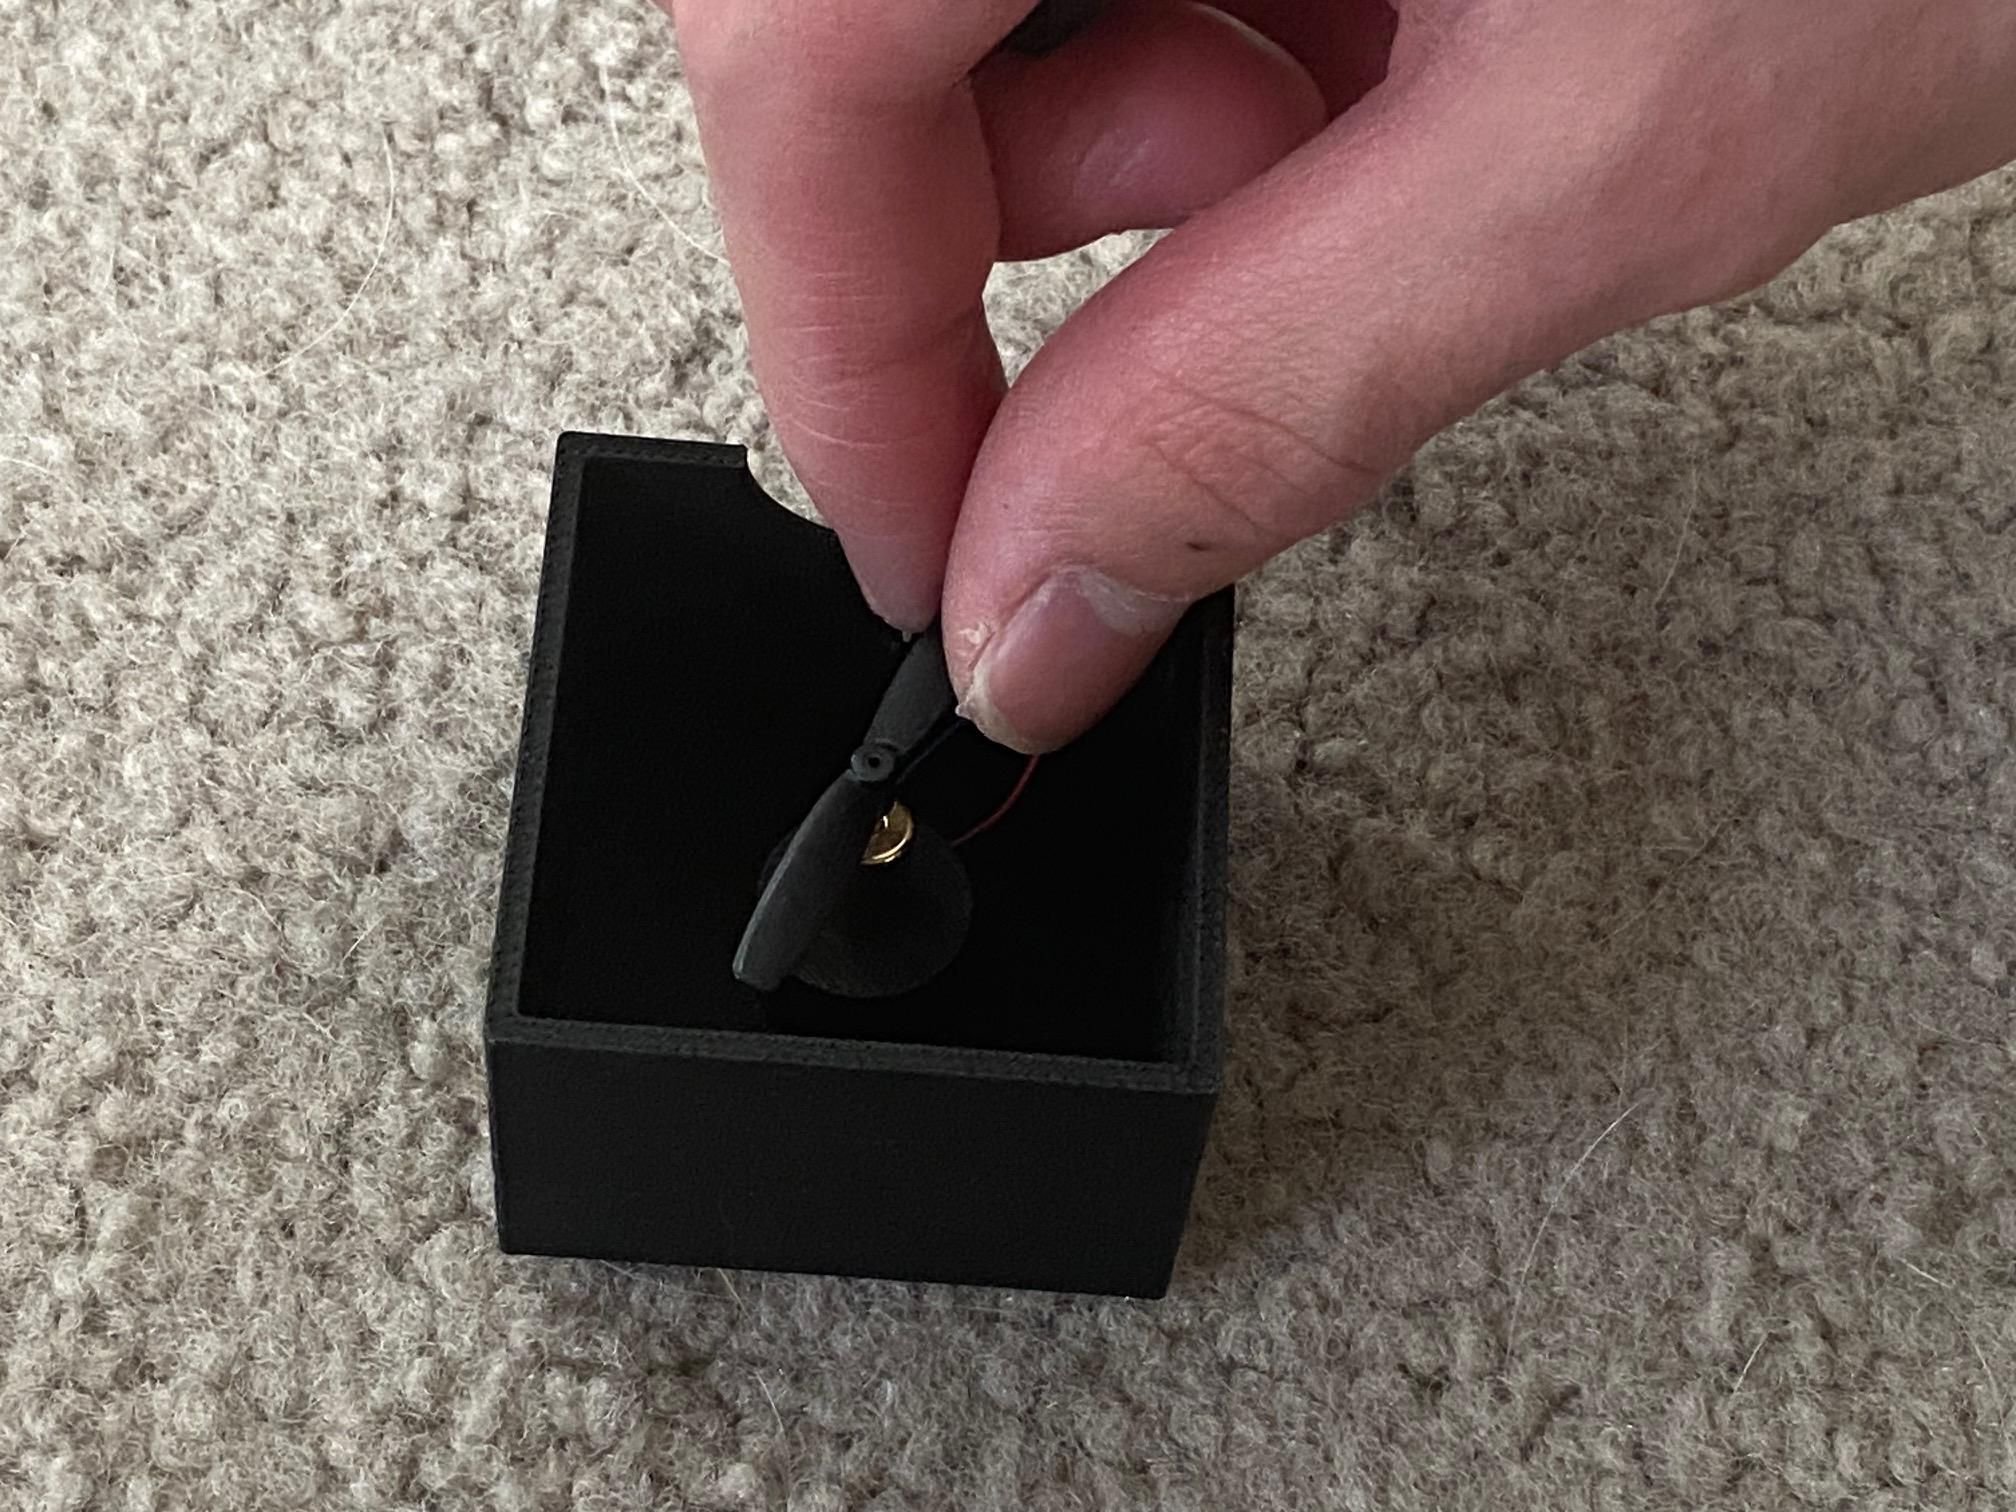
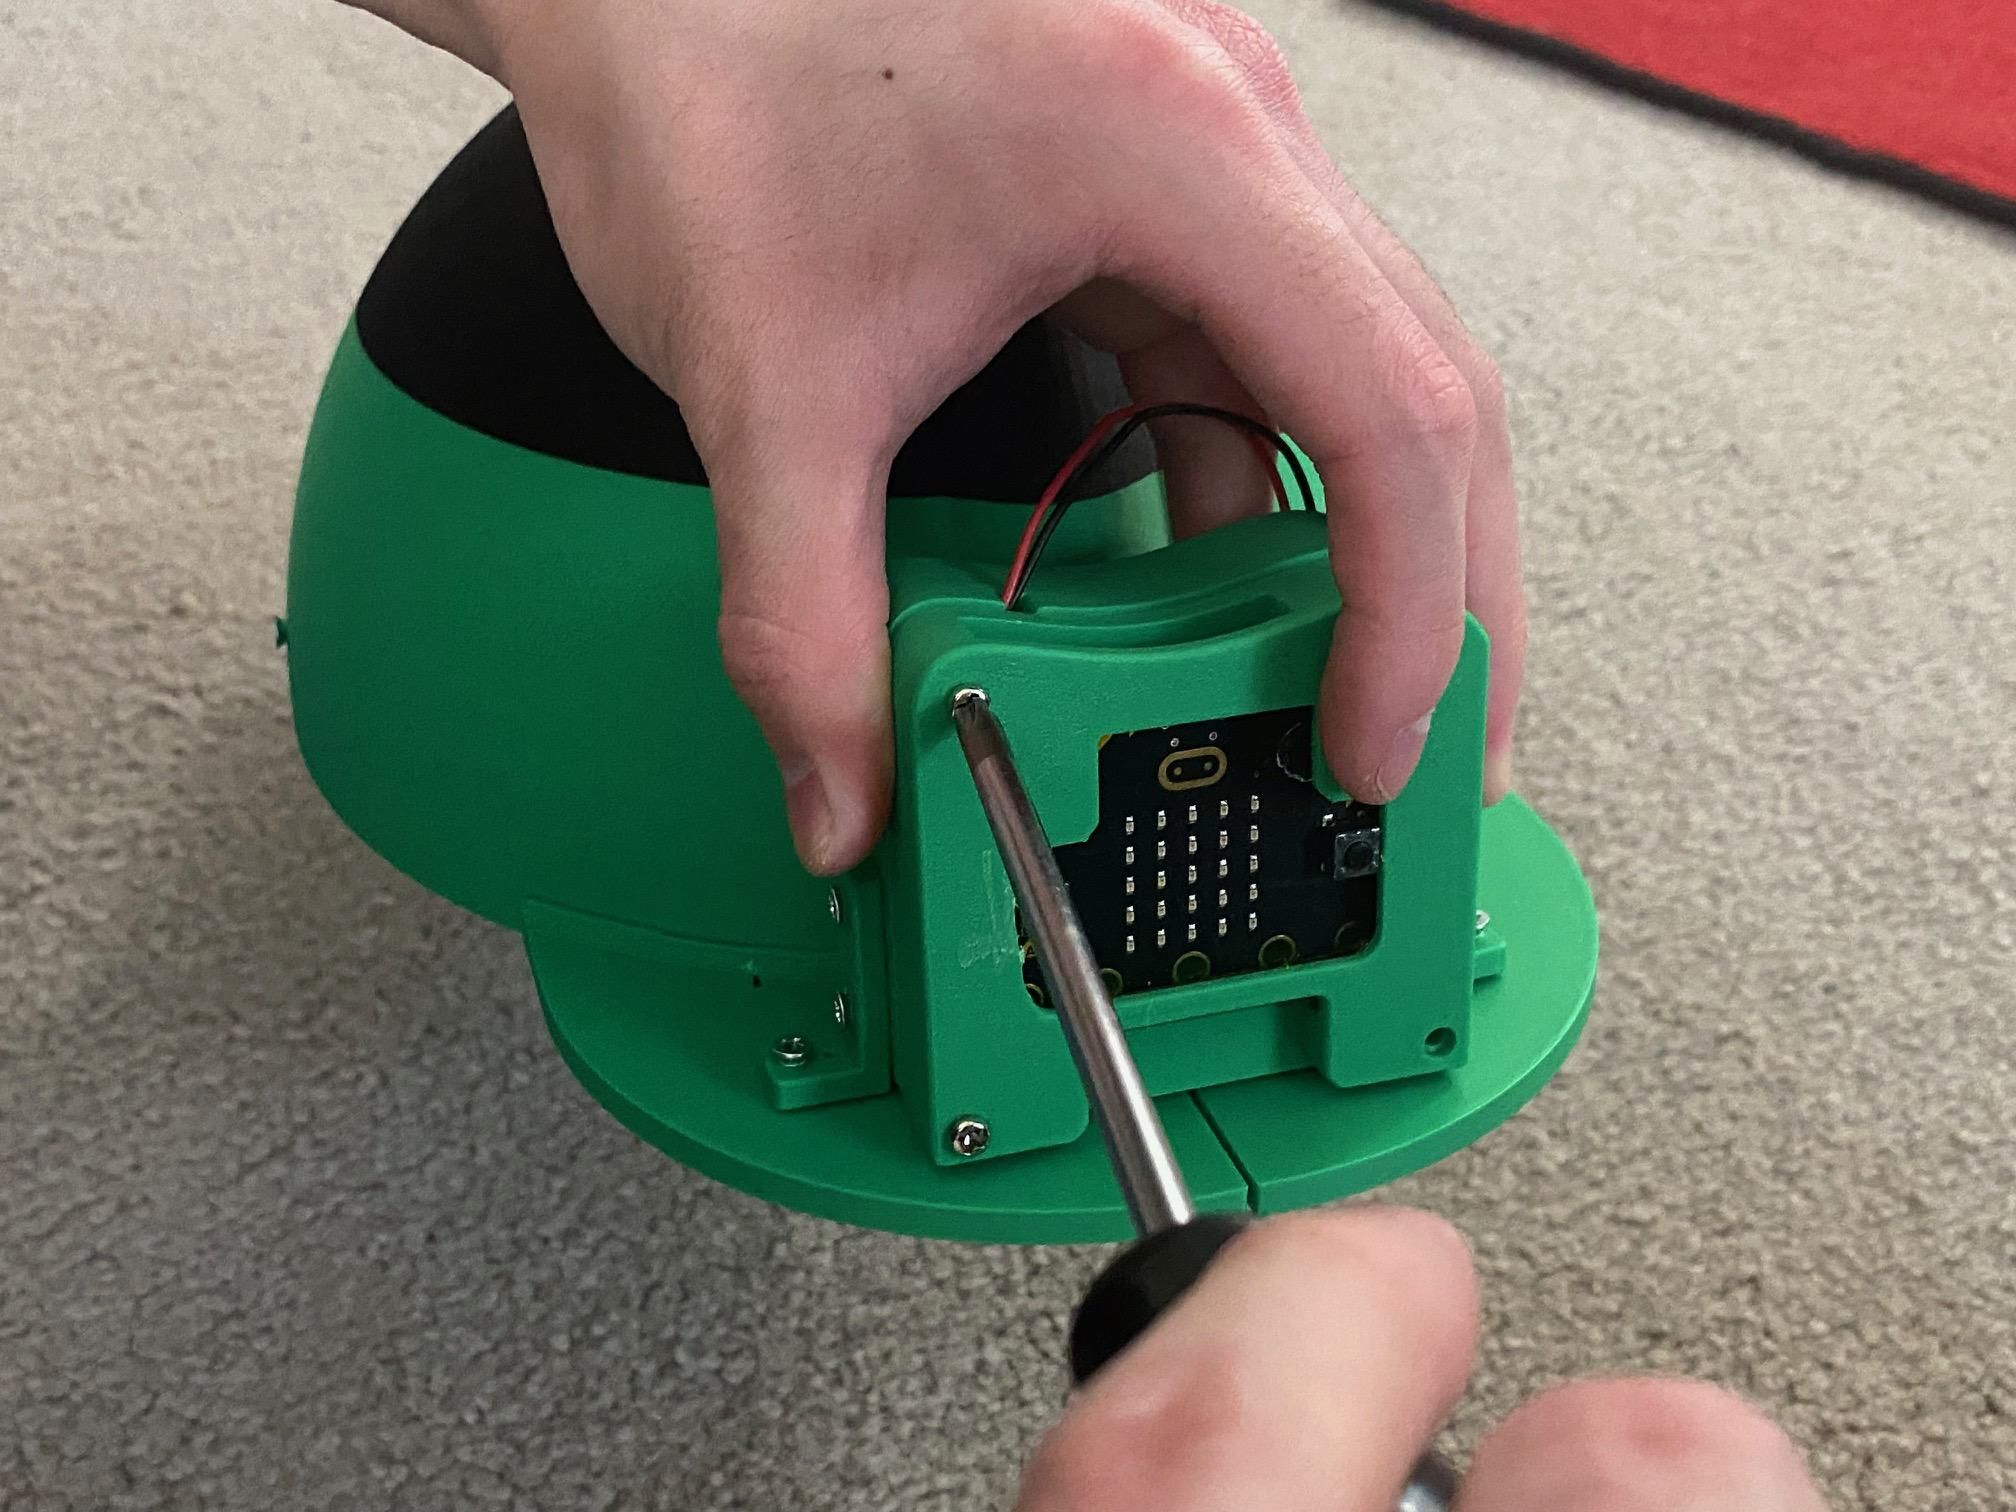
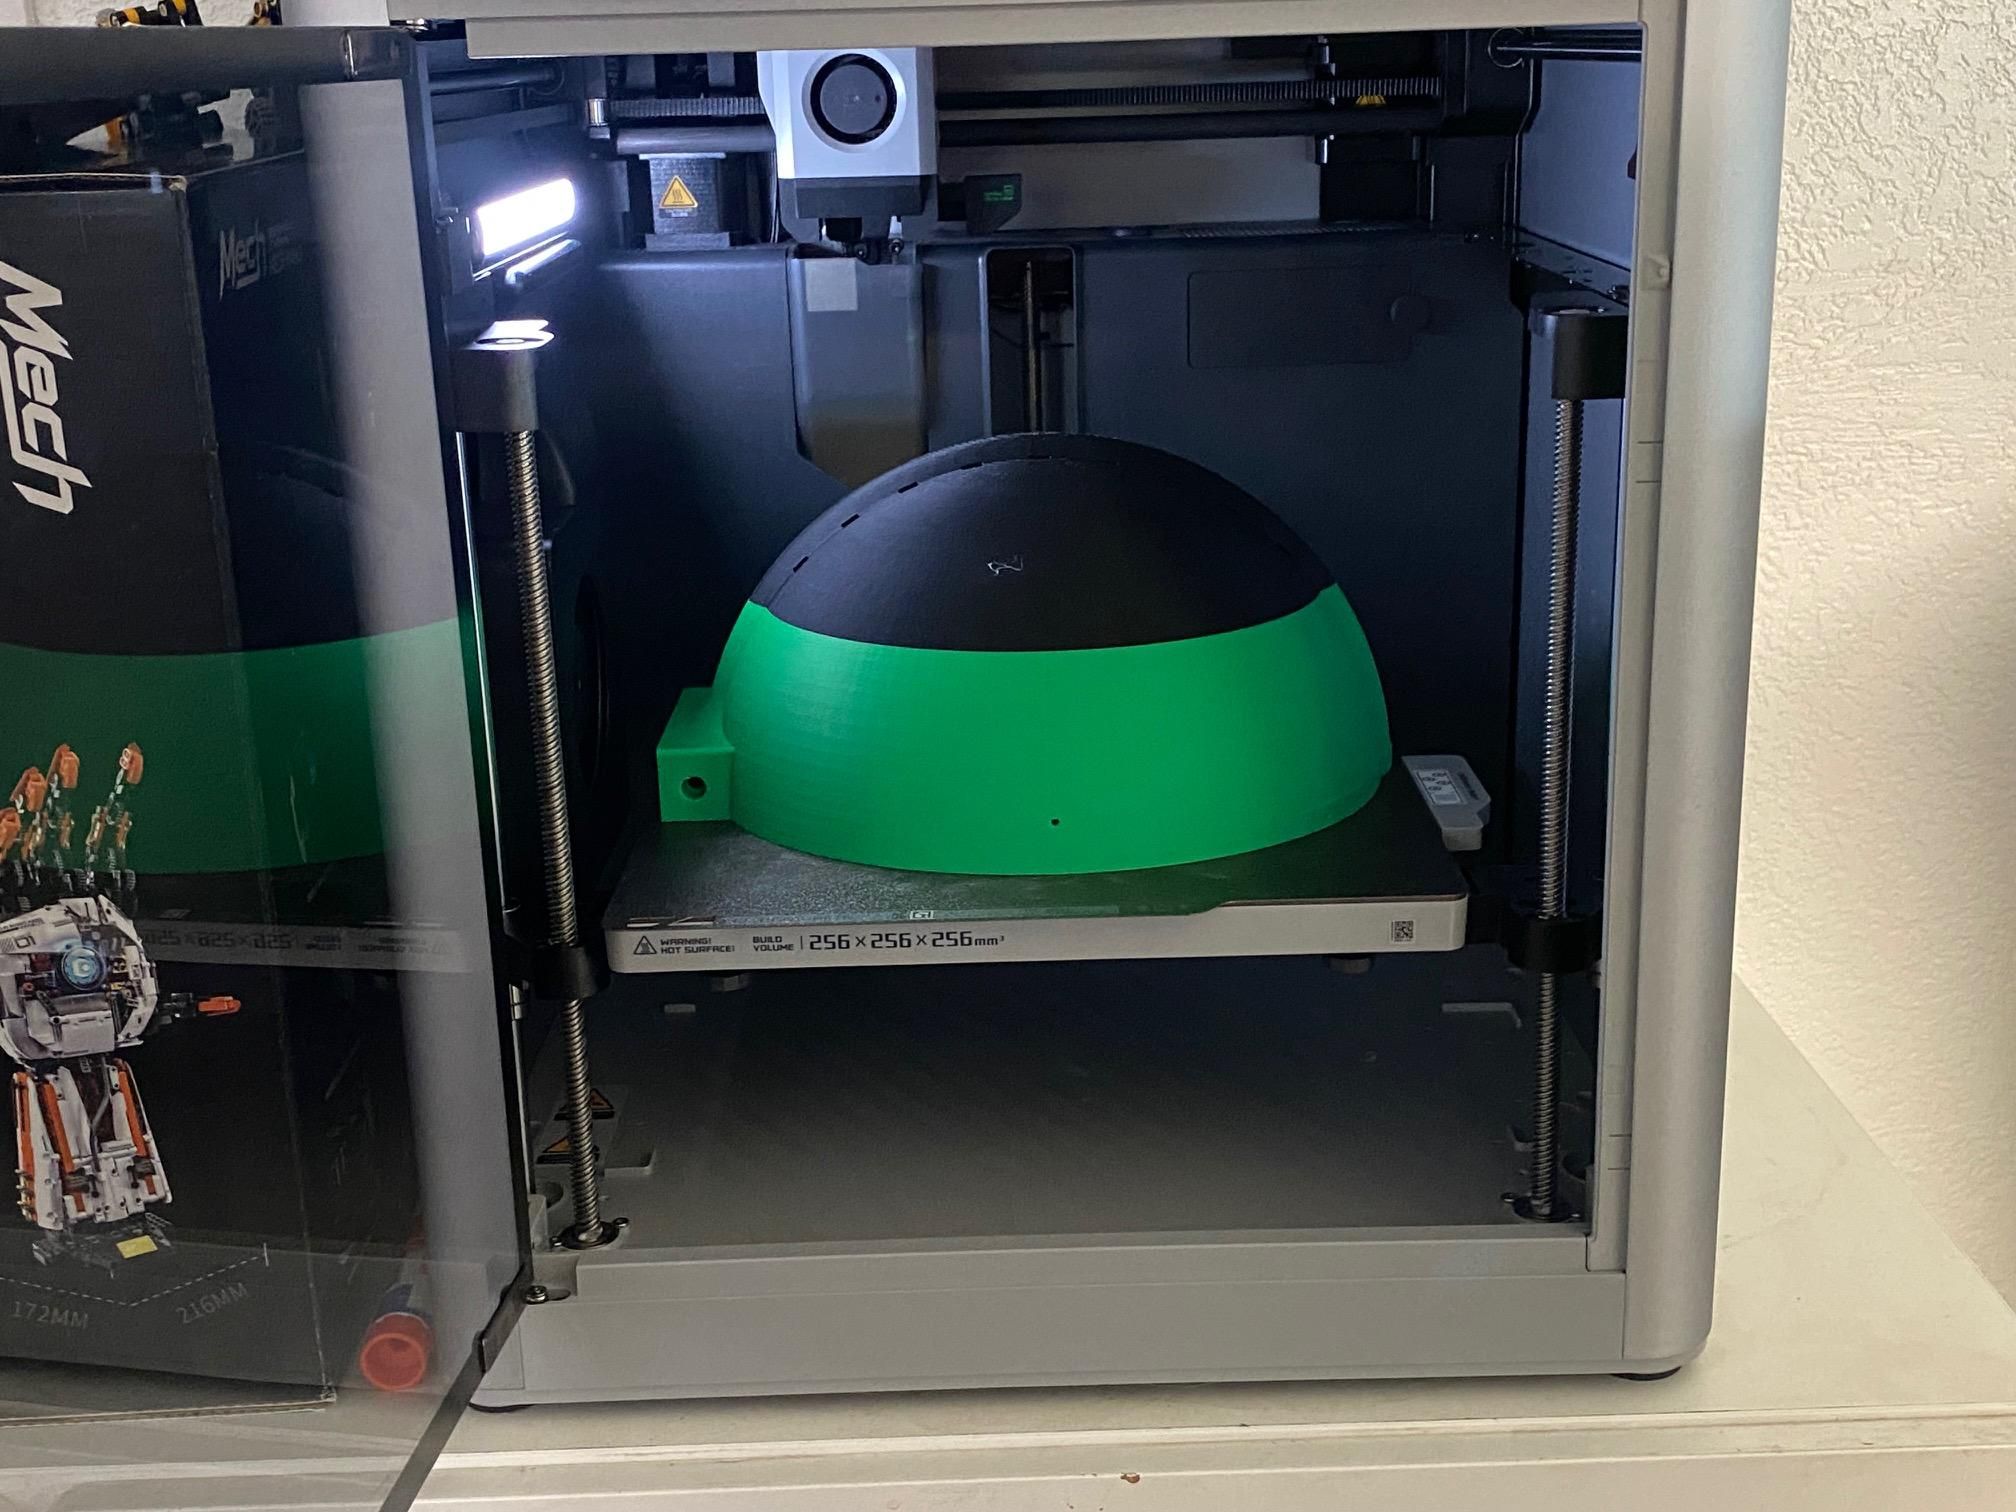
Improve the enclosure 3D design by adding rounded corners, fan guard, cable-management channels, mounting points, ventilation openings, battery access, sanding and painting. After the 3D-printed parts are finished, sand the surfaces to remove rough edges and small imperfections, then paint the enclosure to give it a clean and professional appearance. Assemble the fan, airflow duct, Arduino Nano, temperature sensor, battery holder, and wiring inside the enclosure, making sure each component is securely mounted and easy to access for maintenance.
Soldering and Wiring
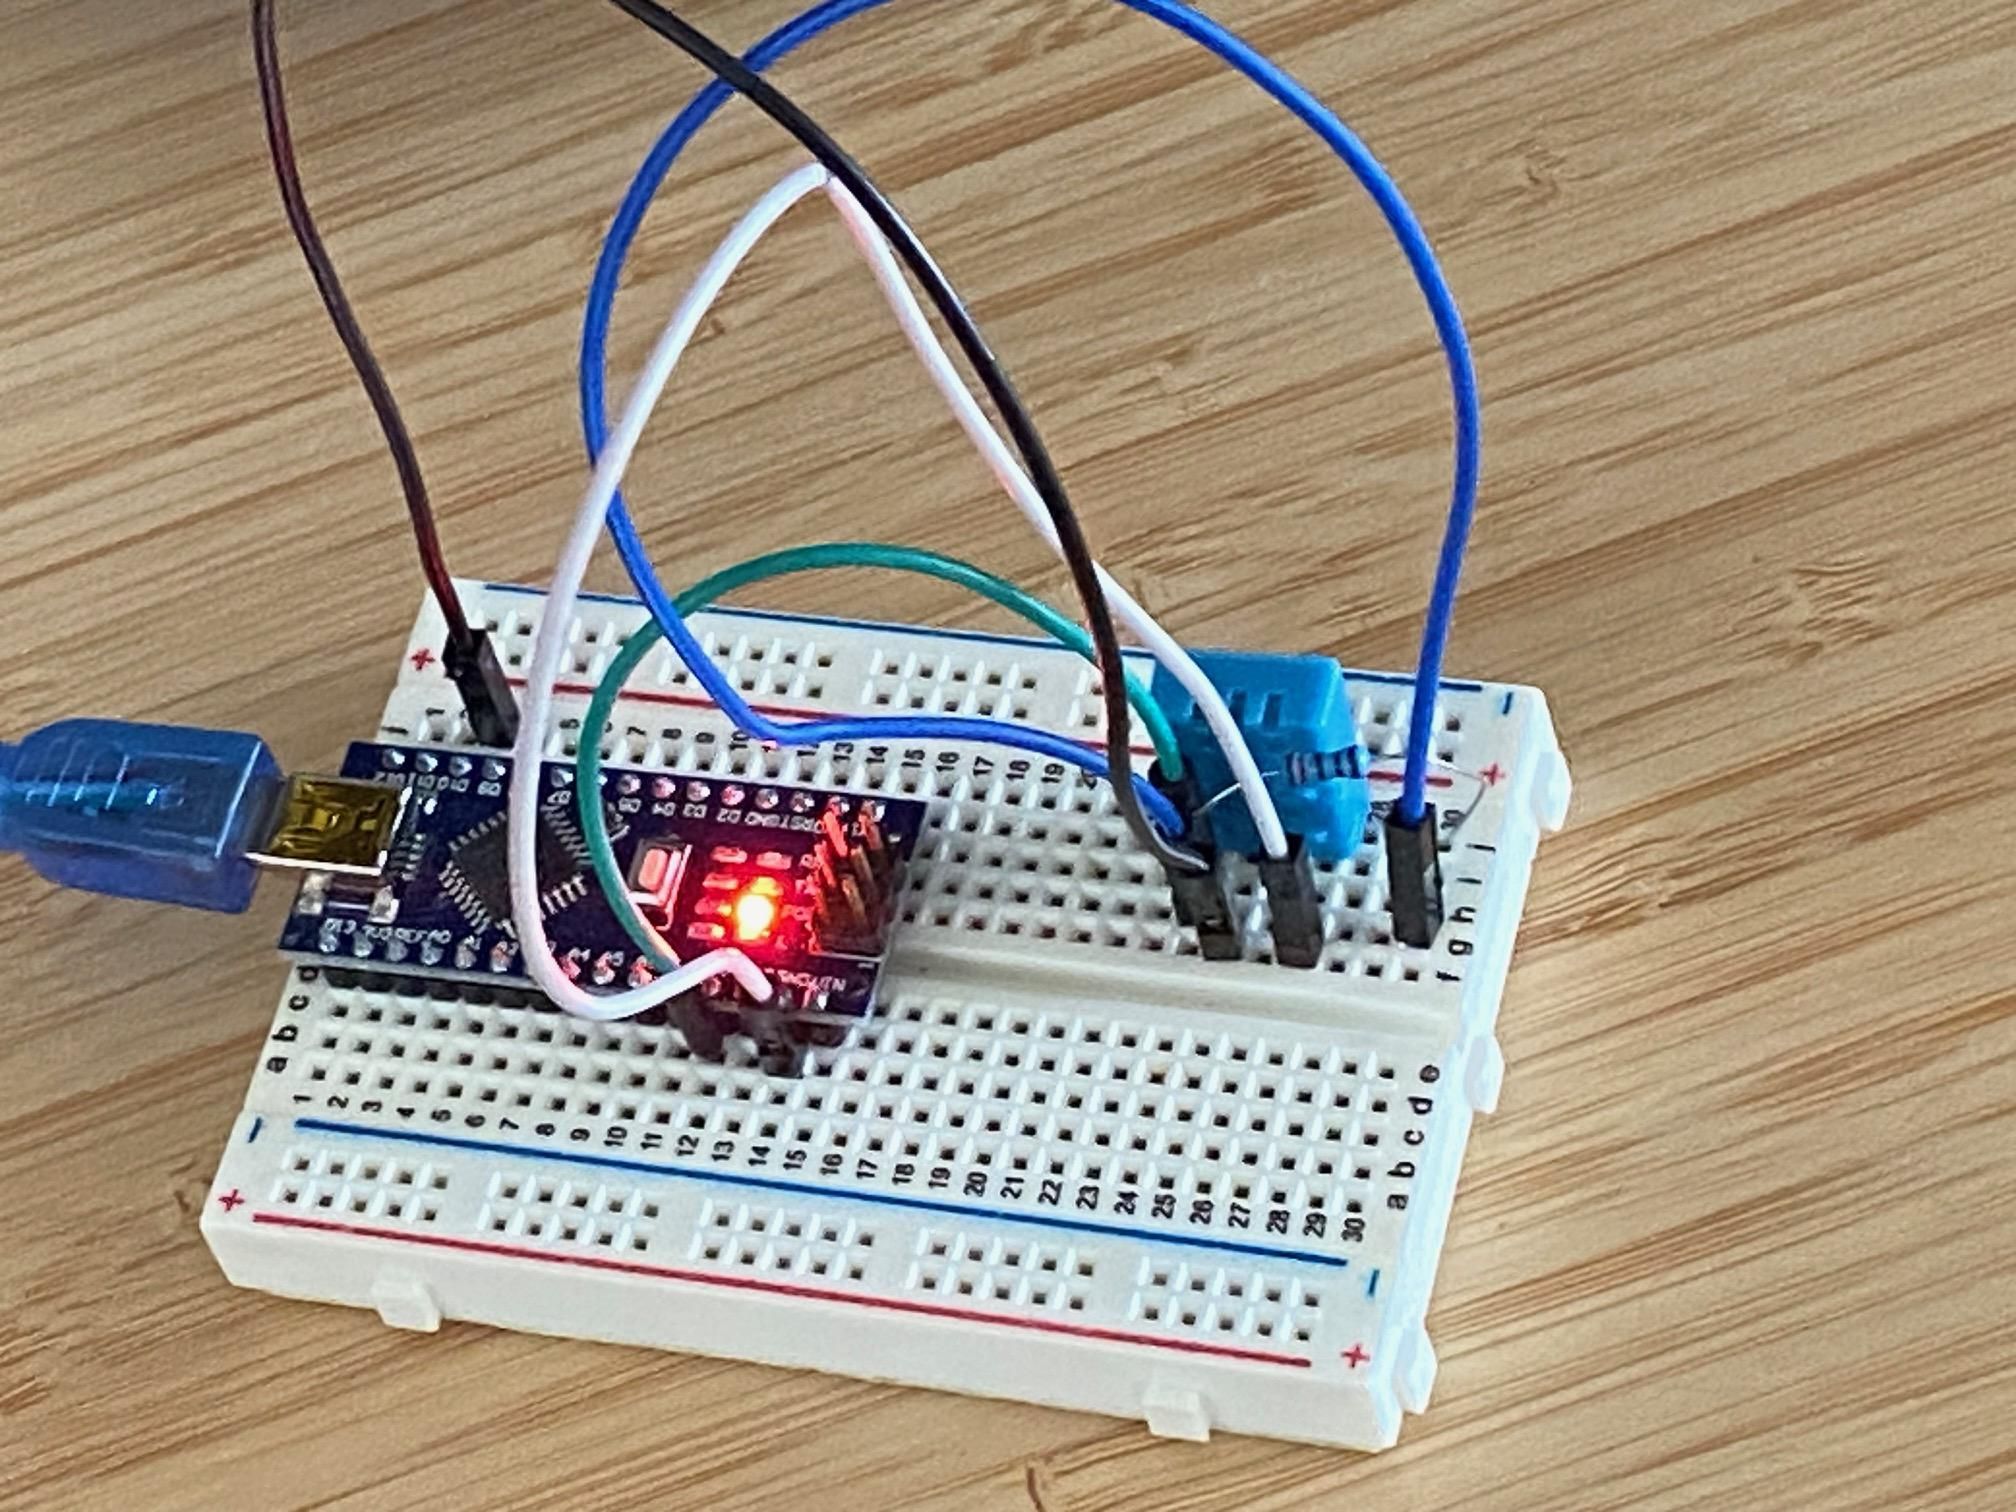
After the breadboard prototype works, disconnect the power. Transfer the circuit to a more permanent wiring setup. Solder connections carefully. Insulate exposed electrical connections. Secure wires so they cannot contact the fan. Test the circuit before putting it inside the enclosure. Finally, keep the electronics outside the protective hard-hat shell and avoid drilling or cutting the shell.
Finished Enclosure
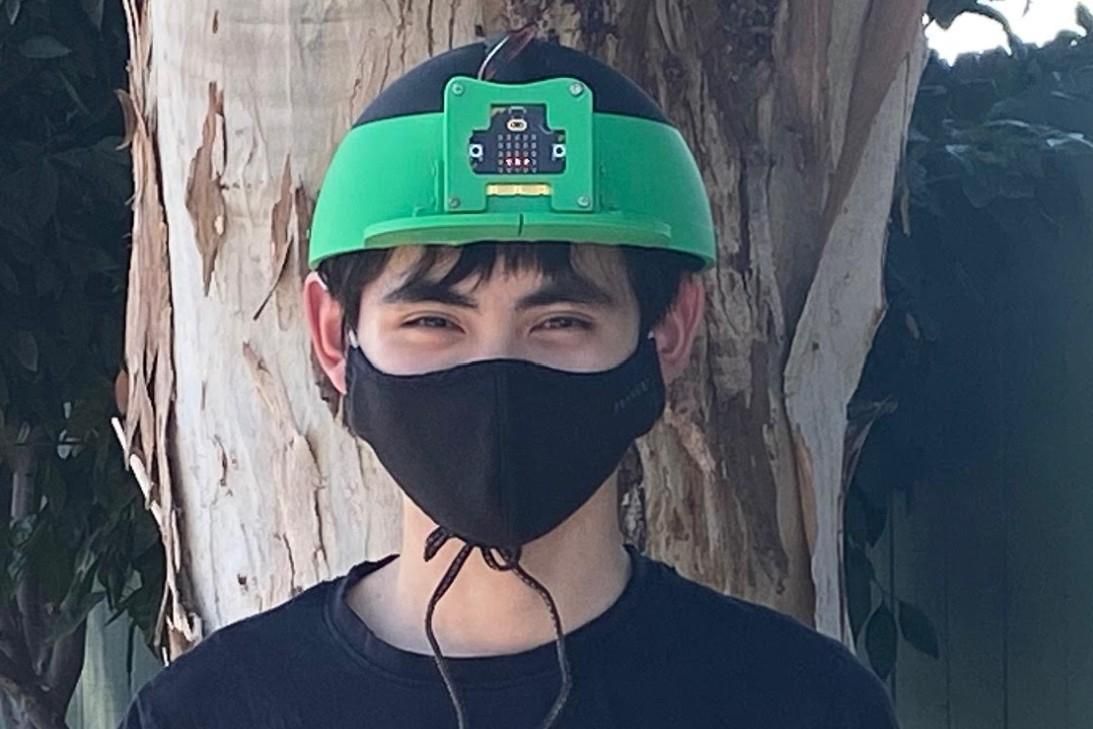
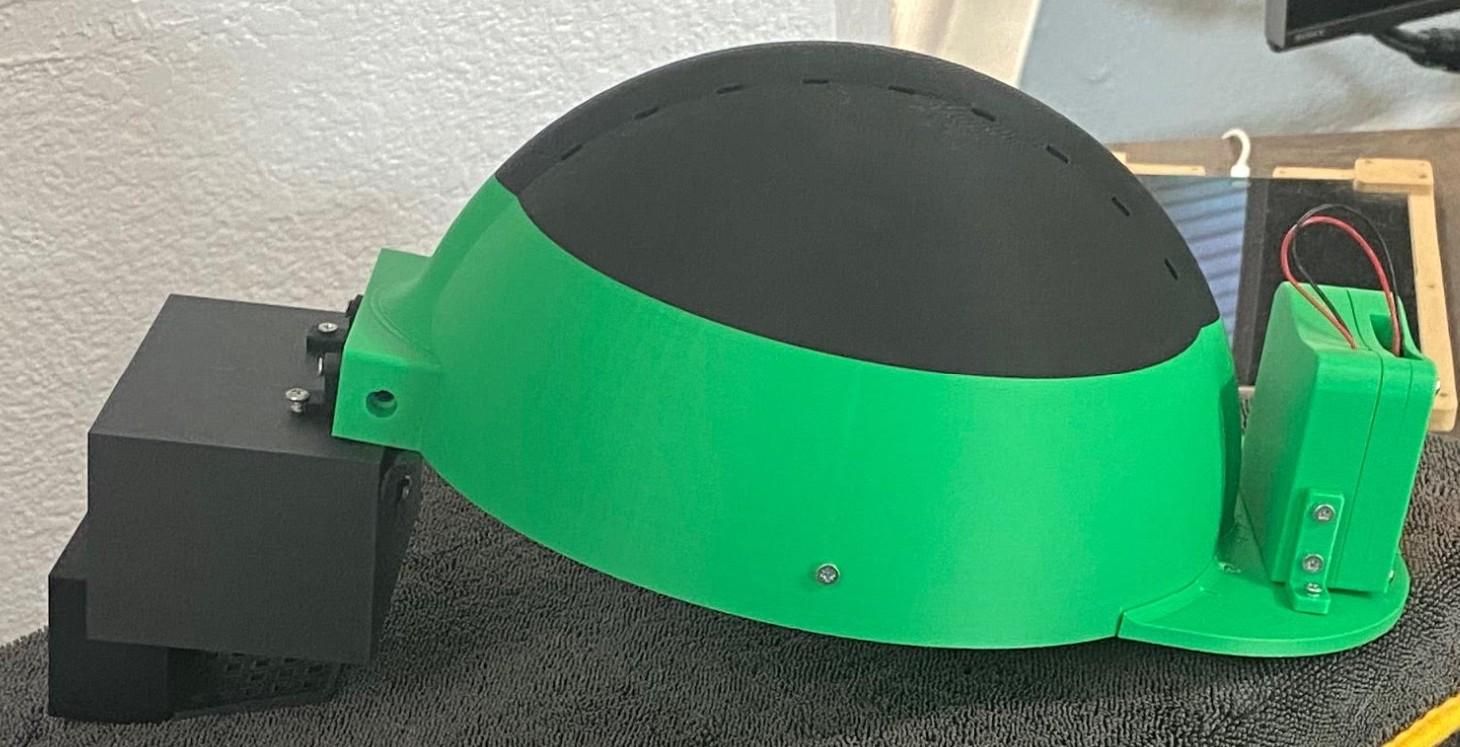
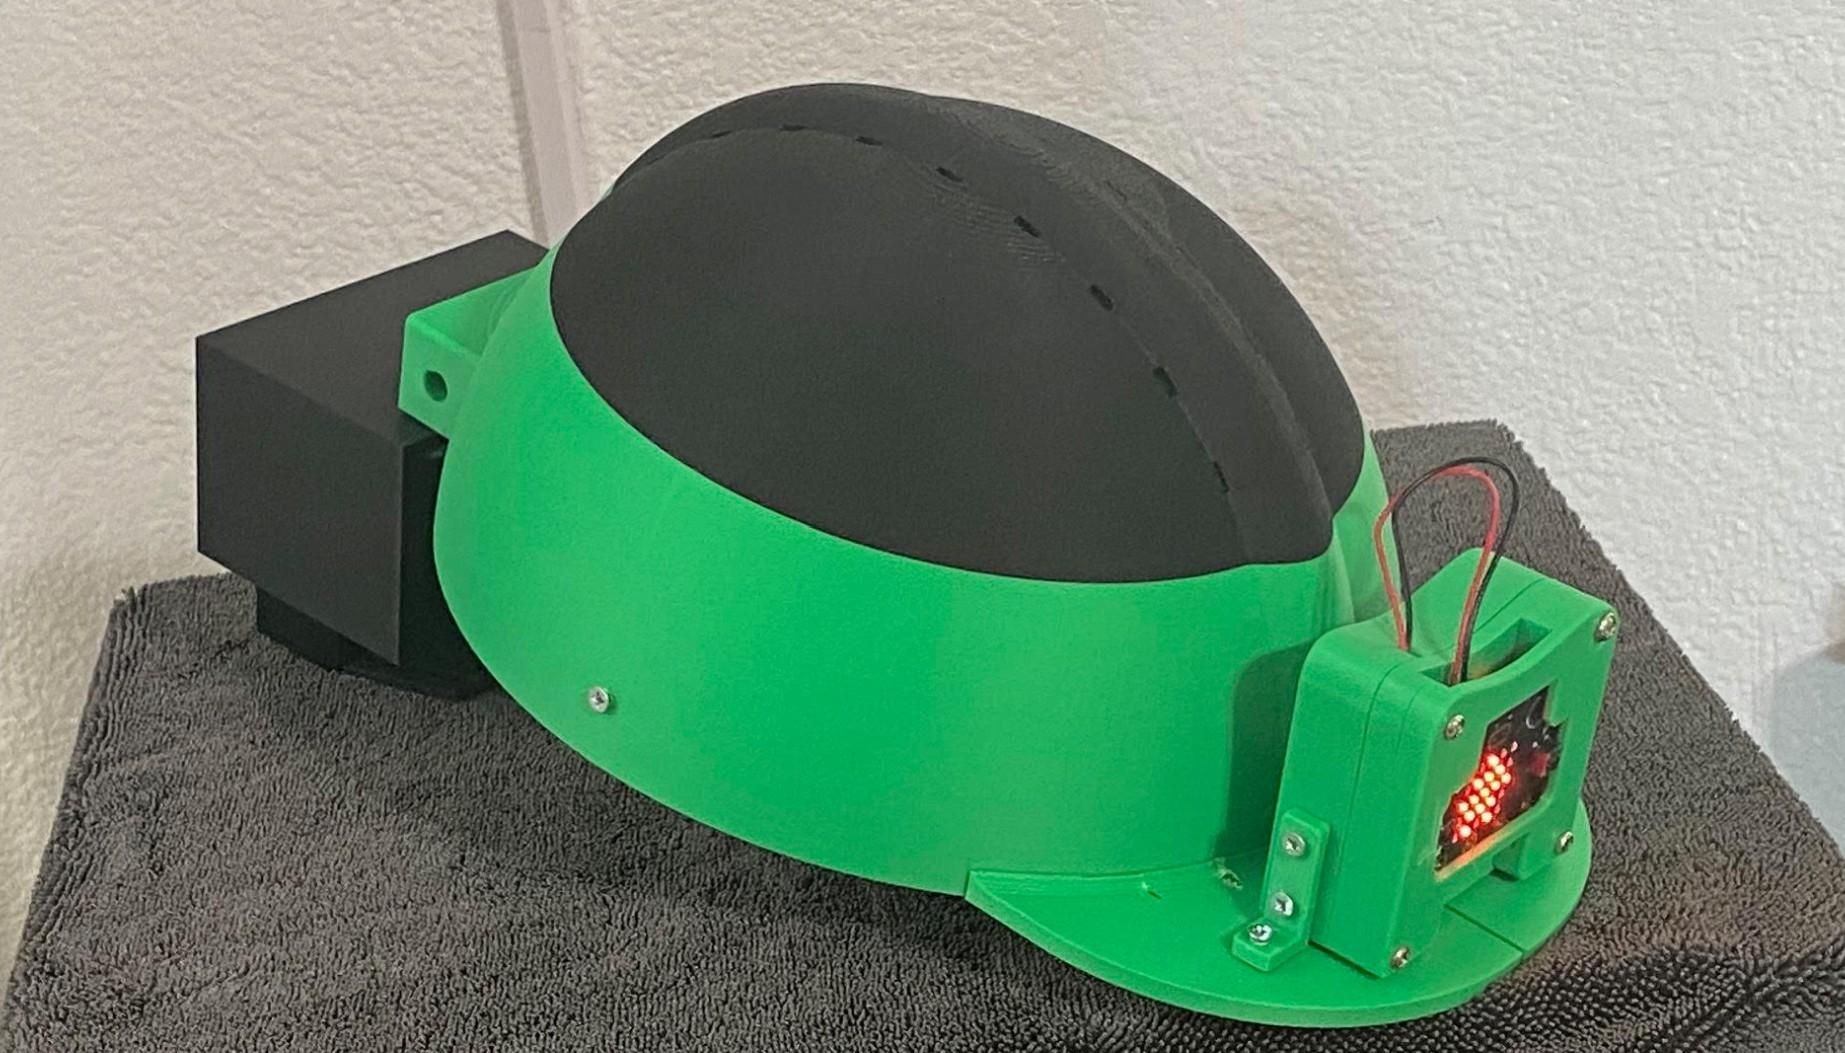
The fan can be positioned so that it moves air through a separate airflow duct instead of blowing directly onto the electronic components. This design helps protect the Arduino Nano, temperature sensor connections, and other electronics from direct airflow while allowing the fan to efficiently distribute cool air around the inside of the hard hat. A protective fan guard can also be included to prevent objects from contacting the fan blades and to make the prototype safer and more durable.
Additional Fun With Microbit Create AI (AI Training Microbit)
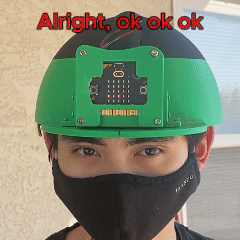
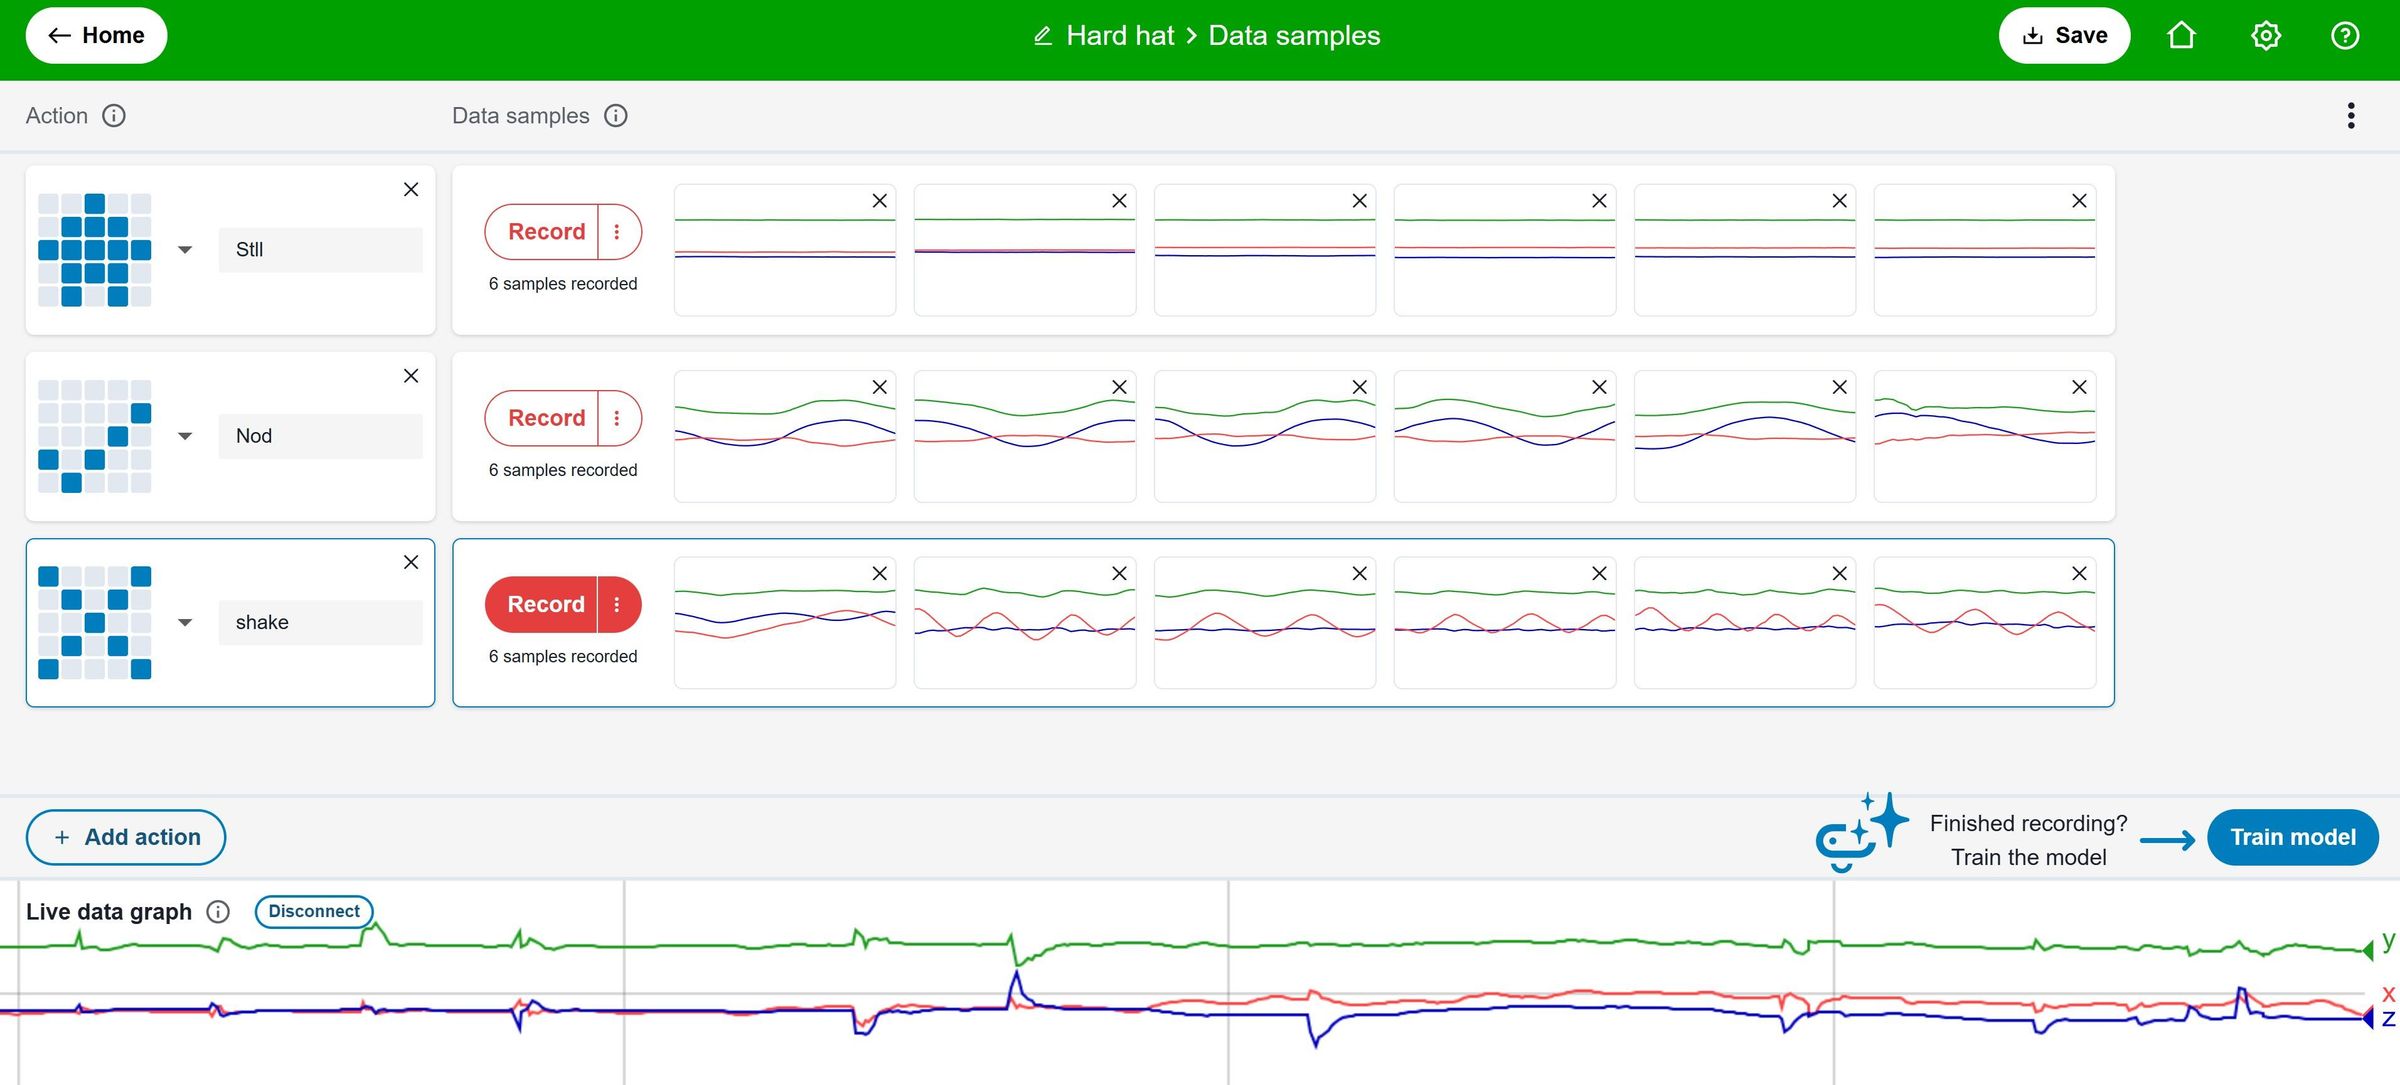
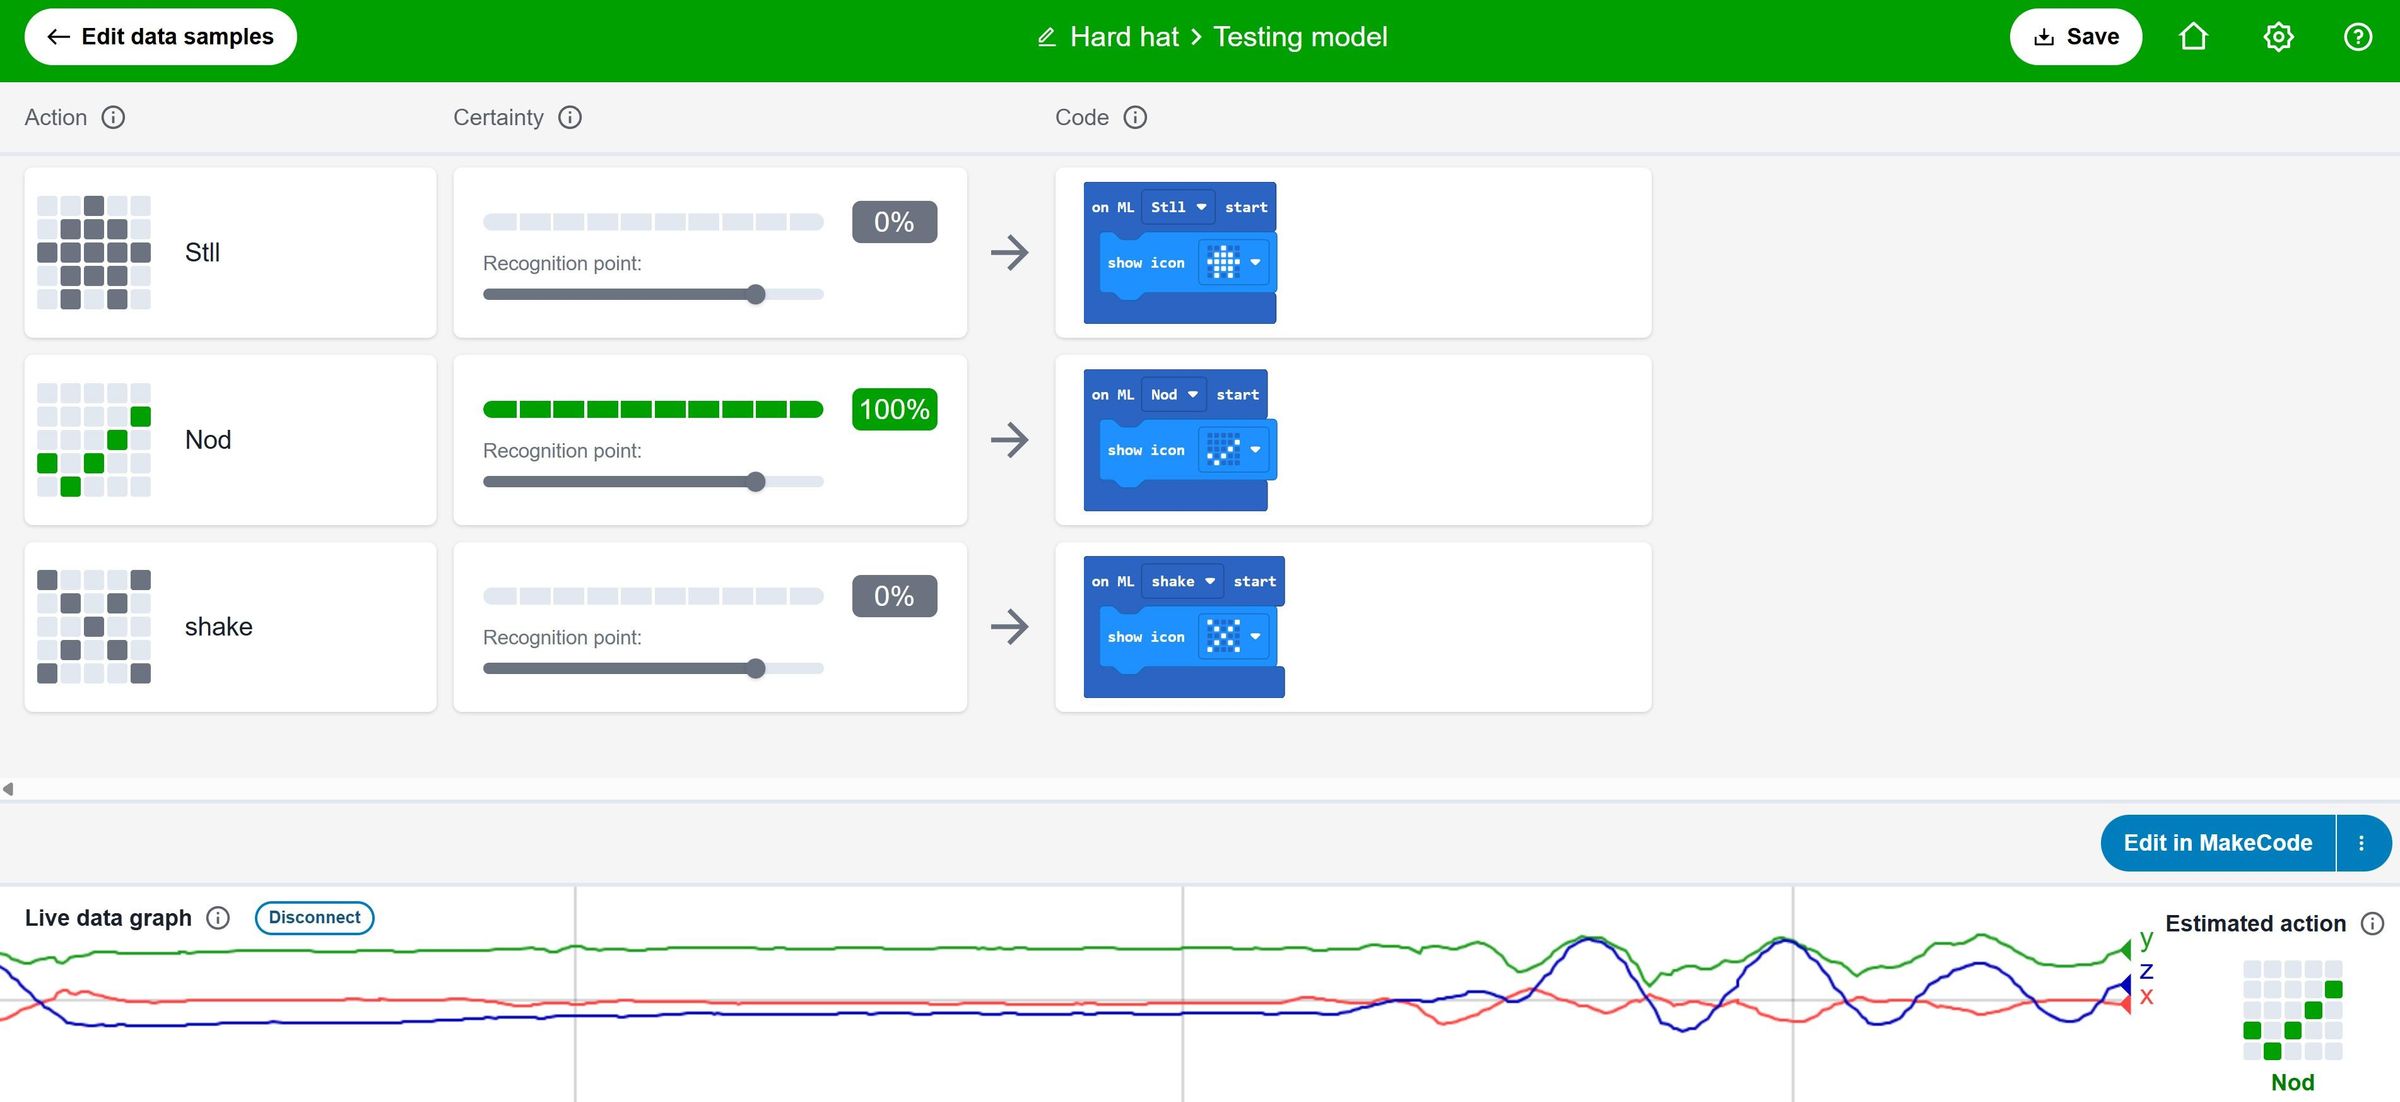
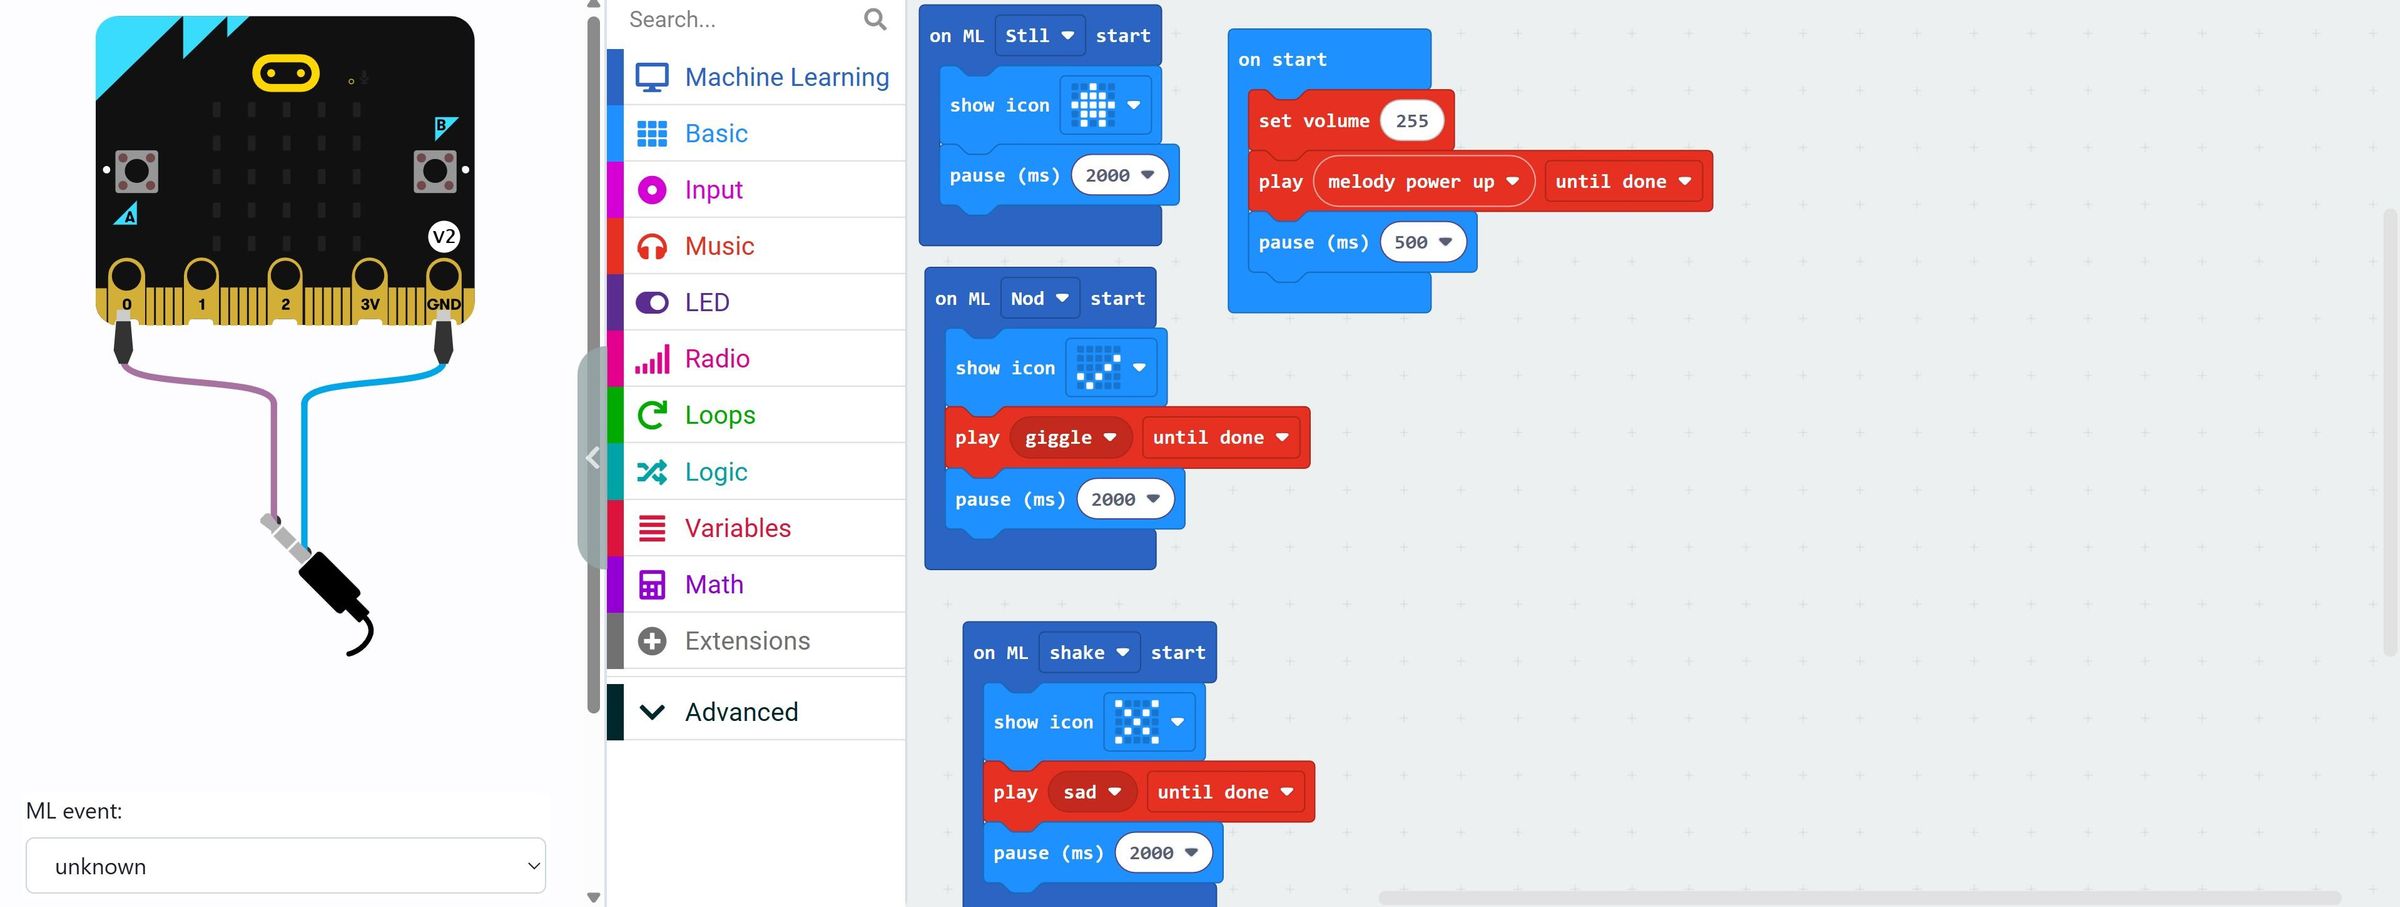
To make the Smart Hard Hat more interactive, I added a microbit CreateAI machine-learning program that recognizes head movements. The microbit uses its built-in motion sensor to collect movement data. I trained the machine-learning model with different examples, such as Nod, No Nod/Still, and the head shaking movement. After collecting enough examples, CreateAI trains the model to recognize the movement patterns. In this training process, there are some steps needed to be done. First, connect the microbit to the computer. Open Microsoft CreateAI for micro:bit. Create a new machine-learning project. Create a training label called “Nod.” Hold the hard hat normally and record several examples while nodding the head. Do with other movements (still and shake head). Add several samples for each category so the model can learn the difference. Train the machine-learning model. Test the model. If the model makes mistakes, collect more training examples and train it again. After the model is satisfied, edit the code in Microsoft MakeCode by adding the music feature. Play around what kind of music you want.
The source for training machine learning model in microbit create AI is here.
Also, make some additional 3d Printing for attaching Microbit by making a design in Autodesk Fusion 360.
Finished Product and Testing
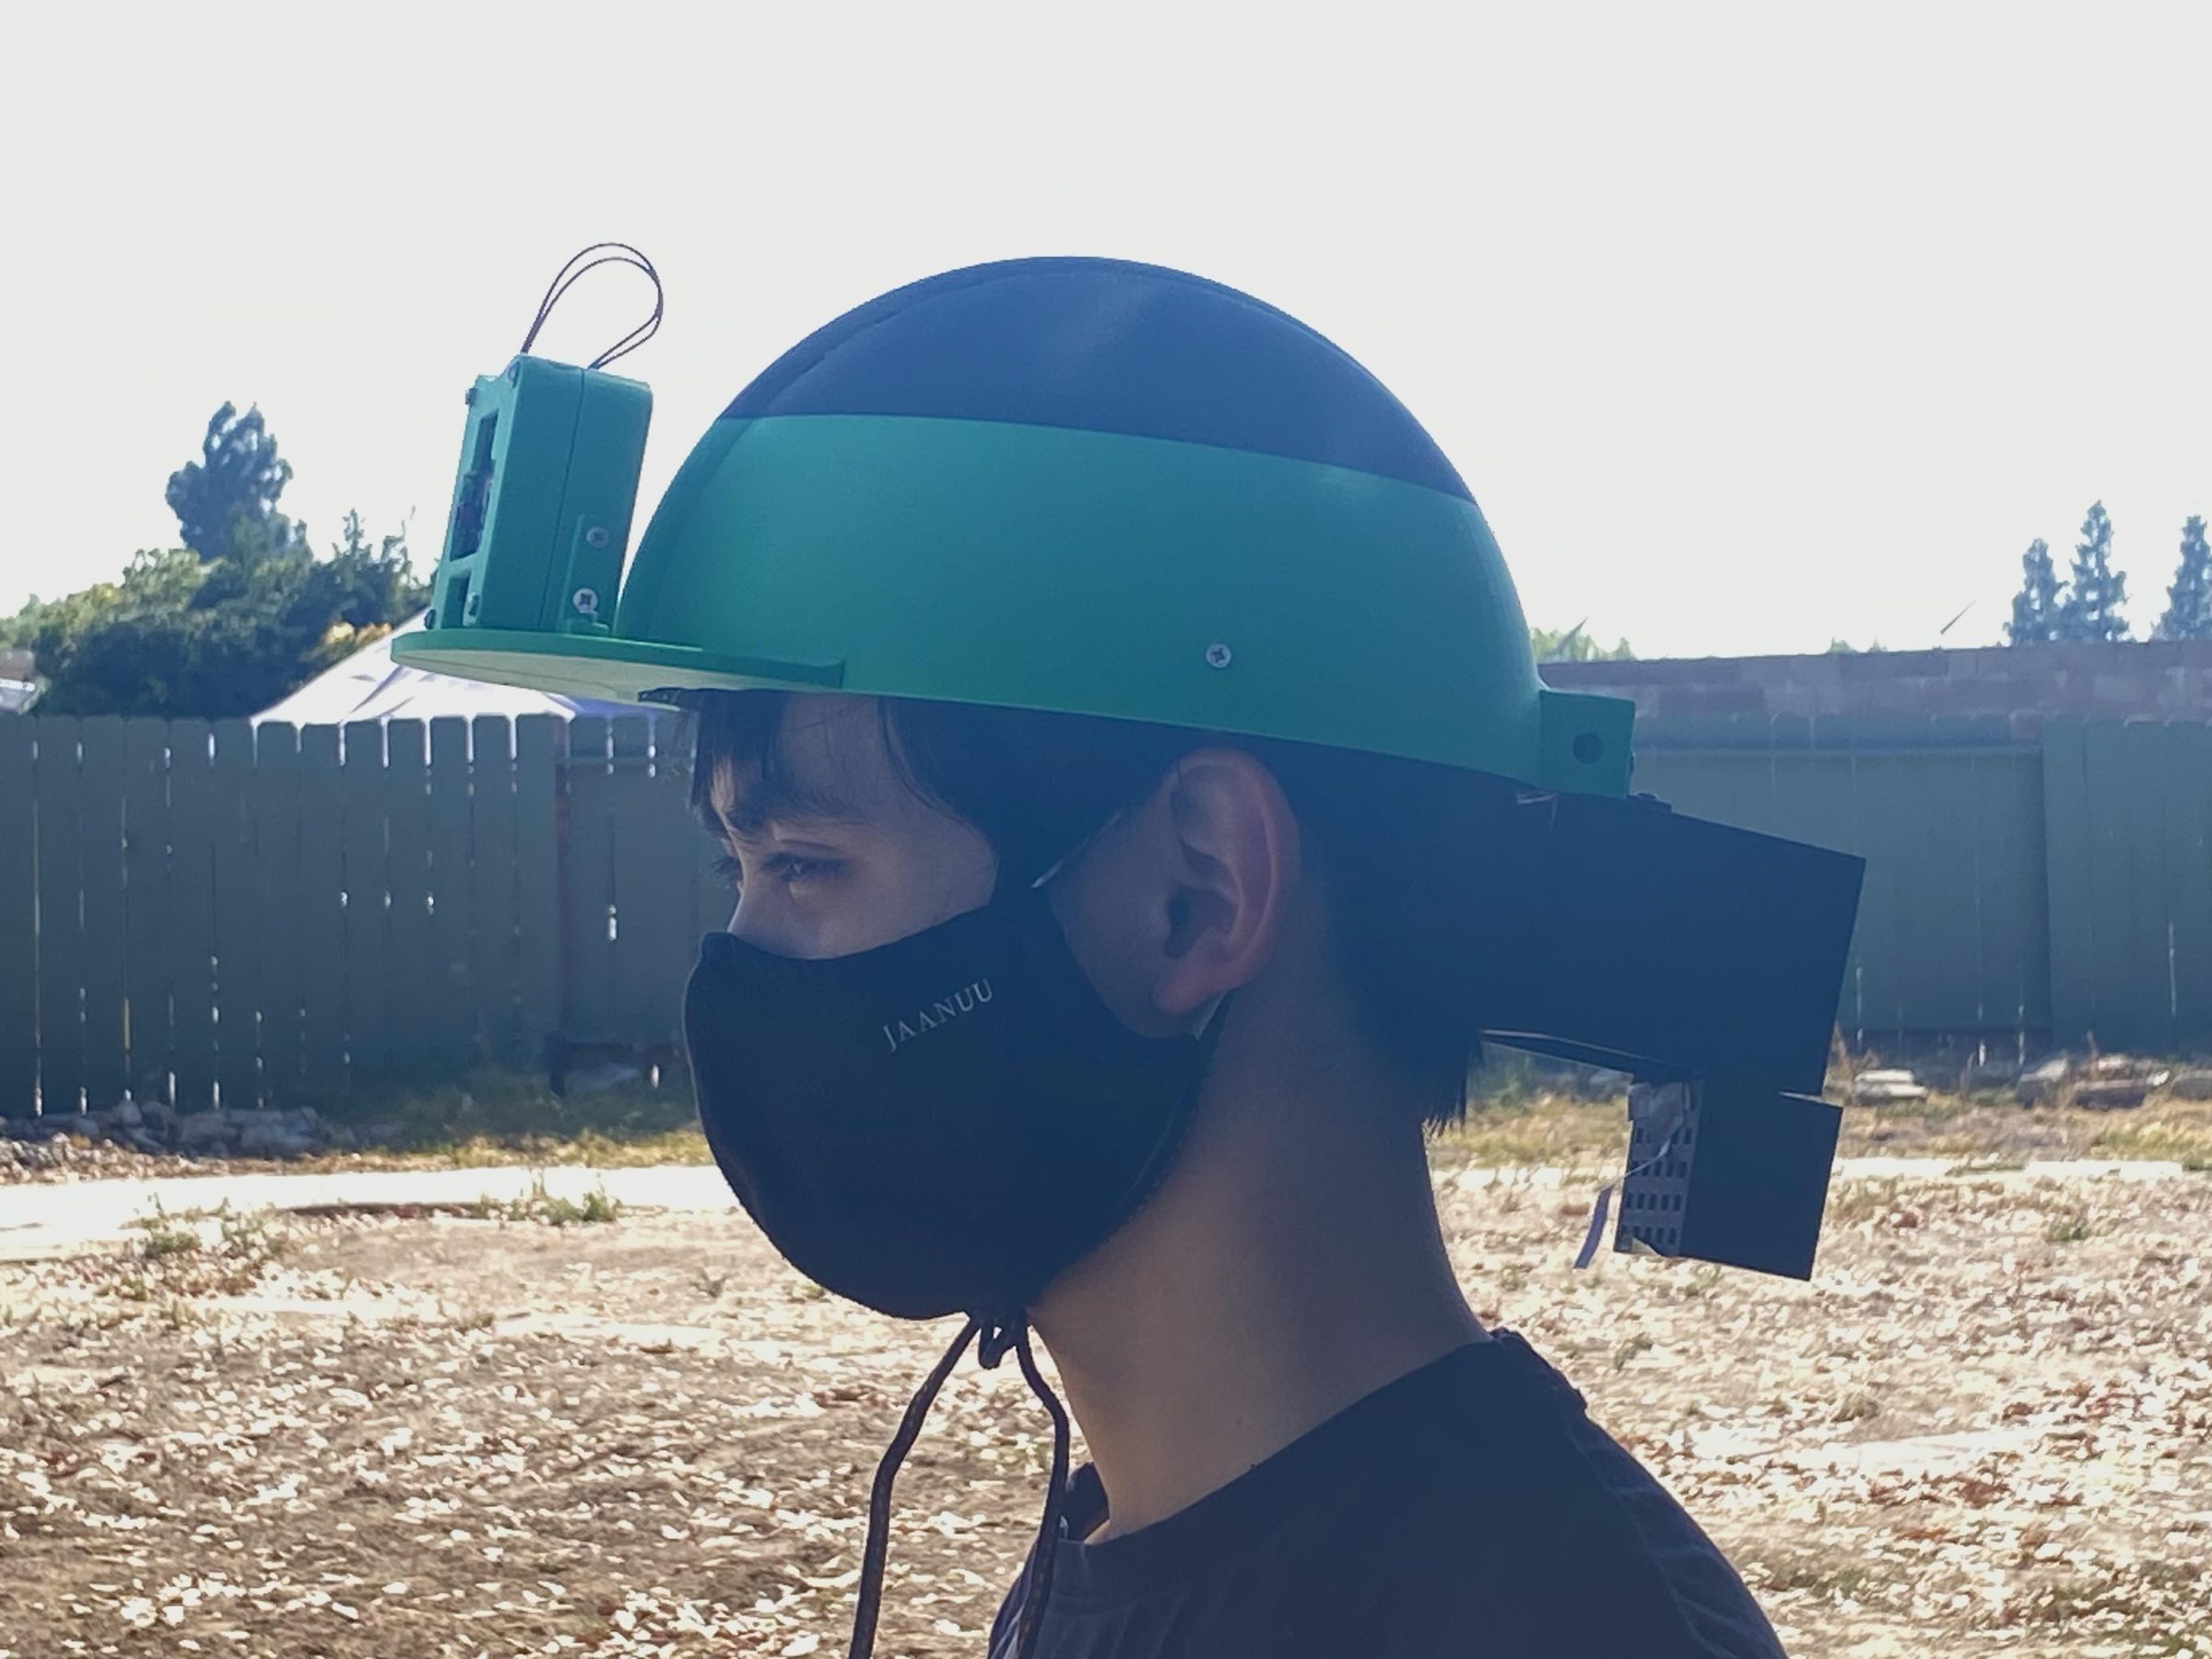
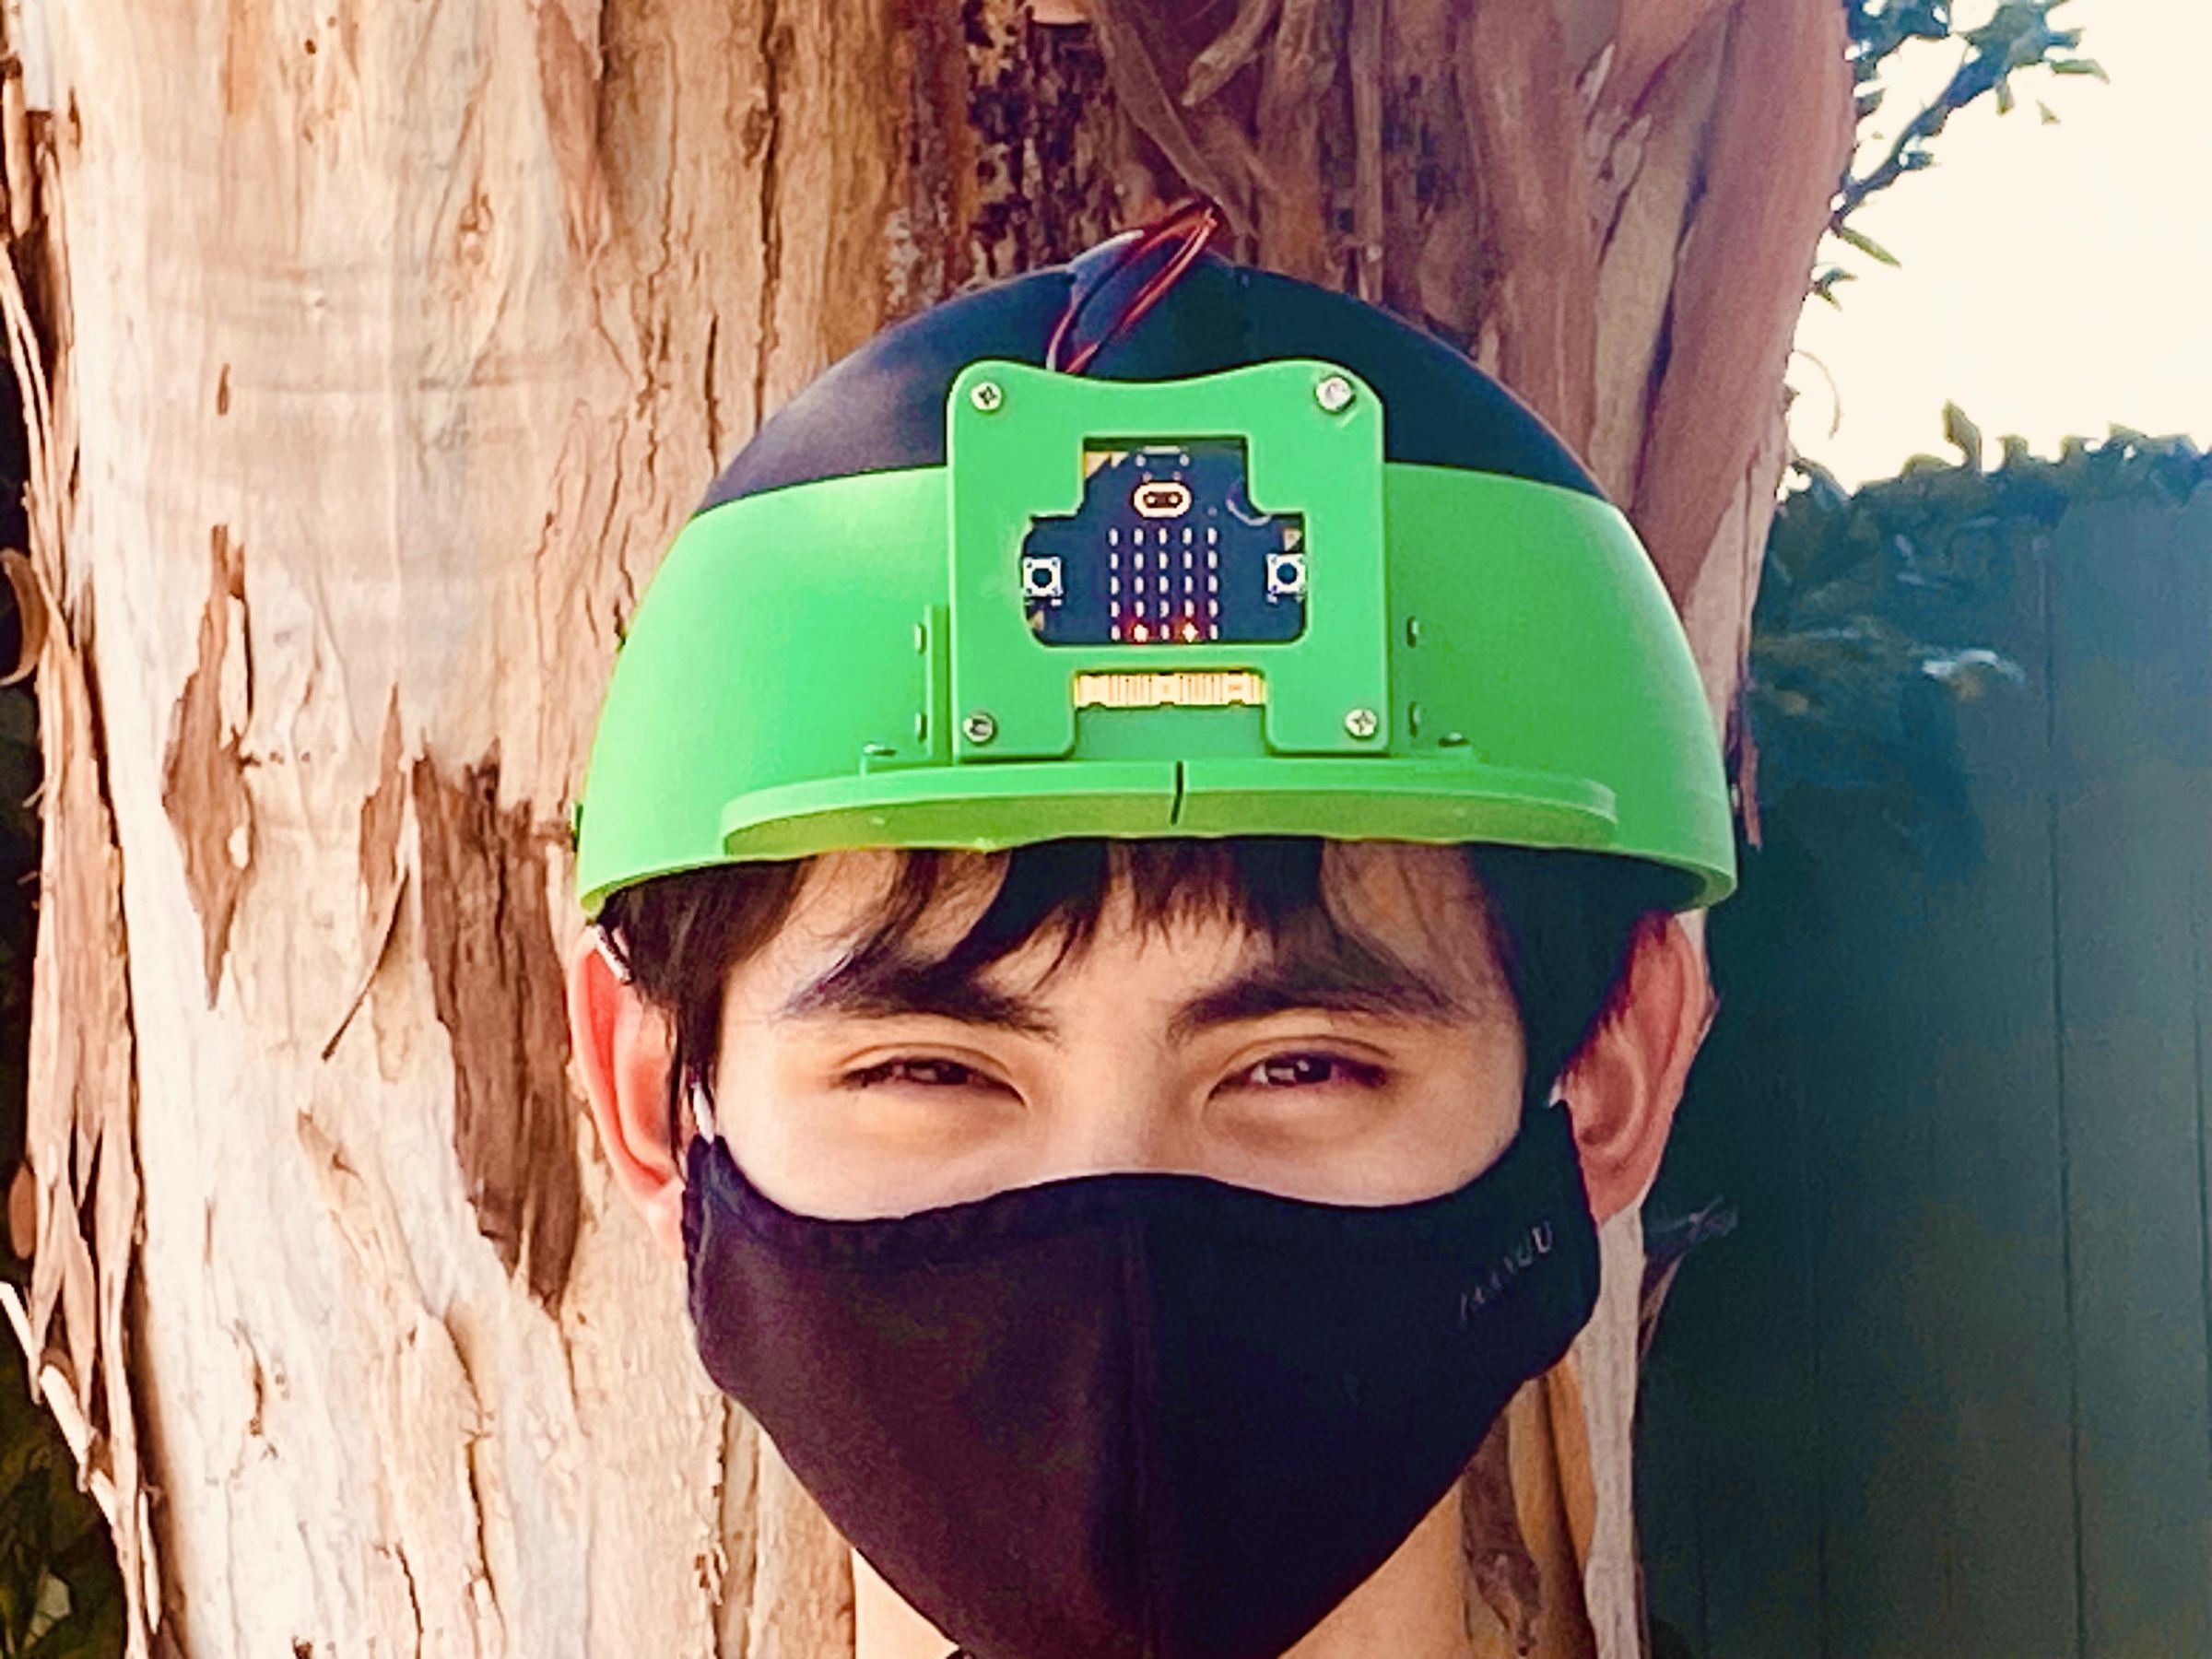
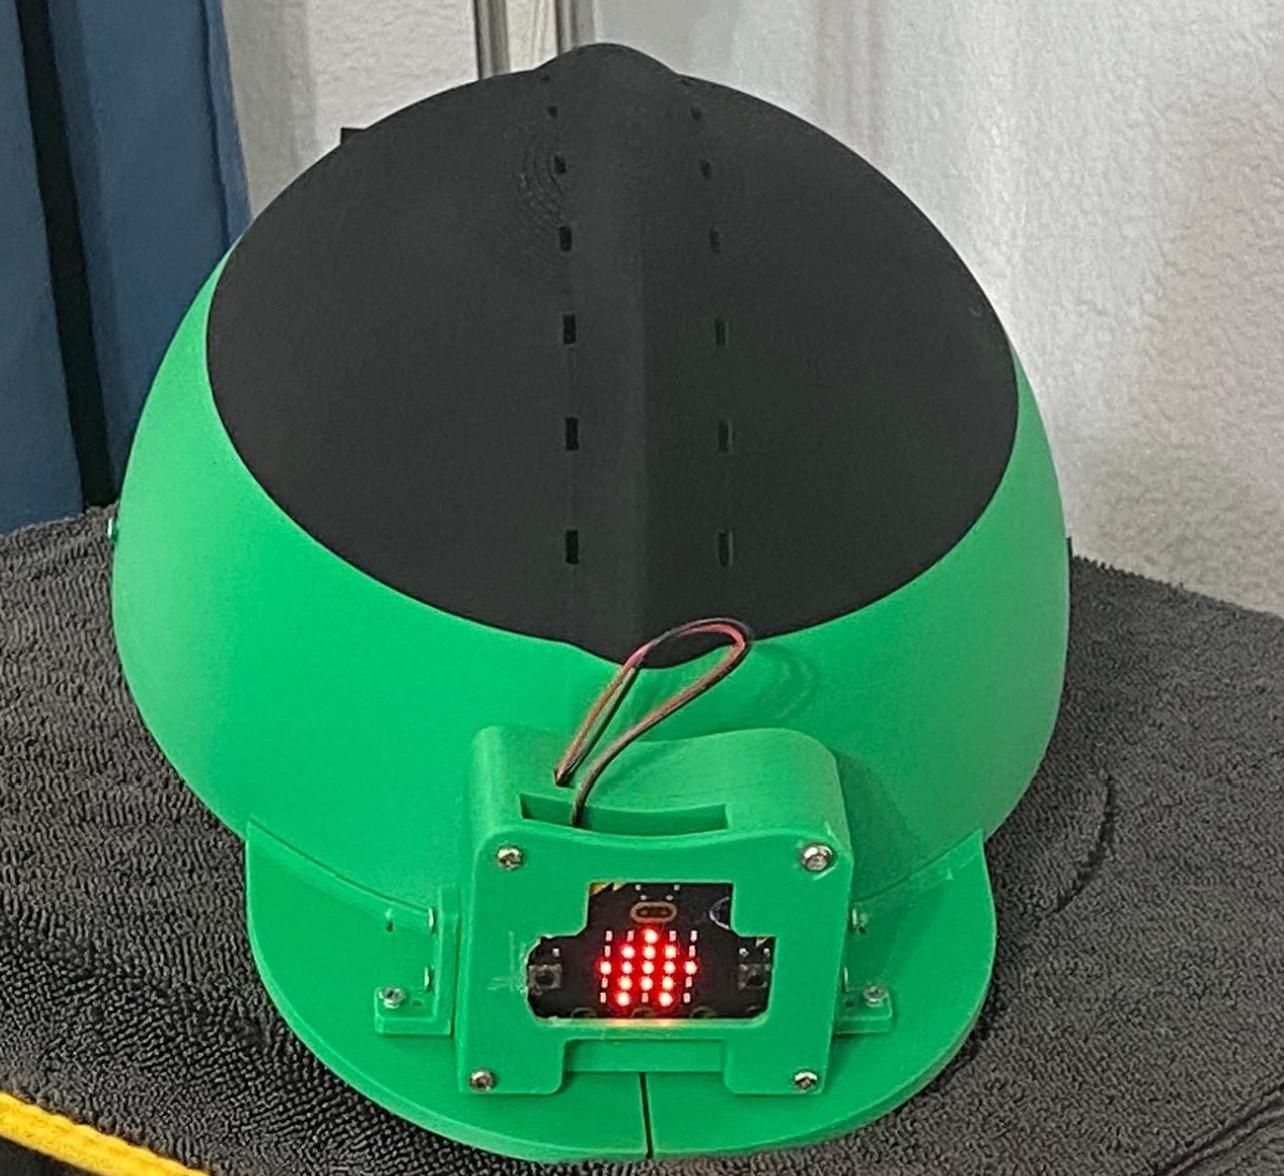
When the user nods their head, the trained AI recognizes the movement and sends the programmed response with playing a desired music and the LEDs will display a specific pattern. When the user performs the opposite movement (shaking head) or stops nodding, the program detects the change and changes different music and switches the LED pattern.
This makes smart hard hat more than an automatic cooling system that combines Arduino temperature control, machine-learning motion recognition, music, and LED pattern in one wearable prototype. Have fun!