4Duino Electronic Piano
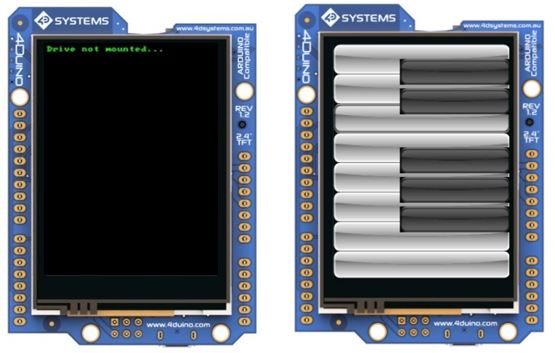

In this project, we will learn how to use an Active Buzzer and a 4Duino to create an Electronic Piano. An active buzzer is an electric piezo device which is commonly used to produce sound. When subjected to an alternating electric field, a piezo ceramic material disc inside the buzzer is caused to stretch or compress, in accordance with the frequency of the signal thereby producing sound. Buzzers are widely used in computers, alarms, toys, telephone and so on. For this project 4Duino resistive touch display is used as a means for a graphical user interface to play the piano.
How It Works

The user input is received when the key of the piano is pressed. Picaso (Graphical-Controller) which drives the Display, receives and processes this input.
The Picaso communicates the processed information to ATMega32U4 via Hardware Serial (DO, D1)
The ATMega32U4 then toggles the D12 with the appropriate delay in order to play the note.
Build
Collect the following components:
- 4Duino
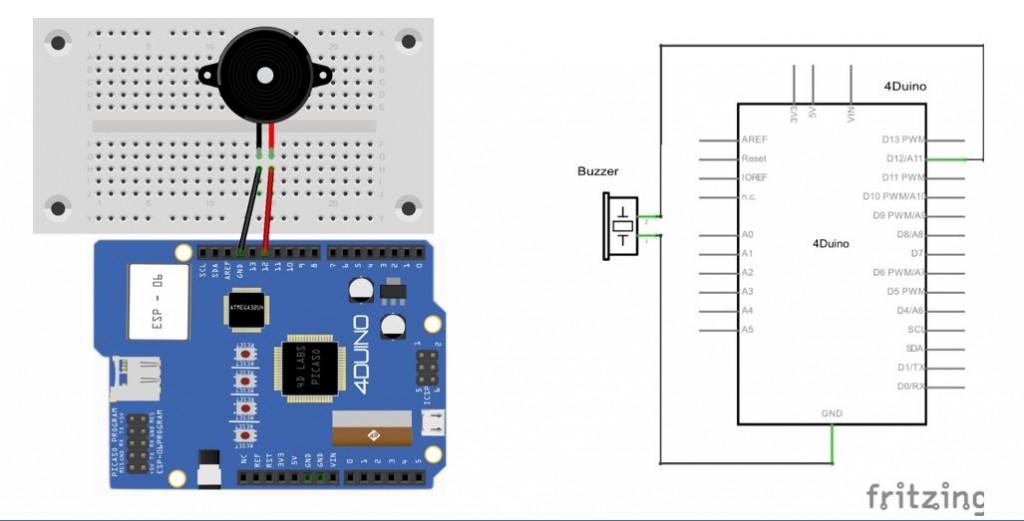
- Active Buzzer
- Jumper cables
- Micro USB cable
- µSD card
Then build the circuit as shown in the image above.
Program

Workshop 4 – 4Duino Extended Graphics environment is used to program this project.
This project requires the Arduino IDE to be installed as Workshop calls the Arduino IDE for compiling the Arduino sketches. The Arduino IDE however is not required to be opened or modified to program the 4Duino.
Download the project here.
- Open the file using Workshop 4.
- Connect the 4Duino to the PC using µUSB cable.
- Then navigate to the Comms tab and select the Comms port to which the 4Duino connected.
- Finally, go back to “Home” tab and now click on the “Comp’nLoad” button.
- The Workshop 4 IDE will prompt you to insert a µSD card to the PC in order to save the widget images. Insert µSD card, select the appropriate drive and press button “OK”.
- If the µSD card has the widget images you can click button “No Thanks”
- After uploading the program in to the 4Duino, it will try to mount the µSD card. If the µSD card is not present it will prints an error message. All you need to do is insert the µSD card you saved the image files to into the 4Duino.
Demonstration


Now you can play the electronic piano and have sound output from the buzzer.
You can change the octave or the sound itself by modifying the program or use SOMO-II for more audio applications.
For more creative stuff visit 4Duino Projects.
Enjoy !!!
Flow Chart
