5v USB Portable Fan Adjustable Speed
by latimertech in Circuits > Electronics
945 Views, 5 Favorites, 0 Comments
5v USB Portable Fan Adjustable Speed
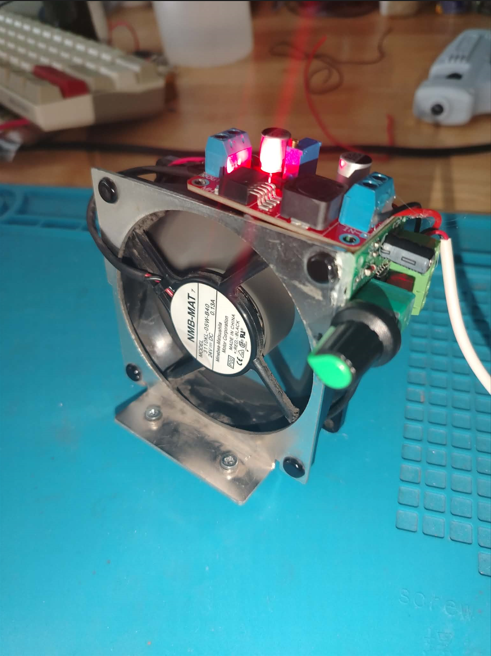
We've been experiencing an intense heatwave recently, so I wanted a fan that could move plenty of air while being powered by a small portable USB power bank for convenience on the go.
This little gadget has been fantastic at keeping me cool. It's compact, quirky looking, and slim enough to slip into my laptop case, making it the perfect companion for busy days at the office.
Supplies
1X PSU fan, mine came from an industrial label printer but you can easily find one on eBay from various devices.
1X Buck Boost Converter Module 5V-24V to 5-40V 5A Adjustable Voltage Regulator: XL6019 DC-DC Buck Boost Converter Module 5V-24V to 5-40V 5A Adjustable Voltage Regulator | High Efficiency Step-Up Power Supply Module : Amazon.co.uk: Business, Industry & Science
1X Speed Motor Speed controller Gebildet DC 0/1-10V Knob LED Dimmer (No Flickering or Humming),Paste Type Low Voltage Passive Dimmer PWM Dimming for 0-10V or 1-10V Dimmable Electronic LED Driver : Amazon.co.uk: Business, Industry & Science
1X USB cable.
1X Electronics wire. Any diameter will suffice, we aren't drawing a lot of current here.
1X Soldering Iron
1X Multimeter
1x Small flathead Screwdriver
Start at the Source
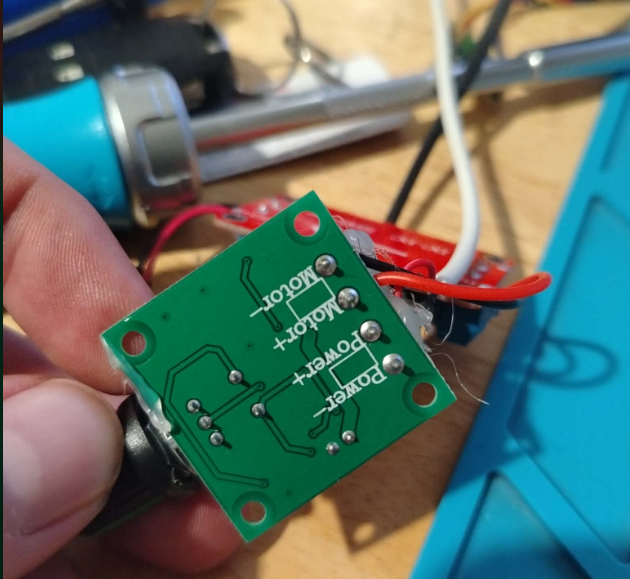
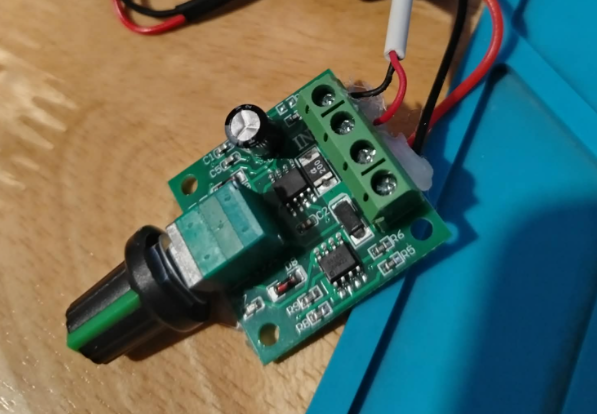
Begin by carefully stripping the outer insulation from the USB cable. Inside, you should find two wires: one red (positive) and one black (negative). Strip a small section of insulation from the end of each wire to expose the bare conductors.
Next, slightly loosen the Power + and Power - terminal screws. There is no need to remove the screws completely. Insert the red wire into the positive (+) terminal and the black wire into the negative (-) terminal.
Finally, tighten both terminal screws securely to clamp the exposed wires in place, ensuring a firm and reliable electrical connection.
Up the Voltage
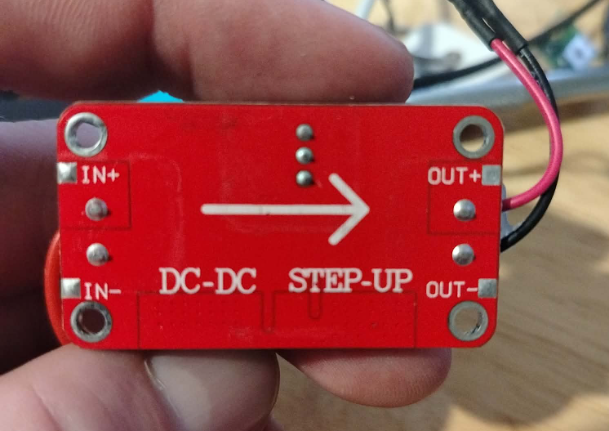
Next, connect the speed controller to the voltage regulator.
Using two short lengths of wire, connect the positive (+) output terminal on the speed controller to the IN+ terminal on the voltage regulator. Then connect the negative (-) output terminal on the speed controller to the IN- terminal on the voltage regulator.
Once both wires are in place, tighten the terminal screws securely to ensure a solid electrical connection.
Connect the Fan
Most fans come with pre-attached wiring. Connect the red wire from the fan to the OUT+ terminal on the voltage regulator, and connect the black wire to the OUT- terminal.
Once both wires are in place, tighten the terminal screws securely to ensure a firm and reliable connection.
Cranking the Volts!
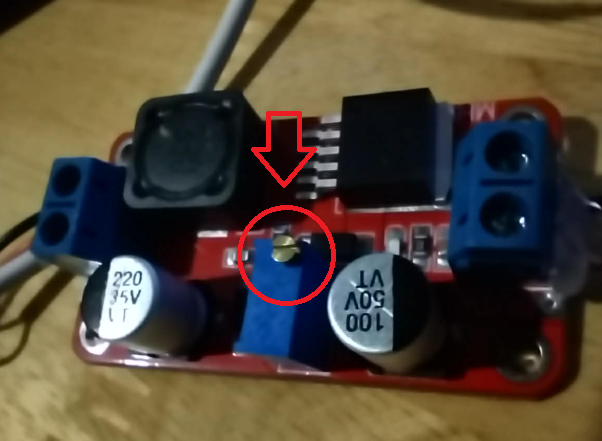
The final step is to adjust the voltage regulator so that it matches the operating voltage of your fan. The regulator boosts the 5 V USB input to the voltage required by the fan. In my case, I needed to increase the voltage from 5 V to 24 V, but your fan may require a different voltage.
Locate the small adjustment potentiometer (trimmer) on the voltage regulator. Plug the USB cable into a power source, then use a multimeter to measure the voltage across the OUT+ and OUT- terminals.
Using a small flat-head screwdriver, slowly turn the adjustment screw on the potentiometer until the output voltage matches the rated operating voltage of your fan. Once the correct voltage has been set, get ready to be the most comfortable person in the office.