A Koi Pond Mosaic Made From 10 Pounds of 3D Printer Waste
by jnell61072 in Craft > Reuse
11949 Views, 0 Favorites, 0 Comments
A Koi Pond Mosaic Made From 10 Pounds of 3D Printer Waste
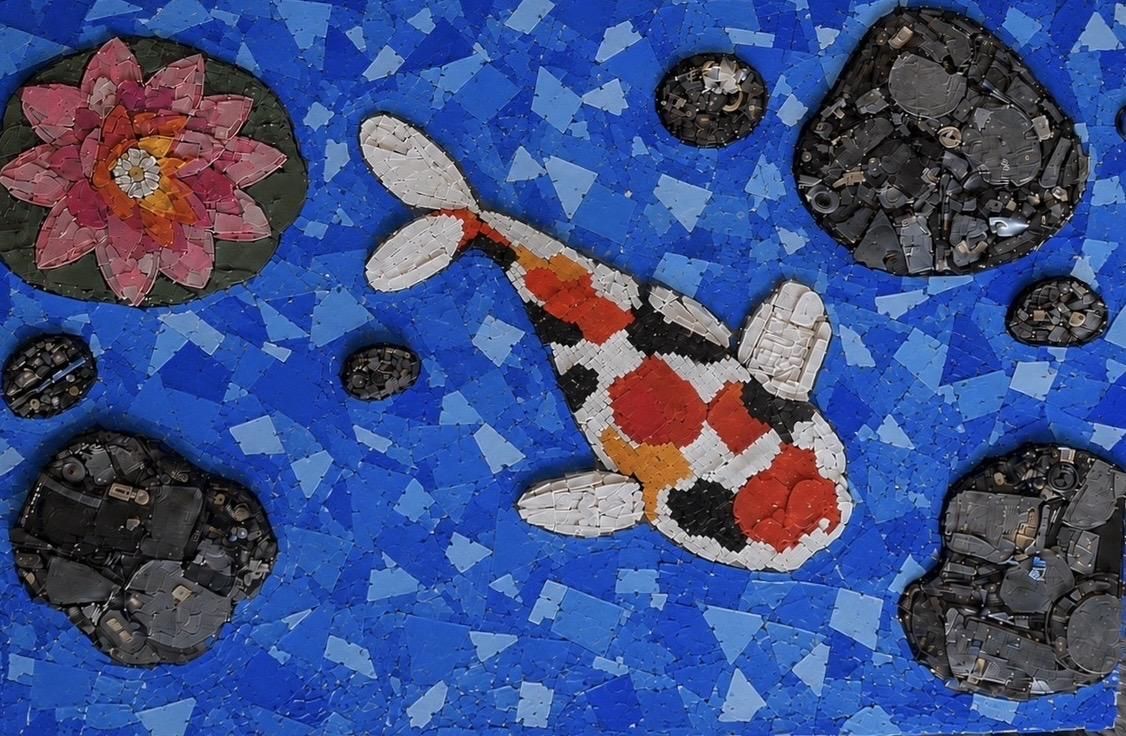
Every 3D printer owner ends up with quite a pile of plastic waste: failed prints, stringy purge, and the plastic purge tower left behind after a multicolor job. Over three years I saved every scrap of mine, and it added up. When I finally weighed it, the hoard came to 56.6 pounds of plastic, roughly the weight of 25.7 full spools of filament, sitting in bins in my basement.
I always told myself I would grind it up and turn it back into new filament. I never did, because the equipment cost more than the plastic was worth. But I could not throw it away either. So I did the next best thing: I turned about 10 pounds of that hoard into a mosaic. It is a koi fish gliding through a pond of lily pads and rocks, built entirely from plastic.
No new material. No paint. Just sorted scrap, a lot of hot glue (186 sticks, to be exact), and the cardboard a TV came in. Here is how I made it, mistakes and all. Let's get into it.
Supplies
Skill Level: Beginner to Intermediate. The technique itself is simple hot gluing. What it really takes is patience, a decent eye for color, and the willingness to sit with a big piece over many short sessions.
Time Required: Several weeks of small sessions for the build, plus about an hour and a half to sort the plastic. (And, in my case, three years of casually saving scrap before any of it started.)
Materials (all upcycled or nearly free)
- Failed 3D prints and filament scrap, sorted by color. I used about 10 pounds out of a 56.6 pound hoard. (Any plastic scrap would work)
- A large, sturdy sheet of cardboard for the backing. I used the flat panel from a TV box: 3 ft 8 in wide by 2 ft 6 in tall (44 in x 30 in, or about 112 cm x 76 cm).
- Hot glue sticks. I went through 186 of them. (costs a few dollars)
Tools
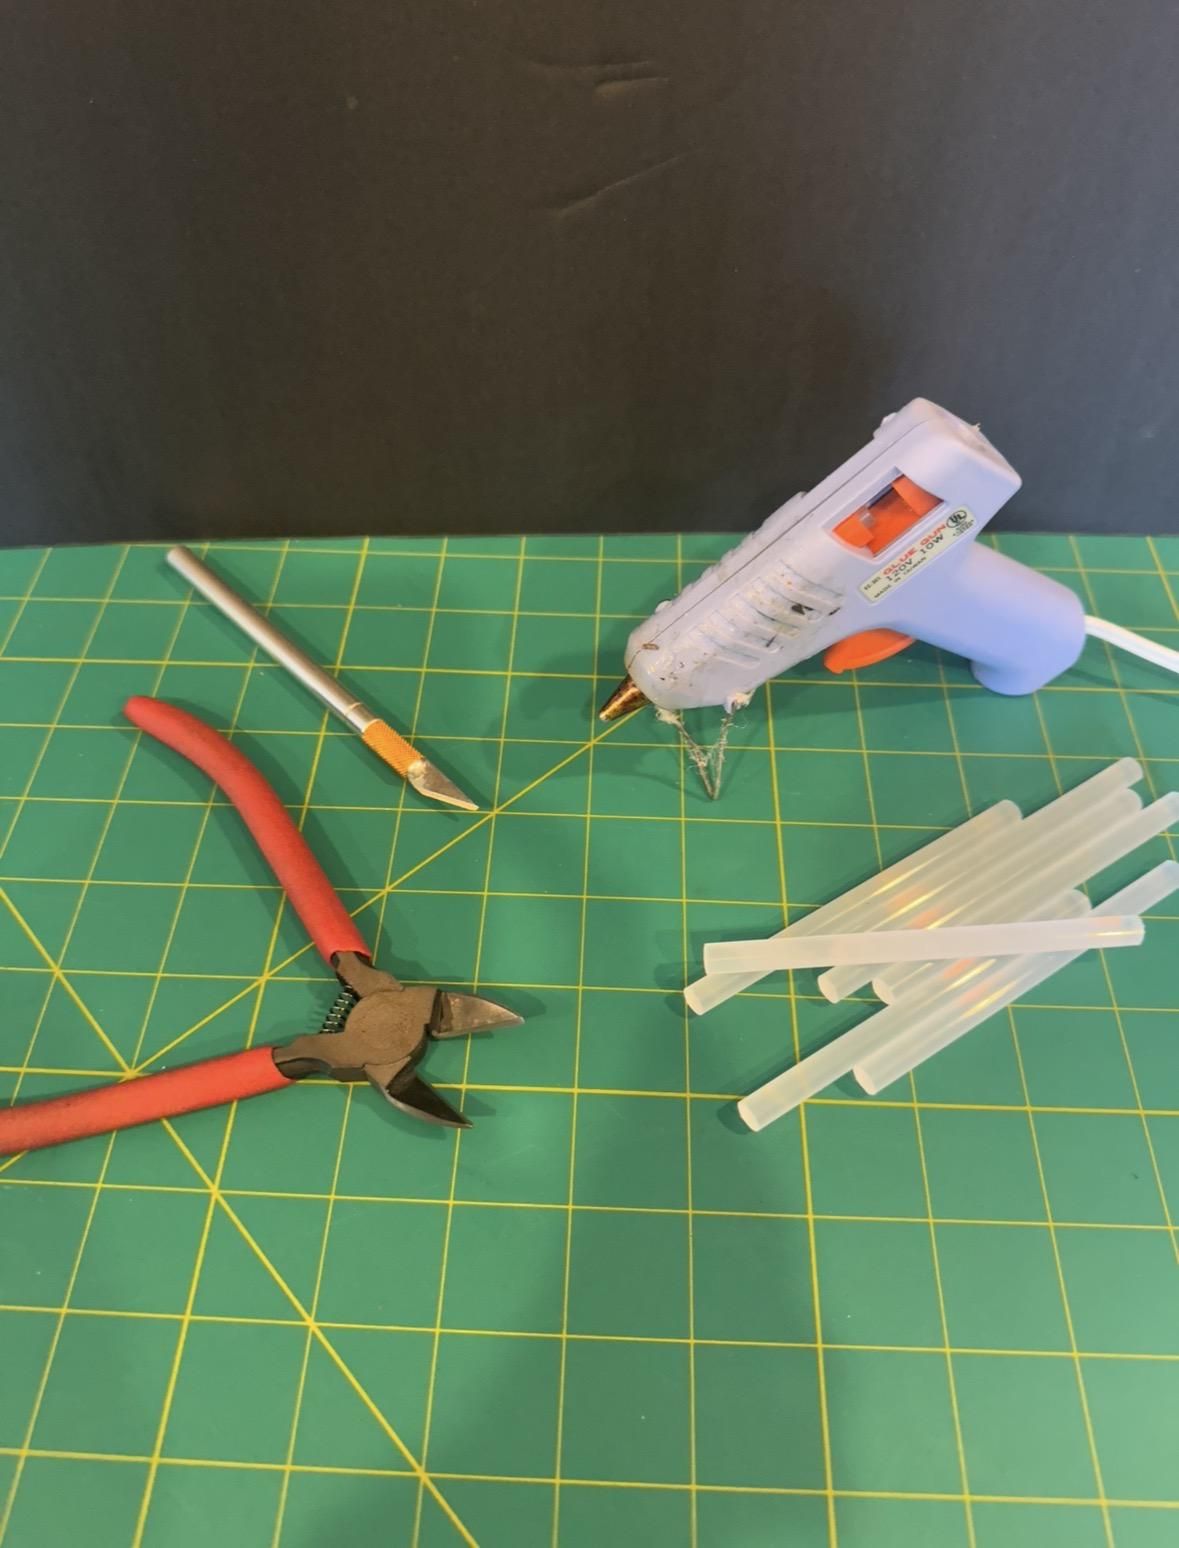
- Hot glue gun
- Scissors and wire cutters (for snapping and cutting scrap into smaller pieces)
- A craft knife / X Acto (for cleaning up stray glue)
- A pencil (for sketching the design)
- A scale (only if you want to weigh your plastic, optional)
Software (optional, free)
- ChatGPT, or any image generator, to make a pixel art reference image.
Cost: Basically zero if you already own a 3D printer and have been saving your scrap. The cardboard was free and the plastic was destined for the trash. The only real expense was hot glue.
3D Printing Has a Plastic Problem
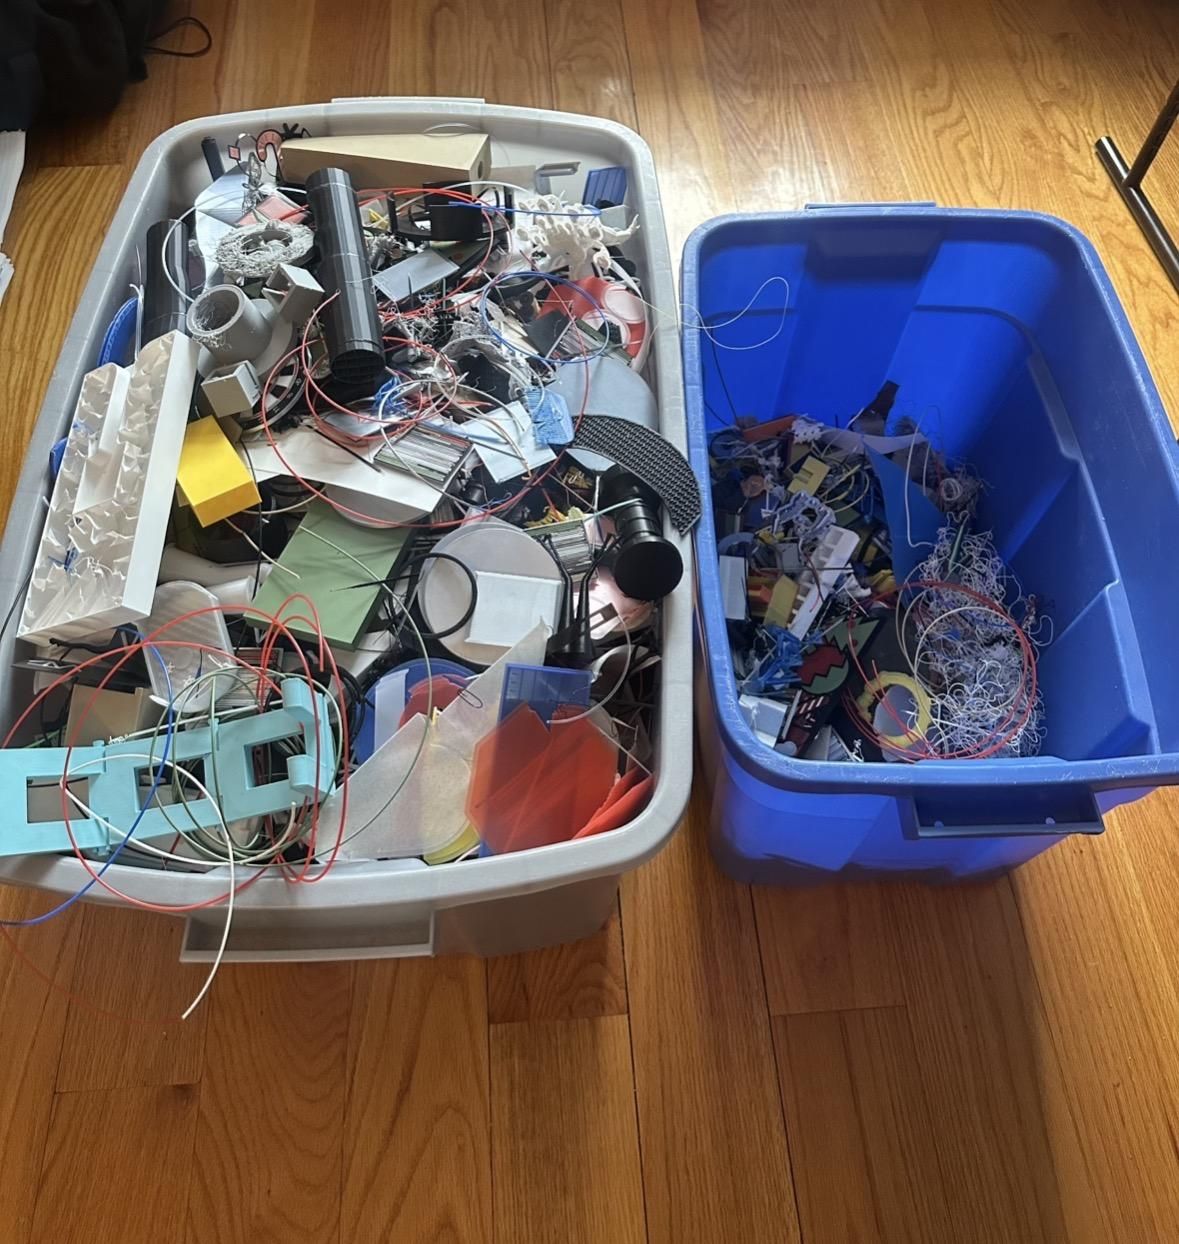
3D printing feels clean, but it generates a lot of waste. Every failed print, every raft and support, and every bit of purged filament from a color change goes somewhere, and most of it goes in the trash. I did not want to add to that, so three years ago I started saving all of mine in bins instead of tossing it.
The scale of it: Zoom out and the numbers get heavy. The world produces more than 400 million tons of plastic every year, and less than 10 percent of it is ever recycled (source: Filamentive). Makers buy roughly 180,000 tons of 3D printing filament worldwide each year, and a real share of it never becomes a finished part. Waste estimates run from around 10 percent of prints up higher for trickier materials, and one industry survey estimated that about 8,000 tons of 3D printed plastic went to landfill worldwide in 2019 alone (sources: Printables, Filamentive). The real problem is that there is almost no recycling stream for printed plastic, so most of it just goes in the trash.
My own hoard: When I finally weighed everything I had saved, it came to 56.6 pounds, the equivalent of about 25.7 full one kilogram spools of filament that never made it into a finished object. Seeing that number is what pushed me to actually do something with it.
Sorting by Color
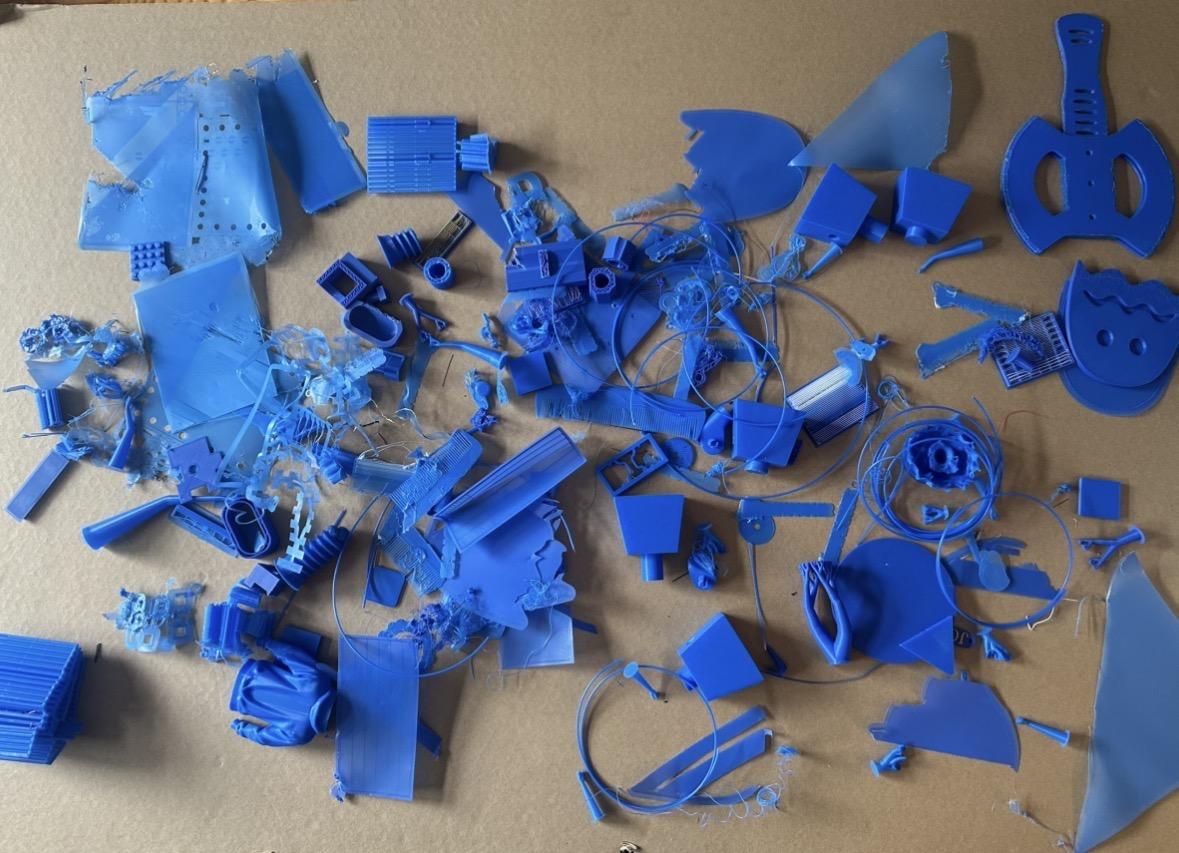
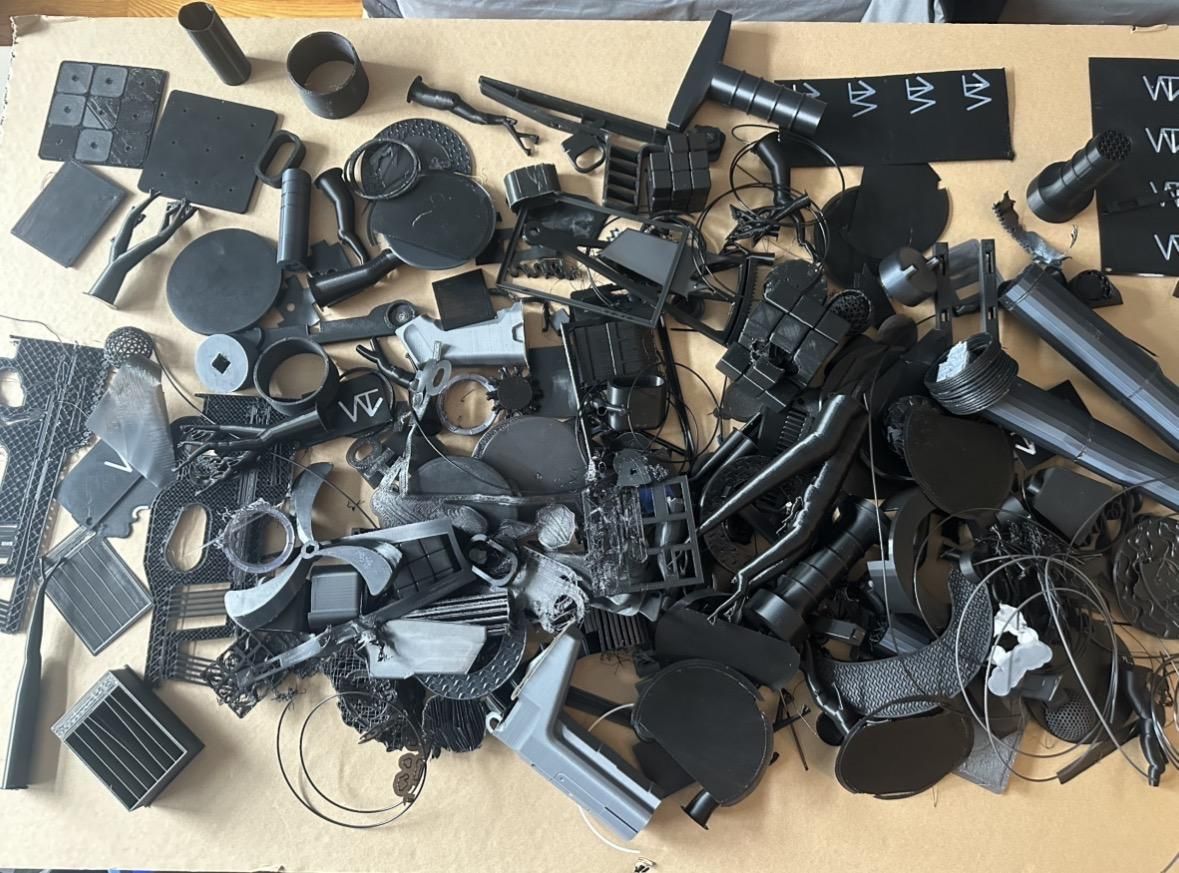
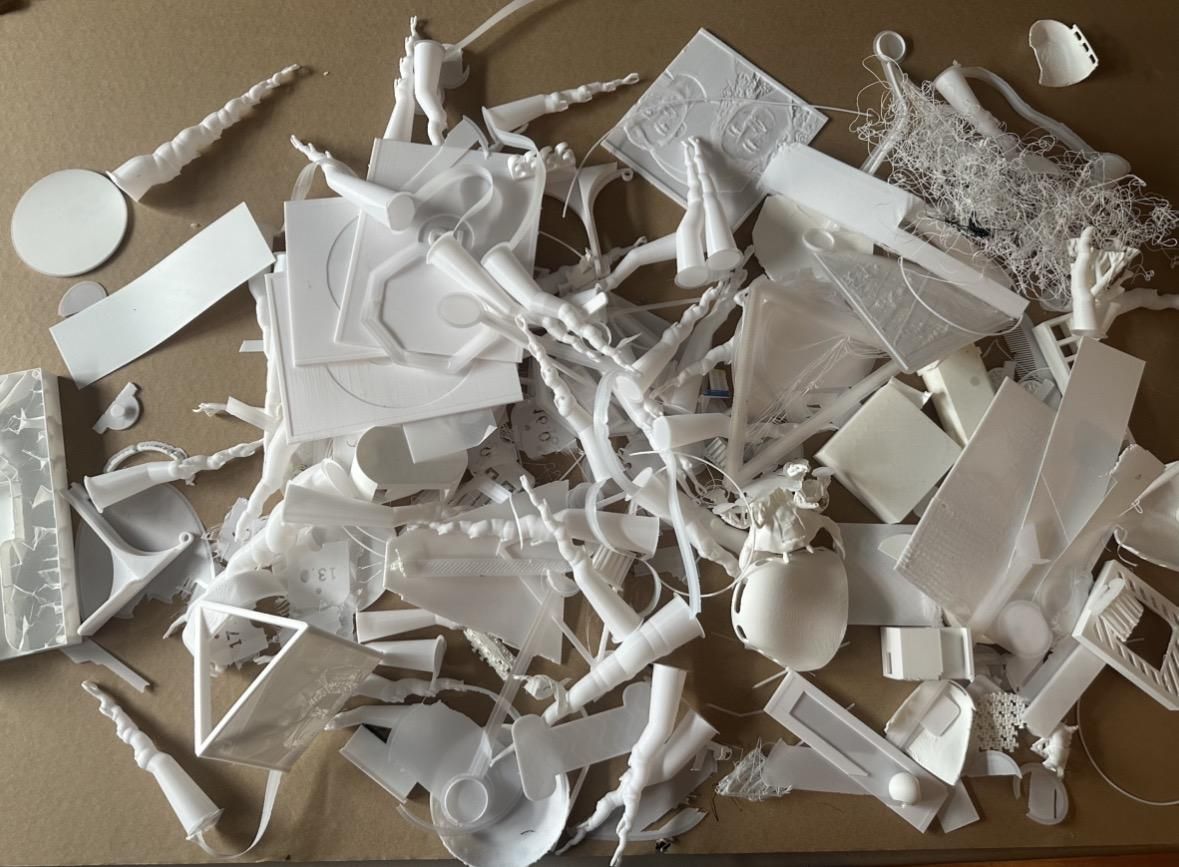
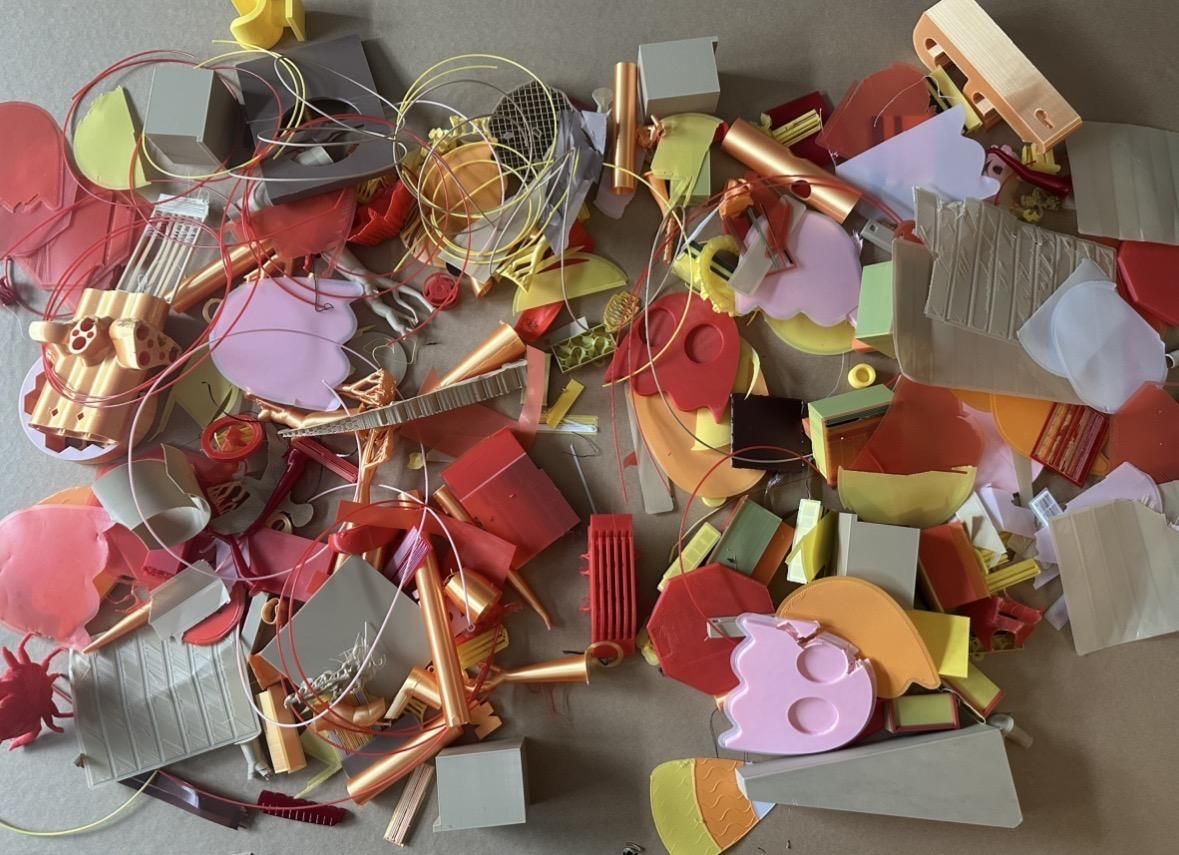
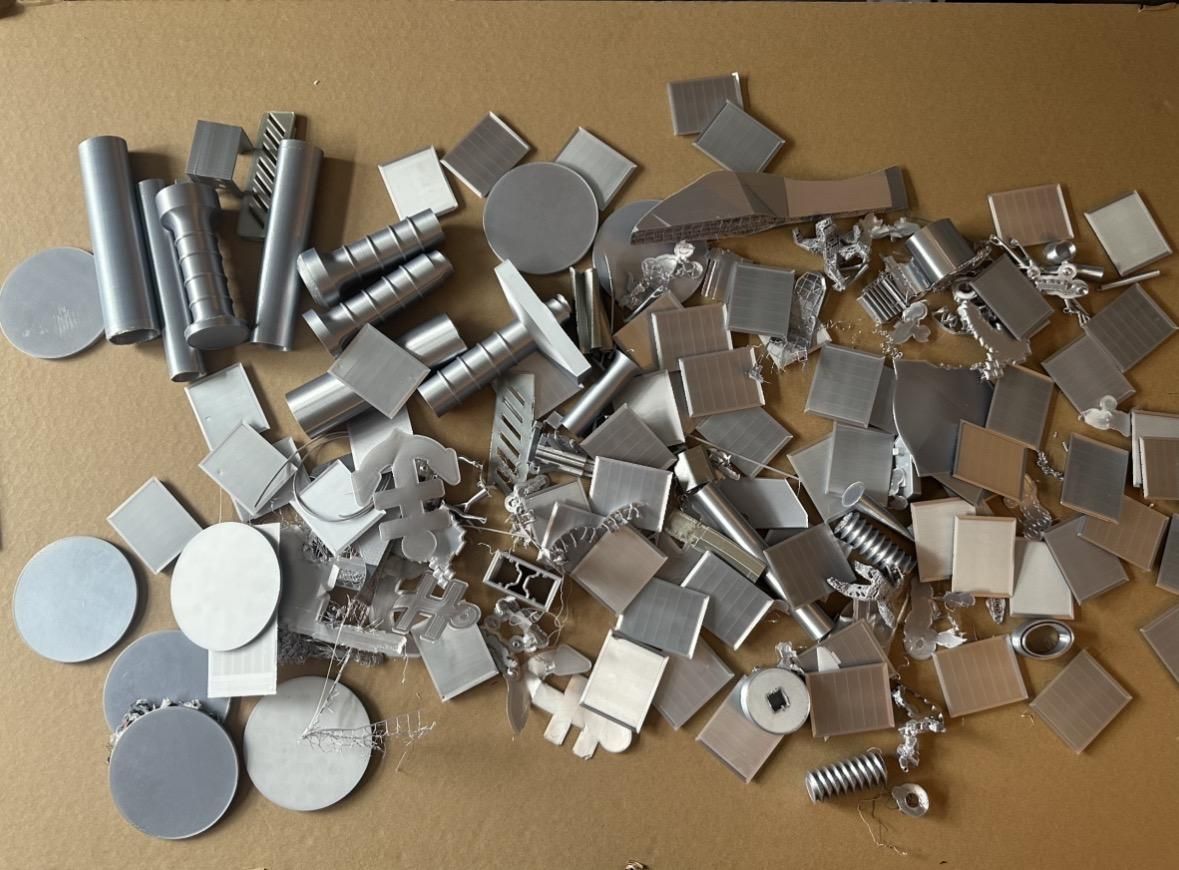
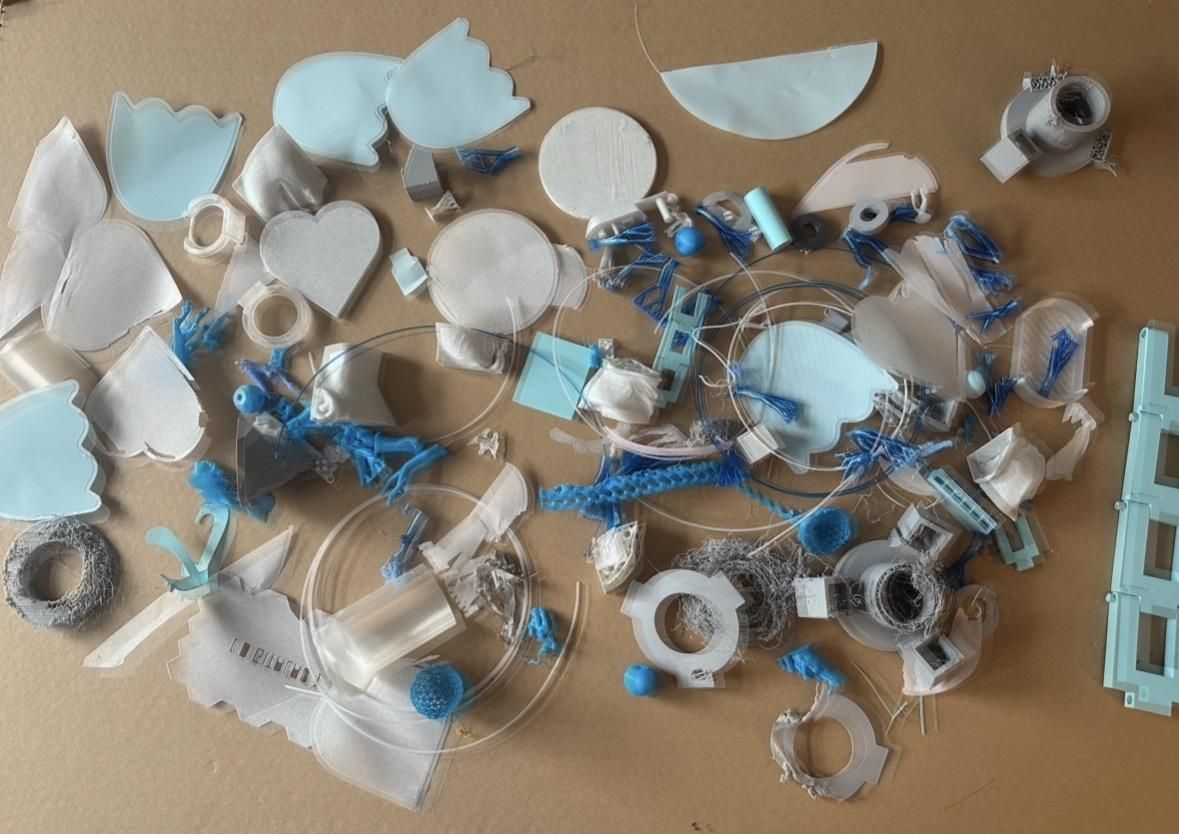
Before I could design anything, I needed to know what colors I actually had and how much of each. I grabbed a mix of plastic storage tubs and cardboard boxes and started sorting into piles.
My final groups ended up as: one big pile for black and dark shades (including dark silks and grays), a container for silver, a container for whites, a container for blues (with marbles and clears mixed in), and a "sunset" bin that combined reds, oranges, yellows, golds, and light browns. I also kept a small stash of a specific gold and sunset color for accents. Greens were the one color I barely had, which mattered later.
This whole sort took about an hour and a half. I did not process every last scrap, just enough to work with.
Choosing the Design (Wave Vs Koi Pond)
My first idea was a giant ocean wave, all blues, dramatic and simple. Then I laid my blue pile out on the board to check coverage and realized I did not have nearly enough blue to fill a whole wave. The material picked the design for me.
So I pivoted to a koi pond, which needed a bit of everything: blue water, gray and gold rocks, a green lily pad, a bright flower, and an orange, red, black, and white fish. This was important as I could recycle more plastic.
Generating a Pixel-Art Reference
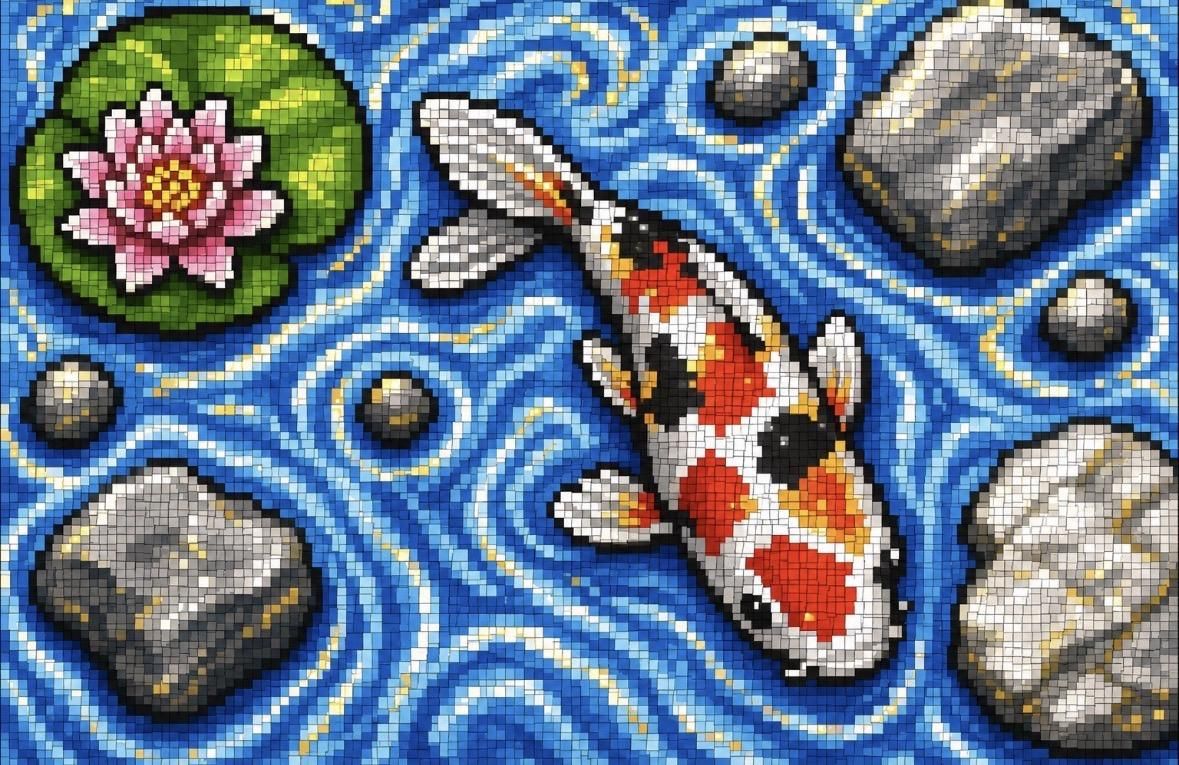
I found a koi fish design online that I liked, then used ChatGPT to turn it into a pixel art style guide with uneven pixel sizes, which is closer to how mosaic chunks actually look. I used it as a loose guide, not a strict pattern.
Here is the exact prompt I used:
Generate a pixel art style image of a koi fish in a pond with lily pads and rocks in the water. The pixels should vary in size. The colors of the pixels should be white, black, olive green, neon green, silver, royal blue, baby blue, grey, red, orange, gold, marble, yellow. Before you generate, are there any questions? If not, generate it.
The Backing, Free Cardboard From a TV Box
I had recently bought a TV, and the flat cardboard panel from its box was thick and rigid, perfect for a heavy mosaic. It measures 3 ft 8 in by 2 ft 6 in (44 in x 30 in). Free, sturdy, and already flat.
Dry Layout, Previewing the Whole Scene
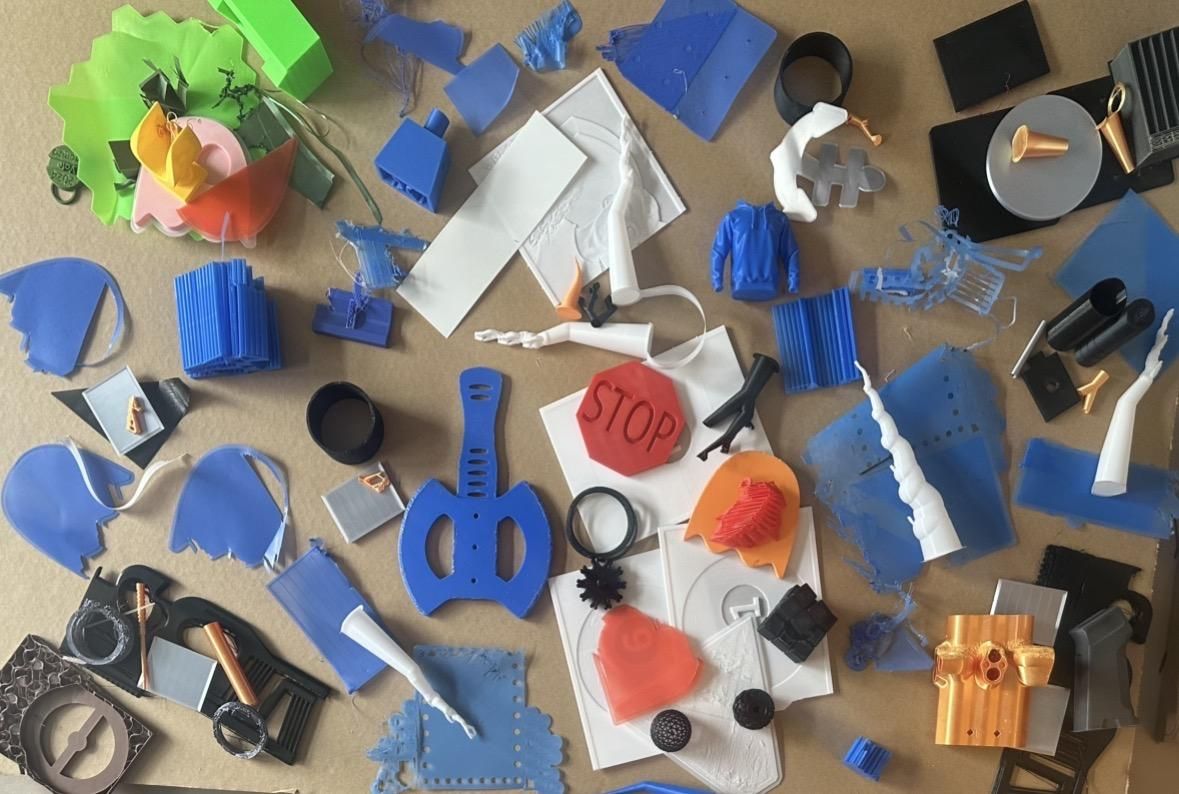
Before gluing anything down, I laid the sorted pieces onto the board in the rough regions where they would live: blue in the water zones, gray and gold in the rock zones, and so on. This let me see the whole picture, confirm I had enough of each color, and catch problems while they were still free to fix.
Once I was happy, I gathered the pieces back into their bins so I could sketch on a clean board.
Note: This is the cheapest insurance in the whole project. Moving loose pieces costs nothing. Moving glued ones costs a fight.
Gridding the Board for Scale, Right Before Sketching:
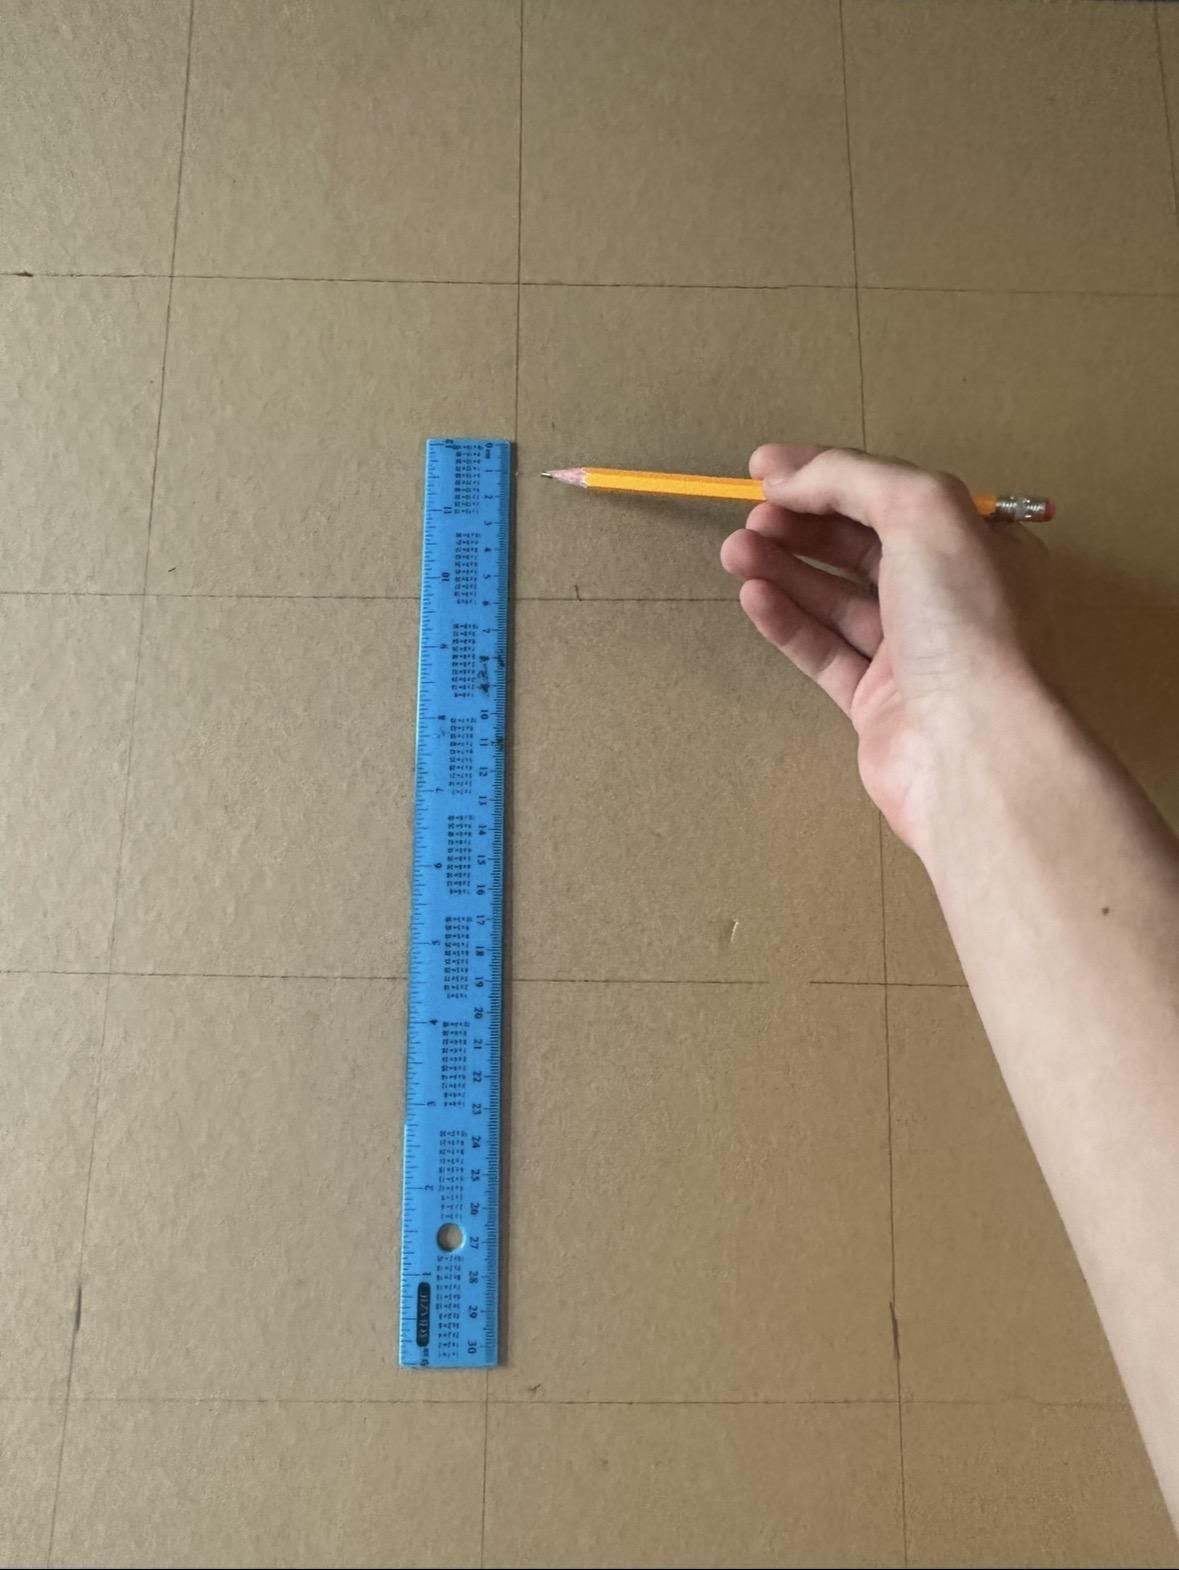
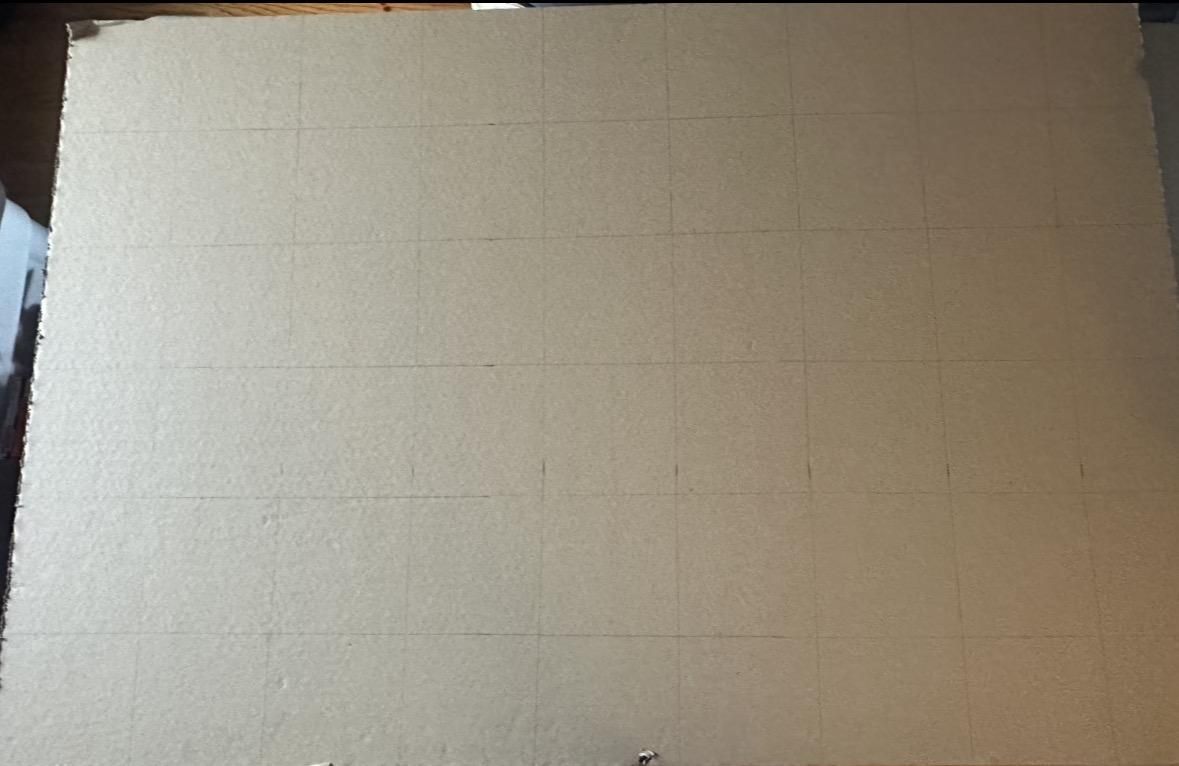
Using a ruler and pencil, I drew a grid of 5 inch by 5 inch squares across the entire 44 in by 30 in board (roughly 9 squares across by 6 down). This helped with spacing and sizing of the various rocks and features. This step was crucial as it helped me to layout everything and achieve the best spacing.
Sketching the Scene
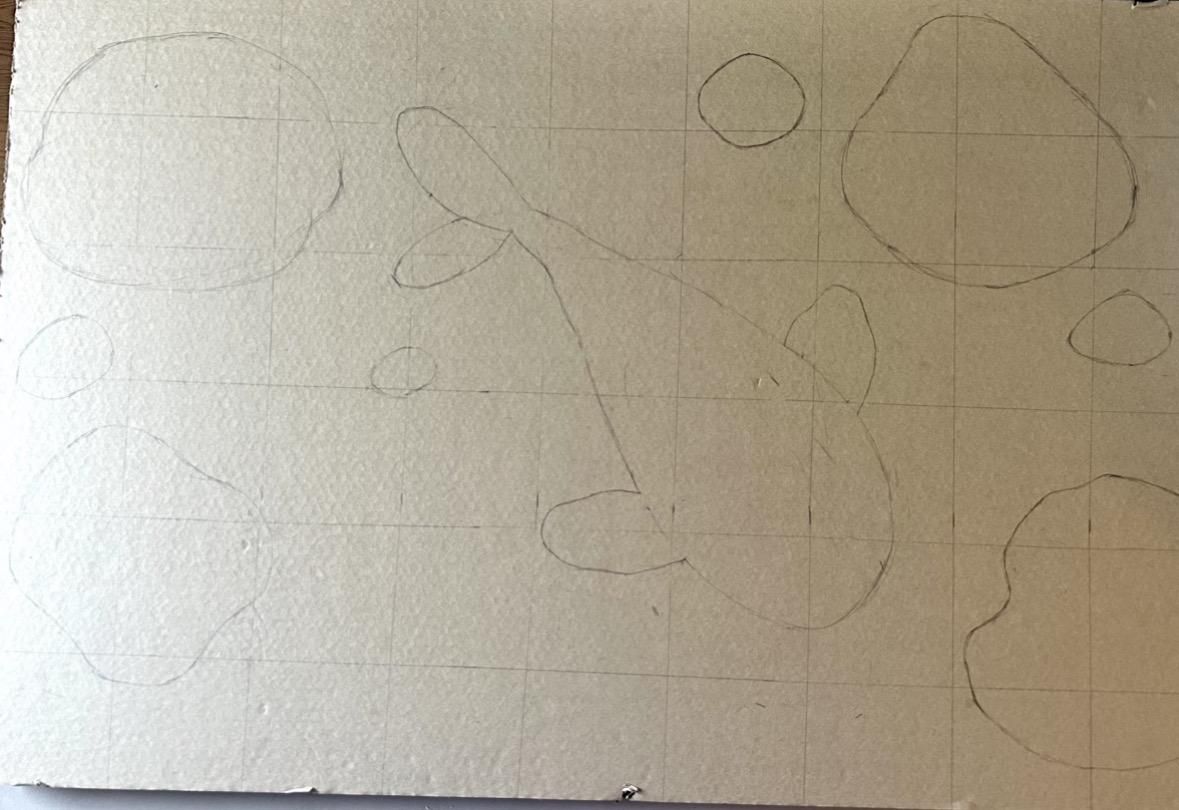
I sketched the layout directly onto the cardboard in pencil so I could erase and adjust. I kept it loose on purpose, just marking the major shapes: the fish, the lily pad, and the rocks. No fine detail yet.
Outlining Everything in Black
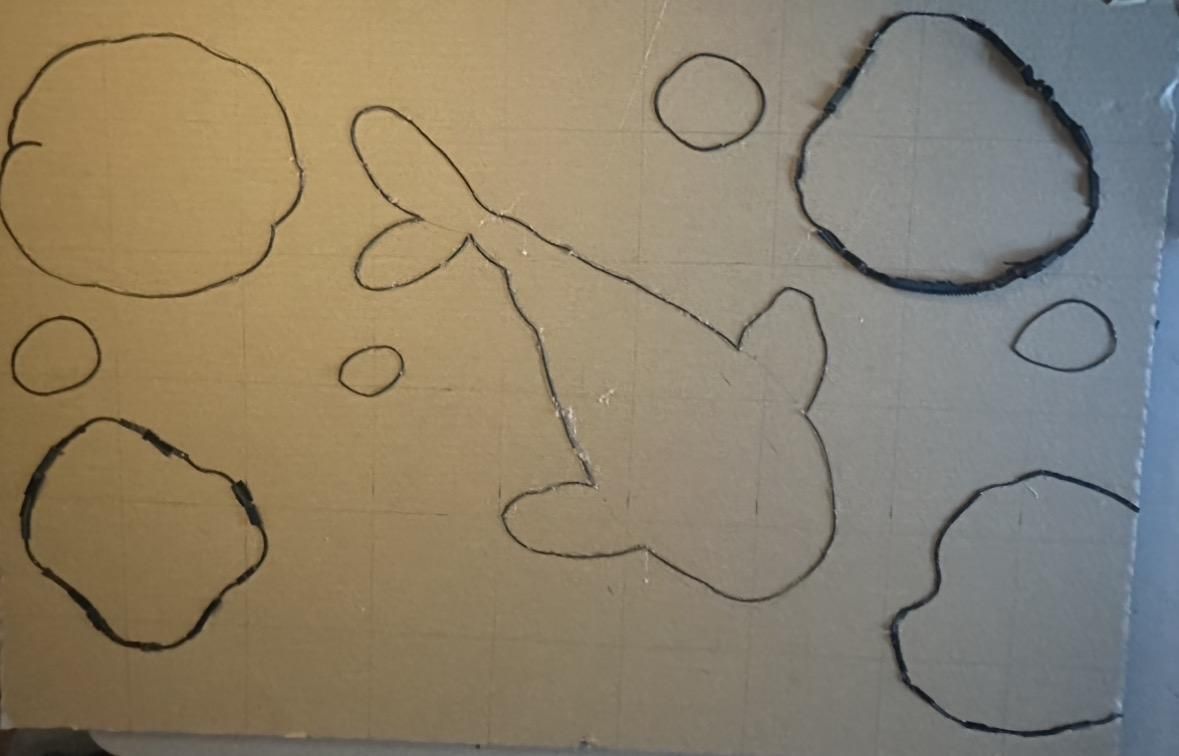
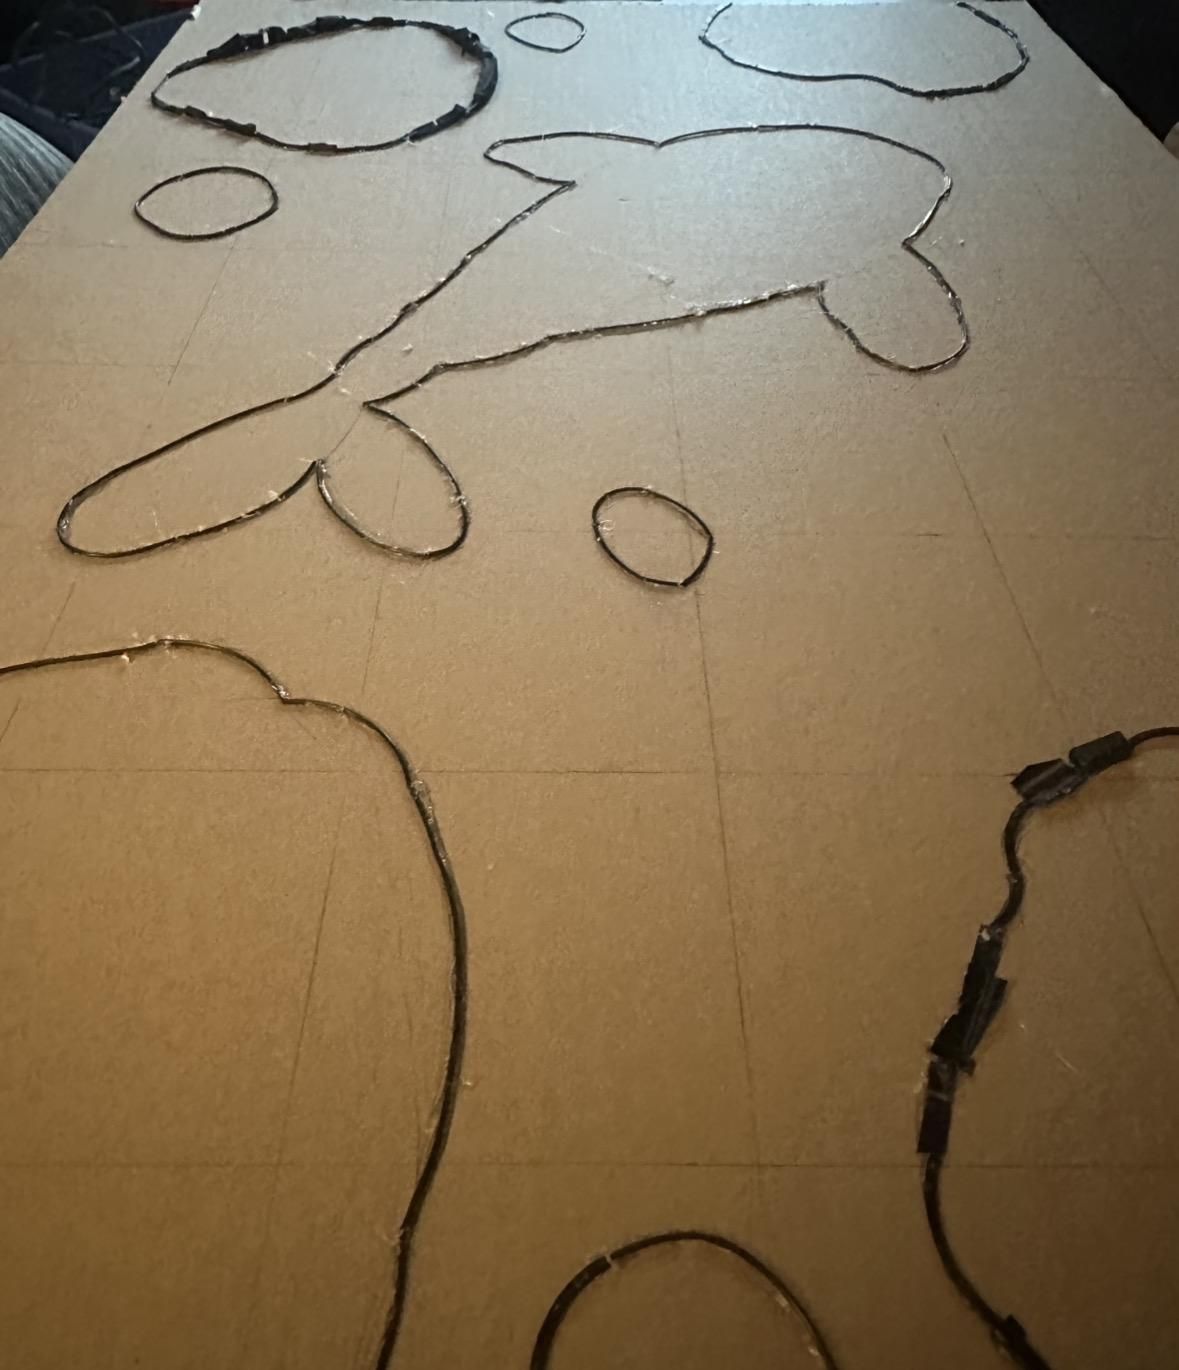
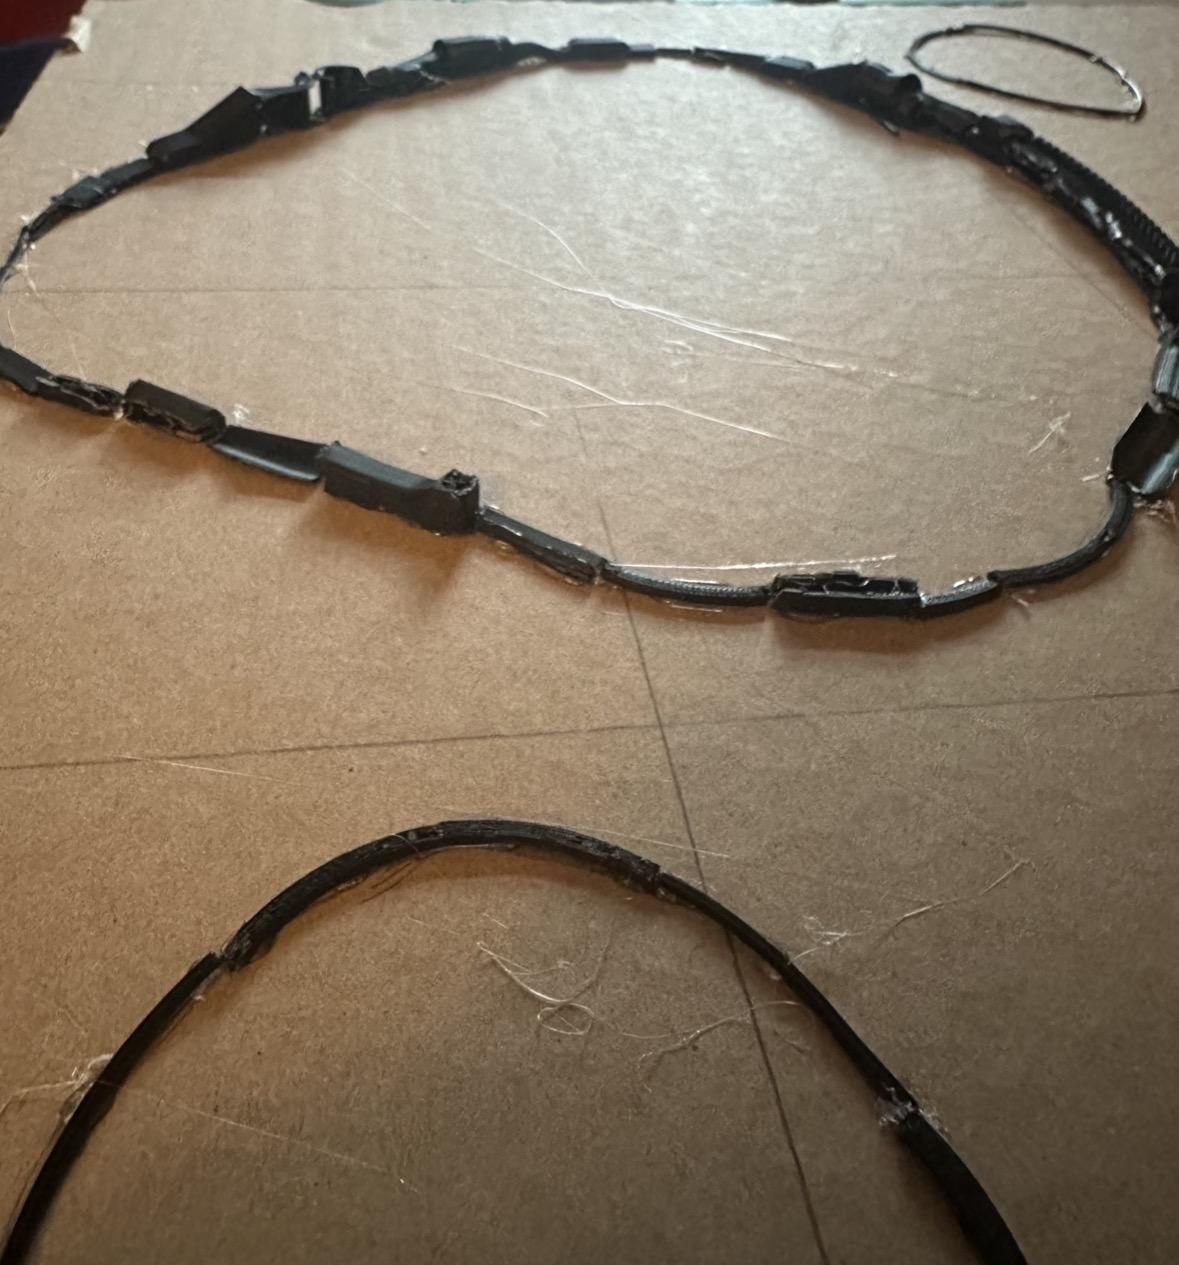
I outlined every shape in thin black plastic, using the hot glue gun to tack down thin straps and straight bits of scrap along my pencil lines. I varied the line thickness on purpose: thick outlines for the big rocks, thin outlines for the small ones, so the outline itself started to suggest depth.
I started with the small rocks first, since they mattered least. If I fumbled the technique early, it was on the least important part. Then I worked up to the larger rocks, the lily pad, and the fish. For thicker outlines I stacked pieces or laid two strands side by side.
The Fix, Re-Gluing Lifted Pieces
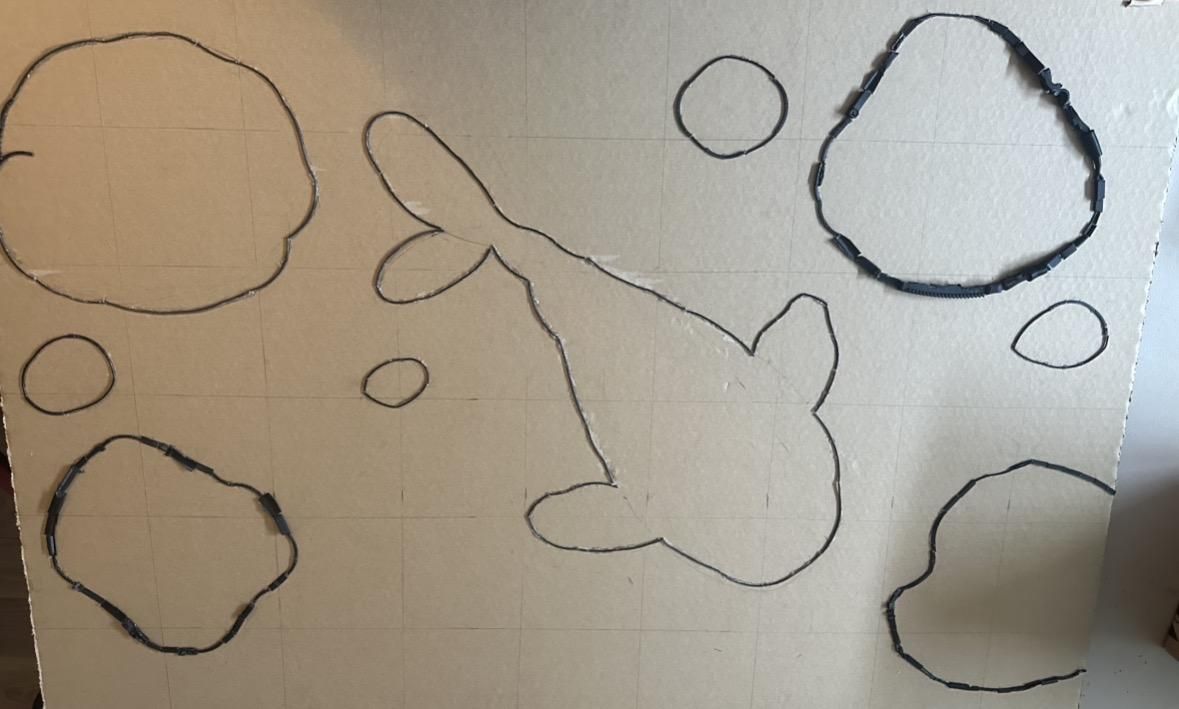
After outlining, I ran the craft knife along the glue lines to trim away stringy plastic and lumps of dried glue, which cleaned everything up nicely.
Trimming the glue had a side effect: some of my outline pieces lifted right off the board when I cut near them. A few even tore small patches out of the cardboard surface.
The Fix: I simply reglued the lifted pieces. The torn cardboard did not matter, because every bit of the surface gets covered by plastic in the end. The payoff was a much cleaner, smoother outline to build on.
Building the Rocks
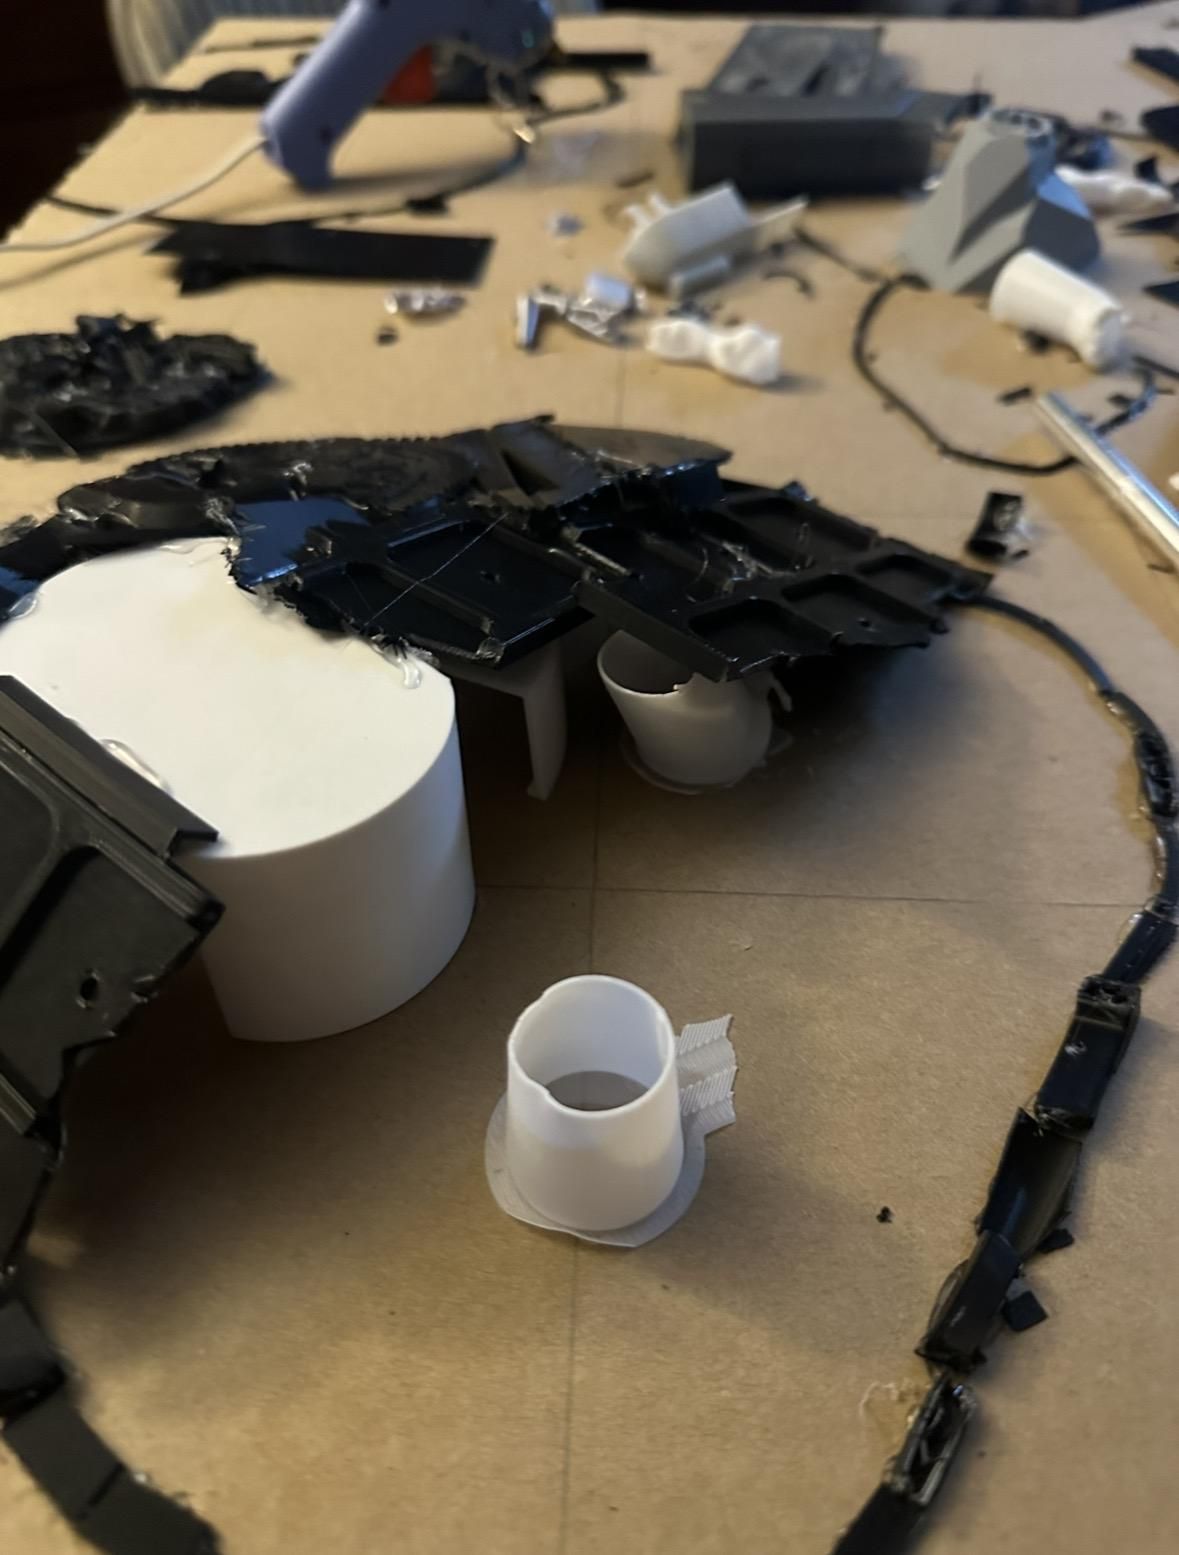
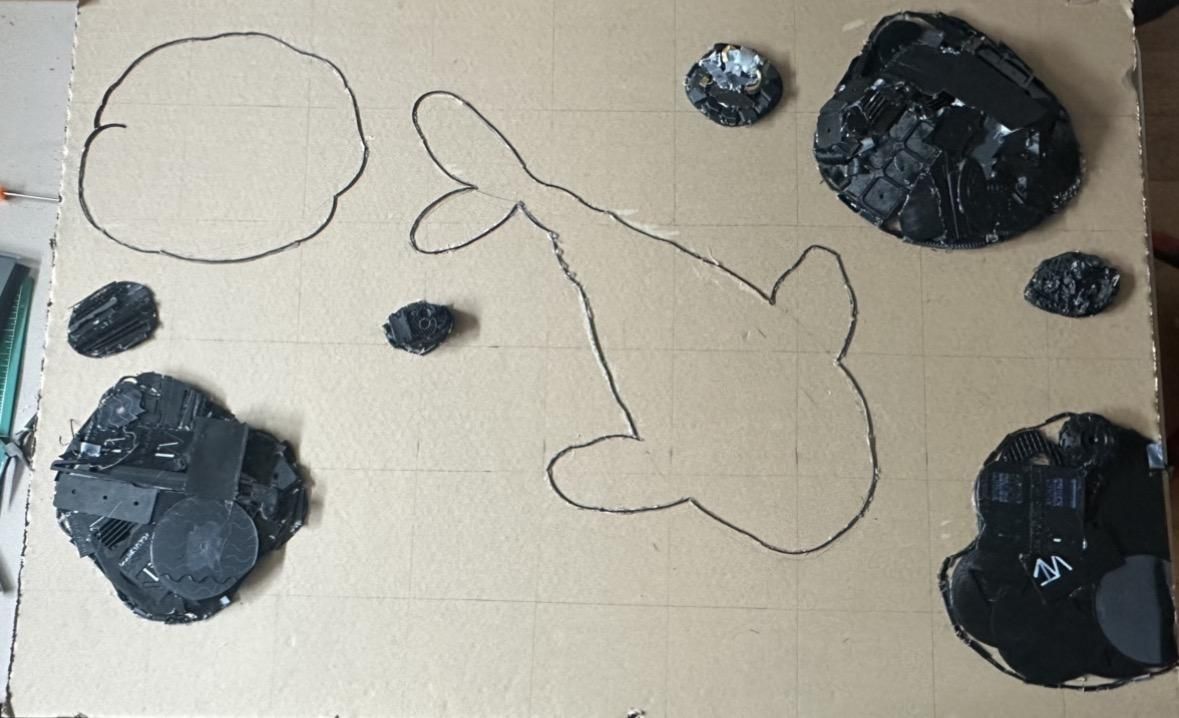
With the outlines set, I started filling in the rocks by building them up piece by piece. Rather than laying anything flat, I stacked scrap to give each rock real height and mass, using whatever colors I had in abundance as the structure underneath, since all of it gets covered by the surface colors later. A bigger, thicker outline got a bigger, taller rock.
The Lily Pad
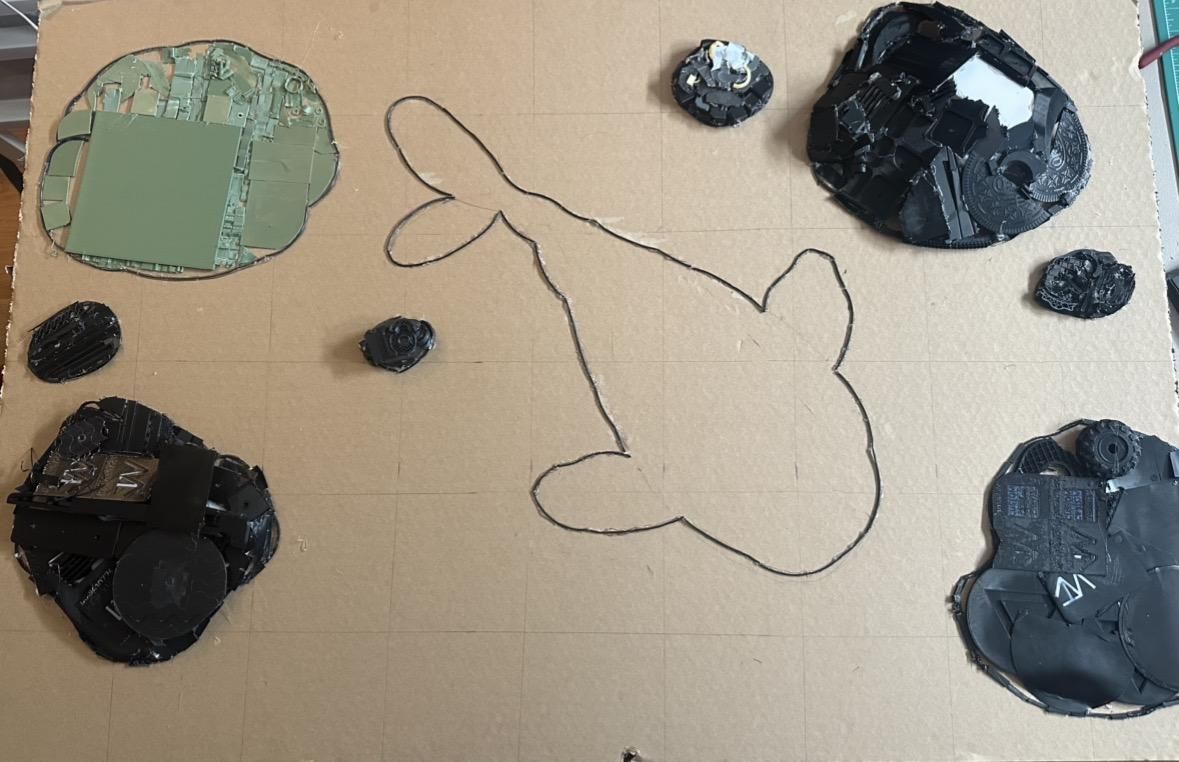
The lily pad was different because I wanted to keep it thin and flat, due to real lily pads being thin. I filled it in green and left a large flat section in the middle for the flower to go later.
The Koi Fish
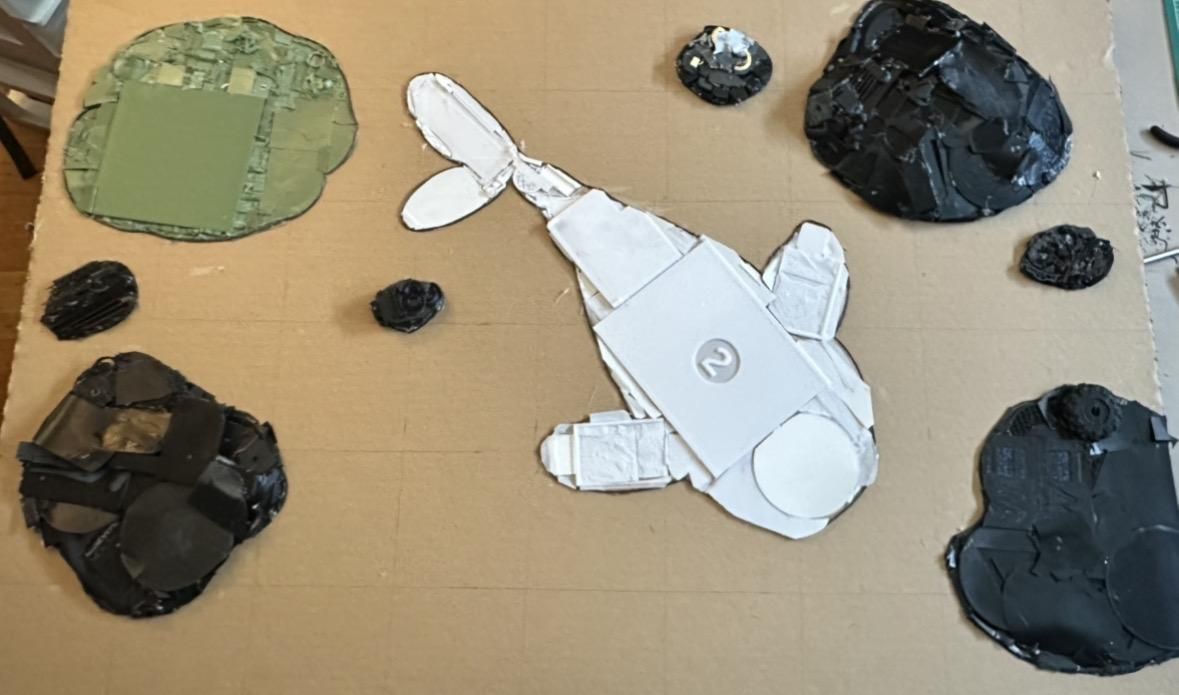
For the fish I laid a white base, following the same process, but this time I wanted it as flat as possible (unlike the raised rocks), so the fish reads as gliding just under the surface. I kept every piece as thin as I could. Later I came back and added the koi's markings with splotches of black, red, and orange.
Closing the Edges
Doing a full pass over everything, I found gaps: a few spots along the lily pad edges and some of the black areas had open seams where the bare cardboard peeked through. I went back and patched the green edges and filled the black gaps until nothing showed through.
The Hardest Part, Blue Water With Almost No Blue
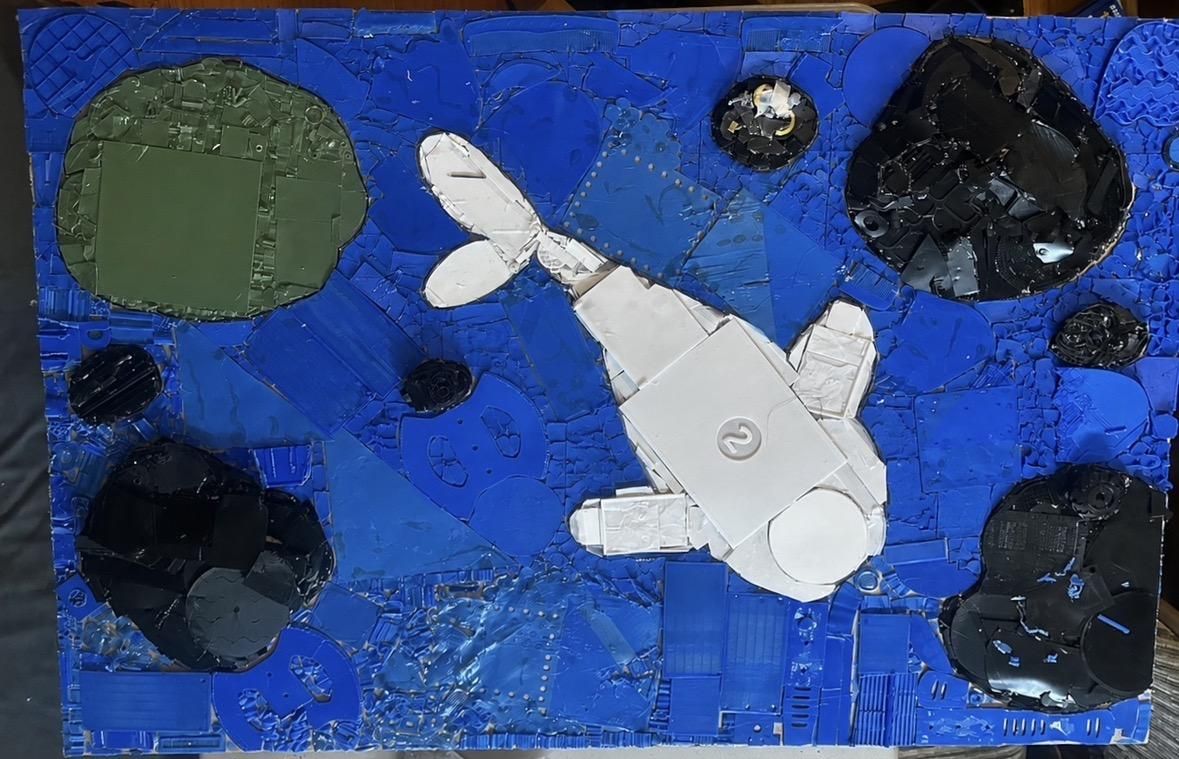
Blue was the biggest challenge of the whole build. The water is the largest area on the board, and blue was one of my smallest piles. I had to be specific about it.
What I did: I hunted down every large, flat blue piece I had and used those first to cover the most area fast. Then I cut my remaining blue into smaller sections to stretch it. My best trick was taking support material scrap, cutting it in half, and flattening it, which turned a piece that normally covers very little into one that covers a lot. To keep the water believable, I flowed the pieces around the rocks and along the direction of the fish, rather than filling in flat rows.
Detailing the Rocks
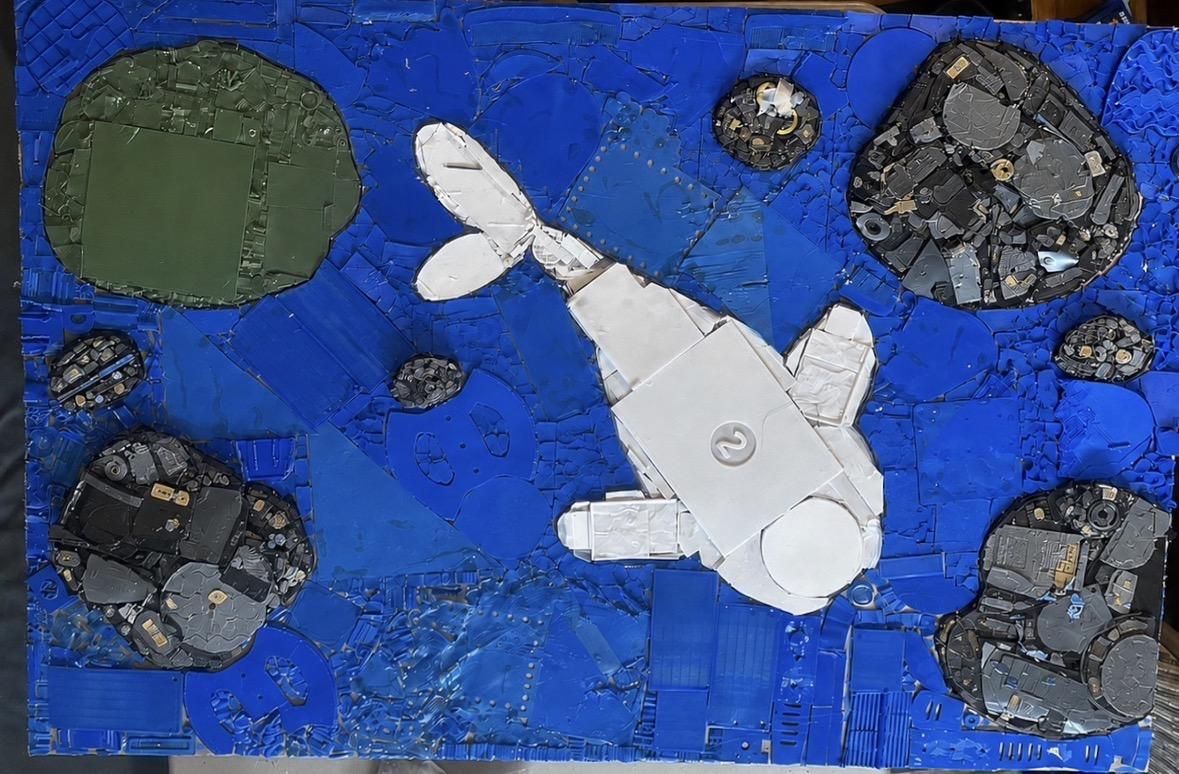
With every main color down, I switched to detail work, starting with the rocks. I laid gray pieces over the built up rock forms, mixing in grays, marble, and silver from my scrap for a natural stone look, then added gold pieces as accents. I leaned on my reference photos the whole time to place the lighter tones where light would catch.
Tip: Vary your grays. A single flat gray reads as plastic, but a mix of grays, marble, and silver reads as stone.
Building the Flower
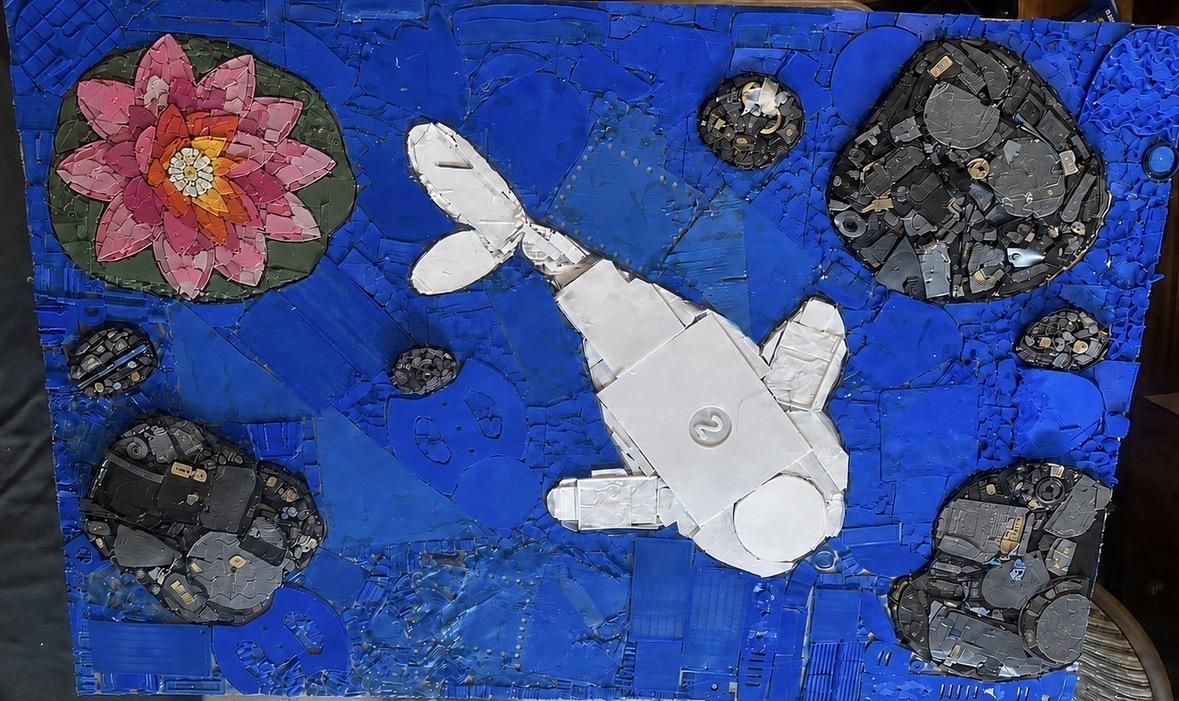
The lily pad had that open gap waiting for a flower. I had planned a small one, but went larger, because a bigger flower gave me room to add finer detail. I started with the overall petal shapes in pink, then slowly built up color toward the center. It ended up covering the pad so completely that the pad itself needed no further detailing. I spent extra time here on purpose: a bright, high contrast bloom is what makes the whole piece pop.
Tip: Put your extra effort where the eye lands. One bold focal point does more than fine detail spread evenly everywhere.
Detailing the Koi Fish
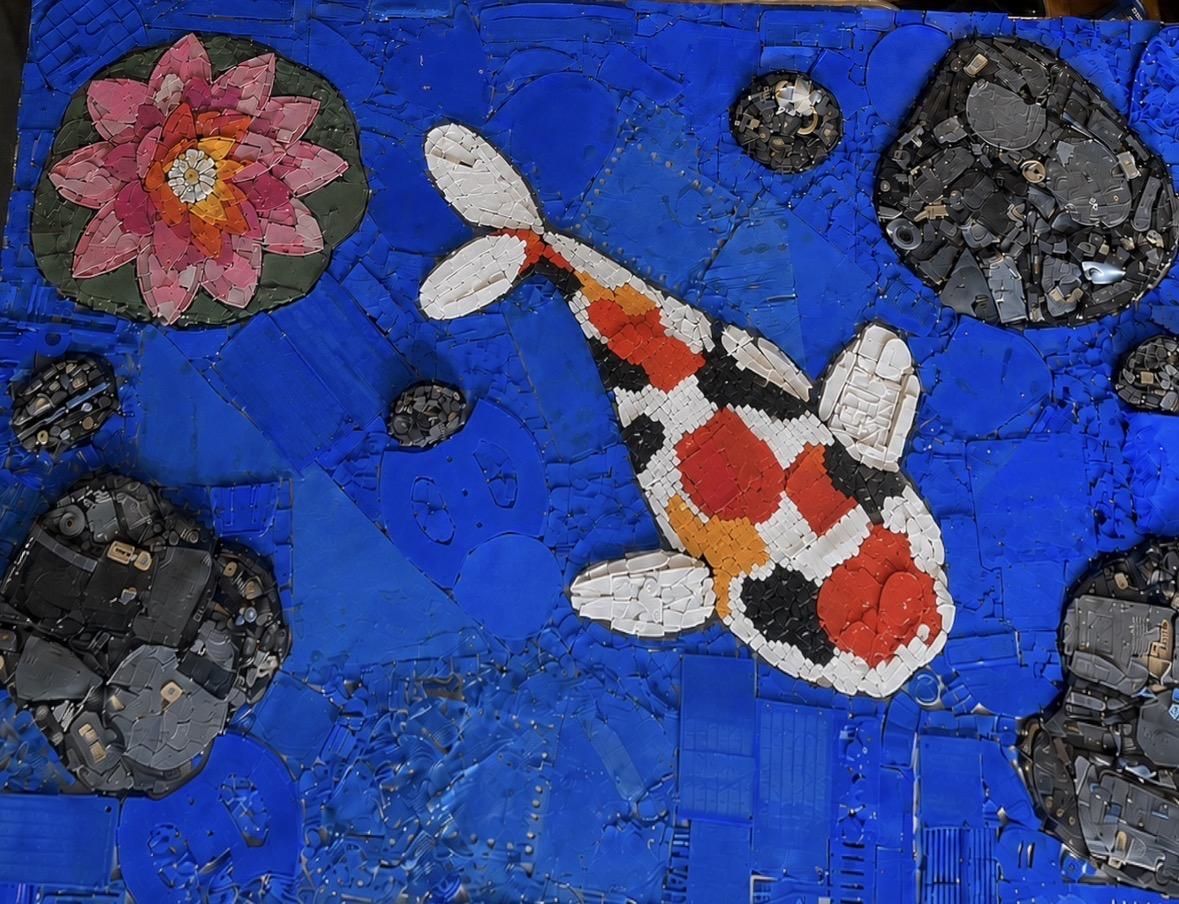
Next I gave the koi its markings. Over the flat white base, I added splotches of black, red, and orange to bring the fish to life, keeping every piece thin so the fish still reads as gliding just under the surface rather than sitting on top of it. I found using very tiny pieces for this step was best as it made the tiny details easier to achieve.
Finishing the Water
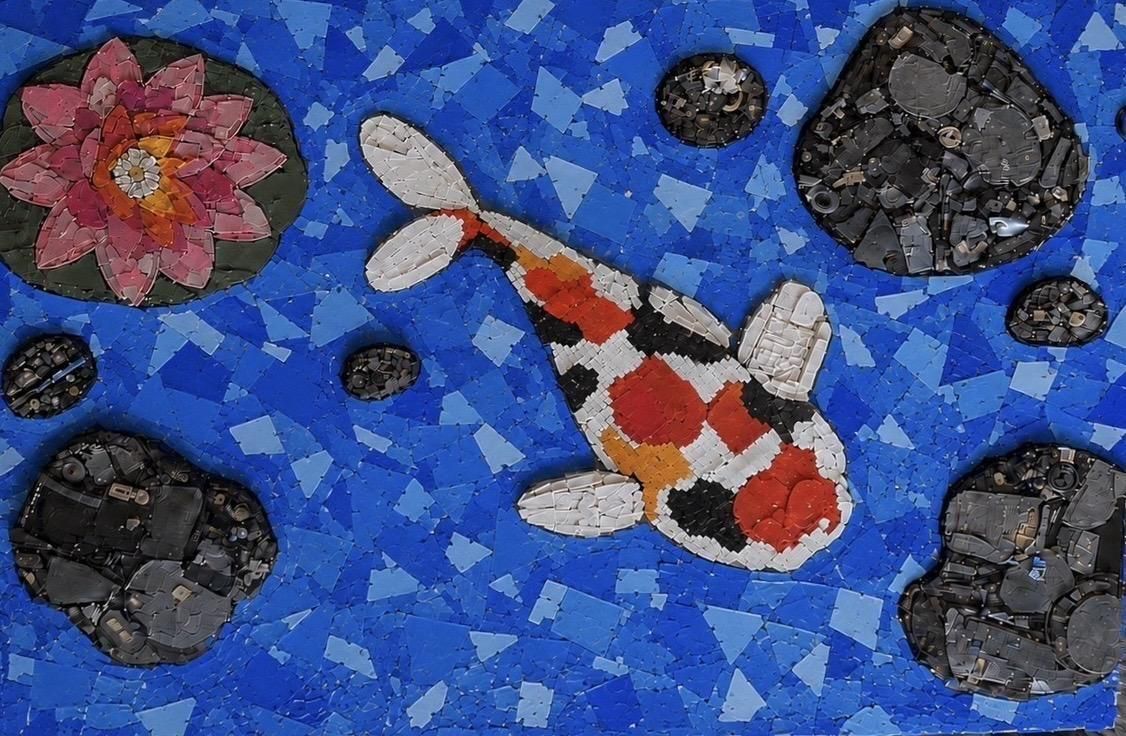
The water was the last thing I detailed, and I saved the most meticulous pass for it. Instead of filling it flat, I curved the blue pieces around the rocks and along the direction of the fish, so the surface looks like real, moving current. That flow is a small thing that makes the pond feel alive instead of like a flat blue background. Just as I did for the Koi fish, I made sure to use small pieces to highlight the details
The Result, 10 Pounds Diverted and 186 Glue Sticks
The finished mosaic is 44 in by 30 in of pure recycled plastic. Roughly 10 pounds of my scrap went onto the board, out of the 56.6 pound hoard, so a single piece of art consumed close to a fifth of three years of "waste." It took 186 hot glue sticks and many short sessions over several weeks.
The best part: none of it is paint or new material. Every color you see is a failed print or a bit of purge that would otherwise be in a landfill.
This project has inspired me to continue to save my plastic waste, as well as make more pieces of art. Some possibilities include other flat mosaics or 3D sculptures.