APP INVENTOR 2 - Clean Front Tips (+4 Example)
by TechnoFabrique in Design > Software
3727 Views, 7 Favorites, 0 Comments
APP INVENTOR 2 - Clean Front Tips (+4 Example)

We're going to see how we can make your App on AI2 look esthetic :)
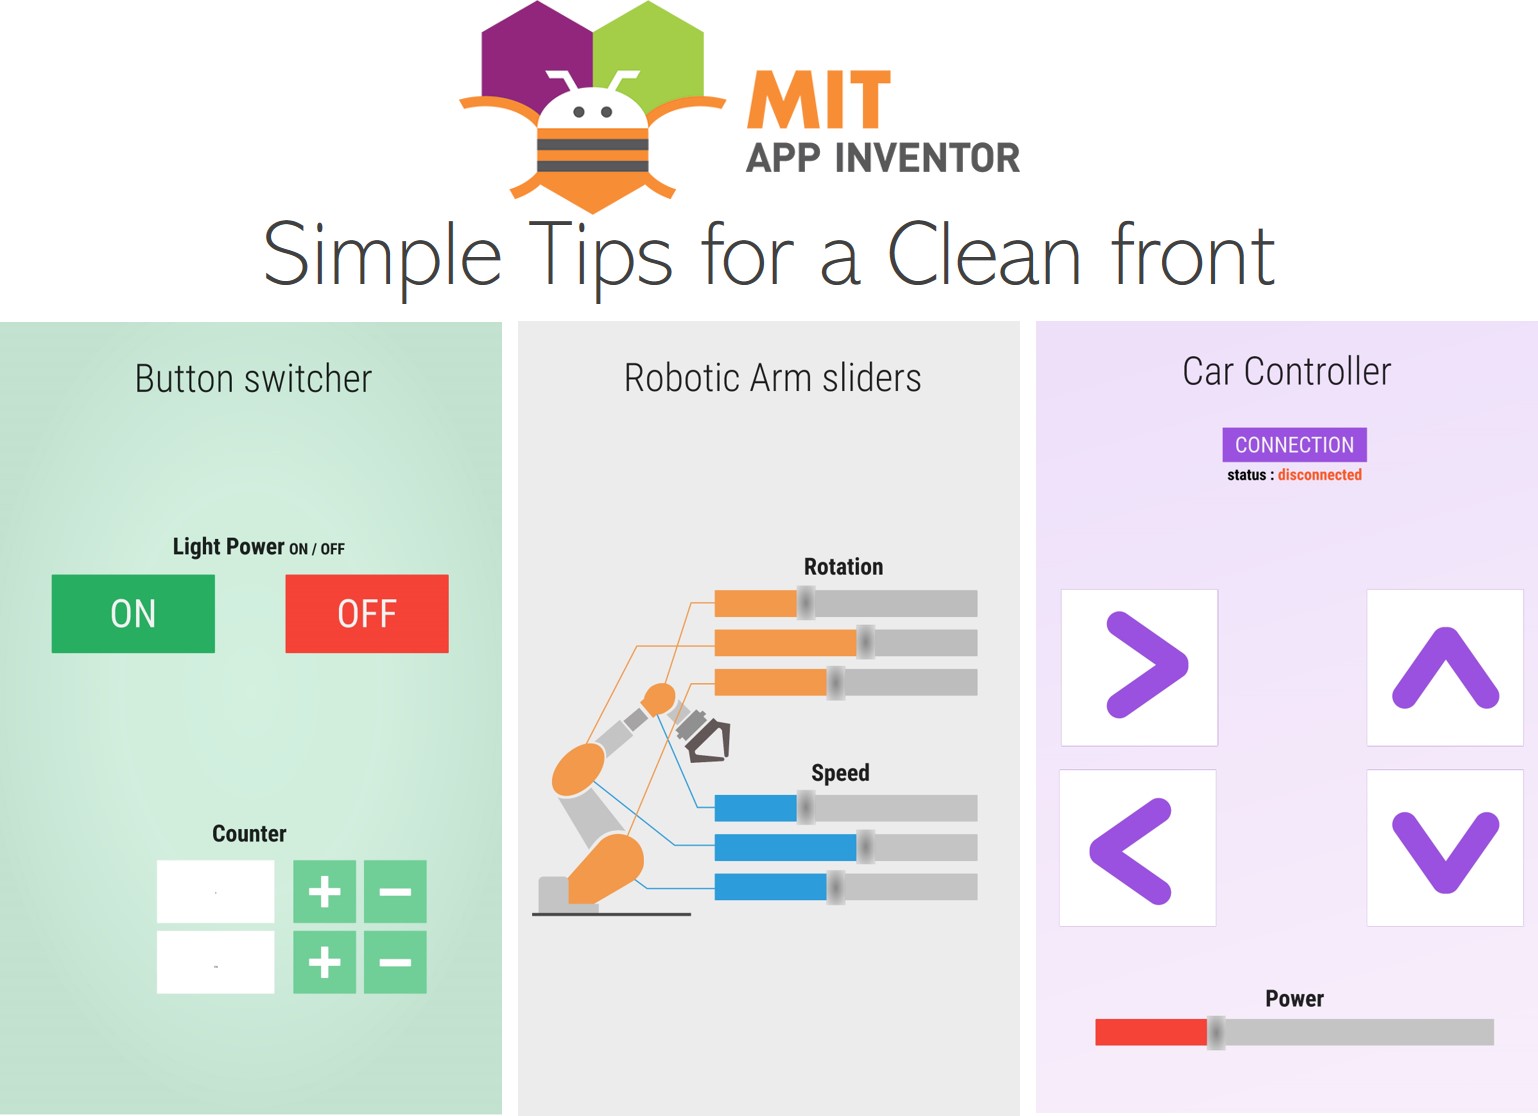
No code this time, only tips for a smooth app like the 4 example on top!
Supplies
Introduction


This Instructable is for everyone learning or using App Inventor 2, software developped by MIT.
MIT AI2 is a free, simple and amazing smartphone app development, which is perfect for every DIY Arduino or electronic device. But his simplicity also make him pretty limited, especially when you are trying to make your app look esthetic.
The purpuse of this Instructable is to give you some tips to create a cool front for your future app, which will look simple and elegant, as every front should be.
We're going to see the basics to create an App which is going to look like the 4 Example showed.
Let's get started !
PS: If you love this project, you can vote for me in the Classroom Science Contest. Thanks you so much !!
PS2 : Some English mistakes will be made, forgive me :)
The BackGround

I've made the further creation on Figma, a vectorial free software, like an advanced paint, that allows you to create easily shapes and colors: It's very intuitive, i recommand it : www.figma.com !
You don't need to use Figma for your front, but i like to make the design before creating the application itself.
As you can see on the picture, the background needs to be very soft, since we are going to put some buttons, images, etc... on it...
I recommand a 30% transparency on the color that you use, and a background with only 1 color.
The Colors

The colors that you choose and their intensity are very important in an App.
The first advice that i give is to choose 3 color maximum (+ black and white) : we're still trying to be soft :)
For the 4 example that i made, here are the advices that i've chosen (you can also see them on the picture, as a recap):
The Background : a soft and light background with no shape (30% transparency of the color). Remember this color to integrate your buttons !
The Title : Thin text in the dark grey color looks good! For the following subtitle and text, stay in black, but change the shade of black (grey when it's not a big information), and play with the size and attribute that you can (bold, italic).
The Button : A single color, in general your background color with (80-100% transparency), then black or white to finish it.
The Sliders : don't use 2 colors for them, only one color on the left side, and the right side in a shade of black.
That's it !!
Less is more !!!! Don't use too many colors, shape and size, Be subtle !
Set the Right Parameter of the Screen

On the main screen of the App Inventor Designer part, you can select the main caracteristic of the screen.
On Screen1 -> Properties, follow the following action to delete the extras frame from AI2 that doesn't really look good ^_^.
1 - Orientation of the screen
Choose only one orientation because the application doesn't adapt very well when you turn it.
I chosed the Portrait orientation.
2 - Disable 'Title Visible' and 3- Disable 'ShowStatusBar'
I disable the title and the status bar, because it add some bar on the app, that are not very esthetic (in my opinion).
4 - Dimension
The dimension of the common app is 505x320 (height x width). Remember those dimension to create your background and pictures (at least have the same proportion) ! If you use Figma, you can create the right size of your app instantly.
5 - Sizing
If you choose Fixed, then the app will be 505x320 sized. If you choose Responsive, then the app will fit your smartphone, but beware, you will have to adapt your pictures.
How to Do It :)

To reproduce the first example, we're going to follow 3 steps (like the pictures) :
1 - Take the dimensions
What's cool on figma is that you can see the size of your frames and object, so you can see what size will be your objects, and the blank ! The blank are very important on App Inventor because we are going to create them by putting invisible label!
2 - Fill the blank will invisible Labels
As you can see on the second picture, we reproduce the front that we want by placing label with the size appropriate. Then make it look invisible (unclick the button 'visible').
Also use the Layout -> Arrangement to place your items
3 - Try to create your Buttons on the software
When possible, create your buttons on the AI2 website, they will be in high quality and the small animation 'on click' will be kinda cool :). When you cannot make your own buttons, you can create them on another software, and then import it as an image.
The Result :)


On the left : a screenshot from my smartphone on AI2.
On the right : the draft made on Figma.
I really hope this Instructable will help you build magnificent application on AI2.
Thanks you so much for watching. If you need some further advices please let me know...
Another Instructable on the backend of AI2 will be released soon !
Respectfully Yours,
Thomas, from Technofabrique