Adjustable Frequency of LED Using an Arduino
by jadenrbiron in Circuits > Arduino
235 Views, 2 Favorites, 0 Comments
Adjustable Frequency of LED Using an Arduino

Created an adjustable LED in my mechatronics class that utilizes an Arduino.
Supplies

- 1 LED
- 1 Potentiometer (POT)
- 6 jumper wires (The wires that can connect to a breadboard)
- breadboard
- Arduino
- 1 100 Ohm Resistor
- USB type B wire
- Computer (one that could support Arduino IDE)
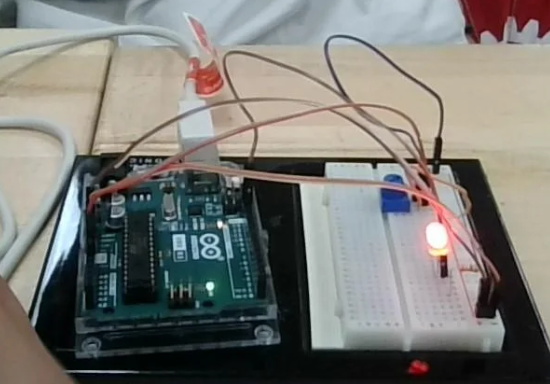
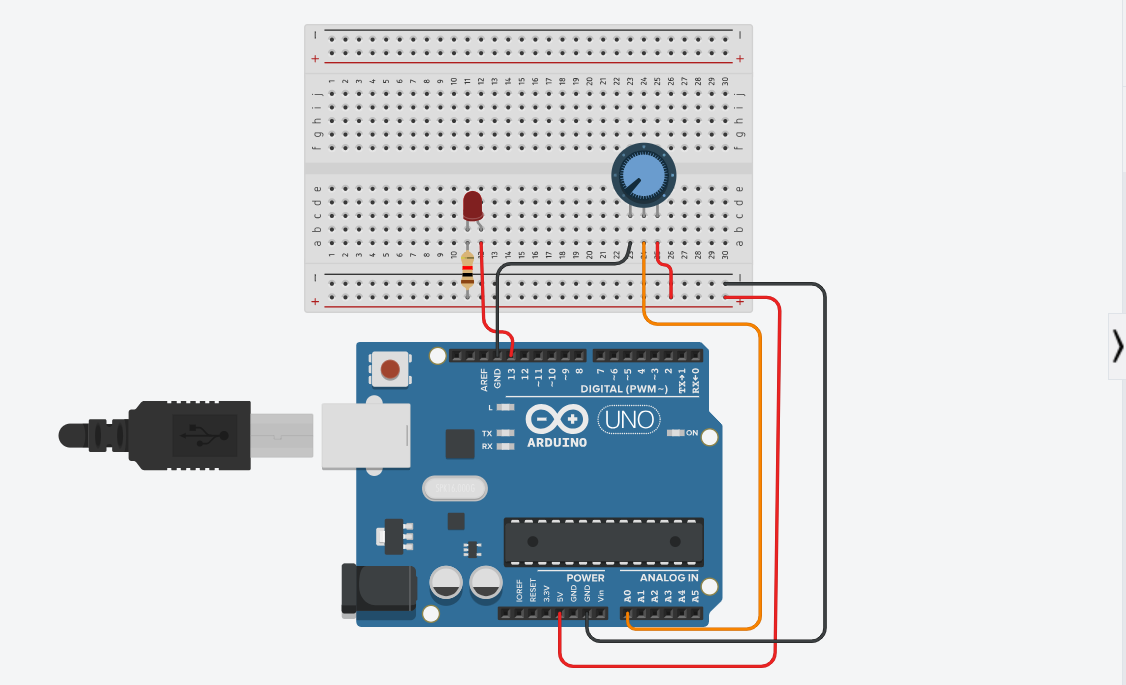
How to Assemble
.png)
.png)
- Have 1 wire be connected to the ground of the Arduino to be connected to the ground (negative) of the breadboard
- Add have 1 wire be connected to the 5V port on the Arduino and the other side of the wire to be connected to the positive of the Breadboard.
- Put in your LED onto the breadboard
- Put in your 100 Ohm resistor into the ground of the breadboard and the anode (negative) of the LED which is the shorter side of the LED
- Connect 1 wire to a numbered pin in the Arduino and have it connect to the positive of the LED (the longer side).
- Put your potentiometer into the Breadboard
- Have 1 wire be attached to the positive on the bottom of the breadboard and the right pin of the Potentiometer
- Have another wire be attached to the negative on the bottom of the breadboard and the left pin of the Potentiometer.
- Have one wire be connected to an analog port of the Arduino and the middle pin of the potentiometer.
How to Code the Arduino
- Open up the Arduino IDE application on a computer that supports it (chromebook doesn't support Arduino IDE)
- First, before the void setup option, you have to define your pins that you're using to power the circuit
- int sensorValue = 0;
- typeint sensorPin = A0;
- int ledPin = 13;
- Now that you're finished with that, go to void setup and type; pinMode(ledPin, OUTPUT);
- Now, in void loop, type :
- sensorValue = analogRead(sensorPin);
- // turn the ledPin on
- digitalWrite(ledPin, HIGH);
- // stop the program for <sensorValue> milliseconds:
- delay(sensorValue);
- // turn the ledPin off:
- digitalWrite(ledPin, LOW);
- // stop the program for <sensorValue> milliseconds:
- delay(sensorValue);
- Now the code of the Arduino should work and you should be able to adjust the frequency of the blinking of the LED's.
References
.png)

This project is from my Mechatronics 1 class taught by Mr. Sweet.