DIY Adjustable Phone Stand
by AIMHIGHMJ in Living > Office Supply Hacks
1441 Views, 3 Favorites, 0 Comments
DIY Adjustable Phone Stand
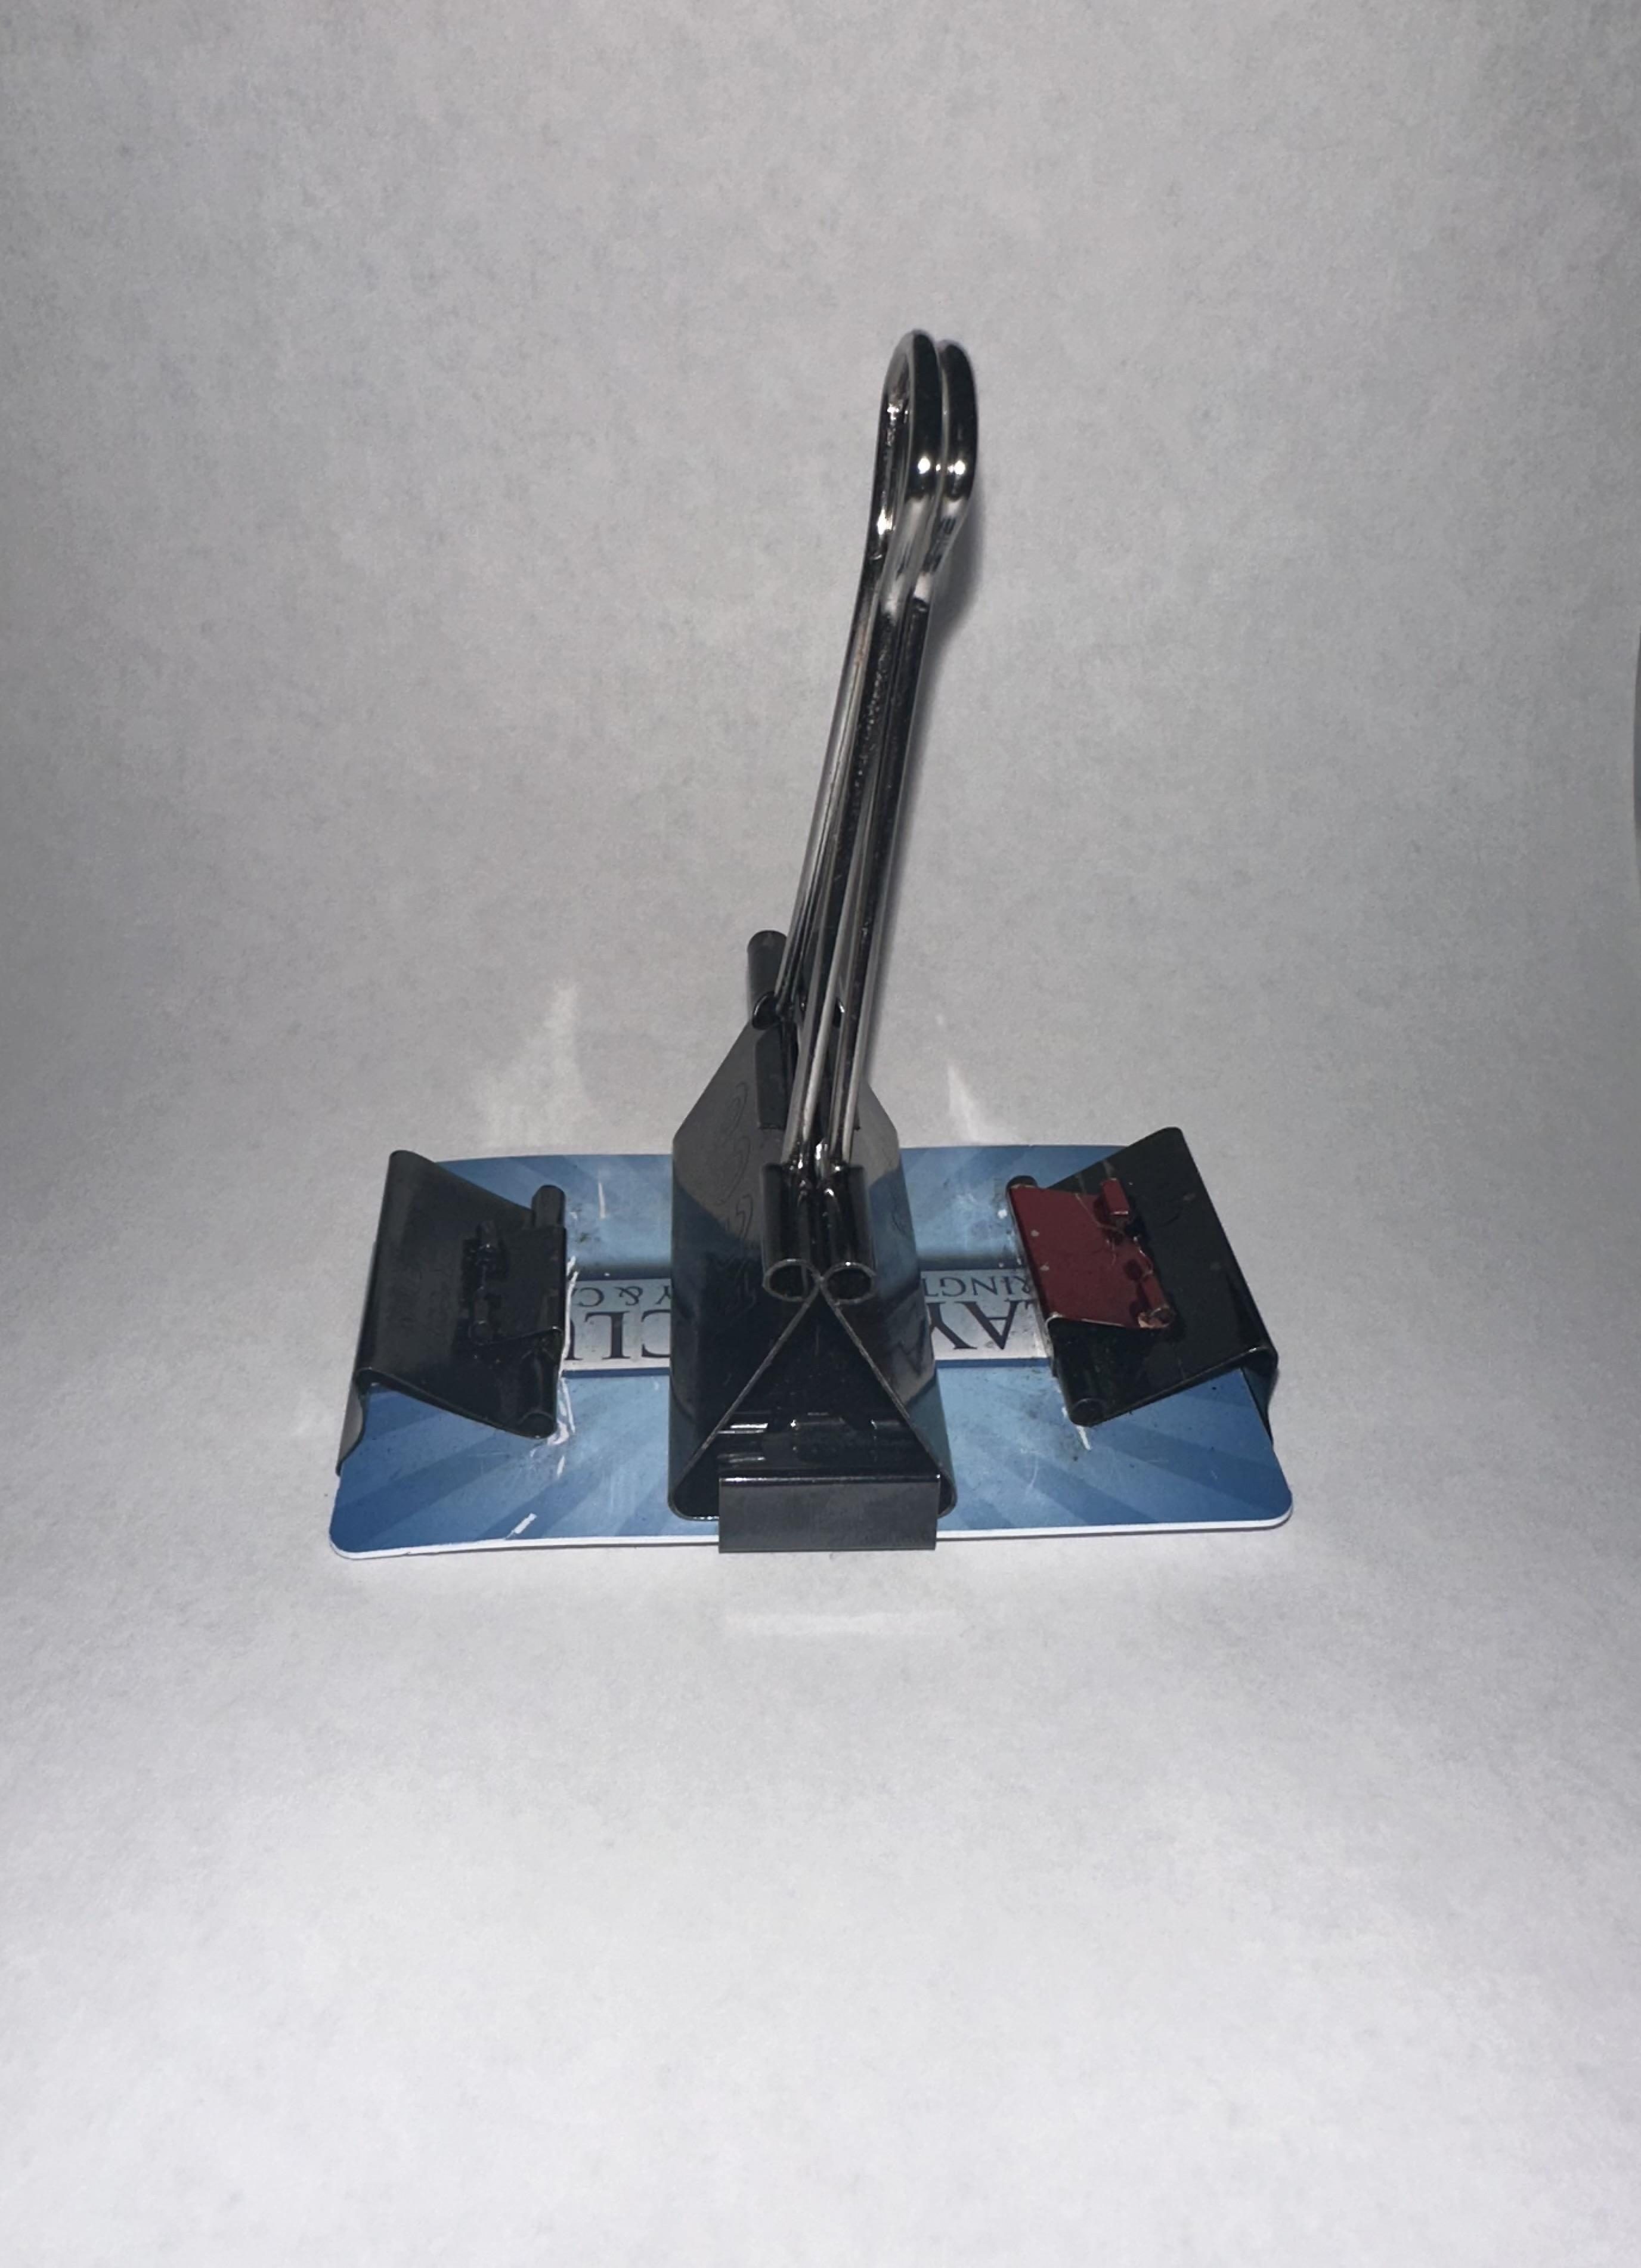
Create a functional phone stand in 5–10 minutes using common office supplies and credit card sized base connecting pieces together using tension.
Disclaimer
This content is provided for informational purposes only. Use appropriate caution and follow standard safety practices. The author assumes no responsibility for any resulting damage or misuse. It is recommended to use a protective case to ensure the safety and longevity of your device.
Estimated Time: 5 -10 minutes Skill Level: Beginner
Supplies



- 1 credit card–sized base (3.370" × 2.125")
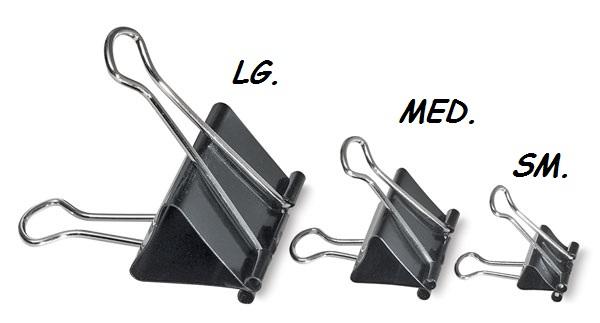
- 1 large binder clip (with handles)
- 2 medium binder clips (no handles)
- 4 small binder clips (no handles)
- 2 paper clips (or similar thin, firm wire such as binder handles or coat hanger wire for added stability)
- Needle-nose pliers
- Protective gloves
Prepare the Sliding Tracks

- Straighten two paper clips. Insert them through the holes of two small binder clips so they face each other. Ensure the paper clip sides are positioned on top.
Assemble the Side Support

- Interconnect the clamping edges of the remaining two small binder clips with the two medium binder clips. Position the small clips facing downward.
Attach Components to the Base

- Slide the small binder clips (with tracks) onto the long edges of the card. Then slide the medium binder clips onto the short edges.
Secure and Finalize


- While adjusting their length, bend the ends of the paper clips into small L-shapes so they fit securely into the holes of the medium binder clips.
- Turn the stand over and move the small clips along the tracks to opposite corners. Slide the bottom of the large binder clip into them to secure it in place. Adjust the large binder clip until it is evenly positioned.
- Finally, place your phone into the base’s open groove.
Optional Enhancements
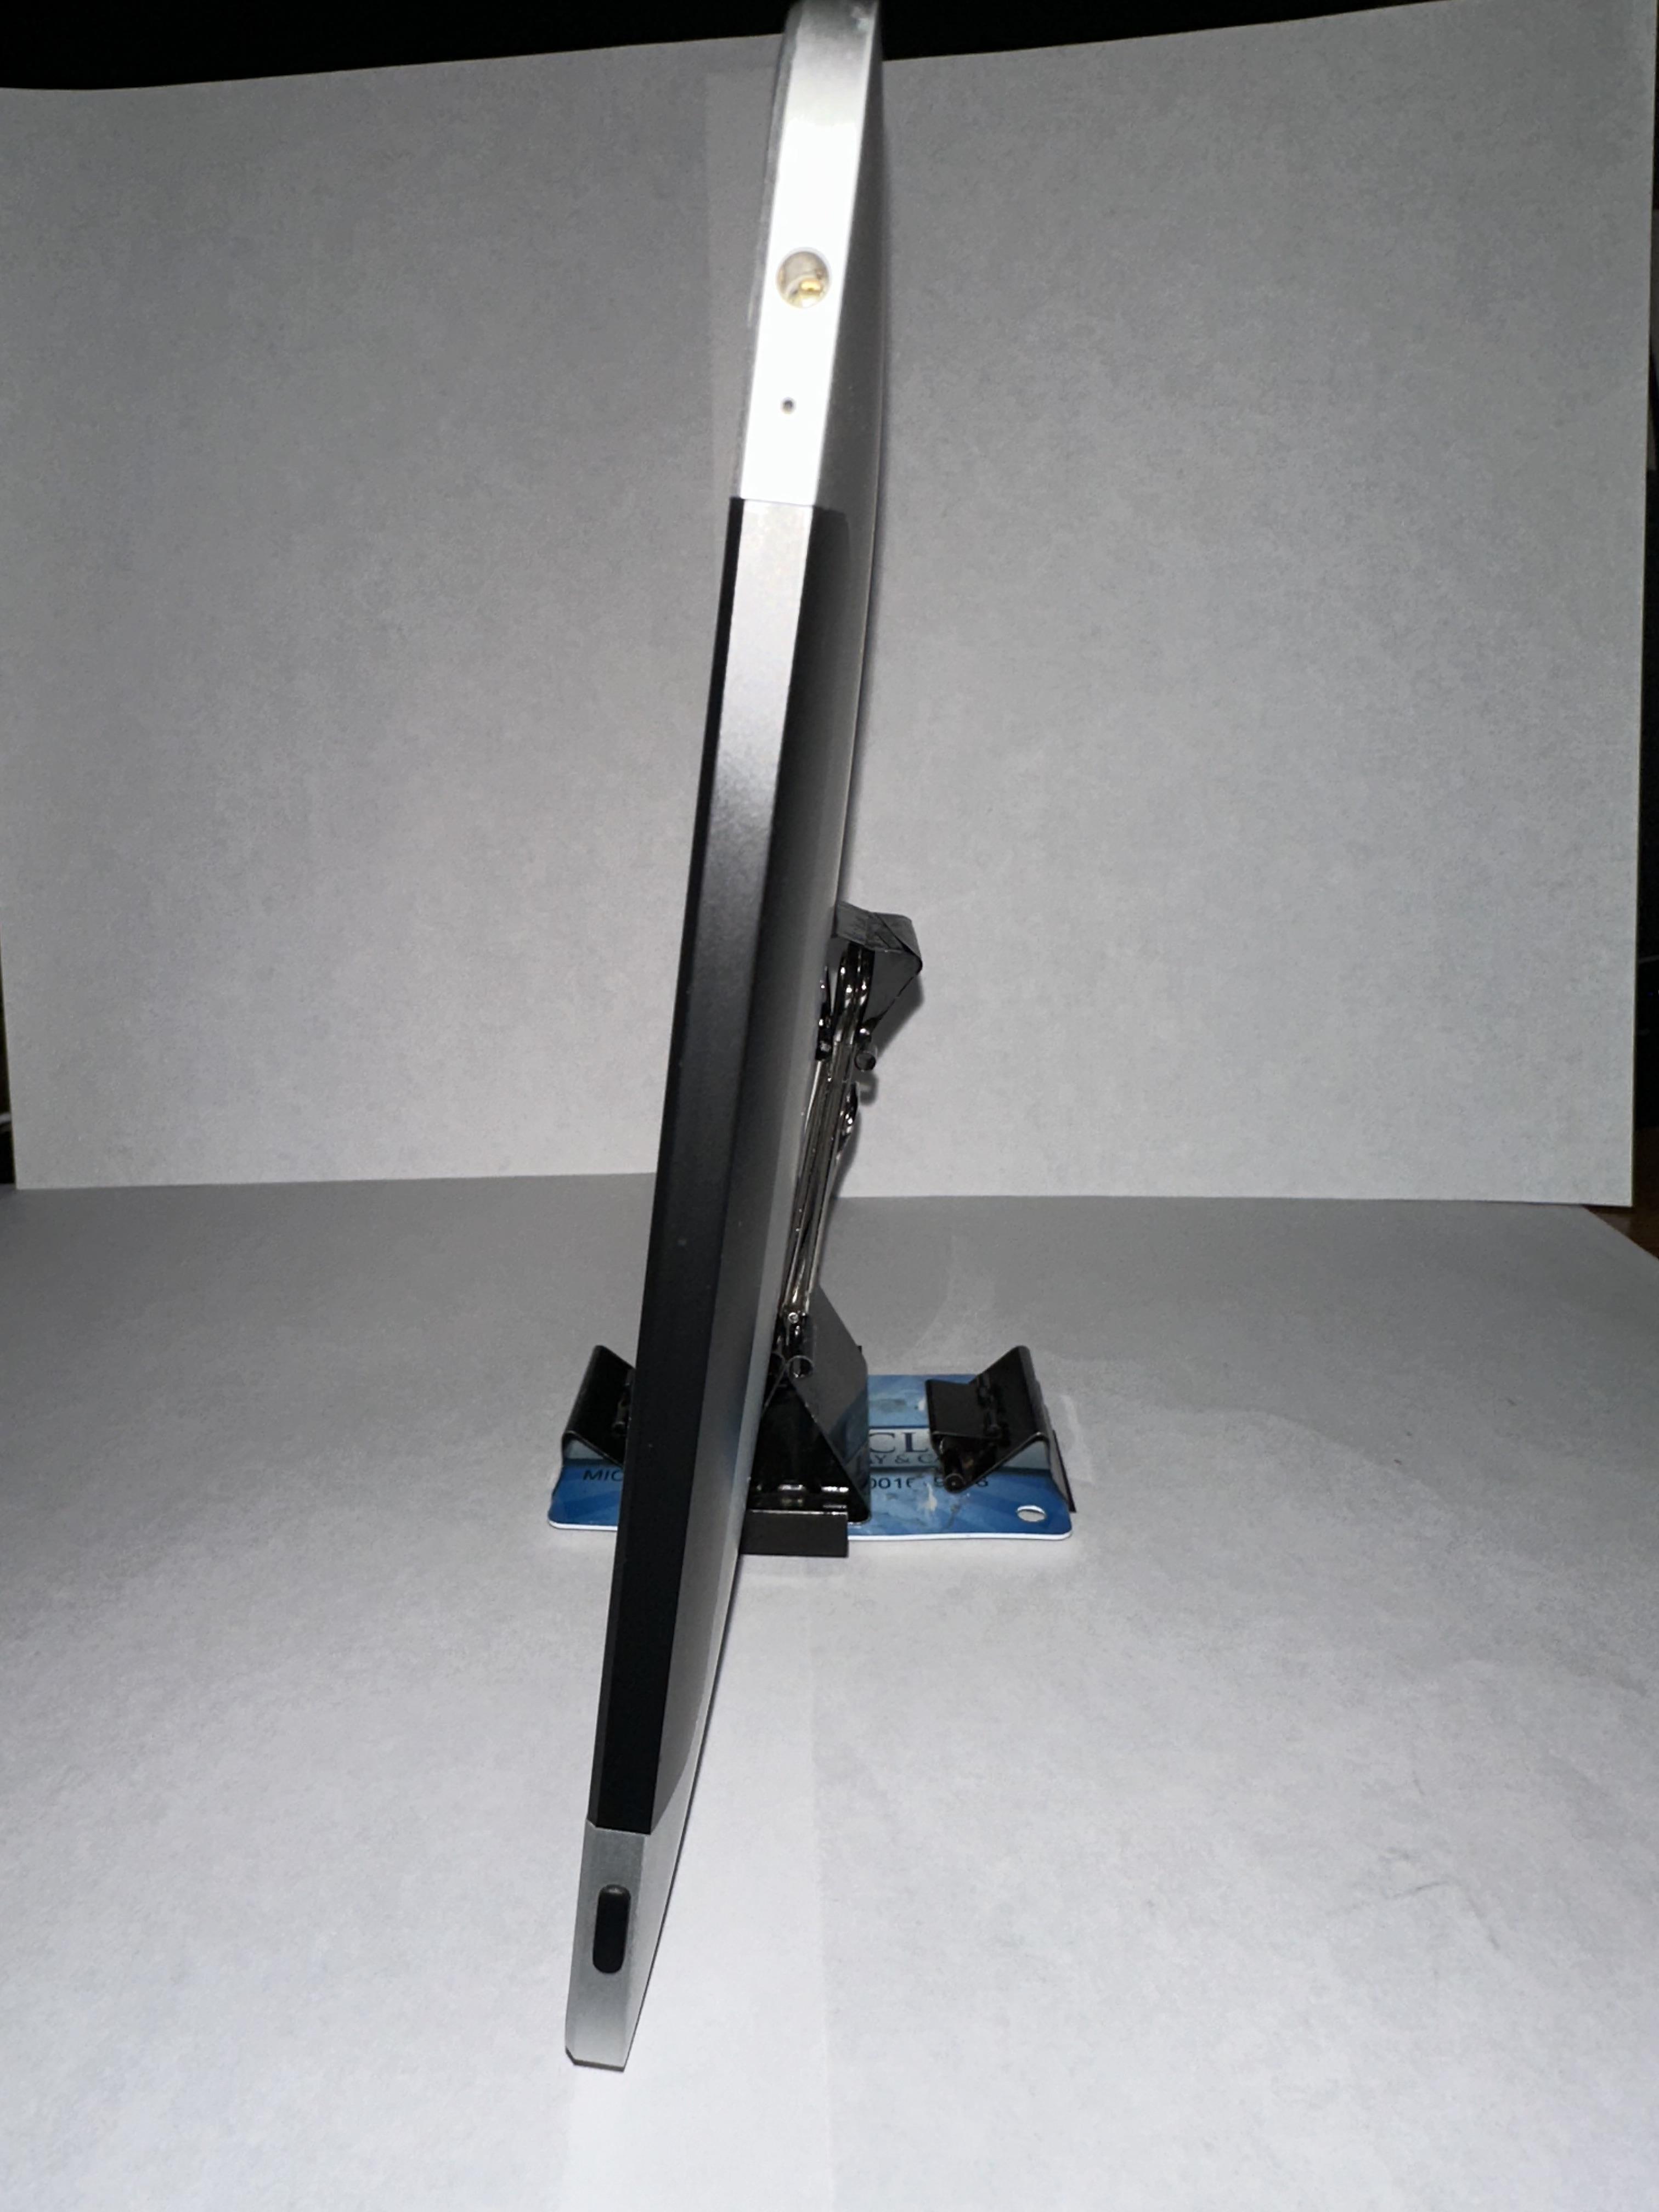
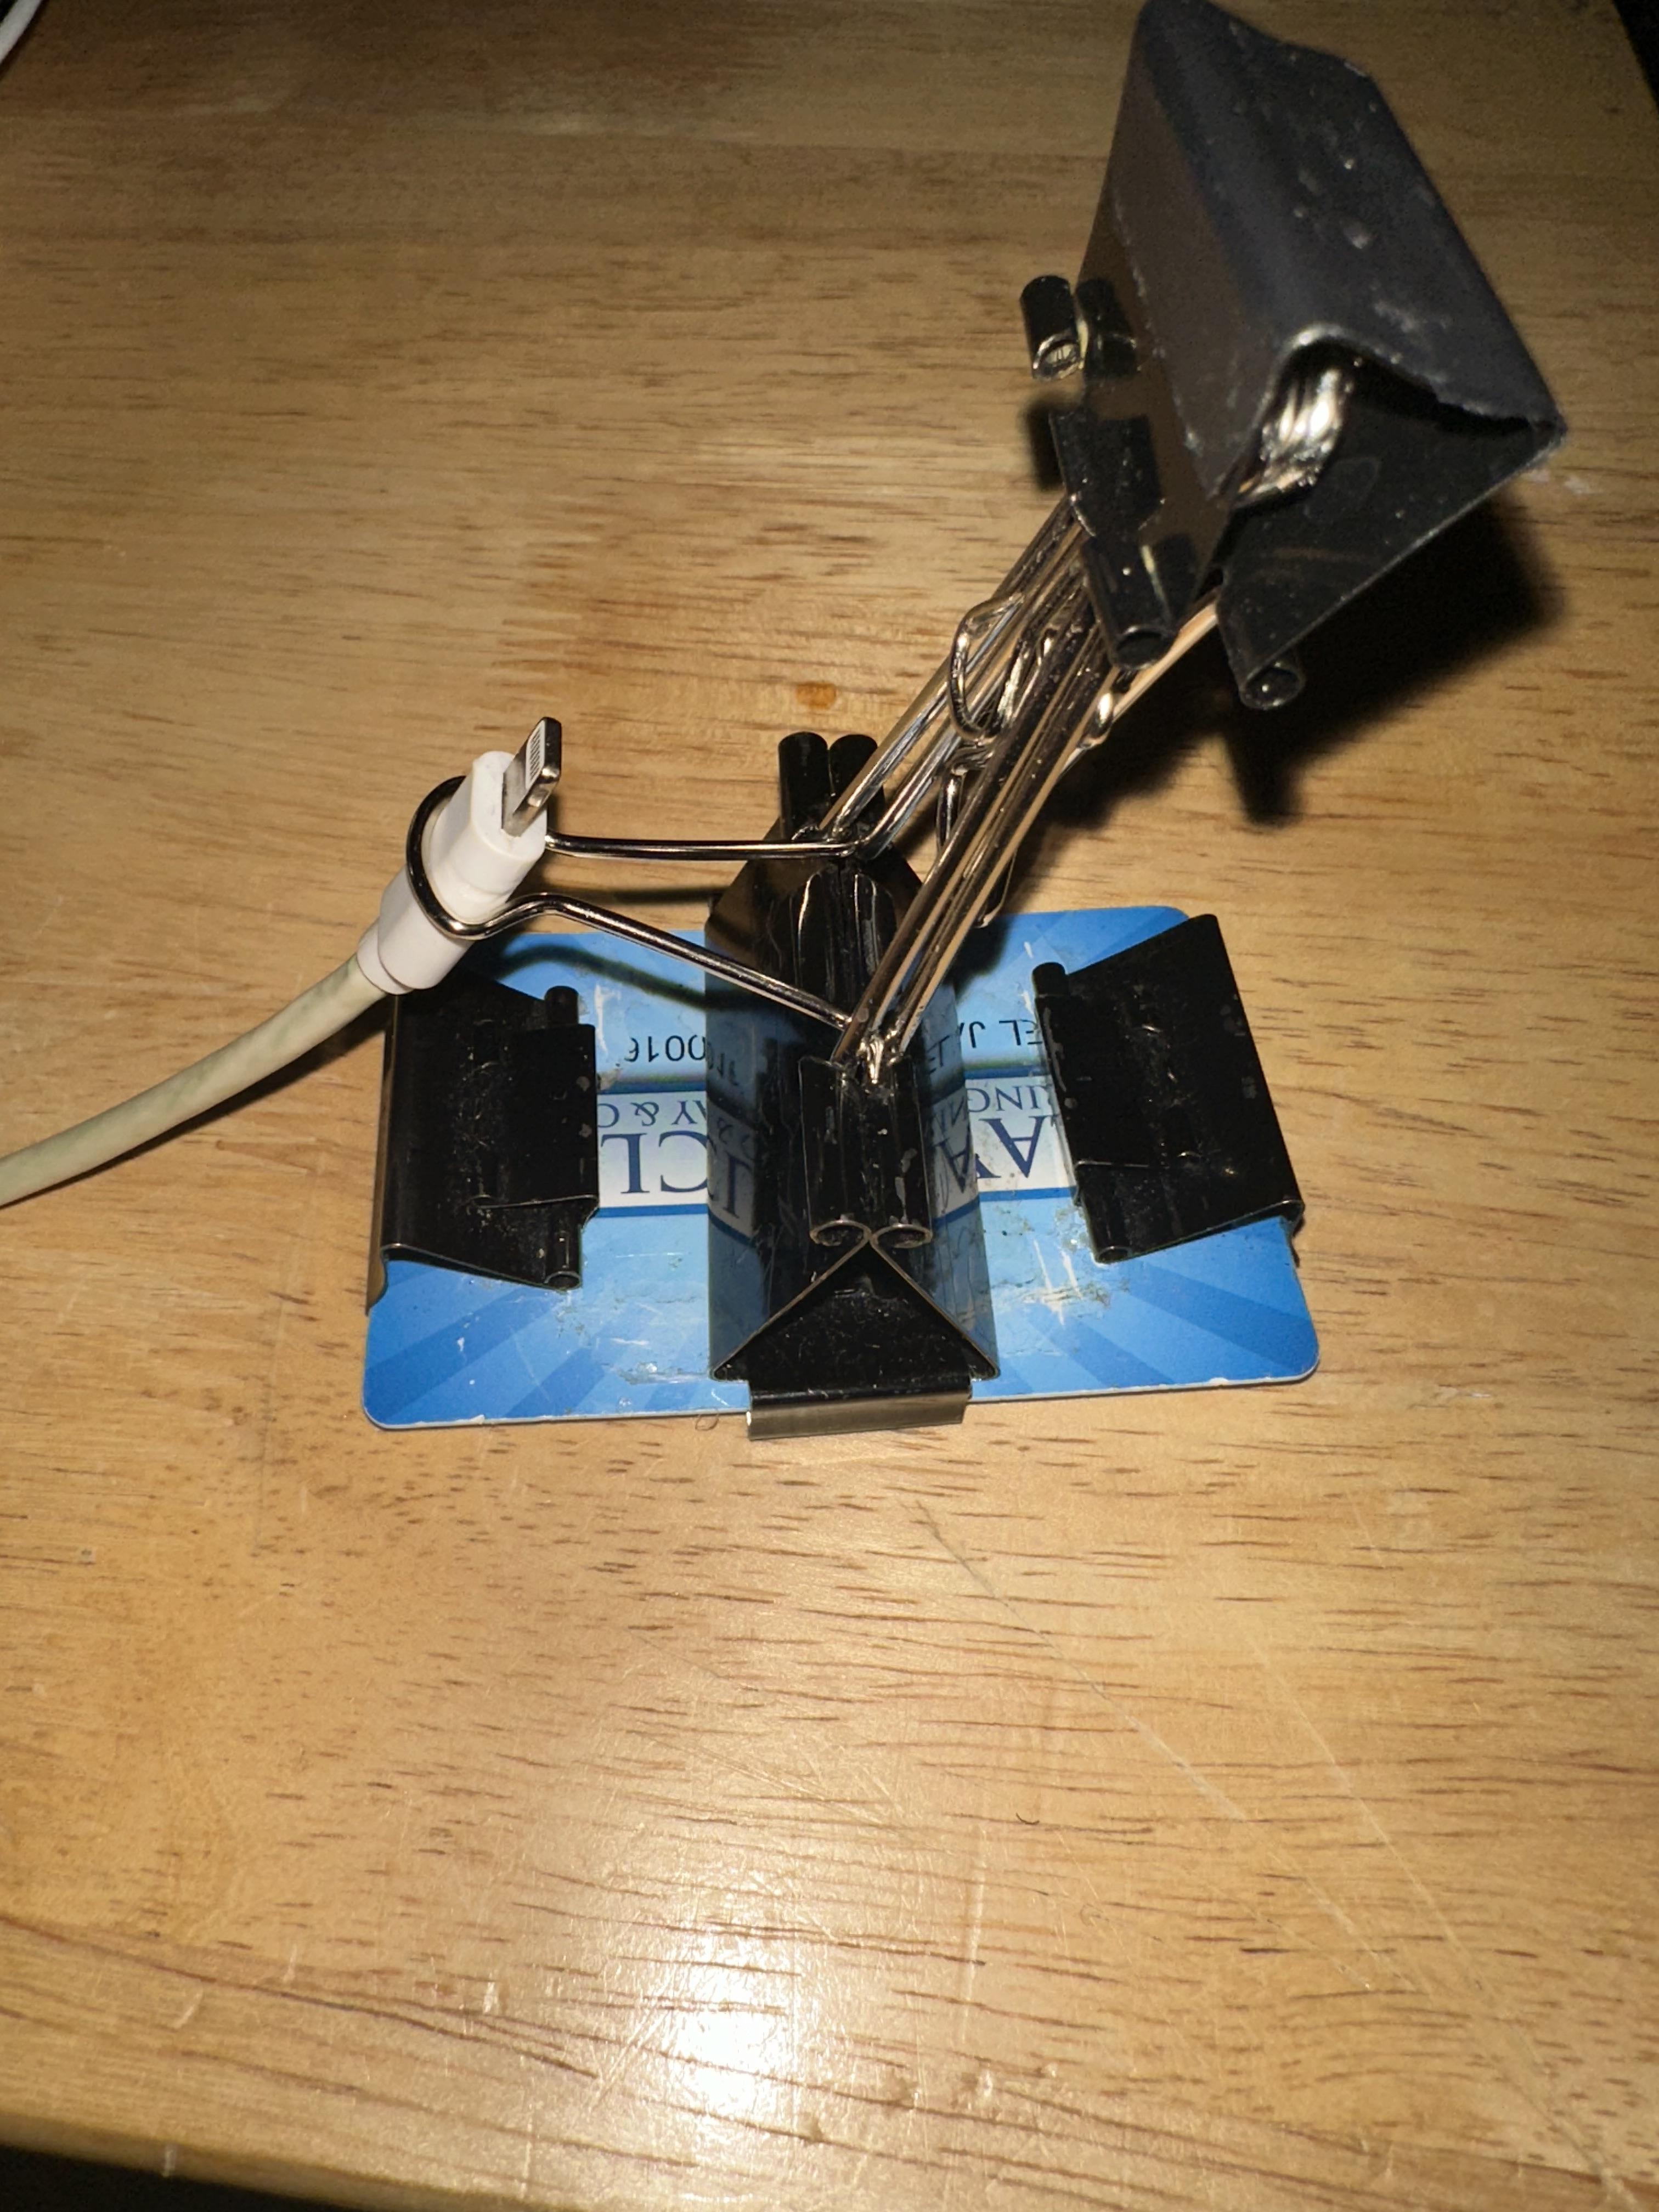
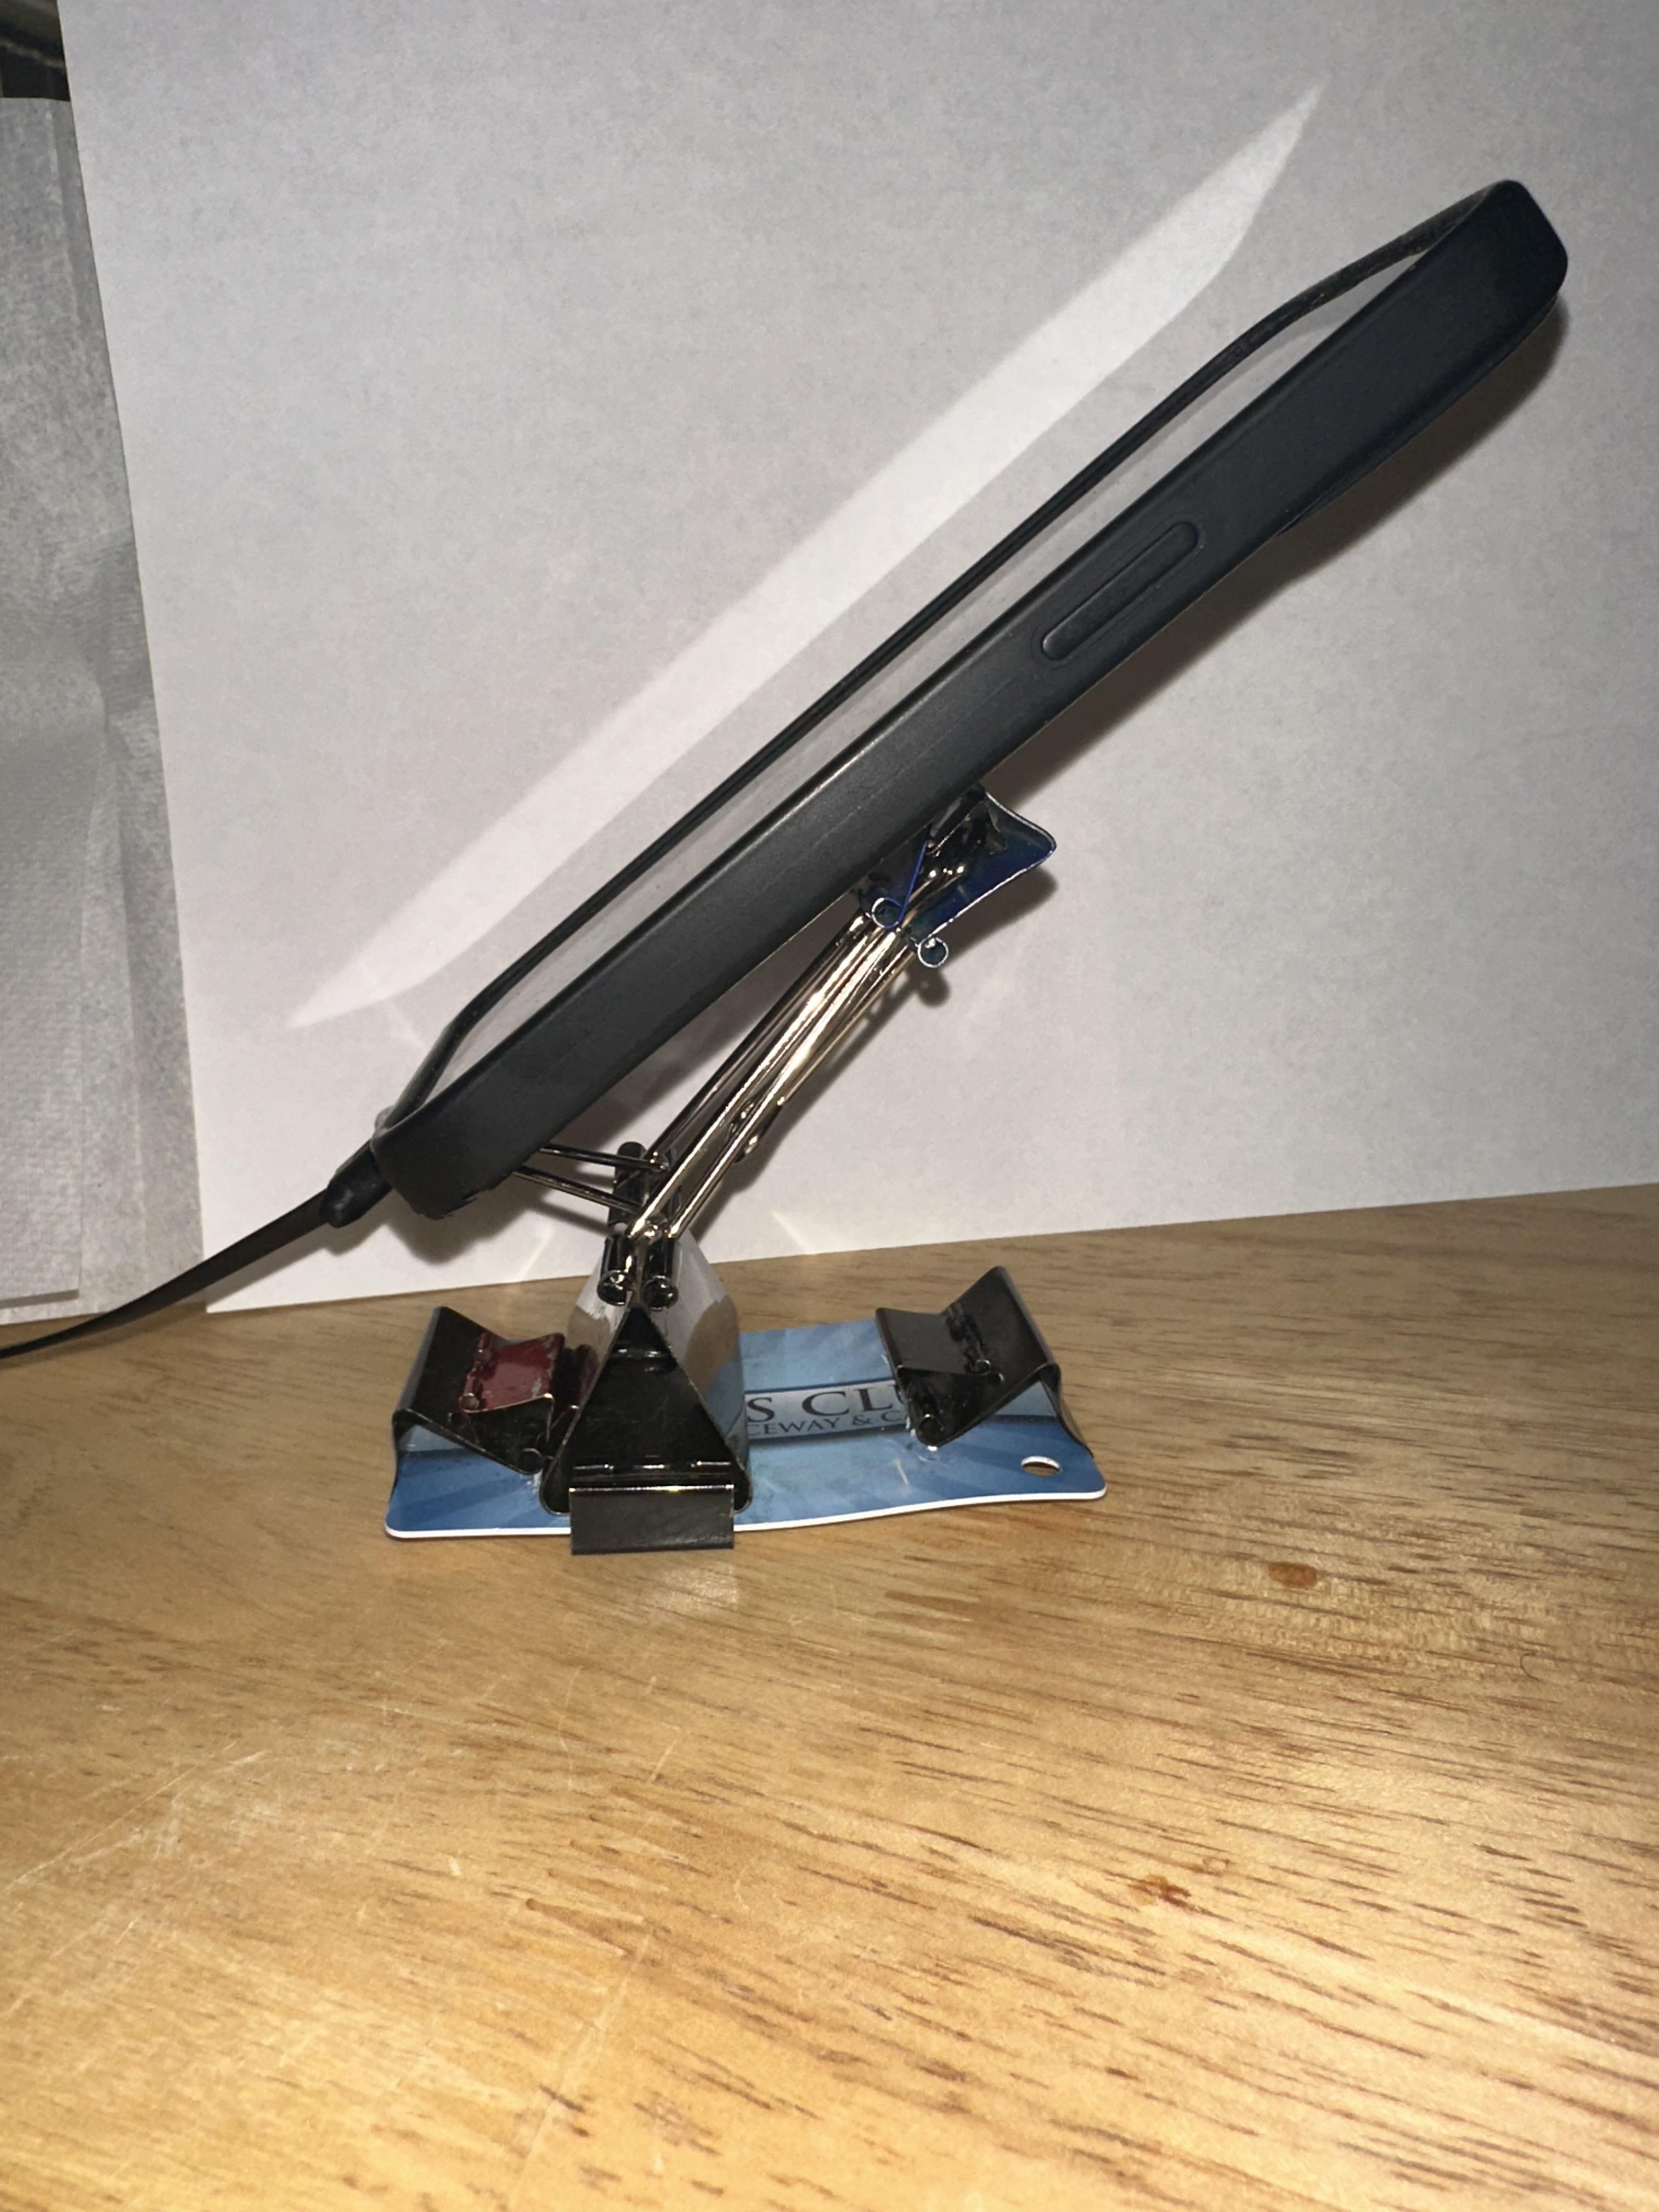

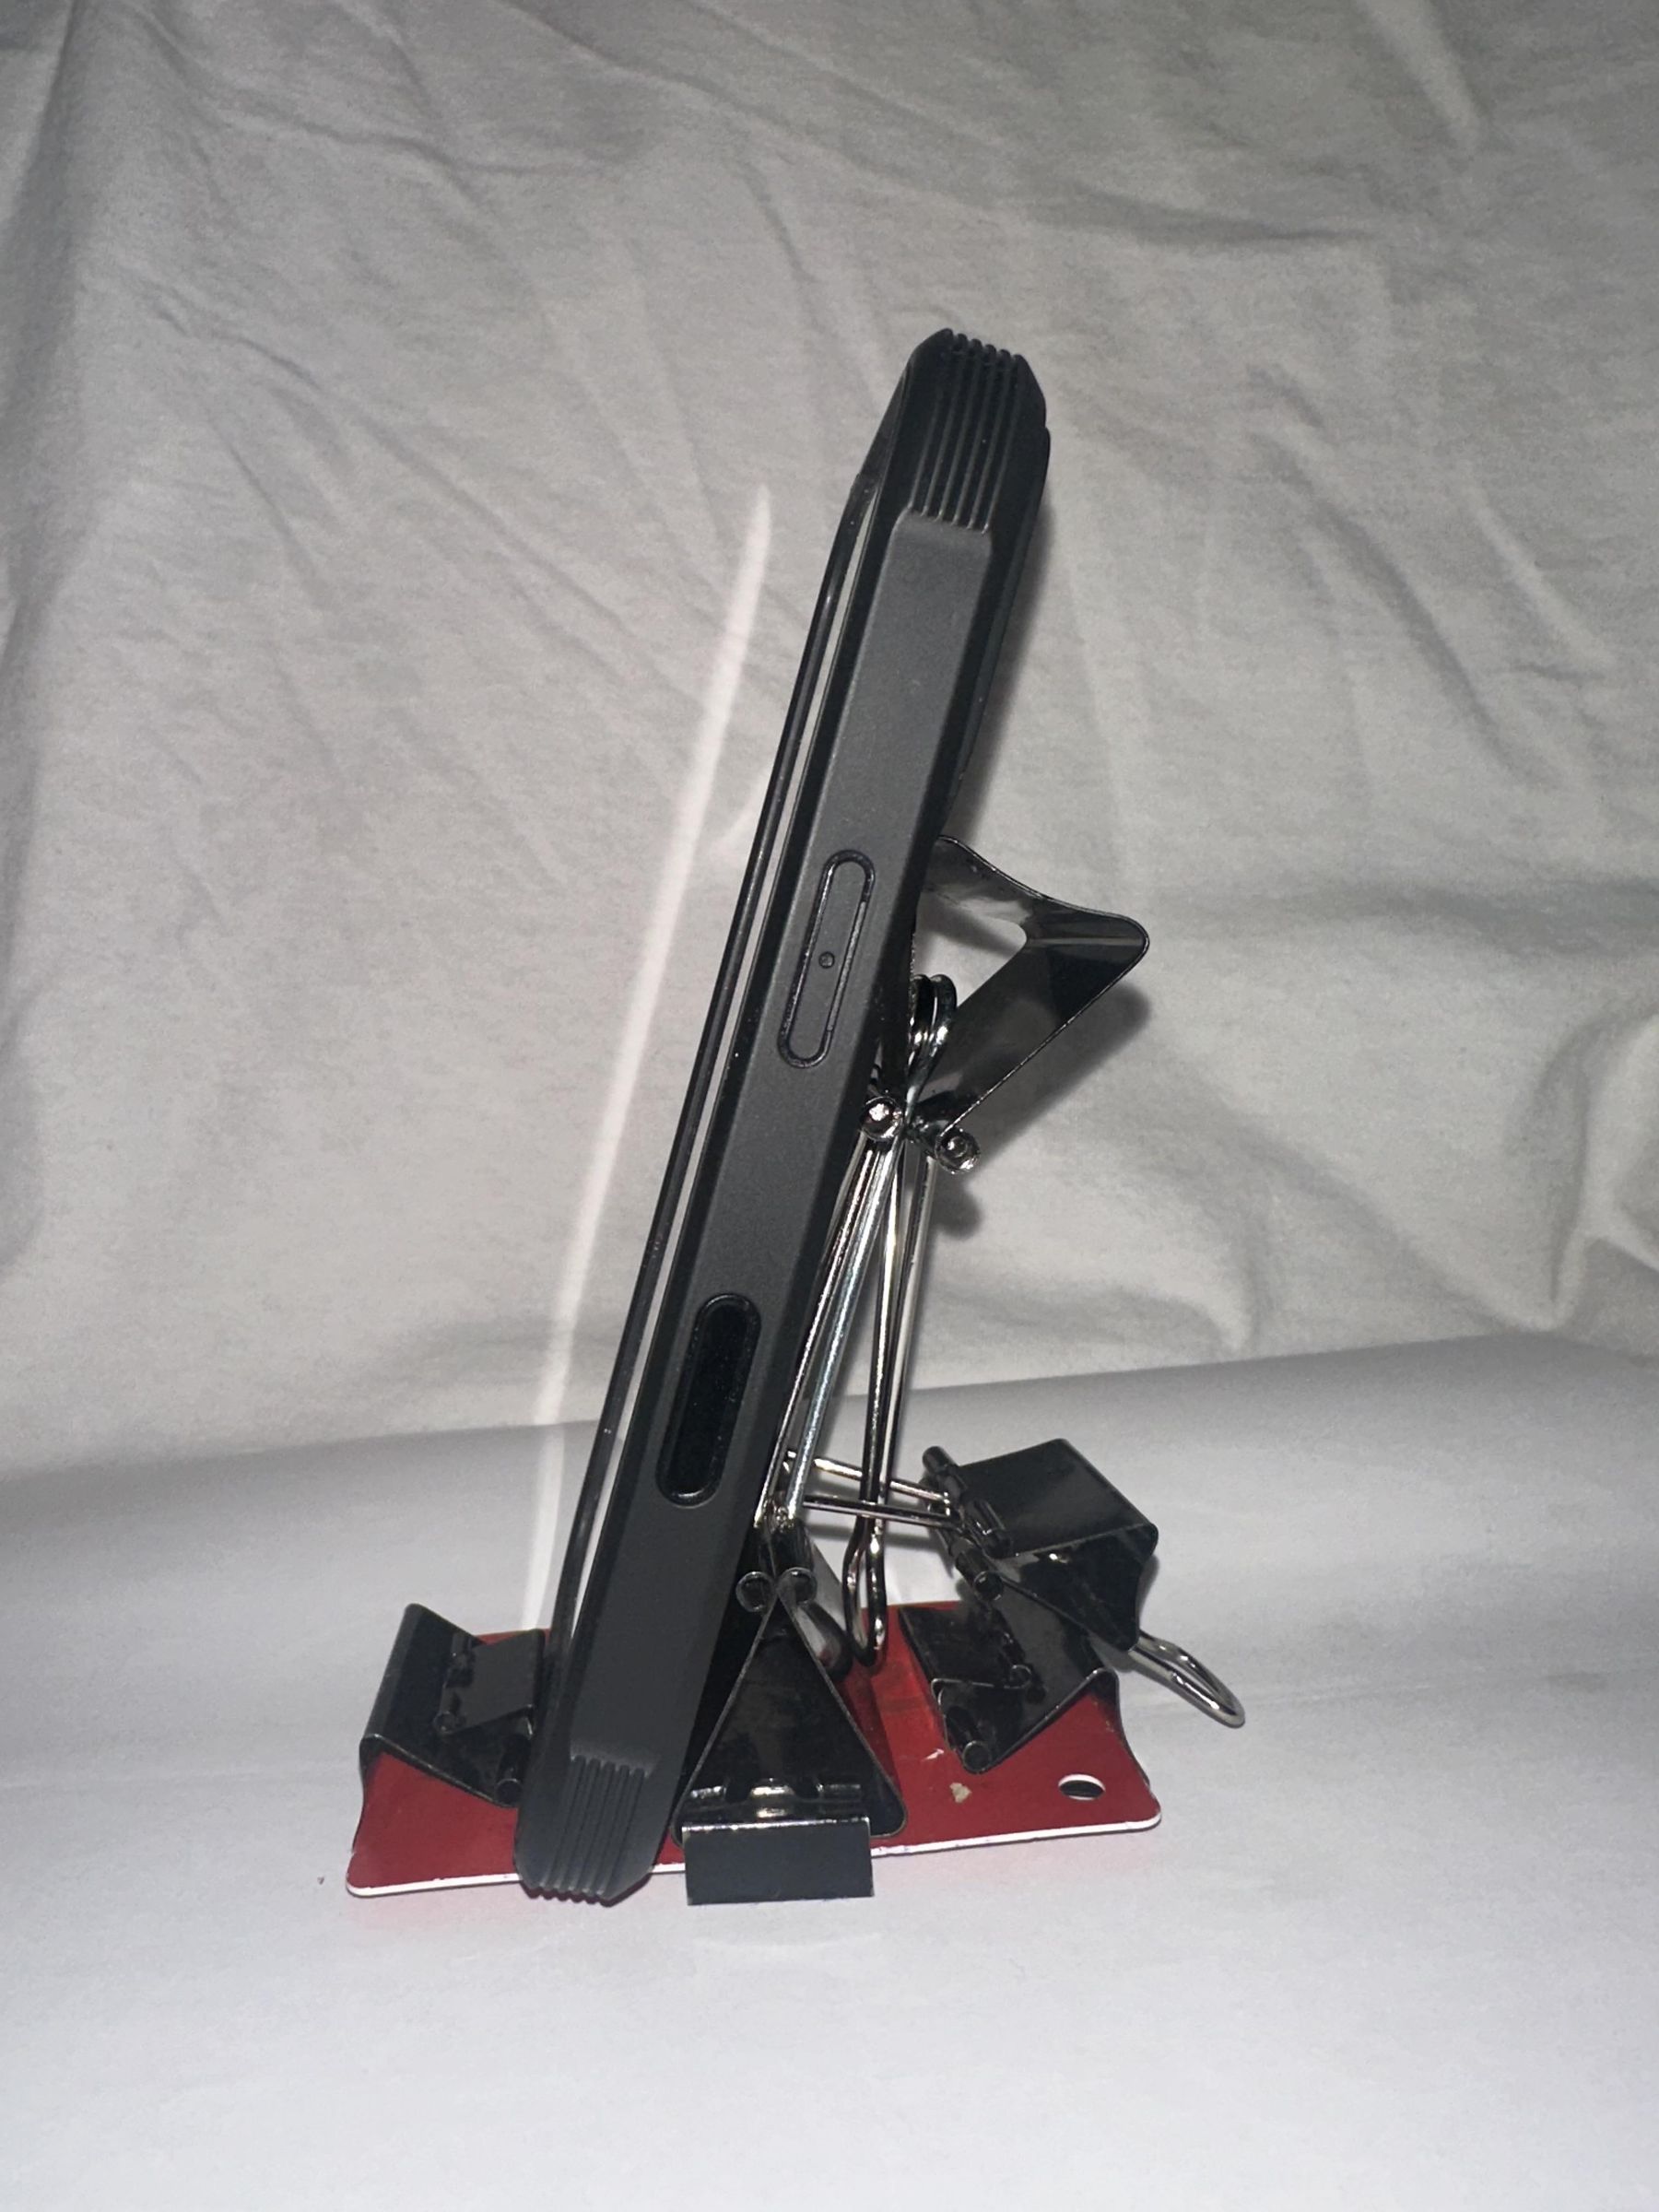
Back Support (for Tablets or Larger Devices)
- Use the existing metal handles on the large binder clip to enhance support by attaching an additional medium or large binder clip (with handles). Close the handles of the extra clip to provide stronger back support and secure it in place.
Charger Cord Support (for Smartphones)
- Use the binder clip handles to guide a charging cable. Insert the cable between the closed handles of the large binder clip so it can pass through neatly. Wireless charging is often the most convenient option.