AeroWear : Don't Carry the Fan. Wear It
by SUCHIR2004 in Design > 3D Design
1151 Views, 7 Favorites, 0 Comments
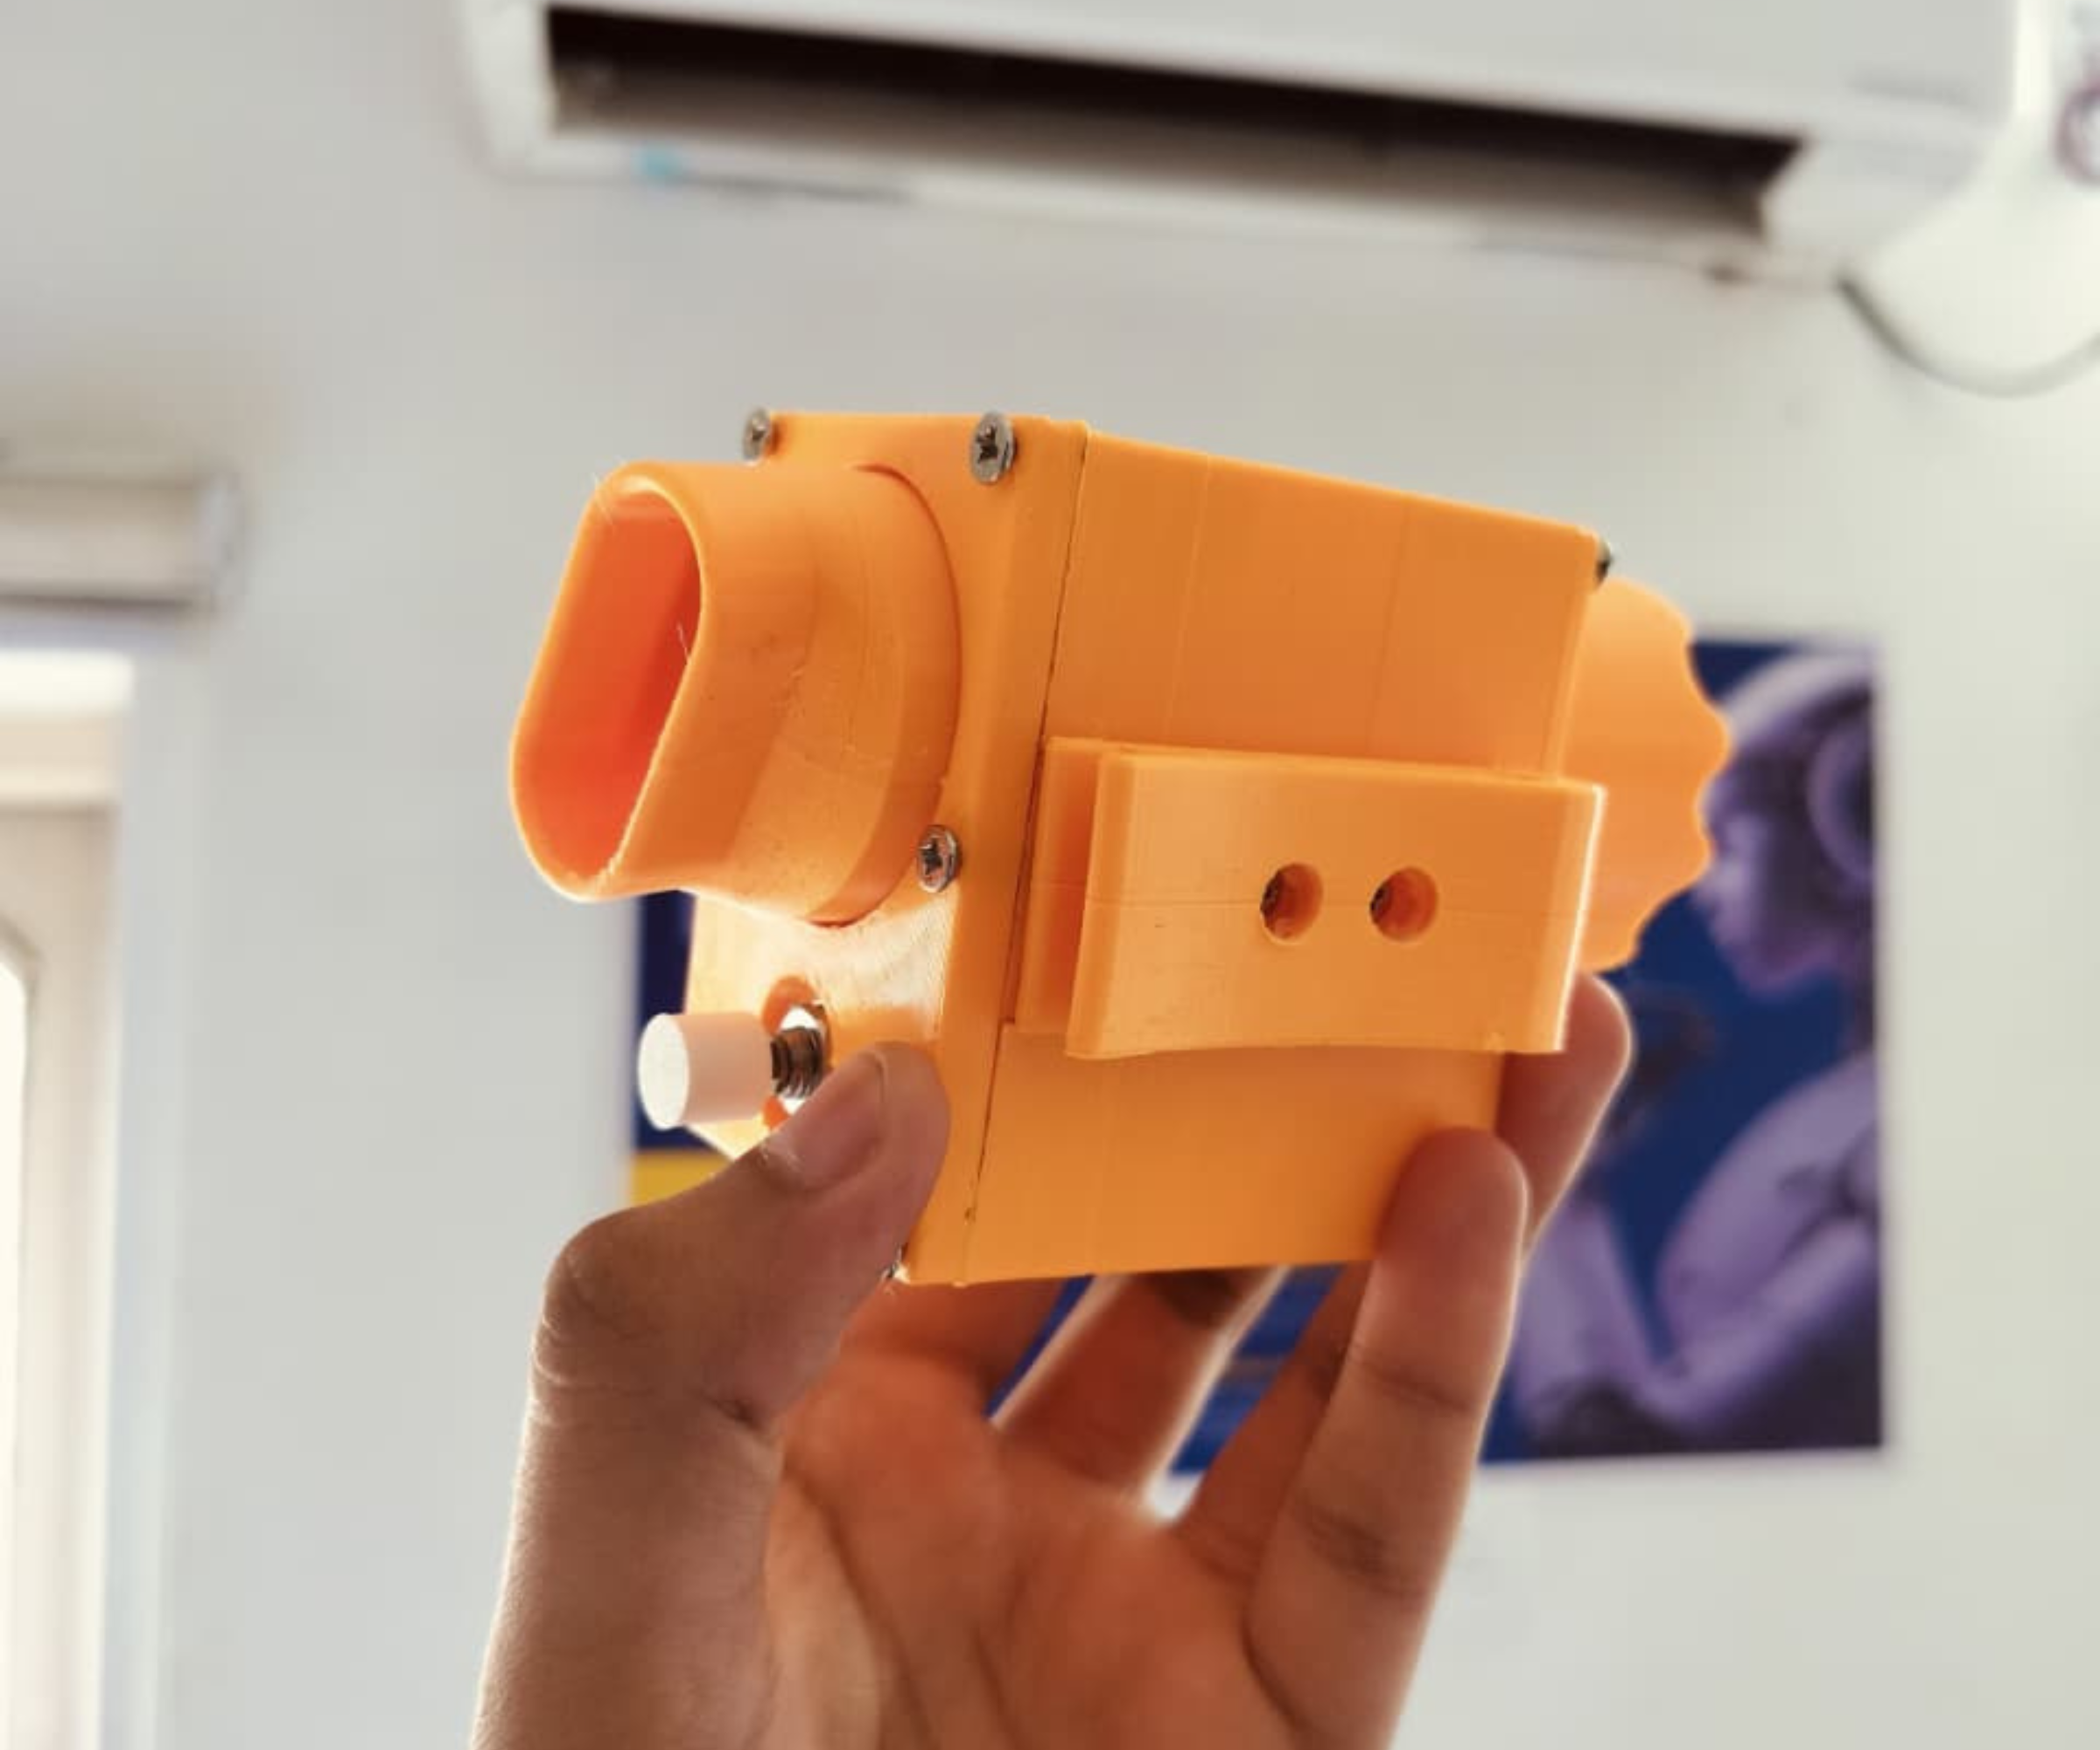
AeroWear : Don't Carry the Fan. Wear It
.jpeg)
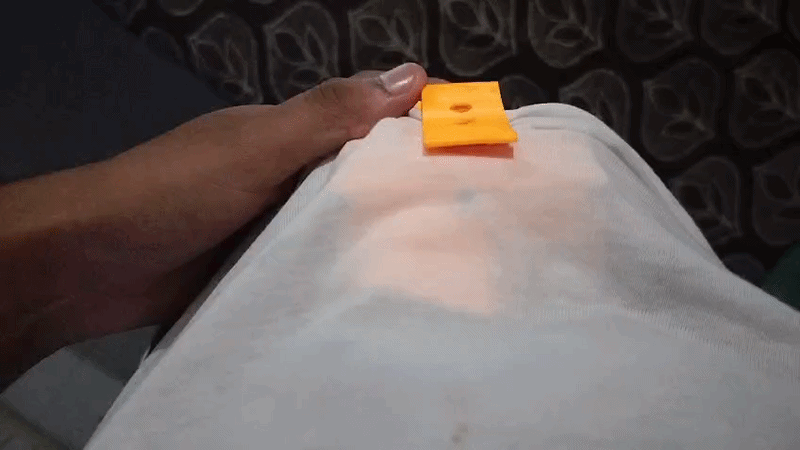
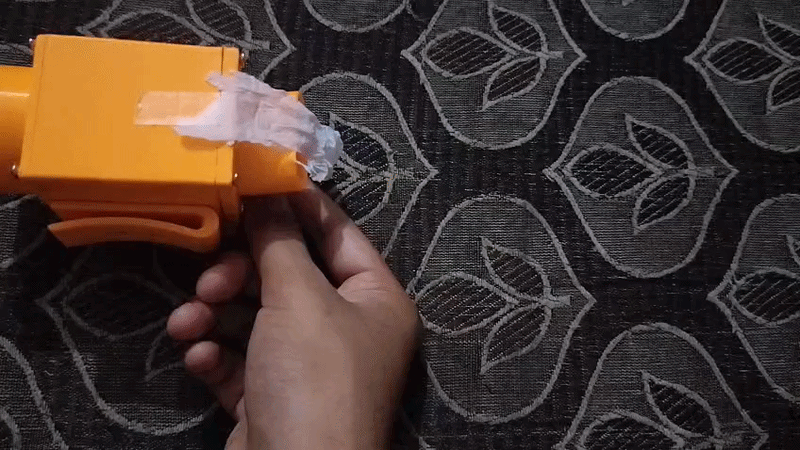
Summer heat can quickly turn a normal day into an uncomfortable one. As temperatures rise, our bodies start sweating, and when there isn't enough airflow, the heat and moisture can become trapped between our skin and clothing. This makes us feel even hotter and more uncomfortable.
Portable fans can provide some relief, but most of them are designed to be carried or placed somewhere, rather than attached to the person. Holding a fan becomes inconvenient when you're walking, cooking in the kitchen, working in the backyard, traveling, or doing anything that requires both hands.
So I came up with a simple idea:
What if you didn't have to carry the fan—what if you could wear it?
This project is a wearable personal cooling system designed to attach directly to the waist of a shirt or pair of pants using clips. Once attached, it stays with you wherever you go, providing airflow without occupying your hands.
The device uses a high-speed mini drone motor to generate airflow and a specially designed nozzle to direct the air inside the shirt. This helps circulate air around the body and move warm, trapped air and moisture caused by sweating.
The airflow can be adjusted using a potentiometer, allowing you to choose the level of cooling you need. The system is also rechargeable and can be powered using an external power bank, making it suitable for longer use when you're away from a regular power source.
It also includes a Power Mode that increases the airflow when connected to a suitable external power source, giving you an extra boost of cooling when you need it most.
Whether you're walking outside, cooking in the kitchen, working in the backyard, traveling, or simply spending time somewhere without a fan, this cooler stays attached to you and moves wherever you go.
The idea behind the project is simple:
Don't carry the fan. Wear the fan.
Instead of trying to cool an entire room, this project focuses on creating a personal cooling zone around the wearer, making hot days a little more comfortable wherever you go.
Supplies
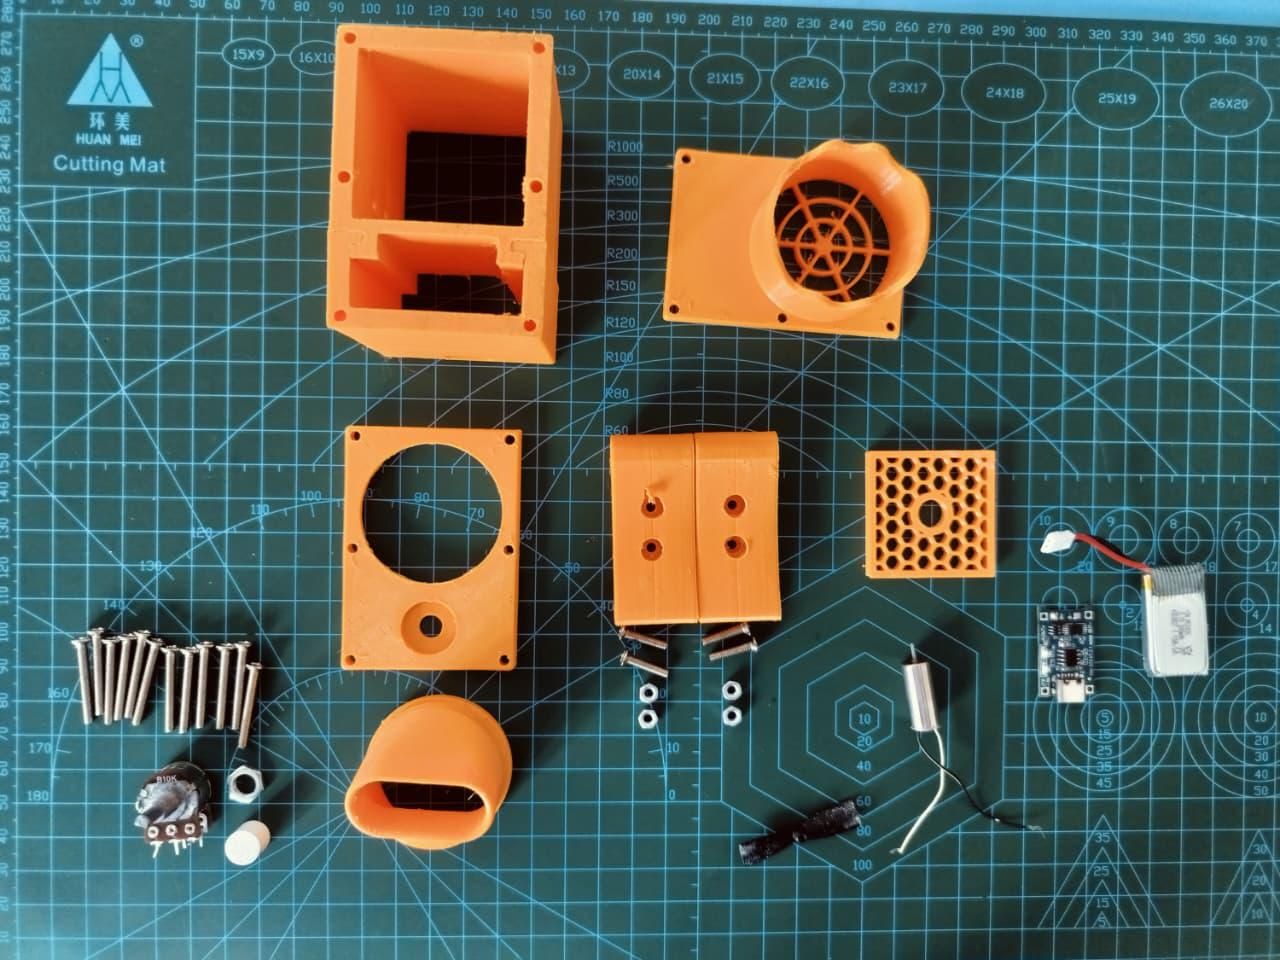
Here is everything you will need to build AeroWear.
️ 3D Printing
- 3D Printer – To print the custom enclosure, nozzle, clips, and other parts
- PLA Filament – For 3D printing all the structural parts
Hardware
- 12 × M3 × 25 mm Screws – For assembling the main enclosure
- 4 × M3 × 4 mm Screws + Nuts/Bolts – For securing the clips.
⚡ Electronics
- TP4056 Li-ion Charging Module – For charging the 3.7 V battery
- 10 kΩ Potentiometer – For controlling the motor/fan speed
- 3.7 V 500 mAh Rechargeable Battery – Main power source
️ Airflow System
- Mini Drone Motor – DC 3.7 V, 8 × 20 mm, 40,000 RPM coreless motor
- Mini Drone Motor Propeller – Matched to the motor for generating airflow
3D Print the Parts
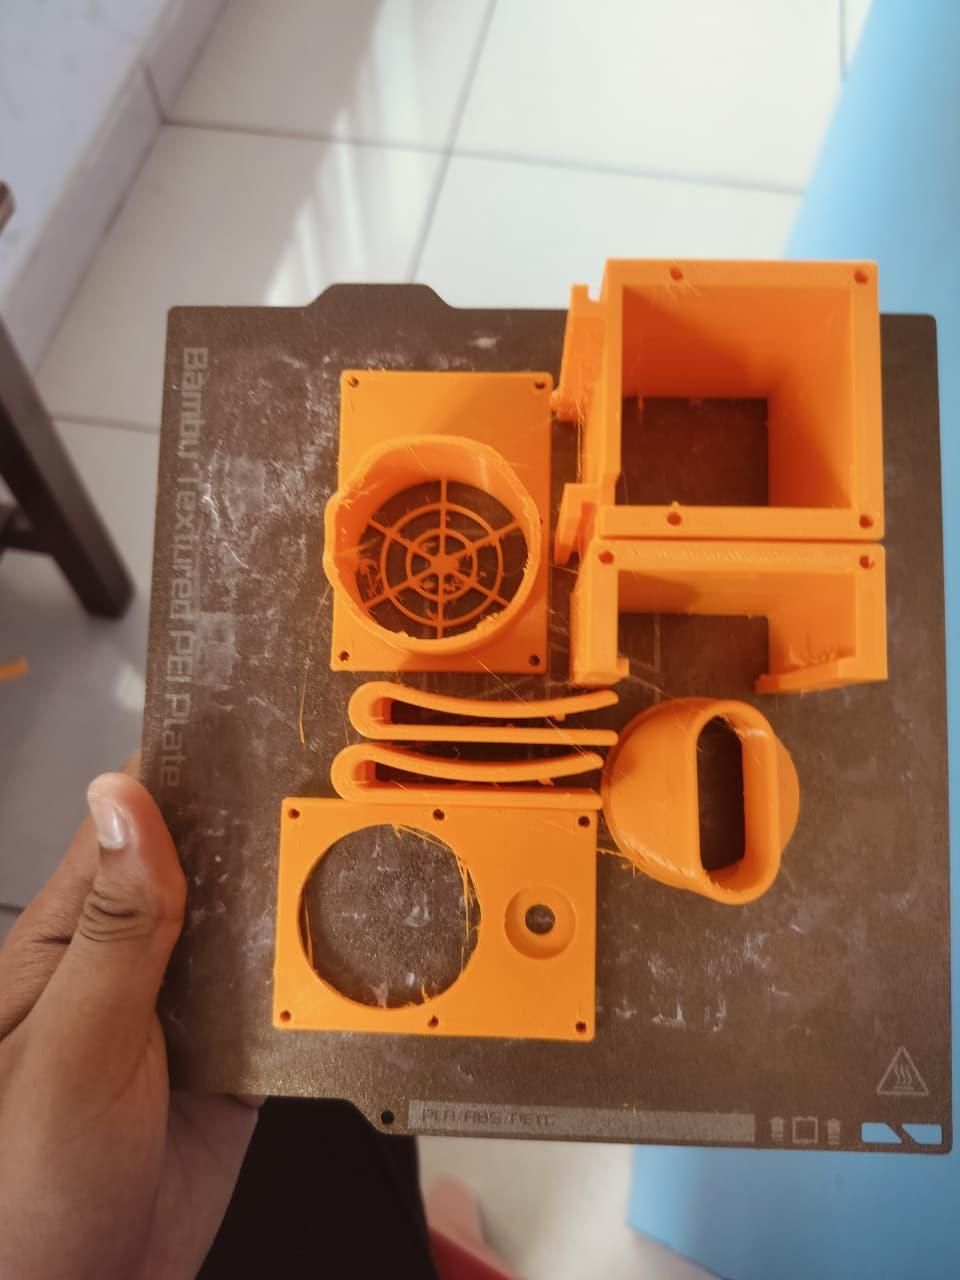
The first step is to 3D print all the custom parts of AeroWear. The enclosure, airflow nozzle, and clothing attachment components are designed to fit together into one compact wearable cooling system.
I used a Bambu Lab A1 Mini to print the parts with PLA filament.
🖨️ My 3D Printing Settings
These are the settings I used for the prototype:
- 3D Printer: Bambu Lab A1 Mini
- Filament: PLA
- Layer Height: 0.2 mm
- Infill: 10%
- Wall/Perimeter: 2–3 walls
- Supports: Only where required
- Build Plate: Textured PEI plate
- Brim: Not required unless your particular part needs additional adhesion
I kept the infill at 10% to reduce the overall weight of the wearable cooler. Since AeroWear is designed to be worn on the waist, keeping the enclosure lightweight is important for comfort.
📥 Download the Files
You can download the 3D model files below and print the individual parts.
Tip: After printing, remove any supports and clean the screw holes carefully. Before installing the electronics, dry-fit all the printed parts together to make sure the enclosure, nozzle, and attachment clip fit correctly.
Once all the parts are printed, we're ready to move on to assembling the motor and airflow system.
Print the following parts:
- upperb × 1
- lowerb × 1
- nozzel × 1
- inlet × 1
- outlet × 1
- motor holder × 1
- Potentiometer knob x 1
- Clips × 2
Understanding the Connections
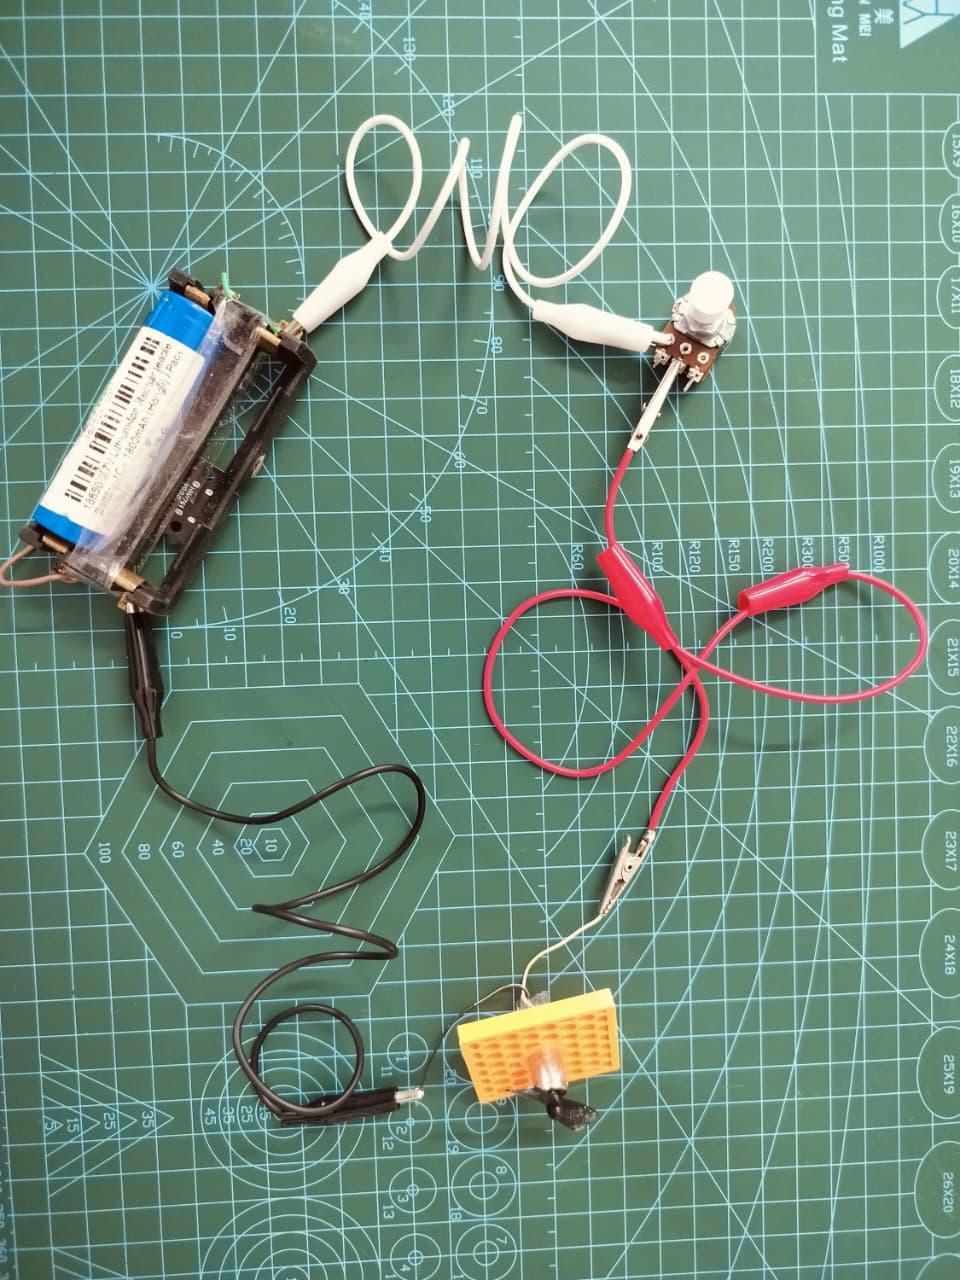
Before assembling AeroWear, let's understand how the battery, TP4056 charging module, potentiometer, and mini drone motor are connected.
🔋 Battery & Charging
- Connect the 3.7 V 500 mAh battery to the B+ and B− terminals of the TP4056 charging module.
- The TP4056 is used to safely charge the rechargeable battery.
- The external charging power source is connected to the IN+ and IN− terminals of the TP4056.
- The battery then supplies power to the motor circuit.
🔌 Motor & Potentiometer Connections
- Connect the negative (-) terminal of the battery to one of the outer/corner legs of the 10 kΩ potentiometer.
- Connect the center leg of the potentiometer to the positive (+) terminal of the mini drone motor.
- Connect the positive (+) terminal of the battery directly to the negative (-) terminal of the motor.
- Leave the remaining outer leg of the potentiometer disconnected.
🔄 Basic Connection Flow
Charging:
USB Power → TP4056 → Battery
Motor circuit:
Battery (+) → Motor (-)
Battery (-) → Potentiometer (Outer Leg) → Potentiometer (Center Leg) → Motor (+)
The potentiometer controls the motor by varying the electrical current through the motor circuit. Rotating the knob allows you to adjust the motor speed and therefore the airflow.
⚠️ Important: Check the polarity of the battery and motor carefully before powering the circuit. Also, use a TP4056 module appropriate for your battery and charging setup. Do not short-circuit the battery terminals.
Installing the Motor and Fan
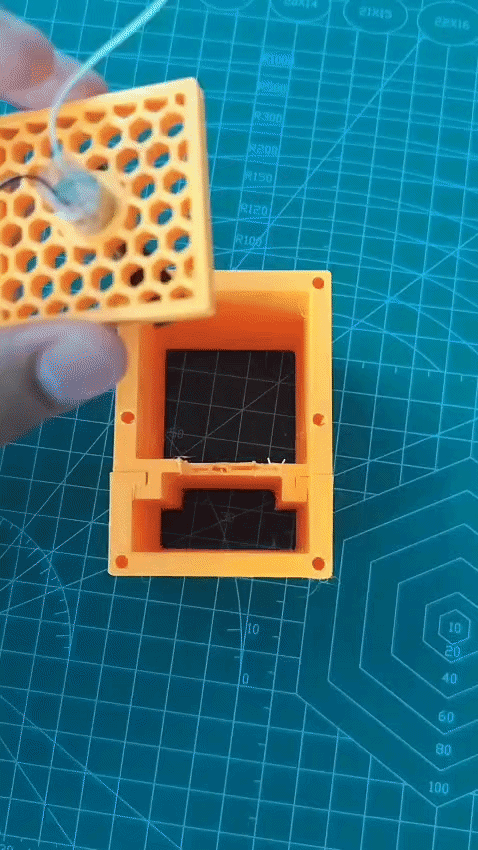
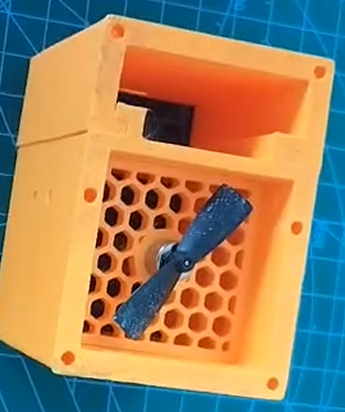
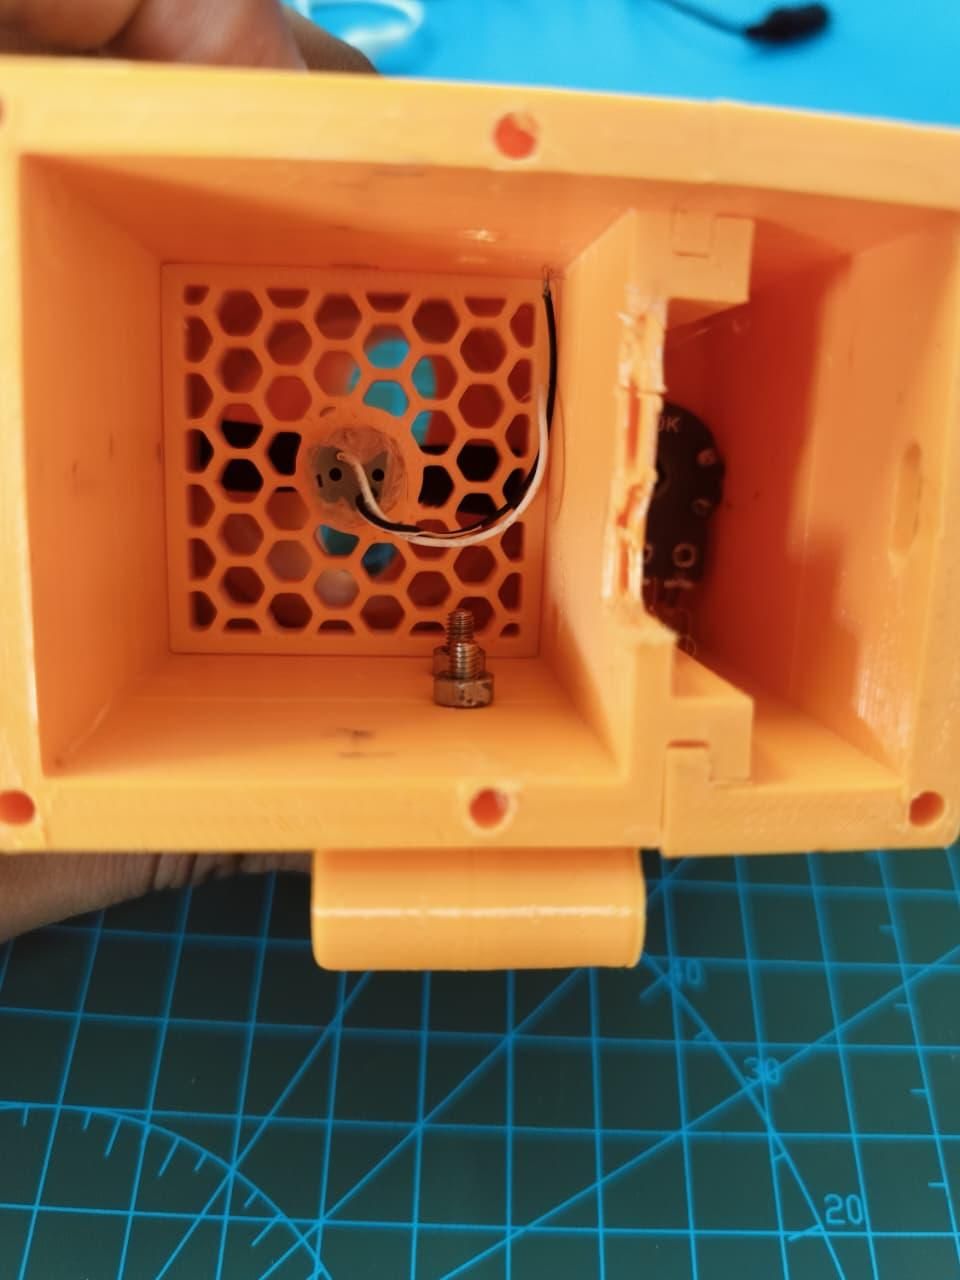
Now let's install the mini drone motor and propeller into the printed body.
- Take the motor holder and gently push the mini drone motor into it.
- The holder is designed to fit the motor perfectly, so no glue is required.
- Attach the mini drone propeller/fan to the motor shaft.
- Make sure the propeller is firmly attached and can spin freely.
- Place the motor holder into the upper body of AeroWear.
- Gently push it into place. It is designed to fit directly into the body.
- Keep the motor wires away from the spinning propeller.
- If you want extra security, you can use a small amount of super glue, but this is optional.
- Finally, rotate the propeller by hand once to make sure it spins freely.
Tip: Make sure the fan is facing the correct direction so that it pushes air toward the nozzle.
Installing the Potentiometer, Nozzle & Front Plate
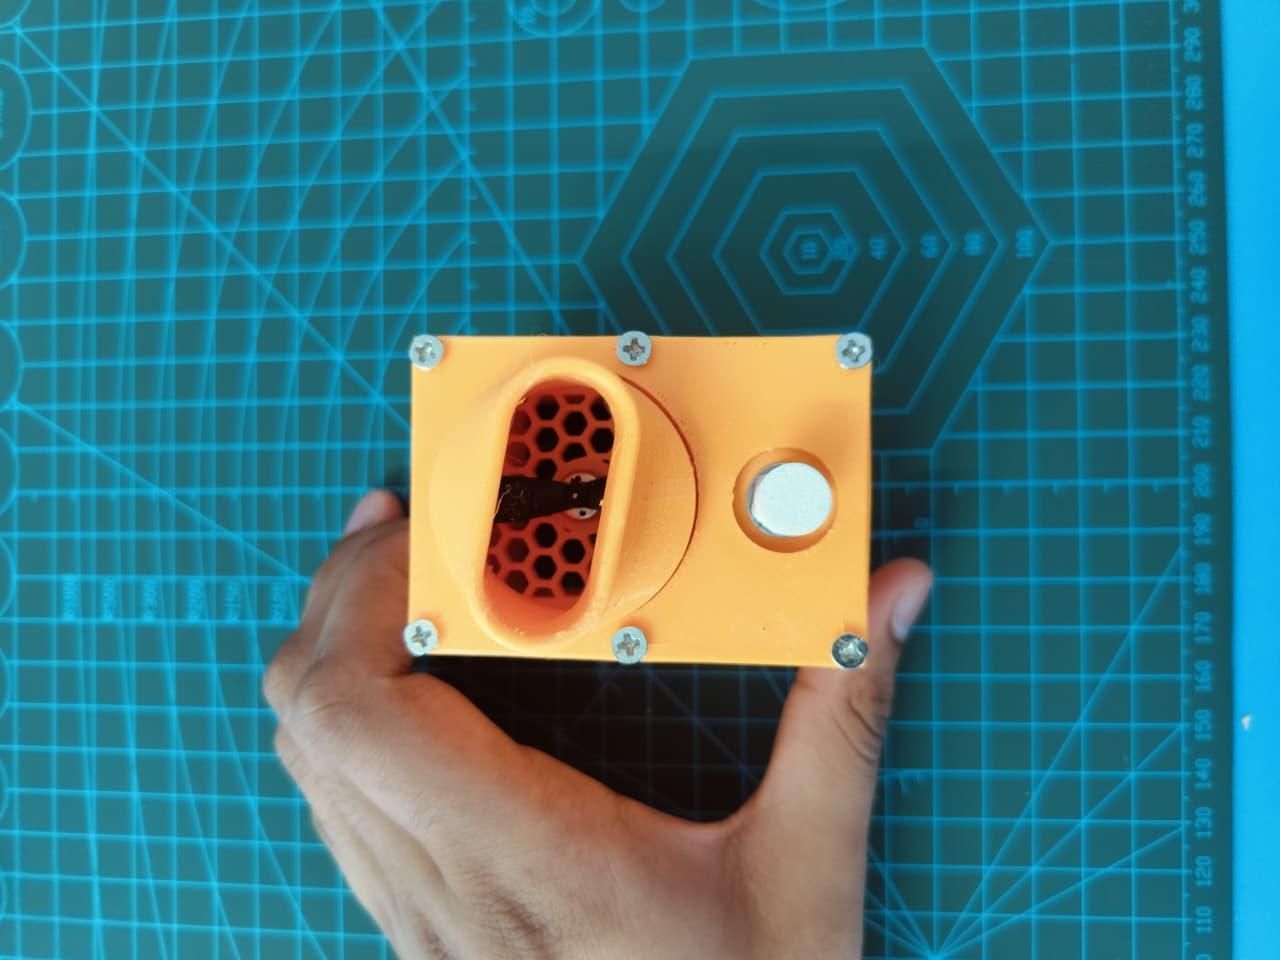
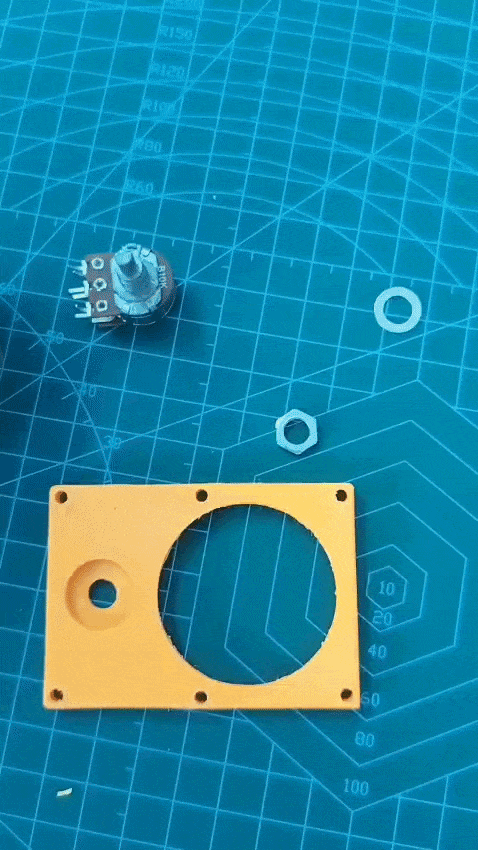
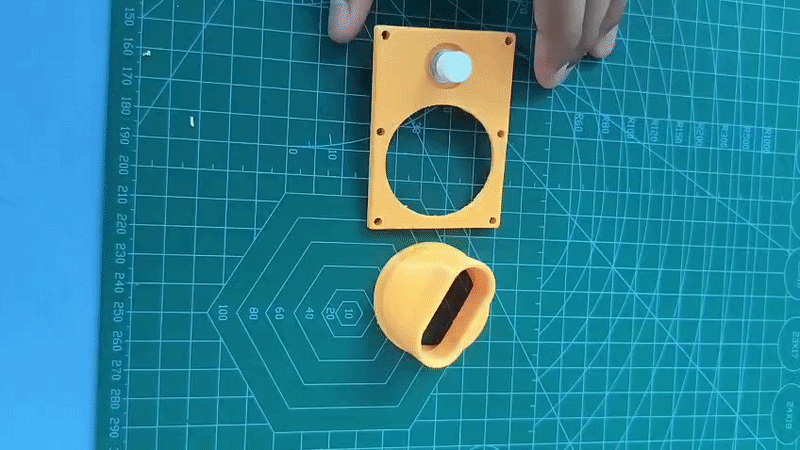
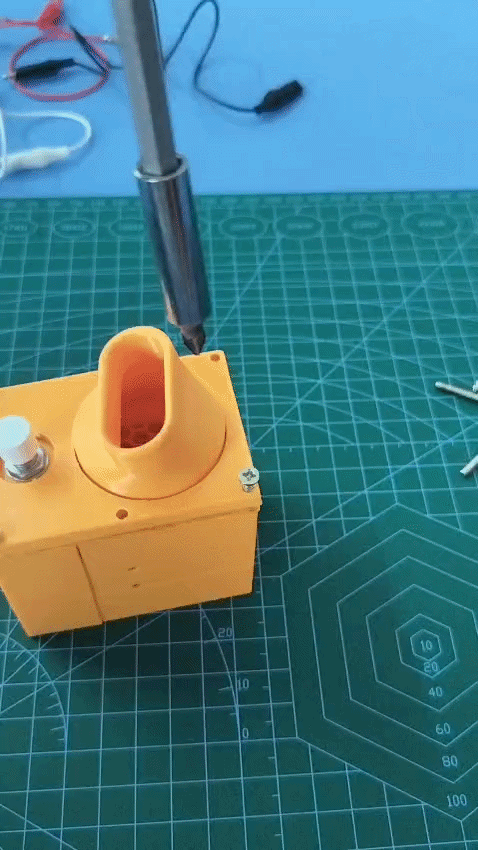
Now we will install the 10 kΩ potentiometer, assemble the airflow nozzle, and secure the front plate to the main body.
🎛️ Install the Potentiometer
- Insert the 10 kΩ potentiometer into its designated hole in the enclosure.
- Gently push it into place until it sits properly.
- Use the nut/bolt on the potentiometer to secure it from the outside.
- Tighten it gently so the potentiometer stays firmly fixed.
🌬️ Assemble the Nozzle
- Assemble the 3D-printed nozzle and its parts.
- Place the nozzle into the designated opening where it is designed to fit.
- Gently push it into position.
- Make sure the nozzle is properly aligned with the motor so that the airflow can pass through it smoothly.
- The parts are designed to fit together accurately, so no glue is required.
🔩 Attach the Front Plate
Once the potentiometer and nozzle are in position, place the front plate onto the main body.
- Align the plate with the screw holes on the main body.
- Make sure all the internal components are positioned correctly.
- Use M3 × 25 mm screws to secure the plate.
- Insert the screws through the plate and tighten them into the main body.
- Tighten each screw evenly until the plate is firmly secured.
Tip: Don't overtighten the screws. Since the body is 3D printed in PLA, excessive force can damage the screw holes.
Attaching the Clips
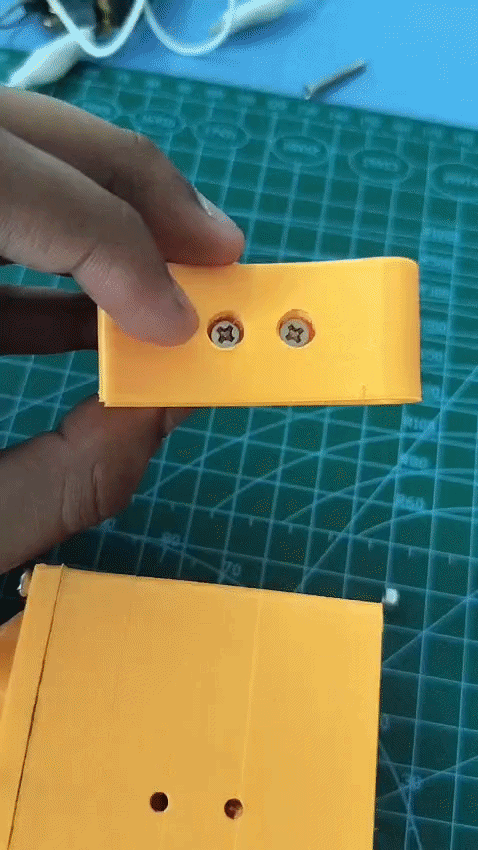
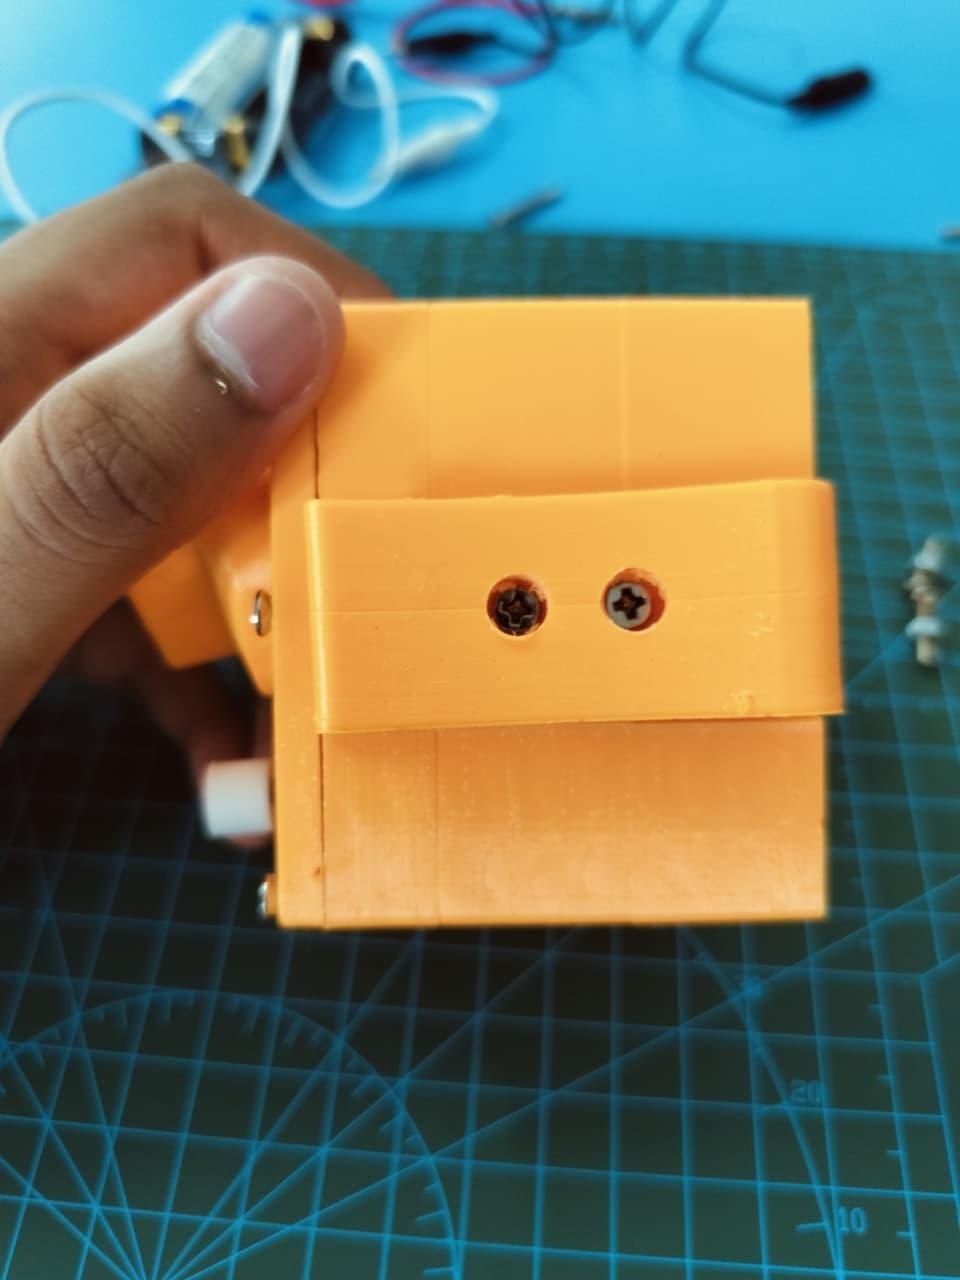
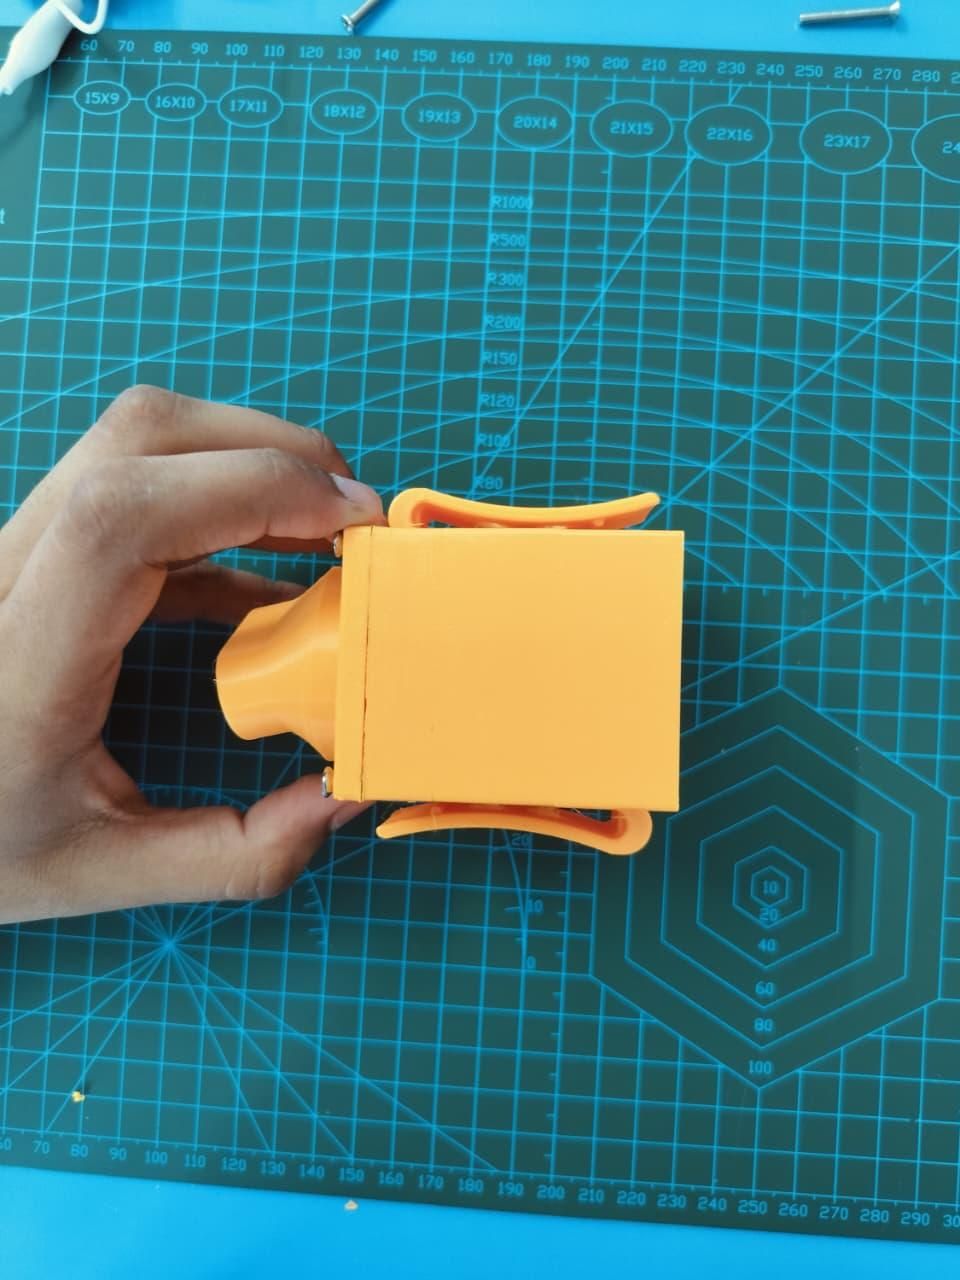
Now it’s time to attach the two clips that will allow AeroWear to stay securely attached to your shirt or pants.
- Take the 2 printed clips and 4 × M3 × 4 mm screws with bolts.
- Position the first clip on the side of the main body.
- Insert the M3 × 4 mm screw through the clip and secure it with the bolt.
- Repeat the same process for the second clip.
- Make sure the two clips face opposite directions, as shown in the image.
- Tighten the screws enough to hold the clips firmly, while still allowing the clips to function properly.
Tip: Check the orientation of both clips before tightening the screws. Having them face opposite directions helps AeroWear grip the clothing securely.
Installing the Battery, TP4056 & Completing the Wiring
.jpeg)
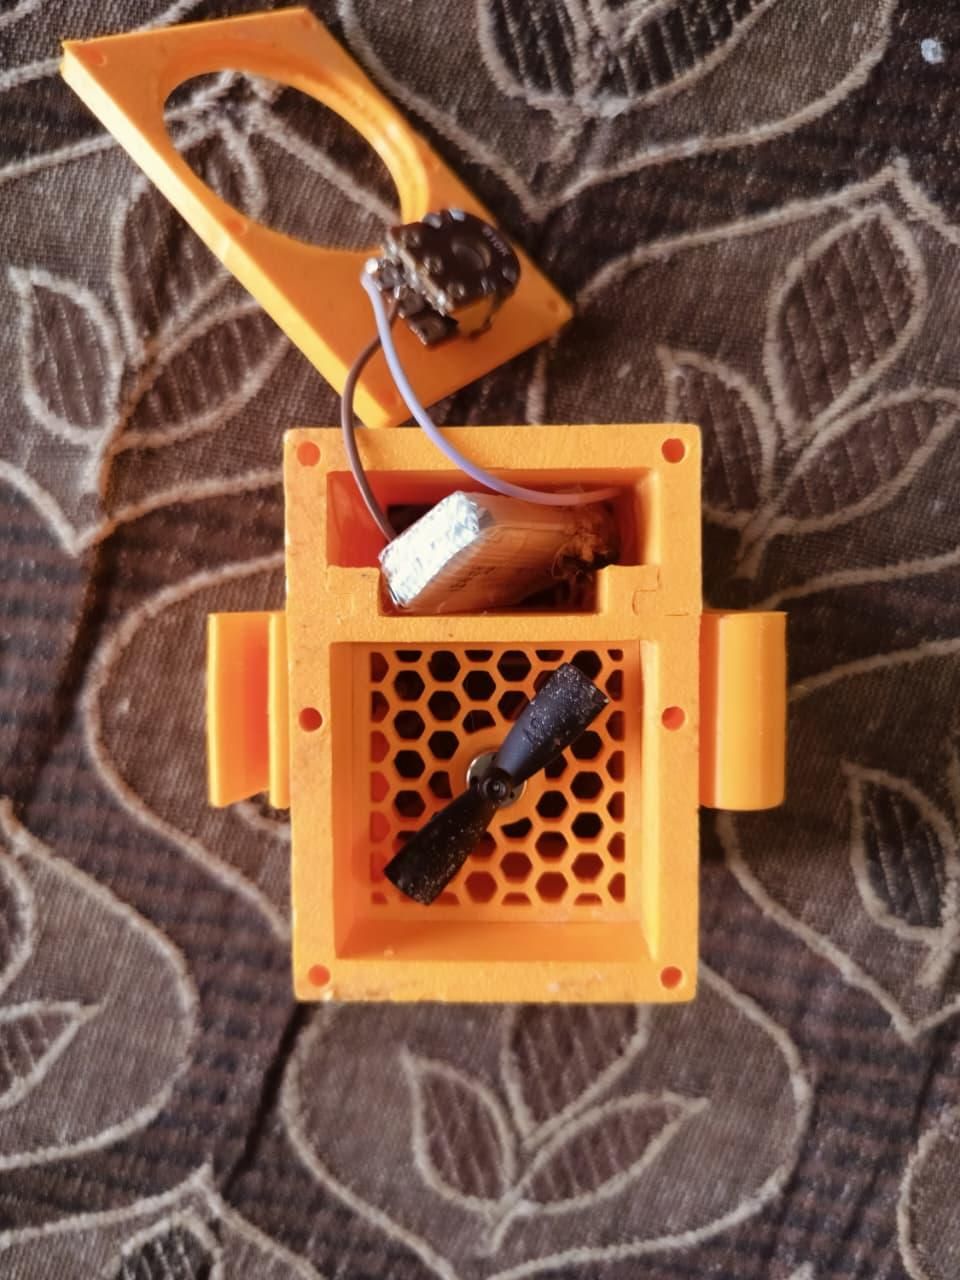
Now we will install the 3.7 V 500 mAh battery, place the TP4056 charging module, and complete all the wiring before closing the enclosure.
🔋 Install the Battery
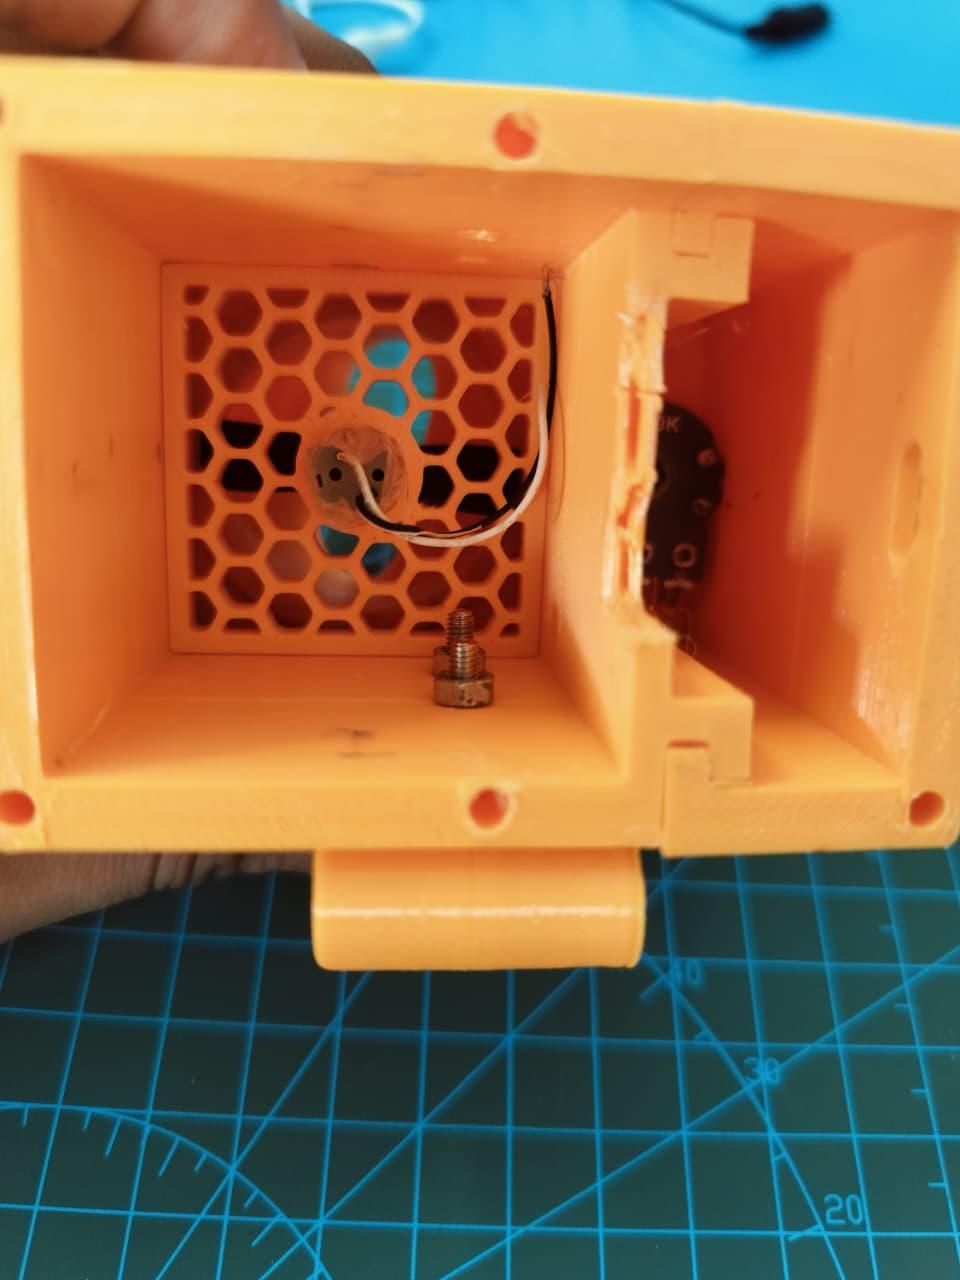
The battery has its own separate box-like compartment in the enclosure.
- Place the 3.7 V 500 mAh battery inside its dedicated compartment.
- Make sure it sits properly and the wires can reach the required components.
- Keep the wires neatly arranged so they do not interfere with the fan.
⚡ Install the TP4056
The TP4056 has a dedicated slot inside the main body.
- Align the TP4056 with its slot.
- Gently push the module into the slot until it fits securely.
- No glue or screws are required.
- Make sure the charging port is accessible from the outside.
🔌 Complete All the Wiring
Now complete the remaining connections according to the wiring explained in Step 2.
- Connect the battery to the TP4056 for charging.
- Connect the battery to the potentiometer and motor circuit.
- Connect the potentiometer to the motor for controlling the fan speed.
- Make sure all positive (+) and negative (−) connections are correct.
- Carefully arrange and secure the wires inside the enclosure.
At this point, all the electronics should be completely wired and installed. Test the motor and potentiometer one final time to make sure the fan speed changes correctly and the airflow is coming through the nozzle.
⚠️ Important: Check all connections carefully before moving to the next step. Once everything works correctly, we can close the enclosure and complete AeroWear.
Closing the Enclosure
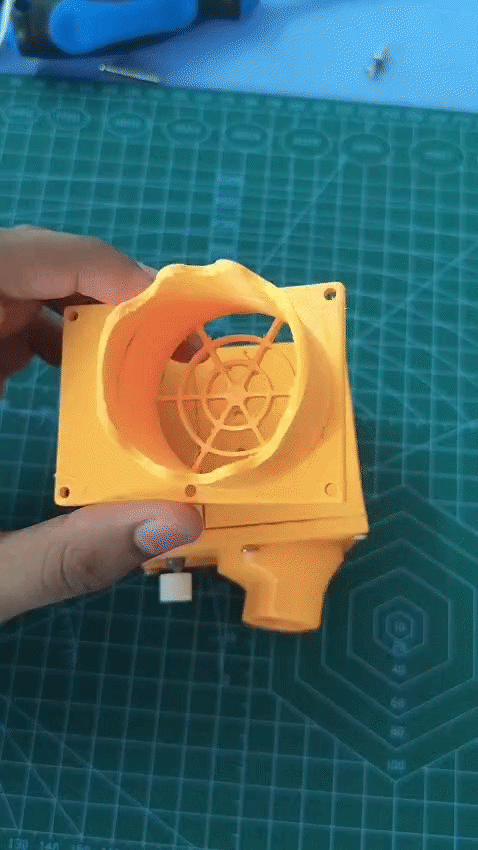
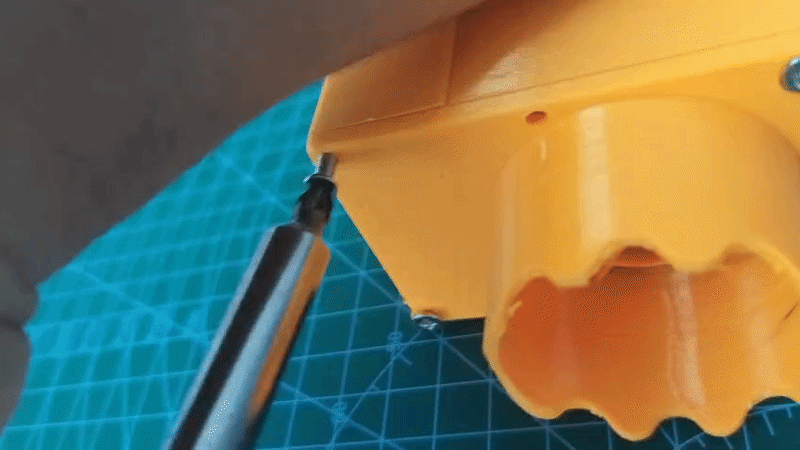
The final step is to close the AeroWear enclosure and secure all the internal components in place.
- Before closing the enclosure, check all the wiring one last time.
- Make sure no wires are hanging outside the enclosure.
- Arrange the wires neatly inside so they don't get pinched, trapped, or block the enclosure from closing.
- Place the inlet/cover part onto the main body and align all the screw holes.
- Use 6 × M3 × 25 mm screws to secure the inlet part to the main body.
- Tighten the six screws evenly until the enclosure is firmly closed.
- Check that the fan can spin freely and nothing is touching the propeller.
- Turn the potentiometer and test the airflow through the nozzle.
- Make sure the nozzle provides a clear airflow path.
And that's it! 🎉
AeroWear is now assembled and ready to use.
Final Look & How to Use AeroWear
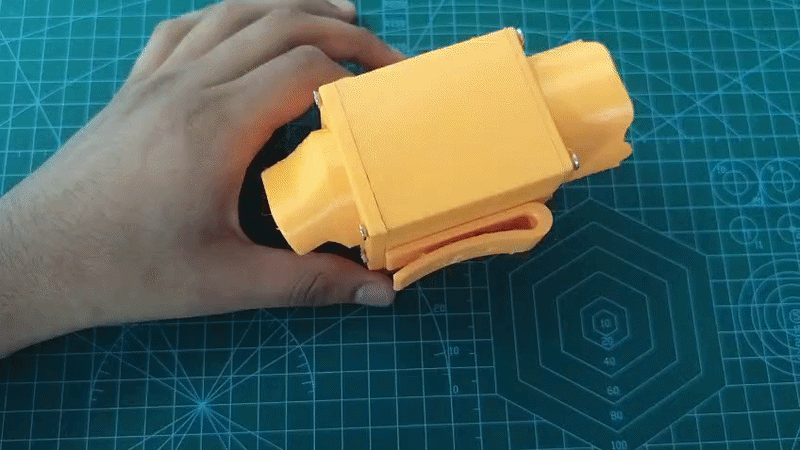
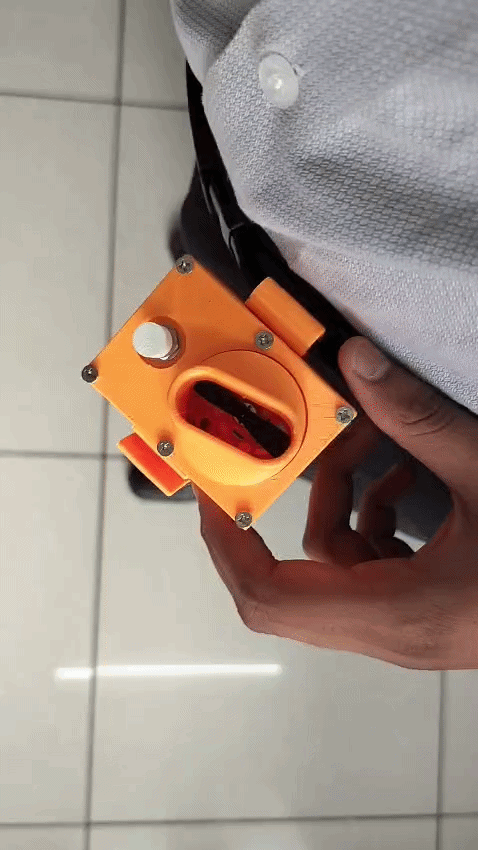
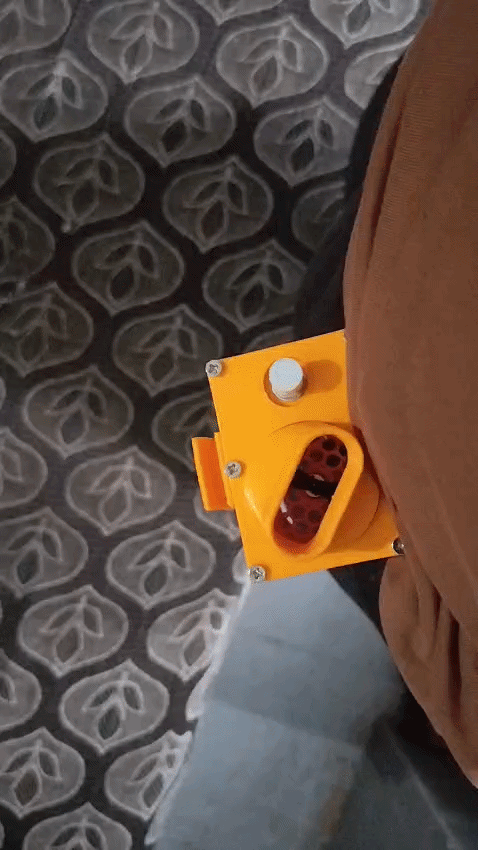
After completing all the assembly steps, AeroWear is ready to use! The compact 3D-printed body houses the motor, battery, charging module, and speed control, while the clips allow it to stay attached to your clothing.
👕 How to Use AeroWear
- Attach AeroWear to the waist of your shirt or pants using the two clips.
- Position the air nozzle inside your shirt so that the airflow is directed toward your body.
- Turn the potentiometer to start the fan.
- Rotate the potentiometer to adjust the airflow according to your comfort.
- Move around normally—AeroWear stays attached to your clothing, keeping your hands free.
- When the battery is low, connect a suitable USB power source to the TP4056 charging port to recharge it.
- You can also use an external power bank when you need longer operation away from a wall outlet.
🌪️ What Makes AeroWear Different?
Unlike a regular portable fan that you have to hold or place somewhere, AeroWear moves with you. The nozzle directs air inside your clothing, helping circulate the warm air and moisture that build up while you're sweating.
Whether you're walking, cooking, working in the backyard, traveling, or simply relaxing outdoors, AeroWear gives you a personal breeze without taking up your hands.
✨ Final Look
And that's the finished AeroWear!
AeroWear — Wear the Breeze. 🌬️
A small wearable device designed to make hot days a little more comfortable—wherever you go.