Animating a Realistic Dragon for VFX in Autodesk Maya
by Marina Peters in Design > Animation
7729 Views, 32 Favorites, 0 Comments
Animating a Realistic Dragon for VFX in Autodesk Maya
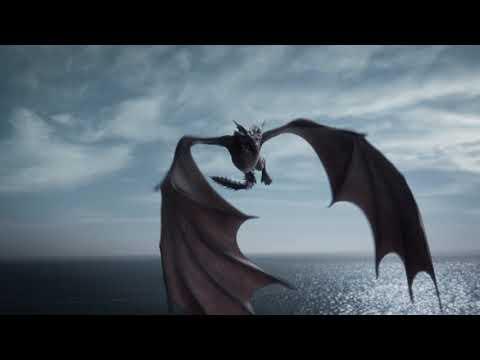
Hey everyone!
My name is Marina Peters, an animation student from Germany and I am so happy, that you are joining me today on my journey of creating a dragon animation. Hopefully after reading this instructable you will be a step closer to creating your own version of it. Be sure to contact me if you have any questions by the end.
As I knew this animation was going to be a huge project, I started creating goals for myself and categorizing them. This would not only help me gain experience in the chosen fields, but also help me during the project to keep my initial goals in mind. I would also recommend you to do the same and modifiy this list to fit your personal goals.
Essential:
- Minimum of 30 seconds animation
- Creation of different cycles
- Usage of animation layers
- Filming of my own video plate
Important:
- Previs
- Matchmove
- Animation of muscles/jiggles
- Render
- Compositing
Nice to have:
- Test render
- Sound design
Now that we have a set list of goals, let's start this project!
Supplies
The supplies highly depend on what you want to do for your project. I will give you a detailed list for all of the steps I did, but you definitely do not need to film a detailed video plate or even track your footage in order to animate an amazing dragon.
Essentials:
- PC or Laptop with the requirements to run Autodesk Maya
- Autodesk Maya (professional, indie or student version)
- Any dragon rig you like (I would recommend the Tyrant Rig by Truong CG or the dragon rig by Sophoria Academy)
Filming:
- Any camera, can also be a phone (in my case: Sony a6500, SEL-18135)
- Tripod (in my case: ZOMEI Q111 55-inch)
- Prepared Shot List
- Drone (in my case: DJI Mini 2)
- ND Filter (in my case: by Urth)
- Soft Graduated Lens Filter (in my case: by Urth)
- Equipment to clean the lens on location
The Software I used:
- Maya Autodesk Student Version (in my case: 2023)
- SynthEyes Student Version
- The Foundry Nuke non-commercial
- DaVinci Resolve
- PureRef
- Studio Library
References and Mood Board


When starting a project it is the most important step to get a good idea of what you want to do right in the beginning. This helps you specify the feedback you get on it and spot problems right in the beginning.
For this I used the software PureRef and started adding as much reference to the mood I wanted to establish into it.
Once I had sorted my own ideas, I was able to start creating a storyboard with the four shots I wanted to create.
Location Scouting and Preparation for Filming


When filming a video plate for VFX it is recommended to visit the location you want to film at before the date, so you can make sure everything is as expected when filming. I visited my location, the Seven Sisters in the south of England in 2022 and absolutely loved it. When visiting for the first time, I already saved some locations to remember for the time I wanted to film a plate there. A few years later when the time had come I only needed to pull up those locations and plan my filming there.
This is also something to remember: The further in nature your location is, the harder to reach it will be, especially with all of the equipment you have to carry. On my filming day, I was in luck to have my boyfriend helping me with carrying all of the equipment, so be sure to ask a person for help in that case.
Most important for filming:
- Prepare a shot list. This means you give every shot a number and do a small table, so you can memorize which shots you need, write down which take you liked and what settings you used on your camera. This will be important later on when importing it into Maya.
- Make sure auto-exposure is set to OFF when filming with a drone. (yes, I made that mistake)
- Also be sure to track the sun direction at your filming location. Why that is important we will discuss in the next step.
Filming 01

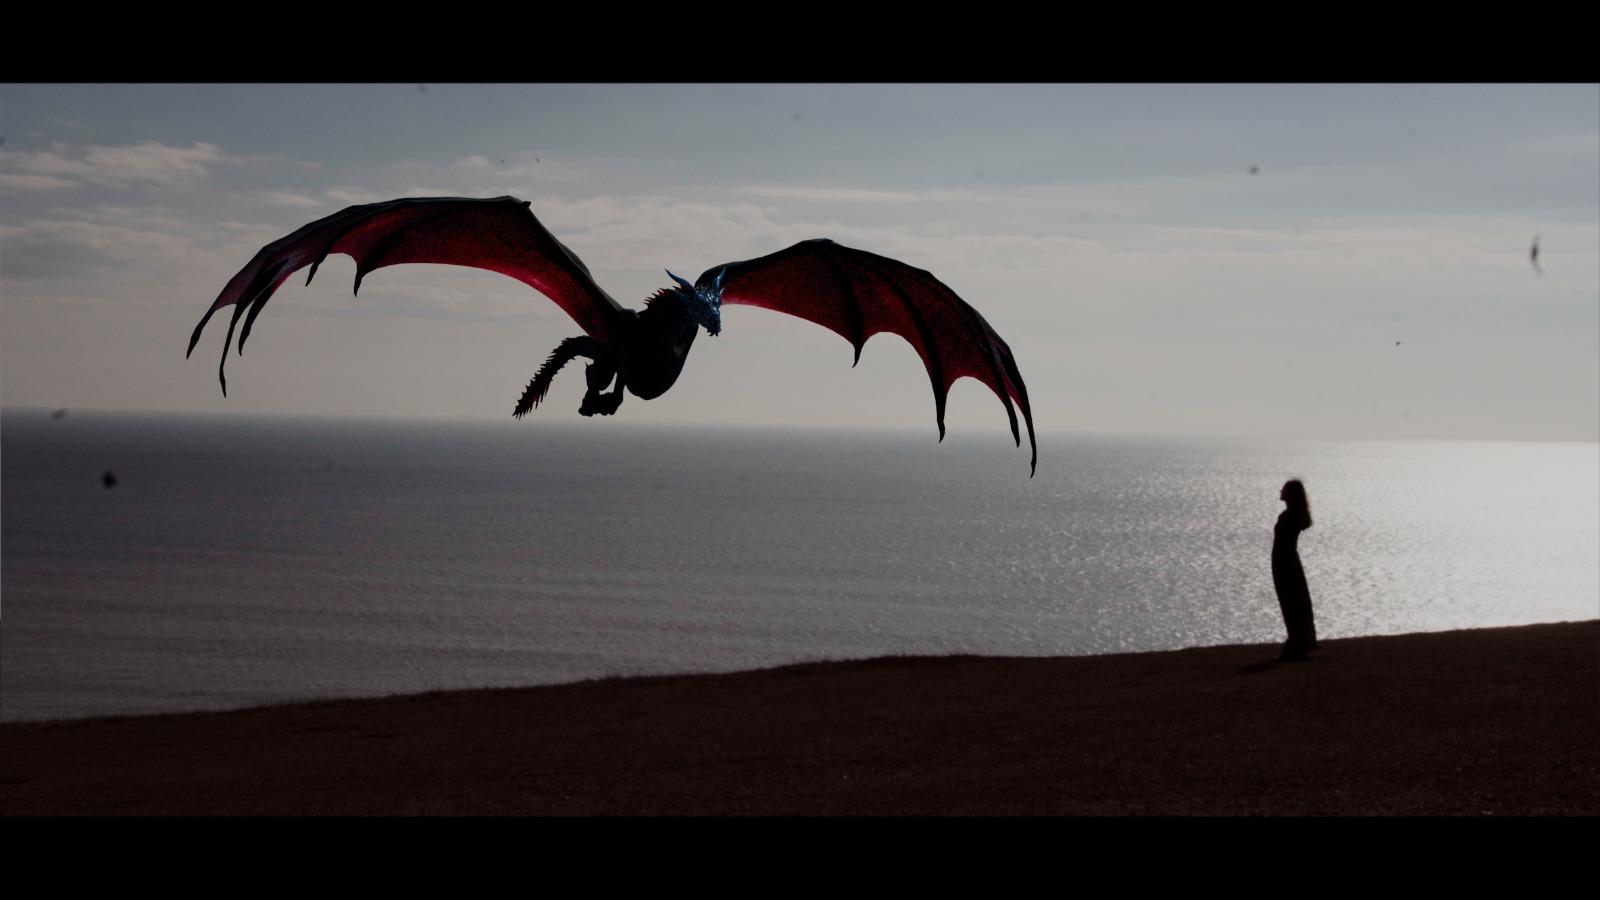
On the day of filming my boyfriend and I, laden with all of my equipment, as well as costume, hiked to the previously selected spot and took the videos, just as planned previously. The drone shots worked very well, as well as the shots of myself, where the dragon was supposed to land.
Only later that week, when reviewing the shots on my laptop I noticed a few problems with my footage:
- The auto-exposure on the drone shot was still on. This meant, that the exposure of the shot changed during the flight. Integrating the dragon would also mean a lot more work.
- All of the shots were filmed against the sun, which meant the dragon would be completely dark when rendering, diminishing all of the detail I wanted to add during the animation.
- There were spots on the footage, which must have been dust on the lens. Those spots would need to be cleaned up during compositing.
- The sky was overexposed on some shots
Filming 02

While I tried to animate on the previous footage at first, I quickly had to realize that the only right decision was going back to my location and filming a new plate. This decision was a big set back for me at this point, but also an opportunity to elevate my work in the future.
With all of the gathered knowledge, we went back to the location and refilmed my footage.
This led to:
- new ideas for the composition
- way more footage to choose from
- a better and well thought-through light situation
- no spots on the lense (took a cleaning kit)
- no auto-exposure
- no over exposed sky, through the Soft Graduated Lens Filter
- a new shot that I did not plan in my story board
Setting Up the Scene in Maya - Rig

Rig:
- Reference your rig into the scene. This has many advantages, as it will keep your file size small and you can change anything about your rig later on as perfectly explained in this video.
- Do this by going to File - Create Reference - Select your Rig - Reference
Camera:
- Create a camera in Maya by going to Create - Camera - Camera
- Now you can rename it (maybe shotcam and add the shot number of the scene)
- If you open the Attribute Editor while having the camera selected (Ctrl A), you can now change the settings for your camera.
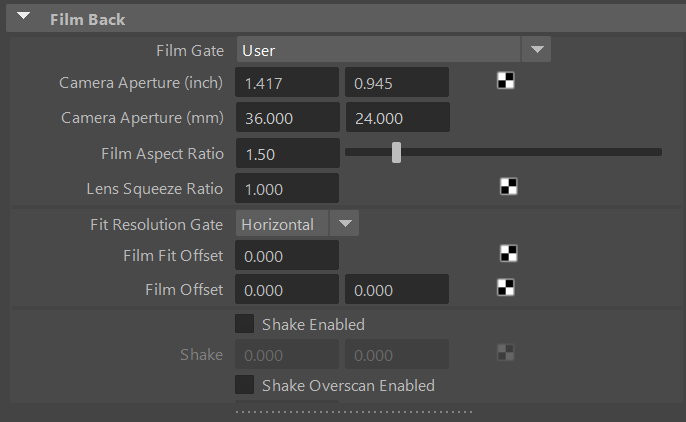
- Most important are the Focal Length and the Camera Apeture. The Apeture is describing the size of your sensor, which you can google and the focal lenght is something you have to note down during your shoot, so the render of the dragon matches your footage.
- It is best to also note down the height of your camera during the shoot, so you can locate it precisely in Maya, by adjusting its translation values in the channel box. Remember, Mayas default measuring system is centimeters.
Adding Your Footage to Autodesk Maya
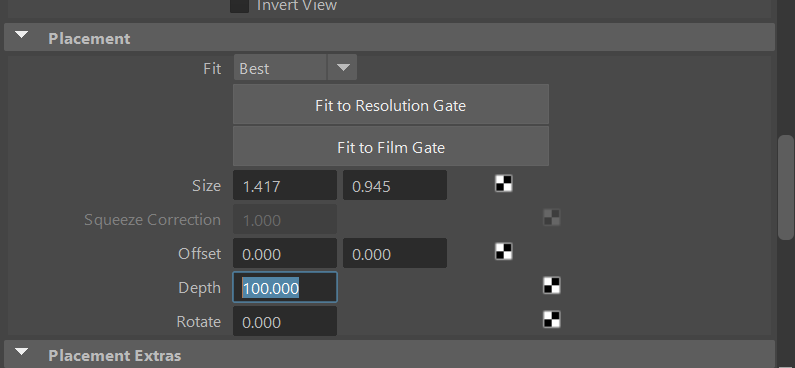

For me it is always easier to animate, when having my plate in frame as well. You can do this as you wish, depending on if you have filmed a plate or not.
- Change the format of your video to a png sequence in a program like DaVinci Resolve.
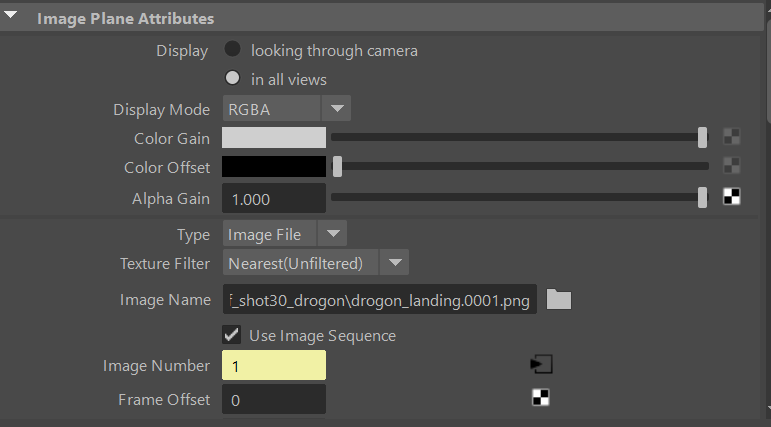
- In Maya go to the menu over the viewport View - Image Plane - Import Image and navigate to the first image of your image sequence. Be sure, that the file naming convention does not include spaces or characters that are not usual in the english language (e.g. ä, ü, ö). It should also be counting up, like: image_plane.0001.png
- Now press "use image sequence" in the Attribute Editor (as shown in the first image) and adjust the Depth, so the images are located behind your dragon (as shown in the second image). The number can be quite high if the dragon is big in size. Also be sure to adjust the Near and Far Clip Plane of your camera to be able to display the image if it is far away.
Now you should be able to see your rig in front of your plate, as in the last image of this section.
Animation Cycles

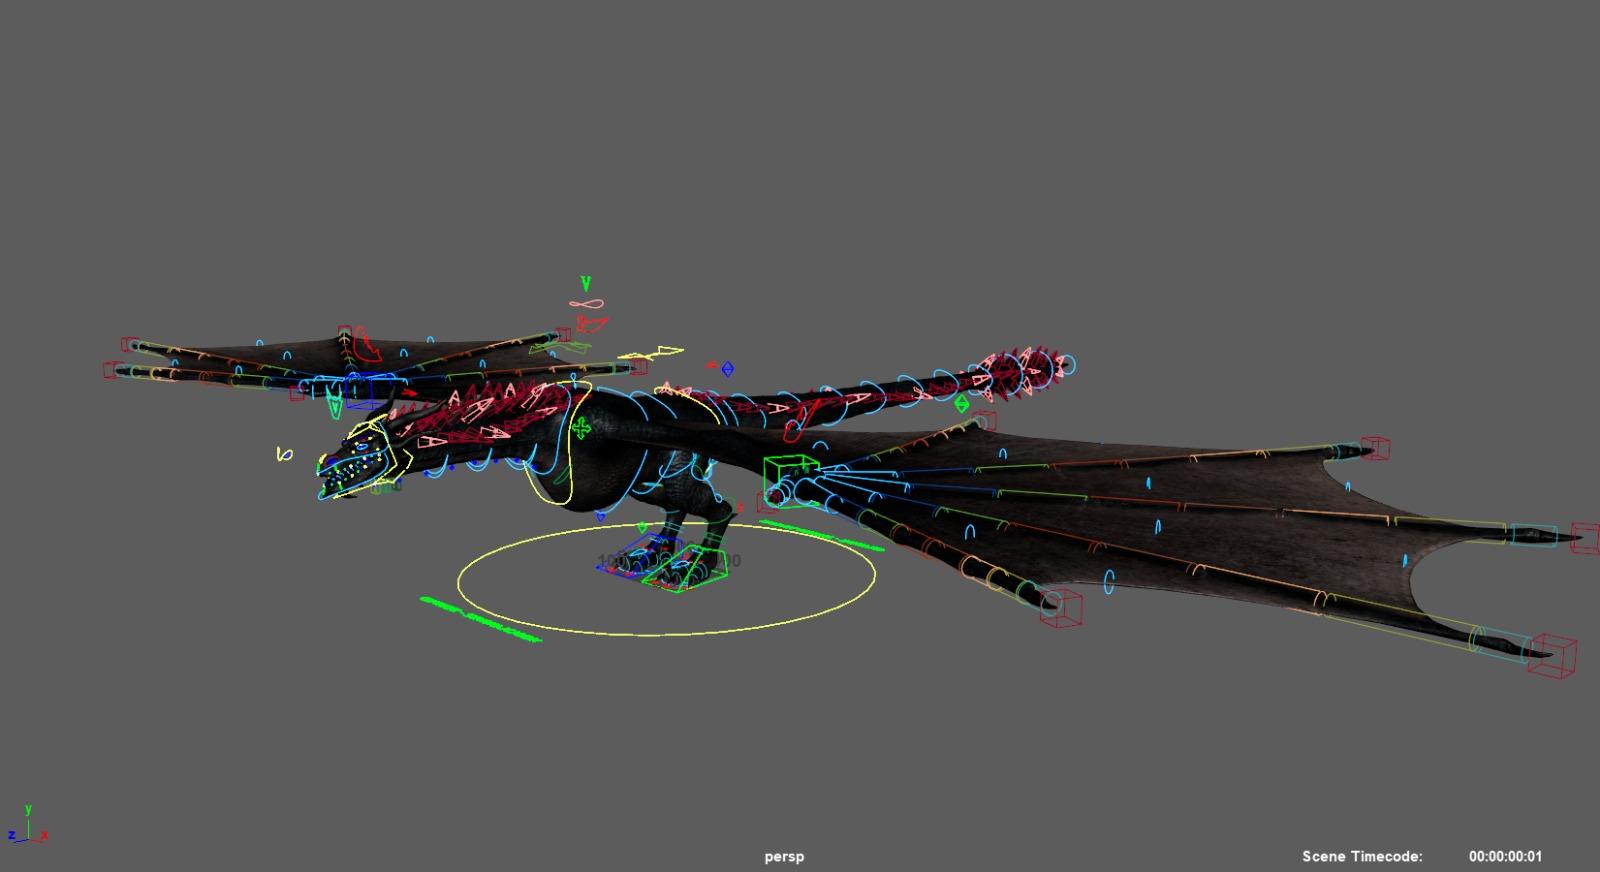
At this point we can finally start to ANIMATE!!
Before splitting your shots up into Maya Files though, we need to think about movements that your dragon does in every shot. Those repetetive movements can be animated once and then added to each file and made unique by adding animation using animation layers (explained in step 9).
For me those movements were:
- Flight Cycle
- Flight to Glide Cycle
- Climb Cycle
- Turn Left
- Turn Right
Animating cycles before starting the shot also has the advantage, that you get accustomed to the rig. A dragon rig tends to have a lot of controls and those can be daunting at first (look at the image I attached to this section).
For the Flight Cycles I followed those steps:
- Gather good reference, of birds and especially bats, study their behaviour in all details. Sites like pond5 or gettyimages can give you very specific references.
- Import snippets of your reference into Autodesk Maya, just as you imported the background footage previously in step 6.
- Animate from the inside out, meaning that you start with the most influential control (in this case the COG, then the hips, the upper body, head, wings, feet, tail, etc.)
- Animating the spine is the most important step at this point. Hiding part of the geometry, like the wings will help you get more overlap into the spine. A tip is also constraining spheres to head, hip and upper body, so you can only concentrate on the overlap.
- Once you have animated the up and down movement, as well as the rotation of the upper body you can start copying those curves to the head and hips and offset them in the graph editor, so you lead with the head and overlap the hips.
- I animated the wings in IK, so I had the most influence over their path and was able to precisely track its arc and changing the amplitude of the movement by only touching one control.
- Track Arcs! You do this by selecting a control and going to the Animation Window in the top right of Maya, Visualize - Create Editable Motion Curve. This will give you a curve that describes the movement of your specific control. Now be sure that the movement is actually a curve and has no harsh stops or spikes in it. (Definitely check your graph editor for it as well. It is such an important tool to use the animate smooth movements)
- For all of the flight cycles, only animate the base movements and add any details, like jiggles or wind in the last steps.
- Be sure to have the same start and end pose for all of your cycles, so you can mix and match them however you want to.
A great ressource for animating flying creatures is Brendon Bodies article on How to make birds fly good, as he points out important principles on flight and how to avoid common mistakes.
Studio Library
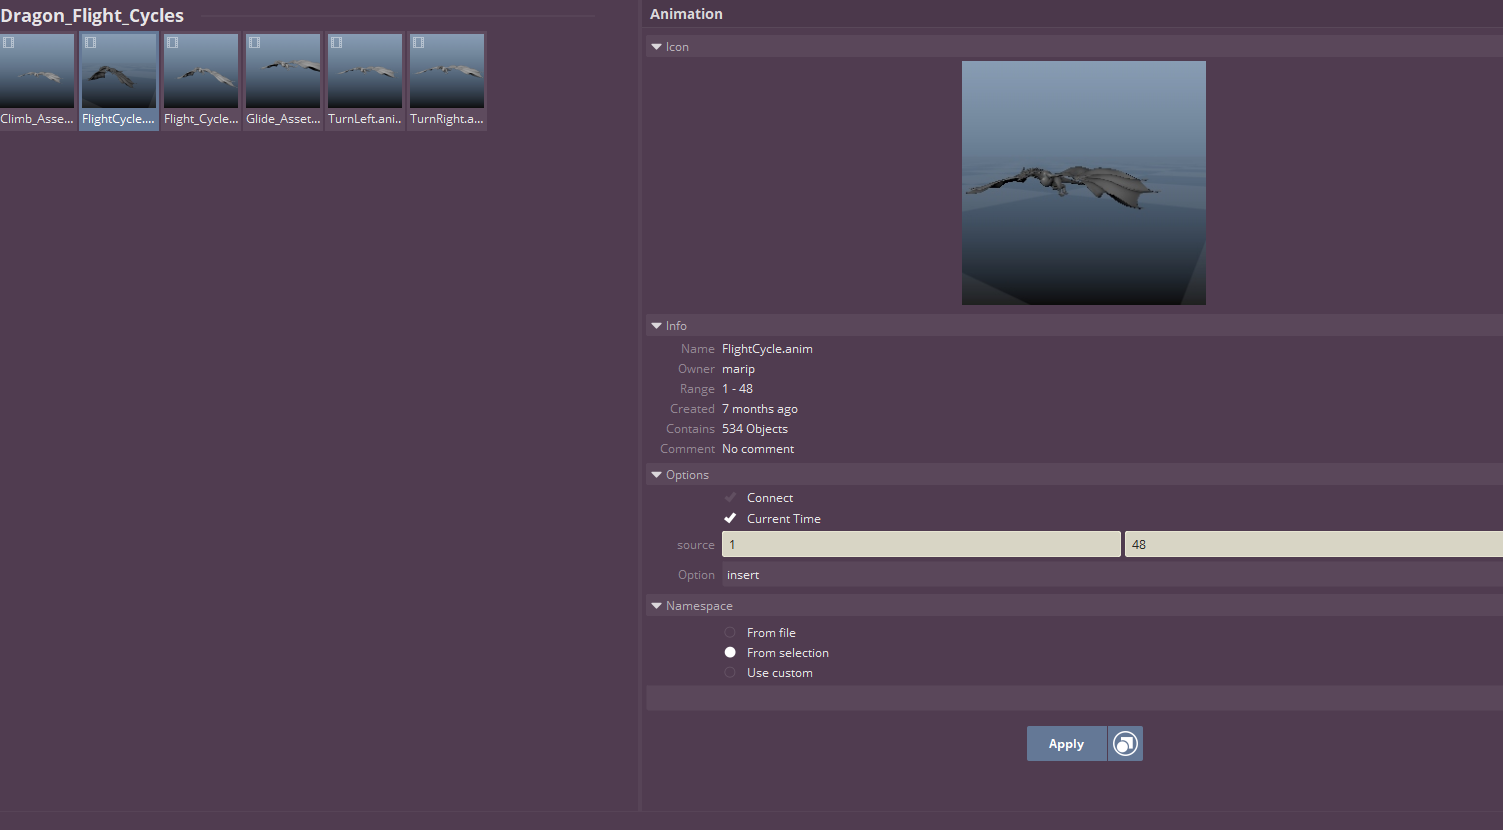
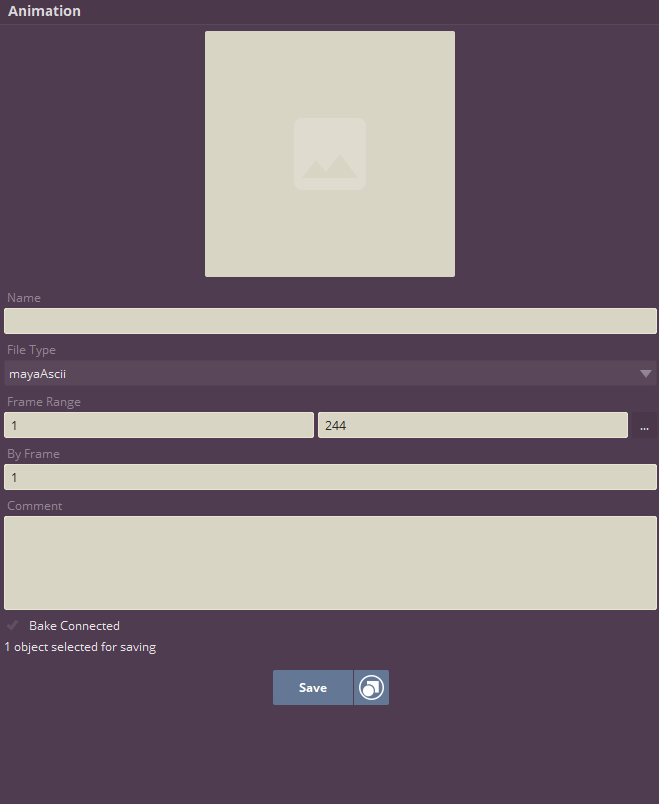
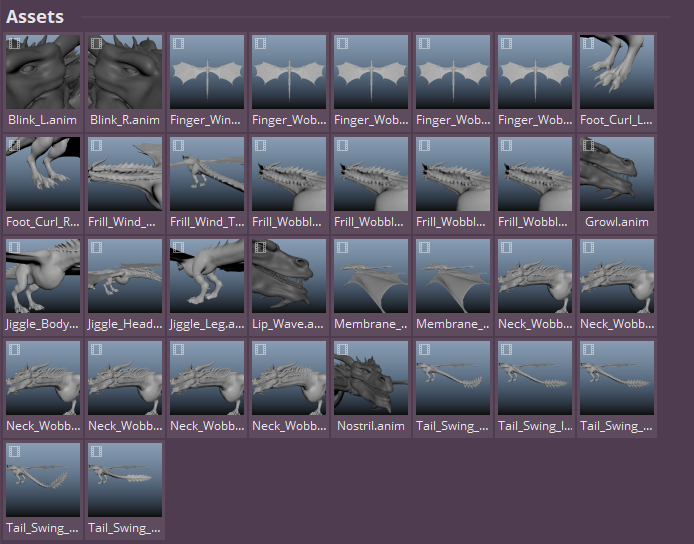
One of my favorite tools I frequently use is called "Studio Library".
Here you can basically create a library of your animations and apply those to all of your different scenes. It is perfect for saving out cycles or animation assets.
Saving an animation to Studio Library:
- Right click anywhere in the program and select New - Animation
- A menu will pop up (second picture in this section). Change your frame range to only include the frames you want and change the Frame Range in Studio Library to the length of your animation
- Now give it a name and press the window at the top to playblast a preview for your icon
- Select all of your controls and press "save"
Applying an animation from Studio Library:
- Select one control of your rig, so studio library recognizes the name space, and press the icon right next to the Apply button - select content. This will select all of the used controls for this animation
- I always use the option "insert" and "from selection". You can also be sure that the animation will be applyied at the current timeline location by checking the "Current Time" box.
- Now press "Apply"
Next to saving my cycles, I also used Studio Library to save the jiggles and wind detail for my dragon, so I could simply add it to my scenes without having to animate it over and over again (as shown in the last image).
Animation, Motion Path


Depending on the number of shots you want to do you can now start to animate the individual shots.
I started by adding the cycles to the shot that I needed to use. The rig I was using had a specific control that was used to create the flight path, so I simply animated that and adjusted the path by editing the Editable Motion Path I explained to you earlier. In other rigs it might be easier to create an actual path and attach your dragon to it.
Attaching the dragon to the Motion Path:
- Create a locator (Create - Locator) and rename it
- Select the locator and then the control of your dragon you want to attach to the path, then go to Modify - Match Transforms - Match all Transforms to move the locator to the control
- Now select the locator first, then the control and go to the Animation Menu, Constrain - Parent, so the locator drives the Control.
- At this point create a curve Create - Curve Tools - EP Curve and draw it in an orthographic view into your scene. You can also modify it later by right clicking it and selecting "Control Vertex". Those pink vertices can be moved around.
- Now select the locator, then the curve and in the Animation Menu go to Constrain - Motion Paths - Attach to Motion Path. In the option box you can now adjust the rotation of your dragon.
Animation, Layers
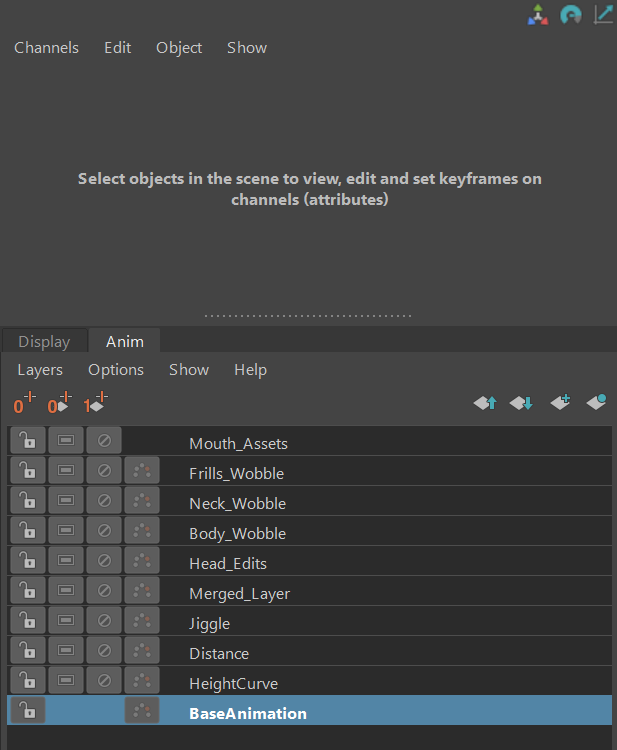
Adding detail to Animation Layers:
To make the flight cycle unique I added detail to it on so called "Animation Layers". Those are located underneath the channel box and stack animation over each other, add to it over even overwrite it.
I used it a lot to make movements more extreme, like the head or the wings and add detail to the whole motion.
Animation Layers also have the advantage, that you can turn them off, so you can look at the whole animation with or without detail, like jiggles and wind. All of the repetetive detail movements we animated in the previous step, like jiggles, can be added onto Layers.
- To create an animation layer to the program, you will need to either select the button on the right in the Animation Layer Tab showing a plane with a plus (create a layer) or the icon with a plane and a sphere (create a layer and add the selected ctrls to it)
- This will now create two layers. The base animation with everything you have done so far and a new layer, which you can now animate on top on.
- If you select the layer and there is a green button on the right, the control you have selected is included in the layer. If it is not there the animation will still be created on the base layer.
- To animate on the top layer you will need to set a key on the selected control first. If you do not key it you will animate on the base layer.
- The 0 button on the left sets the control back to the value that the control had without the layer enabled and basically resets it and can be very useful as well.
- Once you are consent with your layer you can either keep it to turn it on and off. In my case, I baked a lot of the layers down to the base layer again, to have more control over the Graph Editor. You bake the layers down by shift selecting at least two layers, right clicking and pressing "Merge Layers". I recommend you to choose "Smart Bake" in the option box, so you do not get more keys than necessary.
Blocking, Blocking Plus, Polish

In the Progress Reel, I added the most important steps for my animation progress. Blocking, Blocking Plus and Polish.
Blocking:
- Add the cycle assets to the dragon
- Establish the base motion with the help of the path control / motion path
- Add some more key poses to make the motion more unique
Blocking Plus:
- Establish a better timing and weight
- Add overlap in all body parts
- Track arcs
Polish:
- Add jiggles, assets and details from the asset library
- Animate individual assets
- Add overlap to the tail and make the motion more extreme
Here are some more tips for the steps of animation:
- Start with a rough movement, only touching the most important controls
- Hide appendages if they distract you or you want to focus on a specific part, by adding a transparent material to the faces
- Import your references into Maya, so you have a direct reference to use for weight and motion
- Track the arcs of all of your most important controls
- Animate from the most important control to the least important control
- Use animation layers, but bake them, once you do not need them anymore.
- Use the Graph Editor (such an important tool)
Textures
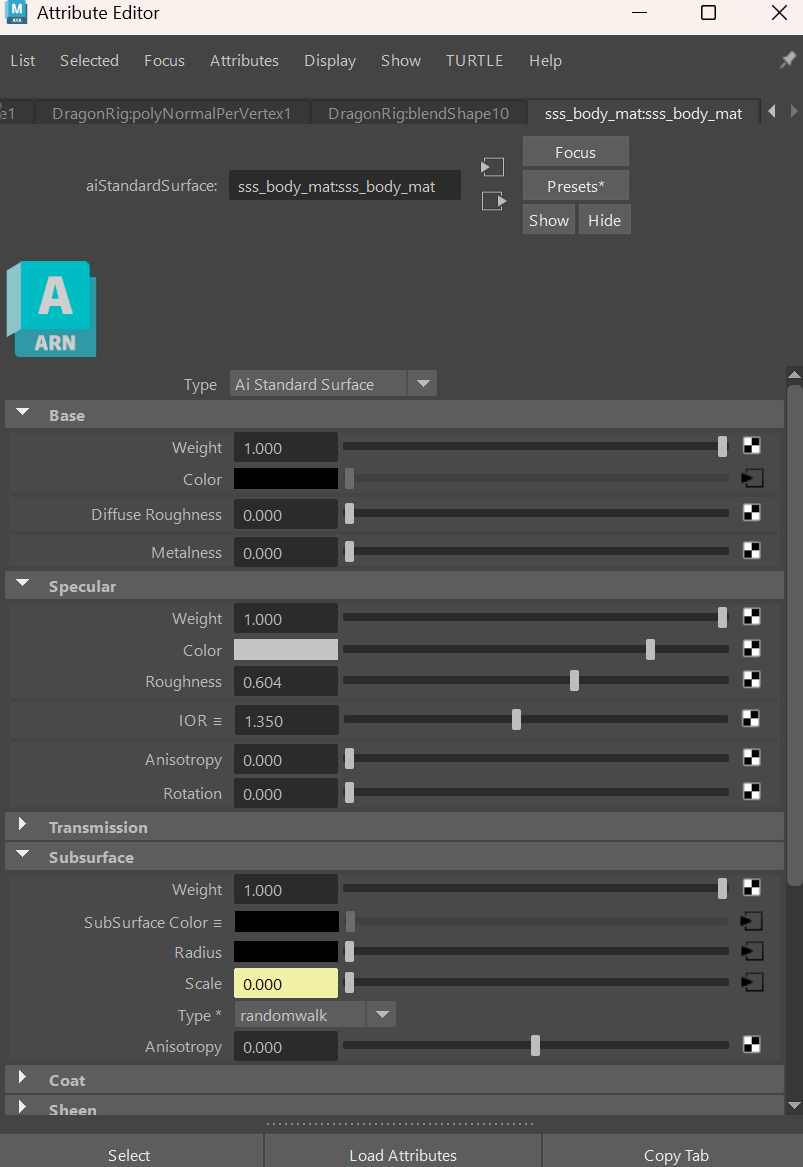
As this article is only supposed to cover the animation of my sequence, Textures, Lighting and Rendering are basically a little bonus that I wanted to add for you guys that wraps up the project.
Textures:
- Be sure to use Arnold Materials. You check if your rig has Arnold Materials, by right clicking the geo and going to "Material Attributes" or navigating to the most right tab in the Attribute Editor. Under the Color Tab, you should have an arrow that pulls up the material options when pressed. Here you can check if the material option in the drop down menu has an ai in front (like ai standard surface). If it does not it is not an arnold material.
- In this case you can go to Arnold - Shaders - Convert Shaders to Arnold. Here you have to check if all of the textures are still found and might have to link them if not. You could also set up the material completely from scratch. In this case you have the option to adjust the roughness or even add a subsurface to it.
- If you have any surfaces that your dragon interacts with, like me in my last shot, it is a good idea to take a look at the so called "ai Shadow Matte" material, which only displays the shadow of an object on a surface without showing the geometry, allowing you to add this on top of your footage. For this step you will need to roughly model the geometry that the dragon interacts with like shown in the second attached picture.
Useful tutorial:
Lighting

- For lighting the scene I used an HDRI from the website Poly Haven. For this you have to create a Skydome by going to Arnold - Lights - Skydome Light. In the attributes of the skydome light you can now navigate to the hdri you selected and will use the colors from that image in your lighting. If you want to be very fancy you can also create your own HDRI.
- Additionally I used directional lights to have more control over my lighting. For this go to Create - Lights - Directional Light.
- In my case I used light groups to have a better overview on what light influences what surface and changing up that lighting during compositing. More on that in the tutorial I added down below.
Useful tutorial:
Rendering


- For rendering I used Render Layers, to have my shadow and dragon split up. This allowed me not only more flexibility in the compositing process but also to have surfaces reflect their color while not being shown in the render.
- Furthermore I used AOVs to split up passes for the compositing process and giving me more flexibility on the overall look later on.
- Take a look at the third picture and the tutorial I attached down below for more information on it. Be sure to contact me if you have any questions.
Useful tutorials:
Final Product

After compositing my shots in Nuke and Rendering the Sequence out of Davinci Resolve my animation was finally done. Here is the end result.
Thanks so much for bearing with me for this whole process. I am really curious to see your dragon animation in the future. If you have any questions on this process be sure to contact me and until then:
HAPPY ANIMATING!