Arduino OLED Retro Racing Game
by thunder_ir in Circuits > Arduino
96 Views, 0 Favorites, 0 Comments
Arduino OLED Retro Racing Game
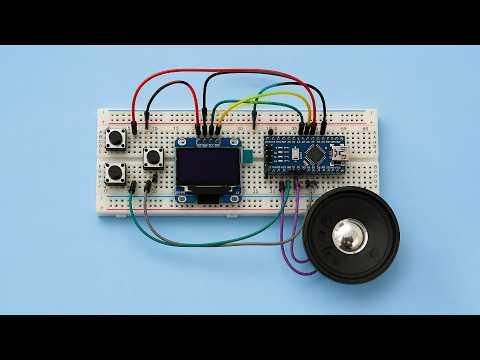
Arduino OLED Retro Racing Game
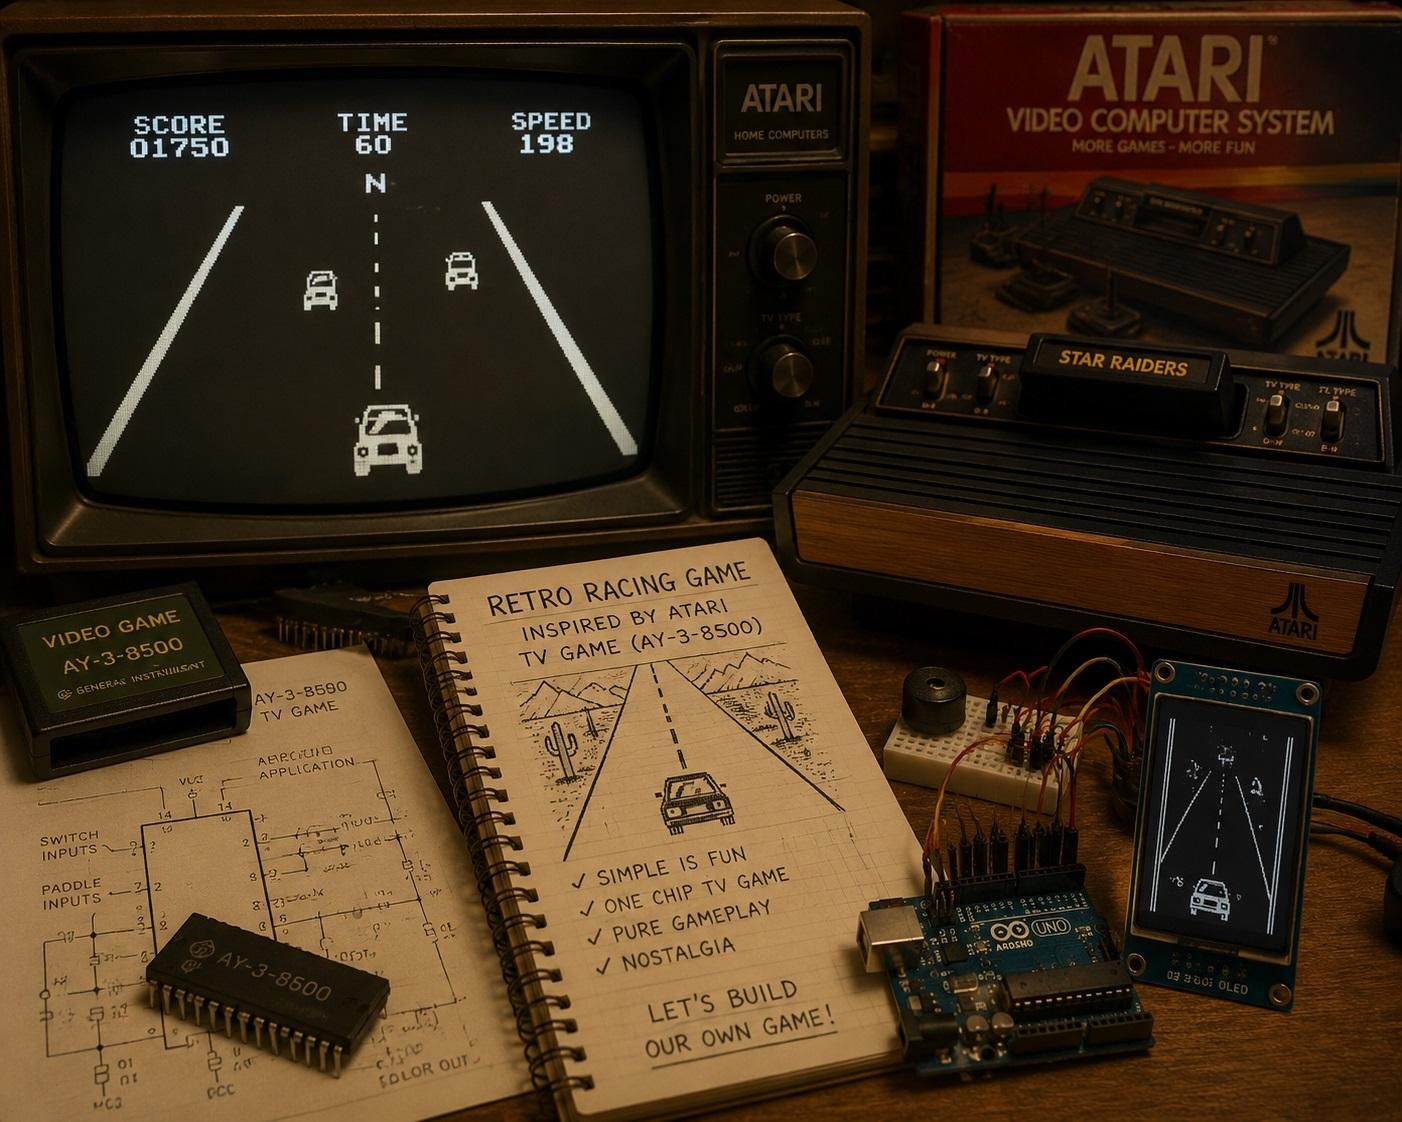
I belong to the generation that grew up with the very first home video game consoles. Long before modern gaming, I spent countless hours playing those classic TV Game systems based on the famous AY-3-8500 chip, and of course the Atari 2600. Those simple games created some of my best childhood memories.
Among all of them, racing games were always my favorite. The graphics were incredibly simple, but that didn't matter. All you needed was a controller, a TV, and a little imagination.
A few days ago I started wondering...
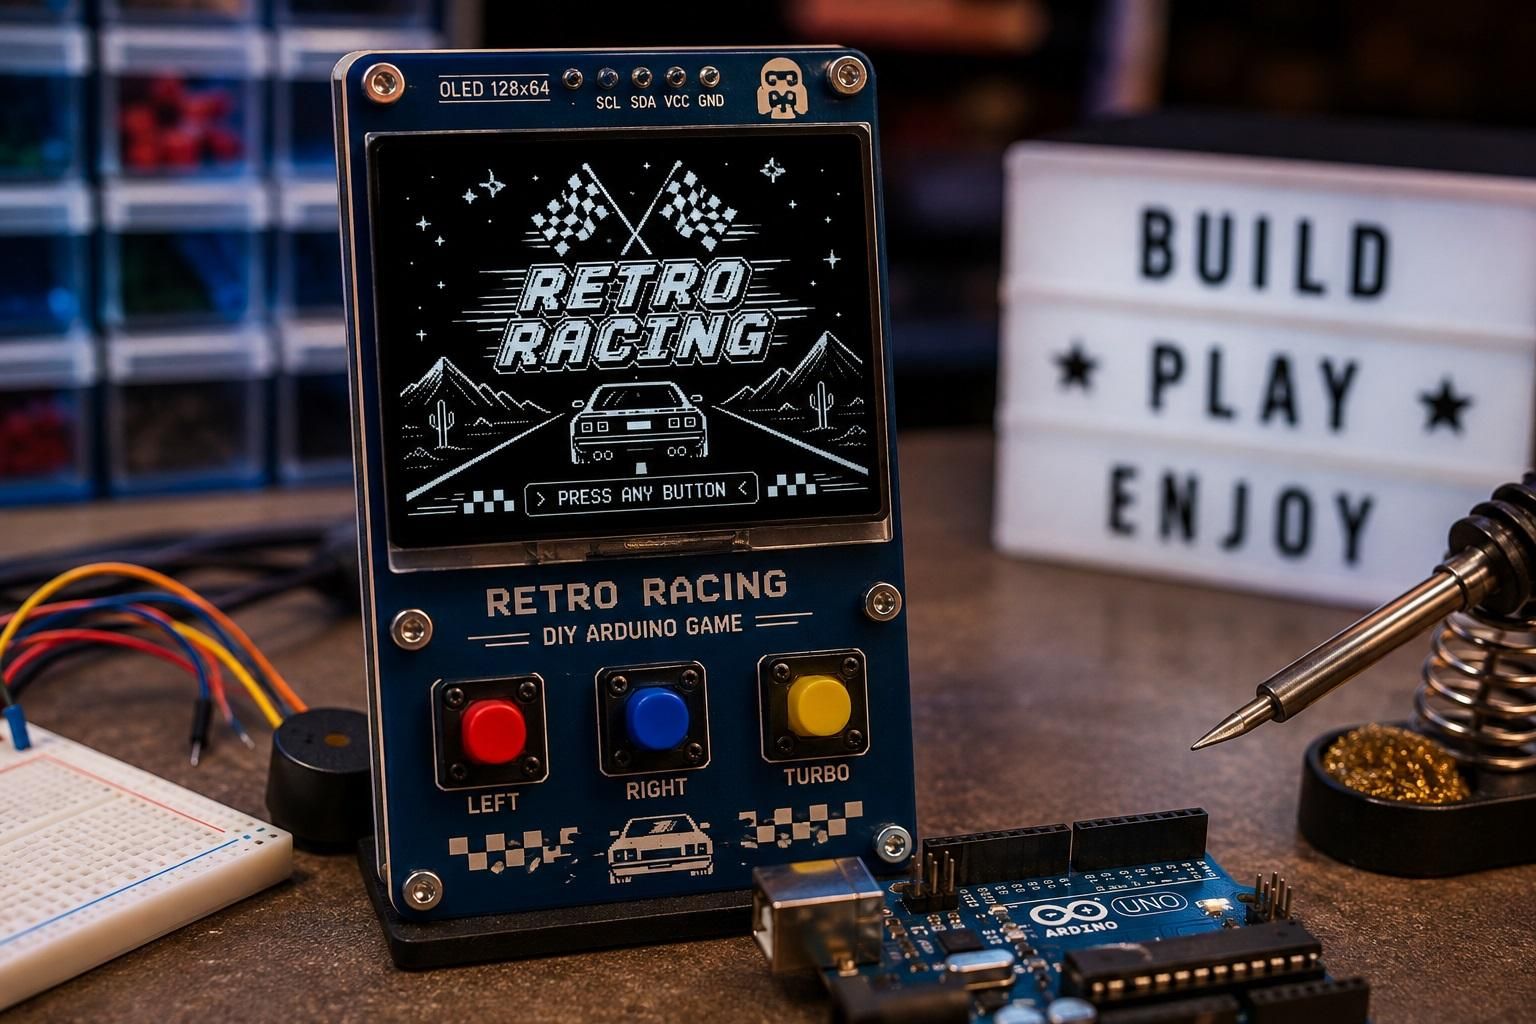
Could I recreate that same feeling using nothing more than an Arduino and a tiny OLED display?
That simple question turned into this project.
I began experimenting with different ideas, discussing game mechanics with AI, improving the code step by step, and gradually transforming a simple concept into a playable retro racing game.
Instead of publishing only the final version, I decided to document the entire journey.
In this series, we'll build the game together from the ground up. Every step adds a new feature, making the project a little more exciting than the previous one. You can stop at any stage, continue all the way to the finished game, or even modify the code and create your own version.
Whether this project reminds you of the early days of video games or simply gives you a fun Arduino project to build, I hope you enjoy the journey. Feel free to experiment, add your own ideas, and create your own version of this tiny retro racing game. Let's get started!
Let's get started!
Supplies
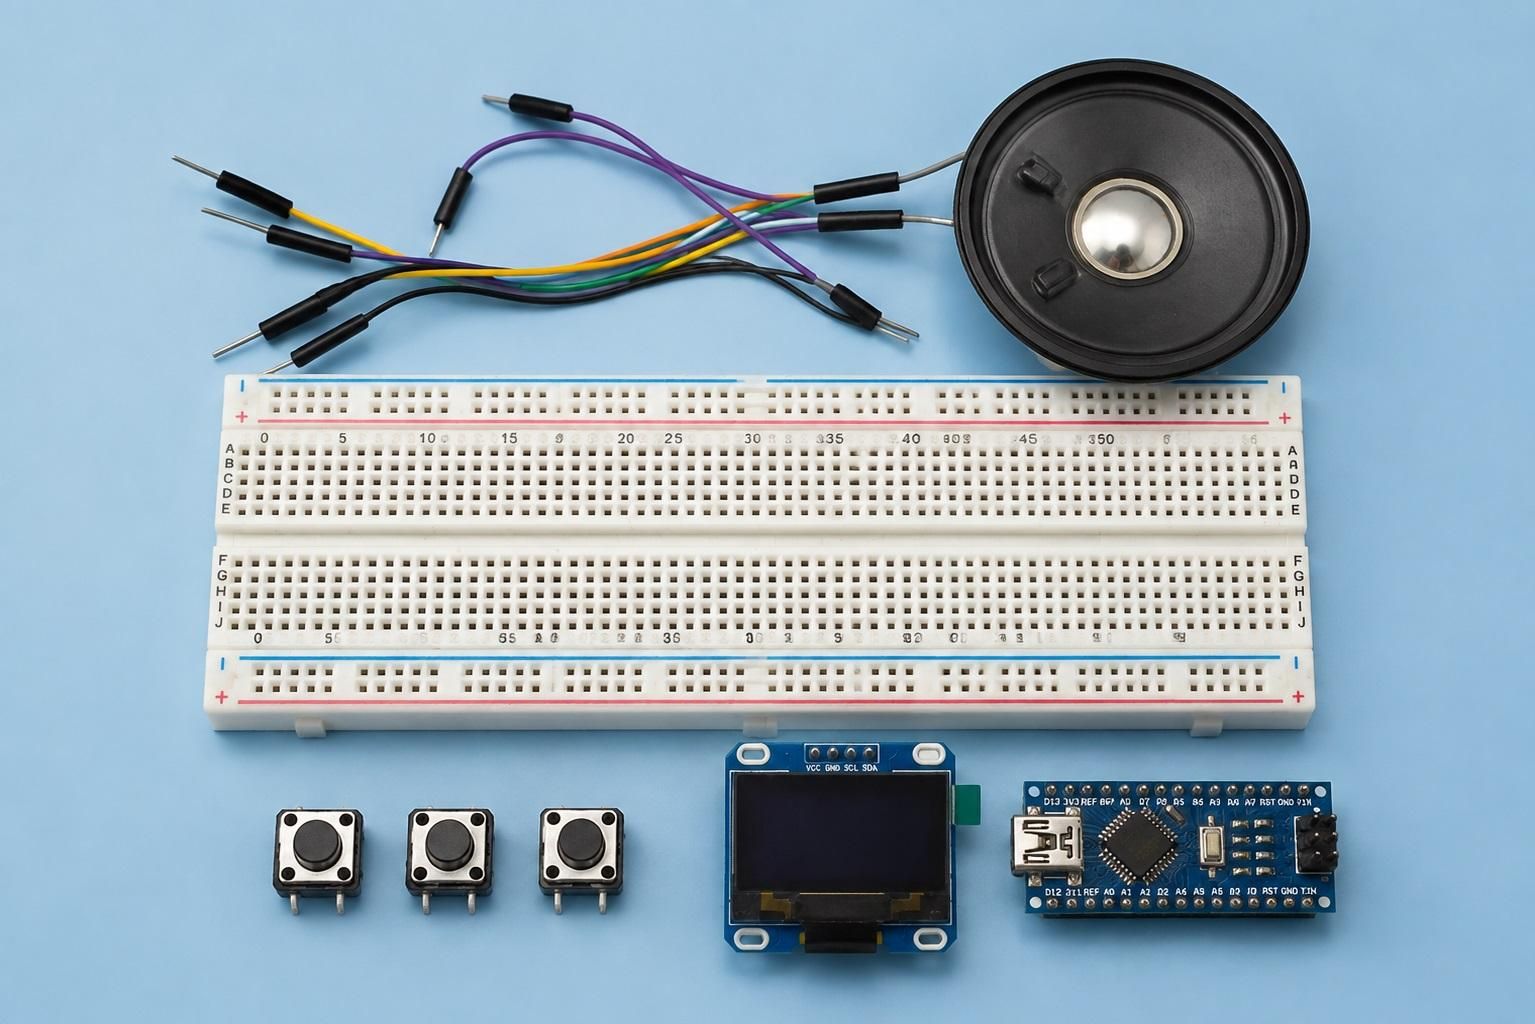
For this project, you will need the following components:
- Arduino Uno or Arduino Nano
- Breadboard
- OLED display (128×64 pixels)
- Push buttons (3 pieces)
- Small speaker (8Ω speaker recommended)
- Male-to-male jumper wires
- USB cable for Arduino programming
Arduino Board
I used an Arduino Nano for this project because it is compact and can be easily installed directly on a breadboard. An Arduino Uno can also be used. Both Arduino Nano and Arduino Uno are based on the same ATmega328P microcontroller, so the program structure and libraries are almost identical.
Other Arduino boards can also be used, but depending on the board, some modifications may be required, especially:
- Pin assignments
- Available memory
- Display connections
- Program optimization
OLED Display
In this project, I used a SH1106 128×64 monochrome OLED display. Other OLED displays can also be used, such as SSD1306-based displays, but the display library and some parts of the code may need to be changed according to the display controller.
For example:
- SH1106 display → Adafruit_SH1106 library
- SSD1306 display → Adafruit_SSD1306 library
Make sure the display size and I2C address match your hardware.
Required Libraries
Before uploading the code, install the required Arduino libraries.
The project uses the following libraries:
SPI and Wire are included with the Arduino IDE, so they usually do not need to be installed separately.
However, you need to install these libraries manually:
- Adafruit GFX Library
- Adafruit SH1106 Library
To install them:
- Open Arduino IDE
- Go to:
- Search for:
and install it.
Then search for:
and install it.
After installing the libraries, restart the Arduino IDE and upload the code.
The First Playable Version
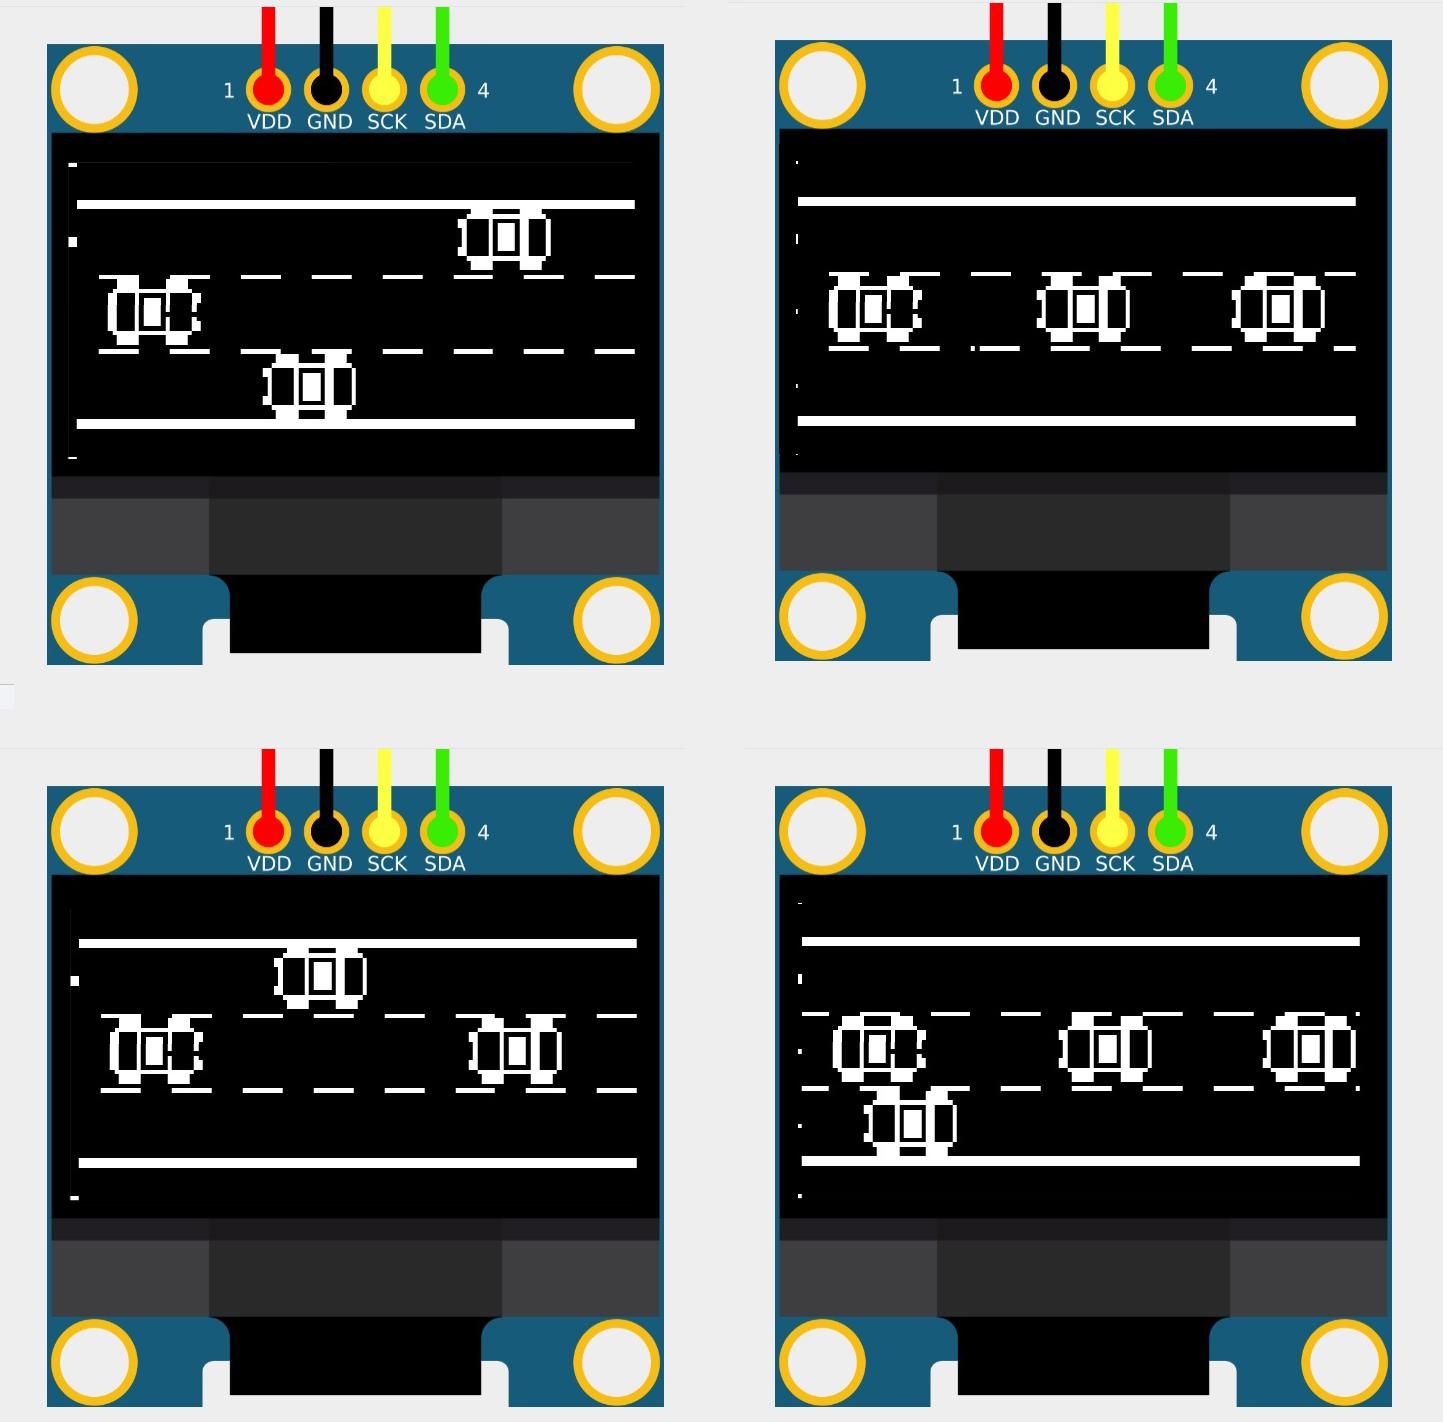
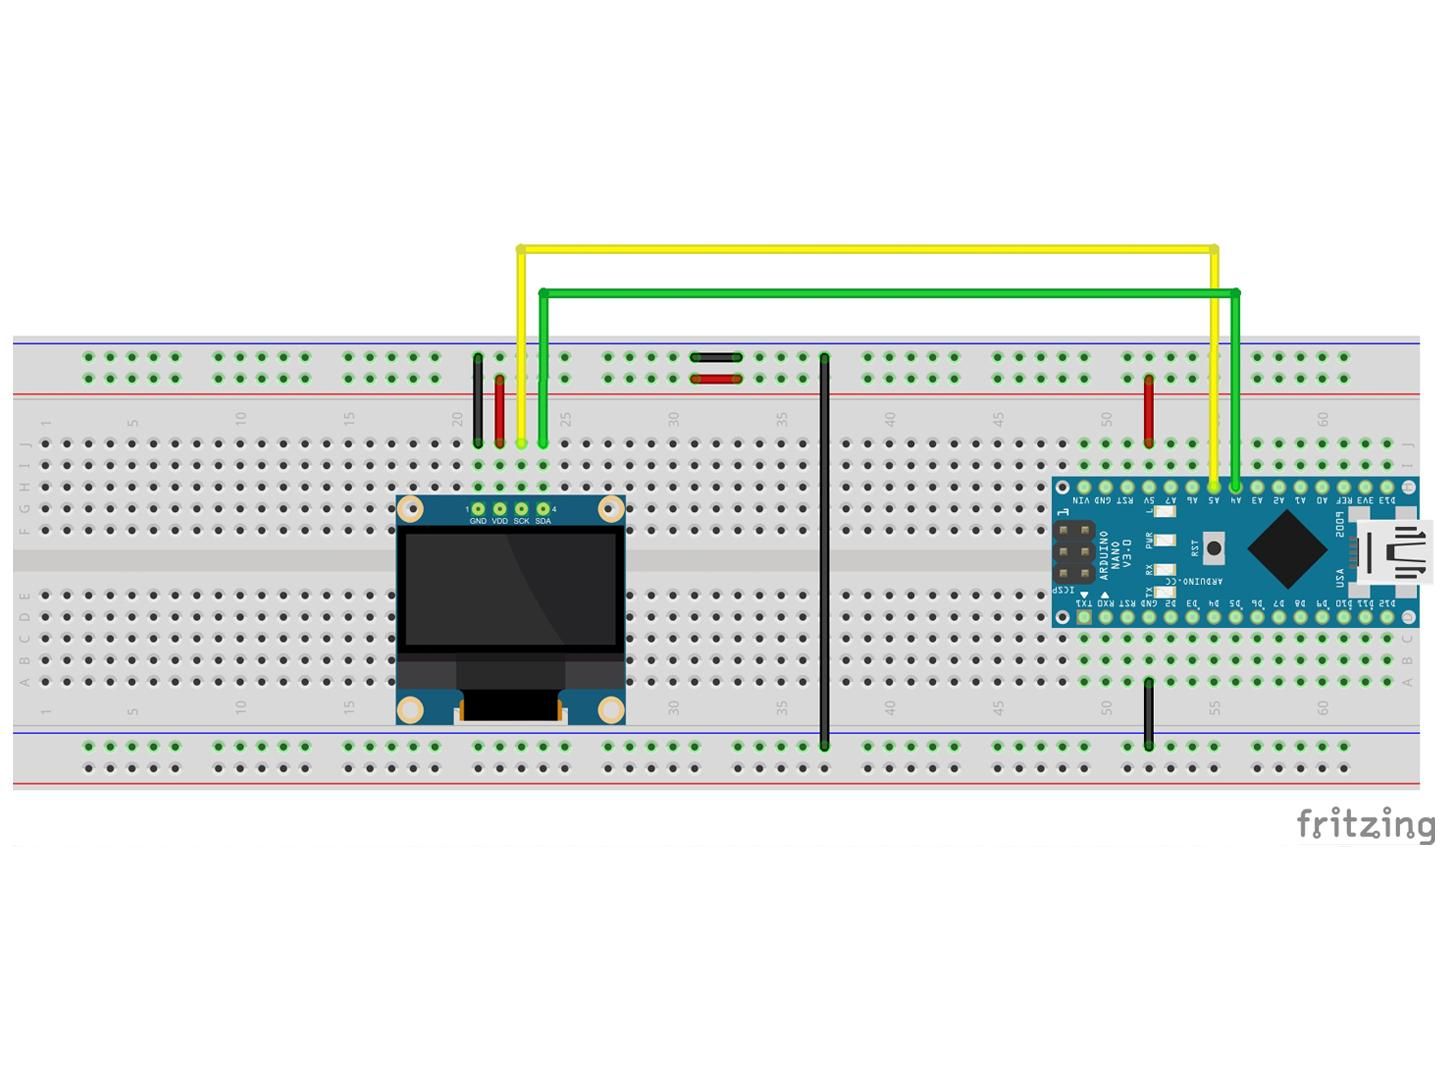
Let's start with a simple but exciting milestone—the first playable version of the game.
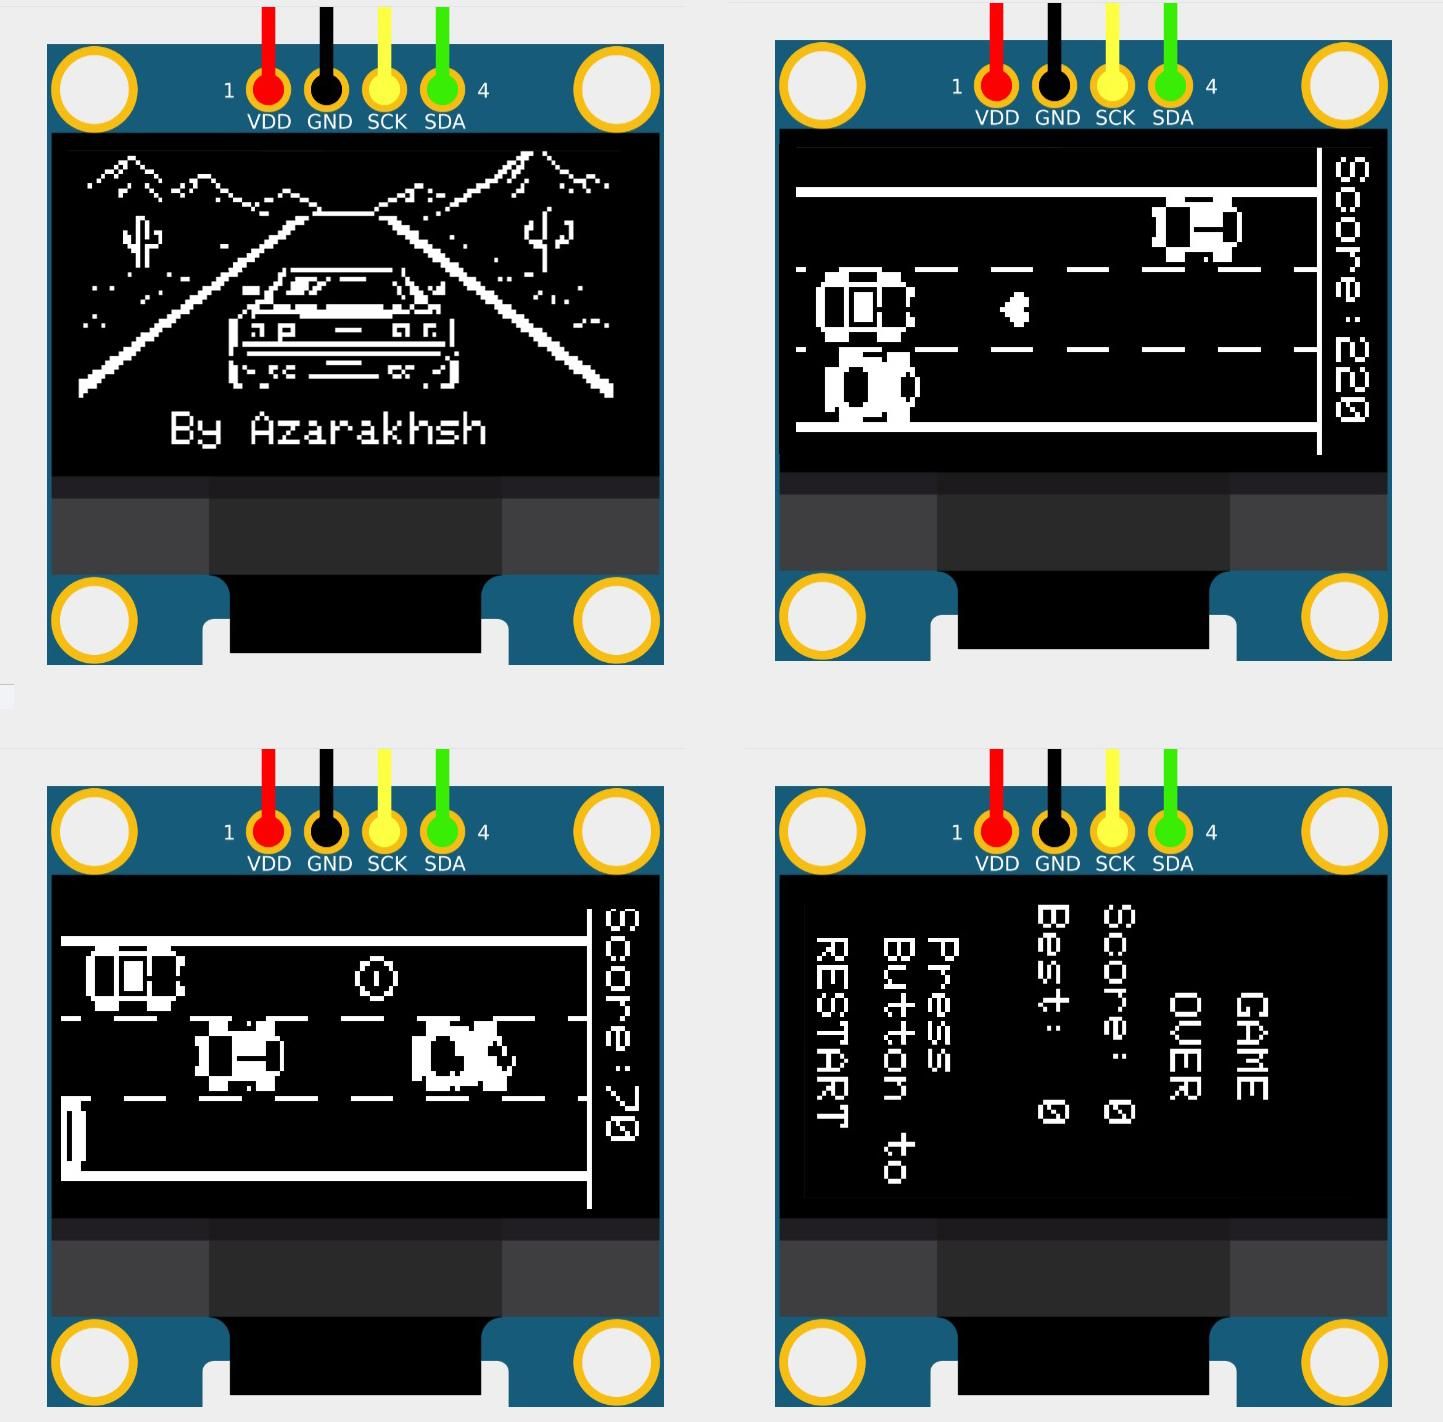
At this stage, the OLED displays the road, the player's car, and oncoming traffic moving toward the player.
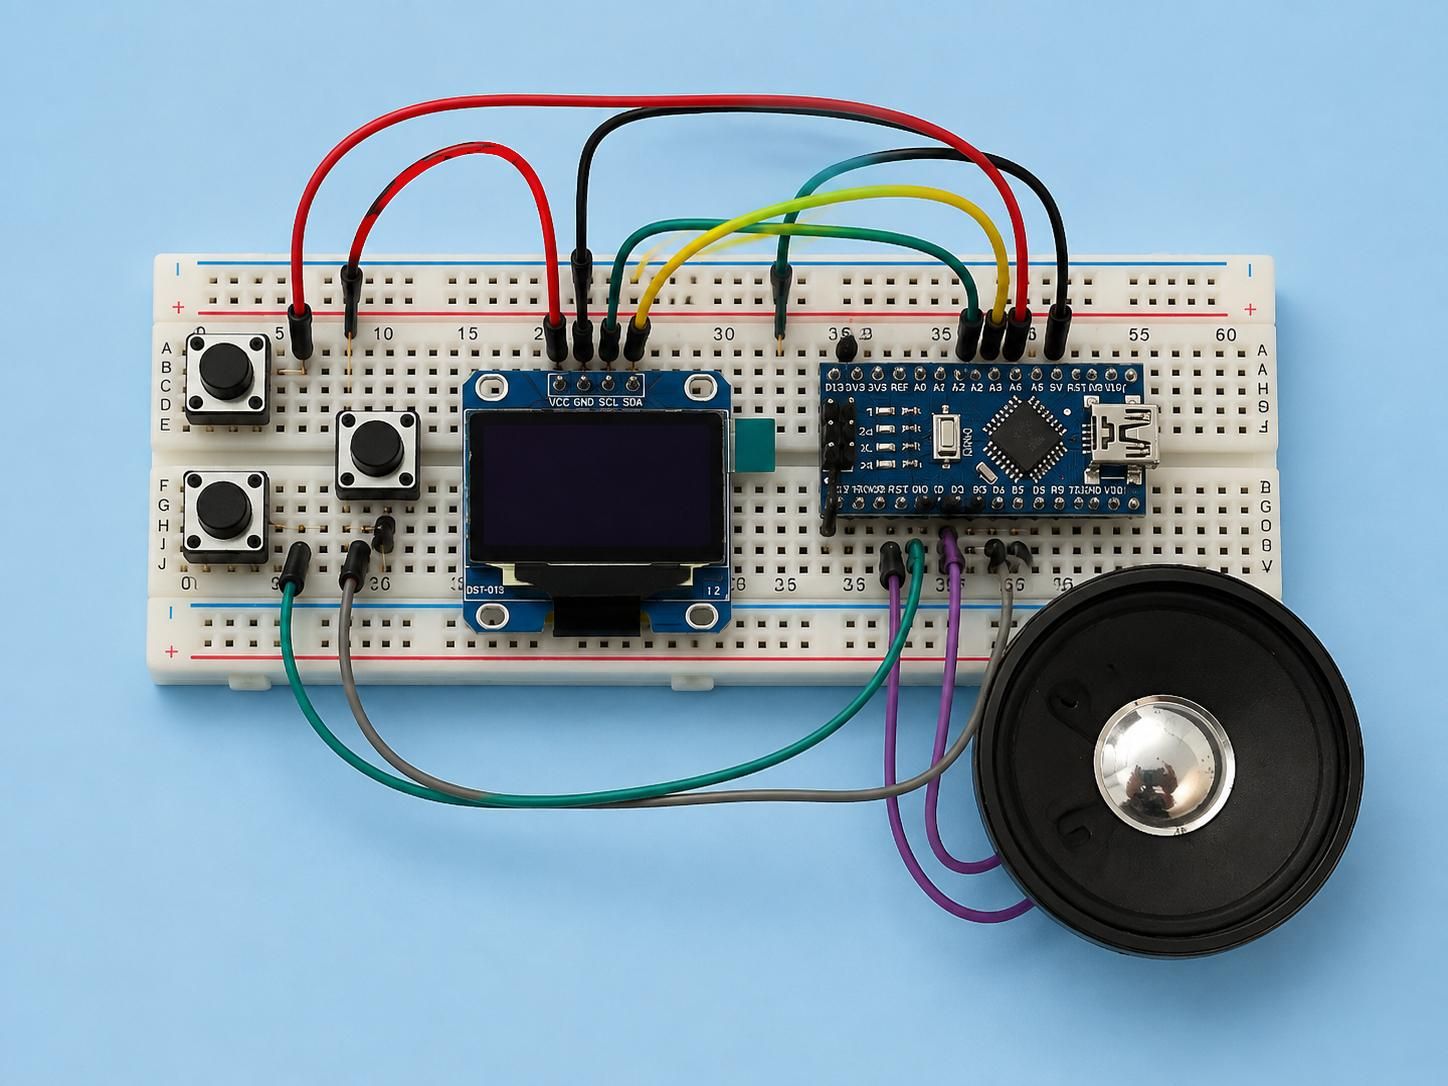
The circuit diagram for this step is shown. The code started from my own idea and was gradually refined and expanded through discussions with AI until I was happy with the result. To make the project easier to understand and modify, I also added some English comments throughout the code.
Upload the sketch, watch it come to life on the OLED display, and then we'll continue adding new features in the following steps.
You can open the simulation from the link below and run the code directly in your browser. This allows you to check the connections, test different parts of the program, and see how the game works without needing the physical components.
https://app.cirkitdesigner.com/project/124db3e8-a5da-452b-be57-2cdc7863af0a
Downloads
Adding Player Controls
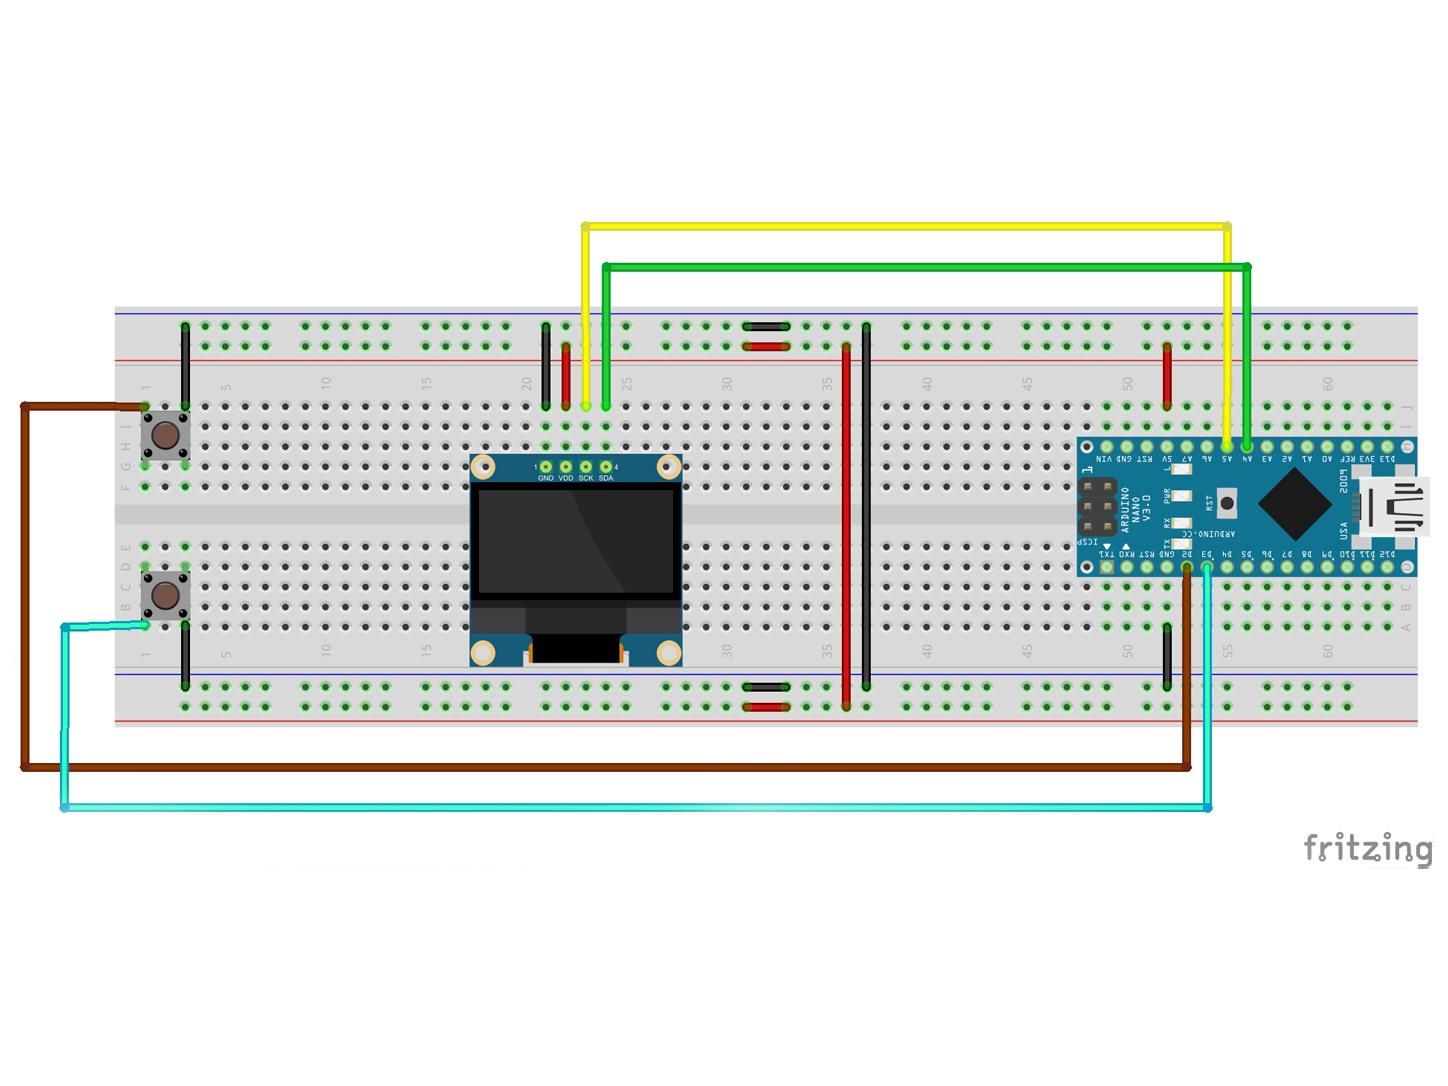
Now it's time to take control of the player's car.
The car can occupy three different positions on the road: left lane, center lane, and right lane. Two push buttons are added to let the player move between these lanes. Pressing the left button moves the car one lane to the left, while pressing the right button moves it one lane to the right.
The movement is limited to the road boundaries, so once the car reaches the leftmost or rightmost lane, pressing the corresponding button has no effect. A simple software debounce is also included to ensure that each button press results in only one lane change, making the controls feel smooth and responsive.
At this stage, collisions are not detected yet. The enemy cars simply pass through the player's car without ending the game. Collision detection will be added in a later step.
The simulation for this section is available here:
https://app.cirkitdesigner.com/project/573272c2-6822-4868-90cc-90a09911adad
Downloads
Collision Detection, Scoring & Game Over
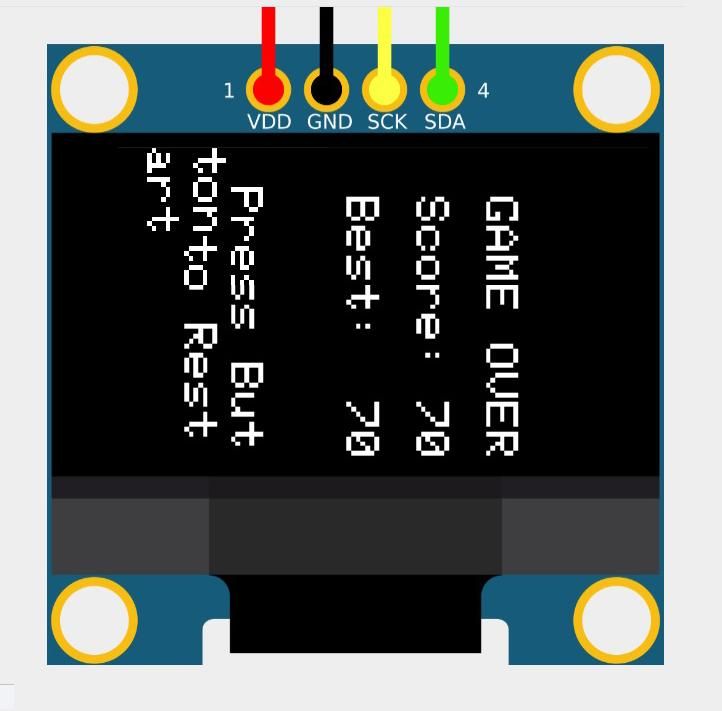
Now the project starts to feel like a real racing game.
In this step, collision detection is added, so hitting an enemy car immediately ends the game. A simple crash animation is displayed before switching to the Game Over screen.
A complete scoring system is also introduced. Every enemy car you successfully avoid increases your score, which is continuously displayed at the top of the screen while you play.
As your score increases, the game gradually becomes more challenging by increasing the speed of the oncoming traffic, making it harder to survive for long.
When the game ends, your final score and the best score achieved during the current session are displayed. Press either button to instantly restart and begin a new game.
Downloads
Adding Sound
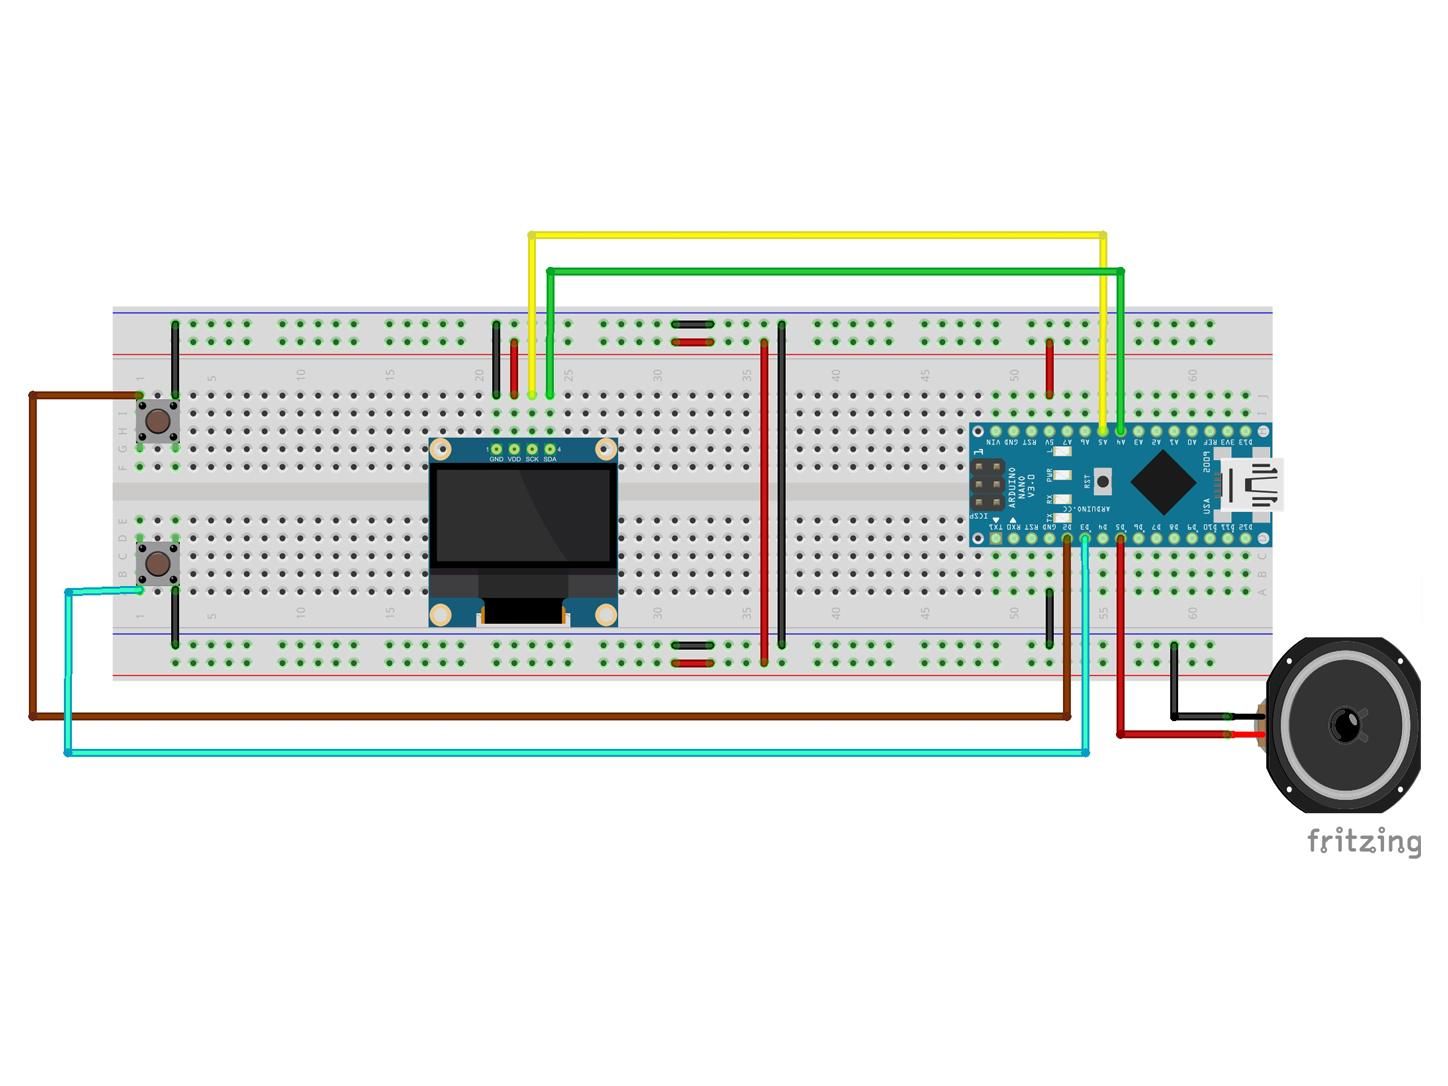
The game is starting to feel more alive, so it's time to add some sound!
In this step, a small speaker is added to the project. Connect the speaker to Arduino pin D5 and GND, according to the wiring diagram below.
Important: Use a speaker, not a buzzer, if you want to hear the different sounds used in this game. The sounds are generated directly by the Arduino using different tones and frequencies.
Several different sounds have been added:
- A continuous low-pitched sound creates a simple engine sound while the game is running.
- A short beep is played whenever the player successfully passes an enemy car and earns points.
- A changing, descending tone is used during the crash effect to make the collision feel more dramatic.
- All sound is automatically stopped when the game reaches the Game Over screen.
The scoring system has also been slightly improved in this version. Each enemy car can only give points once, preventing the same car from being counted more than one time while it is passing the player.
You can test this part of the project in the online simulation:
https://app.cirkitdesigner.com/project/51f08dc0-e389-495b-b9c3-0be9fd670b5e
Downloads
Adding Power-Ups
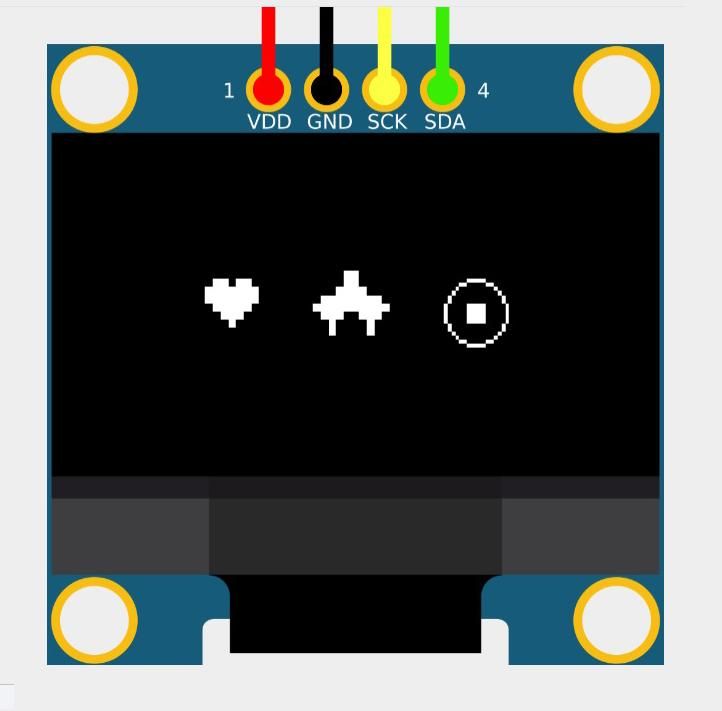
Now things get more interesting!
To make the game more challenging and rewarding, I added special power-ups that appear on the road. Each one has a different effect, so the player has to decide when and how to collect them.
There are three different power-ups in this version:
❤️ Heart – Shield
The Heart gives the player a shield around the car for 8 seconds.
If you crash into another car while the shield is active, you don't lose the game. Instead, the shield absorbs the collision and disappears, allowing you to keep racing.
⭐ Star – Double Score
The Star activates a double-score bonus for 8 seconds.
During this time, every point you earn is doubled, making it especially valuable when the traffic gets faster and you are able to pass several cars.
🎯 Coin – Bonus Points
The Coin gives you an immediate 50-point bonus when collected. Unlike the other power-ups, its effect is instant—the points are added to your score right away.
These power-ups add a little more strategy to the game. Sometimes it's worth taking a risk to grab a special item, while in other situations staying safely in your lane may be the better choice.
Downloads
Adding Different Enemy Cars
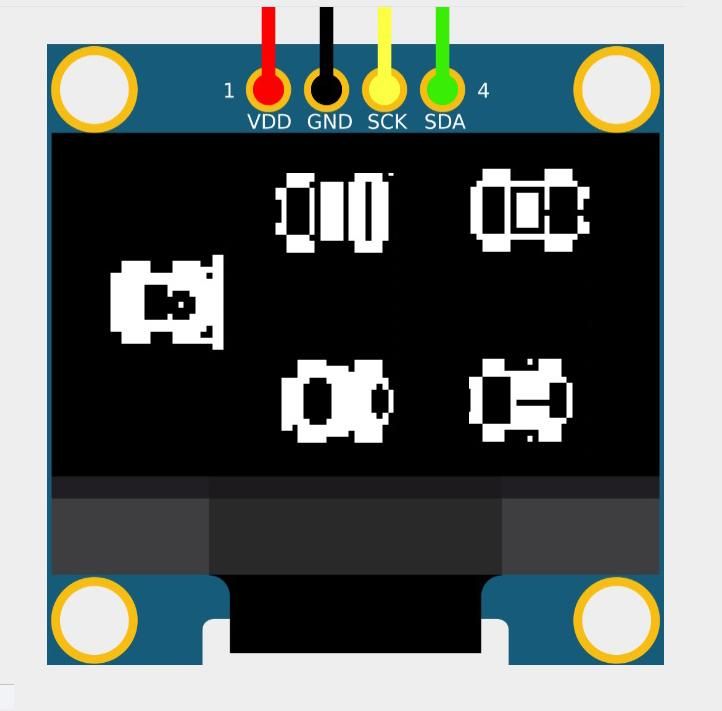
Seeing the same enemy car over and over can get a little boring, so it's time to add some variety to the traffic.
In this step, the game gets four different types of enemy vehicles. Each vehicle has its own shape and details:
- 🏎️ Sports Car – A low, streamlined car with side mirrors and a racing stripe.
- 🚚 Truck – A larger and heavier-looking vehicle with a front cabin and cargo section.
- 🚗 Classic Car – A rounded vintage-style car with chrome-style bumpers and round headlights.
- 🏁 Race Car – A racing car with a large rear wing, front spoiler, and a number on the body.
Each time an enemy vehicle appears, the game randomly selects one of these four models.
This keeps the traffic looking more varied and makes each run a little less predictable. The cars are still controlled by the same basic game mechanics, so the new models don't change the gameplay—they simply make the road much more interesting to watch.
Downloads
Adding Turbo Boost
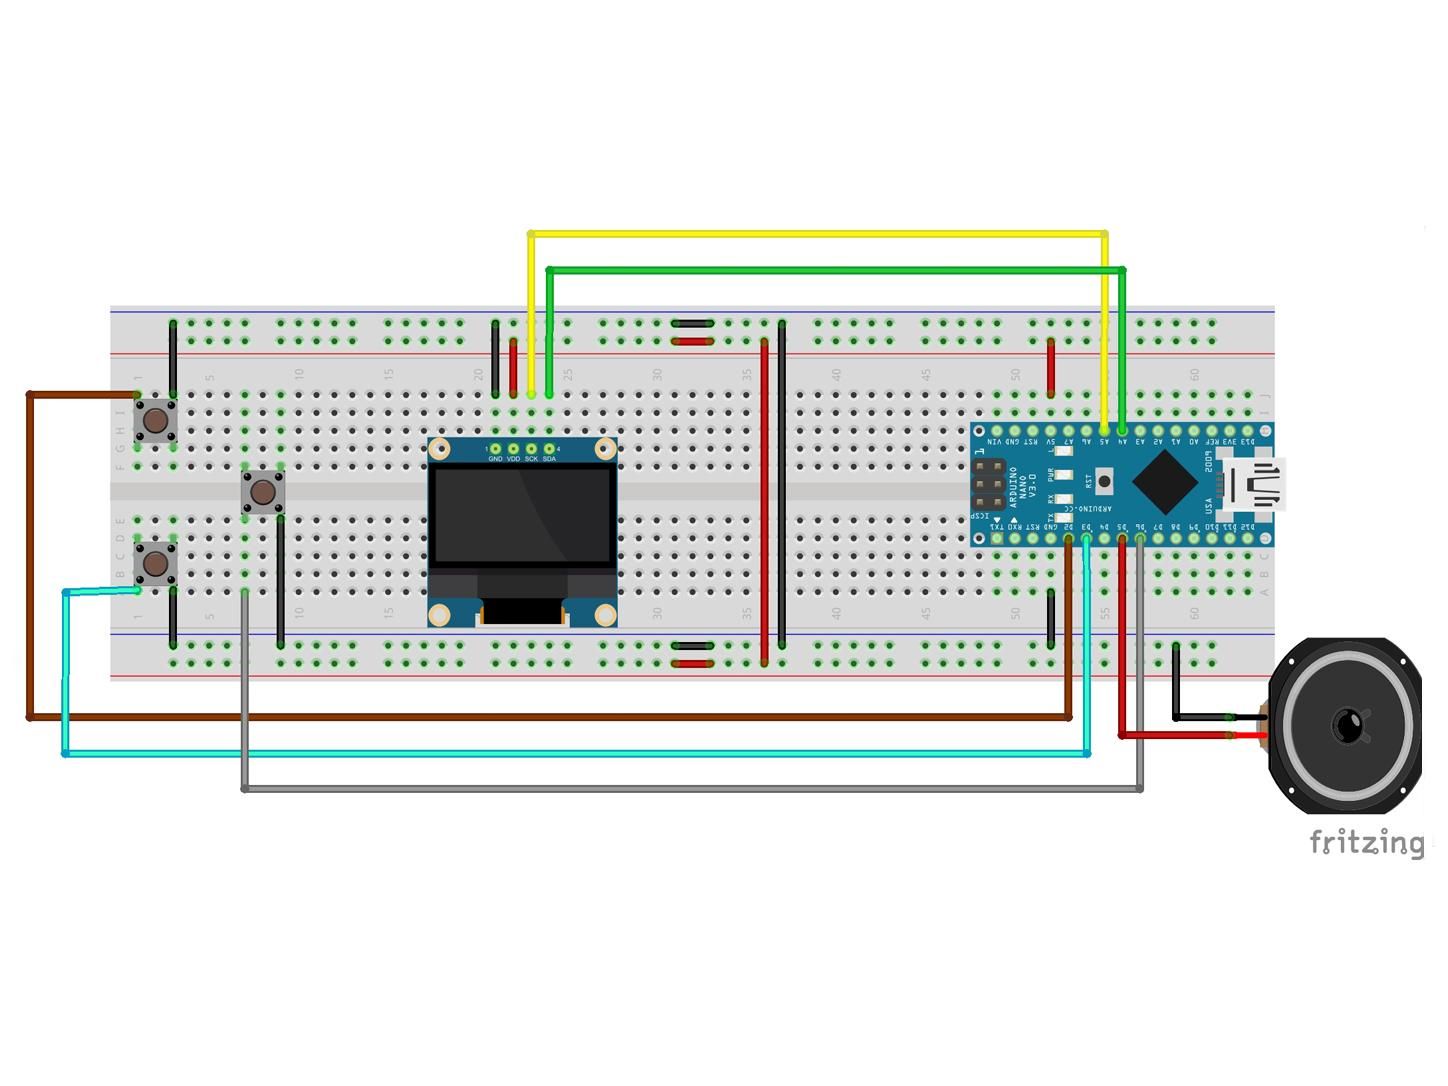
The game is getting faster, but now the player has a way to make it even faster!
In this step, a third button is added to activate a Turbo Boost. The turbo button is connected to Arduino pin D6, as shown in the wiring diagram below.
When the button is pressed, the game speed temporarily increases by 2 levels, giving the player a quick burst of extra speed.
But the turbo isn't just a change in speed. A few extra effects make it feel much more exciting:
🔥 Turbo Boost: Press the D6 button to increase the current game speed by 2.
🔊 Engine Sound: When turbo is active, the engine sound becomes higher-pitched and more energetic.
🔥 Flames: Two small animated flames appear behind the player's car while the turbo is active.
⚡ Separate Base Speed: The normal baseSpeed continues to increase as the player's score gets higher. Turbo is kept separate from the base speed and is only added temporarily while the boost is active.
This keeps the difficulty progression independent from the turbo effect. The game can continue getting faster as the score increases, while the player still has control over when to use the extra boost.
The simulation for this section is available here:
https://app.cirkitdesigner.com/project/44e05607-908a-42d1-8caa-d136db46100b
Downloads
Creating the Start Screen and Adding Music
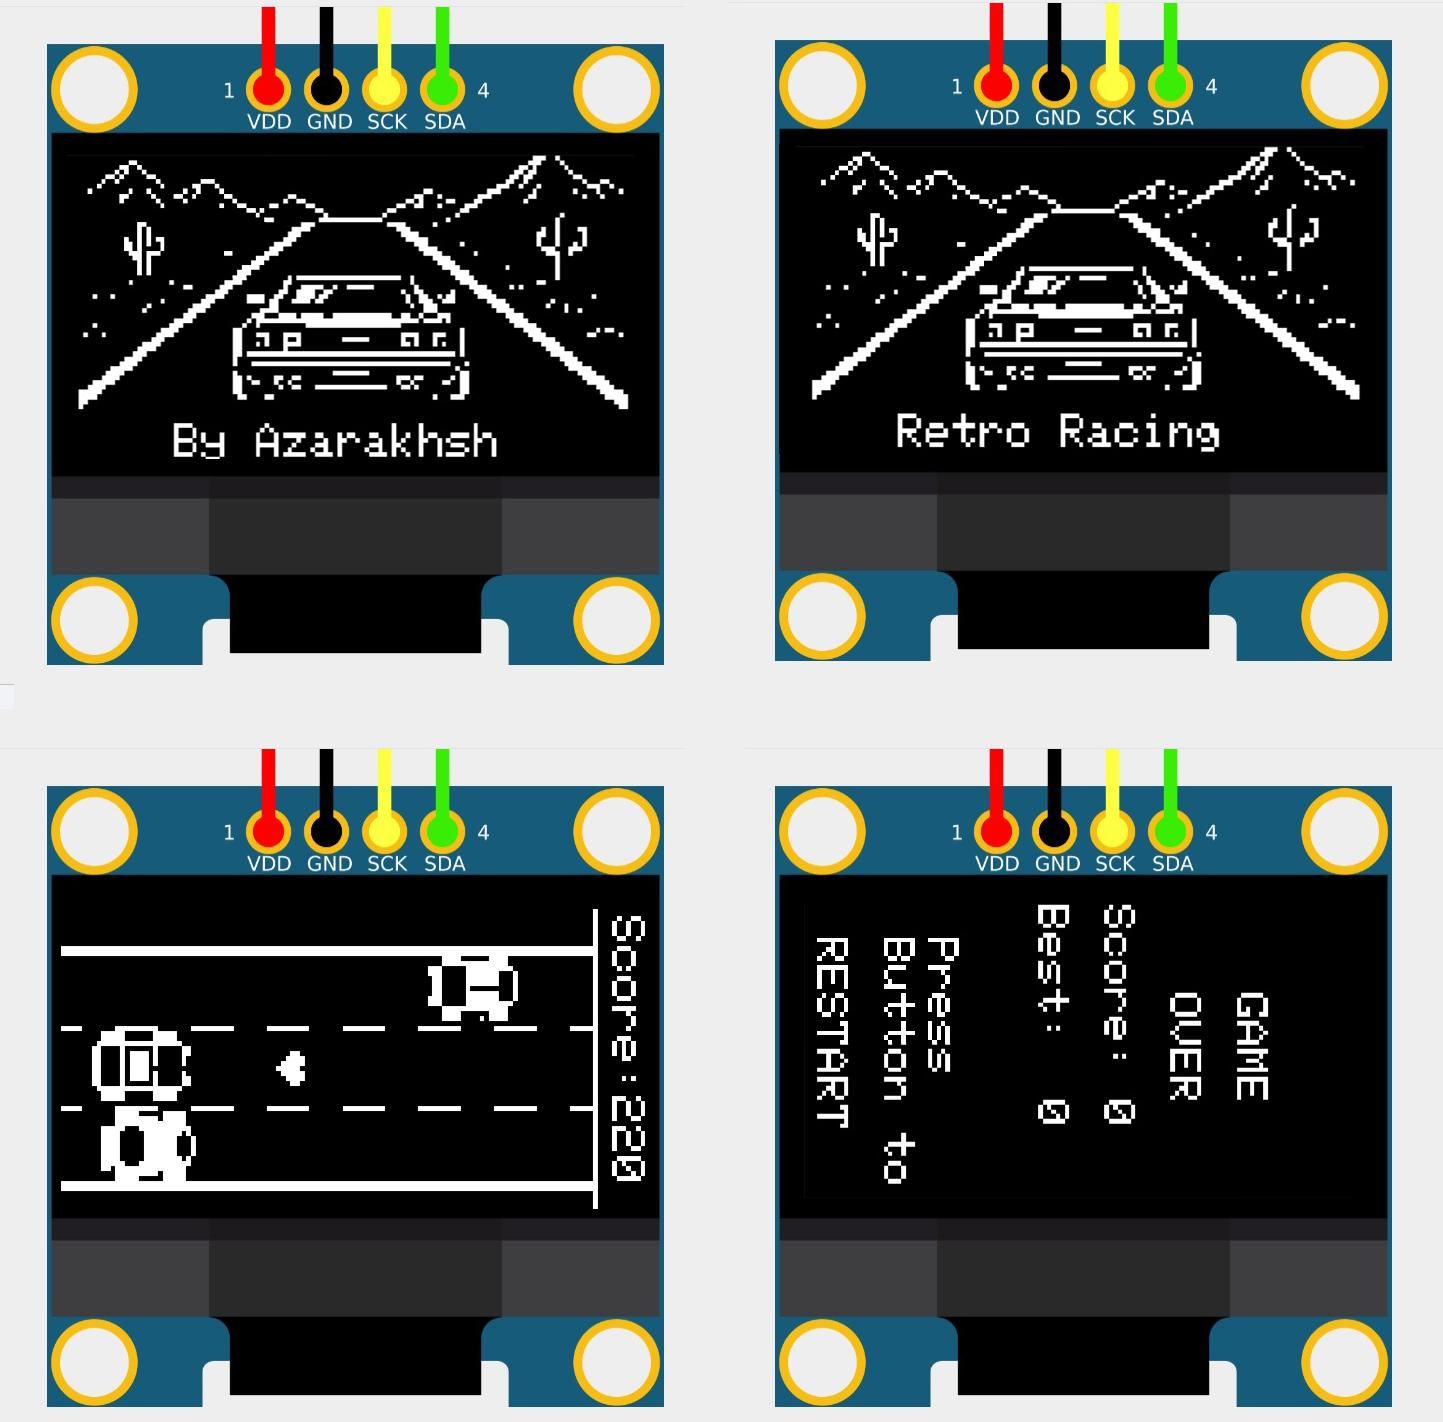
To keep the main code clean and easy to read, the start screen image is stored in a separate file called bitmap.h.
This file should be placed in the same folder as the Arduino .ino file.
The bitmap file contains the 128×64 monochrome image data:
Separating the bitmap from the main program keeps the game code smaller, cleaner, and easier to modify.
If you want to create your own custom start screen, you can design an image and convert it into Arduino bitmap code using:
https://www.oledanimationmaker.com/
After generating the bitmap code, replace the data inside this section in the bitmap.h file:
Now you can create your own logo, game title, or any image you like and use it as the start screen.
You can also replace the author name shown on the start screen. Look for this section:
and change "By Azarakhsh" to your own name, nickname, or anything else you would like to display.
Adding Start Screen Music
To make the game feel more like a real retro console, a startup melody was added.
The melody is played through the speaker when the game starts.
The music code is based on this Arduino buzzer melody example:
https://github.com/hibit-dev/buzzer/blob/master/src/movies/squid_game/squid_game.ino
You can replace the melody with your own favorite tune by changing the musical notes and their durations.
The notes are defined in this section:
By changing the notes and playback timing, you can create your own custom startup sound.
This makes the game more personal and gives it a real retro arcade feeling.
You can test this part of the project in the online simulation:
https://app.cirkitdesigner.com/project/5019b725-6e2e-43c8-b781-66c902f5b20e
Downloads
Where to Go From Here
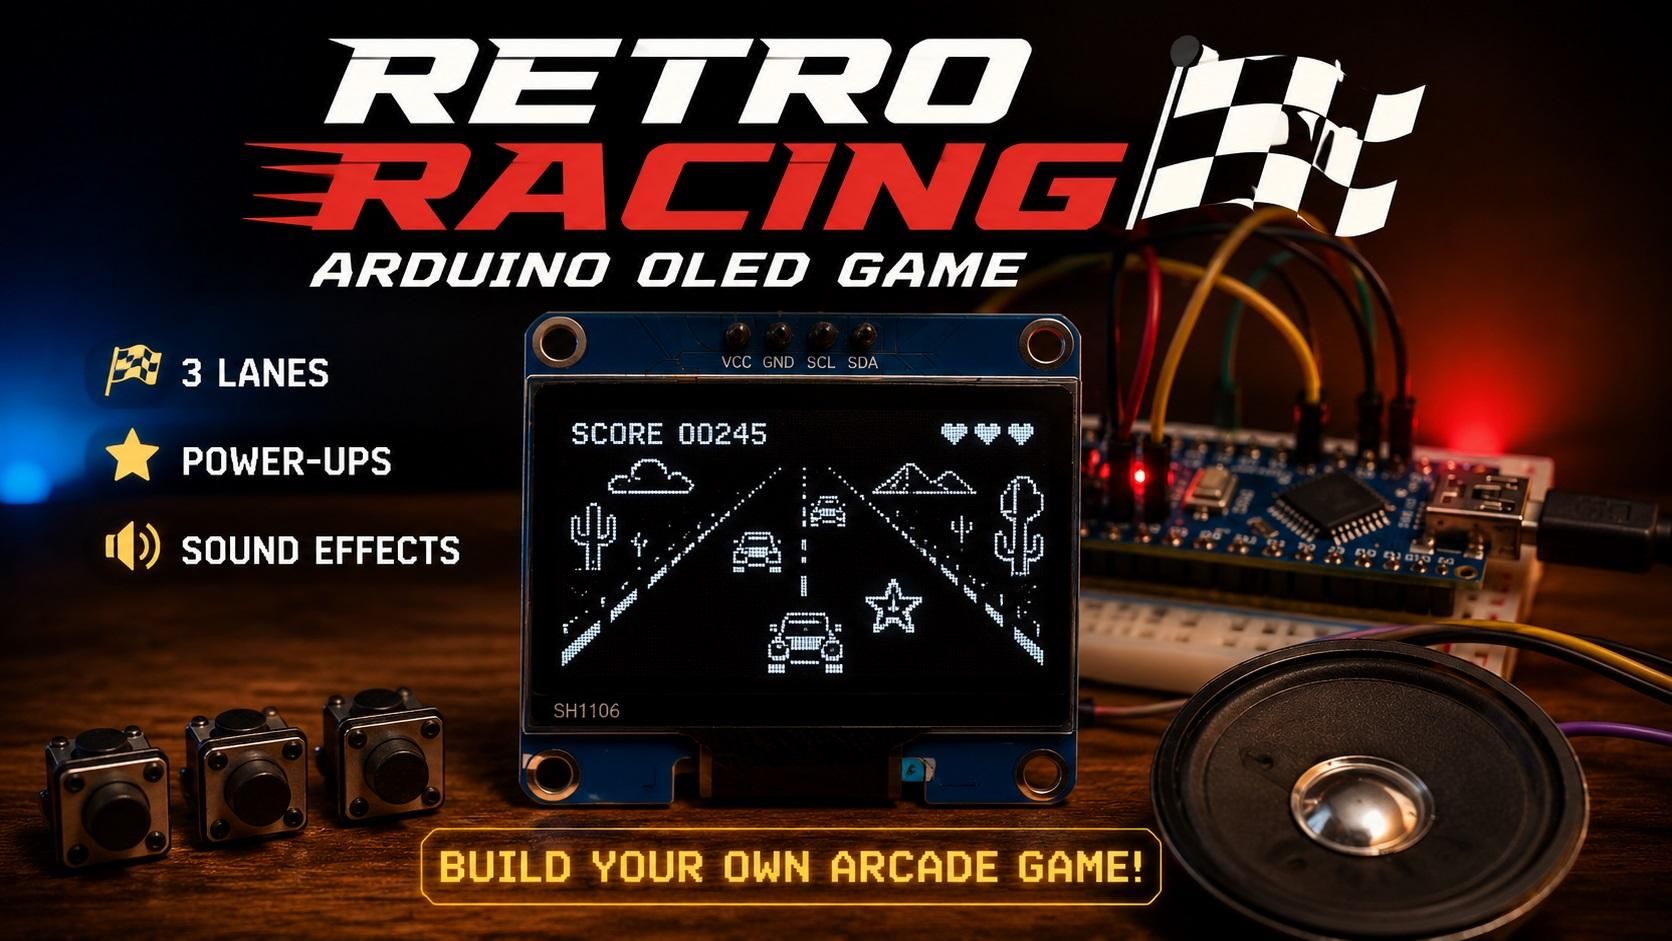
🎉Congratulations!
You now have a fully playable Retro Racing game running on a tiny OLED display. But this is only the beginning. There are countless ways to expand and personalize the project.
Here are a few ideas:
- 📦 Design a custom enclosure using laser-cut acrylic or a 3D printer.
- 🏆 Save the highest score in EEPROM so it remains after power is turned off.
- 🌐 Use an ESP32 or another Wi-Fi-enabled board to upload high scores to the Internet.
- 🕹 Replace the push buttons with a joystick for a different driving experience.
- 🚗 Create your own player and enemy car designs.
- 🎵 Replace the startup melody with your favorite tune.
- 🎨 Design your own title screen and game graphics.
- 💥 Add new power-ups, obstacles, or road types.
- 🌙 Create day/night or weather effects.
- 👥 Add a two-player mode using two controllers.
- 🔋 Make it portable with a rechargeable Li-ion battery.
- 📱 Add Bluetooth control using a smartphone.
- 📈 Increase the difficulty with more lanes, faster traffic, or smarter enemy cars.
- 🎮 Add new game modes such as Time Attack, Endless, or Survival.
The possibilities are almost endless.
I'd Love to See Your Version!
If you build this project, customize it, or improve it, I'd really love to see what you create.
Feel free to leave a comment, post a photo, or share your own version of the game. Seeing how others expand the project is one of the most rewarding parts of publishing open-source projects.
Who knows? Your idea might inspire the next version of Retro Racing!
Happy making! 🚗💨
A Note About AI
This project was developed with the assistance of AI. AI was used to help generate, organize, and refine portions of the source code and documentation. Every part of the project was tested, modified, and adapted during development to ensure it worked correctly with the hardware used in this tutorial.