Arduino RGB Interior Car Lighting (Bluetooth - Android App)
by Ardumotive_com in Circuits > Arduino
9037 Views, 24 Favorites, 0 Comments
Arduino RGB Interior Car Lighting (Bluetooth - Android App)


In this Instructables guide I will show you how to make an RGB interior car lighting by using the Arduino uno board (or any other Arduino based board).
I made my own circuit by using the ATmega328 micro controller but this is an optional step. In this guide I will help you to make it easily on breadboard by using the Arduino uno board, and I will give you some extra tips on how you can make your own Arduino-based custom circuit.
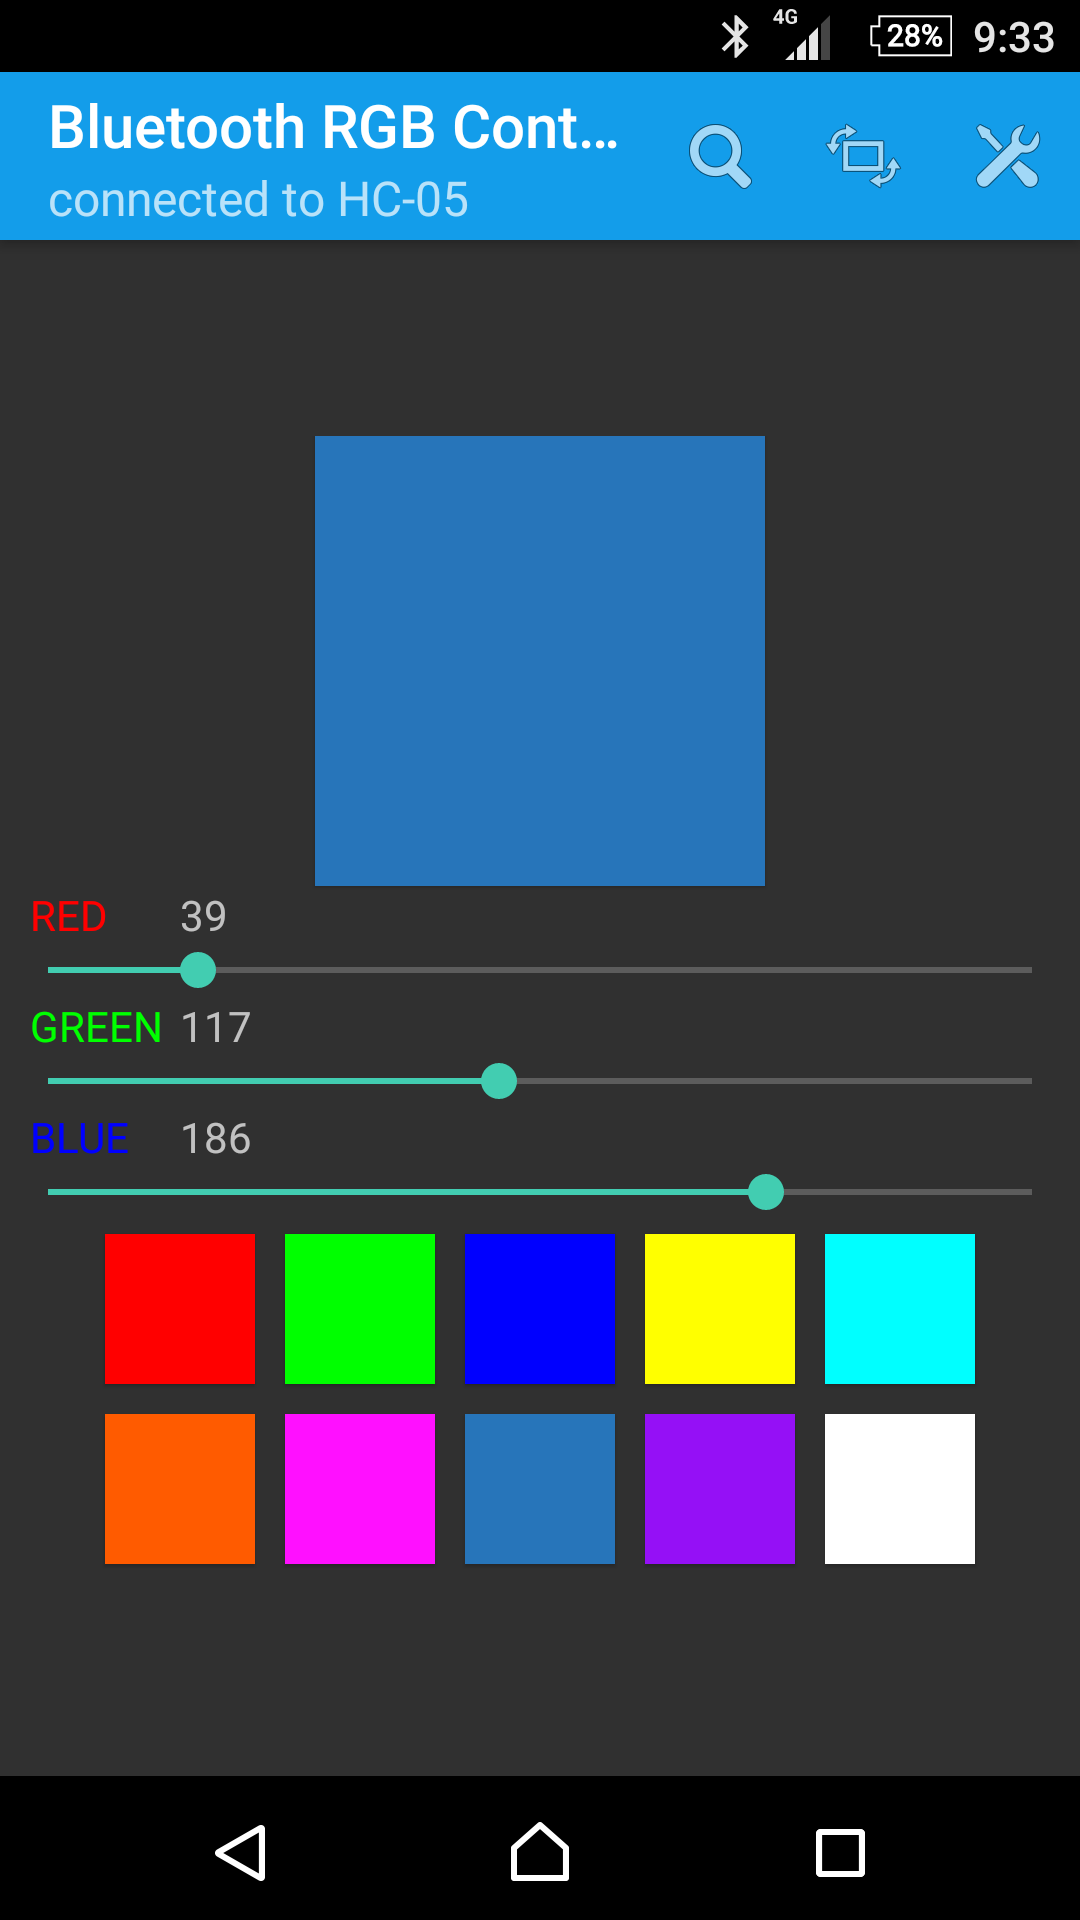
You will be able to change the lighting color through an Android device (phone or tablet) by using the "Bluetooth RGB Controller" application (Dev Next Prototypes) that you can download for free from Android Play Store.
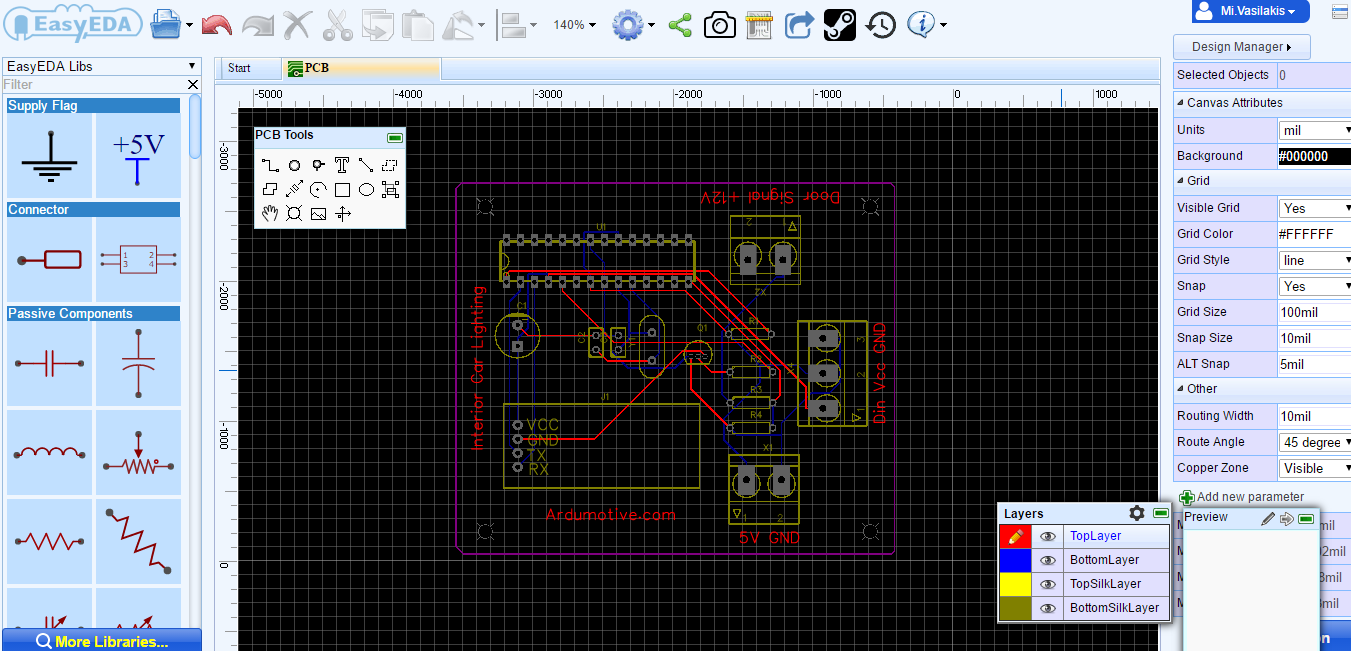
Also you can find the electronic circuit schematic at EasyEDA and order your PCB custom - Arduino based - circuit.
Lights turned on when you open a door with fade in effect, and turned of when you close all doors with fade out effect.
Watch the operation video:
Let;s get started!
Note: You will need some extra skills to connect this system with the interior car lighting signal cable. I am not responsible for any damage.
What You Will Need - Hardware


You can see more photos from my Toyota Yaris, the result it's really amazing, you can make your custom color lighting for about $15.
What you will need if you want to use just an Arduino board (the easy but not recommended way) :
- Arduino uno board (or pro mini, nano e.t.c.)
- 4 x WS2812 5050 RGB (8x RGB LEDs board)
- Serial Bluetooth module (HC-06 and HC-05 are compatible)
- ~270Ω, 10KΩ and 4.7KΩ resistors
- 2222Α NPN transistor
You will also need a small breadboard and some cables. For power you can use the dc input jack of Arduino uno and power it up from the car's battery. Make sure that you know what you are doing!
What you will extra need if you want to make your own Arduino based circuit:
- ATMega328 (micro controller of the Arduino uno board)*
- 16MHz crystal
- 2x 22pF and 1x 10μF (electrolytic) capacitors
- 10KΩ resistor
- 2x 2pin screw terminal connector (optional)
For power you will need one dc to dc converter to make battery 12 volts, 5V. Don't use the LM7805 it will get extremely hot! You can simple use one mobile car charger (1.5-2A).
*You still need the Arduino uno board to program it (plug/unplug ic from board)
The Circuit Schematic - Breadboard

Make the above circuit.
Why you used a transistor on gnd pin of the bluetooth module?
Well, it's simple, while you have your car parked this circuit will keep taking power from the battery. So you don't want to left it on while you are not using it. By using the transistor you can automatically turn it on when door is open, and turn it off when all doors are closed. Now when the leds are off and you park the car, the system will need only 2mA!
Why you are using 10K and 4.7K resistors?
We have to drop down 12V signal to 5V for our micro controller, or we will burn it. This simple voltage divider do the trick ;)
Electronic and PCD Circuit Schematic - Online With EasyEDA


Visit EasyEDA and start making your own circuit schematics online, it's very easy and completely free!
Here you can find the electronic and pcd circuit schematic of this project:
https://easyeda.com/mi.vasilakis/Arduino_RGB_Interior_Car_Lighting_Bluetooth_Android_App-uYWwurDBz
The Code
Here's the code, embedded using Codebender!
Try downloading the codebender plugin and clicking on the Run on Arduino button to program your Arduino with this sketch. And that's it, you've programmed your Arduino board! If you want to make any changes in the code below just click the "Edit" button.
Tip: Don't forget to remove rx and tx cables from Arduino board before hit the "Run to Arduino" button
Android Application


You can download the "Bluetooth RGB" application from Play Store for free.
Credits for this amazing app goes to NEXT PROTOTYPES team.
https://play.google.com/store/apps/details?id=nextprototypes.bluetoothtRGB
Note: Click on settings icon in the upper left corner and make the changes as the second image above.
Well Done!
![DSC_0007[1].jpg](/proxy/?url=https://content.instructables.com/FIH/OTYF/IR6IXFYV/FIHOTYFIR6IXFYV.jpg&filename=DSC_0007[1].jpg)
![DSC_0008[1].jpg](/proxy/?url=https://content.instructables.com/FQX/FSP6/IR6IXFZS/FQXFSP6IR6IXFZS.jpg&filename=DSC_0008[1].jpg)
![DSC_0010[1].jpg](/proxy/?url=https://content.instructables.com/FZV/XF3N/IR6IXG06/FZVXF3NIR6IXG06.jpg&filename=DSC_0010[1].jpg)
That's it! You have successfully completed this "how to" diy guide, I hope you liked this, let me know in the comments!
You can find more cool Arduino projects at www.Ardumotive.com