Arduino Robot Dog

https://youtu.be/6iZg_NbQ3vc?si=OAK0hKCVnW25nTcg
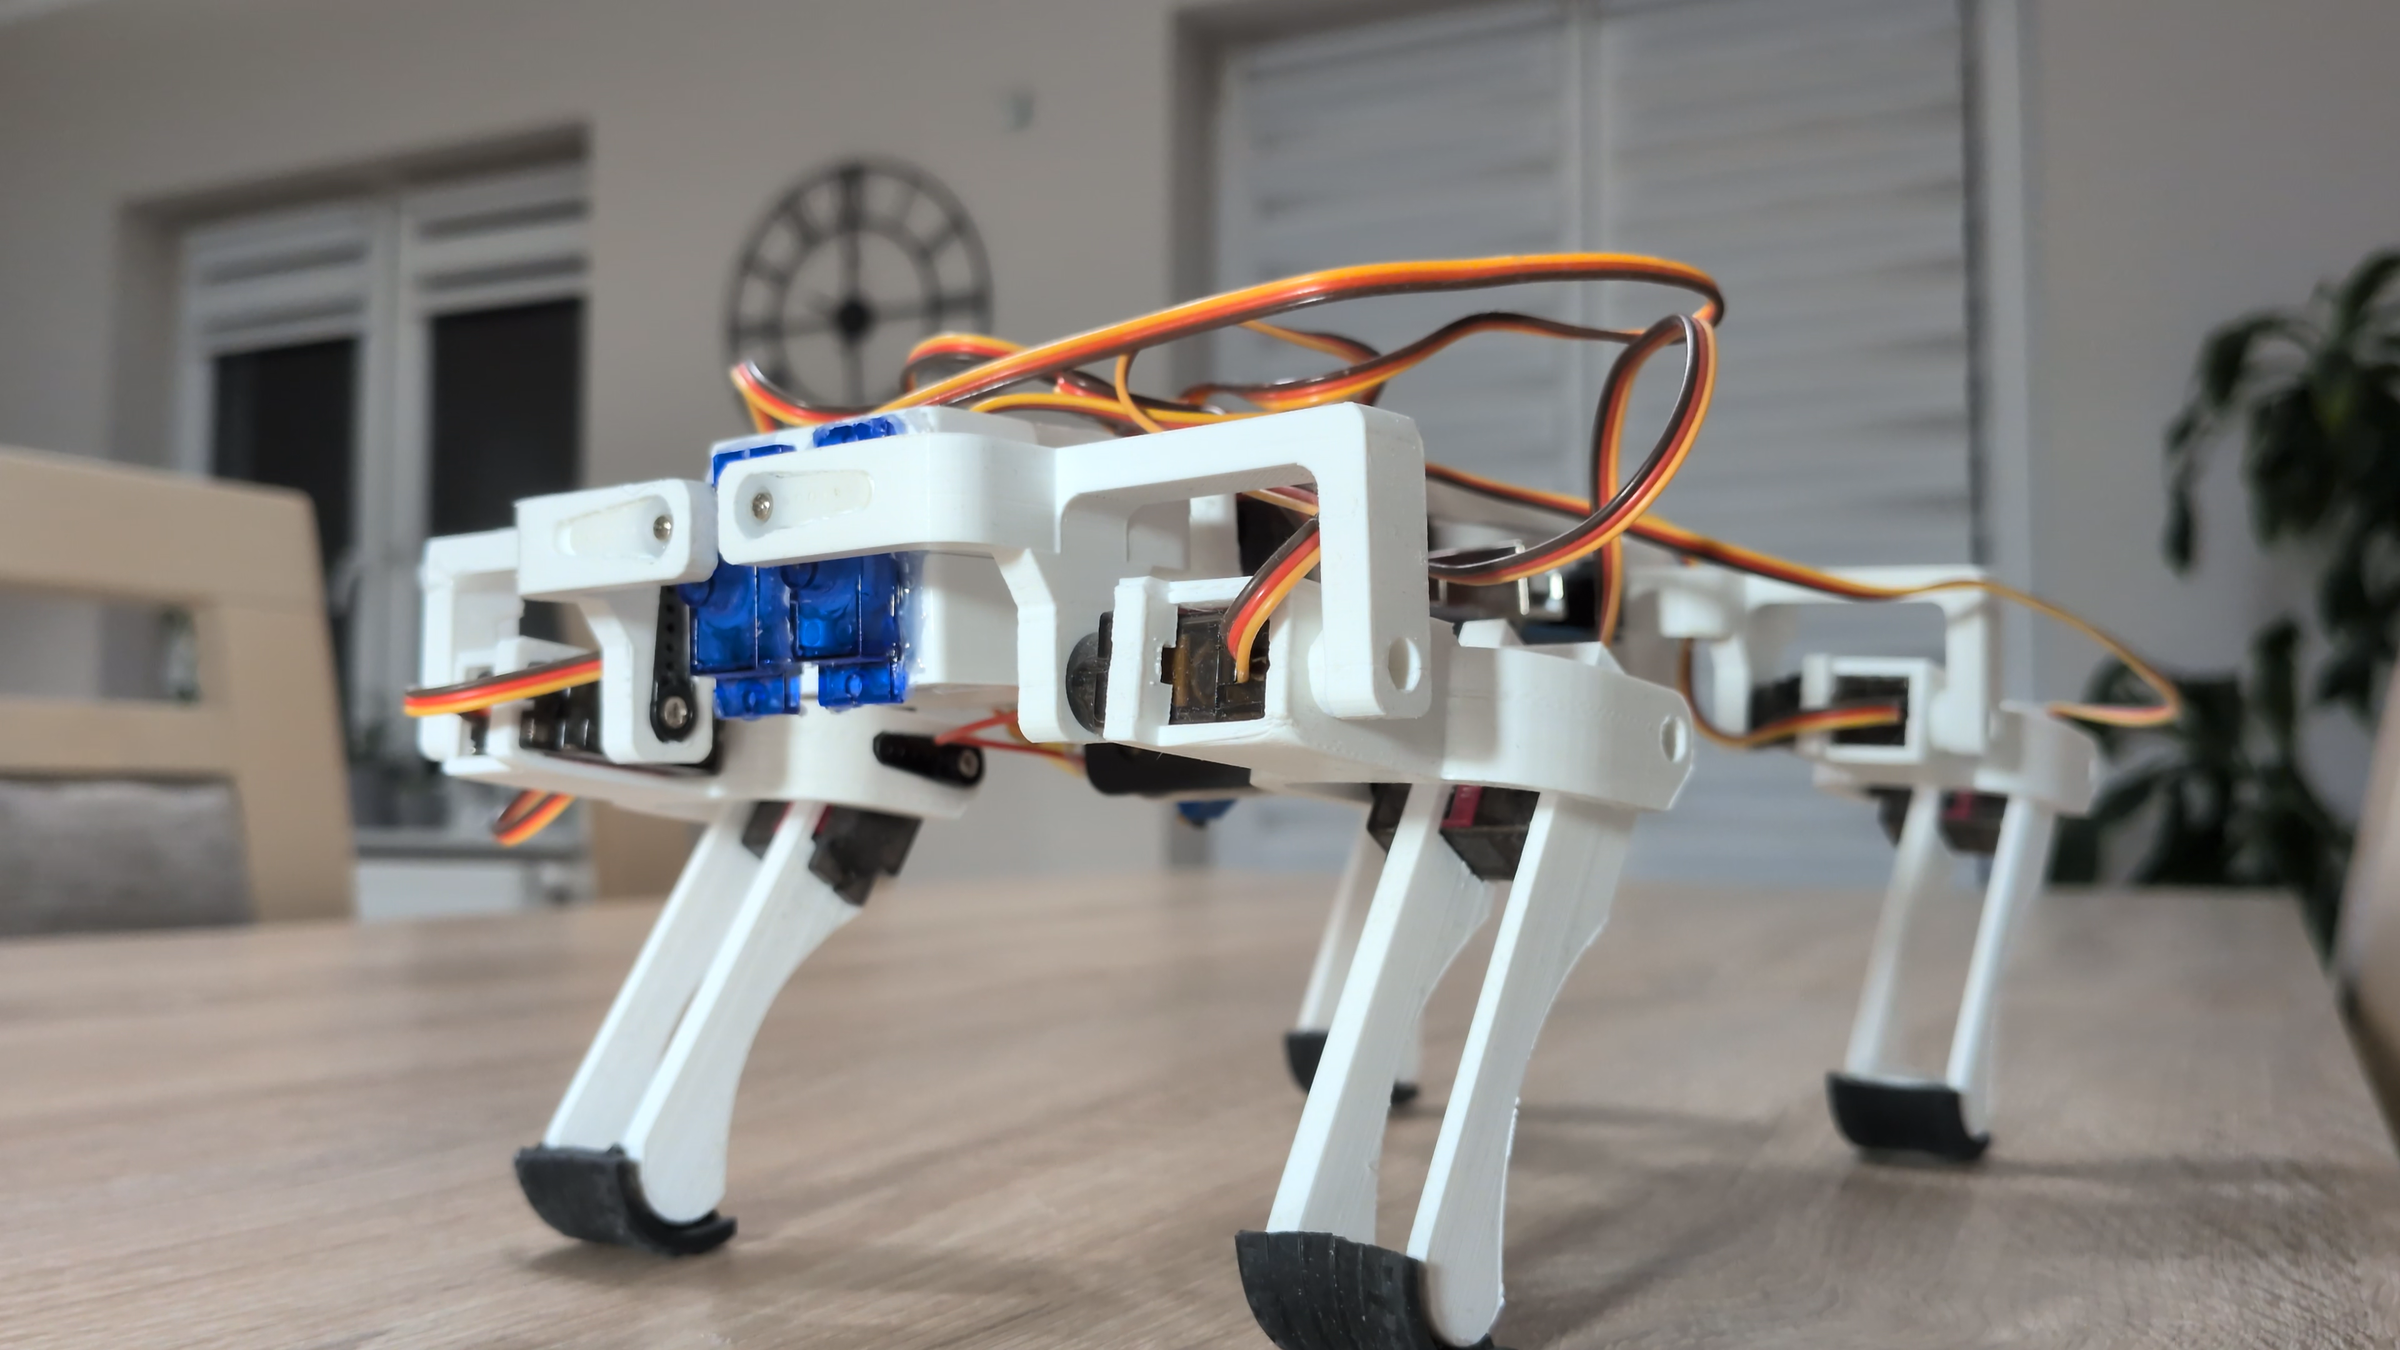
In this project, I built an Arduino Robot Dog. The full development process is shown in my YouTube video, and here I am sharing all the 3D files, source code, and a complete list of components needed to build the robot yourself.
The robot uses 12 servo motors controlled by a PCA9685 servo driver. It can move forward, backward, right, left, turn right or left in place.
I hope you enjoy this project and find it useful for your own builds!
Supplies
List of components:
1x PCA9685 - 16 Channel 12-Bit PWM Servo Motor Driver.
12x TowerPro MG90S Micro Servo, Metal Gear (I used only 8 of them and 4 different ones, but I recommend using 12 identical servos).
1x XL4015 DC-DC Step Down Buck Converter Module, 5A Adjustable Voltage Regulator (4V–38V Input, 1.25V–36V Output) with Heatsink.
1x Arduino Uno.
1x 18650 Battery Clip, 2 Slots.
2x 18650 Li-ion Battery 3.7V.
1x (optional) HY-SRF05 Ultrasonic Distance Measuring Module.
Jumper Wires.
3d Files
You may need to change some 3d models to fit your servos.
Circuit
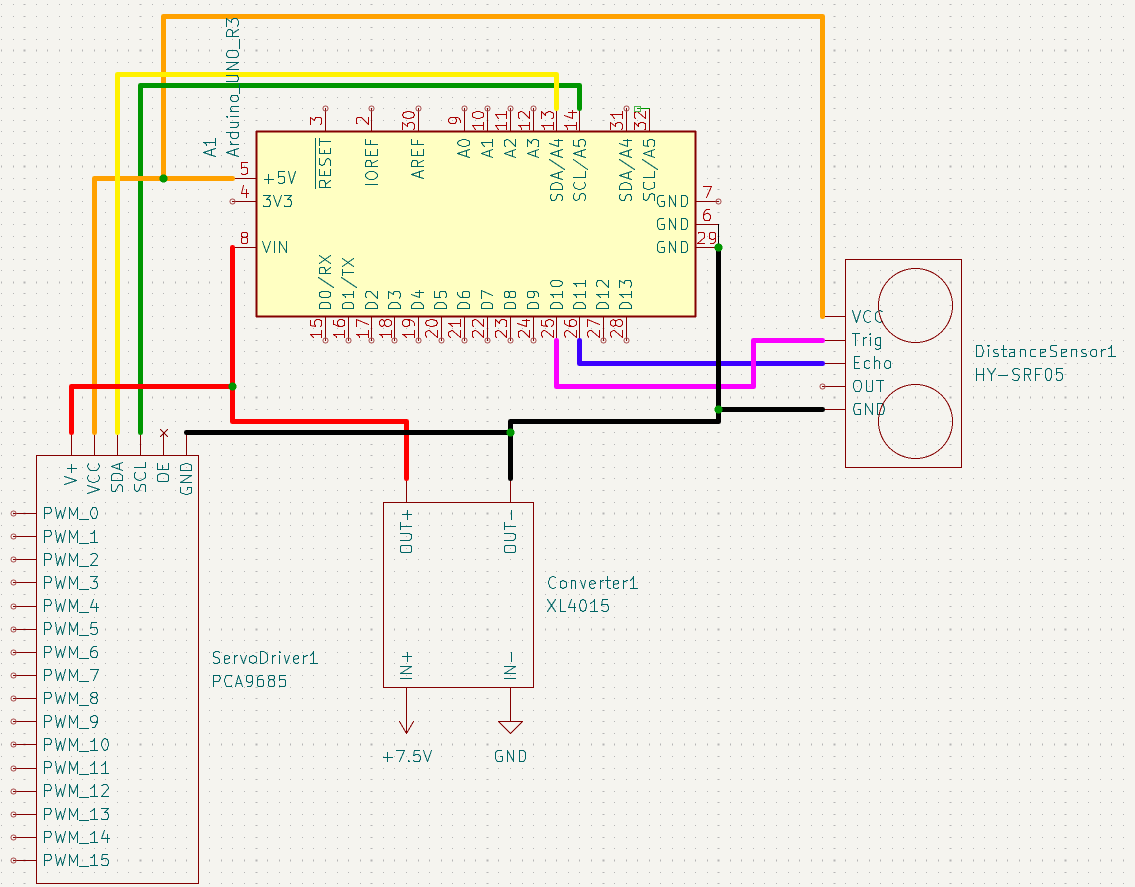
The ultrasonic distance sensor is completely optional.
Servos:
LEFT FRONT HIP Servo- PWM_0
LEFT FRONT FEMUR Servo - PWM_1
LEFT FRONT TIBIA Servo - PWM_2
RIGHT FRONT HIP Servo- PWM_3
RIGHT FRONT FEMUR Servo - PWM_4
RIGHT FRONT TIBIA Servo - PWM_5
LEFT BACK HIP Servo- PWM_6
LEFT BACK FEMUR Servo - PWM_7
LEFT BACK TIBIA Servo - PWM_8
RIGHT BACK HIP Servo- PWM_9
RIGHT BACK FEMUR Servo - PWM_10
RIGHT BACK TIBIA Servo - PWM_11
Code
I recommend to start from 'SetServosPCA9685',
next move to 'IK3-TEST-OneLeg-RF',
then 'IK3-TEST',
and if everything works fine, open 'Trot'.