Automated Alarm System (beginner Friendly)
by natthomp2020 in Circuits > Arduino
148 Views, 1 Favorites, 0 Comments
Automated Alarm System (beginner Friendly)


What is this project?
By the end of this quick tutorial you can expect to have a functioning automated alarm system using the simple materials bellow. This alarm system is activated in low light settings and produces both sound an light displays when motion is detected. All you need to do it properly connect all the materials, add a little code, and set up around a door frame of your choice!
Why I built it?
I choose to build this alarm system because I always run into the issue of remembering to turn things on and off. I wanted a system that was self sufficient but that also could help keep me safe. I gather up all the steps i took and put them into this example to help other have access to the same thing!
Supplies

Materials needed:
- Lillypad Arduino
- LED light strip (Link to light strip used in this project)
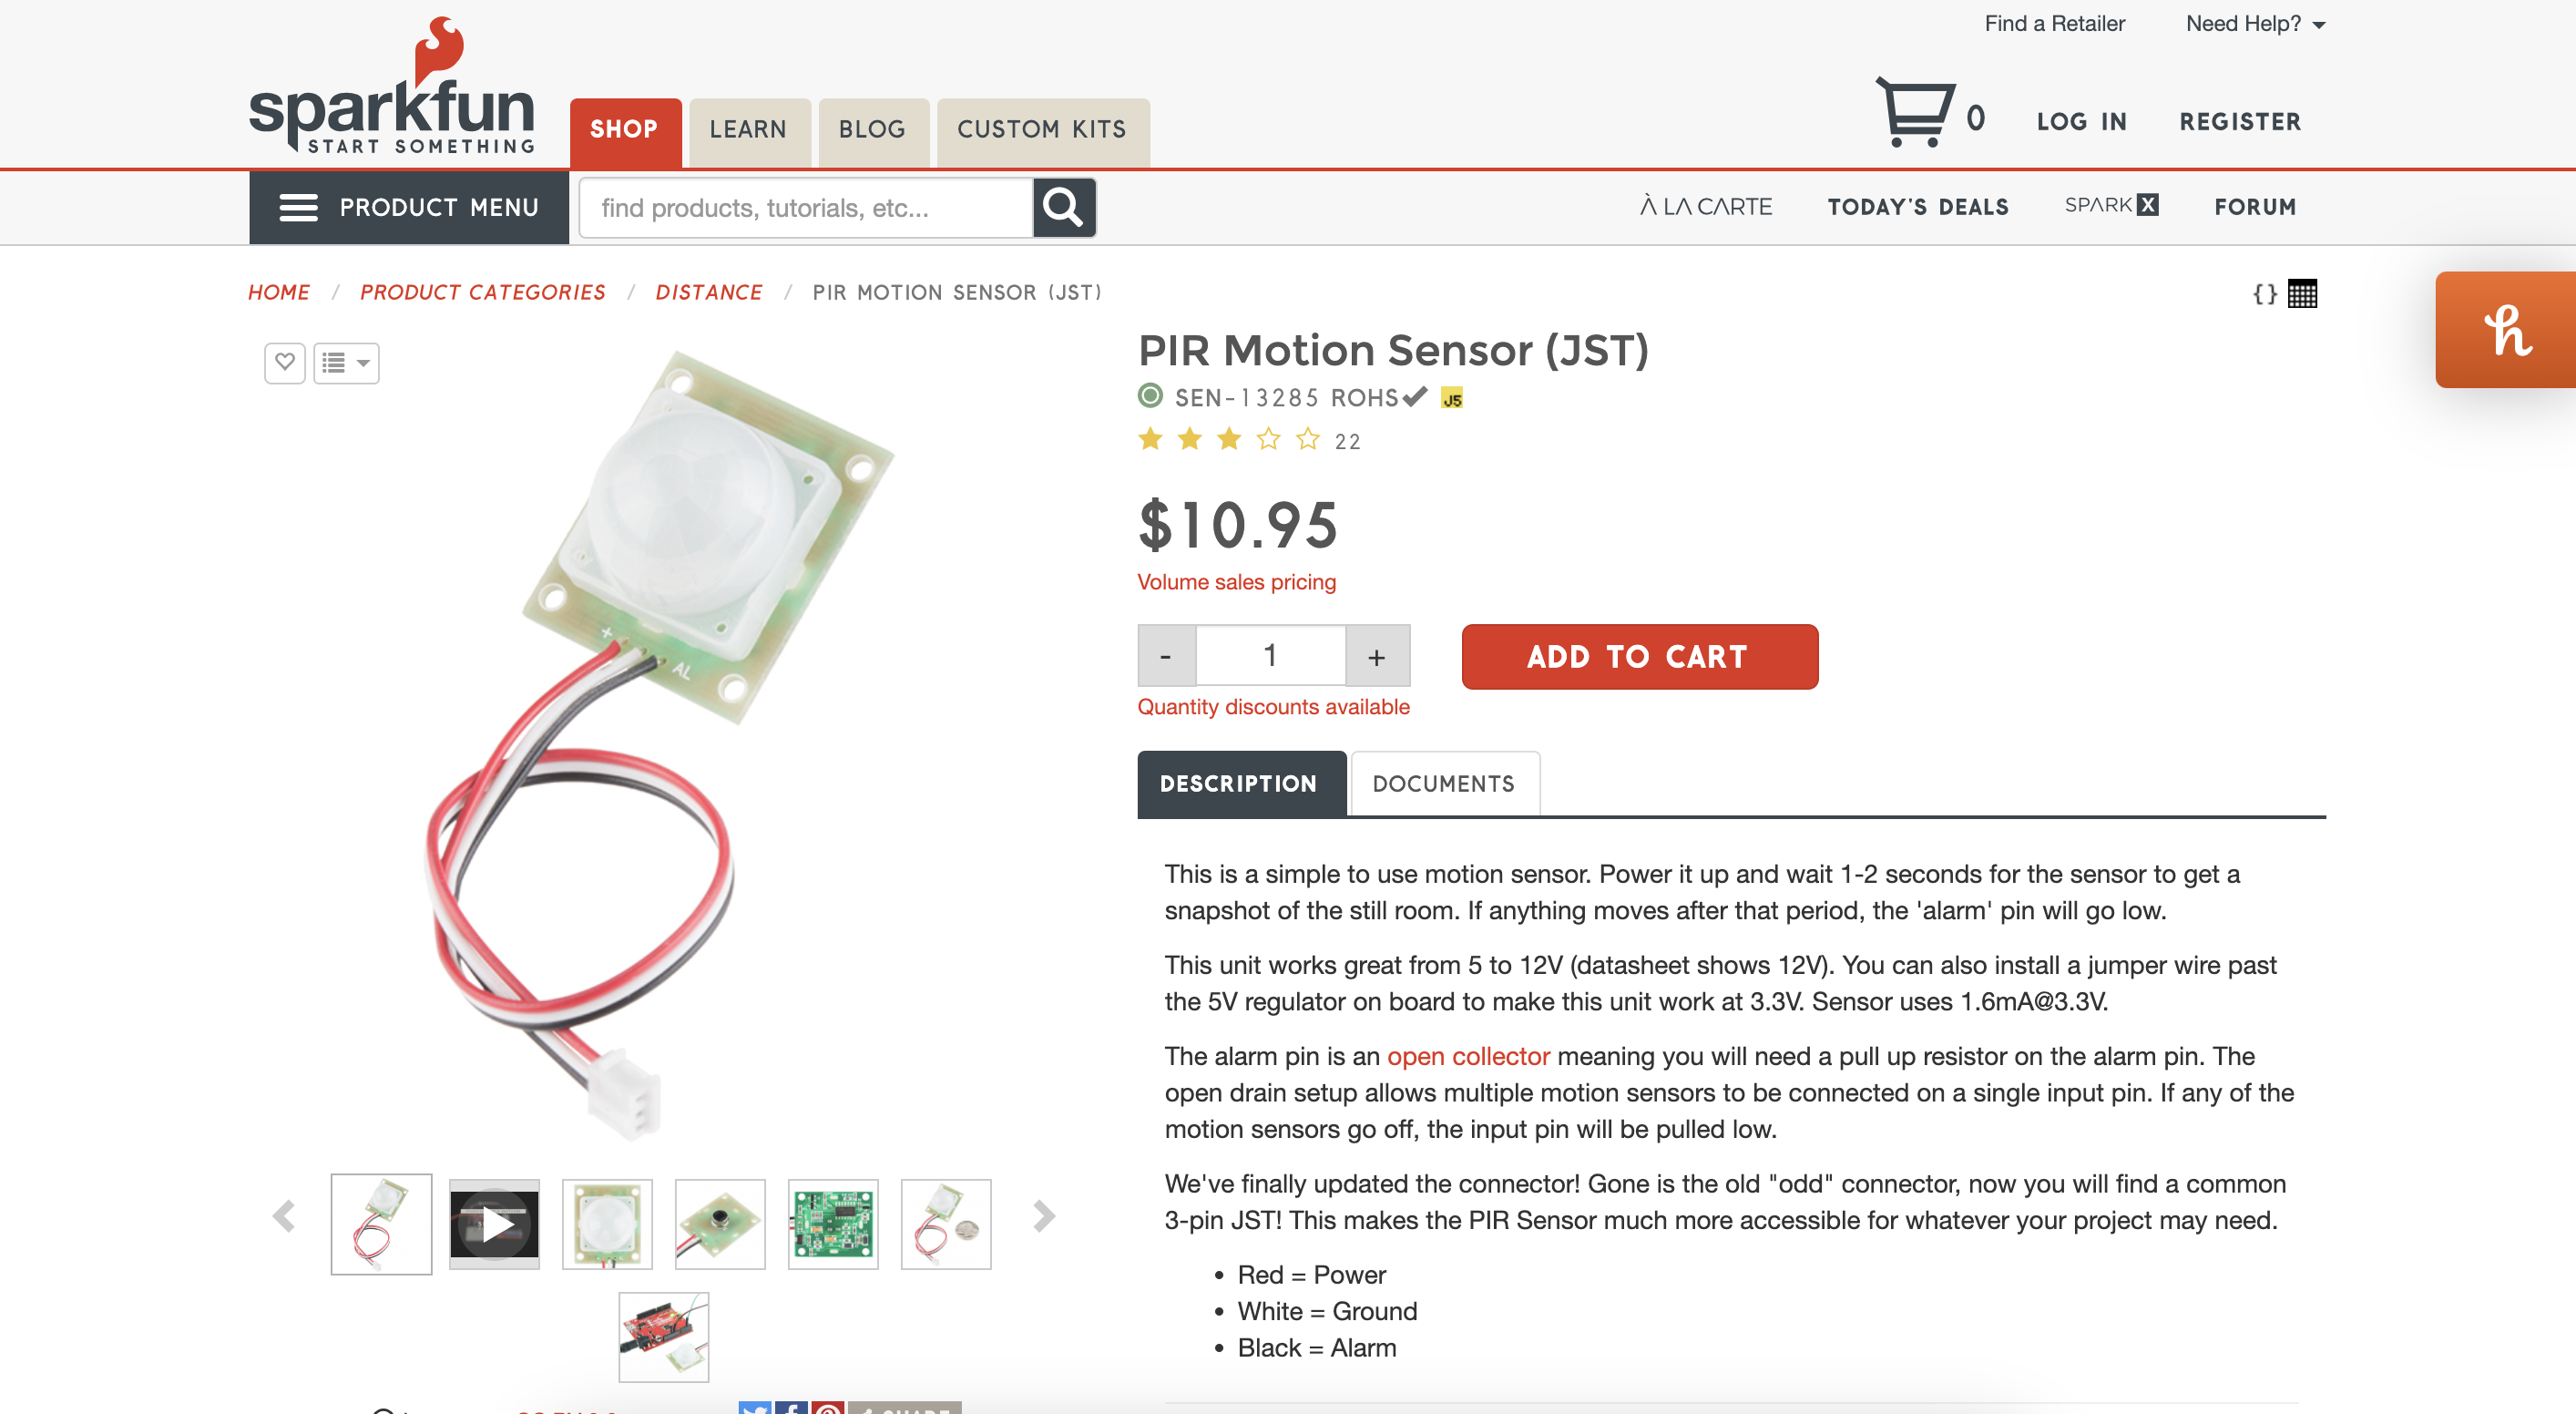
- External motion sensor (Link to external motion sensor used in this project)
- Battery box
- Scissor
- USB cable


Ordering Materials
The very first step of this project is to gather all the materials needed to construct the final product. Some of these materials may need to be ordered in advance. See the list of supplies above.
Physical Construction: Connecting the External Motion Sensor


Physical Construction: Connecting the External Motion Sensor
Once you have all your supplies out in front of you we will construct the physical components of the project starting with connecting the external motion sensor.
Part One: Where to Connect
Our goal is to the wires of the motion sensor to the pins of the Arduino. The lArduino has many pins to connect external sources to and the motion sensor has three seperate wires. For this to work properly we need to connect the wires as follows.
Red connects to 3.3V pin
Yellow connects to ground pin
Black connects to A7 pin
Part Two: How to Connect
Now that we know where to connect the wires lets get into the how. We will first start by stripping back an inch of the plastic covering over the wires. You can do this by lights cutting through the plastic layer with a pair of scissors, rotating the scissors around the wire, and sliding off the covering.
Once the plastic covering is off and your wire is exposed simply wrap the wire through the hole and around the metal portion of the pin 3-4 times.
Repeat this for each wire and their respective pin location.
Physical Construction: Connecting the LED Light Strip

Physical Construction: Connecting the LED Light Strip
We will then repeat the same process above to attach the LED light strip. The only difference being what wires are attach to what pins. They are as follows.
Red connects to VOUT pin
green connects to A1 pin
White connects to ground pin
Coding the Project


The next step of this project is to code the Arduino to set off a sound and light display when motion is detect in low light situations.
Create the Code
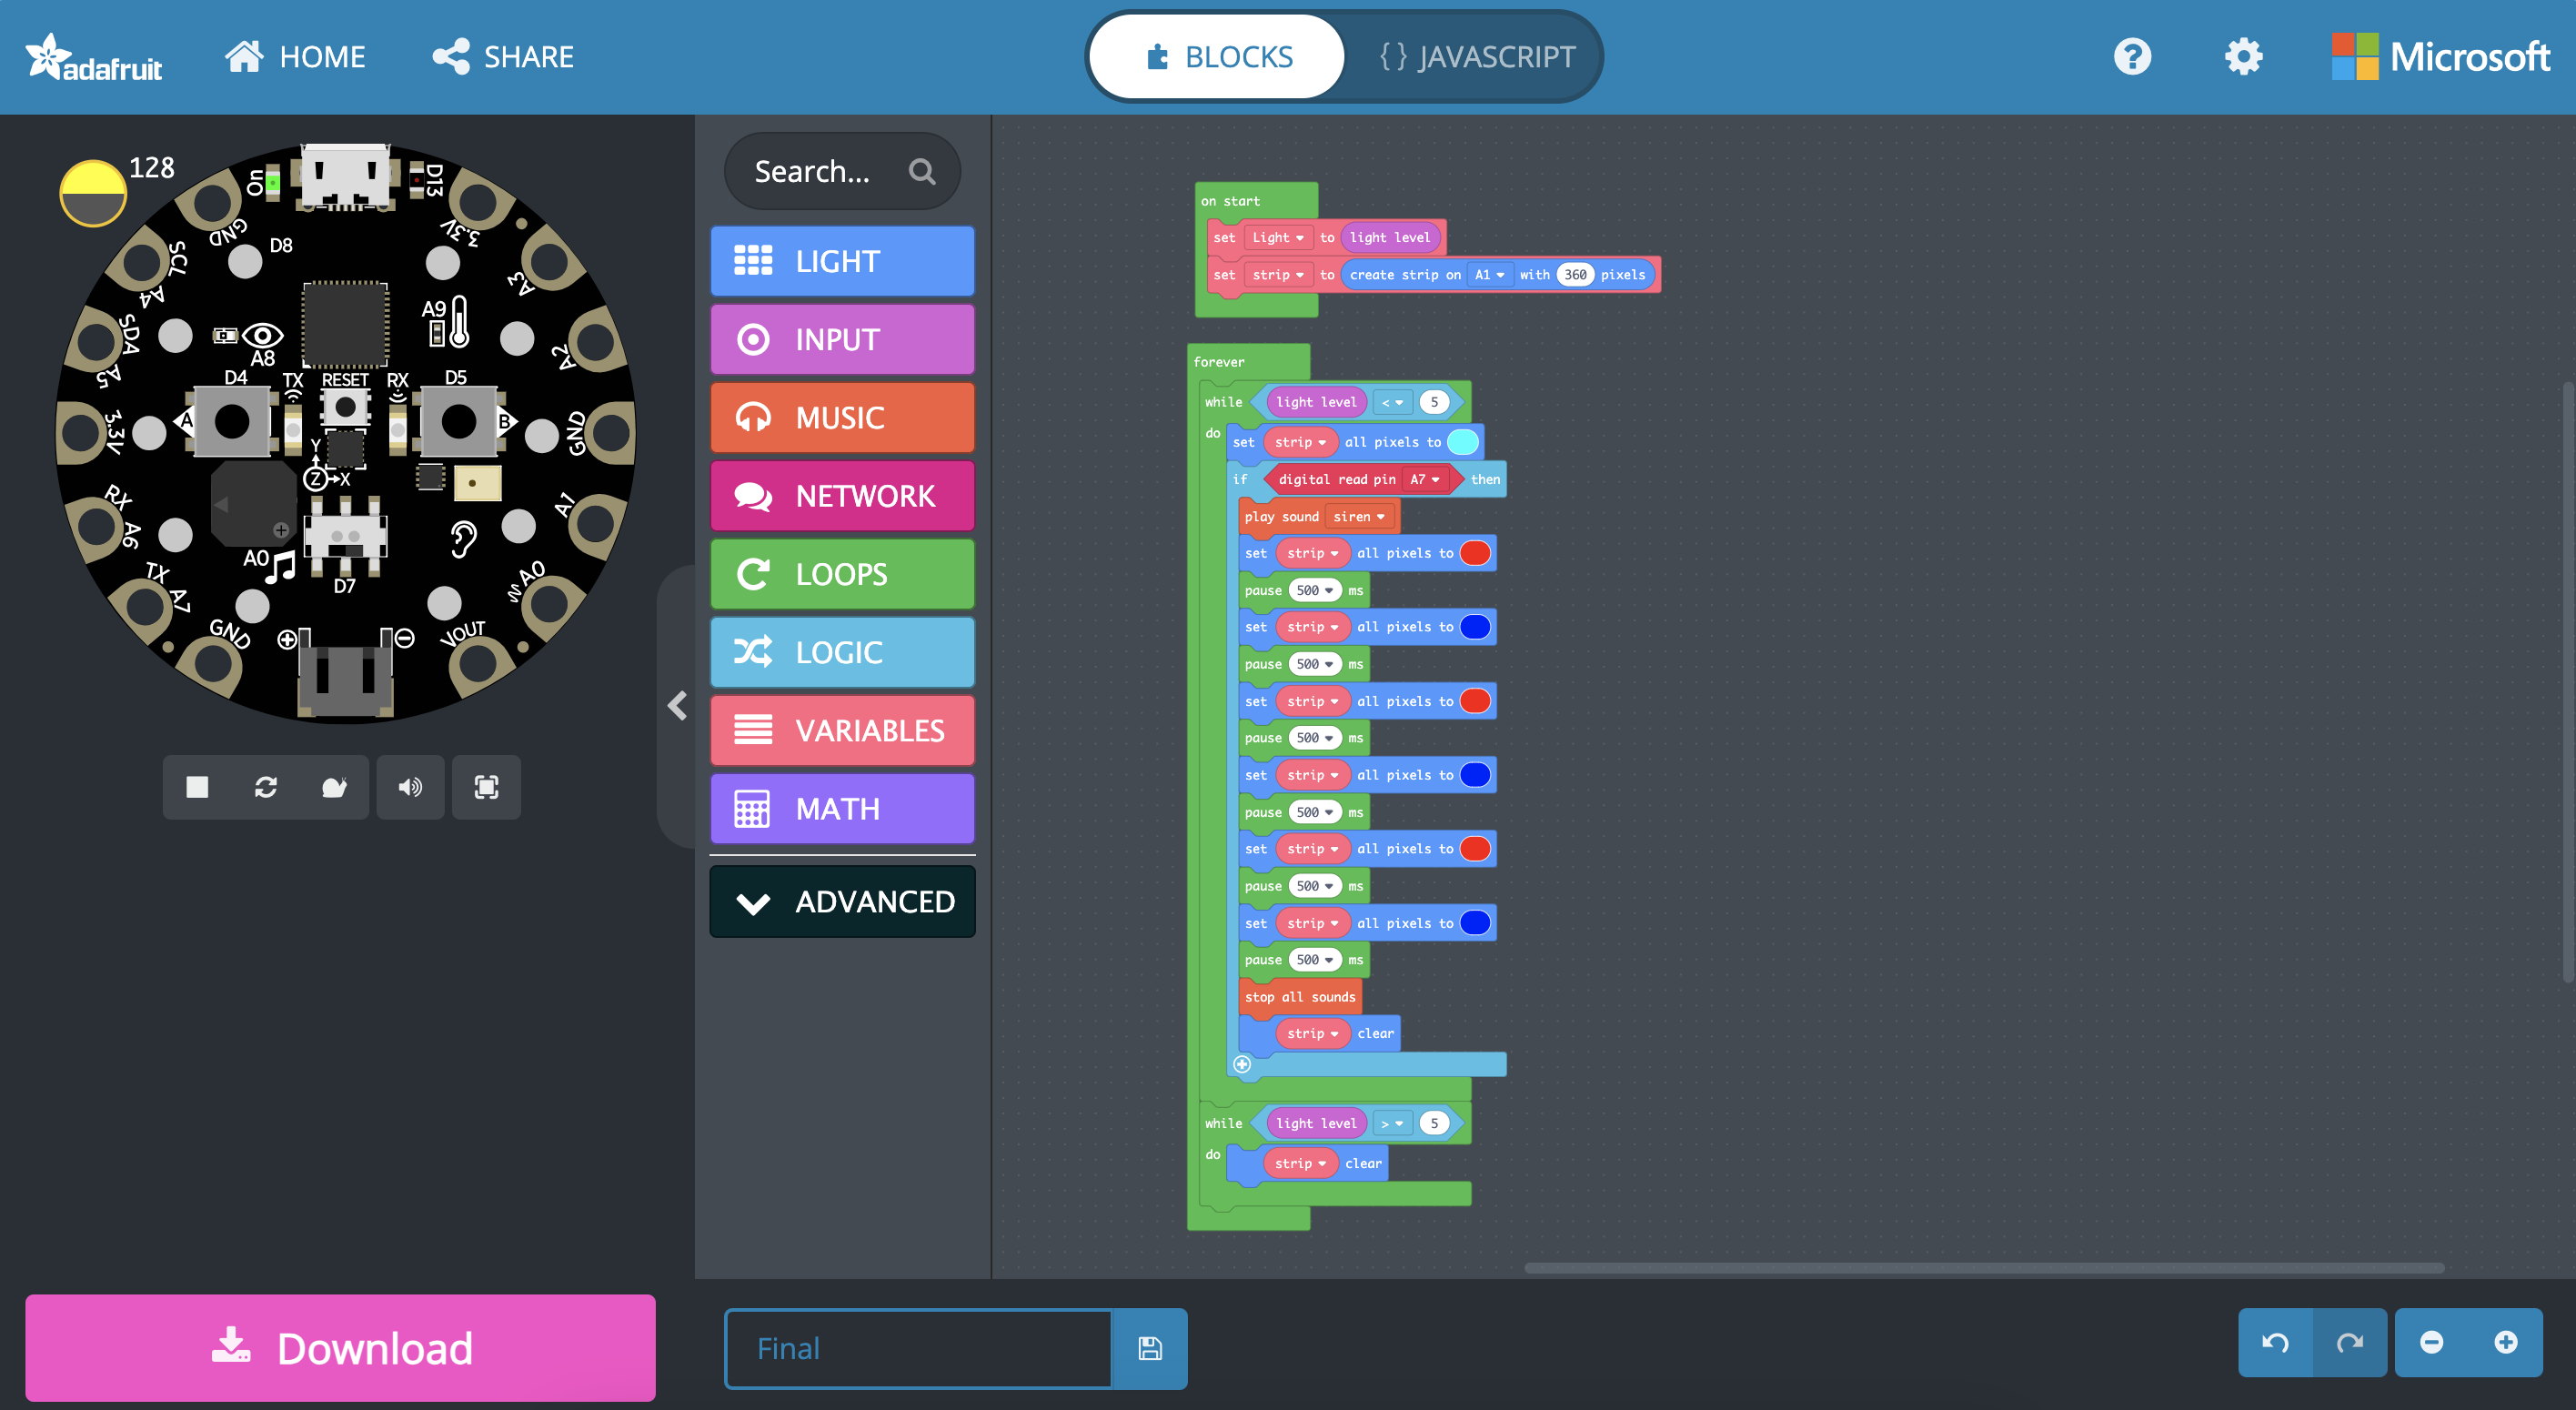
I used Circuit Playground to create the basic code shown in the image above. Copy the block code to achieve the same results and feel free to manipulate color choice or frequency by moving certain blocks of code around.
Export and Upload the Code to Your Arduino
Once you have the code looking how you want select the pink download button in the lower left corner of your screen to download your code file. Then plug your Arduino into your computer via USB cable and drag the coded file onto you Arduino's drive.
(Note: if the code needs adjusting, make the adjustments on Circuit Playground, redownload the new code, wipe your Arduino's drive by pressing the black button in the middle of your Arduino, and re-drag over your new code)
Set Up


Set up Your Alarm System
This last step is the most fun. Hang your light strips around a door frame or anywhere you please. Next, position the external motion sensor in the direction of the door frame to detect motion. Then, connect your Arduino to a power source like a battery box or a computer via USB cable. Finally, turn on your Arduino and watch it light up when the light gets low and motion is detected.