BEN: Your Minimal Desktop Companion
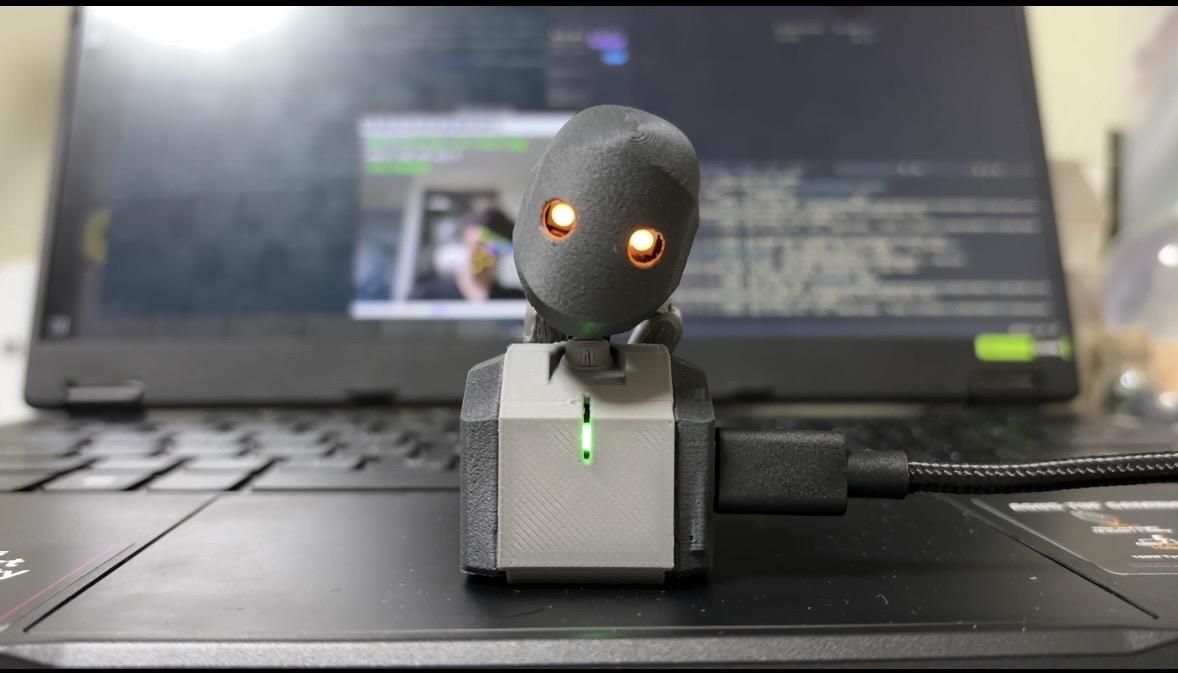
BEN (Basic Edge Node) is a minimal desktop companion robot designed around a simple idea:
how much can a desktop robot be simplified while still remaining expressive?
It has just 2 DOF, a single button, and three LEDs, all built around an ESP32-C3 and a custom flexible PCB.
This guide covers everything you need to build your own BEN, from fabrication and assembly to electronics and setup.
Supplies
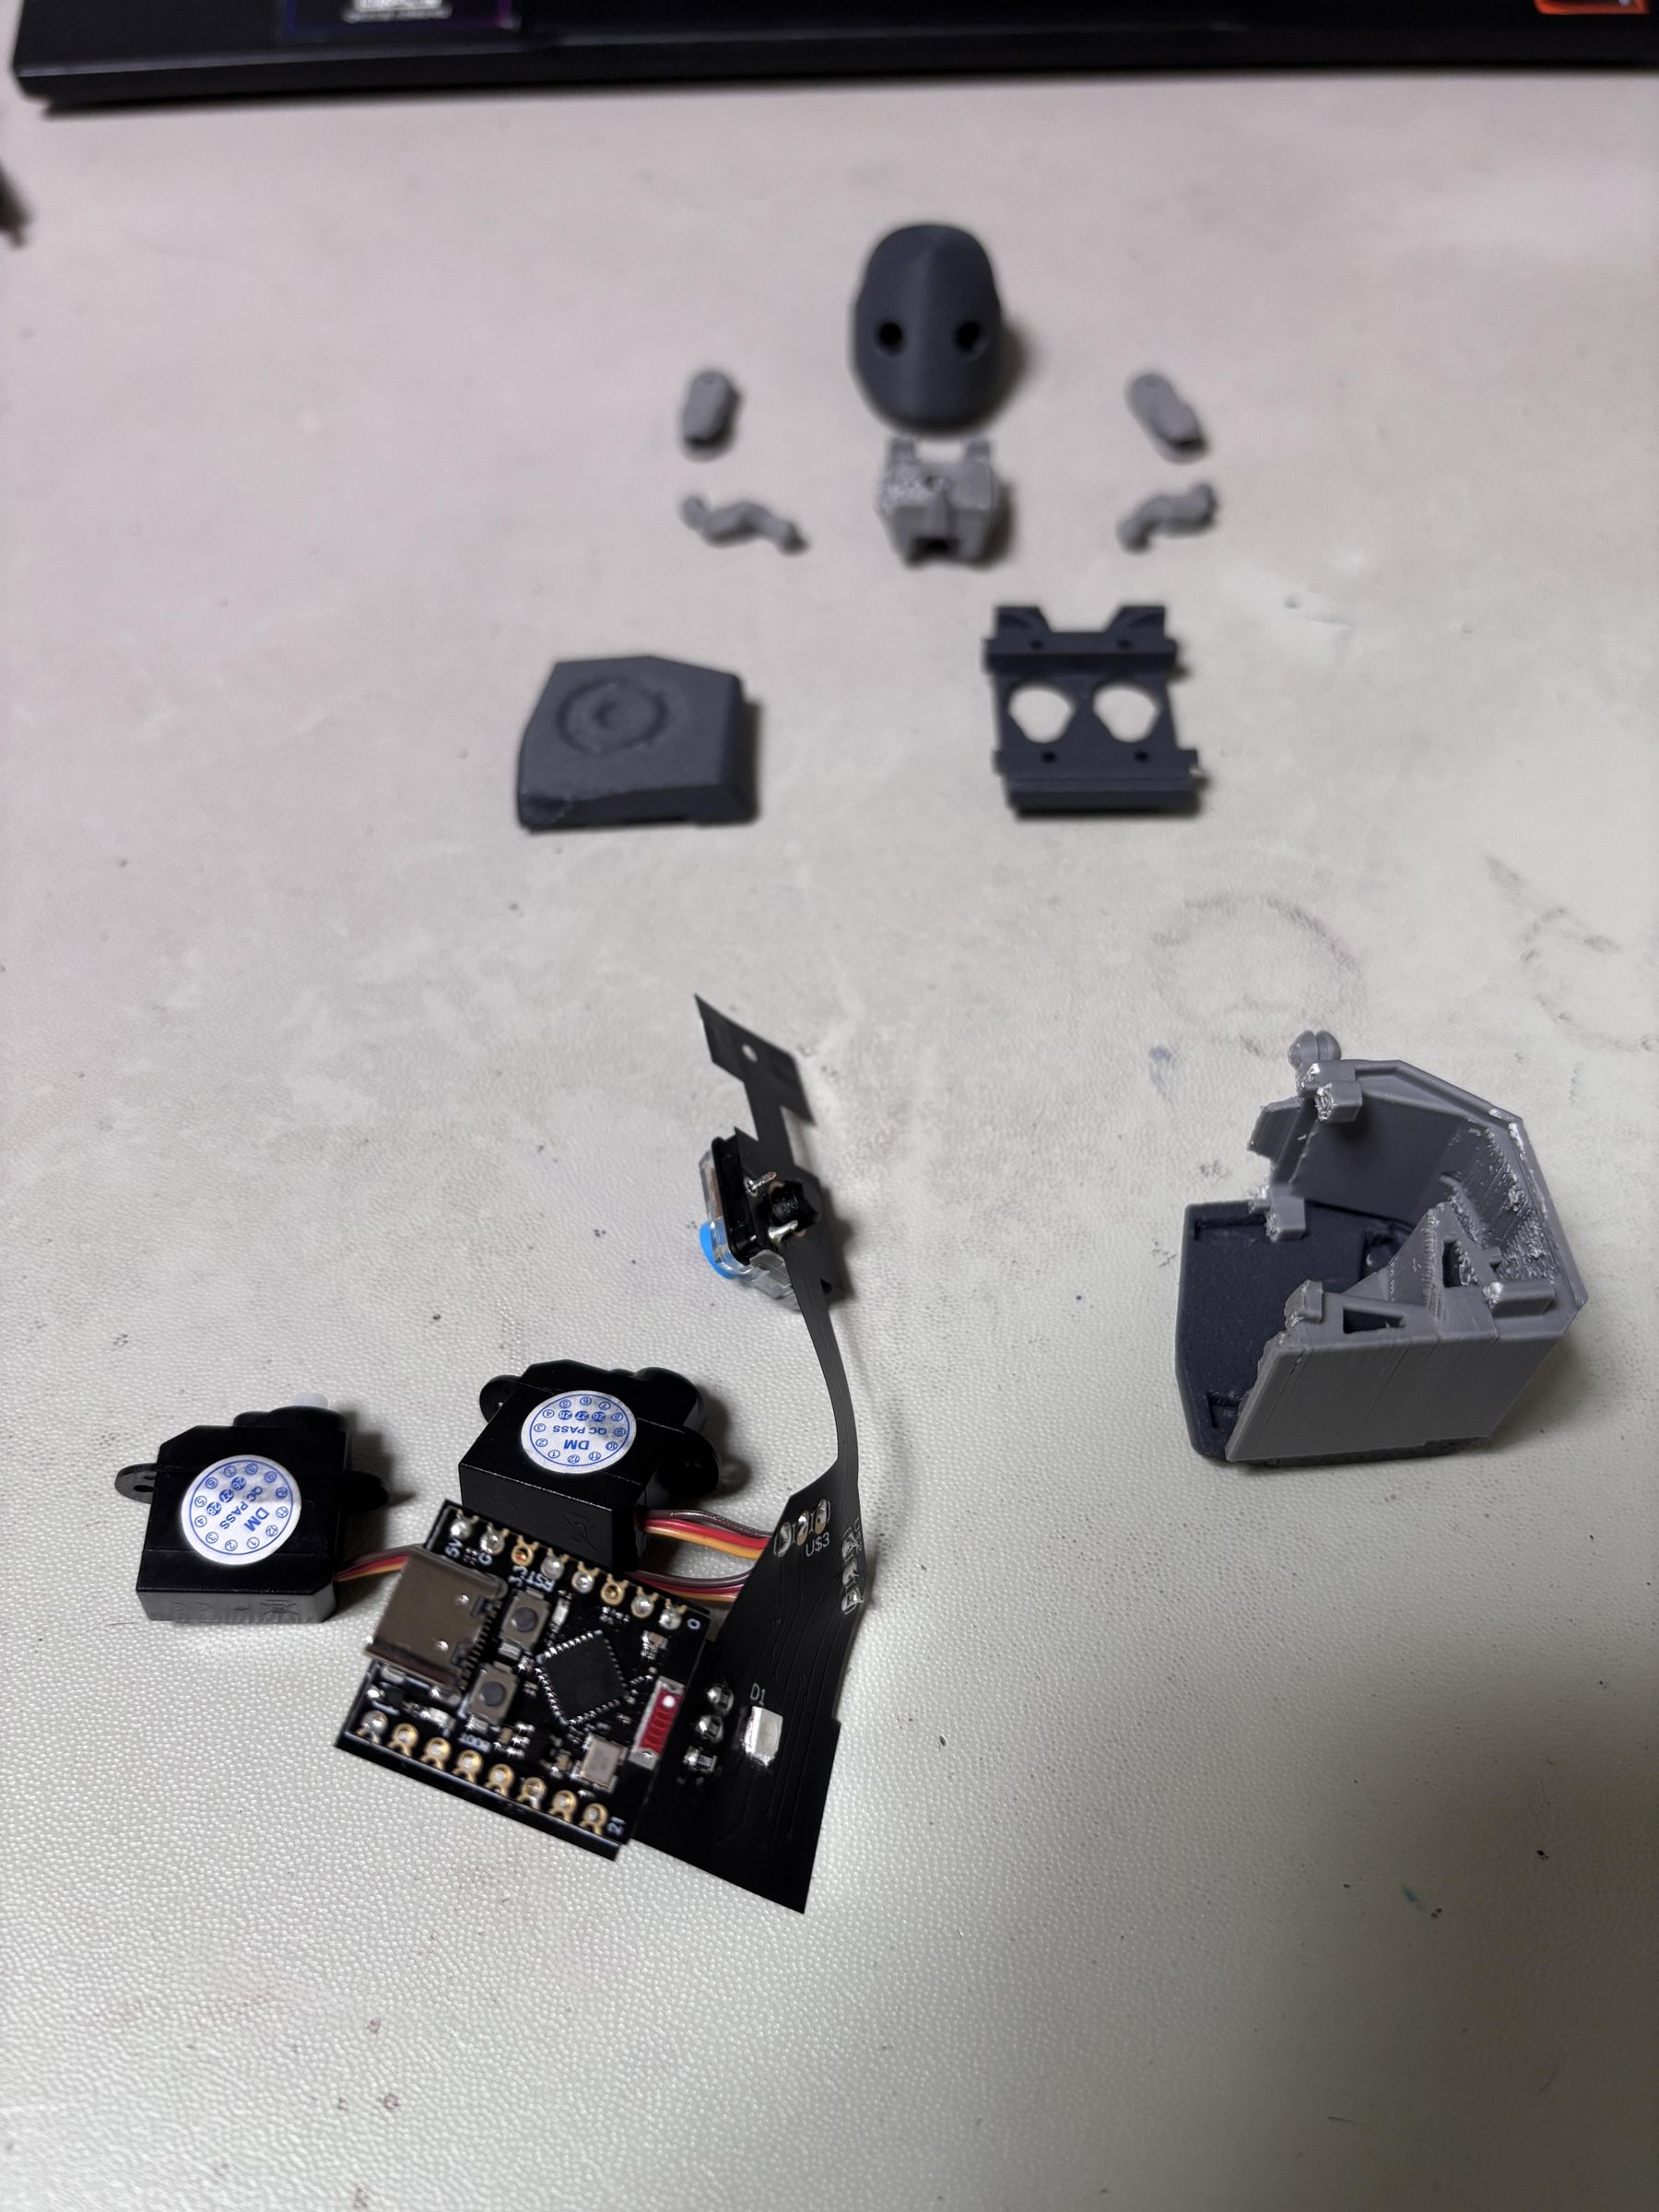
- ESP32-C3
- 1 × Kailh Choc V2 mechanical switch
- 2 × DM-S0020 2g micro servo
- 3 × LUXEON 3535L LED
- 3 × 220 Ω SMD resistor
- FPCB (or superior soldering skill far beyond human capability)
- 3D printed parts
Mechanical Design
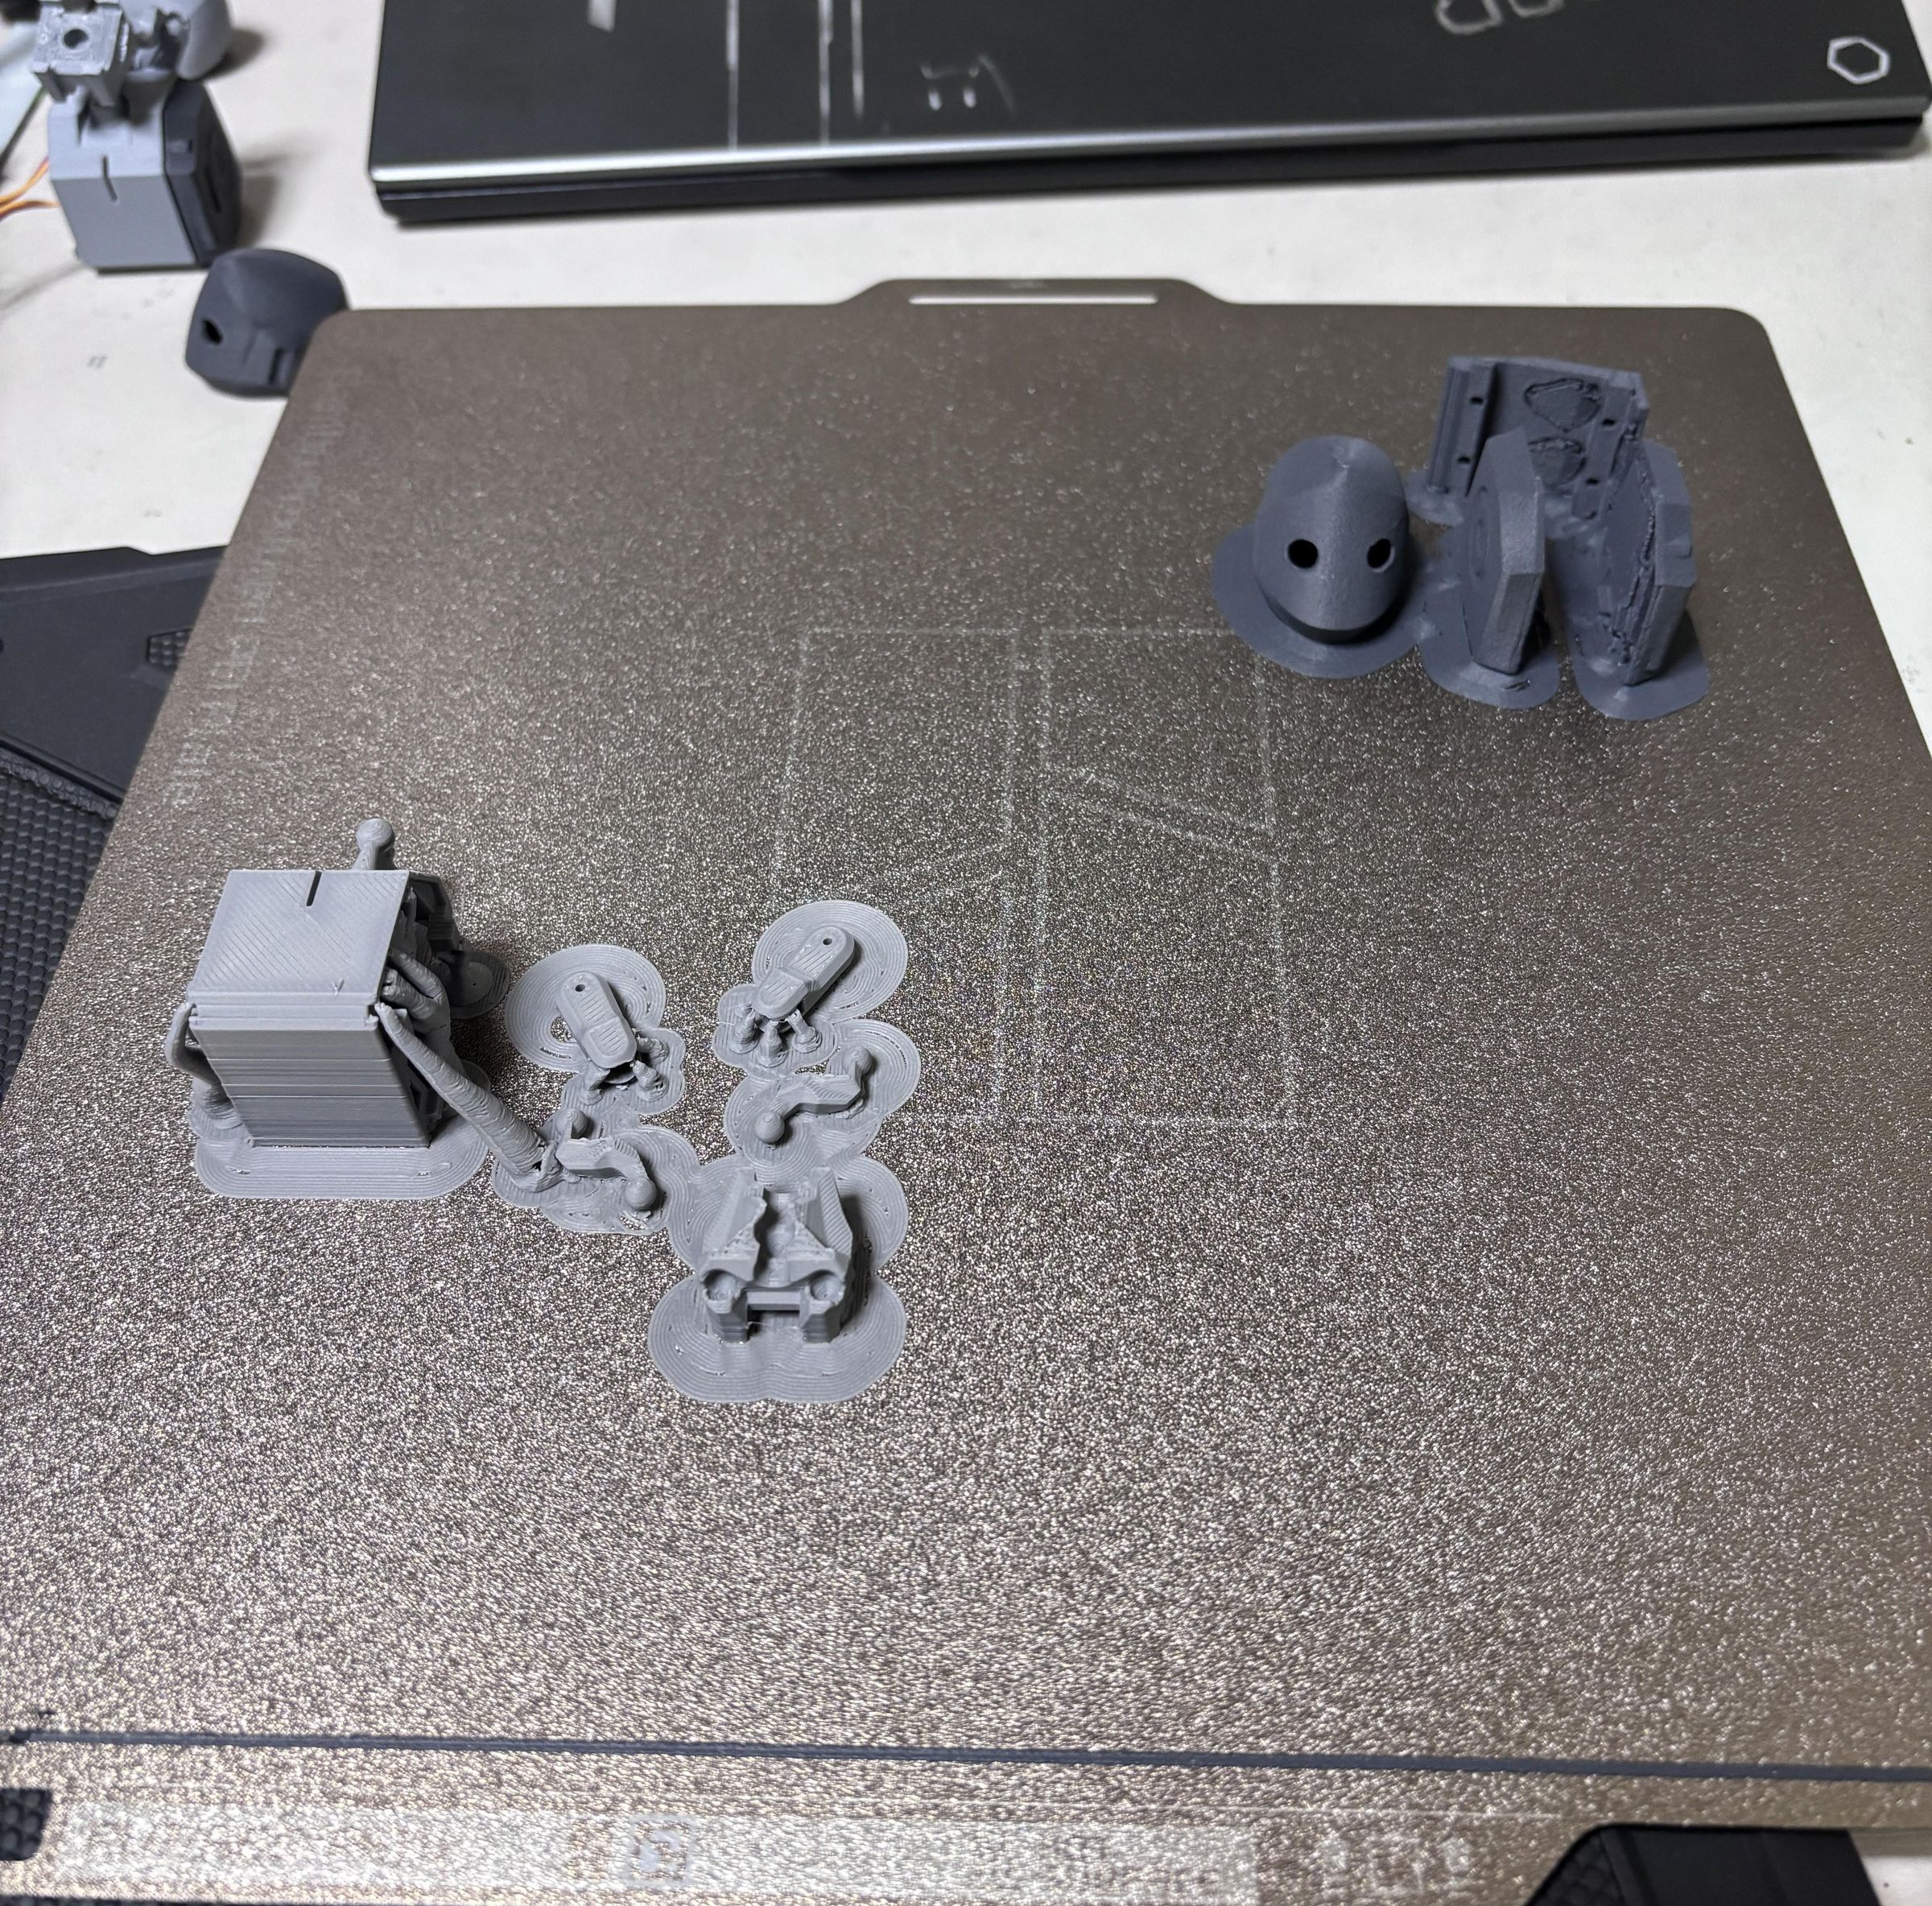
BEN was designed using Autodesk Fusion 360.
Most robotic necks use yaw and pitch motion. This makes sense for robots carrying cameras or other sensors, since rolling the sensor itself is often unnecessary and makes the resulting data harder to handle.
BEN, however, is a social robot. I wanted to get more human-like and expressive motion from only two actuators, so I chose roll and pitch instead.
The neck is based on a ball joint with two pins and a slot, which constrain the joint into two revolute axes. This gives the head independent roll and pitch motion without making the mechanism underactuated.
The two servos use a linkage arrangement commonly seen in humanoid ankles and some animatronic necks. Fundamentally, the mechanism works by changing the effective distance between two points. To keep it simple, I used links with ball joints on both ends, driven by rotating servo arms.
For the exterior, I wanted something neither too simple nor too complicated.
At least to me, the result turned out pretty cute. :]
All mechanical prats are printed on P1S
PCB Design & Fabrication
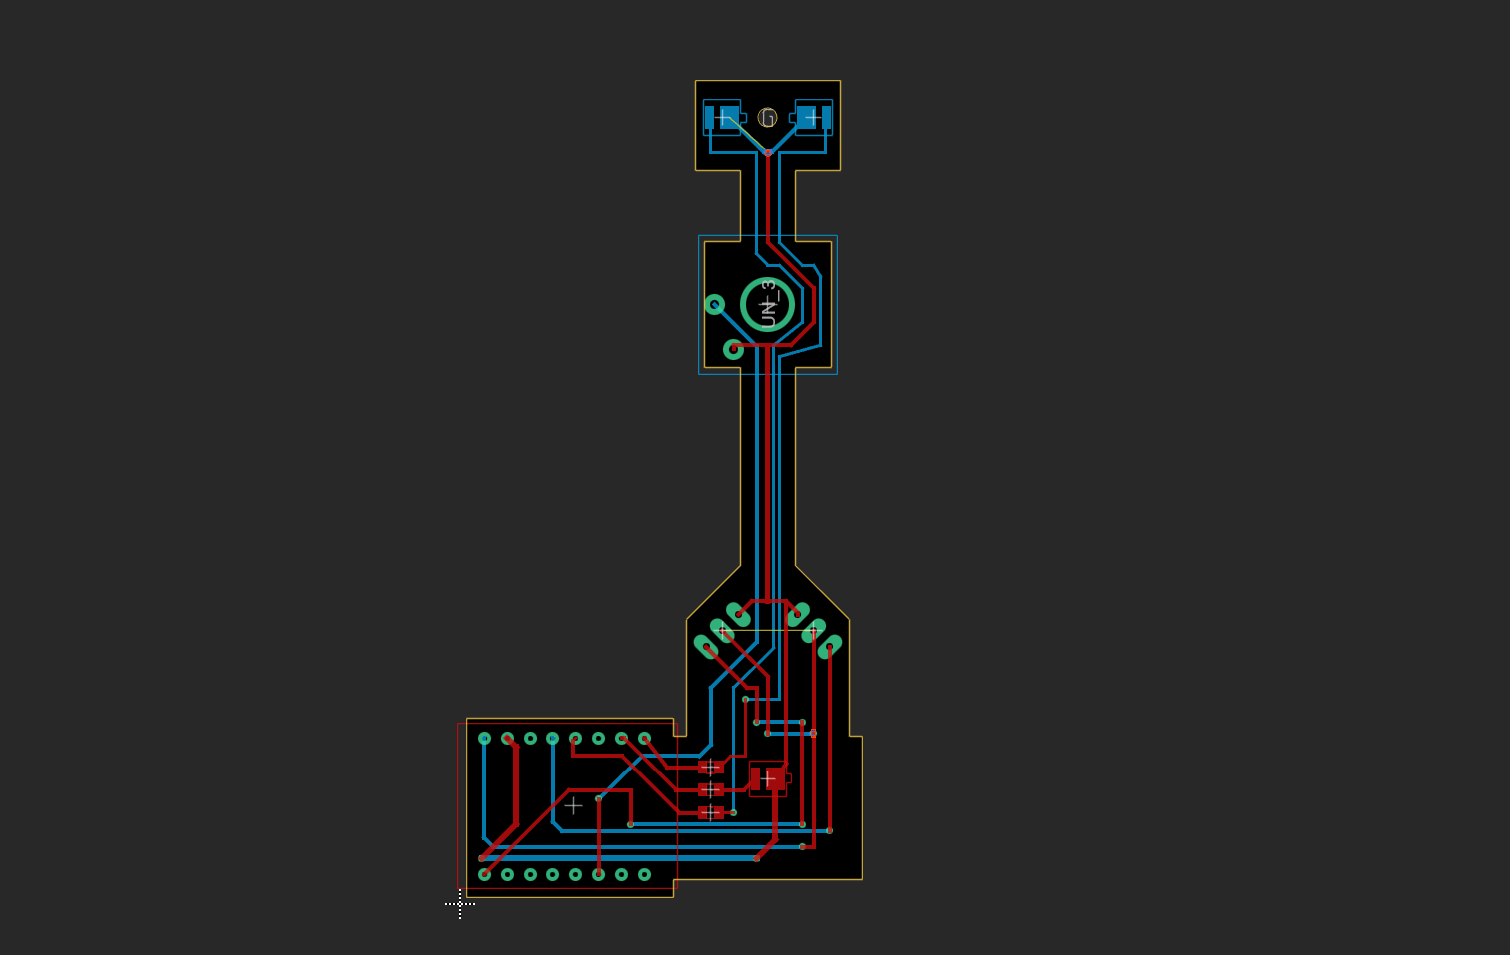
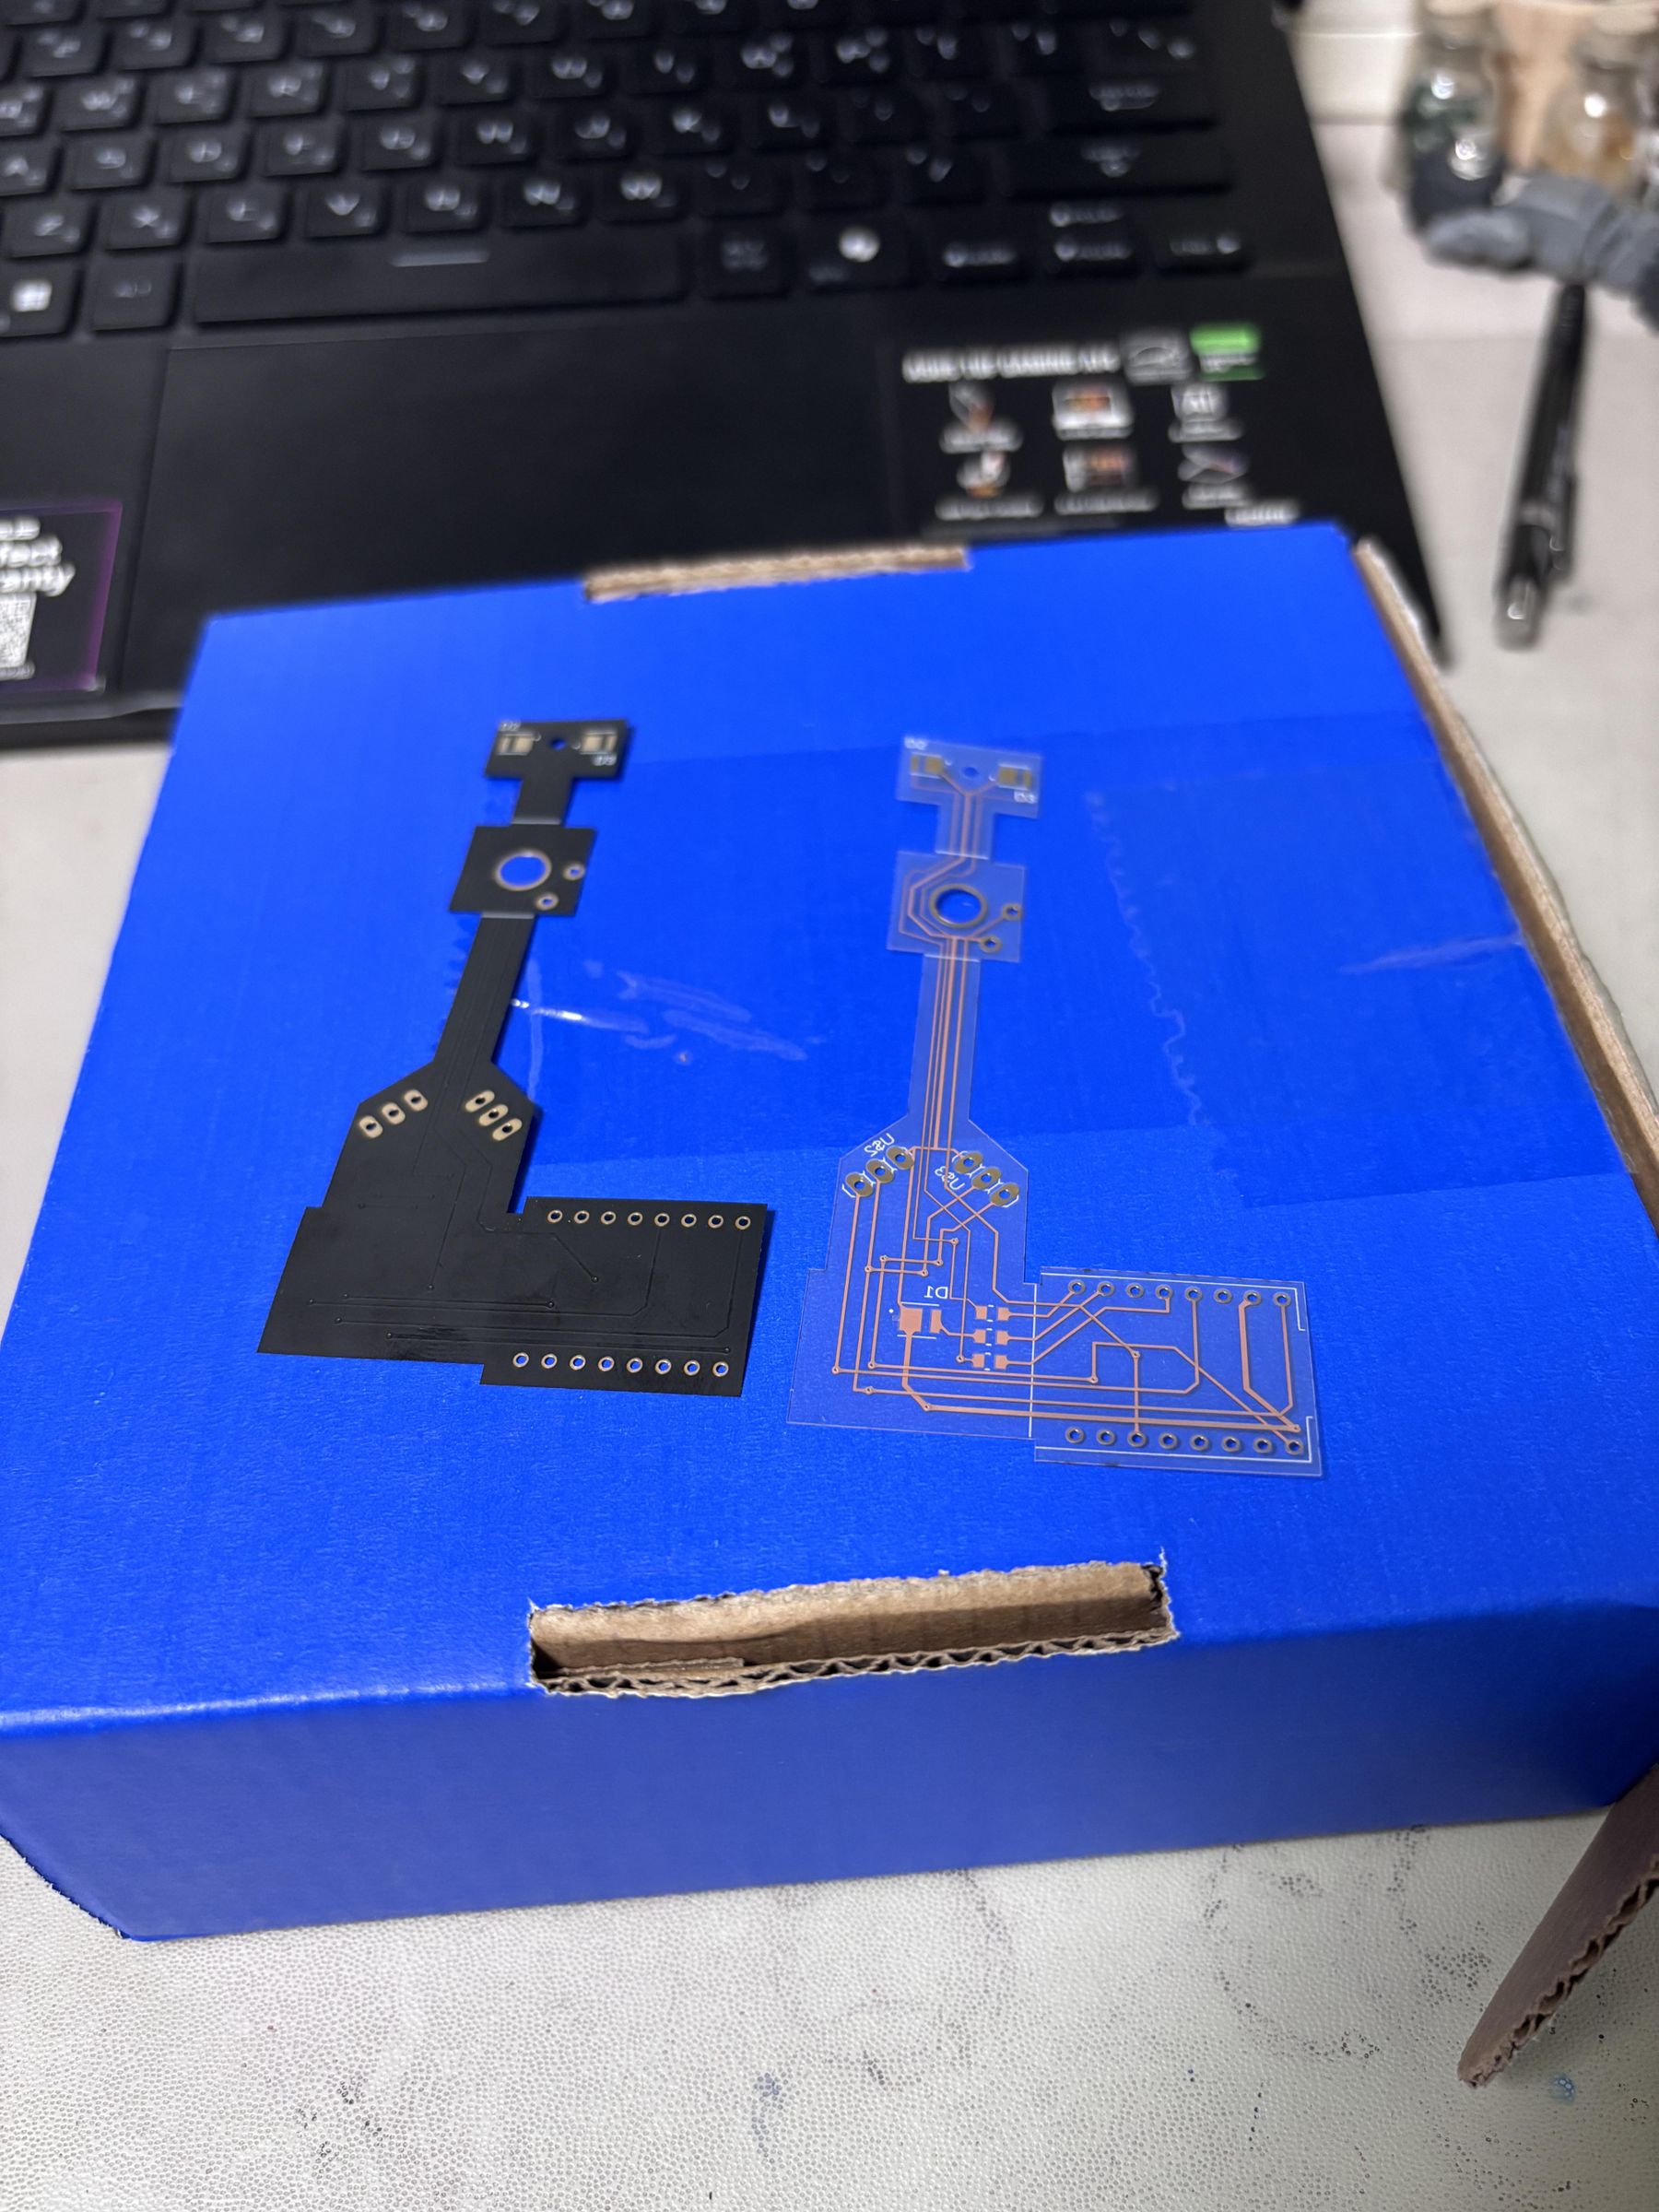
There wasn't much flat space available for the electronics, and the connection to the moving head also had to be considered. So, I decided to use a flexible PCB (FPCB).
The component symbols and footprints were obtained from the manufacturers and SnapEDA.
This probably isn't the best idea for a highly reliable system, but I thought folding the PCB and fitting it inside the body would make the overall design much cleaner—so that's what I did.
As long as the traces aren't damaged during assembly, it works reliably enough. At least, it has so far.
Soldering
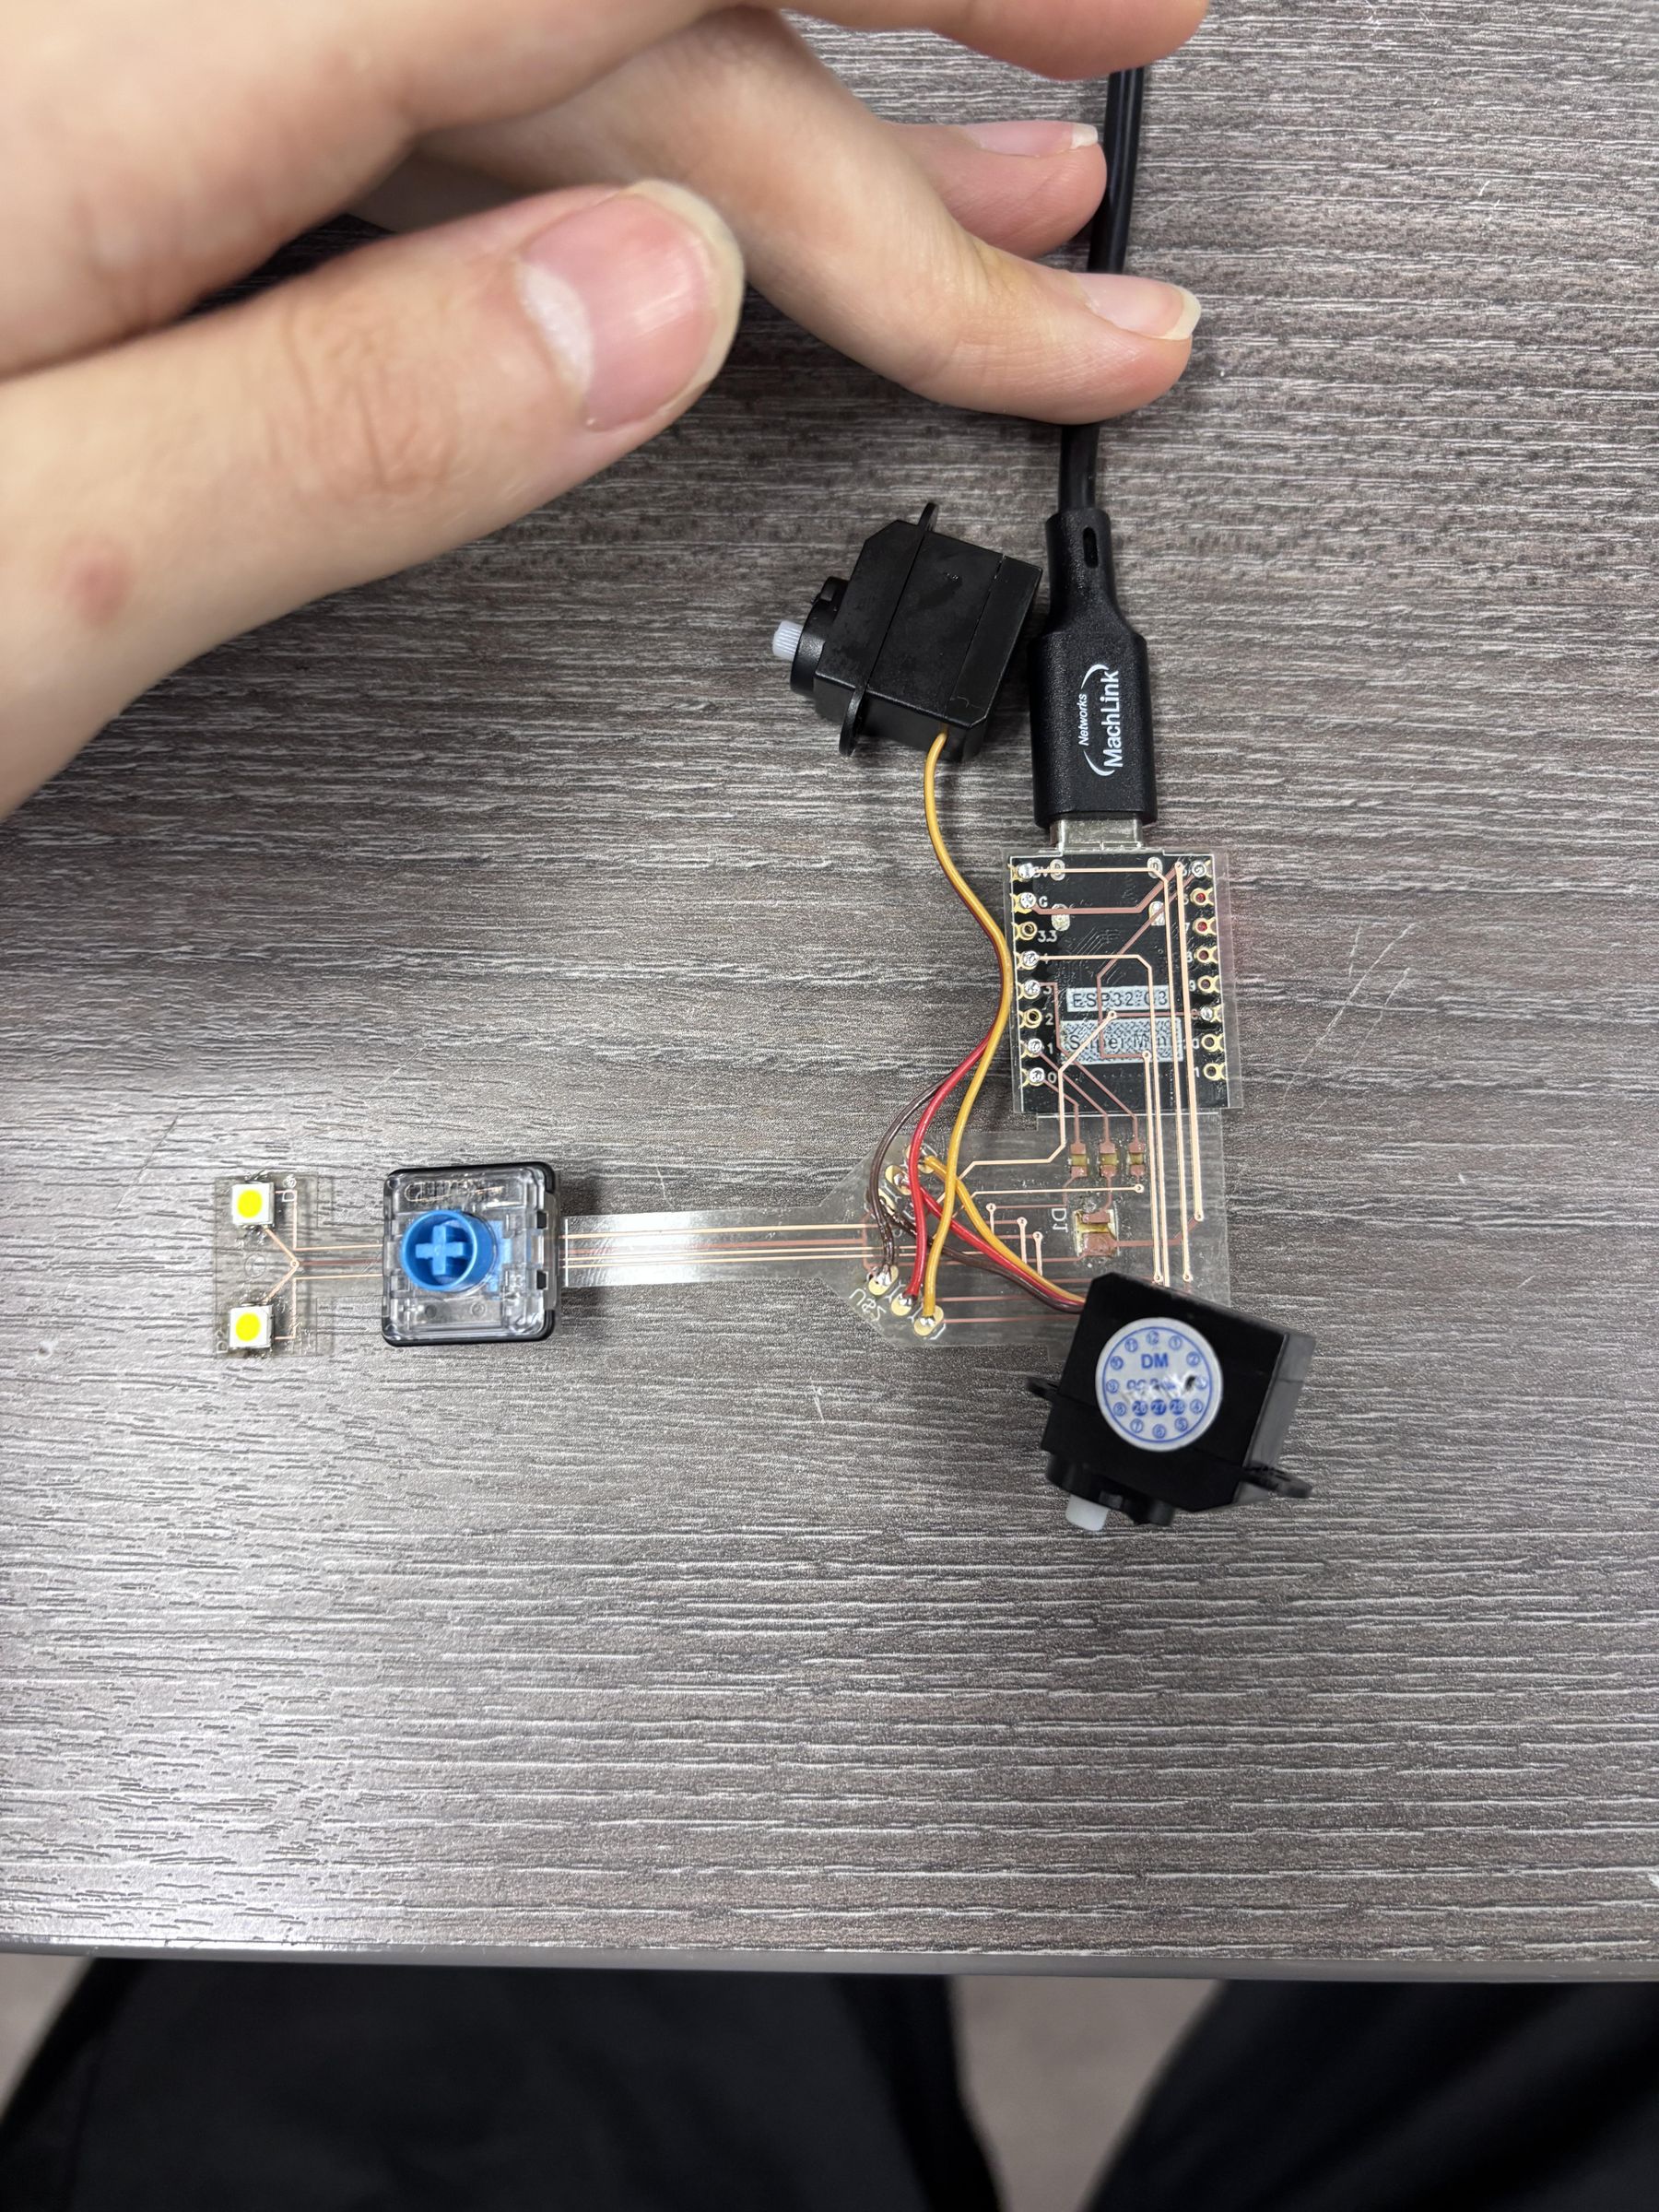
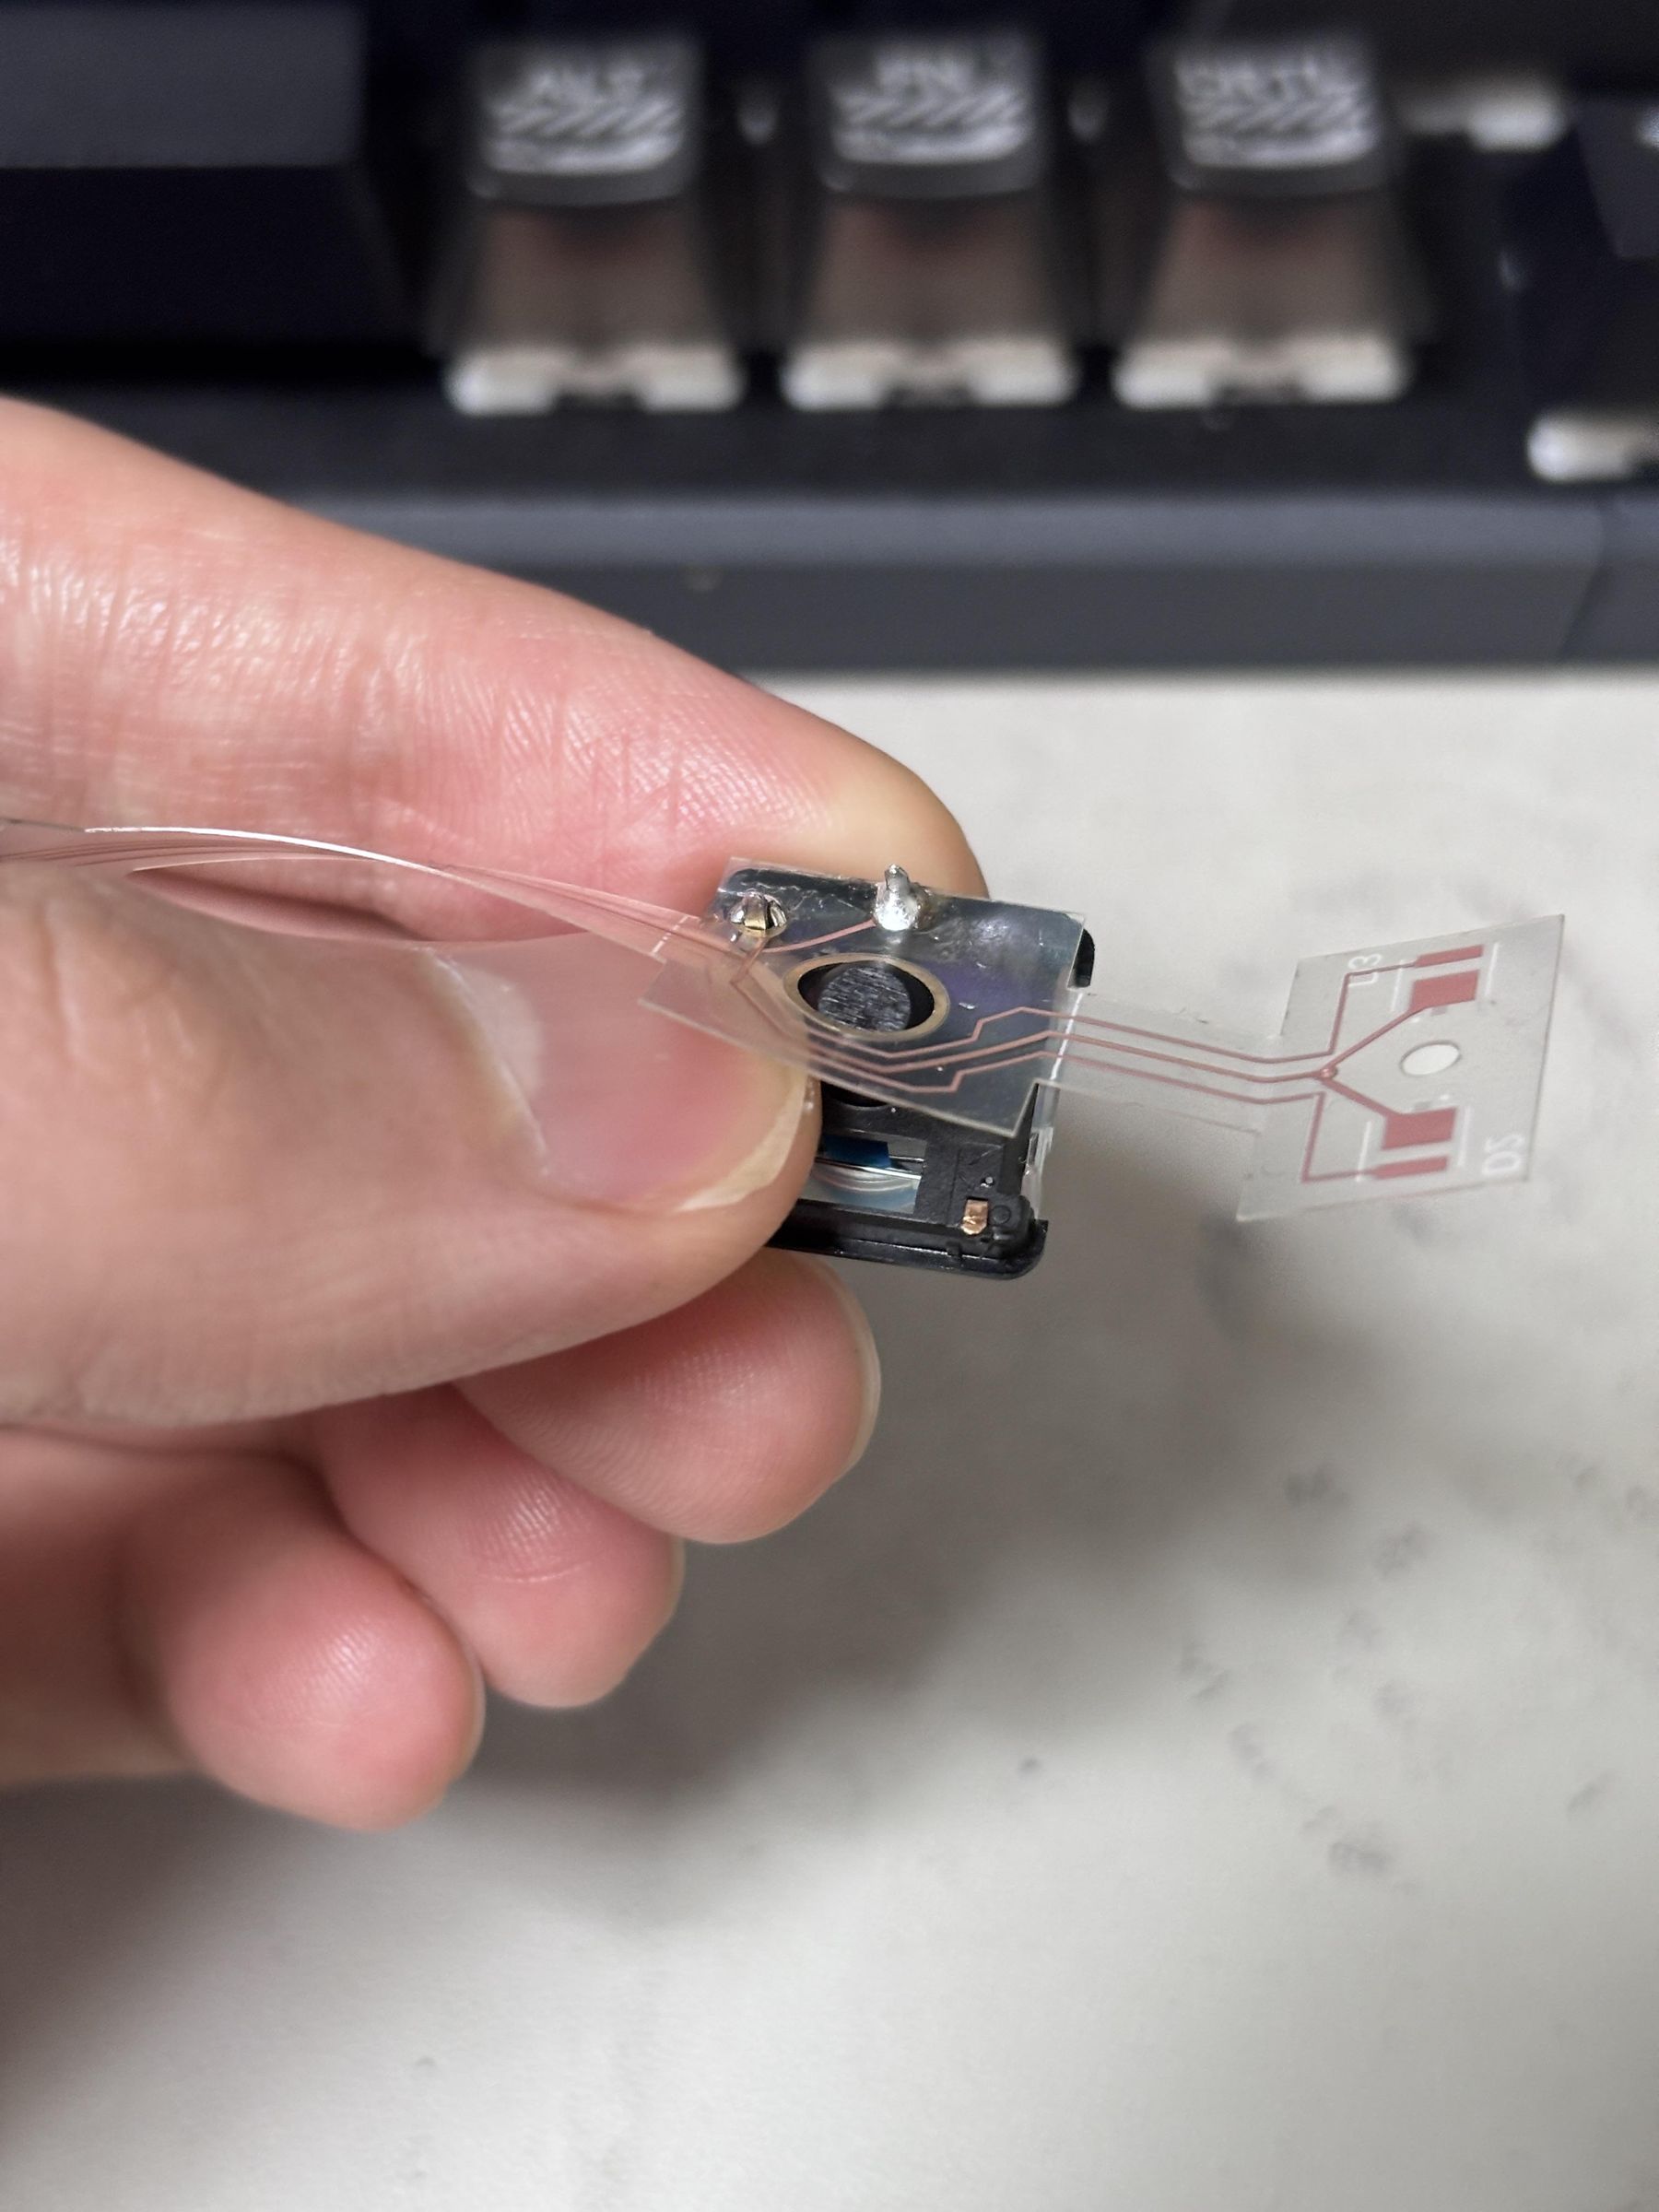
For the LEDs and resistors, I recommend using a small hot plate and heating each side of the FPCB separately.
However, if all you have in front of you is a random soldering iron—like I did—you'll need to be a little more careful.
With a regular rigid PCB, you can sometimes heat the board from underneath with the tip of a soldering iron, almost like a tiny hot plate. I wouldn't recommend doing this with an FPCB. Prolonged local heating can cause the copper layers to delaminate from the flexible substrate before the solder flows properly.
What I did instead was solder one side of the component at a time, heating it from the side. This is definitely not a recommended soldering method, but it works with some patience. The plastic package of the LEDs may get slightly damaged in the process, but if you don't want to buy a hot plate, that's a risk you'll have to take. (And don't forget to buy a few spare LEDs....)
For the ESP32-C3 module, I soldered directly between the pads instead of using additional header pins.
For the switch, the Kailh Choc V2 has an additional pin for mechanical stability. I didn't have enough space for its pad when designing the FPCB, so I simply removed it from the board. Cut the third pin short, bend what's left against the switch body, and solder only the two functional pins.
For the servos, make sure to distinguish GND, 5 V, and PWM correctly. There wasn't enough space to add labels to the FPCB:
- GND is the innermost pad when looking at the entire board
- The center pad is 5 V power
- The outermost pad is PWM
Assemble Side Part & Electronics
.jpg)
.jpg)
.jpg)
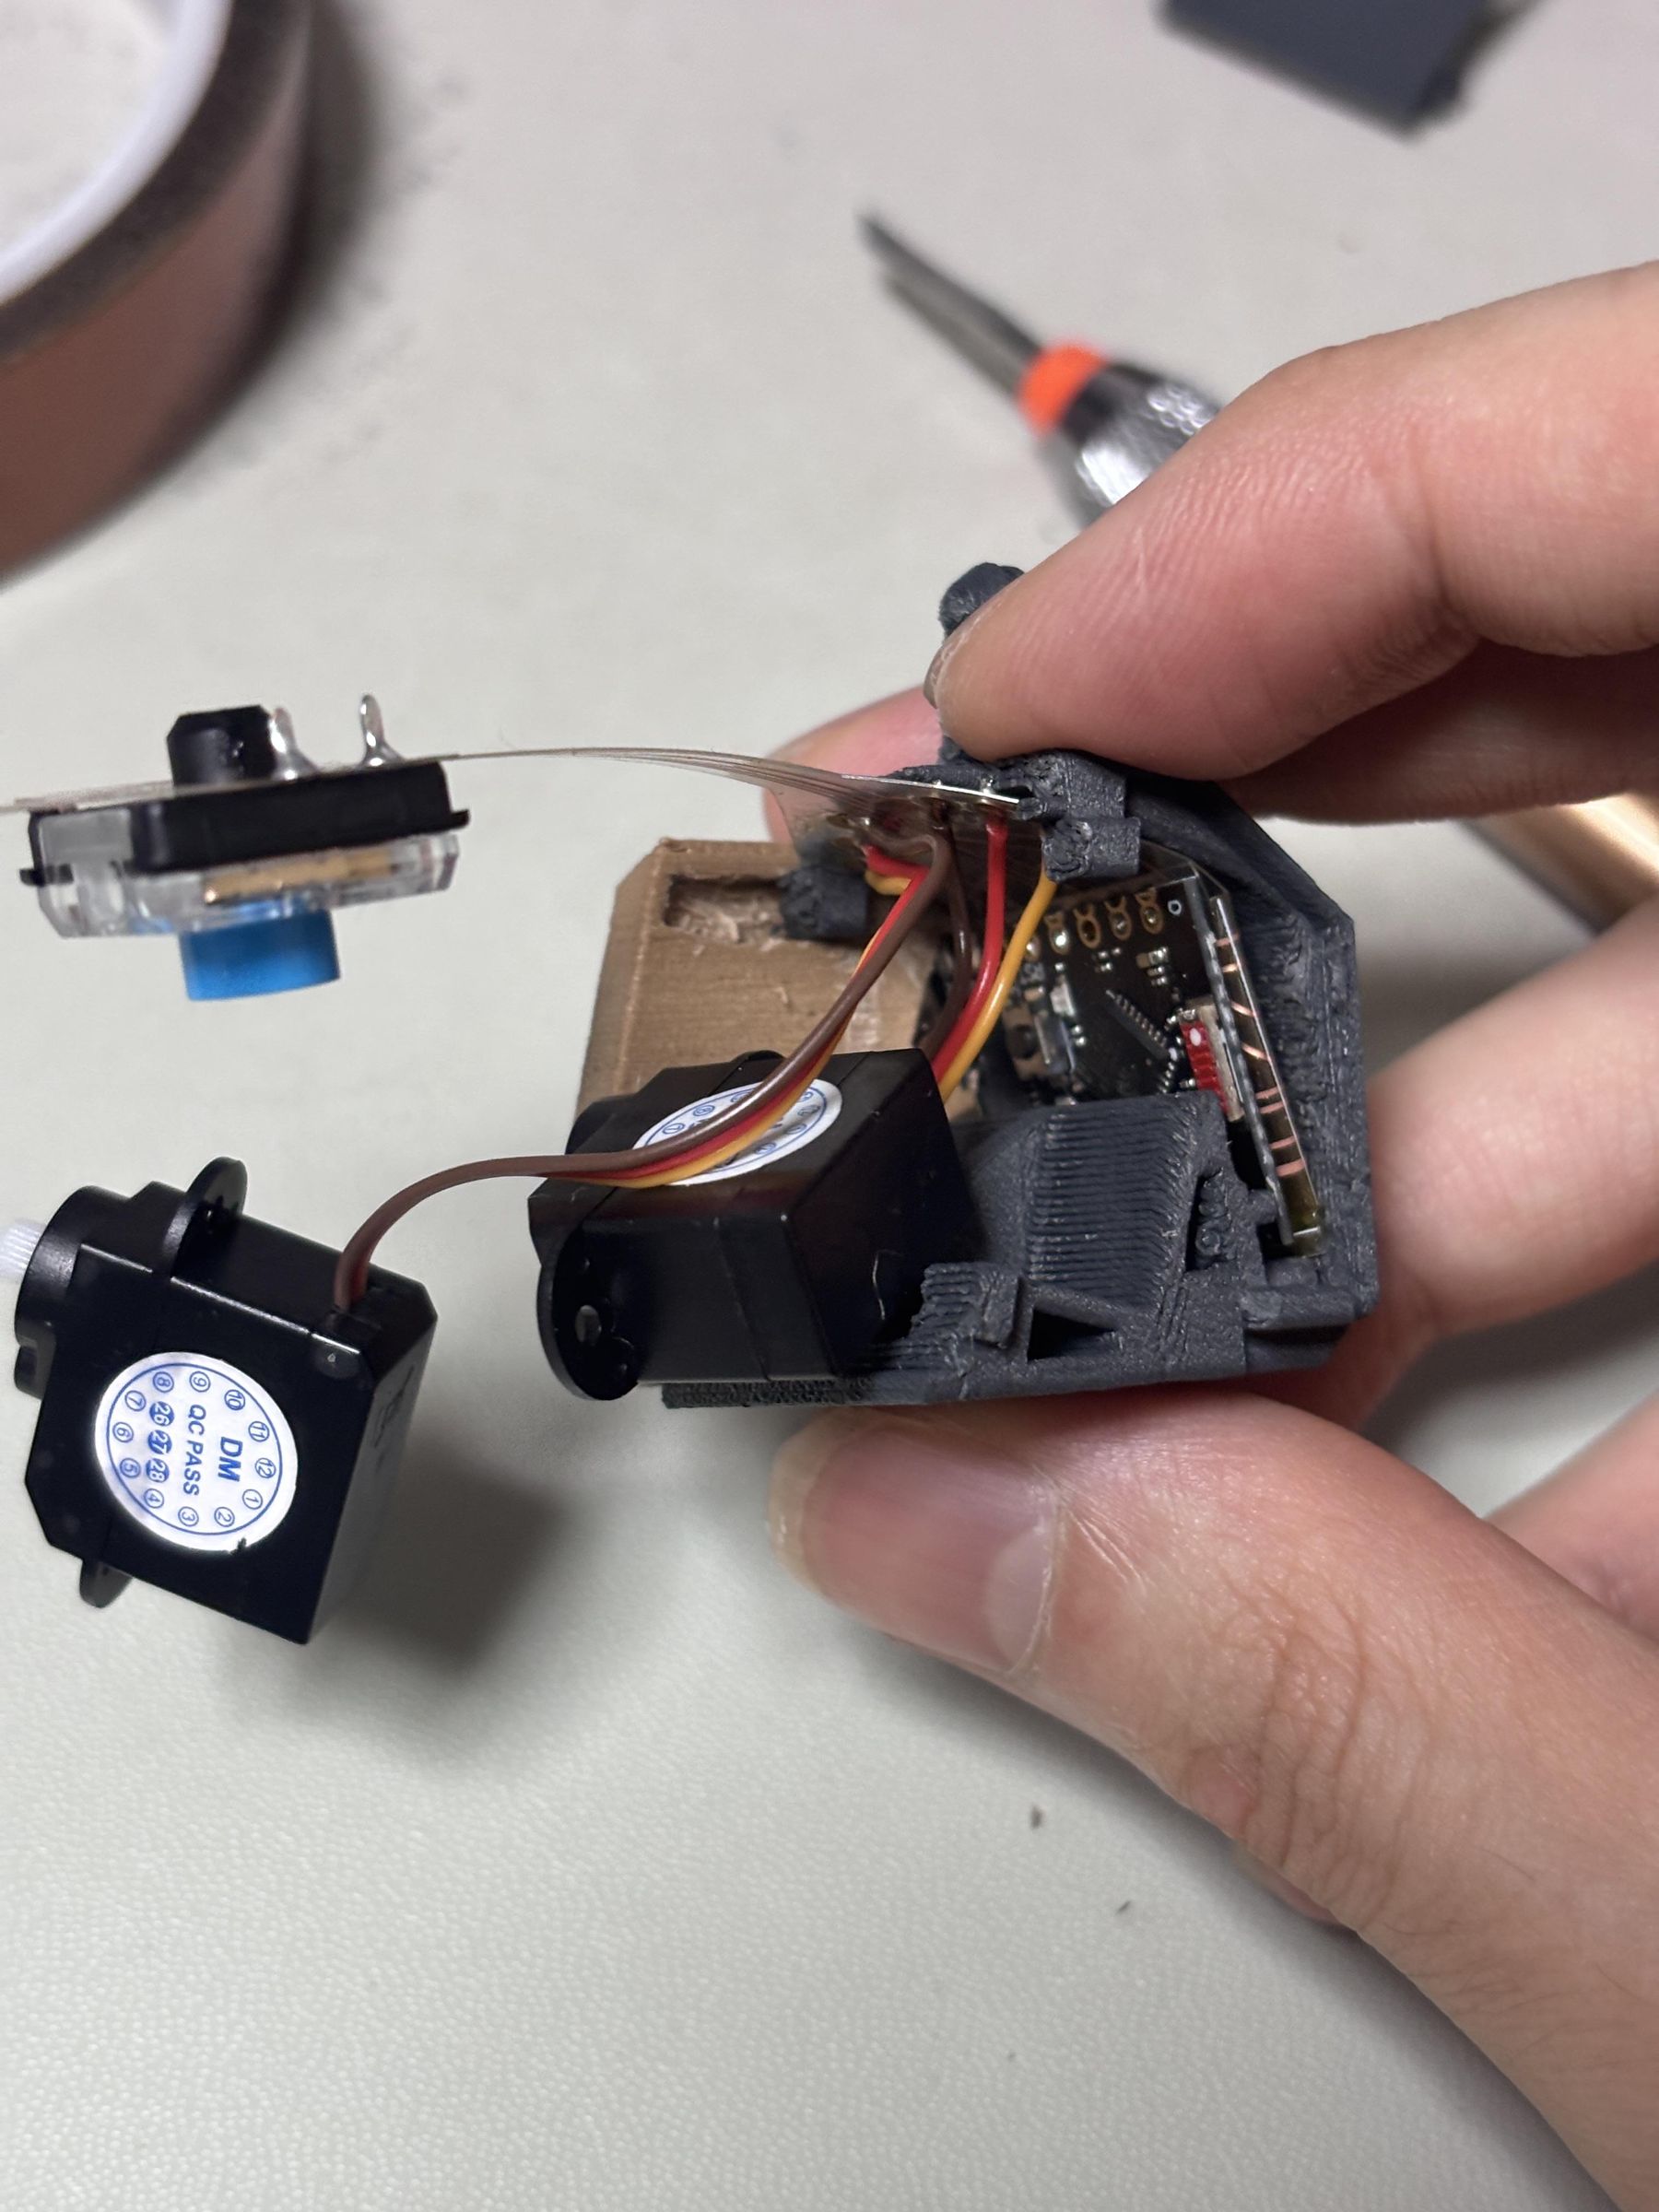
Assemble the side panel with the USB-C opening and the front panel.
Carefully fold the section of the FPCB with the ESP32 in half along the printed white line, then push it inside the body. Push it all the way in until the ESP32's USB-C port is fully seated in the opening of the plastic part.
Place the two servos into their slots. Tuck the wires into the upper space inside the body.
No screws are needed.
Assemble Back Part & Another Side Part
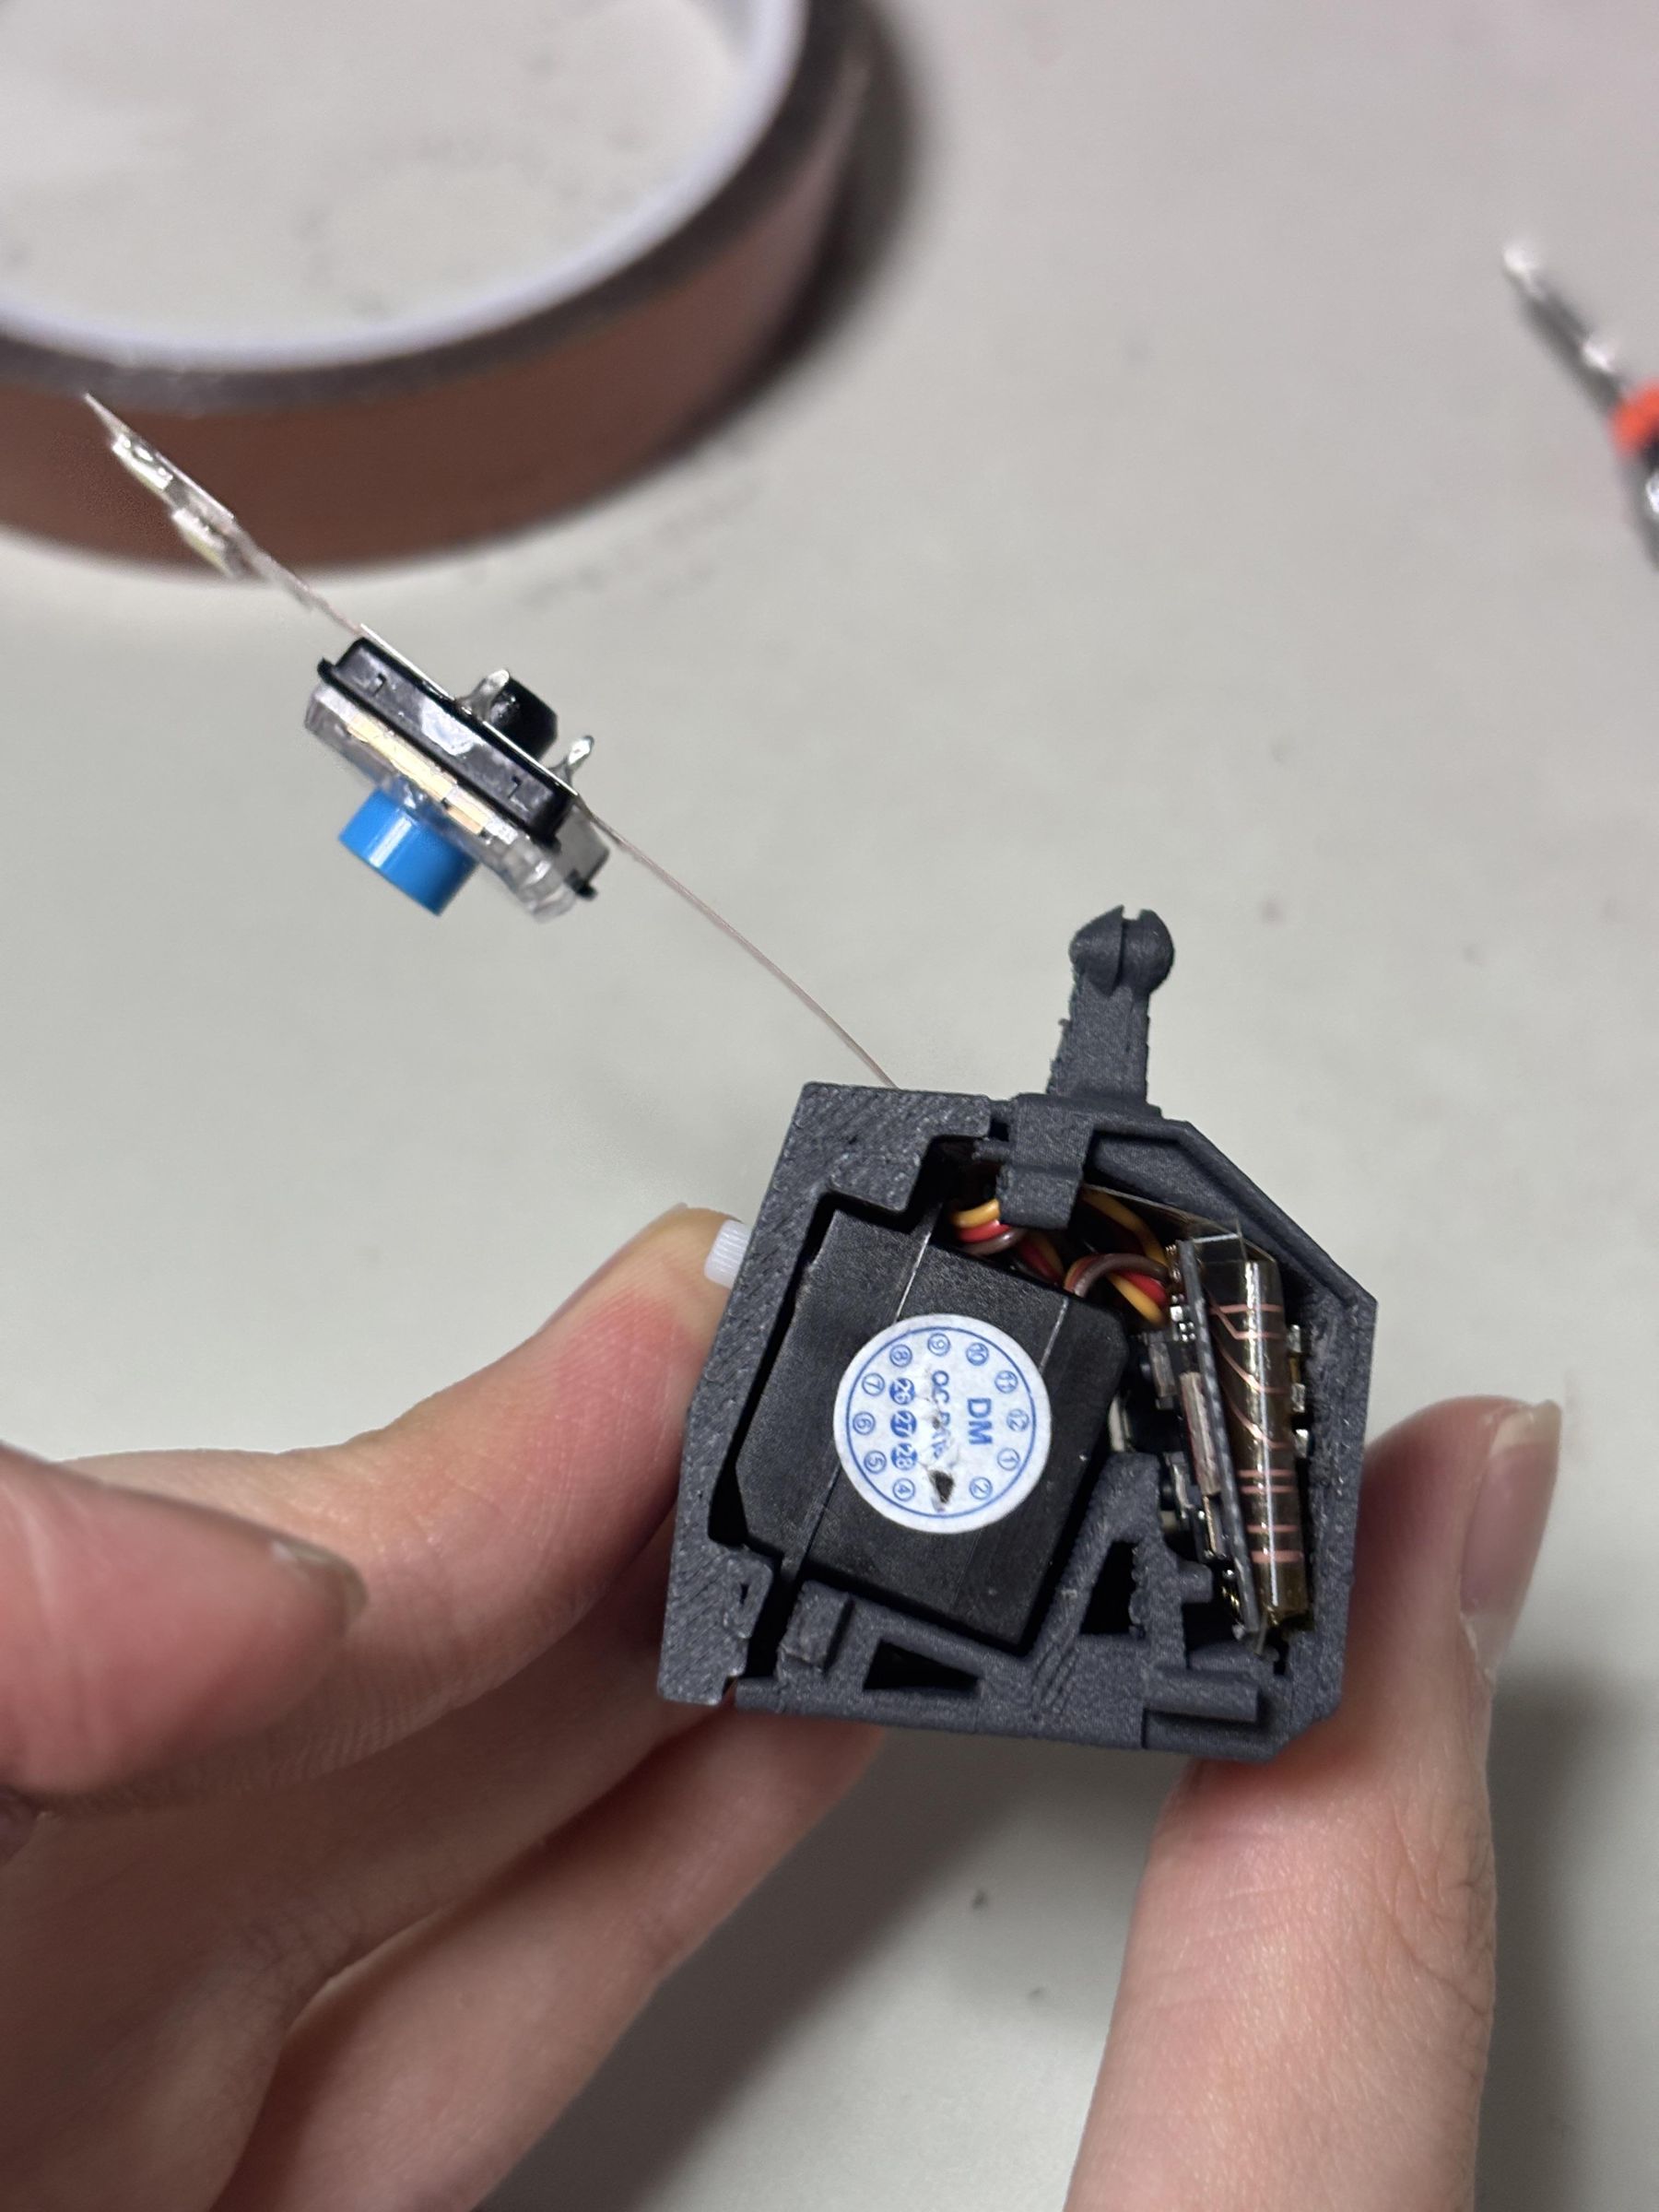
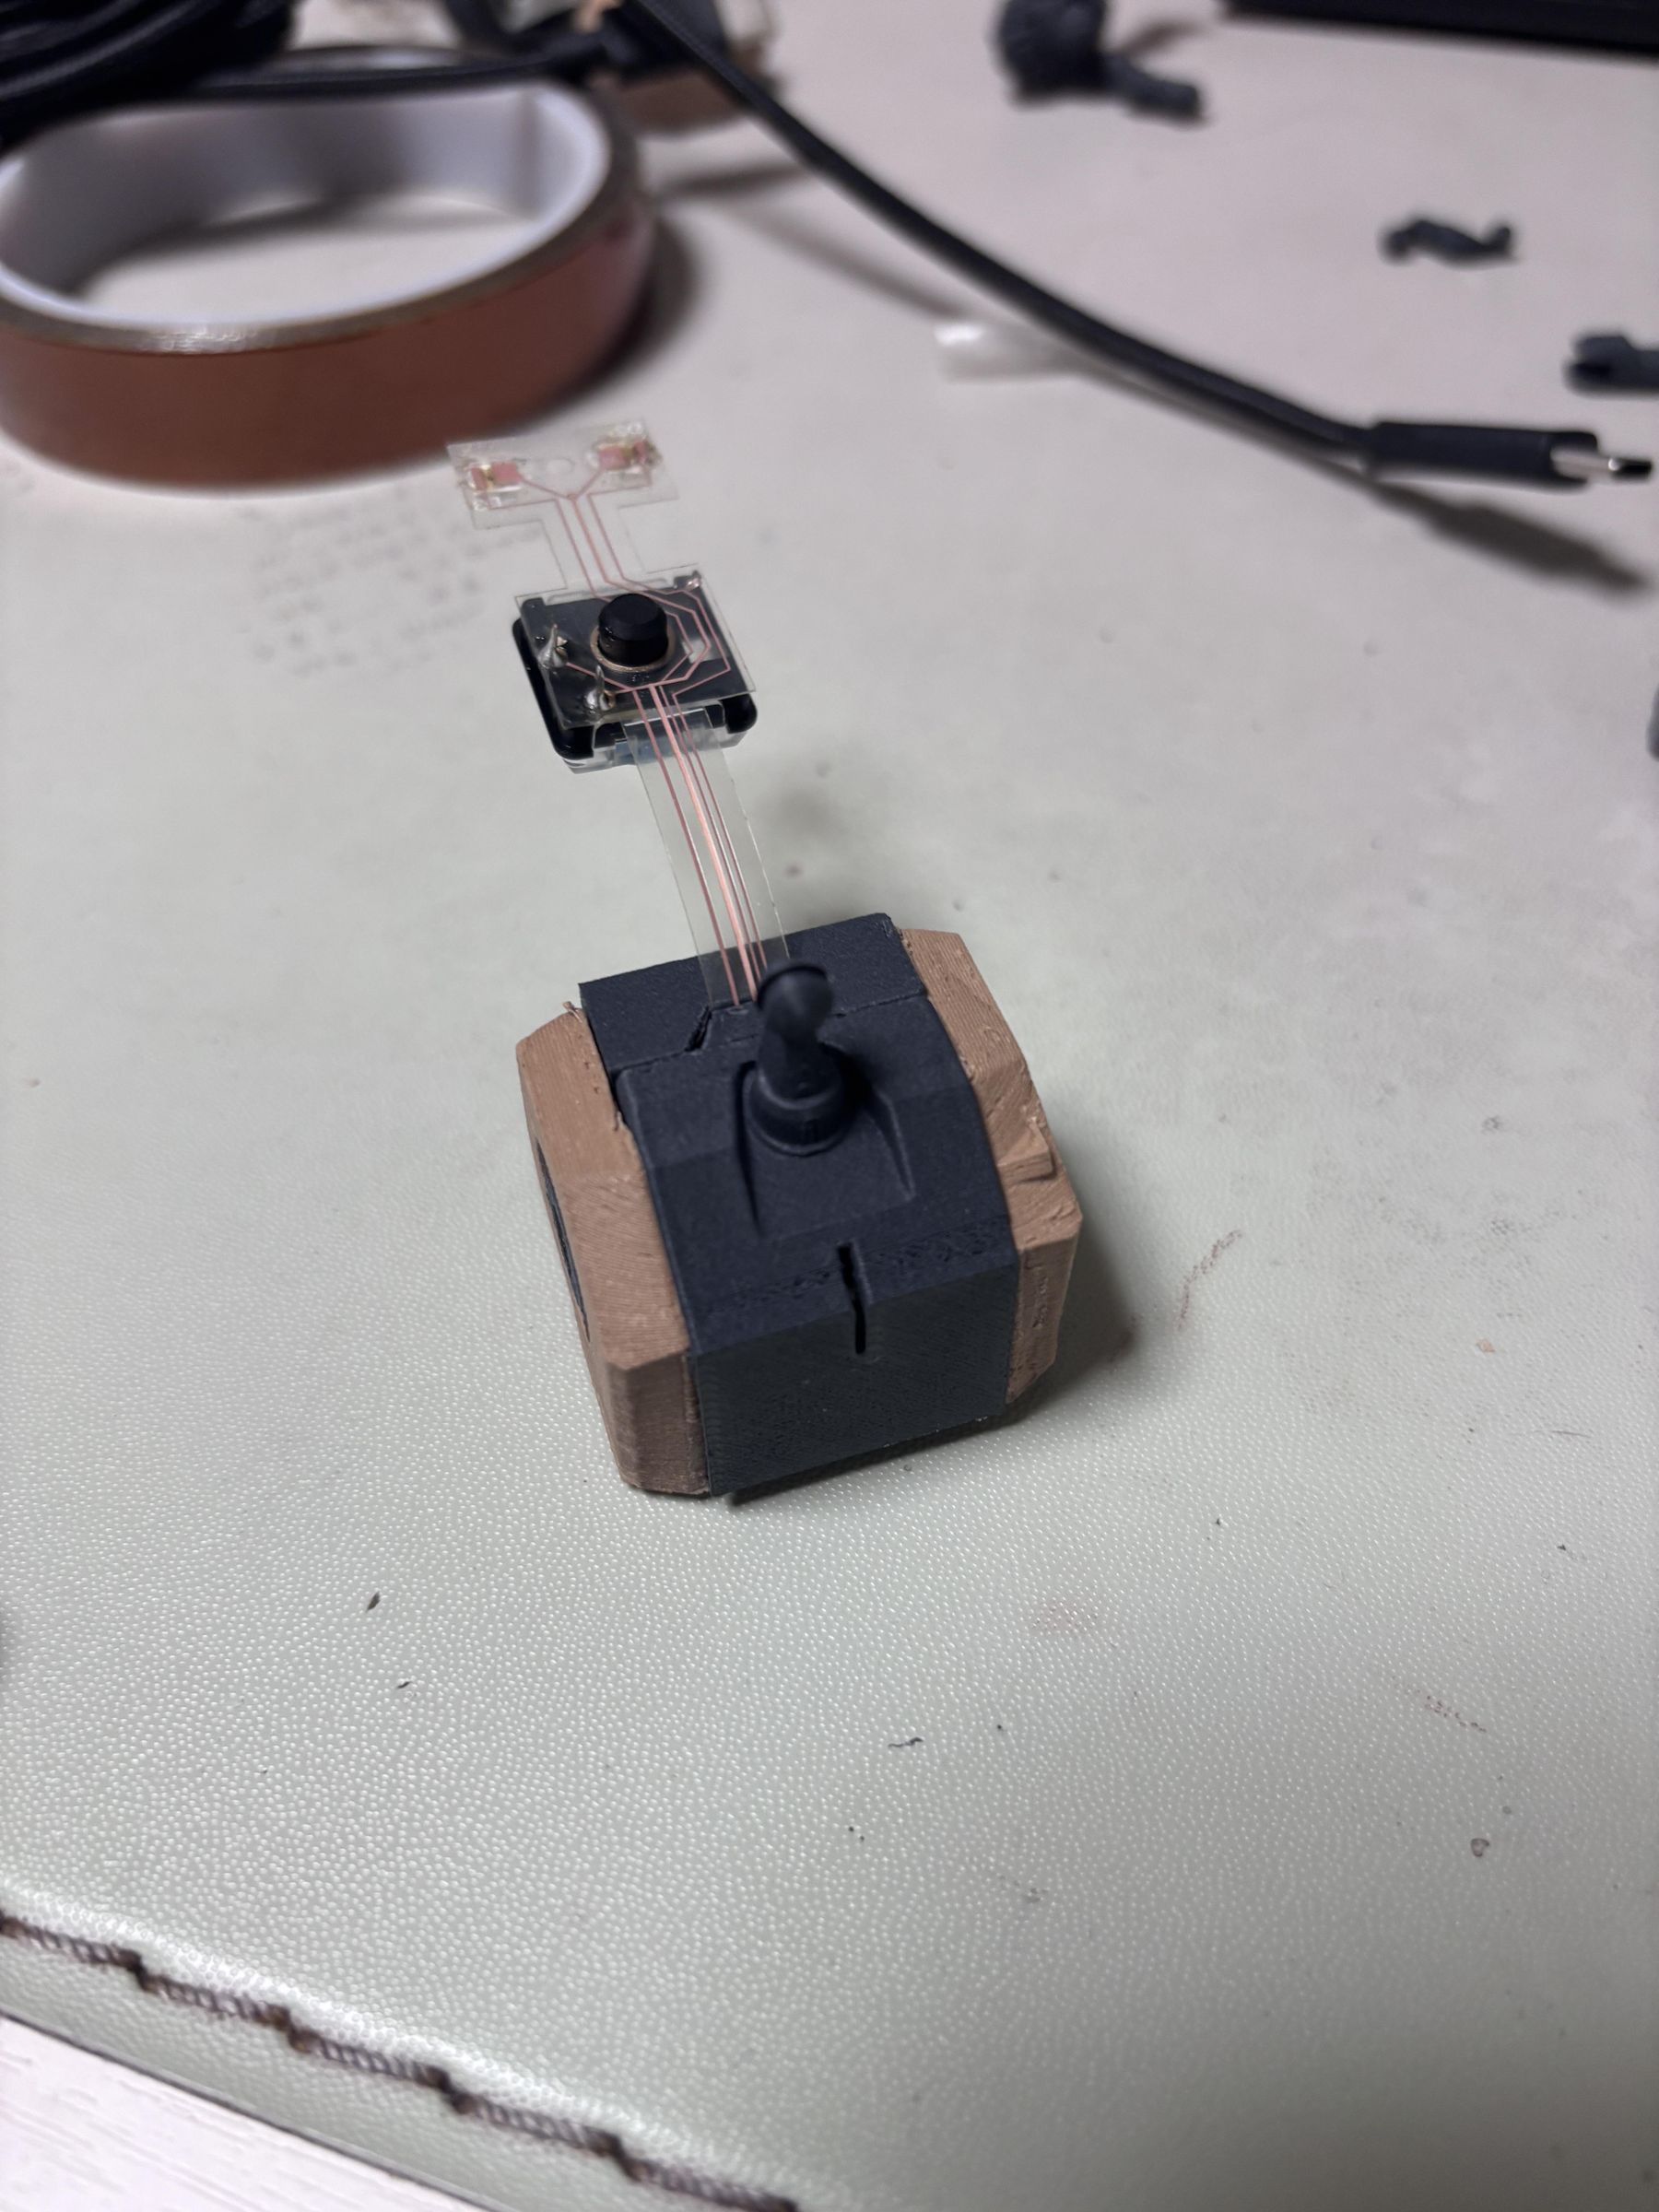
Fit the back panel onto the protruding parts of the servos and the side panel already assembled. Moving the servos or the side panel slightly may make this easier.
Then, attach the other side panel.
Before closing it, plug a USB-C cable into the port from outside and make sure the ESP32 stays firmly in place. If it gets pushed back into the body, I recommend filling the small gap behind it with a bit of hot glue.
Connect Neck Parts & Fold Eye Parts
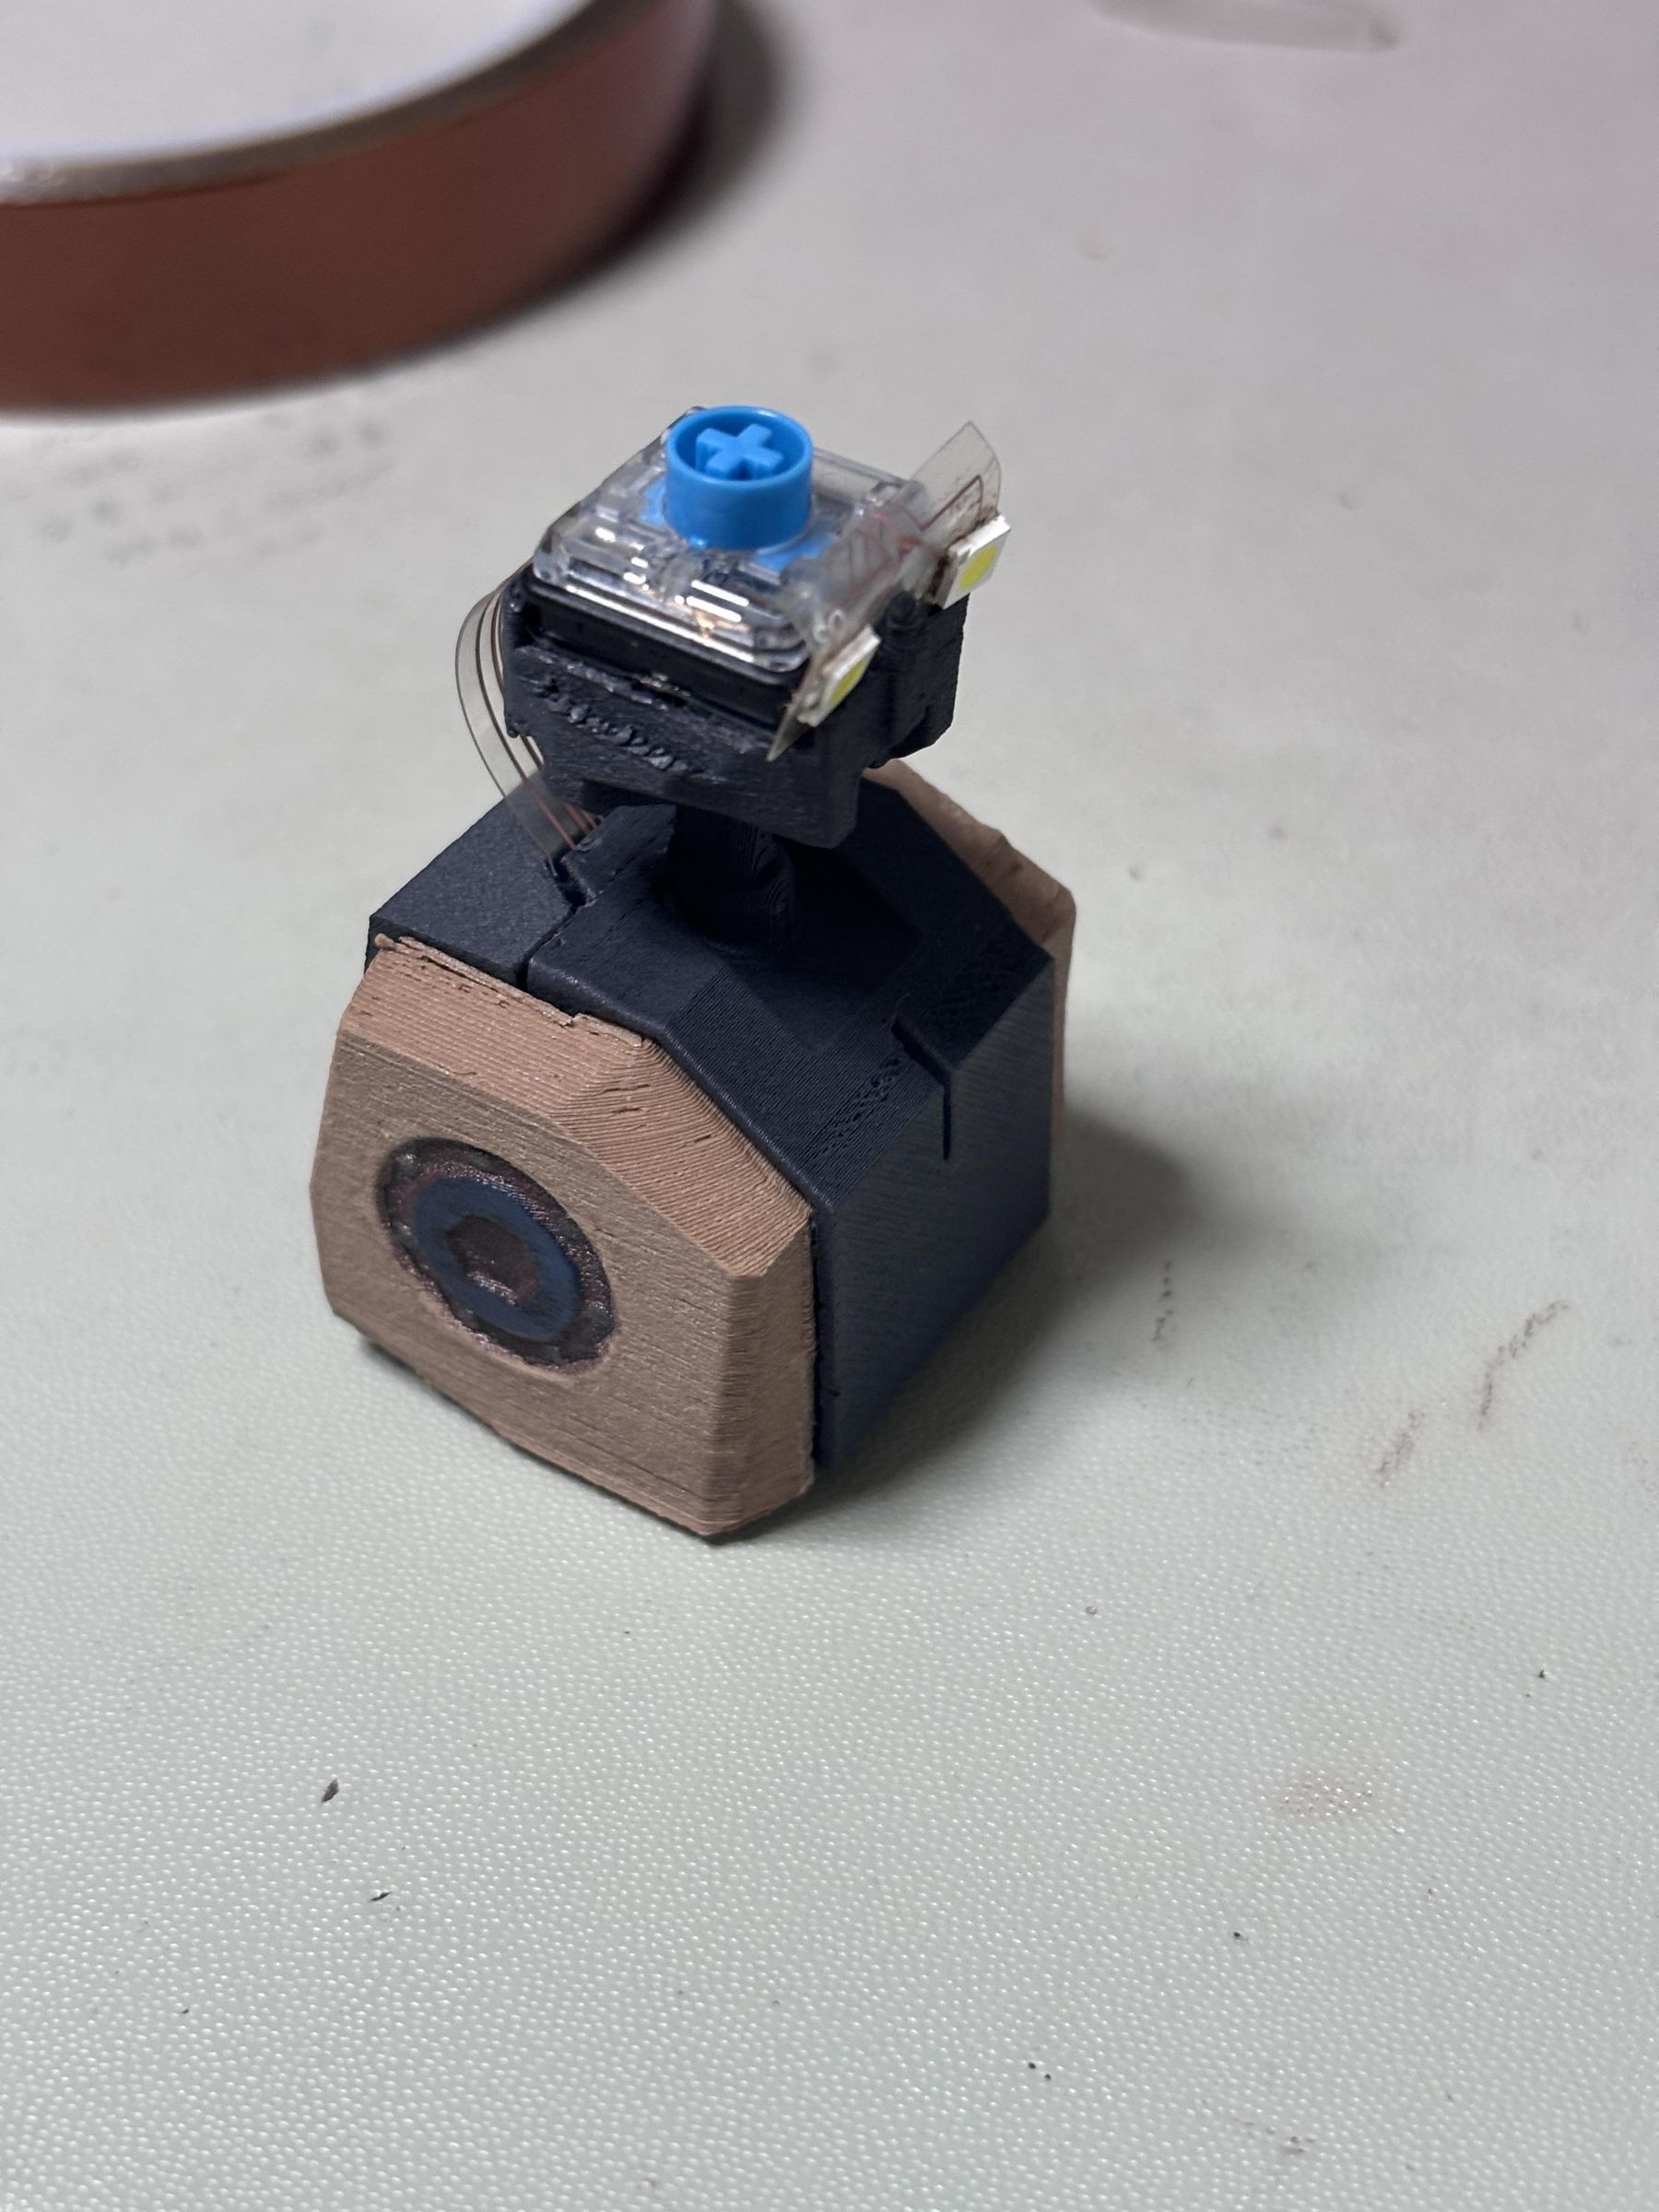
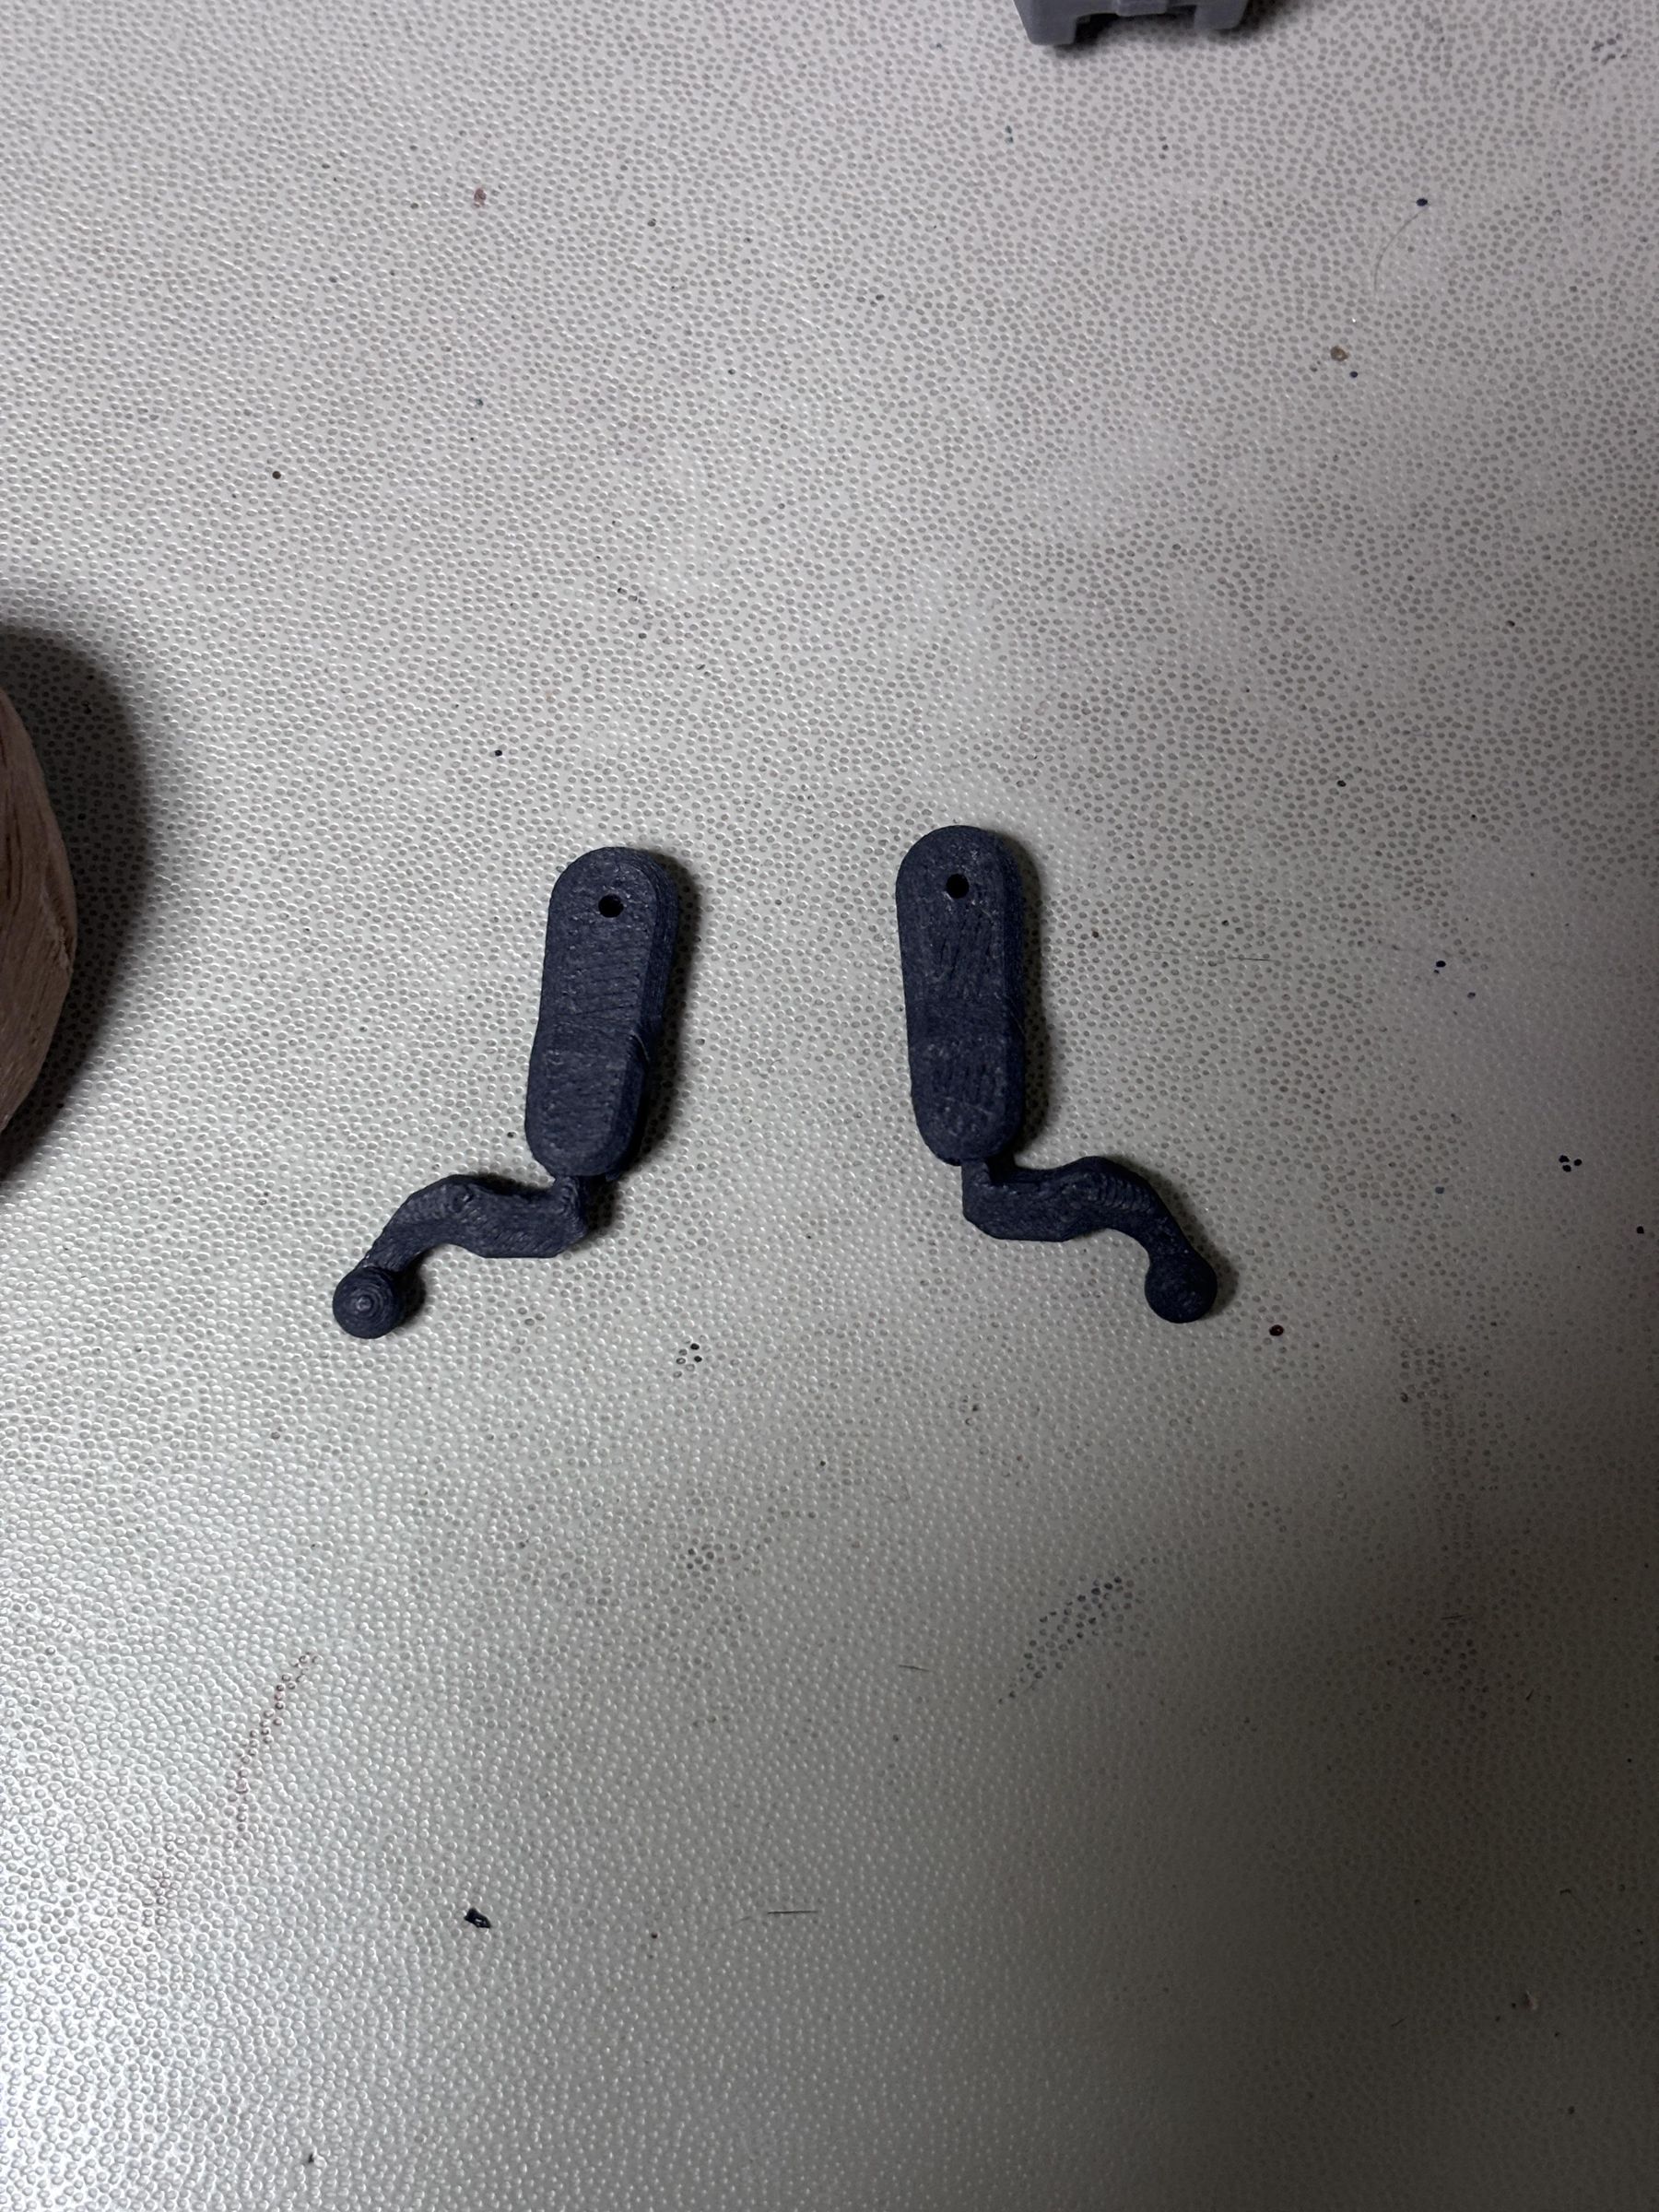
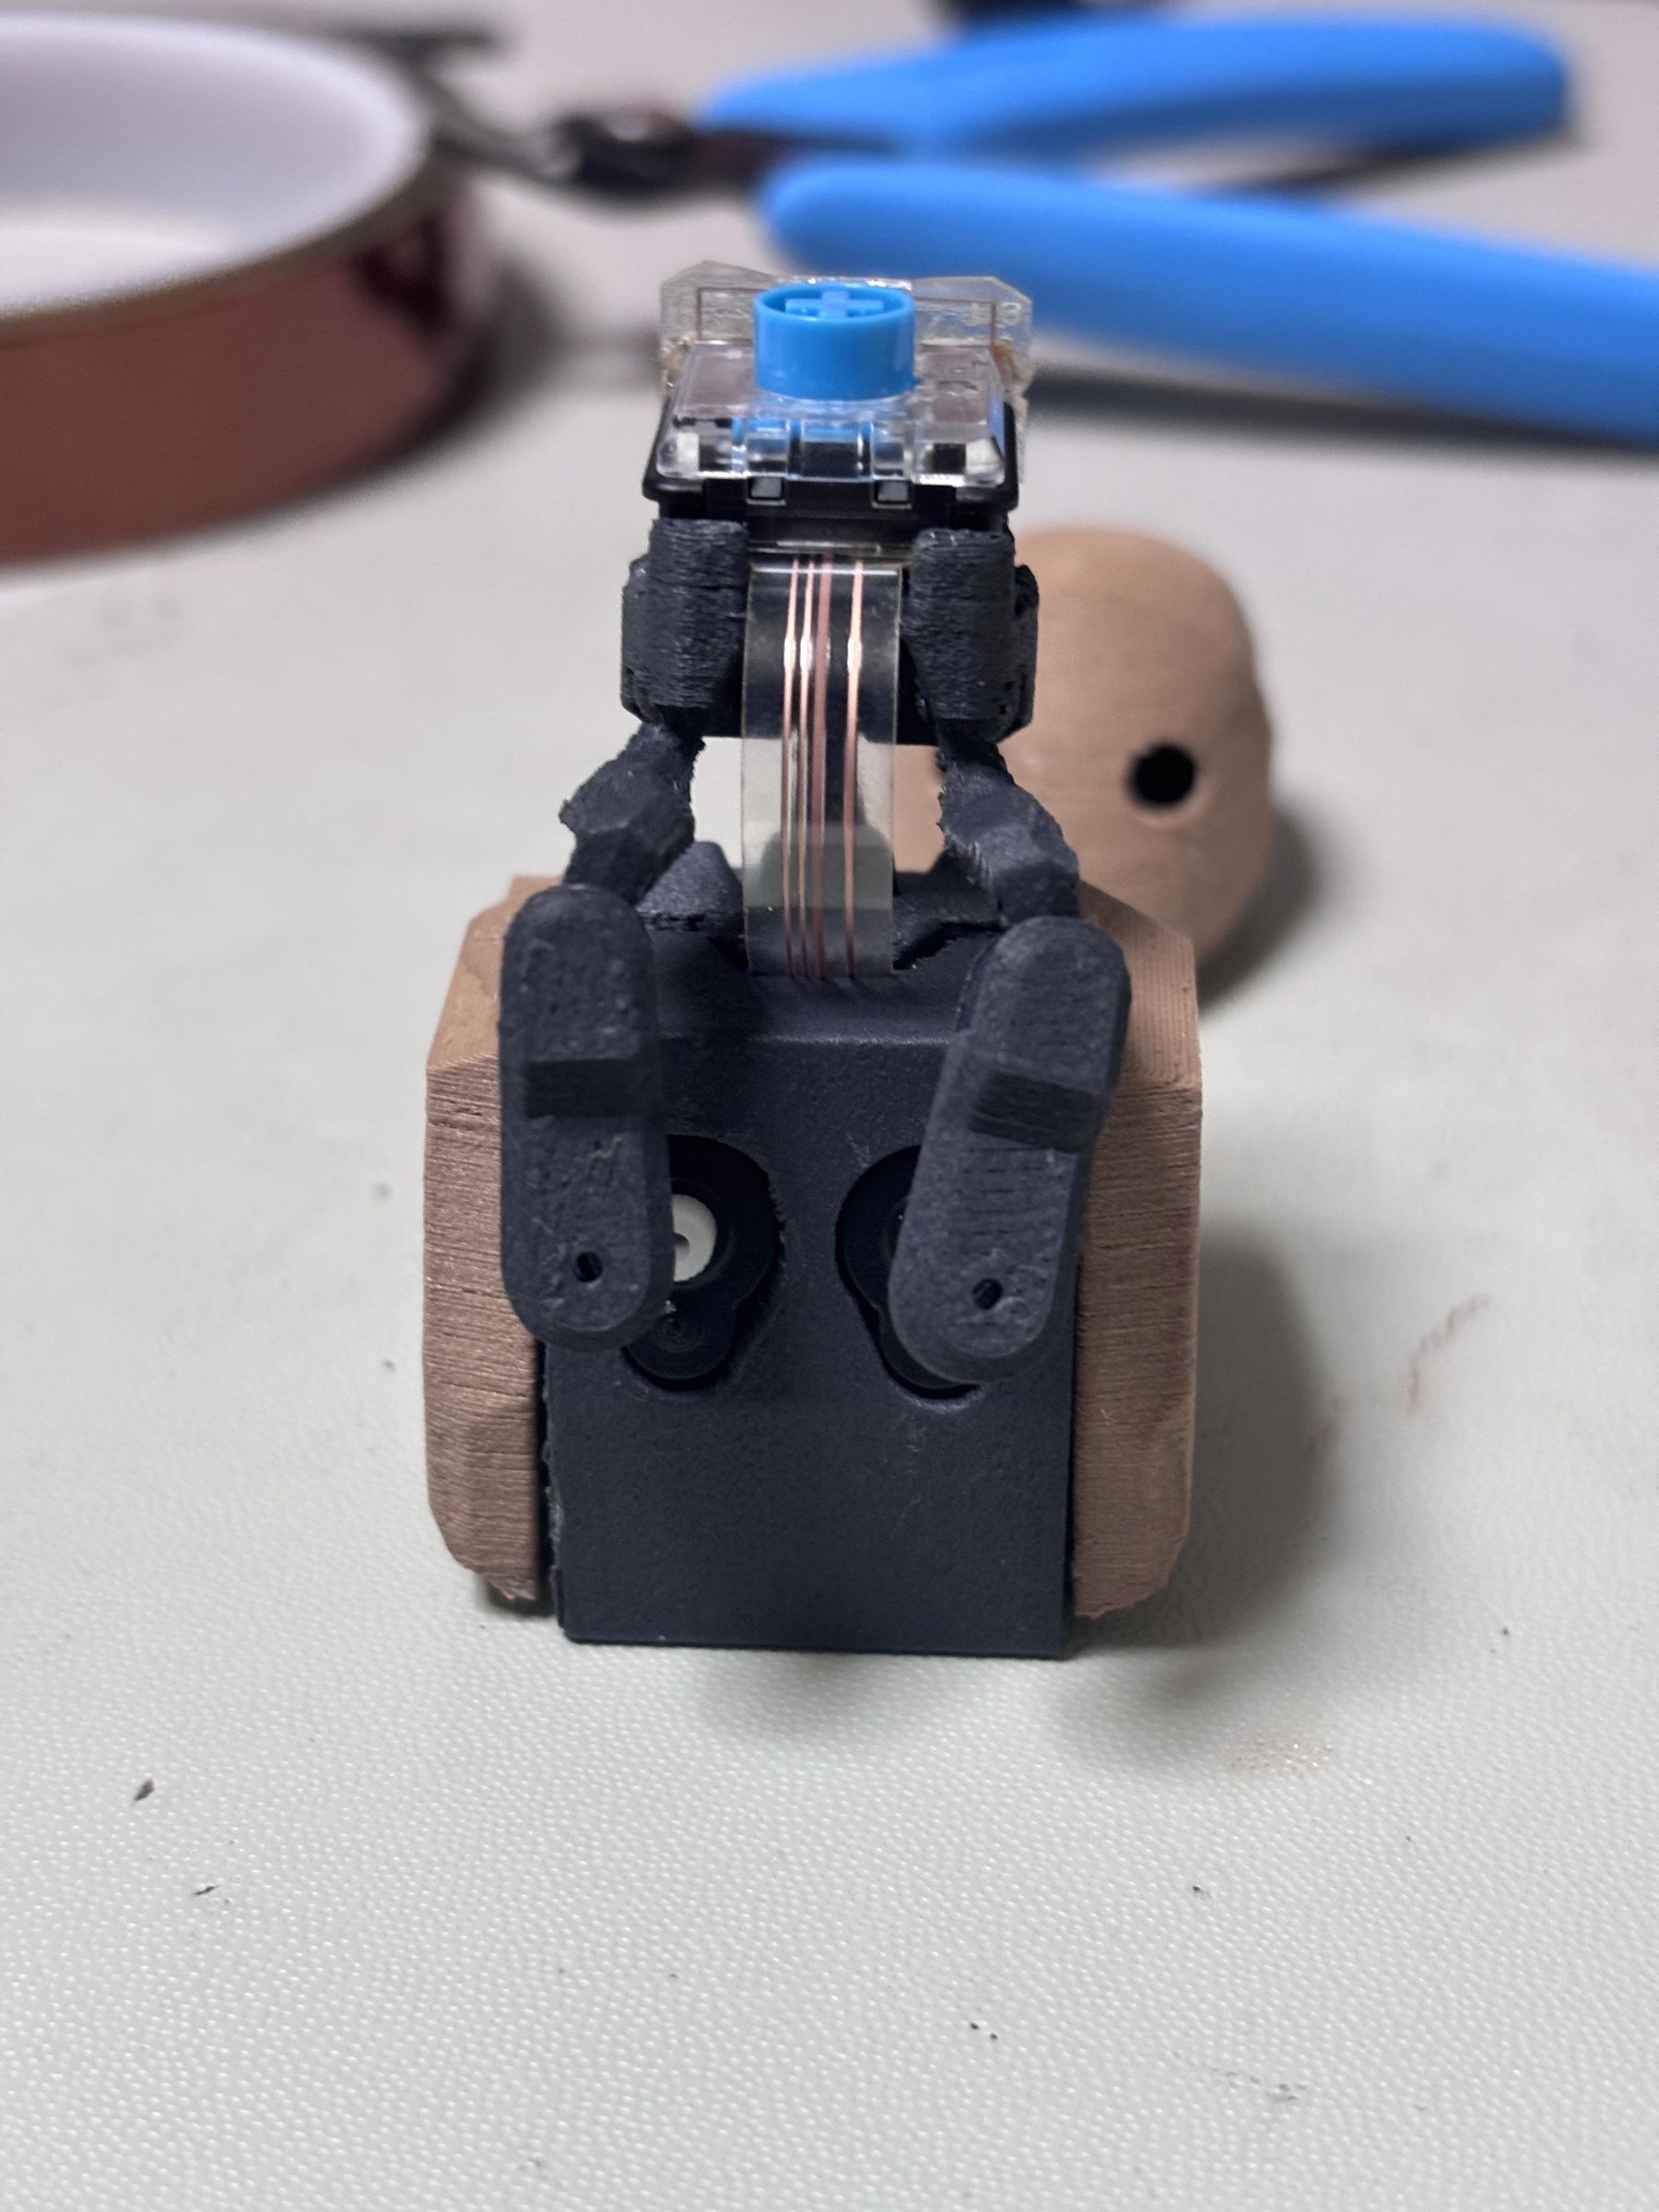
Insert the neck part, making sure the pins are aligned with the slots.
Install the switch, then carefully fold the FPCB sections with the LEDs into place. I recommend using a little hot glue to fix their position and angle. Depending on the printing direction, the small features holding the eye LEDs can break quite easily, and fixing a misaligned LED after assembly is rather difficult.
Assemble the servo arms with the pair of connecting links. Insert the links into the two slots on the back of the neck. Set both servos to their neutral (zero) position before attaching the servo arms, then attach the arms to the servos.
Connect Head
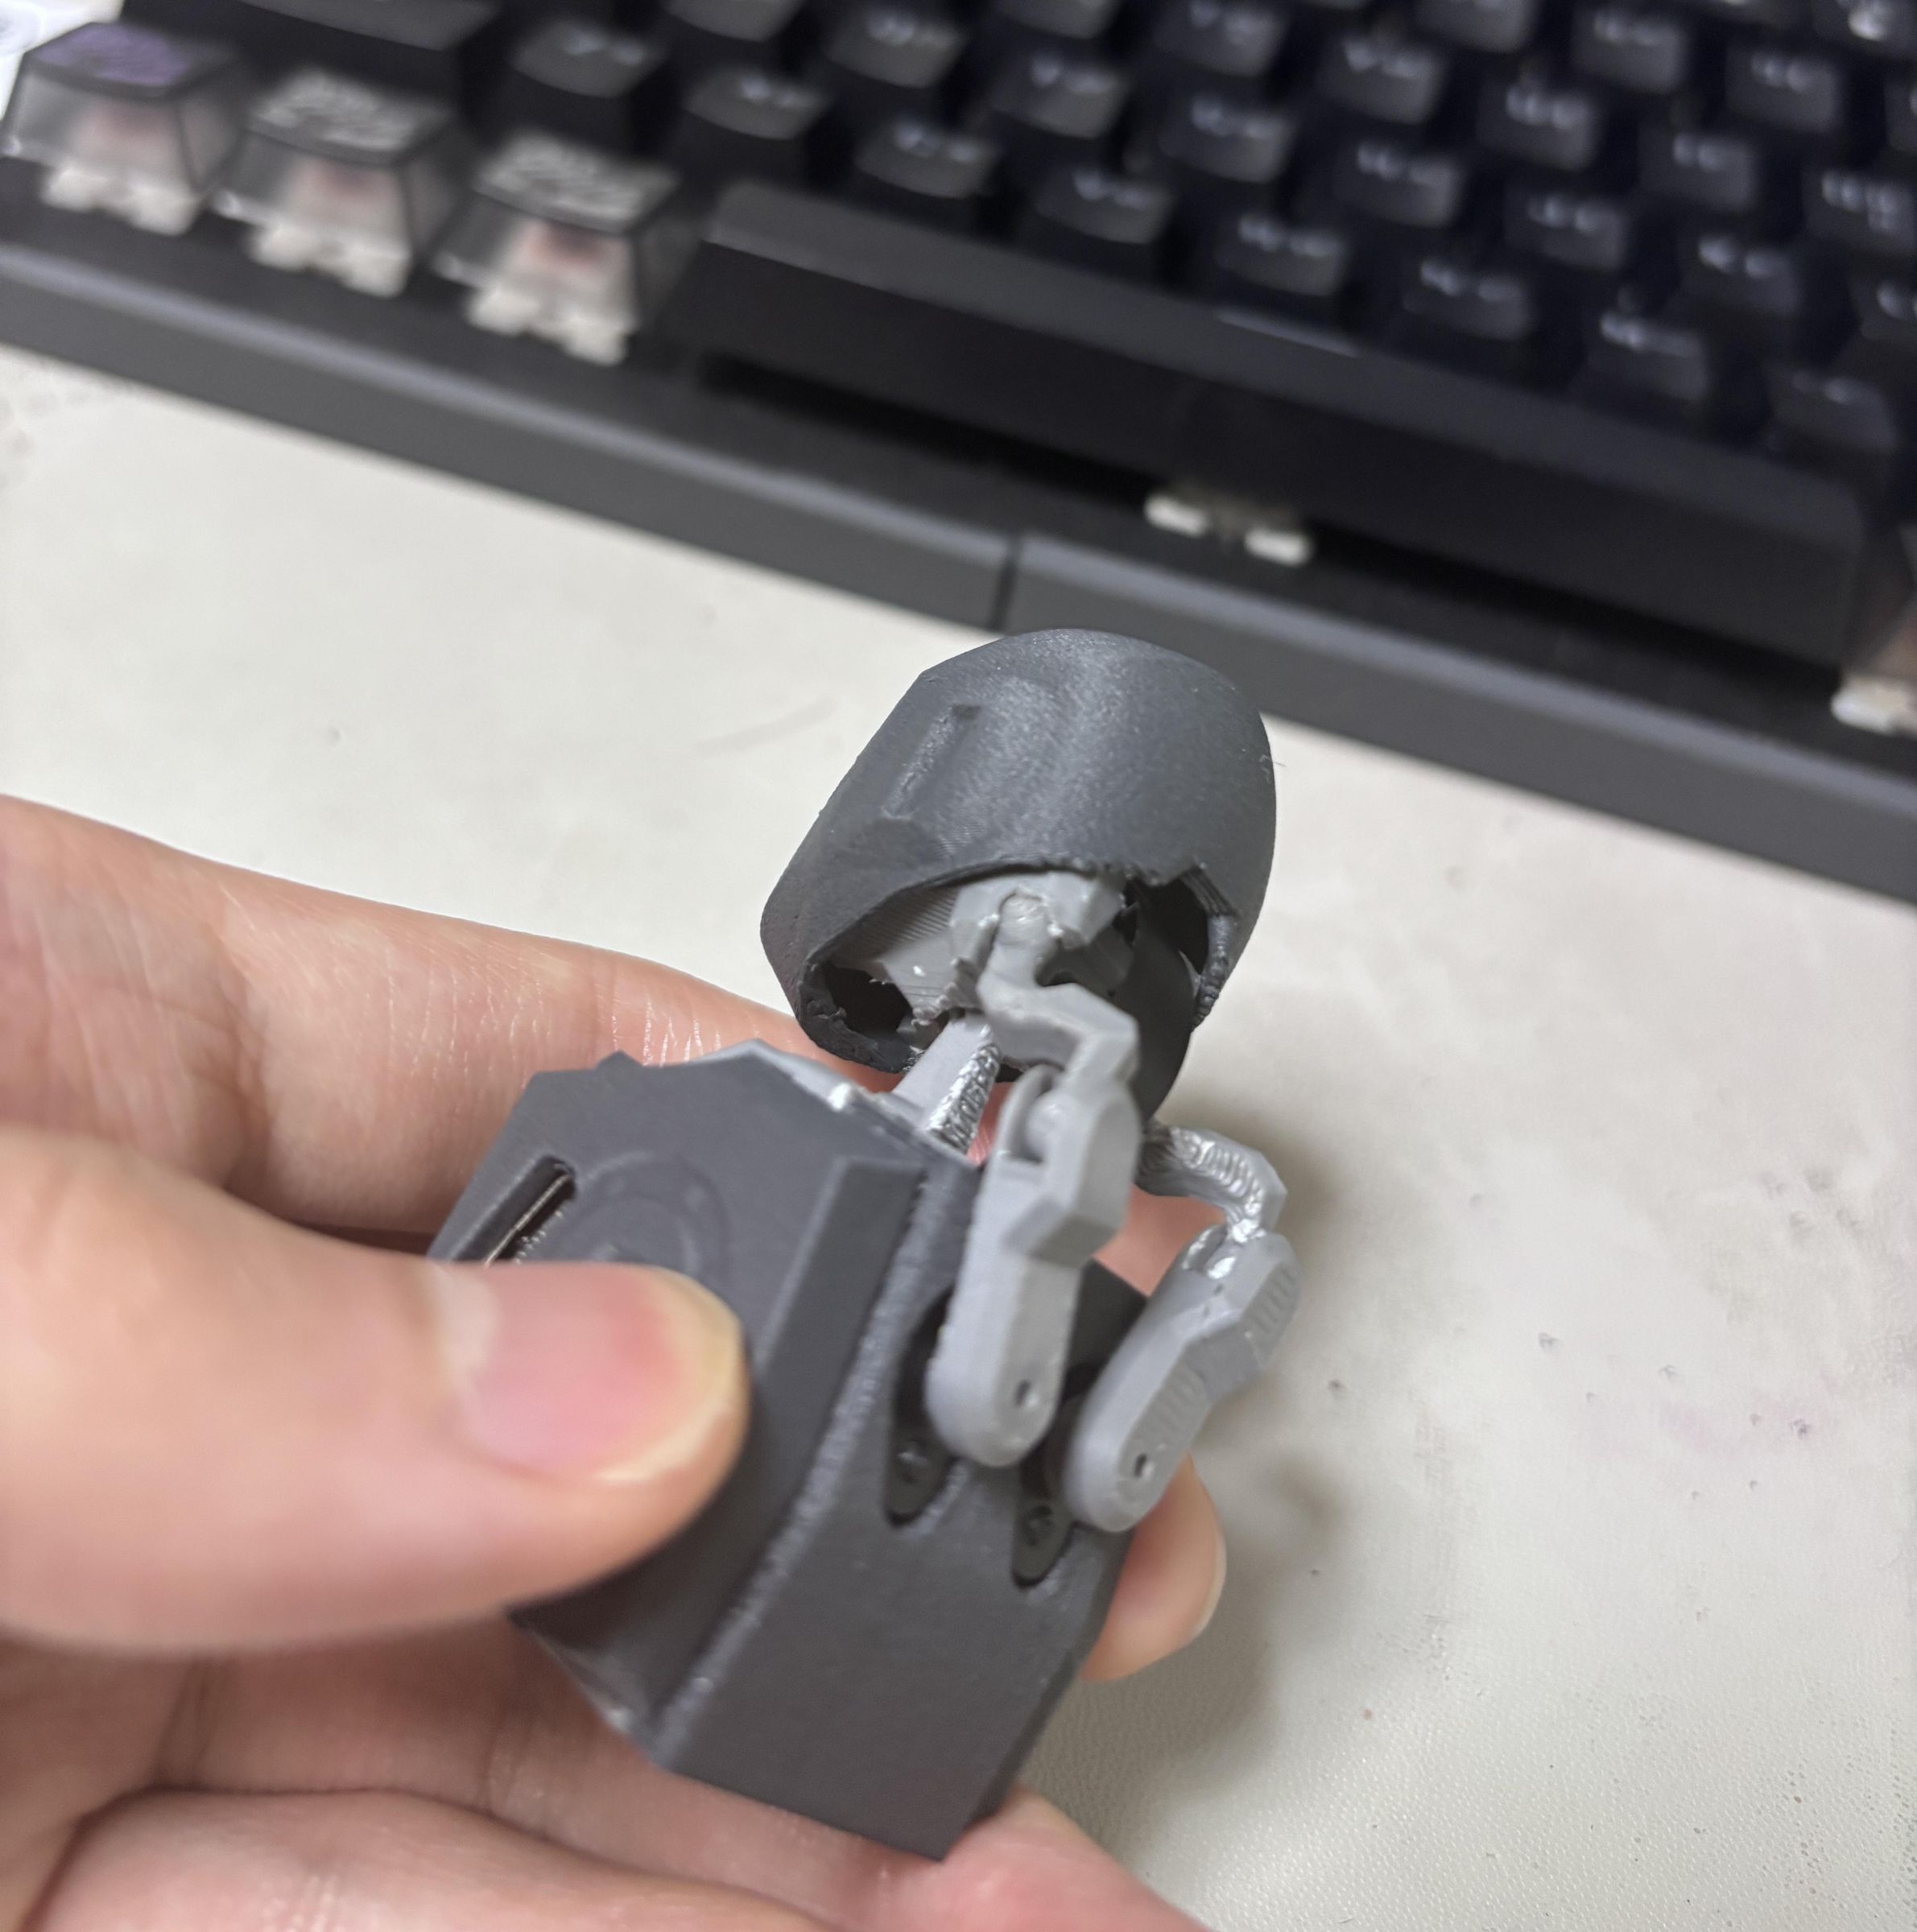
Fit the head part onto the neck assembly, then rotate it slightly and snap it into place around the switch.
...and you're done! :]
Firmware
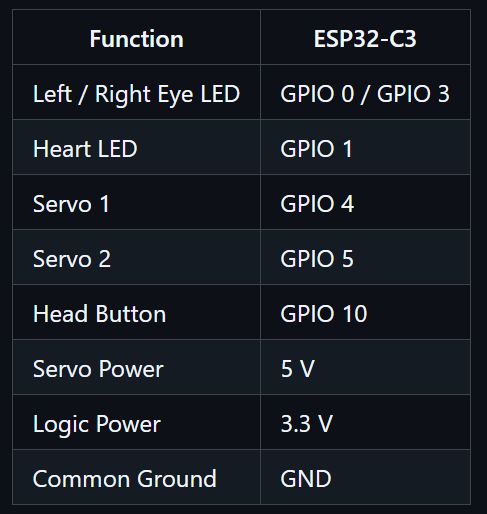
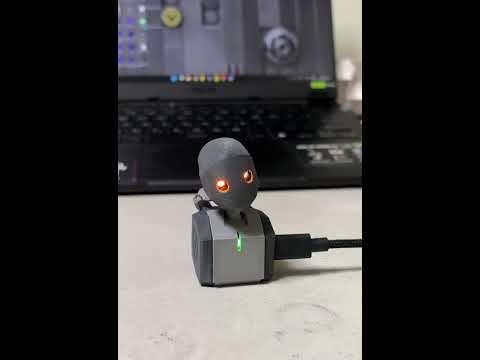
Write and upload the firmware for the ESP32-C3 using the provided pin map.
BEN was designed to have as few physical elements as possible. By default, it doesn't have a built-in battery and needs to be powered by an external device, such as a laptop.
However, I hope this limitation can lead to more interesting uses by taking advantage of the resources already available on laptops and other connected devices.
If You Want to Build Your Own...
BEN's design files, electronics, and example firmware are all available here.
Feel free to modify them, try something different, or build something completely new with BEN. If you make something interesting, I'd love to see it—so feel free to share your build or modifications.
Have fun with it, and good luck! :]