Bandsaw Circle-Cutting Jig (Super Quick and Rough)
by mlduffy in Workshop > Woodworking
5124 Views, 70 Favorites, 0 Comments
Bandsaw Circle-Cutting Jig (Super Quick and Rough)


I needed to make some small wood circles to later make into some decorative wood gears. I learned this trick for making a larger circle-cutting jig here on Instructables. The one I learned from was for large bandsaws and we were able to cut some giant circles, from props for musicals to Hoplite-style Greek shields. This one is for a small 9" bandsaw. You can cut circles from wood almost as wide as 12 3/4 inches square (just shy).
I did not have a lot of time and I did not want to spend any money so everything is made from scrap. Therefore, this jig is rough-and-ready and might not be as precise as some of the fantsy-schmantsy dowel-based jigs.
Supplies
Scrap plywood or planks (any size can work)
Pencil & Ruler
"Speed Square"/L-Square/T-Square (helps)
Glue (any kind)
Screws (optional)
Clamps (helps)
Grab Some Scrap


I found some scrap pieces of birch ply and a sliver of oak that just barely fit the angle-gauge track on the bandsaw.
Trim the sliver of wood and place into the angle-gauge track. This will be your brace for the top platform to keep it square to the blade.
Draw a line down the center of the platform piece (you usually want one long enough to hang off the side of the bandsaw.
Square the platform piece to the blade. I used a simple speed square but any right angle (like a piece of paper) will do.
Glue Braces


With the angle-gauge track sliver a little proud of the bandsaw platform (I used some washers underneath), run a thin strip of glue.
Place the platform piece a little past the blade (an inch or two) and keep it square as you run the saw and cut the platform piece to the center line.
Turn off the saw but keep the platform square (as best you can).
You might want to have more than one contact point with the bandsaw (for some hands-free stability), so I used the remainder of the oak strip and blocked it against the bandsaw with some glue and clamps.
The weight of the clamps made the platform piece tip a little bit so I wedged the platform piece against the blade guard.
Let the glue dry.
The two scrap strips (the sliver inside the angle-gage track and the block against the platform) should be enough to keep the platform piece steady. If there is wobble when sawing, however, you will have an extra hand free with this jig to hold it down (see vid).
Find the Center of Any Rectangular Plane


To find the center of any rectangular plane, you simply cross opposite corners.
Do this on any piece of wood you intend to make into a circle. The pieces do not need to be square, you will just have to start with the short side (see next step).
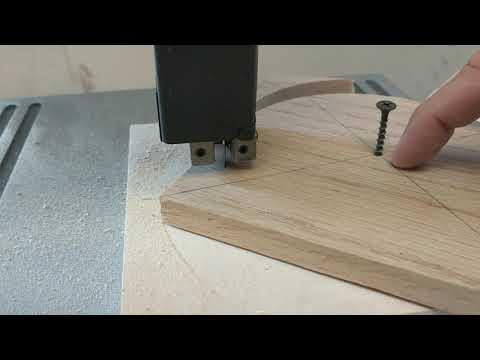
Once you have the center point marked on your future-circle, drill a screw through the crossing lines.
Continue the screw through the wood until it is about 1/8 proud of the bottom of the board.
Land the Point on the Line


If you are cutting from a rectangle (or just a square that is a little off), wedge the future-circle against the blade on its short-side.
Line-up the point/tip of the screw with the center line of the platform piece.
Hint, if you are using a thick board for your future-circle, you might need to continually press the board against the blade as you lower the screw to the center line.
Press the future-circle down onto the platform piece so that the screw tip presses into the wood and is secure.
You can screw the tip further into the center line if needed but since you will be turning the future-circle clockwise as you saw, the screw will tighten and keep things steady.
Saw Baby Saw!


Turn on the saw and rotate your future-circle clockwise/to the right.
Go slow, so that the blade doesn't bind or jump through the short sides.
Once all four corners are cut off, turn off the saw.
Spin the circle counter-clockwise to lift off (pulling may tare a good location on the centerline, leaving it loose).
VIOLA! A Wood circle!
Final Thoughts


)
You can use this jig to cut anything really. Plastic, cardboard, hardwoods, etc.
I like to work rough, then smooth at the end so I do not get caught-up on getting everything perfect right away. But, with a little practice, your pieces will be consistent, predictable, and accurate.
Happy circle-making!