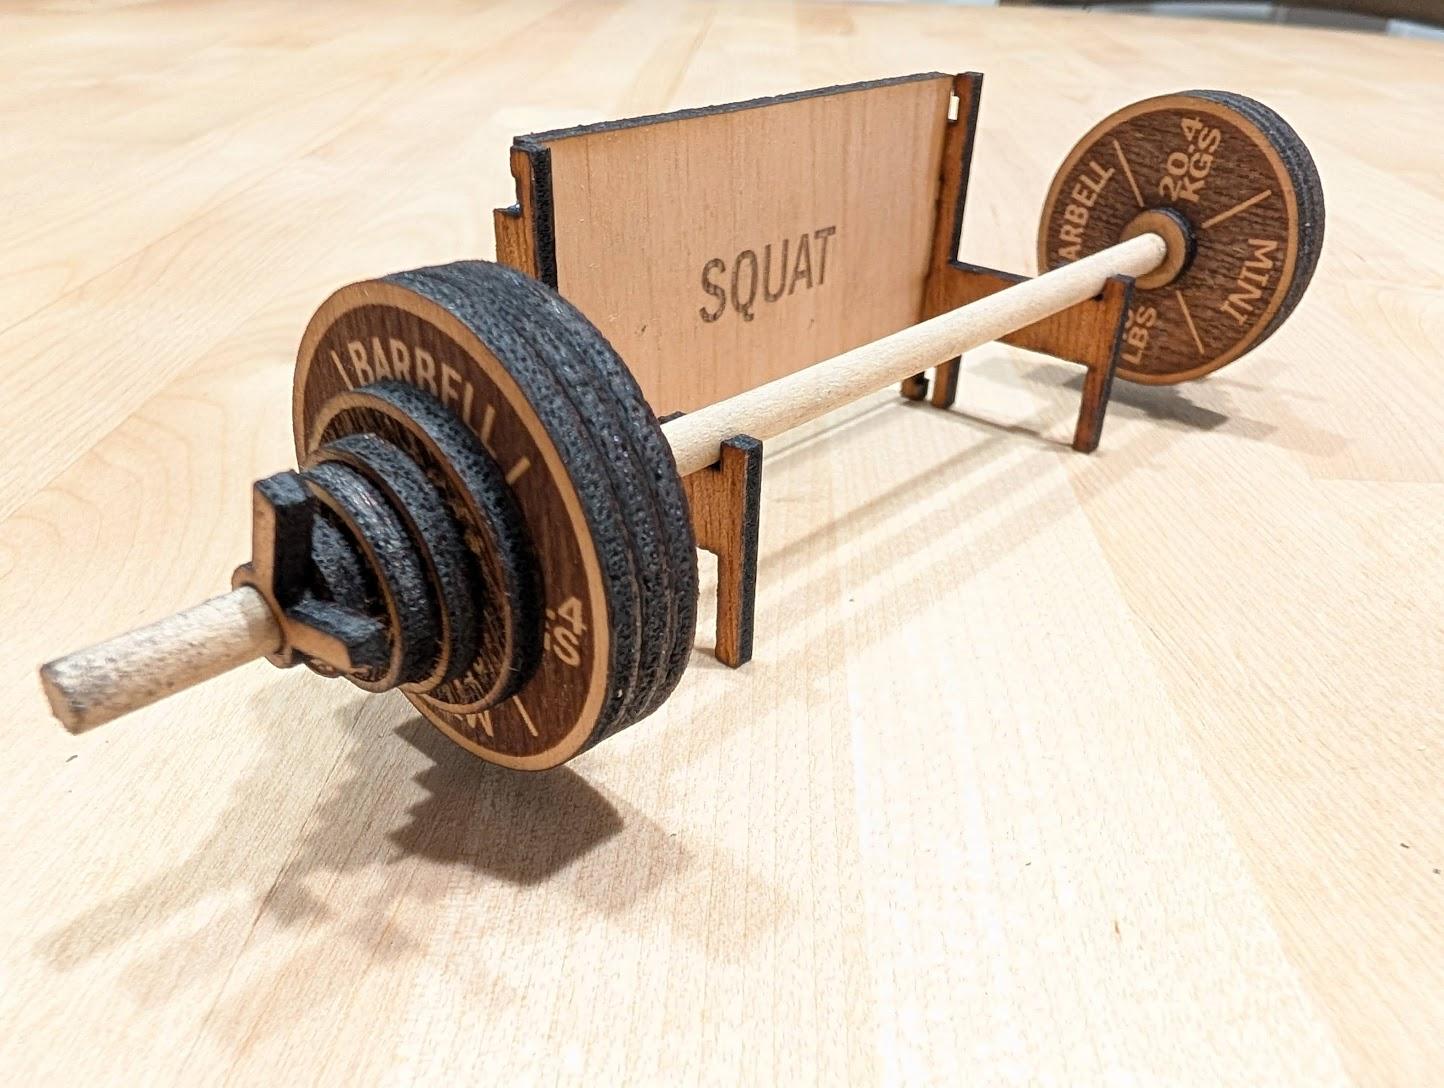
Barbell Mini (and the New Laser That Made It)
by Travis Daniel Bow in Workshop > Laser Cutting
297 Views, 5 Favorites, 0 Comments
Barbell Mini (and the New Laser That Made It)
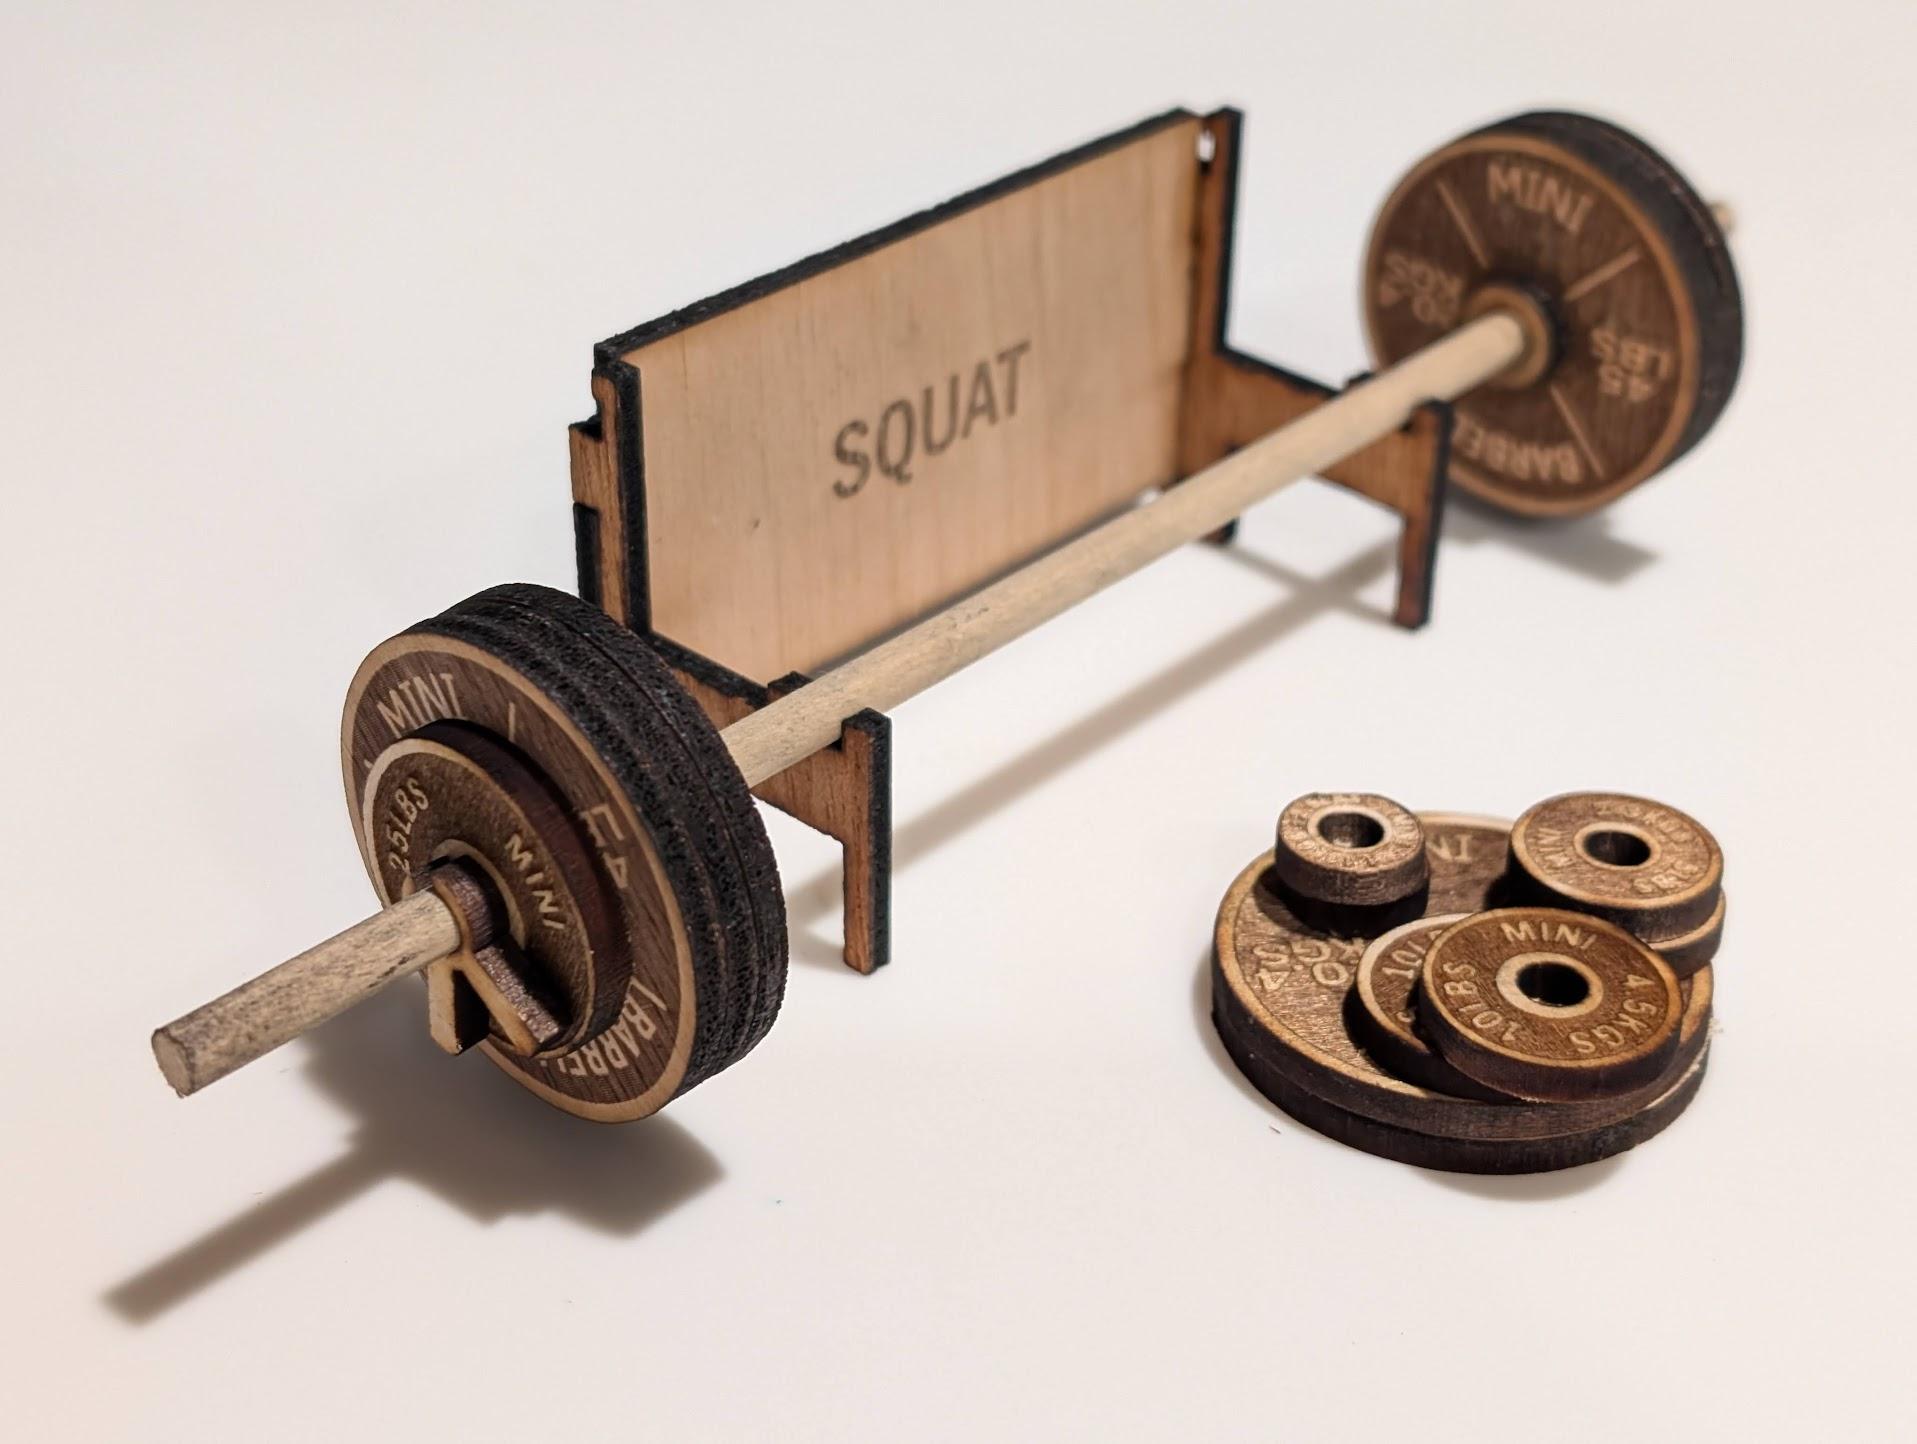
A mini barbell is a fun way to track your PRs (and let your friends know that you even lift, bro). There are plenty of 3D printed barbells out there, but since wood is classier (and I had a new laser to test), I came up with this original design. Read on to learn how to make it and get some sweet tips on laser engraving in general and the newly released LOKLiK iEngrave in particular.
Supplies

All you need is:
- A laser
- 1/8-inch (3mm) board
- 3/16-inch (4.75mm) dowel
Unnecessary (but fascinating) extras:
The most critical supply for laser cutting is (drumroll) a laser cutter.
There are lasers that cut steel for structural or sheet metal fabrication, lasers that engrave eyeballs so you don't have to wear glasses anymore, lasers that look like swords and work equally well for melting through blast doors and chopping off familial hands (just kidding)... but for us hobbyists, there are mostly lasers that engrave designs on things and do a little light cutting of things like cardboard, wood, leather, and acrylic.
Zooming in on just hobbyist lasers, there's still a spectrum (aha!?) of options:
- UV, IR, and Fiber lasers with advanced capabilities (some of these cost several times more than the house I grew up in)
- CO2 lasers like the Epilog that your university or makerspace probably had (costing in the $20k realm)
- Diode lasers (which you can get for as little as $300-$500).
The next most critical supply is wood.
Plywood from Home Depot is cheap (especially if you buy big sheets and cut them up). It can work great, especially if you get a nicer grade with a light even color (birch is common). The layers in plywood can cause you problems, though. Engraving too deep sometimes punches through the first layer and starts looking wonky as you engrave partial glue and partial wood. Cutting takes a lot more passes since you have to punch through uneven layers of both wood and glue, and you often end up with little strings that didn't quite cut.
For an upgrade, you can get some basswood or balsa from a hobby store (a 4" x 24" piece of 1/8-inch thick basswood ran me about $4). It's hard to get bigger sheets, but if you're making keychains or barbells, these little pieces are great.
Engrave and Cut

If you know how to laser stuff:
- Download attached svg
- Engrave the black
- Cut the red
- If desired, flip plates and re-engrave
- Edit text and repeat for other lifts (font is Franklin Gothic Medium Cond, which is readily available in Inkscape)
If you don't know how to laser stuff, check out the Tips and Tricks section at the end.
Downloads
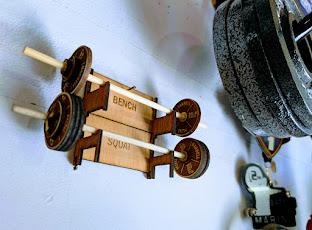
Assemble the Barbell
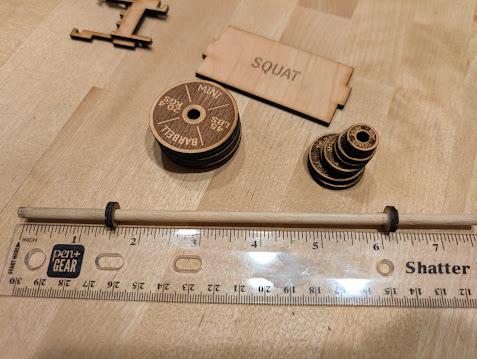
- Cut the dowel to 7.5" (190mm) long
- Glue on the two barbell collars (smallest circles) about 1.5" (38mm) from the ends. I used Elmer's glue... anything would work.
Assemble the Rack


Add some glue and put the rack(s) together. They're designed to link together if you want to make a stack.
Elmer's and E6000 both worked OK but took a while to set up. Superglue would have been easier. Hot glue would probably work too.
Add Weights and Spring Clamps
Slide the weights on and secure with the spring-clamps.
The spring clamps are sized to fit snugly without actually 'springing' (no need to squeeze the handles).
Display
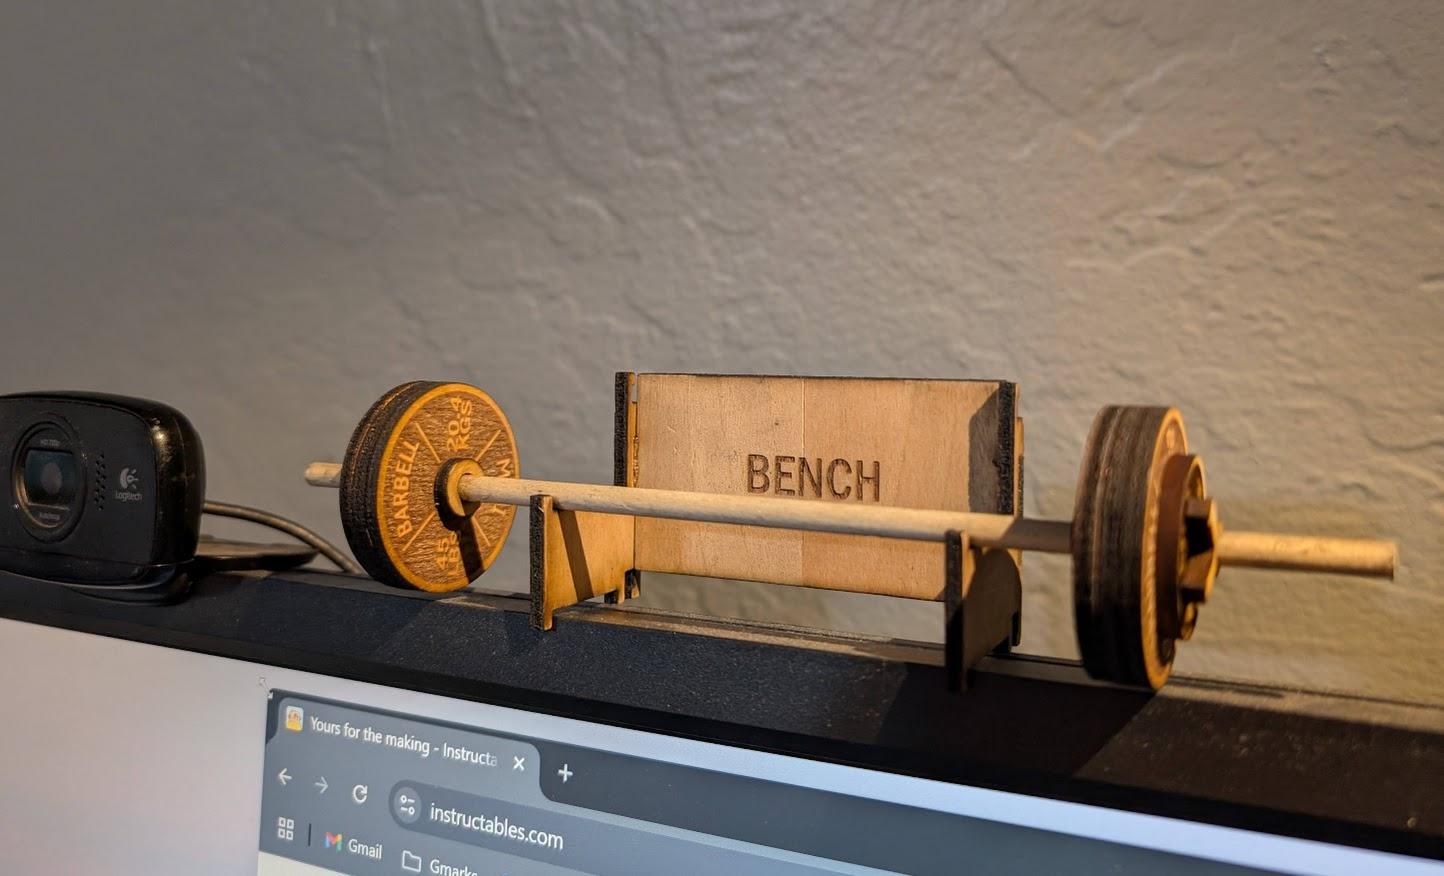

Put it on your computer monitor, hang it in your garage, or perch it on your laser.
Tips and Tricks: Engraving Vs Cutting
What's engraving? What's cutting?
In the laser world, engraving is like printing... the laser takes an image with pixels and "rasters" it (goes back and forth in lines sending laser pulses to burn off tiny amounts of material on the surface of your material). You can do this with black and white logos (like this example), or with some tweaking you can engrave photos as grayscale images. Settings are everything. I'll expand on settings later.
Engraving (real time):

Cutting is what you think it is, just done with a tiny robotic light saber. You move slower, you use more power, you make multiple passes... and you use a 'vector' file. Vector files store shapes as equations rather than grids of pixels (which makes them popular for graphic design... equations can be scaled up or down without losing quality, unlike pixel-based images). Common vector file types are:
- .ai (Adobe Illustrator)
- .cdr (Corel Draw)
- .dxf (AutoCad)
- .svg (Inkscape, the most popular free vector editor)
Again, settings (and airflow under your material) are critical. More later.
Cutting (faster than real time)

Tips and Tricks: Engraving Settings


For engraving (burning images), most laser programs give you these knobs to turn:
- Power (how hot your laser burns)
- More = darker
- Speed (how fast the laser moves)
- Slower = darker
- Resolution (dots per inch, or lines per mm... how finely the laser tries to slice the image)
- More = darker and more detail
- Dithering (whether the laser tries to 'blend' the dark areas with a bunch of random dots)
- Yes = more subtle look, sometimes better grayscale (see this article)
- Dynamic power (whether the laser tries to compensate for acceleration/deceleration parts of the move, when the laser is moving slower and needs less power)
- Yes = slower speeds needed but allows higher resolution and better overall results
- Image pre-processing steps (how contrasty the image is, grayscale adjustments, etc.
- Vectorizing (to engrave thin lines as text or outline shapes with a clean sharp line, you can use vector files and engrave with higher speed / lower power than a cut)
- This can be very fast and produce clean text or line art
For all these tests, I used LaserGRBL, a free general-purpose laser engraving program. It can be a little clunky at first (especially compared to the print drivers available for Epilog or other higher grade laser systems), but it's currently the only fully functional free option for the LOKLiK iEngrave (at least until their app gets some bugs worked out... more on this later).
So what settings should you use? Depends on your material, laser type, and laser max power. LOKLiK sent me the attached file of starter settings. If you have the same laser, these seem like a pretty solid starting point. I did a lot of experimenting with wood and settled on a few tweaks:
- Engraving (black and white logo) on basswood:
- Speed 7500 mm/min
- Power 100%
- 10 lines/mm
- Line to line OR dithered (dithered is slower, not noticeably different for logos)
- M4 setting (dynamic power)
- Same but on plywood
- Turn power down to 75% (to avoid burning through the first layer of wood and getting stripey glue showing through)
- Faster engrave with blacker / deeper design
- Turn speed up to 12000 mm/min
- Turn power down to 40-70%
- 5 lines/mm
- M3 setting (constant power)
When in doubt, your best bet is to print a test grid. LaserGRBL lets you generate a custom grid of speed and power settings. As you can see on this grid, there's a spread of settings that will work pretty well for this material.

I did a similar test with veg tanned leather (this one after figuring out how to get LaserGRBL to play nice with LOKLiK and not engrave things backwards, more on that later). LOKLiK's recommendation for leather was 8000 mm/min, 40% power, right in the middle of this grid of tolerably-good settings.
TEST
- Veg tanned leather
- M4 (DYNAMIC POWER)
- 10 Lines/mm
- Line-to-line tracing (no dither)
- F = speed (mm/min), S = power (1000=100%)

Your best bet is to get a list of starter settings and, as you experiment with your laser and preferences, make some test grids and take notes on the settings that work the best for you.
Downloads
Tips and Tricks: Cutting Settings


Cutting settings are a little simpler than engraving. Usually you're picking:
- Power (how hot your laser burns)
- More = deeper cuts but more scorching
- Speed (how fast your laser burns)
- Less = deeper cuts but more scorching
- Number of passes (how many times to trace the same pattern)
- More = deeper cuts with less scorching, but takes longer
- Focus (how high off of the piece your laser is)
- Focusing at the top surface of the material is easiest, but you can get the deepest cuts if you focus at the midplane of the material (i.e. for 8mm material, focus at the top, then move the laser down 4mm).
For wood, the type of wood can make a big difference. I had to use twice as many passes for plywood as for basswood. This is what I settled on for 1/8" (3mm) thick wood:
- Recommended by LOKLiK: 230mm/min 100% power
- Too scorchy for me... left charred edges and scorch marks
- My favorite for plywood: 700mm/min 100% power 4 passes
- Usually cuts through all the way but leaves some strings
- My favorite for basswood: 700mm/min 100% power 2 passes
- Always cuts through all the way and cleanly
- Adjusting for 1/4" poplar: just did more passes (8 passes) and got pretty clean results (see quiver)
Another factor that makes a huge difference for cutting is airflow. If you put your workpiece straight on top of something flat and solid, you'll get trapped smoke and heat and all kinds of scorch marks. This is what I did for my first several tests. It doesn't lead to great results (lots of smoke and char marks on the back side of the material):

Many lasers come with a honeycomb laser bed. These allow the laser to dissipate heat and smoke on the bottom side of your workpiece. LOKLiK says they'll offer this as an accessory at some point, but mine didn't come with one. With a little time on the table saw, though, I was able to make something that worked almost as well:


This allows some air flow under the work piece. It still leaves a few scorch marks (the "ribs" holding the workpiece are thicker than honeycomb laser bed ribs are), but it's a significant improvement.
What About the LOKLiK IEngrave?

So what about the brand new LOKLiK iEngrave that I received for review and used in this Instructable? Here are my thoughts:
Assembly: Not bad, 4/5 stars. Neither the user manual nor the assembly video were quite enough on their own, but by switching back between the two I (and my 6 year old) were able to get things up and running in about an hour and a half. [this was specifically for the iEngrave Cover, which has some protective covers on top and bottom to help with fumes and not burning out your retinas]

Learning Curve: Not great, 2/5 stars. I've used a lot of lasers, I own a 3D printer, and I'm usually pretty able to figure out hacky stuff, but I faced some serious frustration getting up and running with this thing. Much of this was probably because it was a pre-release with bugs yet to be worked out (and I'll update this as I find out that things have been fixed), but here are the problems I faced:
- The LOKLiK app for the laser (available on Android and Apple but not PC) is pretty slick...
unless you want to engrave your own design. It's supposed to let you, but currently has a bug that makes it impossible.LOKLiK says they're working on this; I'll update here as soon as I find out it's fixed.Update as of 6/21/2025: This bug is now fixed and the LOKLiK app is very usable for custom vector or bitmap images. - LaserGRBL is the free recommended software to use with the LOKLiK. It is solid software, but it has a learning curve that was exponentially steeper because of incomplete LOKLiK integration. It took me many hours of Youtube and experimenting and emailing bugs to LOKLiK to get a tolerable workflow. A few tips:
- Anthony Baltazar's LaserGRBL tutorials are great. Start here.
- Don't use LaserGRBL to home the LOKLiK twice. It will drive itself into the hard stops and make terrible noises (see video).
- Workaround: don't home the laser twice.
- LaserGRBL & LOKLiK firmware are confused on coordinate systems, so the laser engraves everything backwards and manual jogs go in strange directions.
- Workaround 1: enter $3=2 into the LaserGRBL gcode command line. This sets the origin at the bottom-left corner (inconvenient because it's hard to see), but it does make engraving and jogging work the way you'd expect. Make sure to use $3=0 to set it back to the default before using the LOKLiK App.
- Workaround 2: mirror all your files before engraving
- The "set zero point" command (which lets you set the current laser position as home so you can engrave on the unused part of your workpiece) doesn't work with the LOKLiK. It gives an "unsupported Gcode command". I'm told that LOKLiK is also working on this.
- Workaround: if you move the laser around, then power cycle it, it will default the zero position to "here" when you start engraving.
- The laser bed: It's too low to engrave on. The laser comes with sample pieces, but you can't physically adjust the laser head low enough to reach them
- Workaround: buy or make your own laser bed (see Cutting section)
Utility (once you figure it out): Unexpectedly good, 4.5/5 stars
I didn't expect much out of a $500 diode laser. It's not as good as the $20,000 90W CO2 Epilog I used to use in college... but it's pretty darn good for the price point. I cut through 1/4" thick material with it, engraved and cut out tons of little doo-dads and keychains (and even a mini barbell!). It seems to engrave leather well, and I'm excited to see how I can use it to supplement my leatherwork projects.
The enclosure (on the iEngrave Cover version) is also nice. It comes with the option of plugging in the safety switches (to shut the laser off automatically if you open the cover), has a nice bright LED and a fan with a hose to route the fumes out the garage window. The bottom cover comes off as well, so if I ever want to engrave something super thick, I can.
The working area is 12x12" (300x300mm), which is big enough for little things (if not for making shelves or 3D printer enclosures). The power (10W) isn't going to break any speed records or get you high throughput (engraving, cutting, and engraving the other side of 12 little keychains took nearly two hours). But if you want something to tinker and make your own projects with, this seems like a solid choice.
Overall, I'm really excited to have a laser engraver at my disposal again, and the LOKLiK iEngrave seems to have very capable hardware. If you can stomach a bit of a learning curve (or if the software integration improves), it's a solid choice for your home makerspace.