Beat the Heat: DIY Catamaran Using 2 Paddleboards (Easy Assembly, No Welding)
284 Views, 2 Favorites, 0 Comments
Beat the Heat: DIY Catamaran Using 2 Paddleboards (Easy Assembly, No Welding)
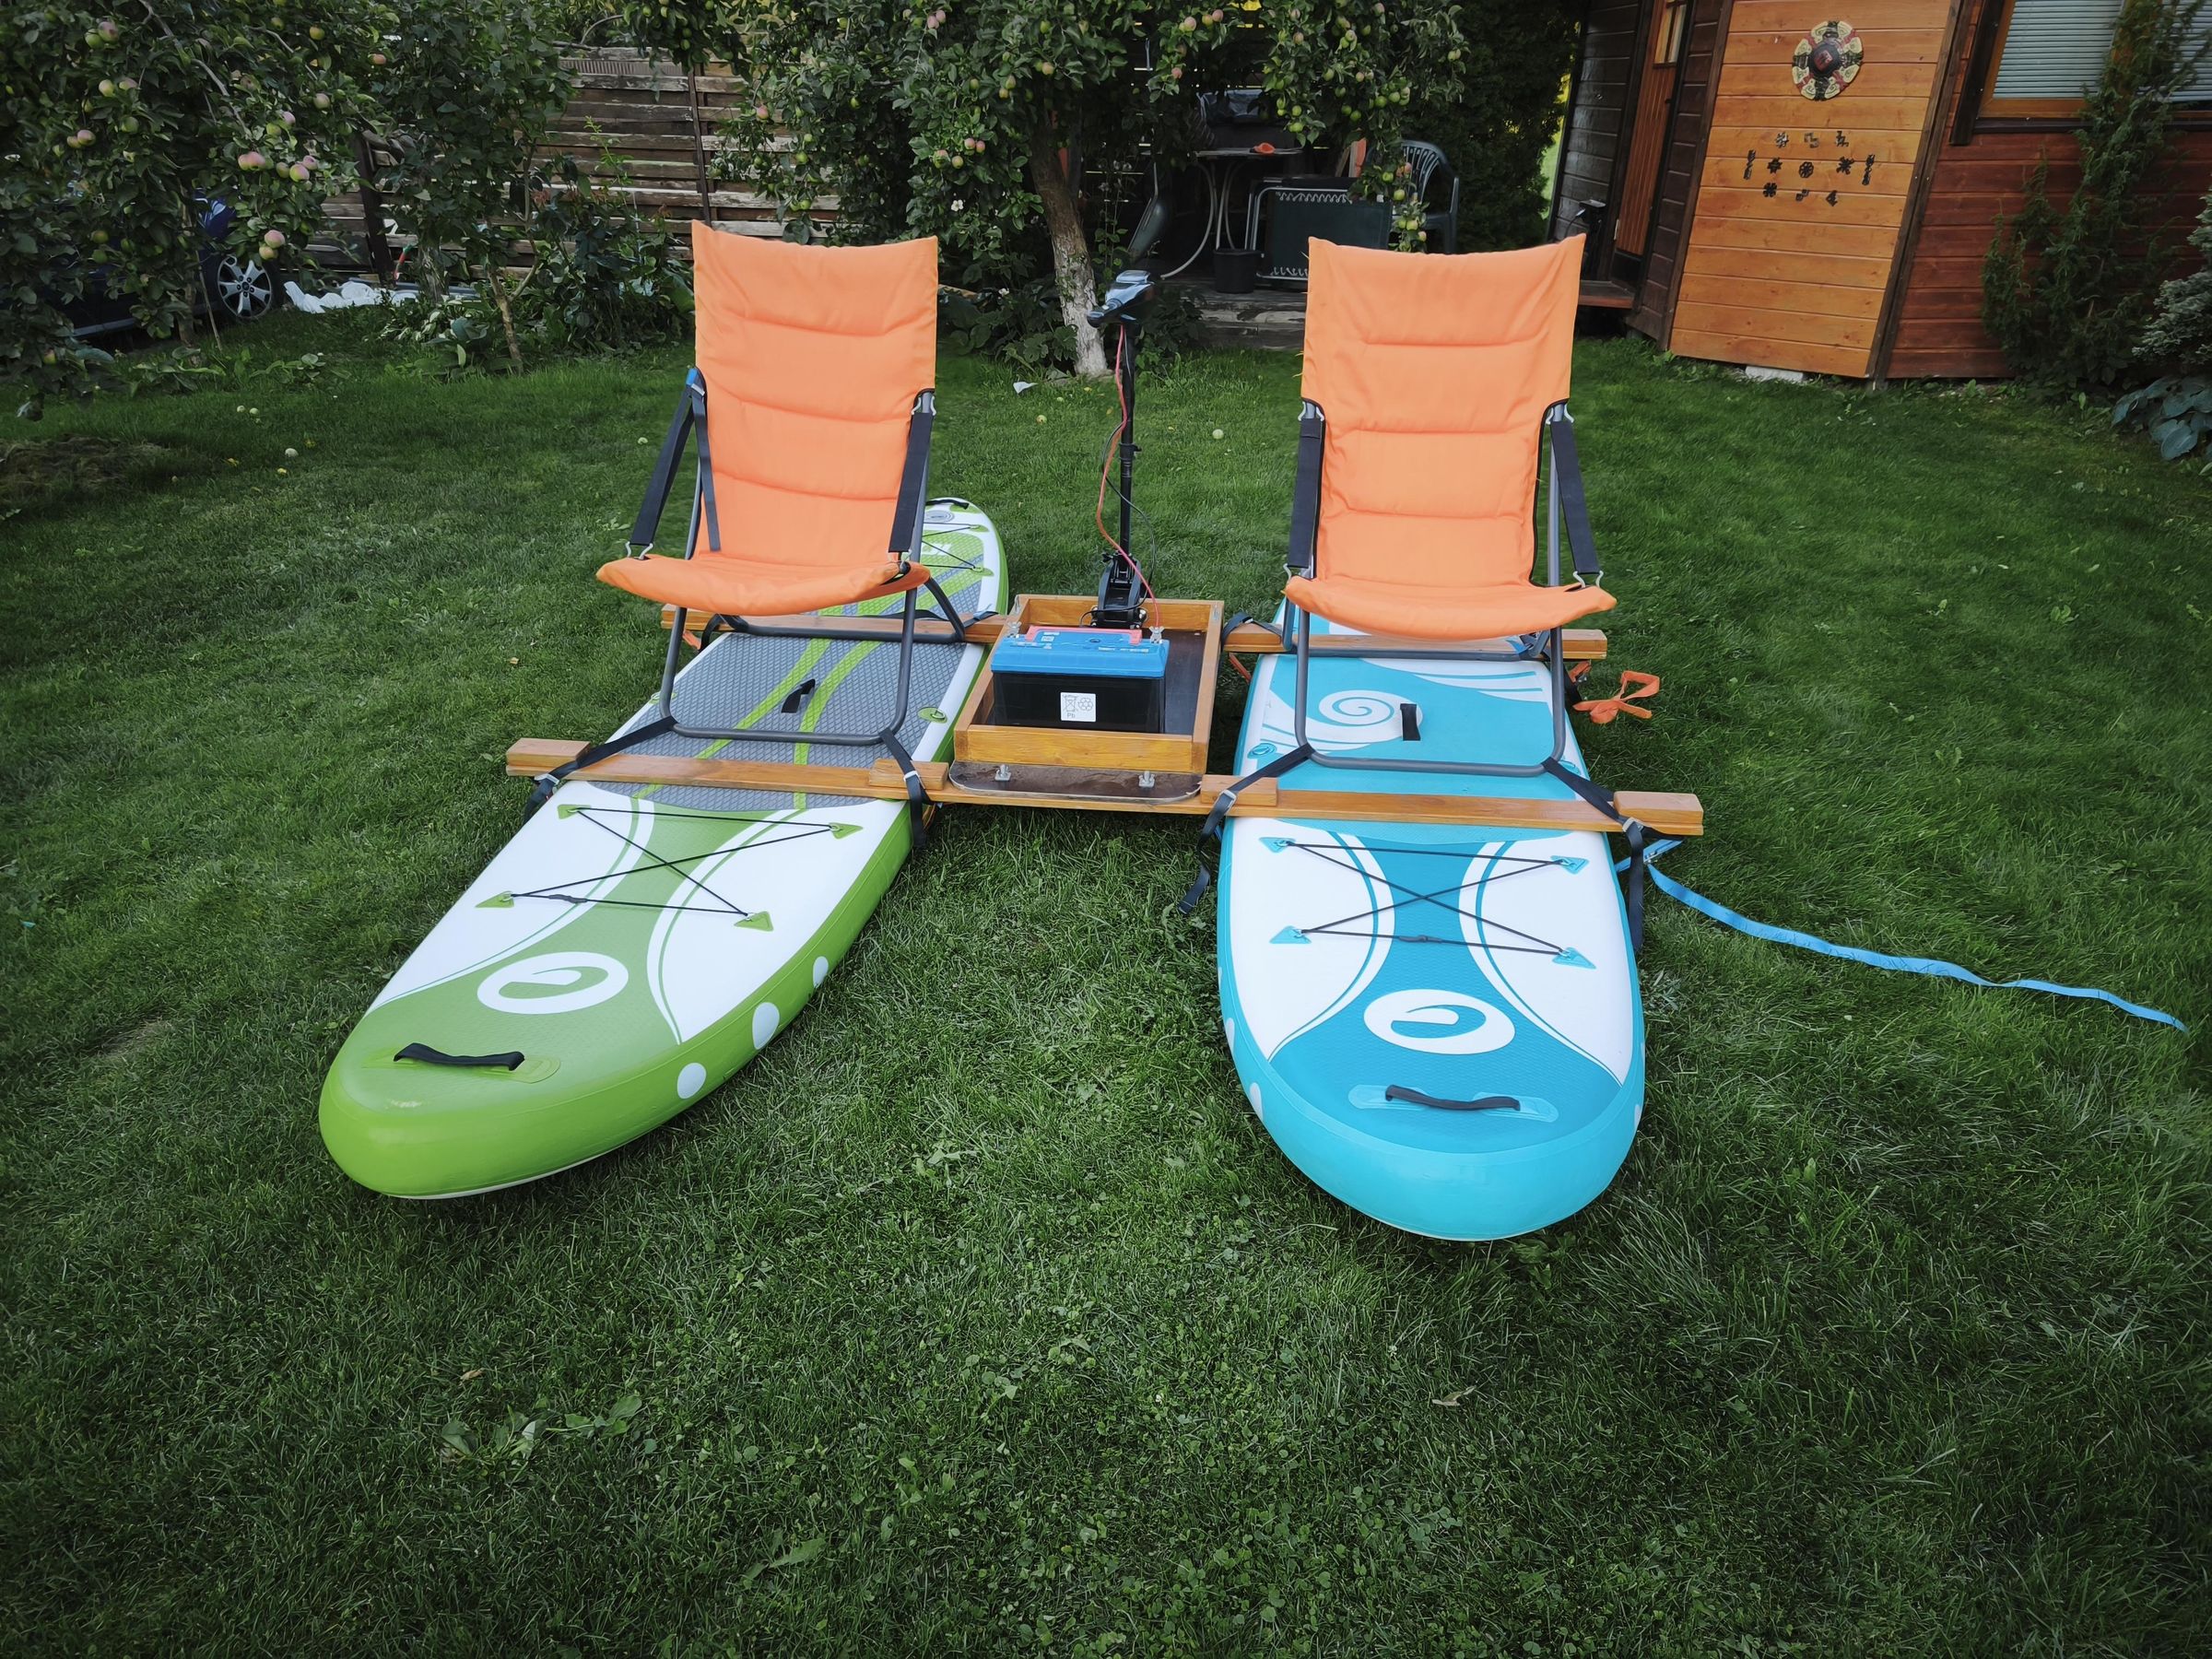
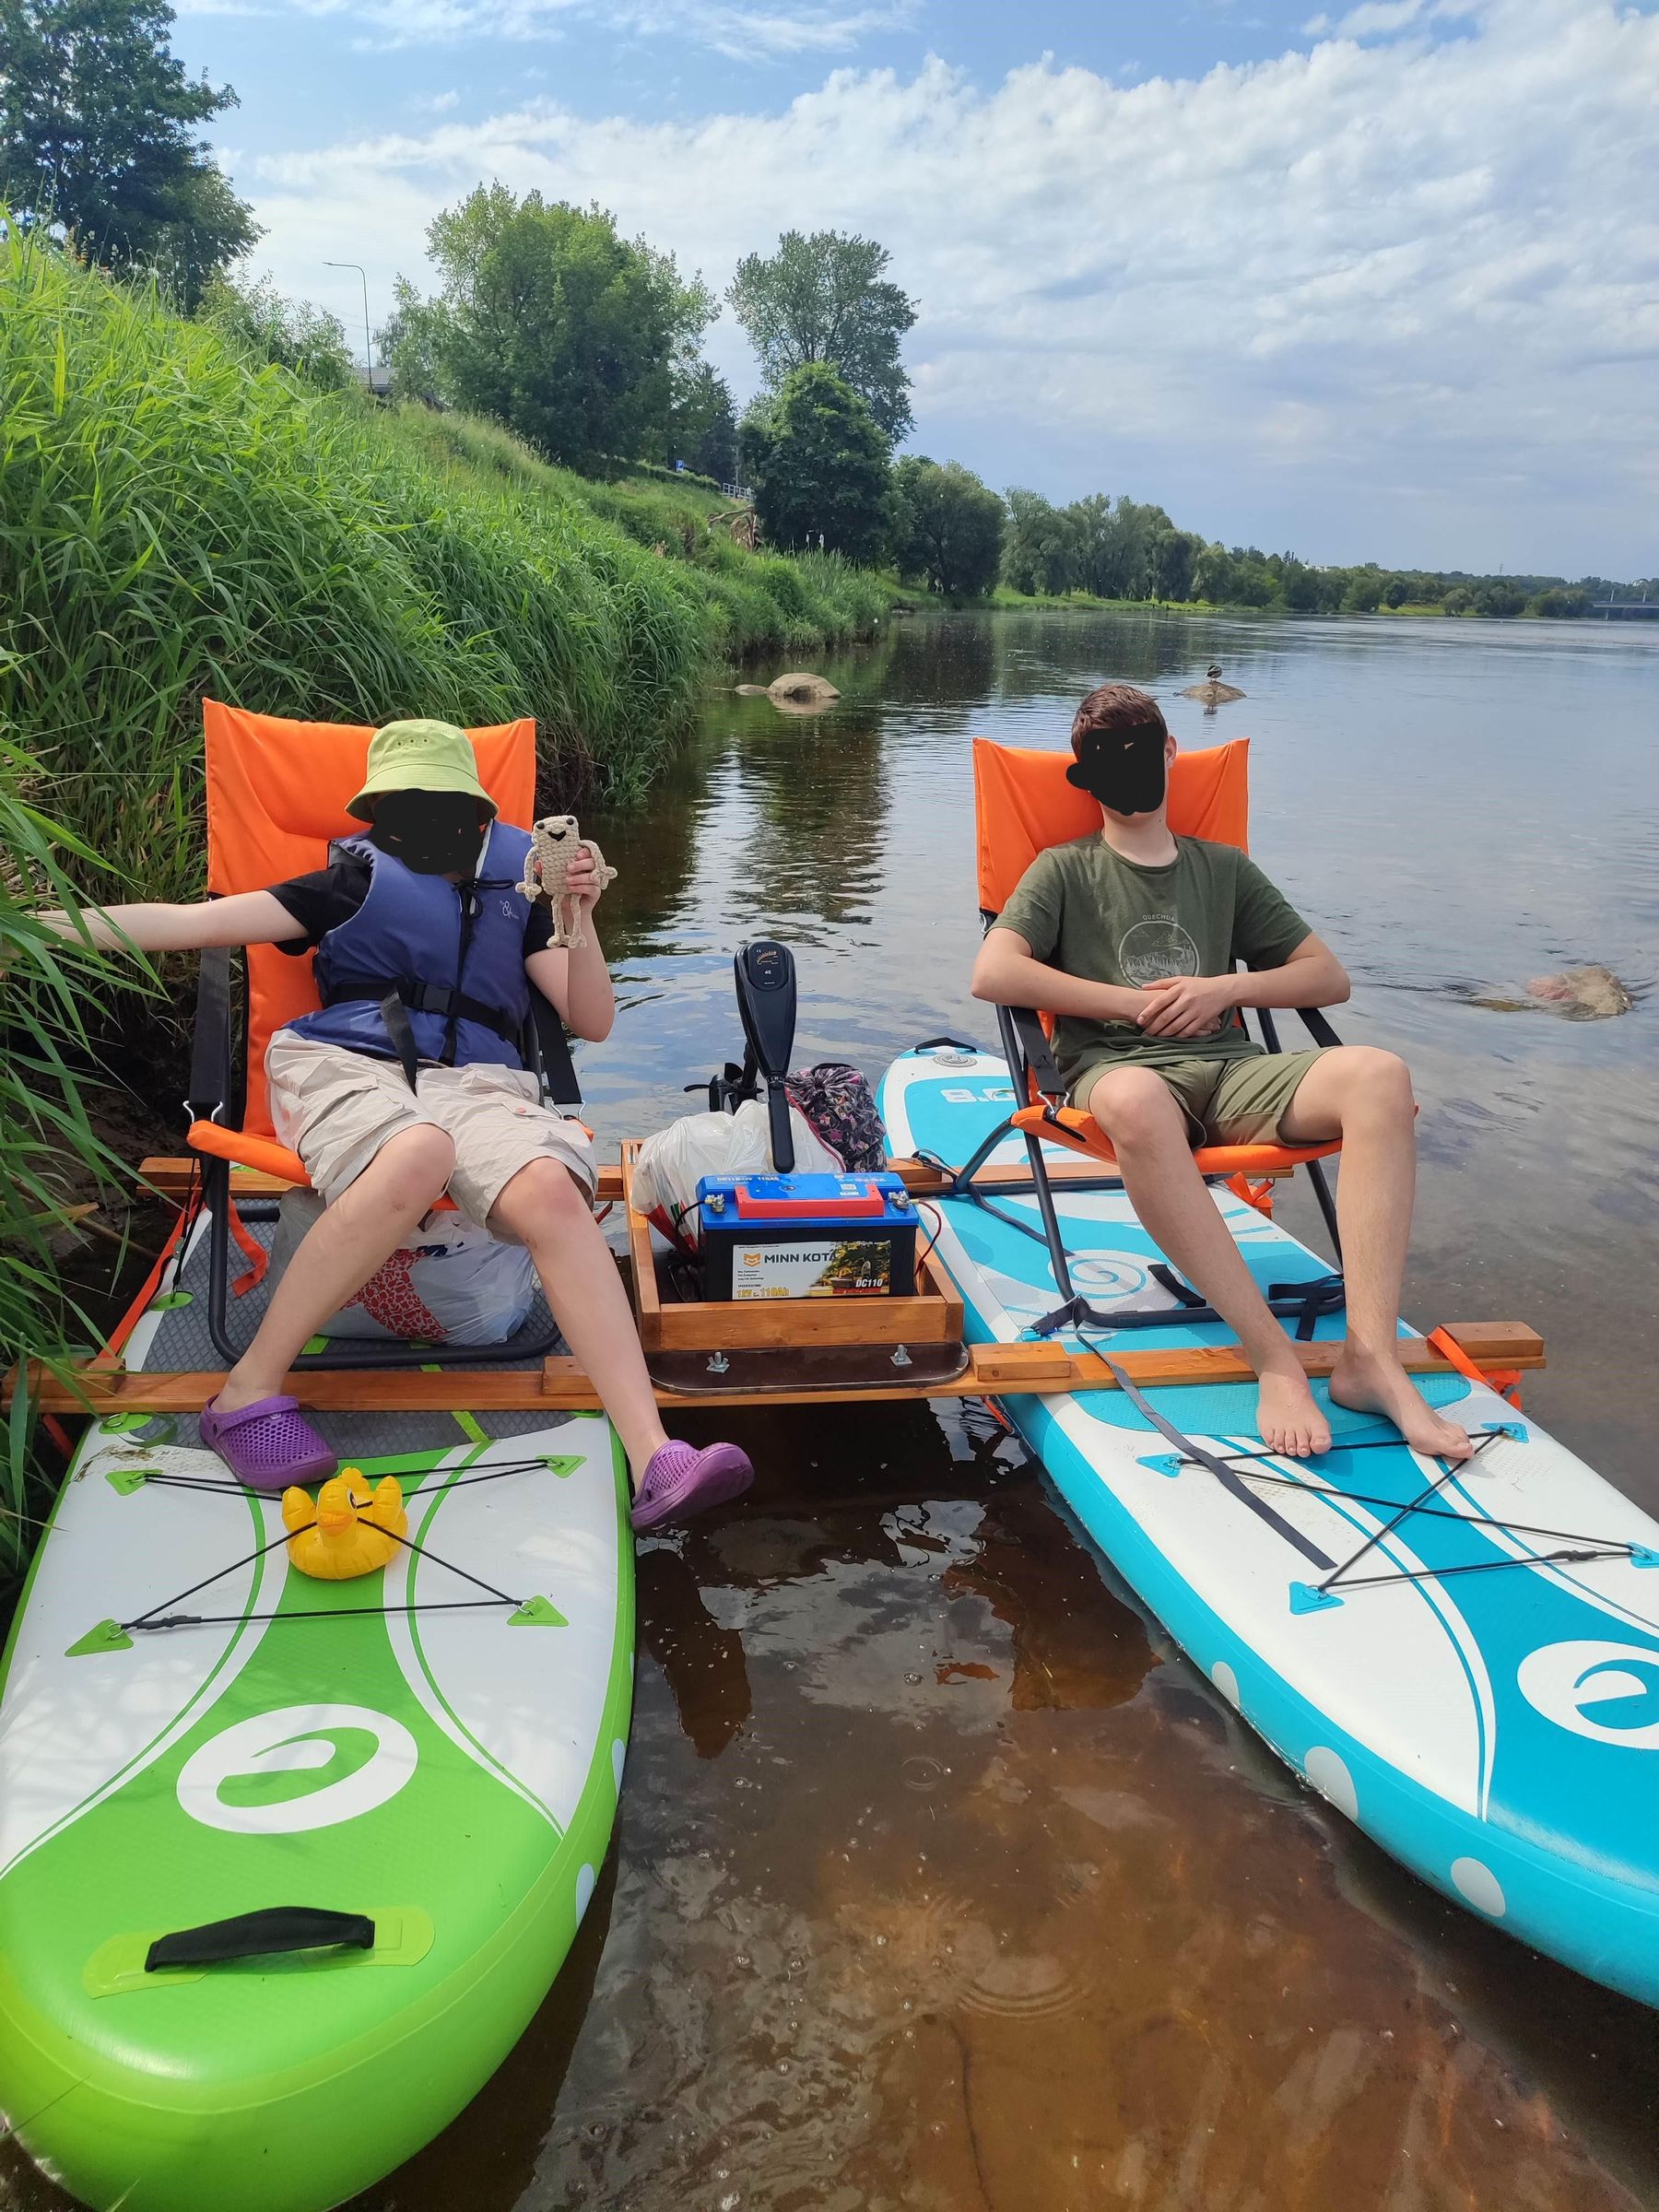
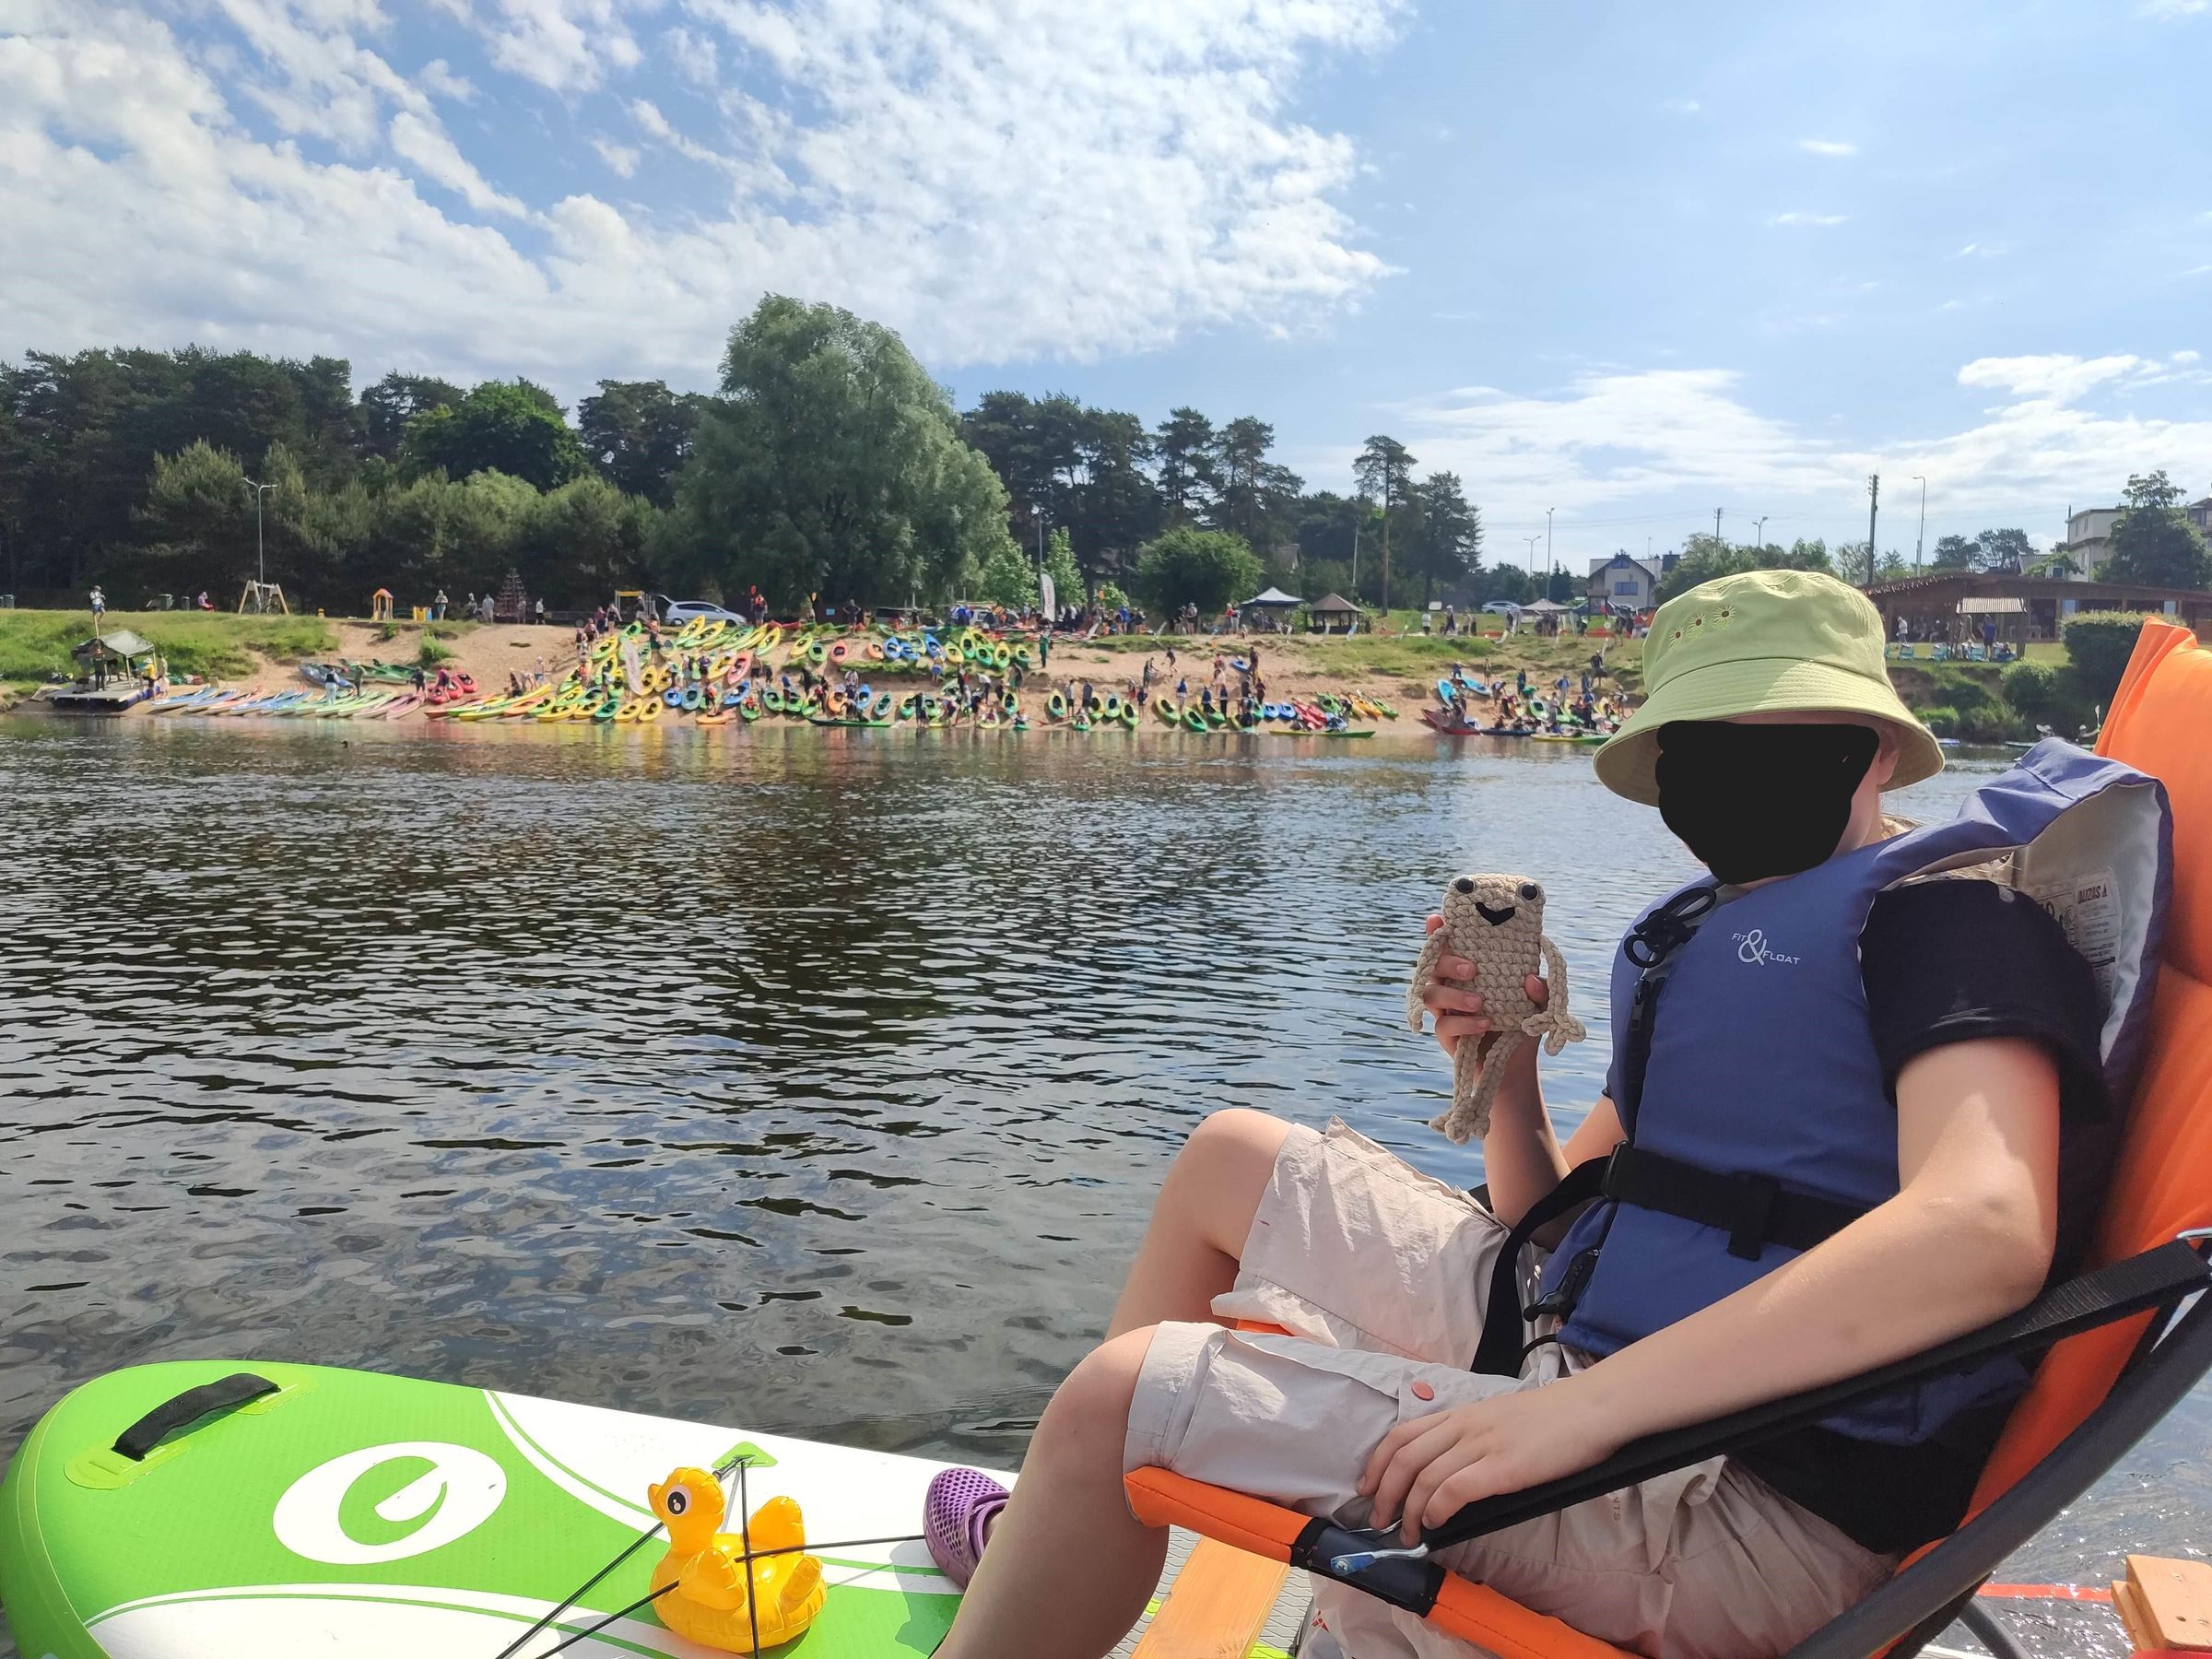
Summer down here gets hot. Standing on a paddleboard in that heat for me is more work than fun, really.
So I stopped standing. And I got to visit that lovely, lovely DIY store multiple times :D .
The build is super simple and can easily be build in an afternoon with some basic tools and readily available materials.
Two inflatable SUPs. Two pine boards across them. A plywood platform in the middle for the battery. A 36 lbf electric outboard at the back. Two padded garden chairs on top. Add drinks, cheerfull mood and you'll get a relaxing afternoon on the lake, canal or wherever you take yours. I'd strongly suggest AGAINST using this at sea. The conditions there might be too rough for this setup.
And kids, remmeber, always wear your life jacket when on-board!
Rules I set for myself while building this:
- No welding. No metal works (no skills on my side)
- Goes together and comes apart with bare hands, fits into a car (planks can go on top)
- Basic materials, basic tools, one time trip to the DIY store.
Cost of the conversion: about 450 EUR with motor and battery. Without them, about 50 EUR. Boards and plywood I already had in my scrap pile from my other Instructable projects - mainly camper trailer.
As for battery, I'd suggest a deep discarge cycle one and not skimp too much on this, as this directly impacts how long one can enjoy. Full speed has around 2 hours of fun time. Slow forward (fun nonetheless) can get you 6 hours of ride time easy.
The whole build is suprisingly stable to get in, get out and sit on top. Very easy to pull on-shore for stops or tie down to a tree or such when stopping for longer.
Supplies
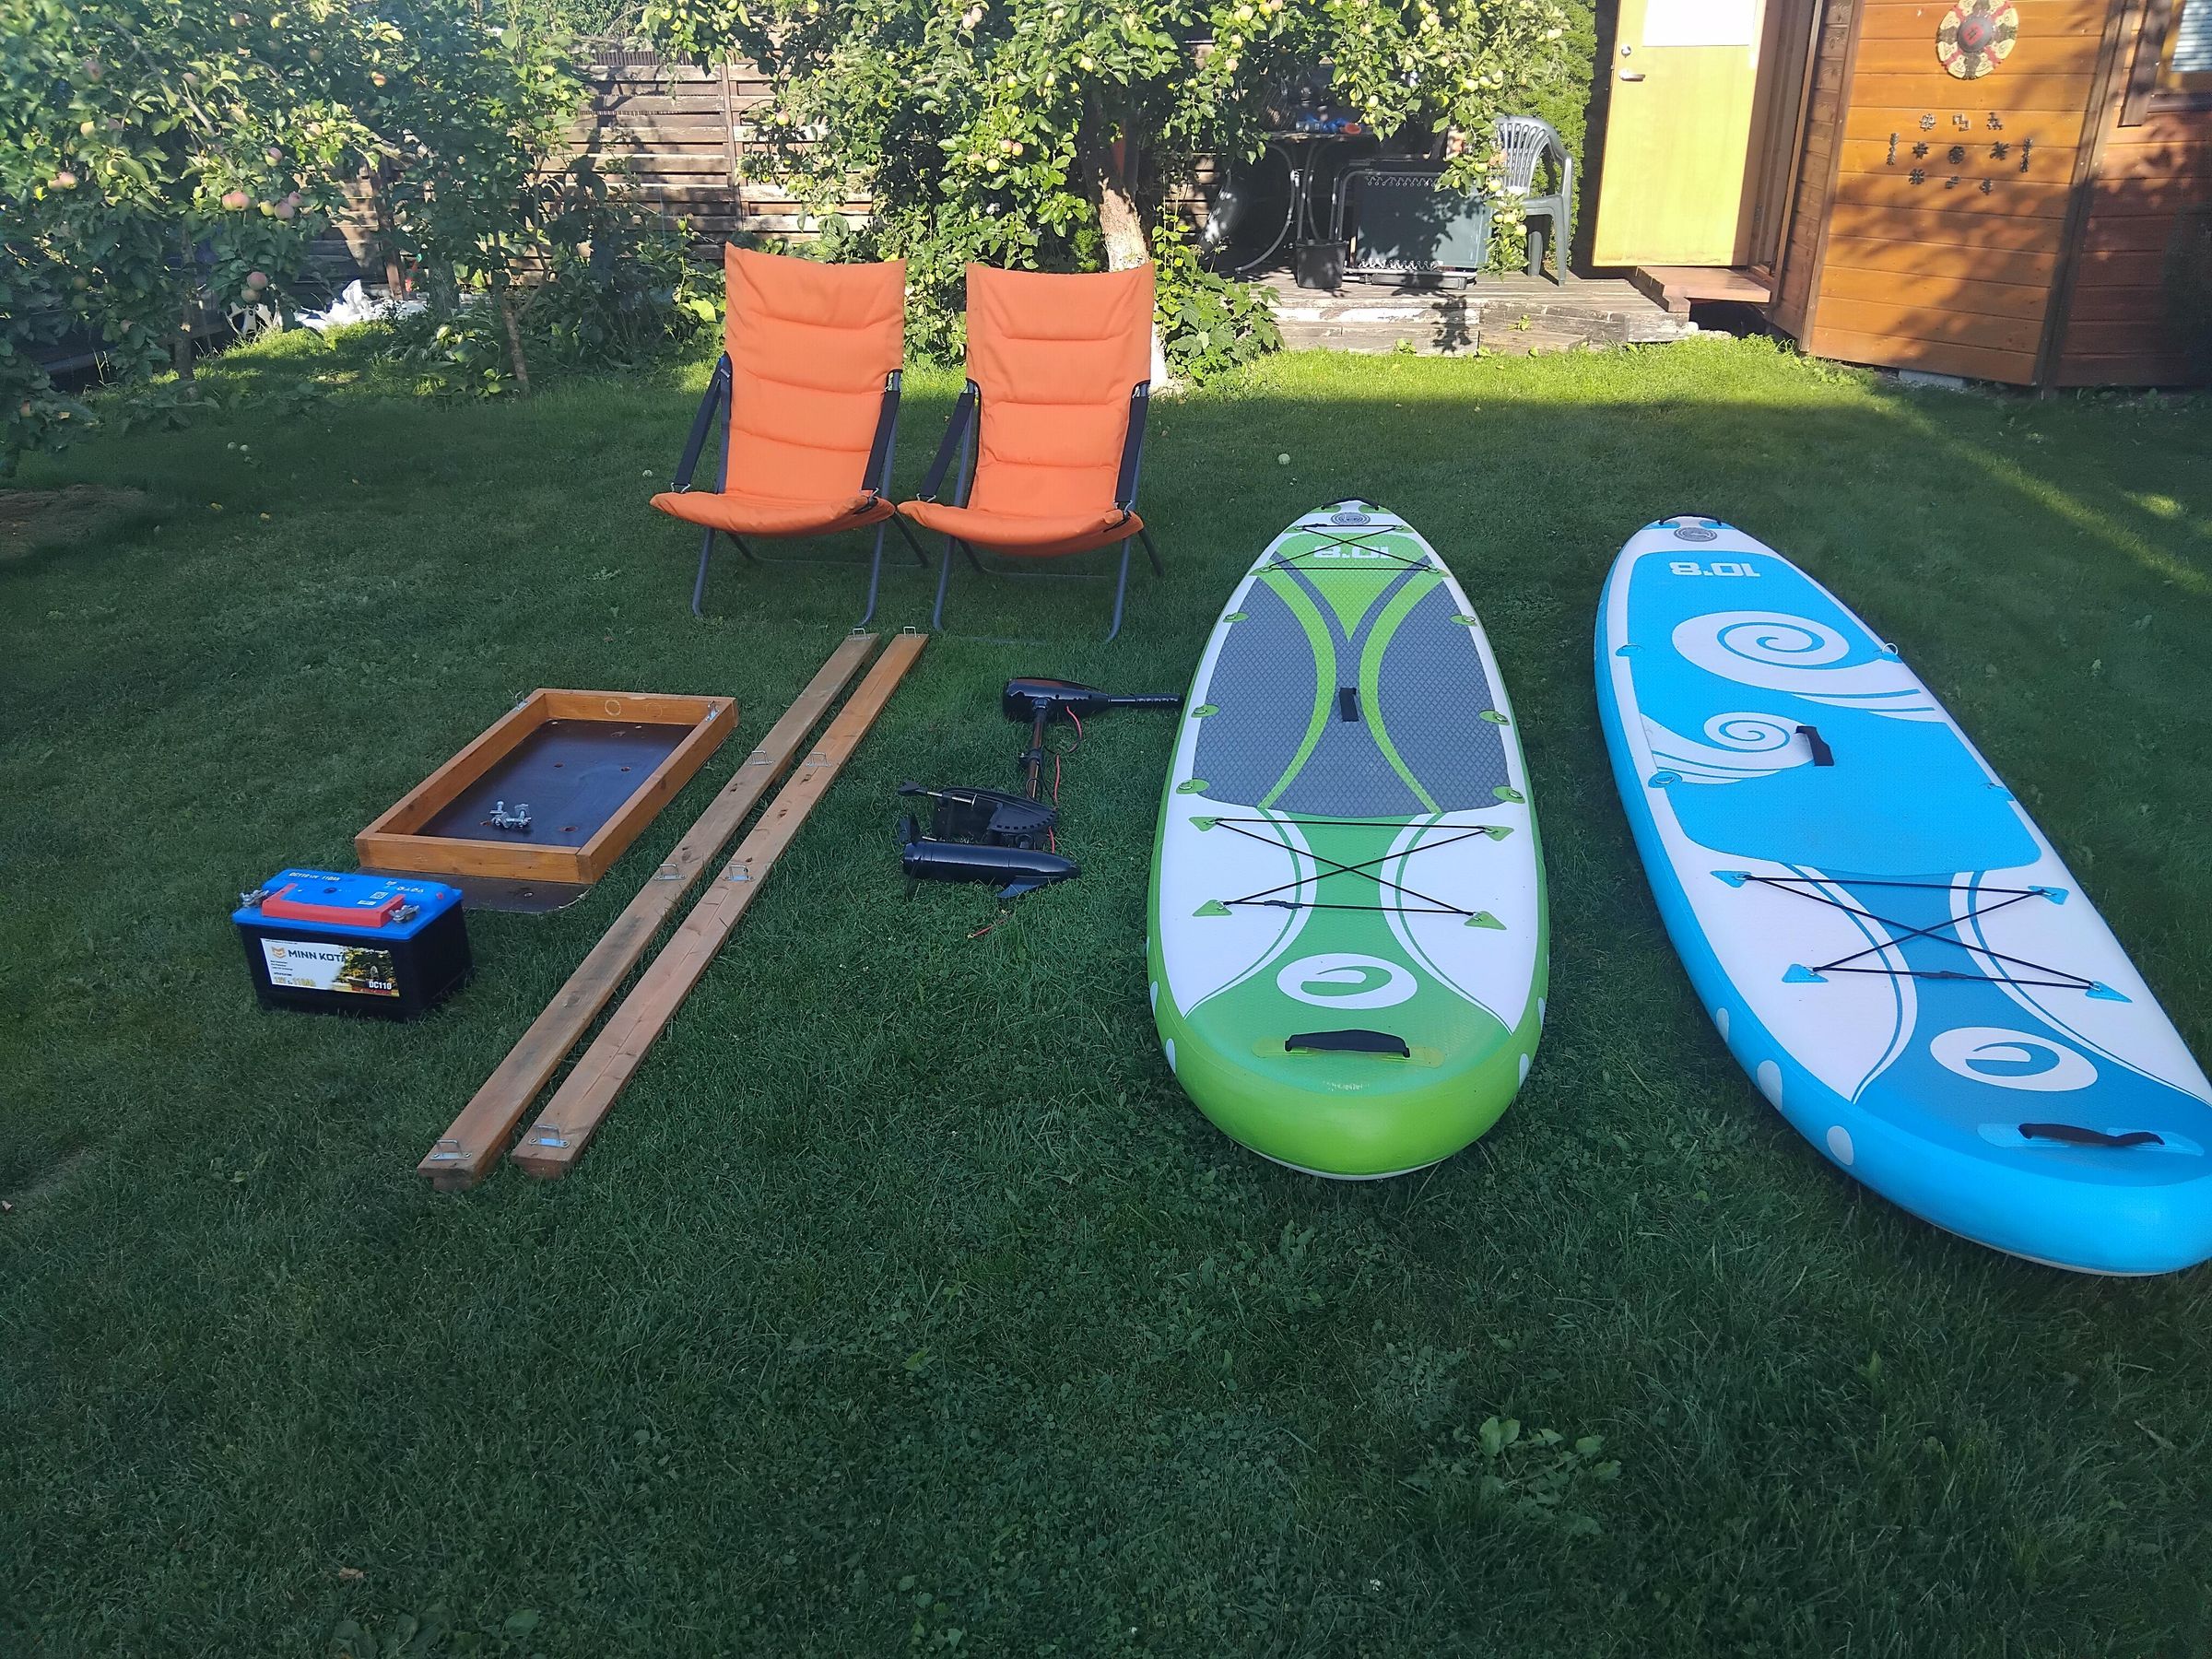
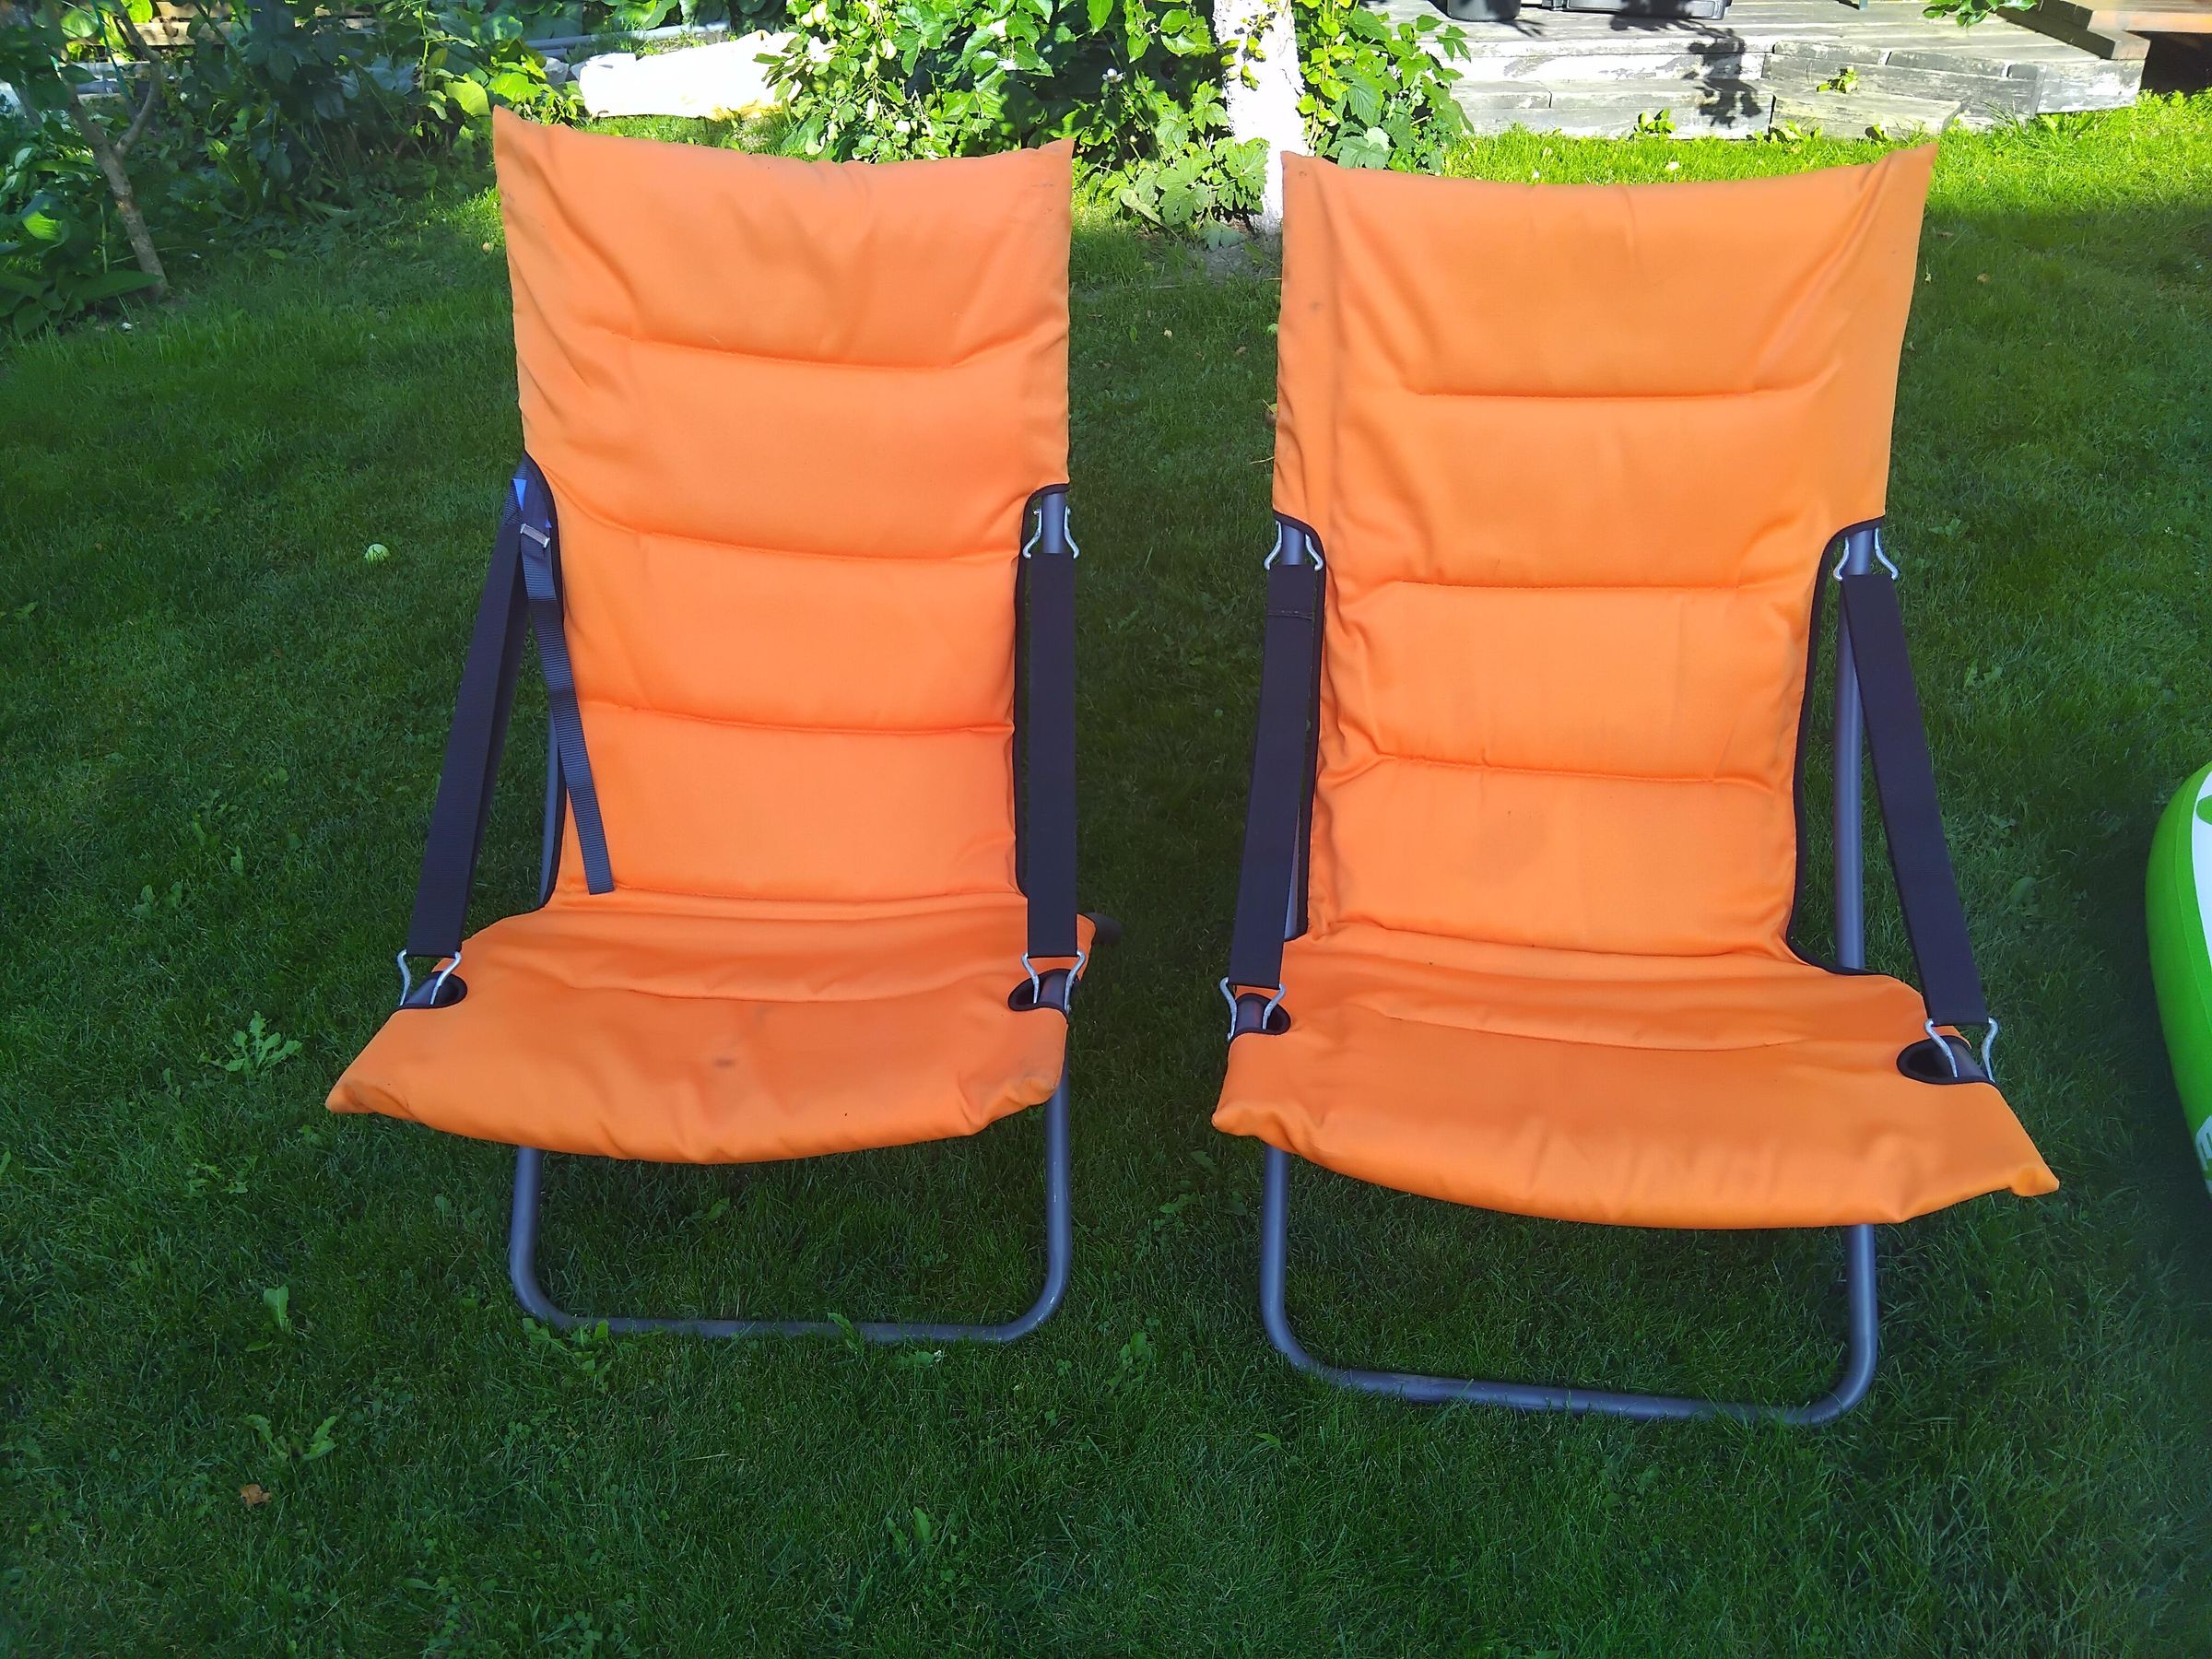
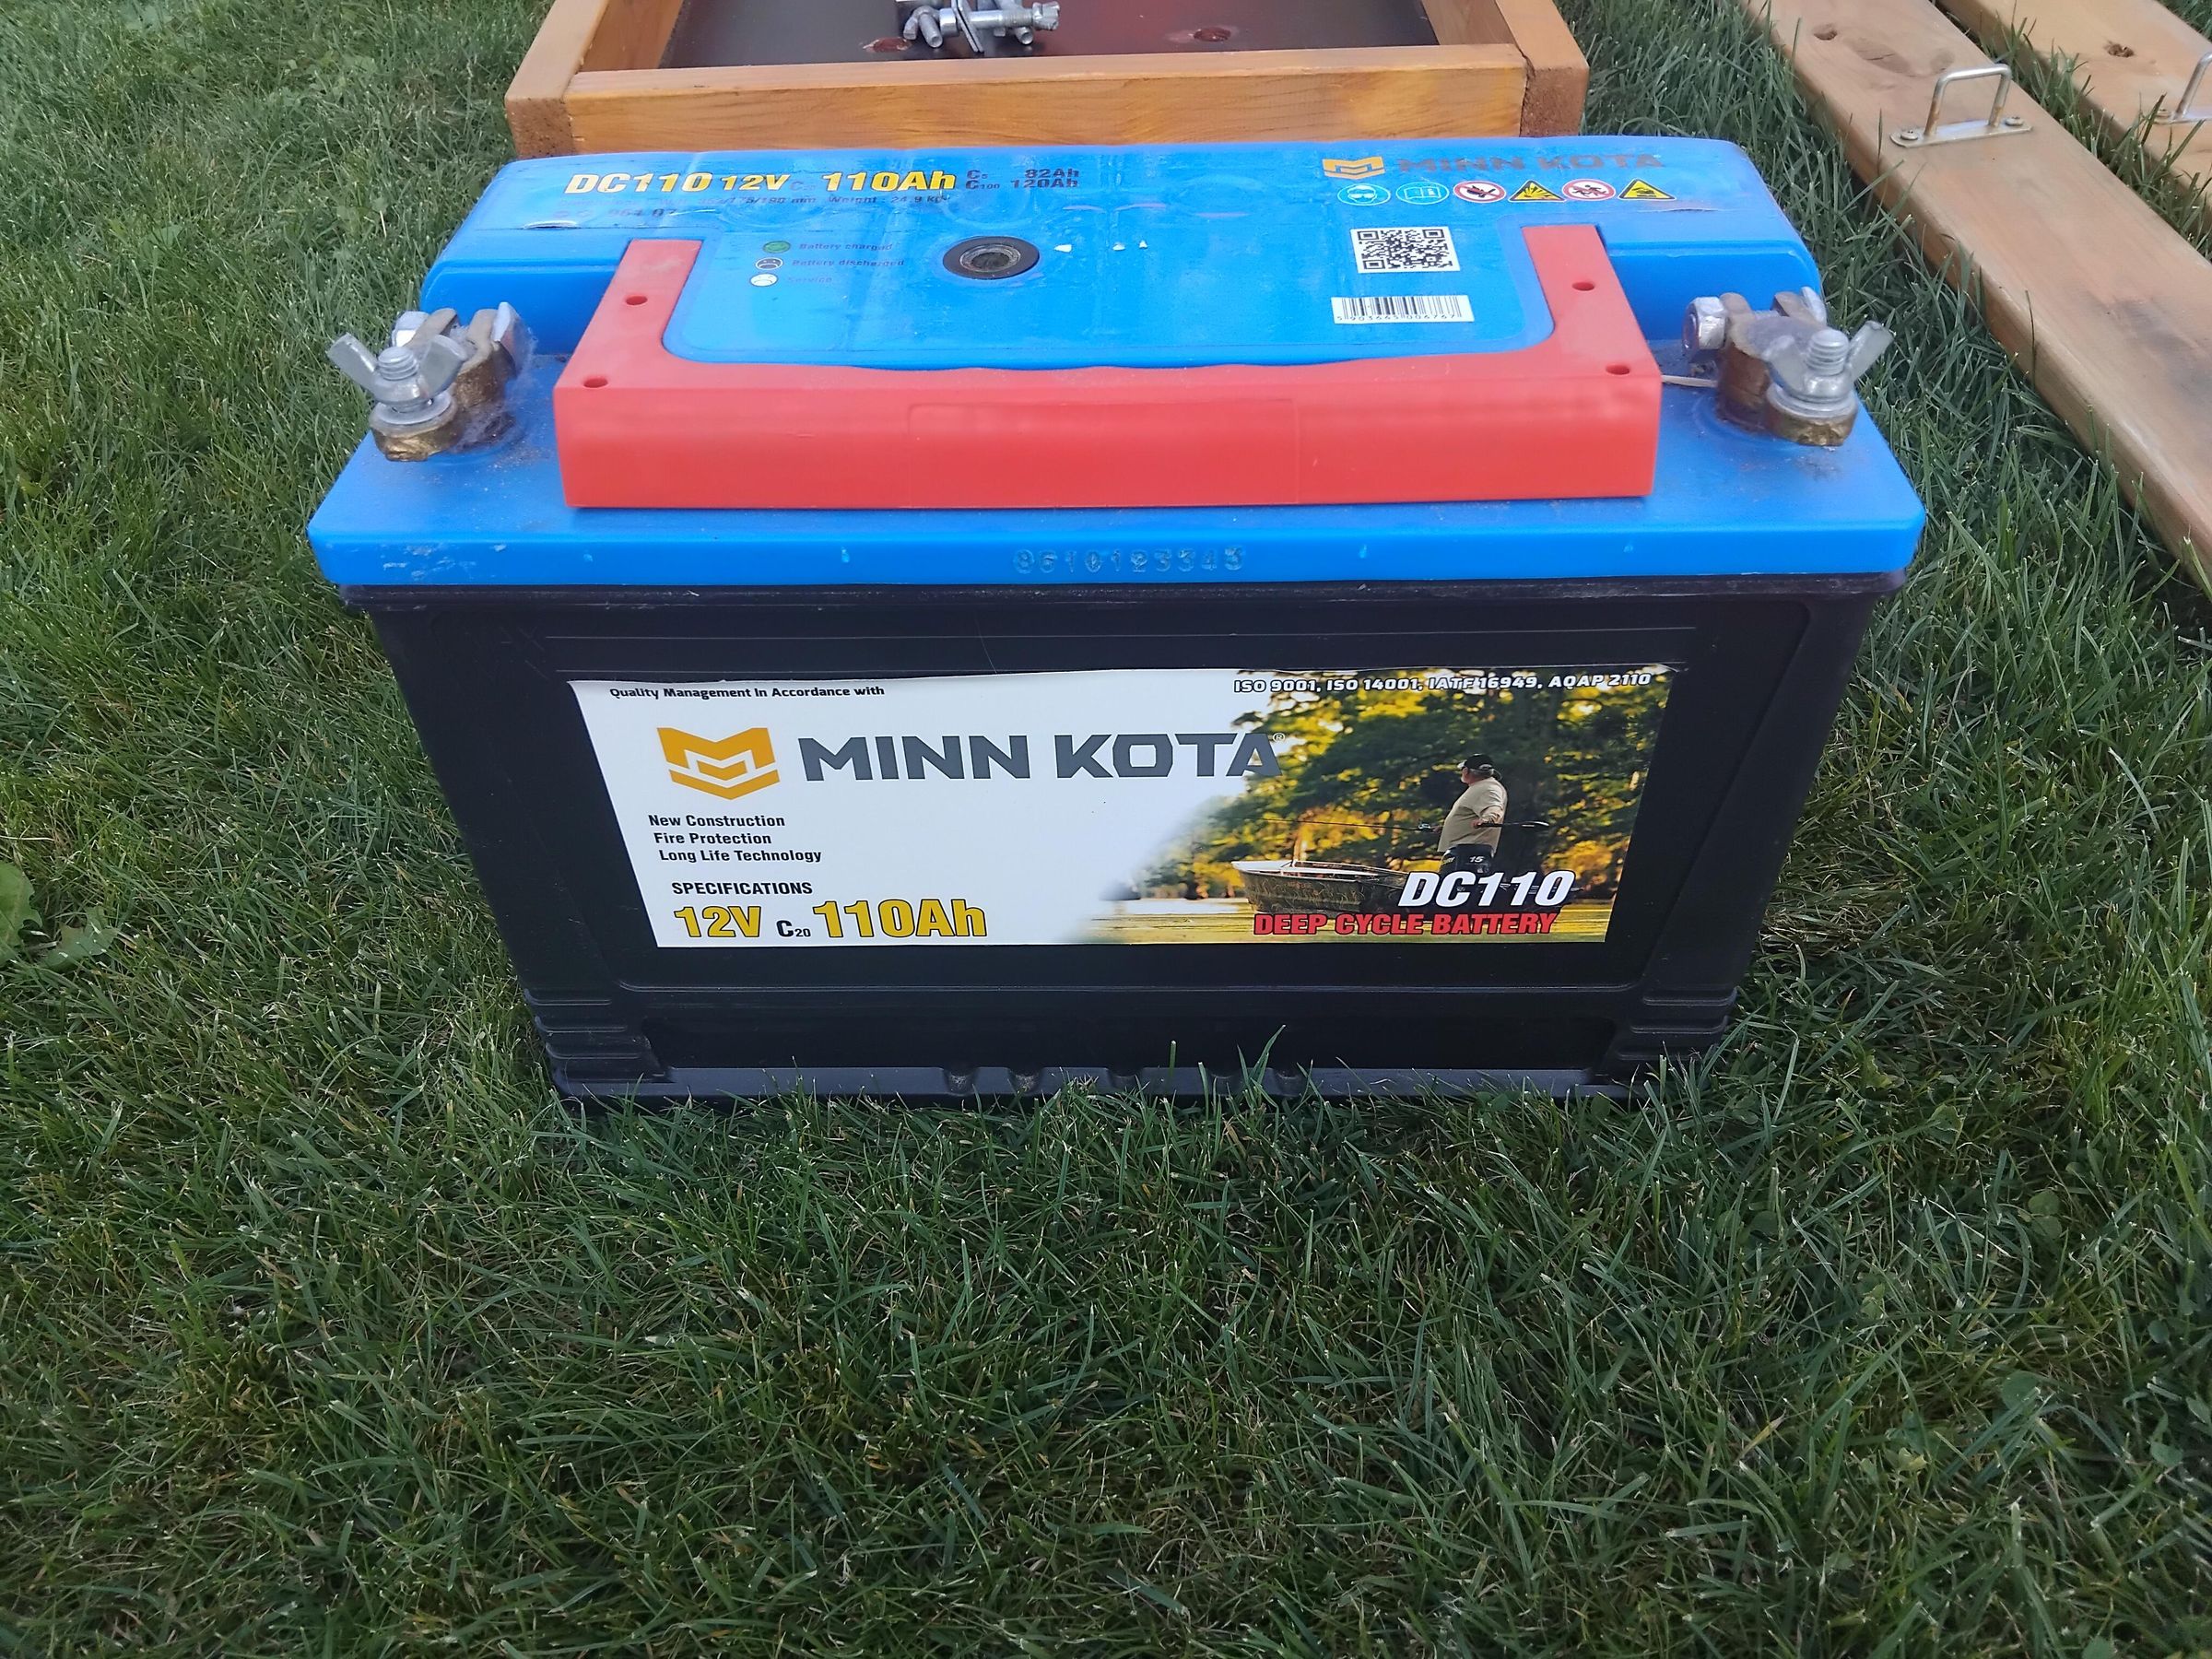
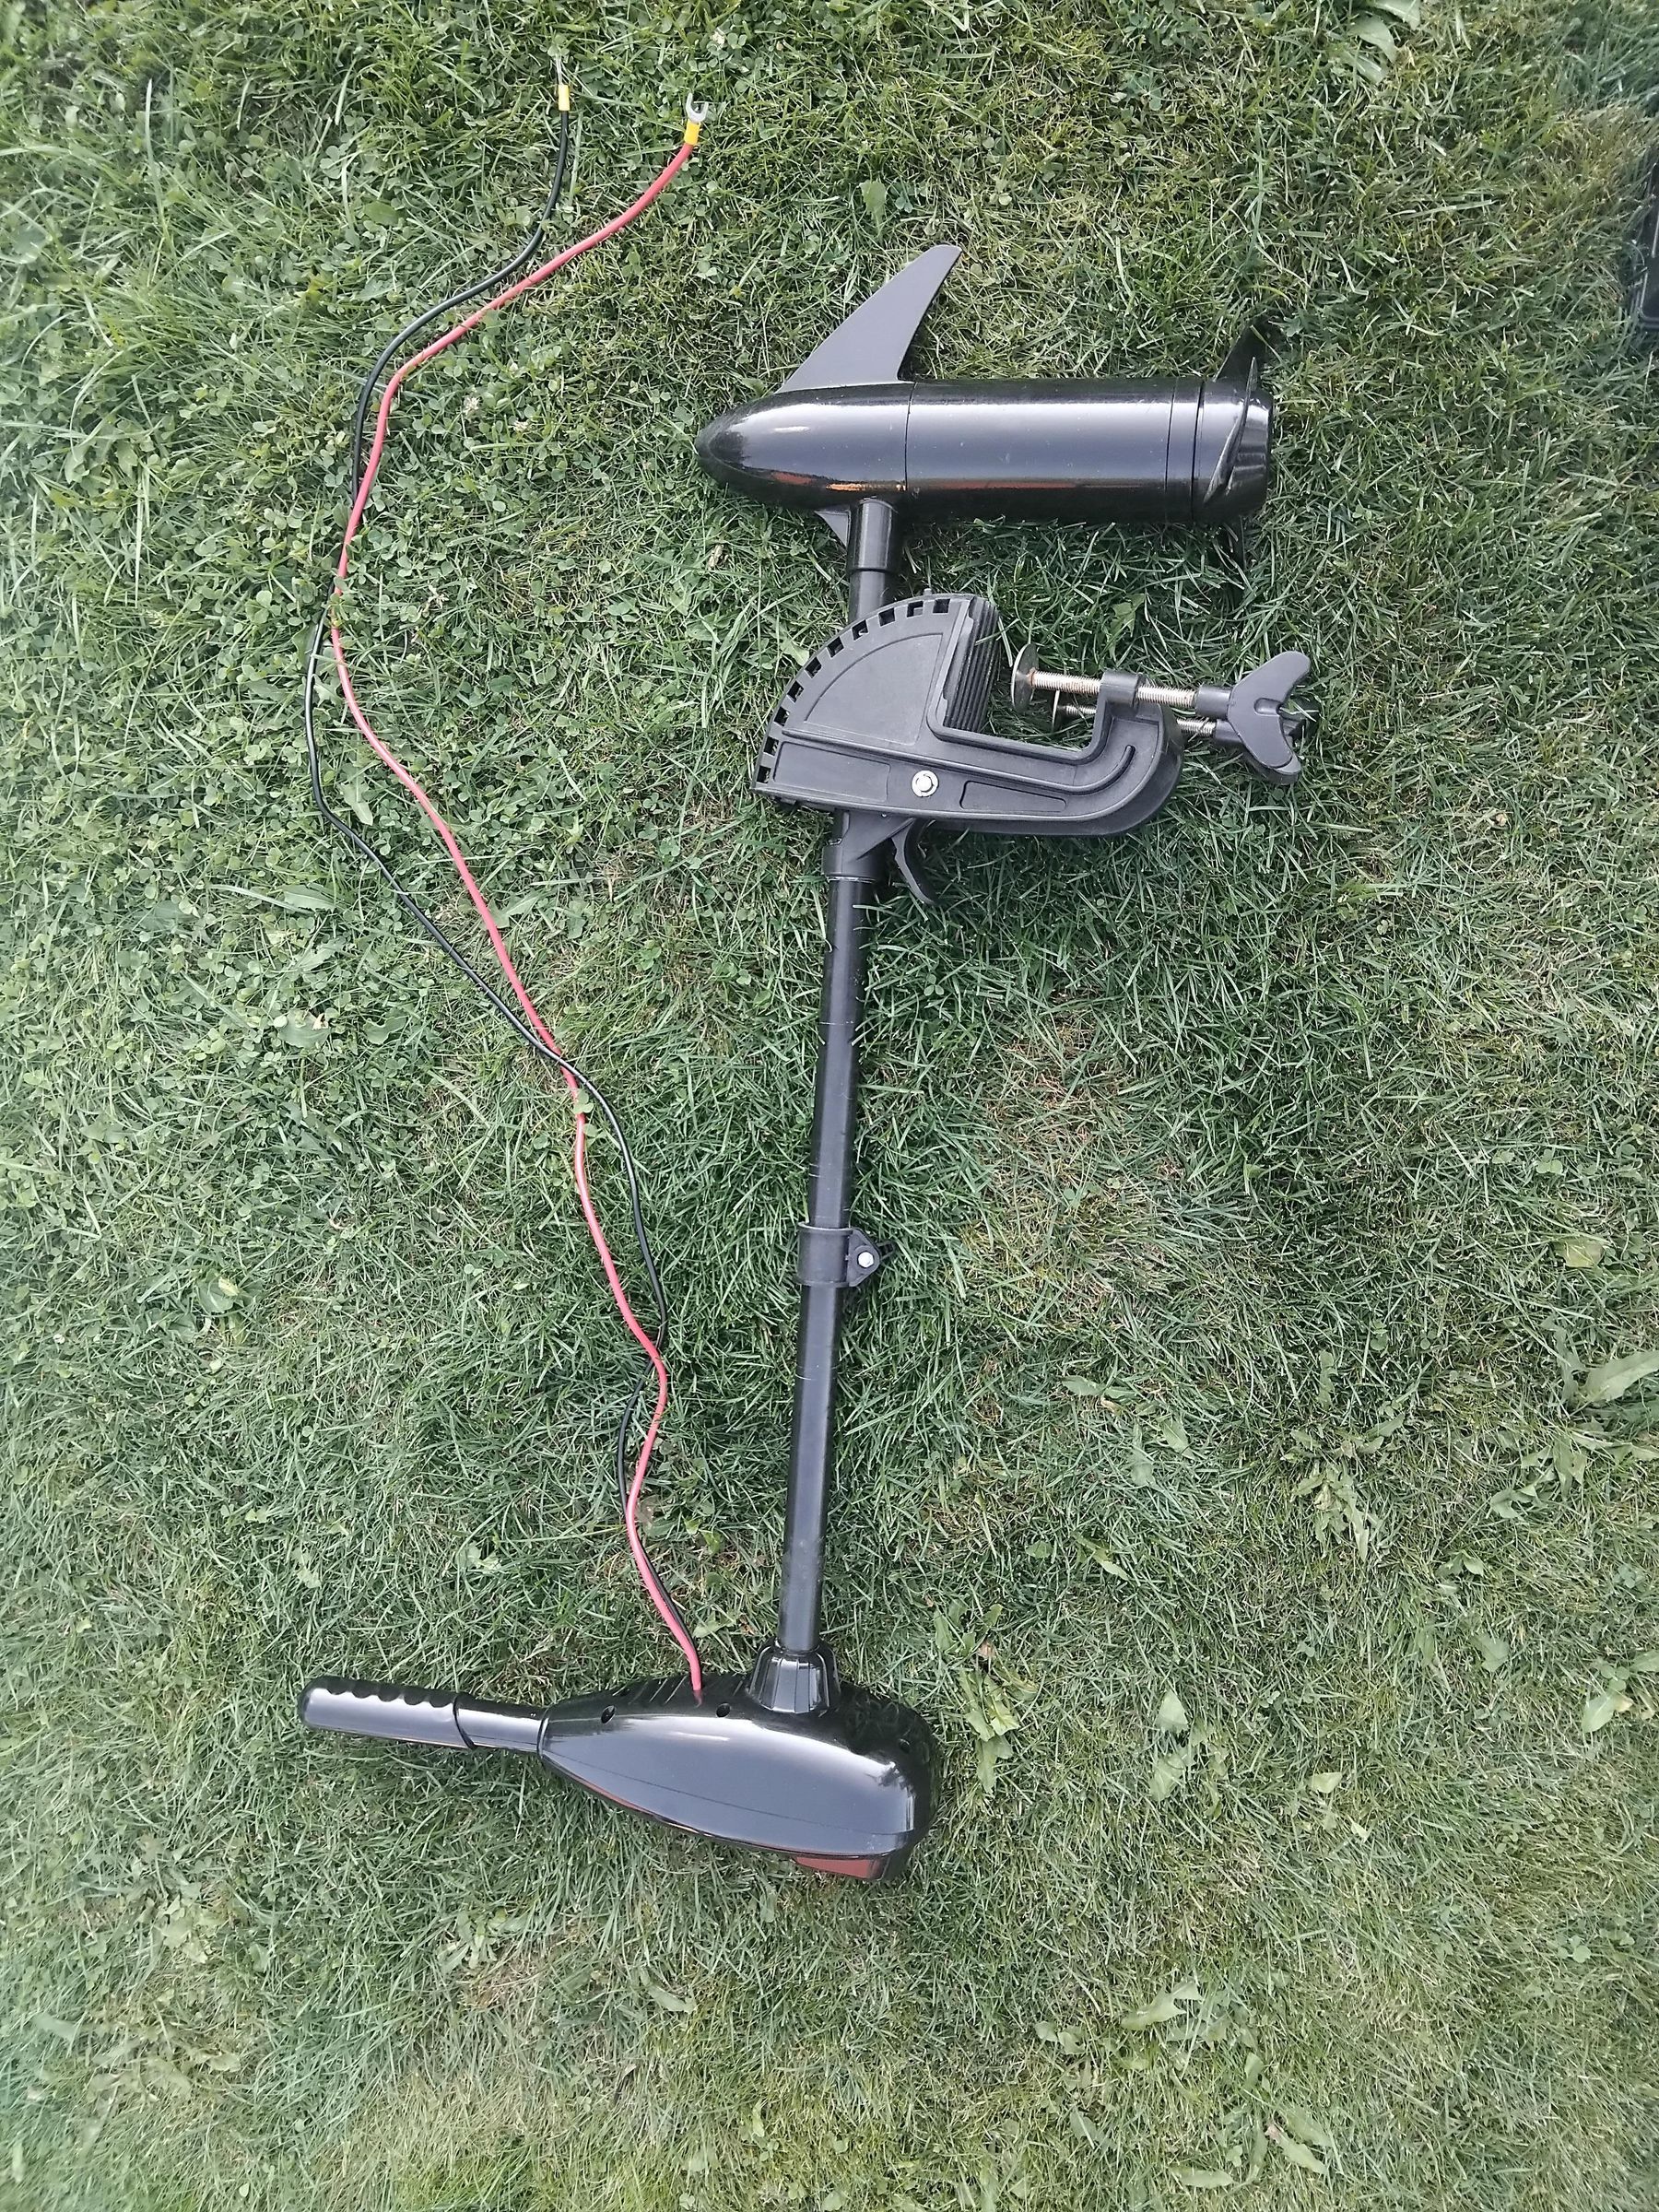
One trip to DIY store and one to a boat shop. Nothing exotic. A DIY store might have the exact same (basic electril trolling motor + battery). I chose boat shop as they specialize in deep cycle batteries for boating.
ALREADY HAD
- 2x inflatable SUP. Mine are Exprotrek E-S-2, 2022. Brand does not matter, equal length does. Length: 3250mm. Mine came off amazon.
- 12 mm laminated plywood offcut, cut to 955 x 515 mm. This was previously a door for my camper trailer @ https://www.instructables.com/Teardrop-Camper-Homemade-With-Plywood
- Paint for the plywood edges
WOOD
- Pine board, pressure treated, 25 x 90 mm, 2350 mm long. 2 pcs. About 14 EUR.
- Pine blocks cut from the offcuts, 145 x 70 mm, 25 mm thick. 8 pcs.
- Pine for the tray frame, cut from scratch, basically 2x4s (50mm x 100mm)
Pressure treated because it lives outdoors and gets wet every trip. 2350 mm is not a magic number. It is board width plus the gap plus enough left over to strap to, so measure your own boards first.
I'd very much suggest sanding the wood where needed, especially the corners. No sharp protruding edges anywhere!
METAL
- Galvanised straps with staples , 29 mm inside height, 25 mm inside width, plate 70 x 15 mm. 8 pcs. About 7 EUR. These are just basic cargo attachment straps in DIY store auto/trailer section.
- Bolts M10 x 70 mm with square washers and wing nuts, 16 mm head. 5 sets. About 12 EUR.
- Torx wood screws, about 30. Length - according to your wood thickness. IMPORTANT: no sharp end can stick out anywhere. As paddleboards gets inflated to 1 bar pressure, you'd not want to puncture that one accidentaly. And on the water, while in movement, all these parts brush against each other.
Galvanised, all of it. Square washers, not round. Round ones push through soft pine when fastened.
MOTOR, BATTERY, SEATS
- Basic electric outboard, 36 lbf. 12 V, 9.5 kg, 76 cm shaft, 5 speeds forward and 3 reverse. 200 EUR.
- Minn Kota DC110 battery. 12 V, 110 Ah, 29.3 kg, 352 x 175 x 230 mm. 150 EUR.
- Folding padded garden chairs with a tubular steel frame. 2 pcs. About 51 EUR each.
TOTAL: about 450-500 EUR. Two thirds of that is the motor and the battery.
The catamaran part on its own is about 50 EUR. If you already own a trolling motor, a battery, or some garden chairs this is a 50 EUR afternoon job.
36 lbf motor thrust is enough.
For the chairs, pick any folding chair with a tube frame, because the tubing has good strapping points to attach straps to. Paddleboards have their own metal rings to tie chairs to, but make sure not to over-fasten, as on can rip out the rings on the paddleboard easily.
TOOLS
Circular saw or hand saw. Drill driver with a Torx bit. 10 to 11 mm bit for the bolt holes. About 25 mm bit or a hole saw for the drain holes. Spanner or pliers for the wing nuts. Tape measure, pencil, paintbrush. SUP pump.
No welder, no router, no jigs. If you can build a shelf, you can build this.
How It Works
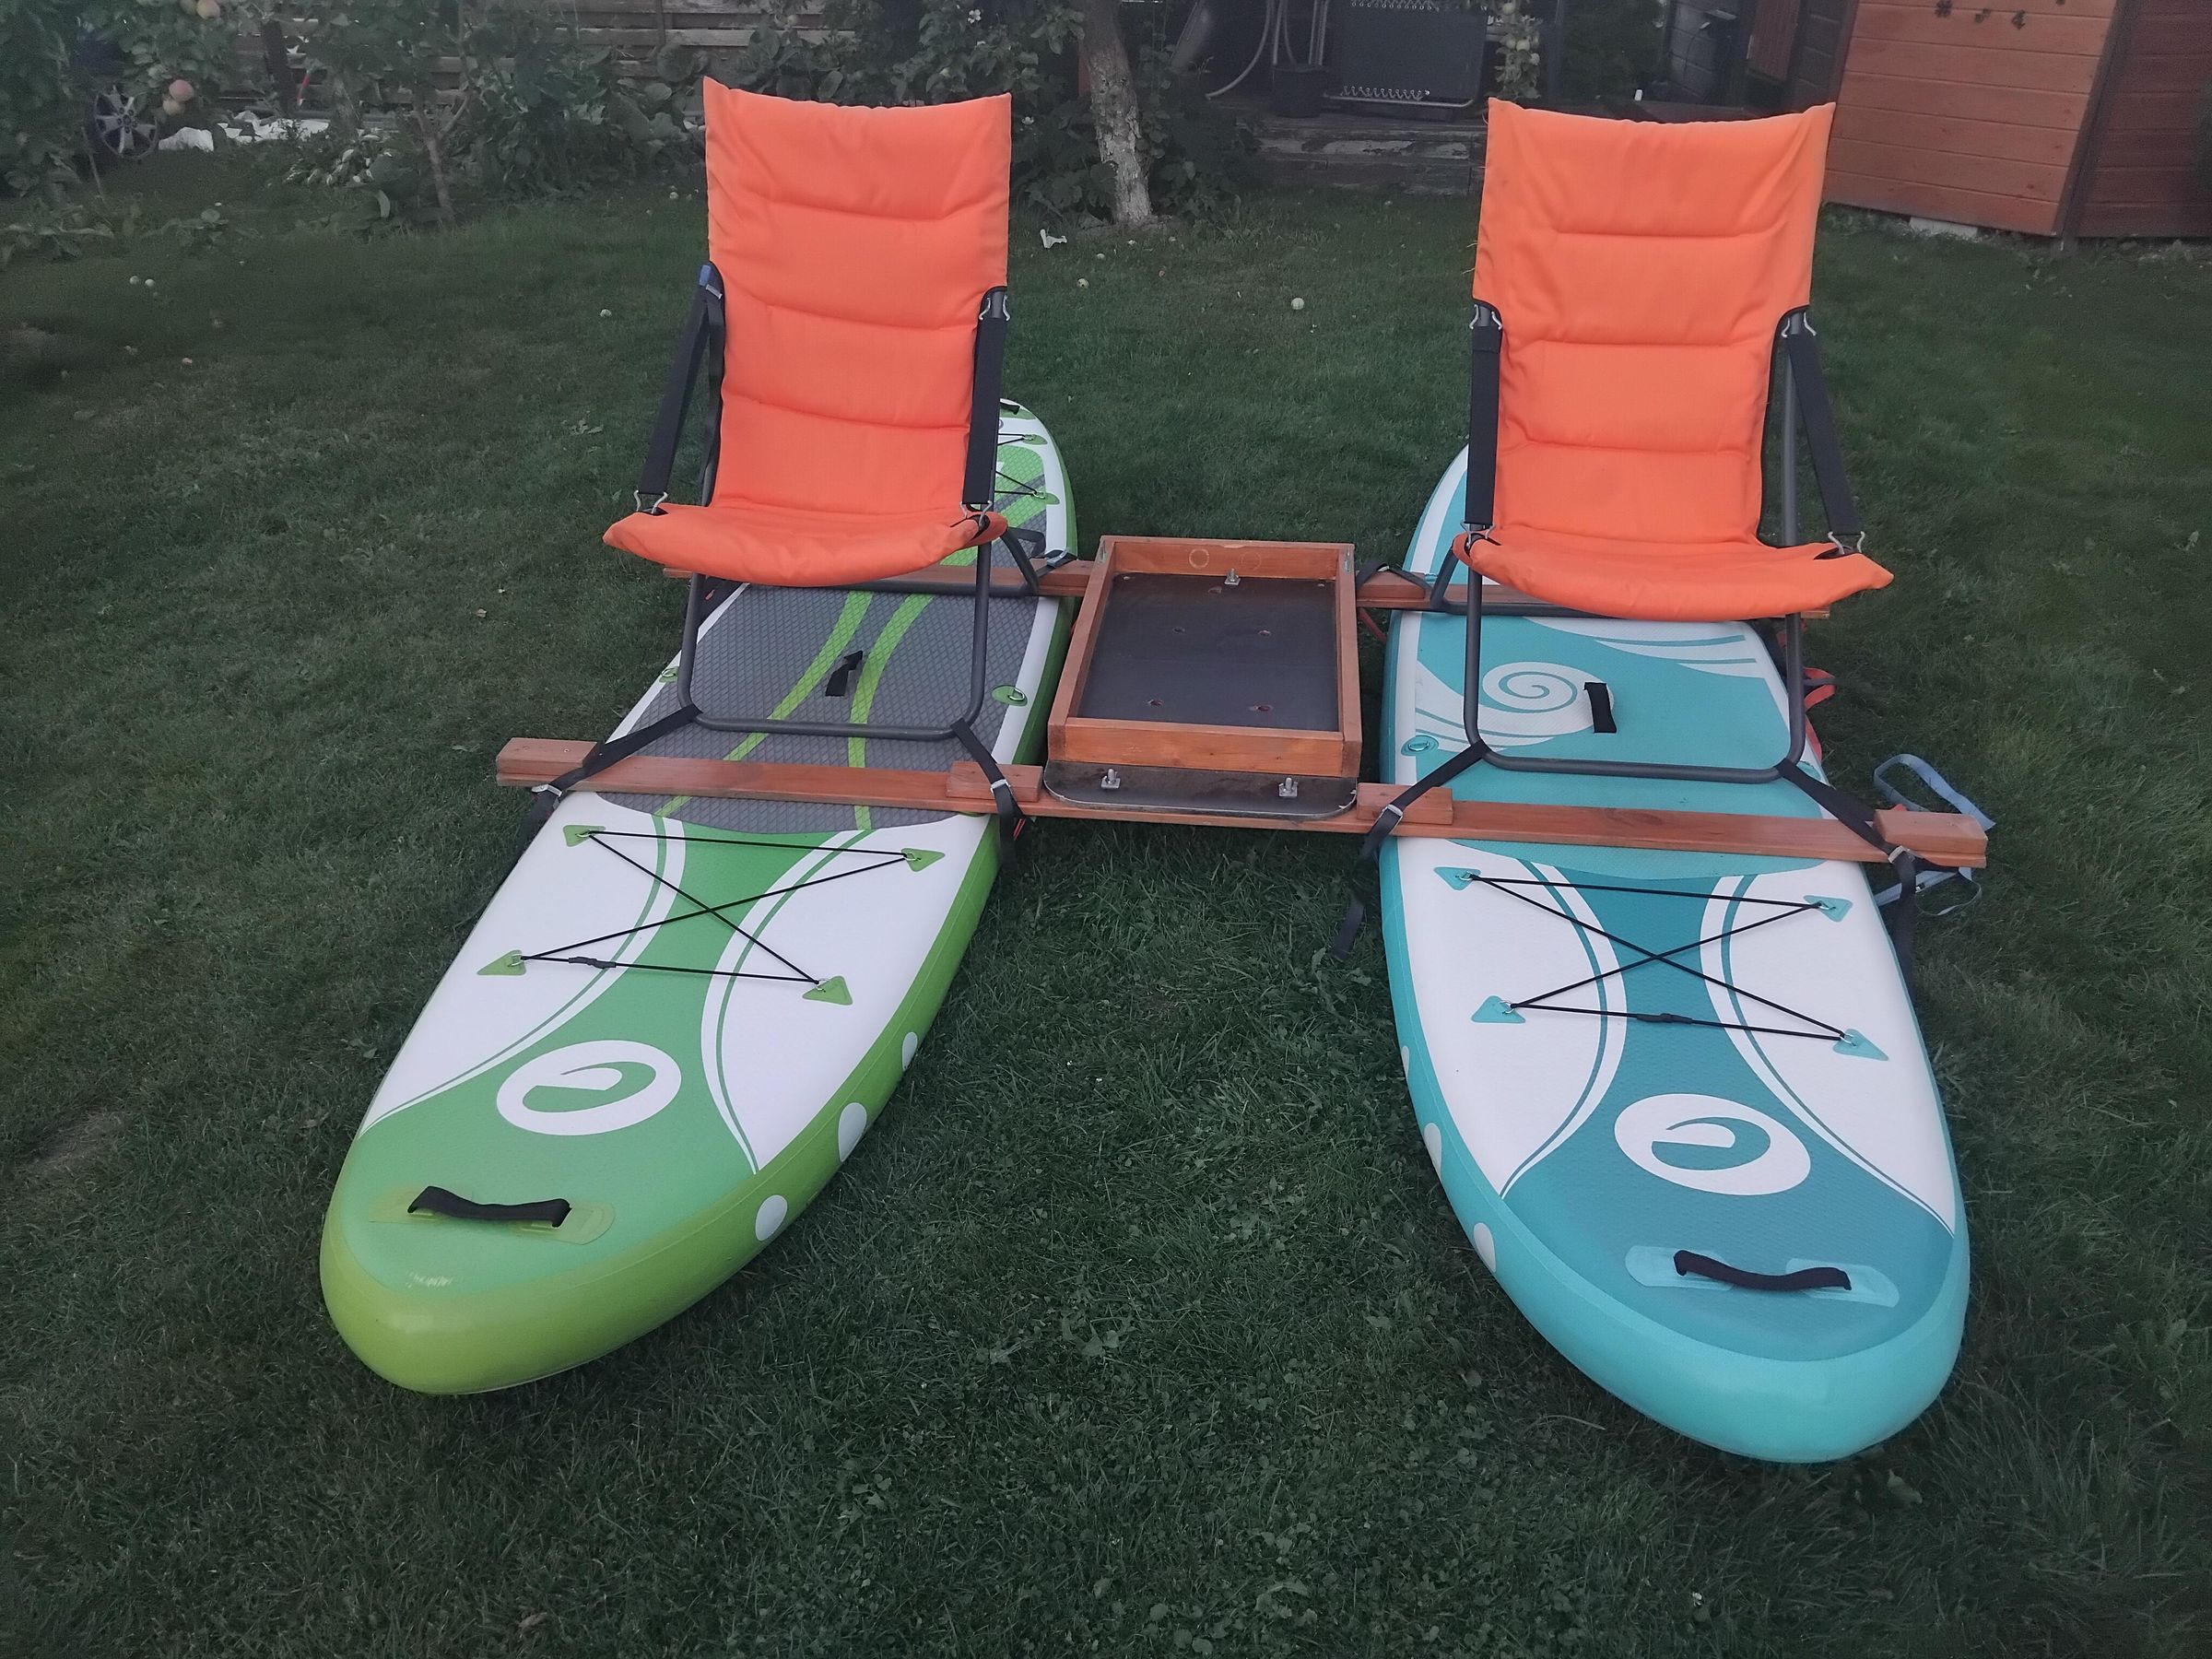
Three decisions shape the whole build. Read them before you cut anything.
STRAPS, NOT GLUE, NOT SCREWS
Inflatable SUPs are drop stitch PVC.
So the beams just lie across the boards and each board gets lashed to each beam. One strap, right around the hull. Tension and deck pad friction do the rest. Minimal friction, minimal risk of accidental board puncture.
THE PLATFORM TAKES THE LOAD, THE BEAMS CARRY THE PLATFORM
A plywood panel sits on top of both beams and bolts through them with five M10. Battery and motor sit on that panel. The boards only float.
BUILD IT UPSIDE DOWN
Boards deck down on the grass, hulls up. Everything is at hand height and the straps route easy. Then flip it. Which is why the fins go on first, see Step 5.
Beams, Blocks and Staples
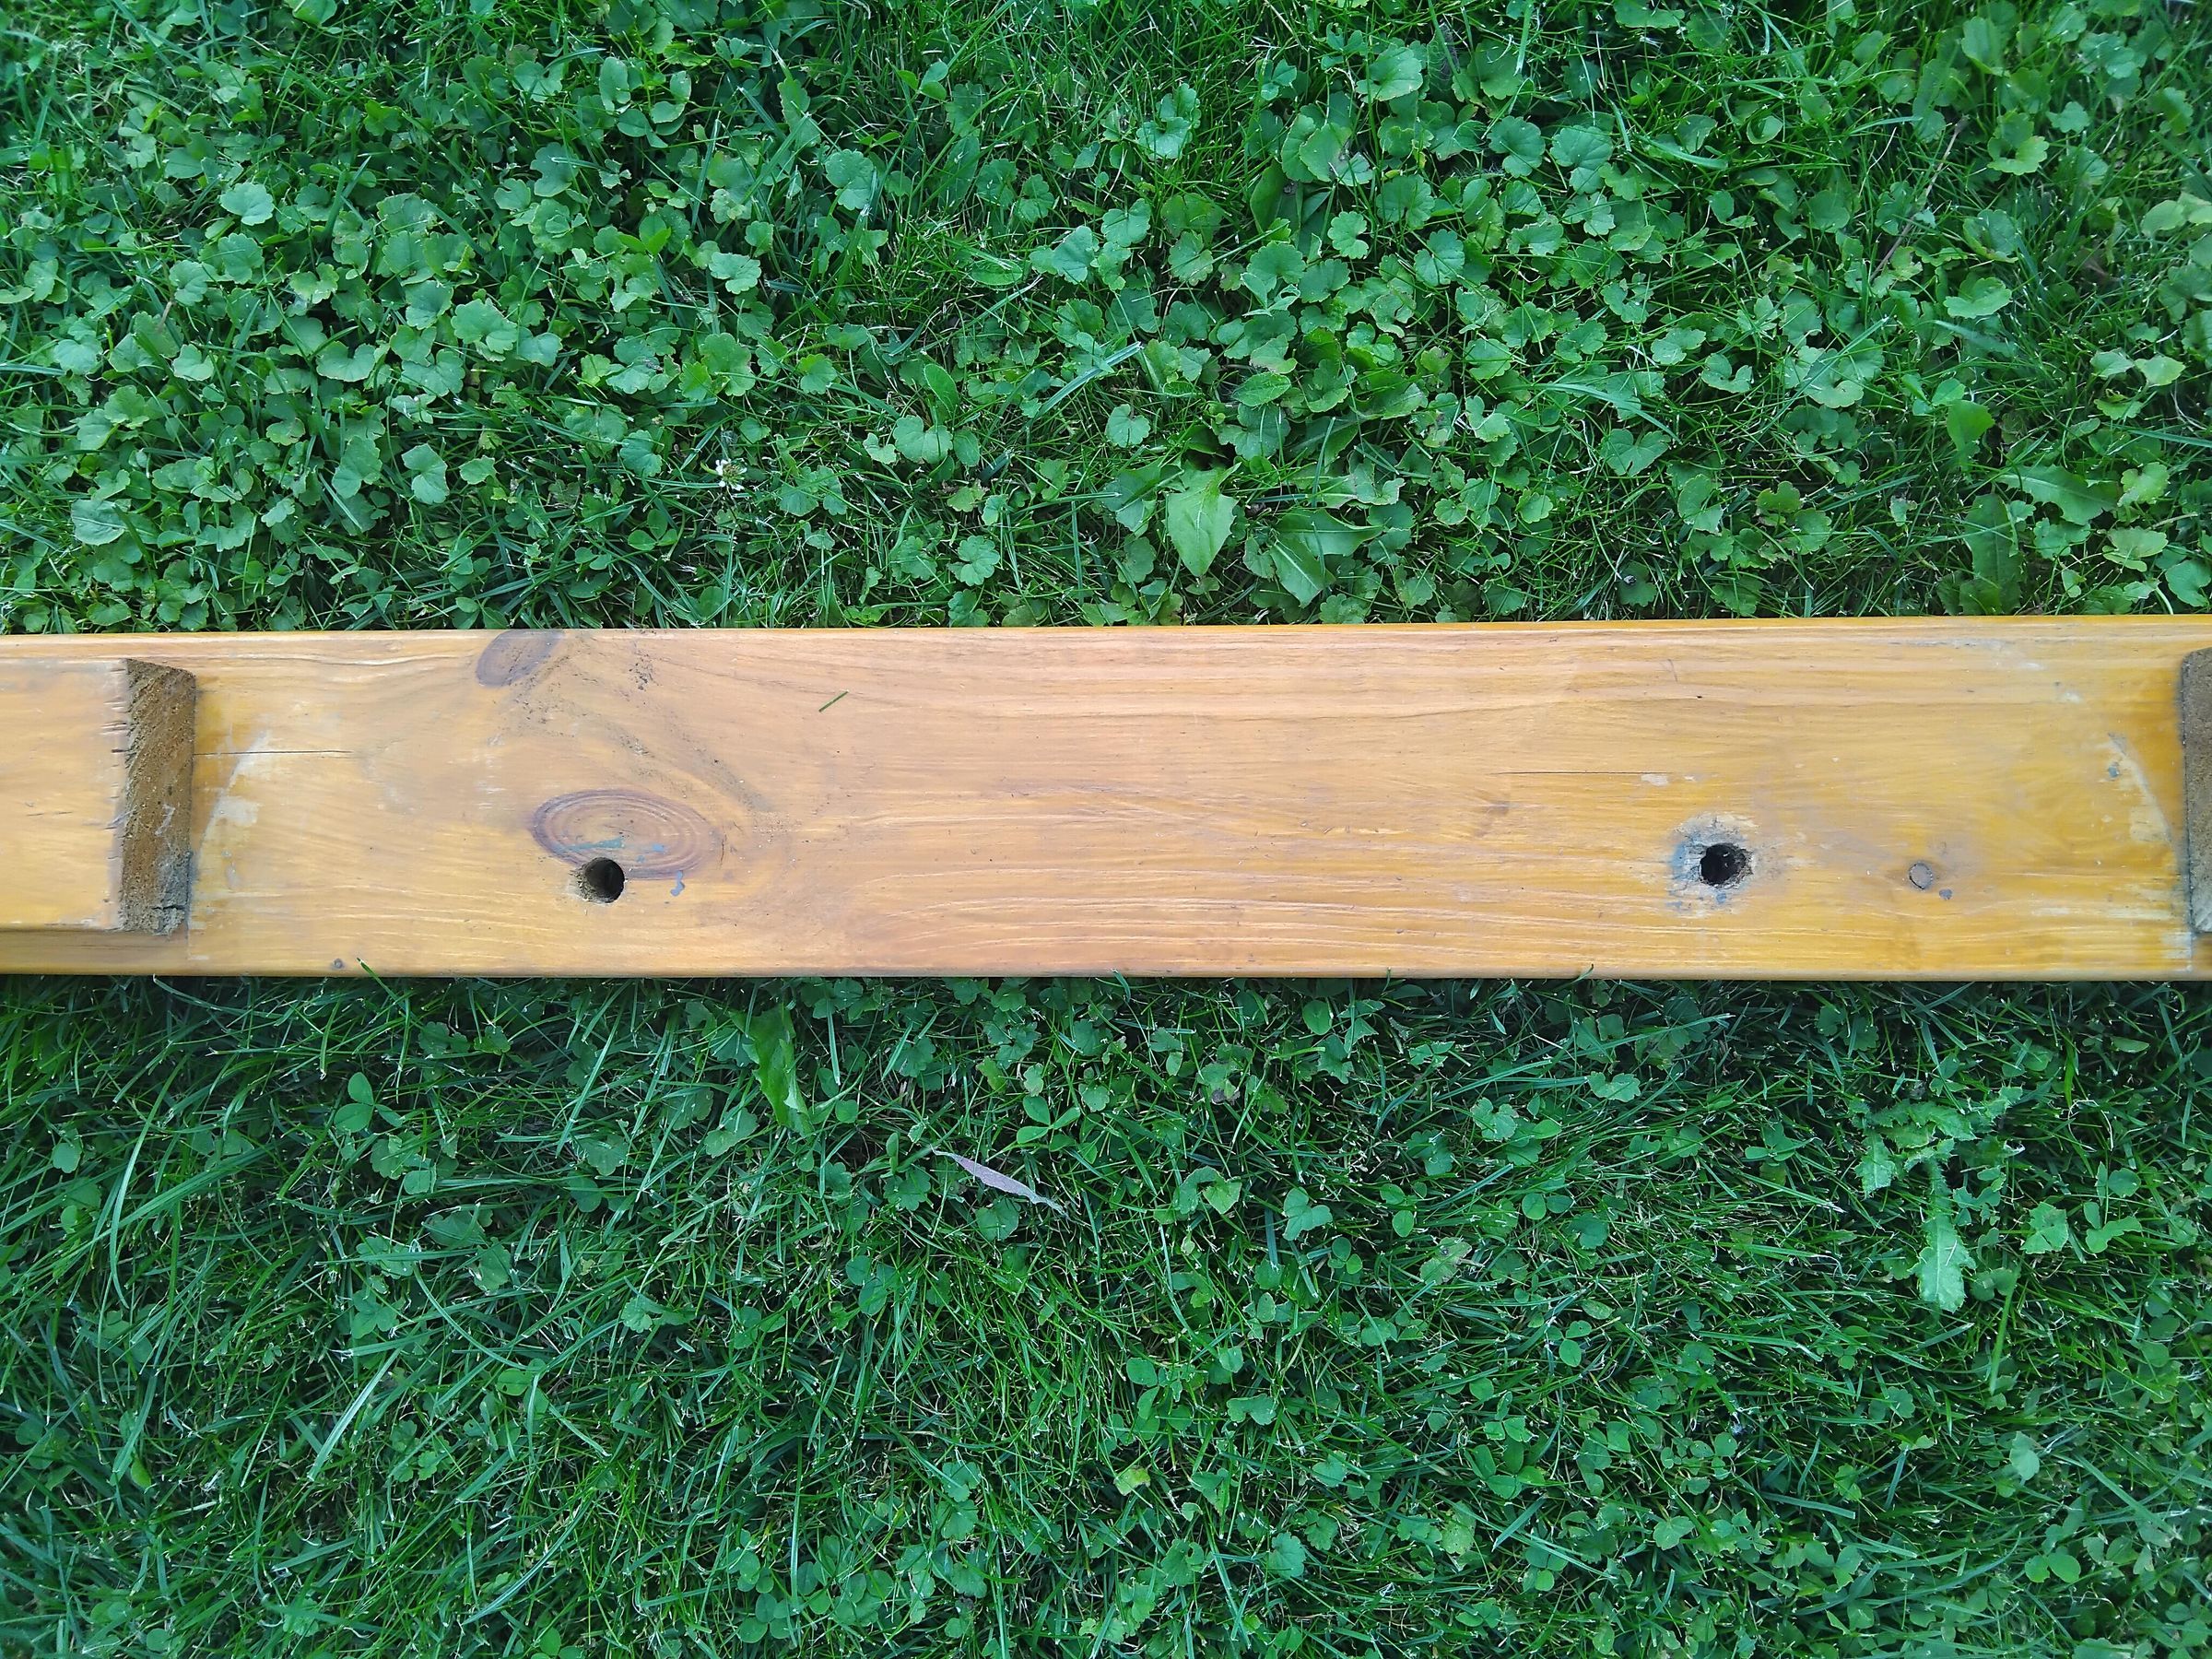
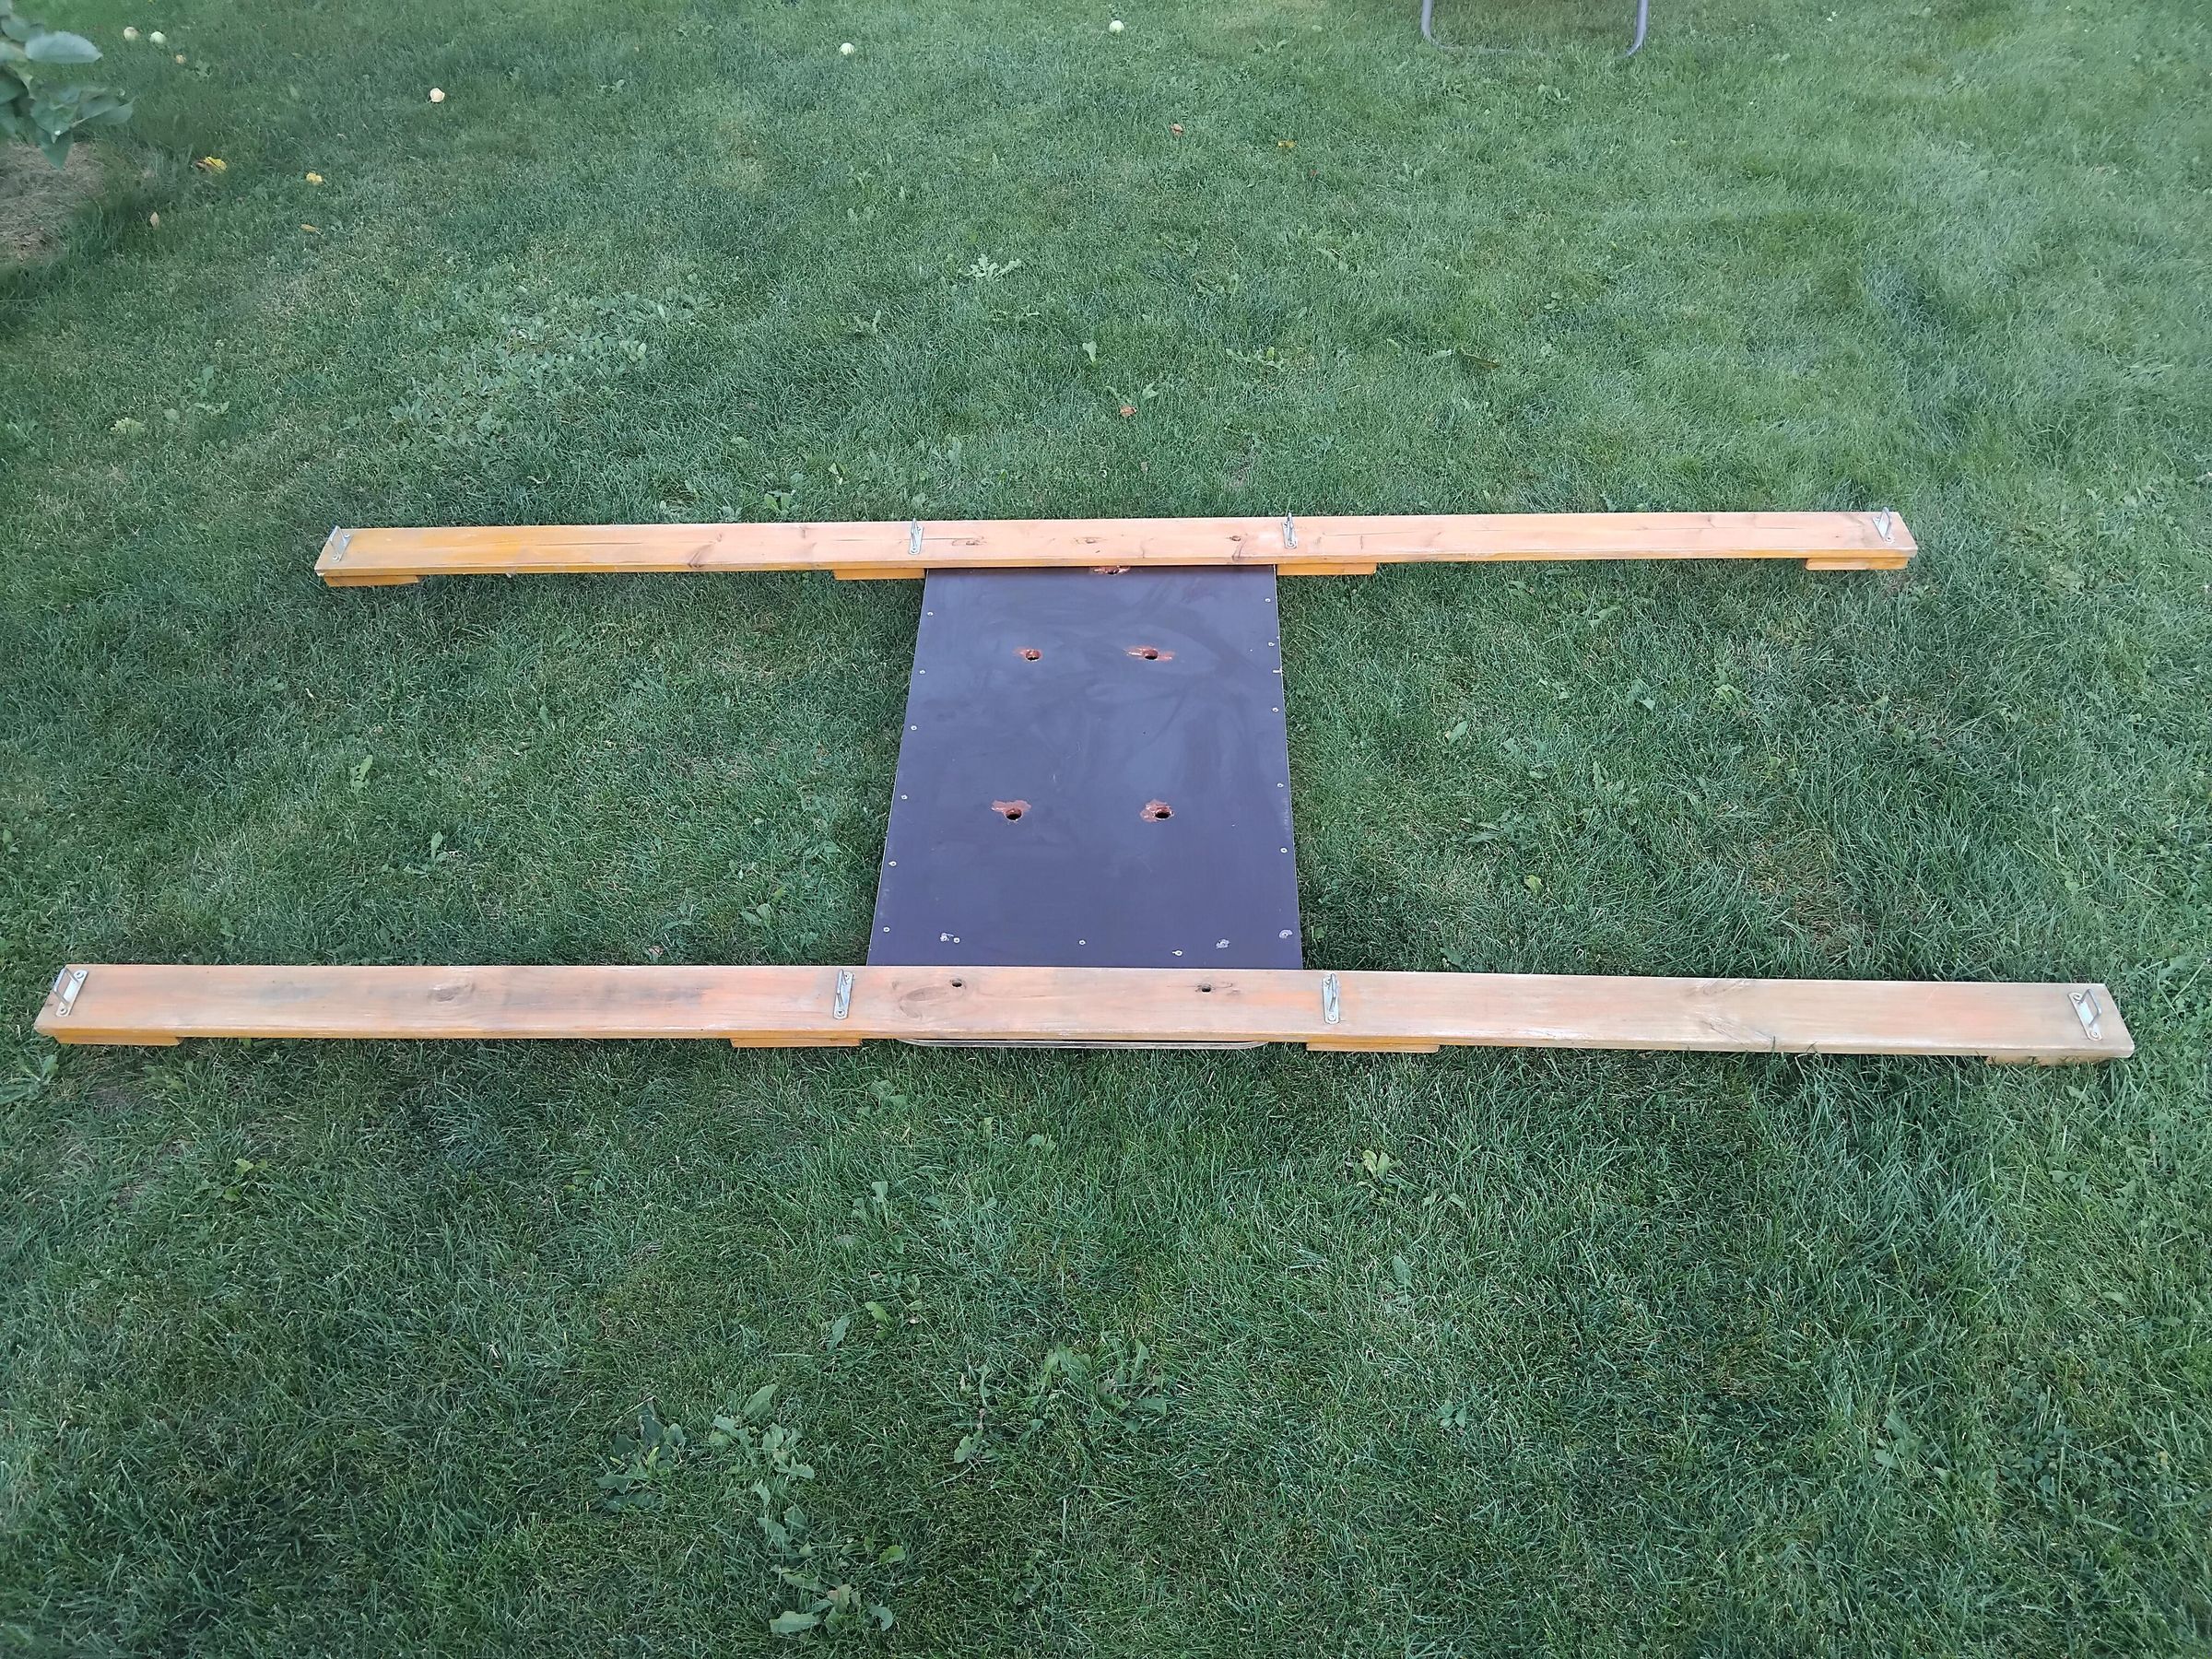
Two pine boards, 25 x 90 mm, 2350 mm long. That covers both boards plus the gap with enough sticking out each side to strap to.
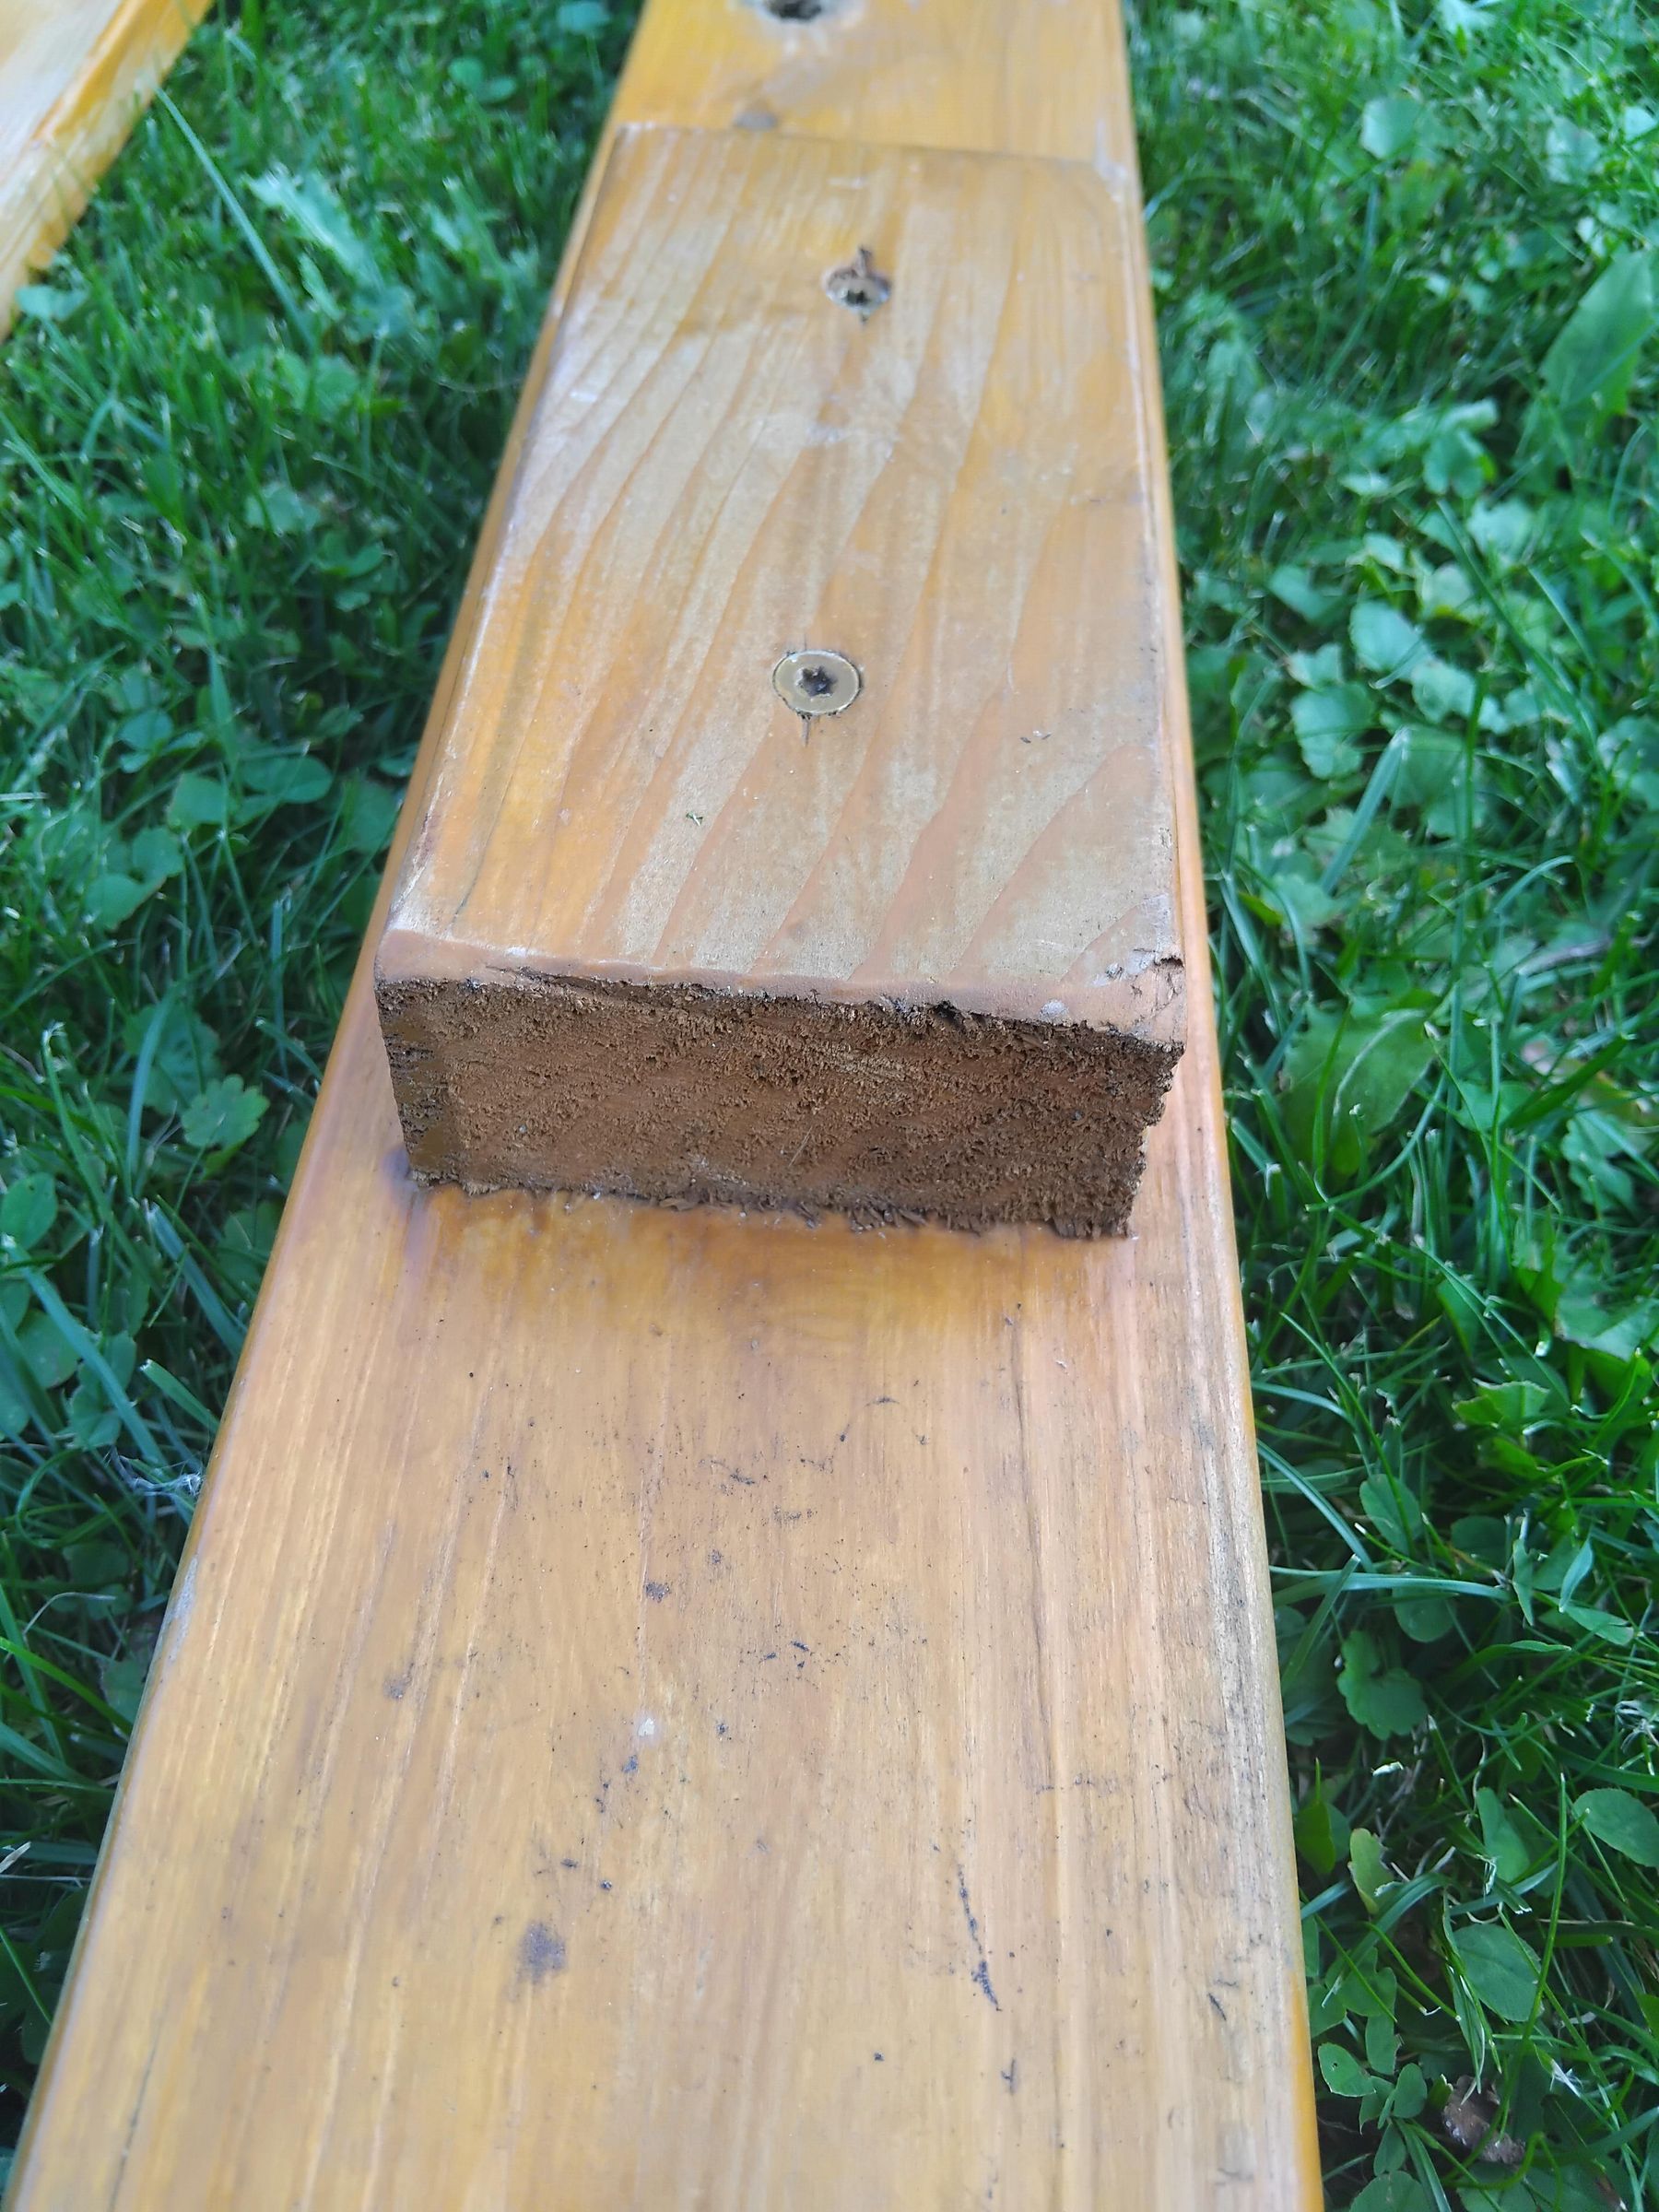
25 mm of pine is too thin for the staple screws, so four blocks go on each beam. 145 x 70 mm, 25 mm thick, cut from the offcuts. Two out near the ends, two in toward the middle. Torx screws.
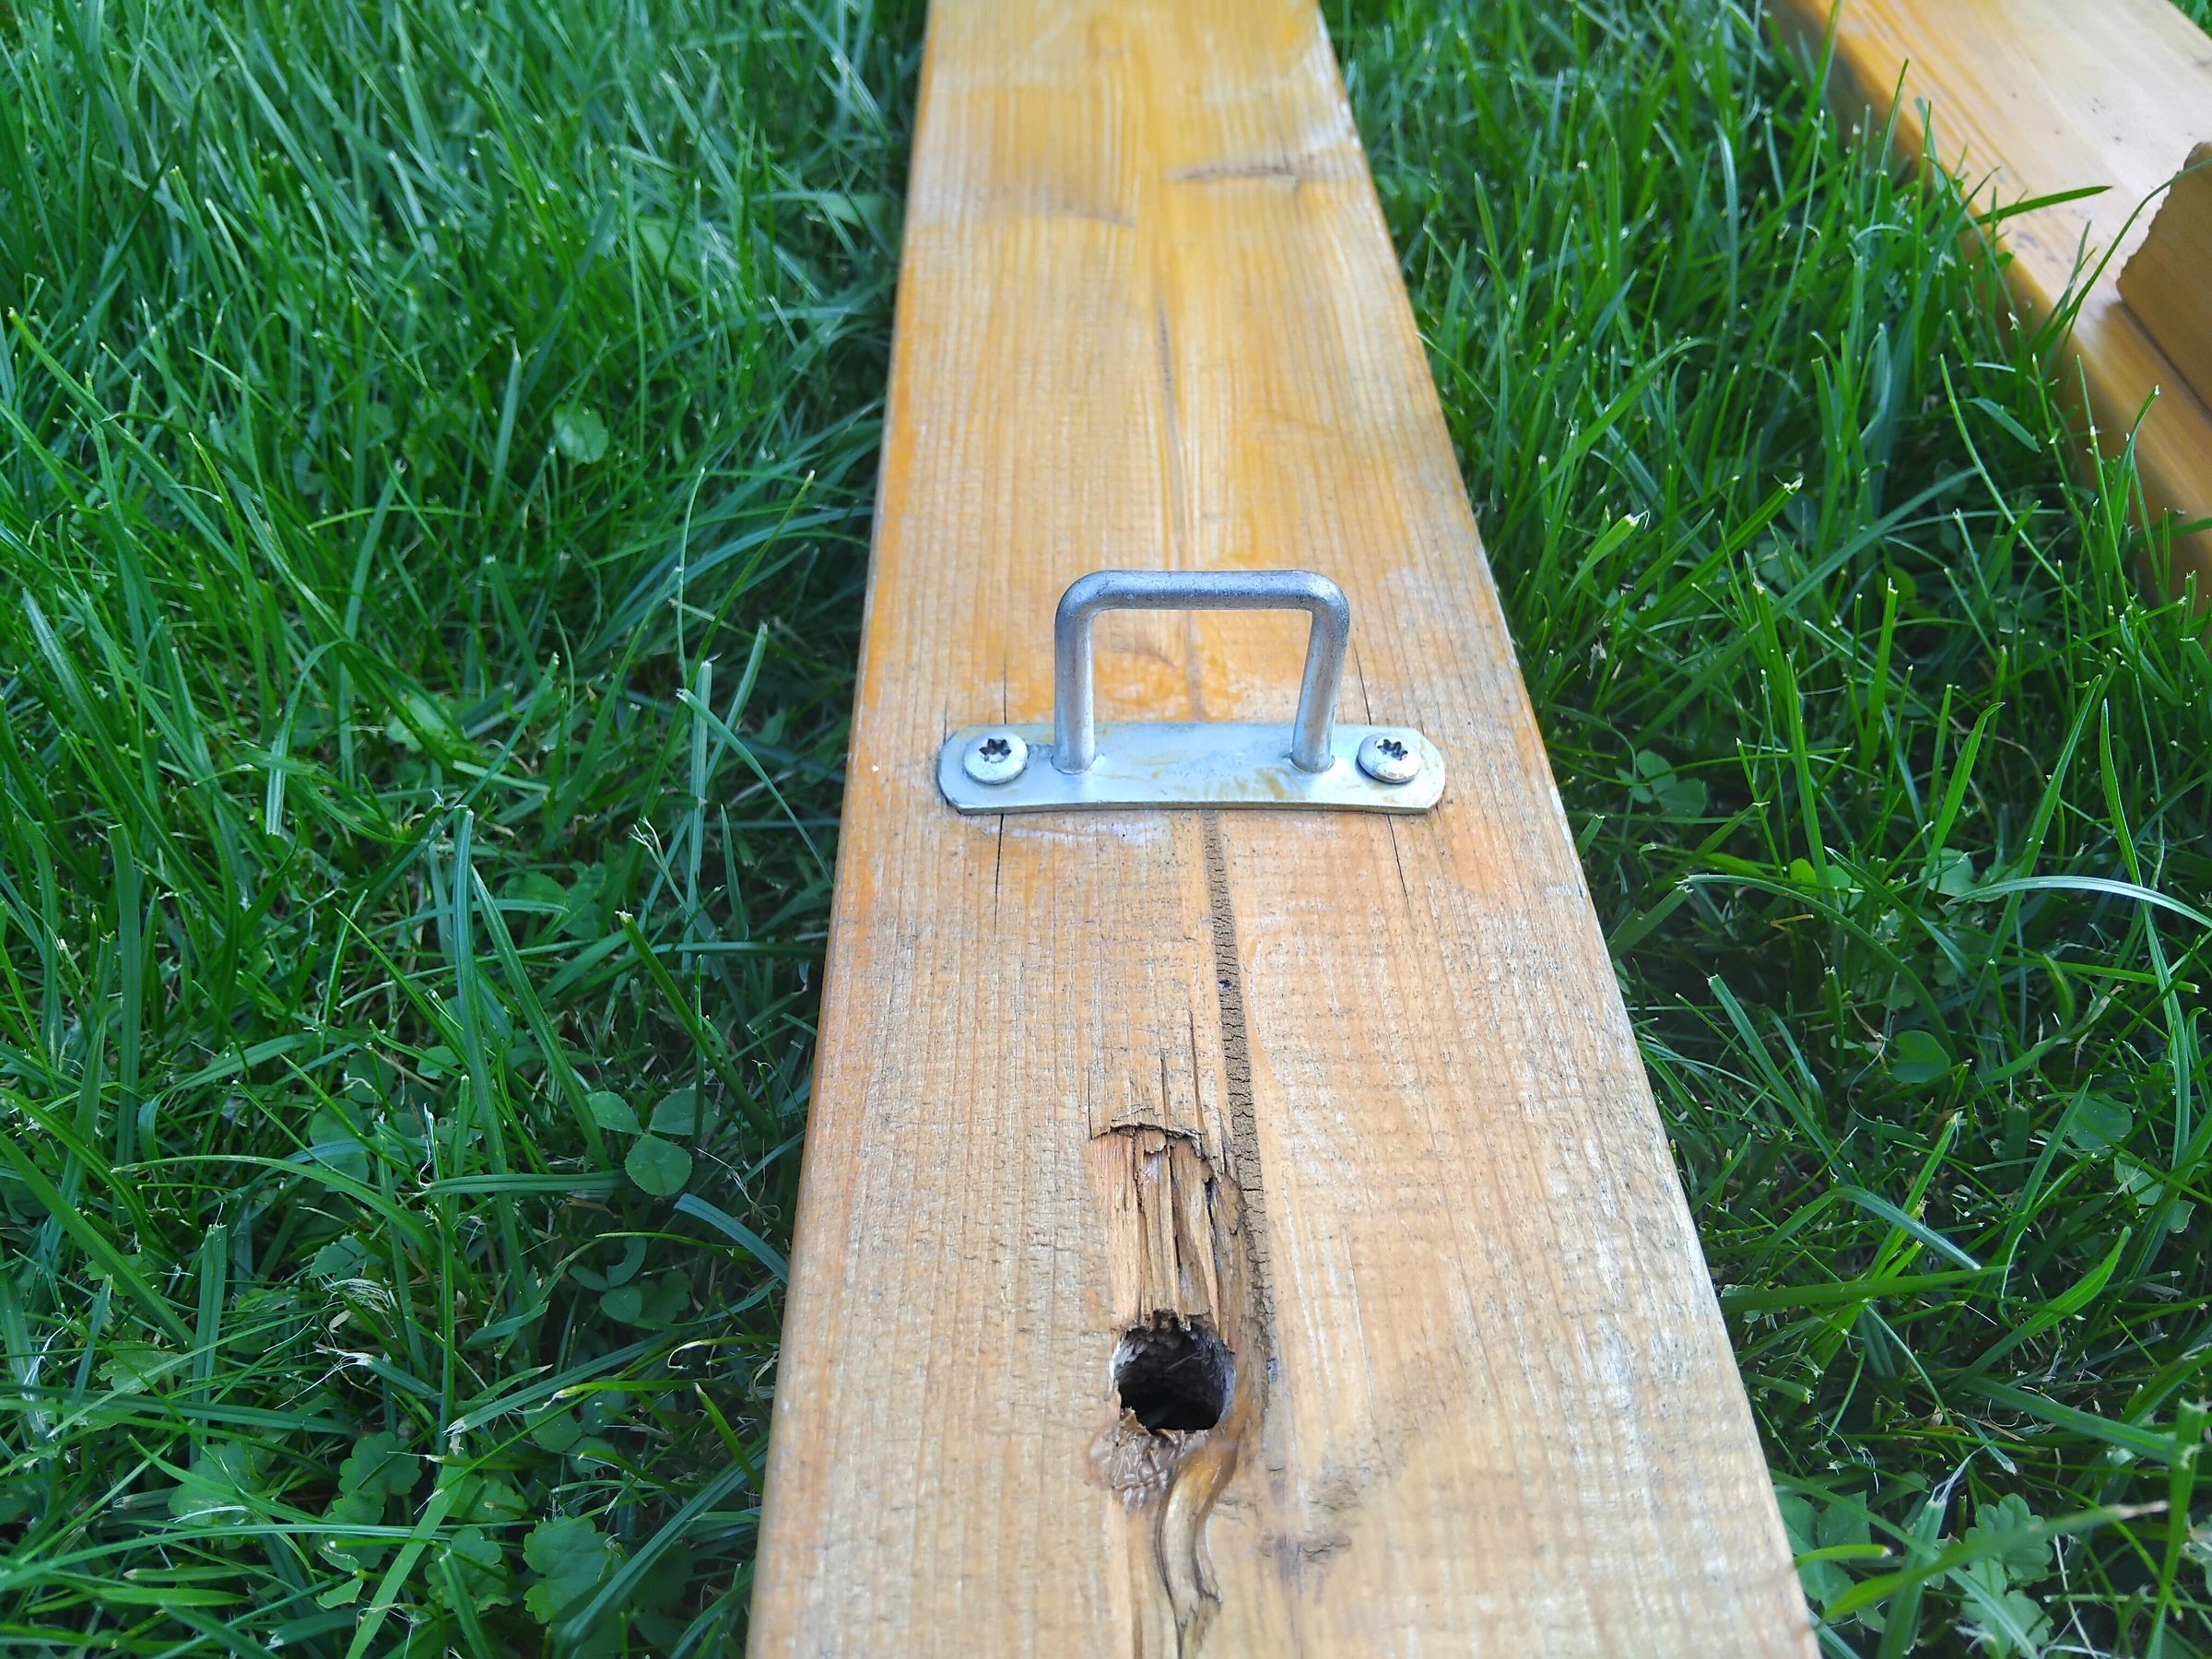
Then eight strap staples, one at each block, on the UNDERSIDE of the beams. The underside is the face that sits on the board. From there the strap pulls straight down onto the hull. Put the staples on top and the strap tries to roll the beam over. The screws go into the block, so they get 50 mm of wood instead of 25.
The stables themselves come from cargo trailer's shop. They are typically used to hold bottom of tents on trailers. Some 0.50€ each.
The blocks turned out to do a second job I had not planned. The tray frame drops into the gap between the inner and outer blocks, so the platform cannot slide along the beams and it lands in the same spot every single time you assemble. Best positive accident in the build.
The Platform
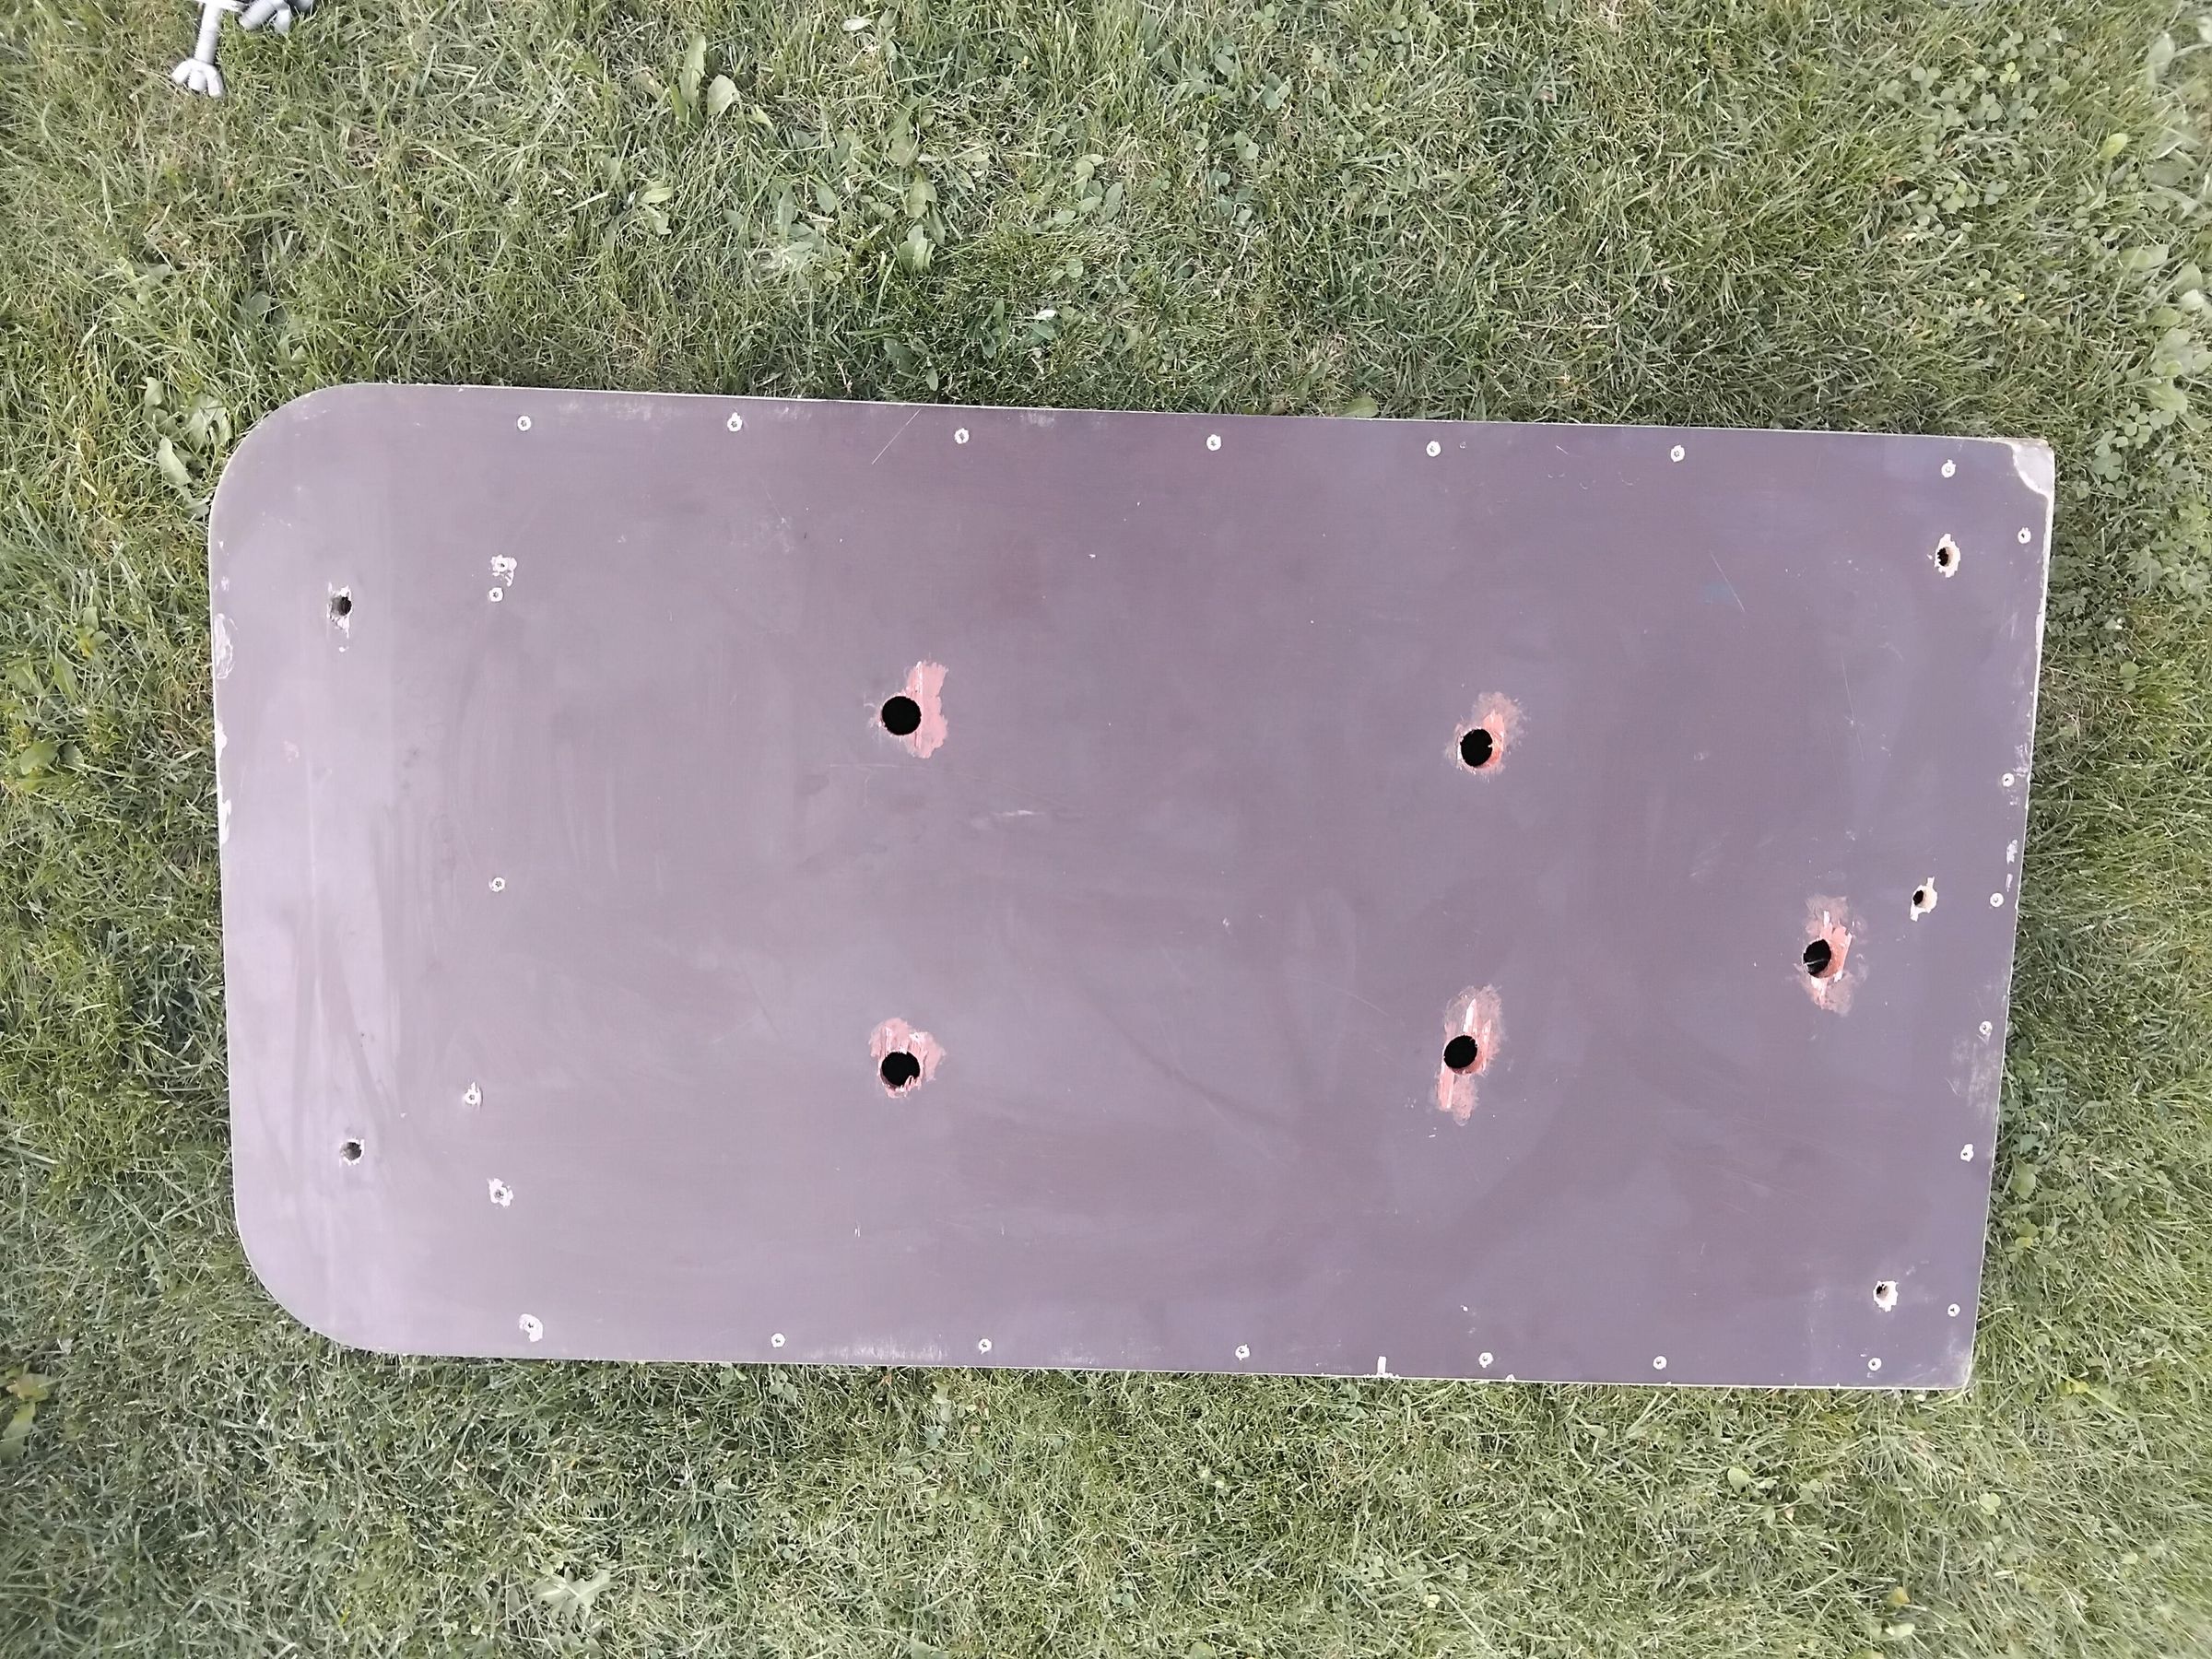
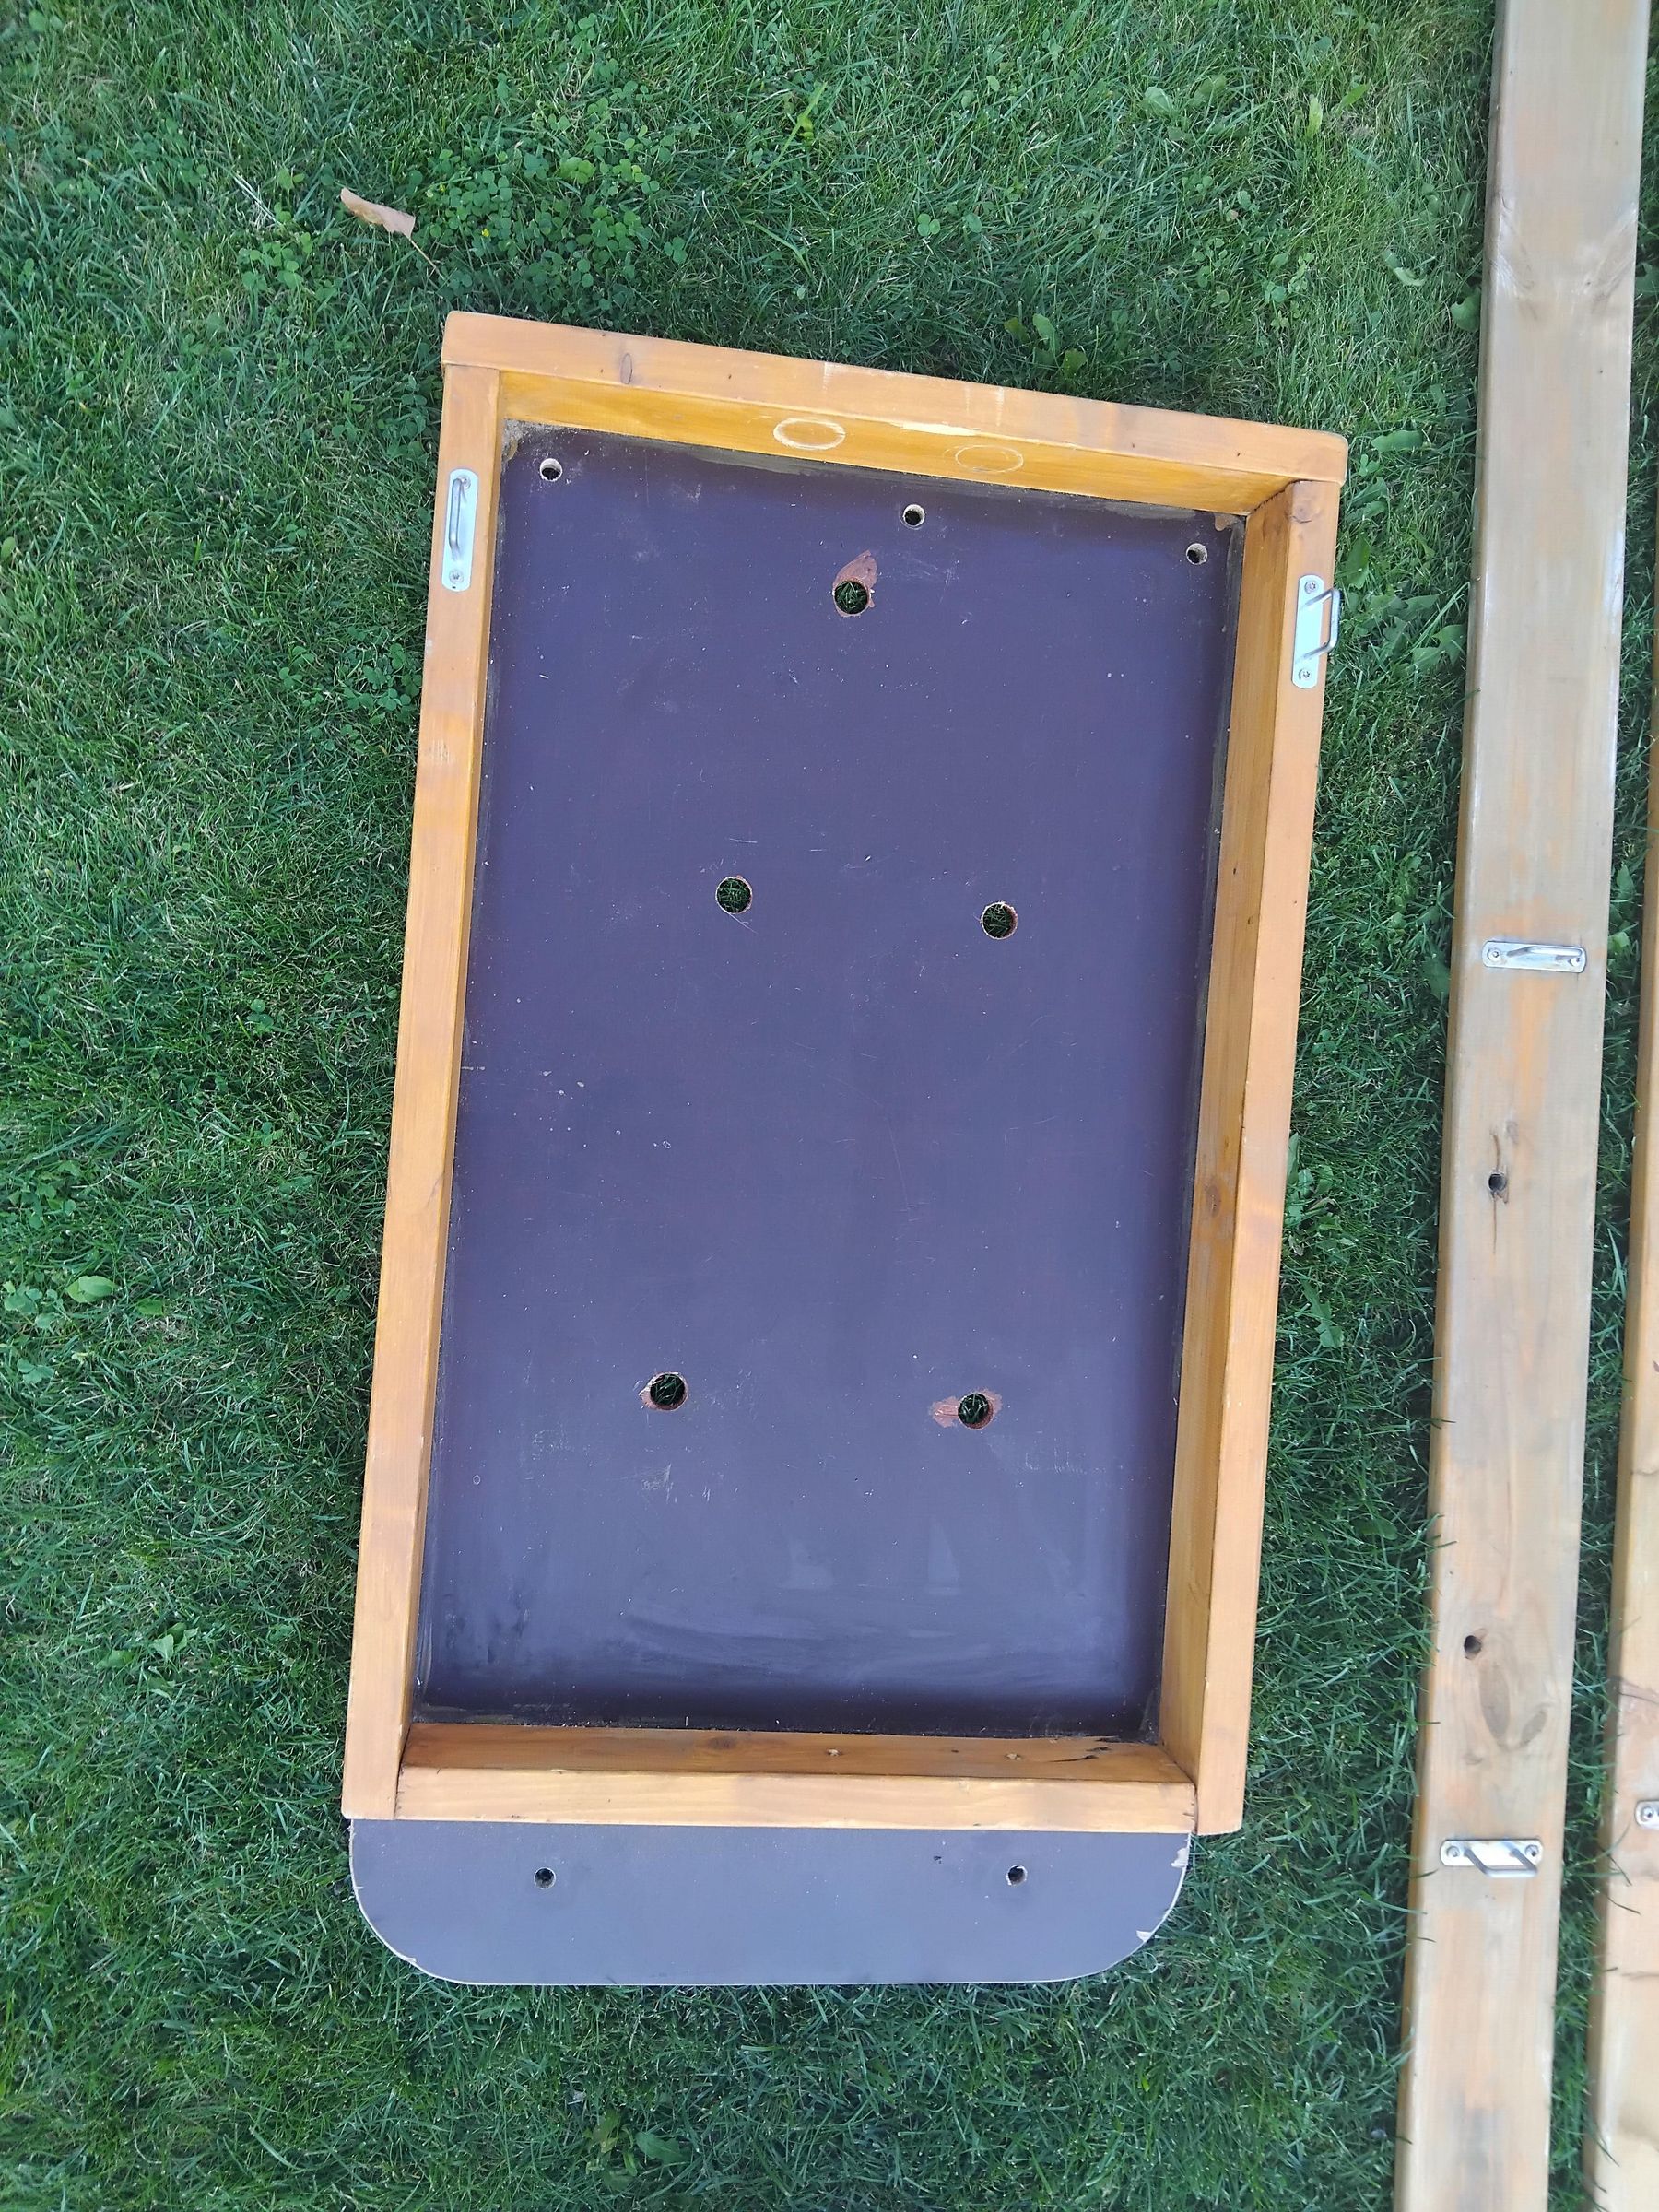
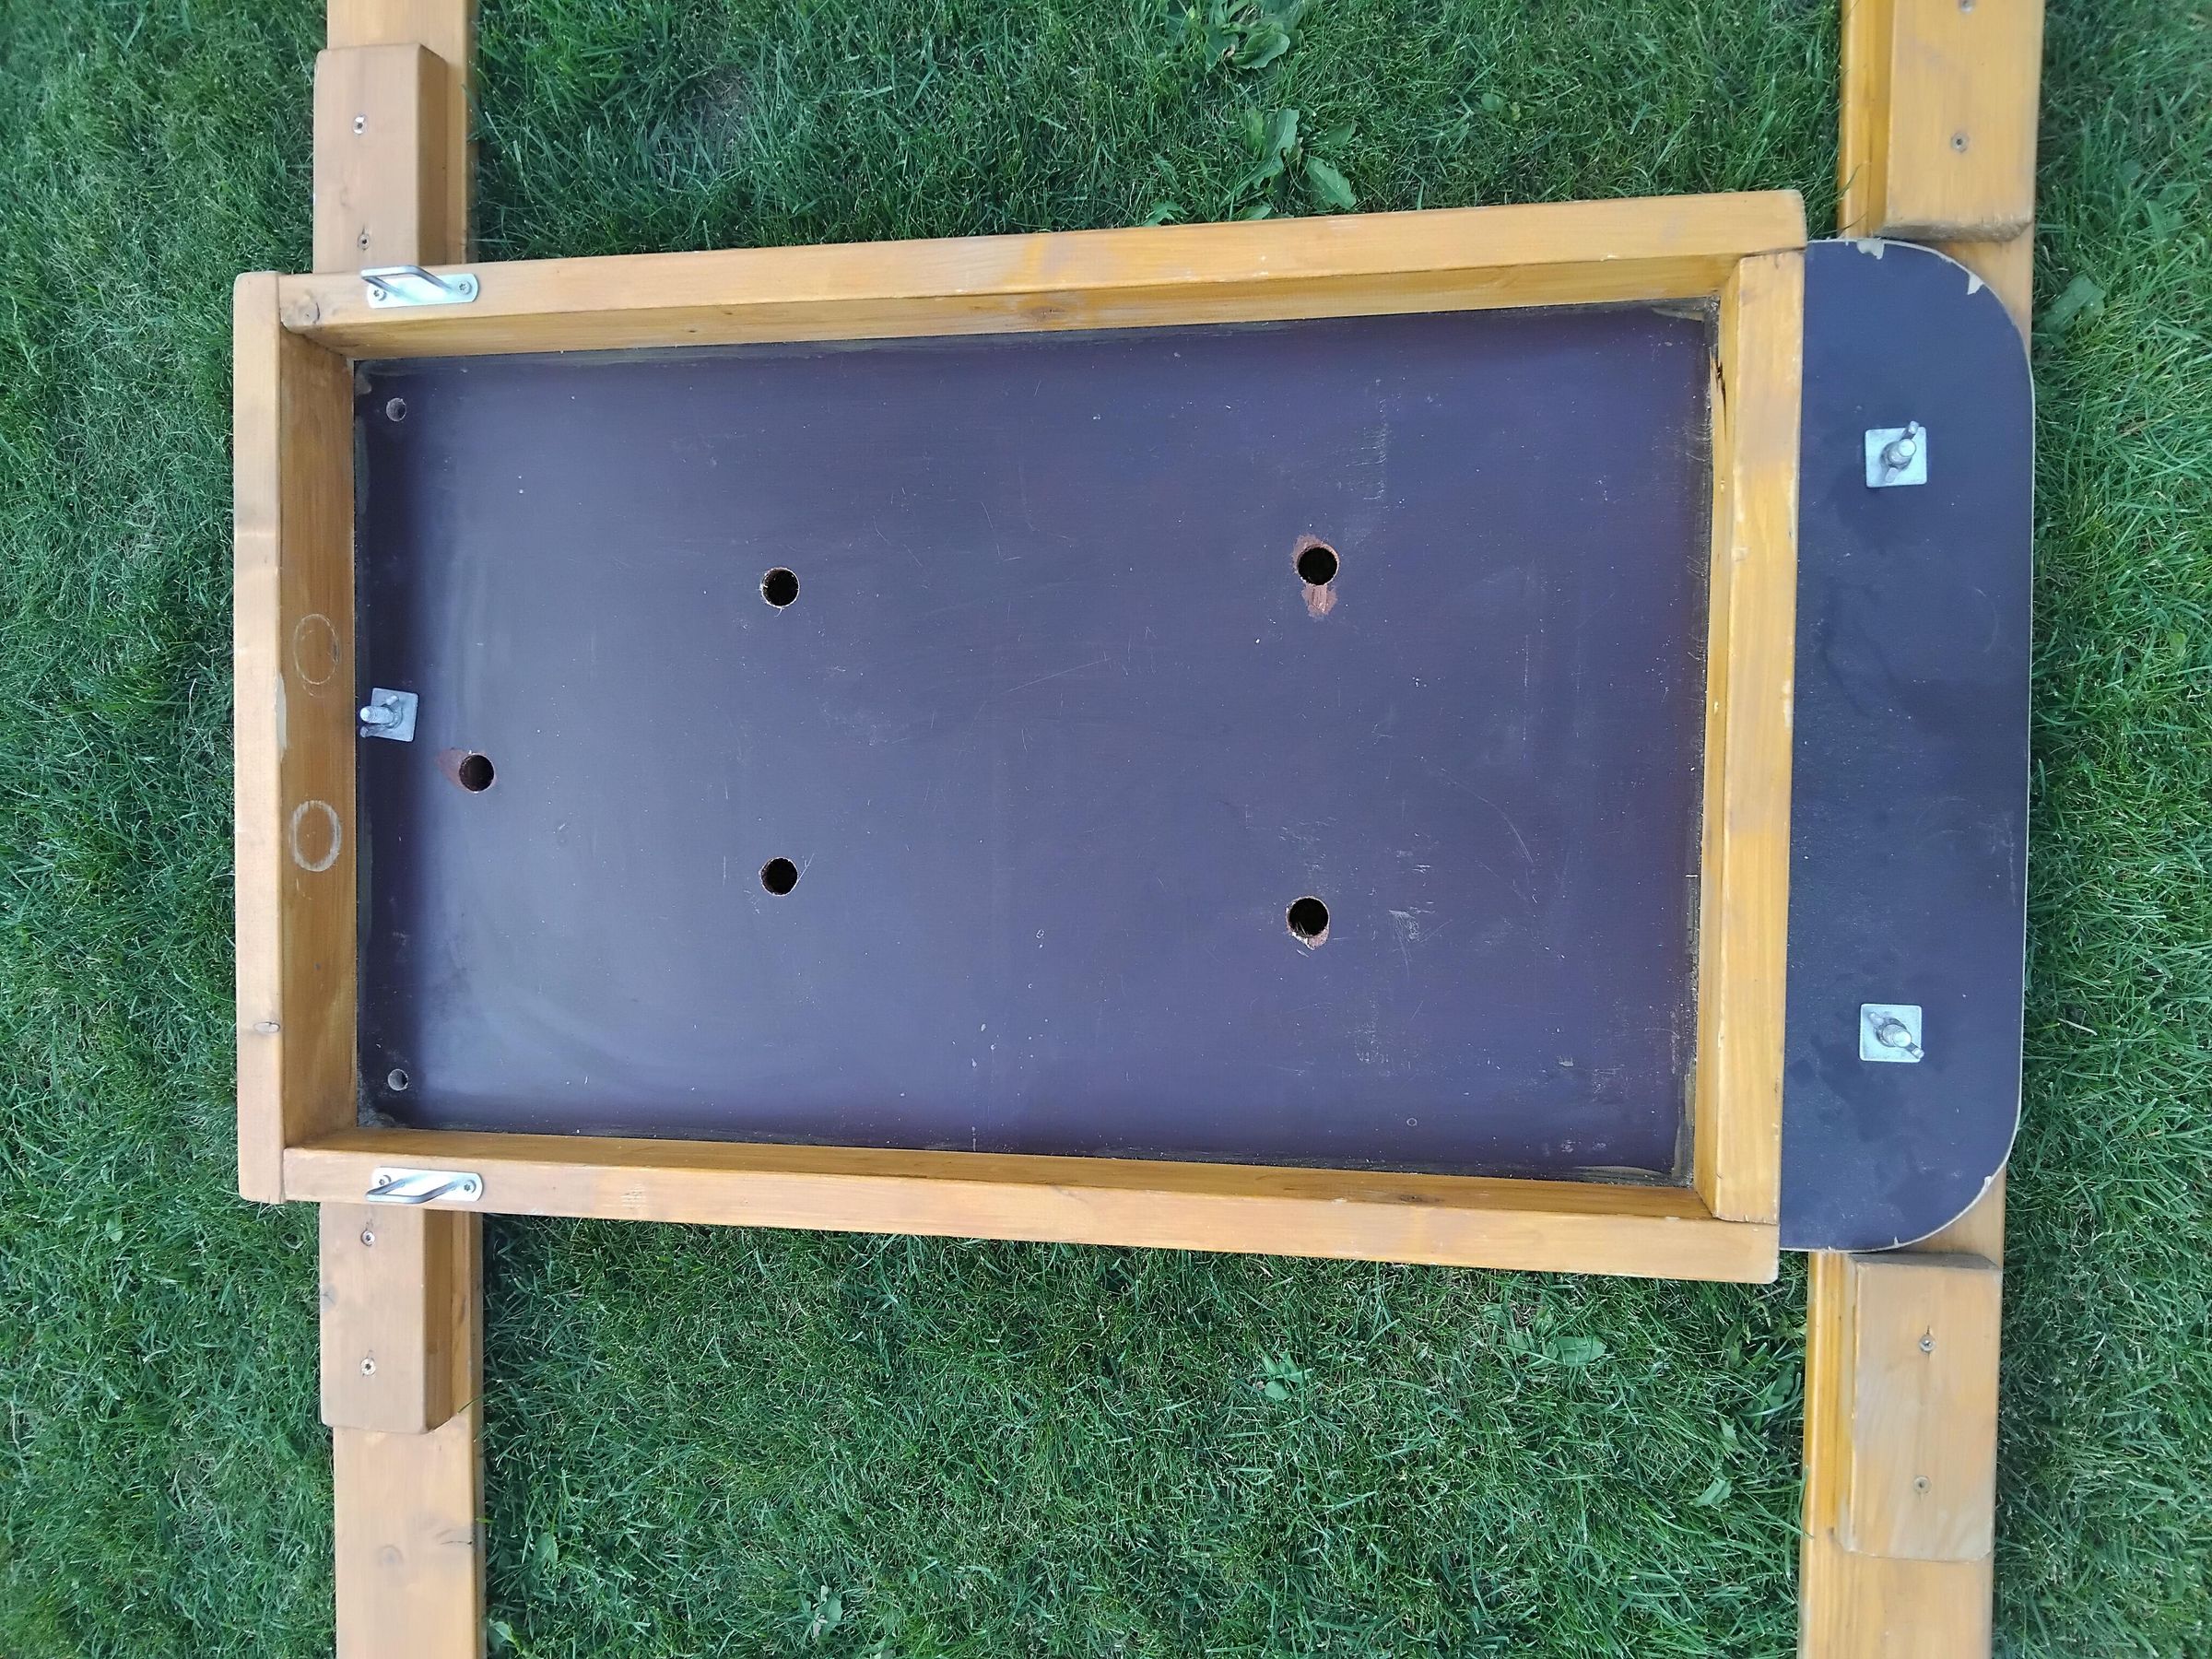
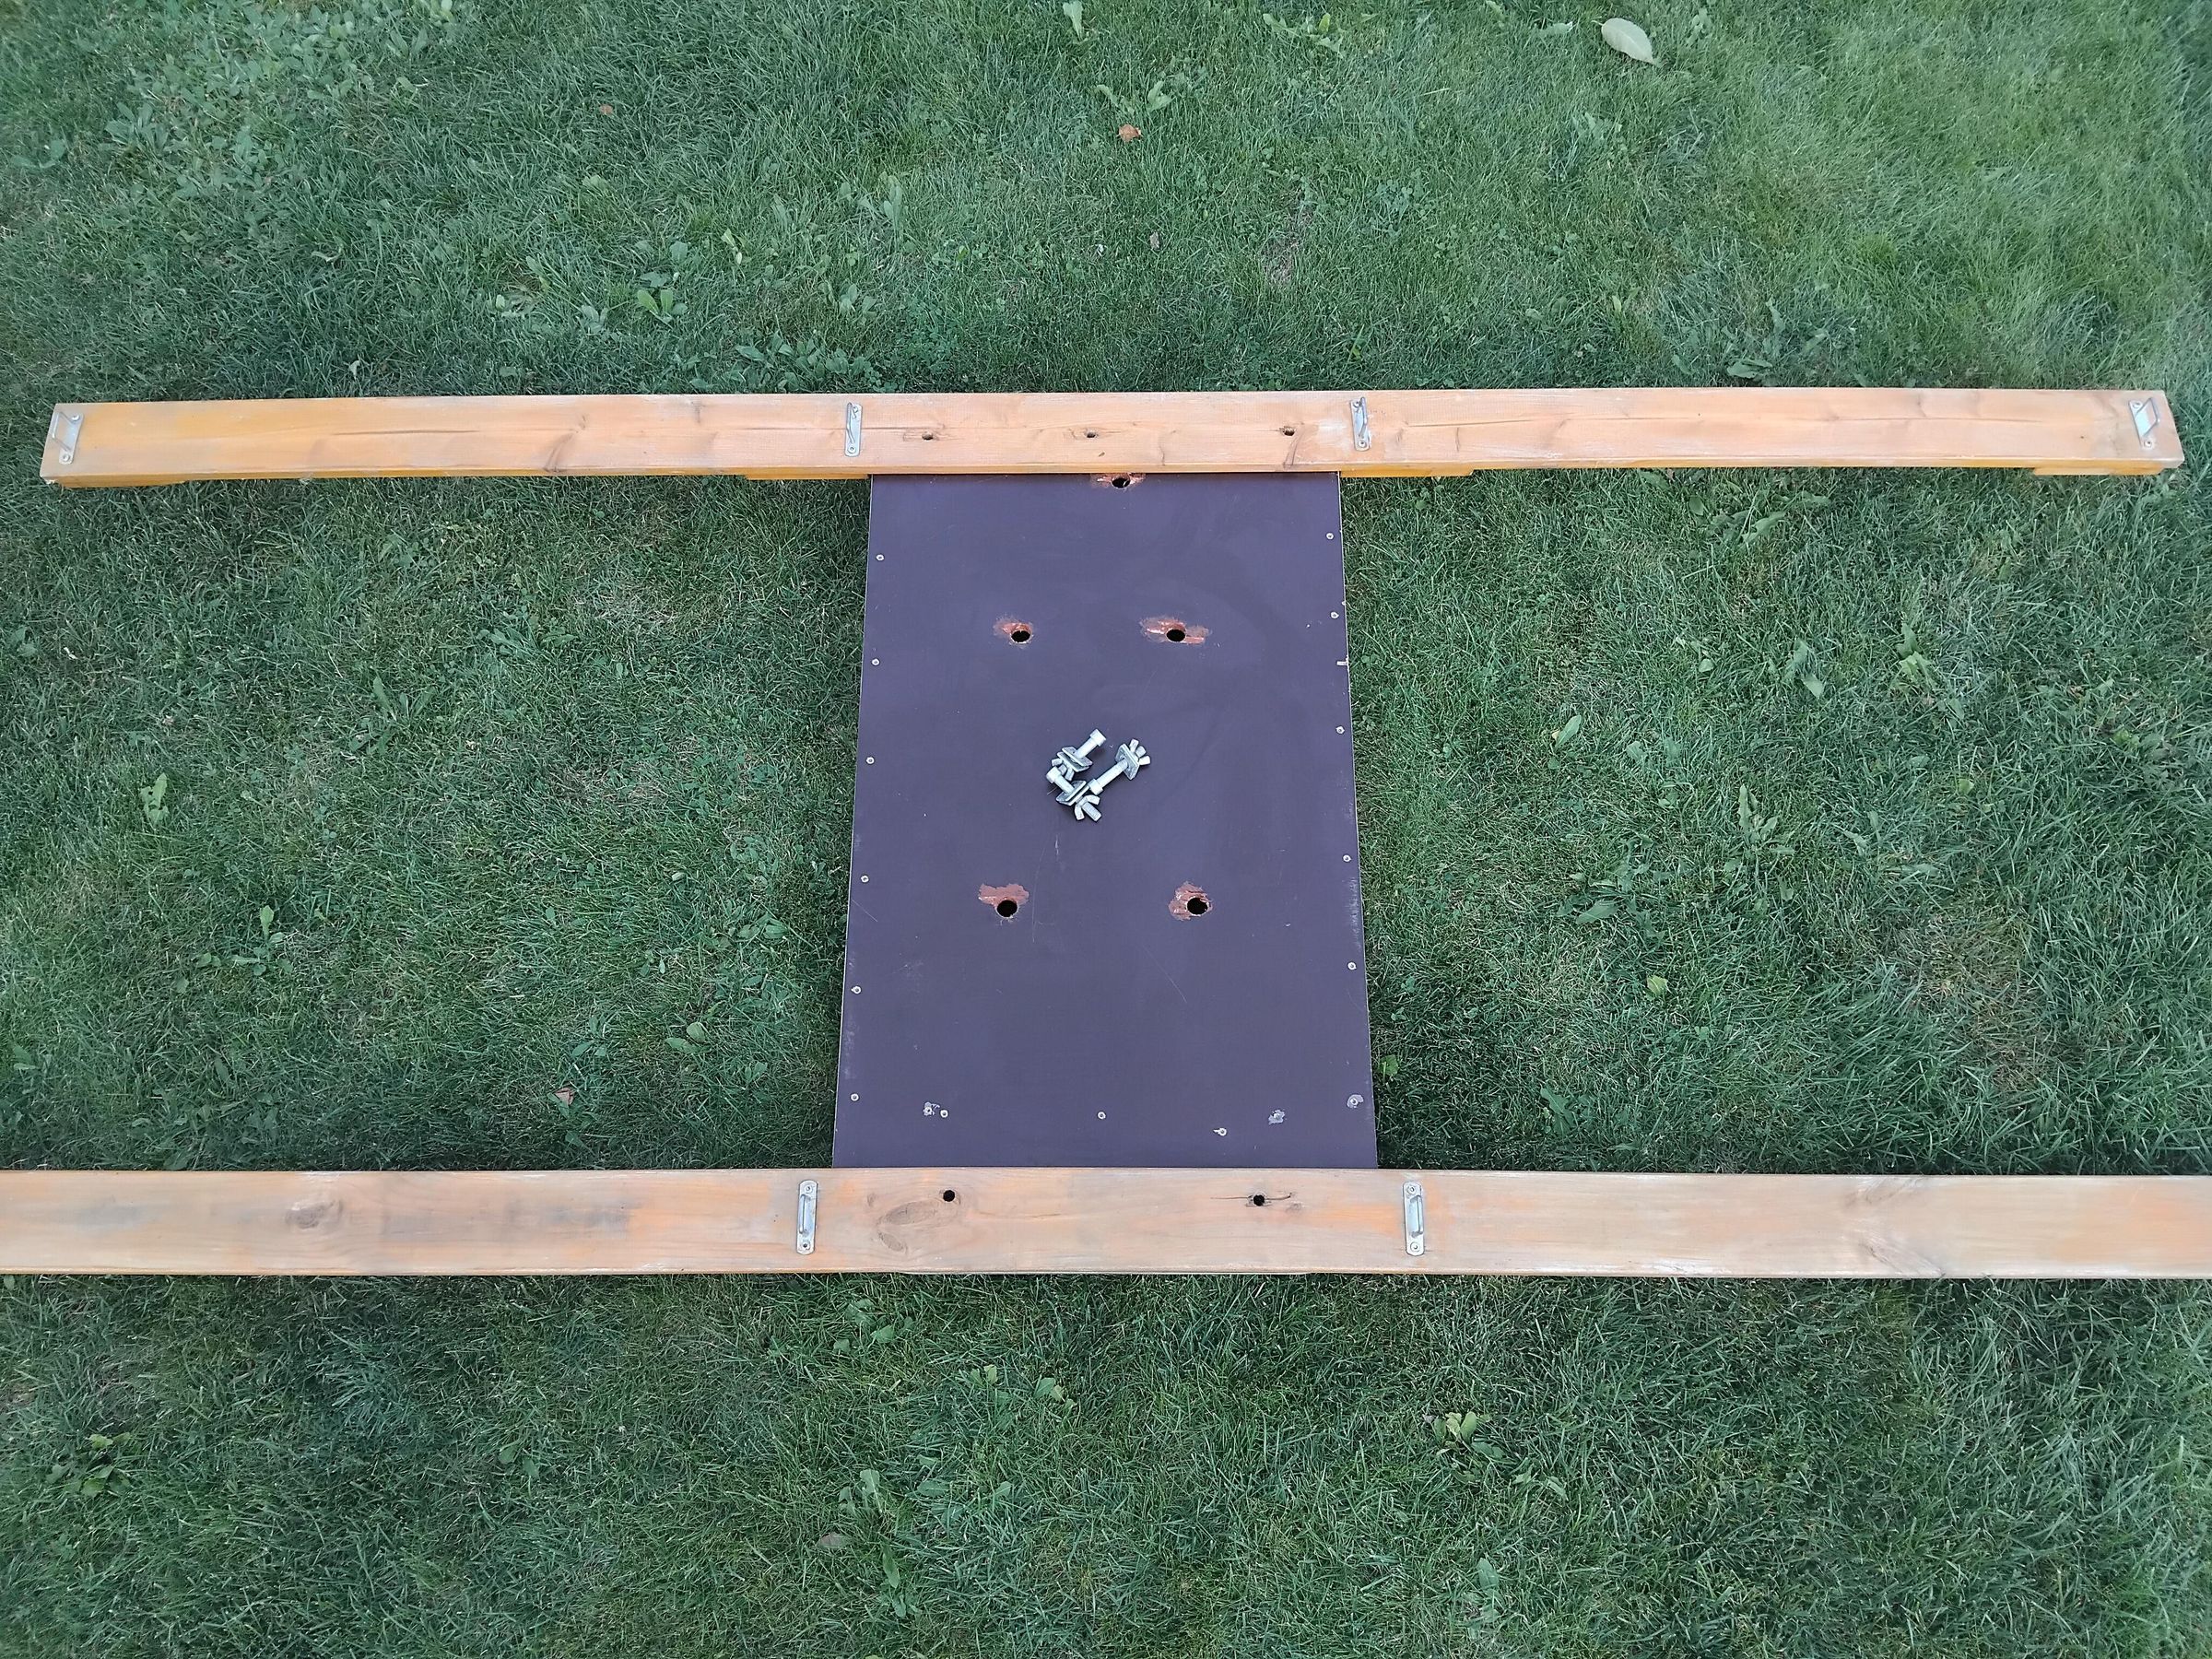
The panel is a salvaged piece of 12 mm laminated plywood, 955 x 515 mm. Paint all the cut edges. The faces are waterproof, the edges are not, and this thing lives in water. I used simple acrylic paint.
One end sticks out 130 mm past the tray frame. That is not decoration. The tongue reaches over the front beam so the two front bolts have something to go through.
Four big holes in the middle of the panel let rain and water splash to drain through instead of sitting around the battery. There is a fifth hole near the back beam.
On top goes a pine frame, four rails forming an open box. That is the battery tray. The same rails are what the motor clamps to later, so do not build them light. Eight screws per side, four along each rail. The corners are not braced.
I'm planning to add extra strap to strap the battery in, so it can hold extra firm. The battery is very heave (~30 kg in my case), so it sits well, but, strapping it in would not hurt.
The Bolt Joint
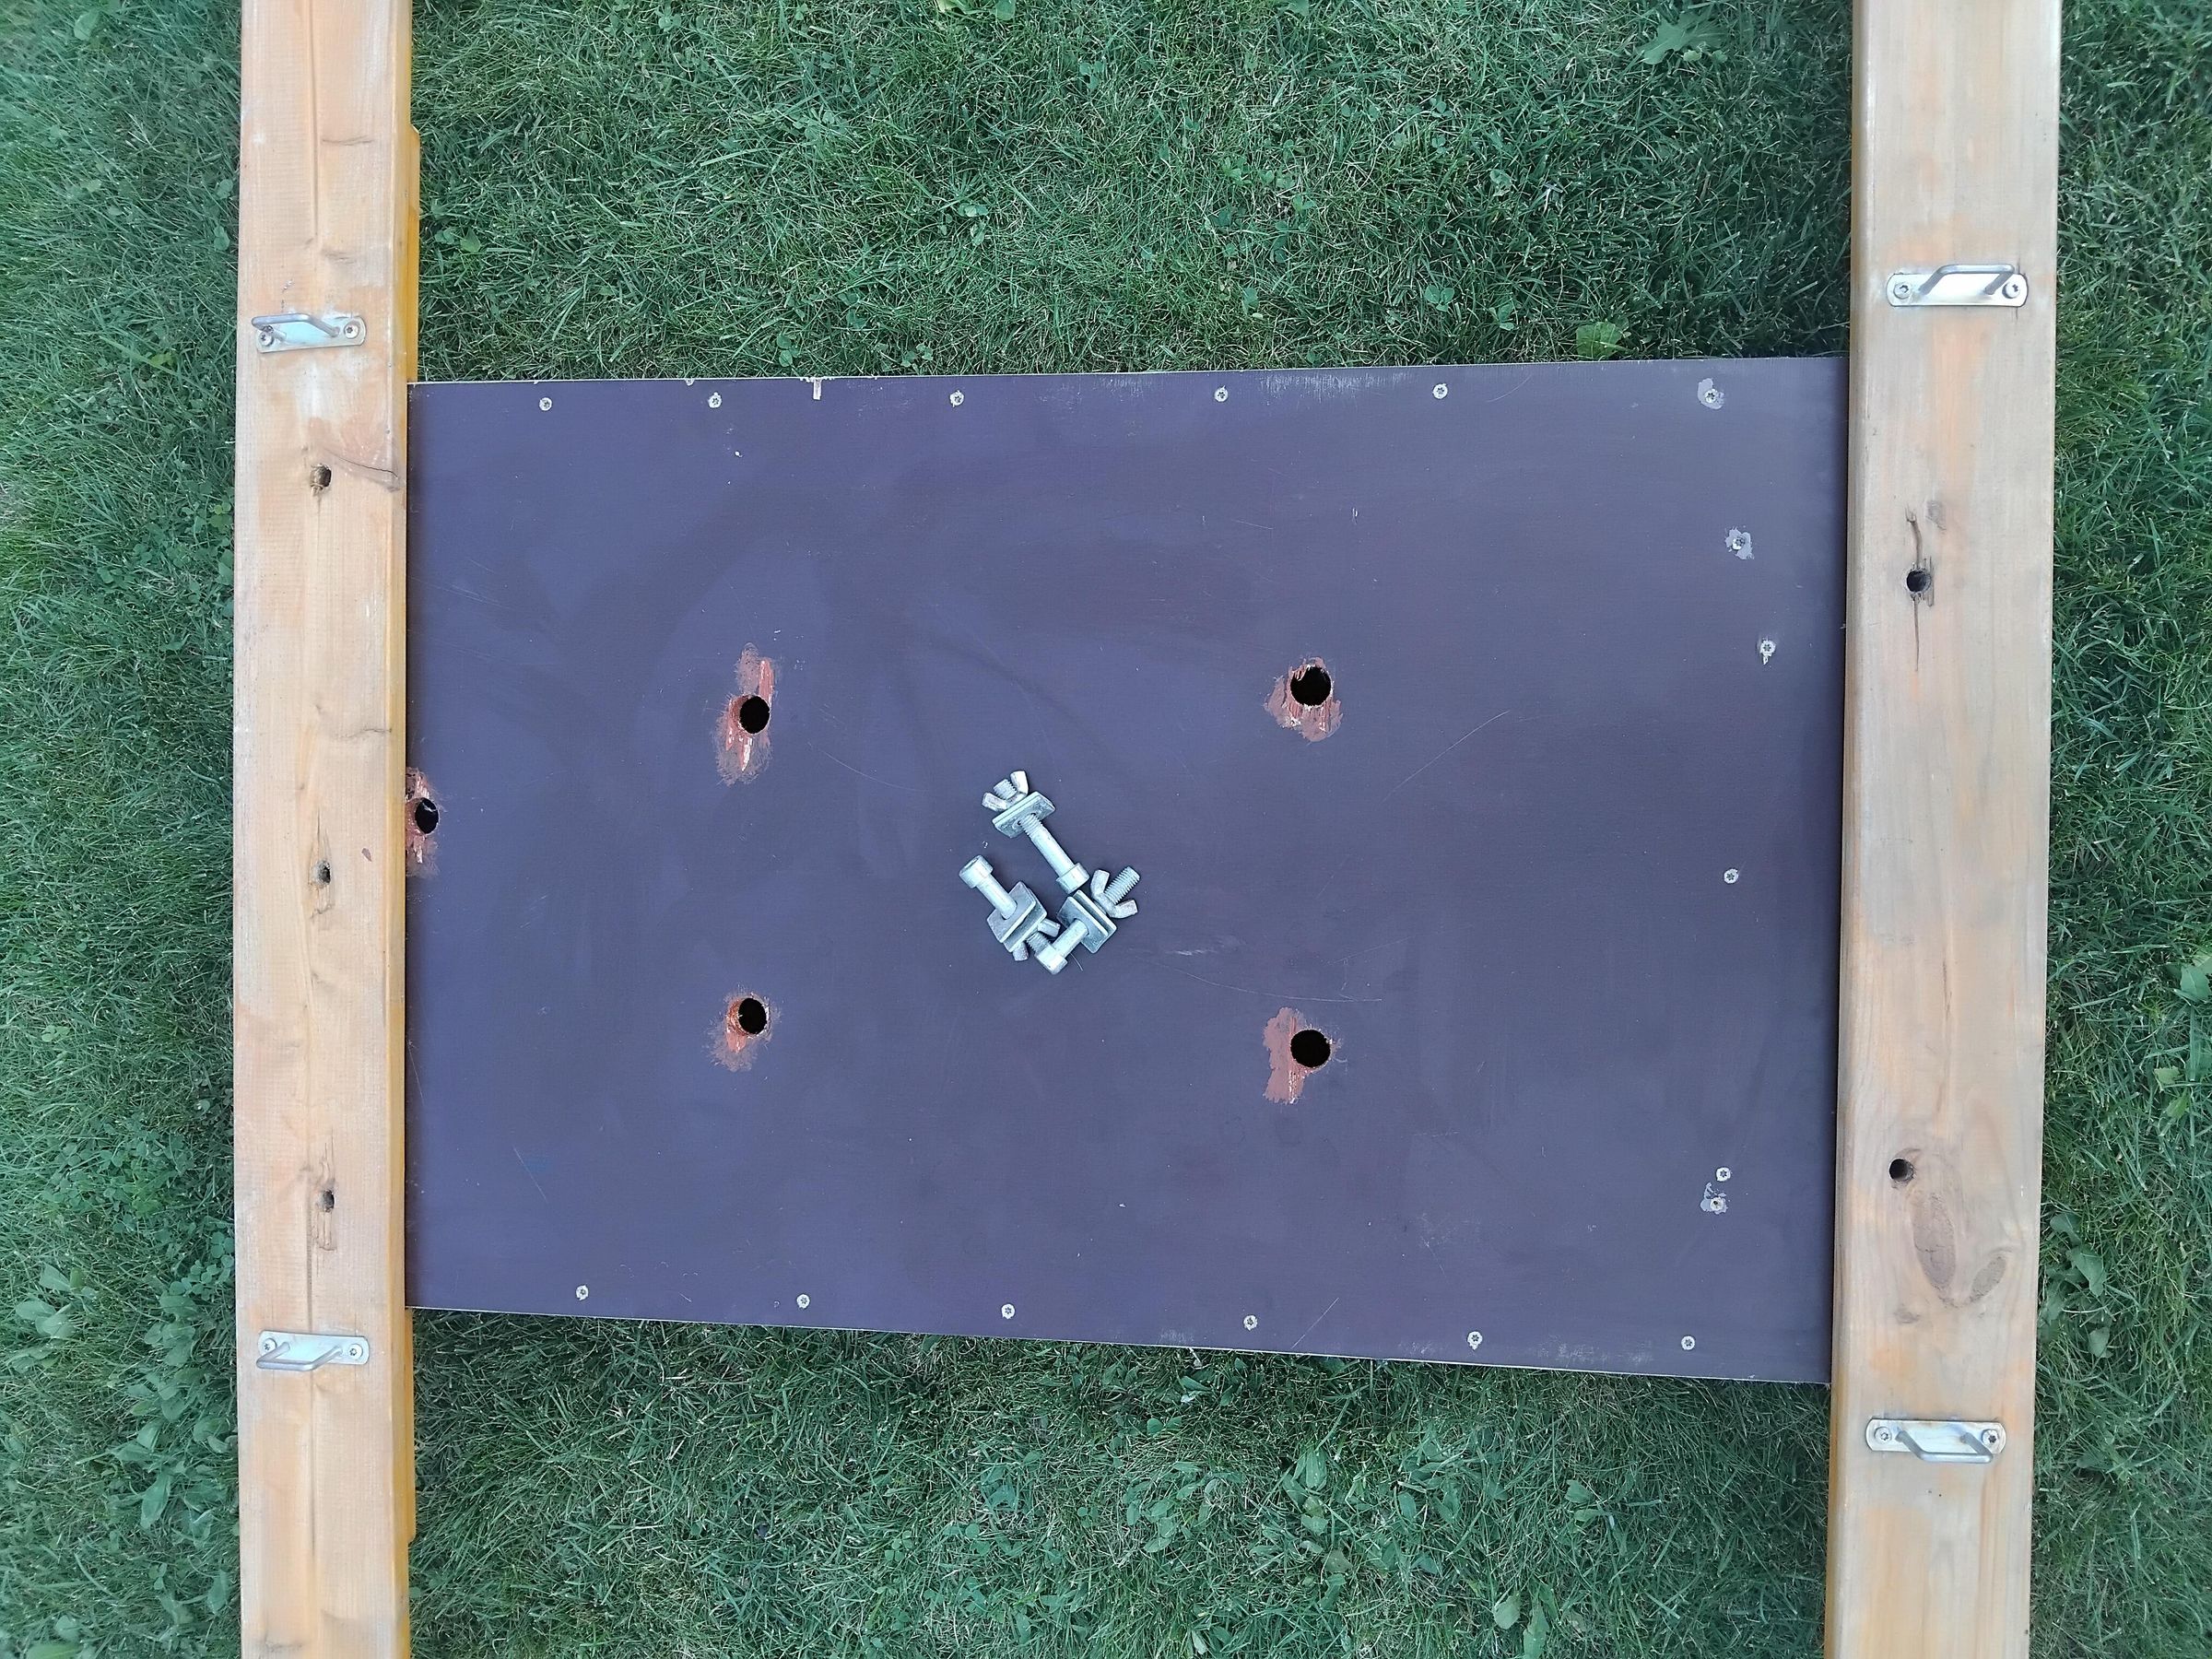
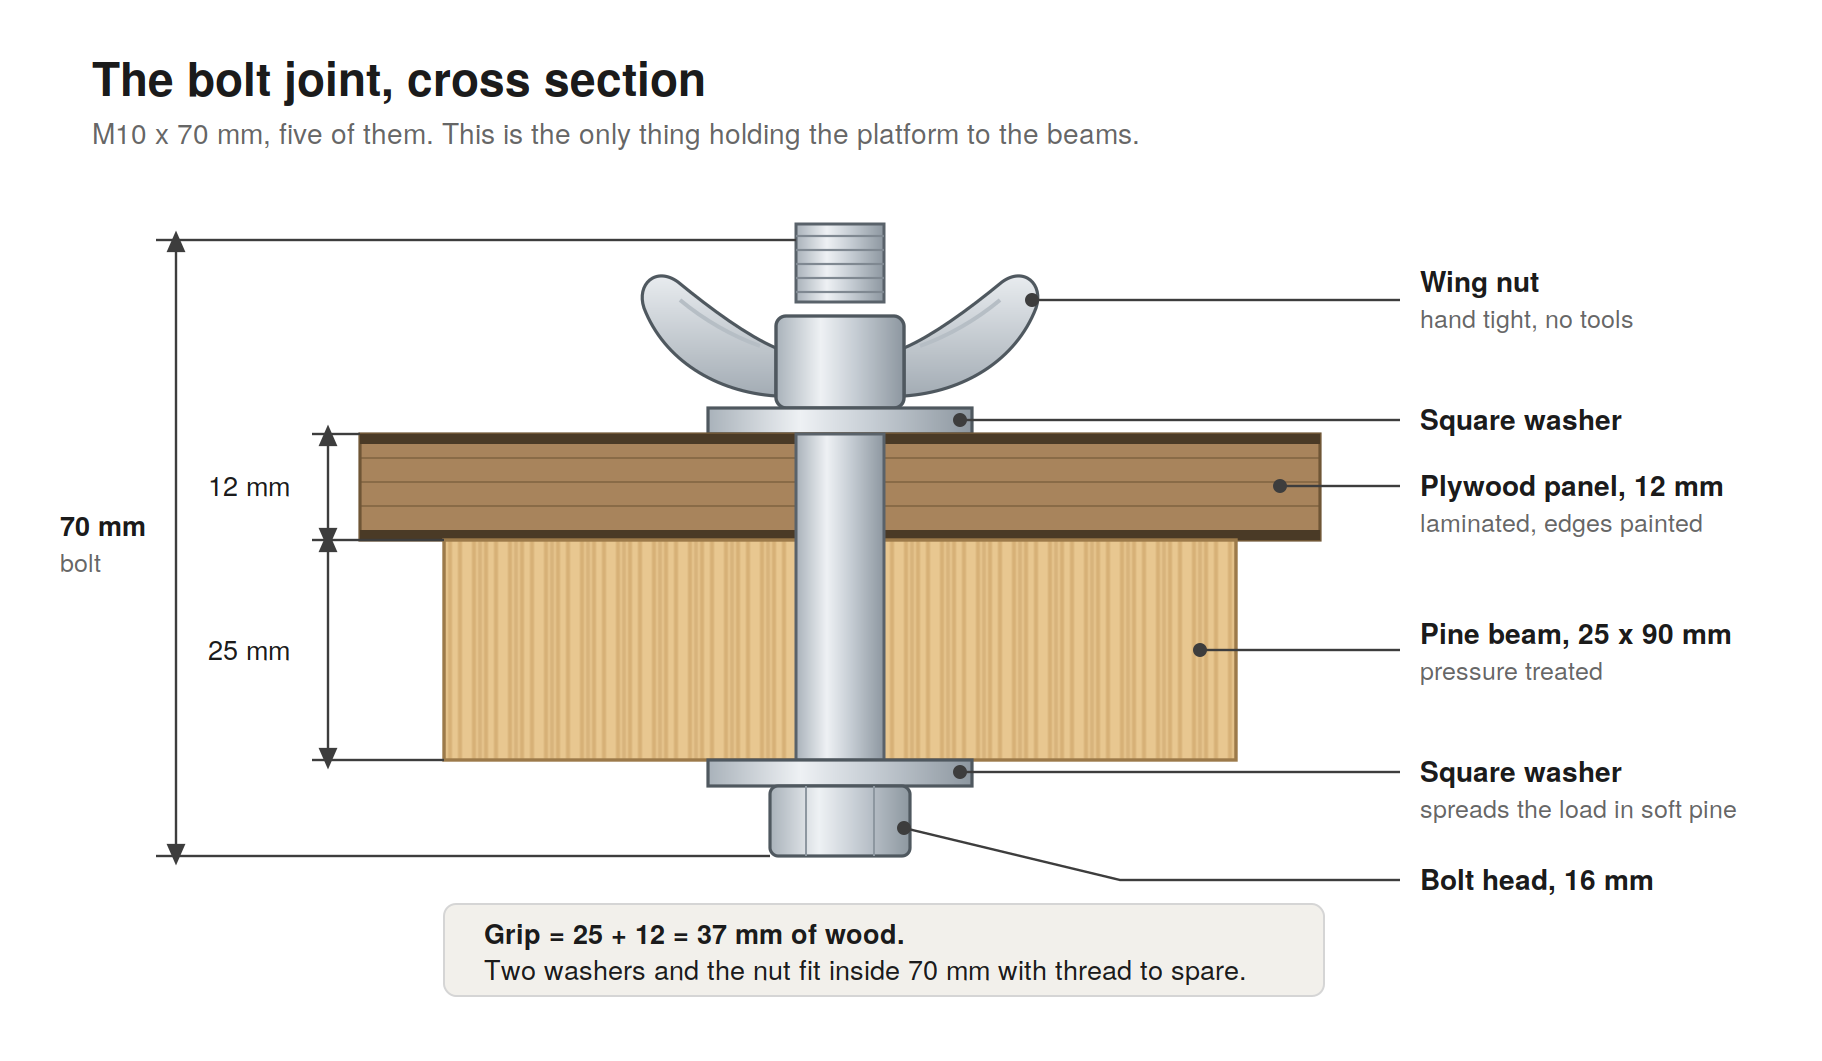
Five bolts hold the boat together, so this gets its own step.
M10 x 70 mm, each one going up from underneath the beam. From the bottom:
bolt head, 16 mm
square washer, spreads the load in soft pine
pine beam, 25 mm
plywood panel, 12 mm
squarewasher
wing nut, hand tight, no tools
25 plus 12 plus two washers, so a 70 mm bolt leaves enough thread for the nut.
Three bolts in the rear beam, two in the front. The rear gets the extra one because the motor hangs off that end. Four would probably do. The fifth costs 2 EUR and I sleep better.
Wing nuts because the whole boat has to be assembled with no tools & using bare hands. Five nuts, four straps, done.
Two at the front and three at the rear is not symmetric. It works. Building it again I would put three at both ends, so nothing can pivot on a single bolt.
Assembly
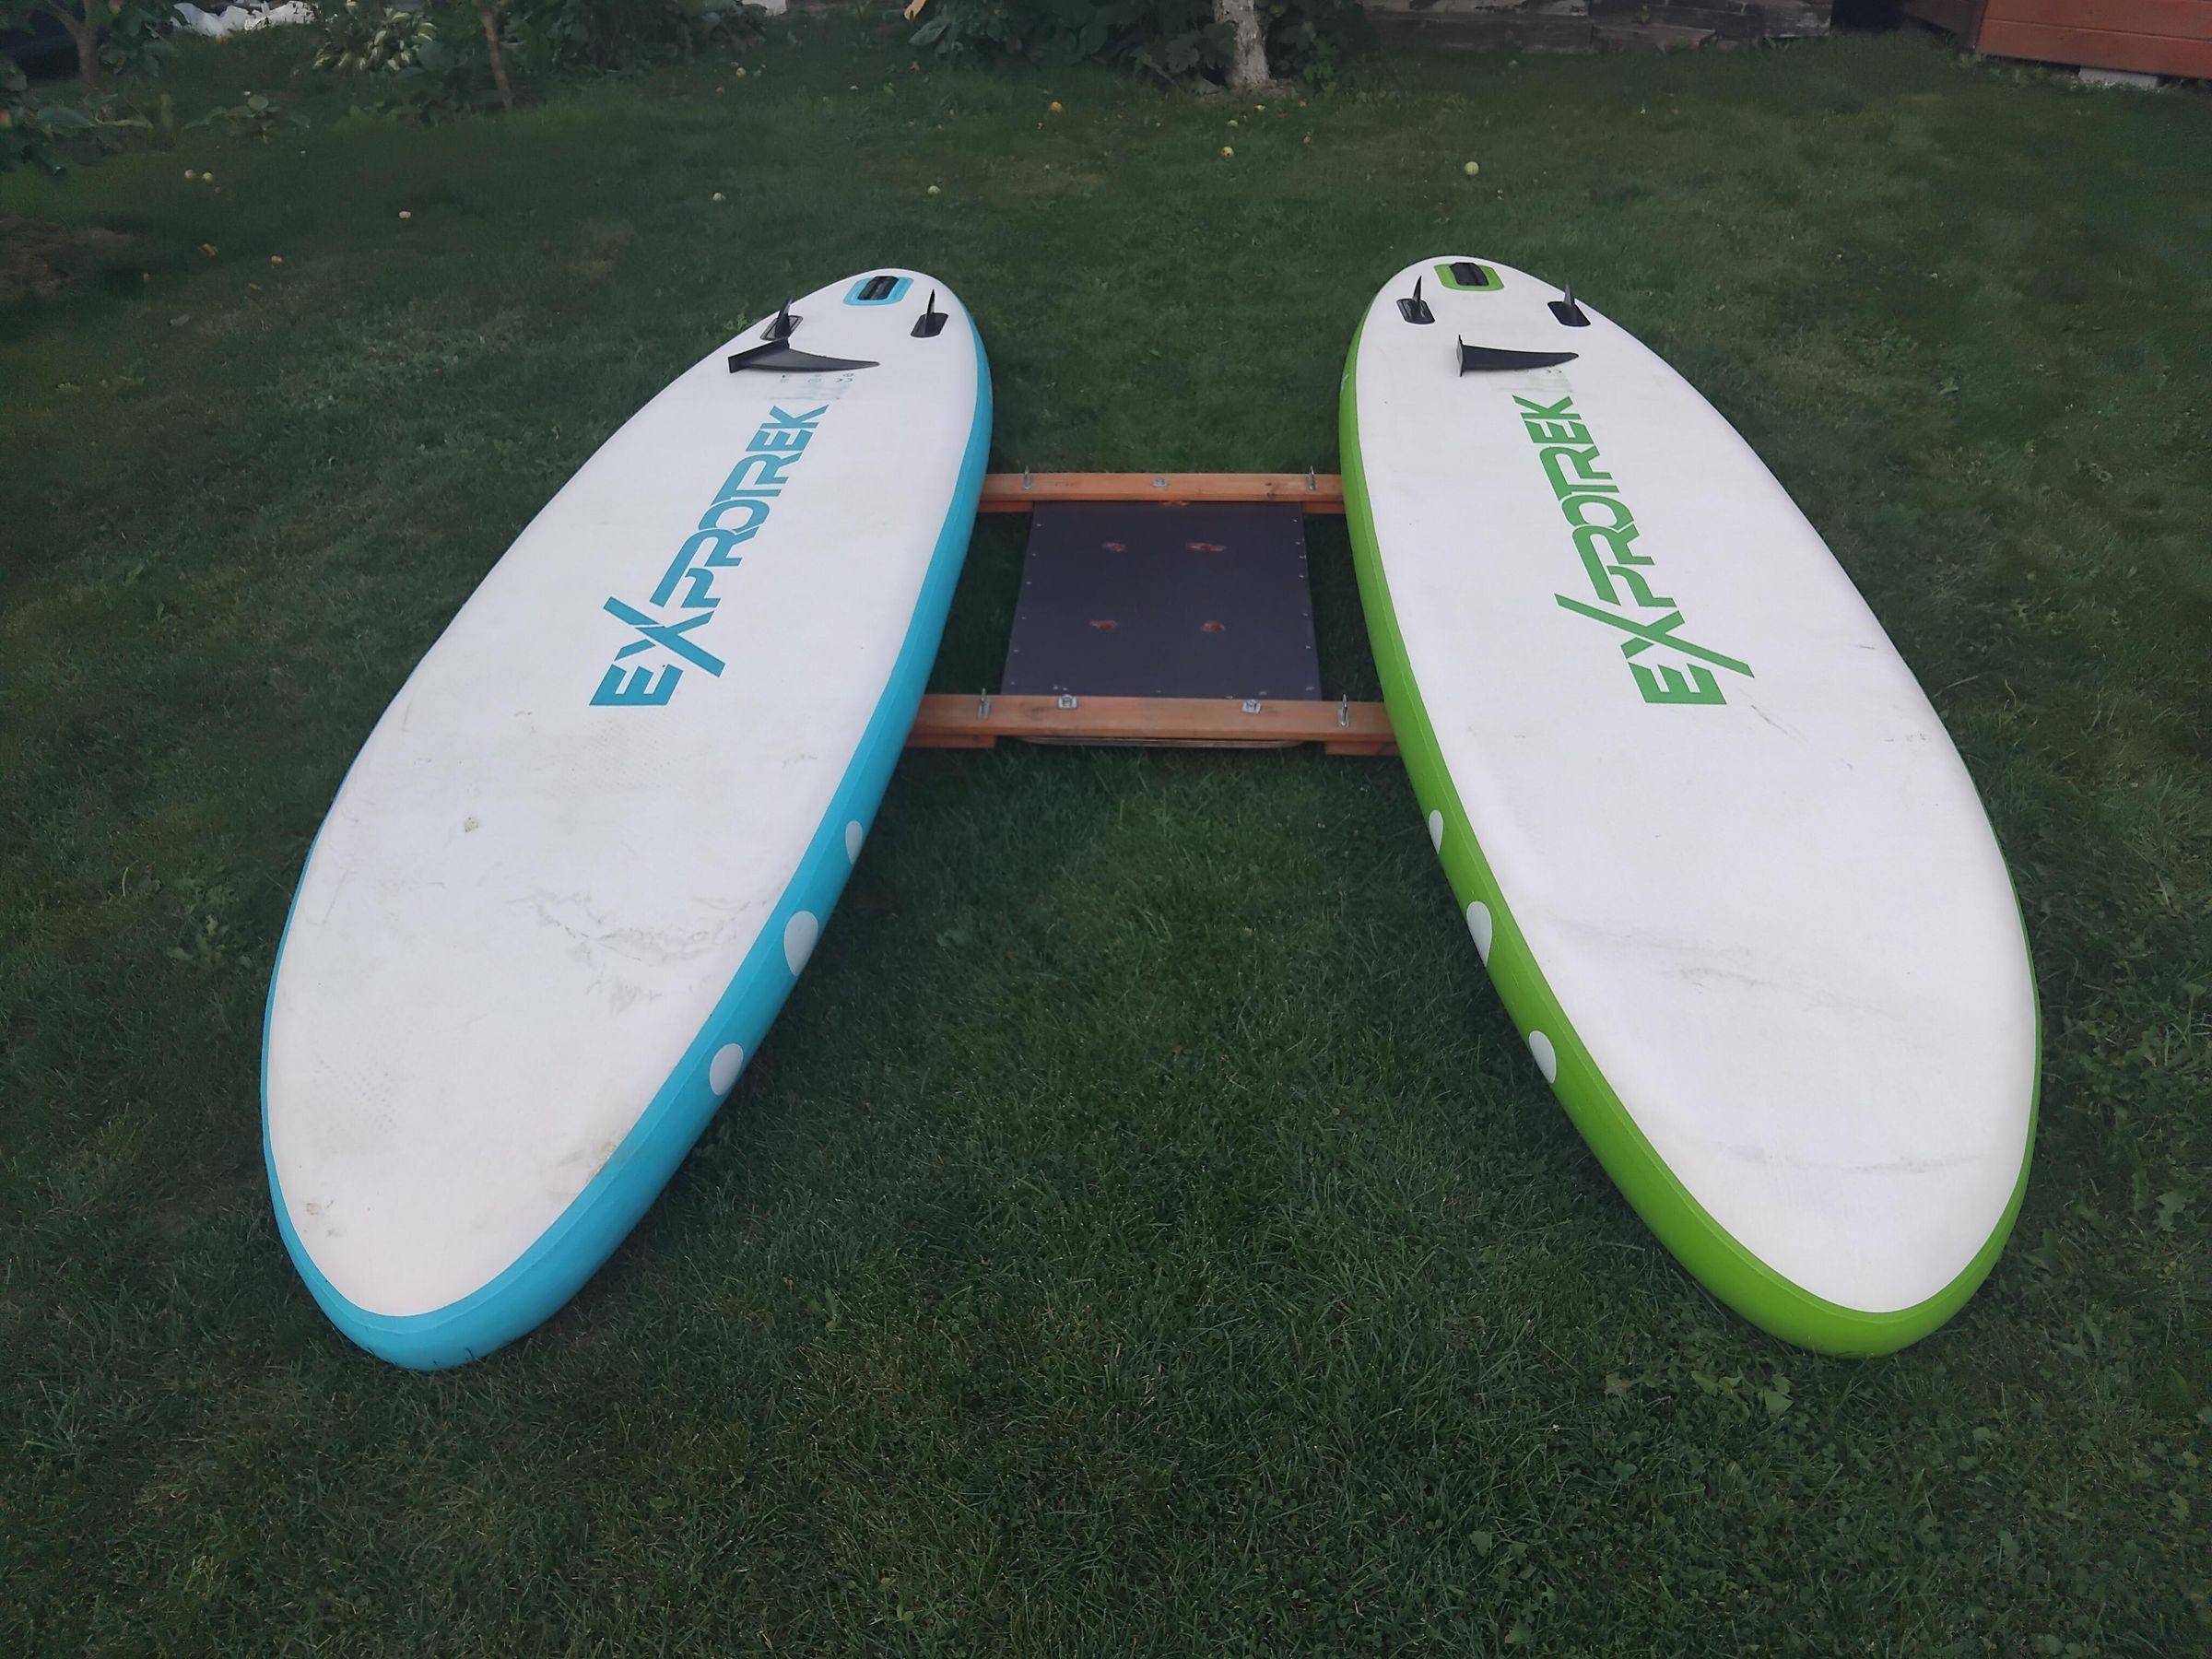
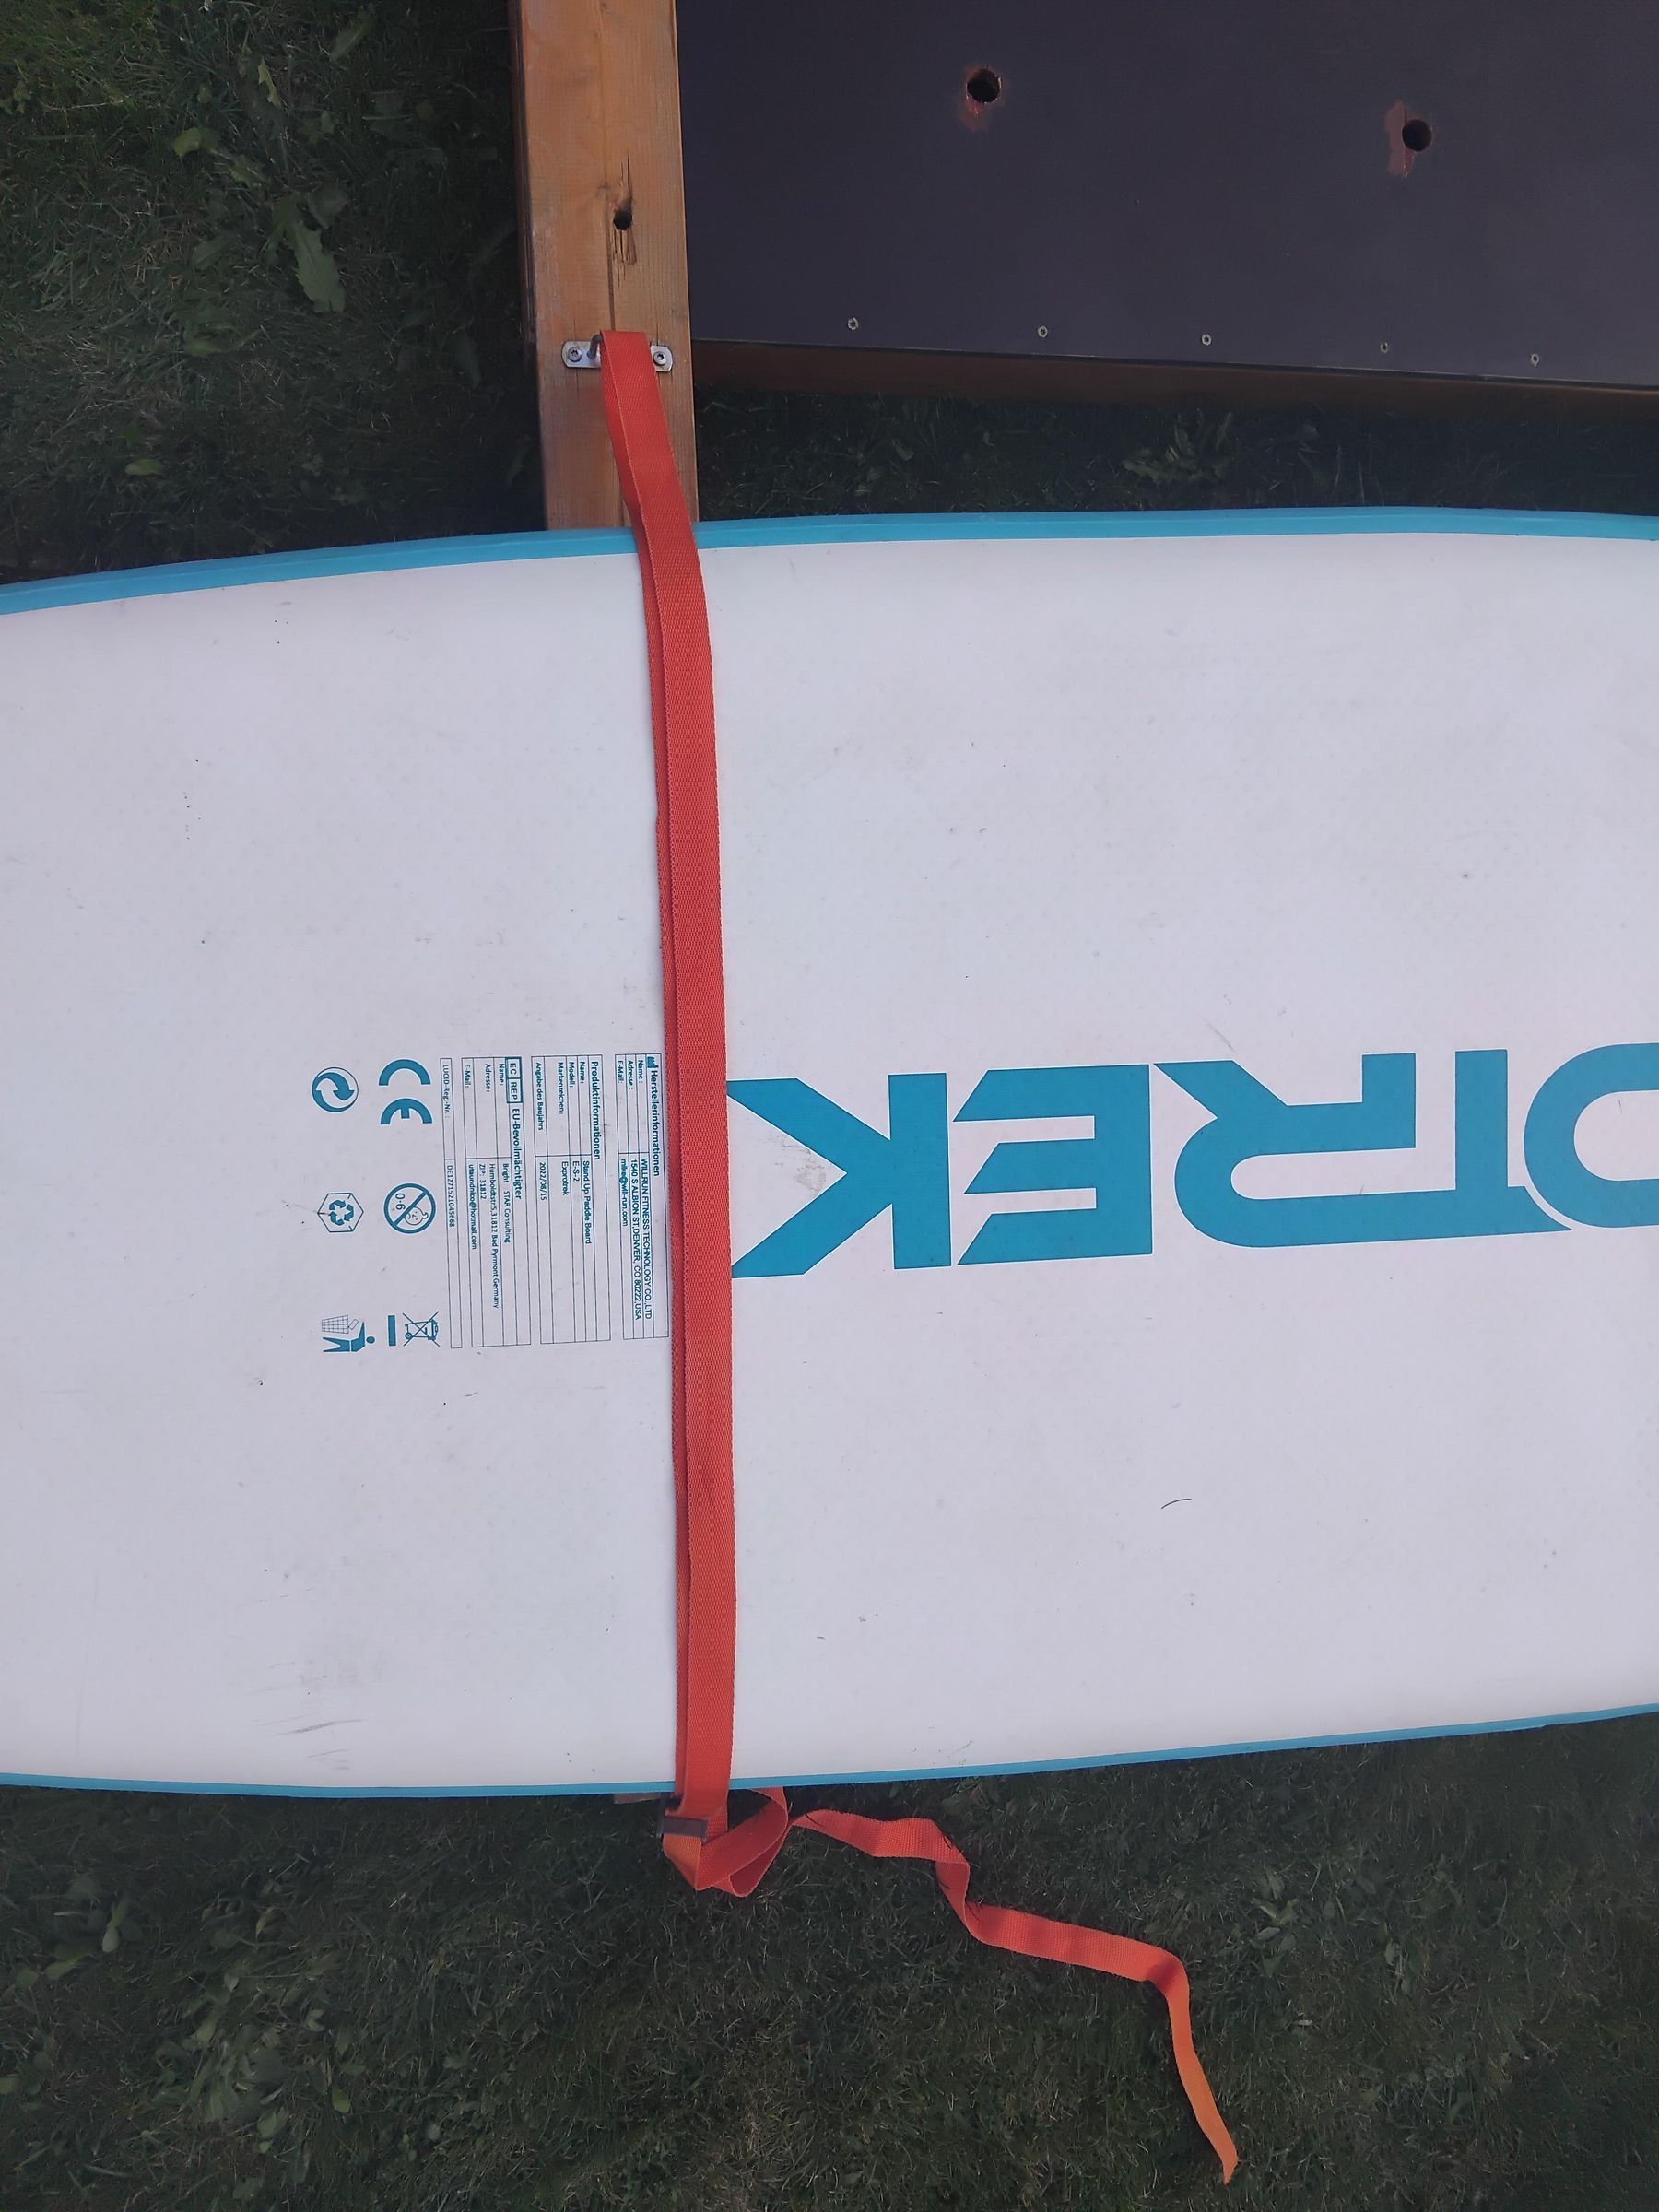
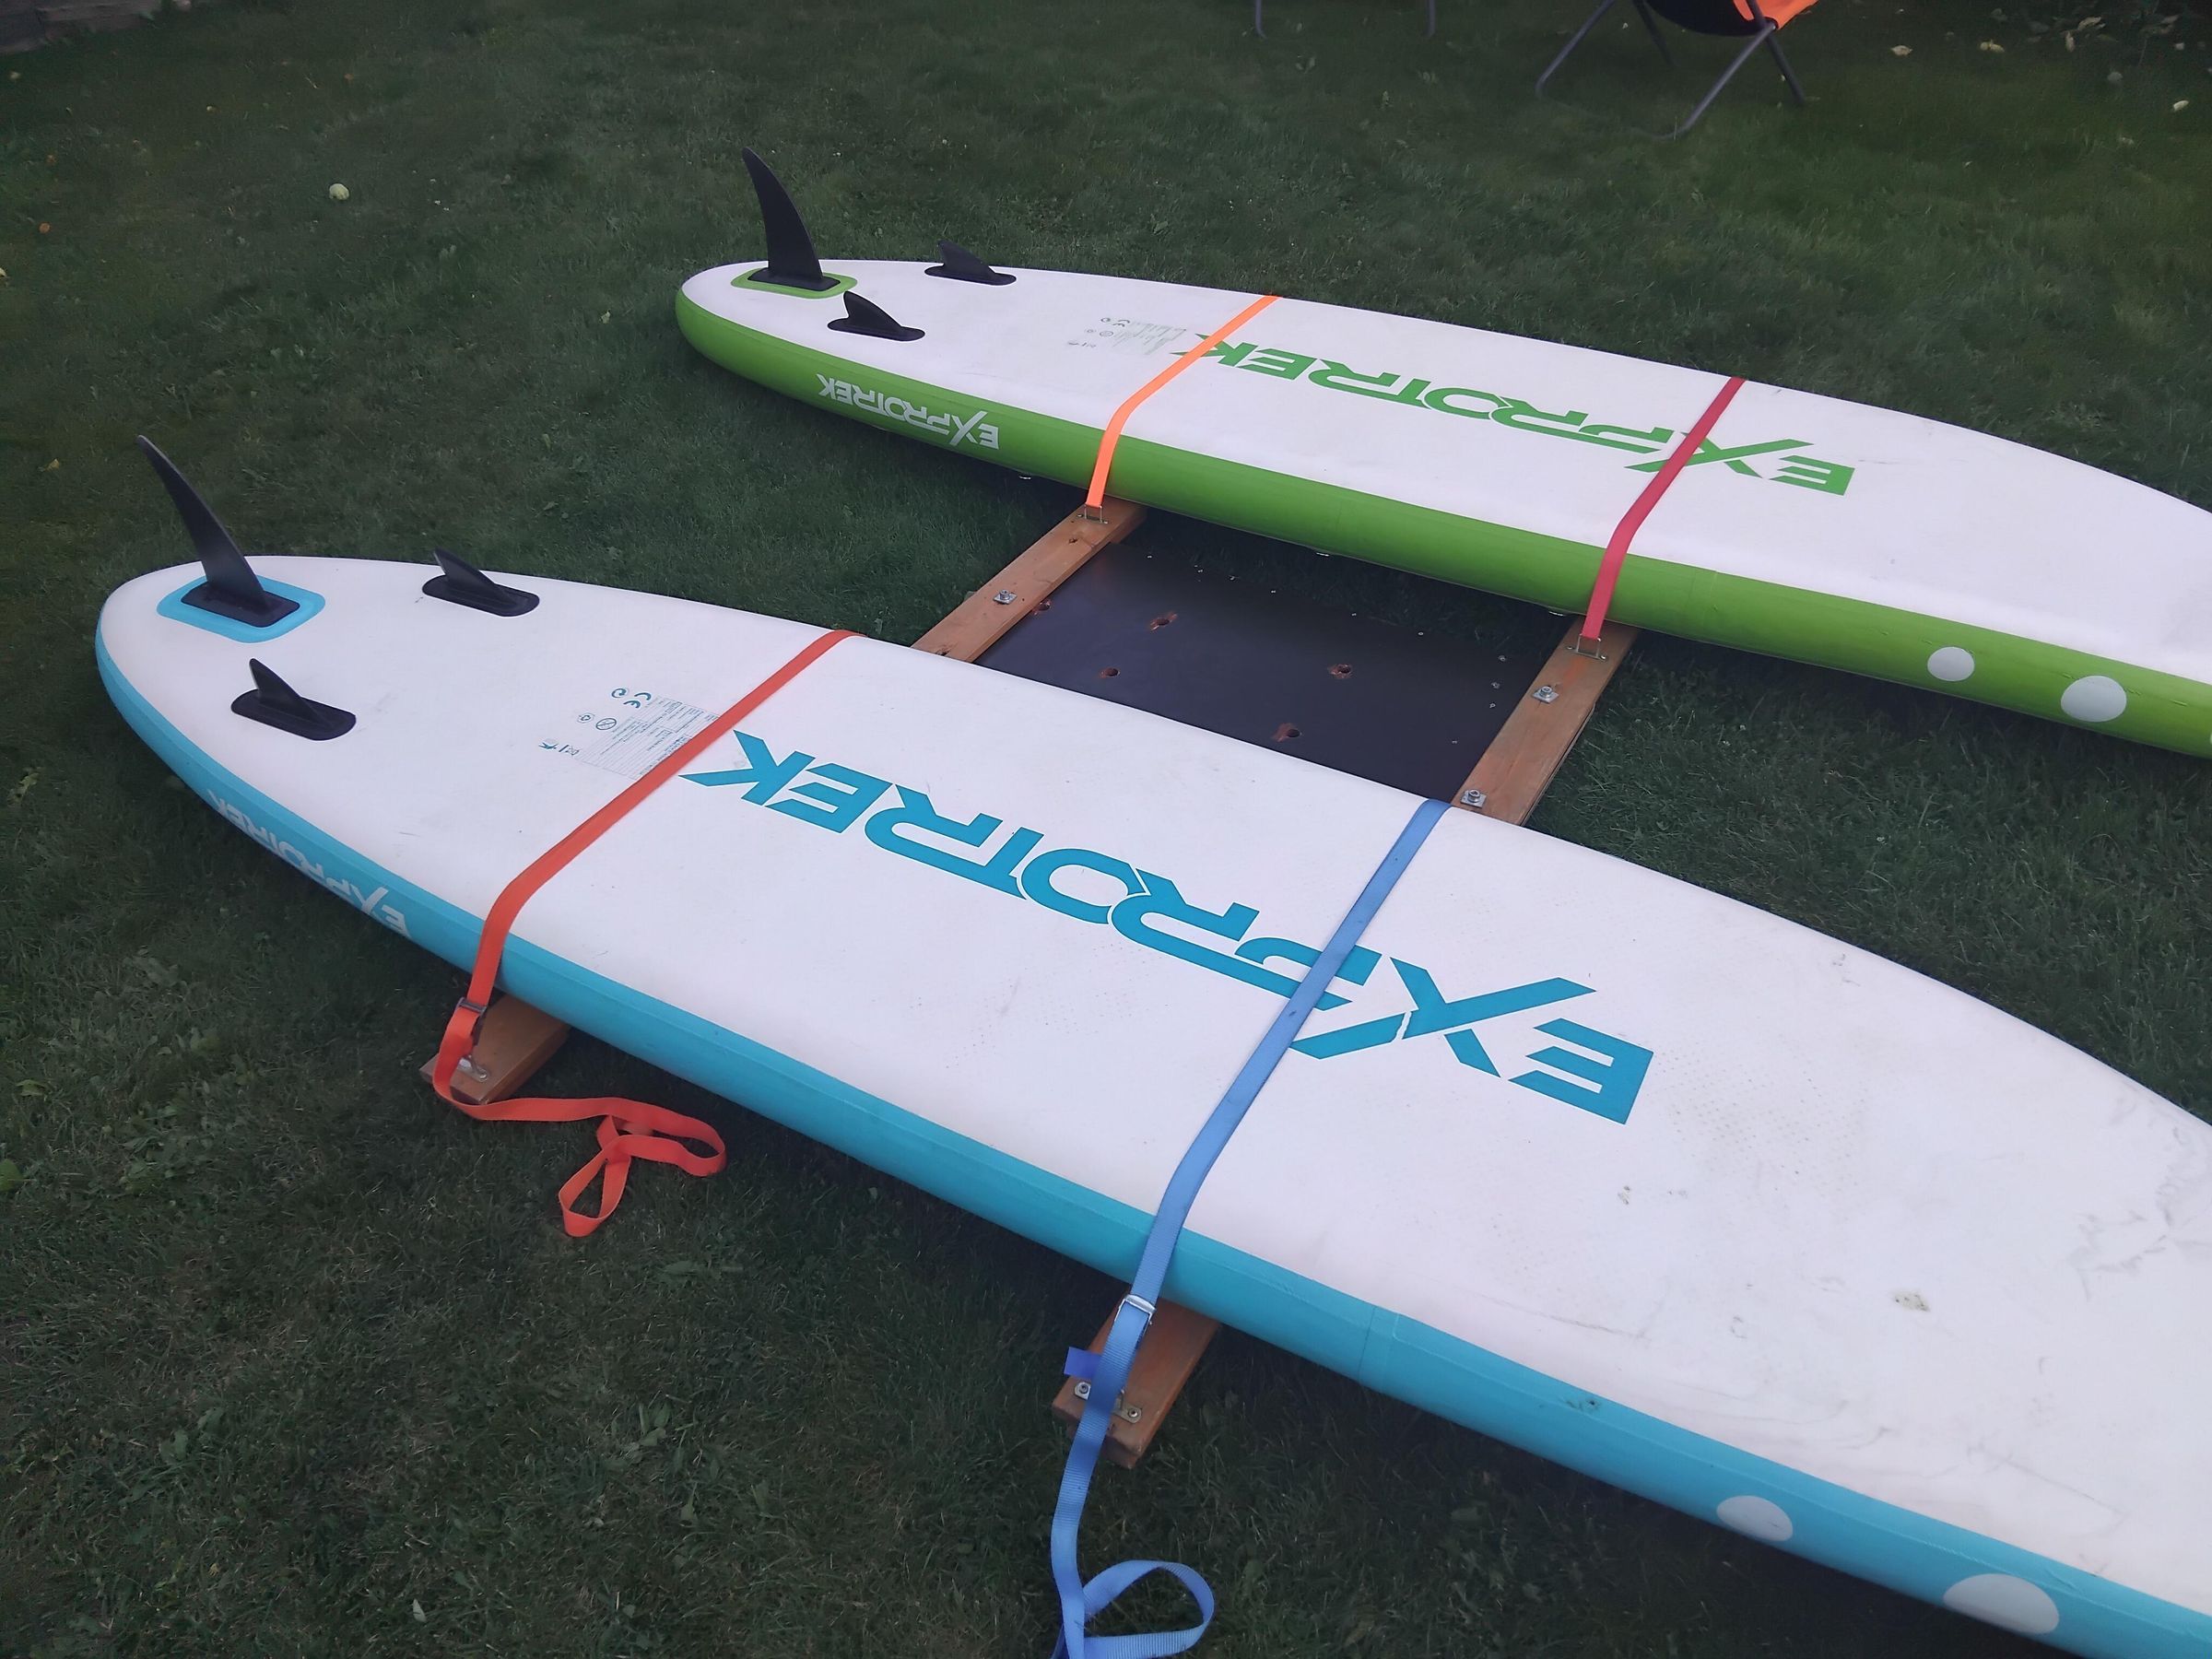
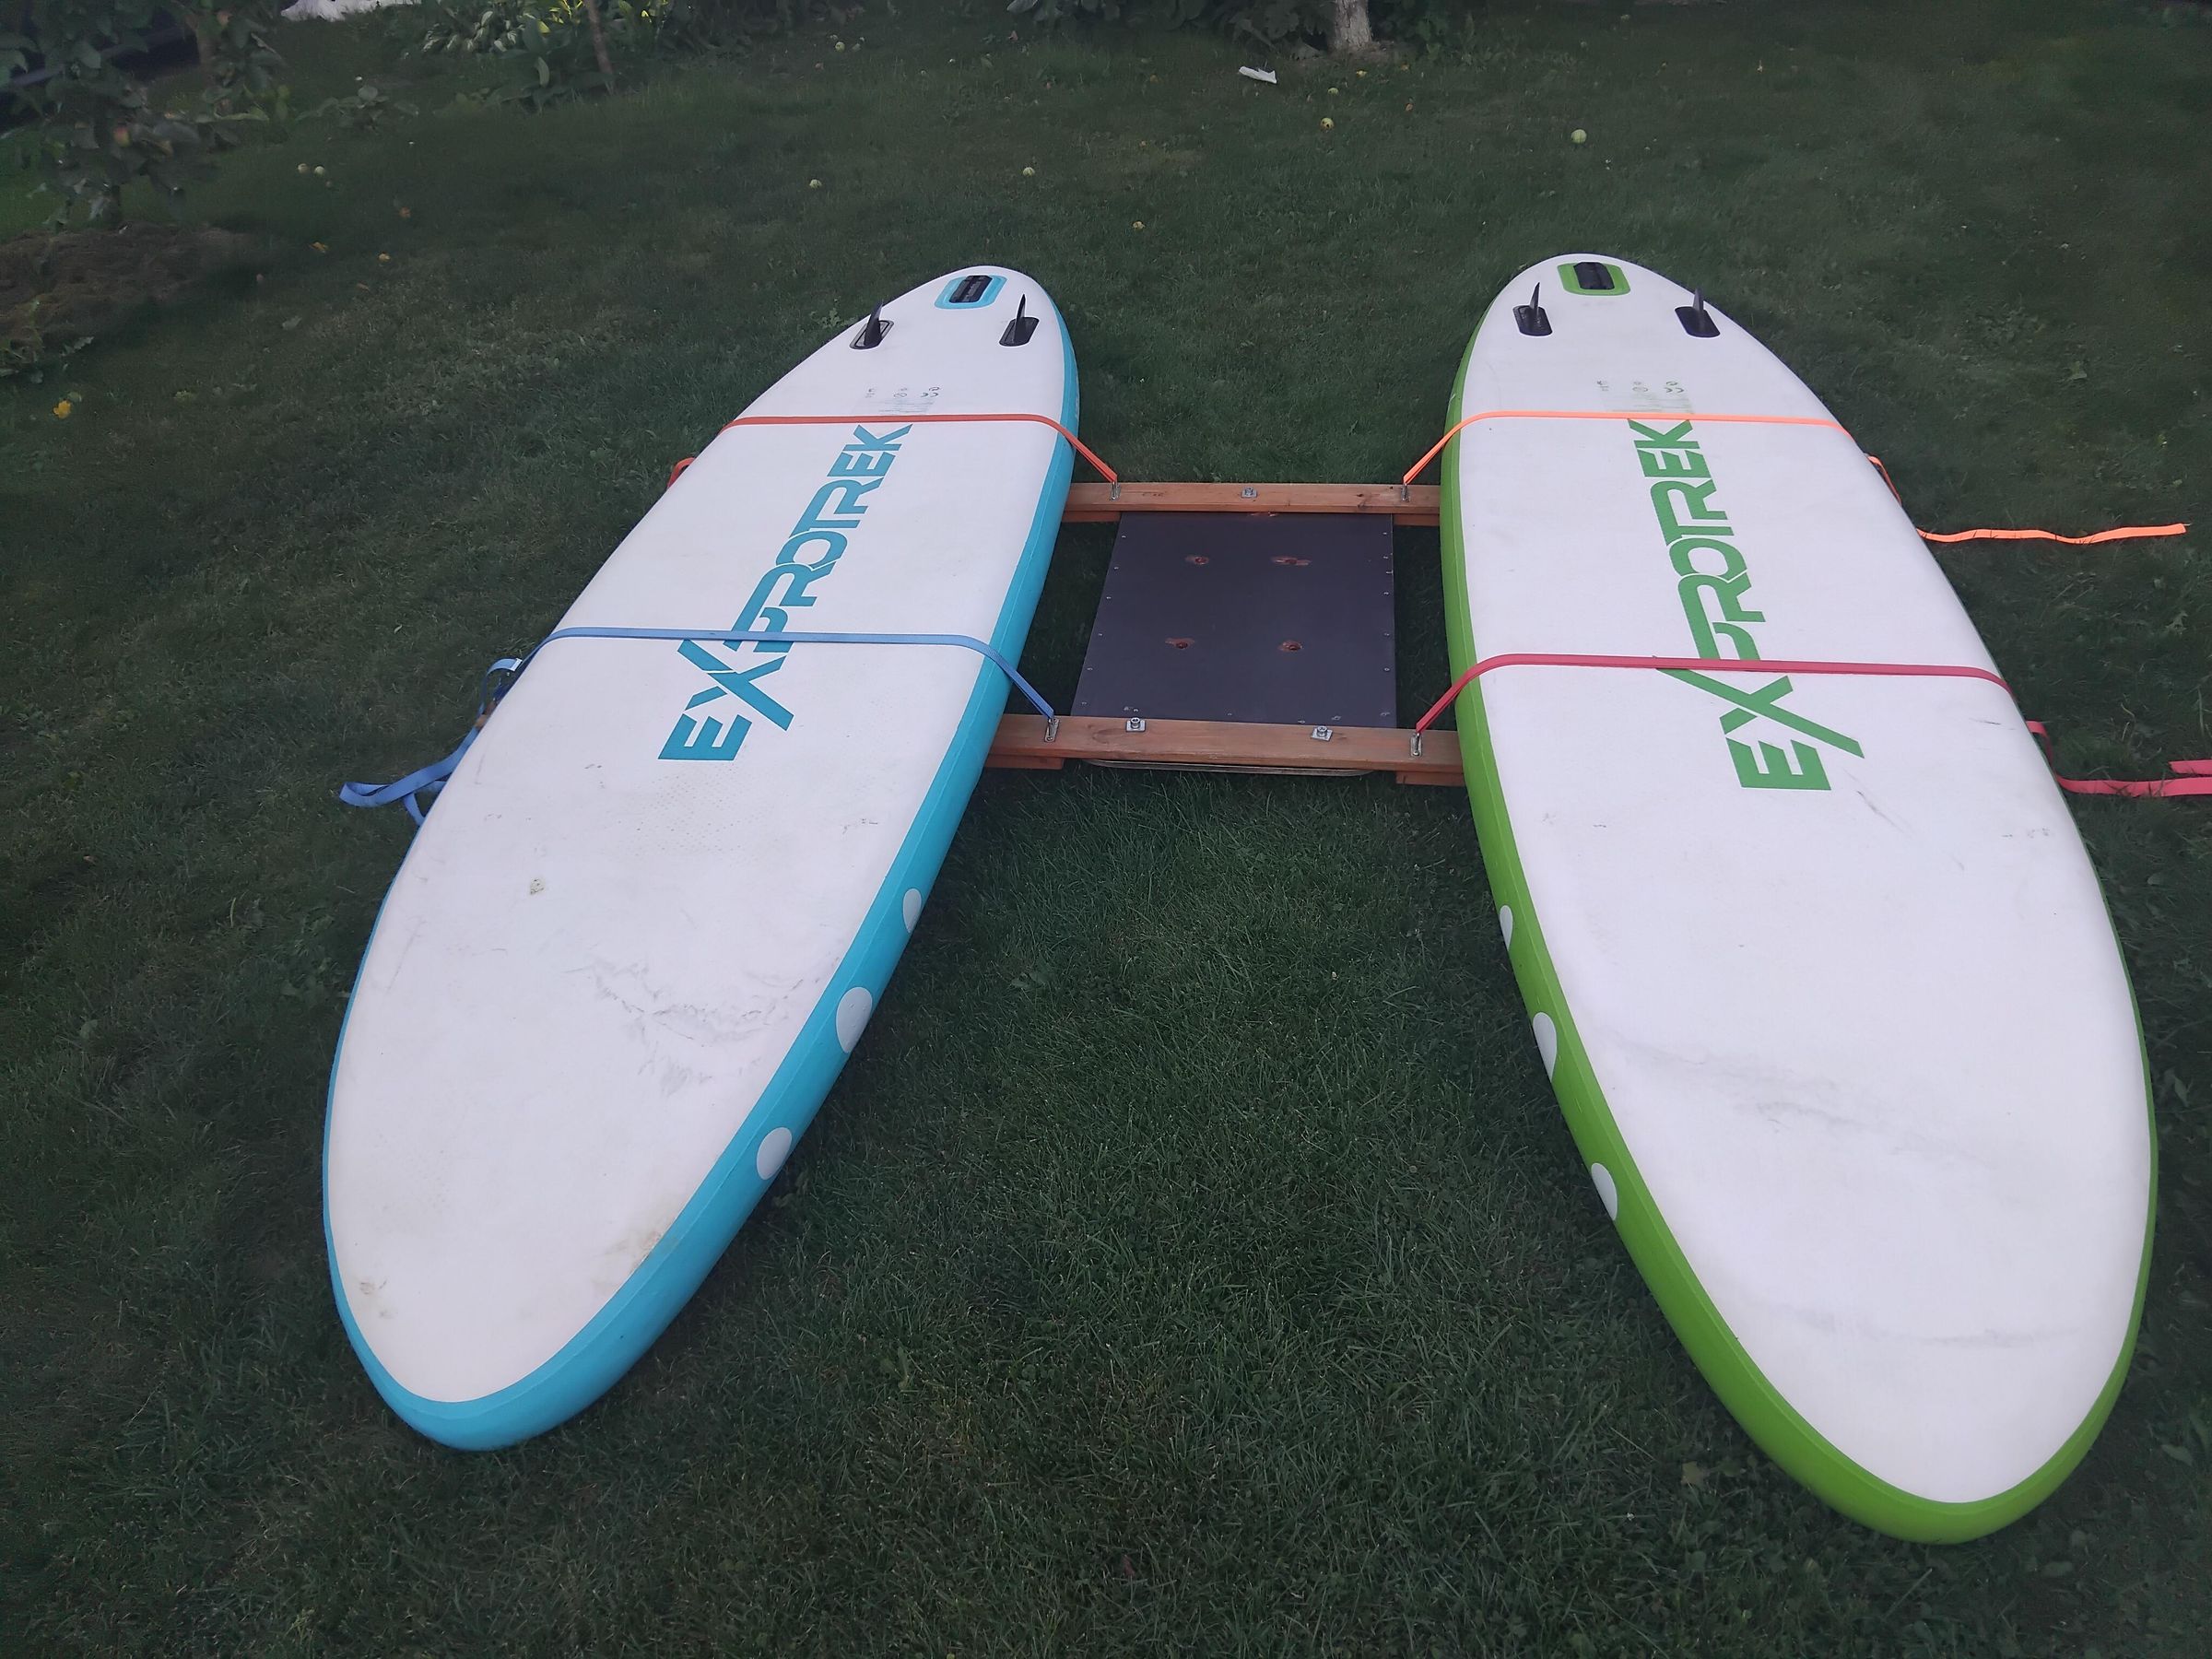
FINS FIRST. With the battery aboard the thing weighs a bit more than you can flip. Fins take two minutes on the grass and are tricky to add afterwards.
Fit the fins only if the boat is going straight into the water. Do the whole assembly at the launch site, flip it, and walk it in.
How we do it:
1. Pump both boards to the pressure on the label. Fit all fins.
2. Boards deck assembled upside down on grass
3. Beams across the hulls, blocks facing up.
4. Platform between the beams, frame seated between the inner and outer blocks. Five wing nuts, hand tight.
5. One strap per board per beam. Through the inner staple, around the hull, back through the outer staple, into the buckle. Four straps.
6. Tension until the strap just dents the deck pad. No more. You are not trying to squeeze the board. Avoid the strap metal buckle touching the paddleboard. There is usually 2-3 cm clearance. The friction is real while using this setup.
7. Flip it. Two people.
8. Add battery, add motor (next step).
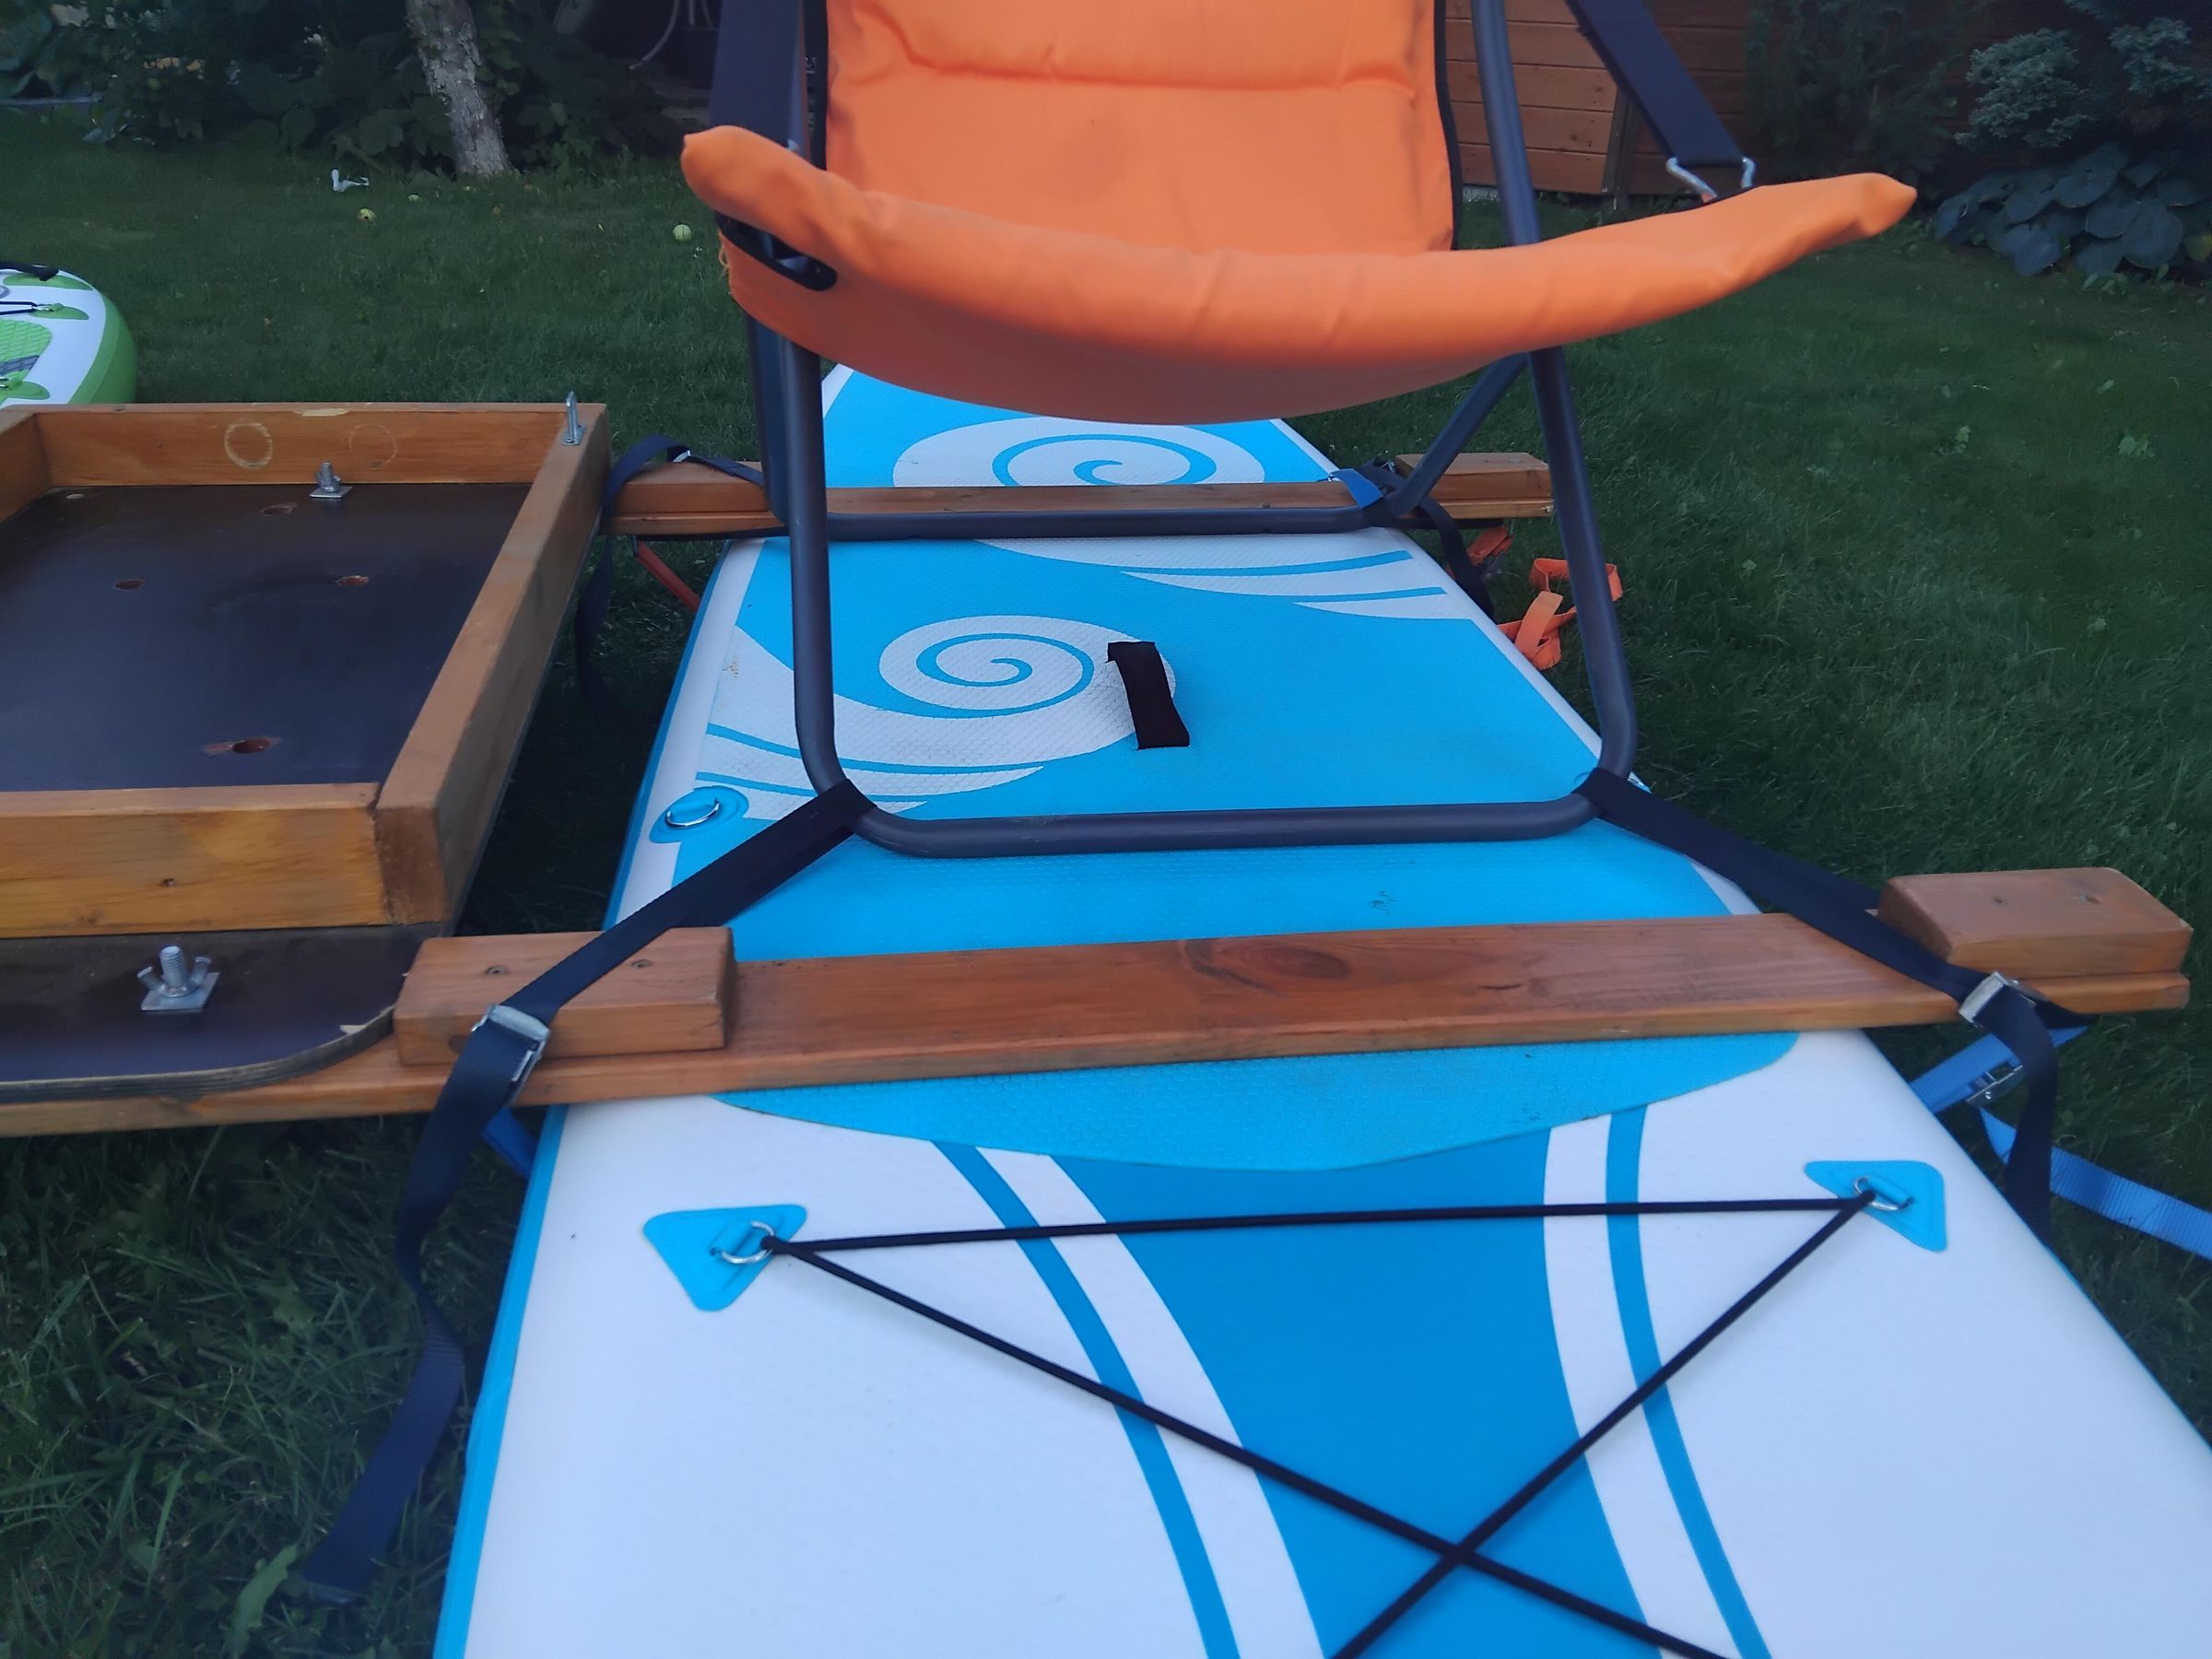
9. Chairs strap in on last.
The chairs are plain folding garden chairs. Their feet stand on the deck pad and their frame straddles the beam. A short strap runs from the beam, over the chair frame tube, and pulls it down. We usually tie it down to either planks or paddleboard D rings. I would suggest planks or adding extra fixture points.
Motor and Battery
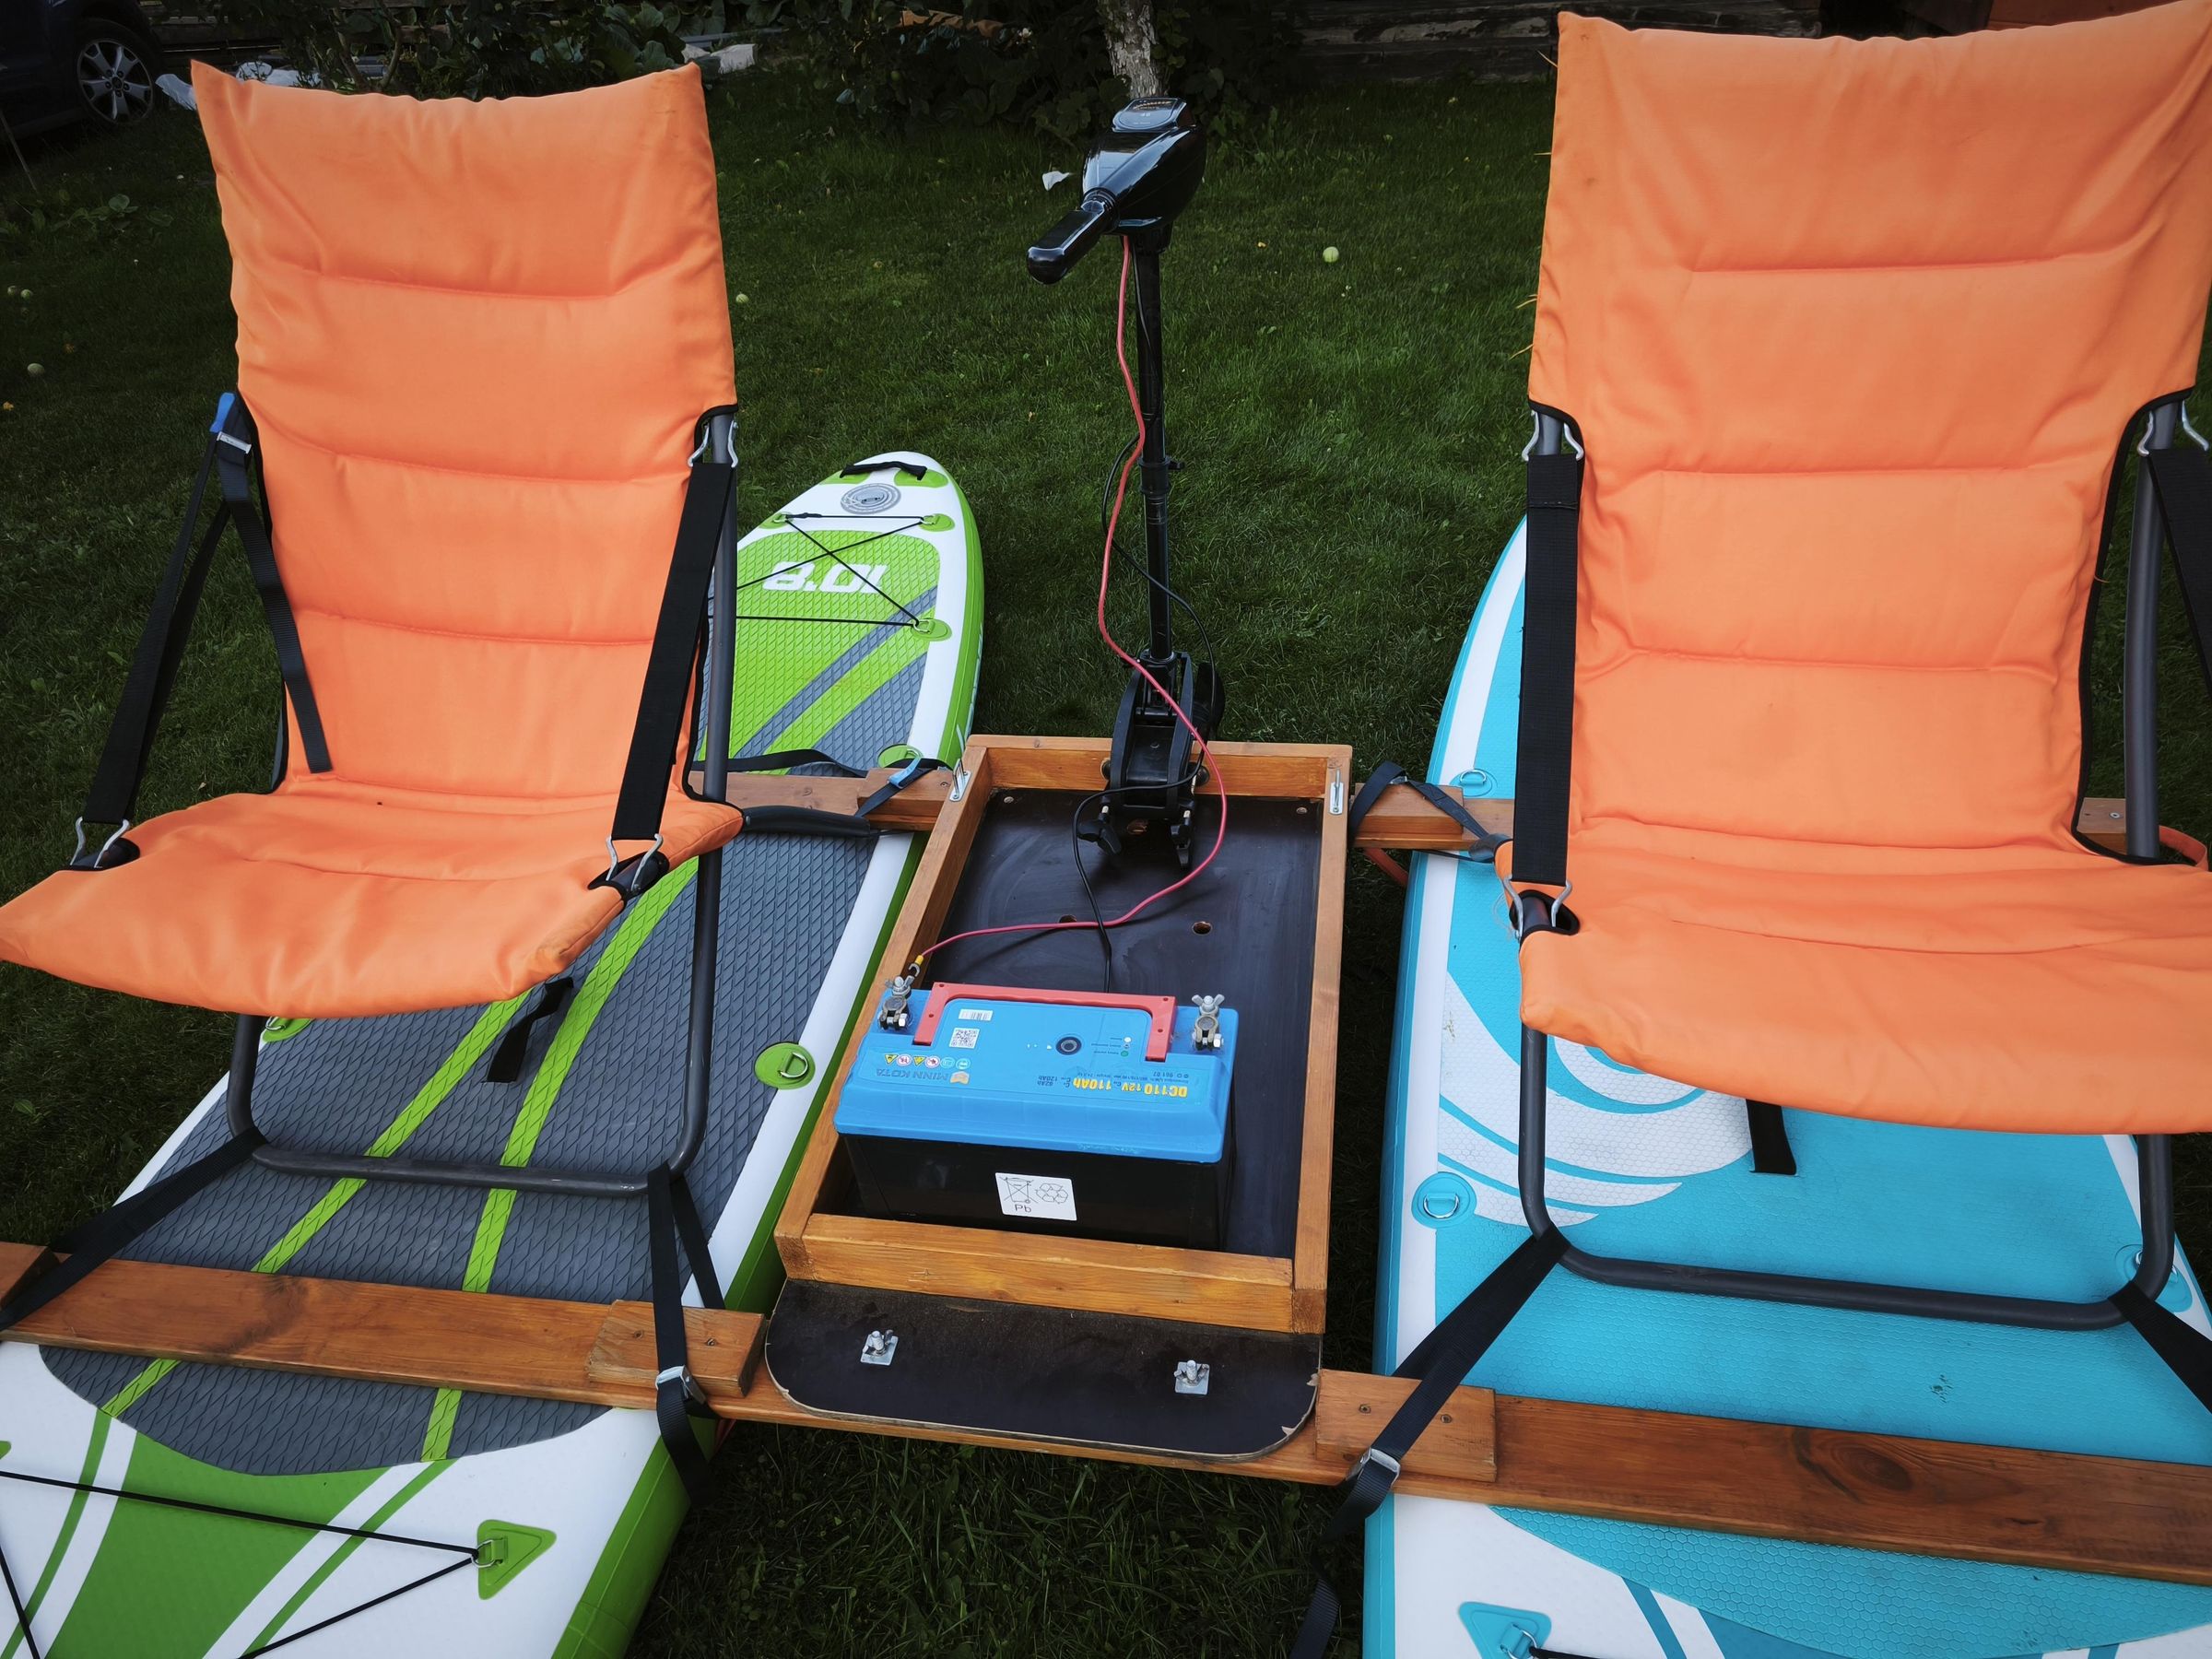
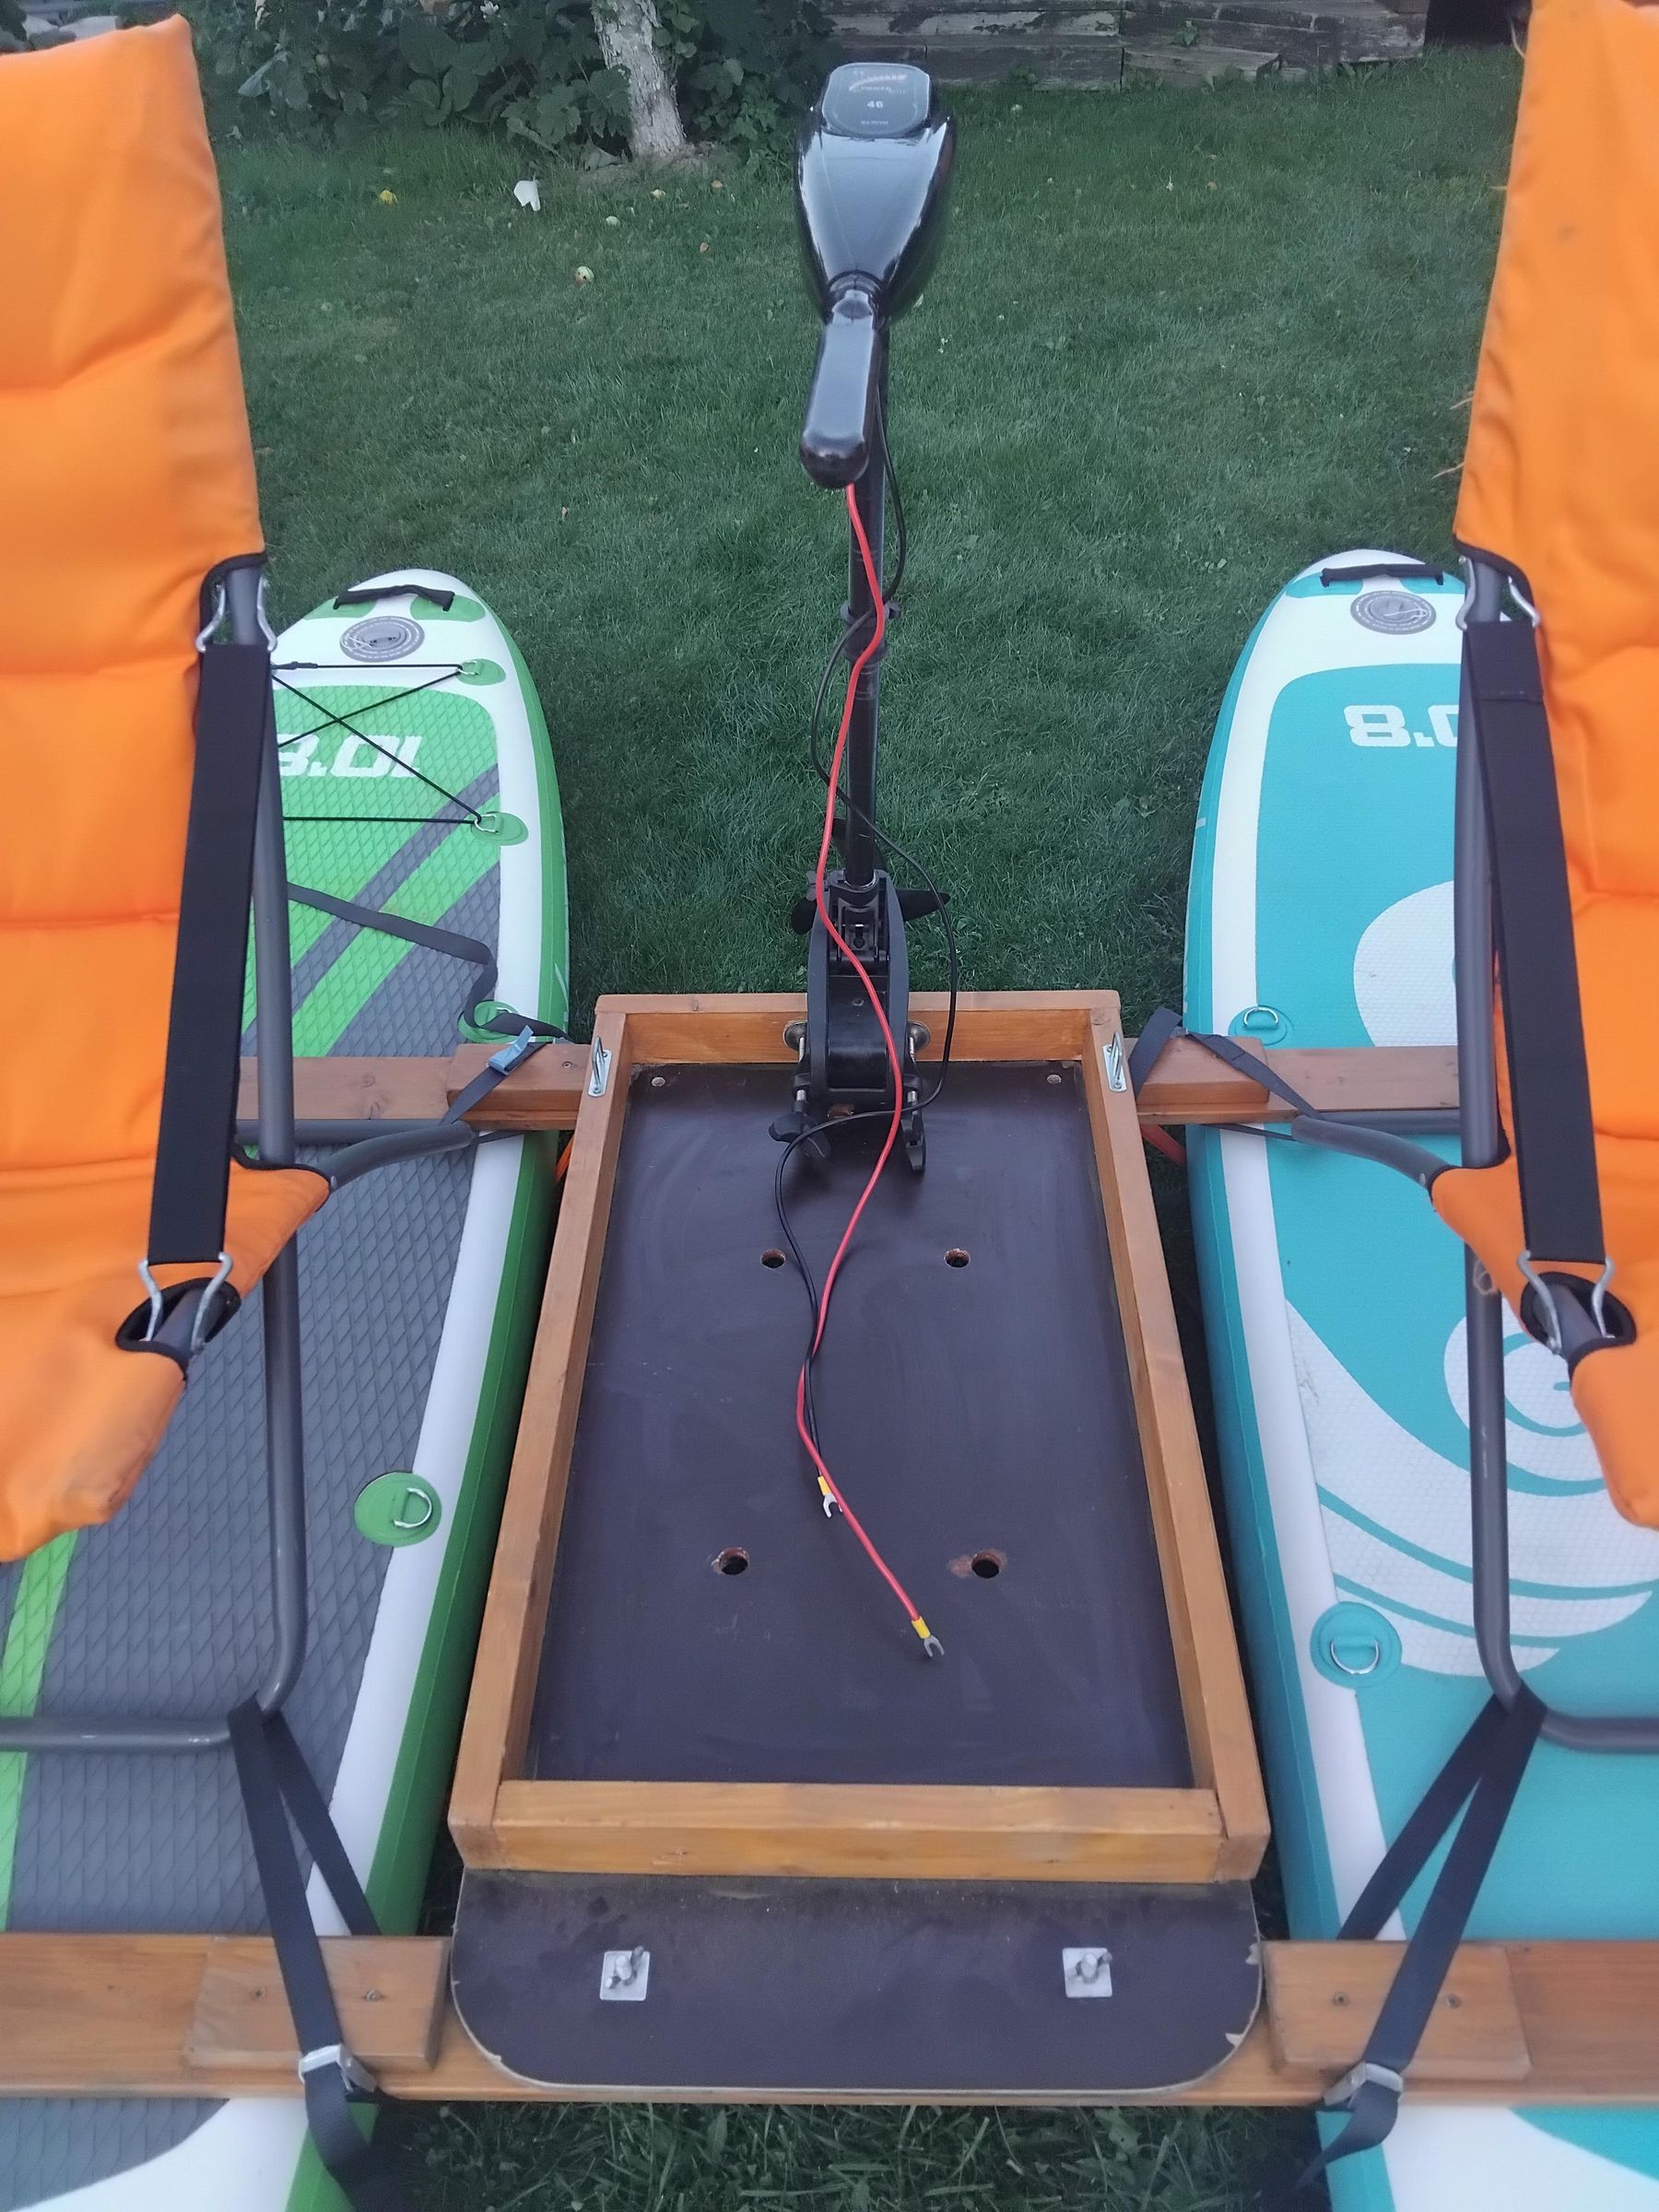
The motor clamps on with its own transom clamp and grips the rear rail of the tray frame, not the plywood. It sits dead centre between the hulls, right above the rear beam, so its weight and thrust go almost straight down into the beam instead of out on a lever.
It will not go on the front. The bolt heads and washers on the tongue leave the clamp nowhere to close. Rear only, which turned out to be the better answer anyway. Sometime we need to lift the motor out of the water to clear the weeds, etc. Turned out at the back is the perfect spot for steering and cleaning.
The battery goes in the tray. 29.3 kg, low and centred, exactly where you want that much mass on a catamaran. It does not slide. Nothing is going to move it.
Even so, add two more strap staples on the tray frame and one strap over the battery. Mine ran without and it was fine, but 29 kg loose in a tray is a bad thing to have on the water. If the boat tips, or you hit a stump, that battery becomes a projectile with two live terminals on it. Two staples and a strap cost about 3 EUR. Do it before the first trip, not after.
Same goes for a fuse. Put an inline fuse on the positive lead at the battery.
Mine has none yet. 110 Ah of lead acid will happily dump hundreds of amps into a shorted cable.
A rubber or cork pad under the clamp jaws is worth it too, so they do not chew into the frame rail.
The Numbers
Only one number here is measured. Everything else is calculated, and I've marked which is which.
MEASURED: ~7 hours running at low speed on one charge. That works out to ~8 A average, so I was on speeds 1–2 nearly the whole time.
WHY A BIGGER MOTOR WON'T HELP
The motor puts 360 W in (12 V × 30 A). A trolling motor converts maybe 15–20% of that to actual push, so ~60 W at the prop.
Dragging two hulls (5 m² wetted, 3 m waterline) takes roughly:
- 3.2 km/h → 17 W
- 6.0 km/h → 98 W
So 60 W lands you at 5–6 km/h. Hull speed is 7.8 km/h and wave drag climbs steeply past 6, which is the real wall. Doubling the motor buys a fraction of a knot and halves your runtime.
The 17% efficiency is terrible and completely normal — trolling motors are built cheap and quiet, not efficient.
RANGE
- Wide open: 1.8 h at 5.5 km/h → ~10 km
- Speeds 1–2: 7 h at 3.2 km/h → ~22 km
On a river the current is 2–4 km/h, more than the motor gives you. Downstream the motor is for steering. Upstream is what it's actually for — plan the trip that way.
I would absolutely love to take this setup on some British canals.
WEIGHT
-Battery: 29.3 kg
-Motor: 9.5 kg
-Beams (2): 5.3 kg
-Plywood panel: 4.1 kg
-Chairs (2): ~6 kg
-Blocks (8): 1.0 kg
-Tray frame, hardware, straps
-Boards
~55 kg before anyone sits down, and 29 kg of that is battery.
And it's quiet. No fumes, no noise, and you can hold a conversation between the two chairs.
Safety
Home built and on water. That is on you, not on me.
- Life jackets. Everyone. Every time.
- Check the four straps and the five wing nuts before every launch. Cam buckles
creep.
- Never lift the battery alone, and never with the boat already in the water.
29.3 kg dropped onto an inflatable hull, or onto a foot, ends the day.
- Strap the battery down. See Step 6.
- Inline fuse on the positive lead, and cover the terminals.
- Calm inland water only. River or lake. Two SUP hulls and a tray have no business in waves. Tried in the see without the battery and motor - more stress than fun.
- Do not tow anything. Tried it - drains the battery at 2x .
What Went Wrong and What I Would Change
WHAT ACTUALLY WENT WRONG
-Figuring out the motor. Buying an electric outboard and working out how it mounts, wires and behaves was its own project before any of the woodwork mattered.
-25 mm pine is too thin for the staple screws. Fixed with 25 mm blocks screwed to the beams, which then became the platform stops.
-The motor won't mount at the front. Bolt heads and washers on the tongue leave the clamp nowhere to close. Rear only.
-You can't flip the assembly with the battery on it. Fins first, always.
WHAT TO EXPECT
-Straps loosen in the first ten minutes. Webbing settles, PVC gives. Tension, launch, re-check once loaded.
-Board pressure is structural. A soft board lets the beam rock and the strap goes slack. Pump to the label, not to "feels firm".
-Prop depth. Platform sits high, so the 76 cm shaft may leave the prop shallow — ventilating in turns or chop is the symptom. Drop the shaft as far as the clamp allows.
-Wing nuts and water. Five loose nuts, wet hands, a launch ramp. Carry spares.
-The battery sits in a puddle. The tray drains through the panel, but the battery bottom still sits in whatever runs through. Terminals corrode.
-Transport. 2350 mm beams don't fit in most cars. Check before you cut. Or strap to the roof rack of the car.
WHAT I'D CHANGE
-Three bolts at both beams, not three and two.
-Two staples and a strap on the battery, from day one.
-Inline fuse and covered terminals.
-Corner brackets on the tray frame. Motor thrust is carried by screws into end grain — the one spot in the boat where I'm trusting screws instead of bolts.
-A lid, or at least a cover over the battery, to keep rain off the terminals.