Before and After Wine Bottle Holder
2921 Views, 10 Favorites, 0 Comments
Before and After Wine Bottle Holder

Here's an enjoyable Instructable taking ode skraggley branches and creating a wine bottle holder.

Buy Some Wine

You know it's going to be a good Instructable when the first step is to buy some wine.
I recommend buying two. Maybe three.
Tools and Supplies

Stuff you need:
- Couple bottles of wine
- Branches
- Saw
- Drill with Foster bits (more on those later)
- 150, 220 Sandpaper
- Polyurethane
- Wood Glue
- Couple more bottles of wine
Architecture

The architecture of the final product is simple:
A trunk, a footer, and arms.
Oh, and a bottle of wine.
Search for Branches

Go out and scrounge for some branches to be used for a trunk, arms, and footer.
Harvest Your Branches

Gather your raw materials.
Trim to Size

Cut down the pieces roughly to size. Accuracy isn't too critical here because no matter what you do the cuts will never come out straight.
And you'll be drinking wine anyway.
Pick Bit Size for Arms and Footer

I used Foster bits because they come in a variety of sizes.
Bits come in metric sizes and non-metric sizes. But, unfortunately they still don't come in branch sizes. So you have to kind of get the rough size.
The more wine you drink, the better the match seems to be, though.
Note About Foster Bits

These are special bits with a funny name because they can drill holes to hold Foster beer cans.
Roughly Mark Footer Location

Mark the rough location for the hole for the footer in the trunk.
Here I just used a Sharpeeeee eeee marker to roughly outline the whole, er i Mean hole.
Carefully Drill Hole for Footer

I recommend an A/C drill because it seems to have more oomph.
Here I'm using a Harbor Freight drill. These are great, but be sure to purchase the replacement warranty. heh heh; you'll eventually need it!
I SAID CAREFULLY !

Yah, when drilling onto a conical surface, espeshully after having conshumed a few glasses of the winne, you'll have to be mindfull. hiC
(Sigh) Trim Footer

As all wood workers know, wood has a quality whereby it does not fit the first time. (Thus the well-known phrase "measure once, cut thrice".) So just juse a jisel or Dermel roaRy trool to trim drown the footer branch so that it will fit into the flooter hoe.
h A
ha !
Roughly Gauge Location for Arms

Shove the footer in and get a ruff lokation of were the arm branch should goooo.
h i C skyewse mee!
Gauge Arms With Actual Bottle

dOO a ruFf gagE wif thE BoTel, two!
Test Out Contents of Bottle

aNd bE shur to tesht the qwalitee of tHe proDukt
Carefully Drill Hole for Arms

dRill out hole for da arMs
Dry Fit

Put togetHer so that yo0 can tell how much you have to re-saw, re-chisel, re-drink, etc.
Dry Fit, Cont.

It's always good to make two of everything, so . . .
Sand 150

SaNd everything doWn with 150 grit sand paypers
Sand 220

Then follow up with 220 (paypers).
oops wAit Wah?
(Sigh) Sand Some More

sTill More sanding, you'll note here we are usingk a sandink bocxks.
Wipe Off Sand Dust

Drink suM moRe alCohol, then use denatured alcohol to wIype down the dust from the peeces.
gEsnORt! where's my DrinK?
https://www.youtube.com/watch?v=1iAYhQsQhSY
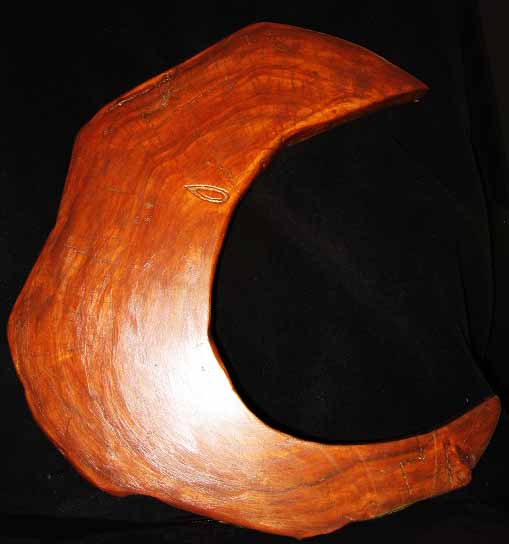
Preview of Project Without Stain

You can get a ruff idea of how the project will luk with just polyurethane (i.e. naked) as you wipe down the pieces with the alcohol. The more alcohol you consume, the better it will look.
hIc snOrt
Stain

Add suM stain.
Wait for Stain to Dry

You have to waiATE several howerS so to let the stain dry.
Poly

Add at leaSt twoo koates of Polyurethanine
polypopolane- sknxz tha's a funny WofrD!
Wait for Poly to Dry

You gotta wait for poly to dry, toooo.
chEeRS!
Glue

Use sum glood wue to hold the plieces together.
Tada

Yay, yeR dun! Go get some more wine and try it out!
Bigger Version...

If you follow the Instructable using larger pieces . . .
... Guitar Stand ...

... you could make a guitar stand, . . .
... or Maybe a Yoga Mat Holder

Or a holder for a yoga mat, or skateboard, or a really really big bottle of wine
Lots O' Possibilities
Here are a few links for more before-n-after 'ibles from tree branches: