Beginner's Guide to Blender
by T_T_ in Workshop > 3D Printing
634617 Views, 150 Favorites, 0 Comments
Beginner's Guide to Blender

The purpose of this instructable is to teach some who has never used blender before, how to use it. We will go over the basics of modeling and navigating in blender.
First download blender from
www.blender.org
First download blender from
www.blender.org
Opening

This is what blender looks like when you open it.
You are faced with a toolbar to the left an right, file operations to the top, timeline on the bottom, and the 3D view in the center.
Blender's default starting mesh is a cube, we will be demonstrating basic functions on this.
You are faced with a toolbar to the left an right, file operations to the top, timeline on the bottom, and the 3D view in the center.
Blender's default starting mesh is a cube, we will be demonstrating basic functions on this.
Basic Navigation

To rotate around in the 3D view, hold down the middle mouse button and move the mouse.
To move up and down or to and fro, hold shift+middle mouse, and and move the mouse.
Use the scroll wheel to zoom in and out.
To select an object right click, to de-select right click away from the object.
To select multiple objects, hold "SHIFT" and select the objects.
To select everything press "A" or to de-select everything press "A"
Notice that when you select something, it will be highlighted orange.
Object Mode and Edit Mode


The two modes we will be using in this tutorial are:
Object Mode
This lets you select objects and move them around as you please.
Edit Mode
This allows you to select individual vertexes, lines, and planes. you can modify the mesh in this mode.
to switch between these two modes you can either go down to the menu below, or just press TAB.
Object Mode
This lets you select objects and move them around as you please.
Edit Mode
This allows you to select individual vertexes, lines, and planes. you can modify the mesh in this mode.
to switch between these two modes you can either go down to the menu below, or just press TAB.
Rotation Scaling and Translating
First I want to make note of the arrows that appear when you select an object.
those are the Axes. The red arrow is the X axis, green is the Y axis, and blue is the Z axis.
These arrows allow you to move things more accurately.
Translating
There are three ways to do this, one is to simple right click and drag. Another is to just select the object and press "G"
Or, you can left click on the axis you want to move the object on, and drag.
Rotating
Rotating is very simple, all you have to do is select the object to be rotated, and press "R"
If you want to rotate around a specific axis, first press "R" then "X", "Y", or "Z". Each letter corresponds to it's respective axis.
Scaling
To scale an object, simply press "S". if you want to stretch an object along a certain axis press "X", "Y", or "Z", after pressing "S"
The 3D Cursor

The 3D cursor is exactly what it sounds like, it's a cursor in the 3D view. By default it starts in the origin, but you can move it by left clicking.
If you add an object, such as a cube or sphere, it will appear where the 3D cursor is.
If you add an object, such as a cube or sphere, it will appear where the 3D cursor is.
Adding a Mesh

to add a mesh, go to the "Add" menu, from there you will find many sub menus, the top one being "Mesh".
Selecting in Edit Mode

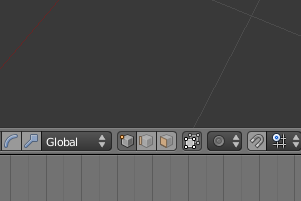
In edit mode there are three ways to select things, you can either select individual vertexes, lines or planes.
To switch, click the three buttons at the bottom.
To switch, click the three buttons at the bottom.
Merging


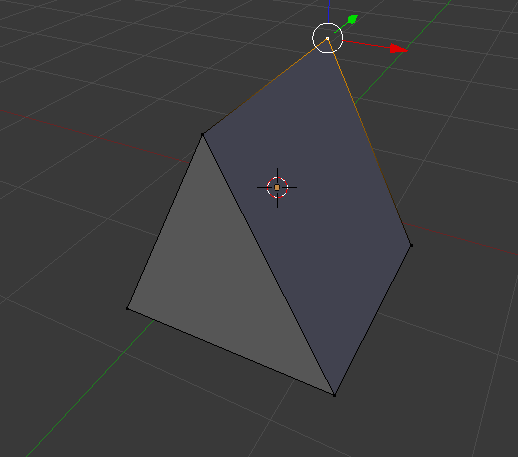

In edit mode you can select two or more vertexes, and merge them together.
To do this, go into edit mode, select the vertexes you want to merge, press "W", then, merge.
To do this, go into edit mode, select the vertexes you want to merge, press "W", then, merge.
Extruding


In edit mode, you can select a line, vertex, or plane, and extrude, or, extend it.
to do this, select the thing you want to extrude, then press "E"
to do this, select the thing you want to extrude, then press "E"
Edge Loop Slide


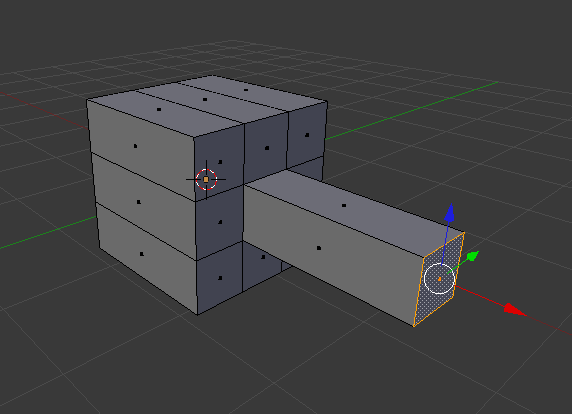
This allows you to make a "cut" in a mesh, letting modify it further.
to do this, press "CTR+R" and select the spot you want to cut, then it will allow you to slide that cut, then place it.
This is handy when you want to extrude only a certain part of a plane.
to do this, press "CTR+R" and select the spot you want to cut, then it will allow you to slide that cut, then place it.
This is handy when you want to extrude only a certain part of a plane.
Modifiers

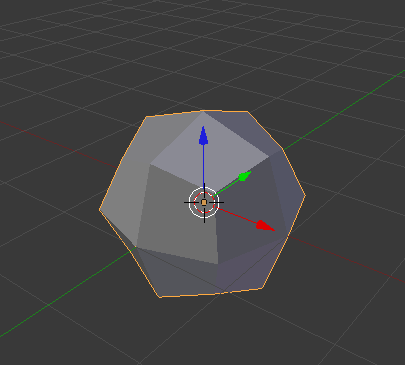

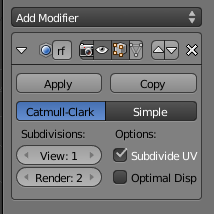
Switch back to object mode.
Modifiers modify your mesh (go figure).
One that you will use often will be the "subdivision surface" modifier.
This modifier makes your model all smooth.
The modifier properties are in the right tool bar.
Modifiers modify your mesh (go figure).
One that you will use often will be the "subdivision surface" modifier.
This modifier makes your model all smooth.
The modifier properties are in the right tool bar.
Stuff I've Made
