Bench With Integrated Houses for Pets
by Thaina Arrais in Living > Pets
94 Views, 1 Favorites, 0 Comments
Bench With Integrated Houses for Pets
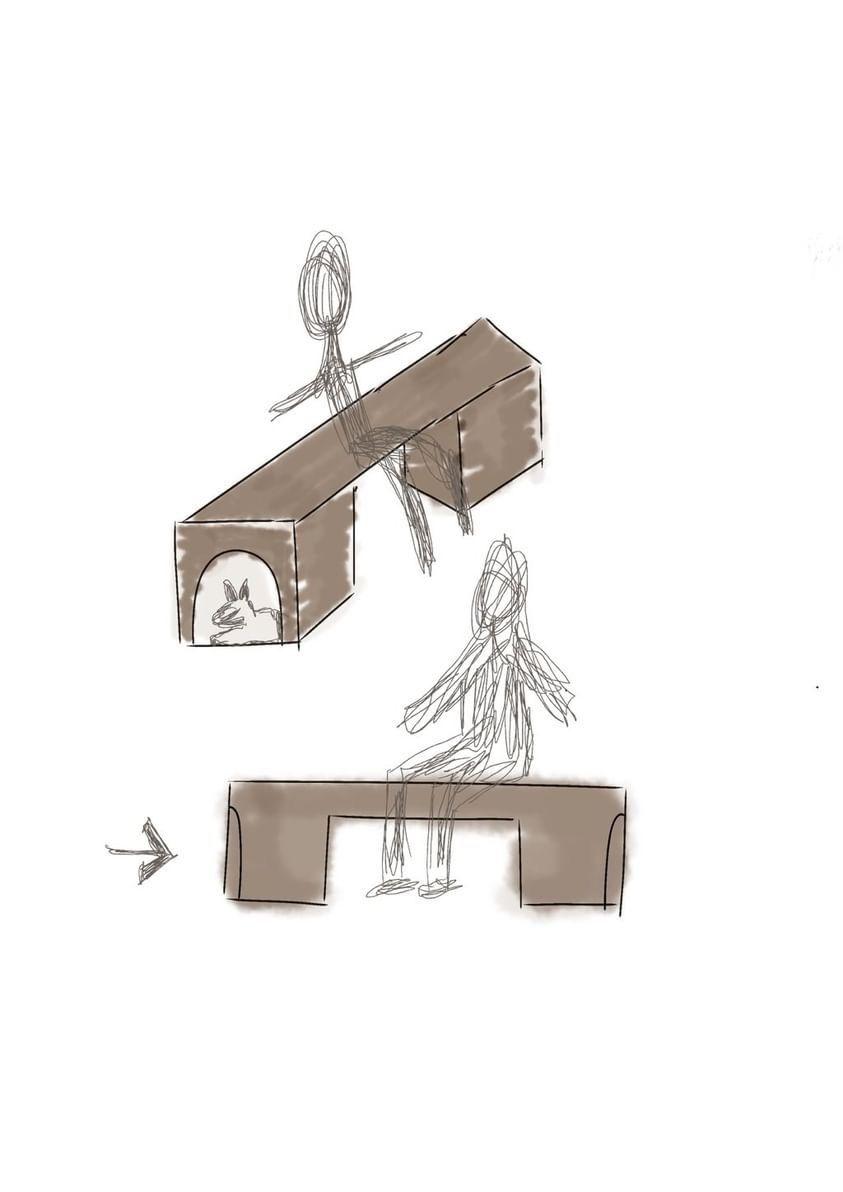
This multifunctional bench combines design and practicality, providing a comfortable seat for people and a safe shelter for animals. We will detail the dimensions and provide a step-by-step guide to creating the project in SketchUp Online.
Supplies
.png)
- SketchUp Online
- Cardboard (Papel Paraná)
- Metal Ruler
- Utility Knife (Estilete)
- White Glue or Hot Glue
- Pencil and Eraser
- Paint or Markers (optional)
- Cutting Mat (optional)
- Printed SketchUp Model or Plans (optional)
Defining the Product Measurements to Start 3D Modeling.
.jpg)
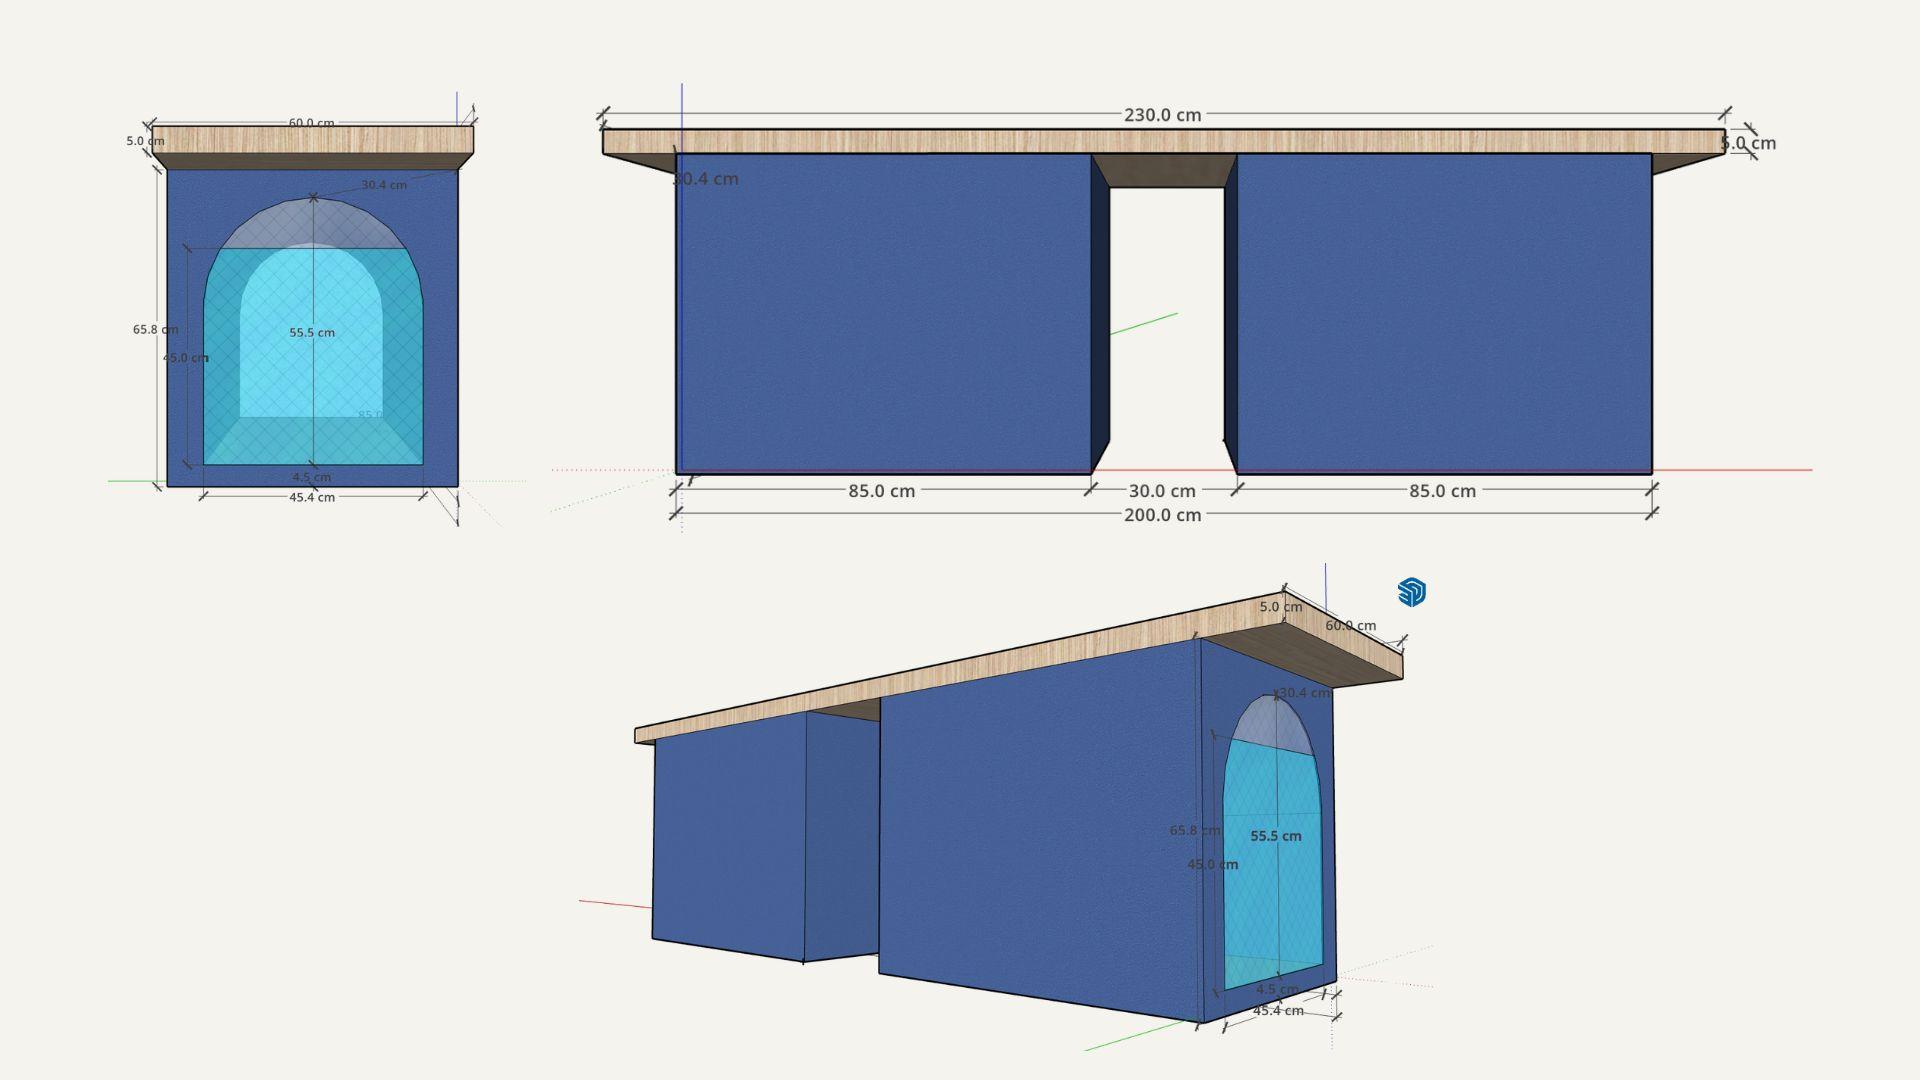
The first step of the project was to define the dimensions. This initial stage was crucial to ensure that the multifunctional bench would meet the needs of both human users and animals, optimizing space while maintaining practicality in its design.
The dimensions were carefully planned to balance comfort, functionality, and harmonious integration into public spaces.
- Total length: 230 cm
- Width: 60 cm
- Total height (with sloped top): 65.8 cm in the front, 70.8 cm in the back
Pet Niches:
- Width of each niche: 85 cm
- Height: 65.8 cm
- Depth: 60 cm
- Door opening: 55.5 cm high x 45.4 cm wide
Space Between Niches:
- Width: 30 cm
- Height: 65.8 cm
Material Thickness:
- Plastic wood top: 5 cm
- Dividers and walls: 4.5 cm
Build the 3D Model in SketchUp Online.
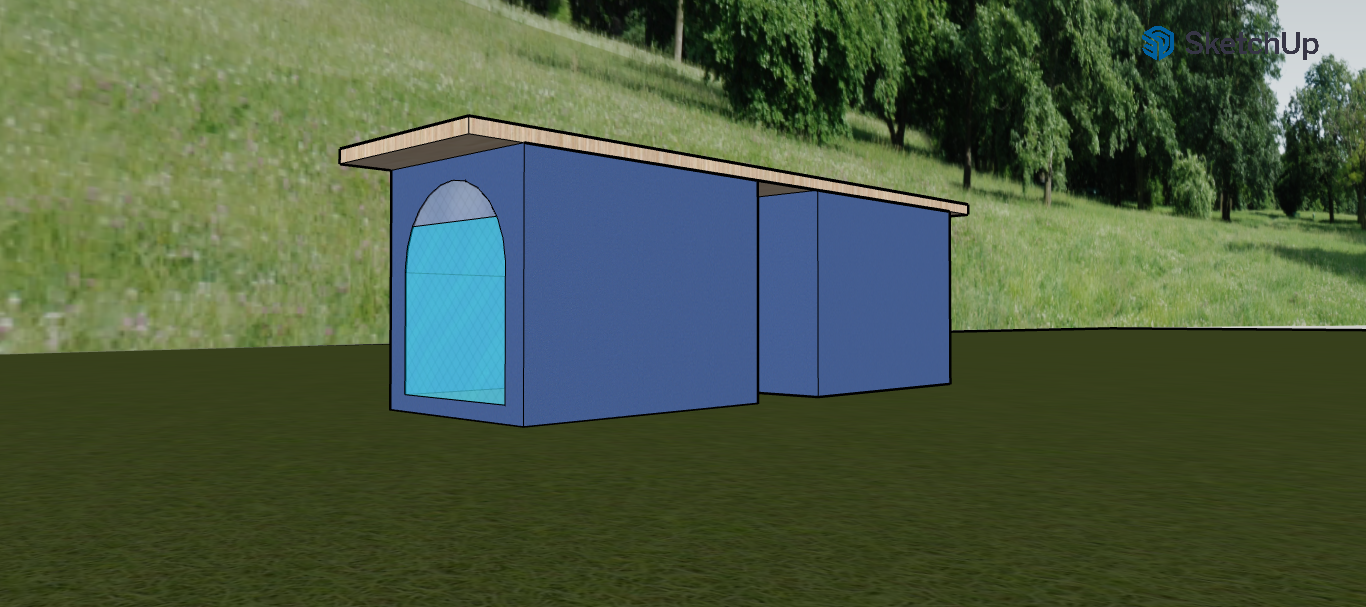
How to Model It in SketchUp Online
1. Access SketchUp Online
- Go to SketchUp Free and start a new project.
2. Set Up Your Workspace
- Make sure your units are set to centimeters.
- Adjust the camera view to work comfortably in the 3D space.
3. Draw the Bench Base
- Use the Rectangle Tool to create a base measuring 200 cm x 60 cm.
- Use the Push/Pull Tool to extrude the base to a height of 65.8 cm.
4. Add the Side Niches
- Draw two rectangles on the top face to represent the niches (85 cm wide each, with a 30 cm gap in the center).
- Use the Push/Pull Tool to create niches with a depth of 60 cm.
5. Insert Internal Dividers
- Use the Line Tool to draw dividers with a thickness of 4.5 cm.
- Pull these dividers up to the full height of 65.8 cm.
6. Create the Niche Openings
- On the front face of each niche, draw rectangles measuring 55.5 cm high x 45.4 cm wide.
- Use the Push/Pull Tool to cut out these openings.
7. Add the Sloped Top
- Draw a rectangle measuring 230 cm x 60 cm.
- Create a slope by drawing a line 5 cm higher on one side, then connect the ends.
- Use the Move Tool to adjust and place the sloped top on the bench.
8. Final Touches
- Check dimensions with the Tape Measure Tool.
- Use the Materials Tool to paint or texture surfaces (optional).
- Save your project or export it as a 3D file for further use.
Defining the Measurements for Building the Scale Model.
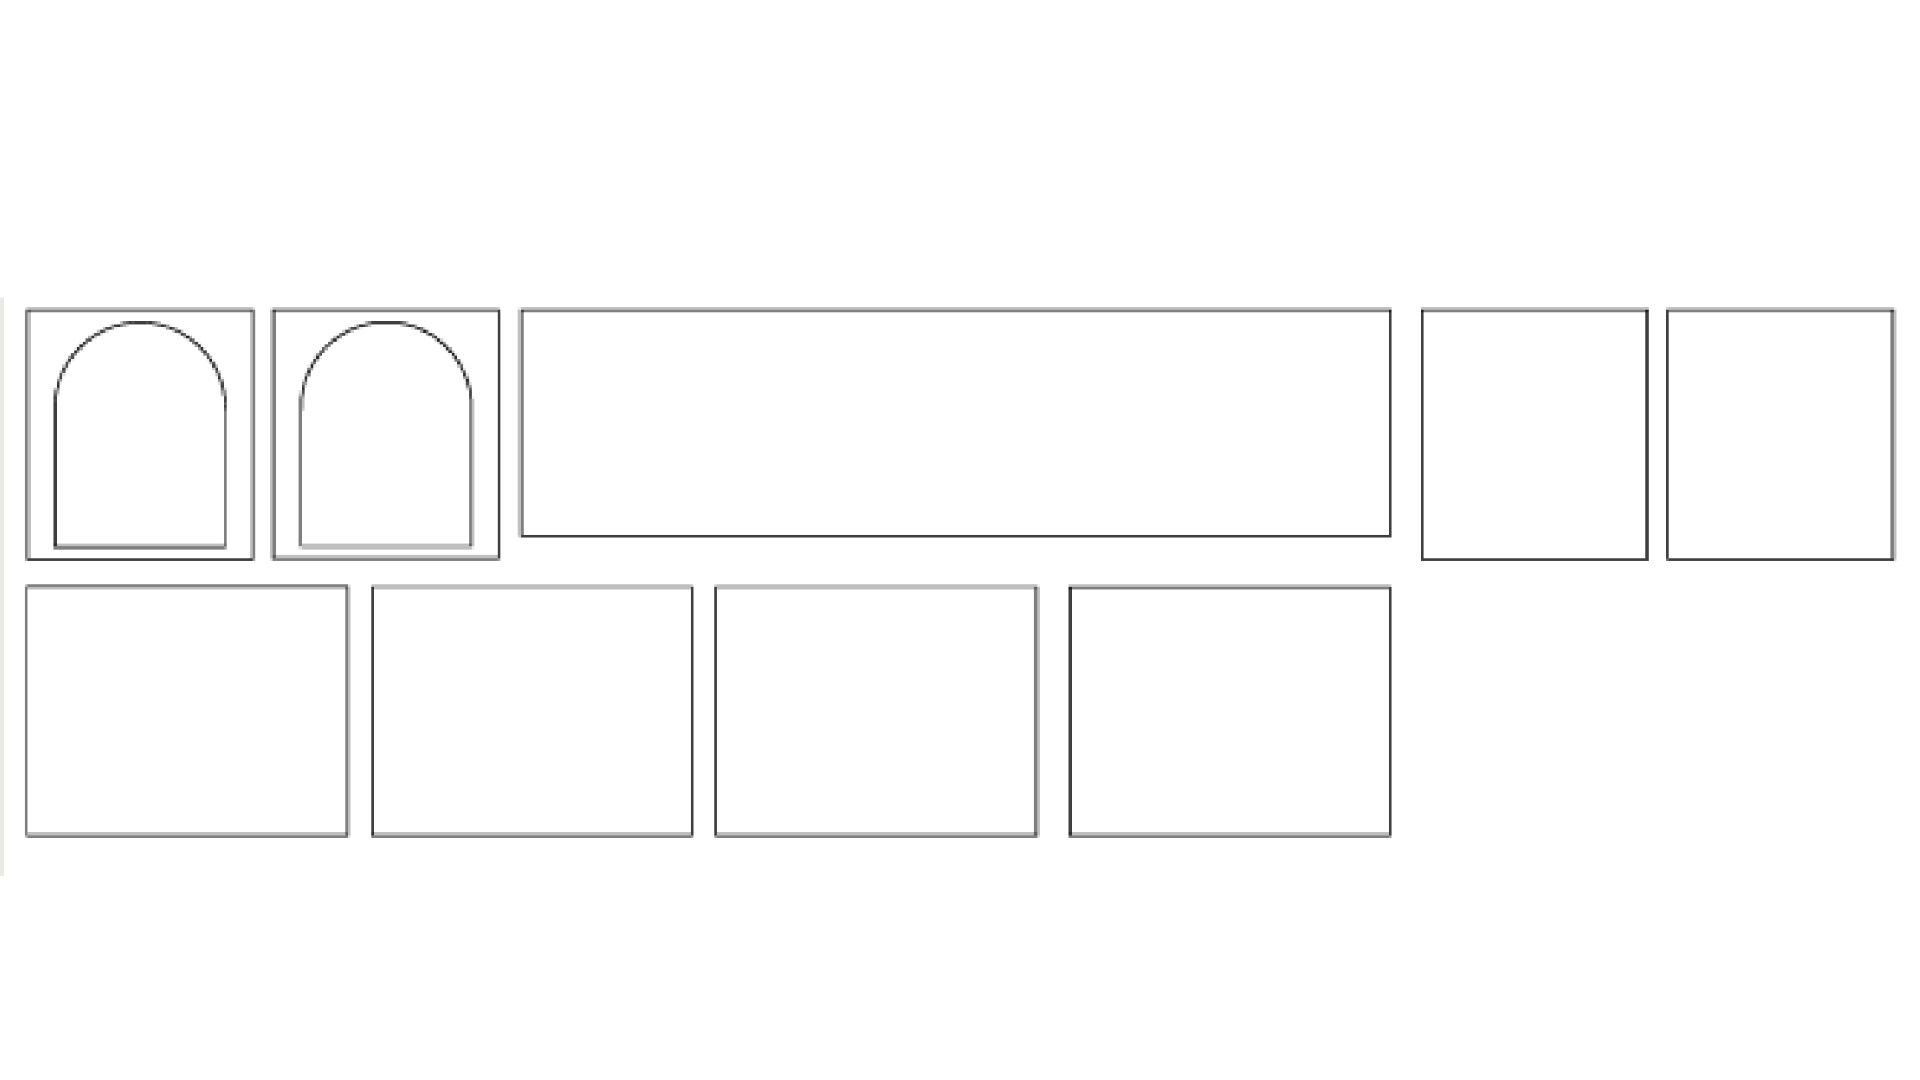
Here is the step-by-step guide for creating my 1:10 scale model, using the real dimensions I mentioned. I will convert the measurements and then apply them to the construction of the model.
Conversion of Real Measurements to Scale 1:10:
General Measurements:
- Total Length:
- Real measurement: 230 cm
- Scale 1:10: 230 cm ÷ 10 = 23 cm
- Width:
- Real measurement: 60 cm
- Scale 1:10: 60 cm ÷ 10 = 6 cm
- Total Height (with sloped top):
- Front Height: 65.8 cm
- Scale 1:10: 65.8 cm ÷ 10 = 6.58 cm
- Back Height: 70.8 cm
- Scale 1:10: 70.8 cm ÷ 10 = 7.08 cm
Pet Niches:
- Width of each niche:
- Real measurement: 85 cm
- Scale 1:10: 85 cm ÷ 10 = 8.5 cm
- Height of each niche:
- Real measurement: 65.8 cm
- Scale 1:10: 65.8 cm ÷ 10 = 6.58 cm
- Depth of each niche:
- Real measurement: 60 cm
- Scale 1:10: 60 cm ÷ 10 = 6 cm
- Door Opening:
- Height: 55.5 cm
- Scale 1:10: 55.5 cm ÷ 10 = 5.55 cm
- Width: 45.4 cm
- Scale 1:10: 45.4 cm ÷ 10 = 4.54 cm
Space Between Niches:
- Width:
- Real measurement: 30 cm
- Scale 1:10: 30 cm ÷ 10 = 3 cm
- Height:
- Real measurement: 65.8 cm
- Scale 1:10: 65.8 cm ÷ 10 = 6.58 cm
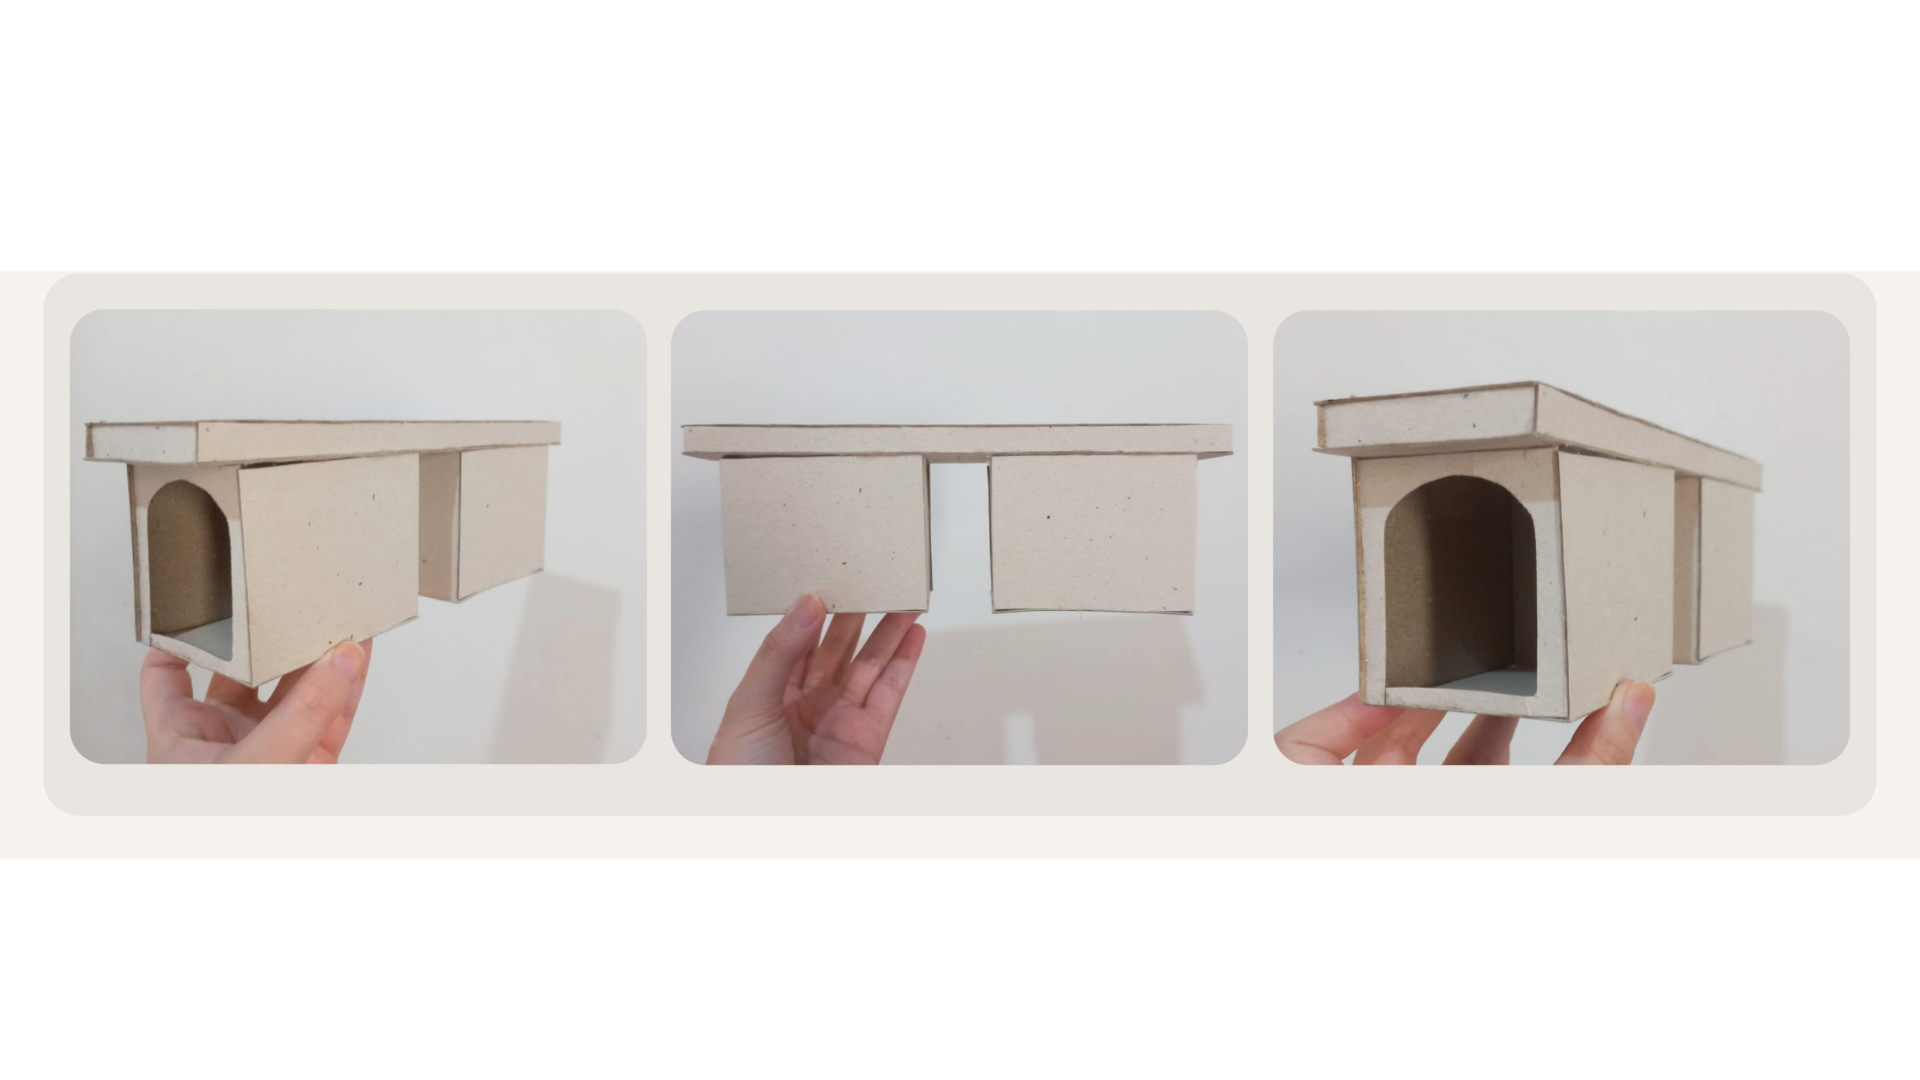
Defining the Measurements for Building the Scale Model.
.png)
Step 1: Creating the Base
Cutting the Paraná Paper:
- Use the metal ruler and craft knife to cut the base parts according to the project dimensions.
- If you have a printed model (such as from SketchUp), use it as a guide to ensure the exact measurements.
Marking Details:
- Mark the areas that need to be cut or shaped, such as openings for niches or size adjustments.
- Use a pencil to make clear markings, and if necessary, adjust with an eraser before cutting.
Precise Cutting:
- Cut the Paraná paper with the craft knife, keeping the blade sharp at all times to ensure clean cuts without tears.
Step 2: Building the Top
Modeling the Top:
- Follow the same measurement and marking process for the top piece. Depending on the design, it may be necessary to cut the top in layers for added strength or to create a specific effect.
Cutting the Top:
- Use the metal ruler and craft knife to cut the top into the desired shape and dimensions.
Step 3: Assembling the Niches
Cutting the Niches:
- Identify the areas of Paraná paper that will form the niches and make precise cuts according to the model.
- If there are niches at different heights or depths, adjust the pieces accordingly.
Fixing:
- Use white glue or hot glue to fix the niche pieces to the base and top, forming the structure of the furniture. Apply glue to the edges, adjusting them to ensure they are aligned correctly.
Step 4: Detailing and Finishing Touches
Final Adjustments:
- After assembly, observe the model from all angles and make adjustments, such as minor corrections in cutting or adding more glue where needed.
Detailing Finishes:
- If the design includes specific finishes, such as painting or detailing edges, use colored pencils or paints to add the desired visual touch. For openings or details in the niches, using an eraser to refine areas can also be helpful.
Inspection:
- Review the model to ensure all pieces are securely fixed and aligned according to your design.
Step 5: Finalization
Drying:
- Allow the glue to dry for enough time to ensure the model is stable.
Presentation:
- Your Paraná paper model is ready to be displayed or used as a foundation for developing a larger model.