Bicycle Inner Tube Organizer-Upcycling
4176 Views, 56 Favorites, 0 Comments
Bicycle Inner Tube Organizer-Upcycling
![20210623_162123.jpg](/proxy/?url=https://content.instructables.com/FU7/3ENL/KR2DMR6H/FU73ENLKR2DMR6H.jpg&filename=20210623_162123.jpg)
![20210608_211300.jpg](/proxy/?url=https://content.instructables.com/F3W/F87Q/KR2DMR6D/F3WF87QKR2DMR6D.jpg&filename=20210608_211300.jpg)
![20210623_162040.jpg](/proxy/?url=https://content.instructables.com/FE4/D49D/KR2DMR6G/FE4D49DKR2DMR6G.jpg&filename=20210623_162040.jpg)
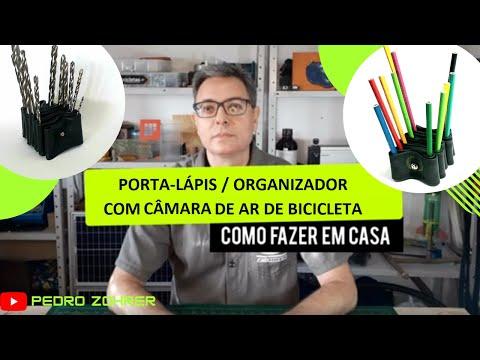
In this upcycling activity, we're going to transform inner tubes taken from an old bicycle wheel into a criative and durable organizer that can be use in a infinity os aplications from office to hause suplies and home workshop.
Depending on the length of the tube used and its width you can make different organizers. I prefer the wider and flatter ones for this task. Here I present the simplest and easiest way to do it where I basically fold the inner tube like an accordion and secure everything in place using a bicycle spoke. With common tools and in a small space in your home, you can explore new possibilities of reuse of bicycle parts, transforming them into new products.
Supplies
Material list:
1-An bicycle spokes & nipples taken from a discarded wheel
2-An old bicycle inner tube that may have many patches or holes that can be obtained for free at the bike shop near your home. Prefer the flat-shaped ones to the tubular ones.
List of tools:
1-An cutting pliers
2-An Linesman’s pliers (common pliers)
3-A metal file or sandpaper
4-A small pointe scissors or stylet
Cleaning and Cutting
![Porta Lápis/ organizador com câmara de ar de bicicleta](/proxy/?url=https://content.instructables.com/FOR/ZADJ/KR3HT01E/FORZADJKR3HT01E.jpg&filename=Porta Lápis/ organizador com câmara de ar de bicicleta)
![WhatsApp Image 2021-07-14 at 13.48.57.jpeg](/proxy/?url=https://content.instructables.com/FLU/PMTN/KR3HSWRM/FLUPMTNKR3HSWRM.jpg&filename=WhatsApp Image 2021-07-14 at 13.48.57.jpeg)
![recorte valvula.png](/proxy/?url=https://content.instructables.com/FOK/4GI9/KR3HSWRL/FOK4GI9KR3HSWRL.png&filename=recorte valvula.png)
![corte raio.png](/proxy/?url=https://content.instructables.com/FLP/89XK/KR3HSWRN/FLP89XKKR3HSWRN.png&filename=corte raio.png)
![limando o raio.png](/proxy/?url=https://content.instructables.com/F12/1HYO/KR3HSWRO/F121HYOKR3HSWRO.png&filename=limando o raio.png)
1- Wash the inner tube with soap and water
2 - Using scissors or a knife, cut around the base of the valve to remove this part.
3 - Cut the bicycle spoke in half and separate the part that is threaded at the end.
4 - Sharpen the tip of the bicycle spoke that was cut using a file or sandpaper.
Mounting
![use um alicate para puxar o restante.png](/proxy/?url=https://content.instructables.com/FWA/TVQY/KR3HSYYC/FWATVQYKR3HSYYC.png&filename=use um alicate para puxar o restante.png)
![dobra da borracha.png](/proxy/?url=https://content.instructables.com/FO4/ICO8/KR3HSYR7/FO4ICO8KR3HSYR7.png&filename=dobra da borracha.png)
![camara dobrada presa com fita adesiva.png](/proxy/?url=https://content.instructables.com/FJI/VY86/KR3HSYR3/FJIVY86KR3HSYR3.png&filename=camara dobrada presa com fita adesiva.png)
![use a parte pontida para furar.png](/proxy/?url=https://content.instructables.com/FT9/M09M/KR3HSYTB/FT9M09MKR3HSYTB.png&filename=use a parte pontida para furar.png)
![use um alicate para puxar o restante.png](/proxy/?url=https://content.instructables.com/FST/GWB9/KR3HSZ3V/FSTGWB9KR3HSZ3V.png&filename=use um alicate para puxar o restante.png)
![empurre o niple .png](/proxy/?url=https://content.instructables.com/FE1/L2R5/KR3HSYRA/FE1L2R5KR3HSYRA.png&filename=empurre o niple .png)
![depois de atravesar fazer a dobra.png](/proxy/?url=https://content.instructables.com/F52/K37T/KR3HSYR6/F52K37TKR3HSYR6.png&filename=depois de atravesar fazer a dobra.png)
![dobra final e corte.png](/proxy/?url=https://content.instructables.com/FWC/Q7QM/KR3HSYR8/FWCQ7QMKR3HSYR8.png&filename=dobra final e corte.png)
![corte final ou nova dobra.png](/proxy/?url=https://content.instructables.com/F2N/KJMI/KR3HSYR4/F2NKJMIKR3HSYR4.png&filename=corte final ou nova dobra.png)
![corte raio.png](/proxy/?url=https://content.instructables.com/FDL/SB8O/KR3HSYR5/FDLSB8OKR3HSYR5.png&filename=corte raio.png)
![segunda dobra.png](/proxy/?url=https://content.instructables.com/FSX/XLO2/KR3HSZNN/FSXXLO2KR3HSZNN.png&filename=segunda dobra.png)
![terceira dobra .png](/proxy/?url=https://content.instructables.com/FEU/9YWU/KR3HSZNO/FEU9YWUKR3HSZNO.png&filename=terceira dobra .png)
![dobra final pronta.png](/proxy/?url=https://content.instructables.com/F19/TR38/KR3HSYR9/F19TR38KR3HSYR9.png&filename=dobra final pronta.png)
1-Bend the inner tube of the bike so that it alternates in a zigzag pattern. Use a width not exceeding 7 cm
2- To keep the set maintaining its final shape, use masking tape.
3- Use the bicycle spoke with the nipple already screwed on, to pierce the folded rubber assembly through the middle.
So as not to hurt your palm in the process, use a PET bottle cap to protect.
4-Once the tip of the bicycle spoke appears, you can use pliers to pull the spoke.
5-Now you can remove the duct tape
6- Note that the side of the bicycle spoke that contains the nipple does not go in as the hole is small. Force it through some layers
7-On the side where the bicycle spoke remains, fold and cut the excess off.
8-Another alternative would be to create a strap to be able to attach the set to the wall.
To do this, make another bend in the bicycle spoke close to the rubber as in the photo.
9-Now using nose pliers, bend the bicycle spoke around the end of the pliers to make a loop.
Then cut the finishing stock
Thanks for reading this tutorial and send me news about the execution and any doubts and changes in the execution of these instructables.