Bloom: a Short Film

This animation explores themes of hope, care, and connection in a dystopian world, where even amidst the desolation, a single flower brings new meaning to a robot’s life. Set in an abandoned warehouse, the story follows a robot that discovers the fragile flower in an otherwise lifeless environment. Despite the bleakness of its surroundings, the robot brings the flower home, tending to it and nurturing it over the years. Through this relationship, the robot finds comfort and purpose, showing how even in a cold, mechanical world, small acts of care can make a significant difference.
A key aspect of this project was the careful use of lighting to enhance the emotional depth of the story. In the early scenes, the lighting is deliberately dim and stark, reflecting the robot's isolation in the warehouse. The use of shadows and cooler tones establishes the emptiness of the environment. As the robot finds the flower and begins to nurture it, the lighting gradually shifts to warmer tones, symbolizing the growth of hope and warmth in the robot's world. Soft lighting highlights the flower, bringing it into focus as a symbol of life amidst the desolation. Over time, as the robot continues to care for the flower, the lighting becomes more gentle and inviting, reinforcing the emotional bond between the robot and the flower.
In this project, I aimed to use lighting not just as a tool for visibility but as a way to tell the story itself. By adjusting the intensity, color, and direction of light, I was able to reflect the changes in the robot’s emotional state and the evolution of its connection to the flower. The progression from harsh, industrial lighting to soft, nurturing warmth mirrors the robot’s own growth and the blossoming of hope in its mechanical world. This attention to lighting helped create a visual narrative that complements the emotional journey, making the story feel immersive and emotionally resonant.
Supplies
Tools:
- Computer
Software:
- Blender
- Mixamo
- Remove.bg
- Sketchfab
- CGTrader
- Meshy
- Imovie
The Character Image

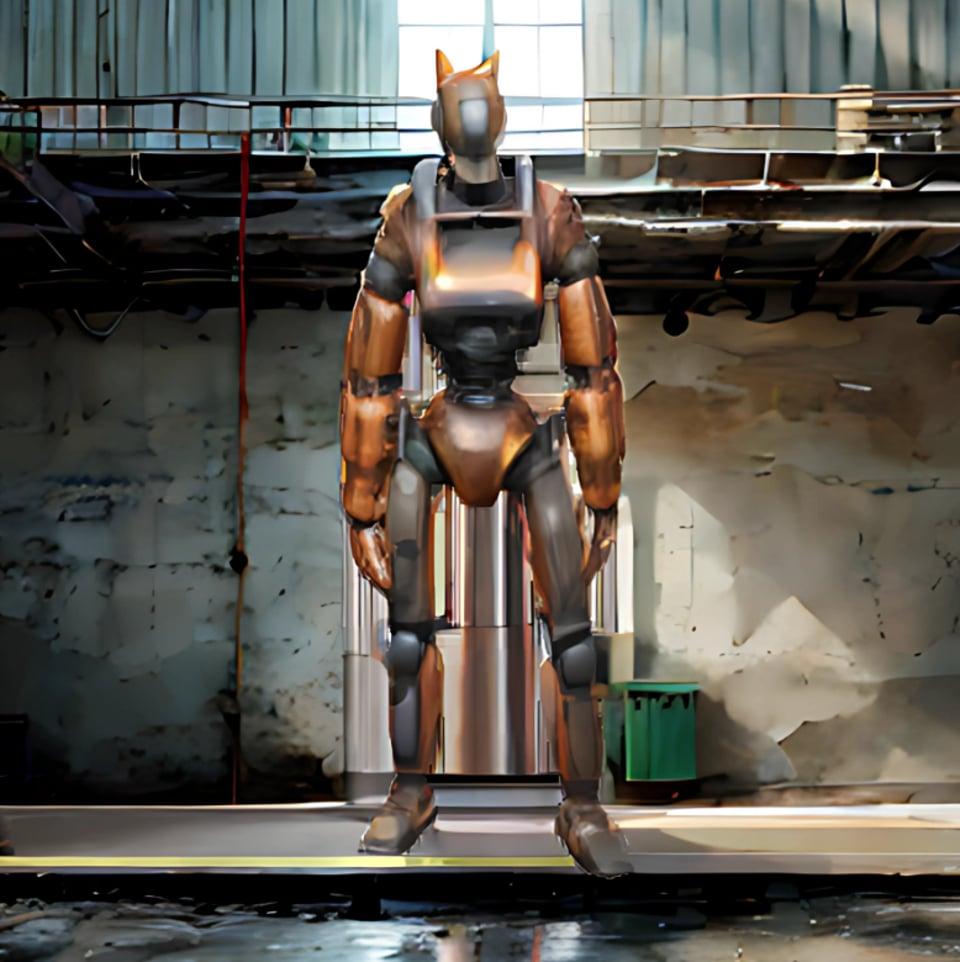
To find a good image for Mixamo, I started by thinking about the kind of robot I wanted to animate. I knew I needed something with a clear, full-body view and a neutral pose—something that would translate well into a 3D model. I focused on finding a front-facing image where the robot was standing upright, with its arms and legs visible and spaced naturally, like in a relaxed T-pose or A-pose. This helps later when Mixamo tries to place the joints during the rigging process.
I also made sure the robot's design was clean and easy to read. I avoided images with overly complex backgrounds or cluttered details, which can make it harder to define the shape when converting to 3D. I explored different sources and options, including drawing tools and image generators, until I landed on a design I liked—a bold orange humanoid robot. The color made it visually striking, and the humanoid shape made it perfect for applying standard animations in Mixamo.
Preparing for 3D Rendering

After choosing the orange humanoid robot image, the next step in my process was to remove the background to prepare it for creating a 3D model in Meshy. I used remove.bg, a free online tool that quickly removes backgrounds from images. I uploaded my robot image to the site, and it automatically detected the robot and erased everything else. Within a few seconds, I had a clean version of the image with just the robot on a transparent background. This was important because Meshy needs a clear and unobstructed subject to accurately generate a 3D model. With the background removed and the robot clearly isolated, I downloaded the transparent PNG and got ready to bring it into Meshy for the next step in the process.
Creating the 3D Model


Once I had the transparent PNG of my orange humanoid robot, I moved on to importing it into Meshy to start the 3D generation process. On the Meshy website, I selected the "Image to 3D" feature and uploaded my cleaned-up robot image. Meshy processed the image and generated four low-resolution, untextured 3D draft models, each with slightly different interpretations of the robot's shape and proportions.
These initial drafts gave me a chance to compare variations and choose the one that looked the closest to what I had in mind. While the drafts were rough and didn’t include any colors or textures, they gave a good idea of the overall form and structure. After reviewing them, I picked the version that best captured the look and posture of my robot. I then clicked confirm to enhance and texture the model, and Meshy started refining it—adding surface detail, color based on the original image, and making it look more complete and polished. This upgraded version would be the one I’d eventually rig and animate in Mixamo.
Downloading the Model

After Meshy finished generating the textured 3D model of my robot, I was ready to export it so I could use it in Mixamo. On the Meshy interface, I clicked the "Download" button, which opened up a few file format options for exporting the model. From the list, I chose FBX, since that’s one of the formats Mixamo accepts for auto-rigging and animation. Clicking FBX started the download of my fully textured 3D robot model as an .fbx file, which I could now import directly into Mixamo for the next stage of the process.
Importing to Mixamo


After I dragged the FBX file from Meshy into Mixamo, it automatically uploaded the model without needing any extra steps. Once the upload was complete, the model appeared on screen. I noticed that the robot wasn’t quite in the correct orientation, so I used the controls in Mixamo to rotate and position the model properly—ensuring it was standing upright and facing forward. After adjusting the orientation to my liking, I clicked "Next" to proceed with the rigging process. This took me to the next step where I would place the markers for the robot’s joints, like the chin, wrists, elbows, knees, and groin, so Mixamo could correctly map the skeleton.
Rigging

Once I clicked "Next" after positioning my robot, Mixamo took me to the rigging step. This is where I needed to map the robot’s joints so it could be properly animated. Mixamo automatically placed markers on key areas of the robot’s body, like the chin, wrists, elbows, knees, and groin, to define where the skeleton joints should be. I carefully checked and adjusted these markers to make sure they aligned with the robot’s actual joints, ensuring the rigging would work smoothly when animating. After confirming the placement of the markers, I clicked "Next" again to allow Mixamo to process and map the skeleton to the 3D model.
Once the skeleton was mapped, the robot appeared in the animation window with a basic rig in place. Now, I had access to a variety of animations that I could apply to the model. Mixamo offered a selection of pre-made motions, such as walking, running, jumping, and more, which I could preview and apply to my robot. I simply clicked on different animations to see how they looked in action, and once I found the ones I liked, I could download them or adjust them further to fit my needs.
Applying the First Animation

After the robot's skeleton was mapped and I could preview the available animations, I started exploring the different motion sequences in Mixamo. I eventually settled on the "Catwalk Sequence 2" animation, which seemed like a fun and dynamic movement for the robot. I clicked on that animation to preview it and make sure it looked right with my robot’s model. Once I was happy with how it looked, I decided to download the animation.
To do that, I clicked the "Download" button on the right side of the Mixamo interface. In the download options, I made sure to select the FBX format, as I wanted to keep the model and animation together. I also ensured that the "With Skin" option was selected so that the animation would be applied to the robot's rigged mesh, not just a skeleton. After confirming the settings, I clicked "Download", and the FBX file containing both the robot and the Catwalk animation was saved to my computer, ready for further use in my project.
Assets


After downloading the animated robot model from Mixamo, I started gathering additional 3D assets to build out the world of my film. I went to Sketchfab and CGTrader, two great sources for free and paid 3D models. I began by searching for a warehouse, which would serve as one of the main environments for the robot. I found a model that matched the industrial vibe I was going for and downloaded it in a format compatible with my animation software.
Next, I looked for a kitchen—a more personal space for the character—and found a futuristic kitchen setup that fit perfectly. This would help show a different side of the robot and give the story some variety in location.
Then, I started searching for more specific props. I found a flower pot and a flower, which at first seemed like just background details. But in the story I’m telling, these items eventually take on a more important, symbolic role later in the film. So I made sure to find models that were visually distinct and could stand out when the time came for them to be featured more prominently. With all these assets collected, I had everything I needed to start building my scenes and bringing the robot's world to life. I then downloaded all of these assets to make sure that I had them ready when I needed them.
Creating a New Blender Project

To start assembling everything, I opened Blender and created a new project. Blender starts every new file with a default scene that includes a cube, a camera, and a light. Since I didn’t need the cube, I clicked on it to select it (it highlights with an orange outline), then hit the X key on my keyboard. A small confirmation prompt appeared, and I clicked "Delete" again to remove it from the scene. That gave me a clean workspace to begin importing my robot model and other assets, and start building the animation step by step.
Importing the Robot

With the default cube deleted and a clean Blender scene ready, I moved on to importing my animated robot. I went to the top-left corner of the screen, clicked on File > Import > FBX, and navigated to the location where I had saved the FBX file from Mixamo. This file already included the robot mesh, skeleton, and the Catwalk Sequence 2 animation.
I selected the file and clicked Import FBX. After a moment, the robot appeared in my scene, fully rigged and posed in its first animation frame. I scrubbed through the timeline at the bottom of the screen to confirm that the animation was working properly—and sure enough, the robot smoothly walked through the catwalk motion, just as it had in Mixamo. Now the character was fully in Blender and ready to be placed in an environment, alongside the other assets I had gathered.
Importing the Warehouse

Since the warehouse model came from CGTrader and was in FBX format, I followed the same steps to bring it into Blender. I clicked File > Import > FBX (.fbx), then navigated to the folder where I had saved the warehouse file from CGTrader. After selecting the file, I clicked "Import FBX" and Blender brought it into the scene.
The warehouse appeared at the center of the workspace. I used G to move it into place, S to scale it if it came in too big or too small, and R to rotate it as needed. Once it was properly positioned, I had a full environment set up for my robot animation to take place in. With both the animated robot and the CGTrader warehouse model in the same scene, things were really starting to come together visually.
Lighting

After importing the warehouse model, I used Blender’s standard lights—like the default point light, sun, and area light—to light the scene. I didn’t add anything complex; I just focused on positioning and adjusting these basic lights to get the look I wanted.
Lighting turned out to be a crucial part of the scene. It helped define the robot’s shape, cast realistic shadows, and gave depth to the warehouse environment. By carefully adjusting the strength, angle, and placement of each light, I was able to highlight the robot’s movement and make the space feel more believable. Even with just the standard lights, I could shape the mood and ensure that the most important parts of the scene were clear and visually engaging.
Rendering the Animation for Scene #1

Once everything in the scene was set up with the robot, warehouse, and lighting, I was ready to render the animation. To do this, I simply clicked Render > Render Animation from the top menu in Blender. This command automatically started the rendering process, and Blender began processing each frame of the animation.
I didn’t need to adjust any complex settings, as the default ones were already in place. Blender handled everything, rendering the animation frame by frame and saving the output to the location I’d set in the Output Properties panel. Once the process was complete, I had a fully rendered animation ready to be reviewed or exported for further use.
Recording Scene #1

After rendering the animation in Blender, I wanted to capture the scene in real-time, so I screen recorded the animation to create a smooth video file. Here's what I did:
I used a screen recording tool to capture the animation as it played. I opened the animation in Blender's Render mode and made sure everything was set up to show what I wanted to record. I then started the screen recording software and selected the area of the screen where the animation was playing. I hit Record, and the screen recorder captured the animation as it played out, creating a video file of the scene.
Once the recording was finished, I saved the video file and opened iMovie. In iMovie, I created a new project and clicked the Import Media button to bring in the screen recording. I navigated to the location where the video file was saved, selected it, and clicked Import. The video was now in my iMovie timeline, where I could edit, add effects, trim, or adjust it further to match the rest of my film.
Setting the Scene for Scene #2


After finishing the robot scene, I needed to set up the next scene, which would focus on a different element. To do this, I first deleted the robot from the scene. I left-clicked on the robot to select it in the 3D viewport. Once the robot was selected, I pressed the X key on my keyboard to bring up the delete prompt. After confirming the delete, the robot was removed from the scene completely.
Next, I wanted to add a new focal point: a flower growing in the ground near the center of the warehouse. I then imported the flower that i had downloaded earlier. I placed it in the scene near the center of the warehouse, where it would be the new focus.
With the flower in place, the scene was ready for the next step in the animation process.
Exporting Mixamo Animation #2

To continue with the robot's animation, I went back to Mixamo and selected the "Stop and Start Walking" animation. I navigated to the Mixamo website, opened the robot model I had previously uploaded, and applied the "Stop and Start Walking" animation to the robot.
Once I was happy with how the animation looked, I clicked the Download button in Mixamo. I chose the FBX format and made sure to include the "Skin" to keep both the robot’s mesh and the animation. After the export was complete, I downloaded the FBX file and was ready to import it back into Blender for further work.
Importing Character Animation #2

After downloading the "Stop and Start Walking" animation from Mixamo, I imported the FBX file into Blender. To do this, I went to File > Import > FBX and selected the FBX file I had just downloaded. Once the robot appeared in the scene, I could see it with its mesh and animation intact.
To position the robot so that it would stop just before the flower, I carefully moved and rotated the robot using the G (grab) and R (rotate) keys. I positioned the robot along the X-axis or Y-axis, depending on the scene setup, ensuring that it was walking towards the flower but would come to a stop right before reaching it.
I checked the animation by scrubbing through the timeline to confirm the robot was walking smoothly and stopping in the right spot. Once everything was in place, I made sure the robot's final position was just a few steps away from the flower, which would set up the next action in the animation.
Rendering Scene #2

After setting everything up for Scene #2, I was ready to render the animation. I simply went to the top menu and clicked Render > Render Animation. Blender then started rendering the scene, processing each frame of the animation and capturing the robot walking toward the flower and stopping just before it. Once the rendering process was complete, I had the animation for Scene #2, ready to be used for further editing or review.
Recording Scene #2


Got it! Here's the updated explanation using the built-in Mac screen recording tool:
To begin the screen recording, I first needed to open the rendered animation in Blender. Here's how I did it:
- I ensured that the animation was set up correctly in Blender, with the robot walking toward the flower and stopping just before it.
- To open the rendered animation window, I went to the Timeline at the bottom of the Blender window and made sure the animation was ready to play.
- Next, I went to the top menu and clicked on Render > View Animation. This opened the rendered animation window, where the animation played in real-time as it was rendered frame by frame.
Once the rendered animation window was open and playing, I used the built-in screen recording tool on my Mac to capture it. I pressed Shift + Command + 5 to open the screen recording tool, selected the area of the screen where the animation was playing, and hit Record.
After the animation finished, I stopped the screen recording and saved the video file. From there, I opened iMovie and imported it after Scene #1.
Preparing Scene for Scene #3

I began by adjusting the camera angle to give the scene a fresh perspective. I rotated the camera to focus on a different part of the environment, making sure the framing was aligned with the next scene's direction. This shift helped set up the visual transition, creating a change in the mood and focus of the story.
After adjusting the camera, I deleted the robot from the scene. I selected the robot model and removed it, clearing it from the shot. This was important for the next scene, as it marked the end of that moment and allowed the next part of the animation to begin without distraction.
Exporting Mixamo Animation #3

After recording Scene #2, I wanted to add a new animation to the robot for the next part of the project. Since the robot was still in Mixamo from earlier animation, I didn't need to re-upload the 3D model. I went back to Mixamo and selected the "Looking Down" animation for the robot that was already set up. Once I applied the animation, I made any necessary adjustments to ensure it looked just right. After confirming the animation played smoothly, I clicked the Download button, selected the FBX format, and made sure to include the "Skin" so both the mesh and animation were exported together. Once the file was downloaded, I was ready to import the newly animated robot into Blender for the next scene.
Importing Mixamo Animation #3

After downloading the FBX file with the "Looking Down" animation from Mixamo, I was ready to import it into Blender. To do this, I opened my Blender project and went to the top menu, clicking on File > Import > FBX. I navigated to where I had saved the FBX file with the new animation and selected it for import.
Once the file was imported, the robot appeared in the scene with the "Looking Down" animation already applied. I made sure the animation played properly by scrubbing through the timeline in Blender. If necessary, I adjusted the robot's position or orientation to ensure it looked just right in the scene. With the animation successfully imported, I was now ready to move forward with the next steps in the project.
Render Scene #3

After importing the robot with the "Looking Down" animation into Blender, I was ready to render the scene. To do this, I first made sure everything was set up, including the robot’s position and animation. I checked the lighting and scene composition to ensure everything was looking good.
Next, I went to the top menu and clicked Render > Render Animation. Blender then began rendering each frame of the animation, capturing the robot’s movement as it looked down. Once the rendering process was complete, I had the final video file for this scene, ready to be used for further editing or review.
Recording Scene #3

After rendering Scene #3, I used the built-in screen recording tool on my Mac to capture it. I first opened the rendered animation in Blender, making sure everything was set up and ready to play. To start the screen recording, I pressed Shift + Command + 5 to open the screen recording tool. I selected the area of the screen where the animation was playing, then clicked Record to begin capturing the scene.
Once Scene #3 played through, I stopped the recording and saved the video file. I then opened iMovie and imported the recorded Scene #3 by clicking Import Media and selecting the newly saved video file. After importing Scene #3, I placed it in the timeline after the already imported Scene #1 and Scene #2, ensuring the scenes were in the correct order.
Exporting Mixamo Animation #4

After completing Scene #3, I wanted to add a new animation to the robot, so I went back to Mixamo and applied the "Kneel" animation.
To do this, I opened Mixamo and selected the robot model I had previously worked on. I then searched for the "Kneel" animation in the Animations section. Once I found it, I applied it to the robot, making sure to adjust the settings to match the robot’s posture and movement. I fine-tuned the speed and positioning of the animation to ensure it looked natural.
Once I was happy with how the "Kneel" animation played out, I clicked the Download button in Mixamo. I selected the FBX format and made sure to include the "Skin" to export both the robot's mesh and the animation together. After the export was complete, I downloaded the FBX file and was ready to import the newly animated robot into Blender for the next scene.
Importing Animation #4

After downloading the FBX file with the "Kneel" animation from Mixamo, I was ready to import it into Blender. To do this, I opened my existing Blender project, which already had the warehouse scene set up.
I went to the top menu and clicked File > Import > FBX, then selected the FBX file containing the robot with the "Kneel" animation. Once the robot was imported into the scene, it appeared with the animation already applied.
Next, I positioned the robot in the warehouse scene, making sure it was in front of the flower. Using the G (grab) key, I moved the robot closer to the flower, ensuring it would kneel down right in front of it. I also used the R (rotate) key to adjust its orientation so the robot would kneel in the correct direction.
I scrubbed through the timeline to make sure the robot's "Kneel" animation played smoothly and that the robot was positioned exactly as I wanted, kneeling down in front of the flower. With everything in place, the scene was ready for the next steps in the animation.
Rendering Animation #4

After positioning the robot and applying the "Kneel" animation in front of the flower in the warehouse scene, I was ready to render the animation. To do this, I first double-checked the robot's position and ensured the animation was playing smoothly. I also reviewed the lighting and scene composition to make sure everything looked good.
Next, I went to the top menu in Blender and clicked Render > Render Animation. Blender then began processing each frame of the animation, capturing the robot as it knelt in front of the flower. Once the rendering process was complete, I had the final animation for this scene.
Recording Animation #4

After rendering the animation where the robot kneels in front of the flower, I used the built-in screen recording tool on my Mac to capture the scene. I opened the rendered animation in Blender and ensured everything was set up and ready to play.
To start the screen recording, I pressed Shift + Command + 5 to open the screen recording tool. I selected the area of the screen where the animation was playing and clicked Record to begin capturing the scene. Once the animation finished, I stopped the recording and saved the video file.
Next, I opened iMovie and imported the recorded animation by clicking Import Media and selecting the newly saved video file. After importing the recorded Scene #4, I placed it in the timeline after the already imported Scene #1, Scene #2, and Scene #3, making sure all scenes were in the correct order.
Add the Transition Scene

After placing Scene #4 into the iMovie timeline, I wanted to add a transition that indicated a passage of time. To do this, I created a "Many Years Later" text scene.
In iMovie, I clicked on the Titles tab at the top of the workspace. I browsed through the available title styles and chose a simple, clean one that fit the tone of the film. I dragged the title into the timeline, placing it after Scene #4.
Once the title was in place, I clicked on the text box in the preview window and typed "Many Years Later". I adjusted the font, size, and position if needed to make it visually clear and centered. I also set the duration of the title clip so it would stay on screen long enough for viewers to read it comfortably.
With the "Many Years Later" transition scene added, the story now smoothly moved into the next part of the animation.
Creating a New Blender Project

After adding the "Many Years Later" title scene in iMovie, I moved on to creating the next part of the animation by starting fresh in Blender. I opened Blender and created a new project, which loaded the default scene containing a cube, a camera, and a light.
To begin setting up the new scene, I needed to remove the default cube. I left-clicked the cube to select it, then pressed the X key on my keyboard. A small confirmation box appeared, and I clicked "Delete" to remove the cube from the scene. This cleared the workspace, allowing me to begin building the next part of the animation from scratch.
Importing Assets and Creating Scene #5


To begin creating Scene #5, I imported the assets into my new Blender project, starting with the kitchen model I had downloaded from Sketchfab. I went to File > Import > FBX, navigated to the downloaded kitchen file, and imported it into the scene. Once loaded, the kitchen environment appeared, complete with counters and a table that would serve as the focal point.
Next, I imported the flower pot by again going to File > Import > FBX and selecting the flower pot model. I placed it carefully on top of the kitchen table, using the G key to move it into place and the R key to rotate it if needed for alignment.
Then I imported the flower model, positioning it directly inside the flower pot. I used the S key to scale the flower so it fit naturally, and adjusted its placement so it looked like it was growing from the pot.
With the flower neatly potted and placed on the kitchen table, Scene #5 was now set up and ready for the next phase of animation.
Lighting

After setting up the kitchen, flower pot, and flower for Scene #5, I moved on to lighting the scene using Blender’s standard white lights. I started by selecting the default point light in the scene and repositioned it using the G key so it would shine more effectively on the table and flower.
To brighten the scene further, I duplicated the light by using Command + C and Command + V. Each duplicated light appeared in the same spot, so I moved them around the scene to different positions, adjusting their placement to evenly distribute the light and eliminate unwanted shadows. I kept all the lights set to a white color for a clean and neutral look, and adjusted their power levels in the light settings to get a balanced and natural indoor atmosphere.
While modeling, animation, and editing all play key roles in bringing a scene to life, lighting is just as important—sometimes even more than people realize. Lighting sets the mood, directs the viewer’s focus, and makes the environment feel believable and immersive. It's not just about visibility; it's about storytelling.
In Scene #5, for example, the careful placement of standard white lights helped draw attention to the flower in the pot without overwhelming the space. By adjusting light intensity and positioning, I was able to highlight the emotional centerpiece of the scene while keeping the rest of the kitchen softly illuminated.
Even with no dialogue, lighting helps convey tone: a warm, quiet kitchen years later, with a single flower that has meaning. It adds depth, contrast, and atmosphere—enhancing everything else in the project, from animation to environment. Without good lighting, even the most detailed model can fall flat. With it, every object gains life and purpose.
With a few well-placed white lights, the flower on the table became the clear focus, and the rest of the kitchen was softly illuminated, making the scene feel warm and complete—ready for the next step.
Exporting Mixamo Animation #5

To continue the story in Scene #5, I returned to Mixamo to apply a new animation to the robot. I searched for and selected the "Sitting" animation from Mixamo’s animation library. This animation made the robot smoothly transition into a seated pose, which fit perfectly with the tone of the next moment in the film.
Once the animation preview looked right, I made sure the robot character was still selected (I didn’t need to reupload the model, since Mixamo saves it during the session). I then clicked Download, chose the format as FBX, and made sure “With Skin” was selected so the character model and the animation would be included together.
After that, the FBX file downloaded to my computer, ready to be imported into Blender for the next scene.
Importing Animation #5 to Blender

After downloading the "Sitting" animation from Mixamo, I imported the FBX file into Blender for the next step in Scene #5. To make it look like the robot was sitting on a chair, I first ensured that I had the chair model imported into the scene as well.
Next, I positioned the robot near the chair, using the G key to move the robot into place. I rotated the robot with the R key so it faced the chair, making sure its posture aligned with the chair’s seat. Then, I carefully adjusted the robot’s position to ensure it was seated properly, making sure its legs were placed on the seat and its arms were positioned comfortably as if it was sitting down naturally.
I also fine-tuned the robot's sitting pose within the animation itself by scrubbing through the timeline and adjusting its location frame by frame if needed, ensuring that the robot’s movement matched the chair’s position.
Once the robot was placed on the chair and everything lined up correctly, the scene was ready for rendering, and I could move on to the next steps of the animation.
Render Scene #5

To render Scene #5, I first made sure everything in the scene was set up and ready for rendering. This included the kitchen model, the flower pot with the flower inside, and the proper lighting that I had already adjusted earlier. I double-checked that the camera angle was set and framing the scene exactly how I wanted it.
Once I was satisfied with the composition, I went to the Render menu in Blender. From there, I selected Render > Render Animation. This command initiated the rendering process, which meant Blender would generate the frames of the animation, based on the scene setup I had created.
Blender processed each frame of the animation, capturing the lighting, camera angle, and objects in the scene. Once the rendering process was complete, the animation was saved as a video file, which was ready for further steps like screen recording and importing into iMovie for editing.
With Scene #5 successfully rendered, I had the final animation file ready to use.
Record Scene #5

After positioning the robot on the chair and ensuring the sitting animation looked natural in Blender, I was ready to record the scene, just like I had done previously.
To capture the animation, I used the built-in screen recording tool on my Mac. I made sure the animation was playing smoothly in Blender and that the robot was in the correct position on the chair. Once everything was set, I pressed Shift + Command + 5 to open the screen recording options.
I selected the area of the screen where the animation was playing, ensuring that it captured the entire scene with the robot sitting on the chair. After selecting the area, I clicked Record to start capturing the animation. Once the animation finished, I stopped the recording and saved the video file to my computer.
The recorded scene was now ready to be imported into iMovie, where I added it to the timeline along with the previous scenes.
Editing for Scene #6

After recording the robot sitting on the chair for Scene #6, I wanted to get a different perspective to add variety to the scene for Scene #7. To achieve this, I moved the camera in Blender to capture the robot from a new angle.
First, I selected the camera in the scene. Then, I used the G key to grab and move the camera into a new position. I repositioned it to the side or at a slightly elevated angle so the robot’s sitting pose was more visually dynamic. I could also use the R key to rotate the camera, adjusting the angle until the robot was framed nicely and the focus was where I wanted it.
I made sure the camera's movement didn’t interfere with the robot’s animation or the scene’s composition. After getting the angle I liked, I scrubbed through the timeline to make sure the camera remained steady and captured the animation smoothly from the new perspective.
With the camera repositioned and the new shot set, I was ready to record the scene from this fresh angle.
Rendering Scene #6

After adjusting the camera to the desired angle for Scene #6, I was ready to render the animation and capture the robot sitting on the chair from this new perspective.
First, I double-checked everything in Blender to ensure that all the elements were in place: the robot’s animation, the lighting, and the new camera angle. I made sure that the camera was framing the robot well and that the lighting was consistent with the rest of the scene.
Next, I went to the Render menu at the top of the Blender interface and selected Render > Render Animation. This triggered Blender to process each frame of the animation, starting from the beginning of the timeline and rendering out the entire sequence. The program rendered the frames at the camera's new angle, capturing the robot's sitting animation from the fresh perspective.
Once the rendering process was complete, Blender saved the animation as a video file, which I could then use in the next steps of the project.
Recording Scene #6

Once Scene #6 was rendered in Blender, I moved on to recording the animation, just like I did with the previous scenes.
I used the built-in screen recording tool on my Mac to capture the animation. First, I made sure that the animation was playing smoothly in Blender and that the camera angle was set correctly to capture the robot sitting on the chair from the new perspective.
To begin recording, I pressed Shift + Command + 5 to open the screen recording options. I selected the portion of the screen where the animation was playing and made sure to capture the entire animation window.
After setting up the recording area, I clicked Record to start capturing the scene. I allowed the entire animation to play through, and once it finished, I stopped the recording and saved the video file to my computer.
Now, I had a screen recording of Scene #6, which I could import into iMovie and place after the already imported scenes for further editing.
Editing

Once all the scenes were imported into iMovie, I began editing them to create a smooth and cohesive animation. I started by arranging the clips in the correct order on the timeline, ensuring that each scene flowed logically from one to the next. After that, I added transitions between the scenes to make the shifts between them more seamless. I selected transitions like fades and dissolves, which gave the film a smooth, natural progression without abrupt changes. I dragged the transitions between the clips, adjusting their length and timing so they felt just right.
Next, I added a title at the beginning of the film. I used the Titles tab in iMovie, selecting a simple style that fit the tone of the animation. I typed in the title or any relevant text and placed it at the start of the timeline. I made sure the title stayed on screen long enough for viewers to read, adjusting its duration to match the pacing of the film.
For the end scene, I included a closing title or credits. I used the same Titles feature to create a simple text screen and placed it at the end of the timeline. This was where I could add credits or a final message, wrapping up the story.
Finally, I reviewed the entire project, ensuring that all transitions, titles, and end scenes flowed well with the animation. Once I was satisfied with the pacing and the overall look, I exported the final video. The editing process in iMovie allowed me to add the finishing touches, making sure the animation was polished and ready for sharing.
Music

After completing the editing of the scenes, titles, and transitions, I moved on to adding soft piano music to enhance the atmosphere of the animation. I started by selecting the piano track I wanted to use and importing it into iMovie by dragging it into the timeline, placing it underneath the video clips.
I ensured the music started at the beginning of the timeline and adjusted its length to match the overall duration of the animation. If the music track was longer than the video, I trimmed the excess by selecting the music clip and dragging the edge to shorten it, making sure it aligned perfectly with the scene.
To make the transition of the music smoother, I applied a fade-in effect at the start of the music and a fade-out effect at the end, ensuring the sound gradually entered and exited without any abrupt changes. I also adjusted the volume of the music so that it complemented the scenes without overwhelming the visuals, providing a soft, calming background throughout the animation.
With the soft piano music now in place, it added a subtle emotional layer to the animation, elevating the mood and creating a more immersive experience.
Final Product
Lighting plays a crucial role in the overall look and feel of an animation. It serves not only as a tool to illuminate the scene but also as a way to set the mood, highlight key elements, and direct the viewer's attention. In this animation, lighting was essential in bringing the scenes to life, creating depth, and enhancing the emotional tone.
For instance, in a scene where the robot is interacting with the flower, soft, warm lighting helps to create a calm and intimate atmosphere, emphasizing the delicate moment between the robot and the flower. Proper lighting ensures that all elements of the scene are visible and adds realism to the setting by casting shadows and giving depth to objects. It can also draw attention to specific areas or actions, guiding the viewer's focus where it's needed most.
In the warehouse and kitchen scenes, lighting was used to highlight the robot’s movements and position, ensuring that the viewer could clearly see the robot's actions as it sat or kneeled. Lighting also affects the mood of these scenes—using cooler tones or brighter lighting can evoke different feelings, whether it's a sense of serenity, tension, or warmth.
Without proper lighting, the animation could look flat and lifeless, failing to convey the intended atmosphere. It would also make the characters and environments harder to distinguish, diminishing the viewer's overall experience. Good lighting ensures that every part of the animation, from the characters to the environments, is showcased in the best possible way, adding realism and enhancing the emotional impact of the story.
Conclusion

In the course of this animation project, I learned just how critical lighting is to creating the right atmosphere and mood for each scene. Lighting is not only about illuminating the characters and environment, but it’s a powerful tool that can shape the emotional impact of the story. For example, the use of soft lighting in certain scenes created a warm, inviting feeling, perfect for moments where the robot interacted gently with the flower. On the other hand, brighter or cooler lighting could evoke a more neutral or tense atmosphere, depending on the scene's needs.
Lighting also plays a key role in visual storytelling. It can highlight important actions or characters, guiding the viewer’s attention exactly where it’s needed. In this project, lighting was used to focus on the robot, ensuring that its movements were clearly visible, such as when it was kneeling or sitting. This helped establish the emotional connection with the audience, as they could see the robot’s interaction with the environment and understand its role in the story.
Beyond simply making objects visible, lighting adds depth and dimension to the scene. The way light and shadows play on the surfaces creates a sense of realism, making the animation feel more tangible and lifelike. Without proper lighting, scenes can appear flat and lack detail, which could hinder the viewer’s immersion in the world you’ve created.
Ultimately, lighting isn't just a technical aspect of animation; it’s an essential tool for setting tone, directing attention, and enhancing the emotional depth of the scenes. I learned that, with the right lighting choices, you can transform an animation, guiding the audience through a visual experience that goes beyond just what they see, but how they feel.
Throughout this project, I learned how much attention to detail and time goes into creating an animation. The experience taught me how each element, from lighting to animation to editing, plays an important role in bringing a story to life. I gained a deeper understanding of the process and the value of patience, creativity, and problem-solving. Ultimately, the time invested in each step helped me develop new skills and produce a final animation that feels polished and complete.