Bluetooth Robot Arm + App | Arduino & Android
by Hugo Trombert in Circuits > Arduino
20587 Views, 57 Favorites, 0 Comments
Bluetooth Robot Arm + App | Arduino & Android

As of summer 2016, it had been a little more than a year since I had started programming. What I used to do was mostly little projects using LEDs, LCDs, sensors, etc, that required a few hours of work.
But this summer, I thought I should do a more concrete project, that would require me to work for multiple weeks, during which I would learn a lot more skills.
Building a robotic arm was great, but I wouldn't learn a lot... So I decided to build it and also create an app to control it, because I had never created any app, nor any Java program.
The app is for Android and works using Bluetooth.
In this Instructable, I will show you how I did and how to do it.
Let's learn !
How It Works

The structure of the arm is made of Legos, but because you certainly don't own the same bricks as me, I didn't design any plan, or any guidelines to build it. However, you can see the overall on the pictures.
In this Instructable, I describe all the electronics and code.
The arm has 4 servos, including one for the claw, all connected to an Arduino Uno.
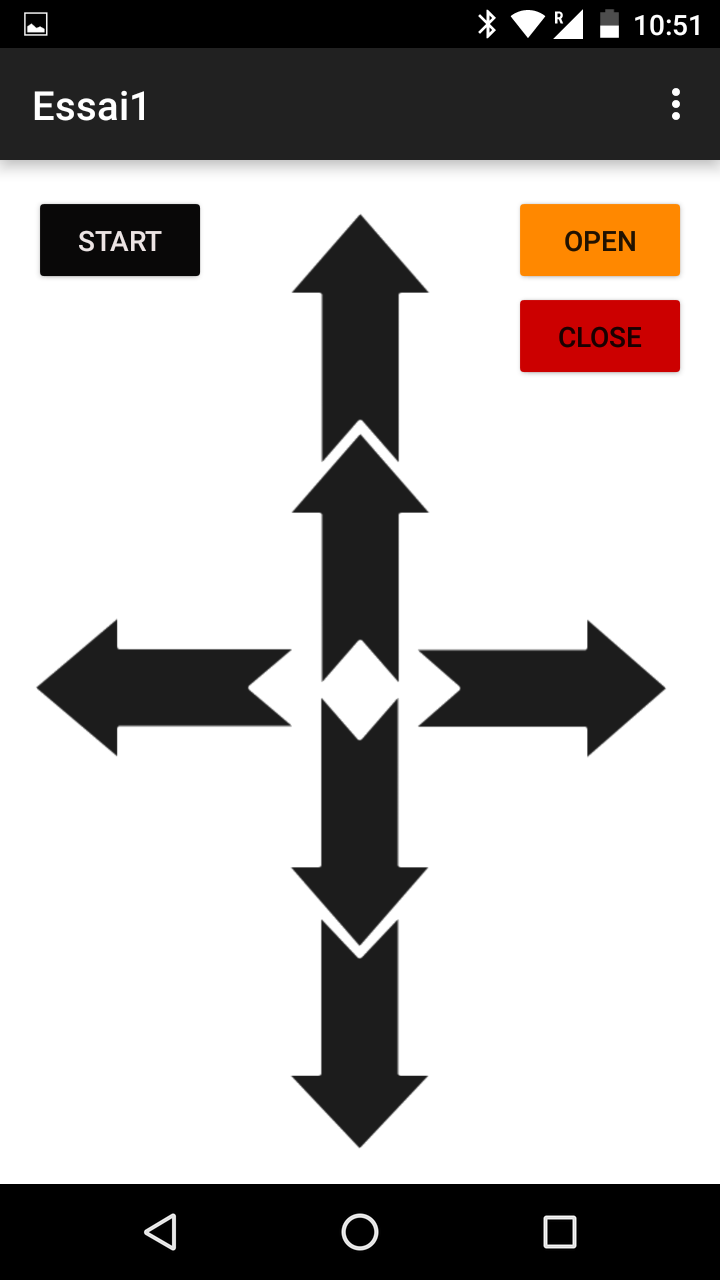
In the app, there are 6 arrow buttons, and 3 normal buttons.
The 'Start' button initializes the Bluetooth.
The arrow buttons send a byte to the Arduino via Bluetooth when they are pressed, and another byte when released.
When the Arduino receives a byte, the corresponding servo starts moving in a direction, and stops when the other byte is received.
For the claw, there are 2 buttons: 'Open' and 'Close'.
When you press 'Close', a byte is sent and the servo of the claw writes an angle closing it.
Opposite for the 'Open' button.
I may upload a video of the arm soon.
Components and Tools Needed
For this project you need:
- an Arduino Uno,
- a permanent breadboard,
- male/male & male/female jumper wires,
- 4 servos,
- a Bluetooth module (HC-05),
- an Android phone,
- Legos or custom 3D printed parts,
- a soldering iron and solder,
- some hot glue,
- eventually tighteners to fix the servos to the structure,
- Android Studio (because my app is not available on the Play Store),
- the Arduino software.
Robot Arm: Circuit
-crop.png)
Here is a Fritzing sketch of the electronic circuit of the arm.
Downloads
Fix the Motors to the Structure

I hot glued the servos to the main structures and their horn to the moving parts of the structure. For more strenght and durability, I added tighteners (see photo).
For the claw. I attached 2 strings to the horn, connected to a part of the claw. With gears on each part of the claw, when one moves, the other one does the same (see video).
Downloads
Robot Arm : Code
.png)
.png)
.png)
.png)
Here is the code of the arm that goes in the Arduino.
Downloads
The App
The files of the app are available on GitHub.
Please not that you have to press the 'Start' button 2 times in order for the phone to connect to the BT module. I may solve this later.
The Development Process
Because this was a big project for me, I had to separate the development in several parts:
First, I developed the arm, but even this had to be developed in different parts.
First, I built the Lego structure.
Then, I developed the claw, activated by push-buttons, and then activated by a serial command (first video). On this video, you can see that the claw doesn't close well, but I solved it later during the development process.
After the claw, I developed the 'shoulder' and 'elbow' of the arm.
I assumed that the app would send a continuous flow of bytes, so during the development, it would work with continuous press push-buttons (second video).
Then I developed the app. I had to learn a lot about Java, the Android environment, etc.
First, I designed it in the WYSIWYG interface of Android Studio (What You See Is What You Get), then I programmed the Bluetooth setup and finally the buttons.
But as it turned out, I couldn't send a continuous stream of data via Bluetooth, so I programmed it to send single bytes, and reprogrammed the Arduino with single press push-buttons.
After a little more than a month of work.... It worked!
Thanks a lot to people on StackOverflow, Android Forums and the Arduino Forum for their help when I needed some, especially about Android development.
Thanks also to OpenClassrooms, a great French website where I learned Java and the basics of Android.