Brain-Controlled Car: EEG + EMG Robotic Control
by Upside Down Labs in Circuits > Sensors
6076 Views, 23 Favorites, 0 Comments
Brain-Controlled Car: EEG + EMG Robotic Control
.gif)
Ever dreamed of driving a car with your brain signals alone?
This project makes it possible - using EEG (brainwave) and EMG (muscle) signals to control a robotic car wirelessly via Bluetooth Low Energy (BLE).
What is an Electroencephalography (EEG)?
Electroencephalography (EEG) is a method used to record an electrogram of the brain's spontaneous electrical activity. It is typically non-invasive, with electrodes placed along the scalp (commonly referred to as "scalp EEG") using the International 10–20 system.
What is an Electromyography (EMG)?
Electromyography (EMG) is a diagnostic and research technique that records the electrical signals generated by muscles when they contract or are at rest.
Focus your mind → Move forward
Flex your left/right arm → Steer left/right
Flex both arms together → Move reverse
Powered by the NPG Lite Device
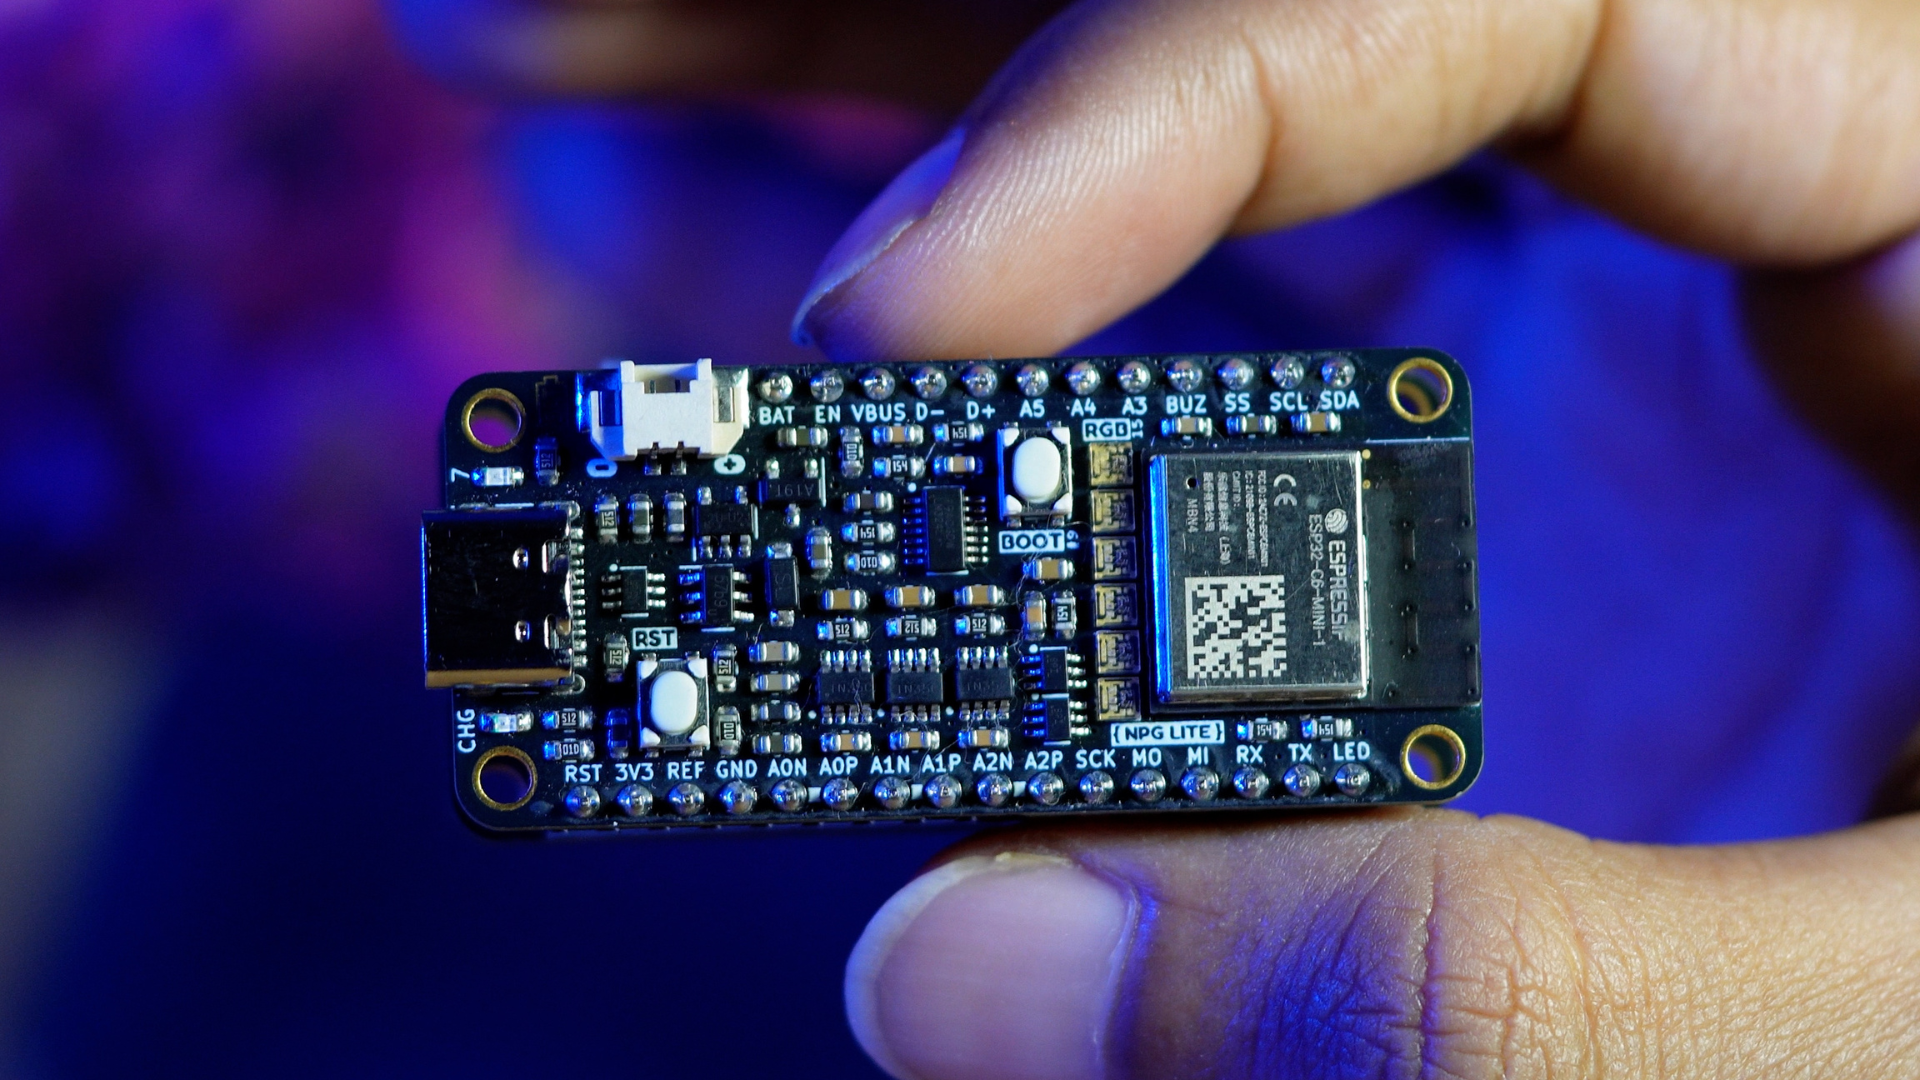
Neuro PlayGround (NPG) Lite is a compact Adafruit Feather form factor, a multi-channel wireless biopotential signal amplifier designed for EMG, ECG, EOG, and EEG recording.
It offers Wi-Fi, Bluetooth, Zigbee, and Thread connectivity, along with patient protection, LEDs (User LED, charging LED, six addressable RGB LEDs), buttons (Reset and user button), LiPo battery charging, and USB-C with ESD protection. Its lightweight and user-friendly design makes it perfect for research, education, and wearable applications.
Neuro PlayGround Lite is available on Tindie.
Watch the complete tutorial for this project on YouTube
This project is made by Aman Maheshwari and Deepak khatri
Supplies
1. Bio-potential acquisition setup
- NPG Lite
- Snap cables + electrodes (or alligator clips)
- Nuprep + alcohol wipes
- USB-C cable
2. Car Components
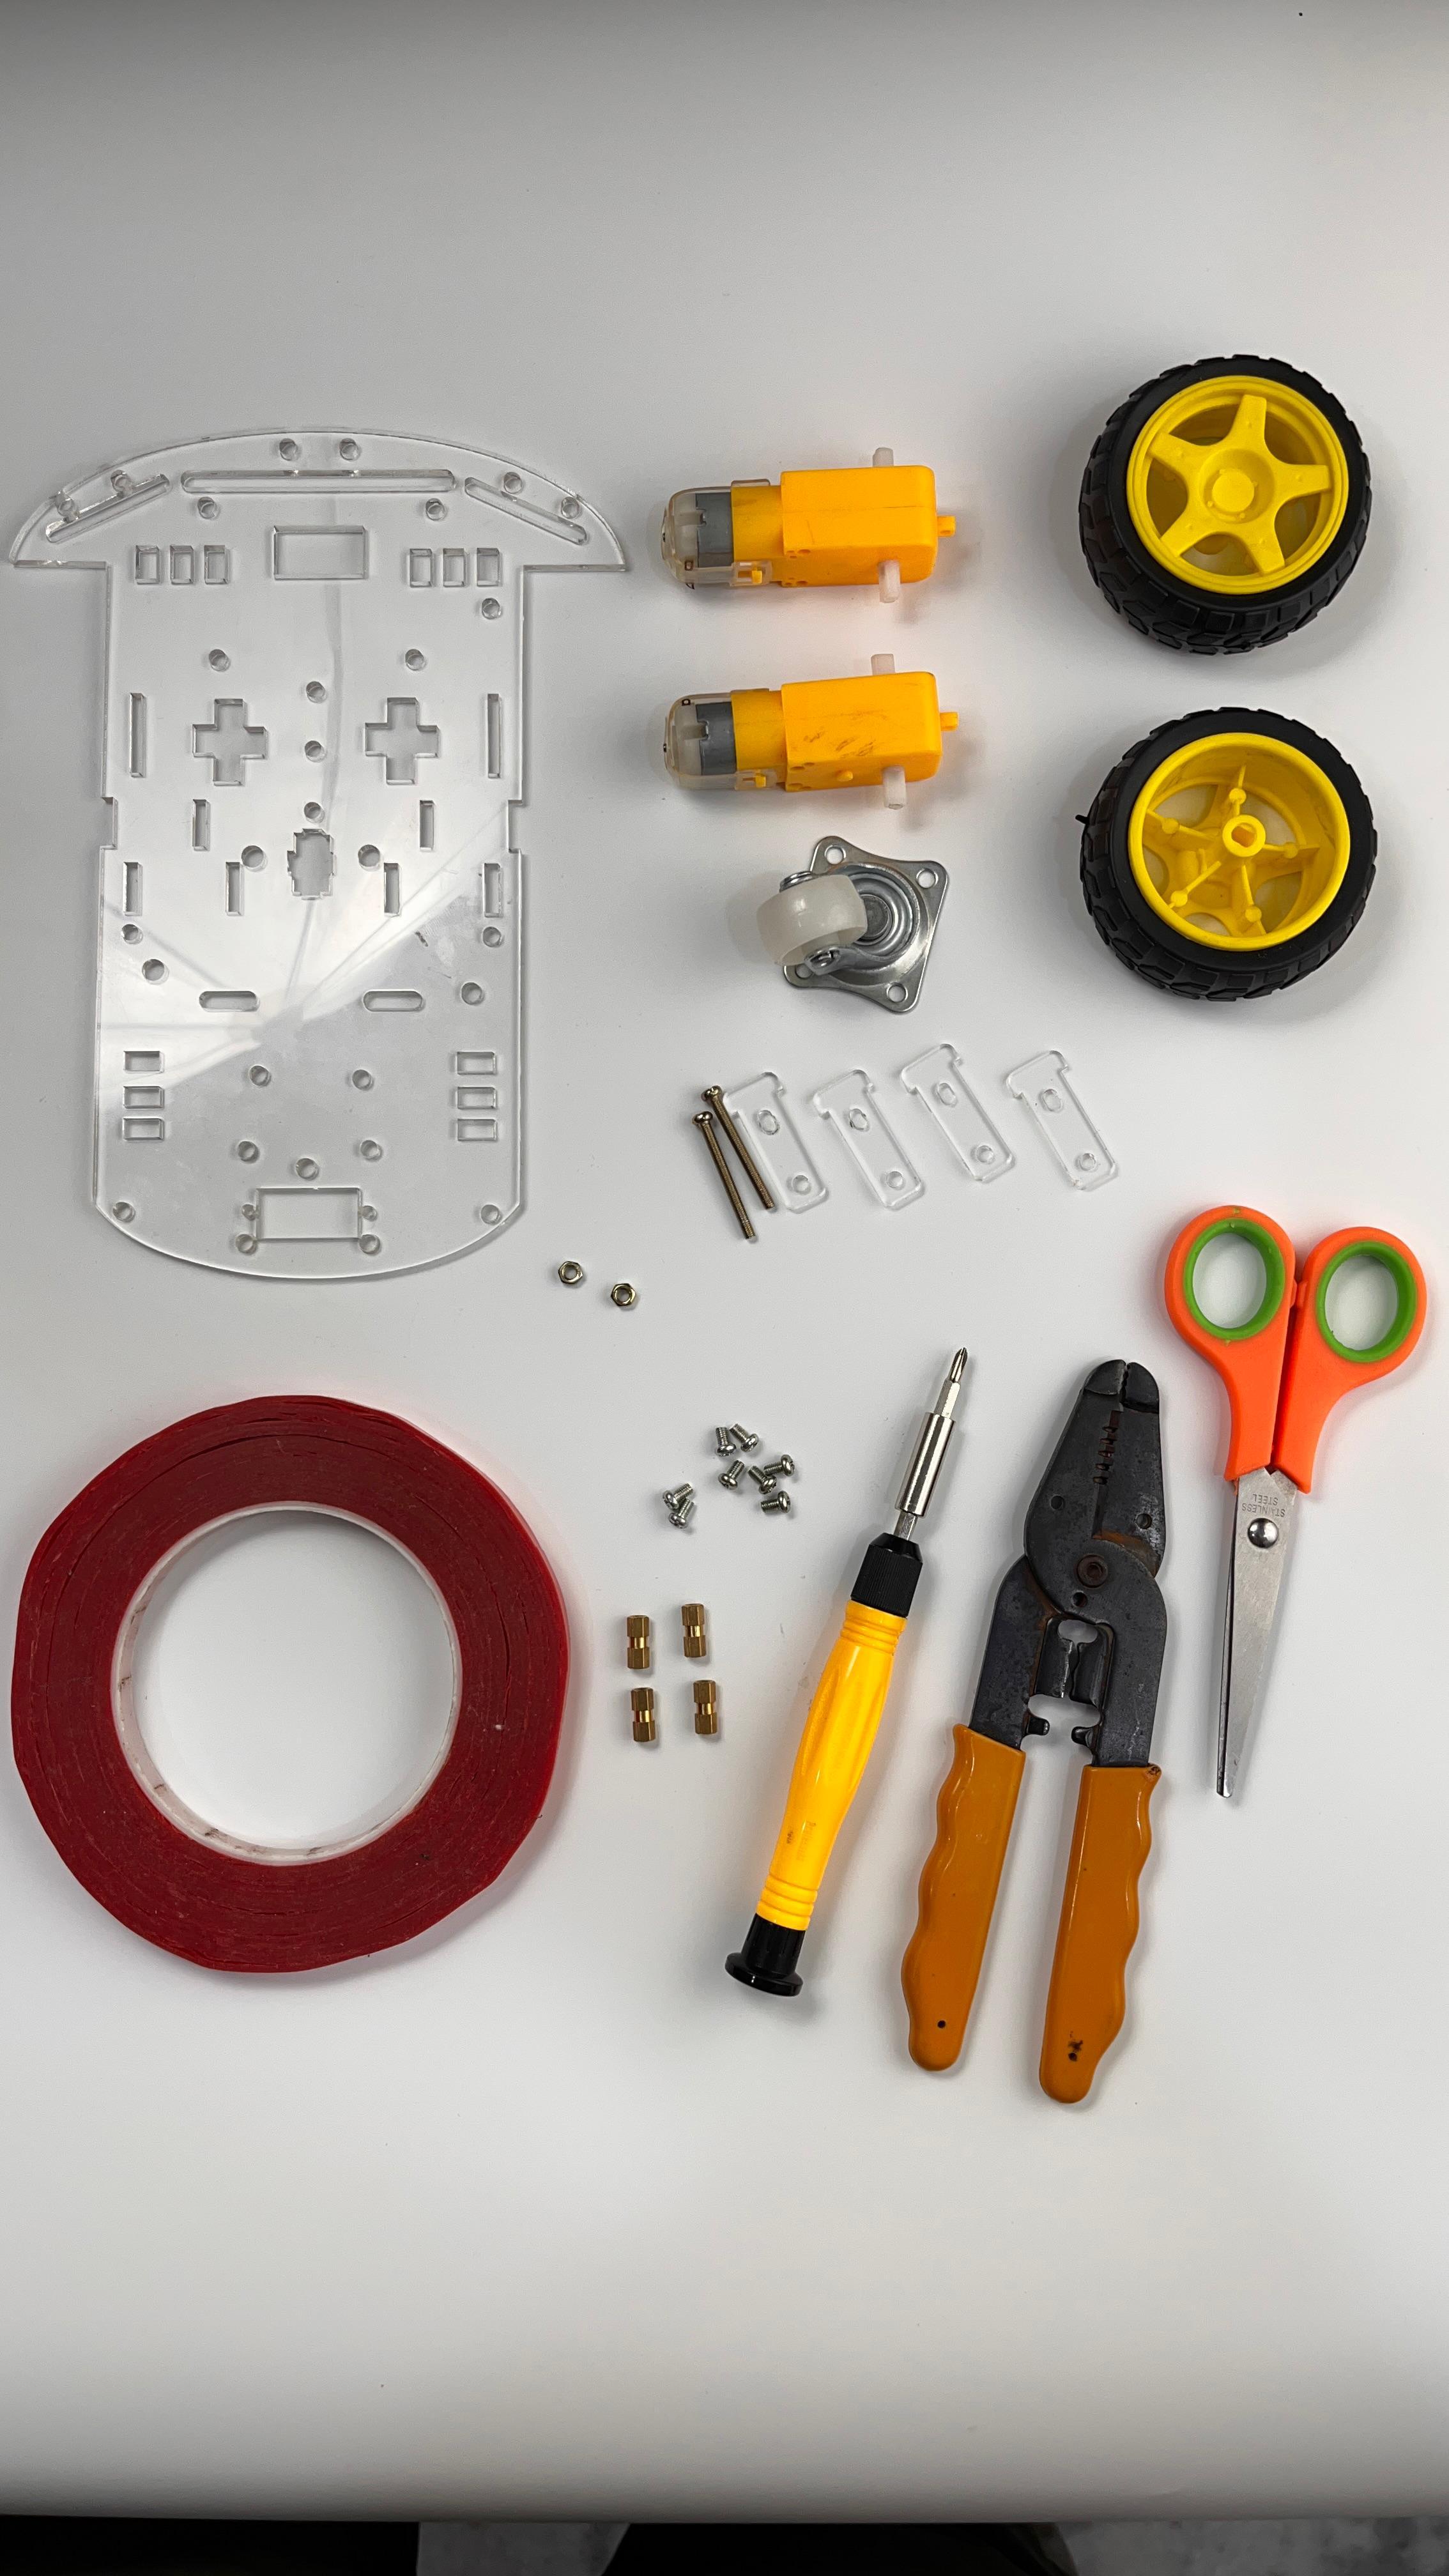
- Robotic chassis (e.g., VoidBot)
- 2 × geared DC motors (6V–12V)
- Motor driver: MX1508/ MX1616
- XIAO ESP32C6 board (receiver)
- LiPo battery
- Slide switch
3. Miscellaneous Tools
- Soldering iron + wires
- Screwdriver
- Laptop with Arduino IDE
Hardware Assembly
.gif)

A. Build the Robotic Car
- Watch this video for step-by-step guidance (only up to 5 minutes).
- After 5 minutes, follow the circuit diagram below for wiring and connections.
- Mount the DC motors to the chassis.
Motor Driver Connection
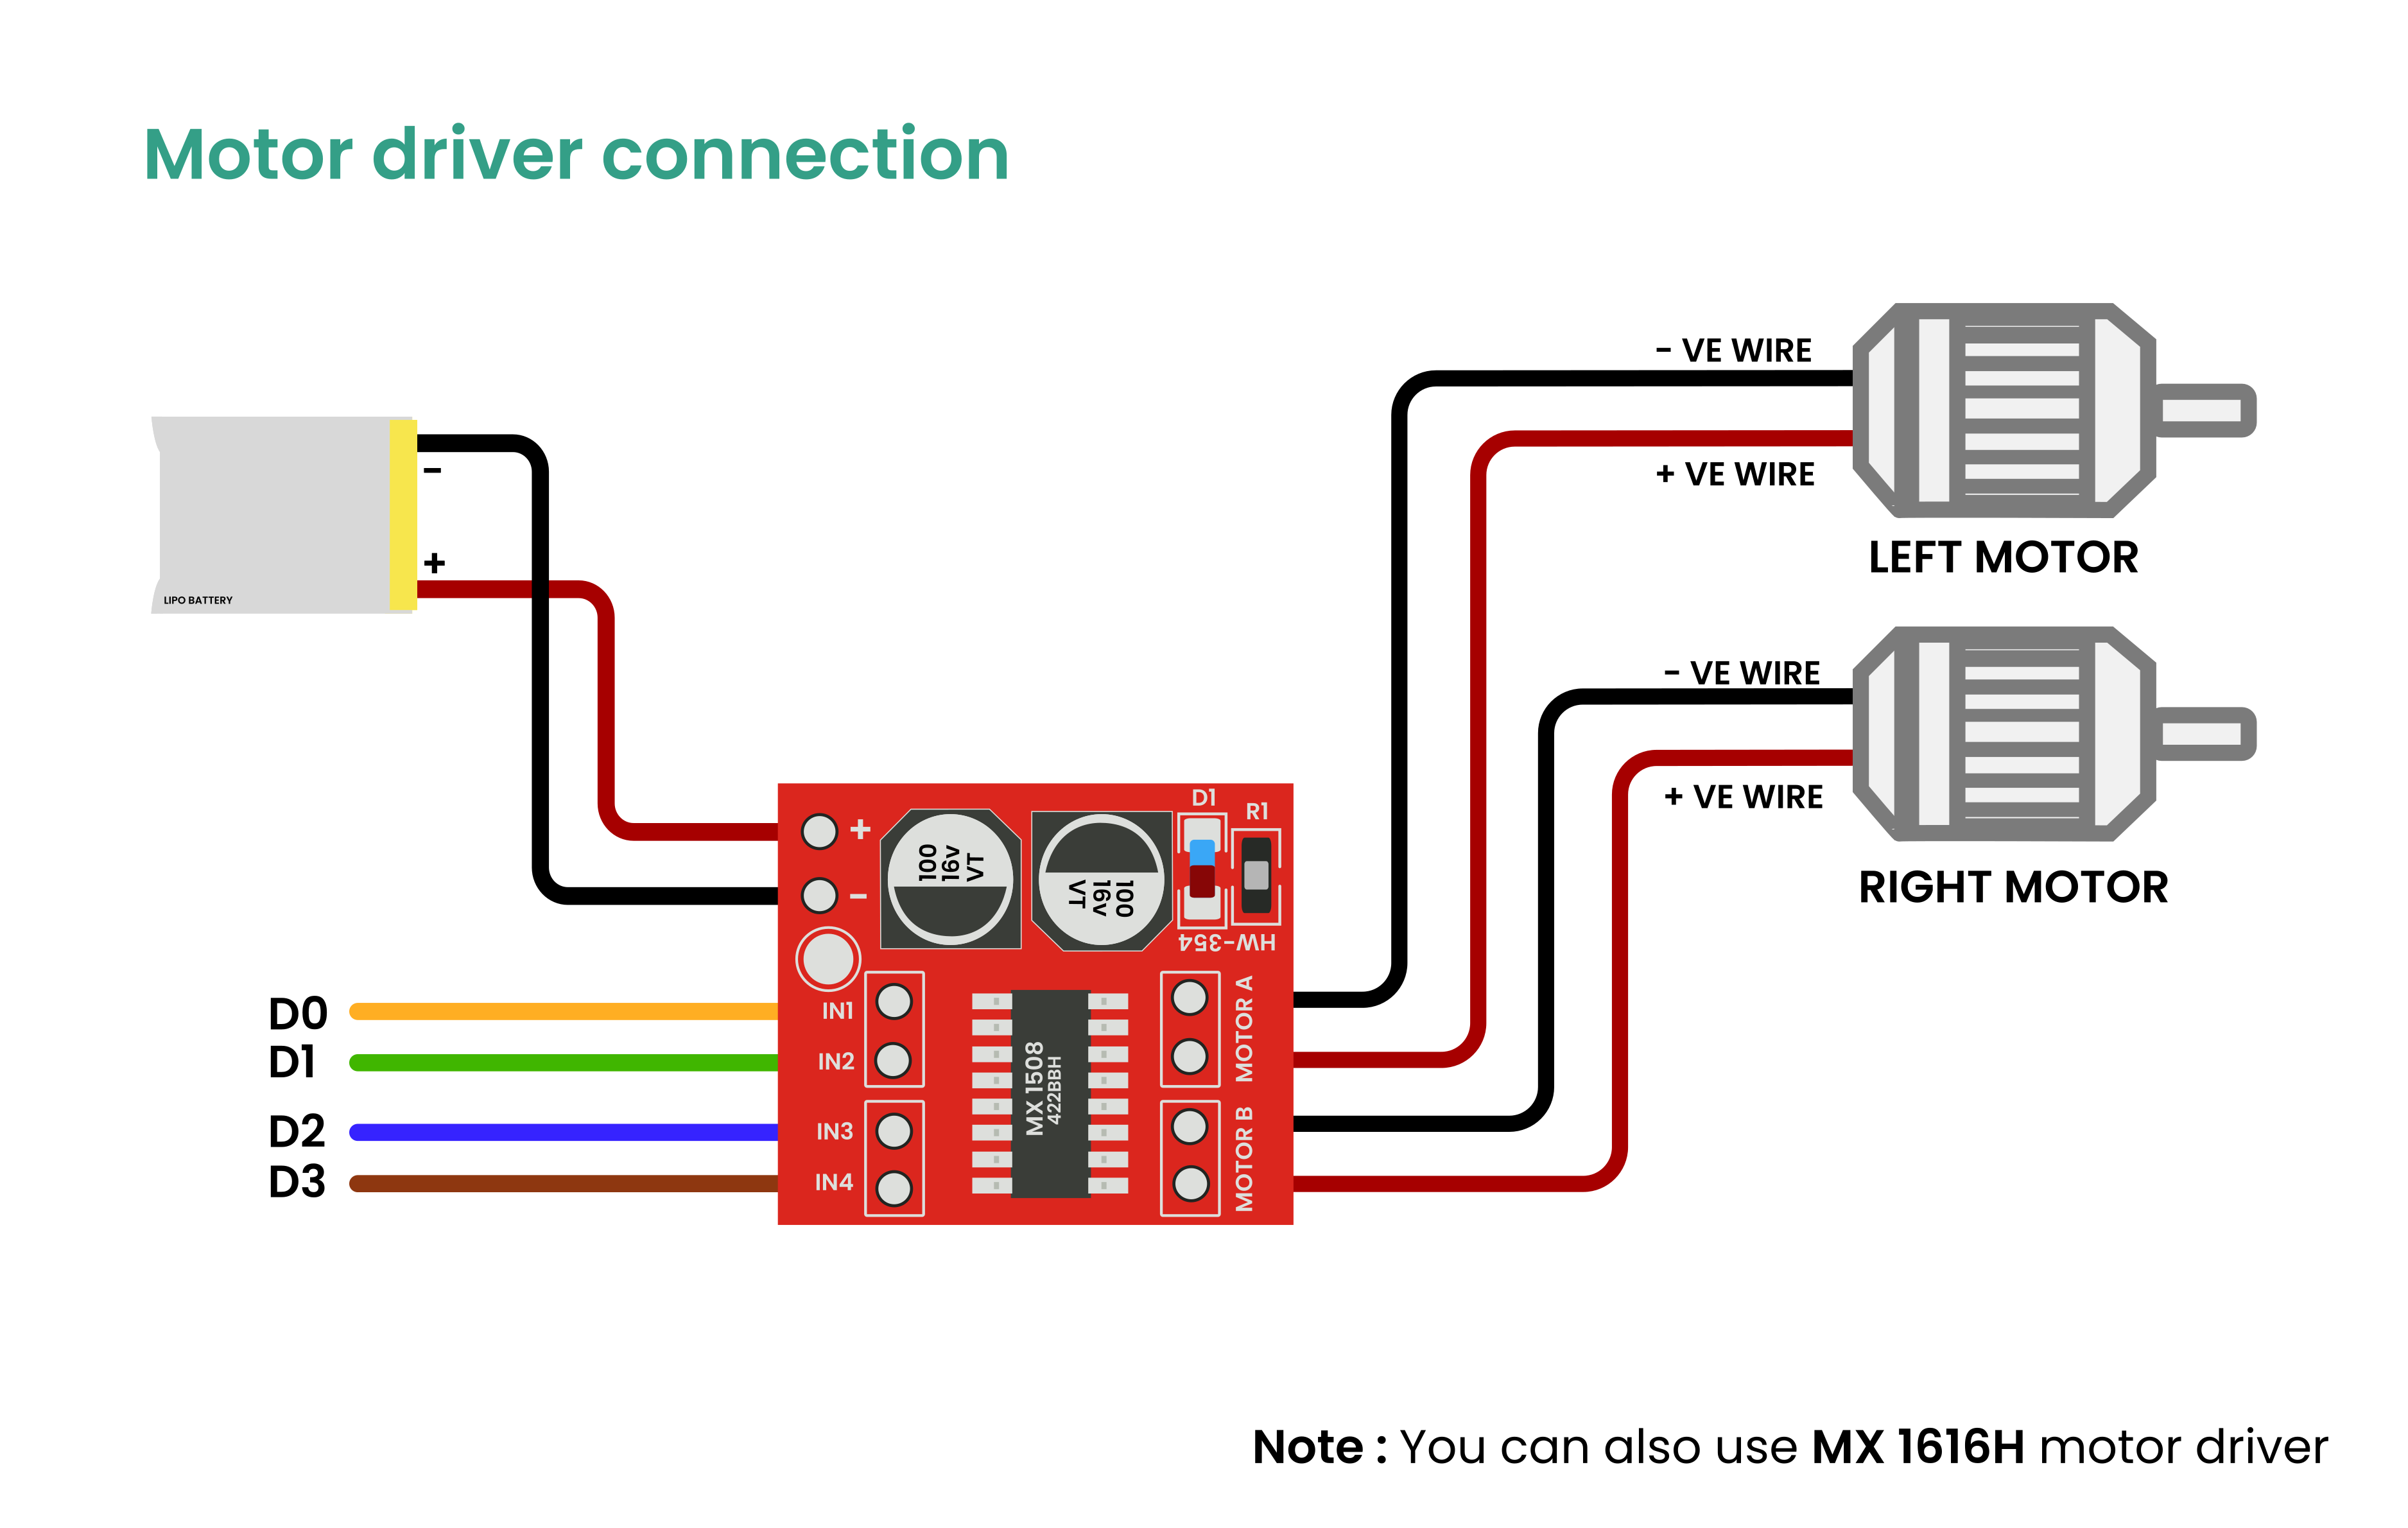
- Connect motors to the driver: Motor A → Left wheel, Motor B → Right wheel.
- Provide power to the motor driver MX1508/ MX1616
- Wire the motor driver inputs to the XIAO ESP32C6 receiver pins.
Motor Driver to XIAO Board Connection
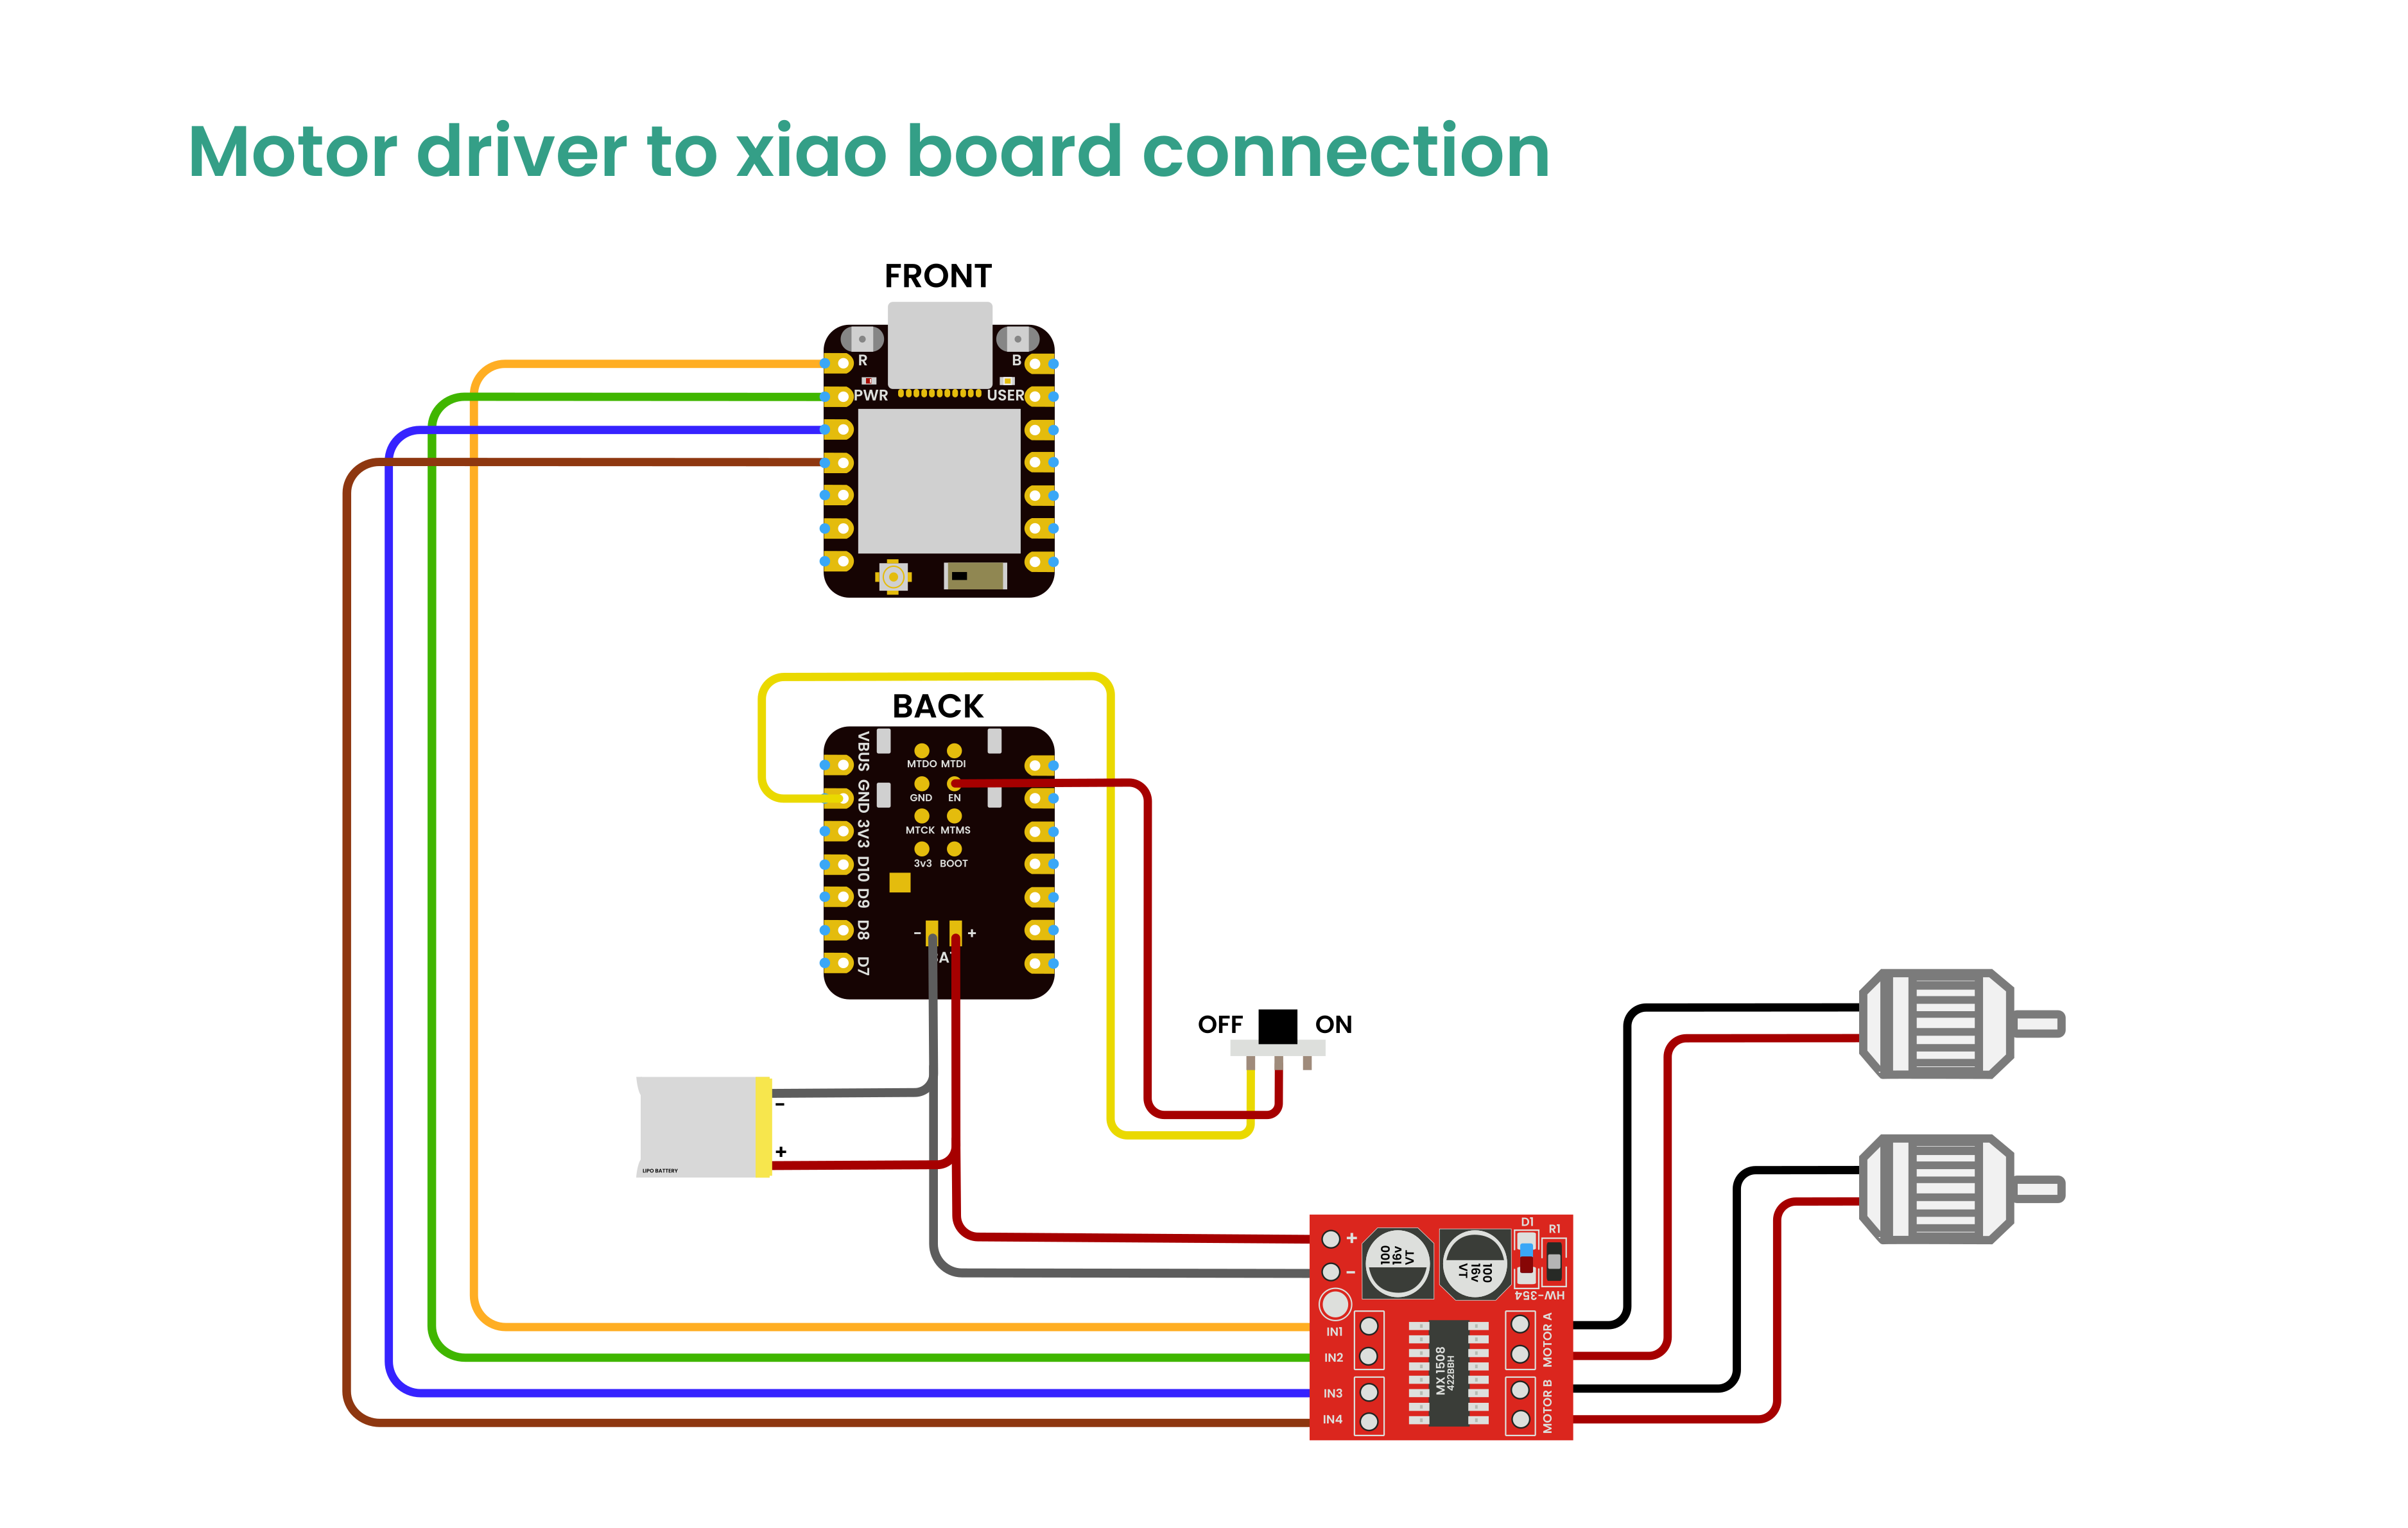
- Wire the motor driver inputs to the XIAO ESP32C6 receiver pins.
- Secure all wiring and components to the chassis like this and the final setup should look like this.
Connecting NPG Lite

.gif)
Connect the snap cables to your Neuro PlayGround Lite device.
Skin Preparation

- Clean the electrode placement areas with an alcohol swab or wet wipe.
- For even better signal quality, you can optionally apply a small amount of Nuprep Skin Preparation Gel before cleaning the skin.
- Allow the skin to dry before placing the electrodes.
- Proper skin preparation removes oils and dead skin cells, improving electrode contact and signal quality.
Wearable Setup

.gif)
| Electrode | Placement | Signal Type |
|---|---|---|
| A0P | Center Forehead | EEG |
| A0N | Behind Right Ear | EEG |
| A1P/A1N | Left Arm (biceps) | EMG |
| A2P/A2N | Right Arm (biceps) | EMG |
| REF | Behind Left Ear | Ground |
Pro Tips:
Clean skin with alcohol wipes before applying electrodes for better signal quality
Install ESP32 Board
.jpg)
Install the following board in Arduino IDE
- Install board manager: ESP32.
Tools → Board Manager → search for esp32 → Install esp32 by Espressif Systems(version - 3.2.0 compulsary).
Install Adafruit NeoPixel Library
.jpg)
Install the following library in Arduino IDE
- Install library: Adafruit NeoPixel.
Sketch → Include libraries → Manage libraries → Search for Adafruit NeoPixel → Install Adafruit NeoPixel
Upload the Code
.png)
.png)
.png)
.png)
Turn ON the NPG Lite device, connect it to your Laptop with a Type-C cable, and then follow the steps below:
A. NPG Lite Device
- Select board: ESP32C6 Dev Module.
Tools → Board → esp32c6 → esp32c6 Dev Module.
- Enable CDC On Boot in the Tools menu.
Tools → USB CDC ON BOOT "ENABLED".
- Upload BLE-BCI-Car-Remote.ino.
- Calibrate EEG using Serial Monitor - adjust BETA_THRESHOLD if needed (Set a value slightly above your relaxed state as the threshold)
- Now connect the XIAO board to your laptop using the USB-C cable attached to the car, and launch the Arduino IDE.
- Re-upload the firmware
B. XIAO ESP32C6 (Receiver Car)
- Select XIAO ESP32C6 in Arduino IDE.
- Upload BLE-BCI-Car.ino.
Set the Beta Threshold Value
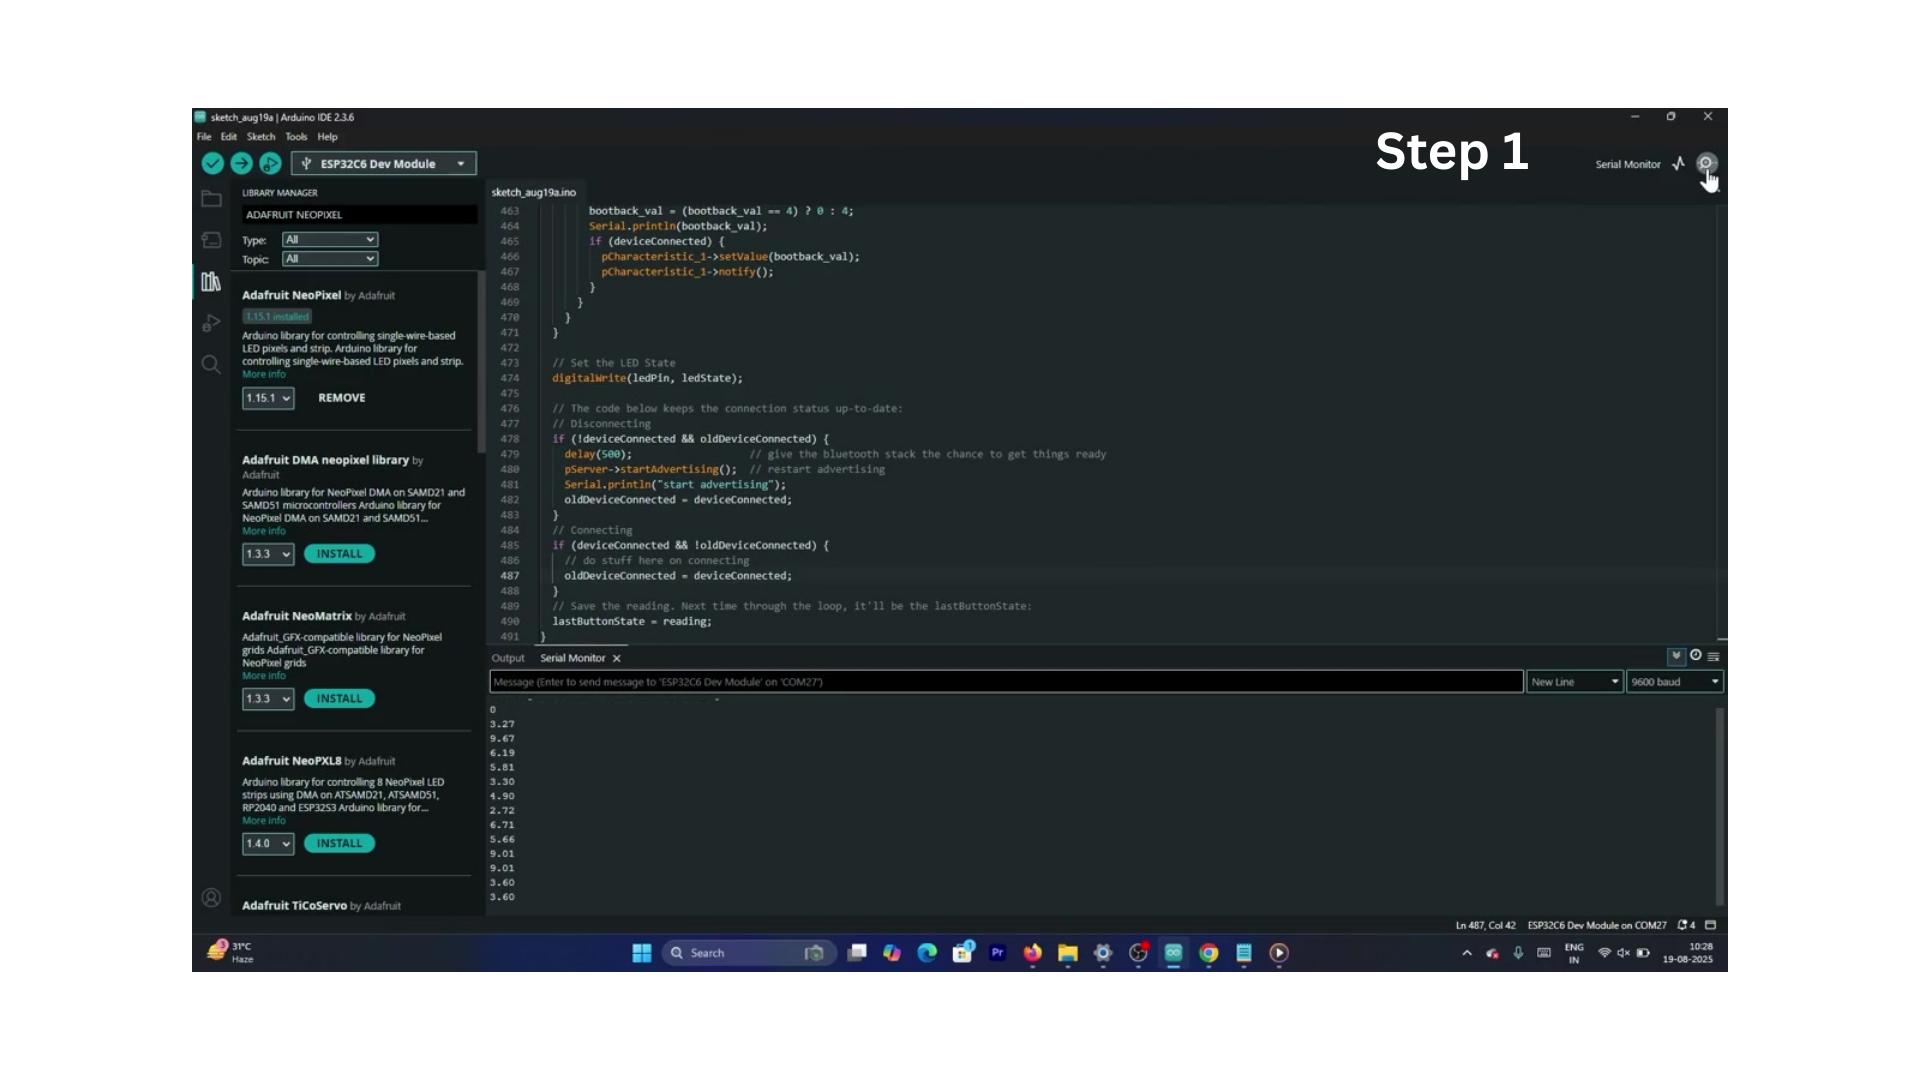
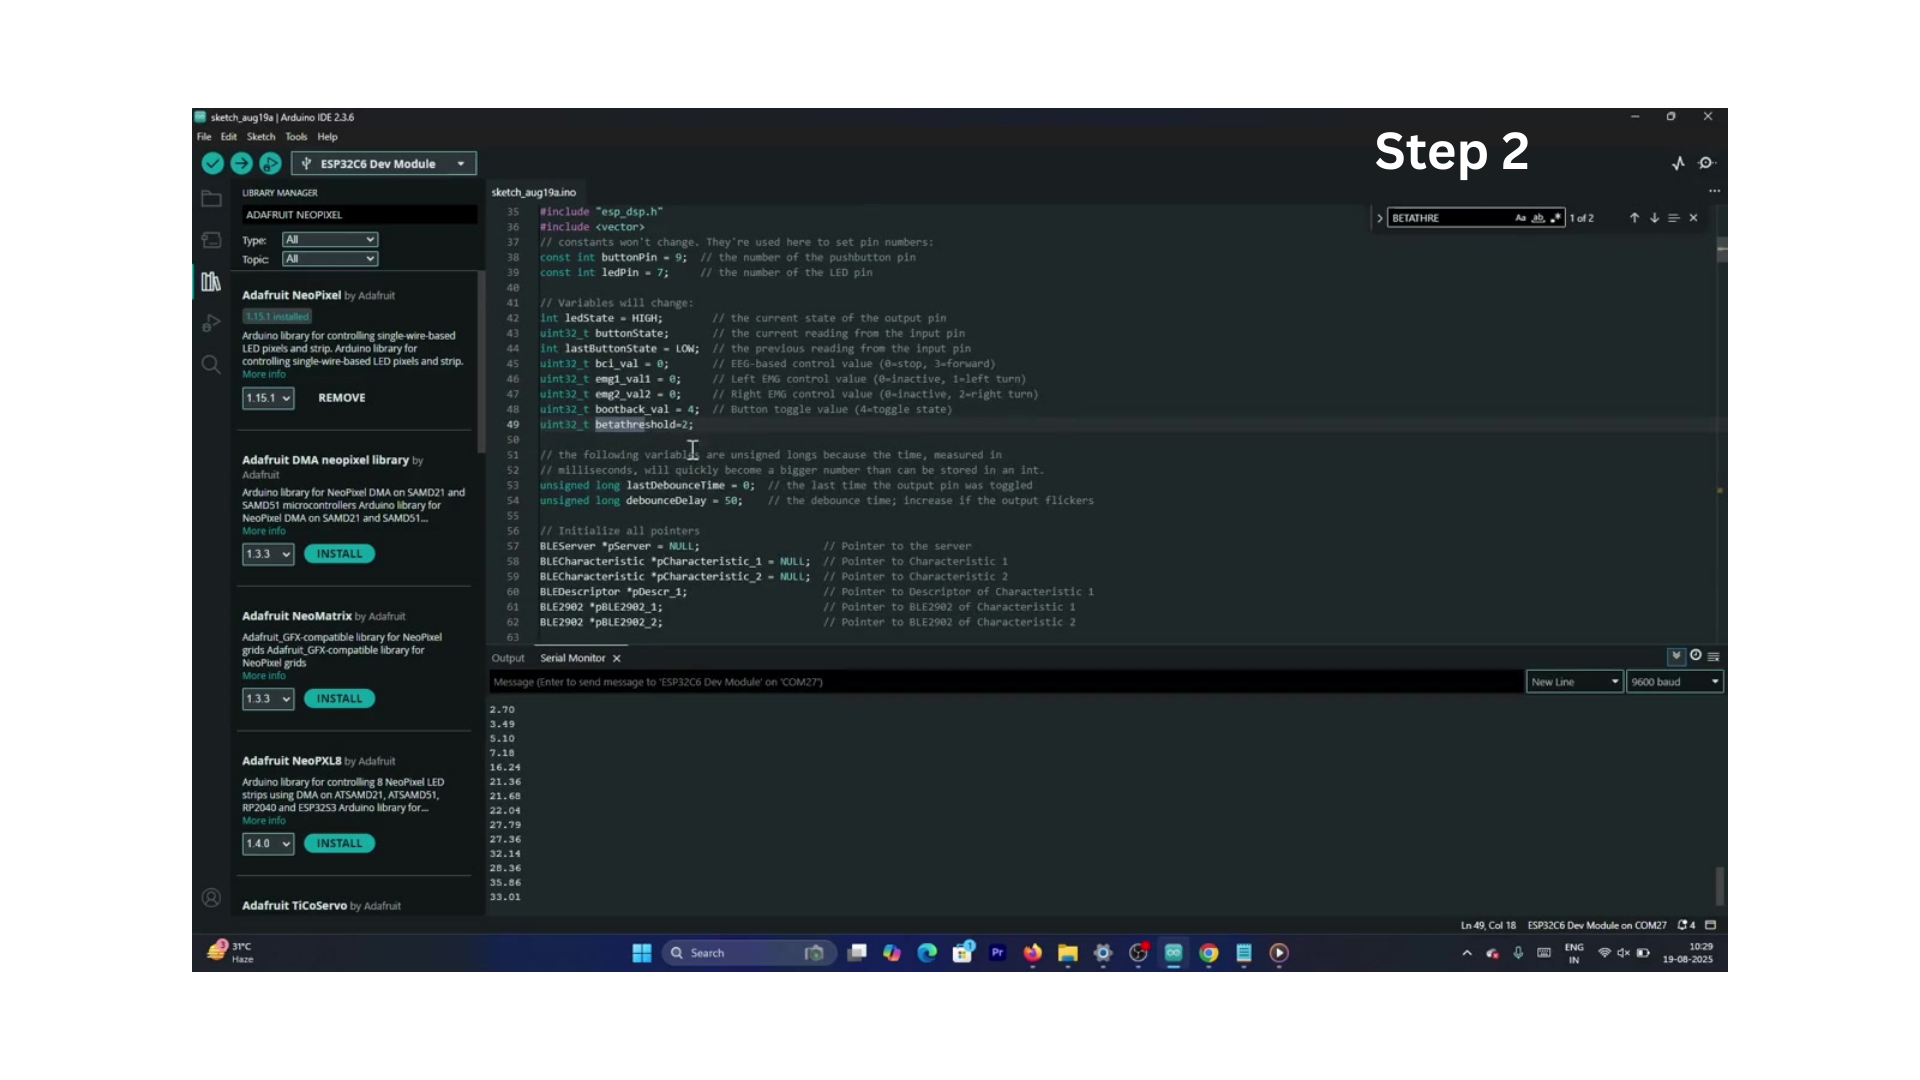
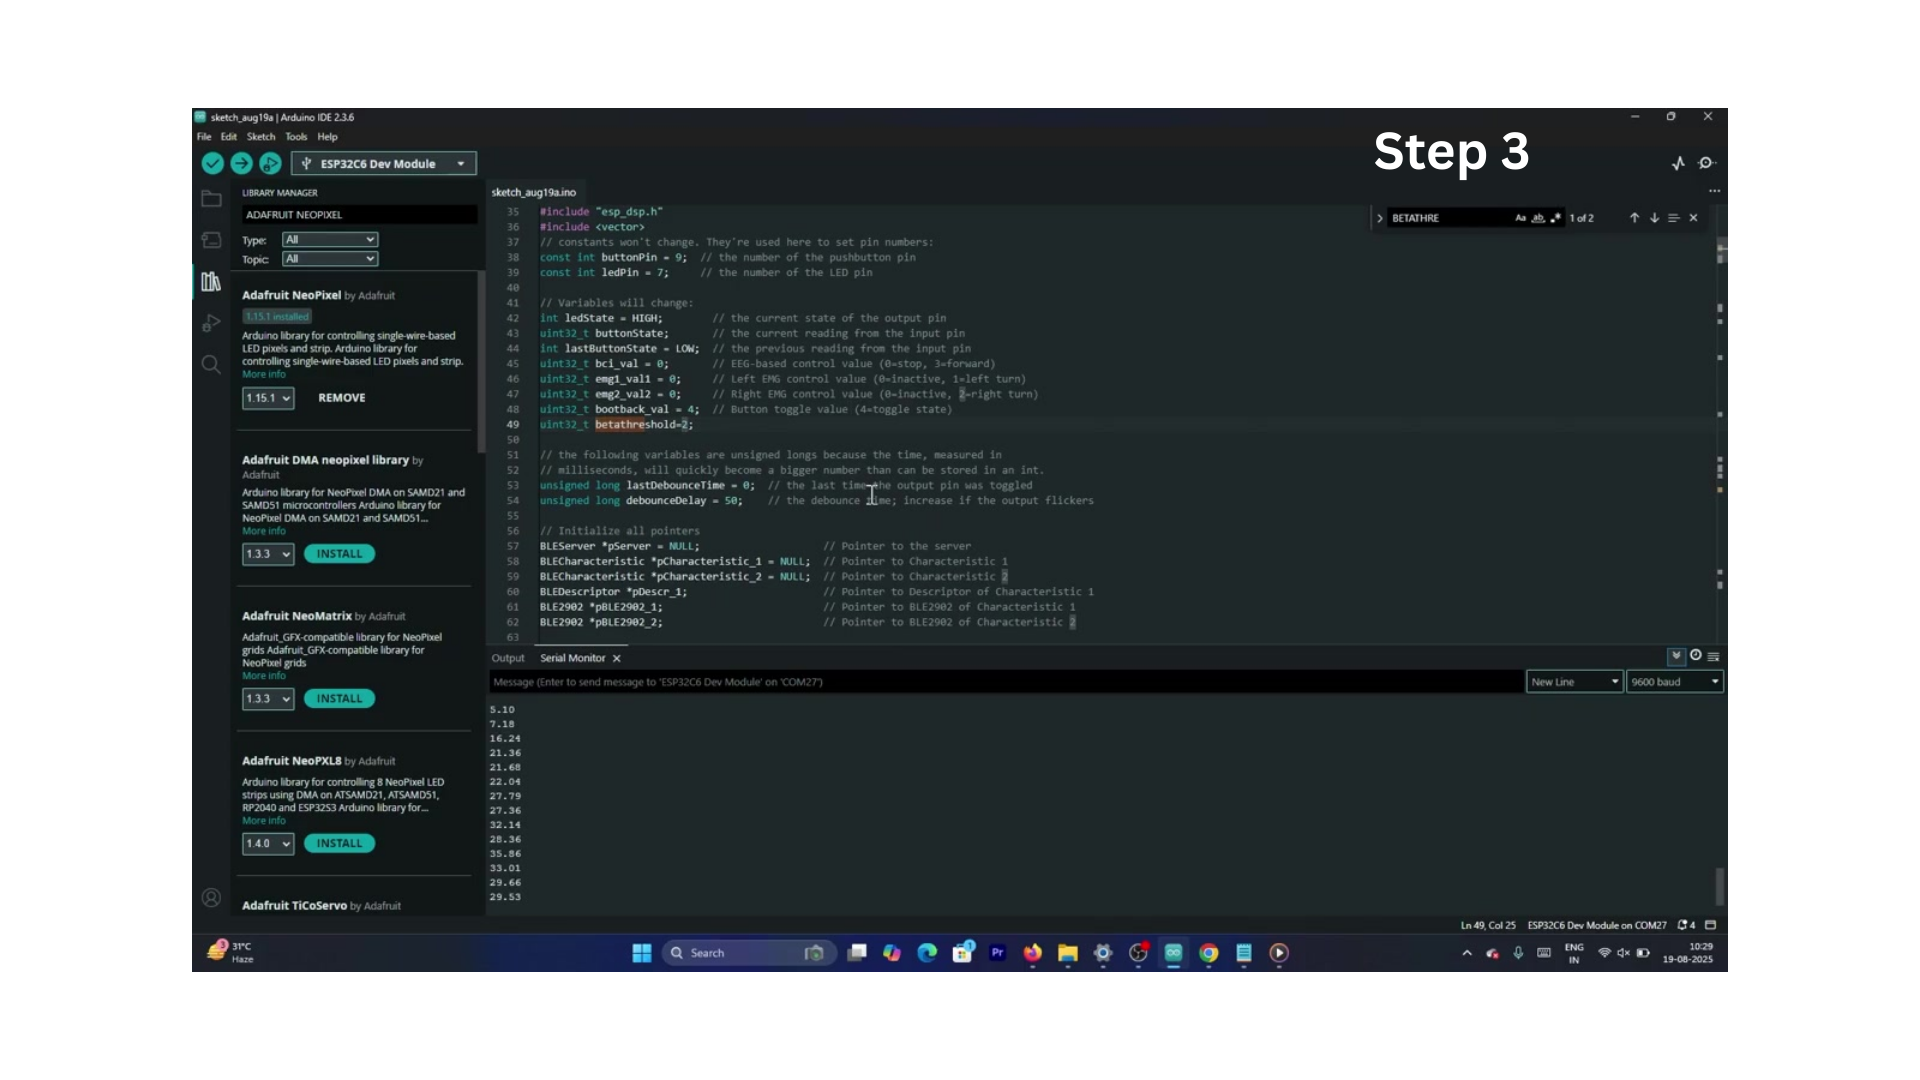

- Open the Serial Monitor and observe the values. If no values appear, type Debug in the Serial Monitor's command box and press Enter.
- Observe the beta-wave percentage while staying focused (default threshold is 2%).
- Set a value slightly above your relaxed state as the threshold.
- After calibration is done.
- It is now time to reflash it, and after flashing, you can disconnect the USB-C cable.
NPG Lite will handle everything wirelessly from here.
Run
Follow these steps to run the car :
- Power the car and NPG Lite.
- Focus your mind → Car moves forward.
- Flex left/right arm → Steering control.
- Flex both arms together → Car moves reverse.
Applications
- Neurotechnology research
- Accessibility devices
- Human-computer interaction experiments
Video Tutorial
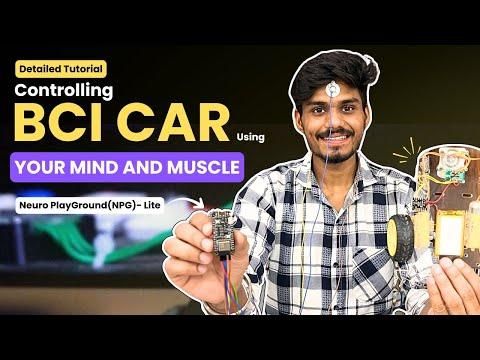
The full step-by-step tutorial for this project is available on our YouTube channel, where we explain every step in detail—from hardware setup and wiring to programming and testing.