Build Your Own Steering Wheel Gaming Setup
by Upside Down Labs in Circuits > Sensors
1077 Views, 8 Favorites, 0 Comments
Build Your Own Steering Wheel Gaming Setup
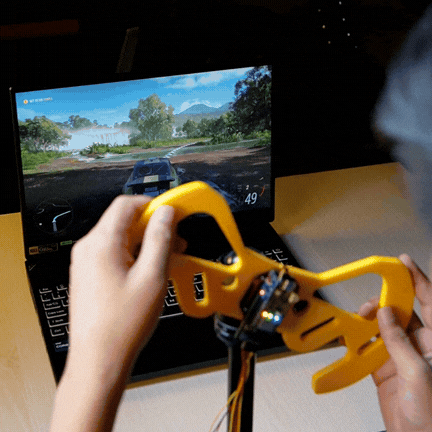
Forget keyboards and gamepads—drive using your own body! Build a DIY racing wheel that lets you steer with a 3D-printed wheel while your leg muscles become the accelerator and brake pedals. With Neuro Playground Lite (NPG Lite) reading your EMG signals and an MPU6050 tracking steering, the entire setup works as a wireless Xbox controller over Bluetooth. It's an exciting project that combines neuroscience, electronics, and gaming into a truly immersive racing experience.
Supplies
Hardware:
- Neuro PlayGround Lite ( Ninja, or Beast Pack)
- MPU6050 Gyro/Accelerometer Module (preferably with a Qwiic port)
- Qwiic Cable (or jumper wires / soldering equipment if your MPU6050 lacks a Qwiic connector)
- 3D-Printed Steering Wheel (download and print the STL file)
- Camera Tripod with a ball joint head (to mount and pivot the wheel)
- Mounting Screws (compatible with the NPG Lite casing)
- 5x Gel Electrodes & 5x Snap Cables (for 2 EMG channels)
- Alcohol Swabs (for skin preparation)
- USB-C Cable
Software:
The following libraries installed in Arduino IDE:
- NimBLE-Arduino by h2zero
- Callback by Tom Stewart
- Adafruit MPU6050
- Adafruit NeoPixel
- ESP32-BLE-CompositeHID
A PC with Bluetooth capability and any controller-supported racing game
Build the Steering Wheel
.png)
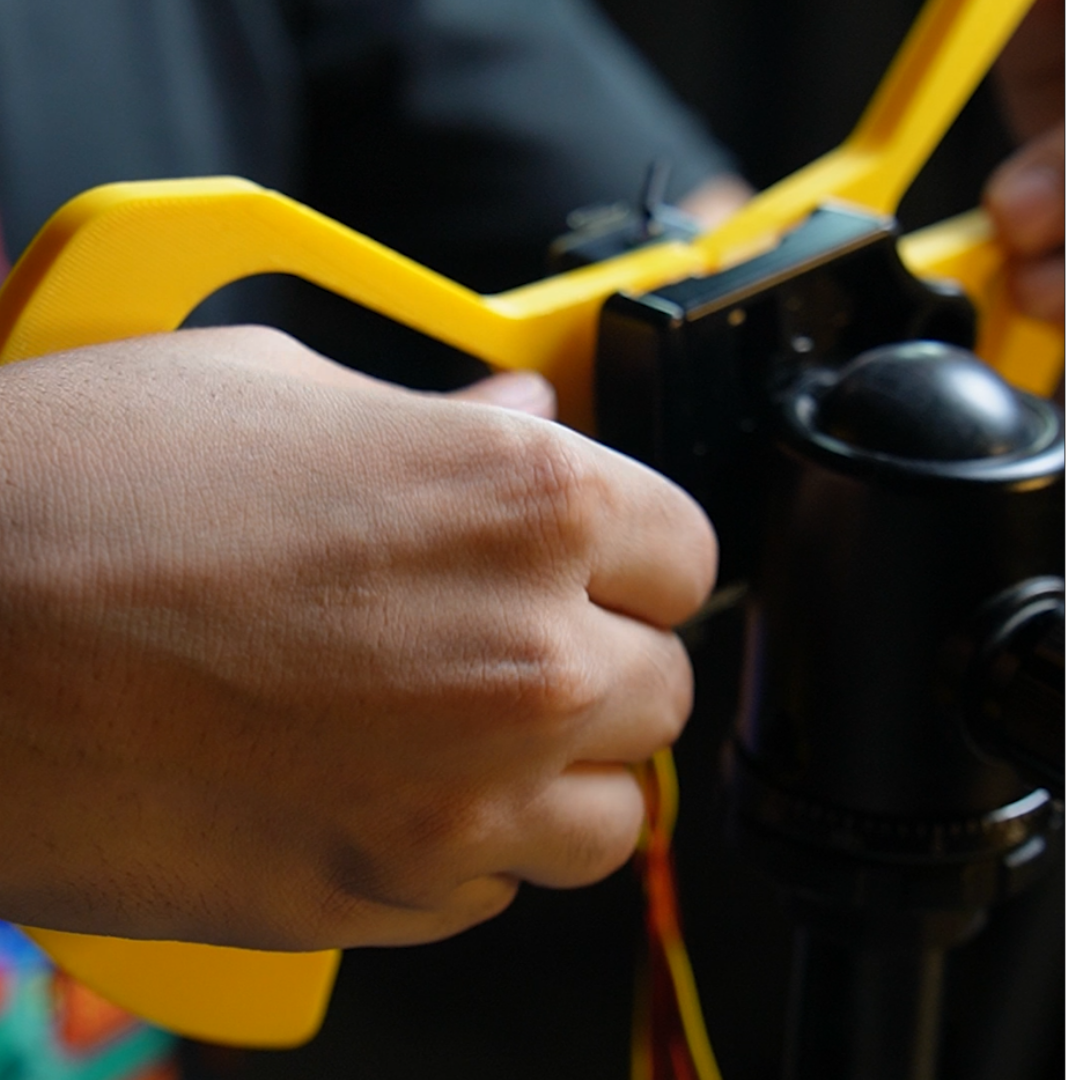
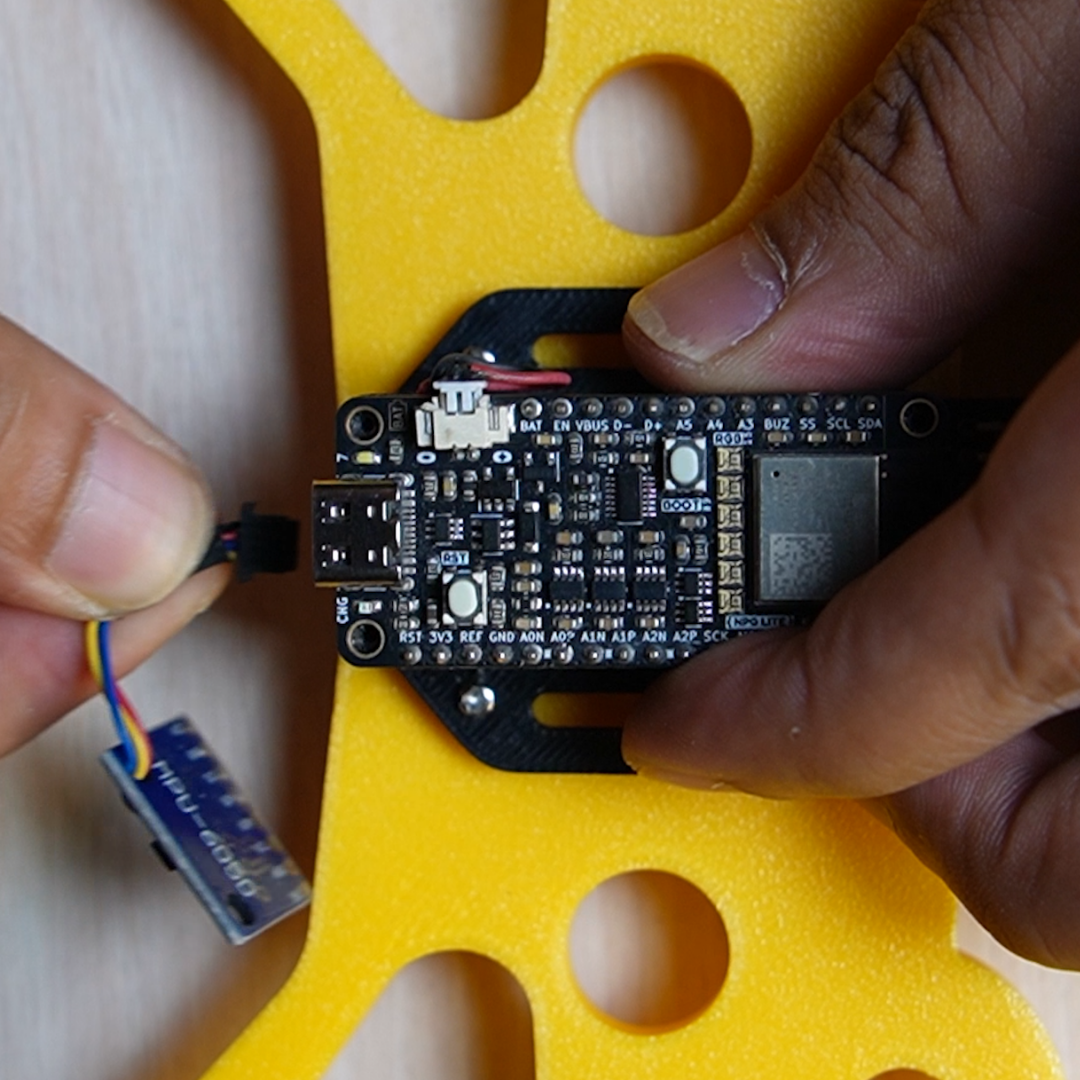
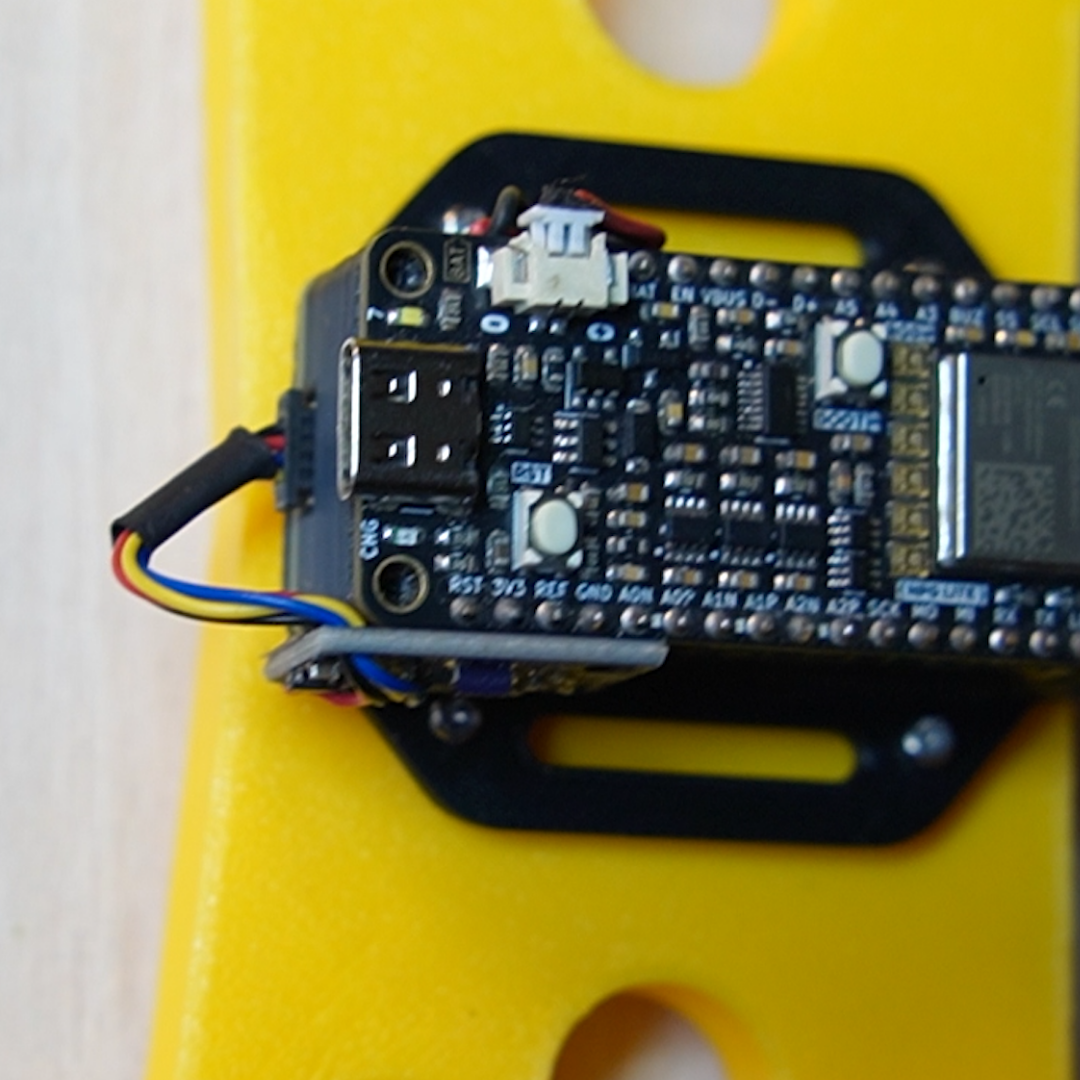
- Print the part using a 3D printer at home or through an online 3D printing service.
- Mount NPG Lite onto the 3D-printed steering wheel using compatible screws.
- Attach the steering wheel to a tripod or any stand that allows free left and right rotation.
- Finally, connect the MPU6050 to the Qwiic port using the Qwiic cable.
Note: If your MPU6050 board doesn't have a Qwiic connector, solder the cable directly to the module or use jumper wires
Connect NPG Lite
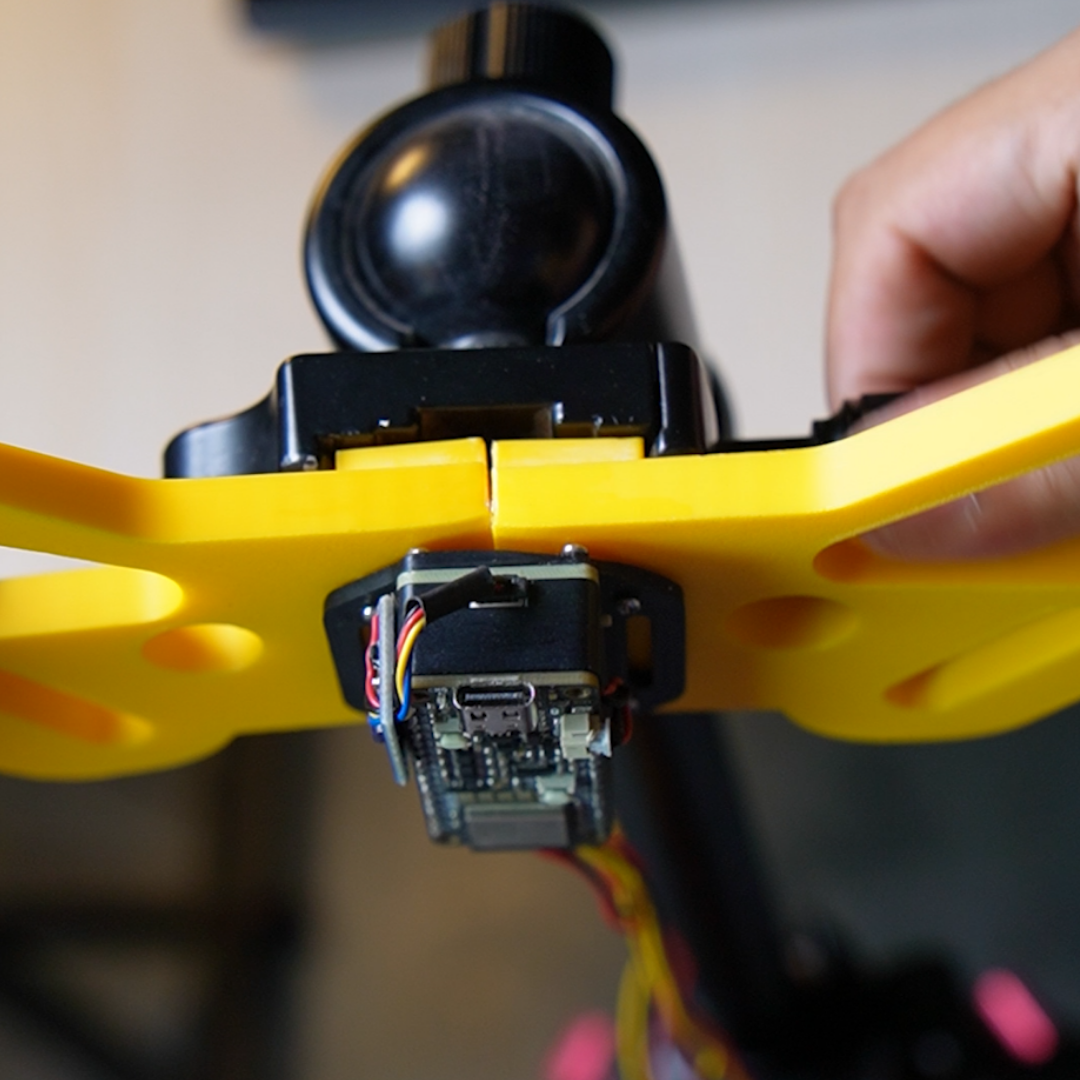
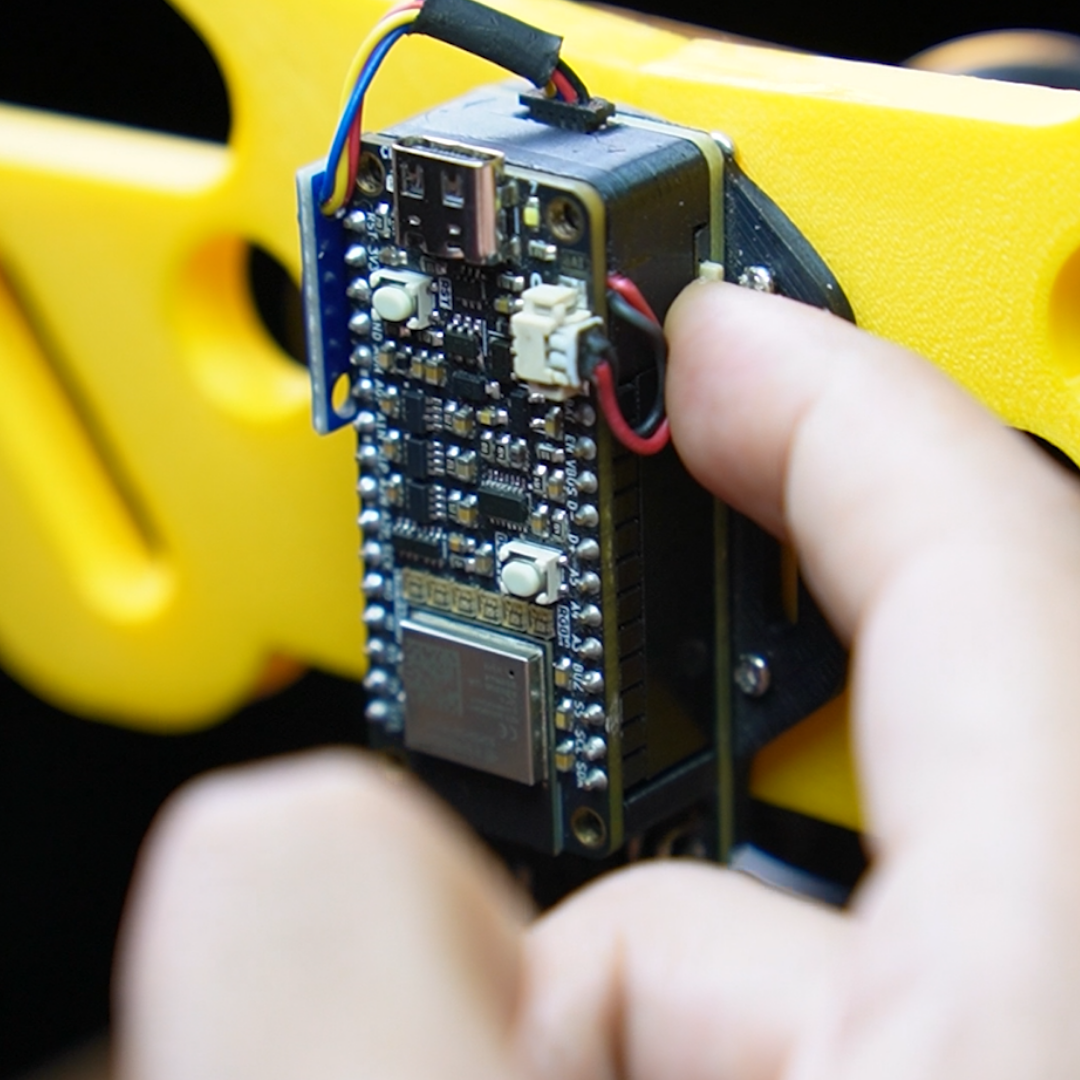
- Turn ON NPG Lite using the power switch.
- If it doesn't power on, ensure the battery connector is plugged in.
- Connect NPG Lite to your computer using a USB Type-C cable.
Install Libraries
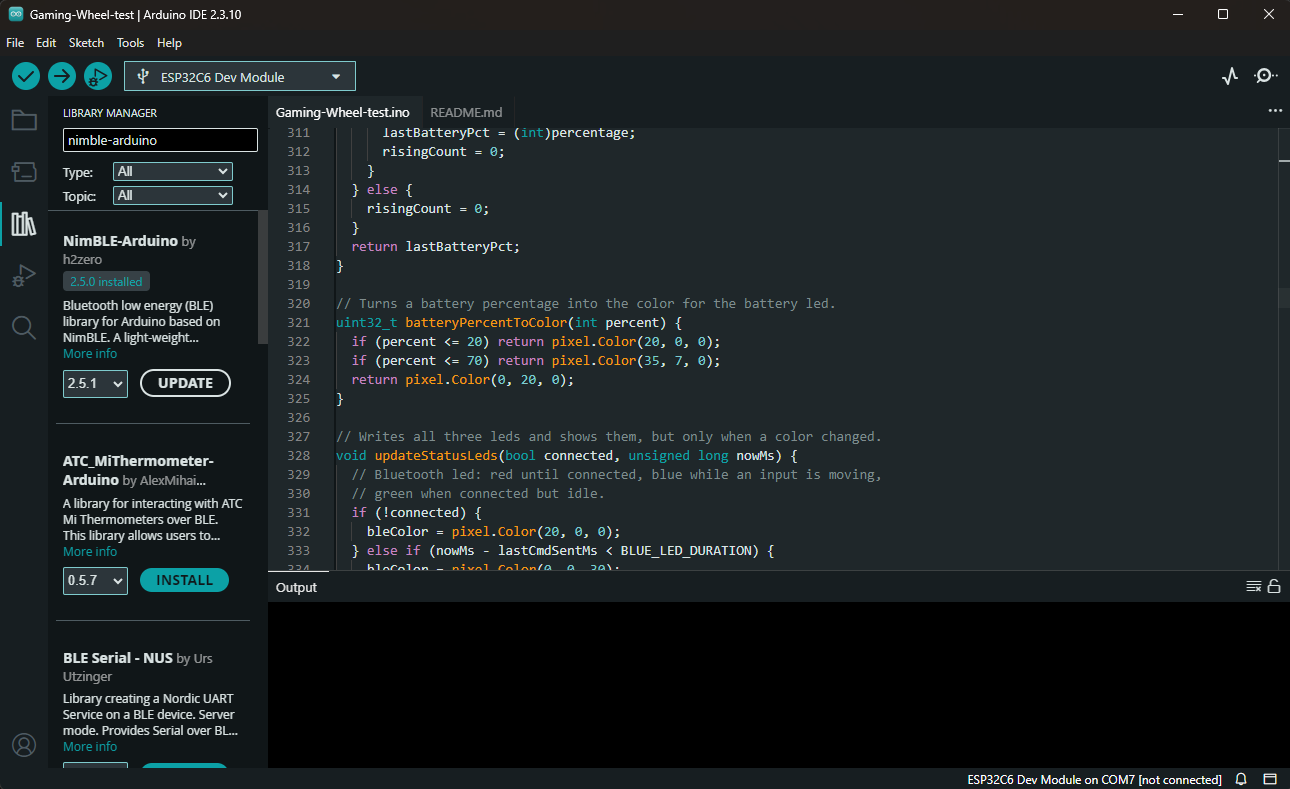
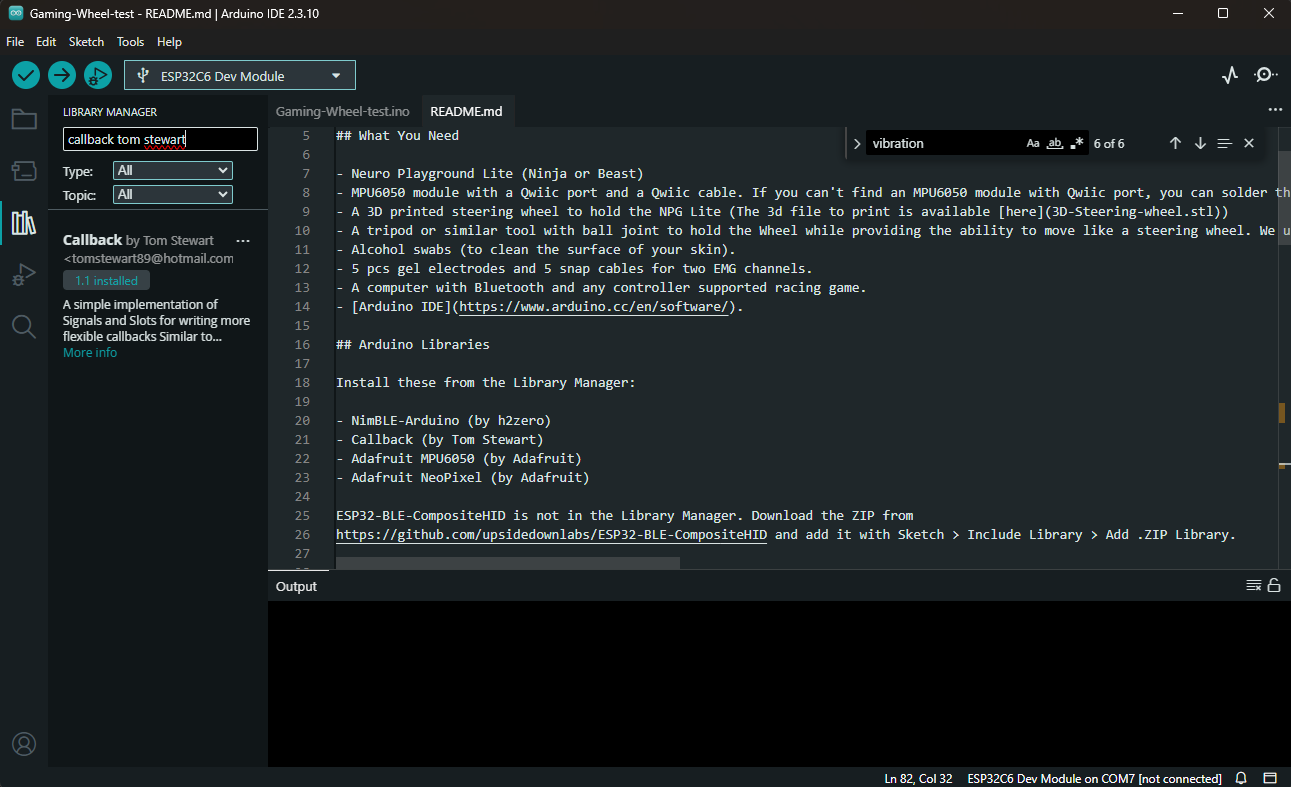
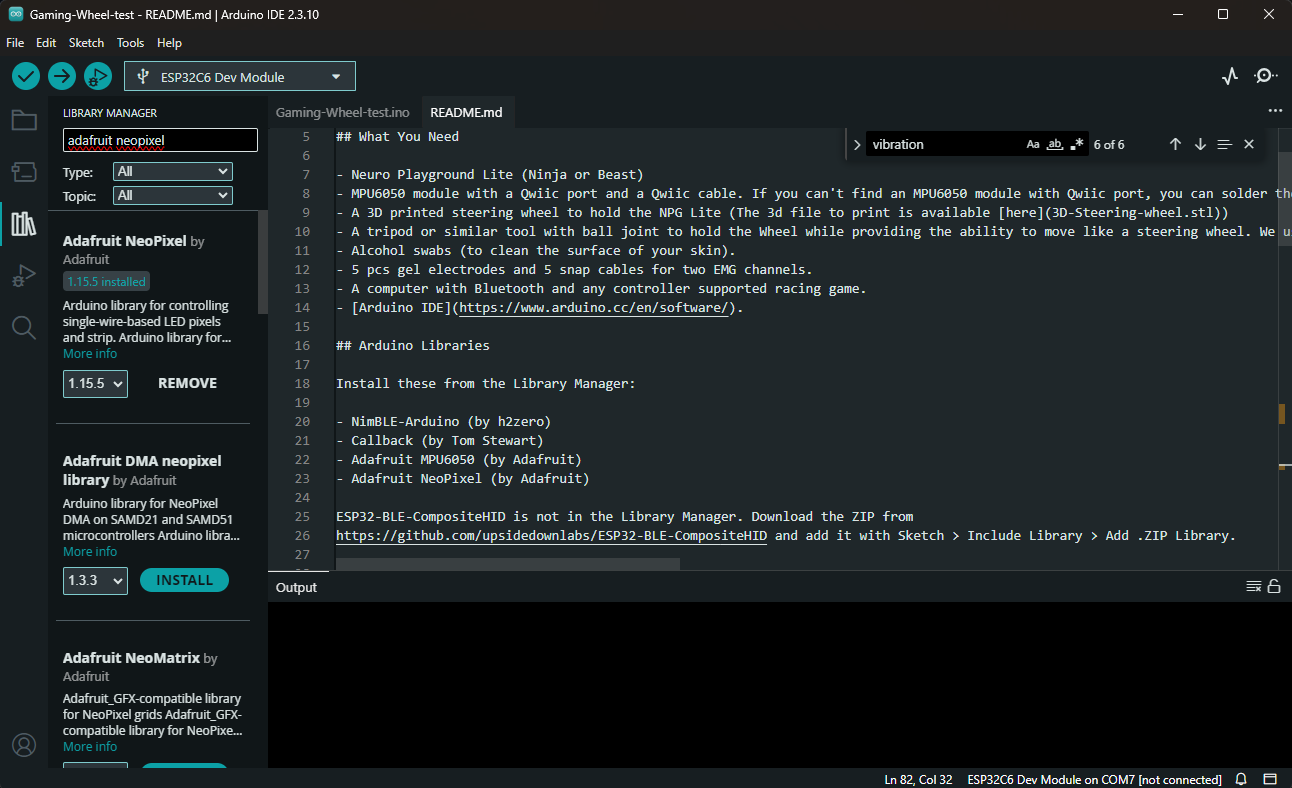
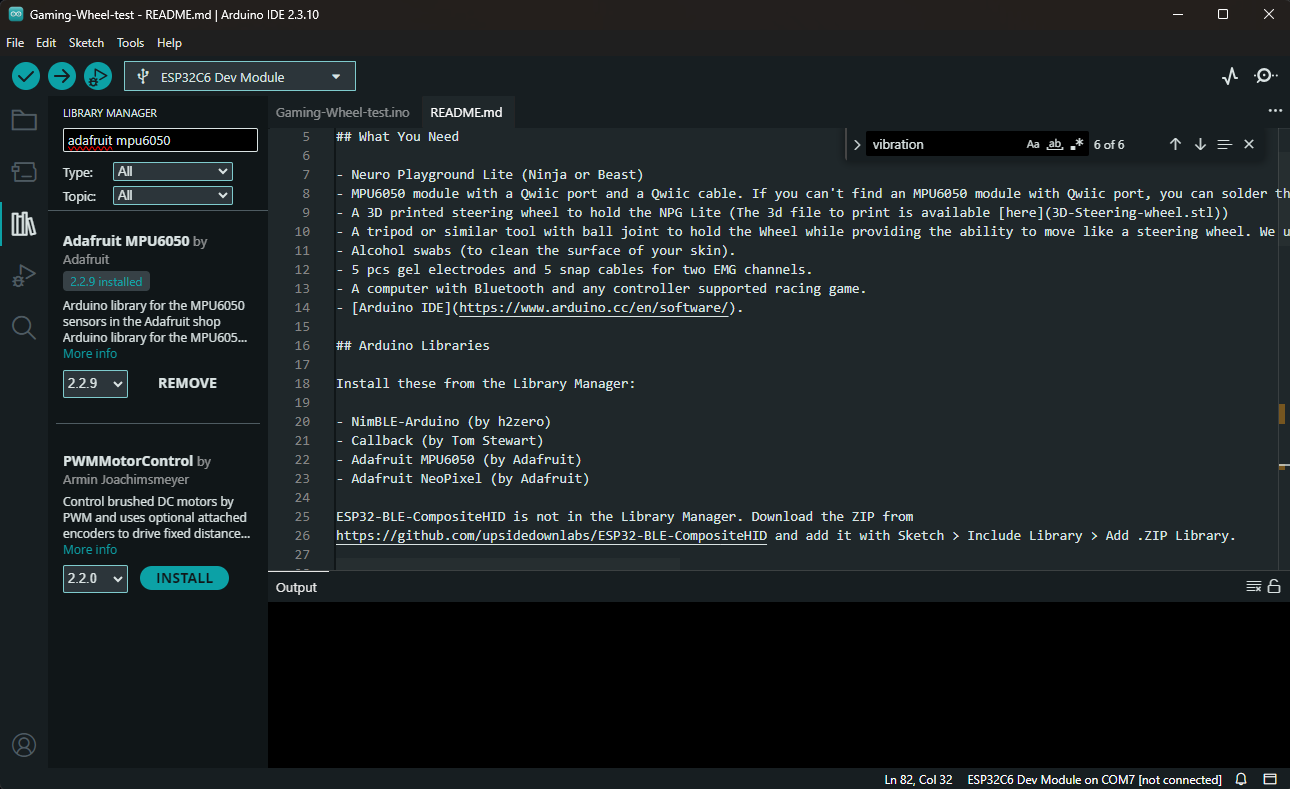
First, go to the Arduino website and download and install the latest version of Arduino IDE.
Once the installation is complete, launch Arduino IDE and go to:
Sketch → Include Library → Manage Libraries...
In the Library Manager, search for and install the following libraries one at a time:
- NimBLE-Arduino — by h2zero
- Callback — by Tom Stewart
- Adafruit MPU6050 — by Adafruit
- Adafruit NeoPixel — by Adafruit
Install ESP32-BLE-CompositeHID
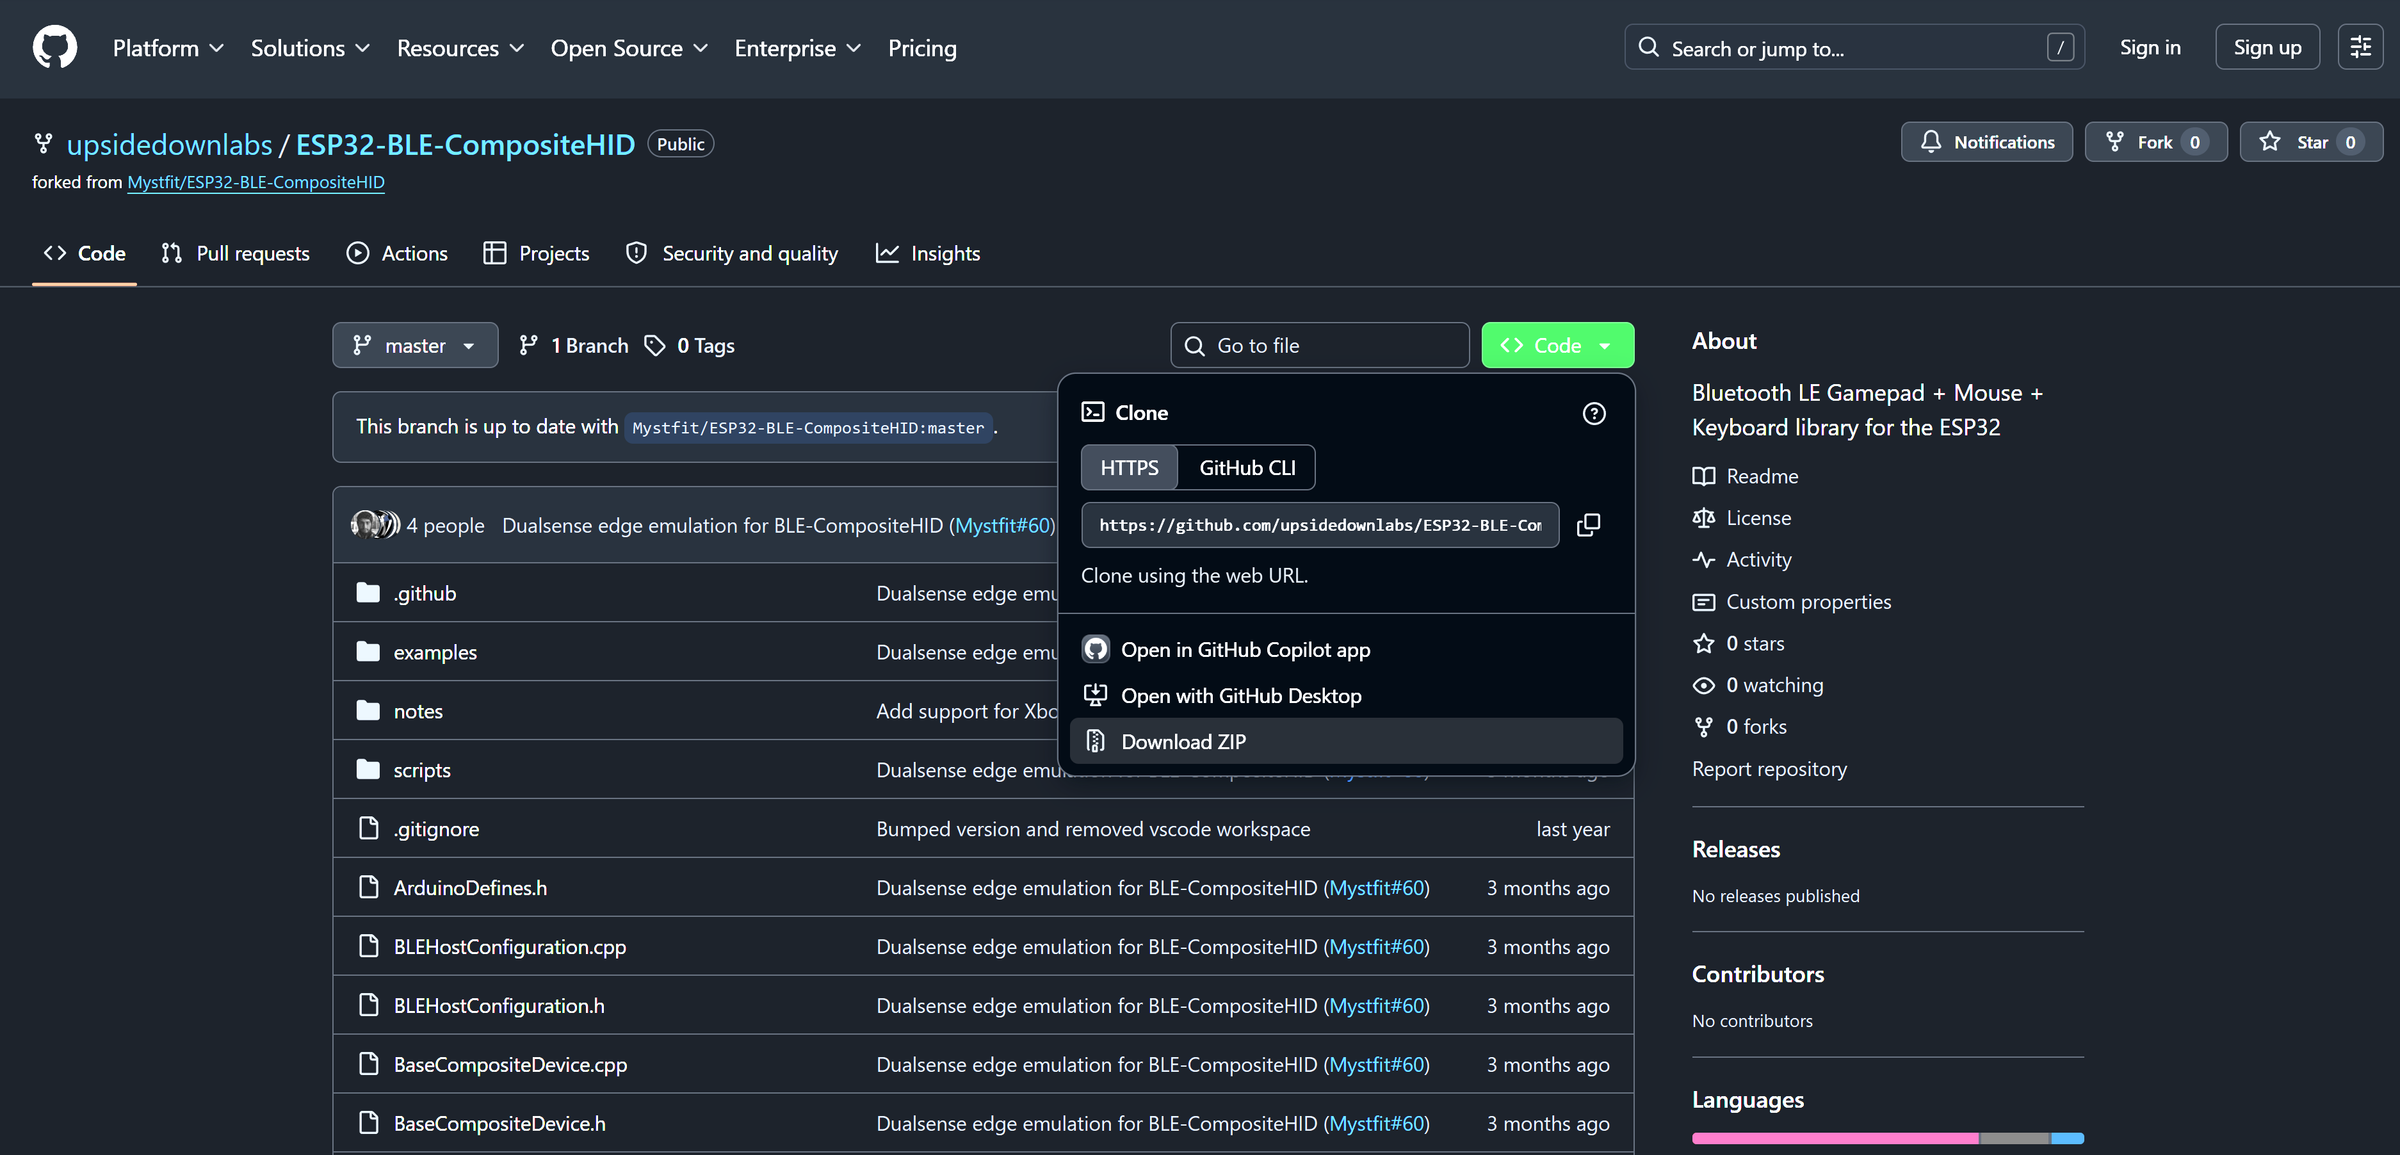
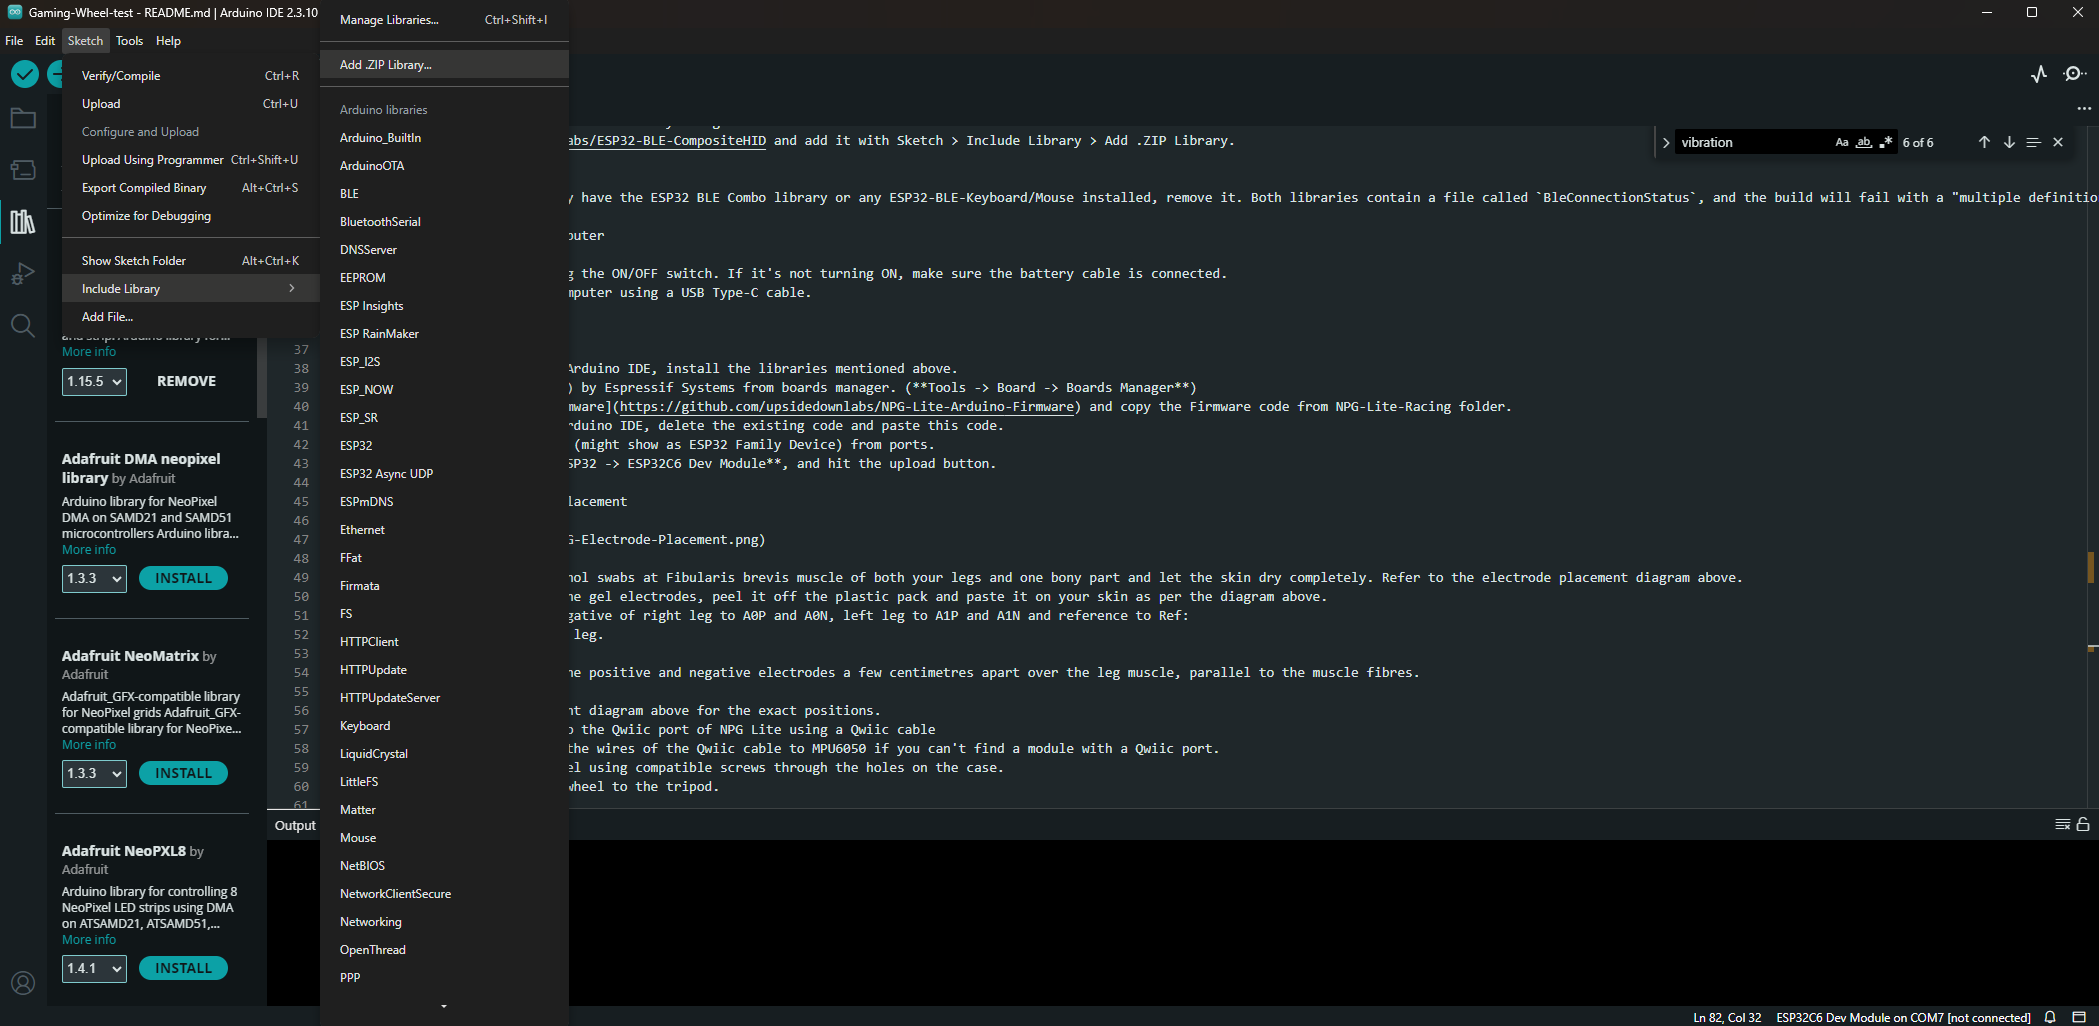
The ESP32-BLE-CompositeHID library is not available in the Arduino Library Manager.
- Download the library as a ZIP file from the Upside Down Labs GitHub repository.
- In the Arduino IDE, go to:
- Sketch → Include Library → Add .ZIP Library...
- Select the downloaded ZIP file and click Open.
The library will now be installed.
Important
Before installing ESP32-BLE-CompositeHID, make sure you remove any of these libraries if they are already installed:
- ESP32 BLE Combo
- ESP32-BLE-Keyboard
- ESP32-BLE-Mouse
These libraries contain the same BleConnectionStatus file, which causes a "multiple definition" compilation error. Removing them ensures the firmware compiles successfully.
Upload the Firmware
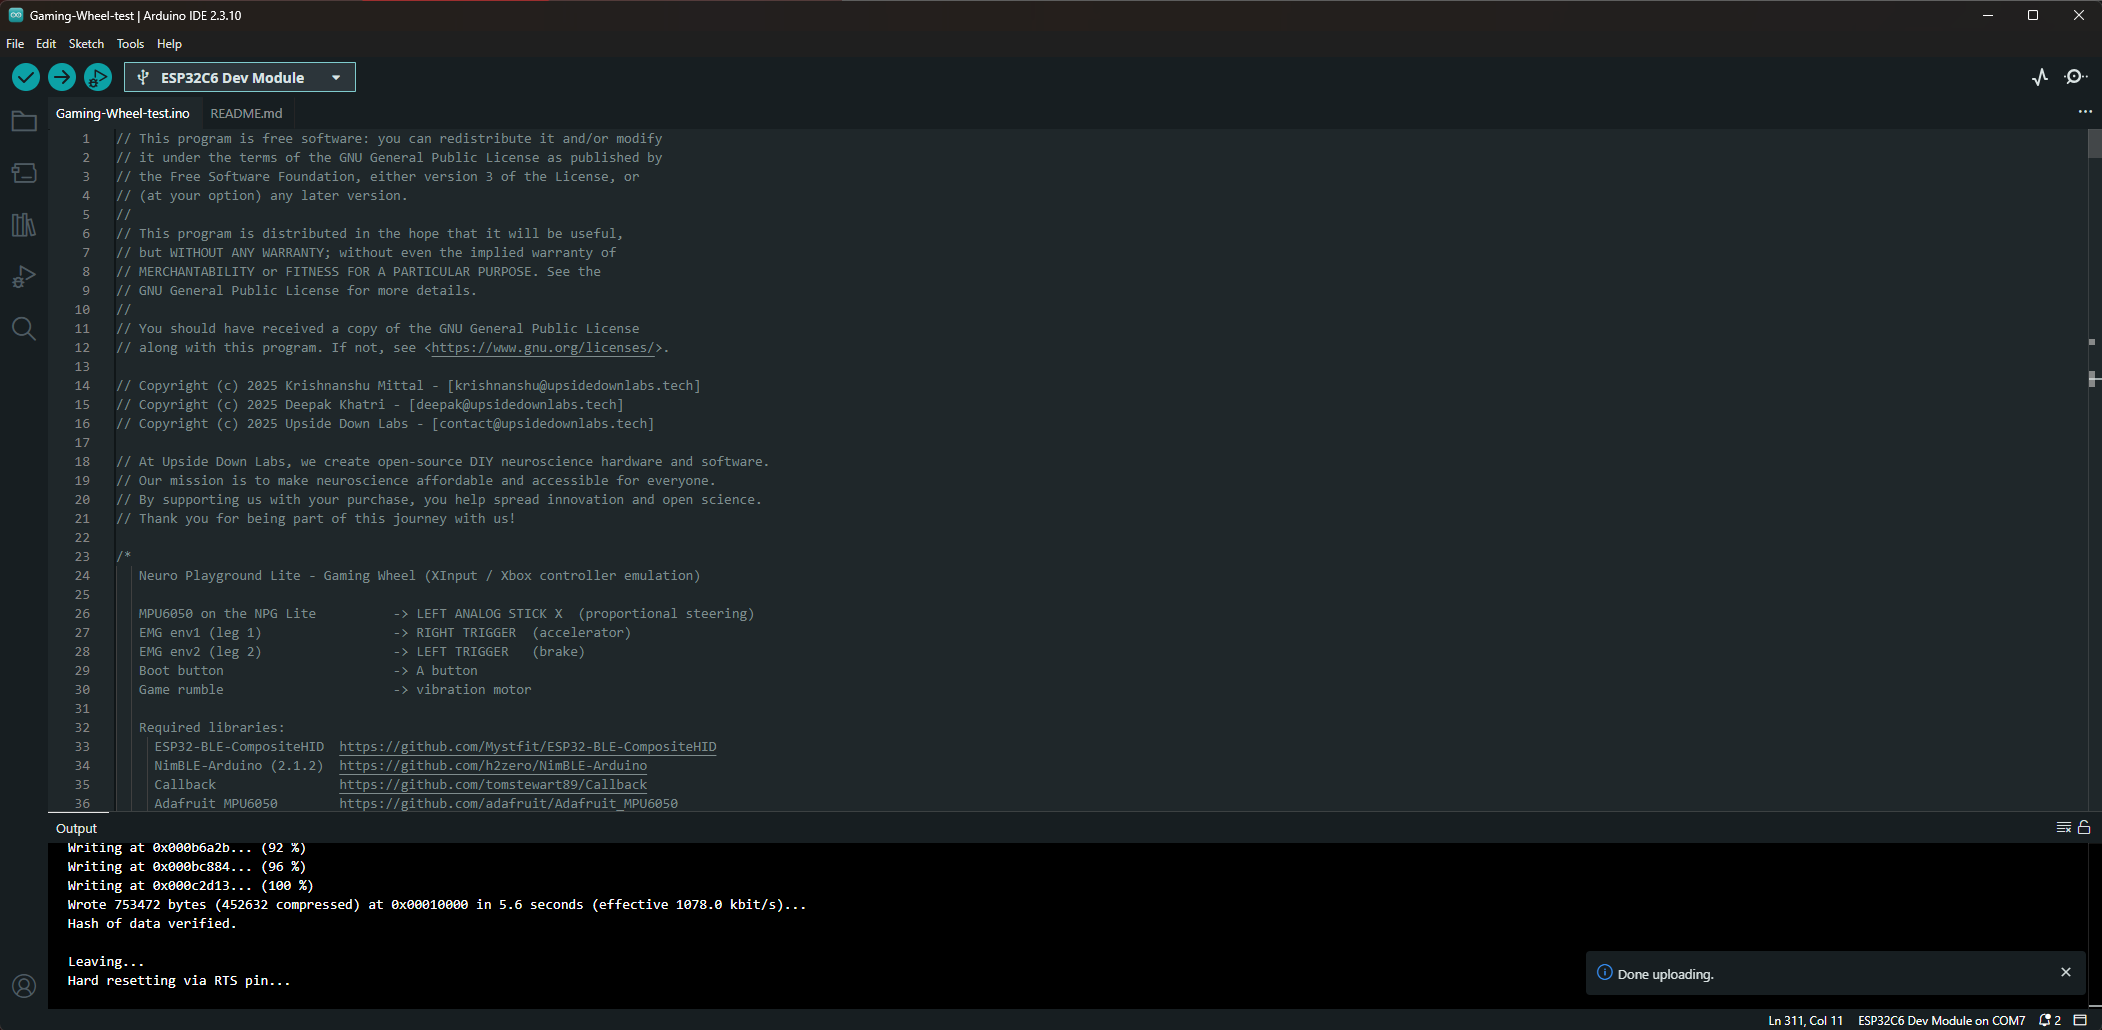
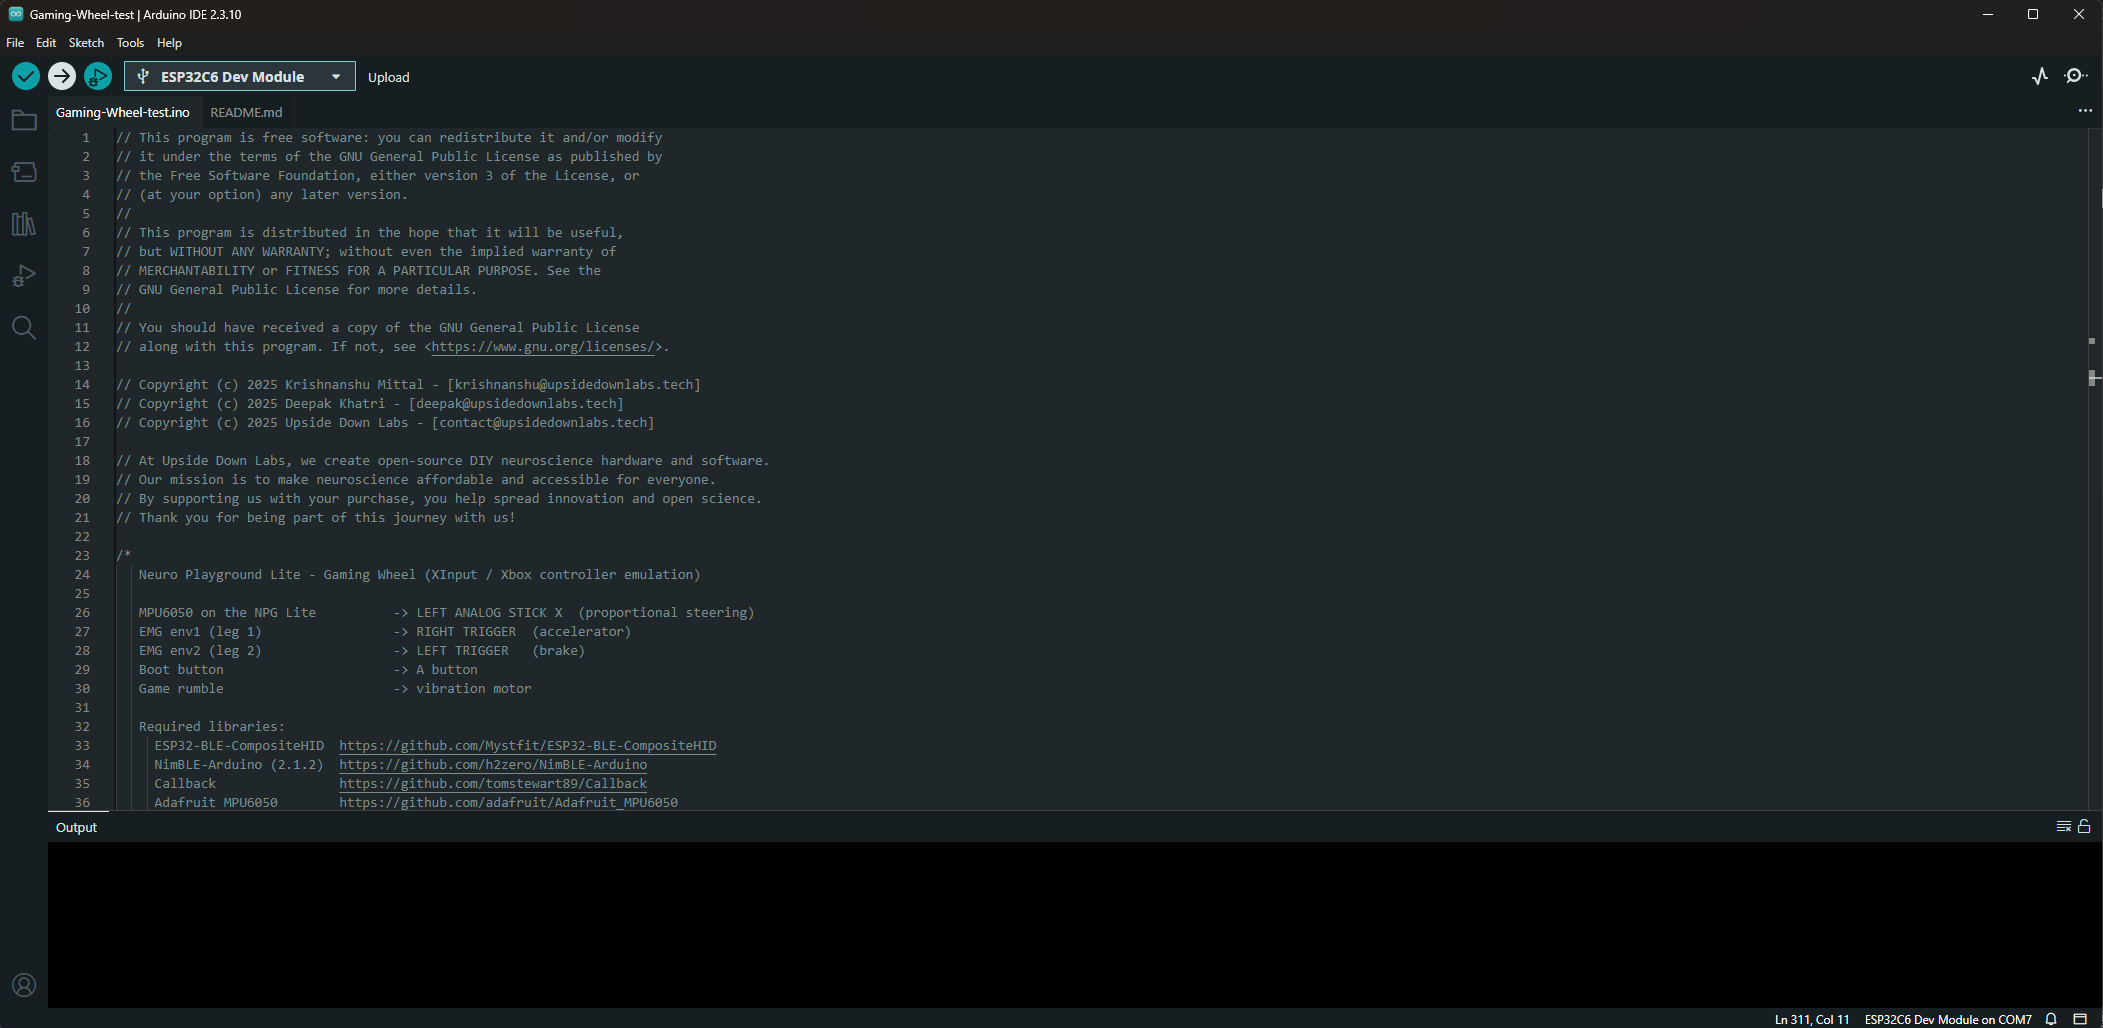
Now that you've installed the Arduino IDE and all the required libraries, it's time to upload the Gaming Wheel firmware to your NPG Lite.
- Open Arduino IDE.
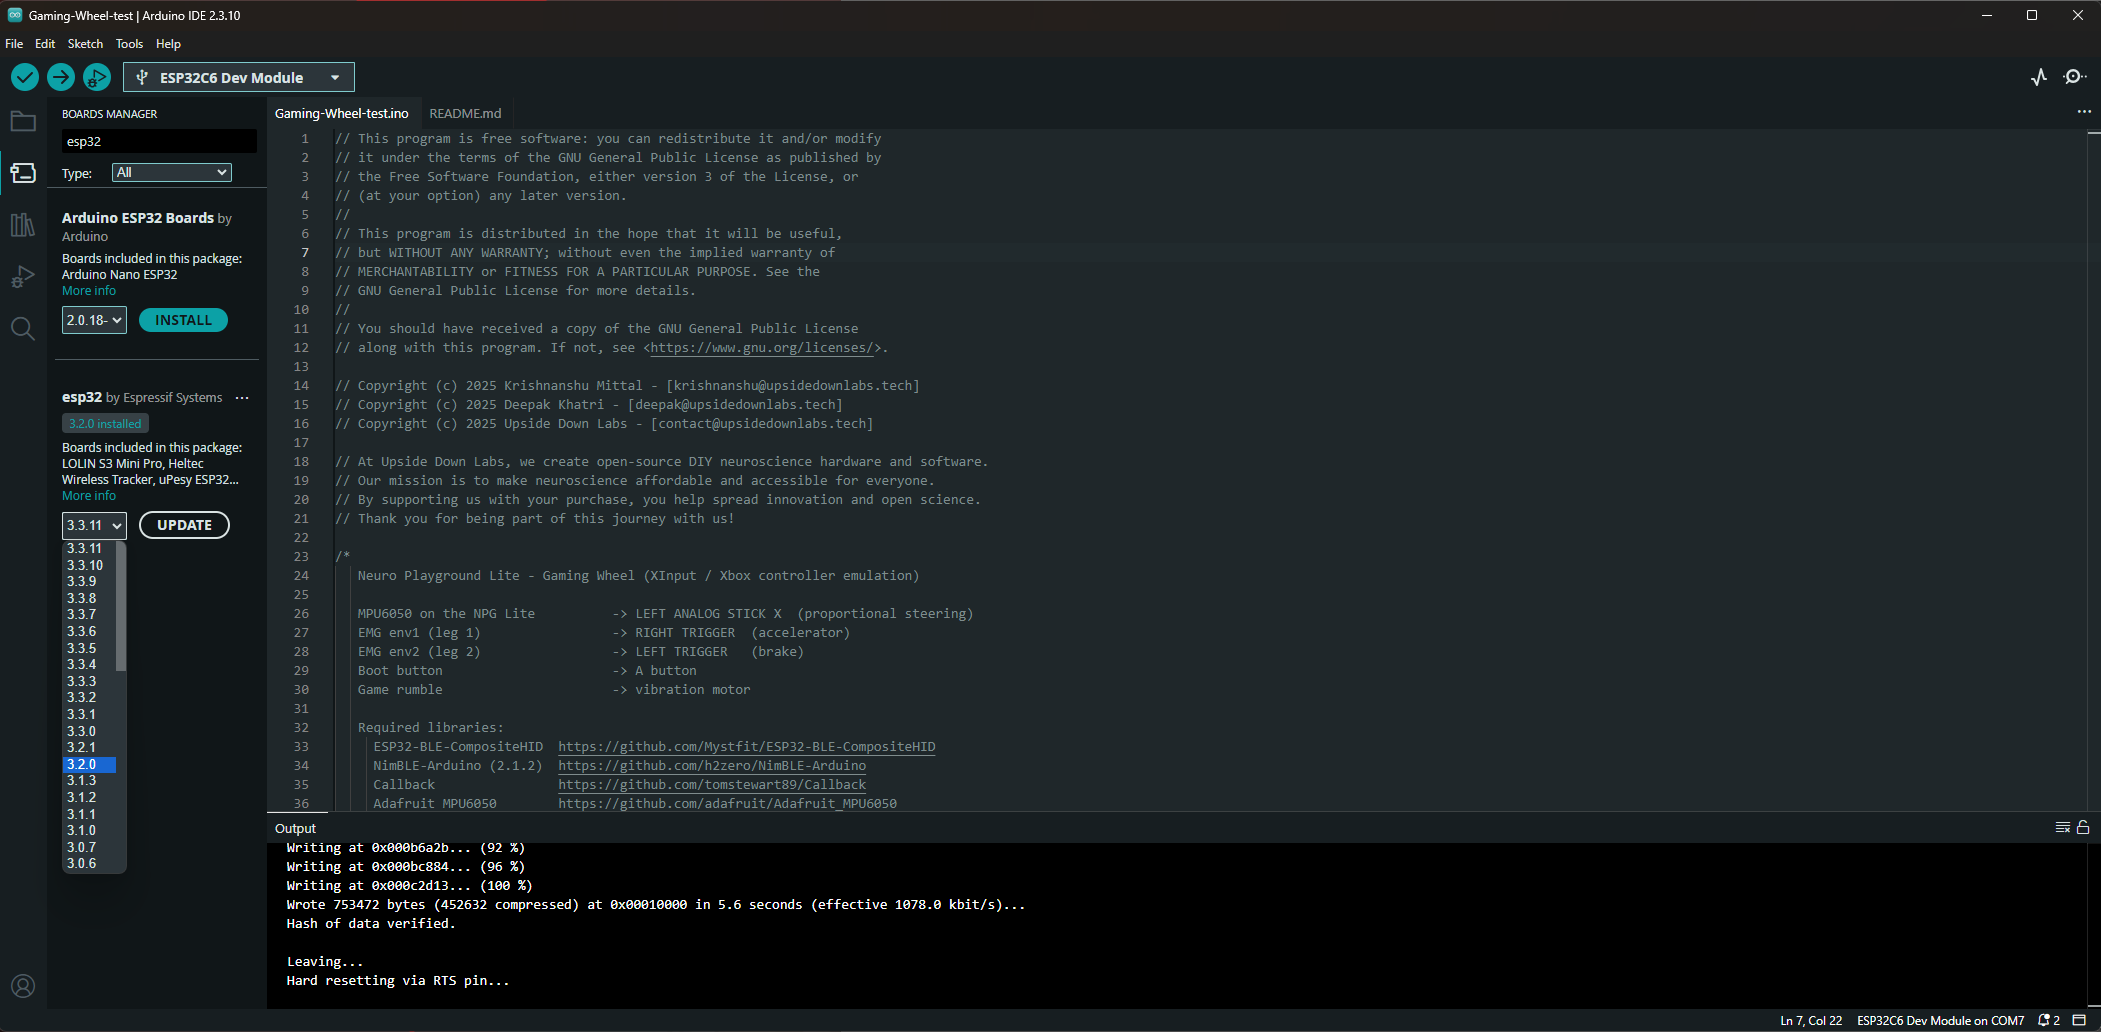
- Install ESP32 by Espressif Systems (Version 3.2.0) from the Boards Manager.
- Go to Tools → Board → Boards Manager
- Search for ESP32
- Install Version 3.2.0 by Espressif Systems.
- Download or open the NPG-Lite-Arduino-Firmware repository.
- Navigate to the NPG-Lite-Gaming folder and copy the firmware code.
- Open a new sketch in Arduino IDE.
- Delete the default code and paste the Gaming Wheel firmware.
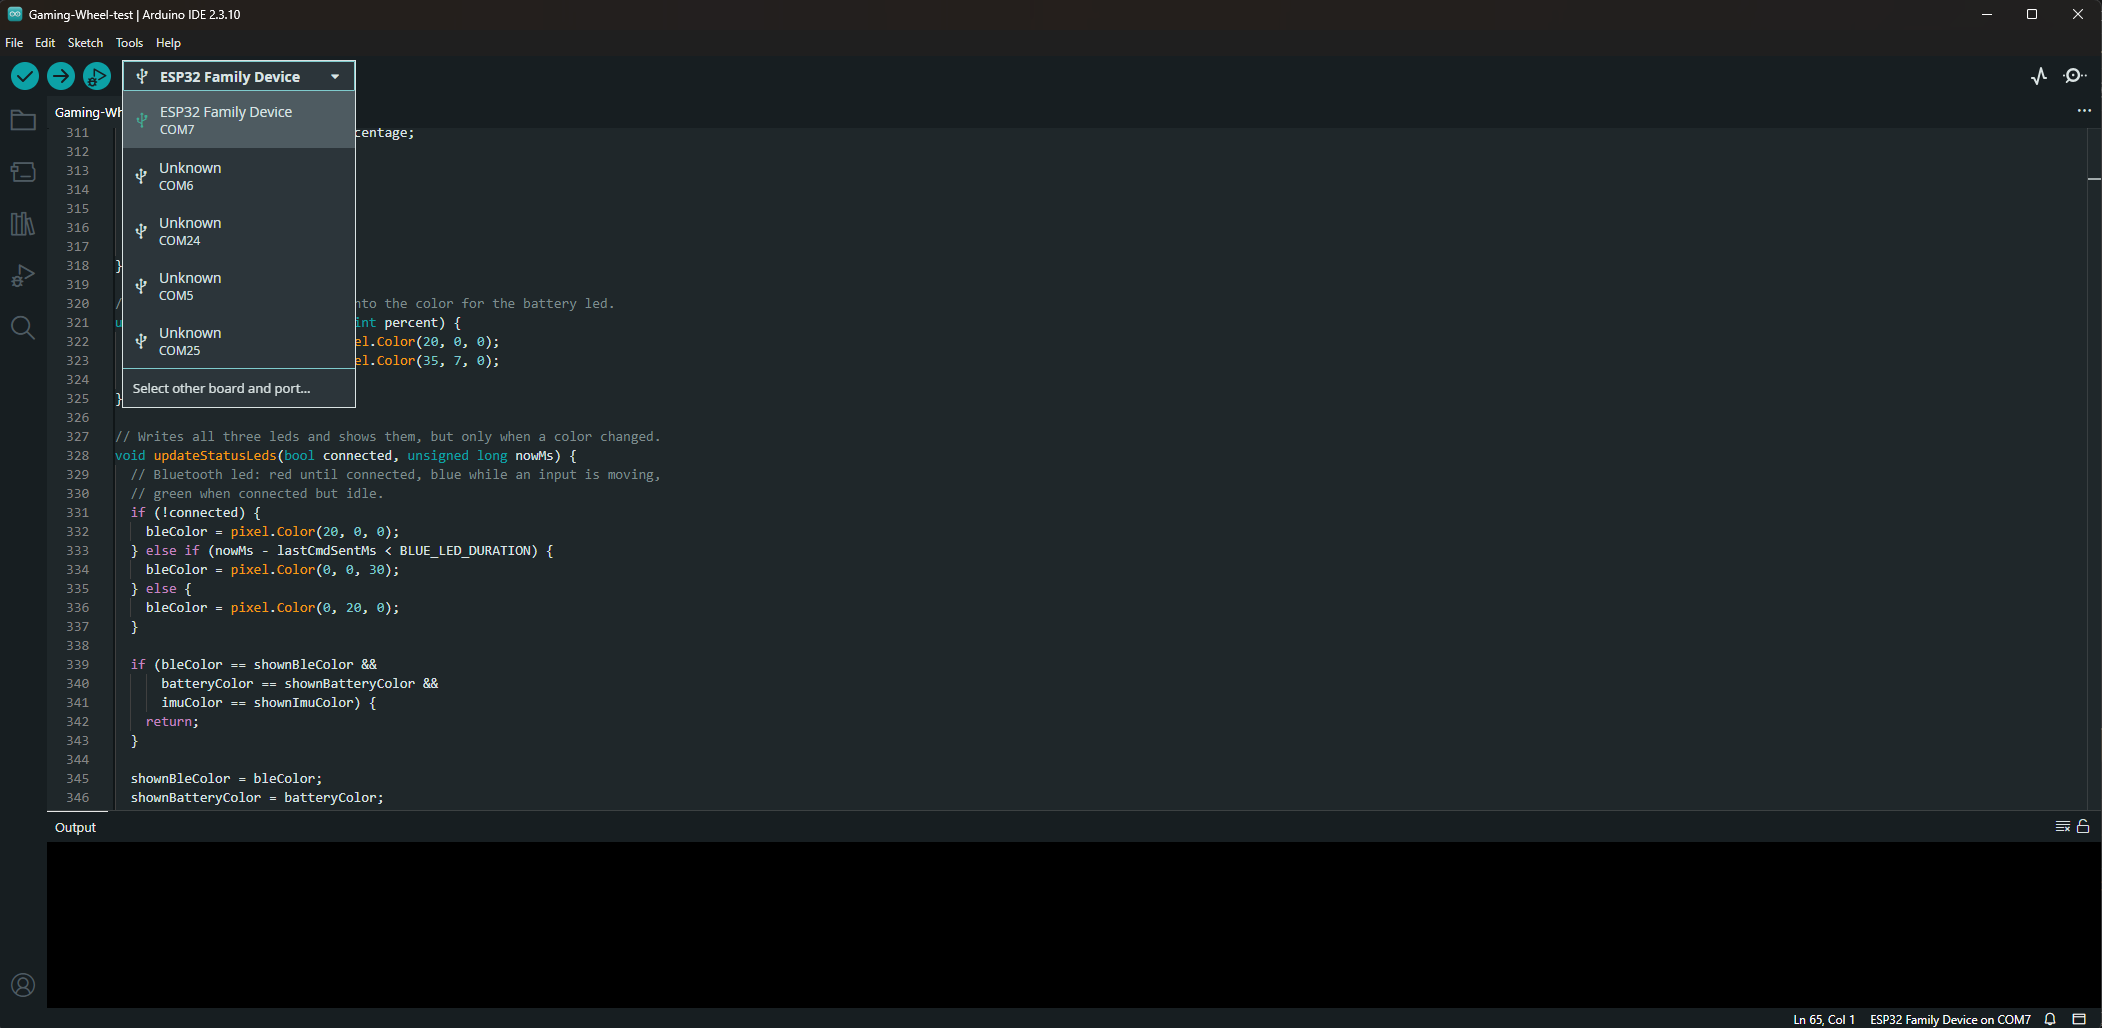
- Connect your NPG Lite to your computer using a USB Type-C cable.
- Select the correct COM Port from Tools → Port (it may appear as ESP32 Family Device).
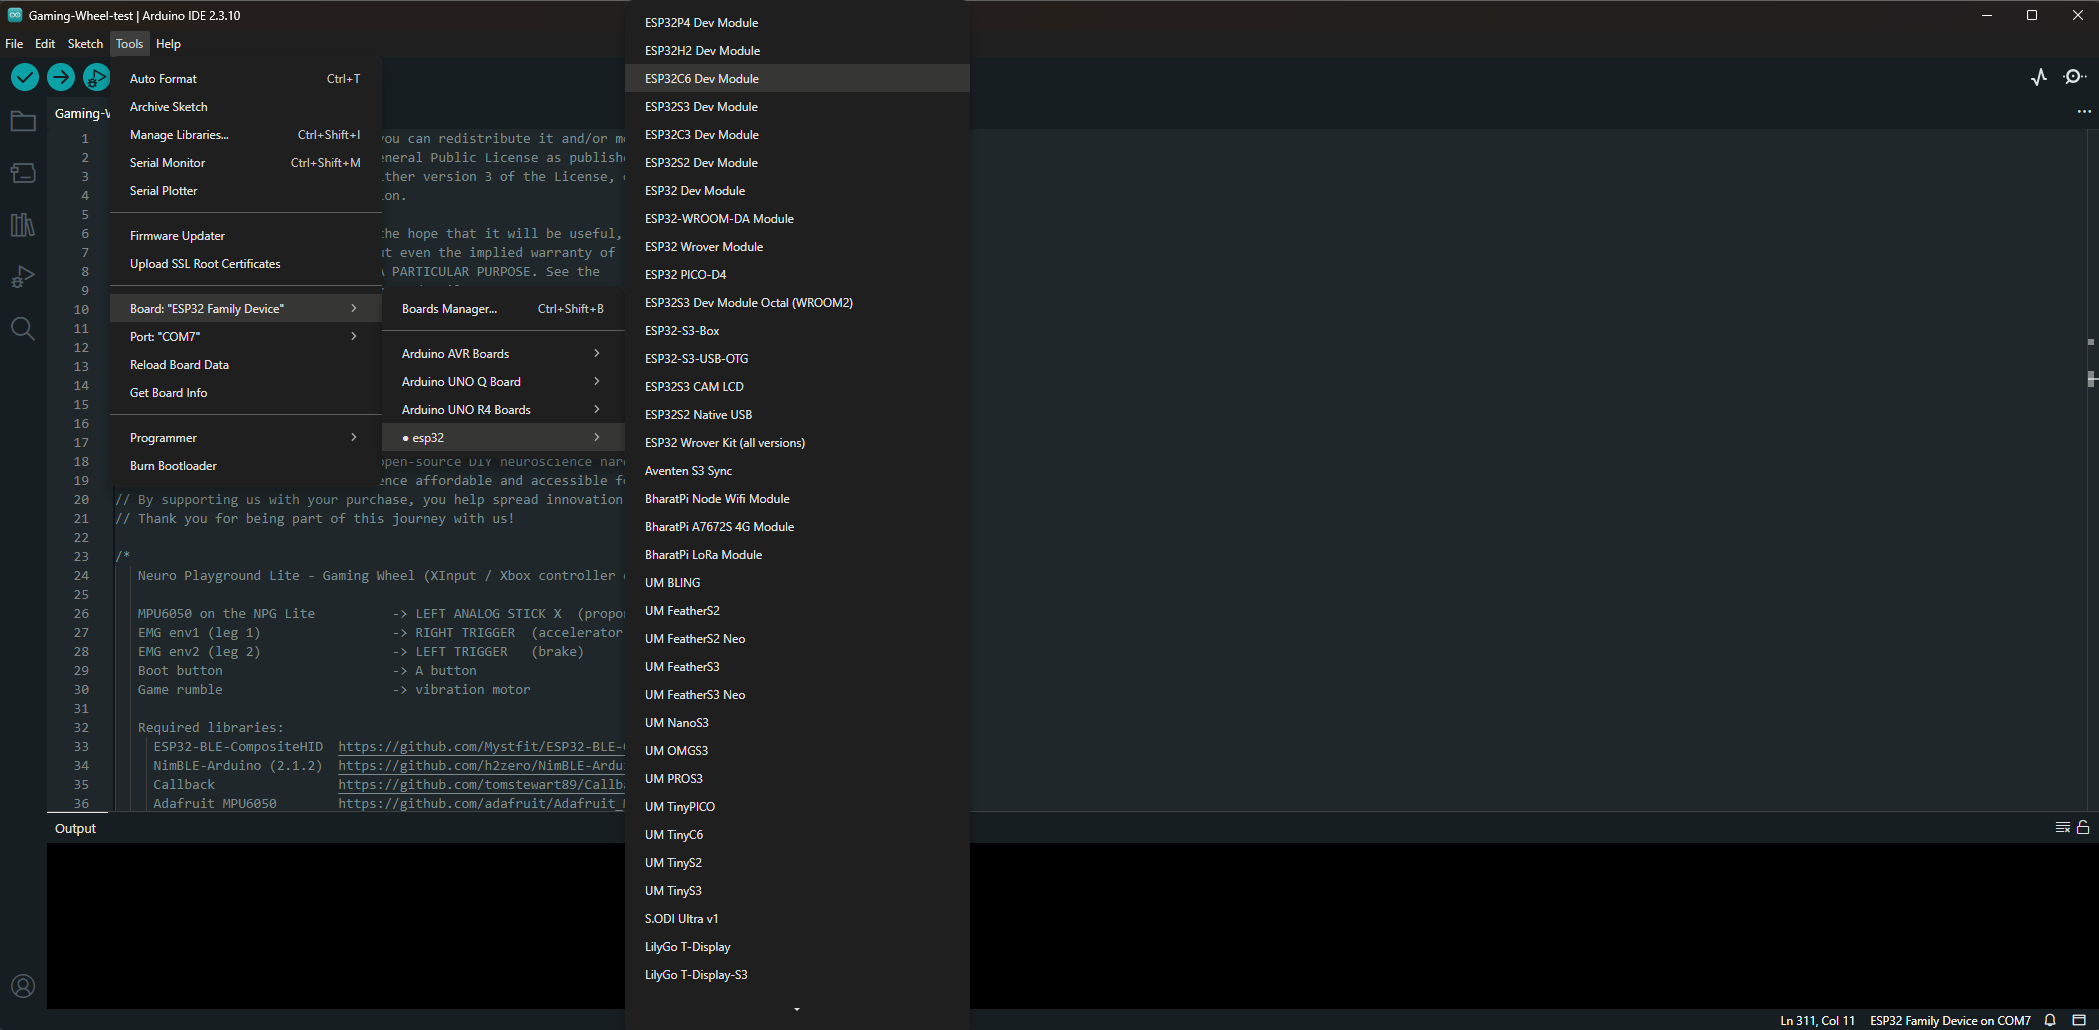
- Select the correct board:
- Tools → Board → ESP32 Arduino → ESP32C6 Dev Module
- Click the Upload button and wait for the firmware to finish uploading.
Electrode Placement
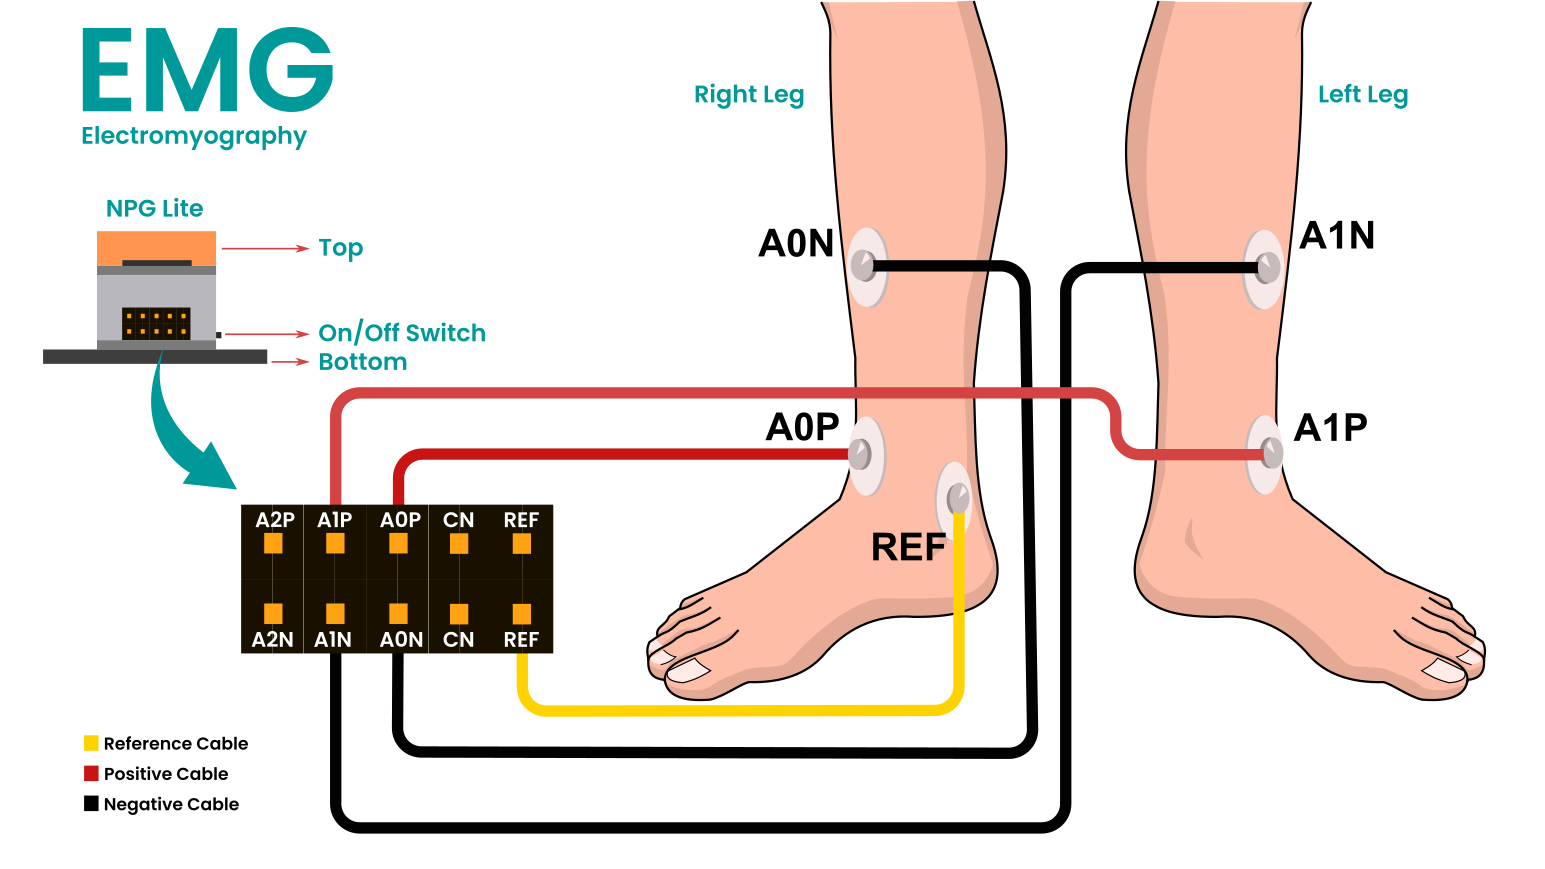
- Prepare your skin with alcohol swabs at Fibularis brevis muscle of both your legs and one bony part and let the skin dry completely. Refer to the electrode placement diagram above.
- Snap the BioAmp Cables on the gel electrodes, peel it off the plastic pack and paste it on your skin as per the diagram above.
- Connect the positive and negative of right leg to A0P and A0N, left leg to A1P and A1N and reference to Ref:
- A0 is the accelerator leg.
- A1 is the brake leg.
- For each channel, place the positive and negative electrodes a few centimetres apart over the leg muscle, parallel to the muscle fibres.
Connect the BioAmp Cables
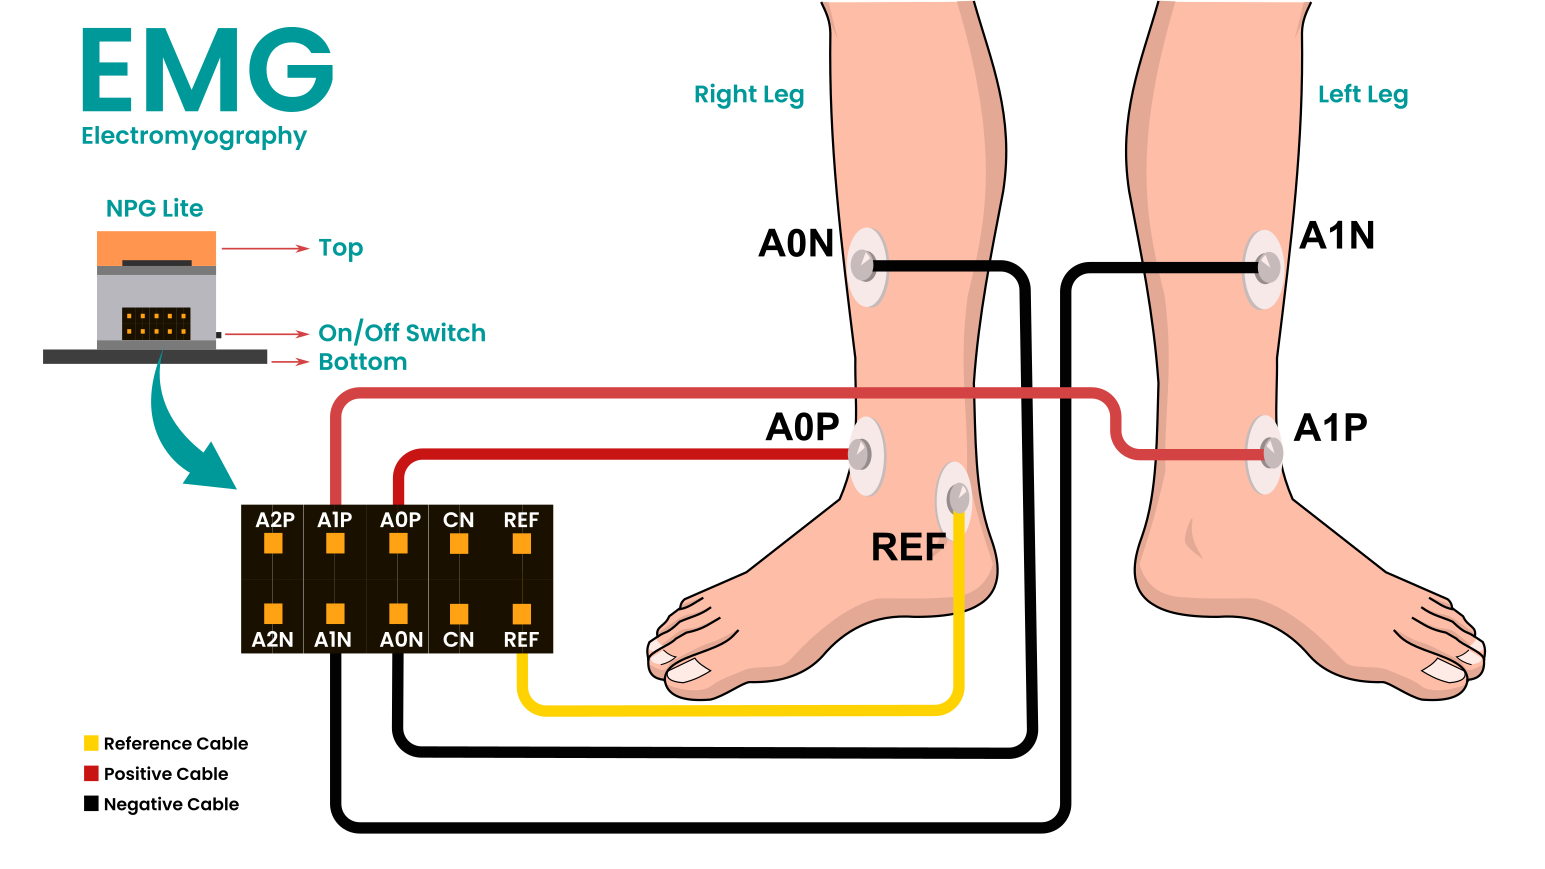
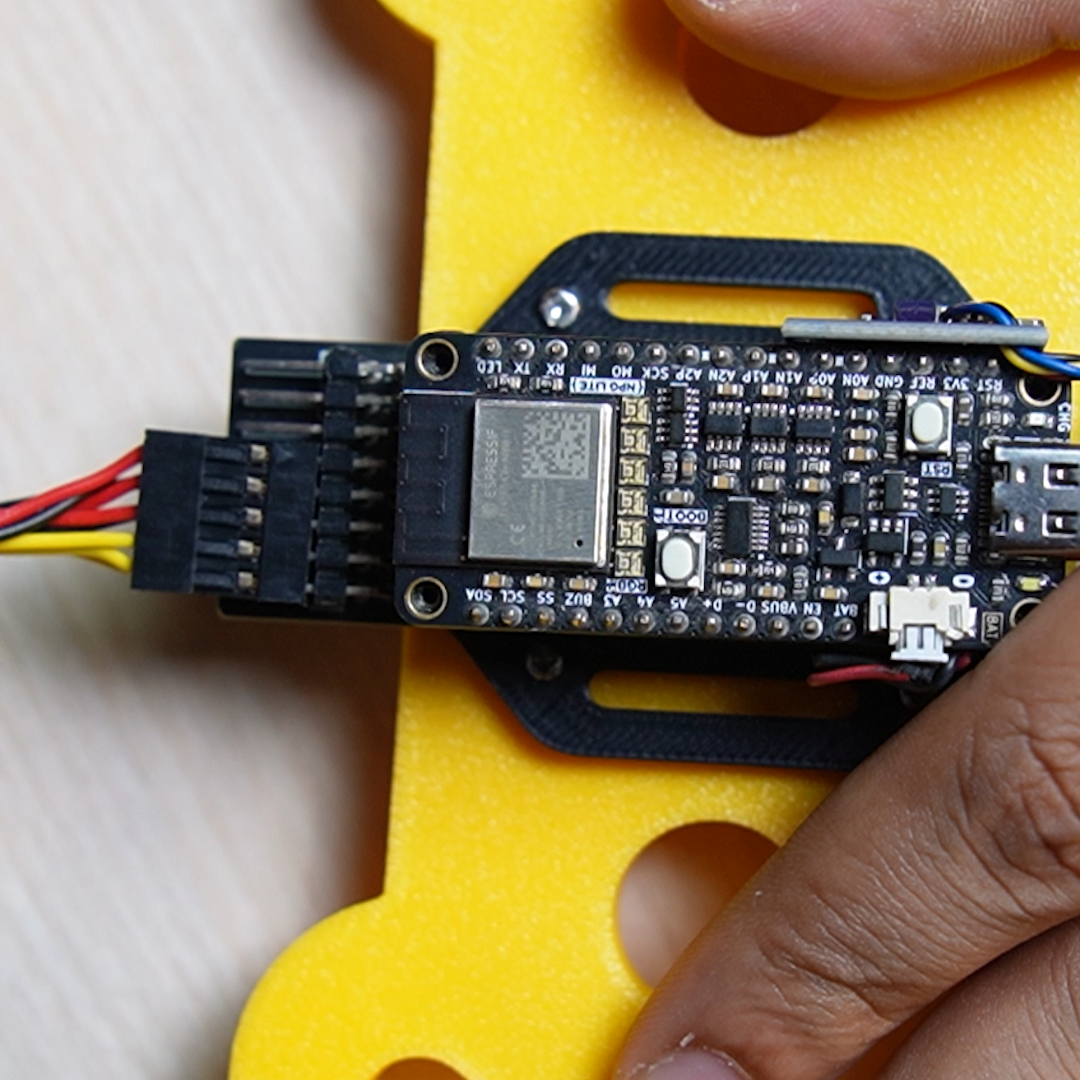
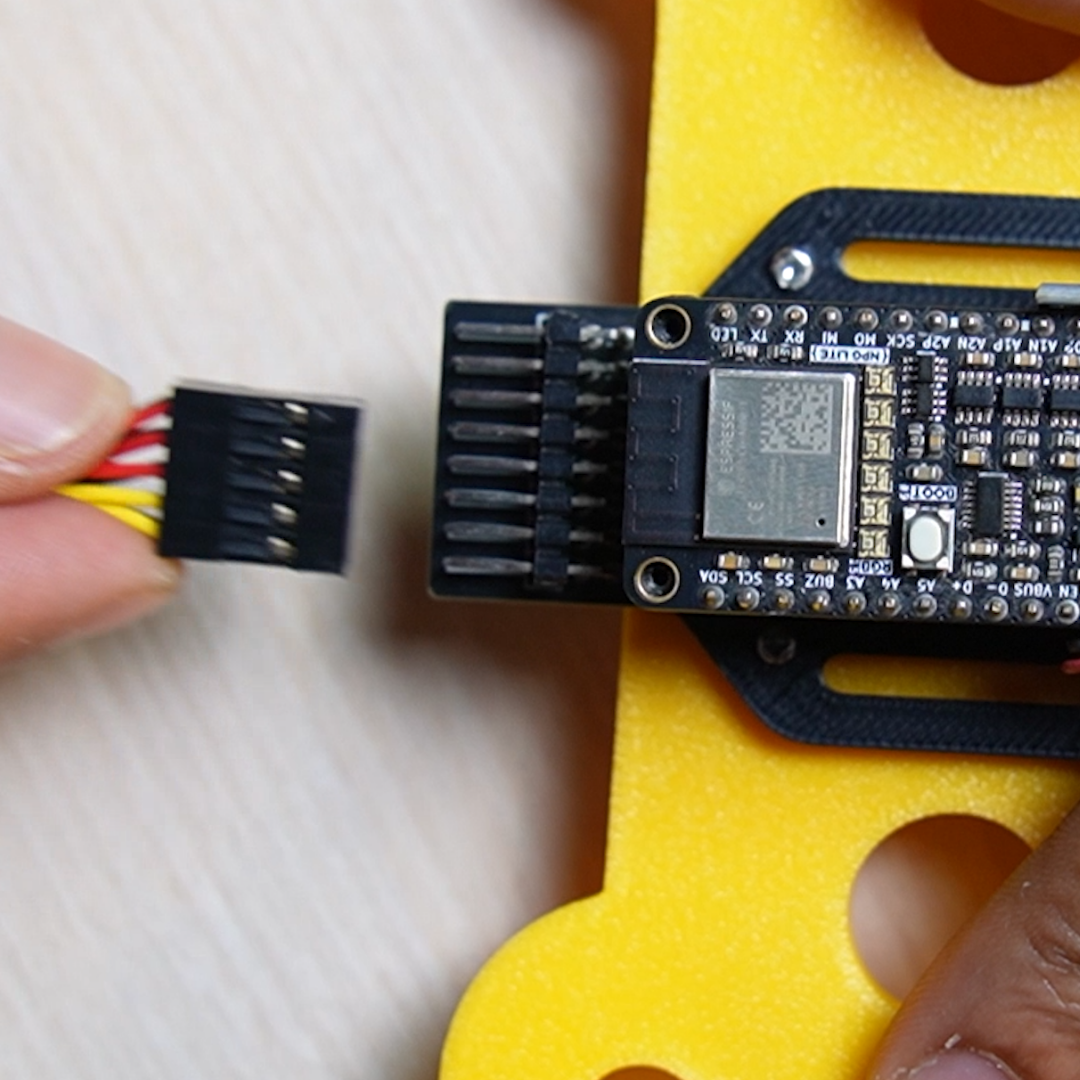
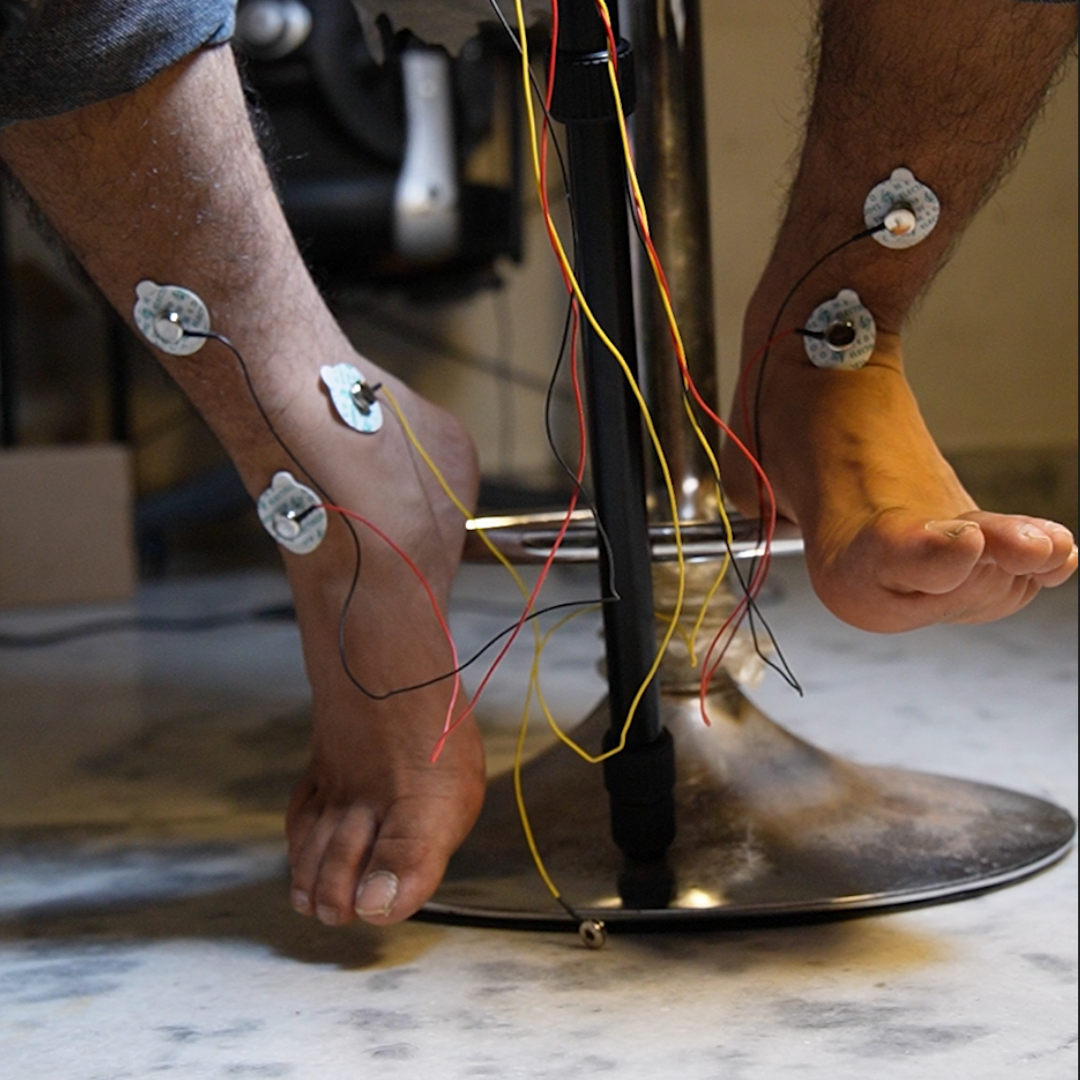
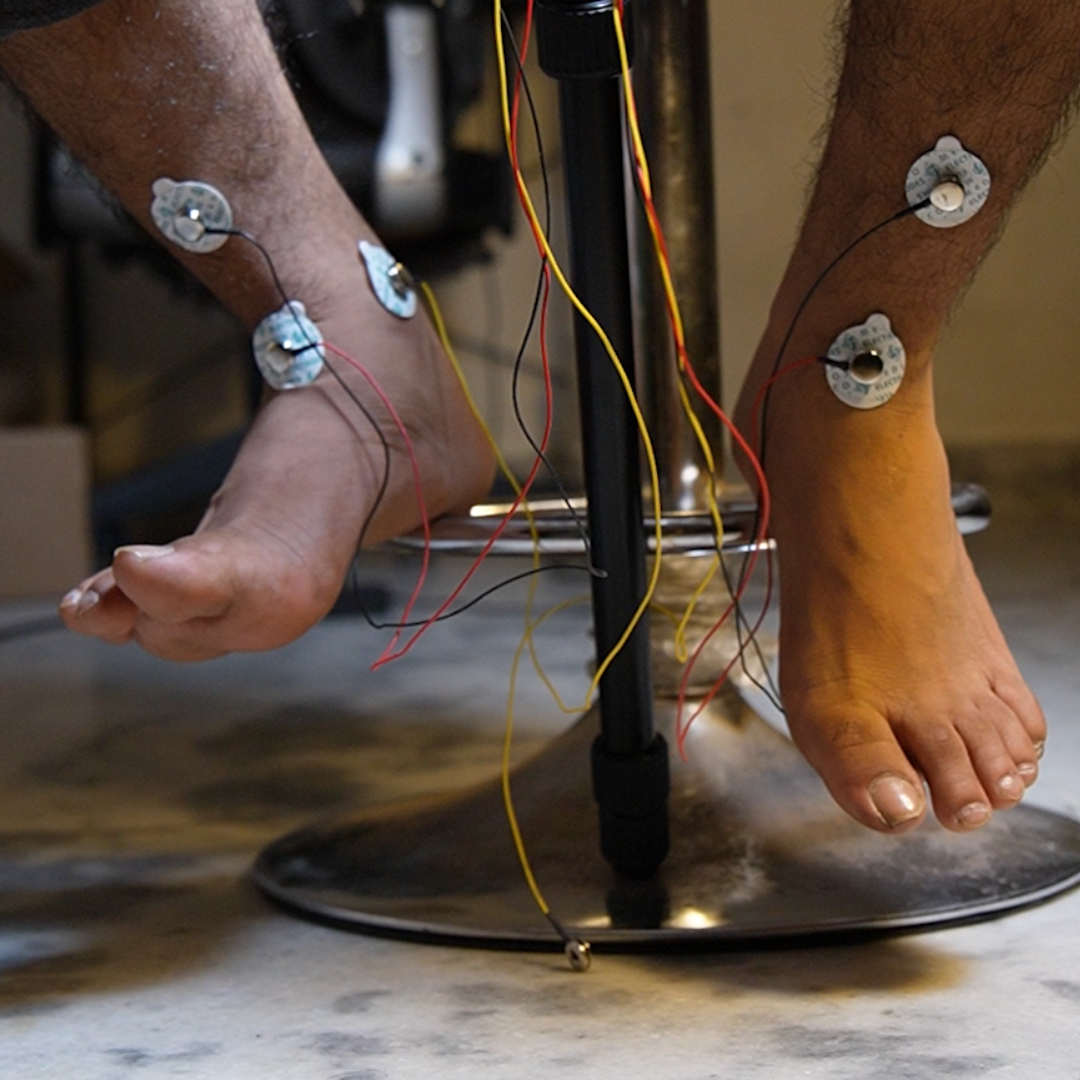
After placing the gel electrodes on your legs, connect the snap cables to the electrodes and plug them into NPG Lite as follows:
- Connect the right leg (Accelerator)Positive (+) electrode → A0P
- Negative (–) electrode → A0N
- Connect the left leg (Brake)Positive (+) electrode → A1P
- Negative (–) electrode → A1N
- Connect the reference electrodeReference electrode → REF
Tip: Double-check all cable connections before powering on the device to ensure reliable EMG signal detection.
Pair NPG Lite
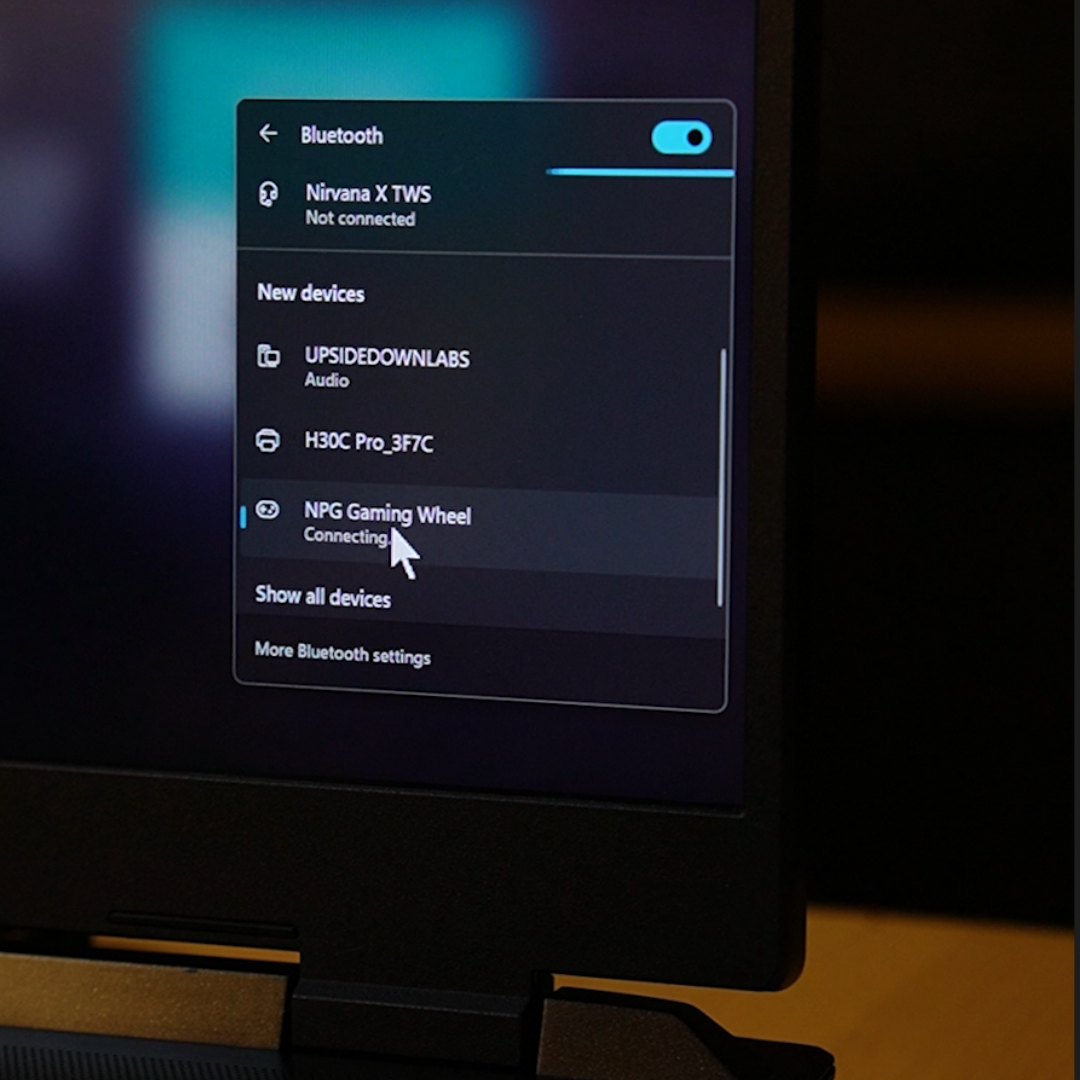
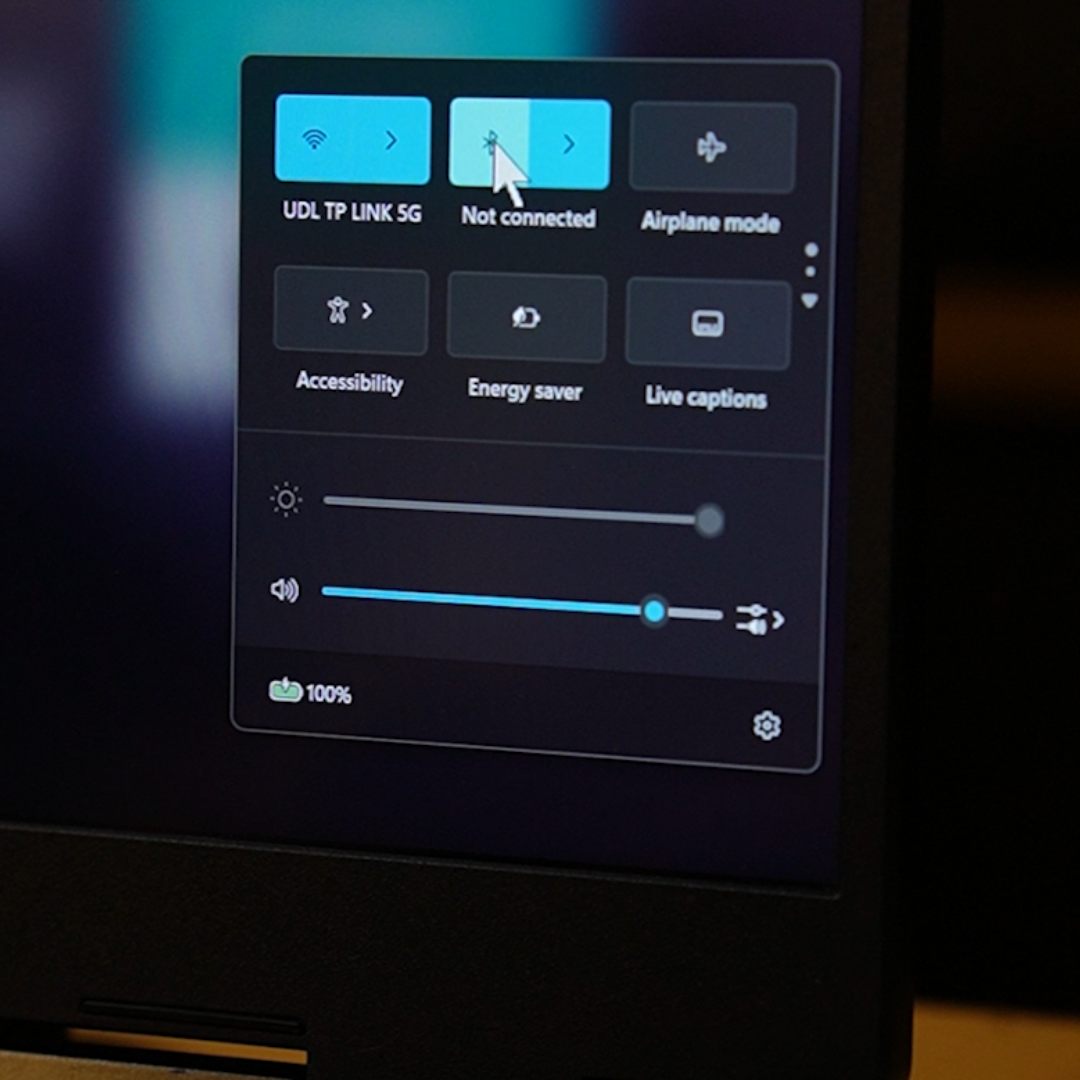
- Enable Bluetooth on your computer.
- A new Bluetooth device named NPG-Lite-Gaming should appear.
- Connect to it.
If it does not appear:
- Verify the MPU6050 is connected correctly.
- Ensure the MPU6050 power LED is ON.
- Bluetooth starts only after the MPU6050 is detected.
Calibrate the Steering Wheel
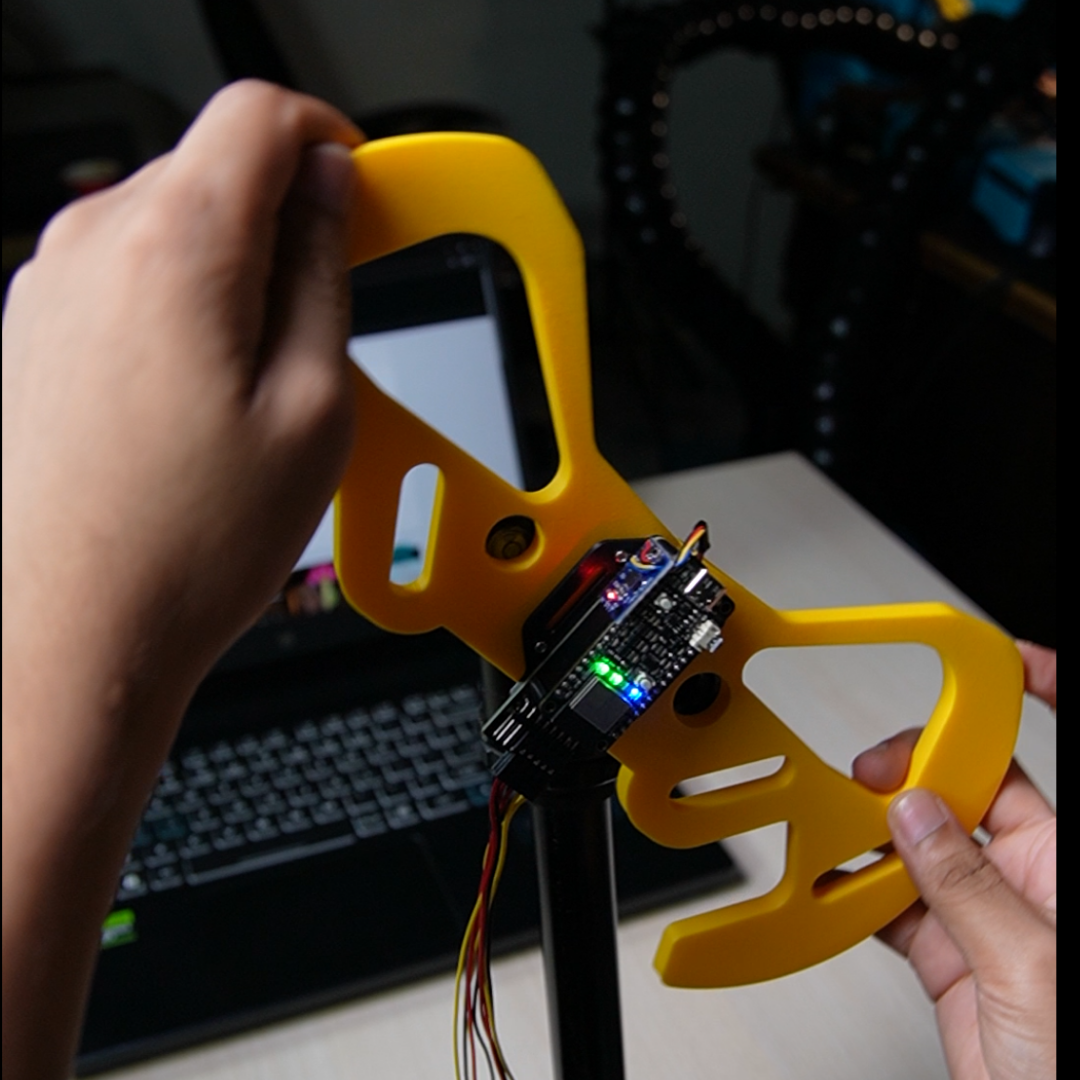
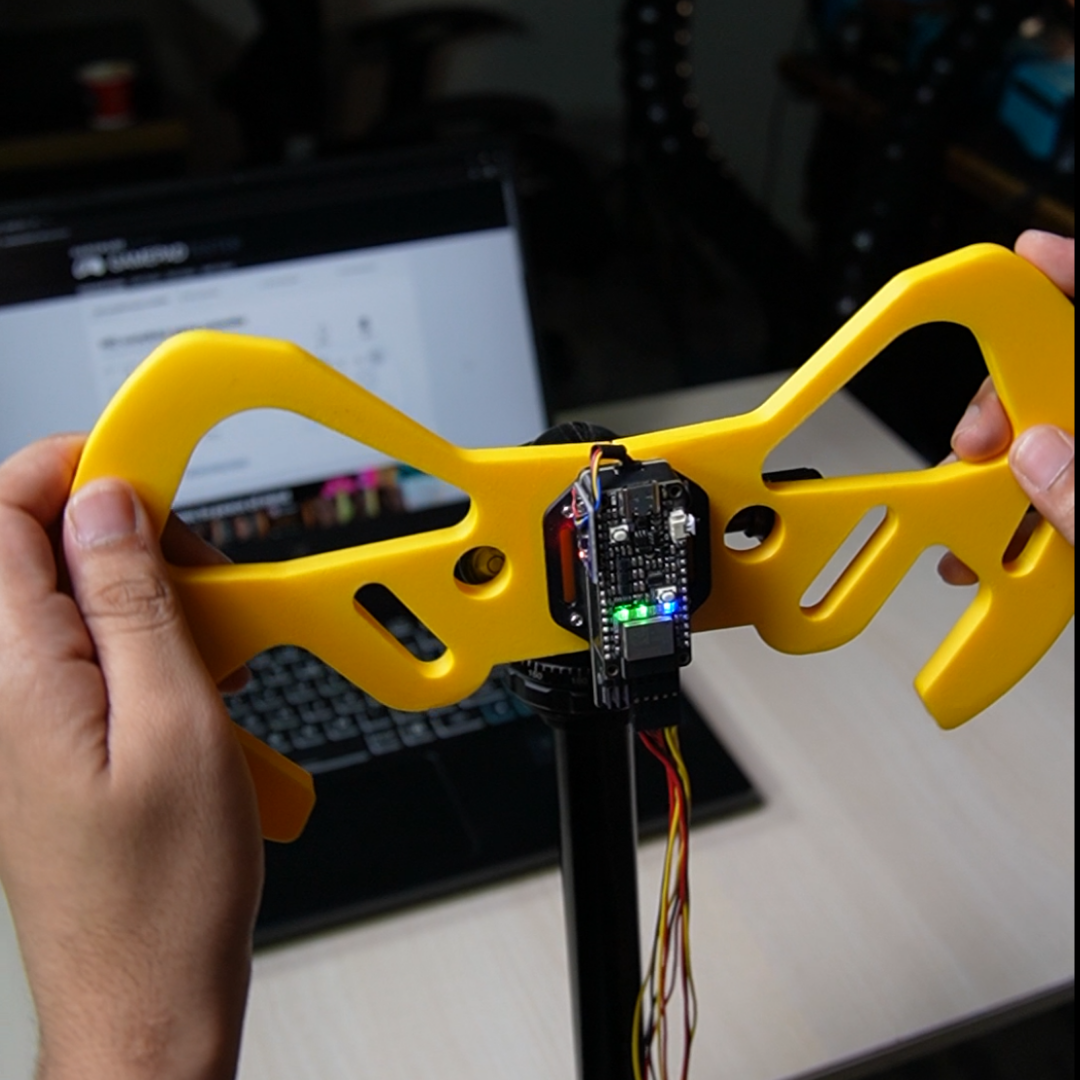
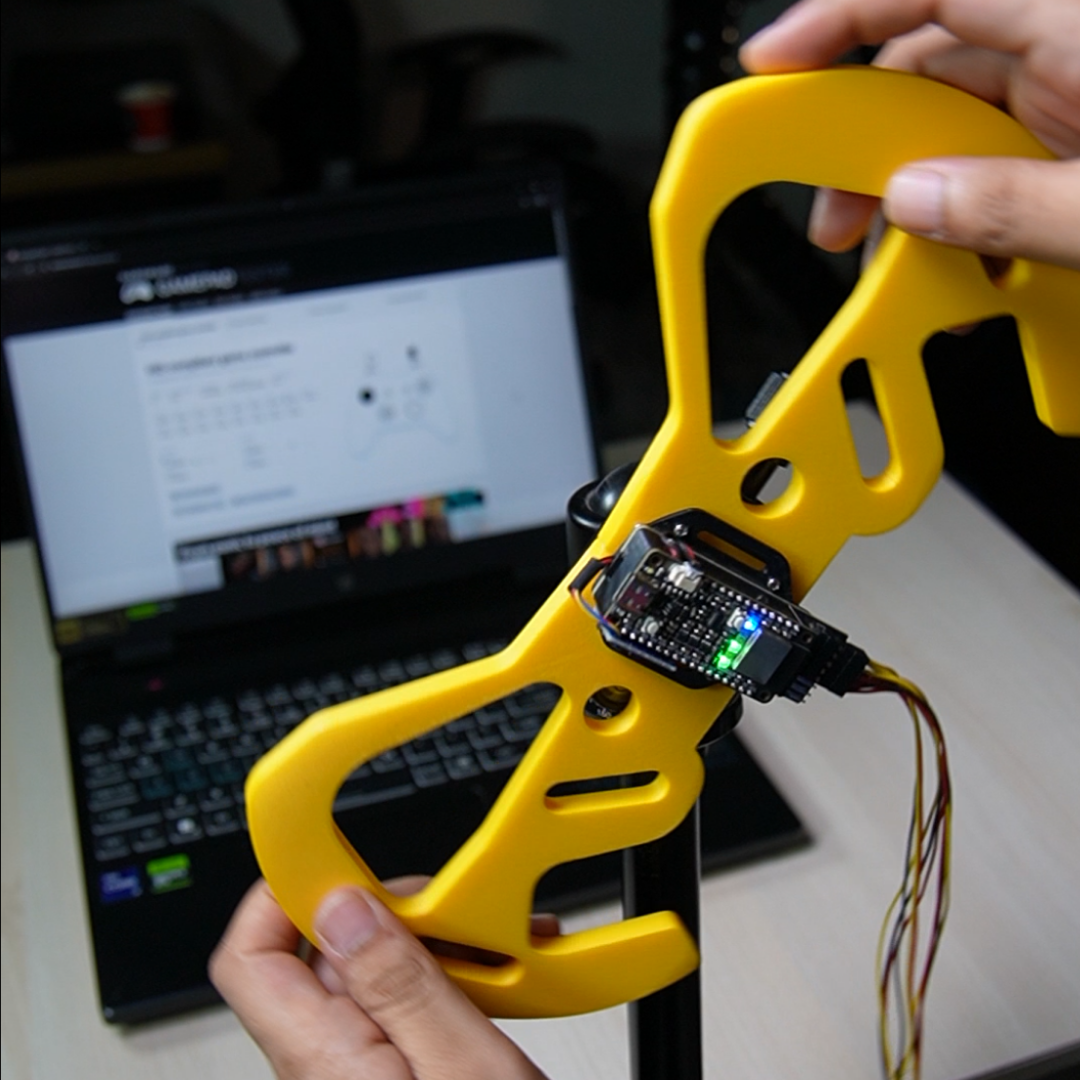
After connecting NPG Lite to your computer via Bluetooth, you'll need to calibrate the steering wheel before playing.
- Keep the steering wheel centered and still.
- Wait for NPG Lite to vibrate. This indicates that the calibration process has started.
- When the first vibration starts:Turn the steering wheel fully to the left.
- Hold it at your desired maximum left steering angle.
- When the vibration stops:Return the steering wheel to the center.
- When the second vibration starts:Turn the steering wheel fully to the right.
- Hold it at your desired maximum right steering angle.
- When the vibration stops:Return the steering wheel to the center.
- After a short final vibration, the calibration is complete and the steering wheel is ready to use.
Tip: The left and right angles you set during calibration become the maximum steering limits while playing. Choose angles that feel comfortable for your driving style.
Need to recalibrate? Simply press the Reset button on NPG Lite. The device will reconnect automatically, and you can repeat the calibration process.
Start Playing
.gif)
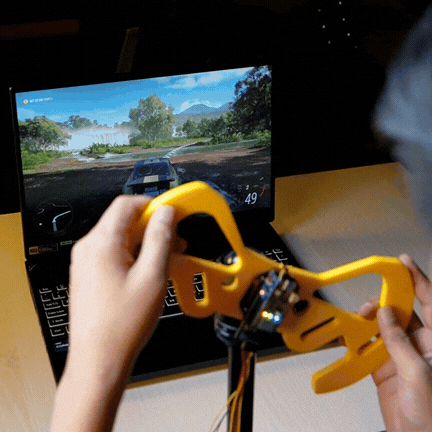
Once the calibration is complete, you can test the controls on this gamepad tester. Now, launch any racing game that supports Xbox or Bluetooth controllers.
Controls
1.Steering: Turn the steering wheel to steer the vehicle.
- The farther you turn the wheel, the sharper the vehicle will turn.
2.Accelerator: Flex the muscles in your right leg to accelerate.
- A stronger muscle contraction results in more throttle.
3.Brake: Flex the muscles in your left leg to apply the brakes.
- Greater muscle contraction produces stronger braking.
4.A Button: Press the BOOT button on NPG Lite to use the A button on the virtual Xbox controller.
5.Vibration Feedback: If your game supports controller vibration, NPG Lite will vibrate to provide haptic feedback, making the driving experience more immersive.
Understand the Status LEDs
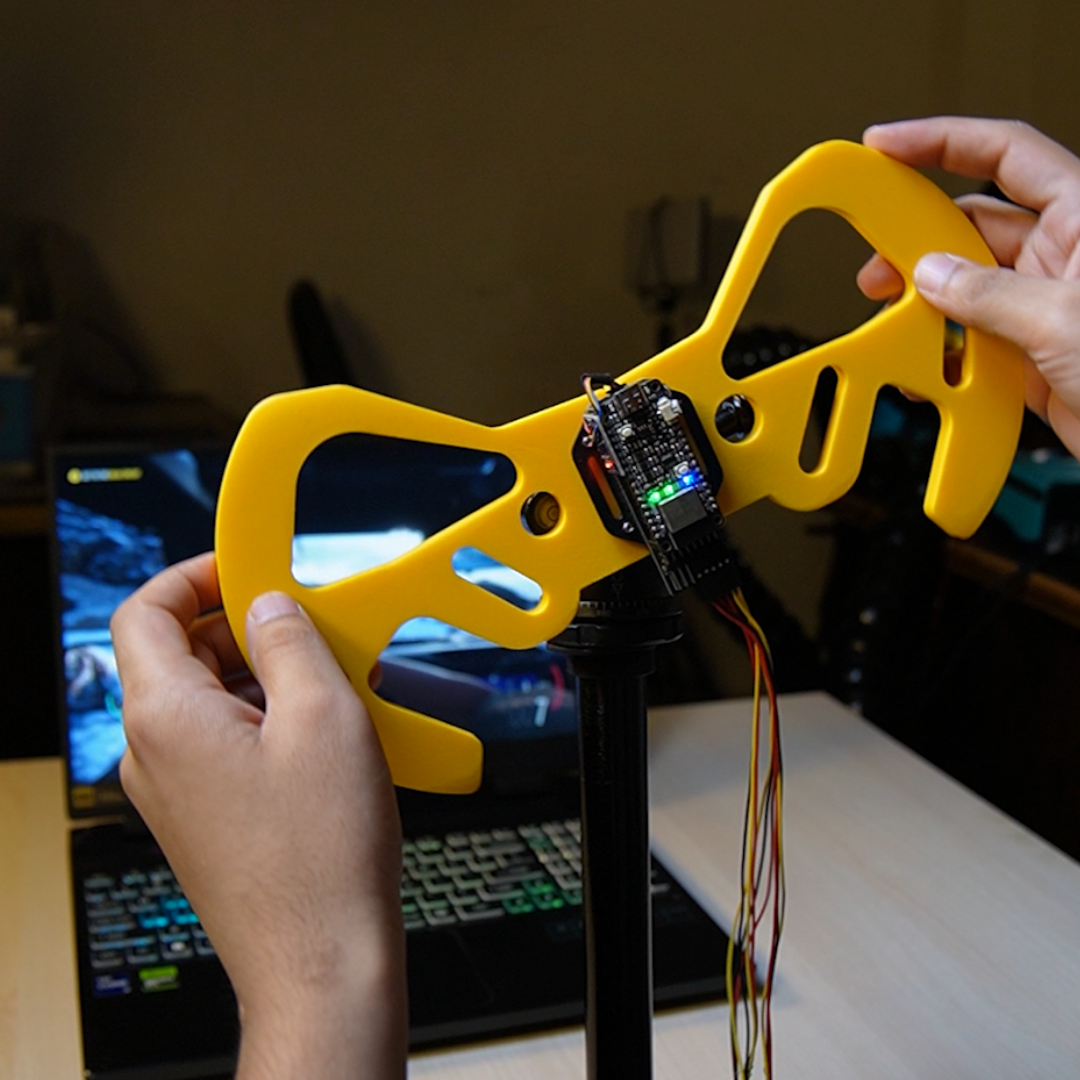
NPG Lite has six RGB LEDs, but this project uses LED 1, LED 4, and LED 6 to display the device status.
LED 1 – Bluetooth Status
- Red: Waiting for a Bluetooth connection.
- Green: Successfully connected via Bluetooth.
- Blue: Steering movement or pedal (EMG) input is being detected.
LED 4 – MPU6050 Status
- Fading Red: Waiting for the MPU6050 sensor to be detected.
- Green: MPU6050 is connected and working properly.
Note: If the MPU6050 is disconnected while you're playing:
- The Bluetooth connection will disconnect automatically.
- LED 4 will return to fading red.
- Reconnect the MPU6050 and recalibrate the steering wheel before continuing.
LED 6 – Battery Status
- Green: Battery level is above 70%.
- Orange: Battery level is between 20% and 70%.
- Red: Battery level is 20% or lower. Recharge the battery before continuing to use the device.
Adjust the Control Settings
You can customize the steering and pedal sensitivity by editing the configuration values at the top of the NPG-Lite-Gaming.ino file.
- Sets the minimum muscle effort required before the accelerator or brake starts responding.
- Decrease this value if you have to flex your muscles too hard before the pedals react.
- Sets the muscle effort required to achieve full throttle or full braking.
- Decrease this value if you cannot reach maximum pedal input even with a strong muscle contraction.
- Creates a small neutral zone around the center position of the steering wheel.
- Increase this value if the vehicle drifts left or right when the wheel is held still.
- Smooths the steering input to reduce sudden movements.
- Higher values produce smoother steering but may introduce a slight delay in response.
- Adjusts the steering sensitivity near the center position.
- Higher values provide finer control for small steering movements while maintaining full steering at larger angles.
- Recommended value: 0.3 to 0.5.
Troubleshooting
Bluetooth Device Not Appearing
If NPG-Lite-Gaming doesn't appear in the Bluetooth device list:
- Make sure the MPU6050 is connected properly.
- Verify that the MPU6050 power LED is ON.
- Press the Reset button on NPG Lite and try connecting again.
Steering Is Not Working Properly
If the steering feels incorrect or unresponsive:
- Press the Reset button on NPG Lite.
- Repeat the steering wheel calibration process.
Accelerator or Brake Is Not Responding
If the pedals do not respond to muscle contractions:
- Check that the electrodes are placed correctly.
- Clean your skin with alcohol swabs before attaching the electrodes.
- Lower the EMG_ENV_MIN value in the firmware to make the pedals more sensitive.
Unable to Reach Full Throttle or Full Braking
If you can't achieve maximum acceleration or braking even with a strong muscle contraction:
- Reduce the EMG_ENV_MAX value in the firmware to lower the effort required for full pedal input.