Build a TinyML Bird Identifier With UNIHIKER K10 and Edge Impulse
by Jaychouu in Circuits > Arduino
31 Views, 0 Favorites, 0 Comments
Build a TinyML Bird Identifier With UNIHIKER K10 and Edge Impulse
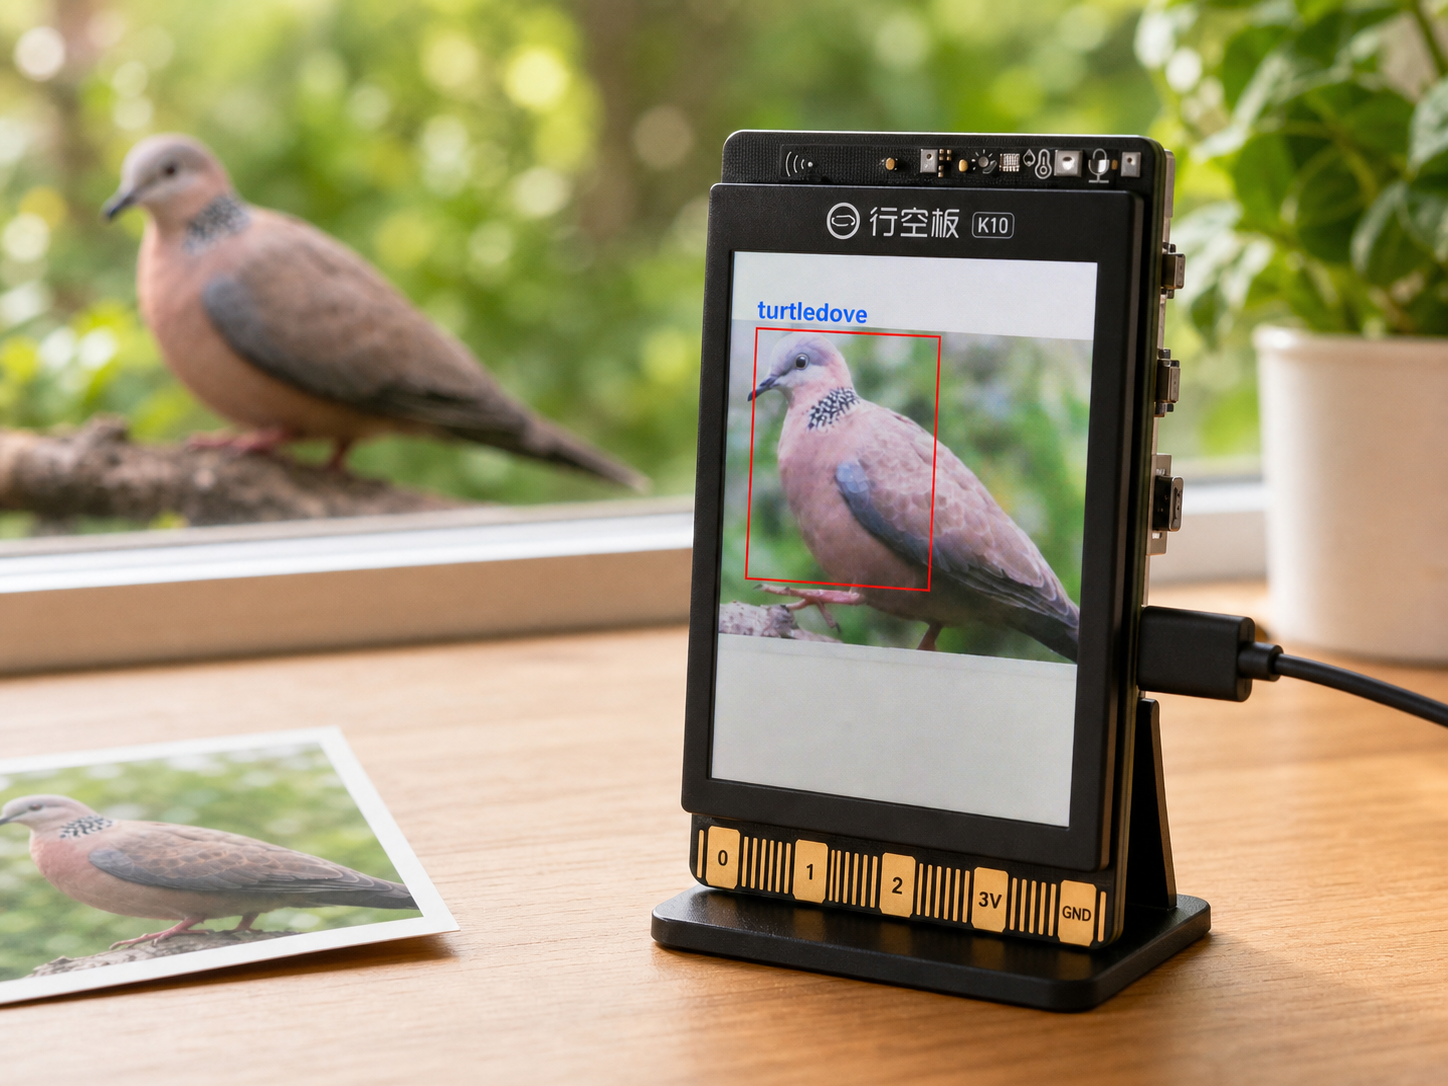
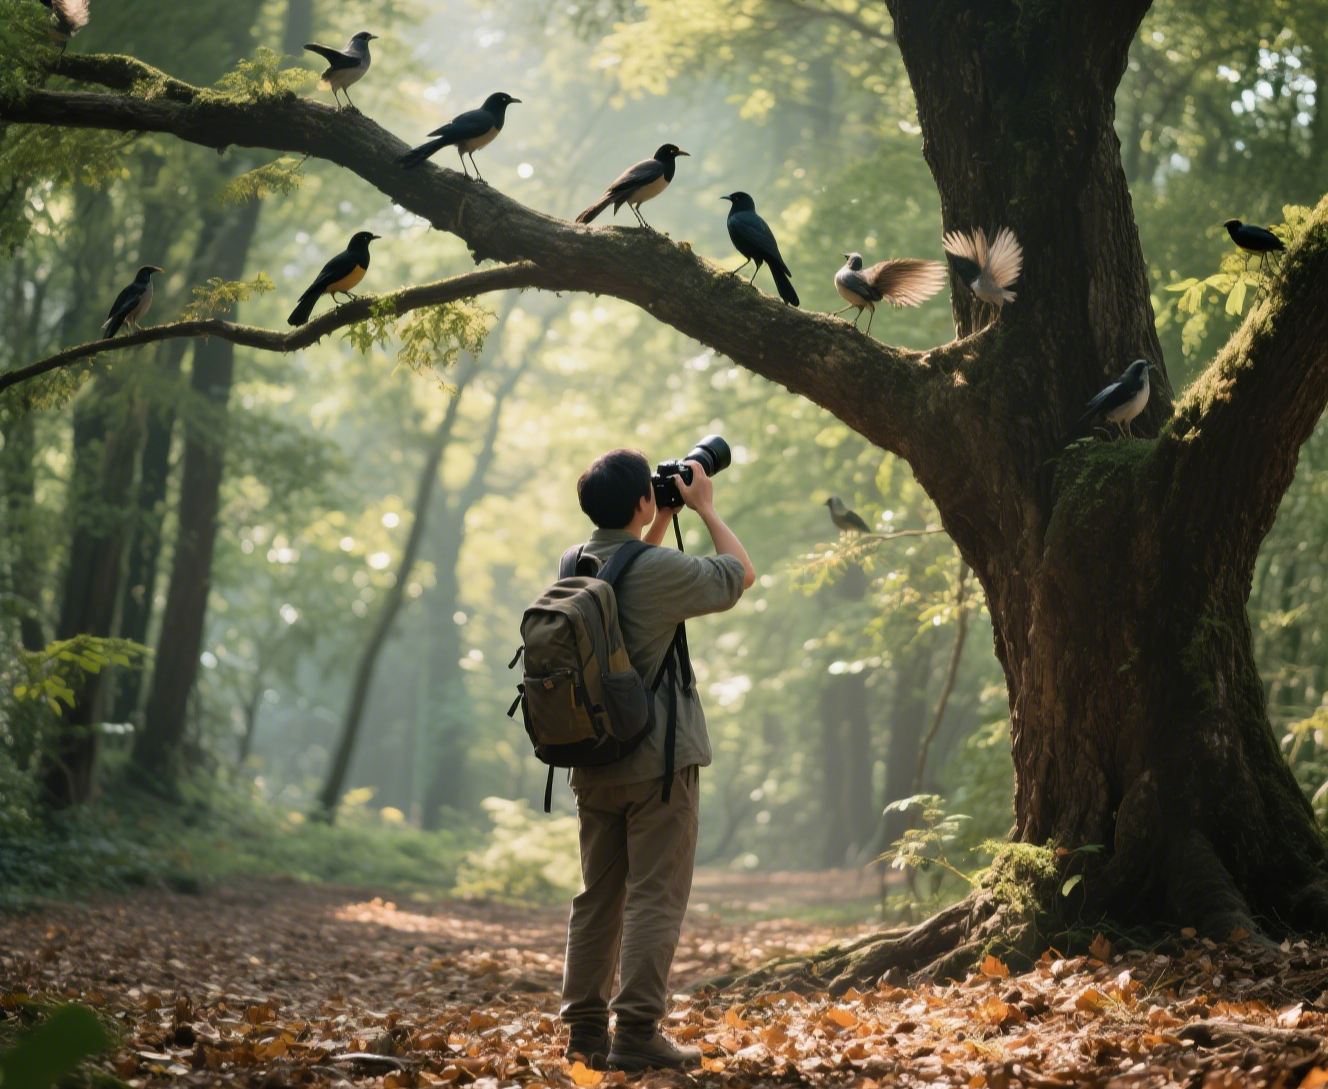
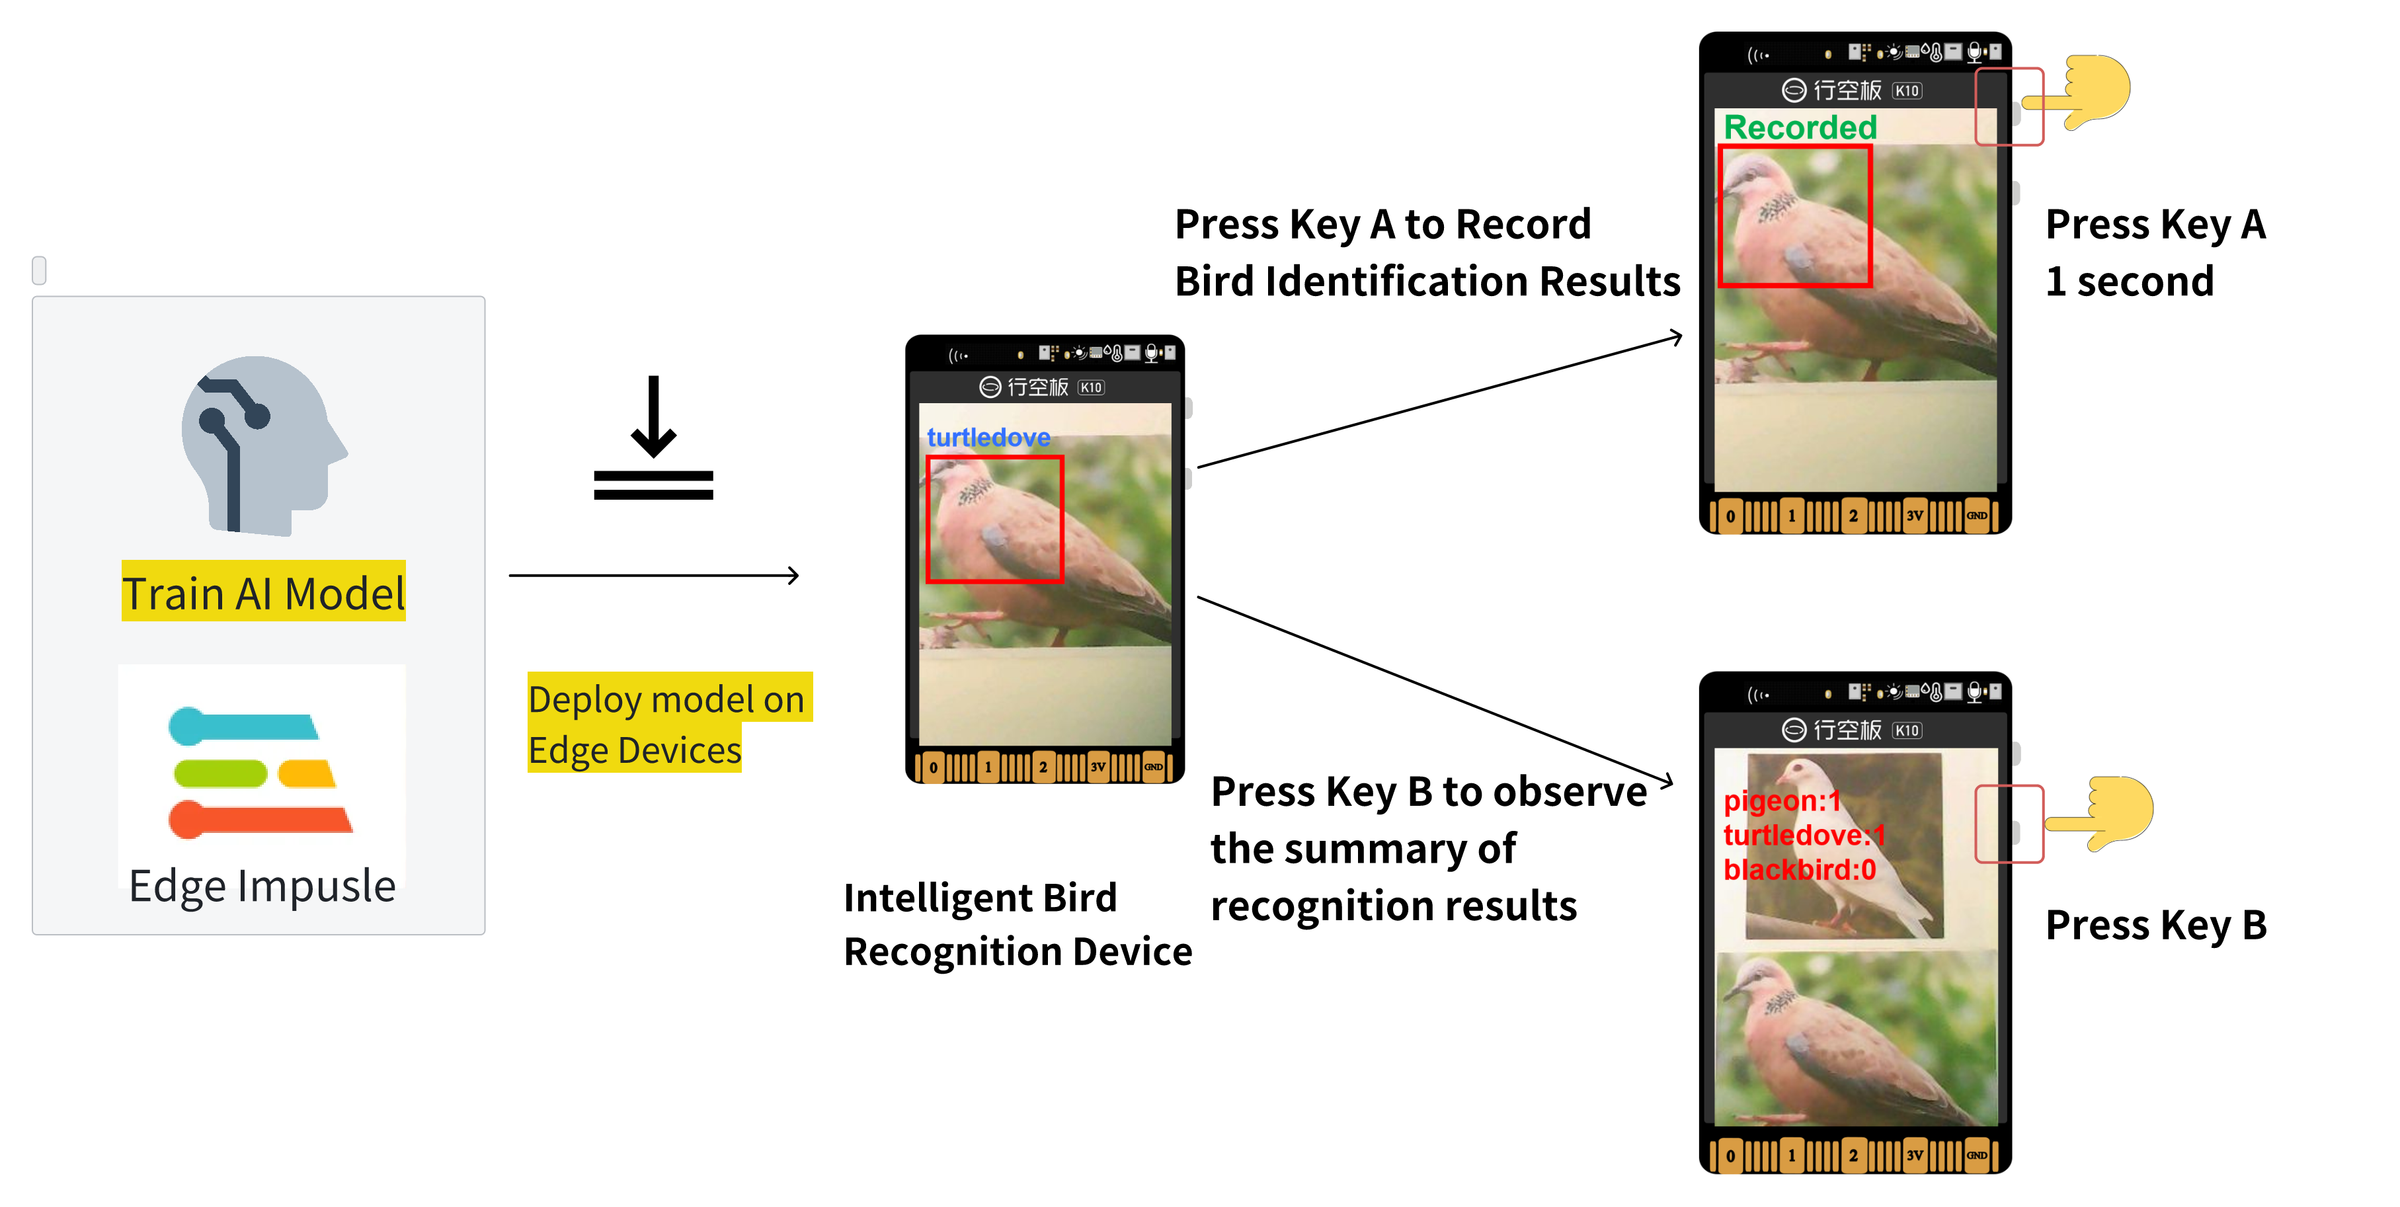
This project turns the UNIHIKER K10 into a compact bird identification and recording device. A custom object detection model trained with Edge Impulse runs directly on the board, identifies birds in the camera image, and draws a bounding box around each detection.
The example model recognizes three classes: blackbird, turtledove, and pigeon. Press Button A to record a detected bird. Press Button B to display the number of recorded sightings for each species.
The build has three main parts:
- Use the K10 as a network camera and collect a bird image dataset.
- Label the images and train a FOMO object detection model in Edge Impulse.
- Export the model as an Arduino library and run it on the K10.
Supplies
Hardware
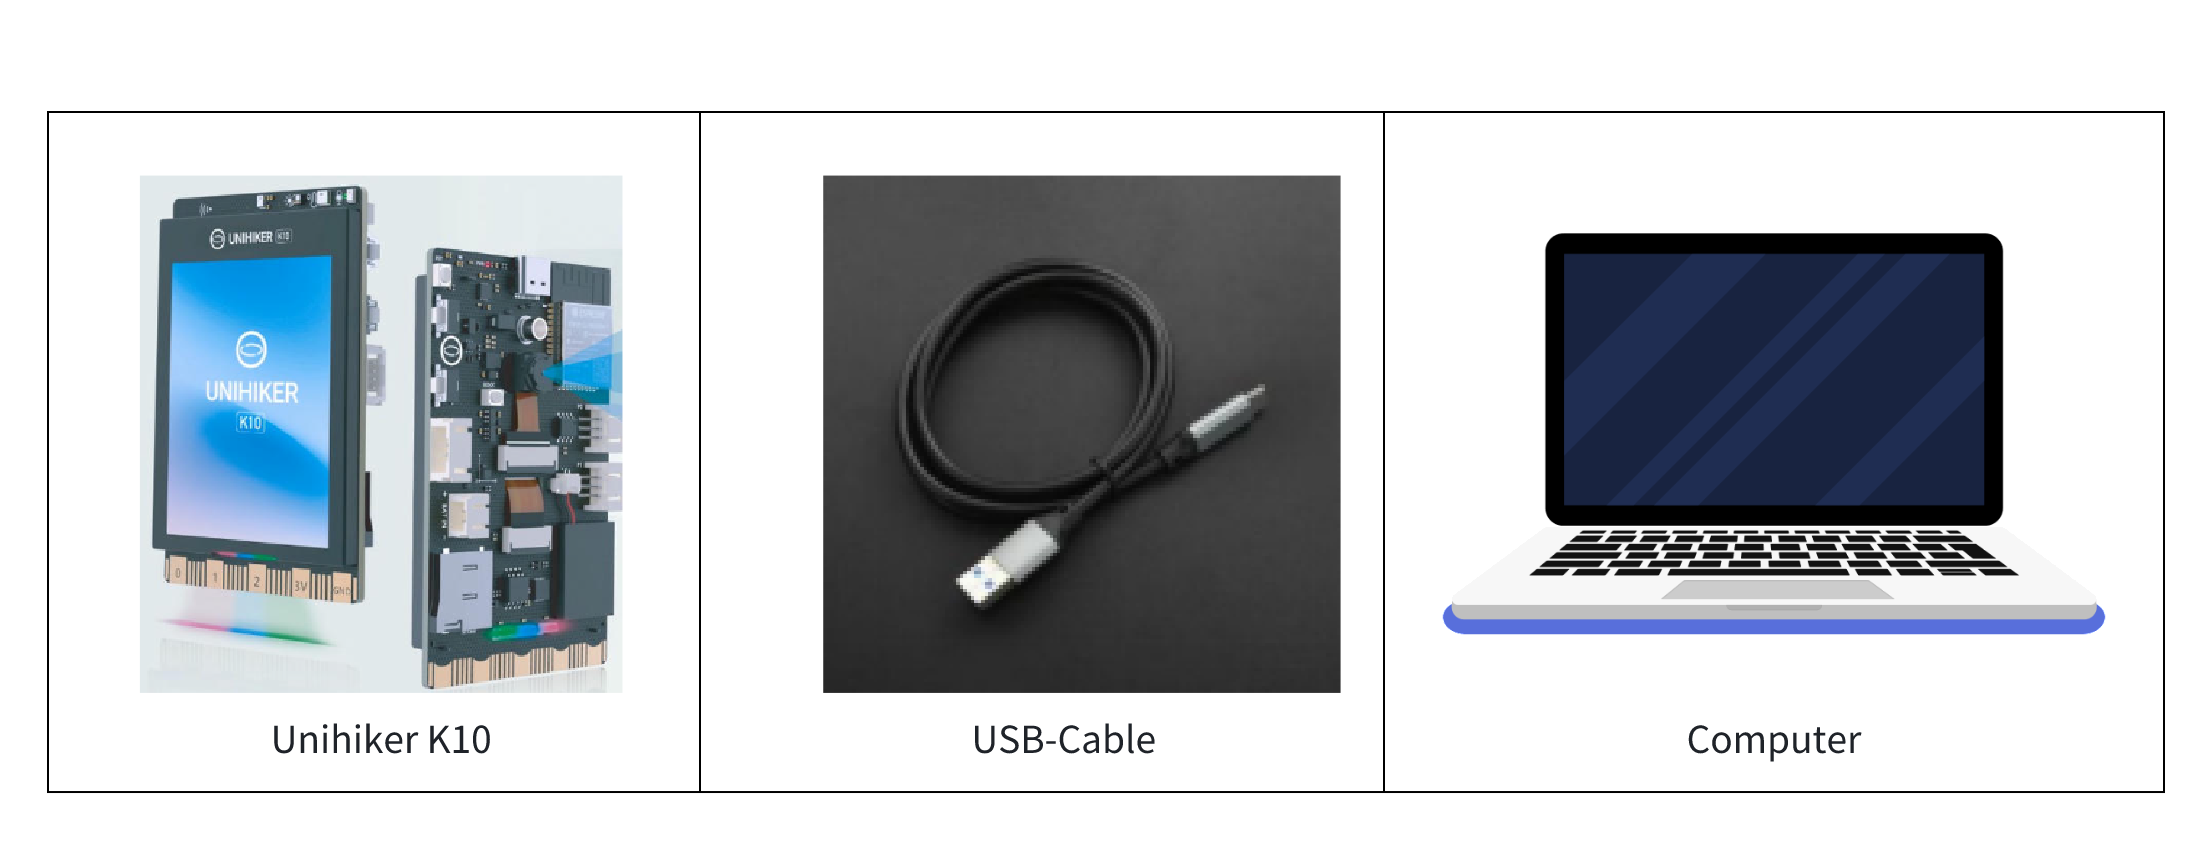
- 1 × UNIHIKER K10
- 1 × USB-C data cable
- 1 × computer
- Access to a Wi-Fi network shared by the computer and K10
Software and Online Services
- Arduino IDE 1.8.19 and the UNIHIKER K10 board package
- Mind+, version 1.8.1 RC1.0 or later
- Edge Impulse account
- K10webCam extension
- edgeImpulse_vision library
This tutorial follows the software versions used in the original build, including Arduino IDE 1.8.19.
Install the UNIHIKER K10 Board Package
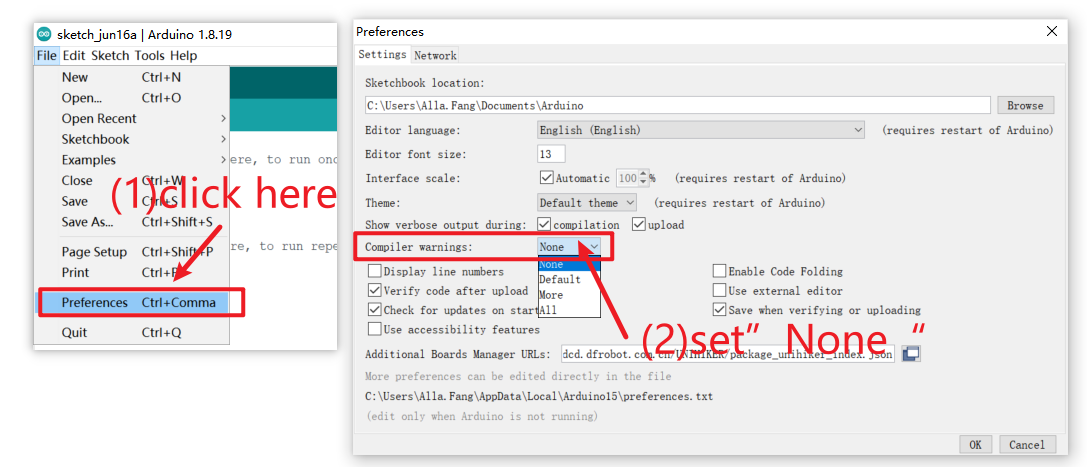
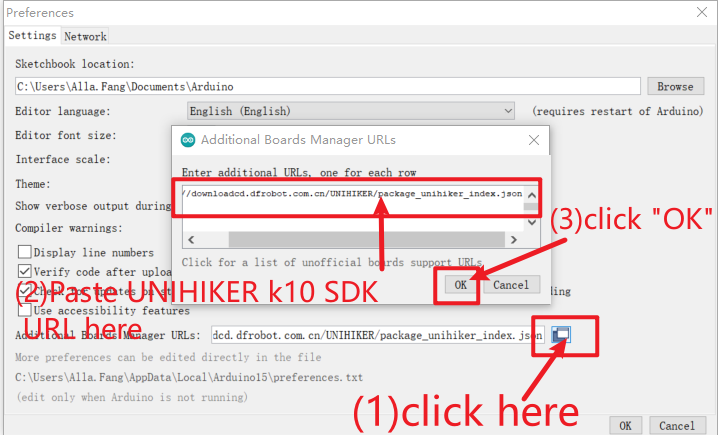
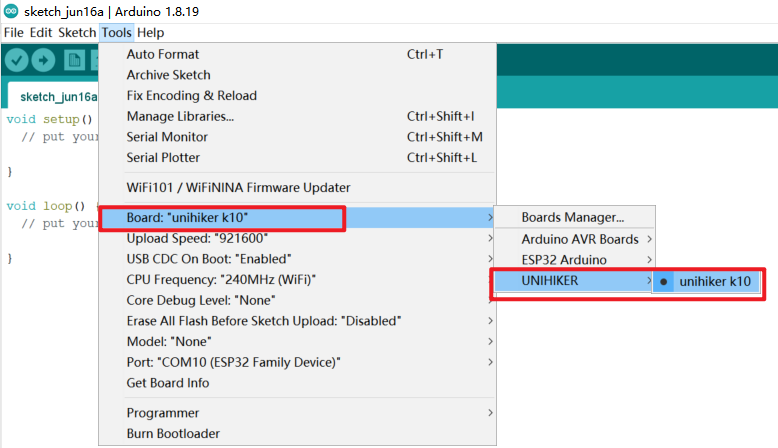
Open Arduino IDE 1.8.19 and go to File > Preferences. Set Compiler warnings to None.
Add the following URL to Additional Boards Manager URLs, then click OK:
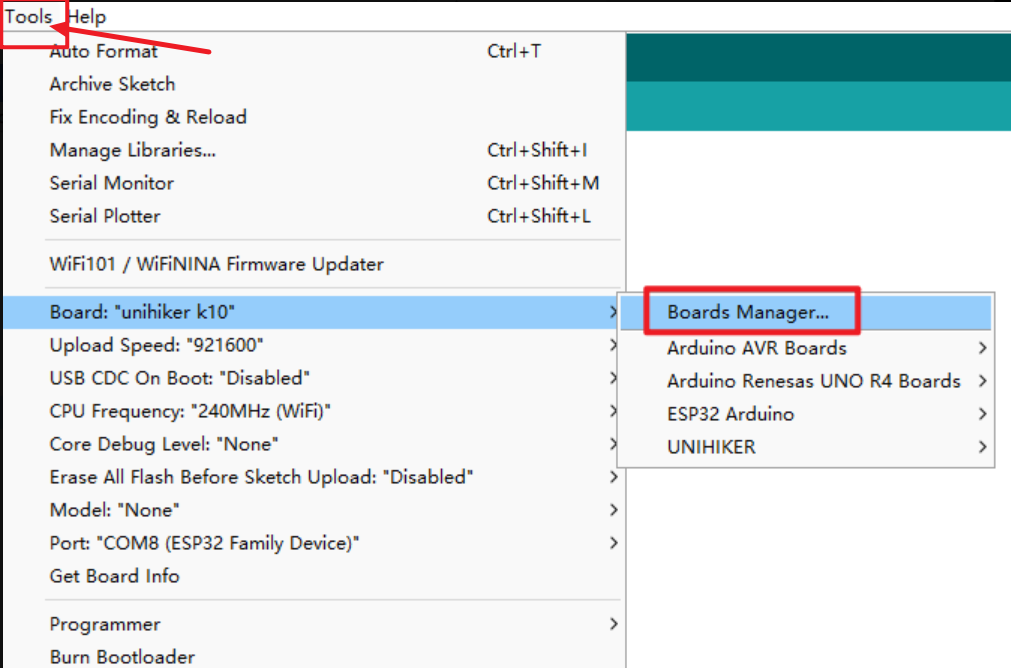
Open Tools > Board > Boards Manager.
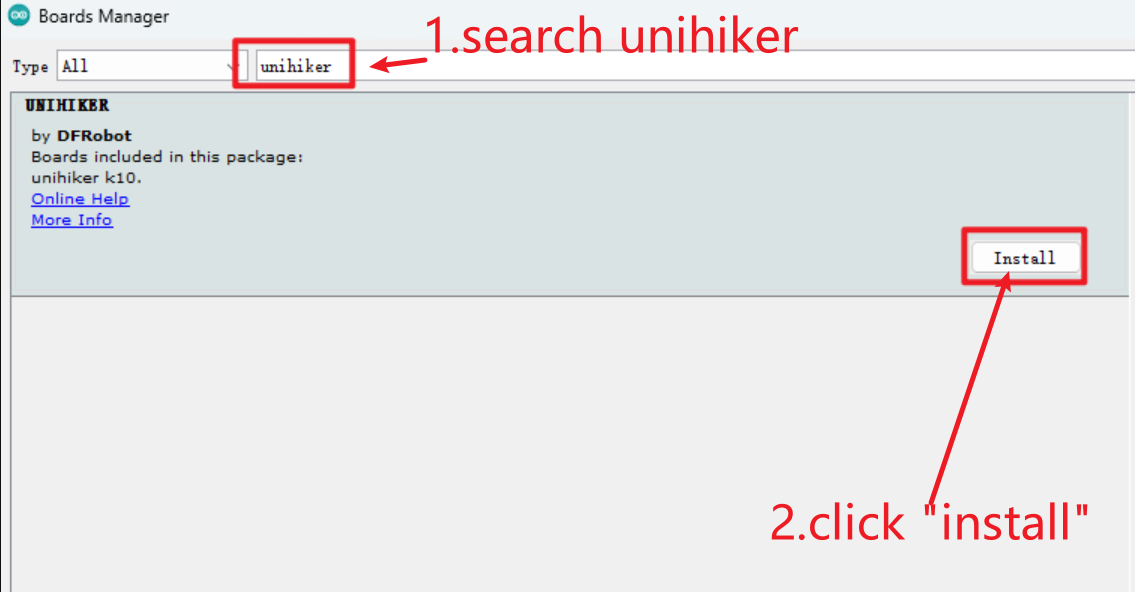
Search for unihiker, then install the UNIHIKER K10 board package.
After installation, UNIHIKER K10 will appear in the Arduino IDE board list.
For more board-package instructions, see the UNIHIKER K10 Arduino IDE guide.
Connect the K10 in Mind+
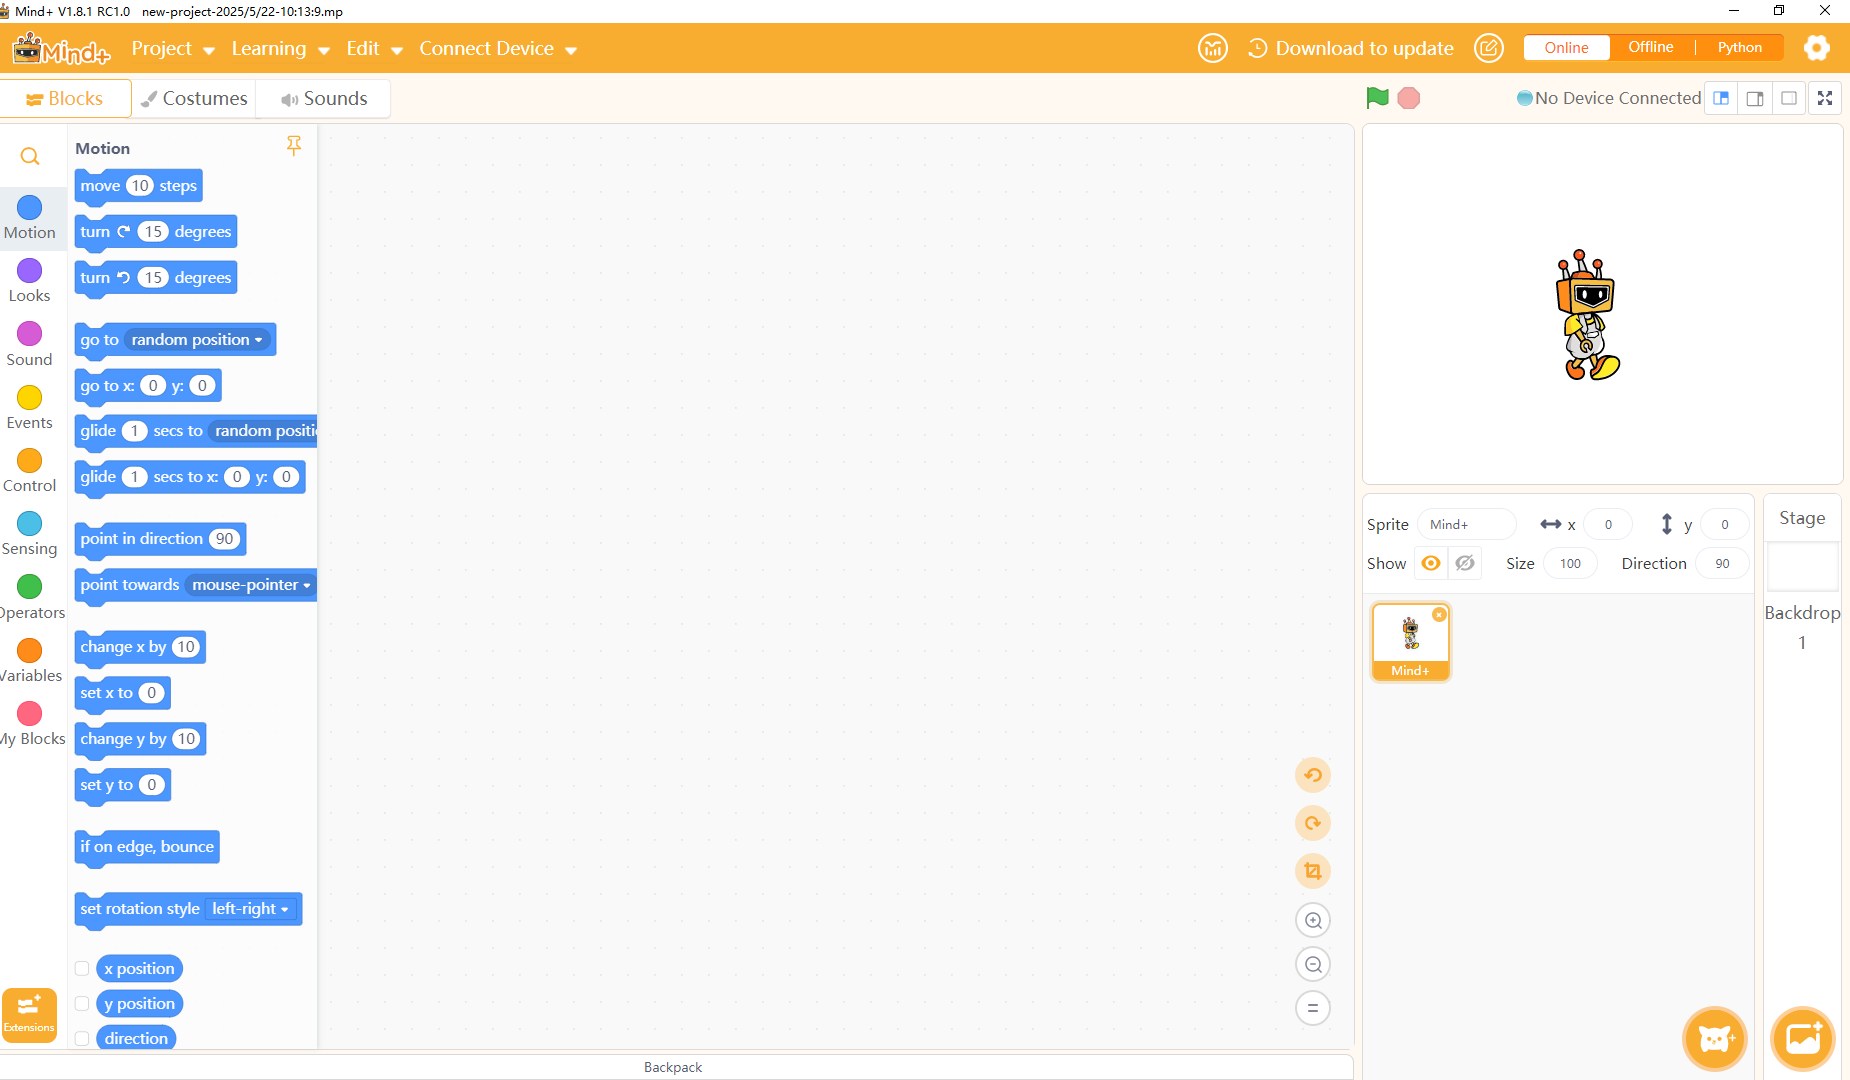
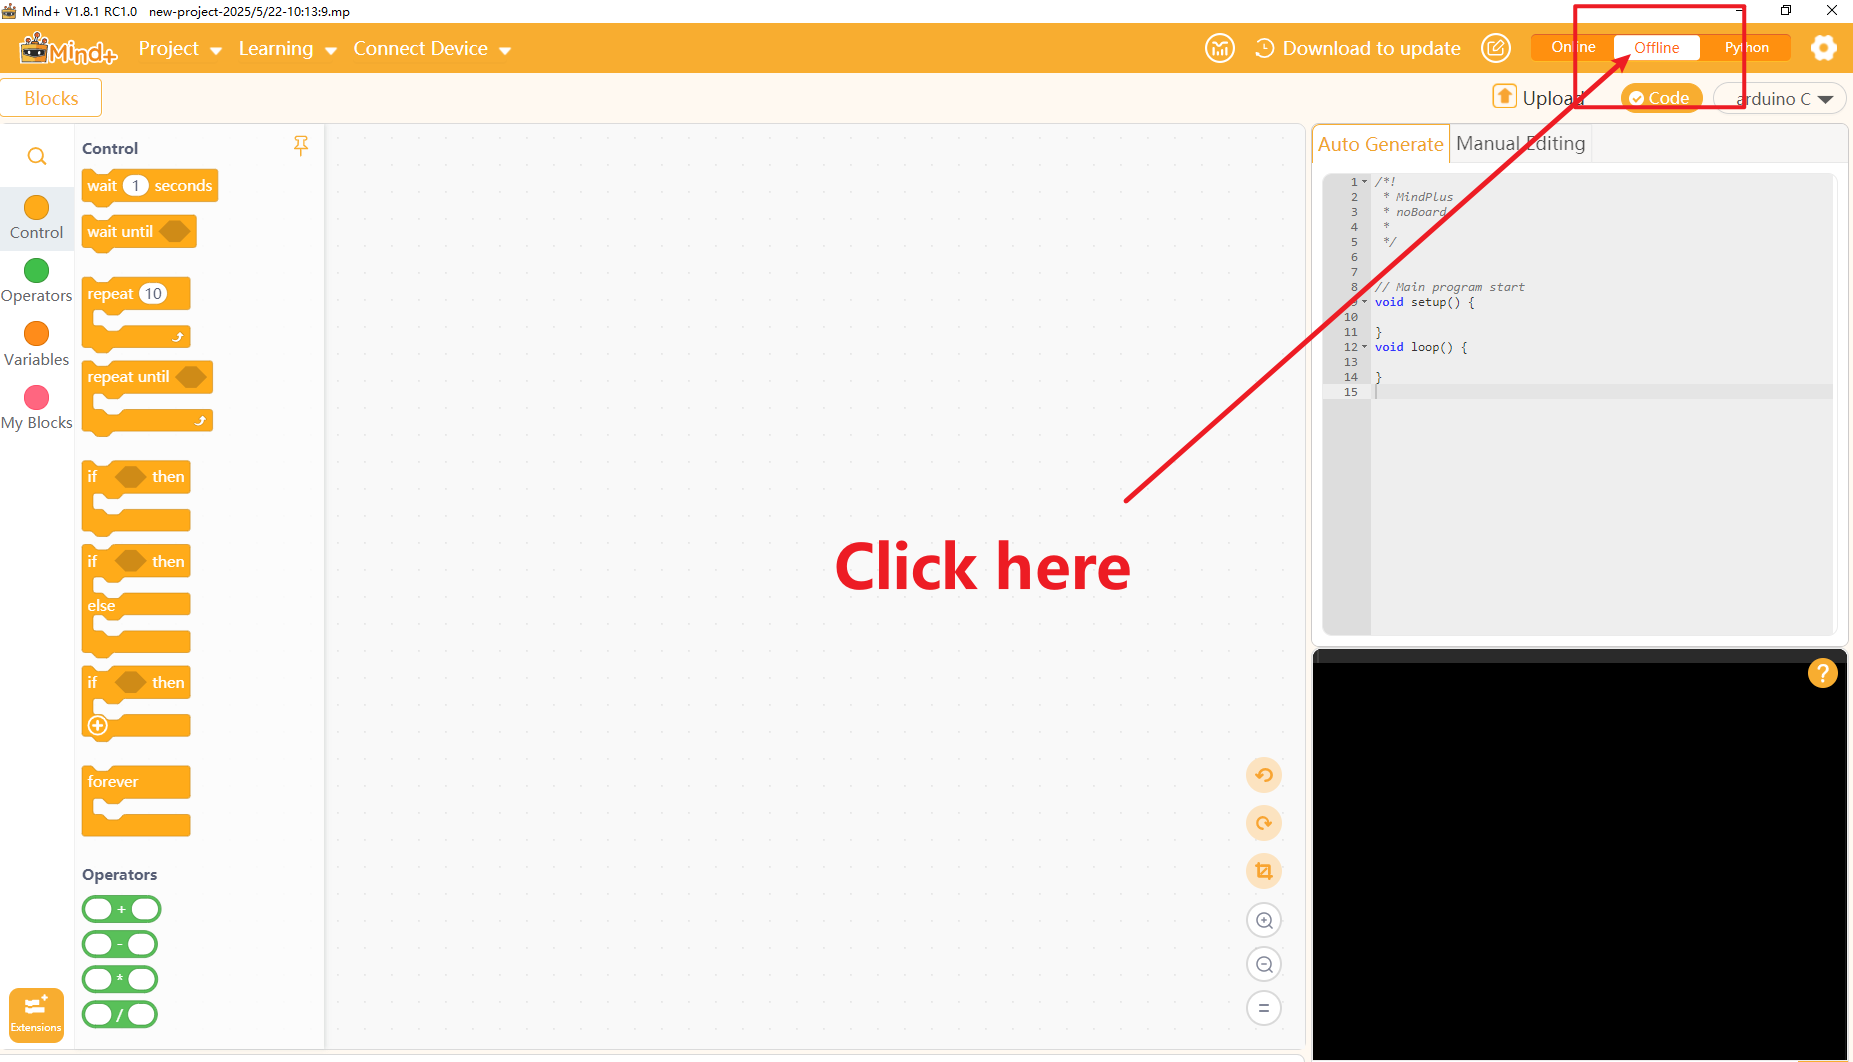
Open Mind+ and switch to Offline Mode.
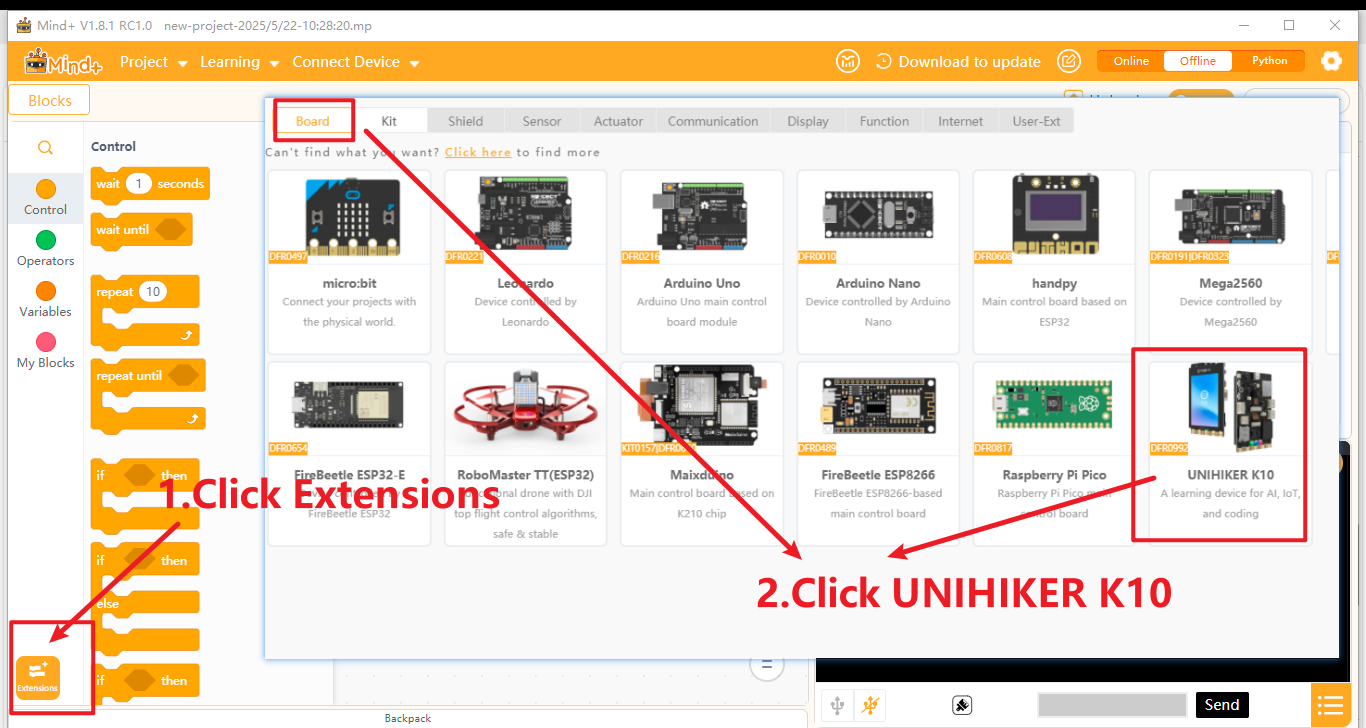
Click Extensions. Under Board, find UNIHIKER K10, add it, and return to the programming screen.
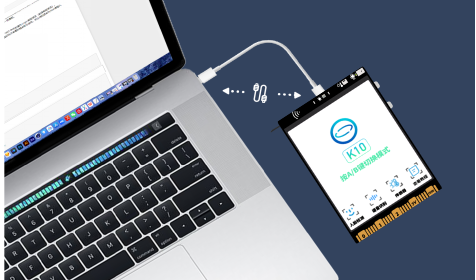
Connect the K10 to your computer with a USB-C data cable.
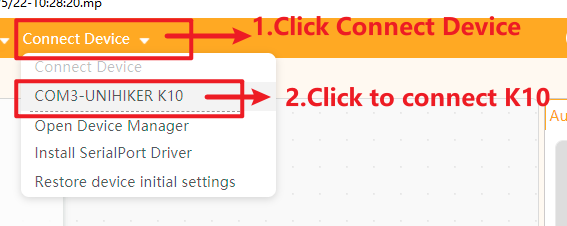
Click Connect Device, then select the serial port whose name ends in UNIHIKER K10. The port number may be different from the COM7 shown in the screenshot.
Turn the K10 Into a Network Camera
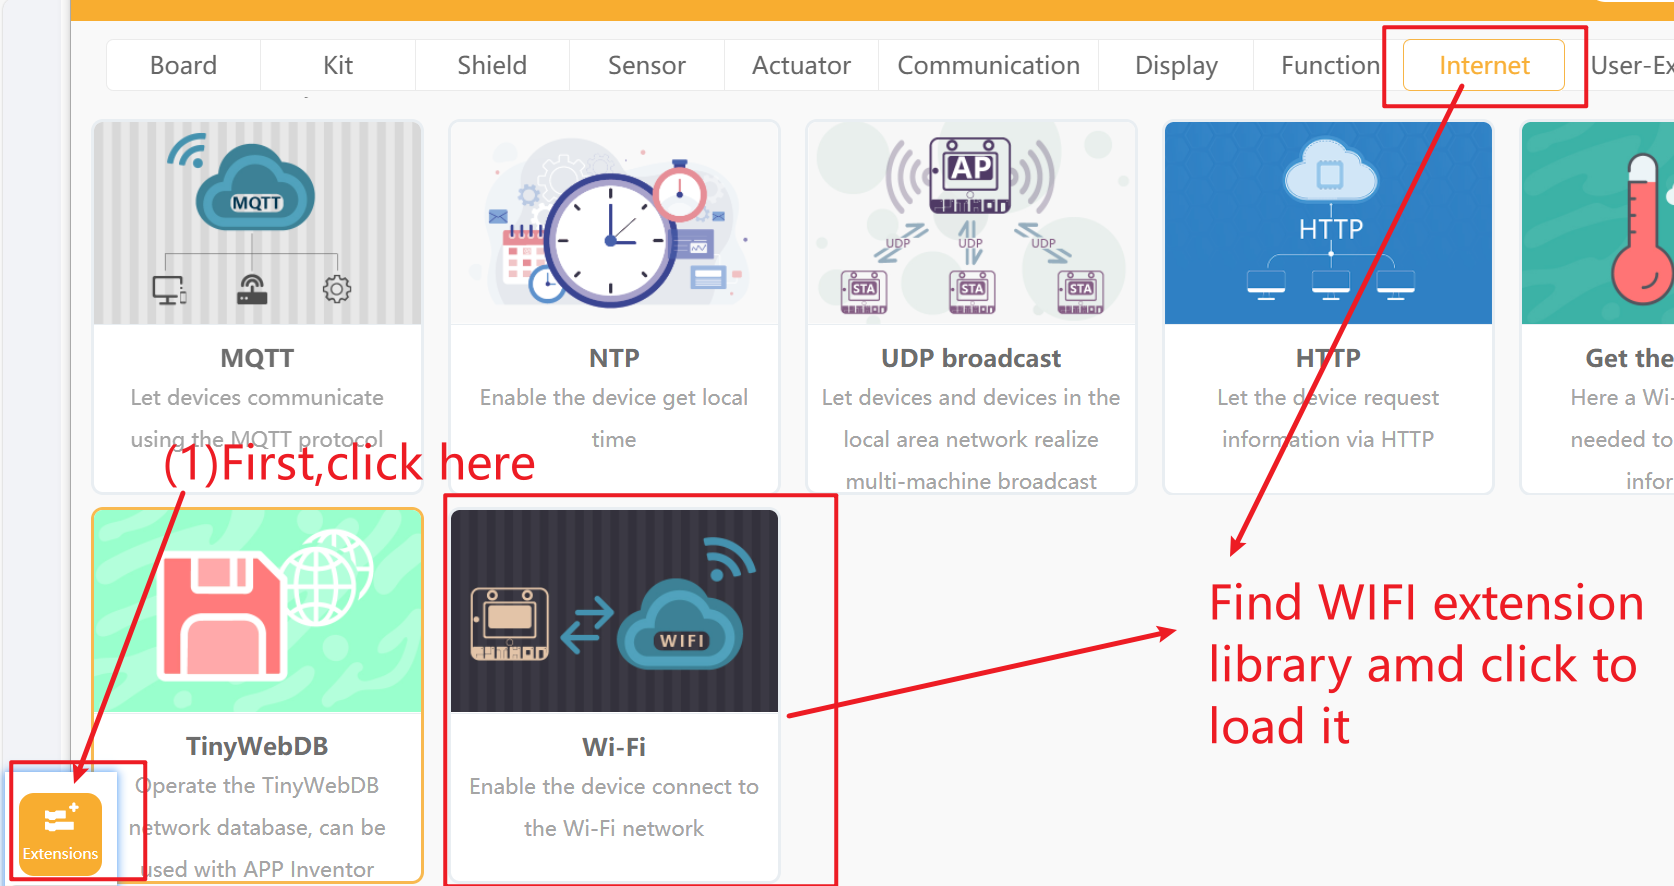
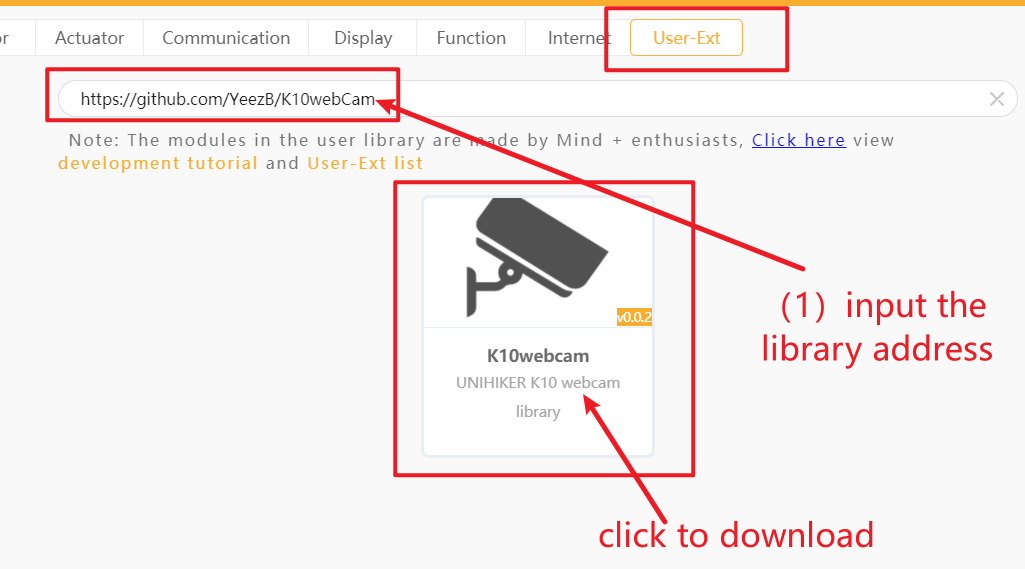
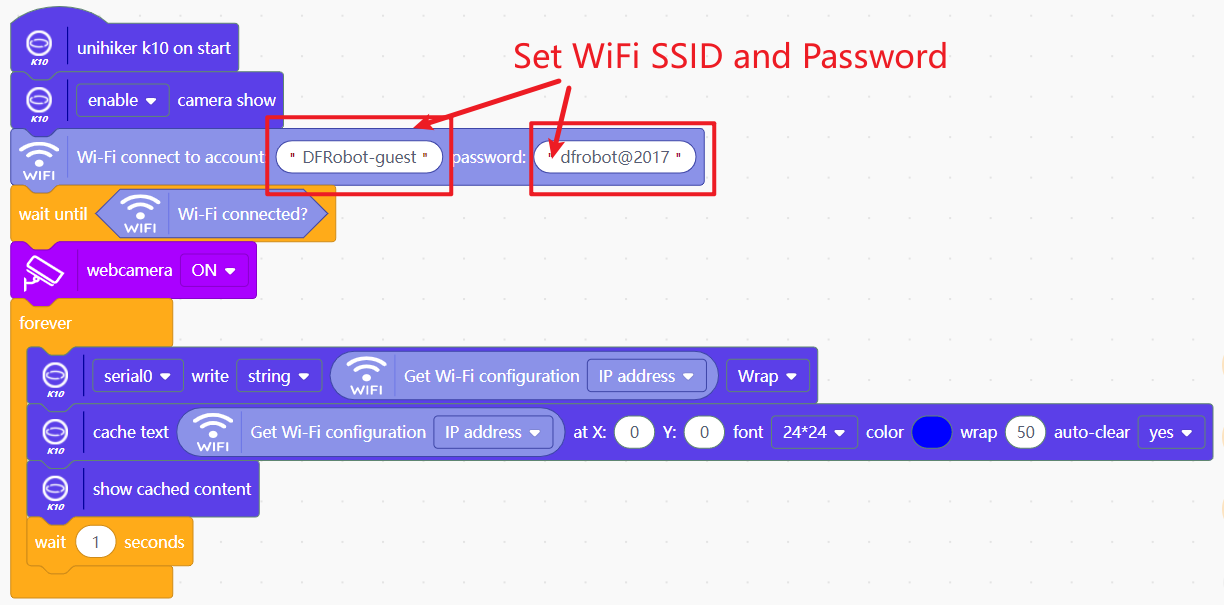
In Mind+, switch to Graphical Programming. Open Extensions, expand the Internet category, and add the Wi-Fi extension.
Open User-Ext and enter this extension URL:
Click Load.
Build the webcam program with the blocks shown below. This program streams the K10 camera image over the local network.
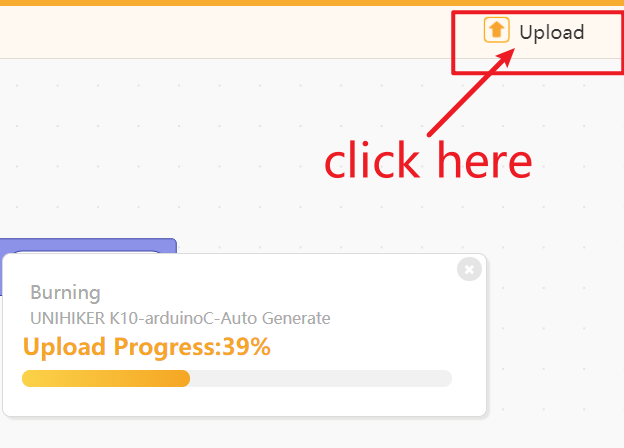
Click Upload and wait for the program to finish transferring to the K10.
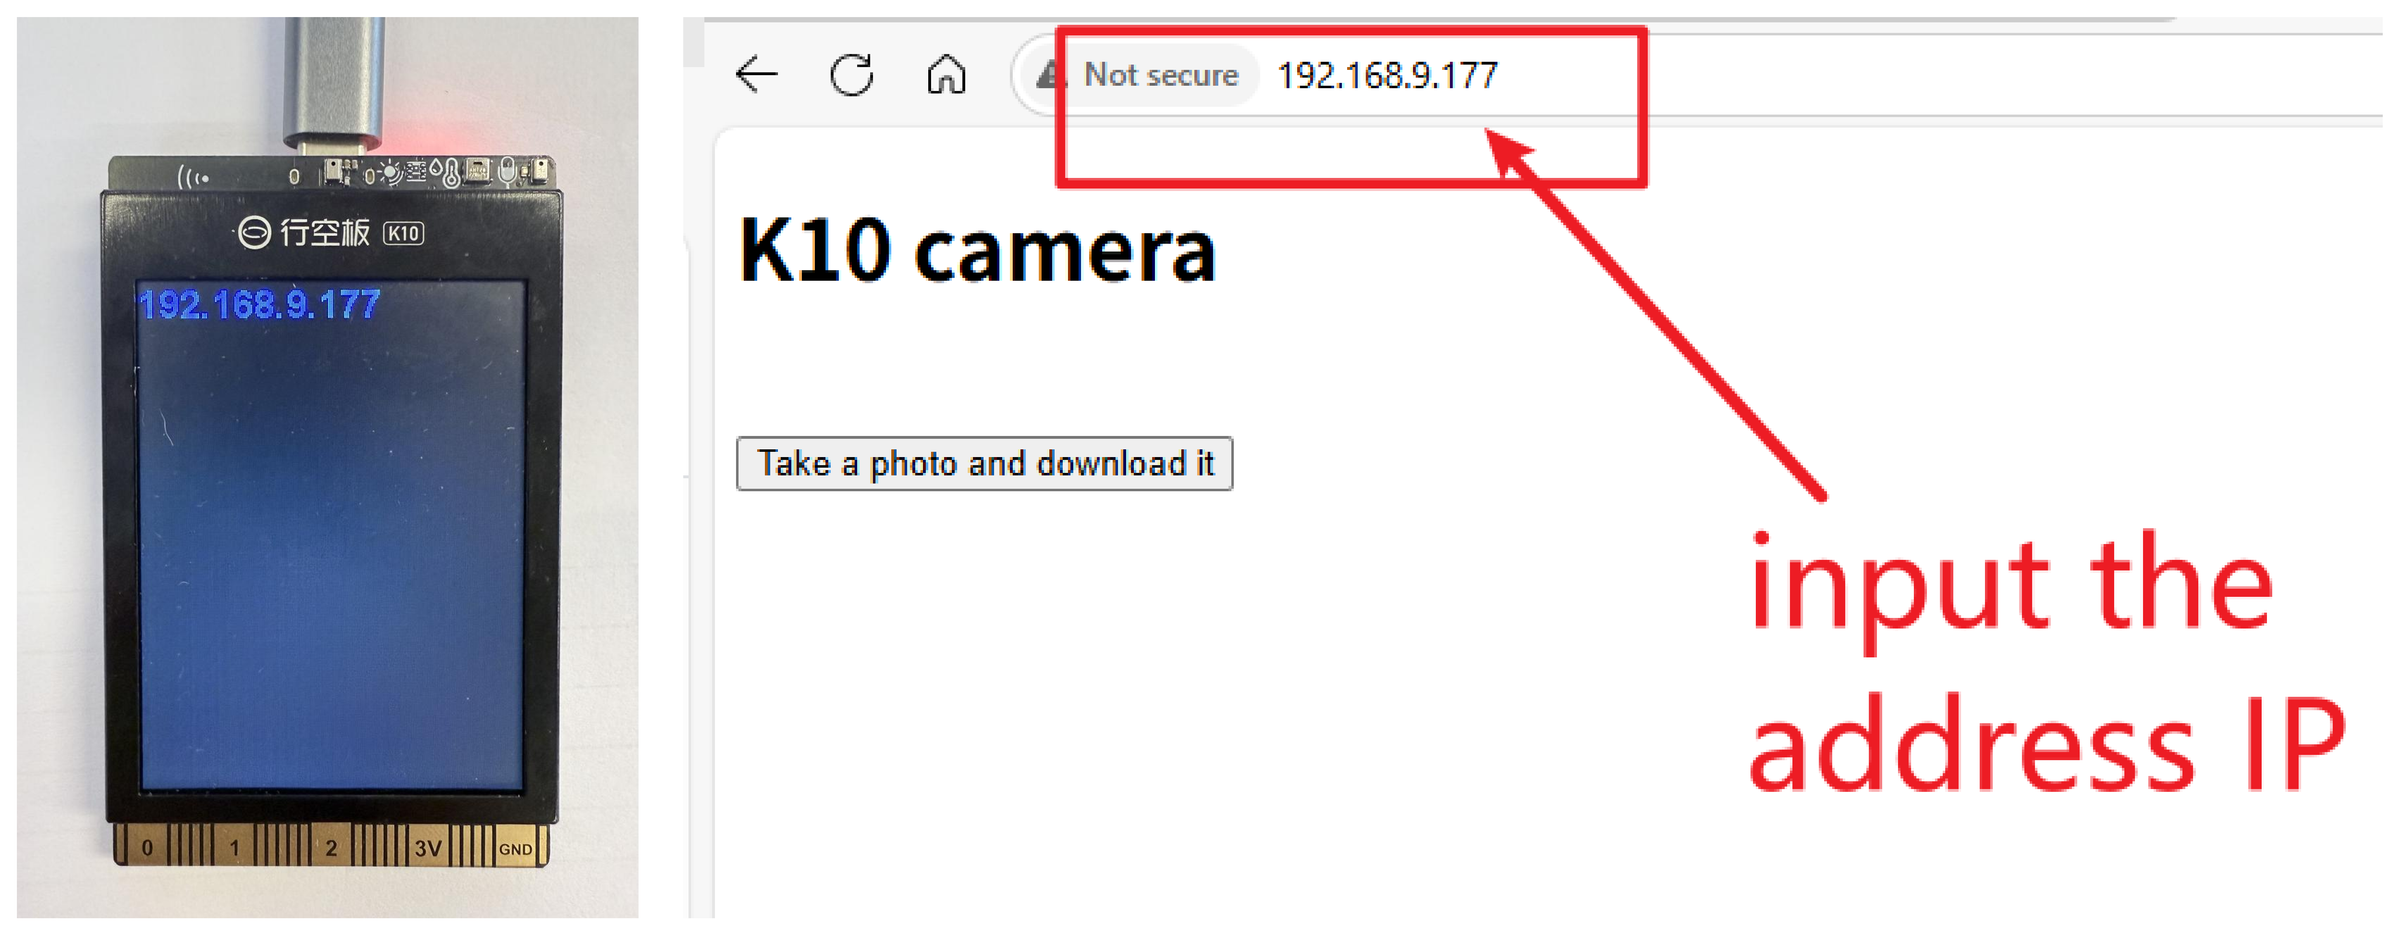
The K10 screen will display an IP address similar to 192.168.9.177. Connect the computer to the same Wi-Fi network, enter that IP address in a web browser, and open the webcam page.
Collect the Bird Image Dataset
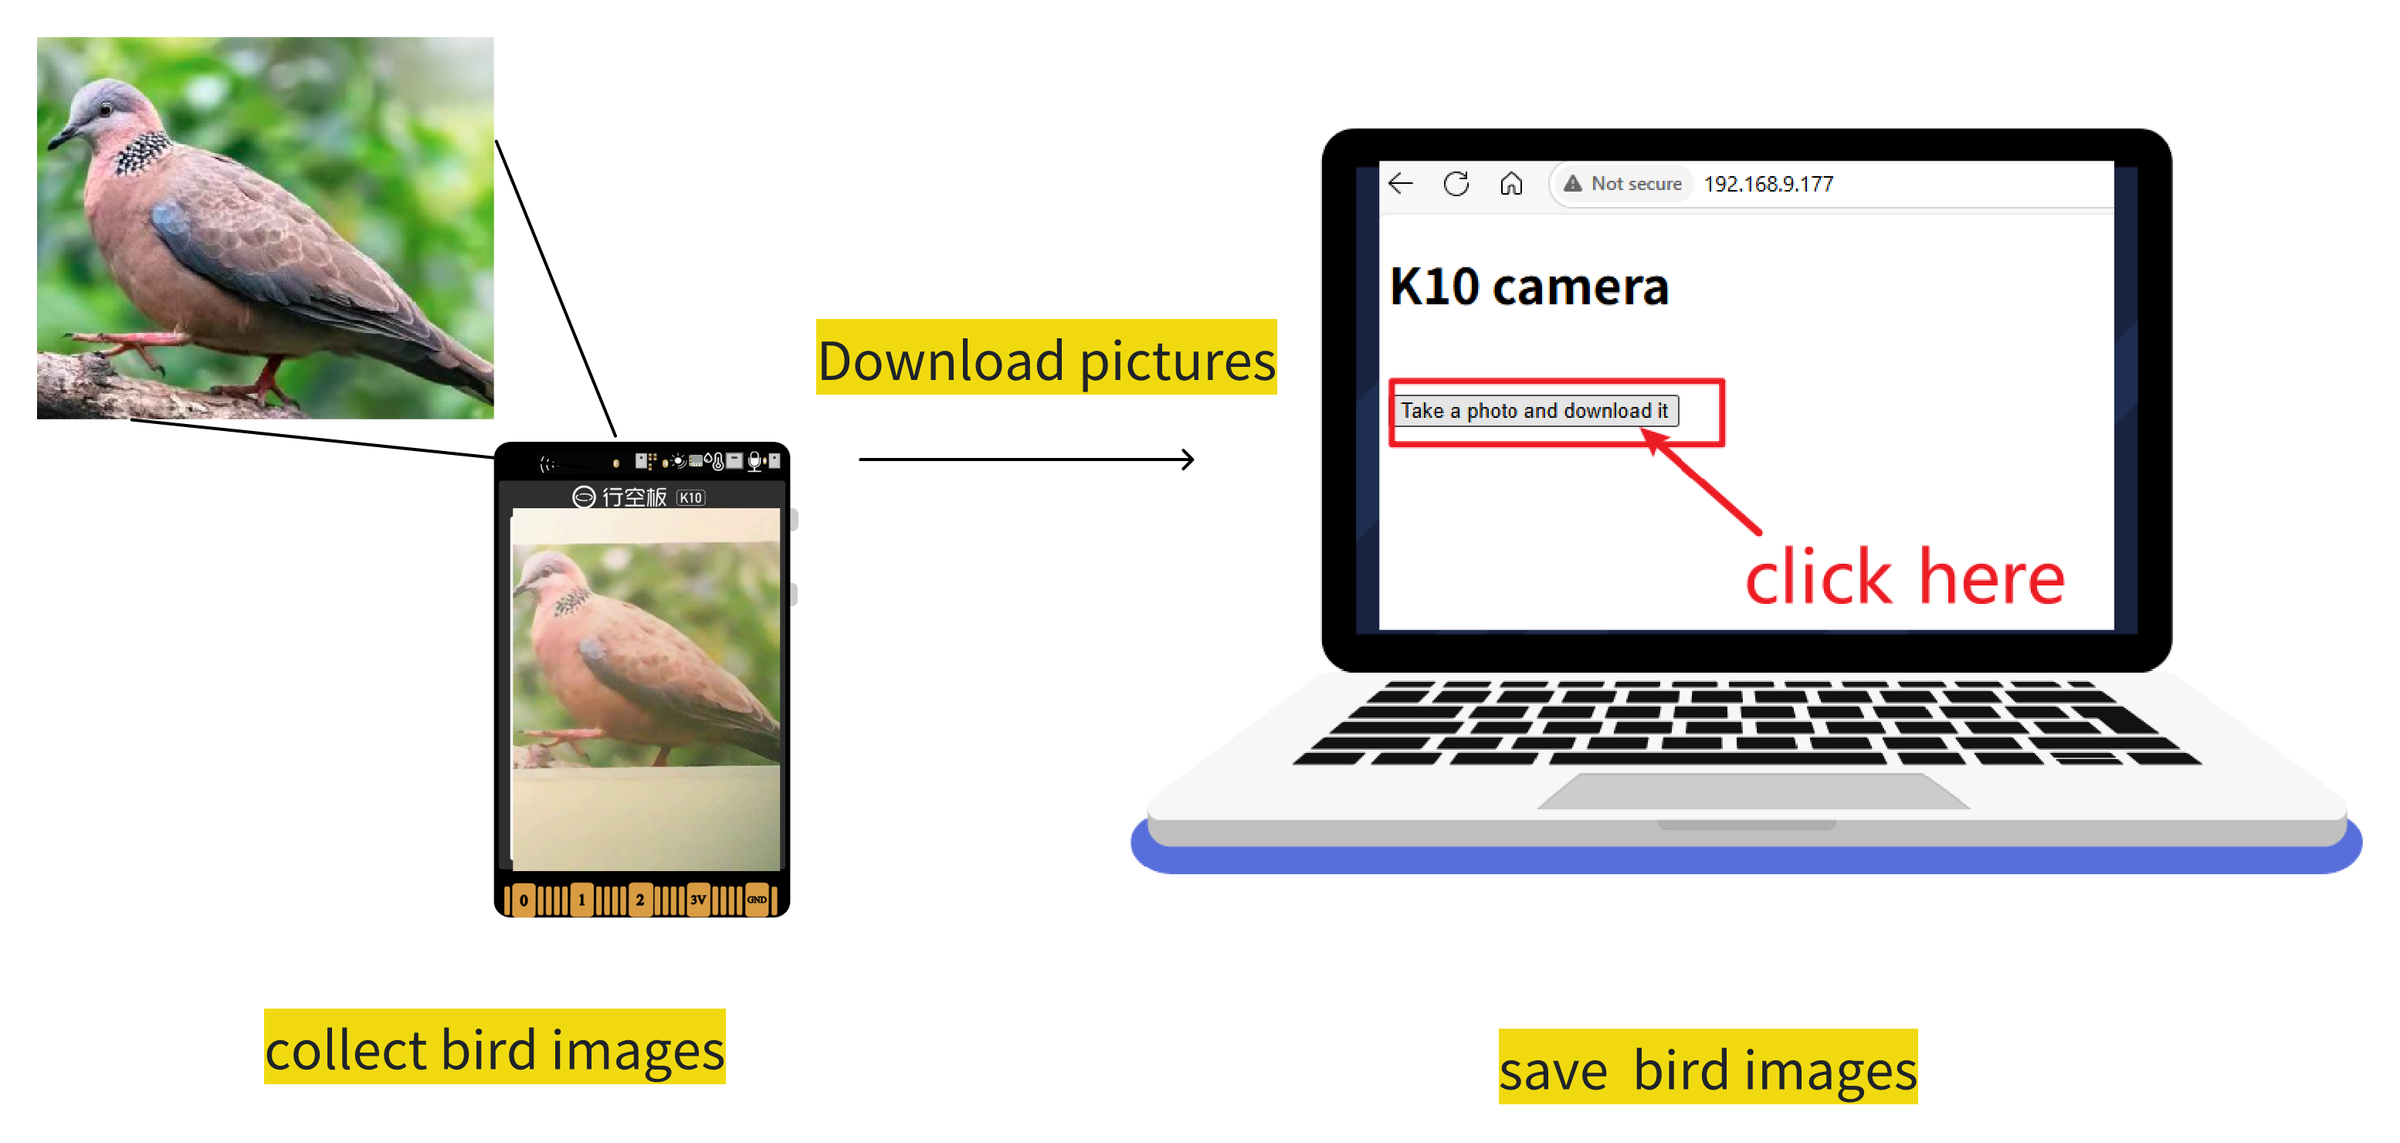
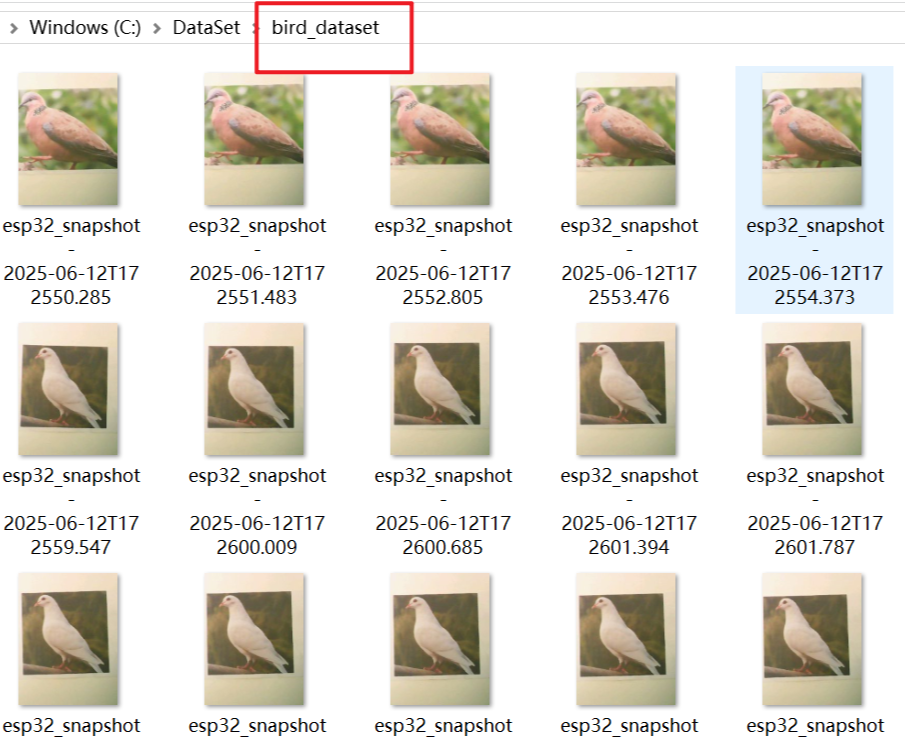
Point the K10 camera at a bird and make sure the bird is clear and fully visible. On the webcam page, click Take a photo and download it to save the current frame.
Collect approximately 30–50 images for each bird species. Include different positions, distances, backgrounds, and lighting conditions when possible.
Place all collected images in a folder named bird_dataset.
Upload and Label the Dataset
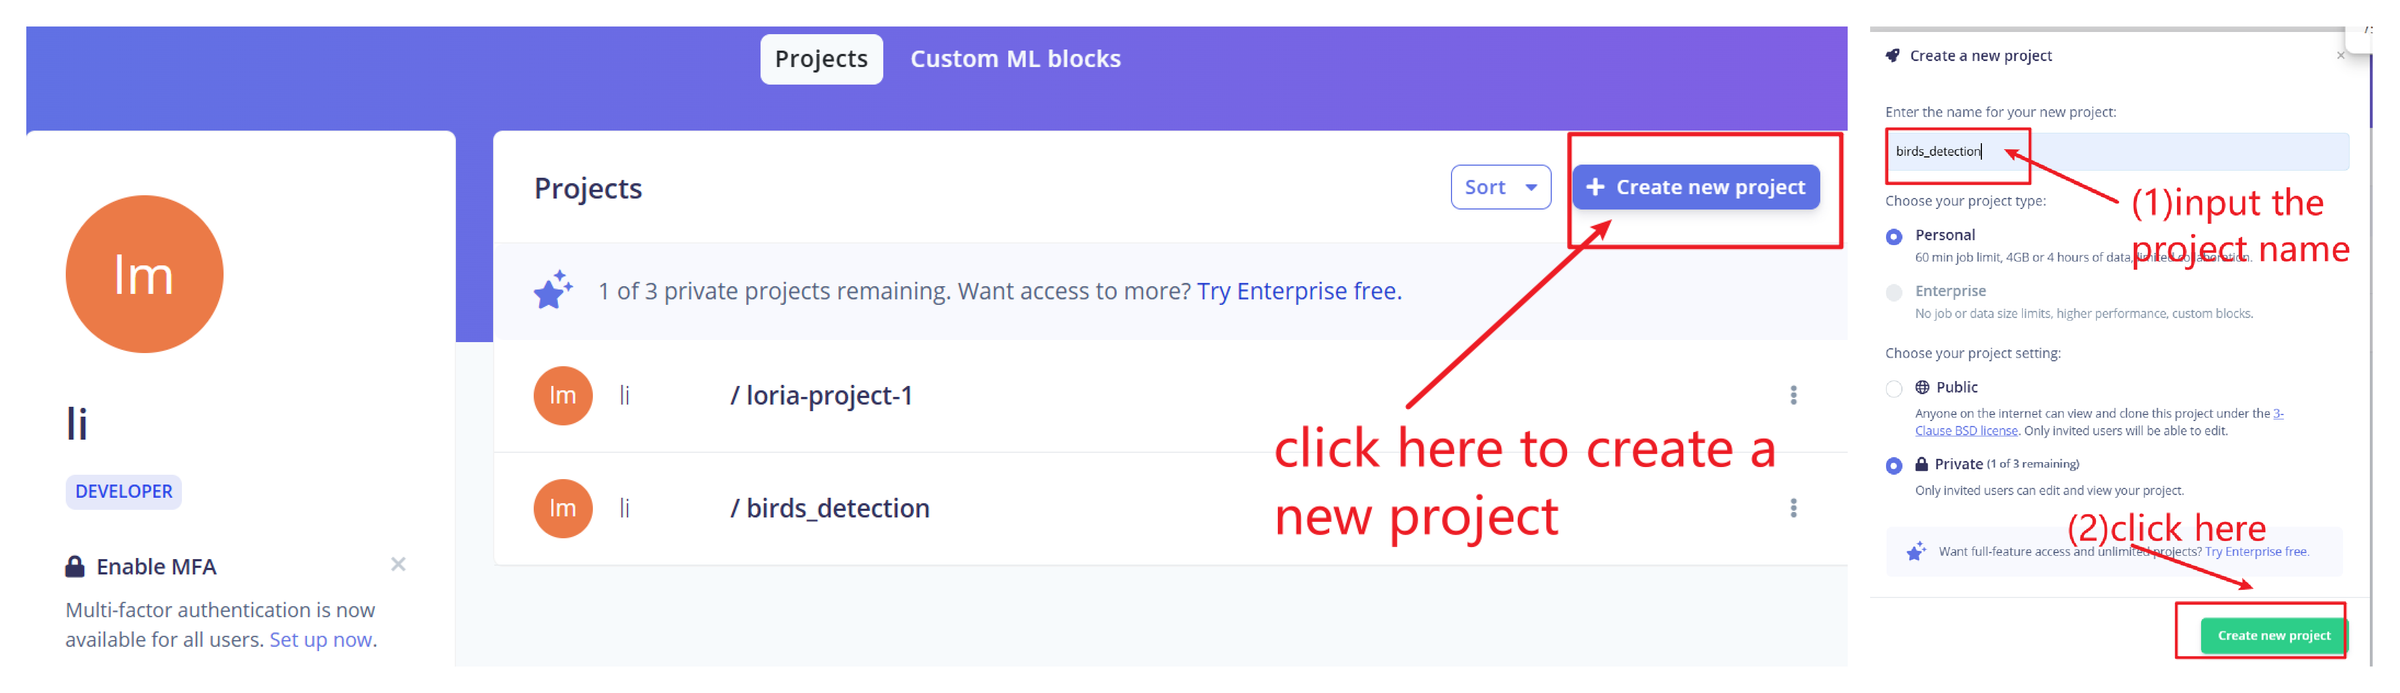
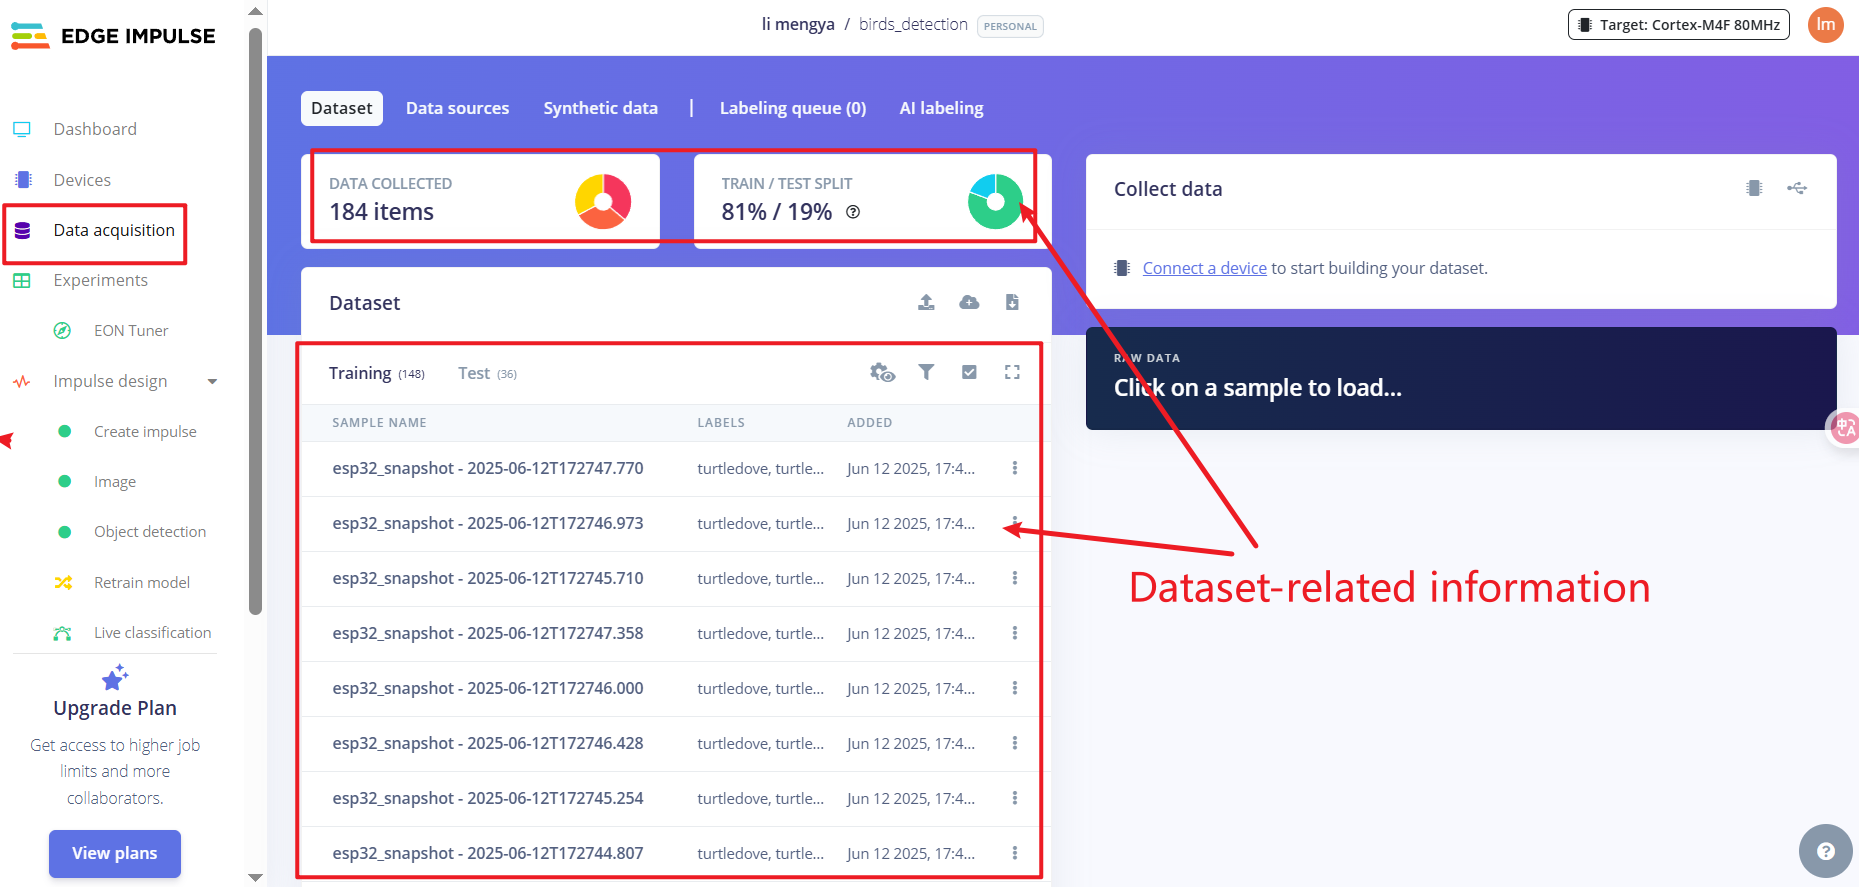
Sign in to Edge Impulse and create a project named birds_detection.
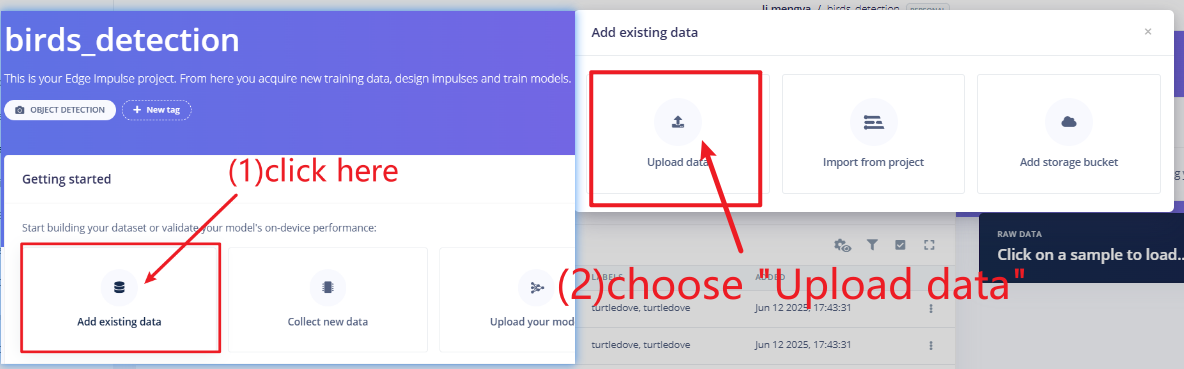
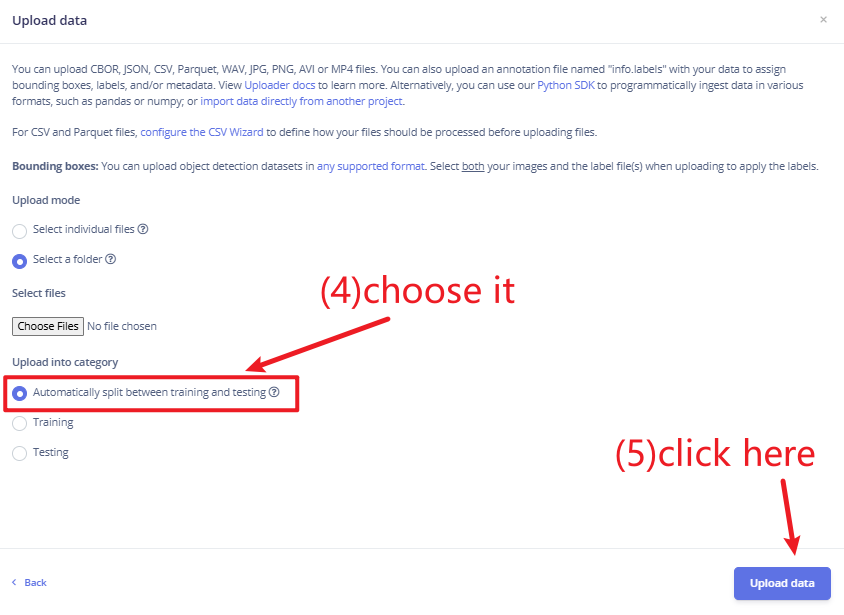
Choose Add existing data > Upload data.
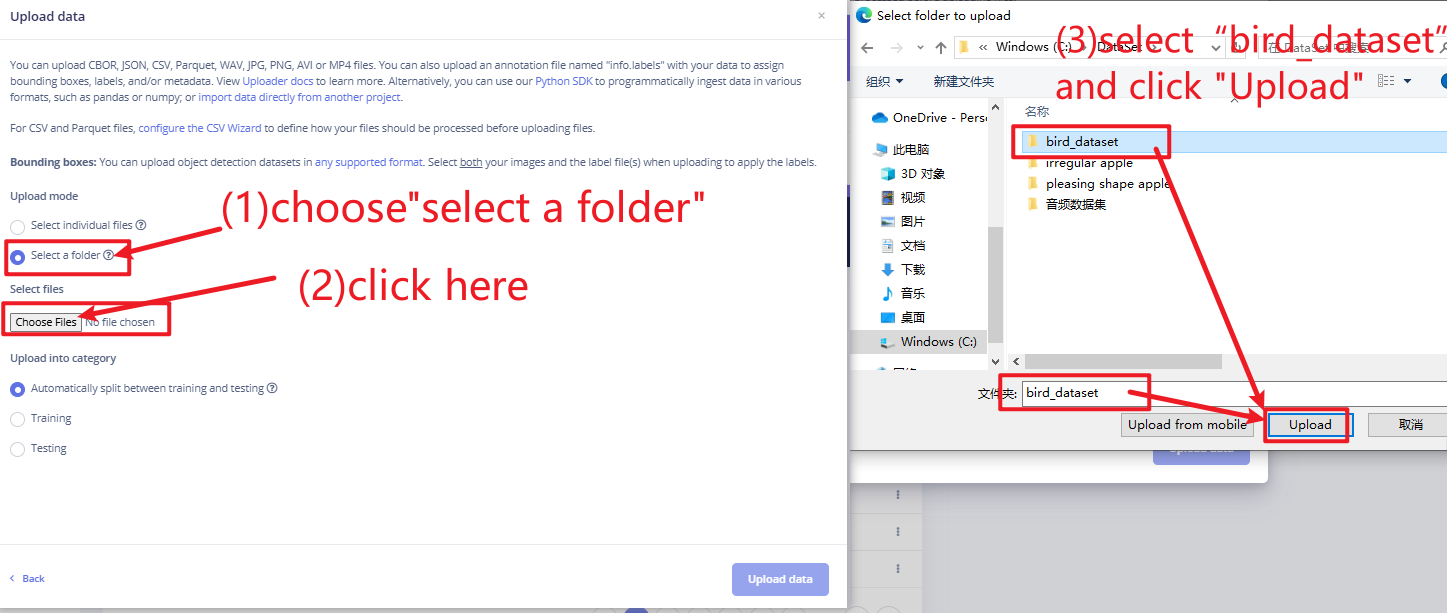
Select the bird_dataset folder.
Choose Automatically split between training and testing, then click Upload data.
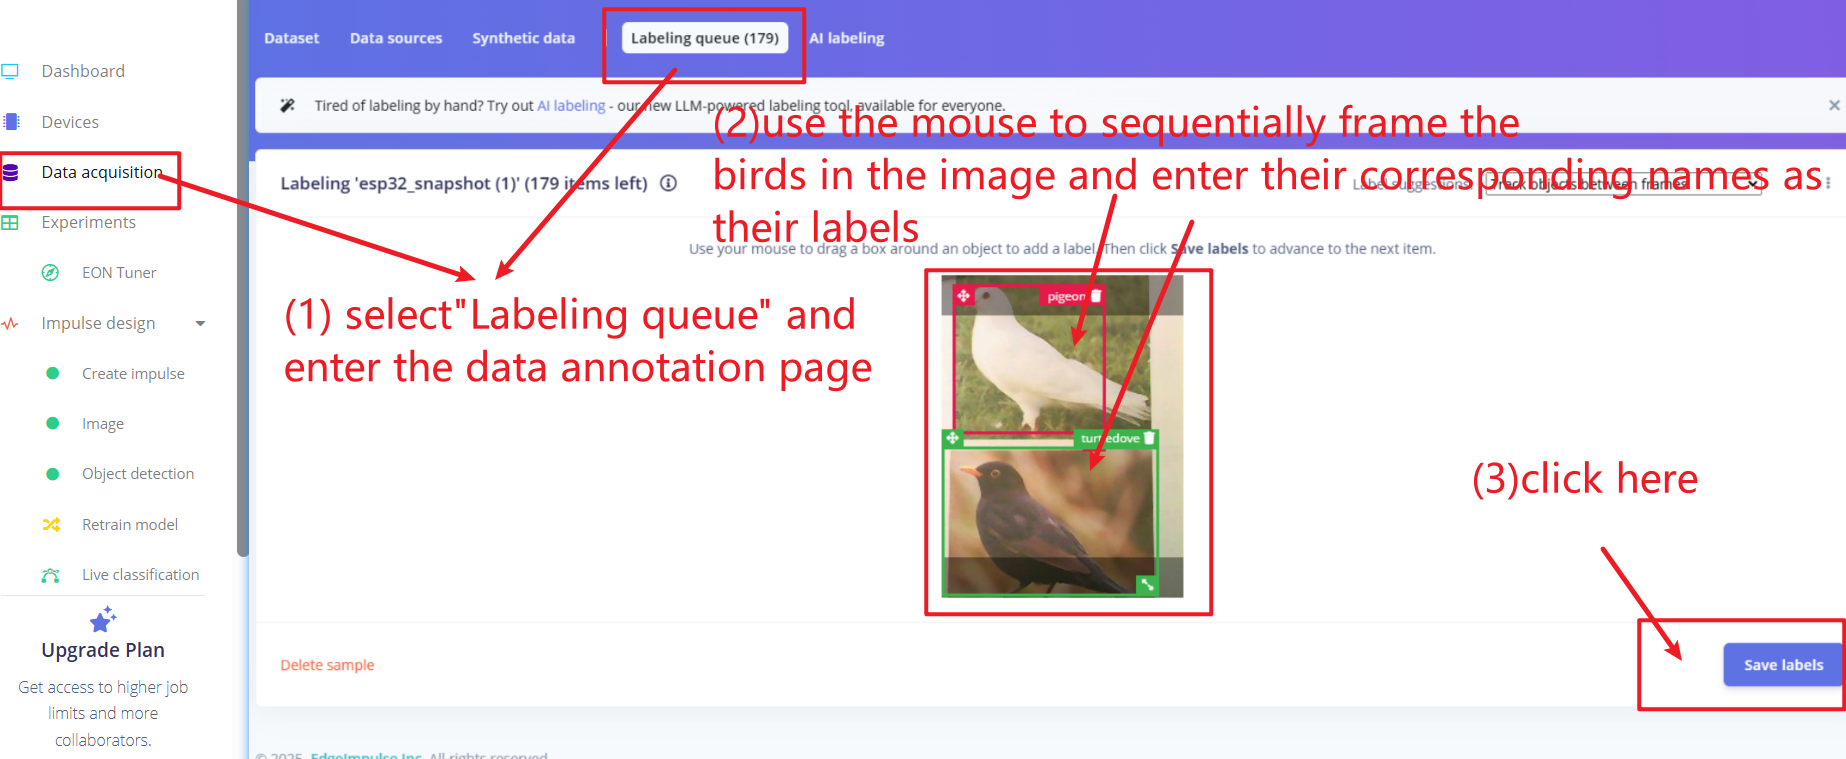
When the upload is complete, open Data acquisition > Labeling queue. Draw a rectangular bounding box around each bird and assign its class label.
If you use the example sketch without changing its class names, label the birds exactly as blackbird, turtledove, and pigeon. If an image contains multiple birds, draw and label a separate box around each one.
Click Next and continue until every image has been labeled.
Create and Train the Object Detection Model
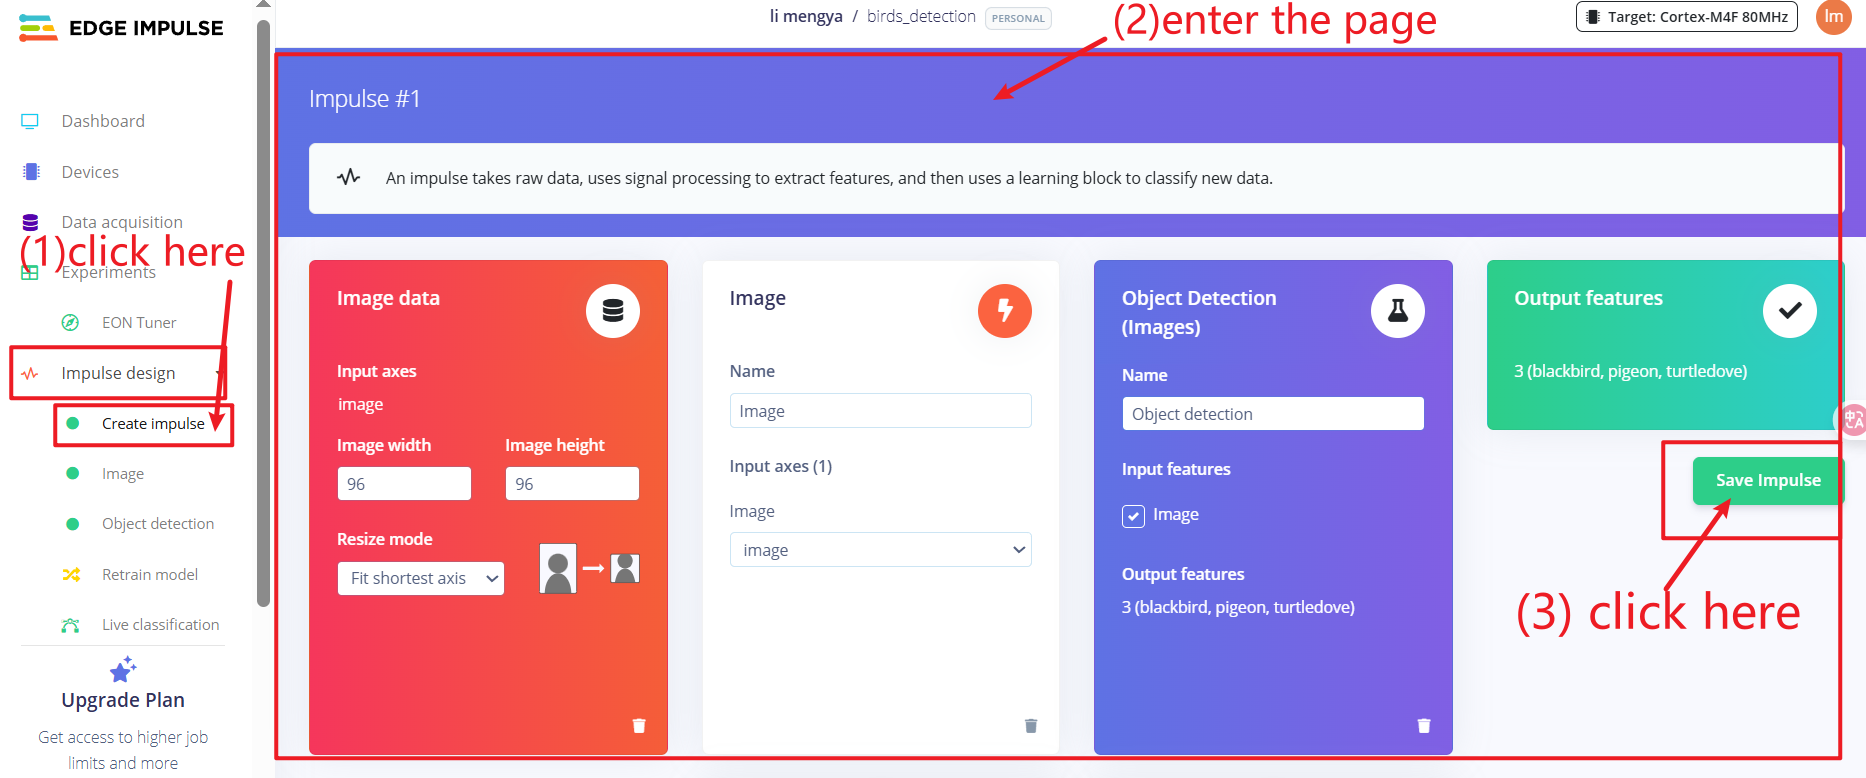
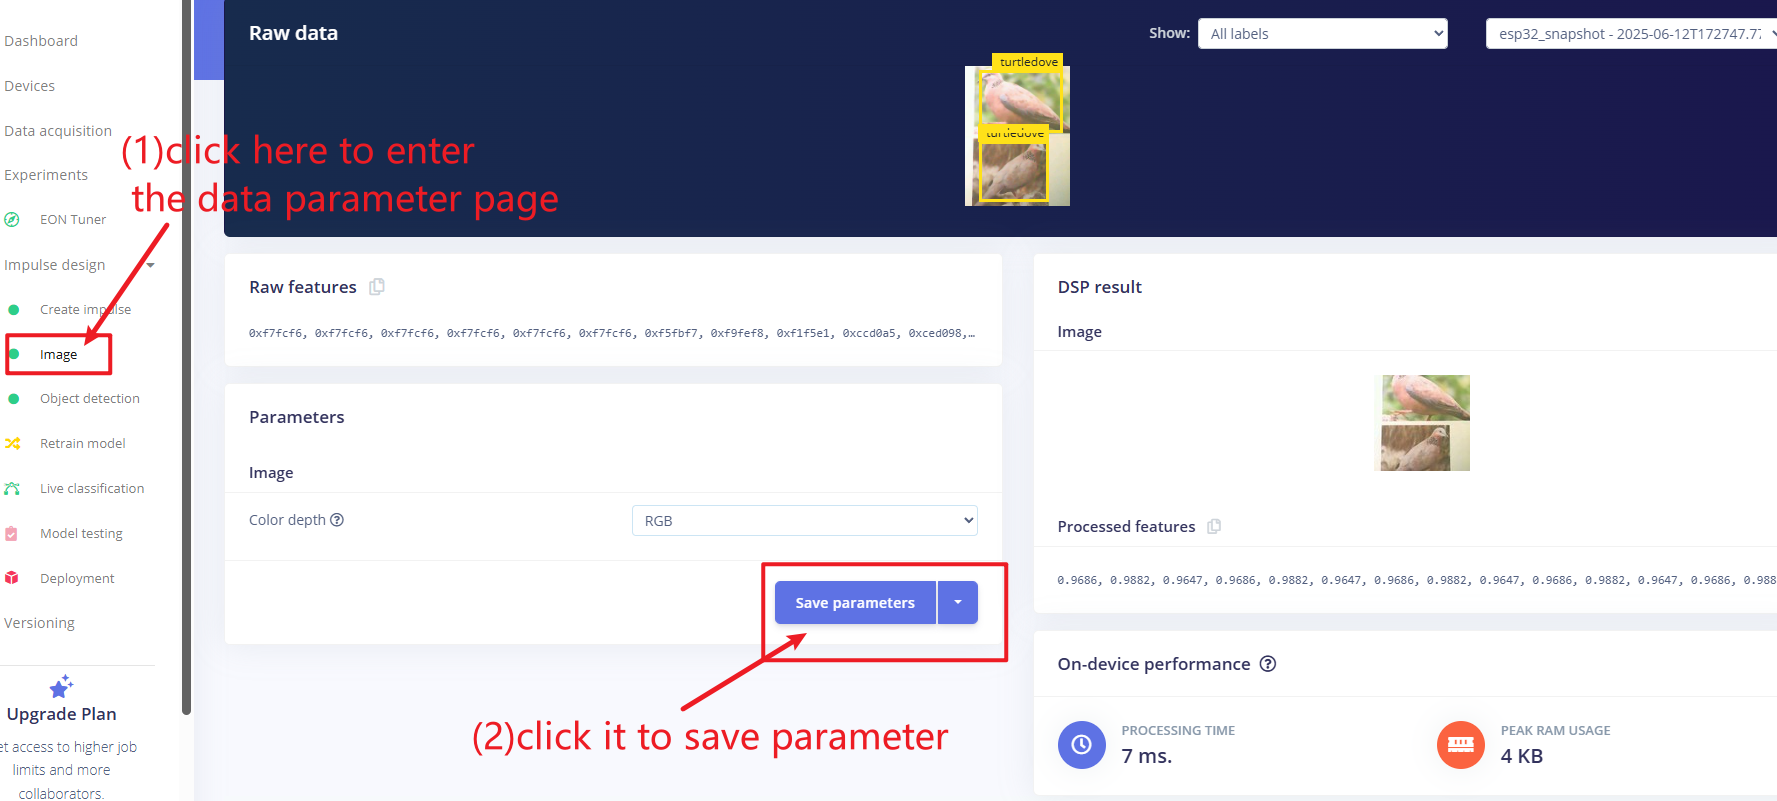
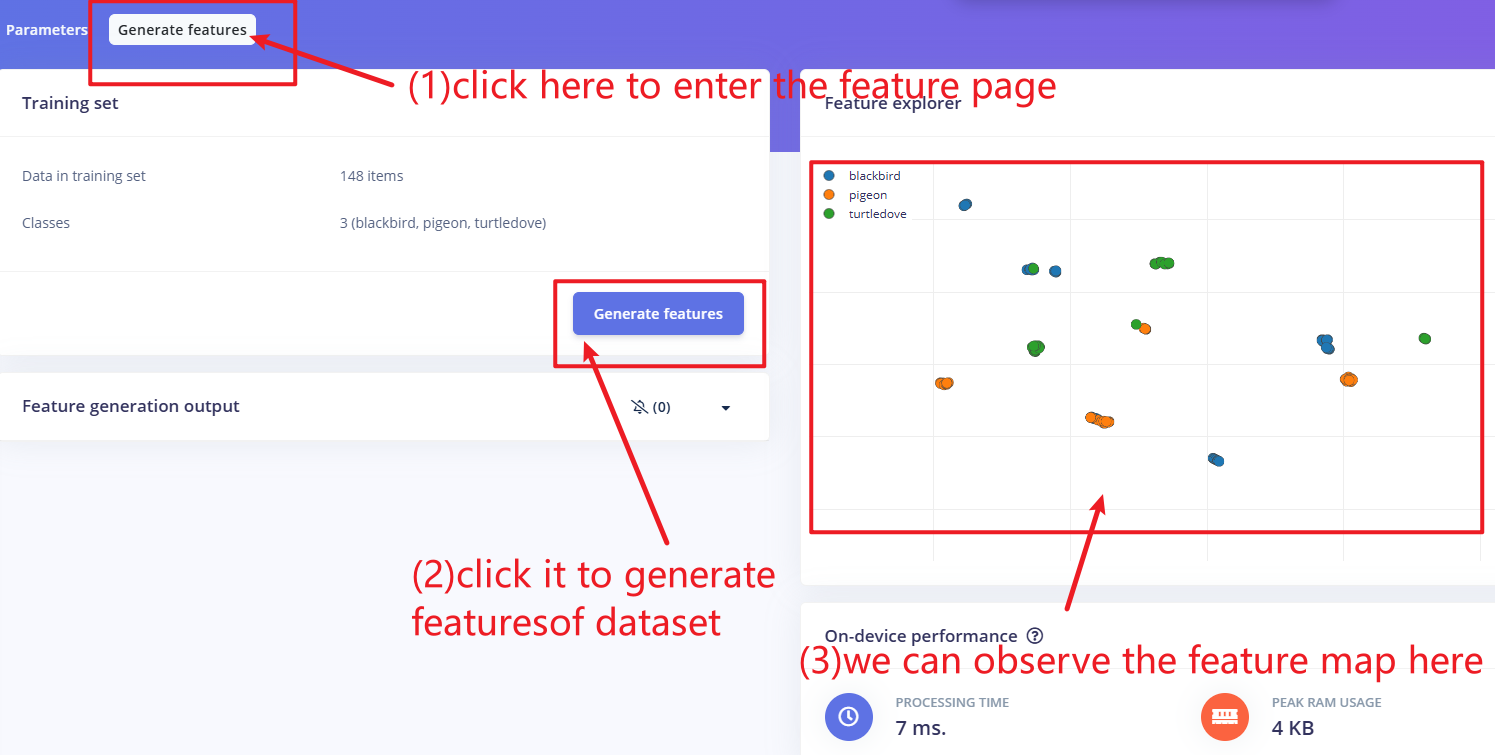
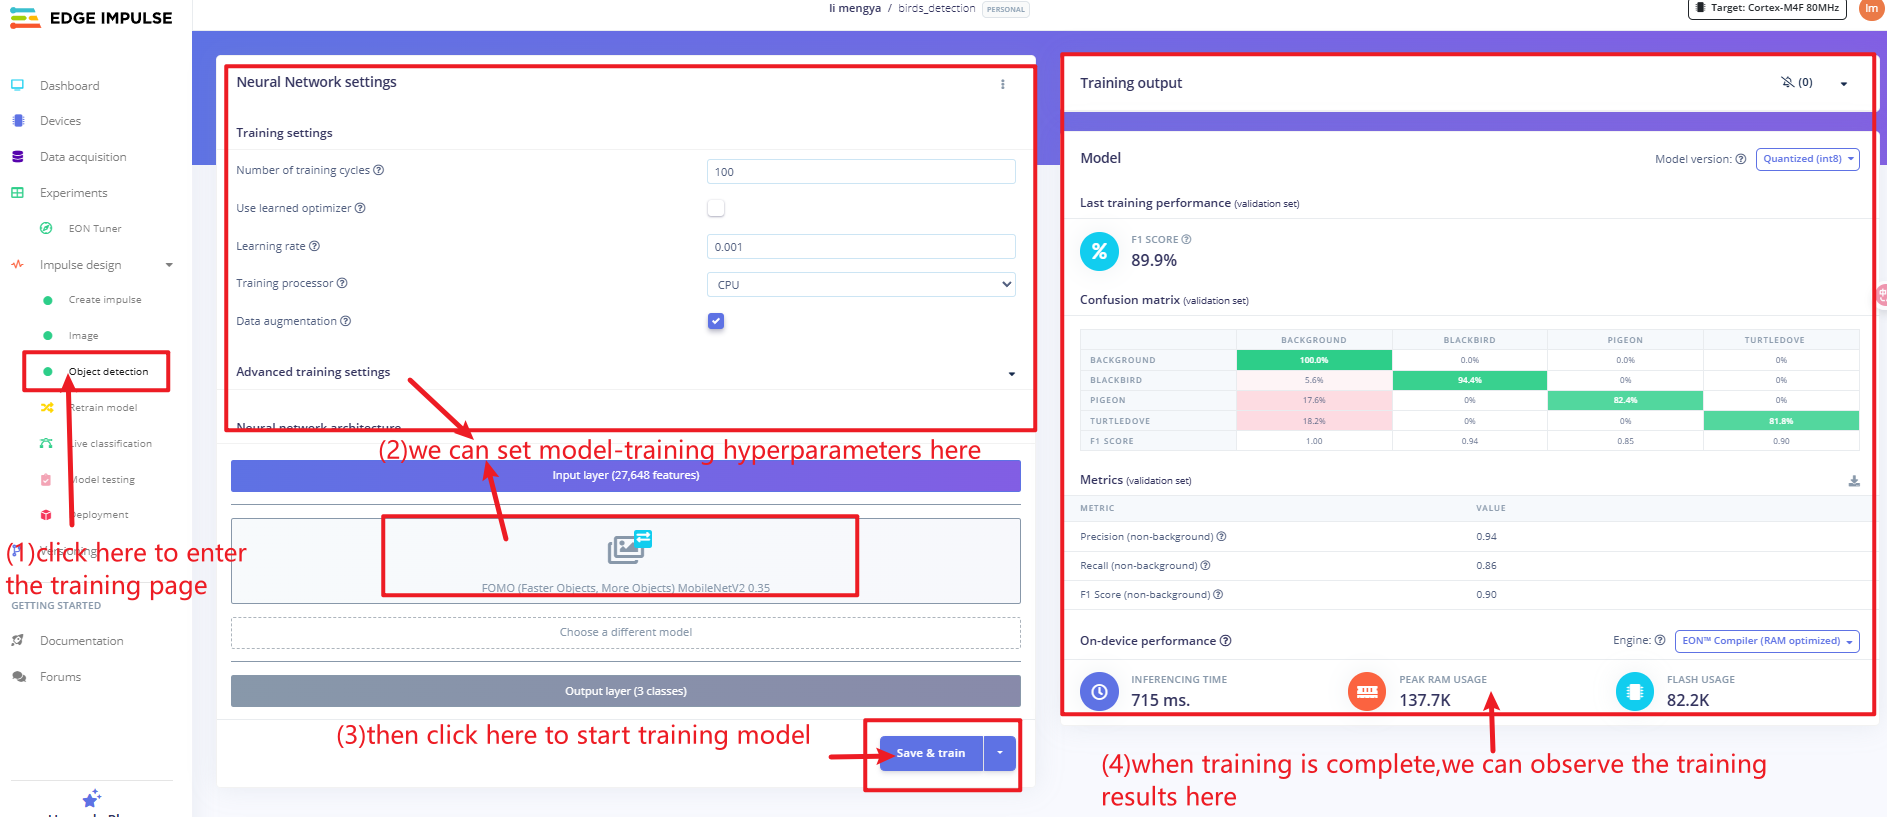
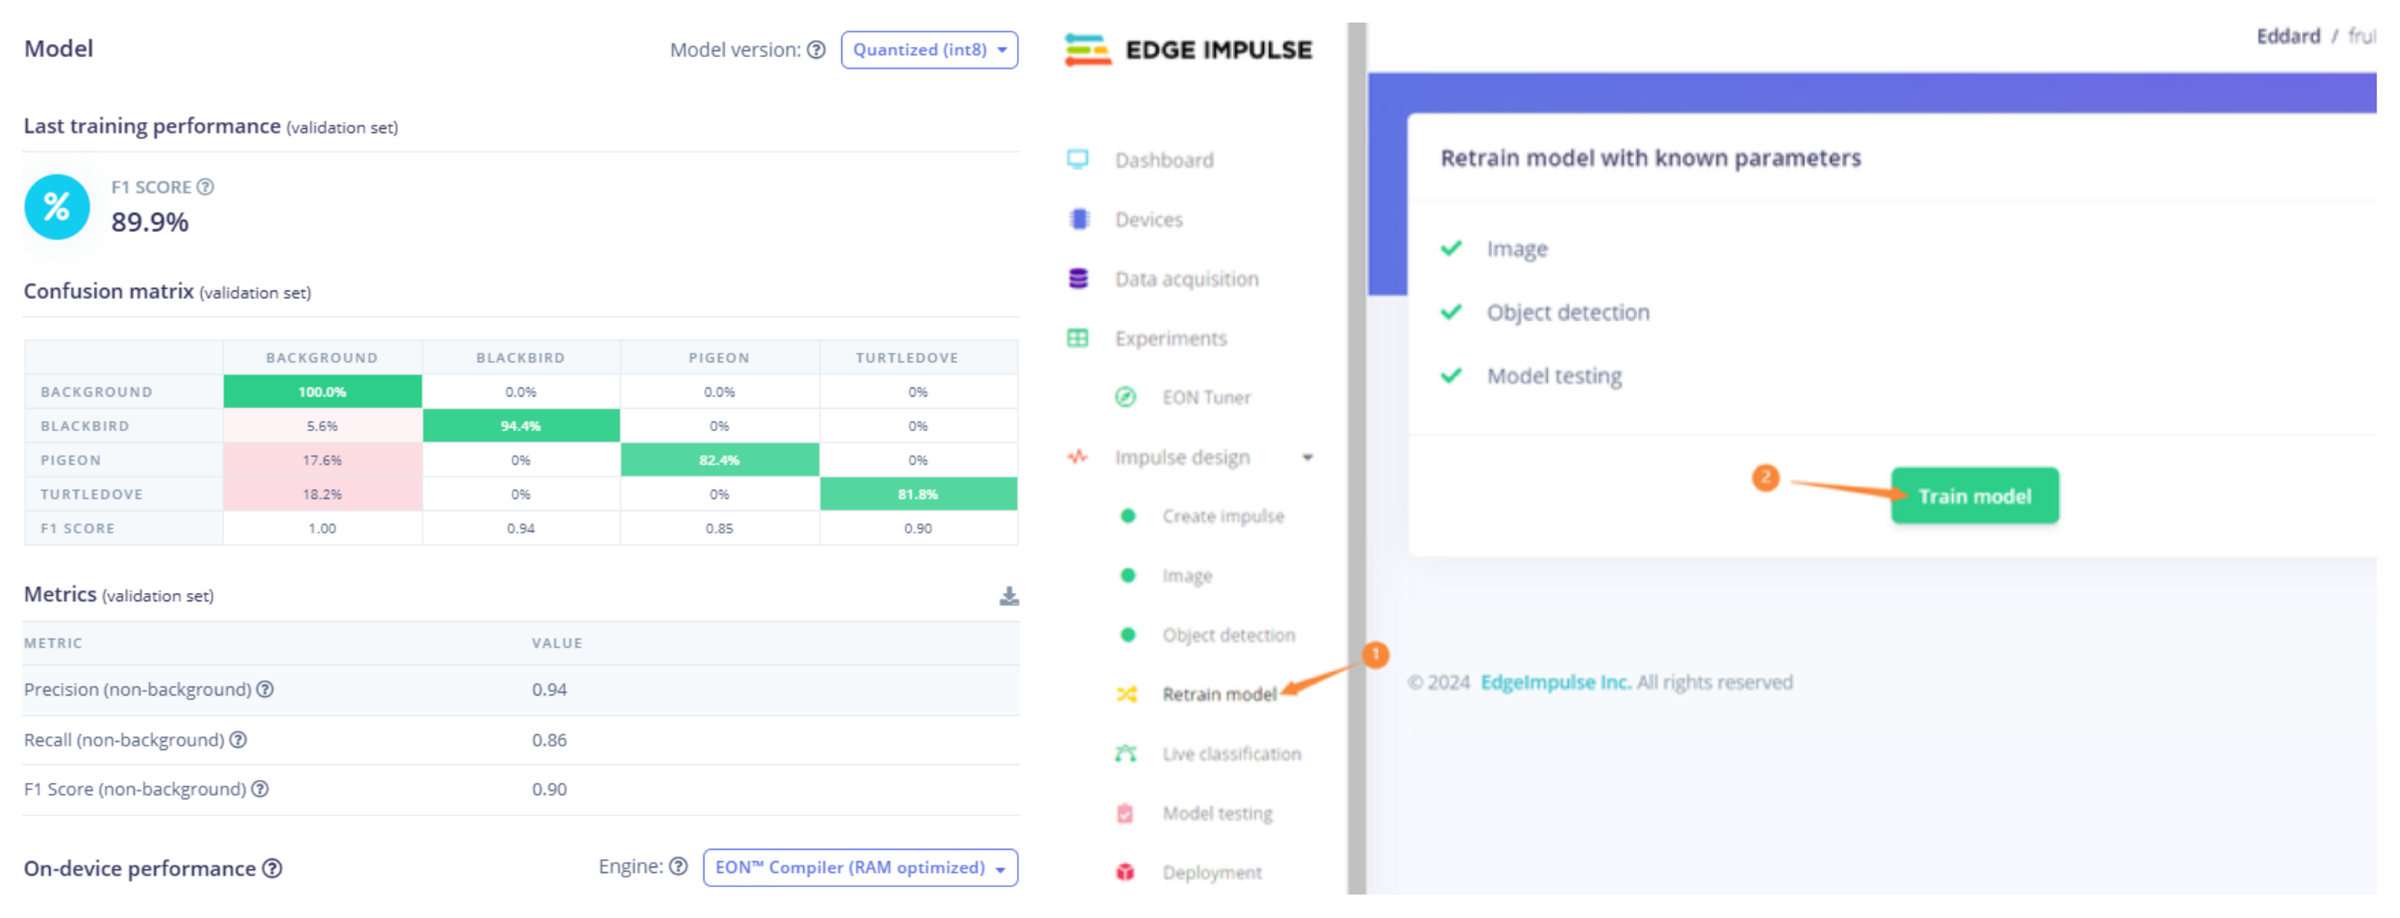
Open Impulse design > Create impulse, configure the impulse as shown, and click Save Impulse.
For details about each processing block, see the Edge Impulse processing blocks documentation.
Open the Image processing block and click Save parameters.
Open Generate features, then click Generate features.
Open Object detection and use these training settings from the original project:
- Training cycles: 100
- Learning rate: 0.001
- Model: FOMO MobileNetV2
Click Save & train.
Review the training results. If the model does not perform well enough, add or improve training images, correct any labels, adjust the training settings, and retrain.
Export and Install the Model
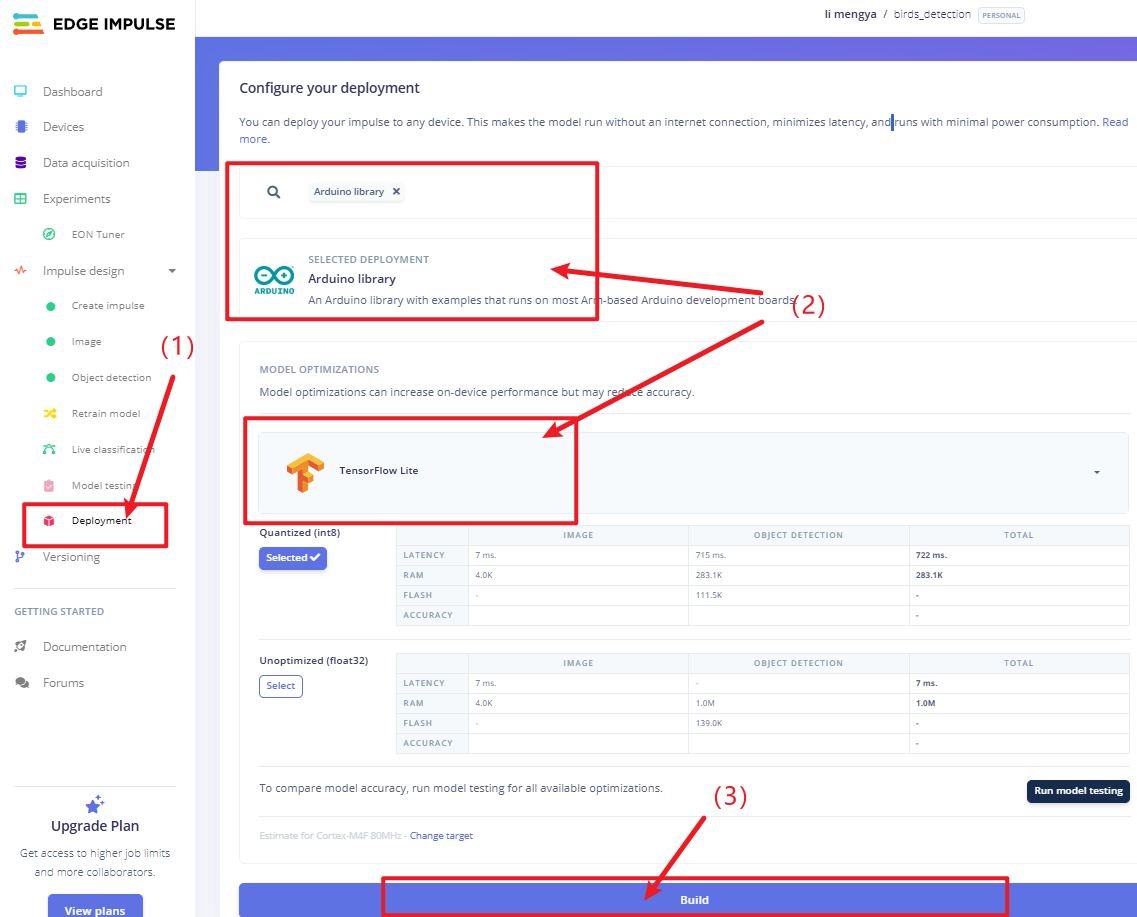
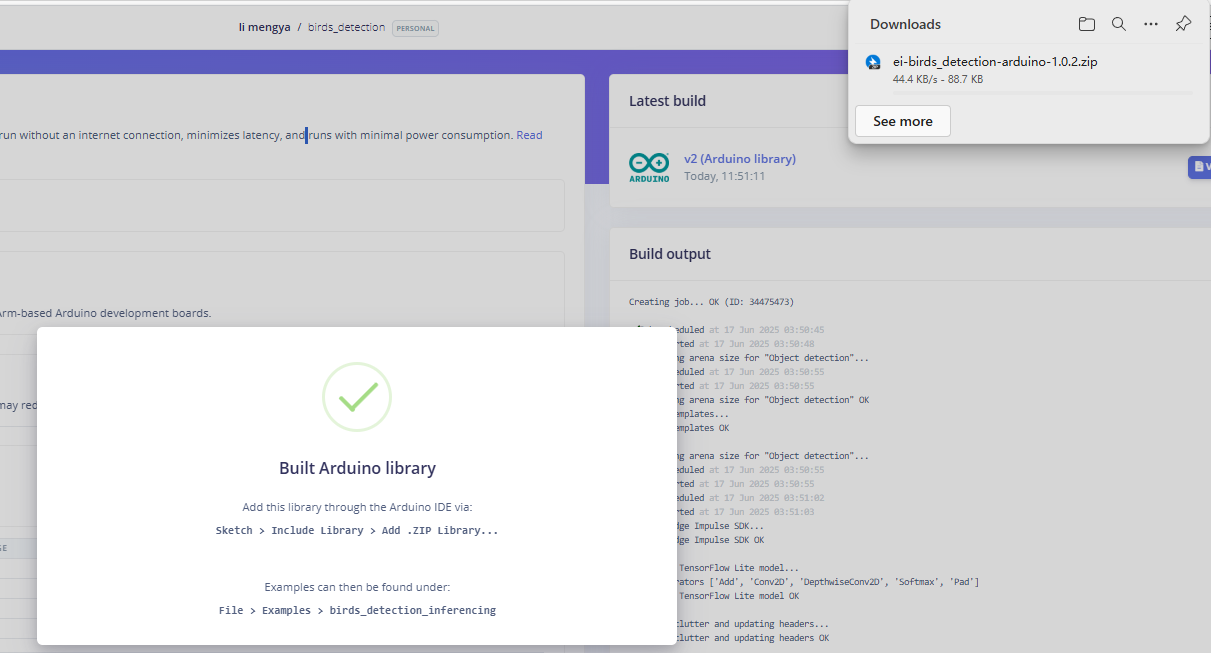
Open Deployment. Under Default deployment, select Arduino library, choose TensorFlow Lite for model optimization, and click Build.
Edge Impulse will download the model as a compressed Arduino library.
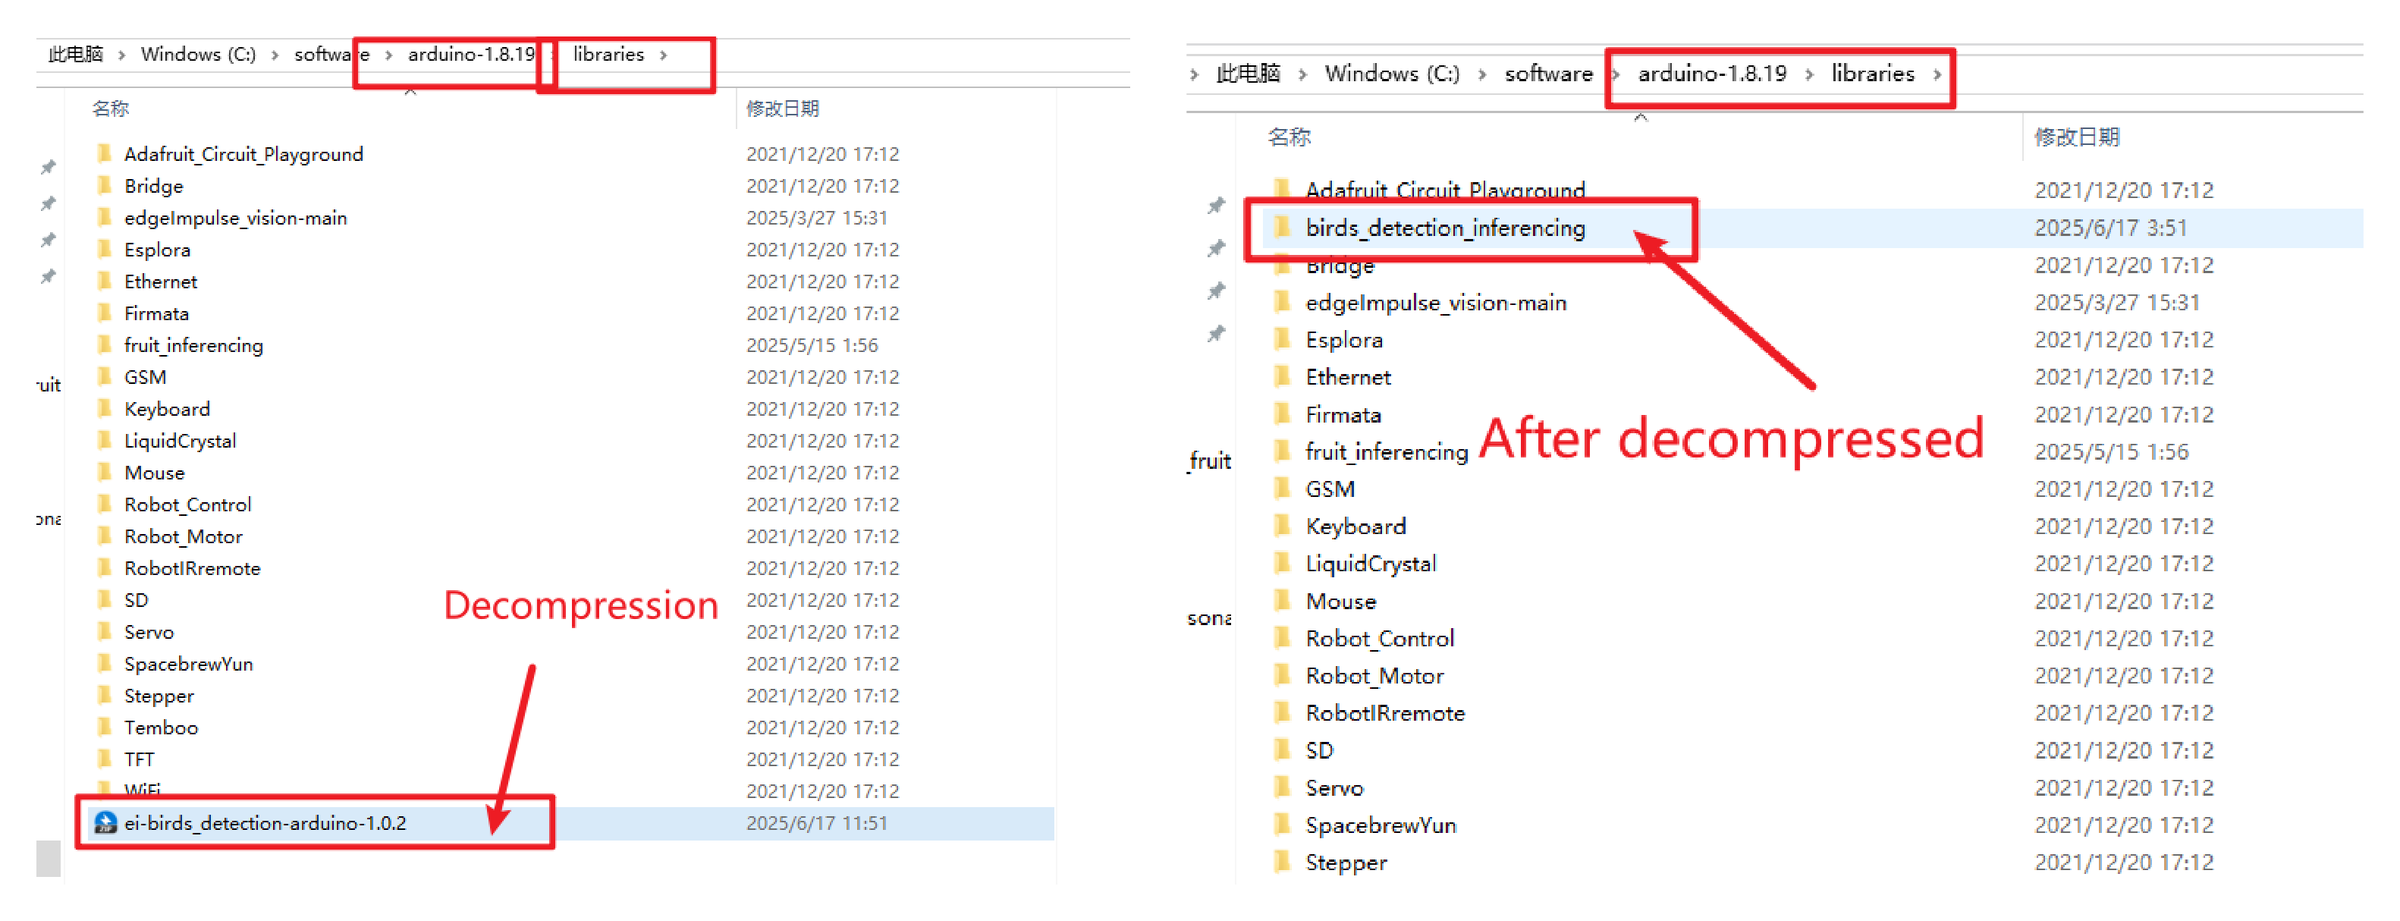
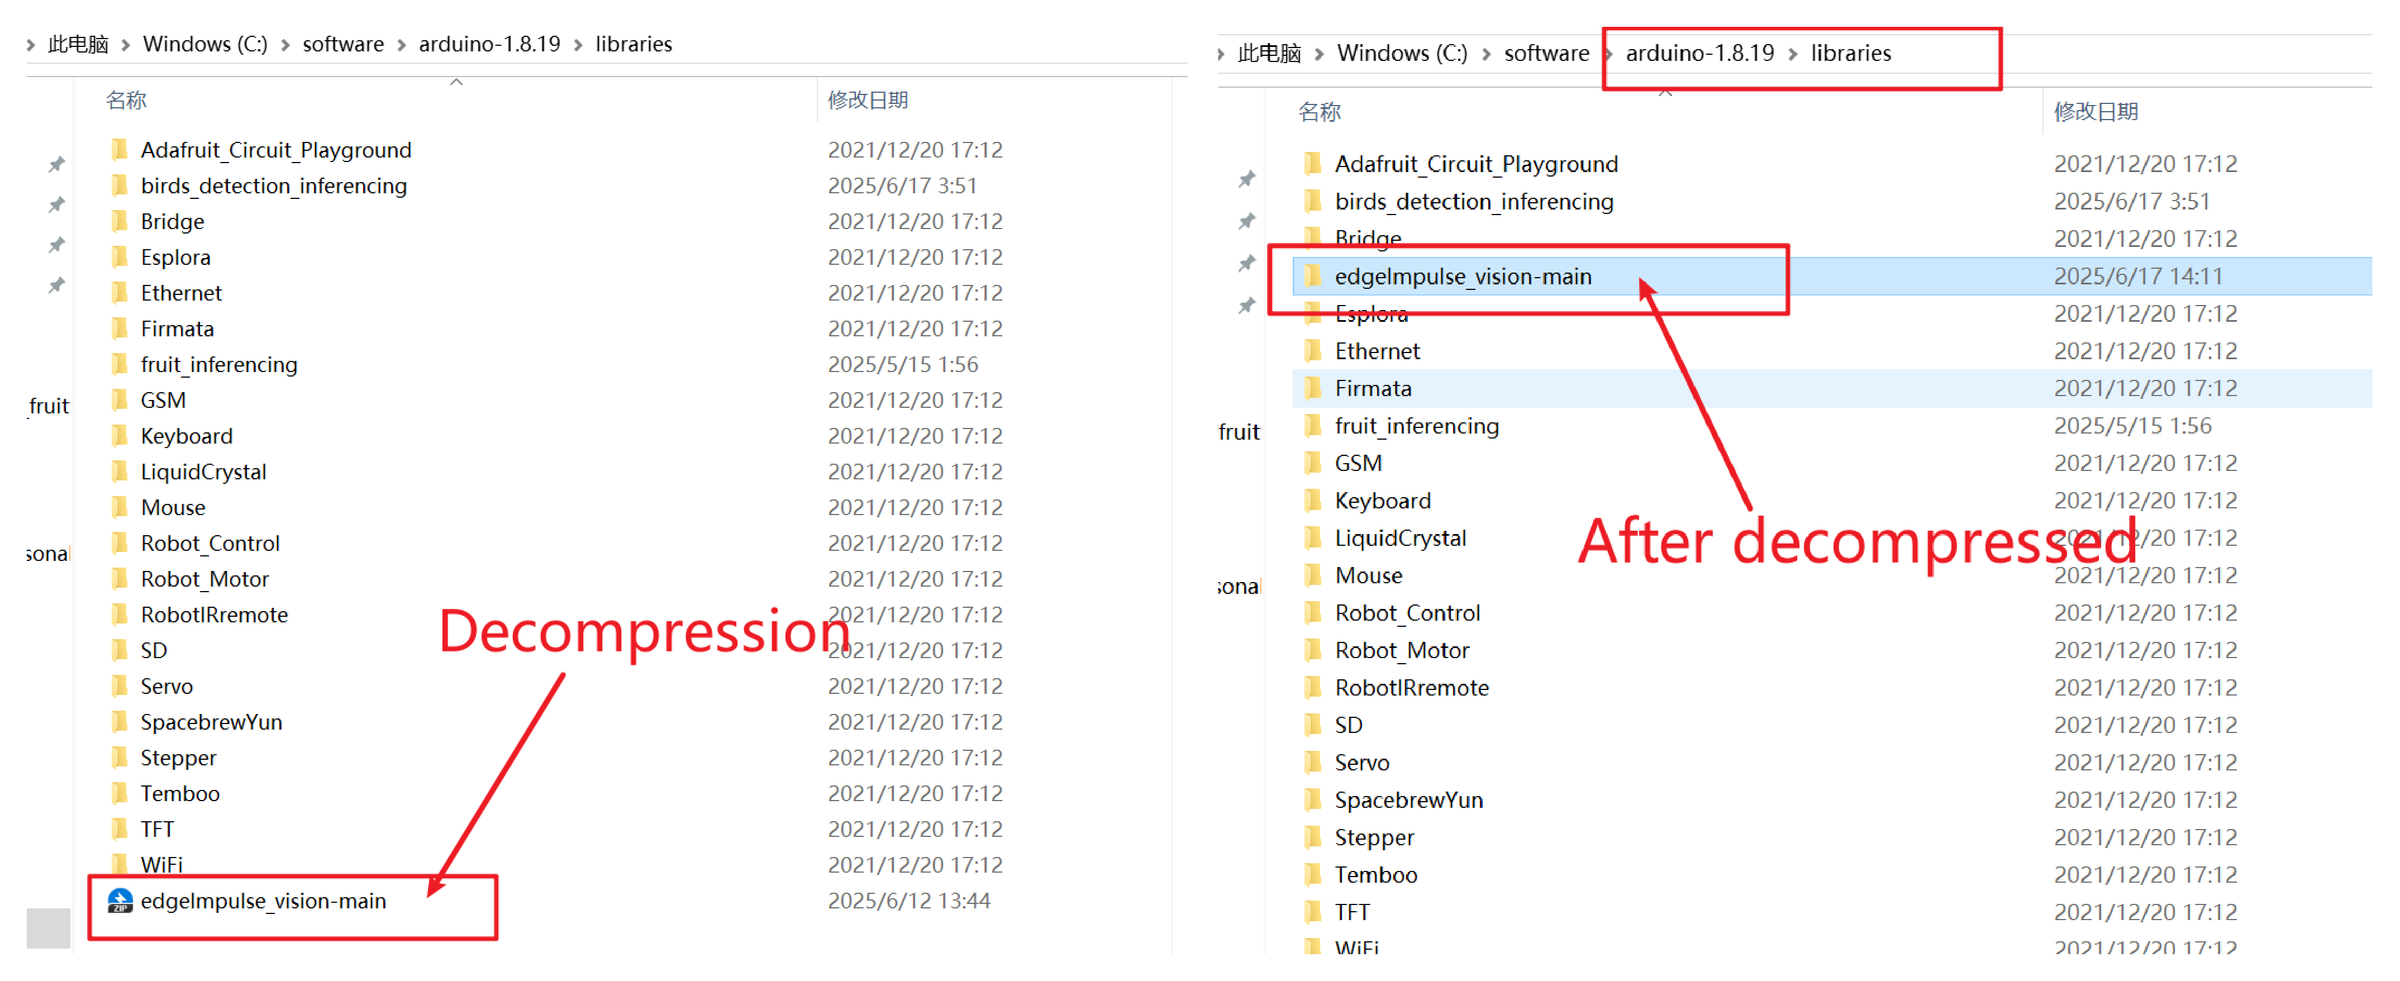
Extract the model library into the libraries directory of Arduino IDE 1.8.19.
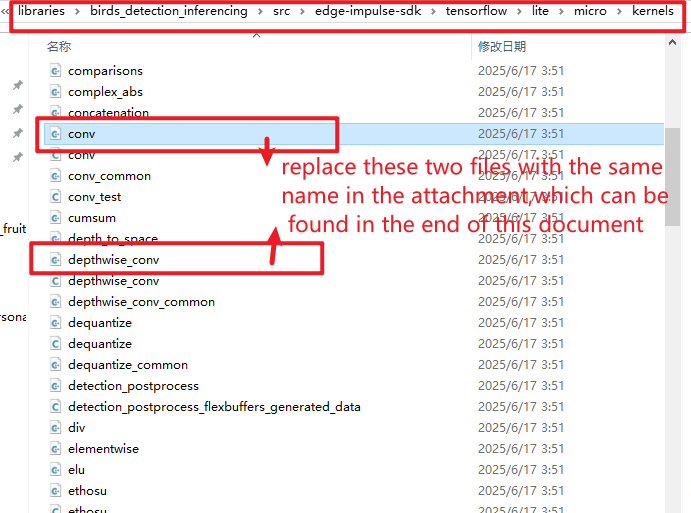
In the exported birds_detection_inferencing library, open this directory:
Replace depthwise_conv.cpp and conv.cpp with the UNIHIKER K10-compatible versions supplied with the project.
Files: https://github.com/mengyali878-jpg/birds_detection_inferencing
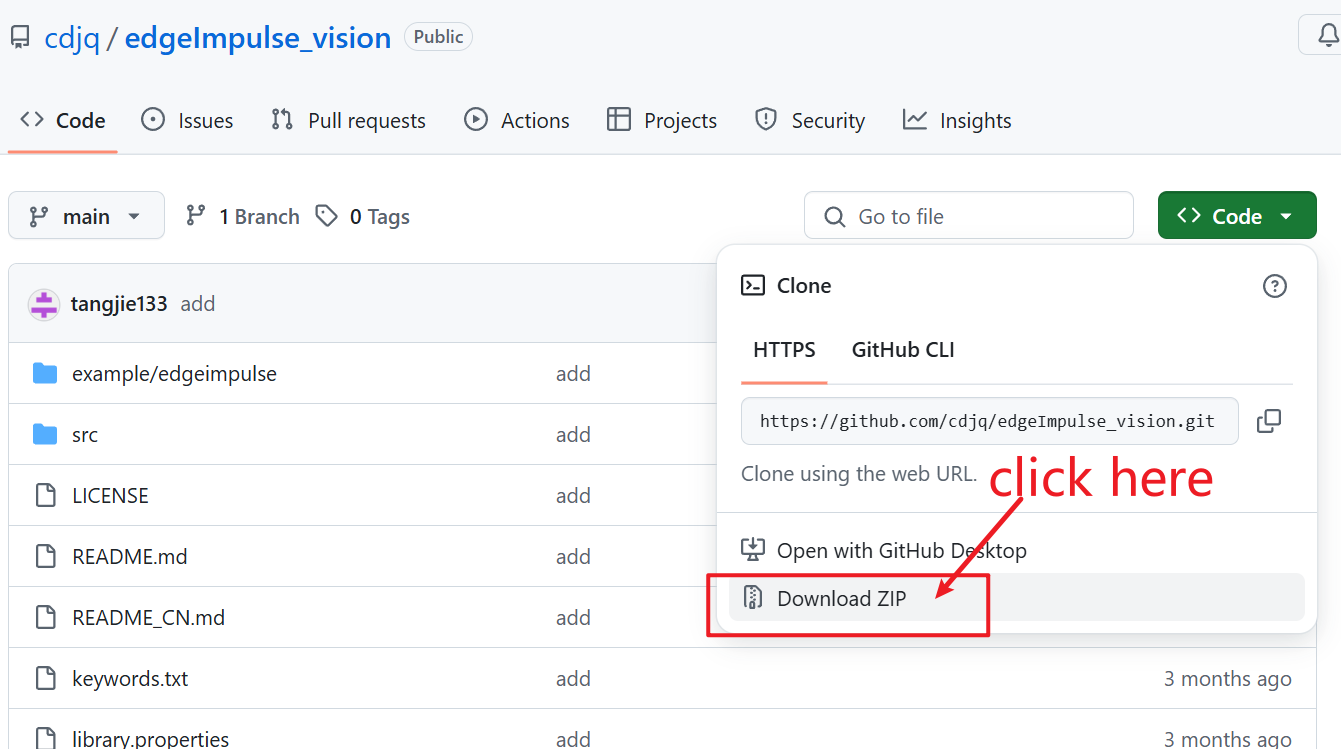
Download the edgeImpulse_vision library.
Extract edgeImpulse_vision-main into the same Arduino libraries directory.
Point EdgeImpulse_vision to Your Model
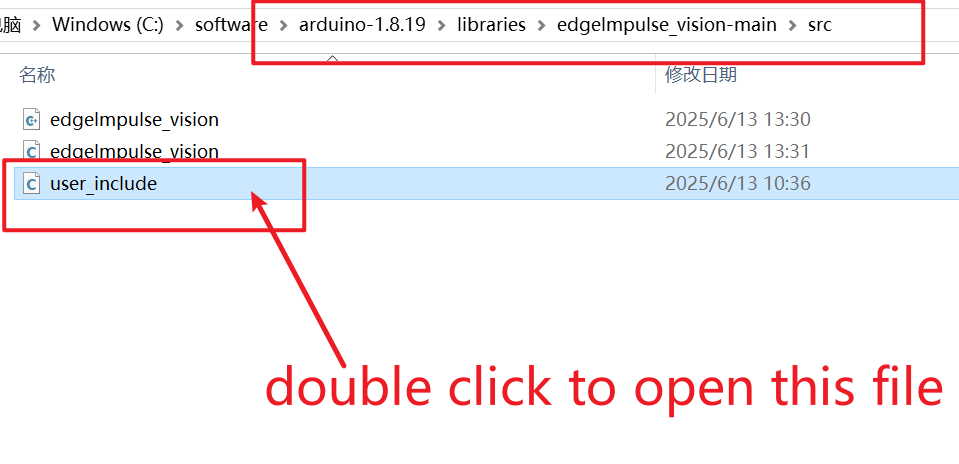
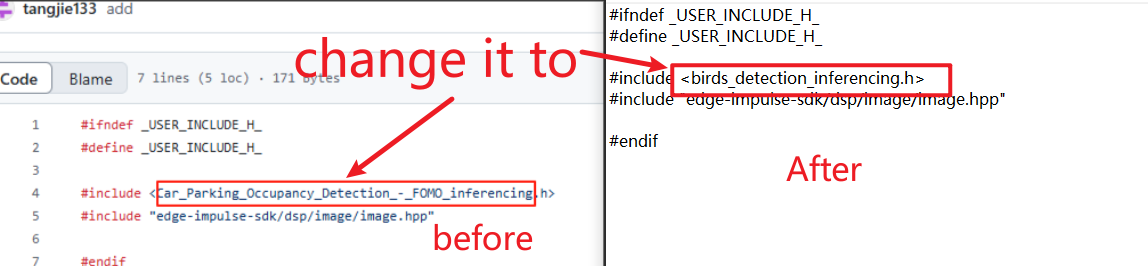
Open this file:
Replace the example model include:
with your bird model include:
The header name is generated from the Edge Impulse project name. If you used a different project name, use the matching *_inferencing.h header from your exported library.
Add the Bird Detection and Counting Sketch
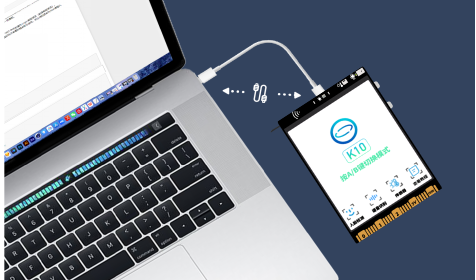
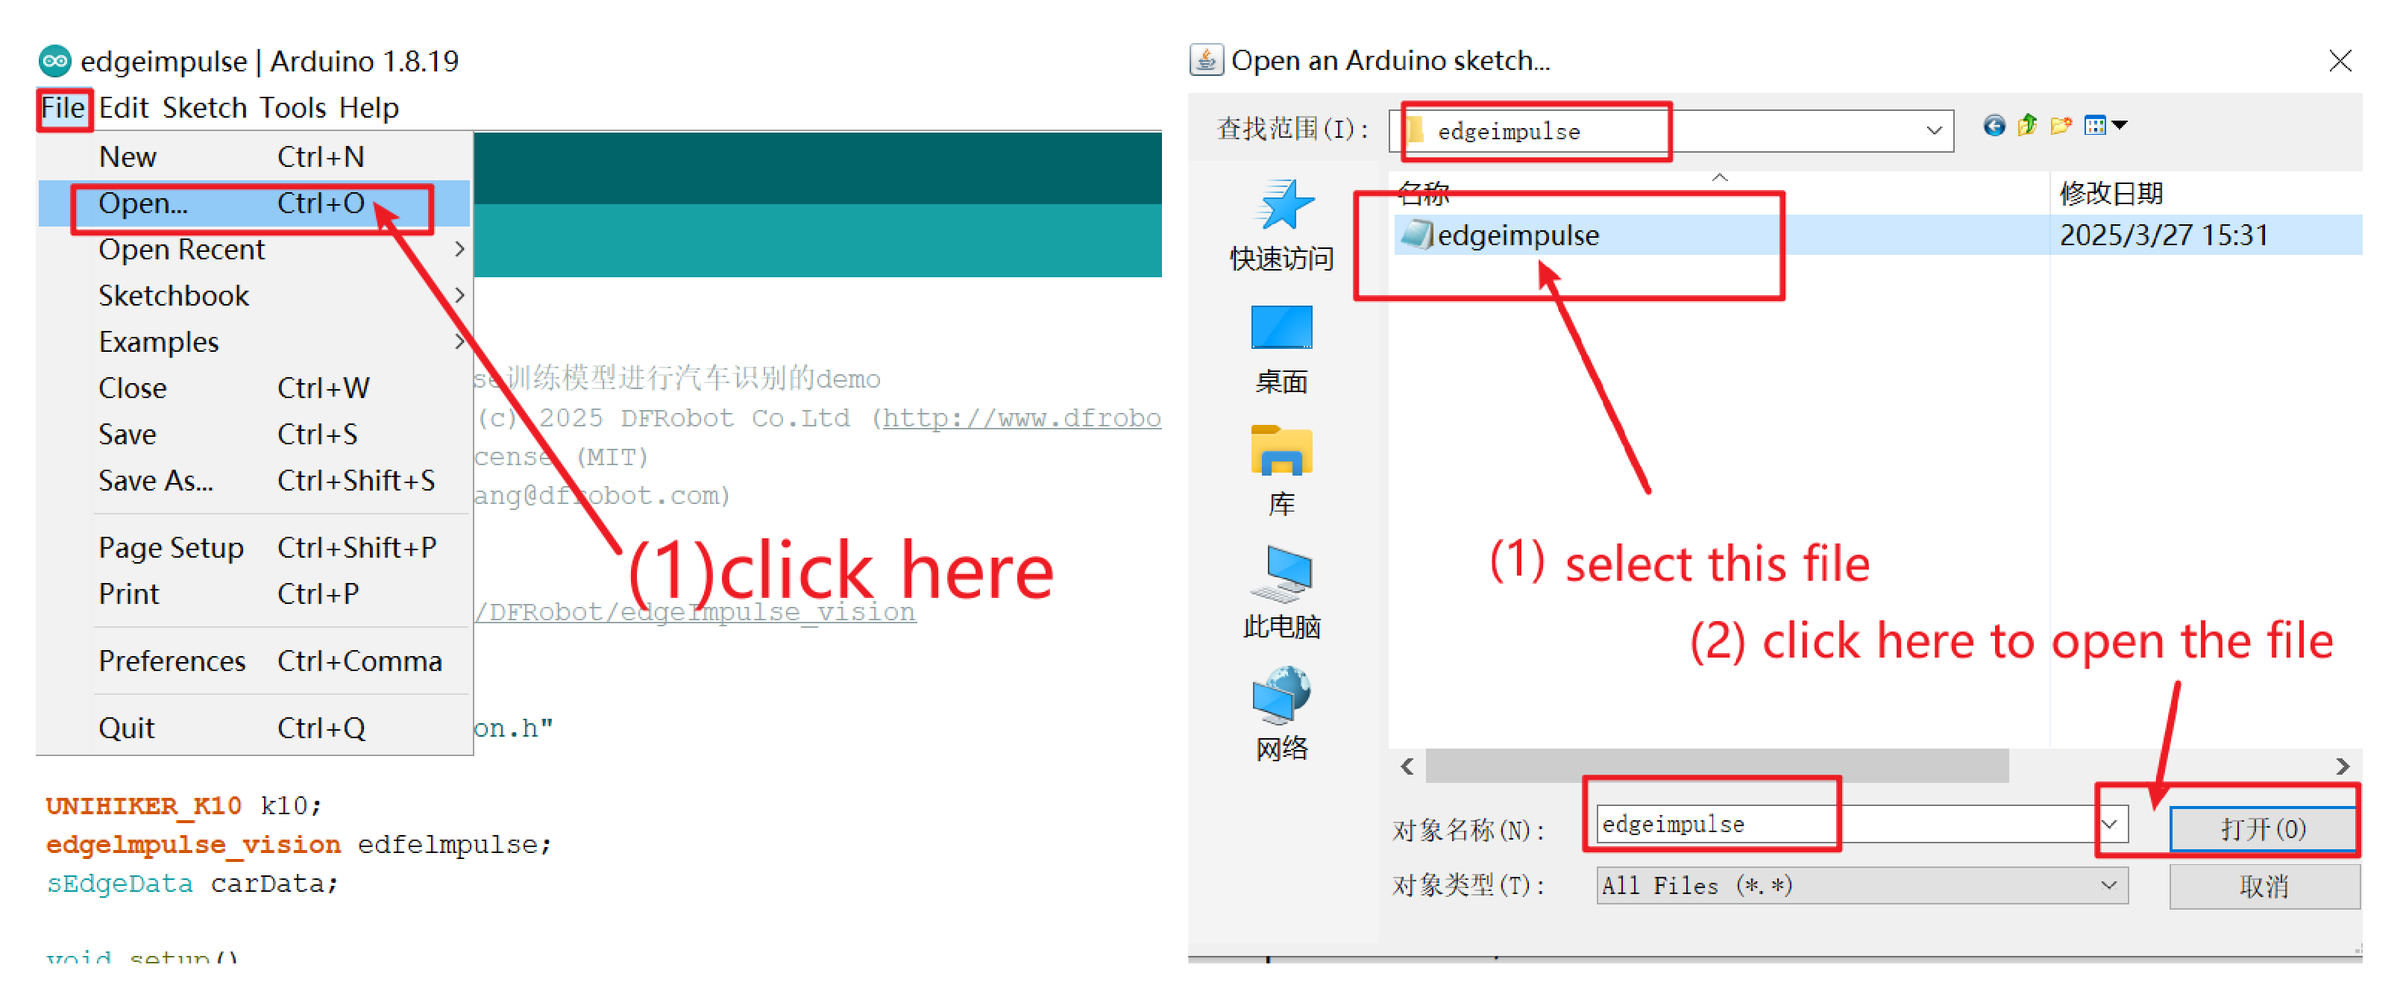
Connect the K10 to the computer with a USB-C data cable.
In Arduino IDE, open:
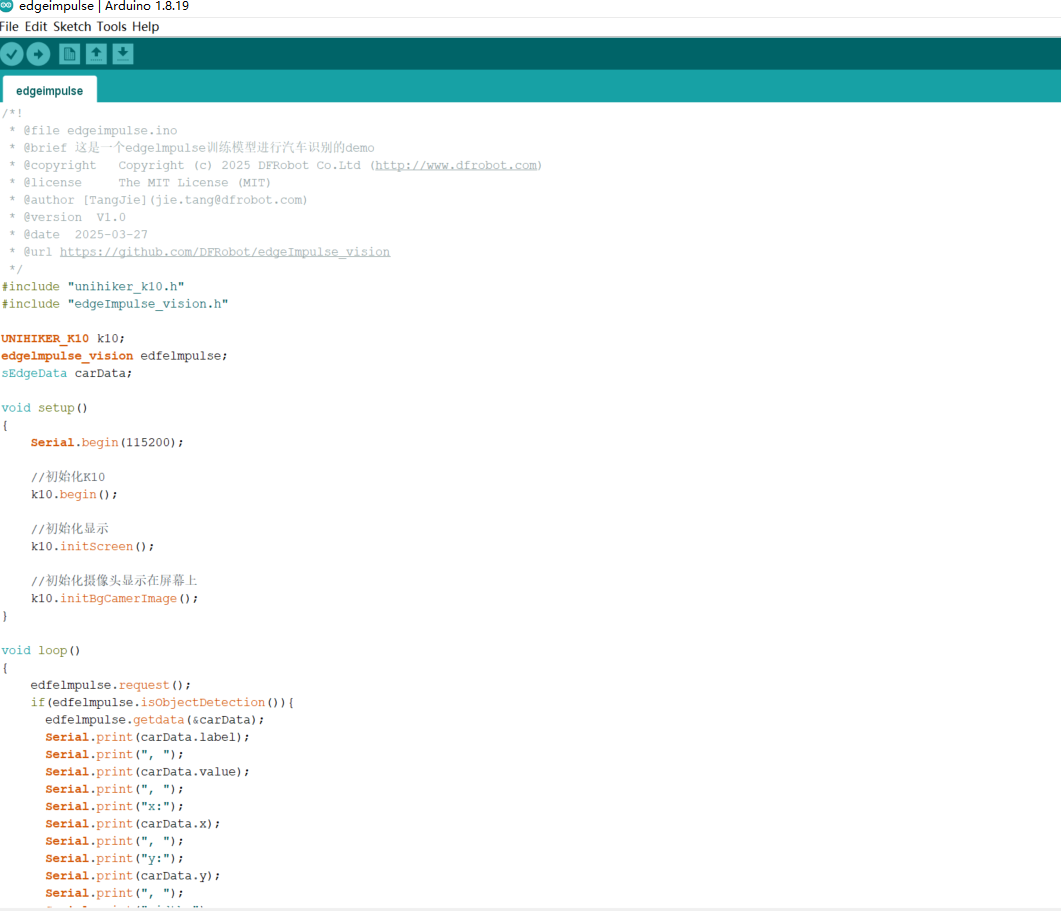
Replace the example with the attached sketch:
Download bird_identifier_from_source.ino
The sketch performs inference continuously, draws labels and bounding boxes, records detections with Button A, and displays the species totals with Button B.
The class names in the sketch must match the labels in your Edge Impulse project. Update these comparisons if you trained different classes:
Upload and Test the Bird Identifier
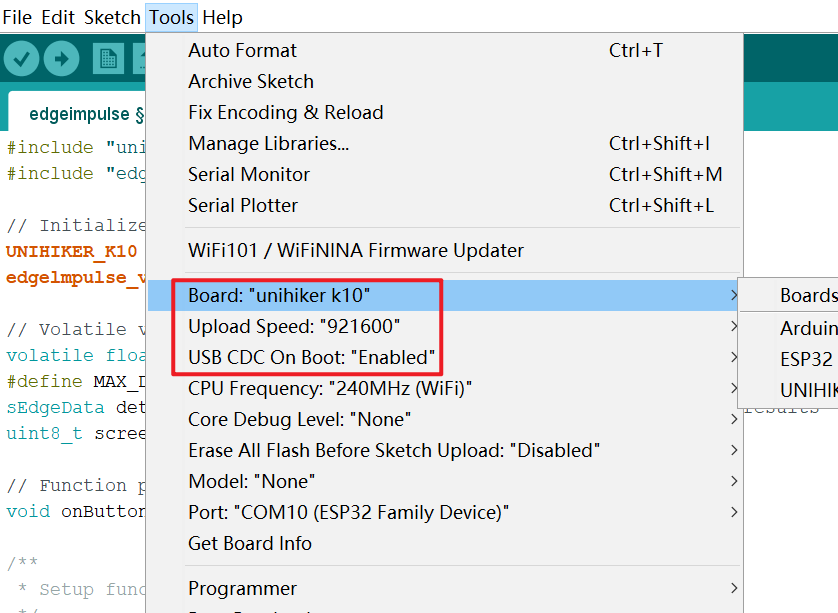
Keep the K10 connected and configure these Arduino IDE settings:
- Board: unihiker k10
- Upload Speed: 921600
- USB CDC On Boot: enabled
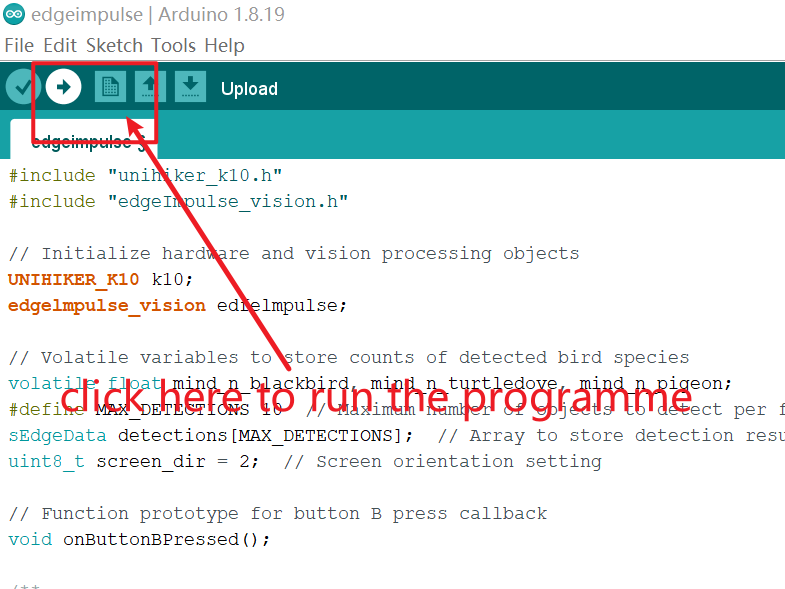
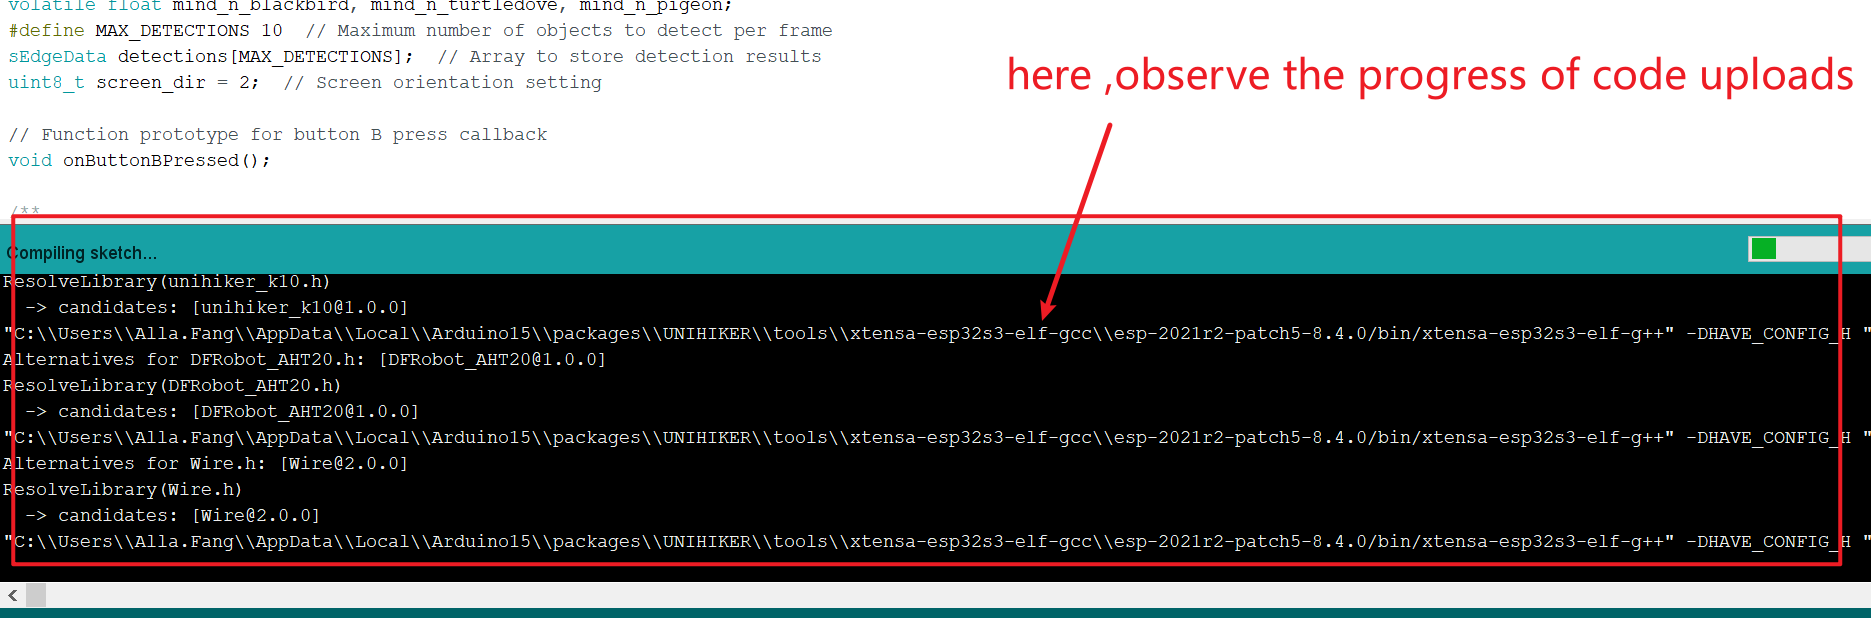
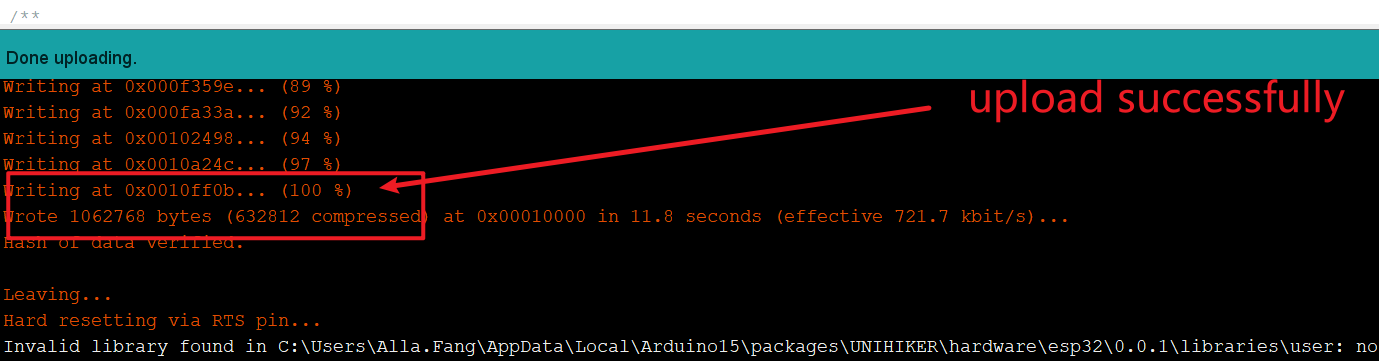
Click Upload to compile and transfer the sketch. The first compilation of an Edge Impulse project can take longer than a normal Arduino sketch.
Wait for the success message before disconnecting the board.
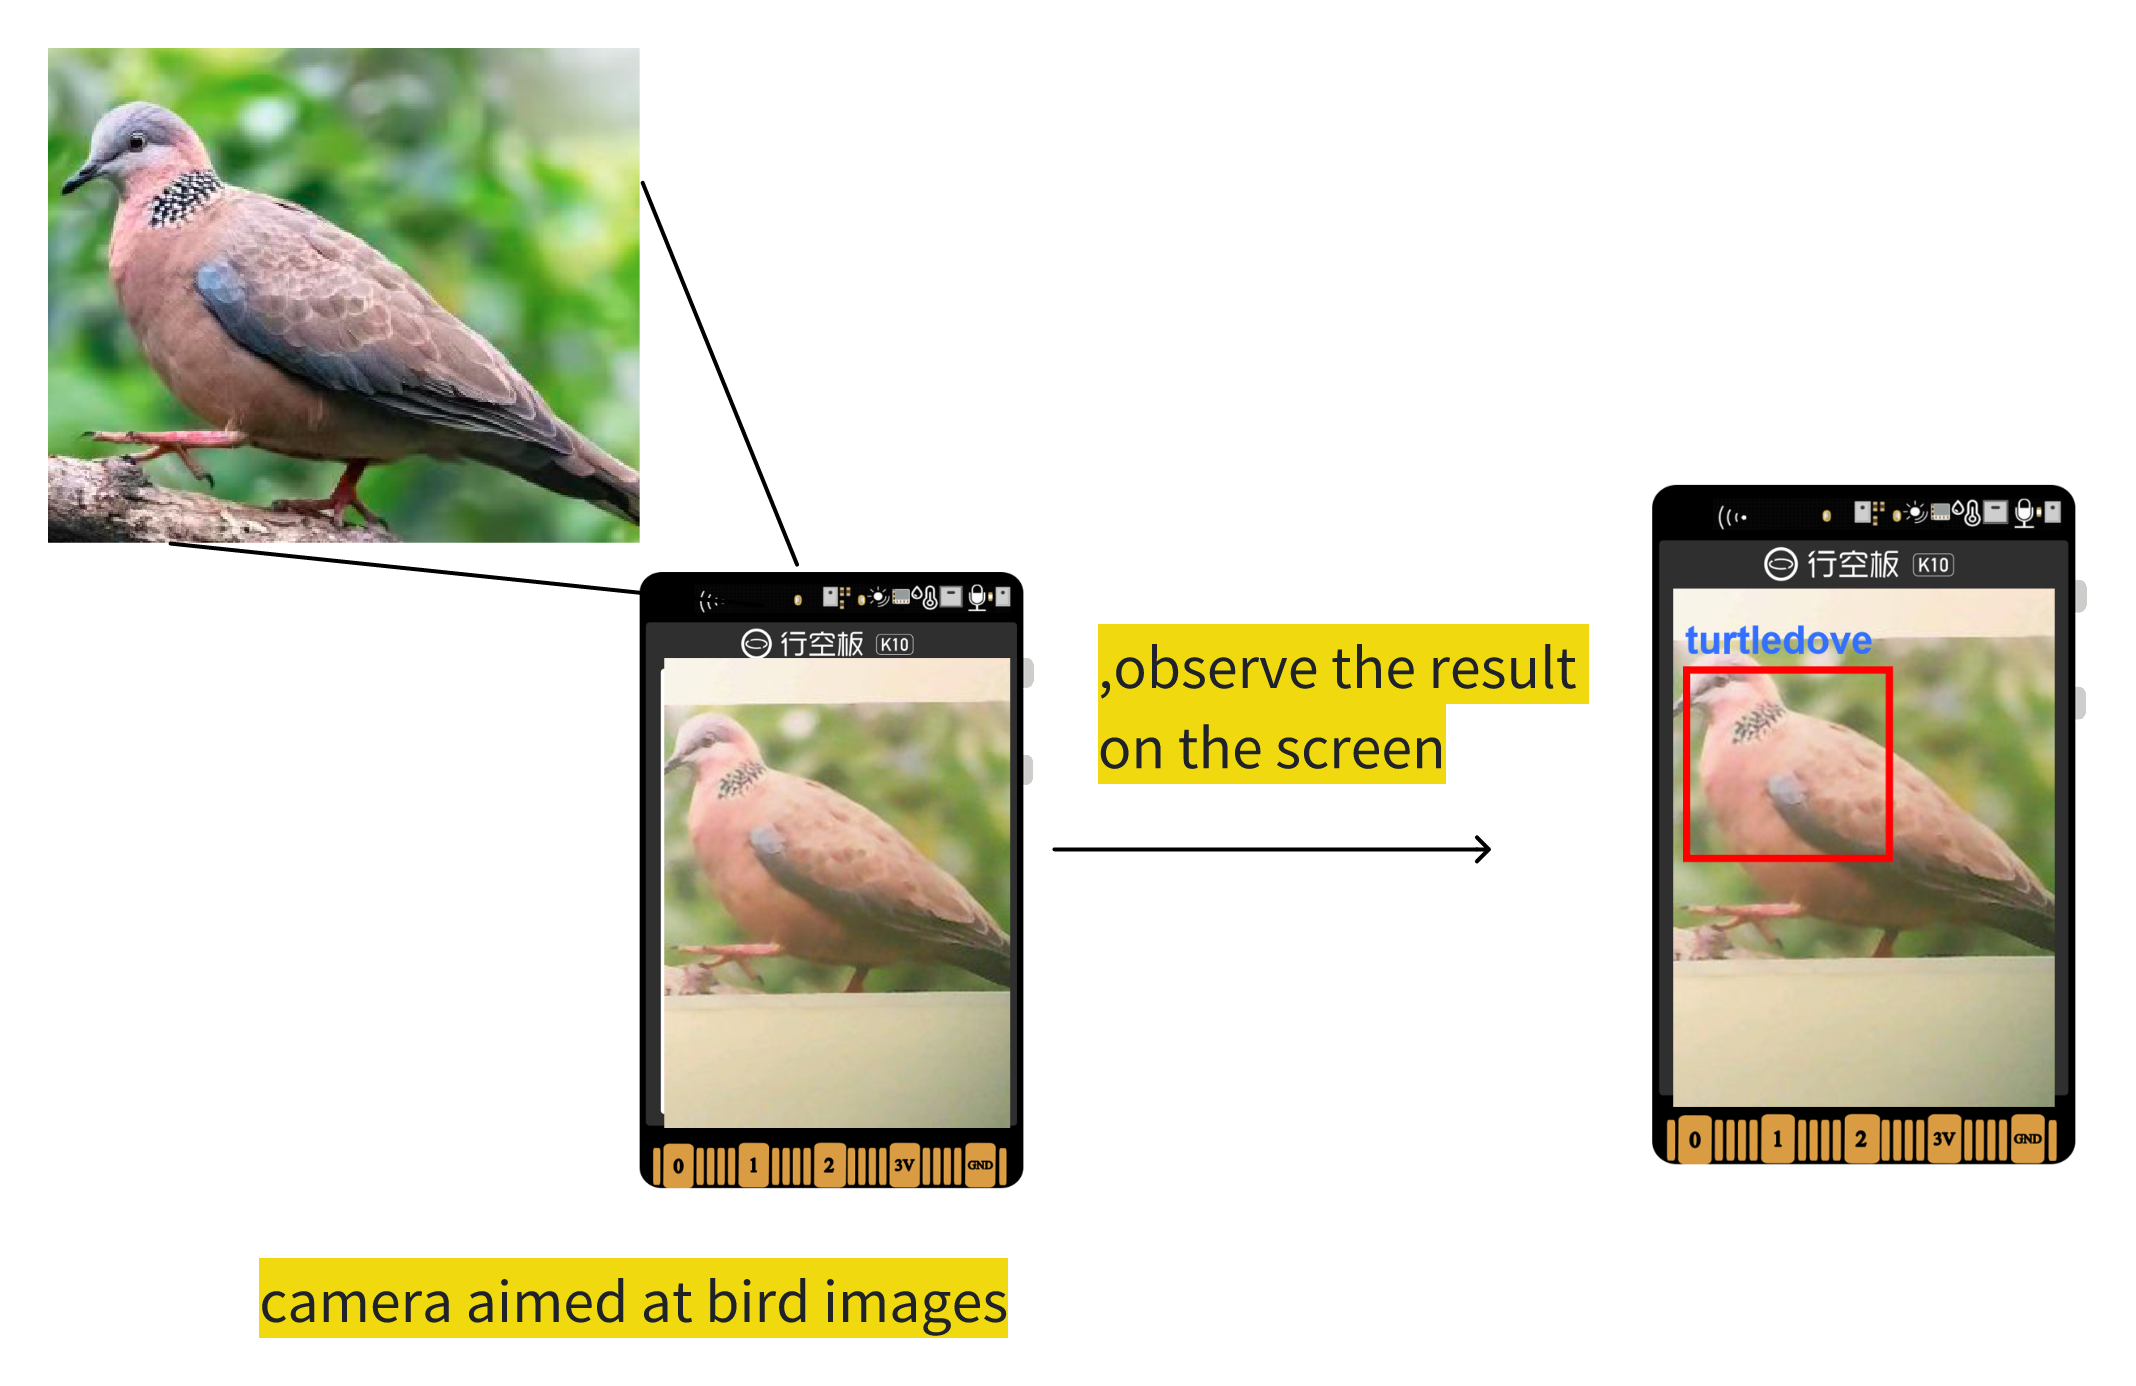
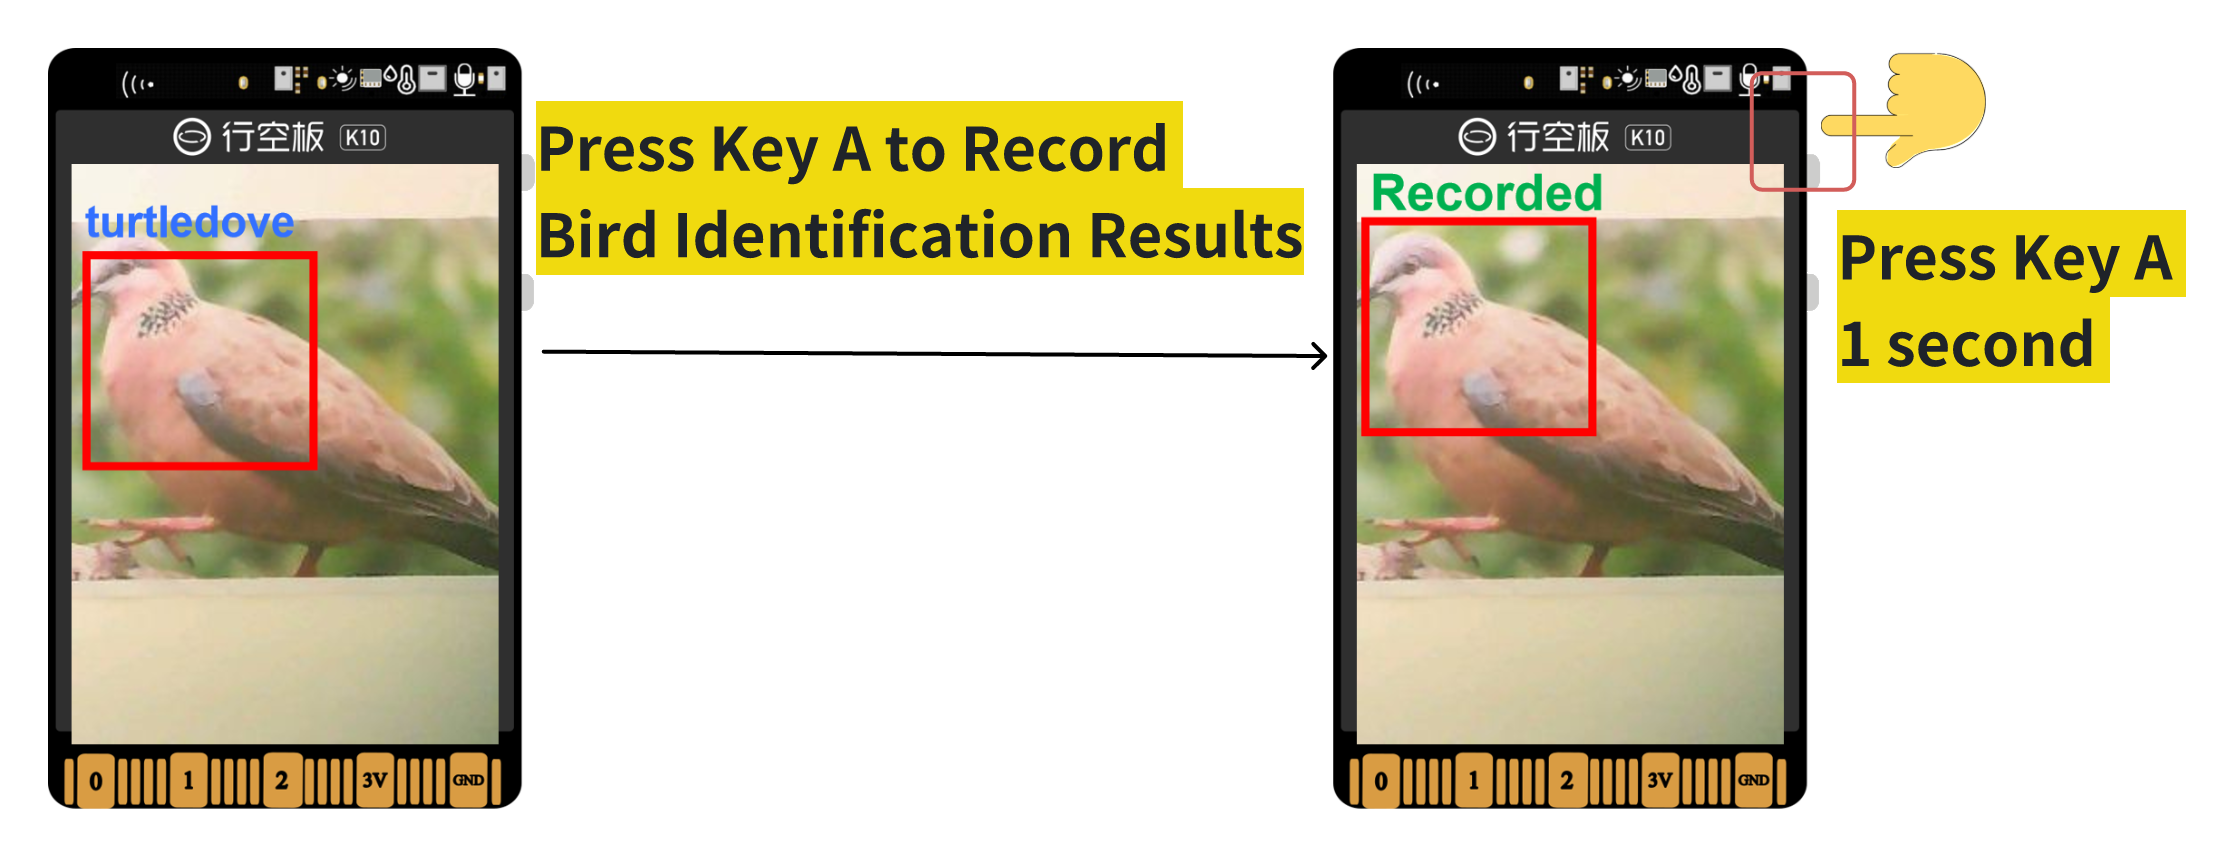
Point the K10 camera at a bird or a bird image. The screen should display the detected class and draw a bounding box around the bird.
Press Button A to record the detected bird. The screen will display recorded as confirmation.
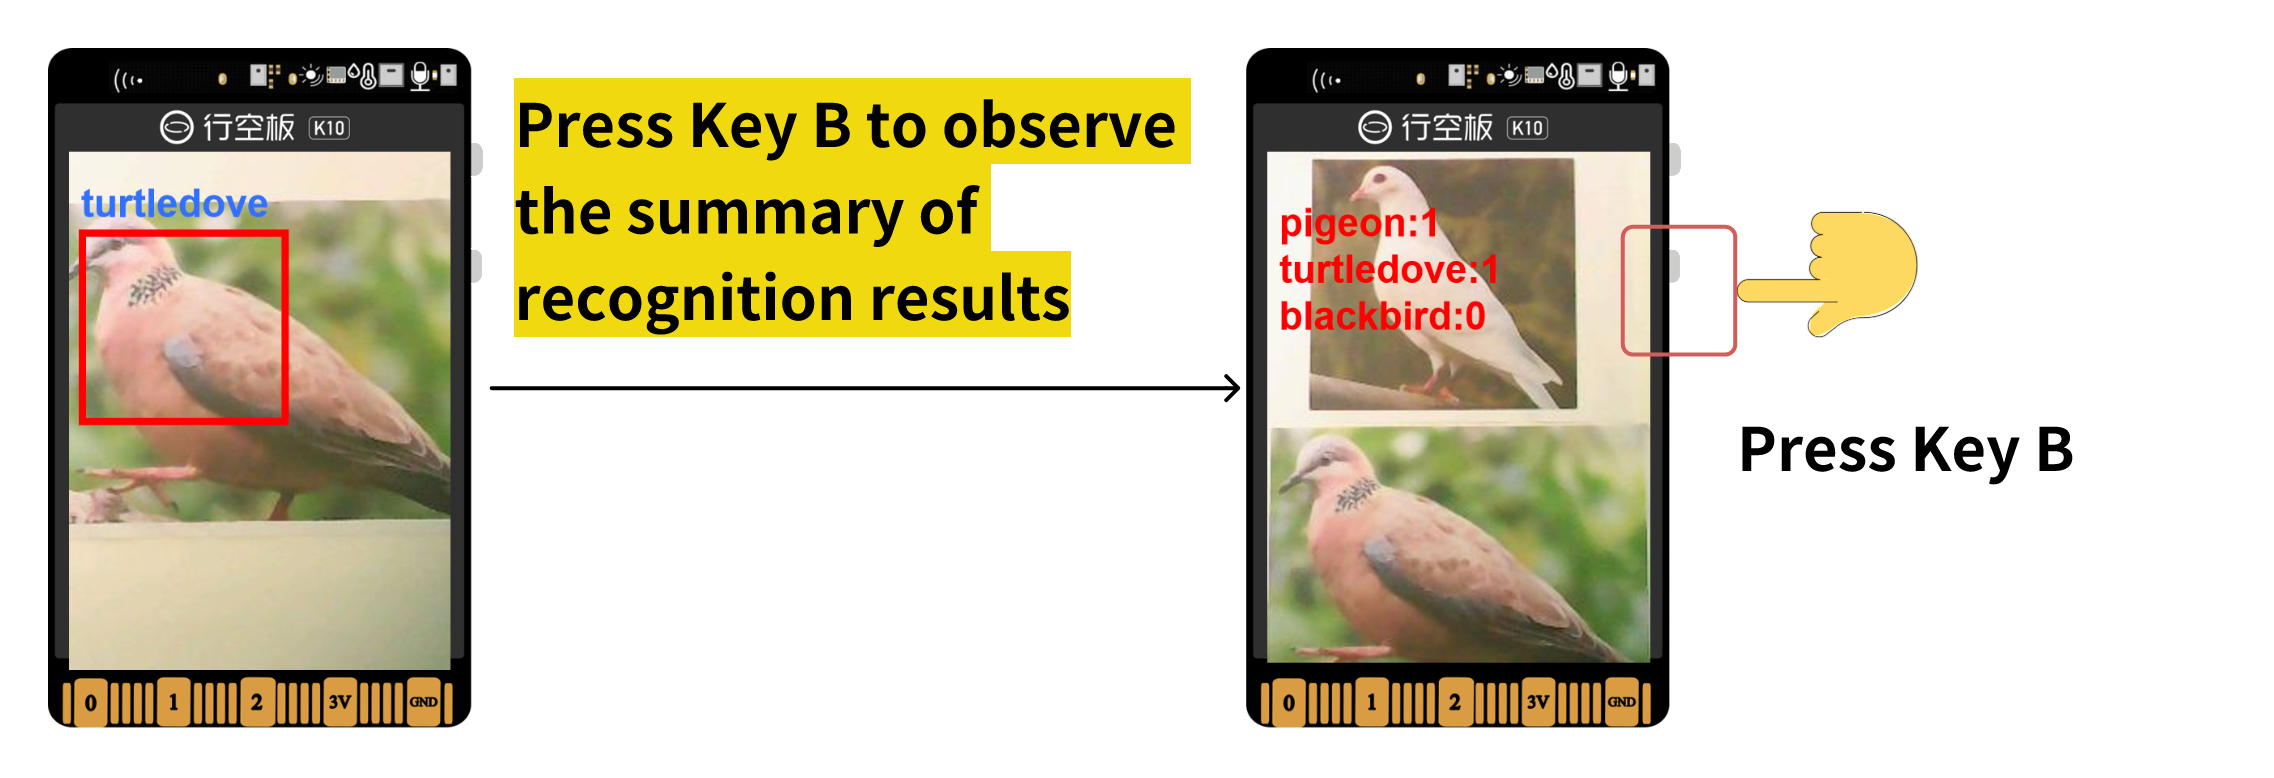
Press Button B to display the recorded counts for each species.
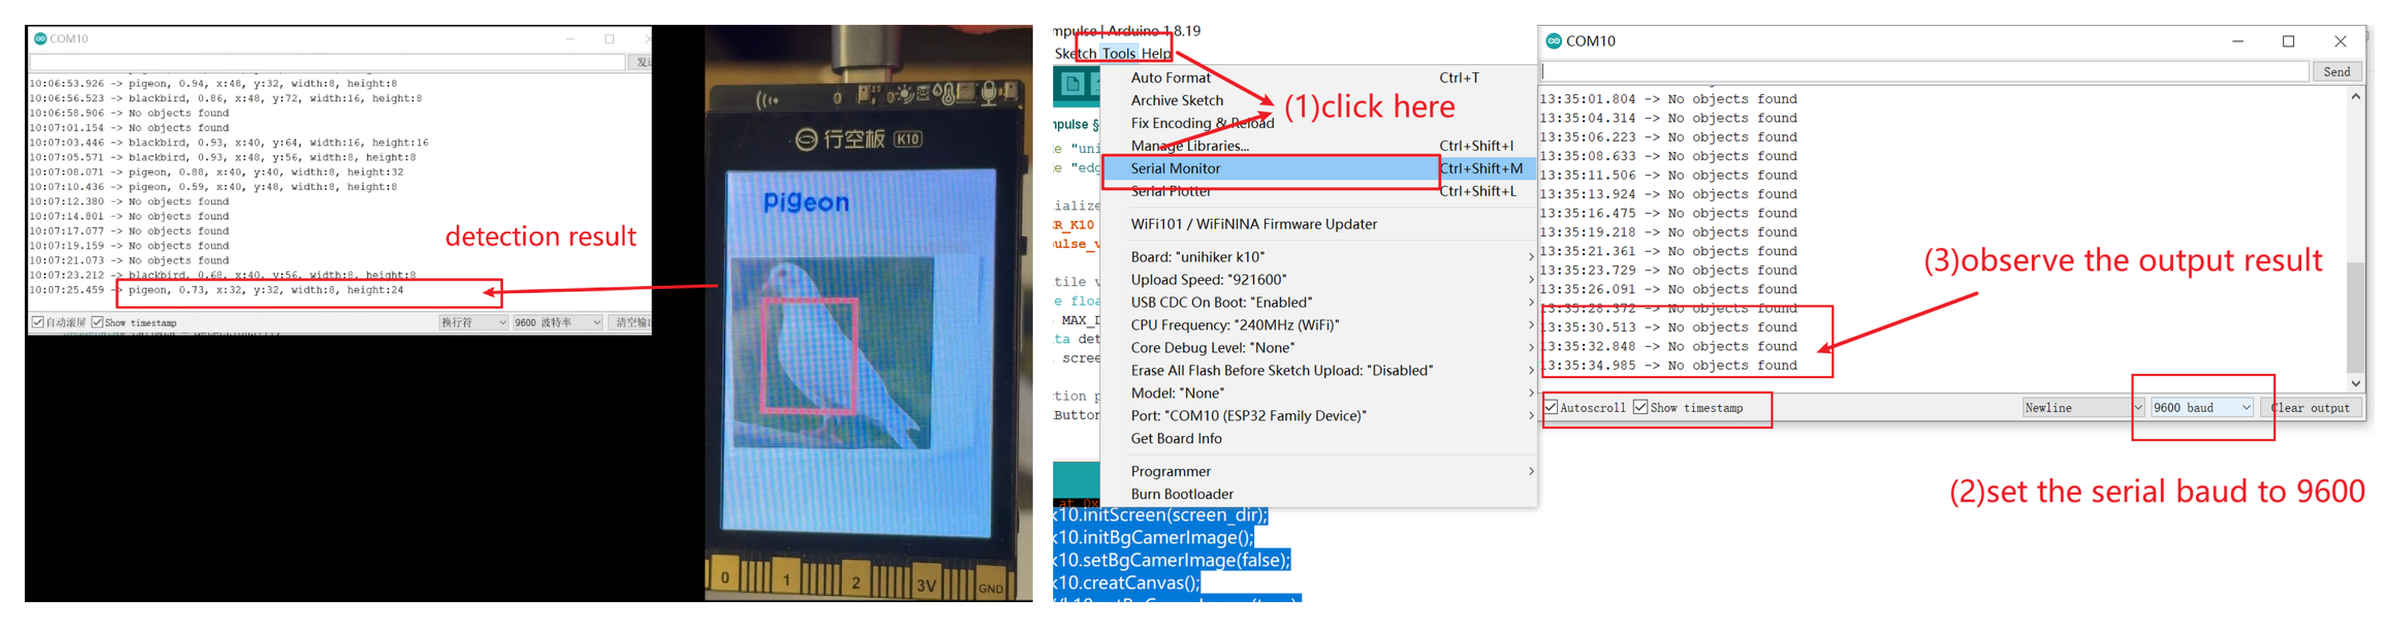
Open Tools > Serial Monitor to view the label, confidence score, position, width, and height of each detection in real time.
How the Project Works
Object Detection
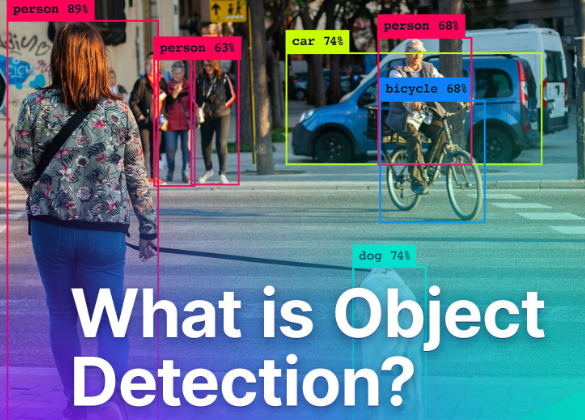
Object detection identifies both the class and location of an object in an image. Unlike image classification, which answers only “What is in this image?”, object detection also answers “Where is it?” by returning bounding-box coordinates.
In this project, the model locates birds in each camera frame, identifies their species, and sends the results to the K10 display.
TinyML
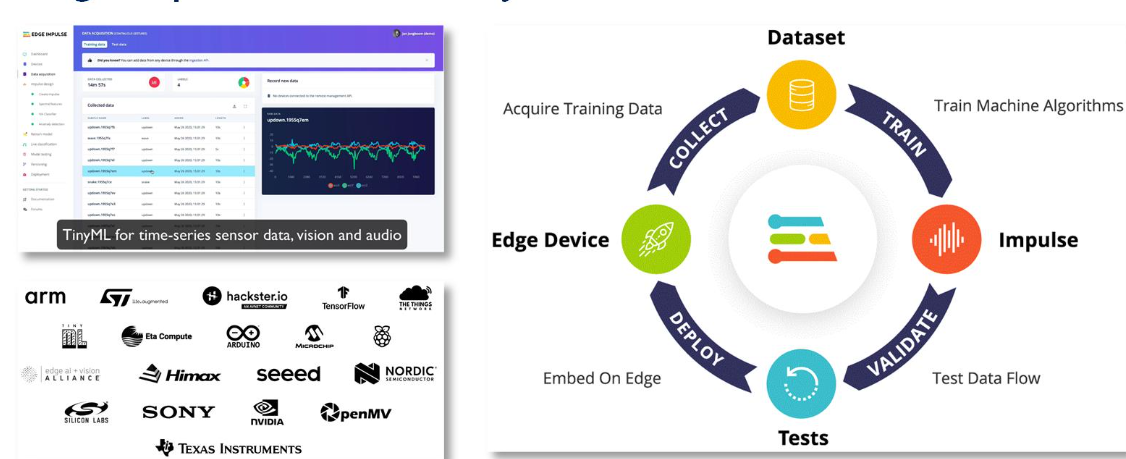
TinyML brings compact machine learning models to resource-constrained devices such as microcontrollers. After training and optimization, the bird detection model runs locally on the K10, so inference does not require a cloud connection.
Local inference reduces network latency and keeps the live camera data on the device.