Building GNU/Linux Distribution for Raspberry Pi Using the Yocto Project
by leon-anavi in Circuits > Raspberry Pi
76529 Views, 51 Favorites, 0 Comments
Building GNU/Linux Distribution for Raspberry Pi Using the Yocto Project

Raspberry Pi is probably the most popular low cost single board computer on the market. It is ofter used for Internet of Things and other embedded projects. Several GNU/Linux distributions have excellent support for Raspberry Pi and there is even Microsoft Windows for Raspberry Pi 2.
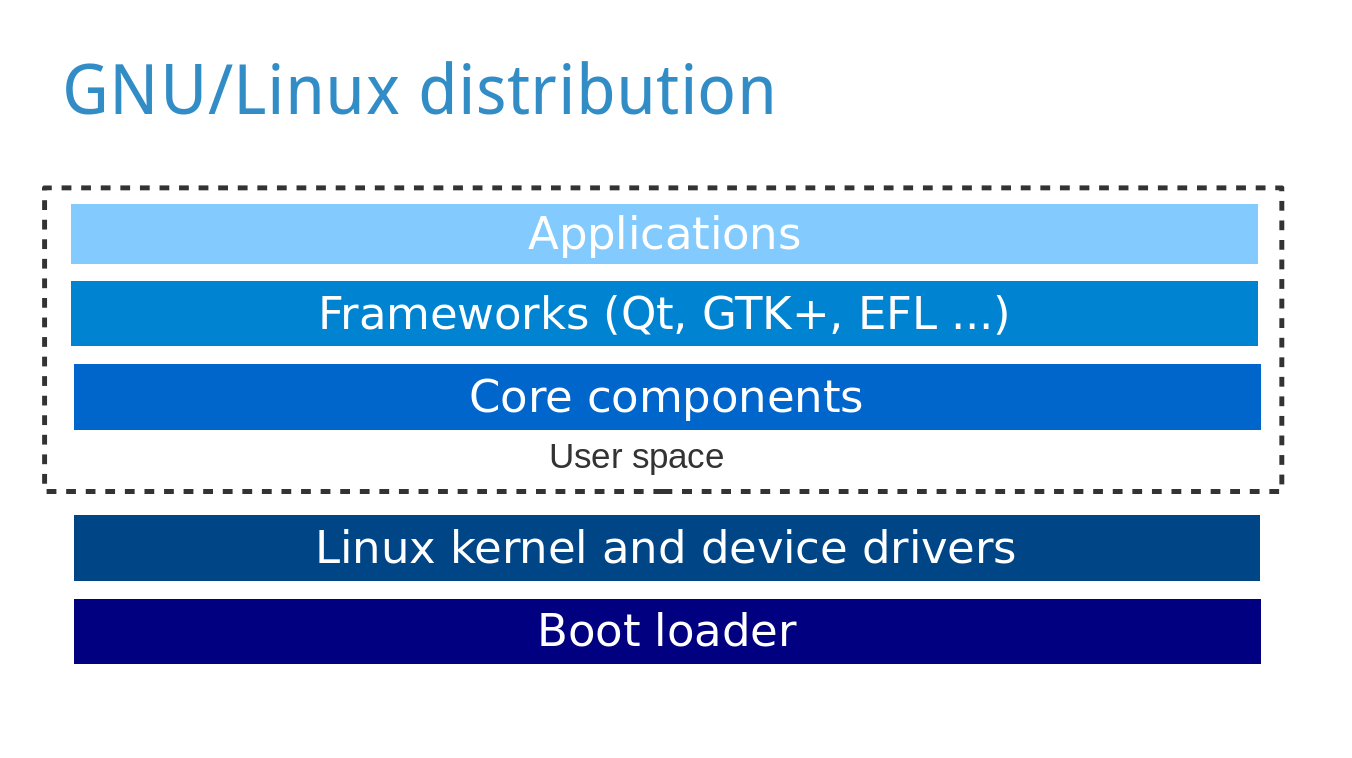
If you want to create Internet of Things (IoT) based on Raspberry Pi and if you want to do it professionally it is recommended to build an embedded Linux distribution that fits the exact needs of your device. To boot a Linux distribution on Raspberry Pi you need a bootloader, Linux kernel and various applications in the user space.
One of the most popular ways for building custom embedded Linux distribution is using the Yocto Project. Yocto is a collaborative project of the Linux foundation that uses the Openembedded framework and bitbake build engine. Poky is the reference system of the Yocto Project with a six month release cycle. It provides meta data divided into layers and recipes for building various packages and images.
This tutorial provides the exact steps for building an image with minimal GNU/Linux distribution for Raspberry Pi, that includes systemd and connman.
Getting Ready

For this tutorial you will need:
- Personal computer with GNU/Linux distribution, for example Ubuntu, on which you will build the GNU/Linux distribution for Raspberry Pi.
- Raspberry Pi
- microSD or SD card depending on the version of your Raspberry Pi
- HDMI cable and a monitor
- USB keyboard
- Power supply
Install the required packages on your personal computer depending on your GNU/Linux distribution: http://www.yoctoproject.org/docs/2.0/yocto-projec...
Notes (by Yunus EmreI):
- You cannot bake an image if your home directory is encrypted because it wont allow long file names
- Initial build takes very long if you have a slow connection
- While flashing the image to SD card make sure you select the main /dev/sdX, not the /dev/sdXp1 or other variation of internal part
Get the Source Code

Perform the actions below on your personal computer:
- Clone Poky using Git (in this case I am downloading release Jethro (2.0) of the Yocto Project):
git clone -b jethro git://git.yoctoproject.org/poky
- Go to directory poky:
cd poky
- Clone meta-raspberrypi:
git clone -b jethro git://git.yoctoproject.org/meta-raspberrypi
Configure

- Initialize the build environment
source oe-init-build-env
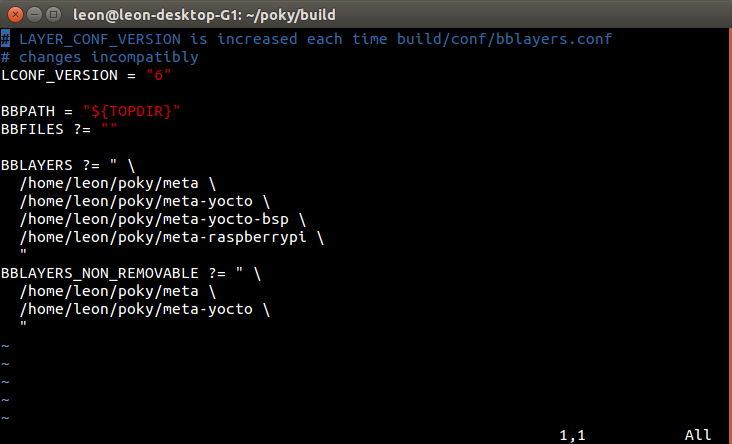
- Add meta-raspberrypi to BBLAYERS in conf/bblayers.conf, after that it should be similar (but in your case with different paths) to:
BBLAYERS ?= " \
  /home/leon/poky/meta \
  /home/leon/poky/meta-yocto \
  /home/leon/poky/meta-yocto-bsp \
  /home/leon/poky/meta-raspberrypi \
  "
- Open conf/local.conf and change MACHINE to raspberrypi, raspberrypi0, raspberrypi2 or raspberrypi3 depending on your Raspberry Pi model, for example:
MACHINE ??= "raspberrypi2"
- Append the following line to conf/local.conf to set GPU memory in megabytes:
GPU_MEM = "16"
- Optionally, append the following line to conf/local.conf to replace System V with systemd:
DISTRO_FEATURES_append = " systemd"
VIRTUAL-RUNTIME_init_manager = "systemd"
DISTRO_FEATURES_BACKFILL_CONSIDERED = "sysvinit"
VIRTUAL-RUNTIME_initscripts = ""
- Optionally, append the following line to conf/local.conf to include the command line network manager connman in the image:
IMAGE_INSTALL_append = " connman connman-client "
Build an Image

- Execute the following command to build a minimal image of a GNU/Linux distribution for your Raspberry Pi:
bitbake rpi-basic-image
Please note that the build may take up to several hours depending on the hardware of your personal computer and the speed of the Internet connection.
Flash SD Card
When the build completes the image will be located at following path in your build directory: tmp/deploy/images/raspberrypi2/rpi-basic-image-raspberrypi2.rpi-sdimg.
Plug a microSD card to your computer, replace X with its corresponding ID (which can be found through commands like lsblk or fdisk -l) and execute the following commands to flash the image on it:sudo umount /dev/sdX sudo dd if=tmp/deploy/images/raspberrypi2/core-image-weston-raspberrypi2.rpi-sdimg of=/dev/sdX sync sudo umount /dev/sdX
Alternatively, if you prefer you can use bmaptool instead of dd.
Be very careful while flashing the SD card and make sure you are using the right letter for the path to the device. Do it on you own risk and keep in mind that a mistake might damage a drive on your personal computer!
Boot and Test
- Login as root without any password
- If connman is installed, verify that its systemd services has been loaded:
systemctl status -l connman