CH340 ProgRamen 1# - How to Upload Code With the Asian Soup?
by KusTech in Circuits > Arduino
1046 Views, 7 Favorites, 0 Comments
CH340 ProgRamen 1# - How to Upload Code With the Asian Soup?

Hello fellas!
In this article, I'll talk about the ProgRamen—a USB UART TTL programmer with a CH340 chip.
Why do you need it? It helps you upload code to boards that don’t have a USB port for direct programming.
I’ll show you how to use it with the ESP32-S3 Young (and it works with other boards from the ESP32 family too) and how to receive data using the Serial port with AssDuino Uno board (Anime Arduino Uno Clone). Everything will be done in the Arduino IDE.
Need help setting up the Arduino IDE for ESP32 boards? Check out my guide (1 Step).
Supplies

All of used boards you can find on my Tindie store:
ProgRamen:
- ProgRamen - Full Kit
- ProgRamen - Ramen Classic
- ProgRamen - Forest Bowl
- ProgRamen - Midnight Ramen
- ProgRamen - Deep Sea Soup
ESP32-S3 Youth:
AssDuino Uno:
Upload Code to ESP32-S3 Youth


Here’s how to upload code via UART in a simple way!
The code is loaded through the Rx and Tx pins, which are used for data exchange between devices. Before connecting, make sure the logic is set to 3.3V (jumper position shown in the first screenshot).
On the ESP32, the required pins are on the left side of the board (inside the Debug section—see screenshot 1).
- The top pin is Rx, and the bottom pin is Tx.
Now, connect the wires like this:
- Rx (ProgRamen) → Tx (ESP32)
- Tx (ProgRamen) → Rx (ESP32)
- GND (ProgRamen) → GND (ESP32)
- VCC (ProgRamen) → 3V3 (ESP32)
To enter Boot mode, turn off the power (use the switch on the left), press and hold the Boot button, power the board back on, and then release the Boot button.
Uploading the Code
In Arduino IDE, select the microcontroller model (ESP32S3 Dev Module) and the port where the programmer is connected. Hit Upload, and once it’s done, press Rst on the board. That’s it—you’re all set!
Read Serial Data From AssDuino Uno


Alright, we’ve uploaded the code—now let’s try receiving data instead of sending it!
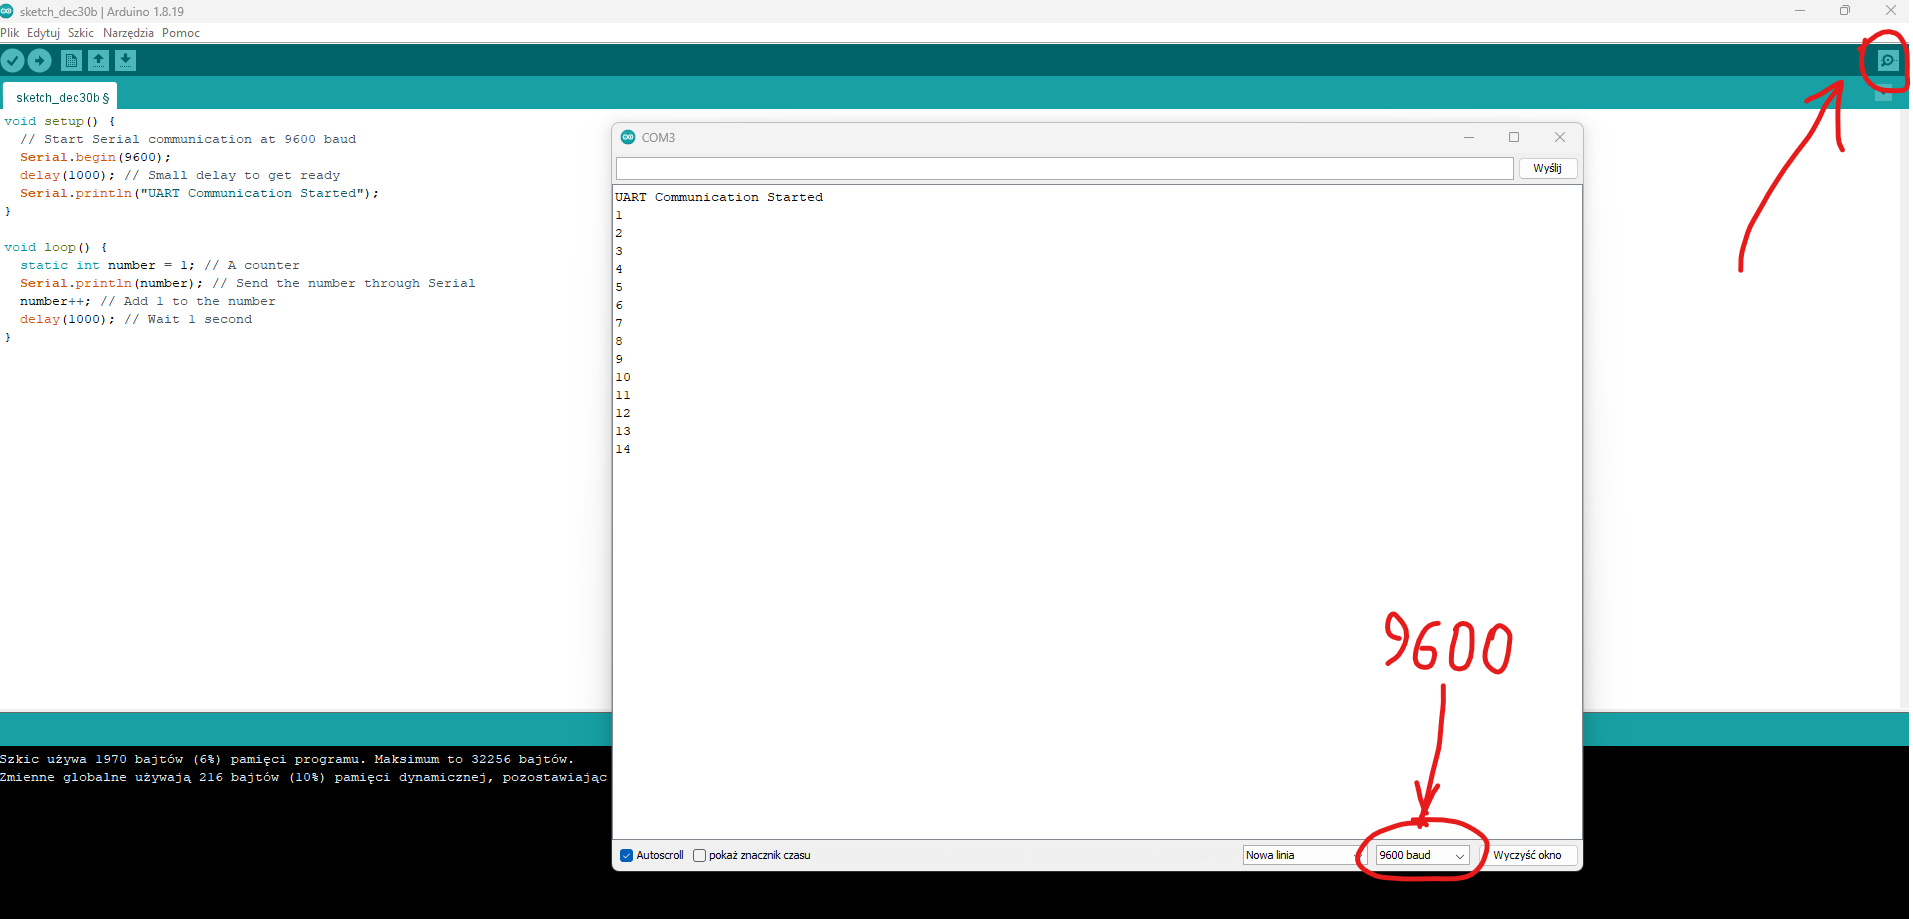
This time, we’ll use a 5V microcontroller from Atmega. Let’s take our Anime Arduino clone and upload this simple code. It sends a number to the Serial port every second, increasing by 1 each time:
What to Do Next:
Upload the Code:
Use the settings from screenshot 1. When done, unplug the AssDuino from USB.
Switch ProgRamen to 5V
Move the jumper on the ProgRamen to change the logic from 3.3V to 5V.
Connect ProgRamen to AssDuino
Follow this wiring (check the second photo):
- Rx (ProgRamen) → Tx (AssDuino)
- Tx (ProgRamen) → Rx (AssDuino)
- GND (ProgRamen) → GND (AssDuino)
- VCC (ProgRamen) → 5V (AssDuino)
Plug ProgRamen into USB
In Arduino IDE, select the port assigned to ProgRamen.
Open the Serial Monitor
Click the magnifying glass in Arduino IDE to open the Serial Monitor. Set the baud rate in the bottom-right corner to 9600.
And there you go! You’ll see numbers popping up in the Serial Monitor—your AssDuino is sending data to your computer through the ProgRamen. Nice work!
In Conclusion

Thank you for reading this article! If you have any questions or if something doesn’t work, feel free to ask in the comments section.
By the way - don't forget to check all Collection in my Tindie shop :)