Cattt ESP32 Dashboard — Weather, Cat Facts, Calendar, Clock
by LiM13 in Circuits > Gadgets
66 Views, 1 Favorites, 0 Comments
Cattt ESP32 Dashboard — Weather, Cat Facts, Calendar, Clock
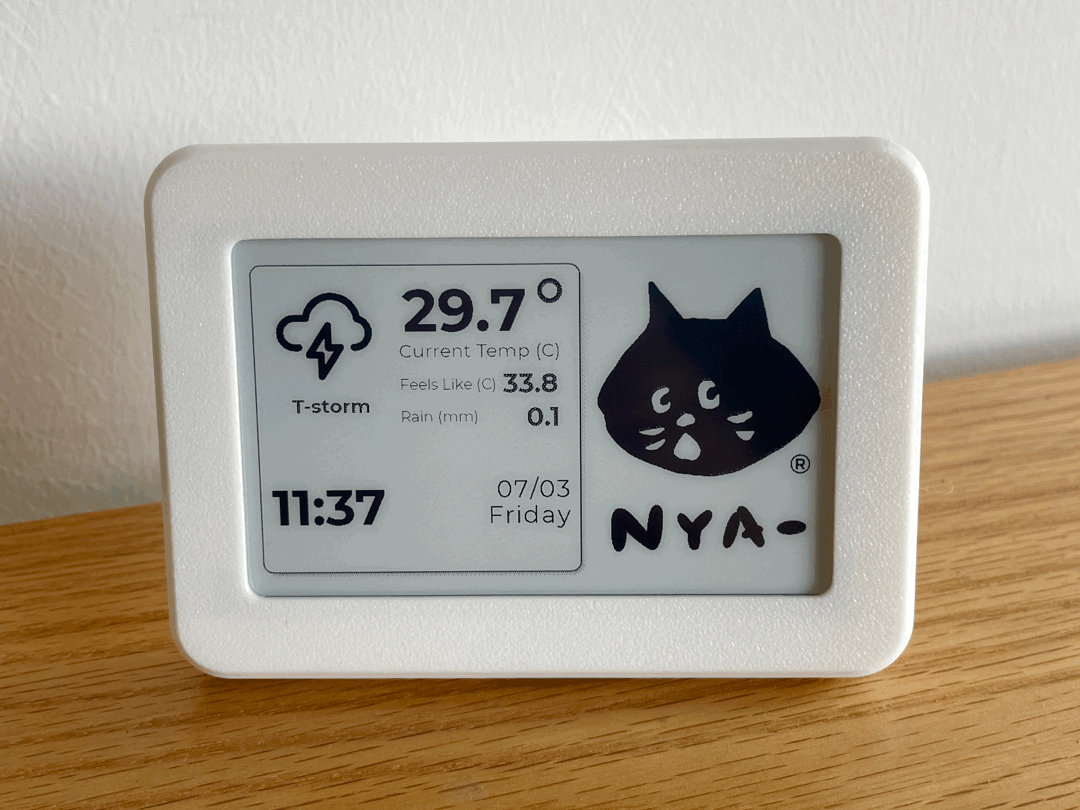

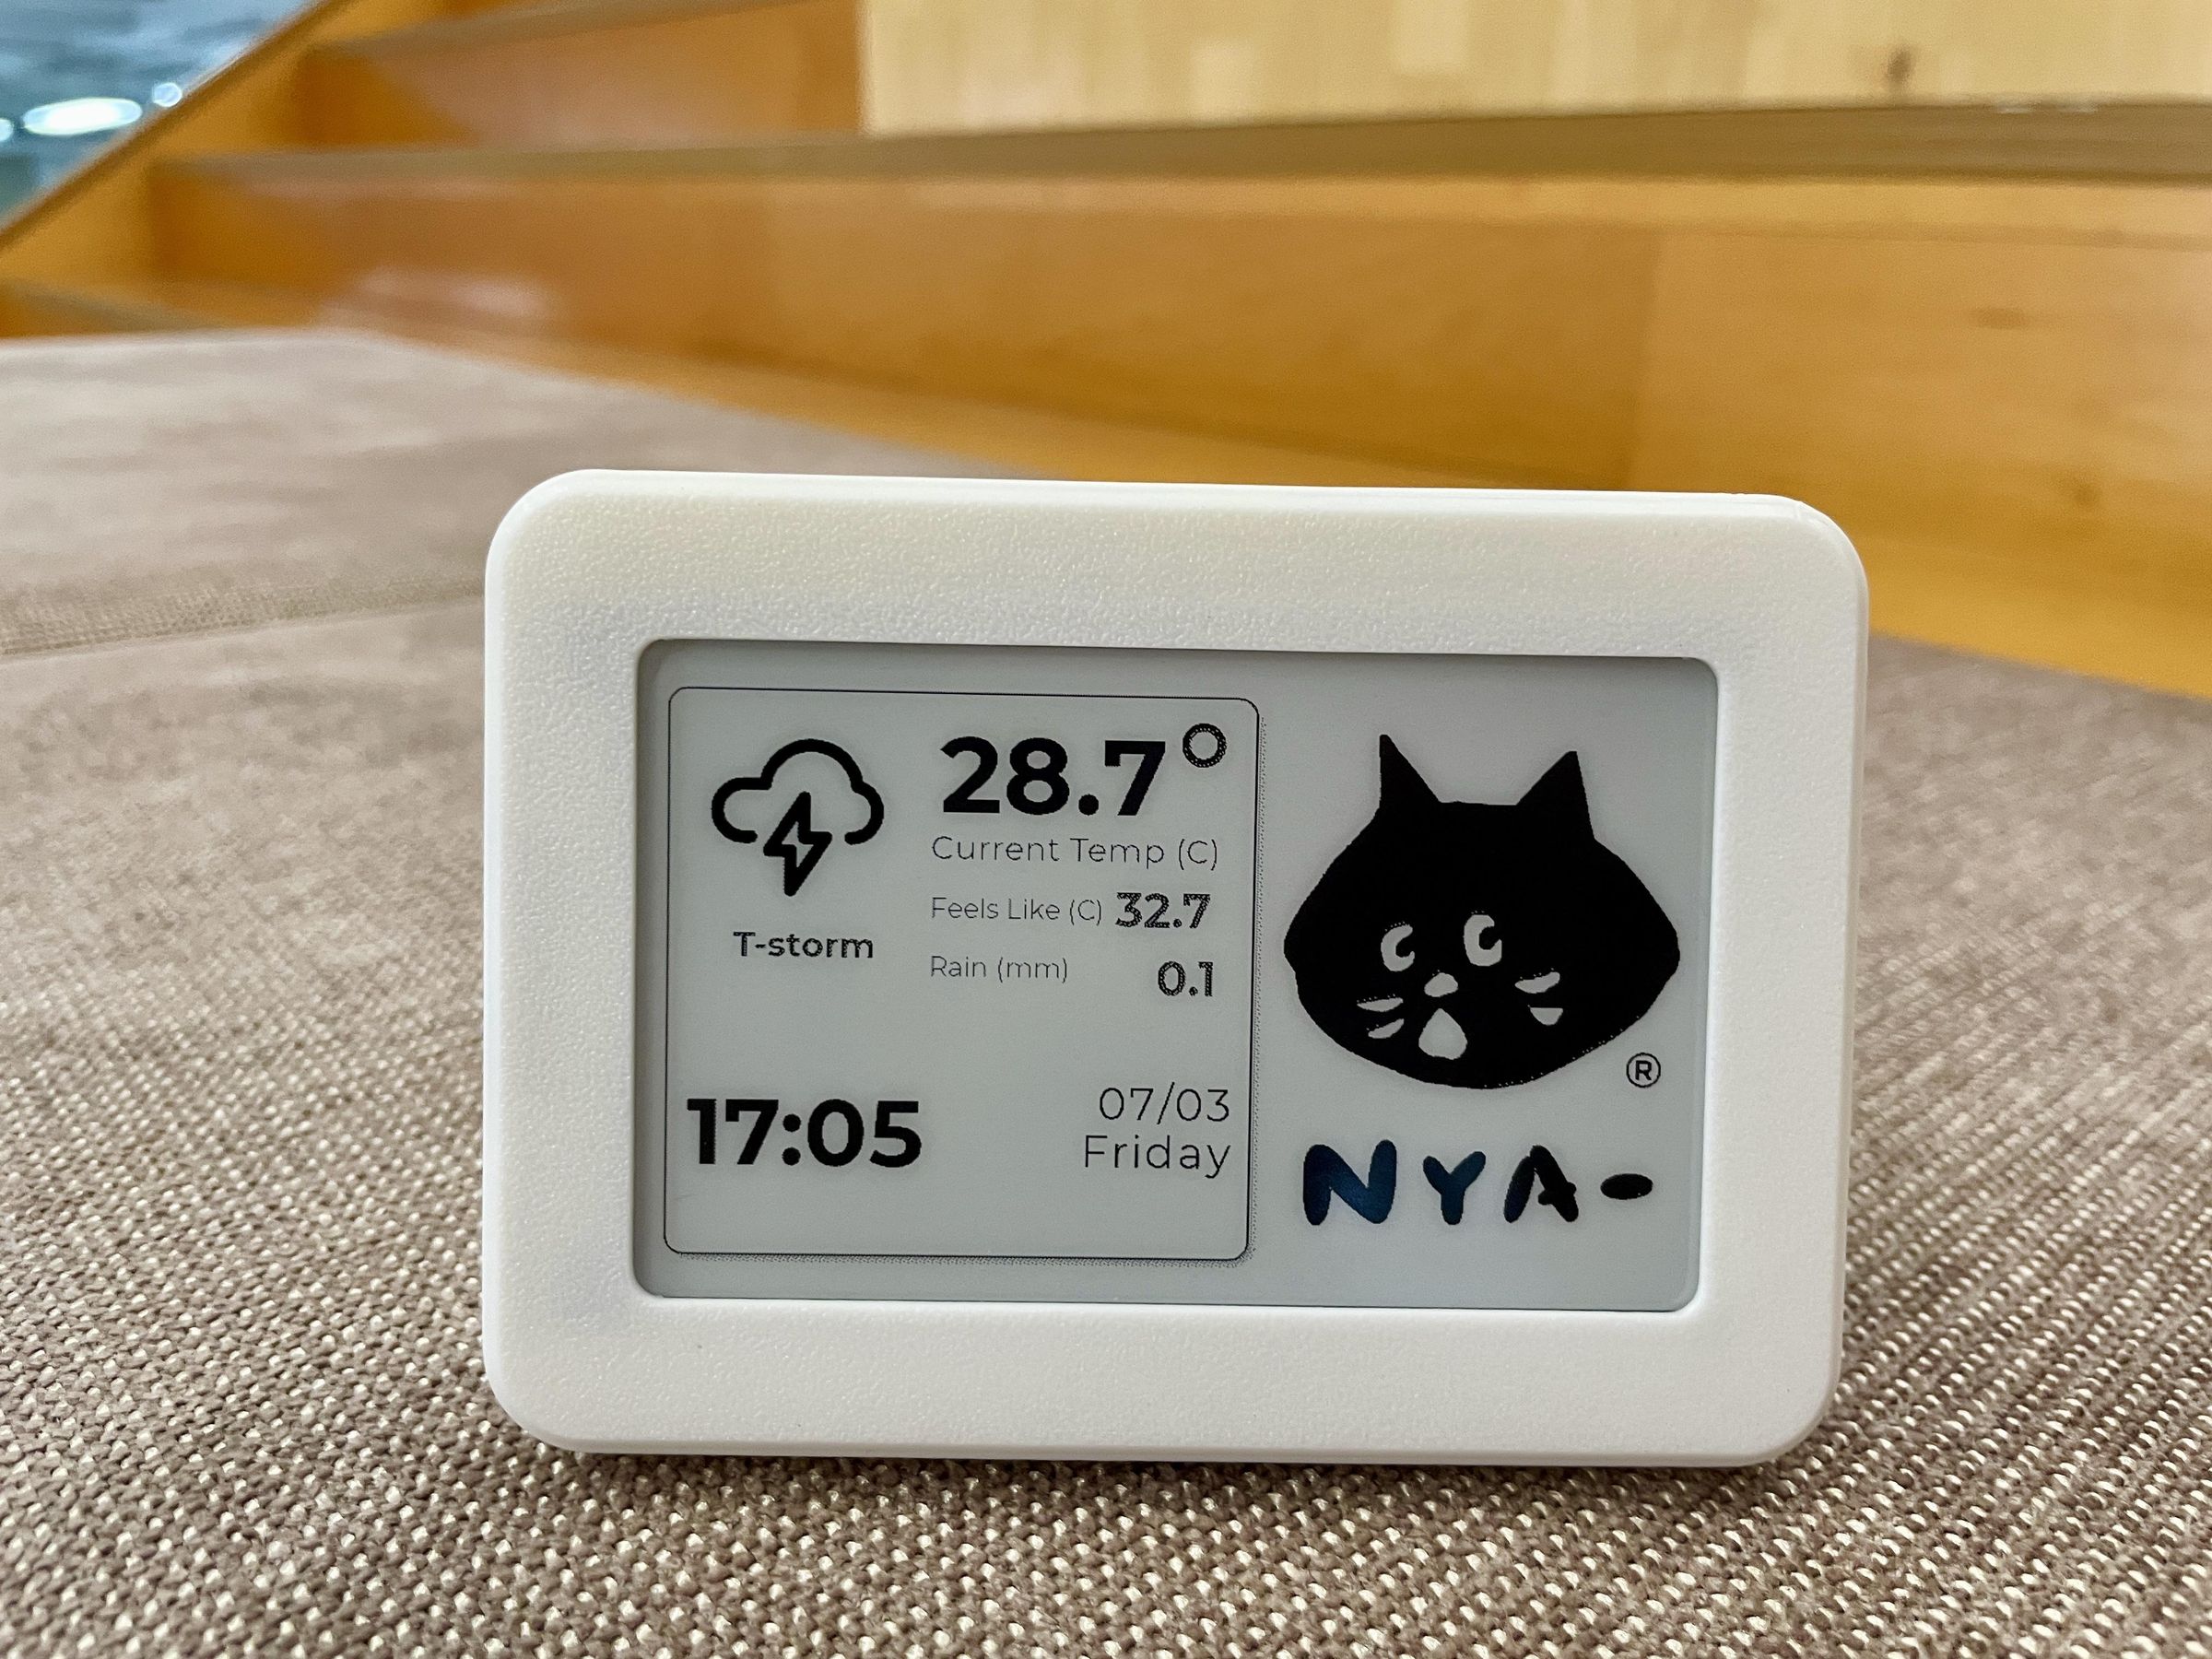
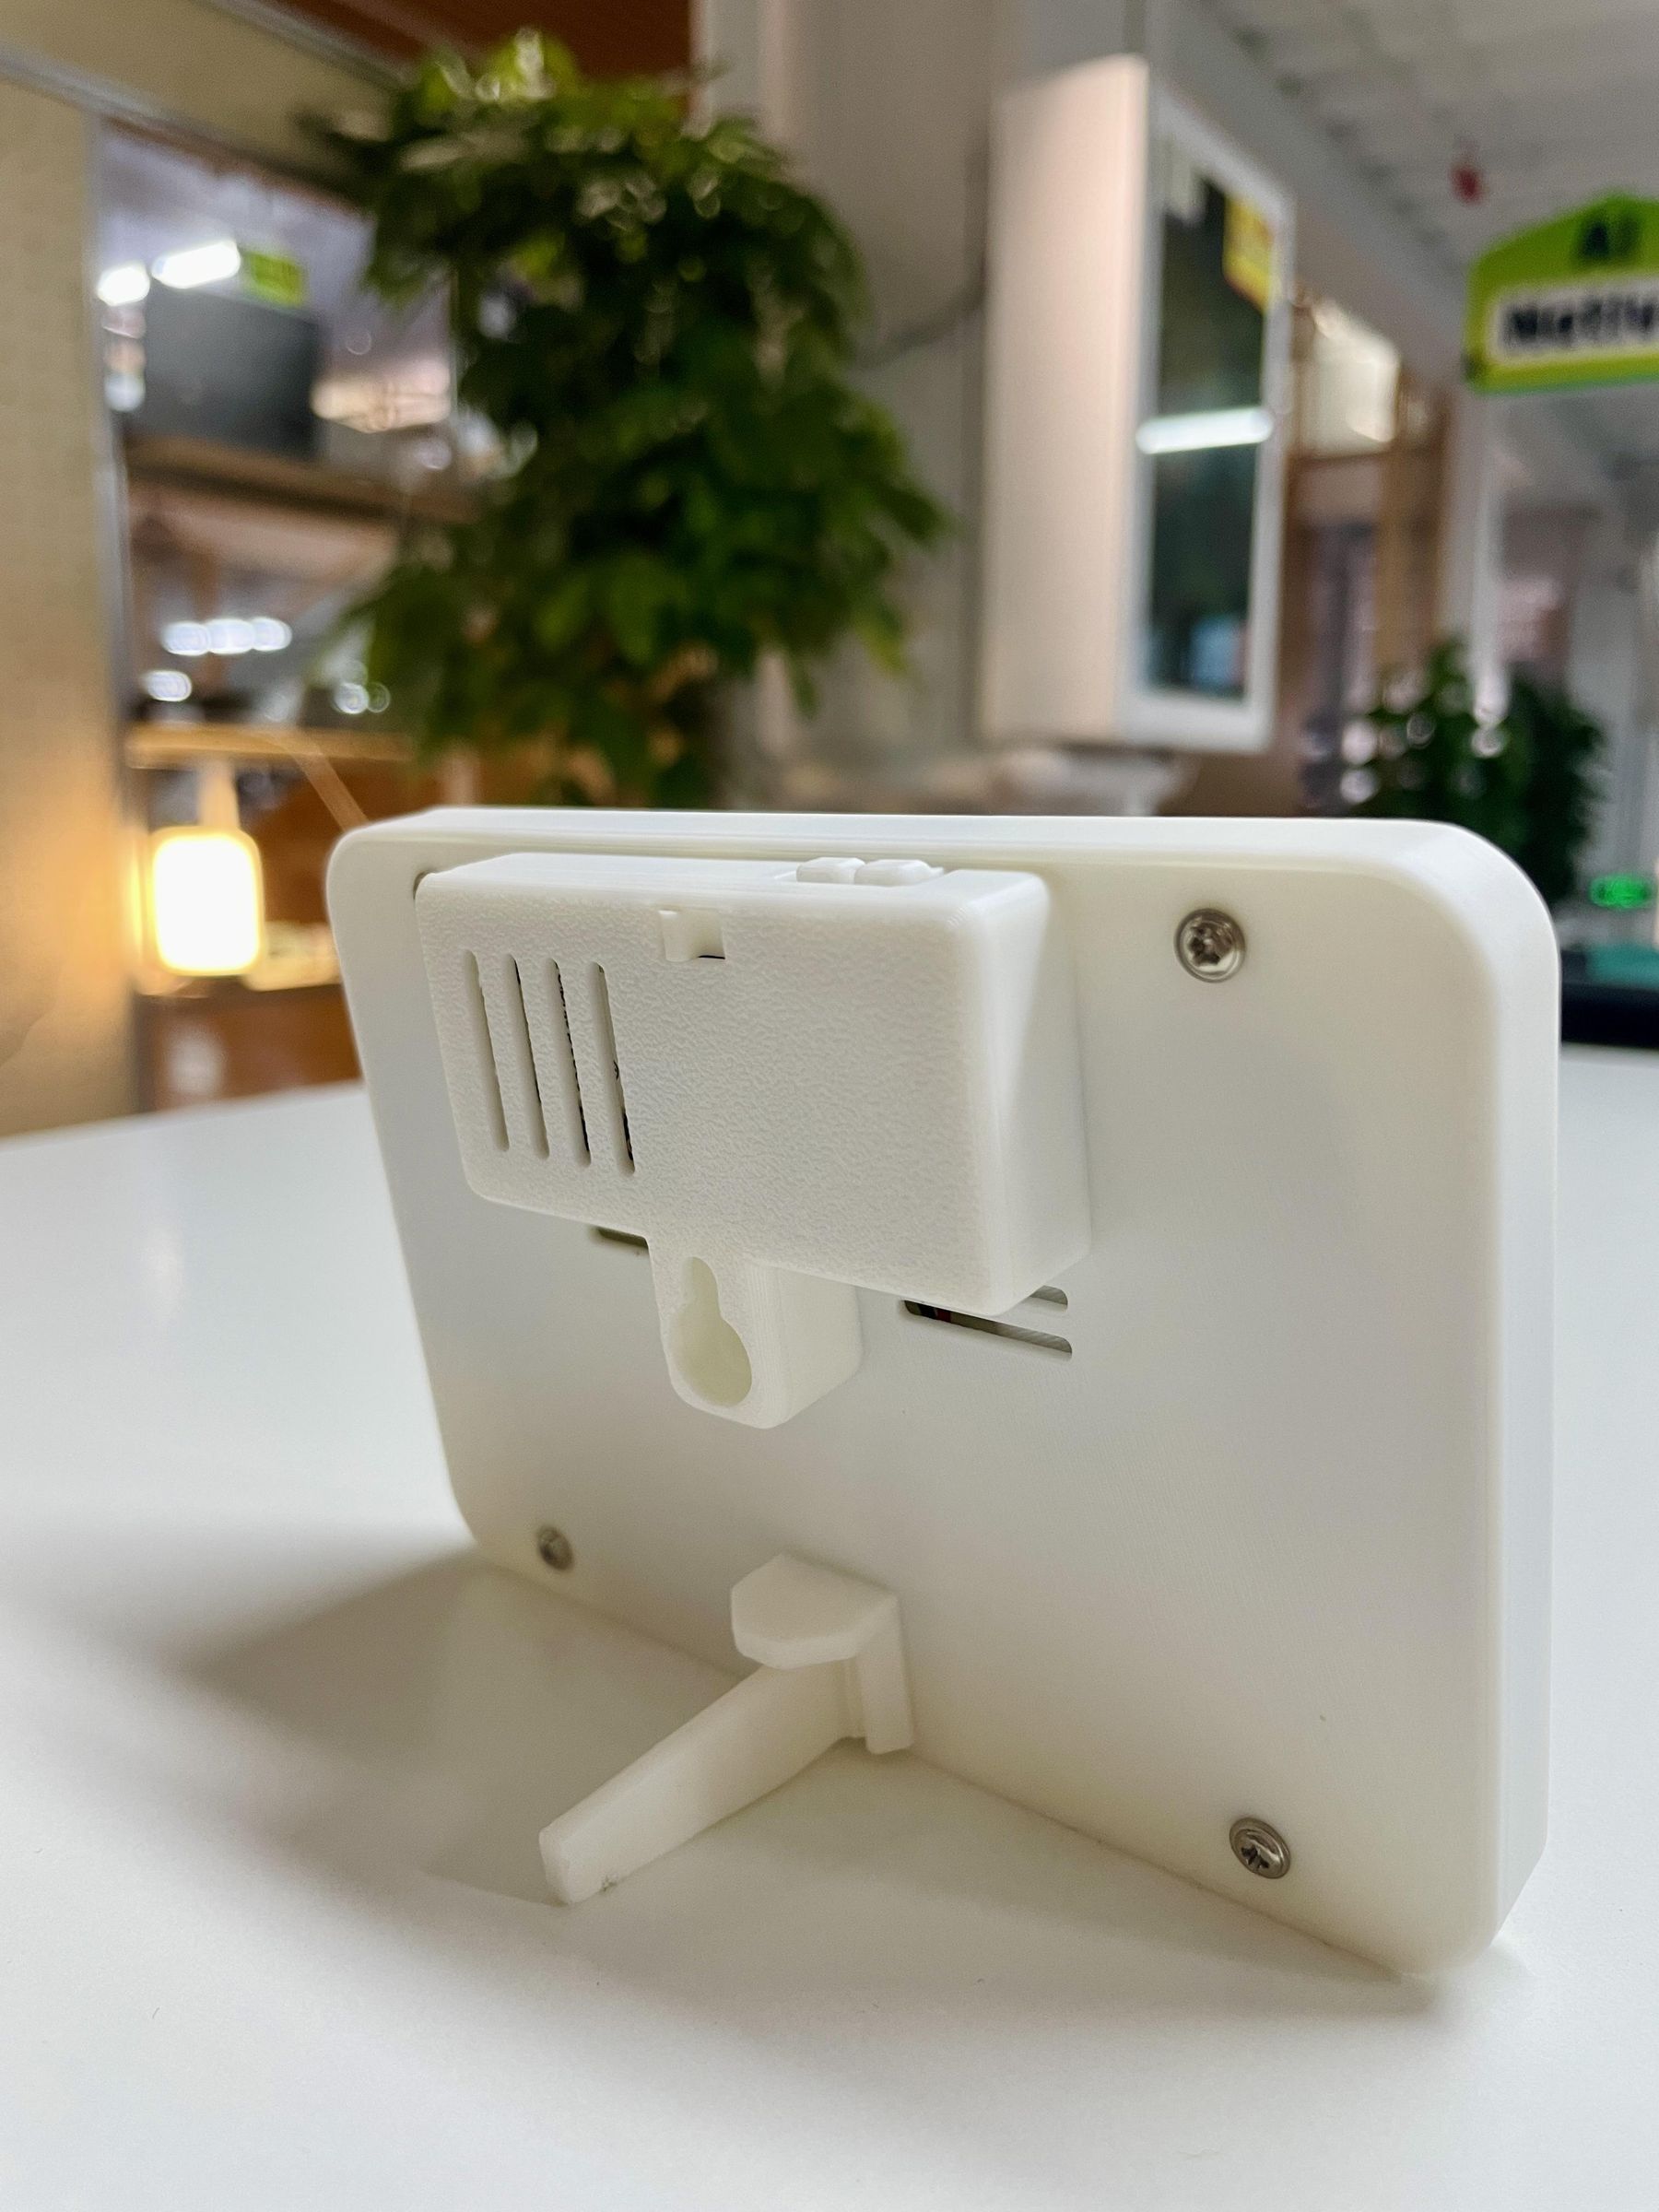
Yes, cats occupy a very special place deep in my heart. So every time I want to add some cuteness to my maker projects, I always turn to include some meow elements. For instance, a 4.26" desktop low‑power e‑paper dashboard display centered around cats:
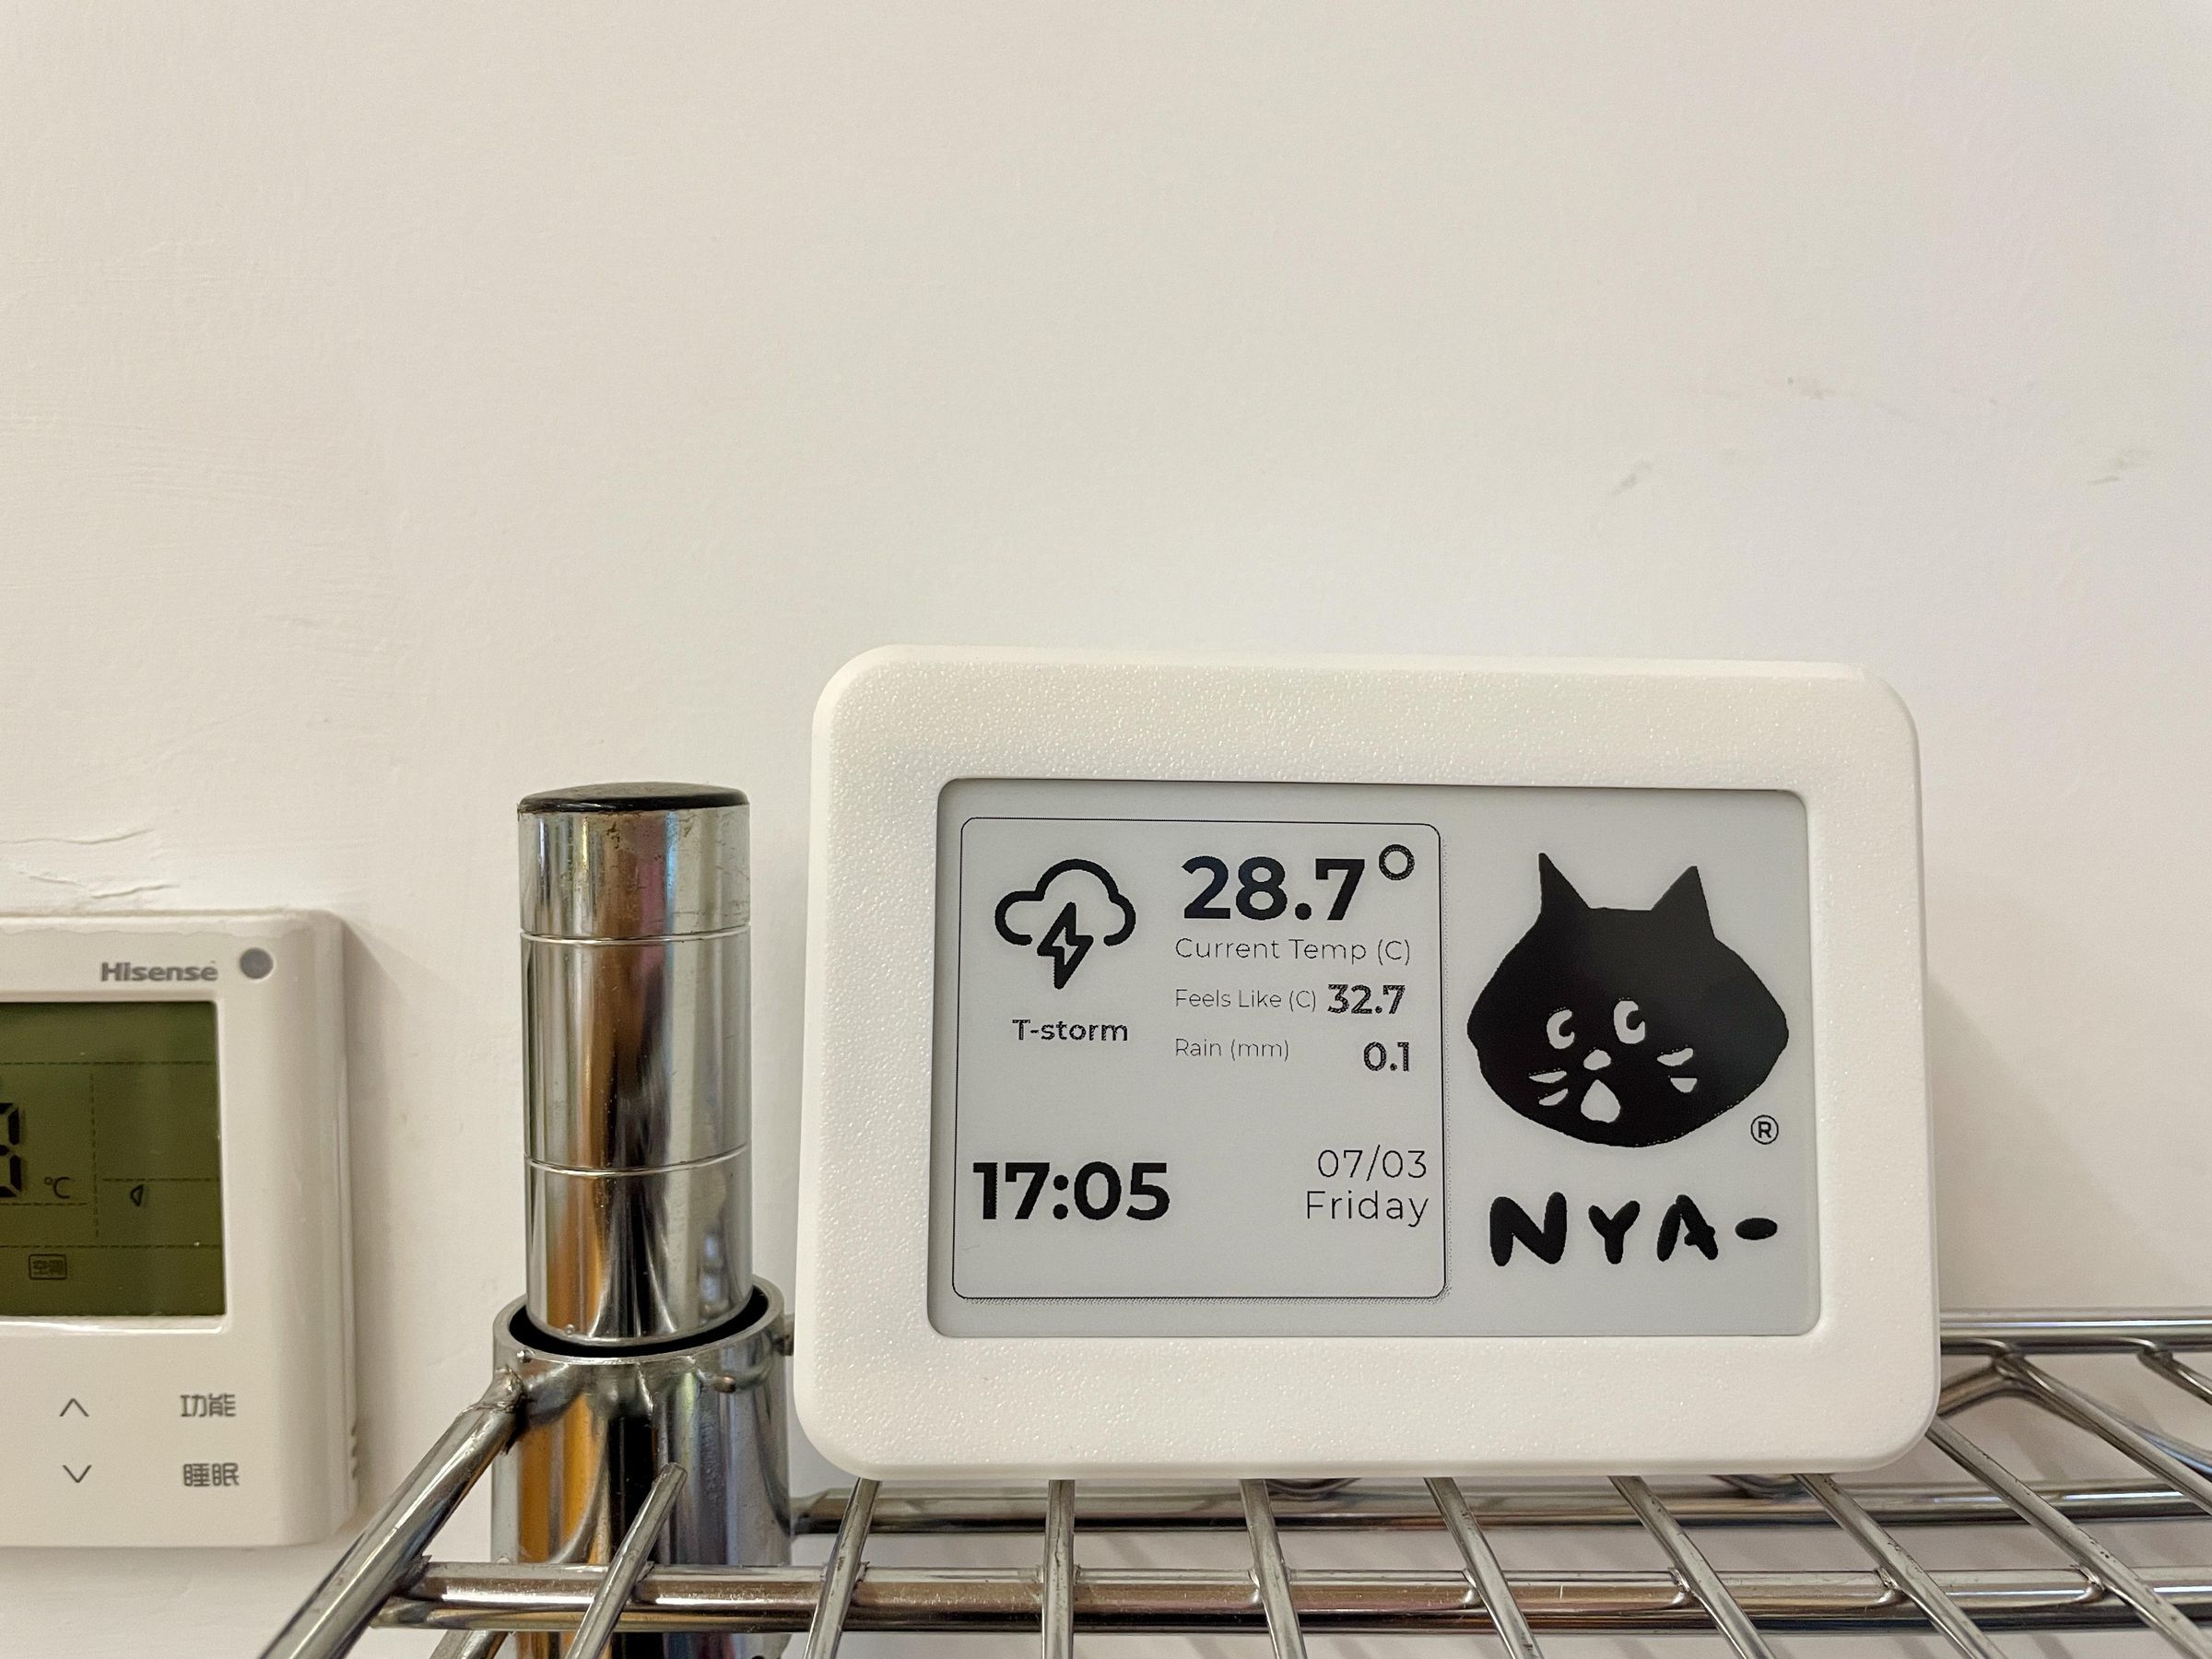
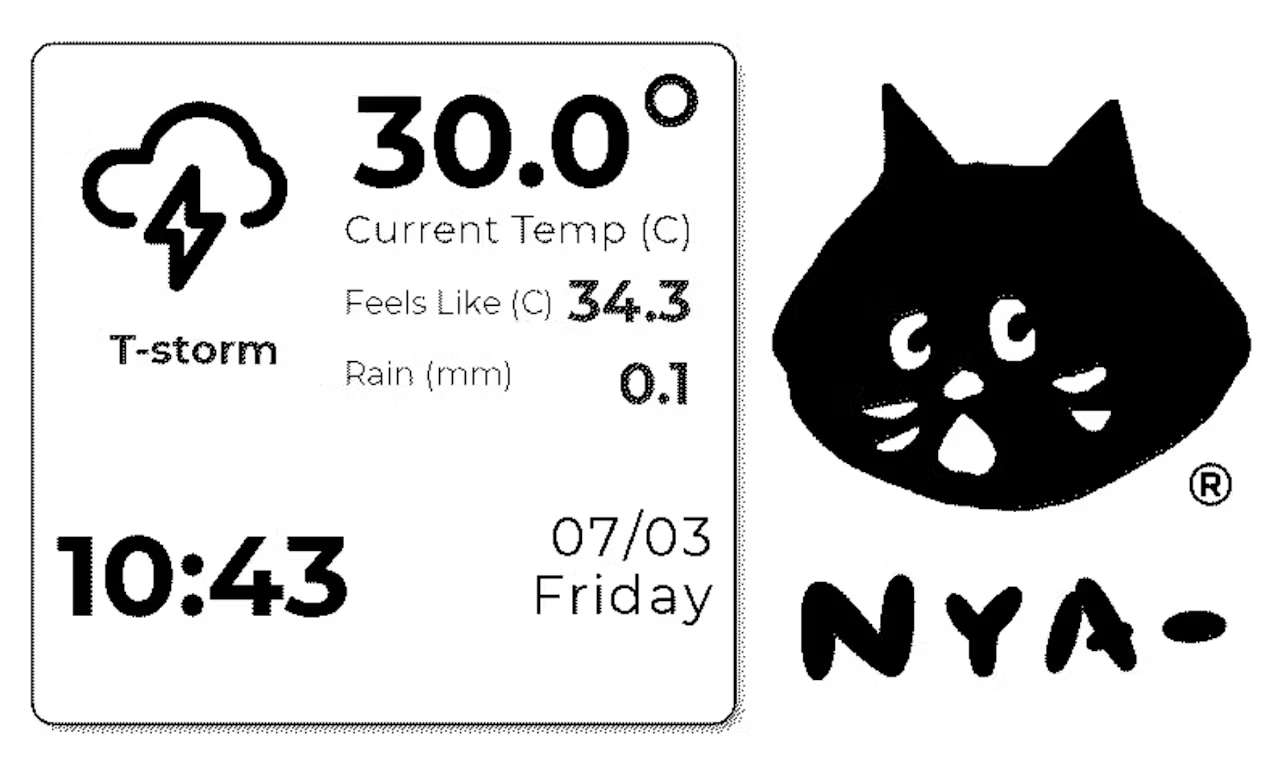
- A NYA‑Cat weather station showing the current temperature and apparent temperature, rain precipitation, current time, date, and day.
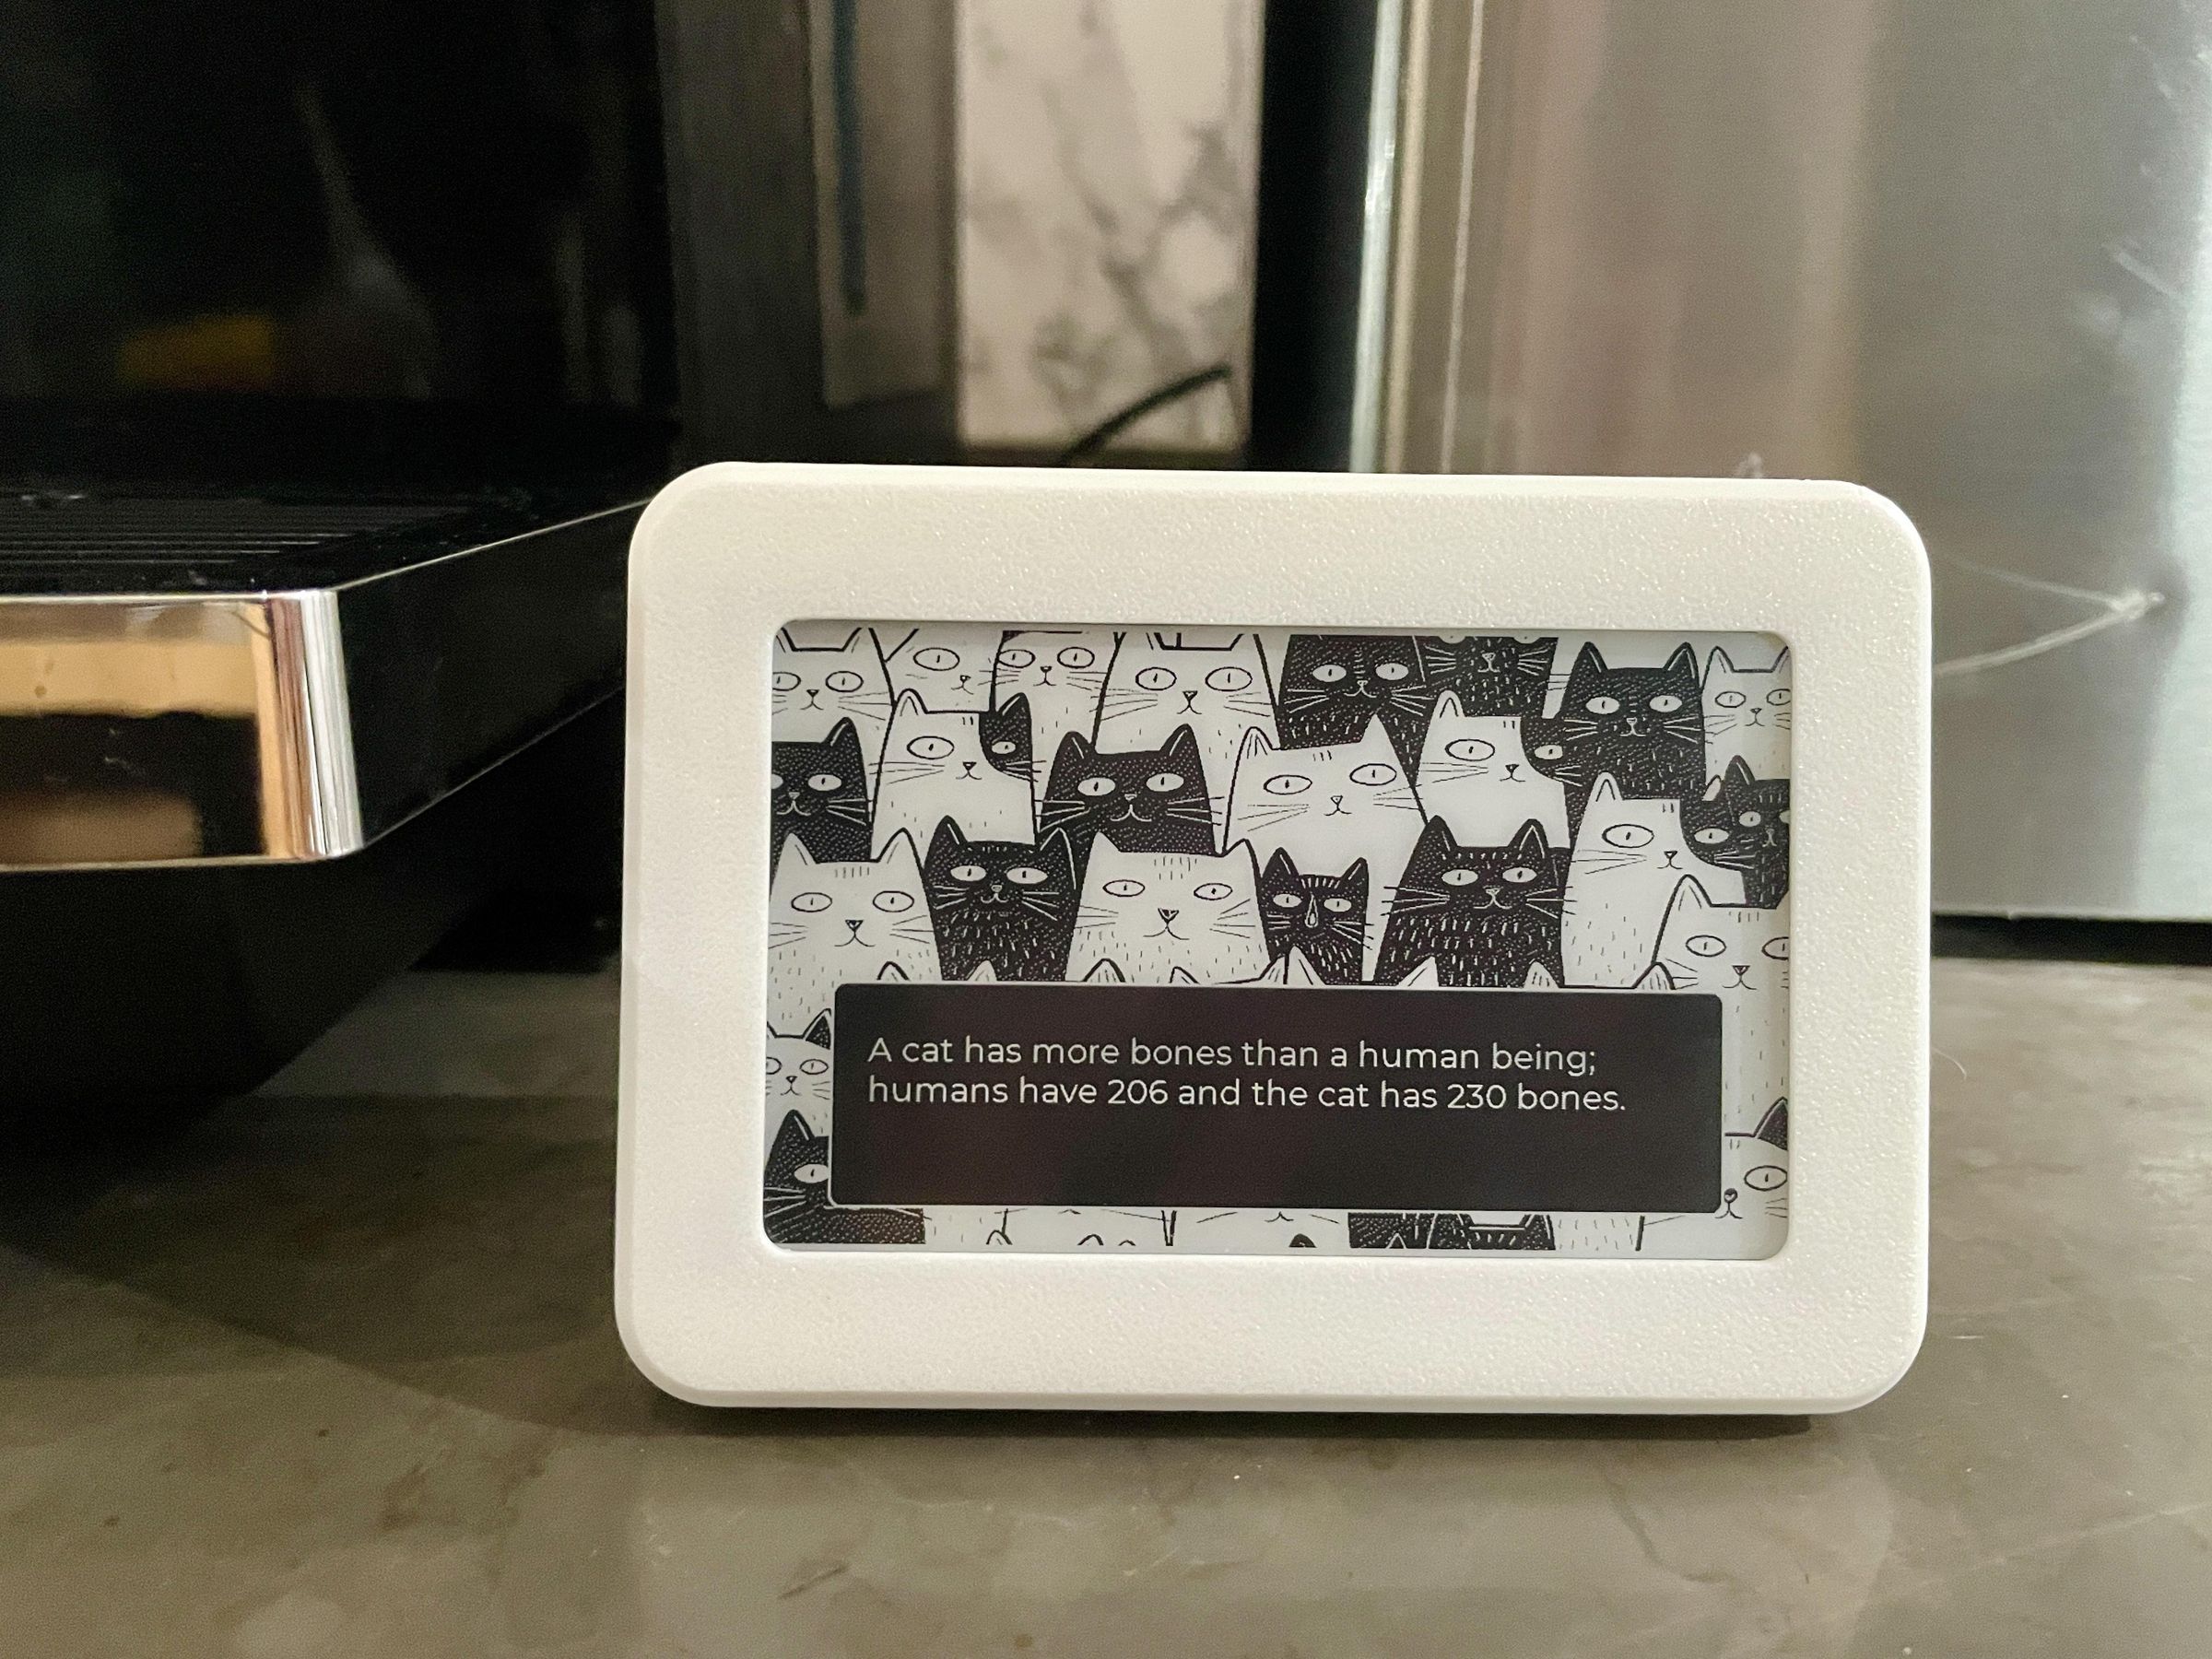
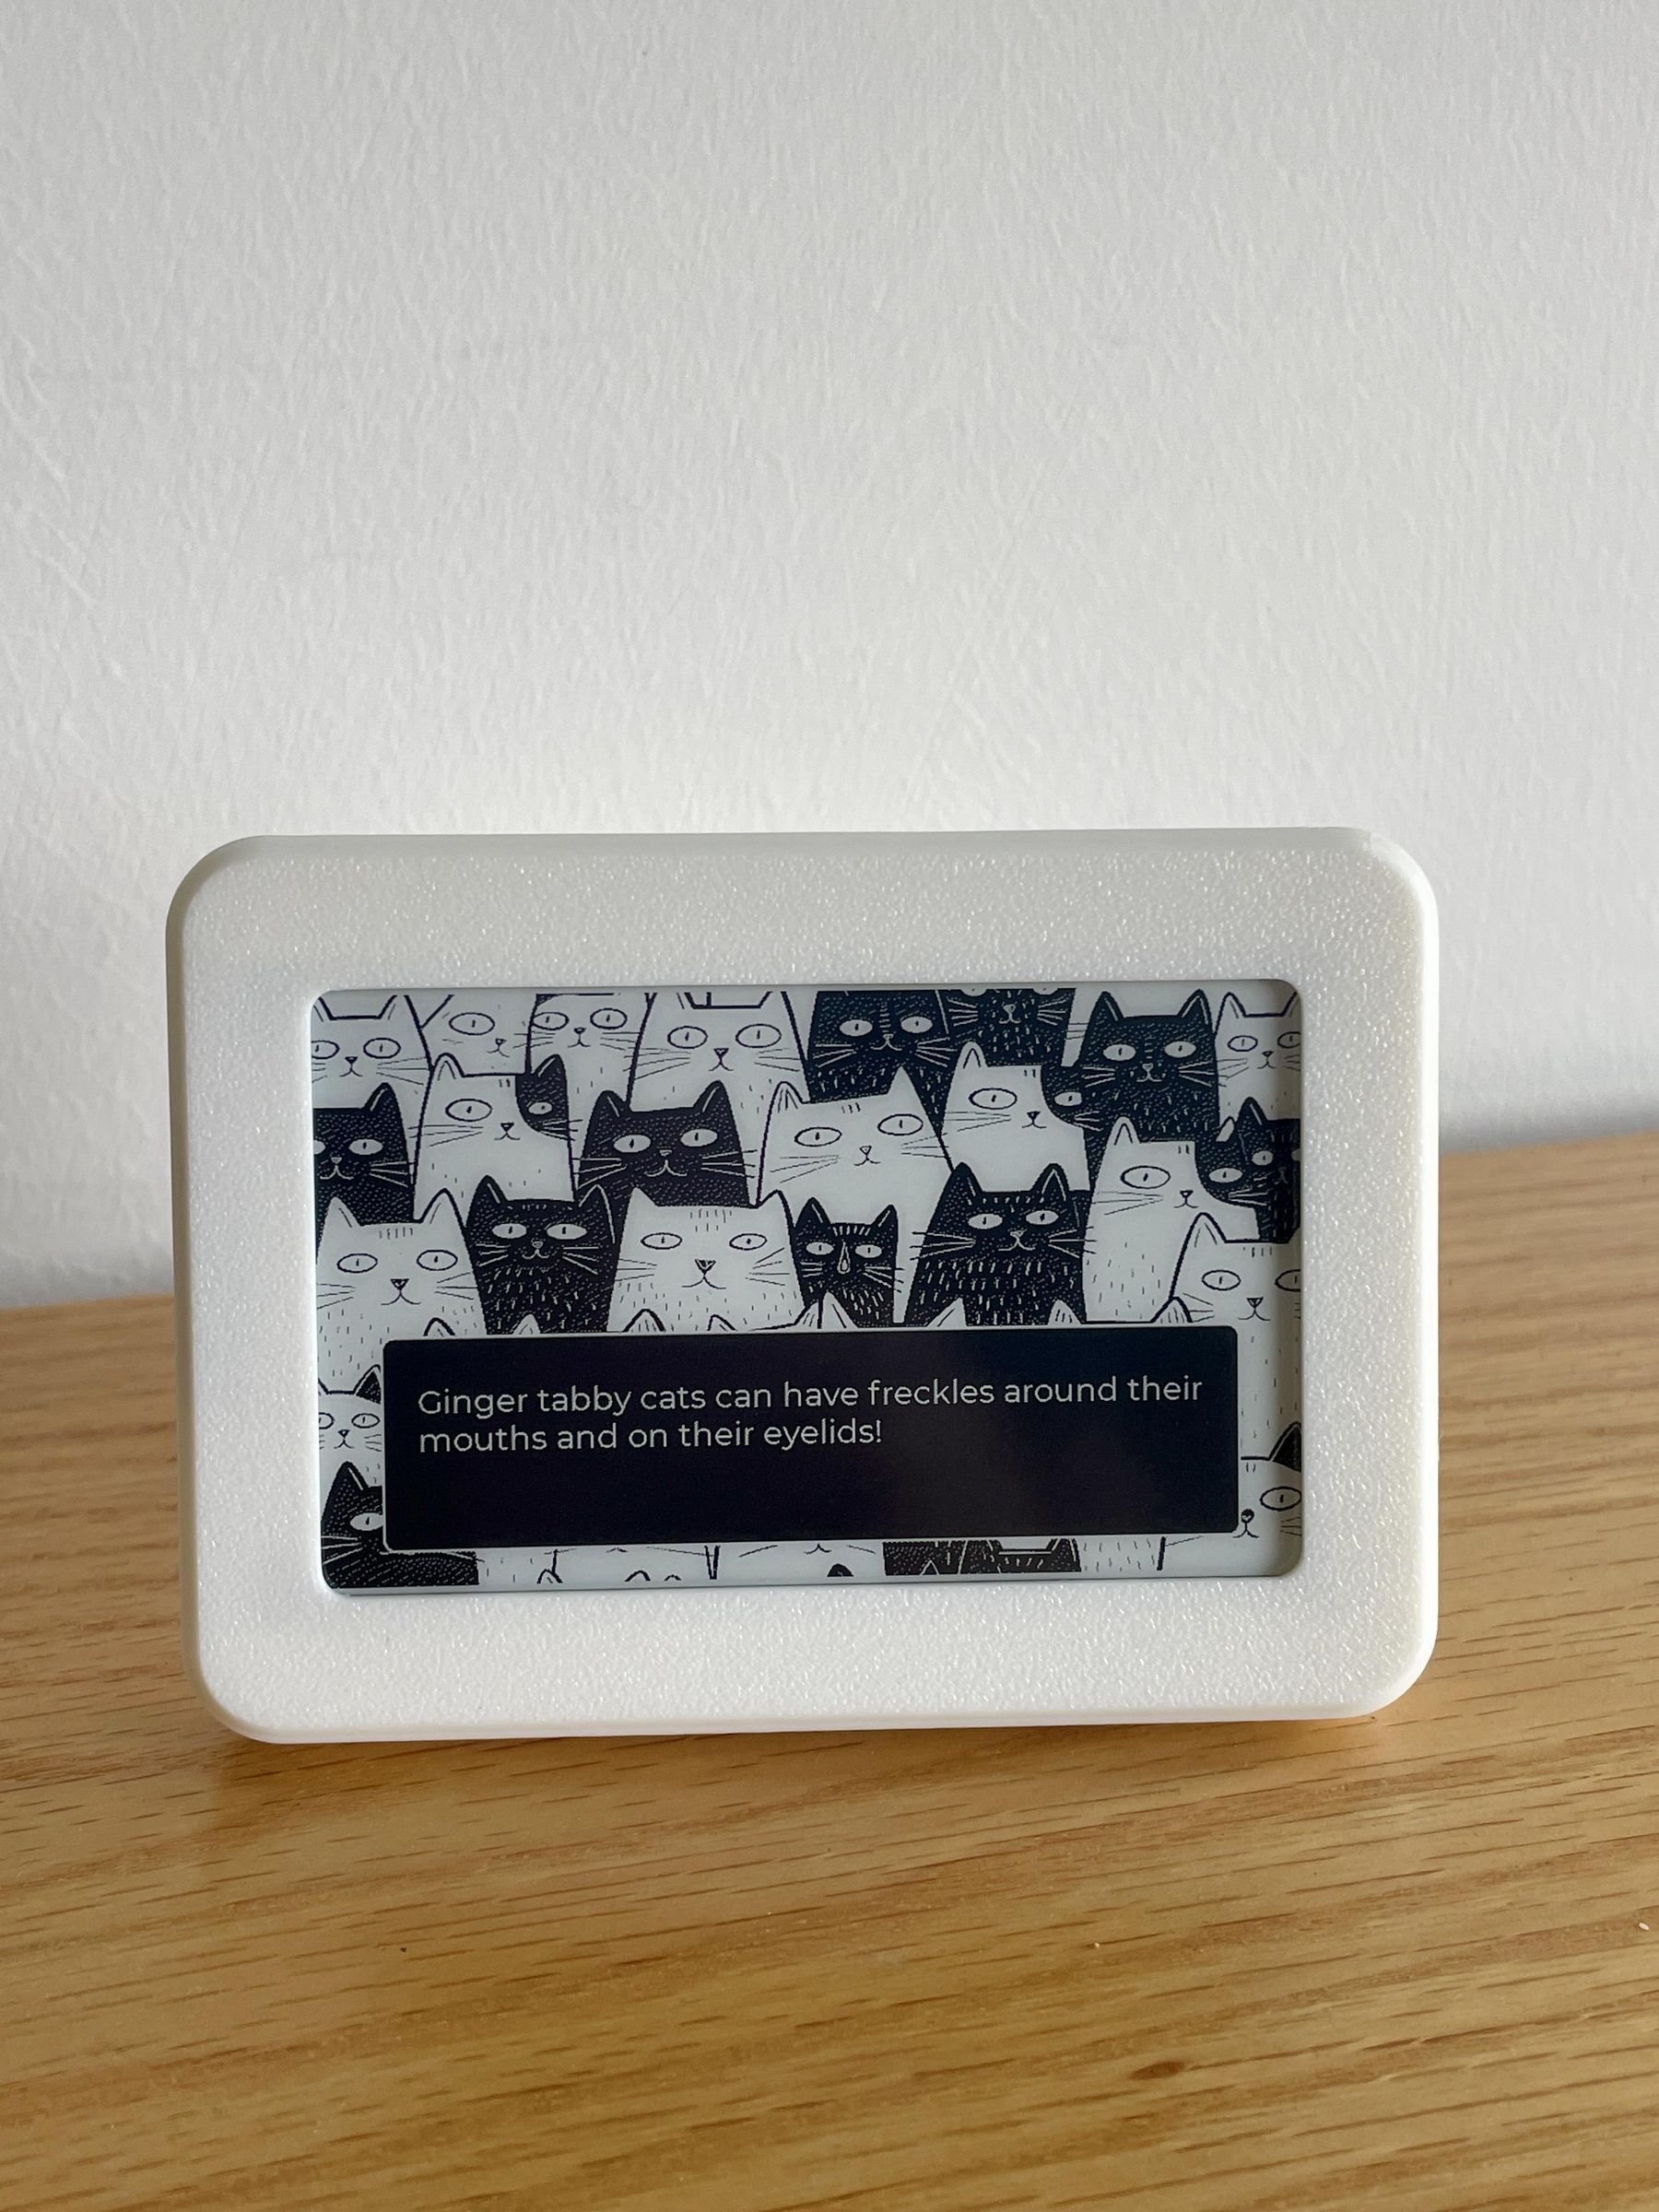
- A daily cat fact.
- A monthly calendar showcasing the current date — which I named Catlendar (and I’m proud of this pun 😸).
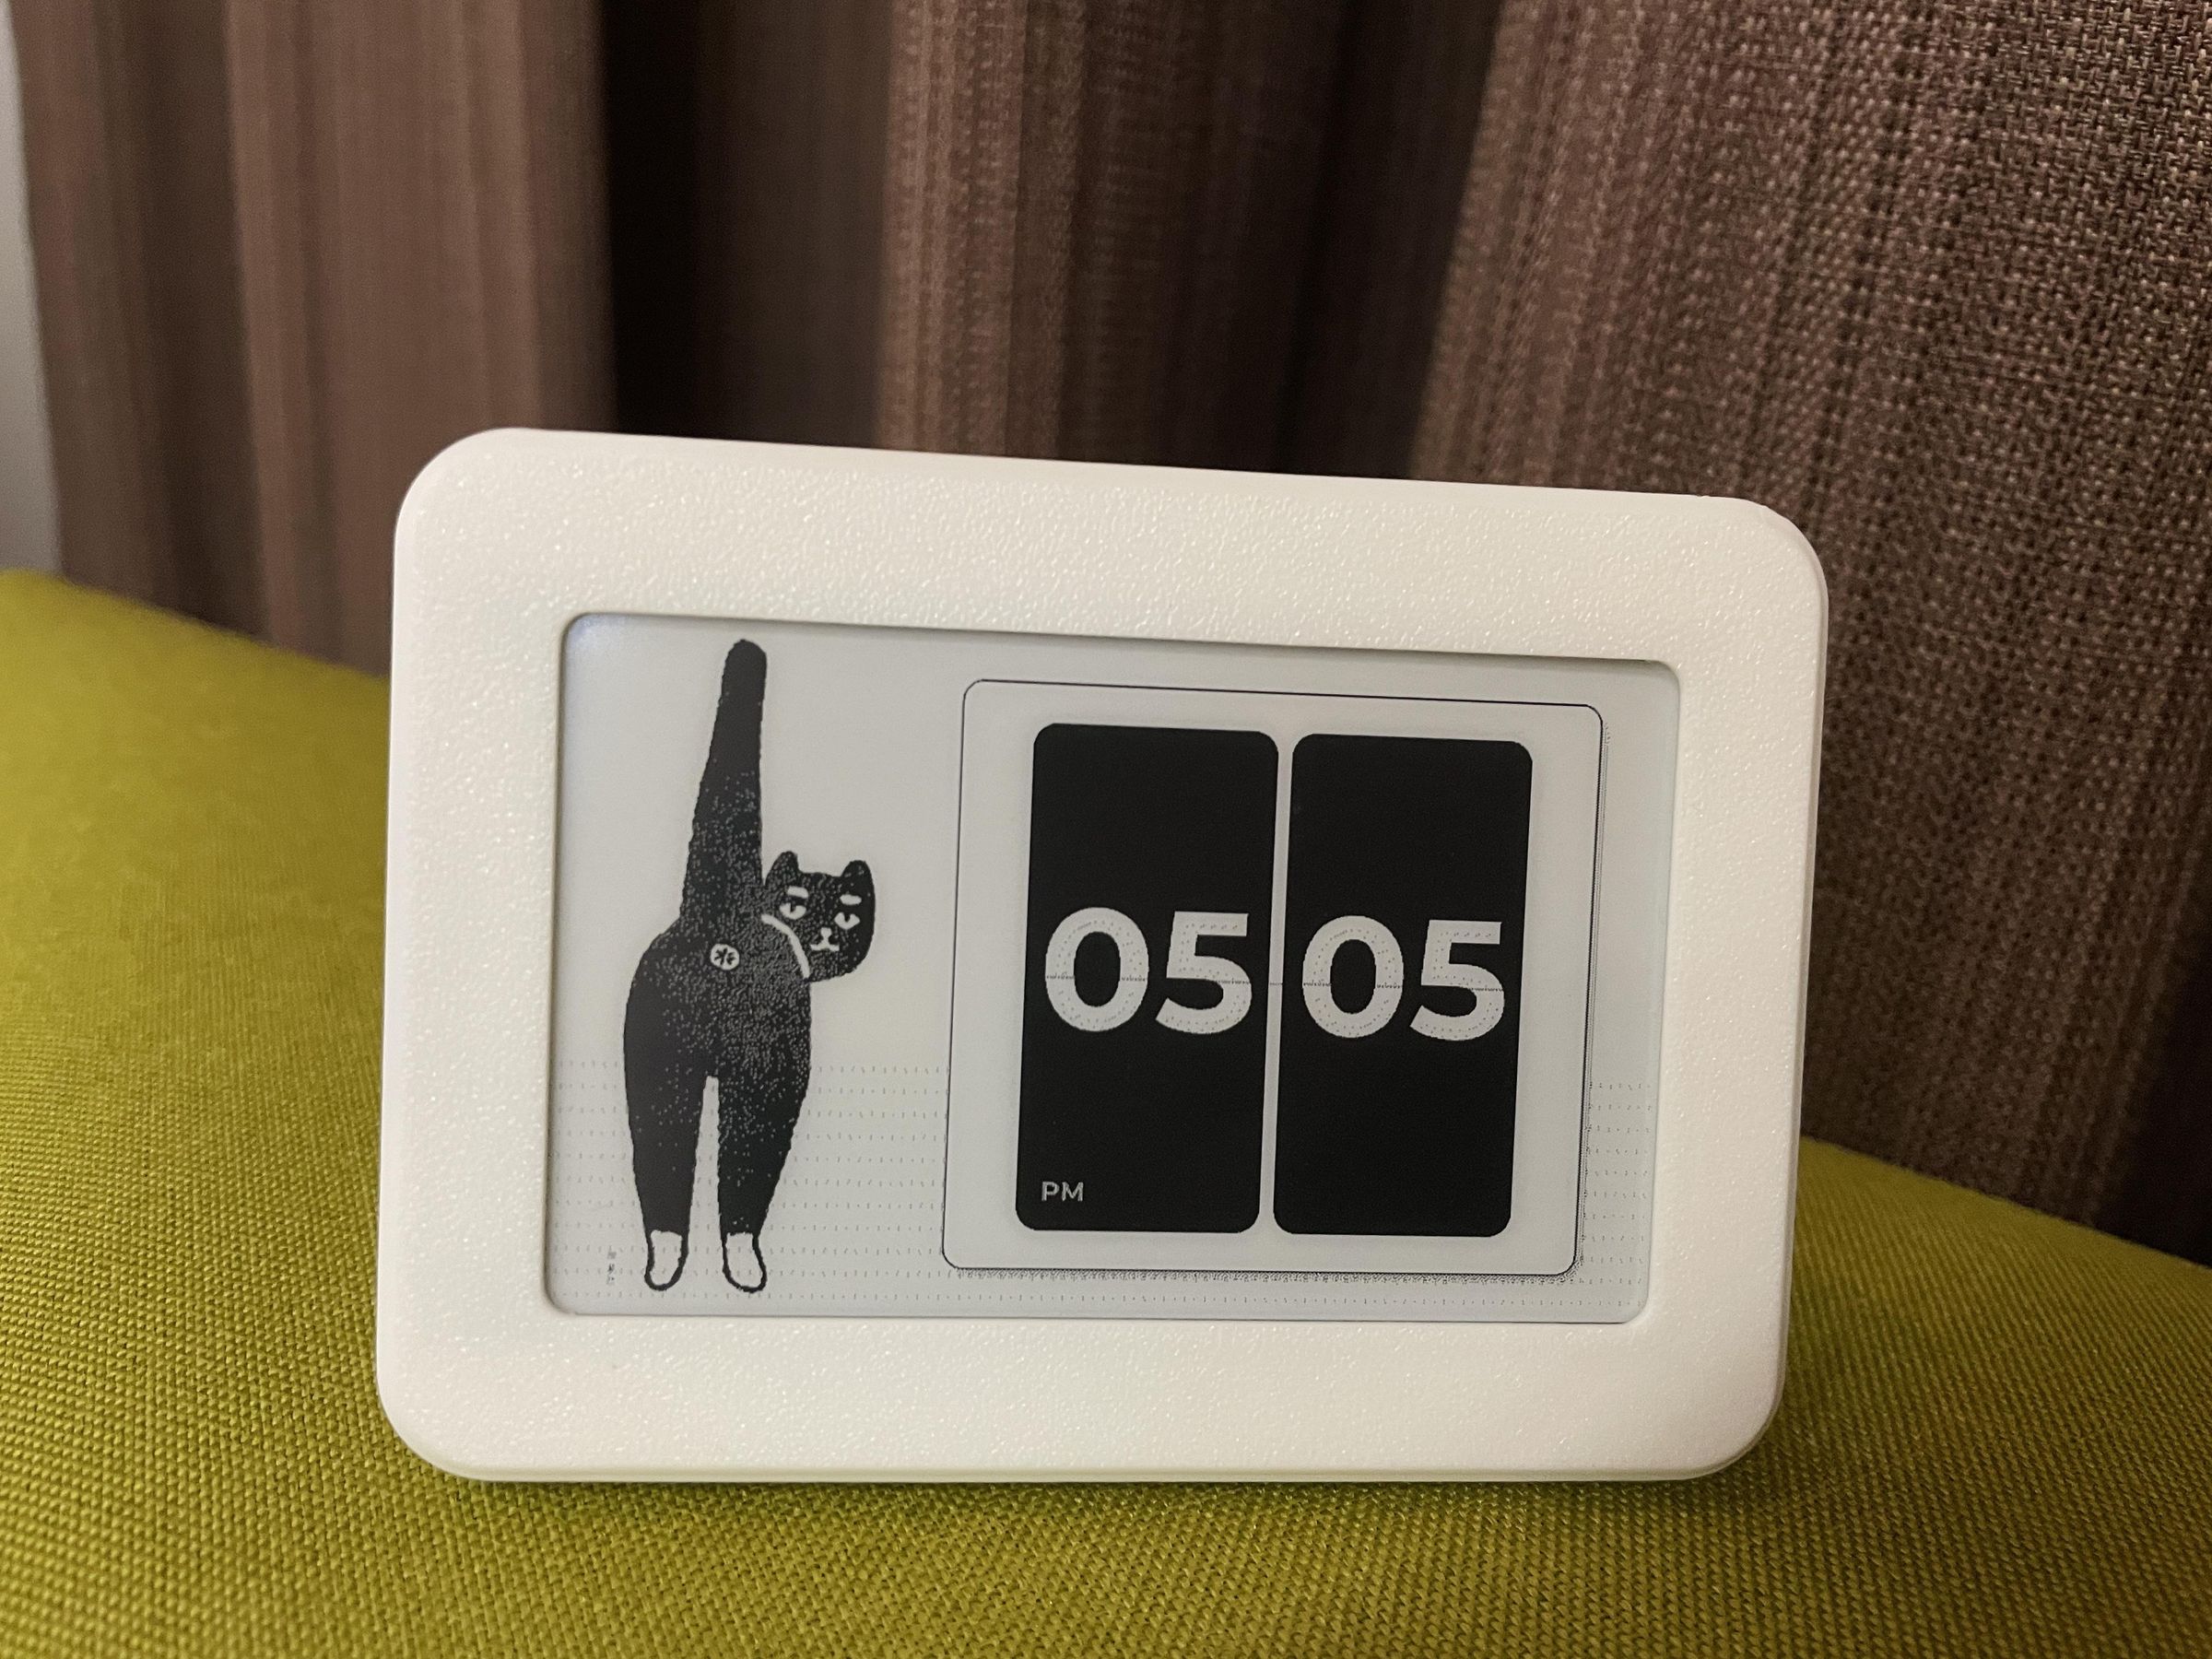
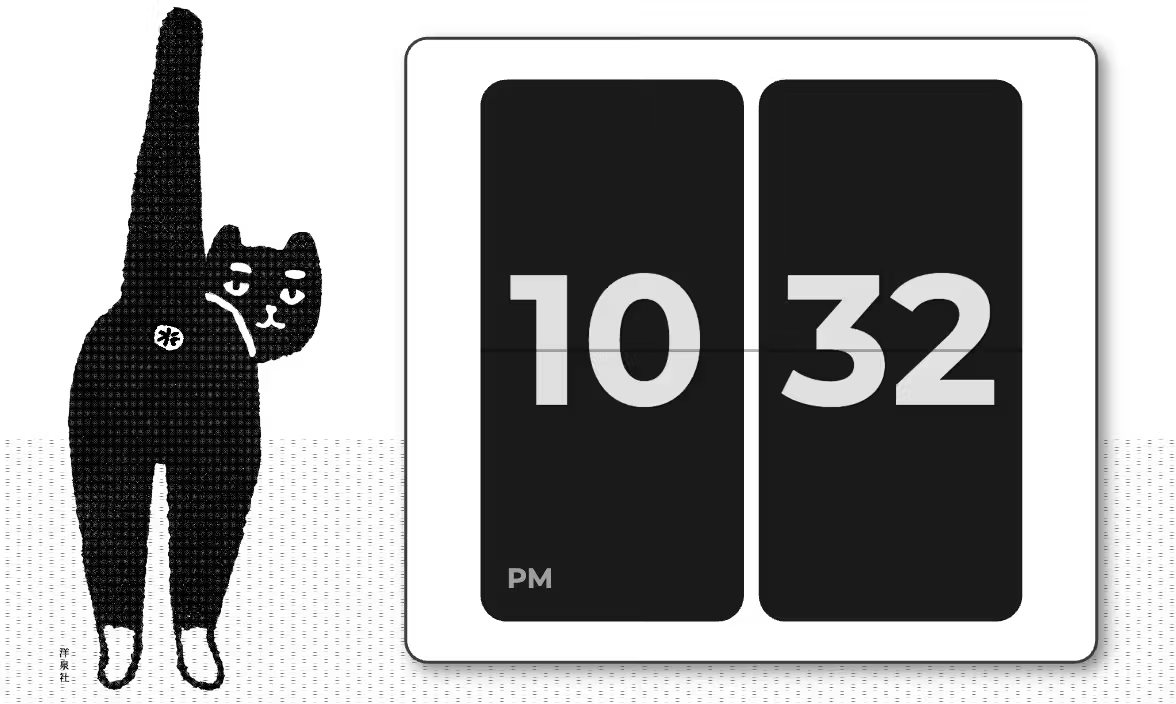
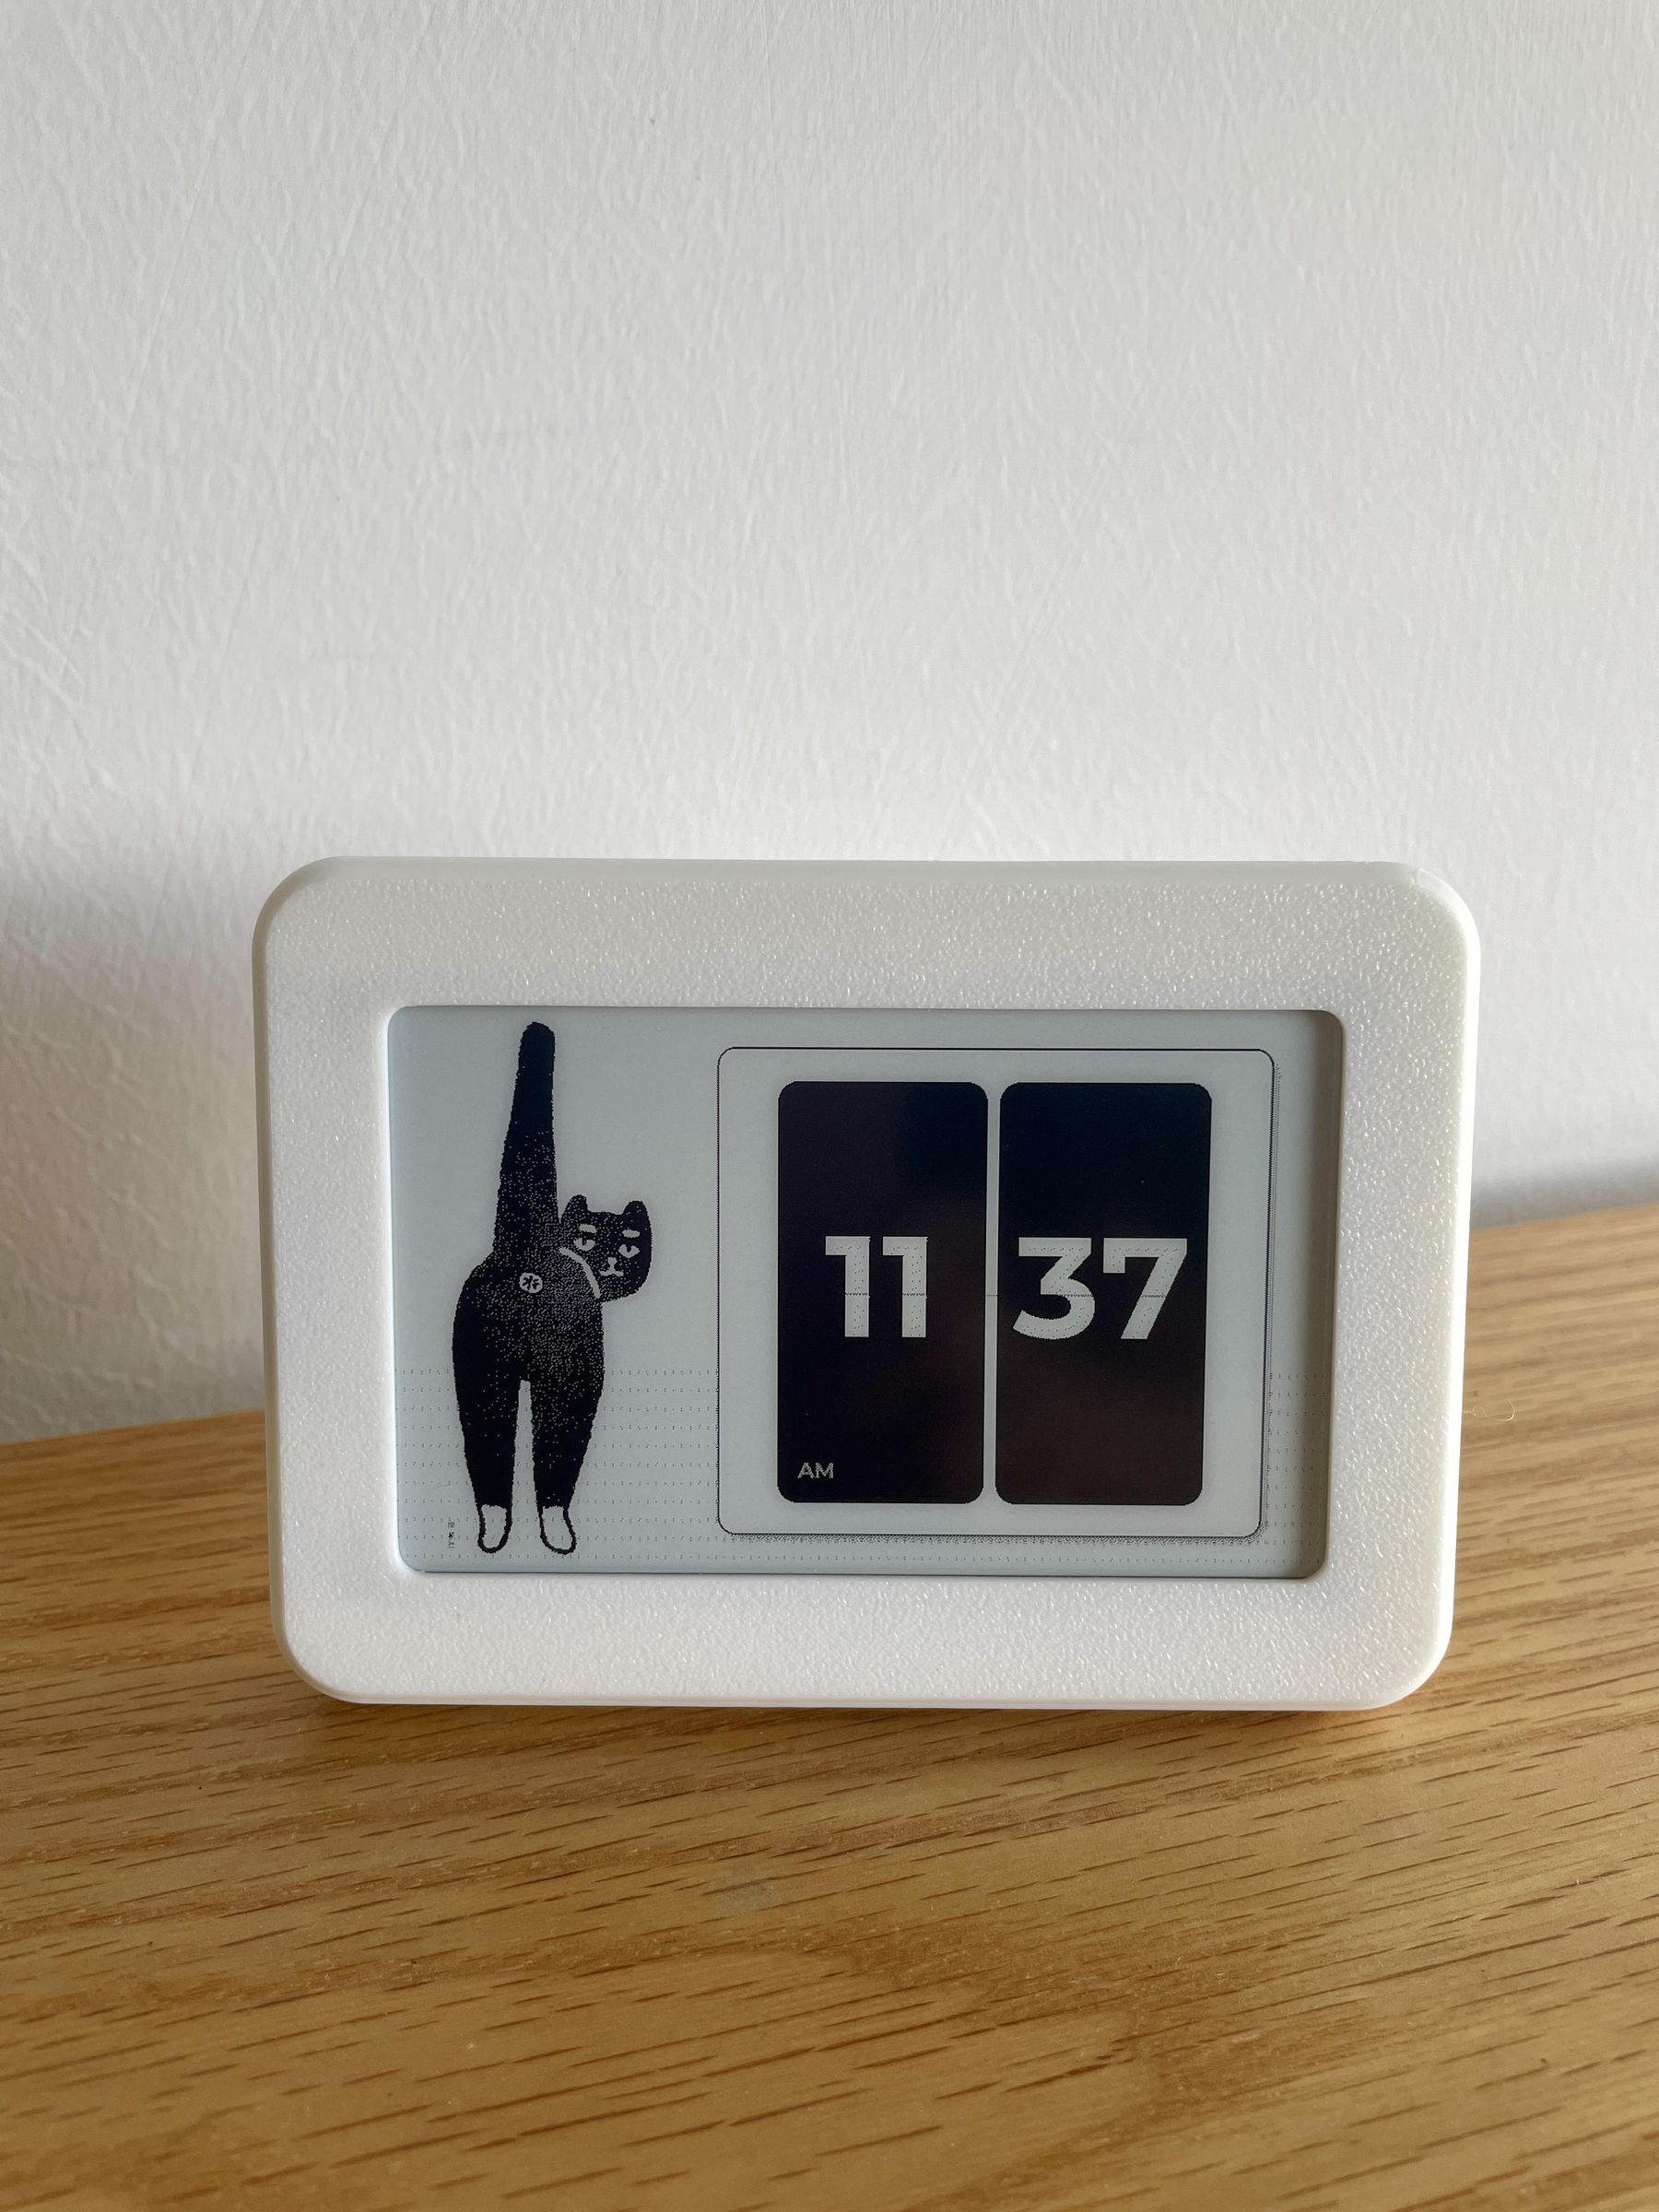
- A lucky cat flip clock showing the real‑time.
All these together as a slideshow, which I set to update every 5 minutes. At the same time, you can press the button to manually switch between the four designs. It’s now a minimalist little desktop gadget, Cattt, that makes me smile every time I glance at it. Don’t believe it? Watch the demo video attached here.
Wanna find out how I built this? Read along. Spoiler: NO CODE at all — and literally anyone can follow along to make their own custom version too. I promise.
Supplies
What You Need to Prepare Before Hands-on
Hardware List
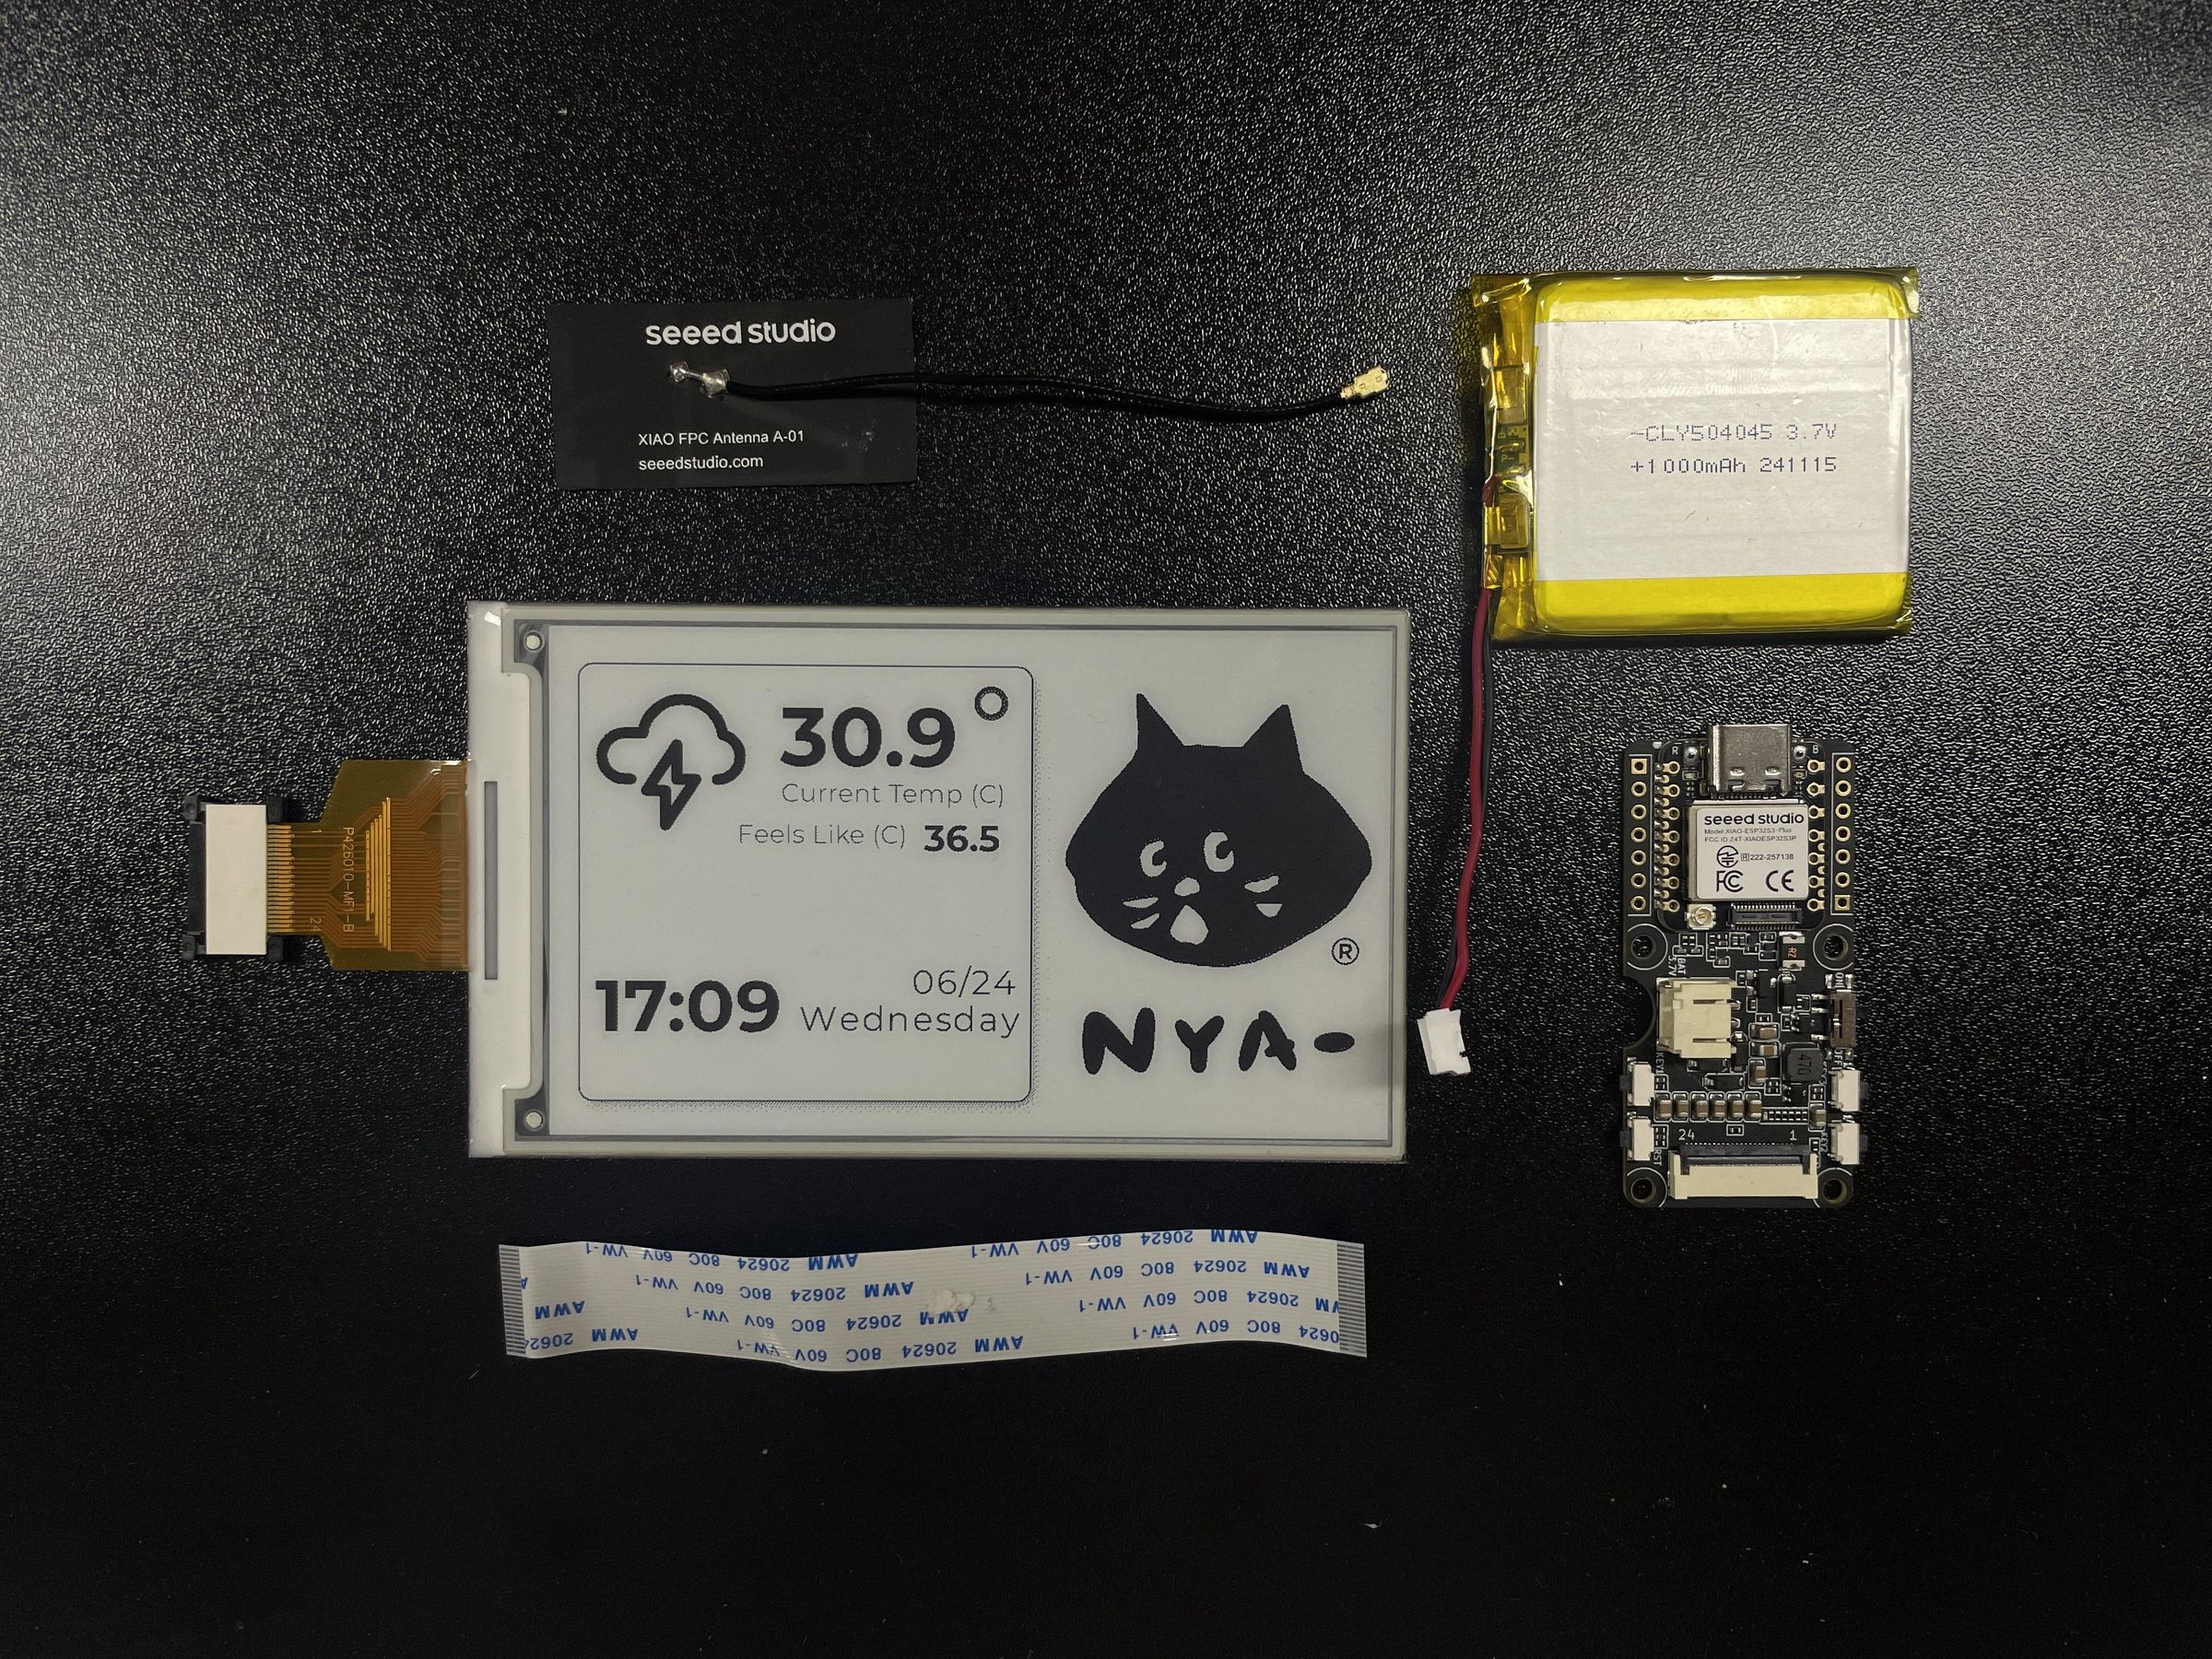
- Seeed Studio XIAO EE05 ePaper Dev Board (comes with a XIAO ESP32-S3 soldered on) - $9.9
- Seeed Studio 4.26'' Monochrome ePaper Display - $24.9
- 2000mAh Battery with JST 2.0mm connector
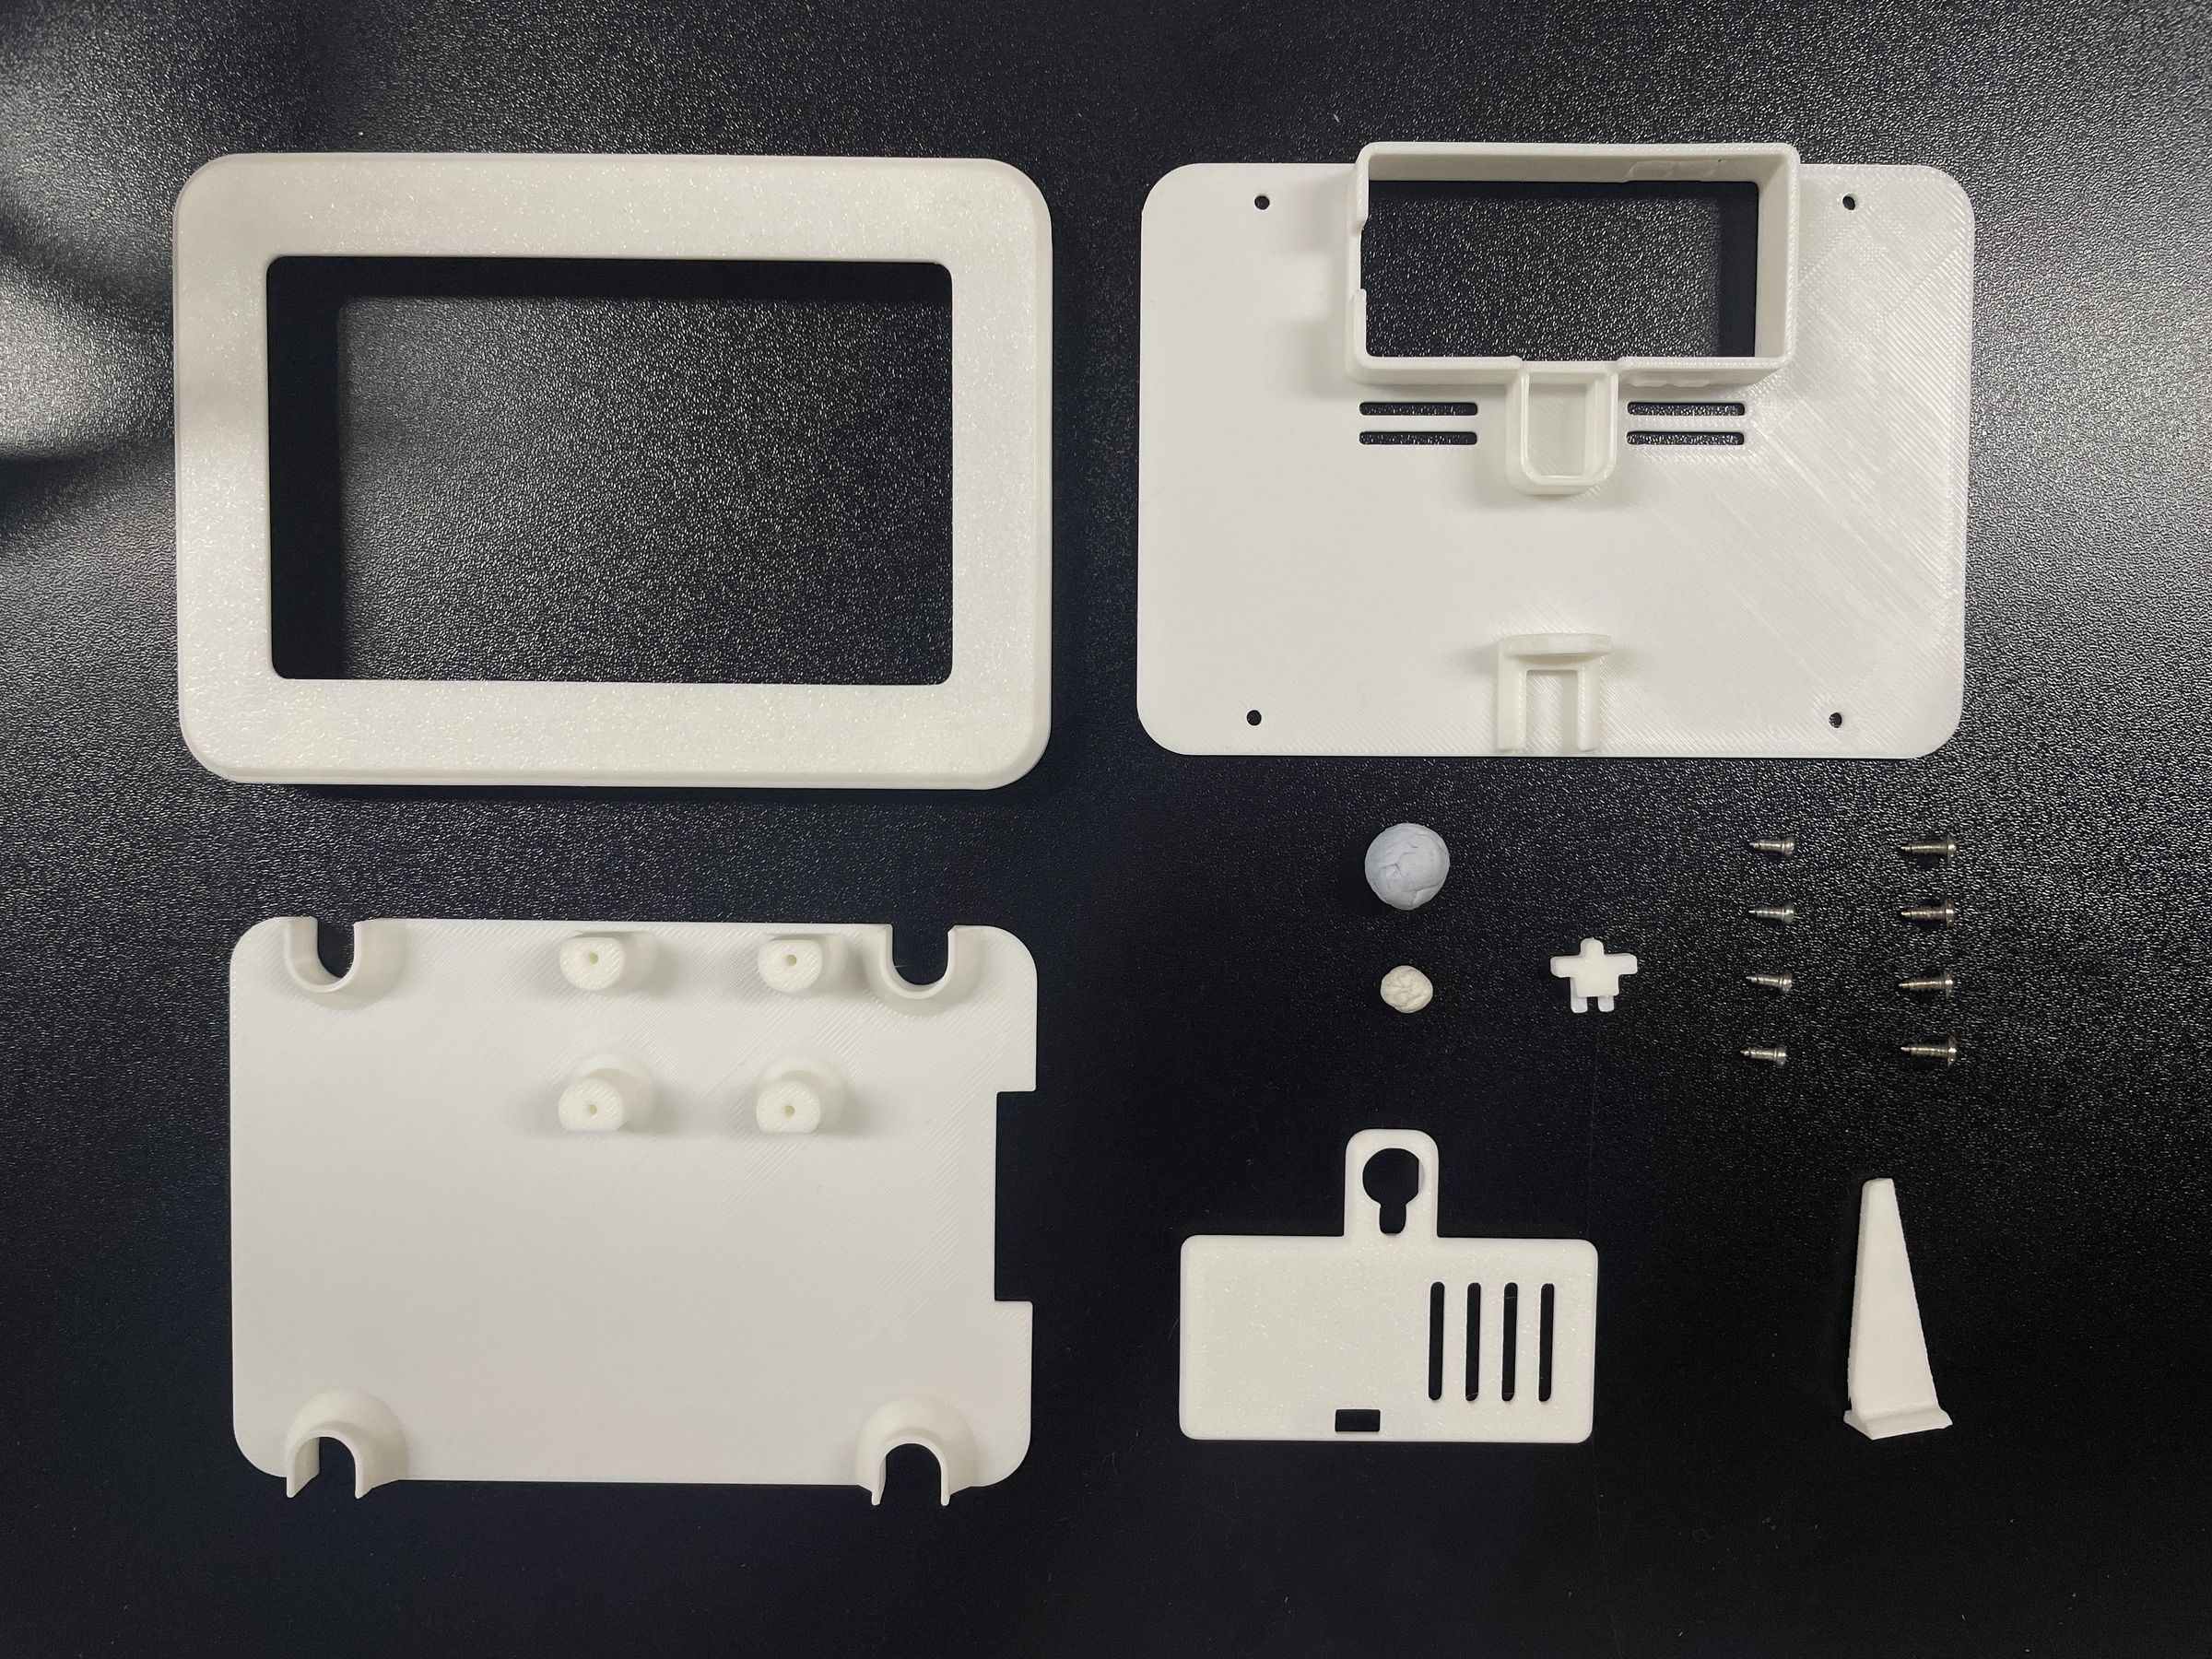
- M2 × 5mm Self‑Tapping Screws ×4 (for mounting the XIAO EE05 Board)
- M3 × 5mm Self‑Tapping Screws ×4 (for tightening the back panel to the frame)
- 3D‑printed casing parts (download in the Attachments)
Software
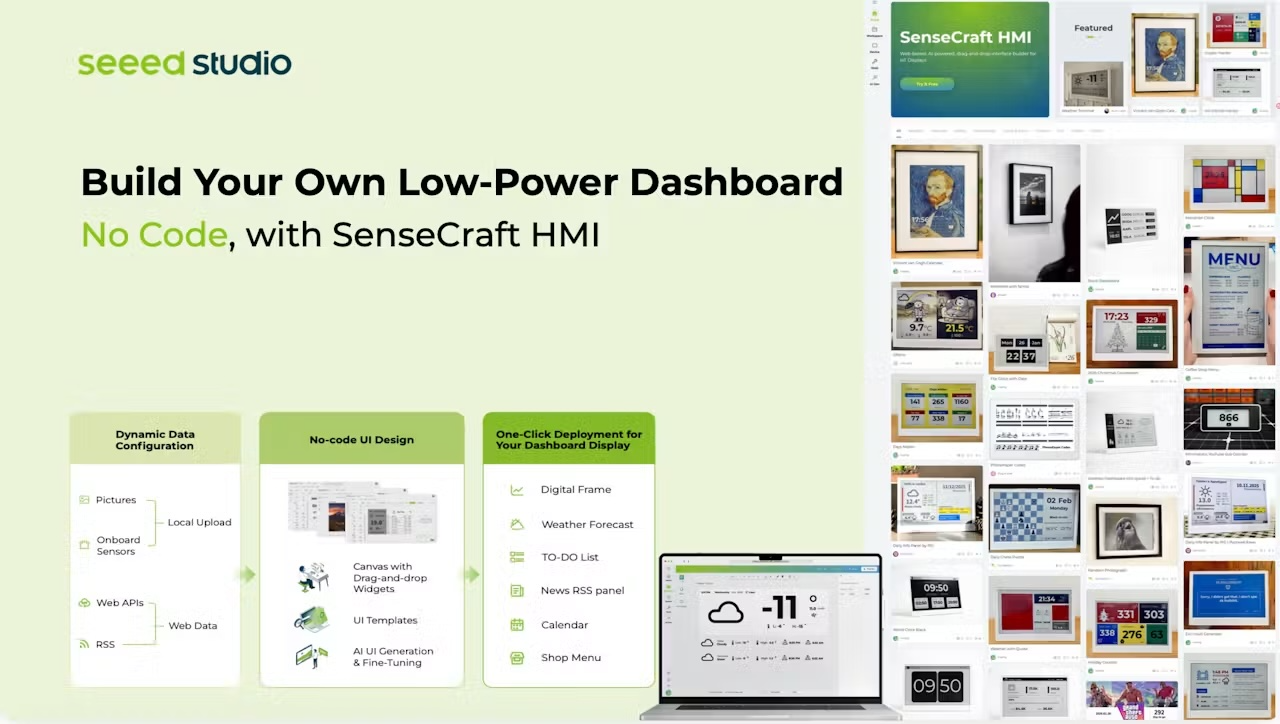
- SenseCraft Seeedash (used to be named as SenseCraft HMI), a web-based no-code dashboard builder developed by Seeed Studio, where you can design all the custom UIs in its drag-and-drop Designer, instead of writing lines of code.
Hardware Setup
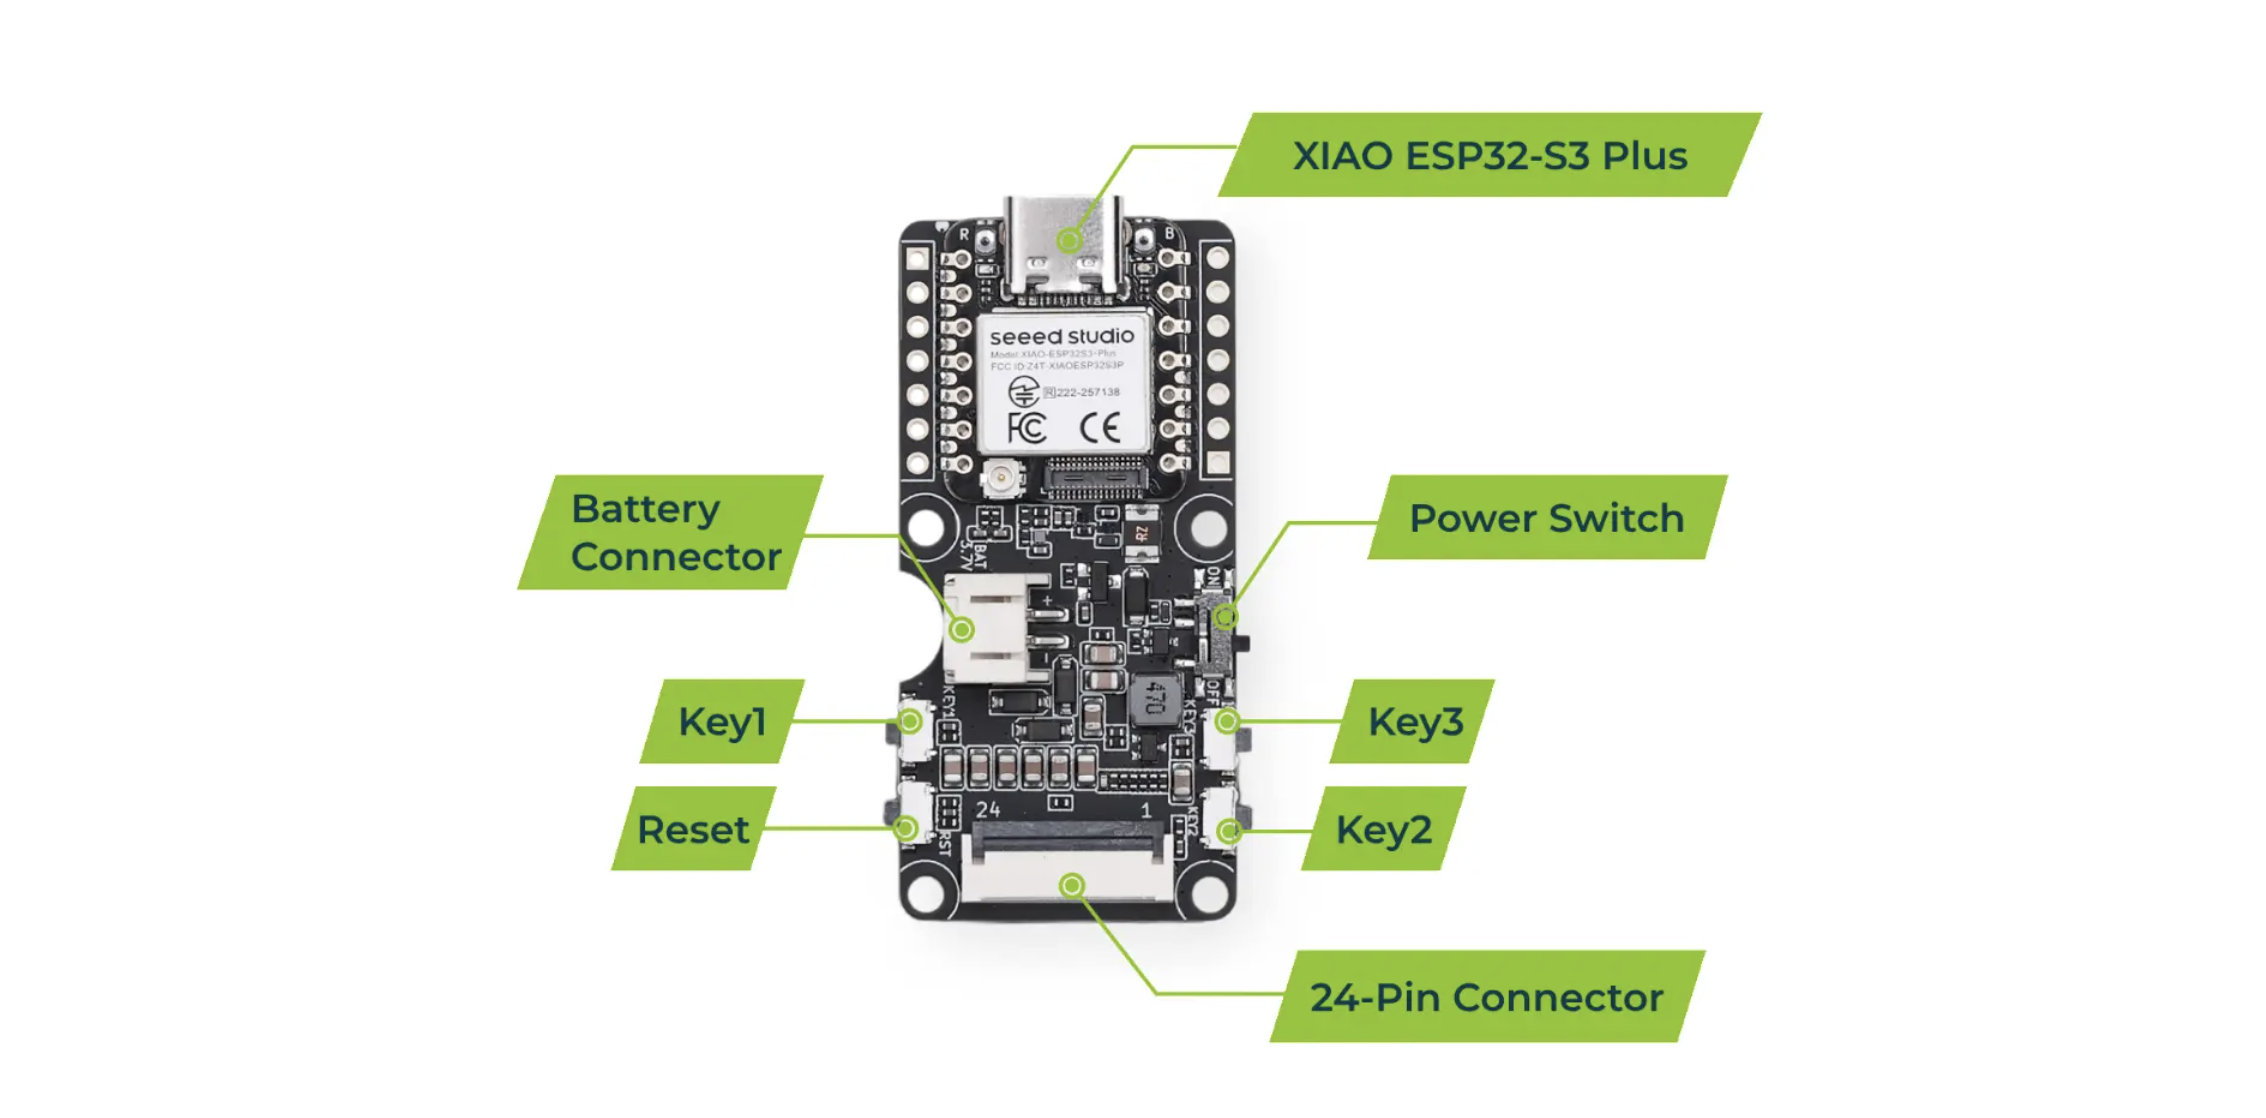
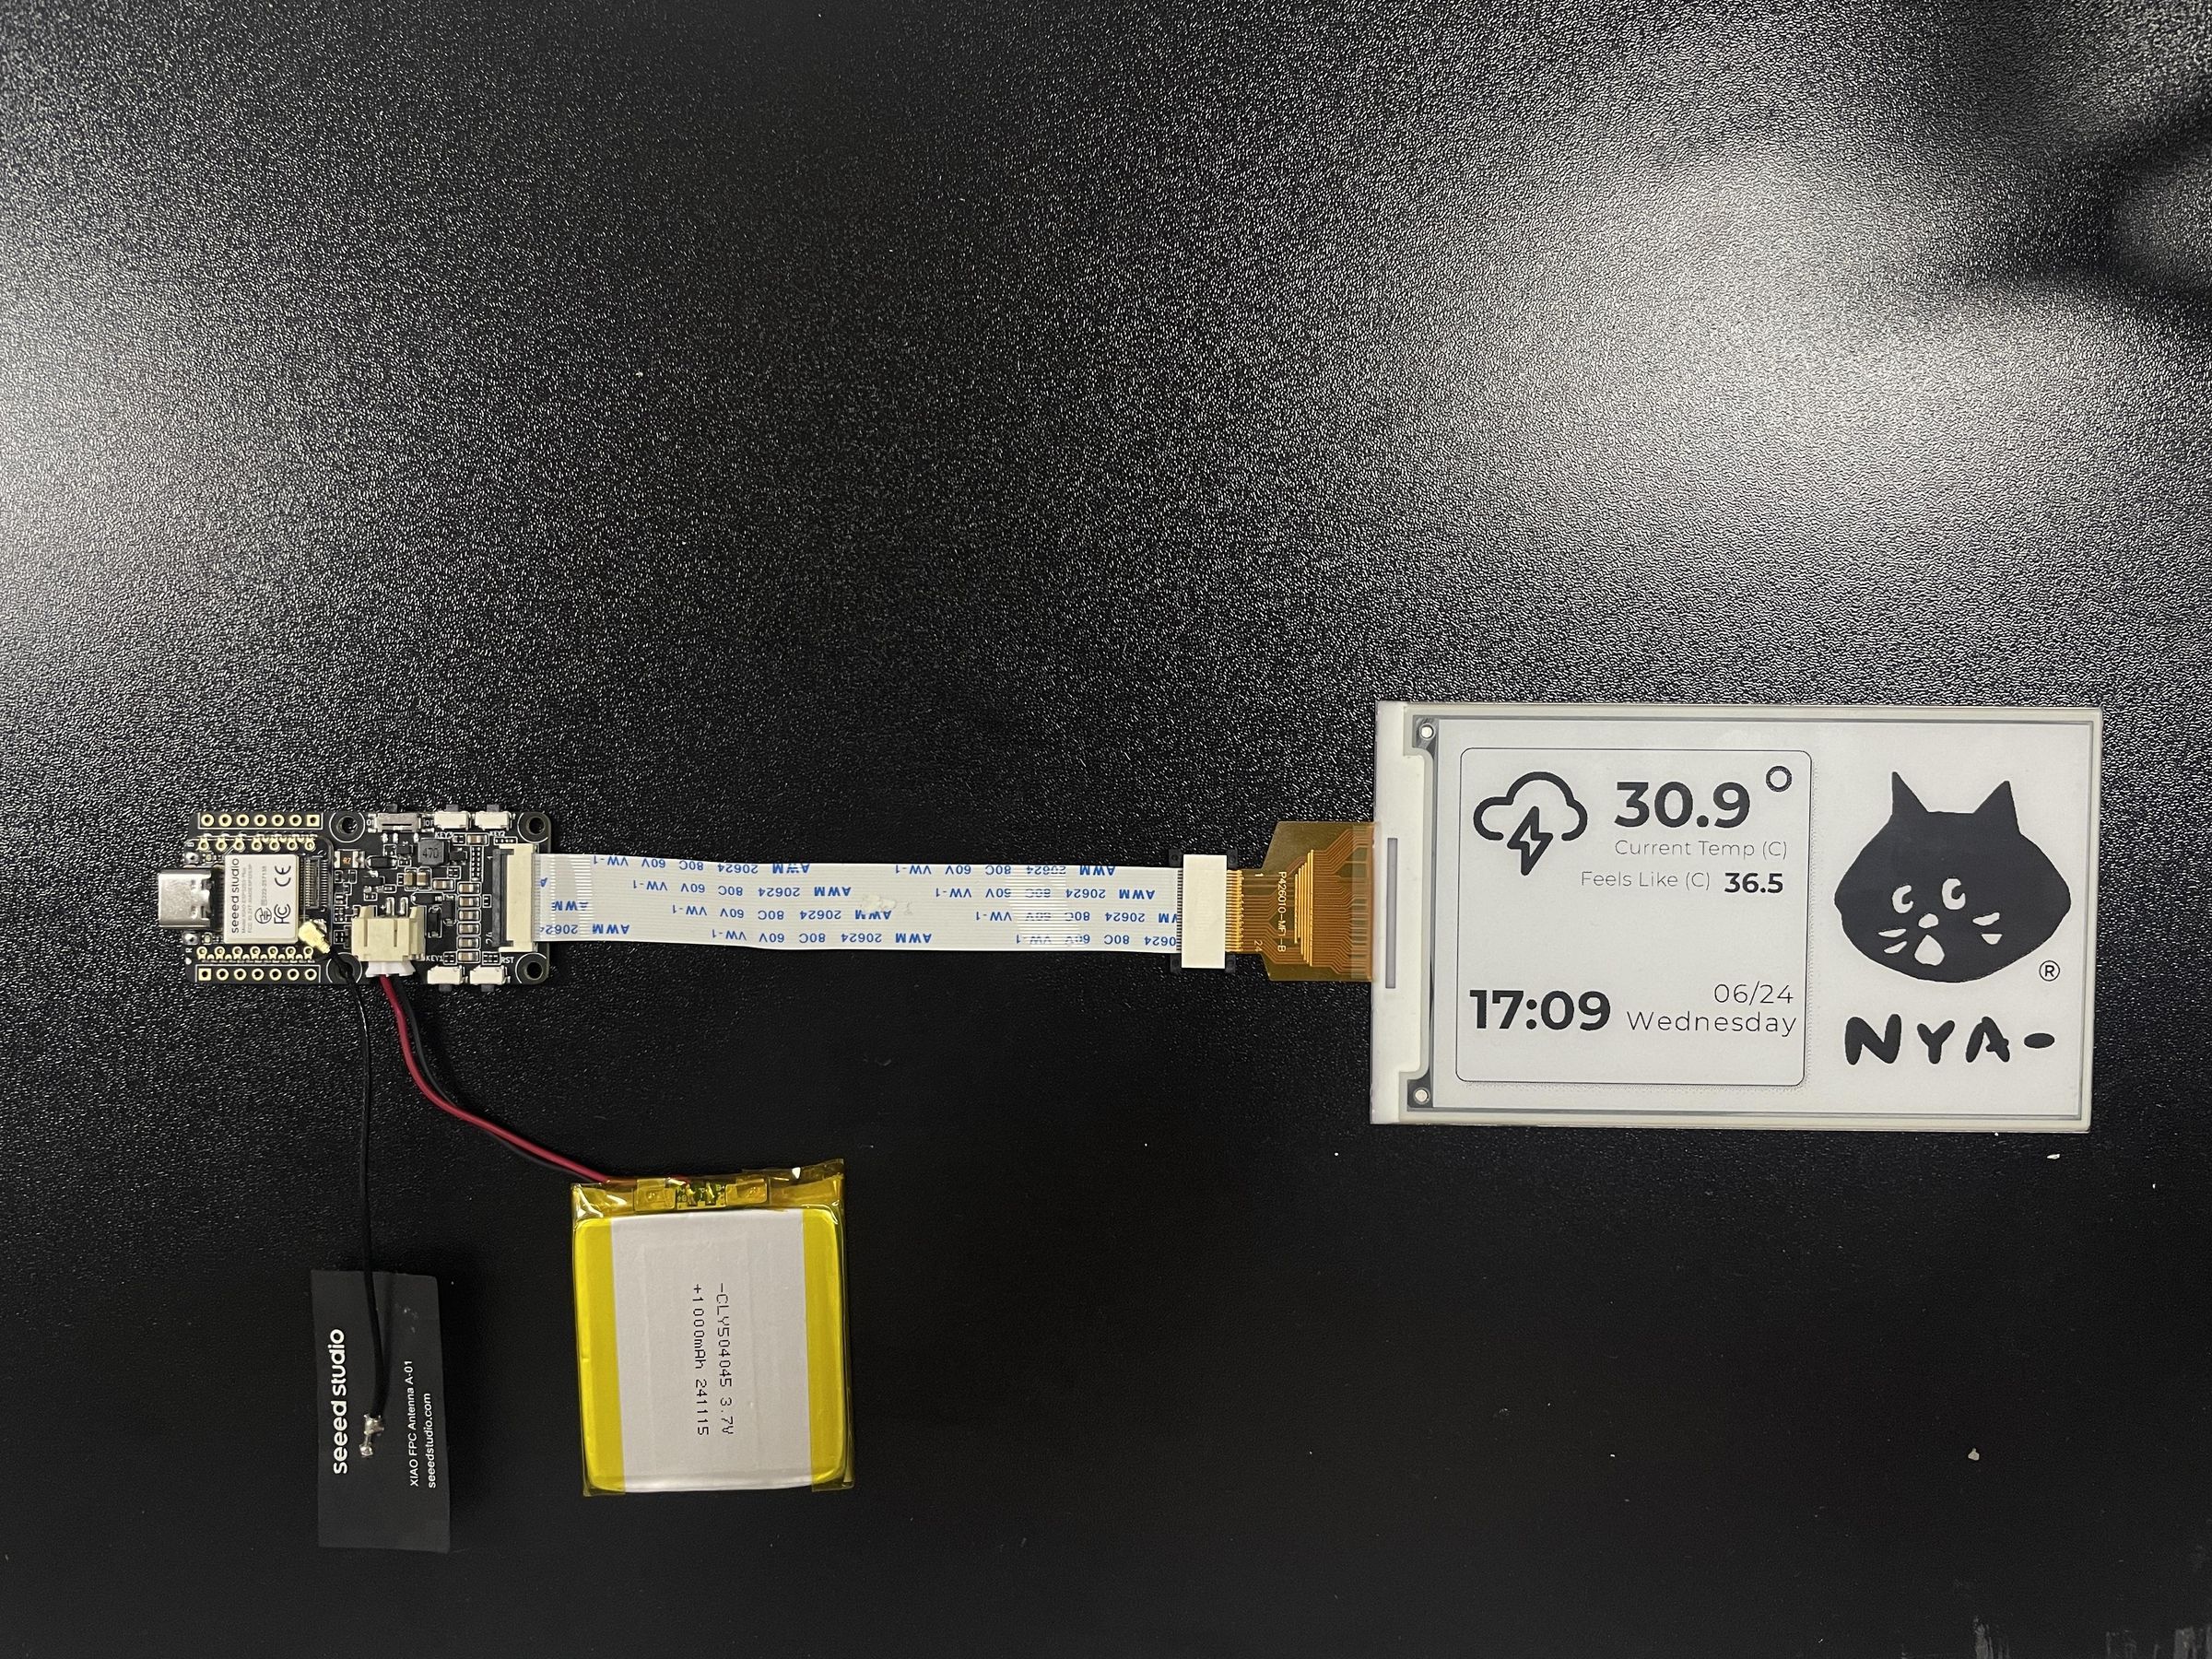
Since the XIAO EE05 already comes with a JST 2.0 connector for the battery and an SPI e‑paper screen connector for all 24‑pin ePaper displays, you can easily connect the battery and the display to the board. Here I've attached a picture of the hardware setup — and it should be good to go. BTW, the Key 3 and Key 2 are the ones that we will use to manually navigate between different designs, and the Reset button is the one that you press to refresh the current design.
Just one heads‑up: the XIAO EE05 also comes with a 10cm FPC extension cable. Make sure to connect the FPC cable, the connector, the 4.26" screen, and the XIAO EE05 board in the correct order. That way, everything will fit perfectly into the casing I shared here.
3D Print the Casing
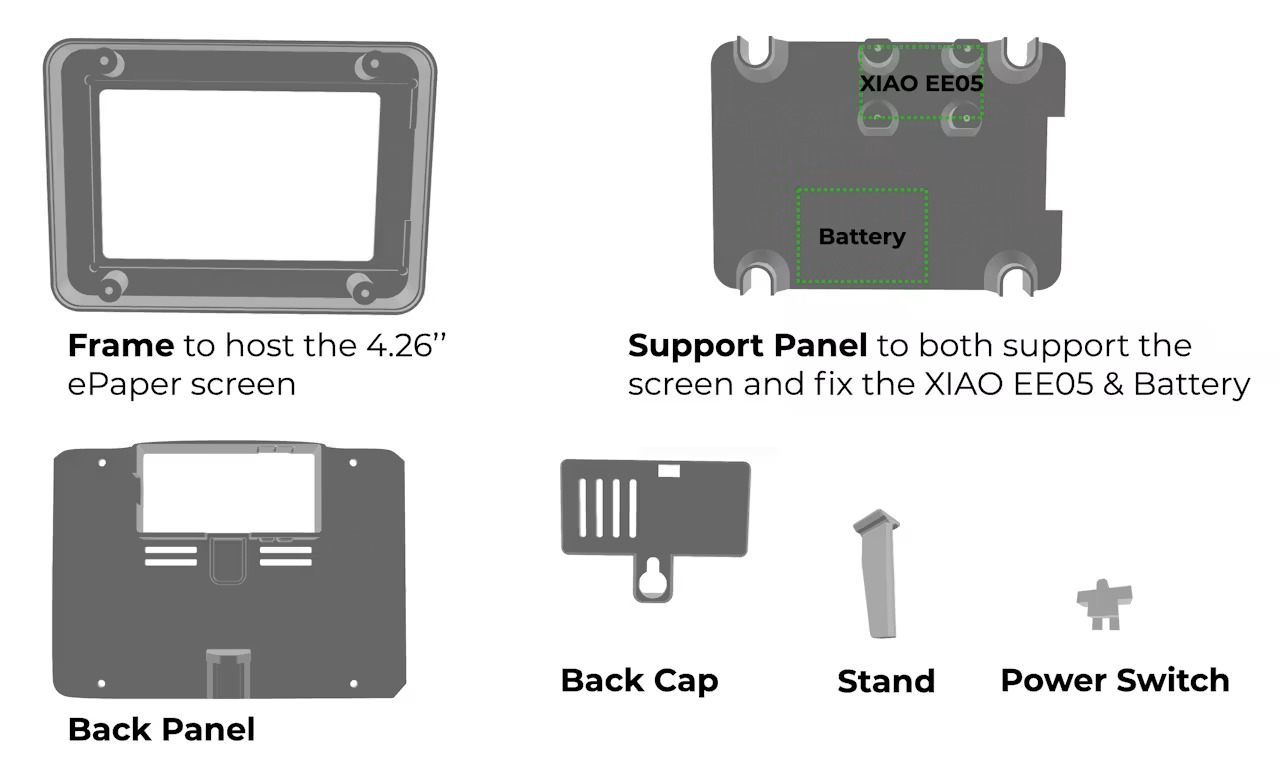
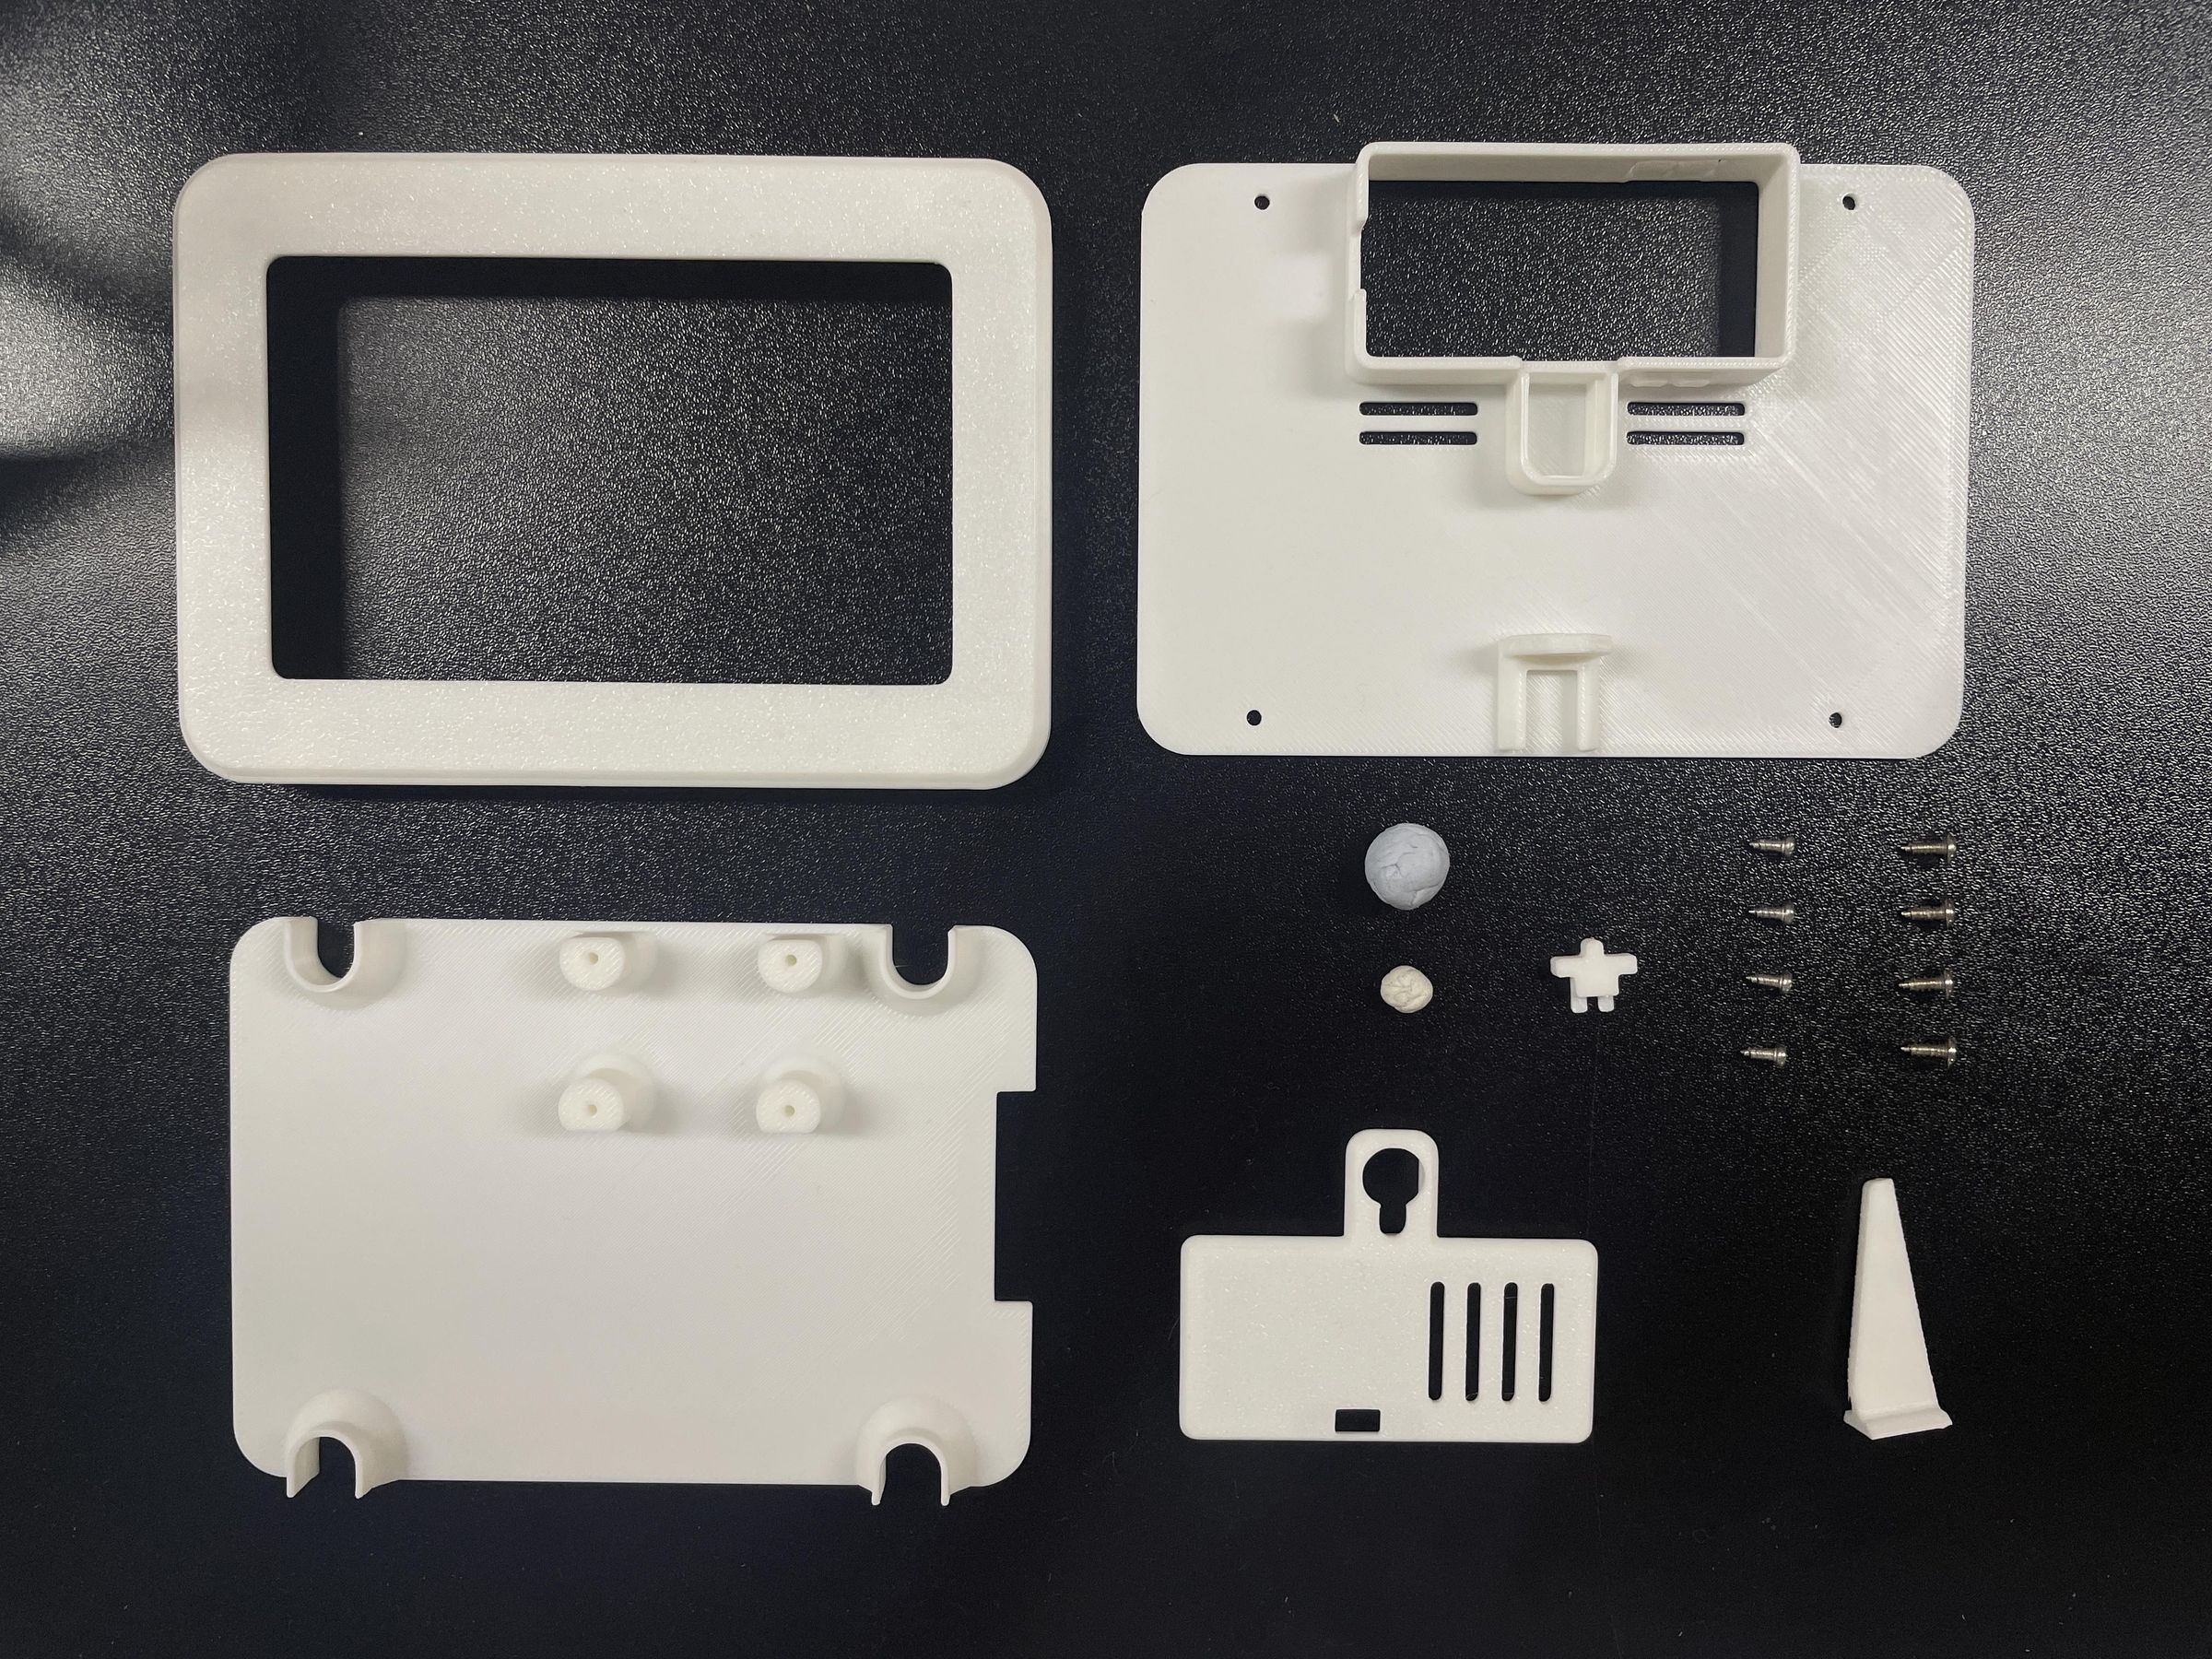
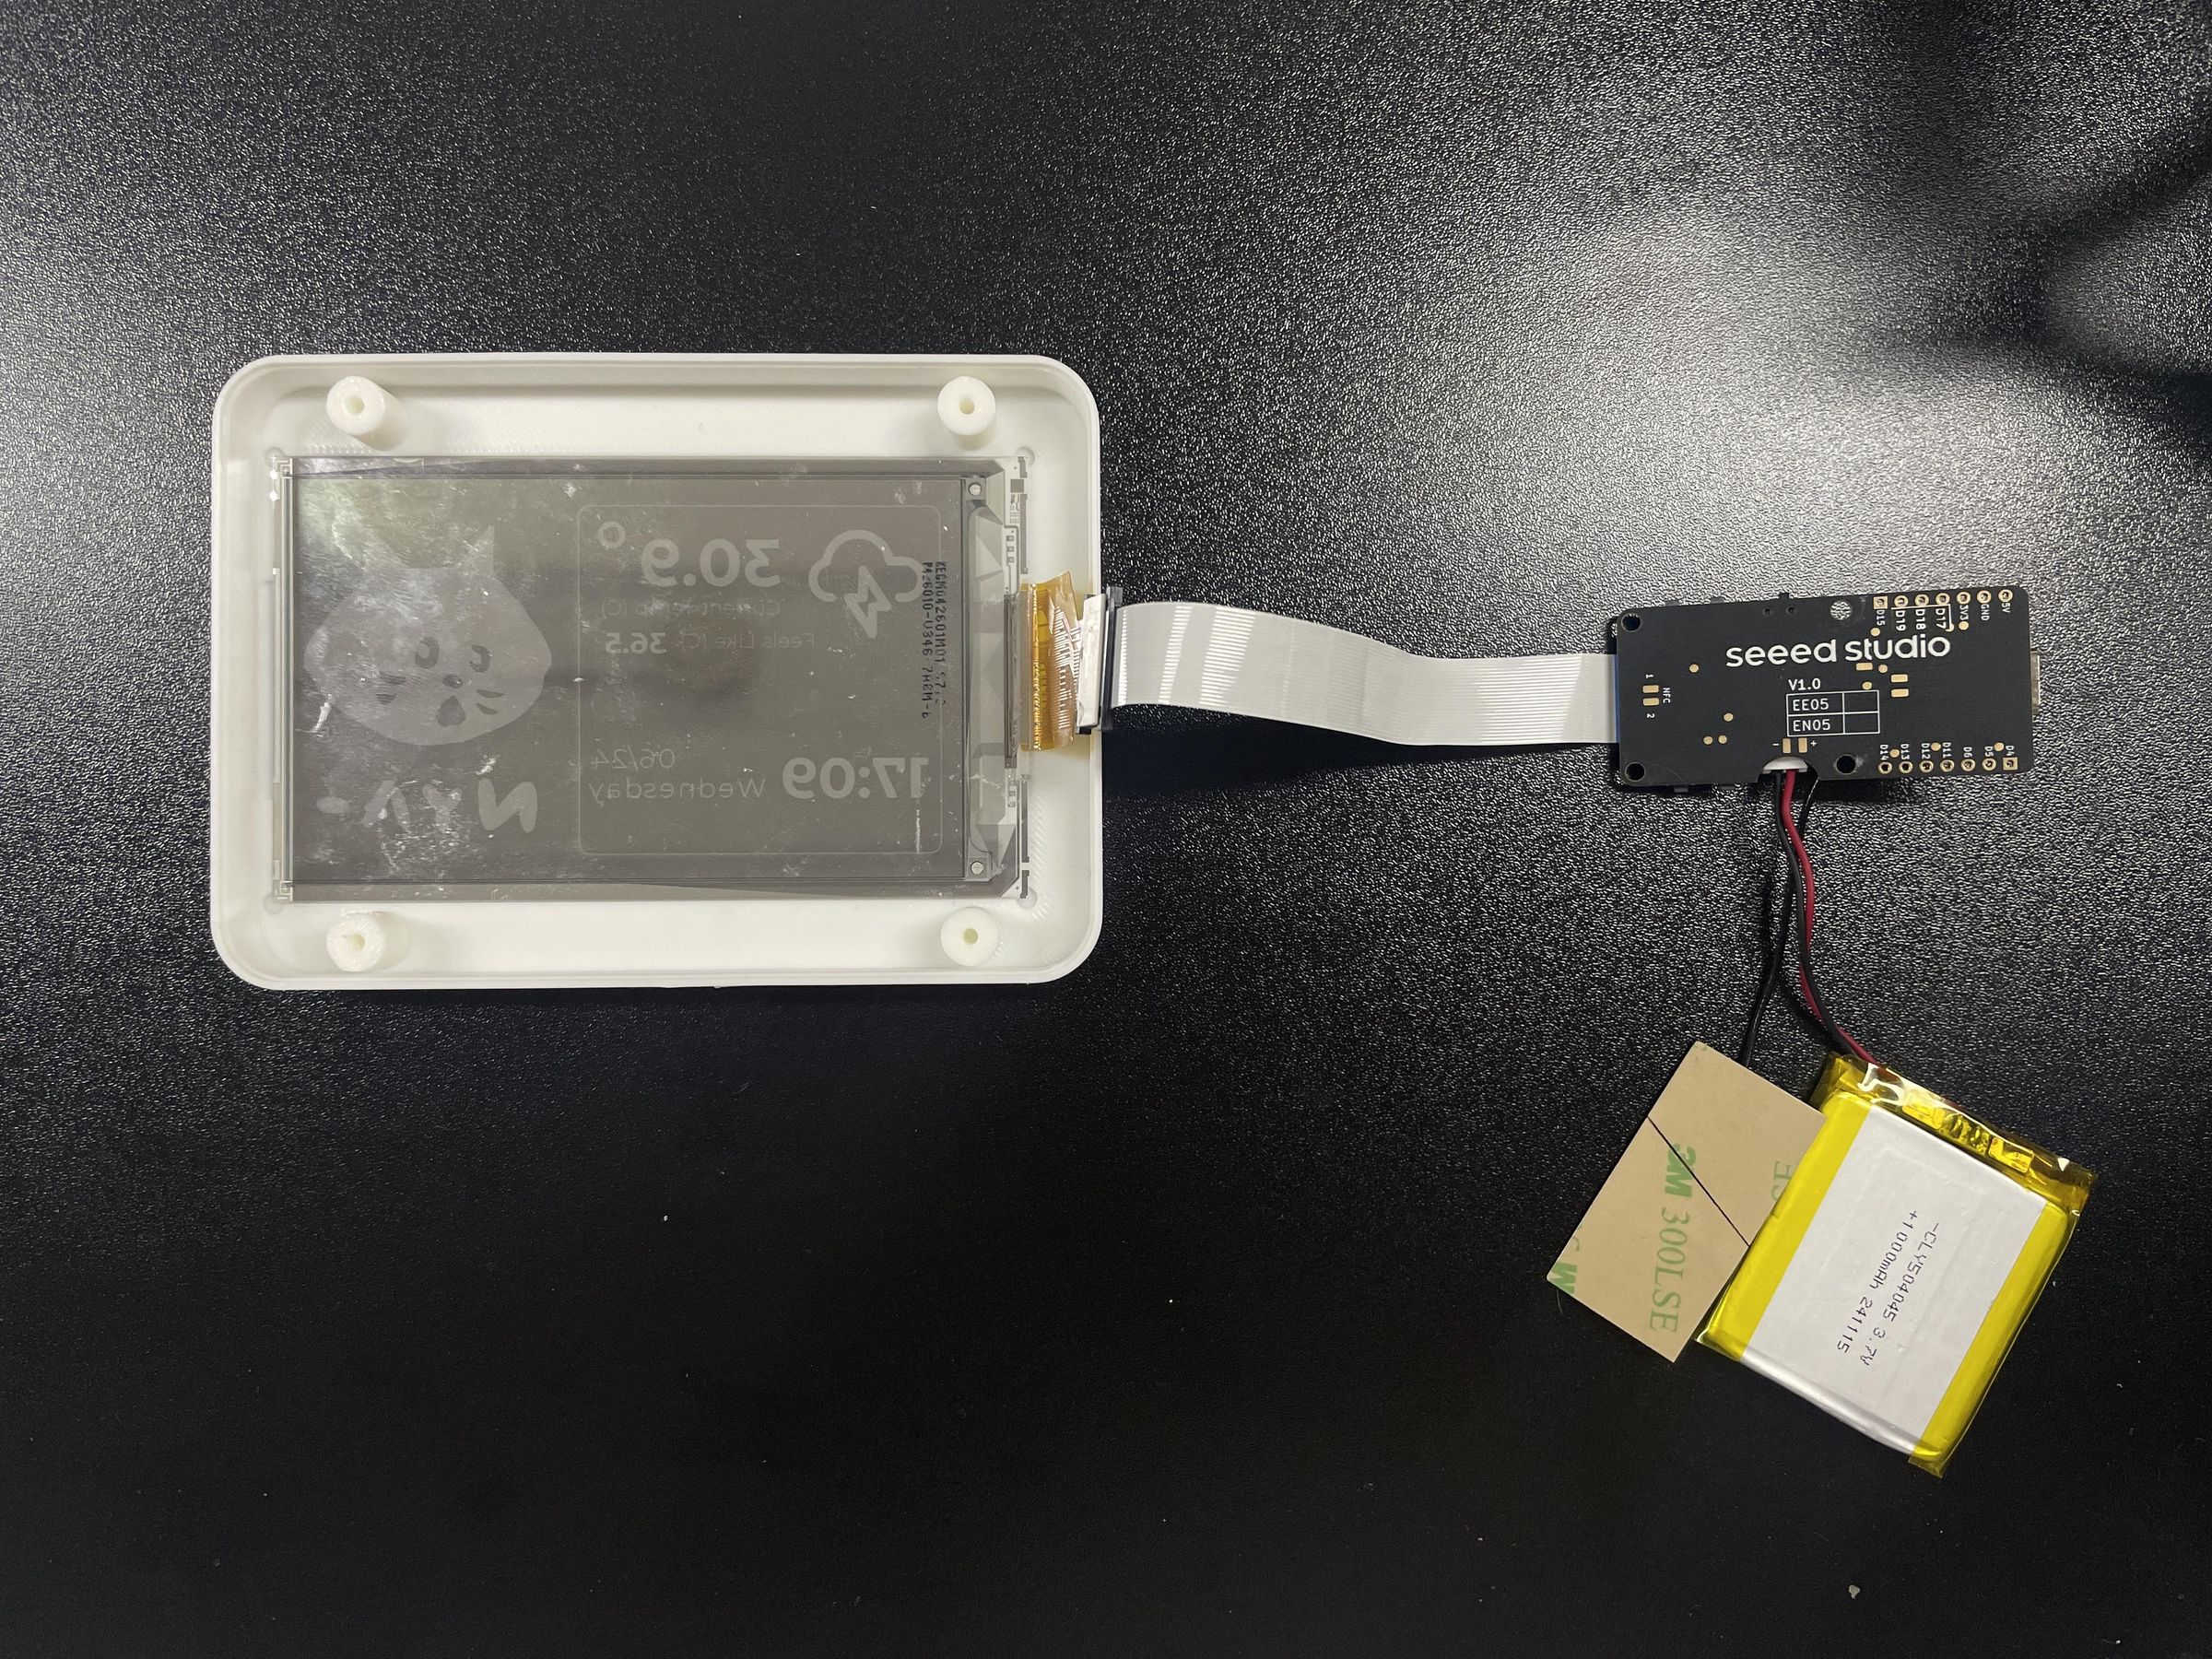
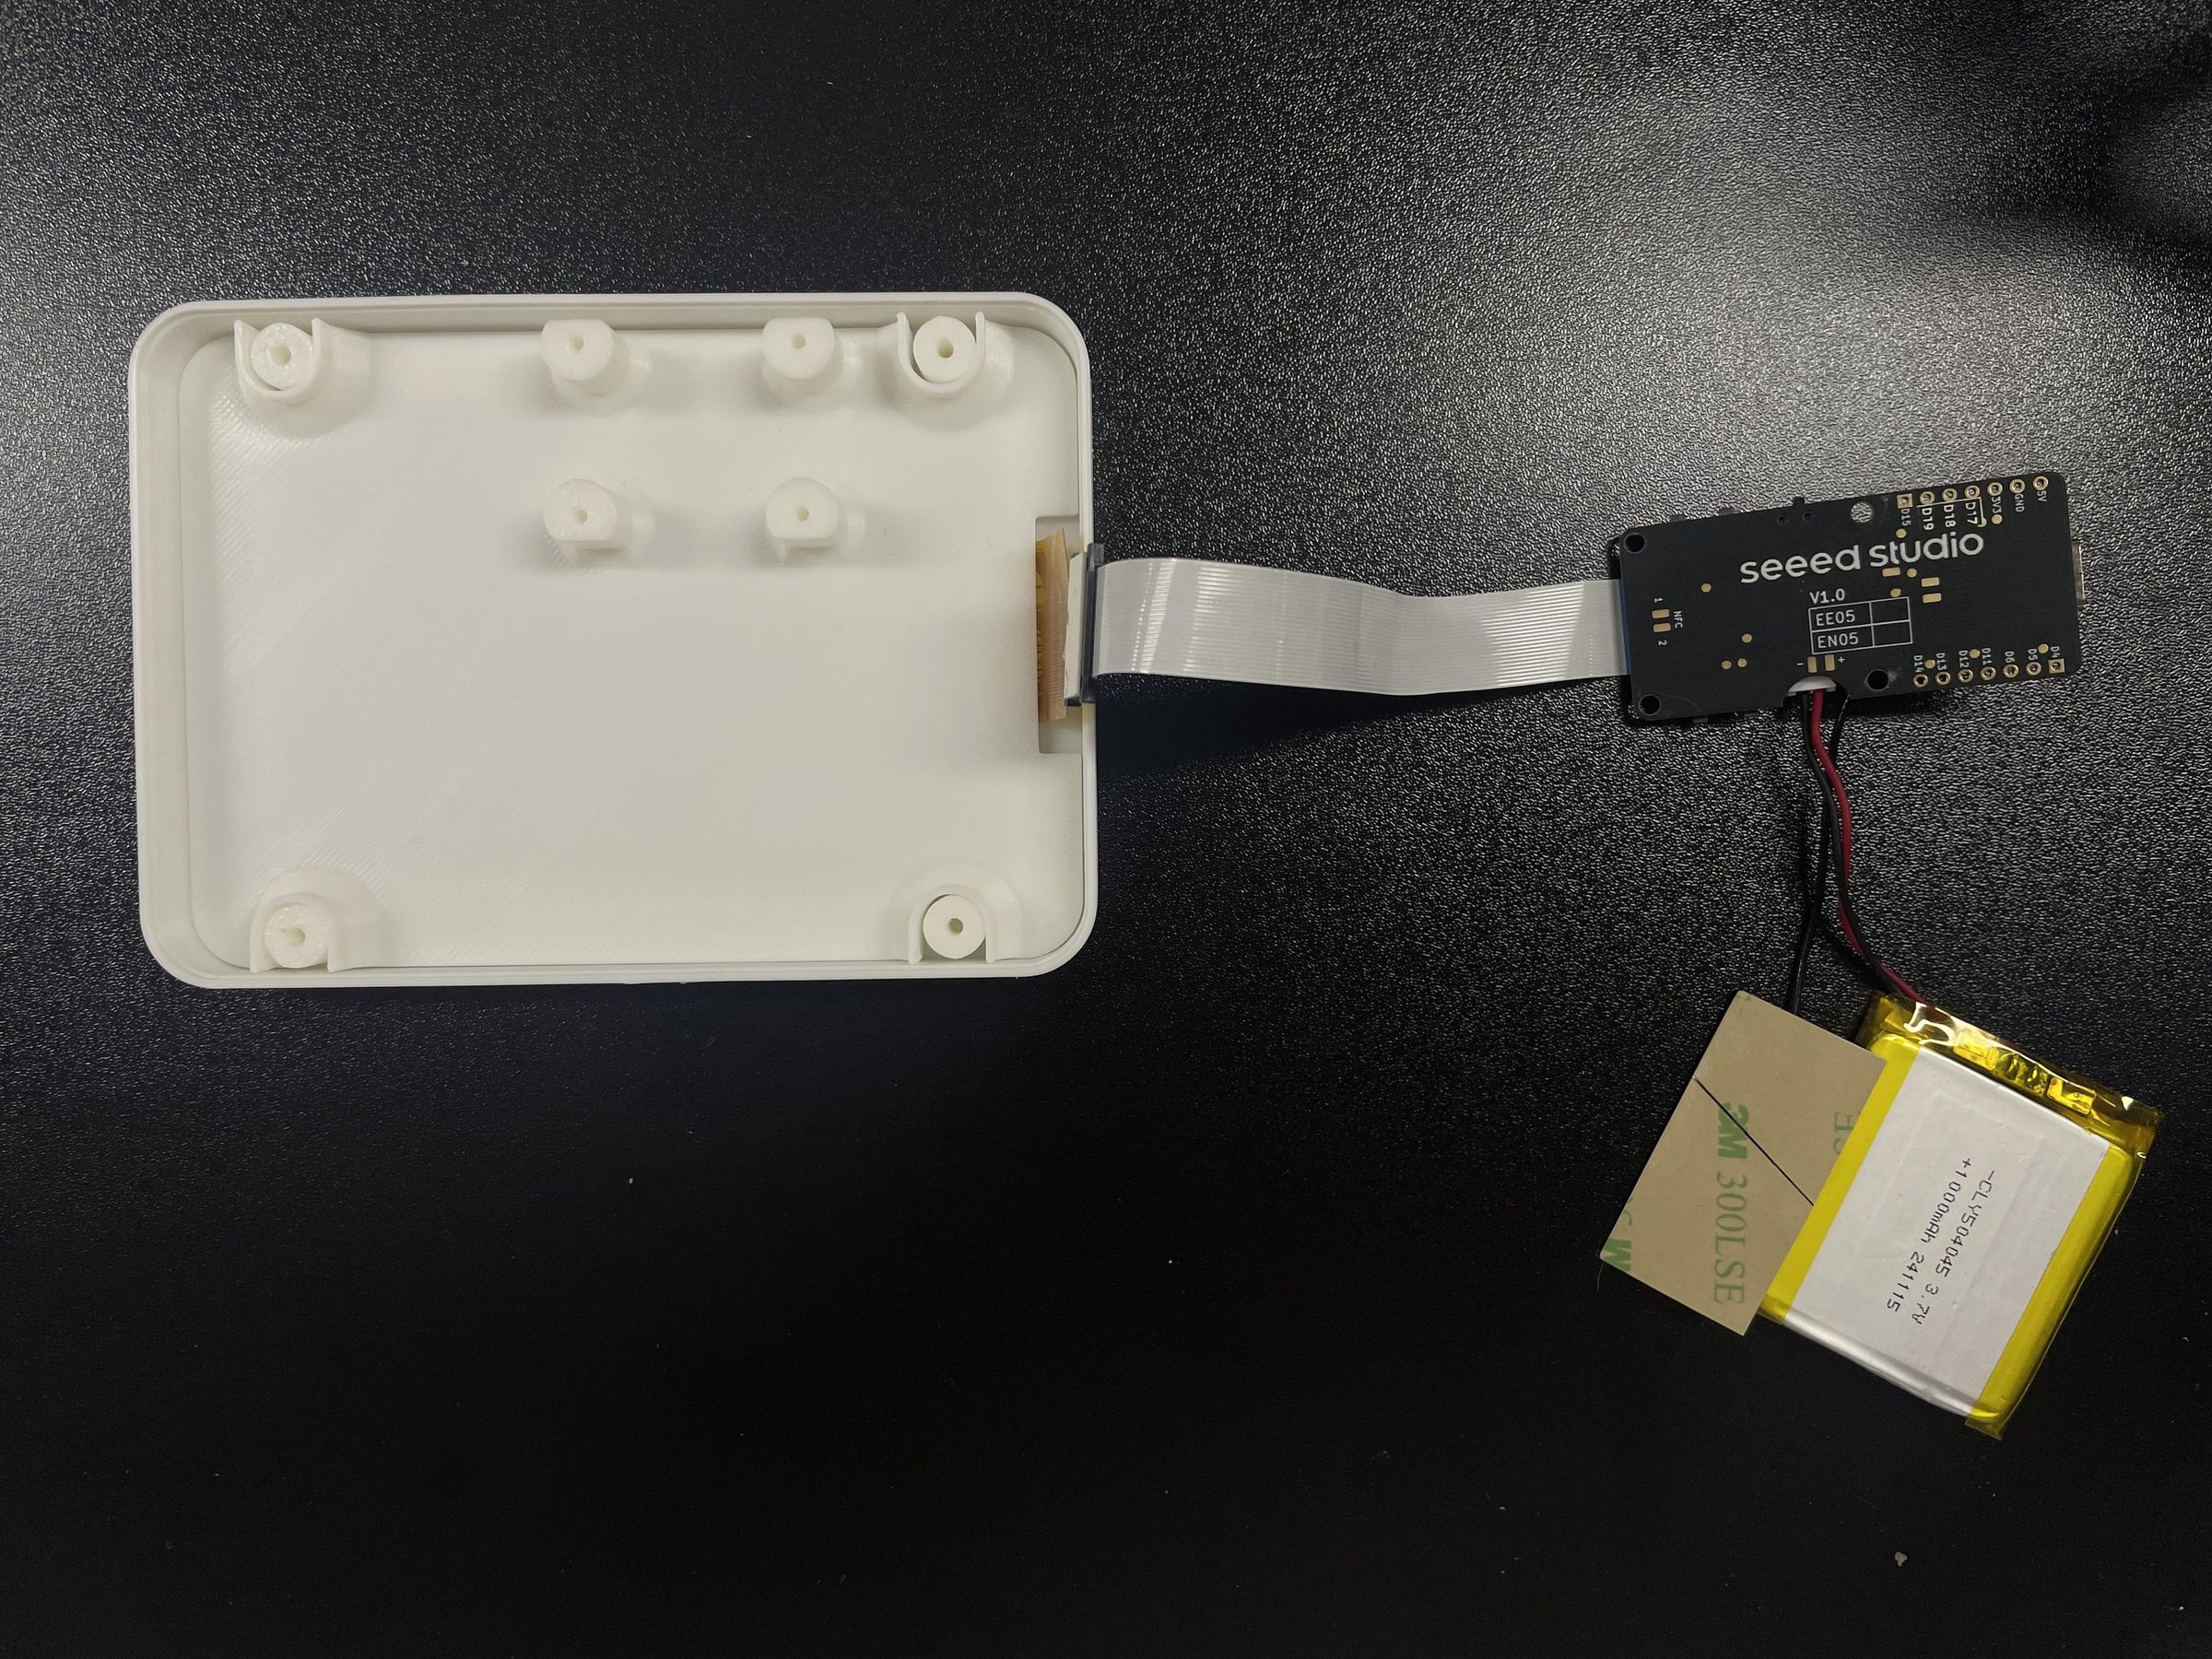
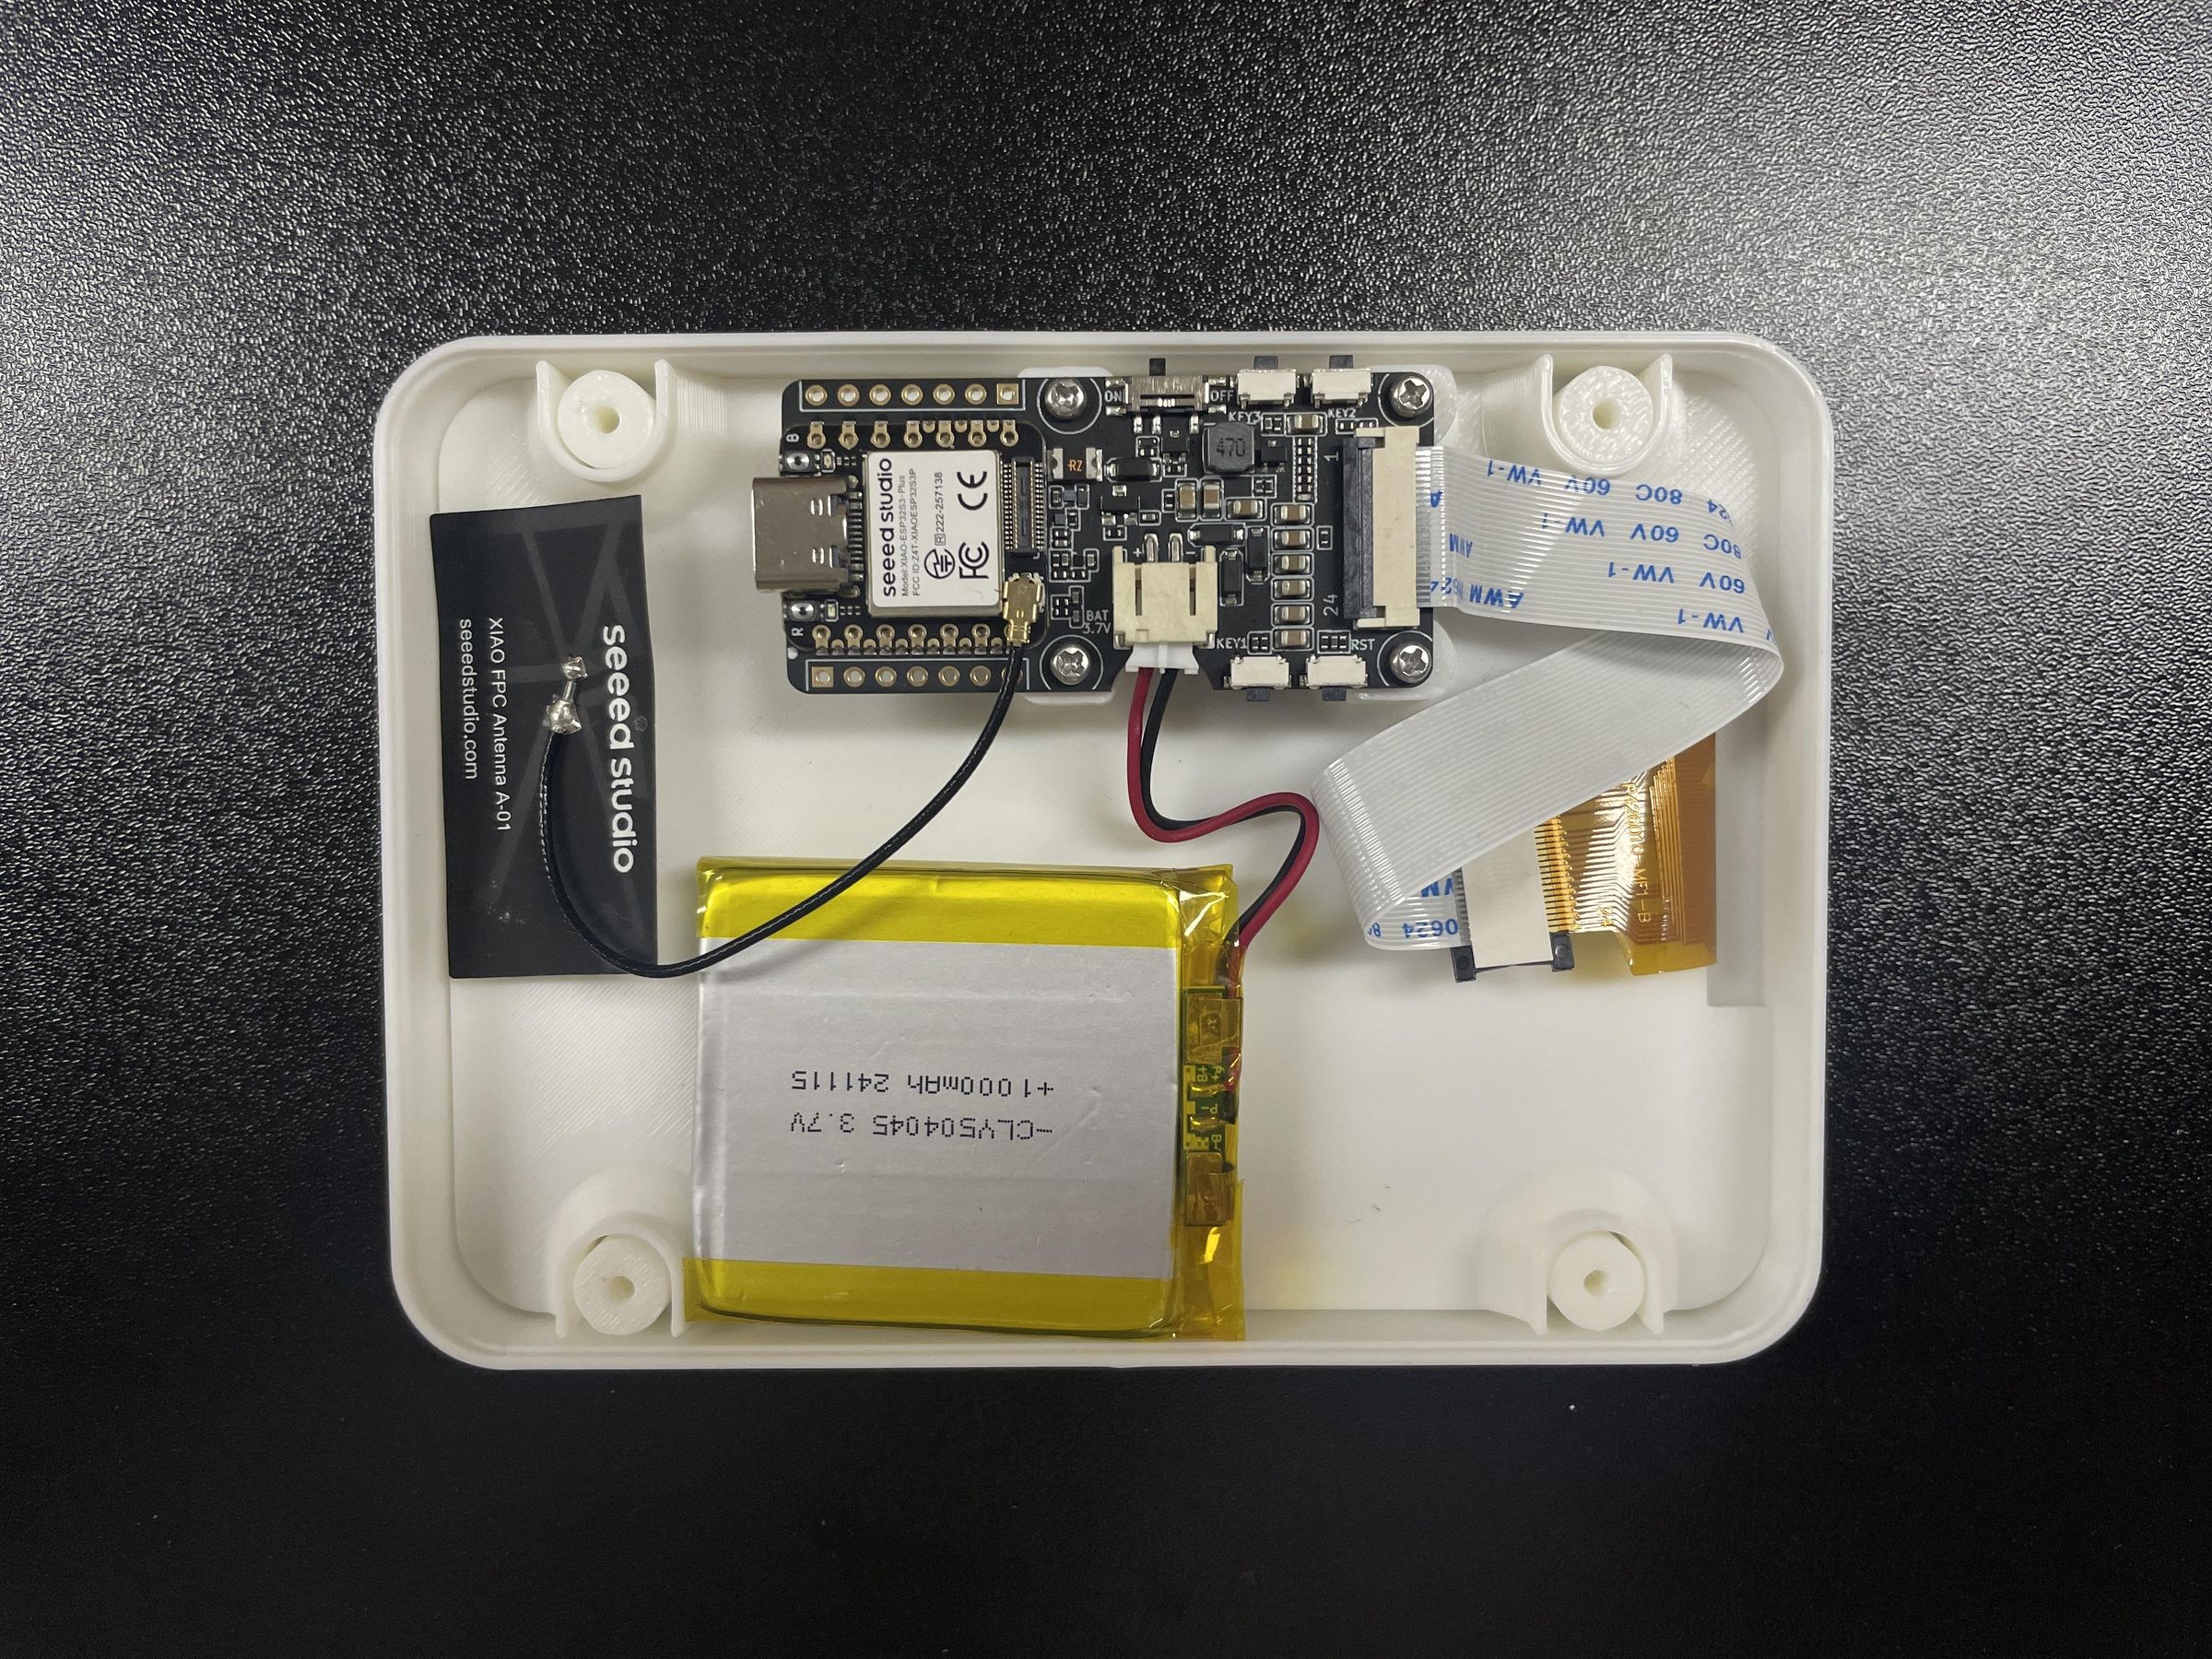
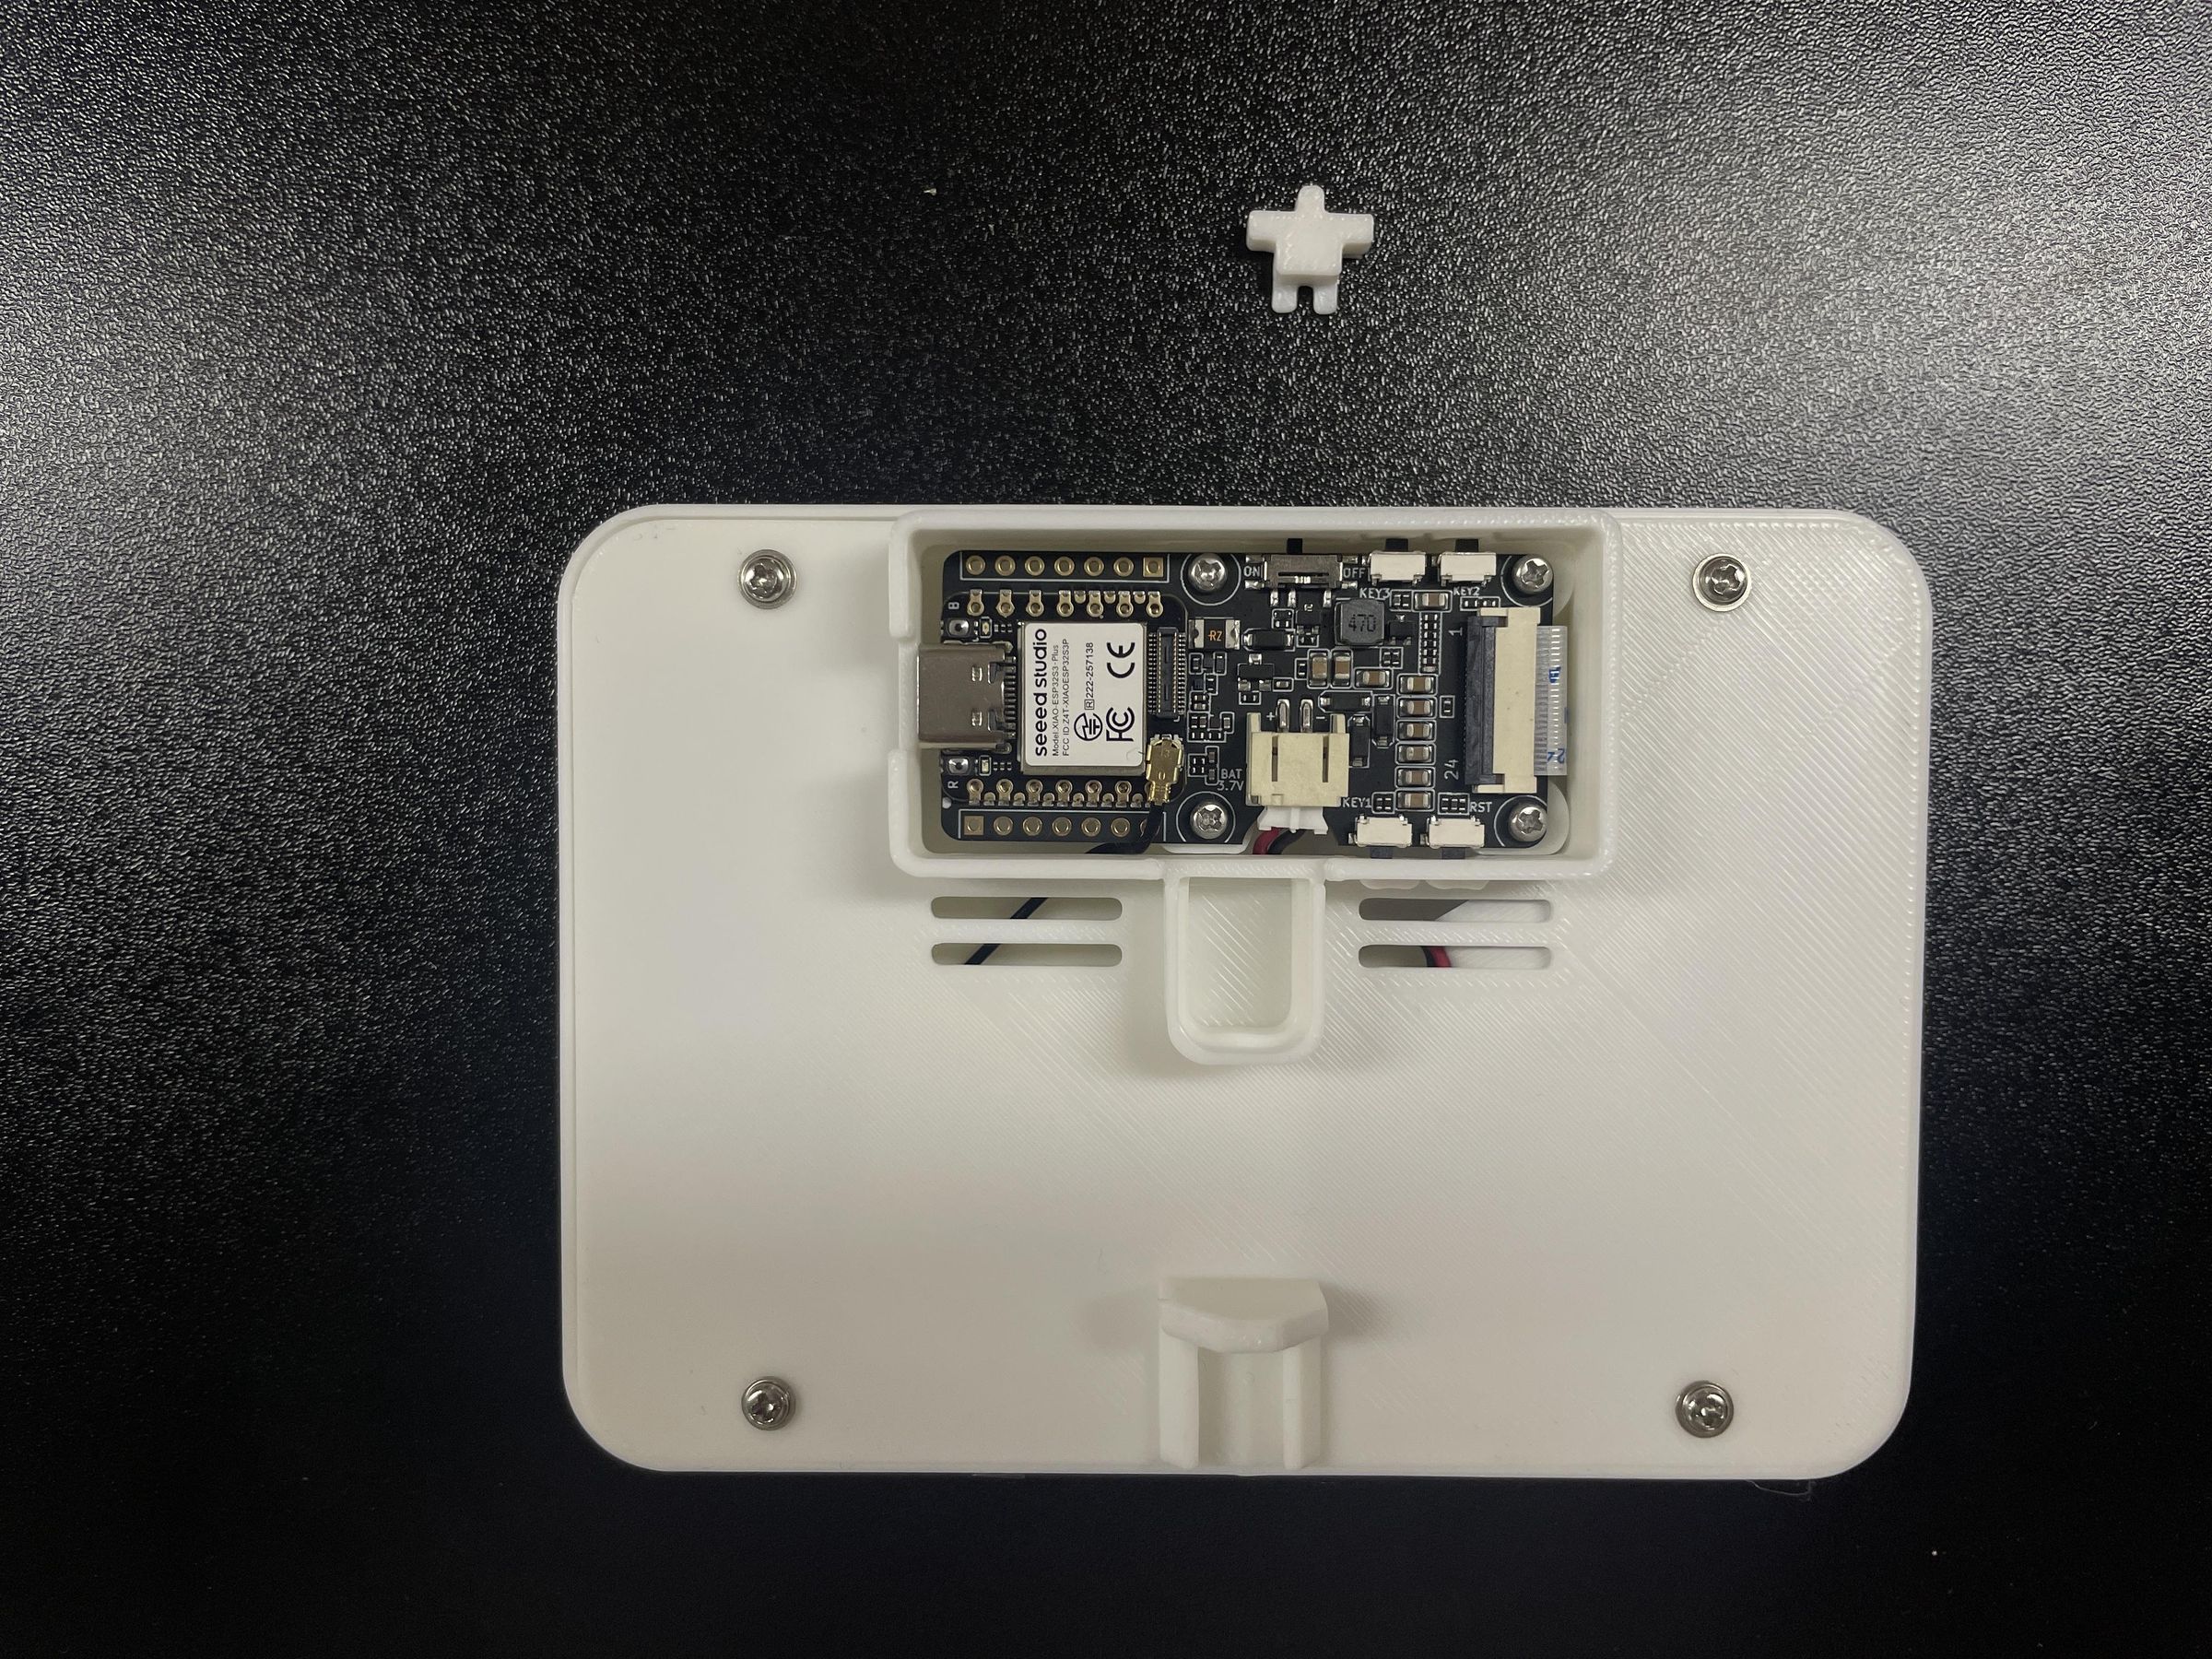
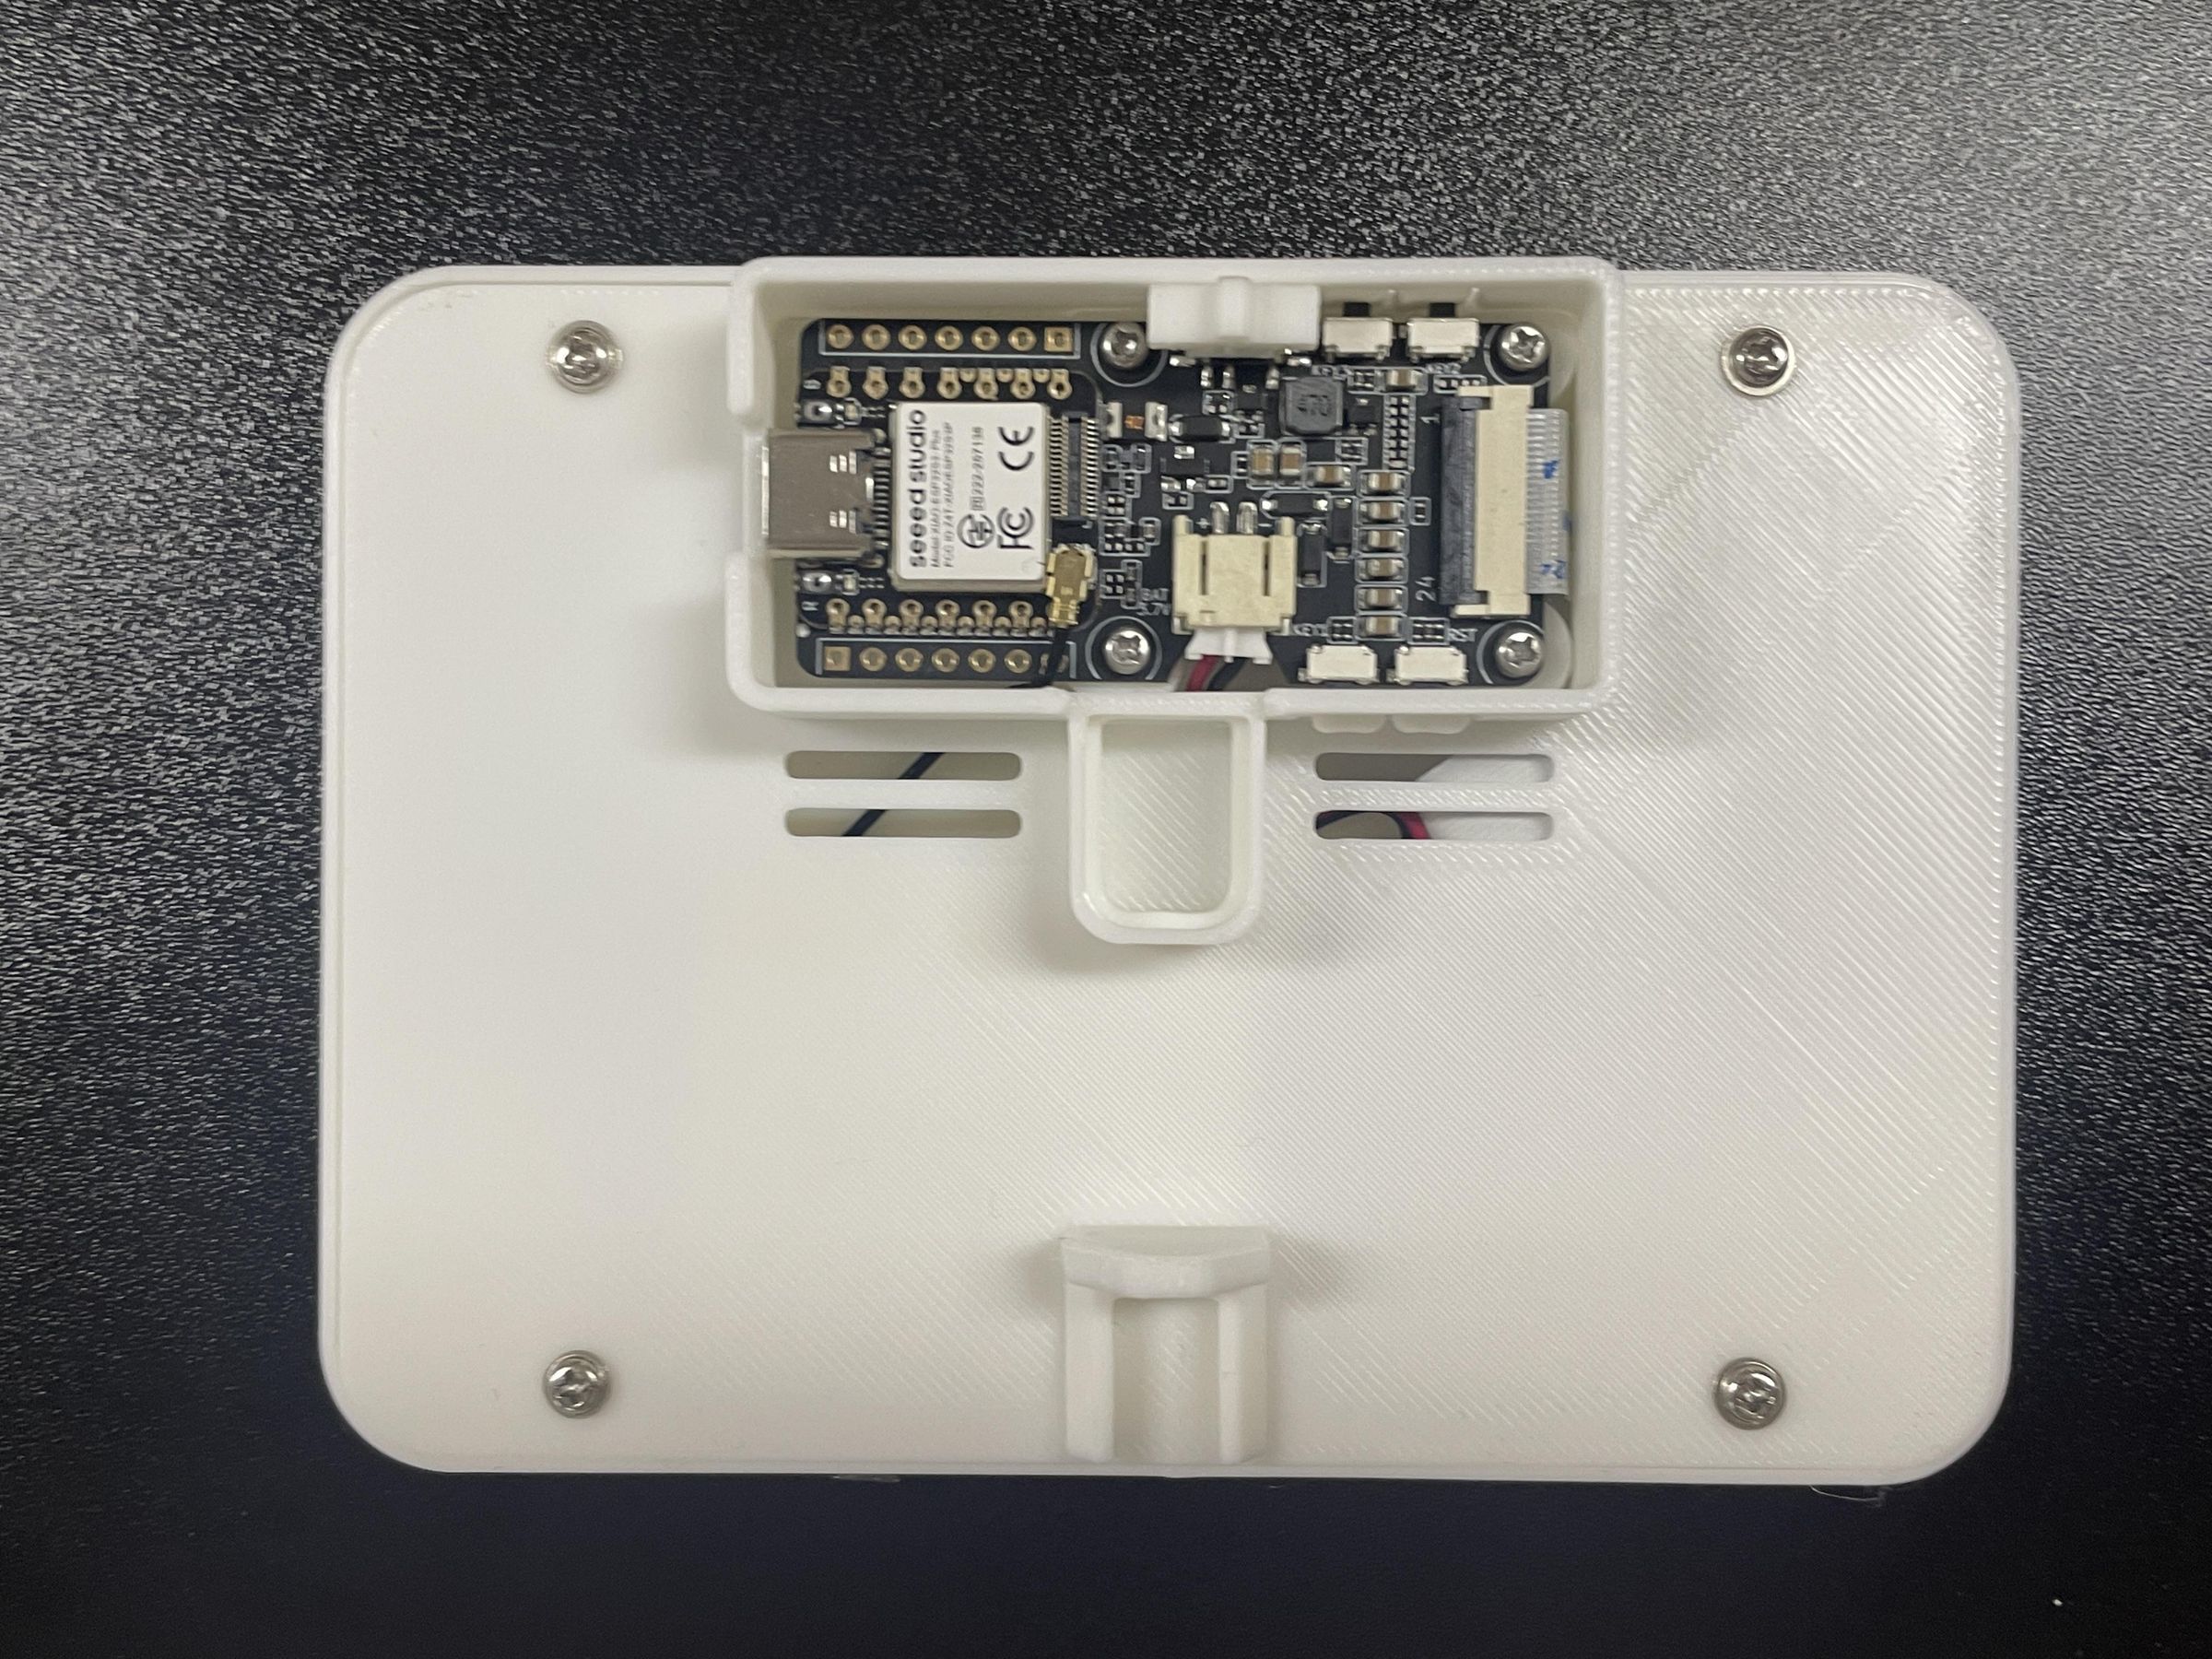
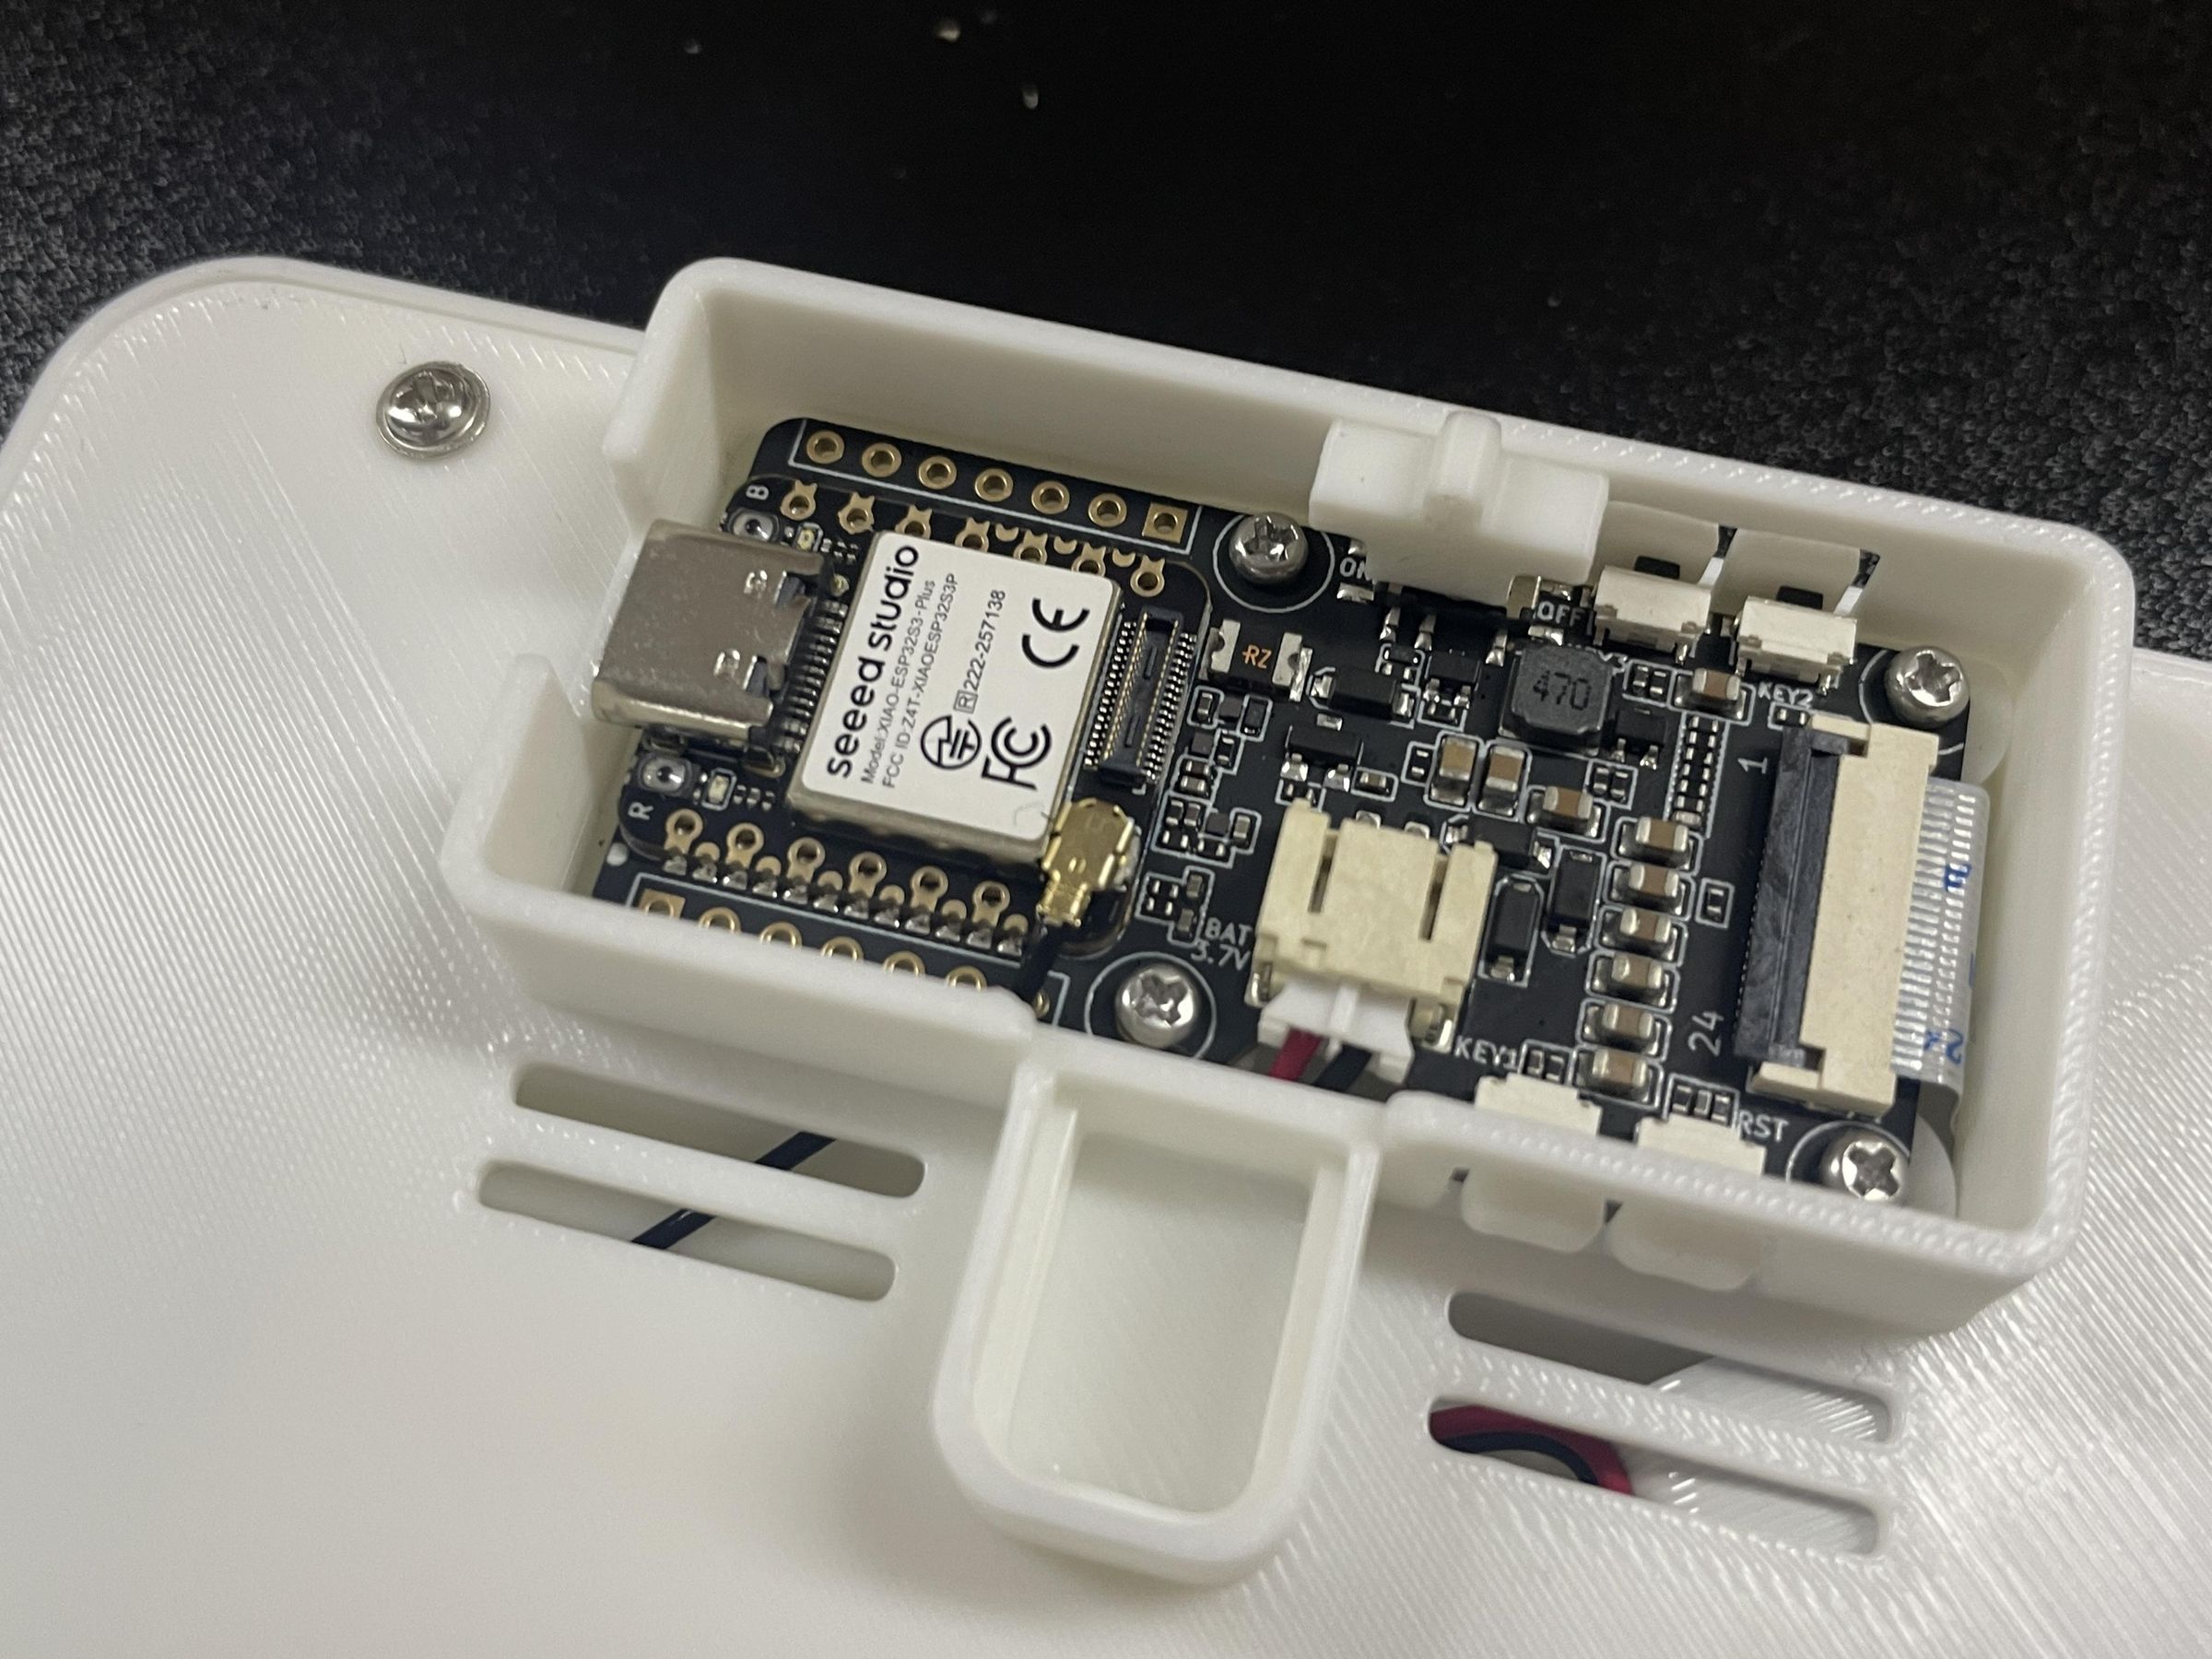
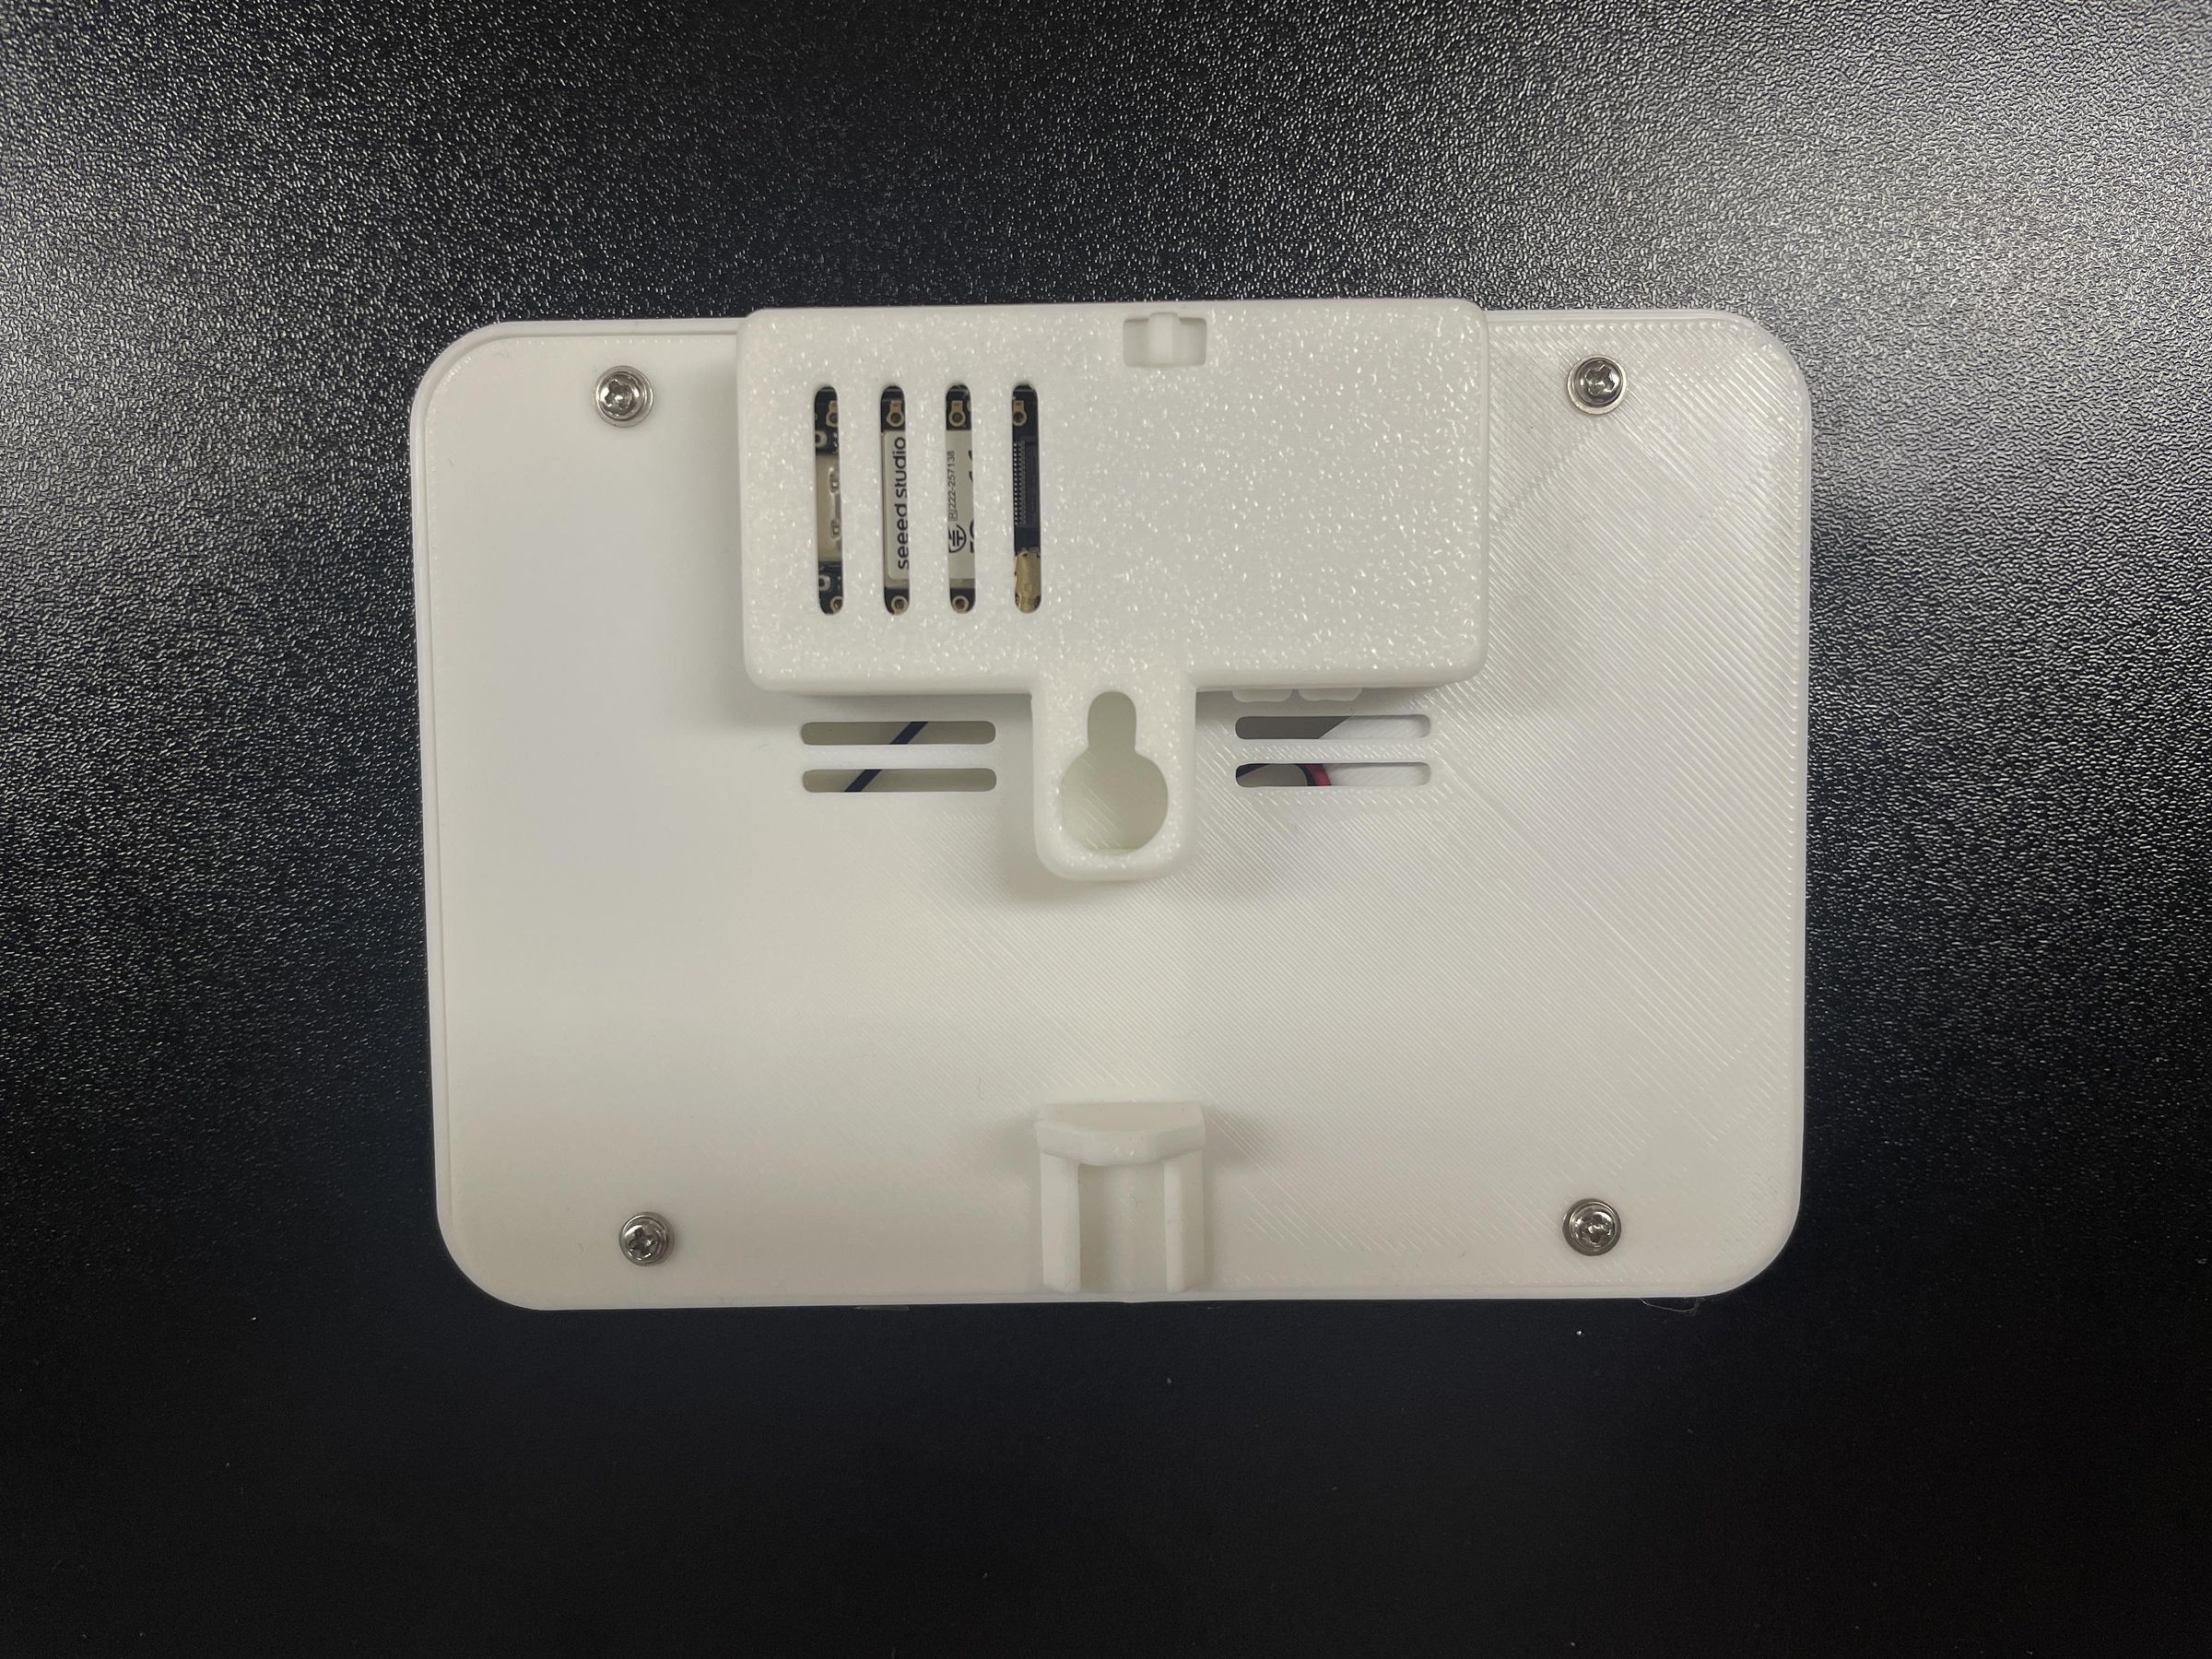
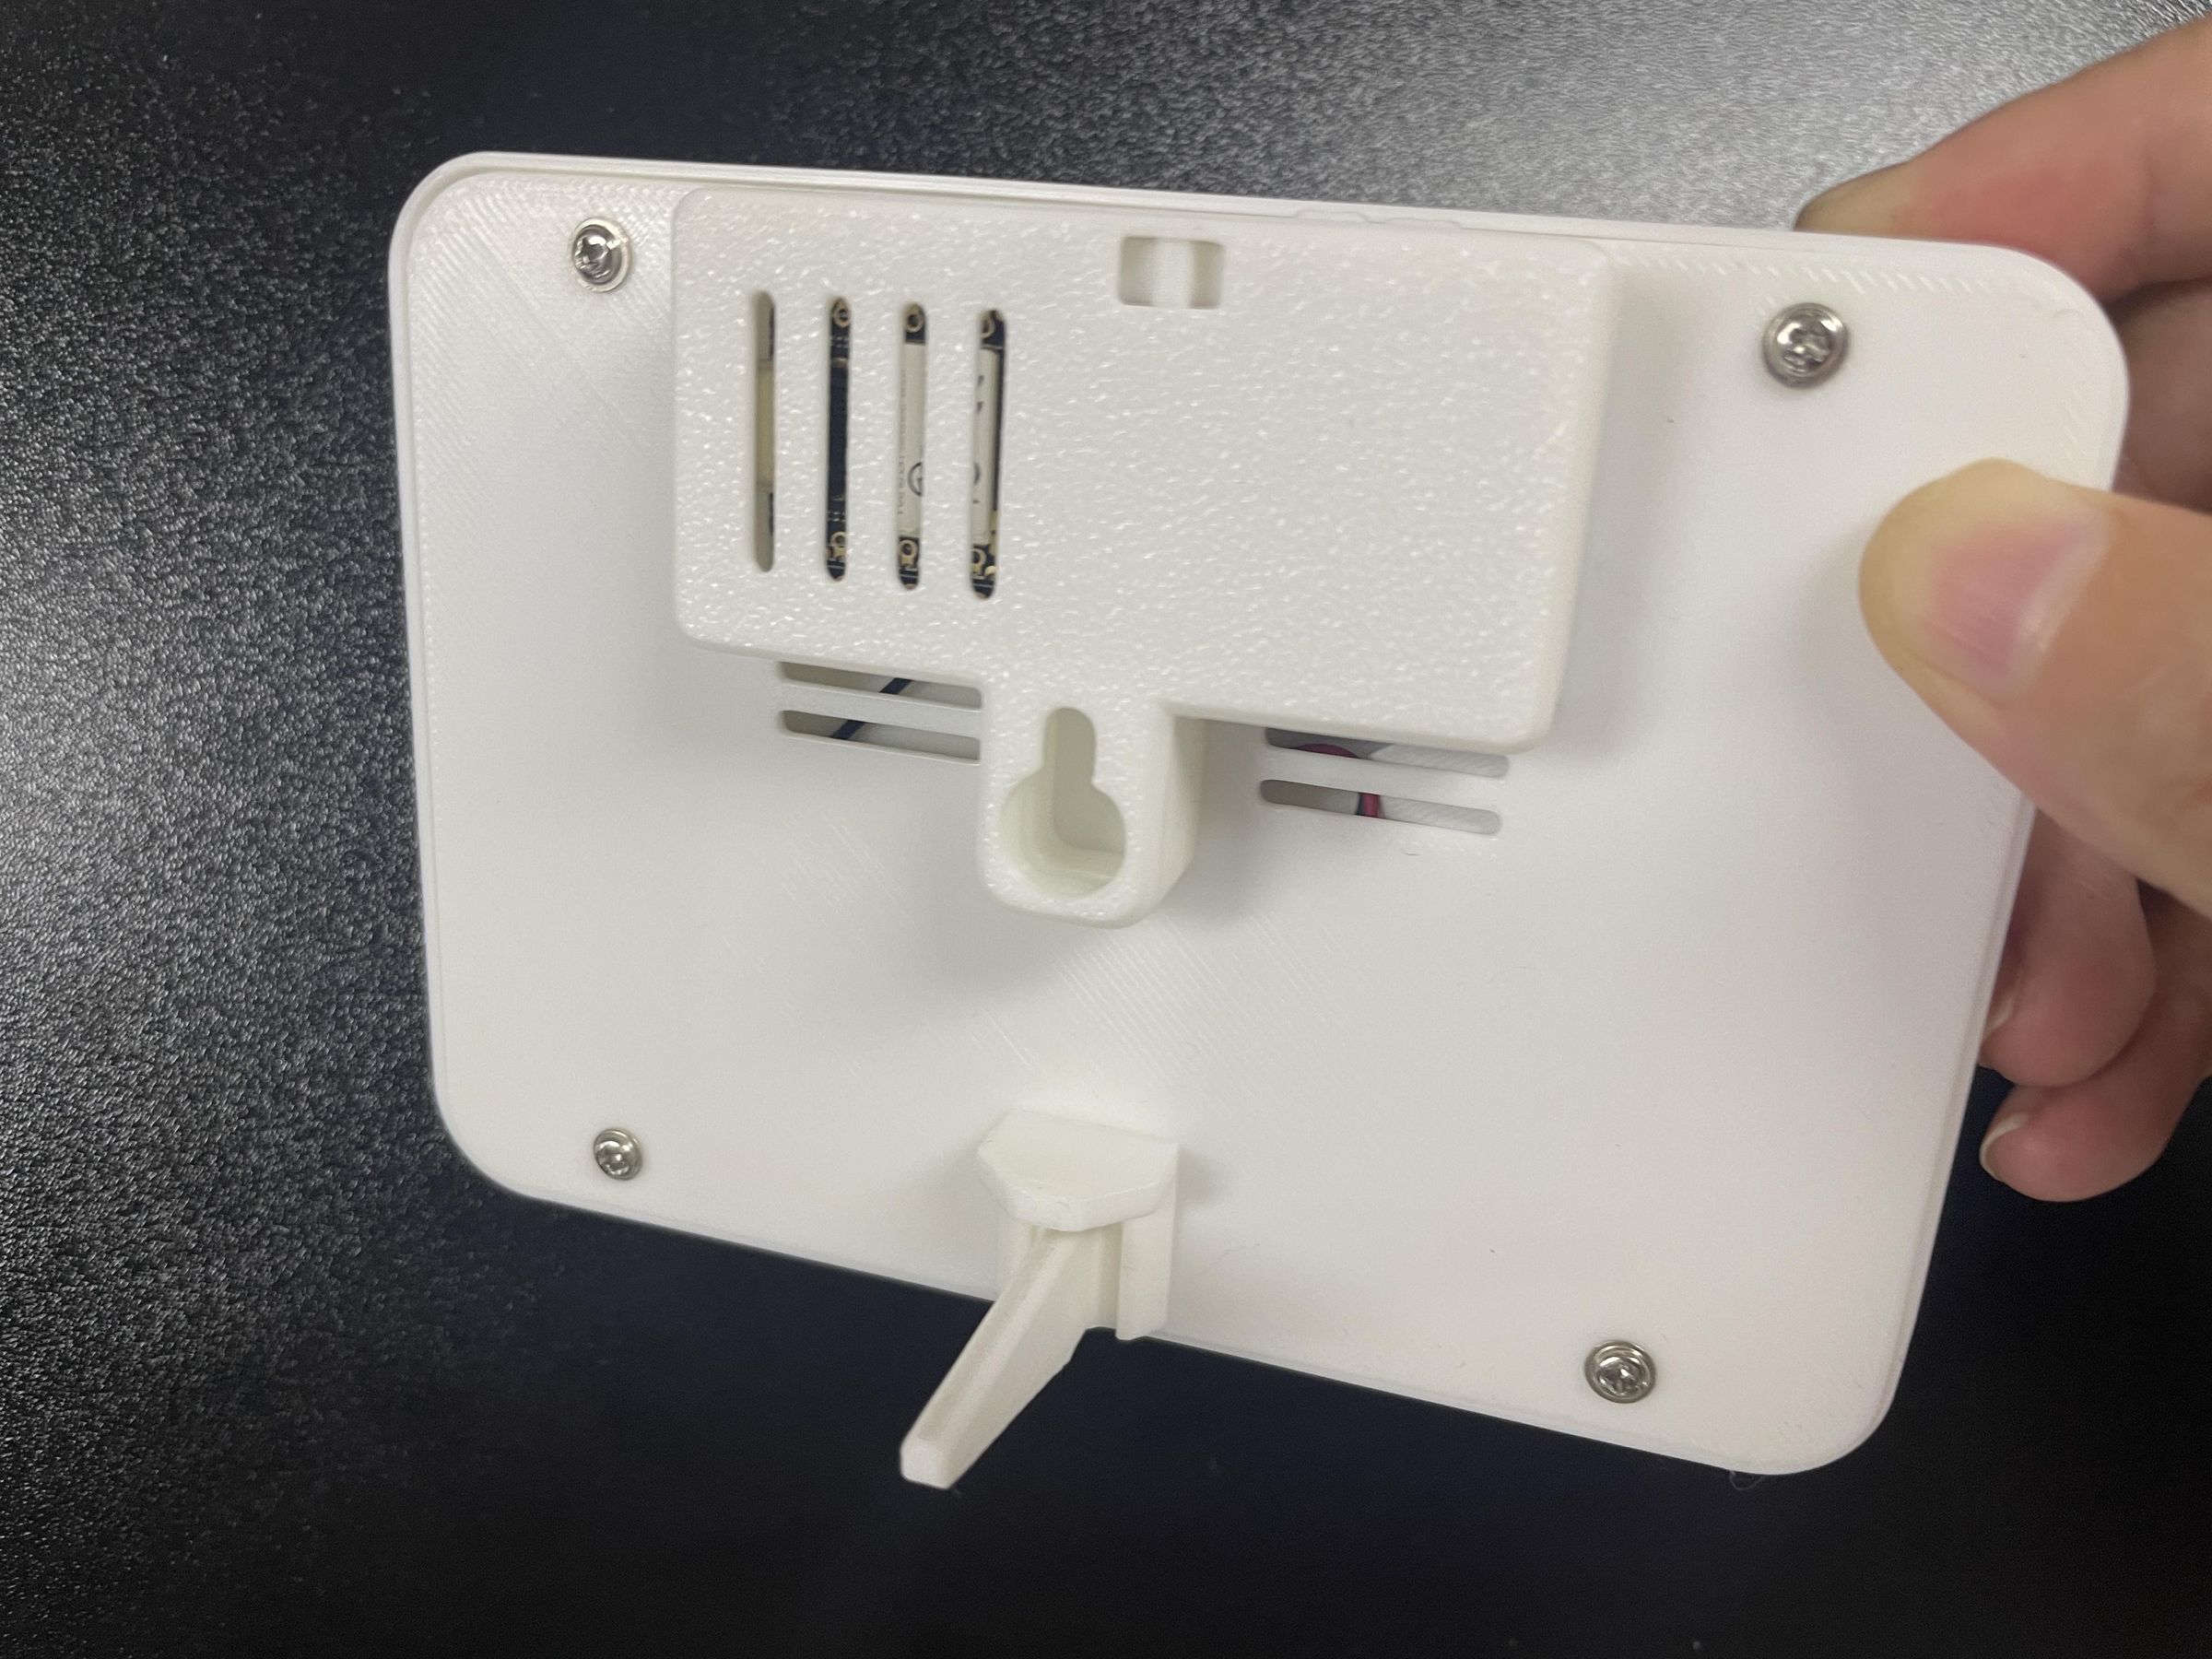
Once the hardware is all set, you're almost halfway done with the whole project. Next, let's move on to 3D‑printing the casing design. A special shout‑out to my maker friend Gokul for helping design this minimalist yet elegant look.
This casing design supports both hanging and desktop placement setups. It also comes with a tiny but cute power switch.
Here’s a step‑by‑step guide to assembling the hardware into the casing. I printed mine on a Bambu printer — the finish came out beautifully, as shown below.
Bind the Cattt Device to SenseCraft Seeedash
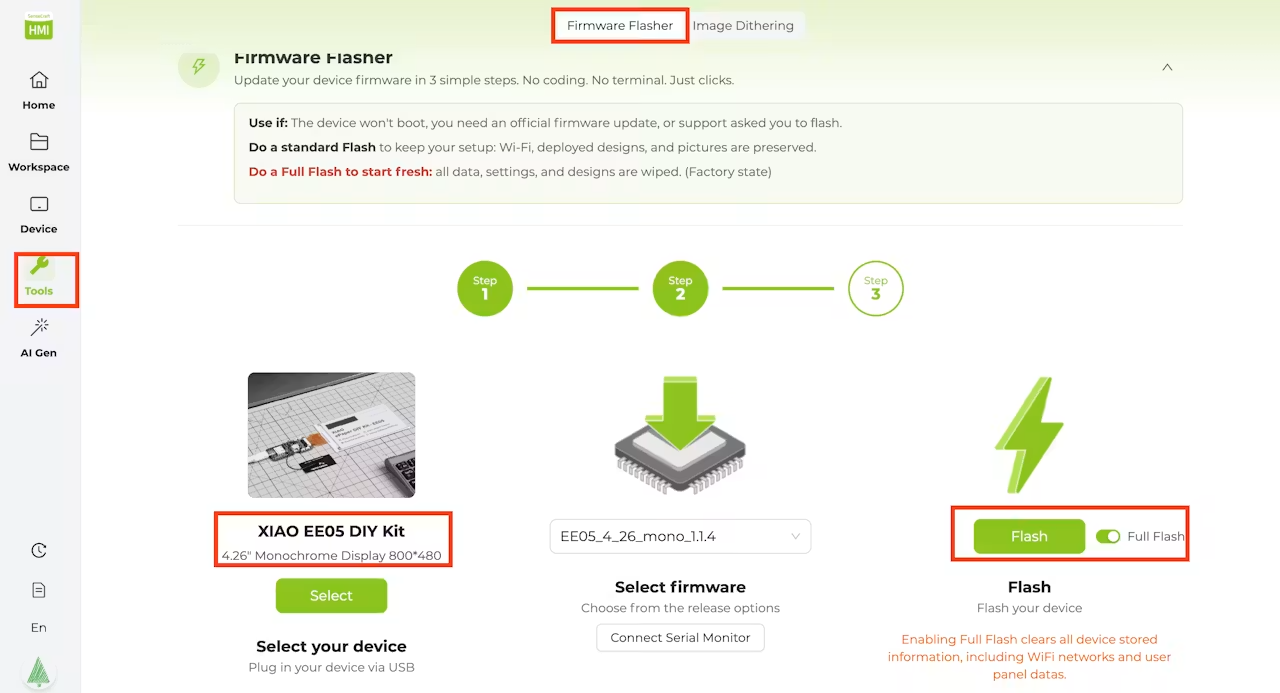
In case you're a first‑time user of SenseCraft Seeedash — it's a web‑based, no‑code dashboard builder that natively supports all Seeed Studio ePaper displays. It has an integrated Designer right in your browser, and you can start creating dashboards just like designing PPT, using drag‑and‑drop widgets (Text, Image, Clock, Calendar, Weather, external APIs, and many more). You can also view all the detailed documentations on how this platform works.
To use this platform, make sure you've registered an account first, then go flash the SenseCraft Seeedash firmware to the Cattt device before binding the device. The firmware bridges the Cattt and the SenseCraft Seeedash. You can refer to this guide for a detailed tutorial on how to flash the firmware.
After the firmware is flashed to the device, you will see a Wi-Fi configuration guide shown on the screen. Follow the guide to connect the device to your home Wi-Fi network, so it can talk to SenseCraft Seeedash.
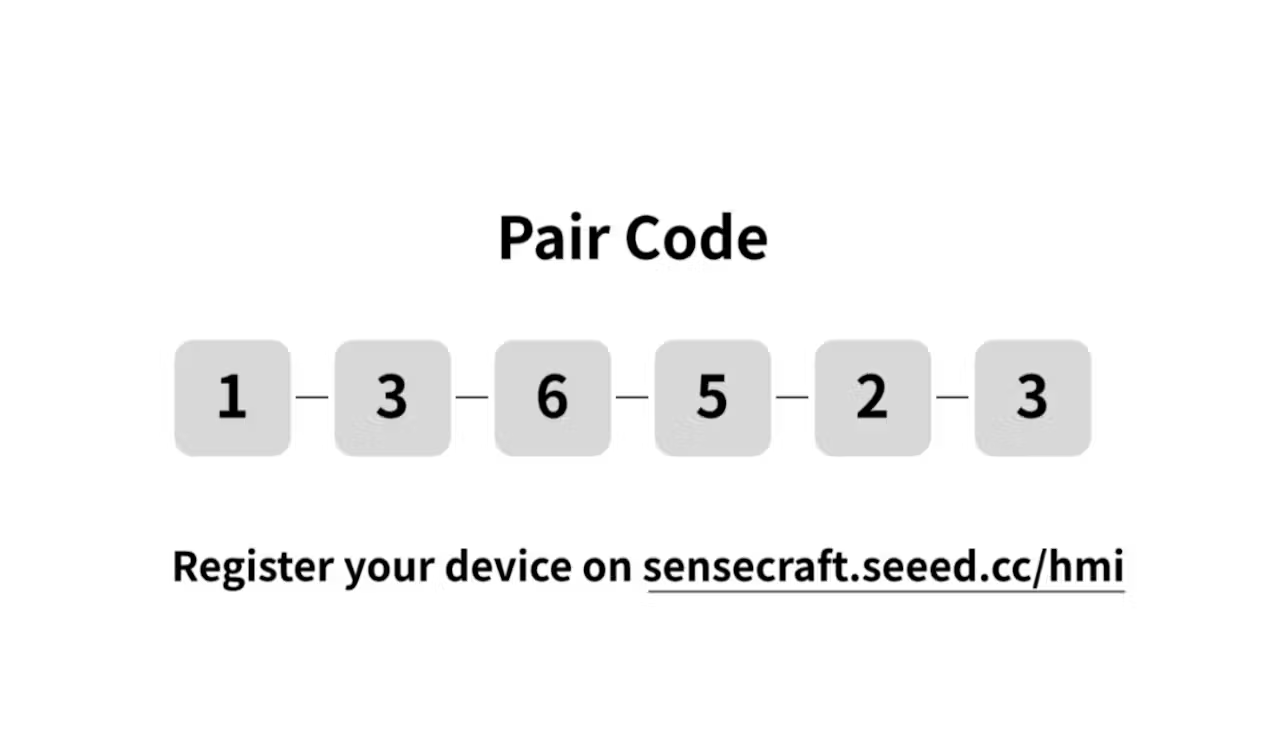
Then follow this detailed guide to connect it to the Wi-Fi network. Once it's connected, it will show a 6-digit Pair Code on the screen, which you'll use to bind the device to SenseCraft Seeedash.
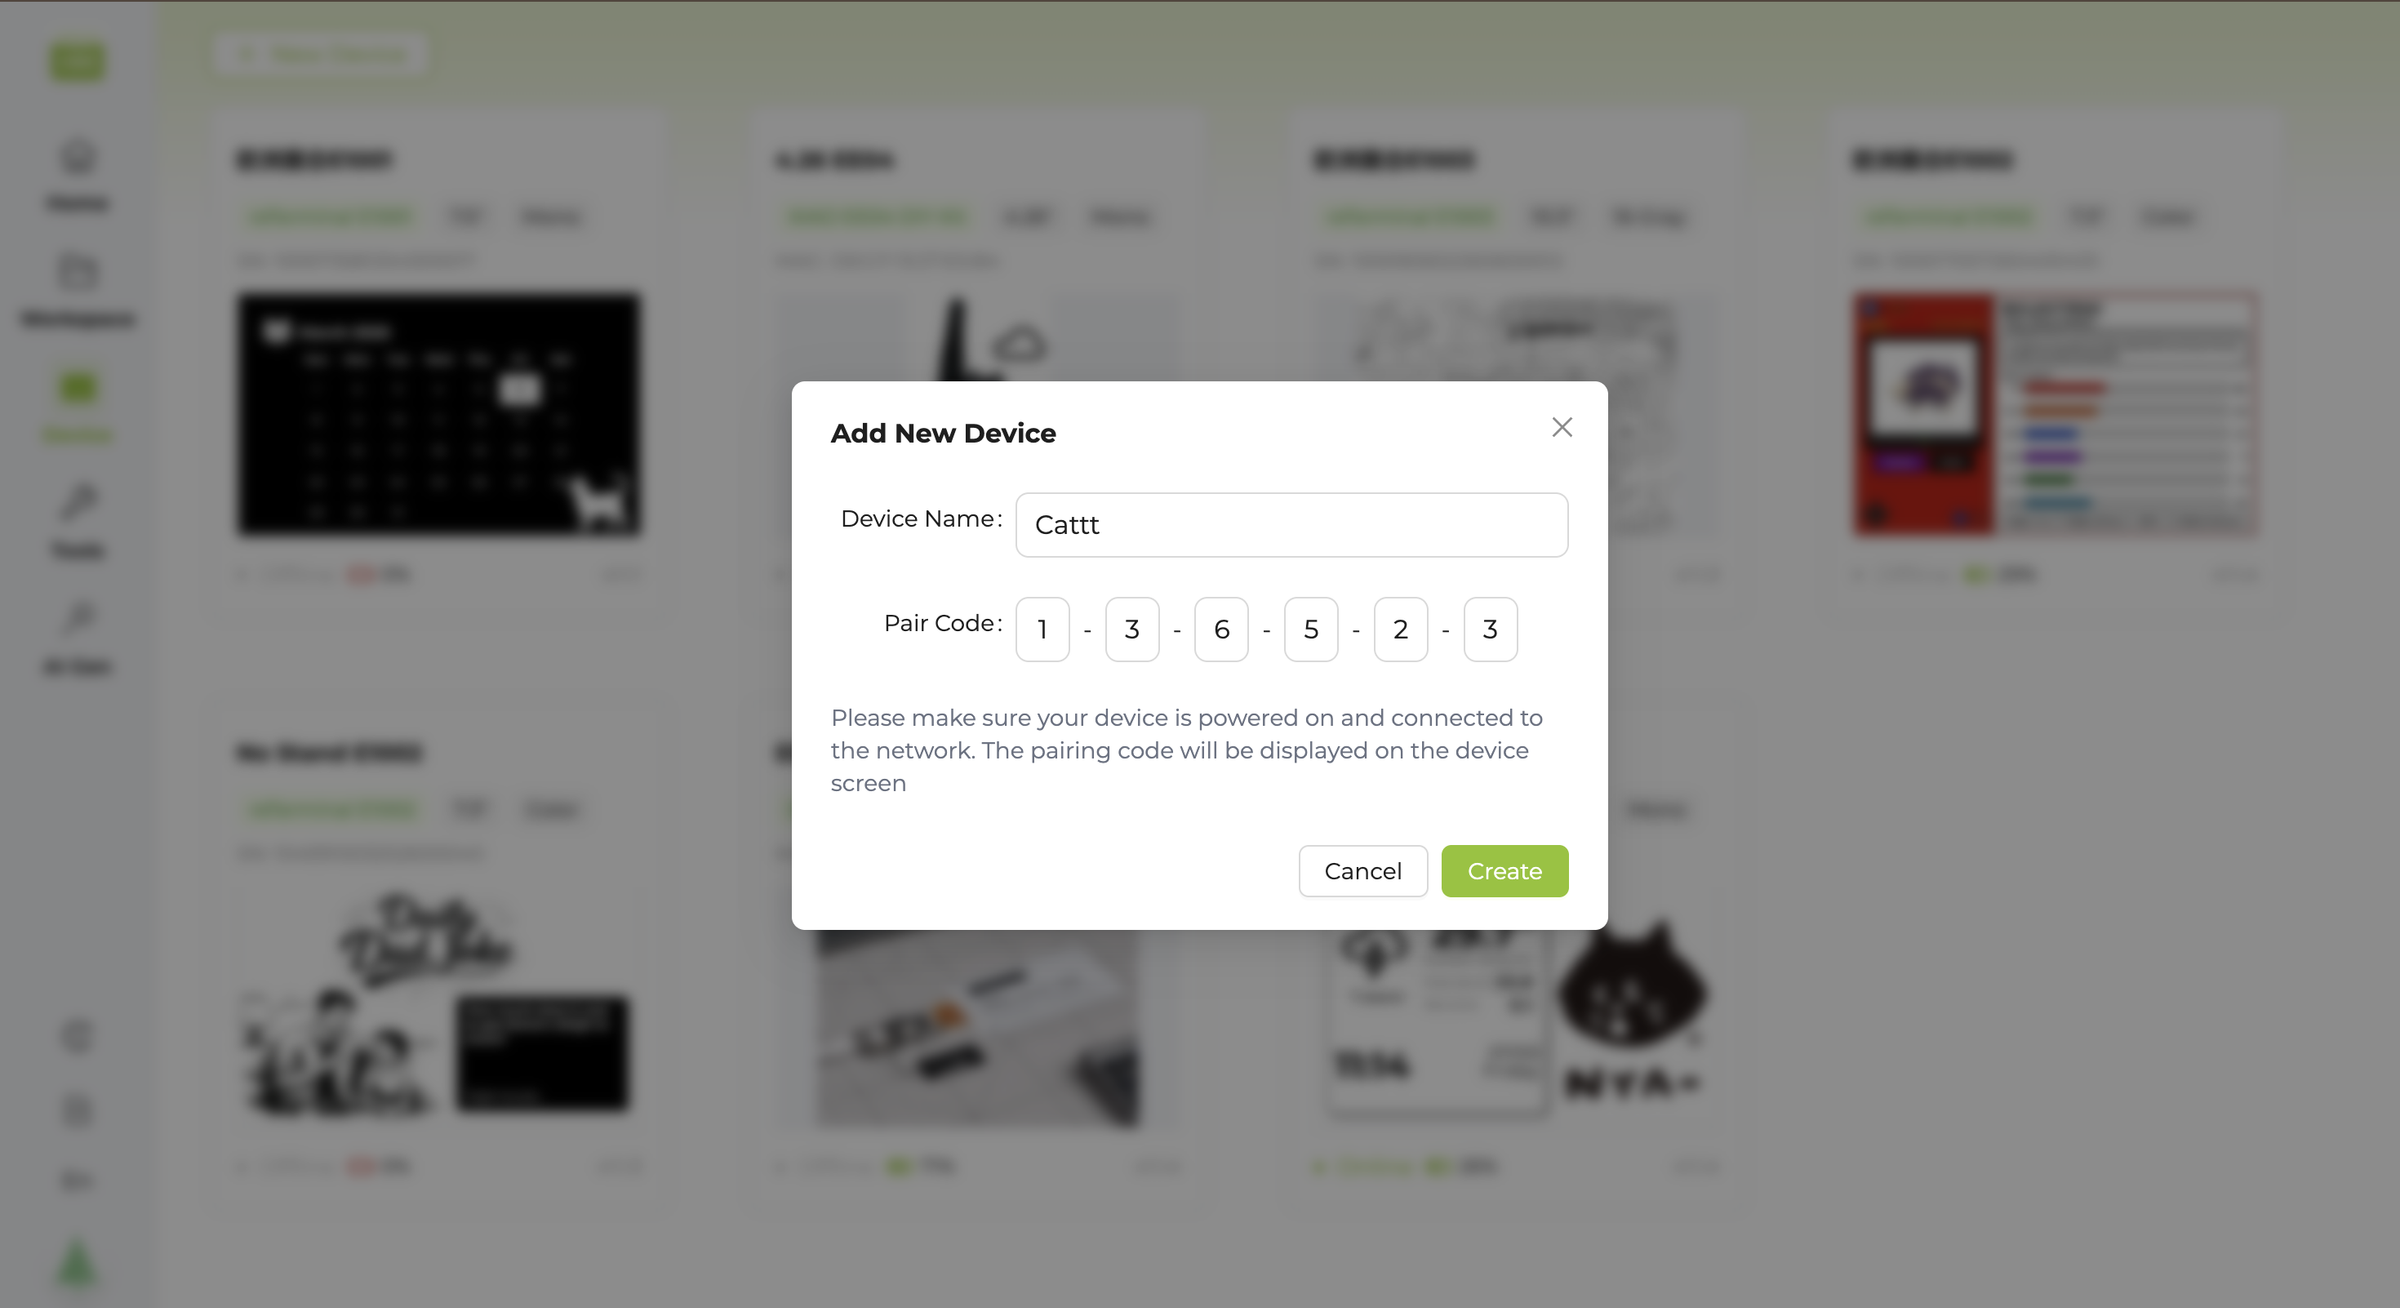
Then you need to head to the Seeedash's Device Tab to add a new device by offering the Pair Code. And you'll be all set for the hardware side.
Design 4 Cat-Themed UIs on SenseCraft Seeedash
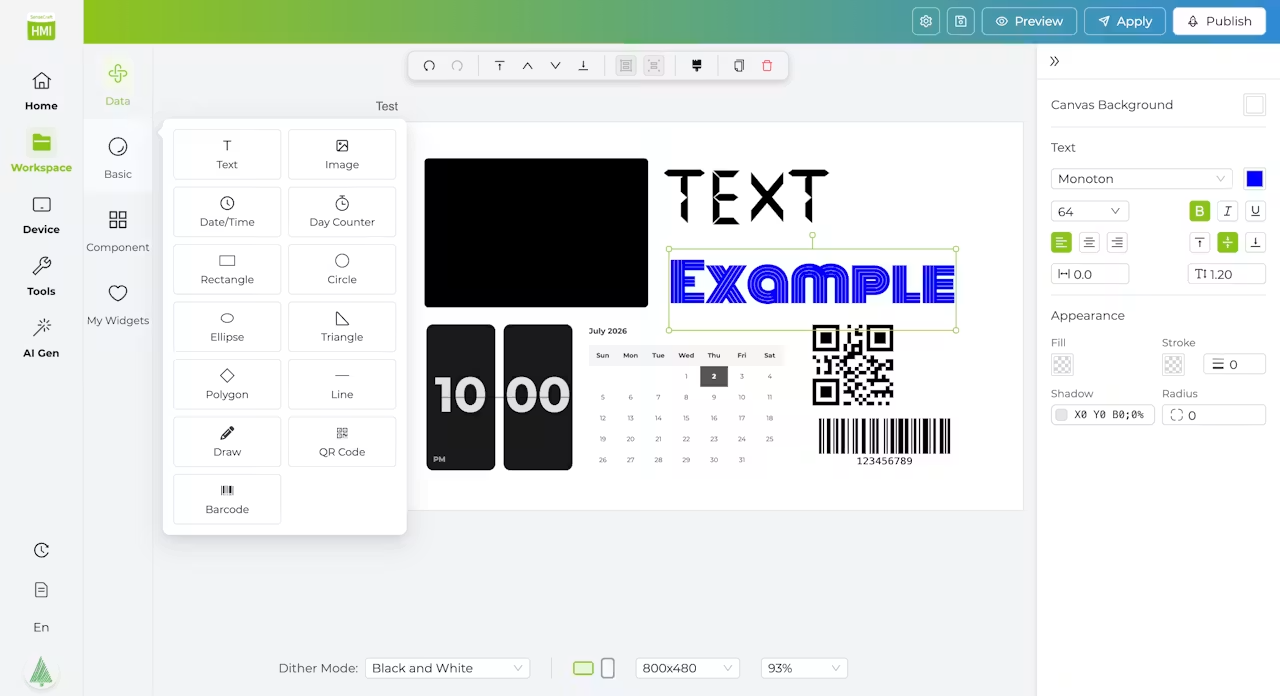
To create a +New design, you can navigate to the Workspace tab to click + New. This will take you to the SenseCraft Seeedash web‑based Designer to start creating.
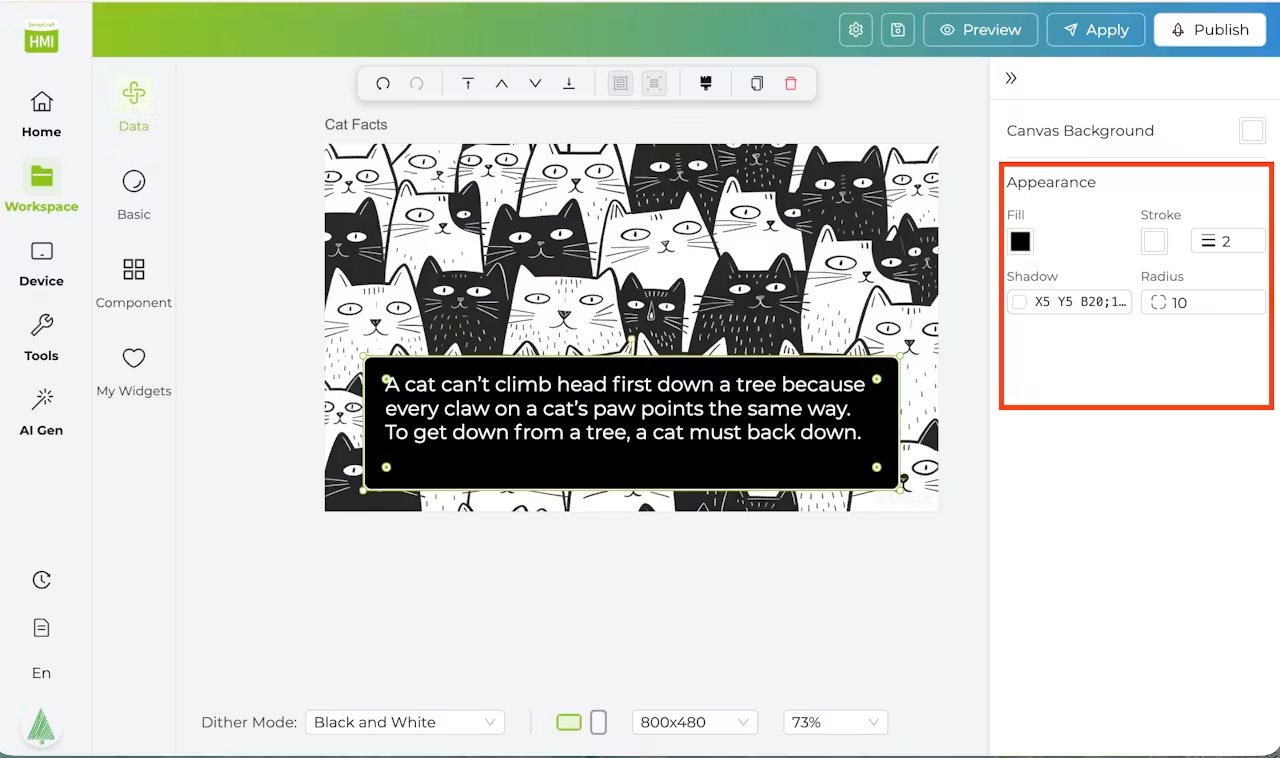
In the Seeedash Designer, you can drag and drop widgets like Text, Image, Shapes, Clock, Calendar, Weather, and more from the left Widgets Panel onto the blank canvas in the center. Then fine‑tune each widget's style (fonts, shadows, fills, and more) in the Inspector Panel on the right.
And on the top right of the Seeedash Designer, you can Save, Preview, Apply and even Publish your design once you're happy with it.
Preview: to stimulate how the design actually looks like on device before deploying it to the device. Really good for fine-tune the designs
Apply: to deploy the design to the device once it's ready
Publish: to share your proud design with the whole community so that they can duplicate your design to remix and deploy to their devices.
Since I have 4 cat‑themed dashboards running on Cattt, I'd love to go through them one by one to show you how easy it is to design dashboards using the integrated widgets and tools in the Seeedash Designer.
#Design 1: NYA- Cat Weather
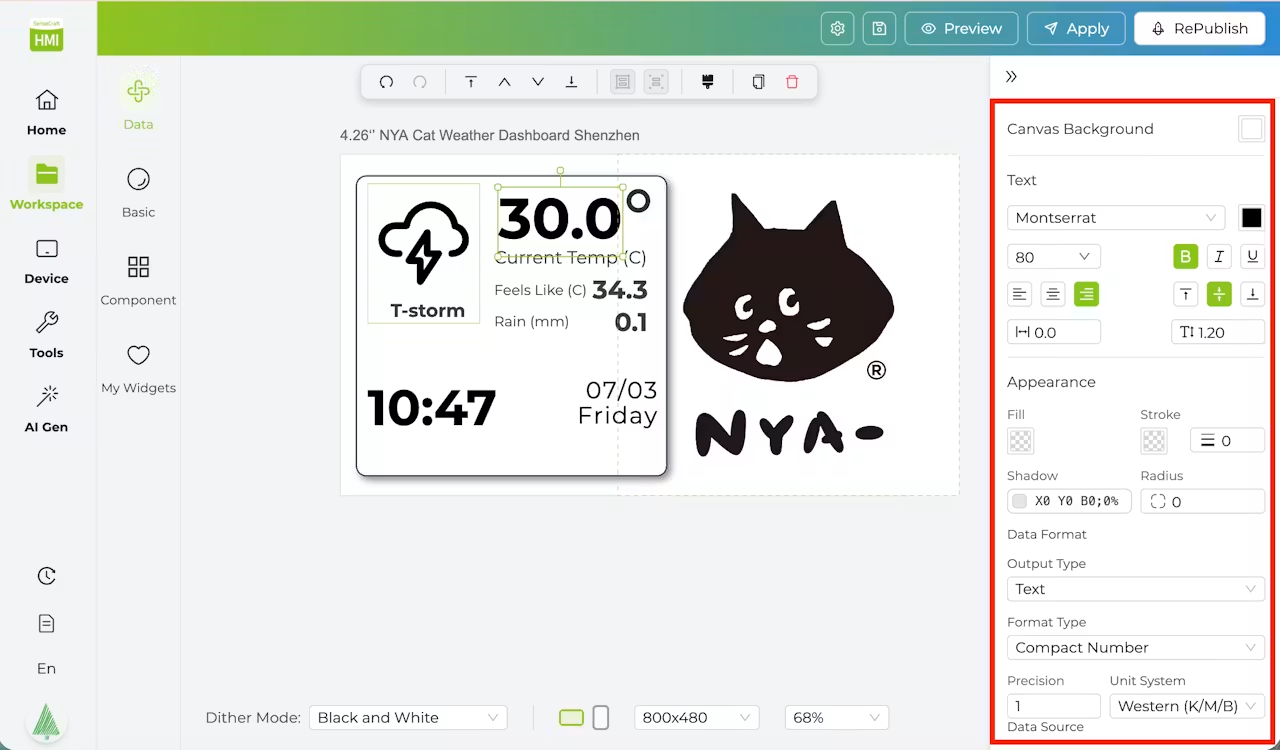
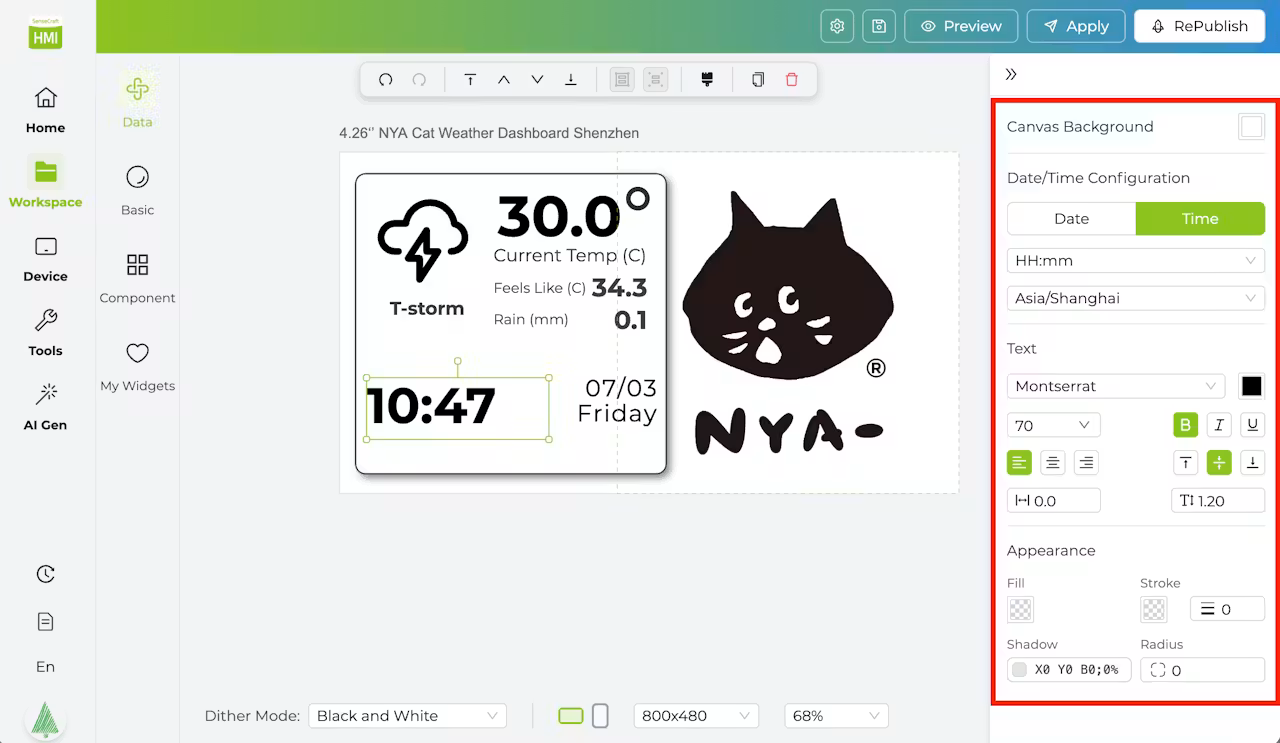
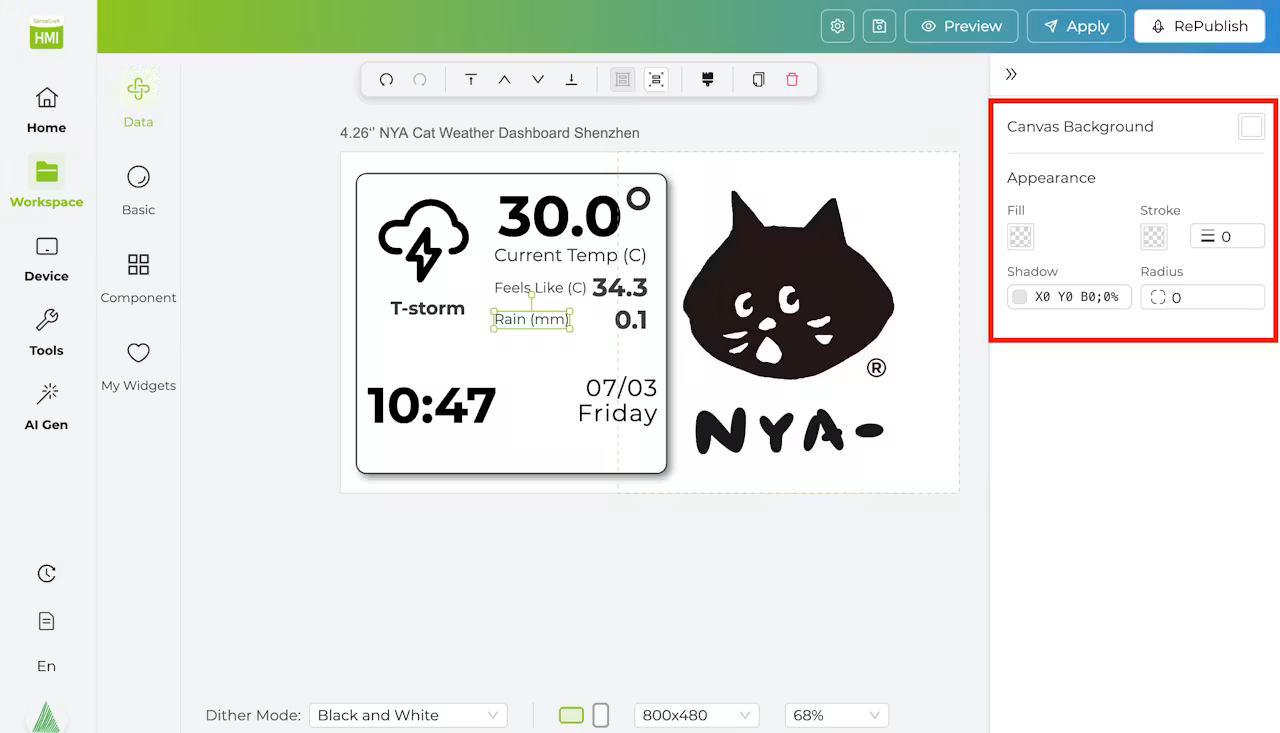
Widgets on the left: Weather (Weather Icon, Current Tempearture, Aparent Temperature in C);Time, Date, and Day (Configured to Shenzhen Time), Rectangle Shape
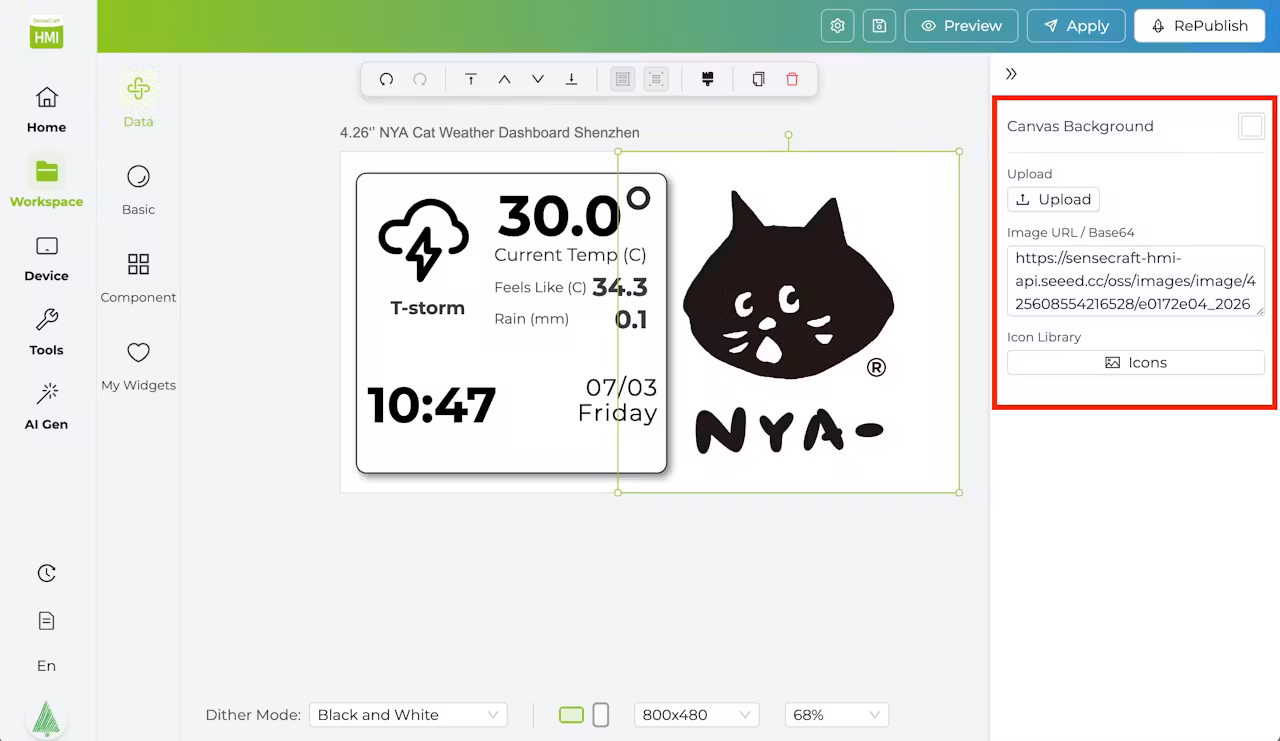
Widgets on the right: Image (which supports local upload)
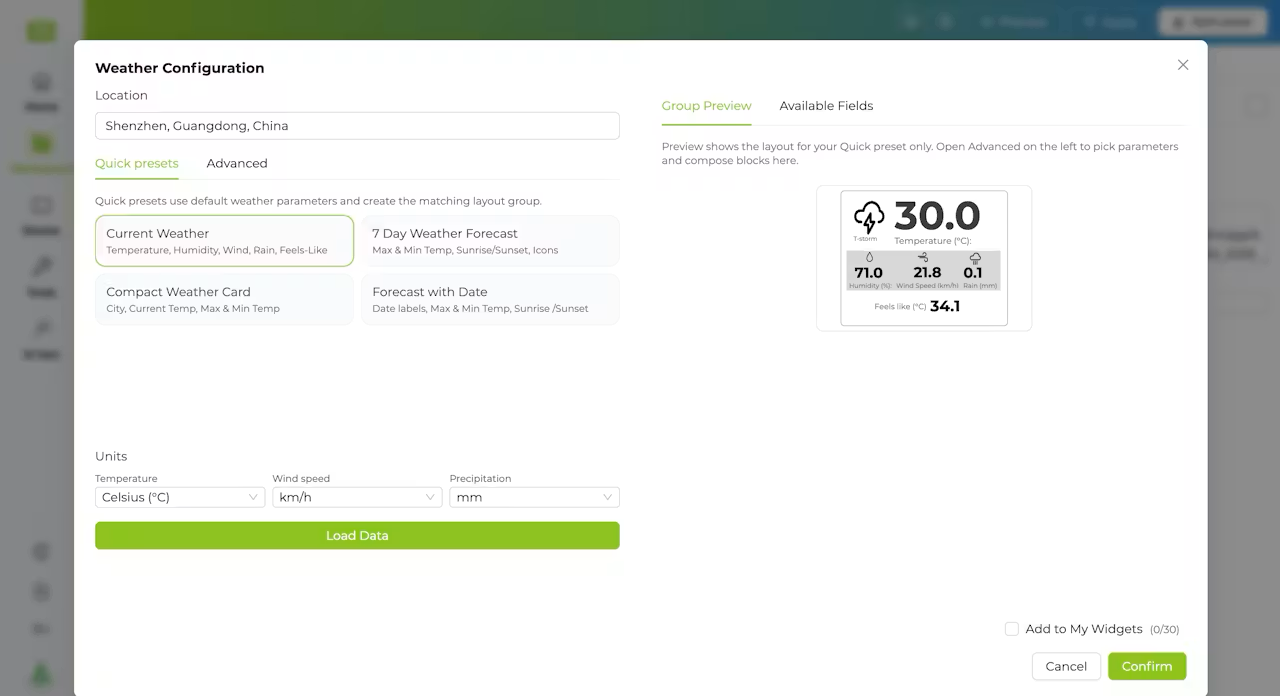
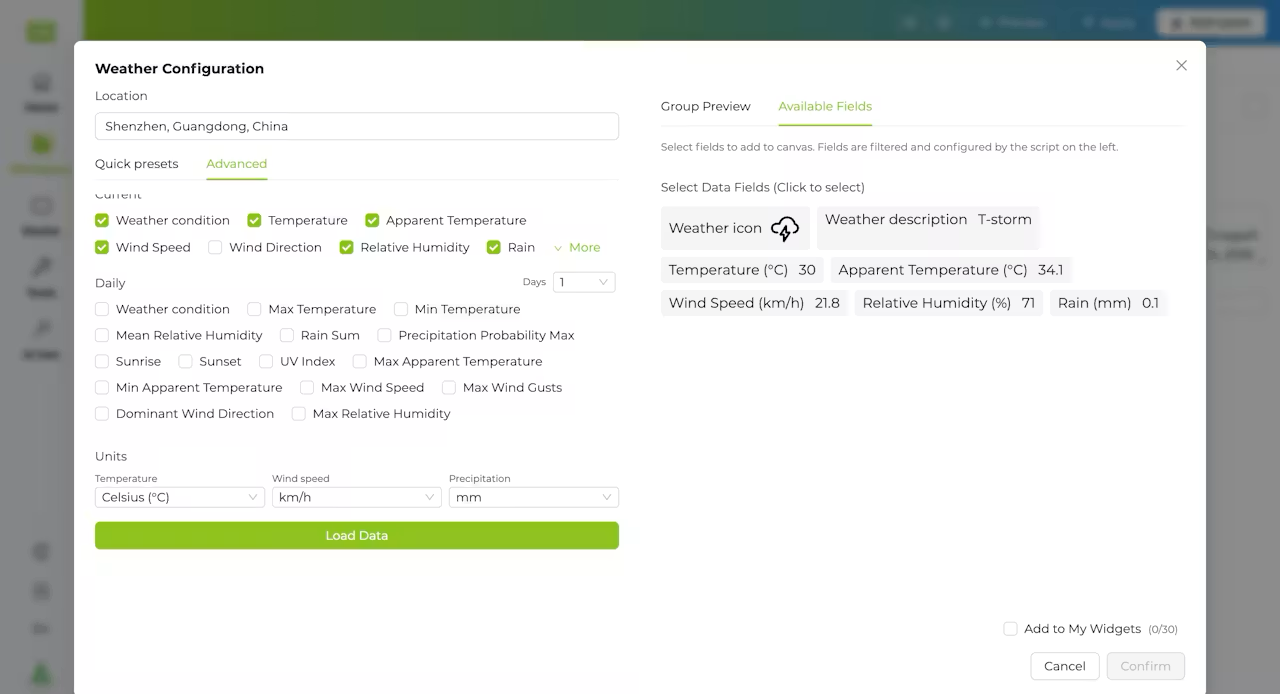
For the Weather Widget, SenseCraft Seeedash has integrated a ready‑to‑use one using the Open‑Meteo API. They also included 4 quick‑preset weather cards (with 4 different combinations of weather parameters) that you can add to your design by clicking the Confirm button. For those who prefer more freedom — whether you want to capture more parameters or create a completely custom design — you can switch to the Advanced Tab, select all the parameters you want, and then add them to your design.
Here are the detailed fine-tuning of all the Widgets used:
However, you don't need to handle all these. Since I've published this design in the community, you can click here to duplicate (Add to My Page) it to your workspace and make some custom touches.
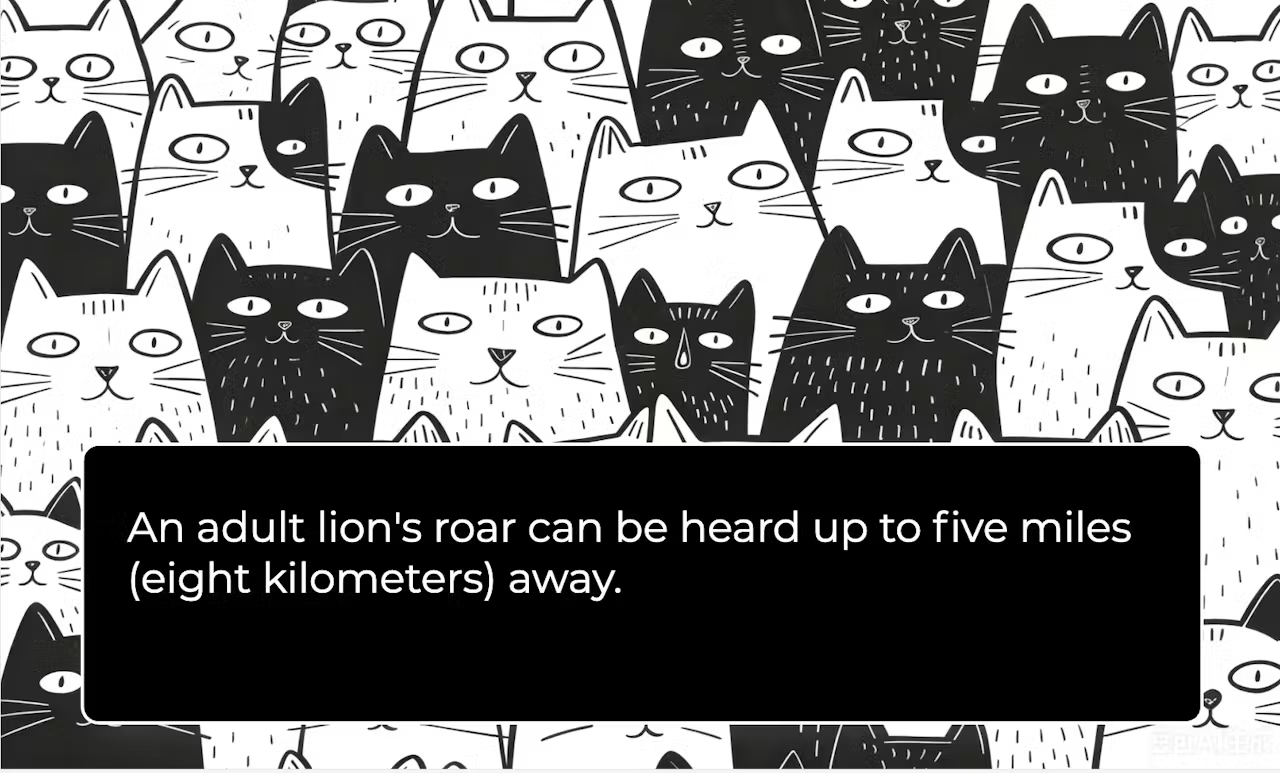
#Design 2: Random Cat Facts
Widget for the backgroupd: Image (which I uploaded a Seeedance Generated illustration of black and white cats)
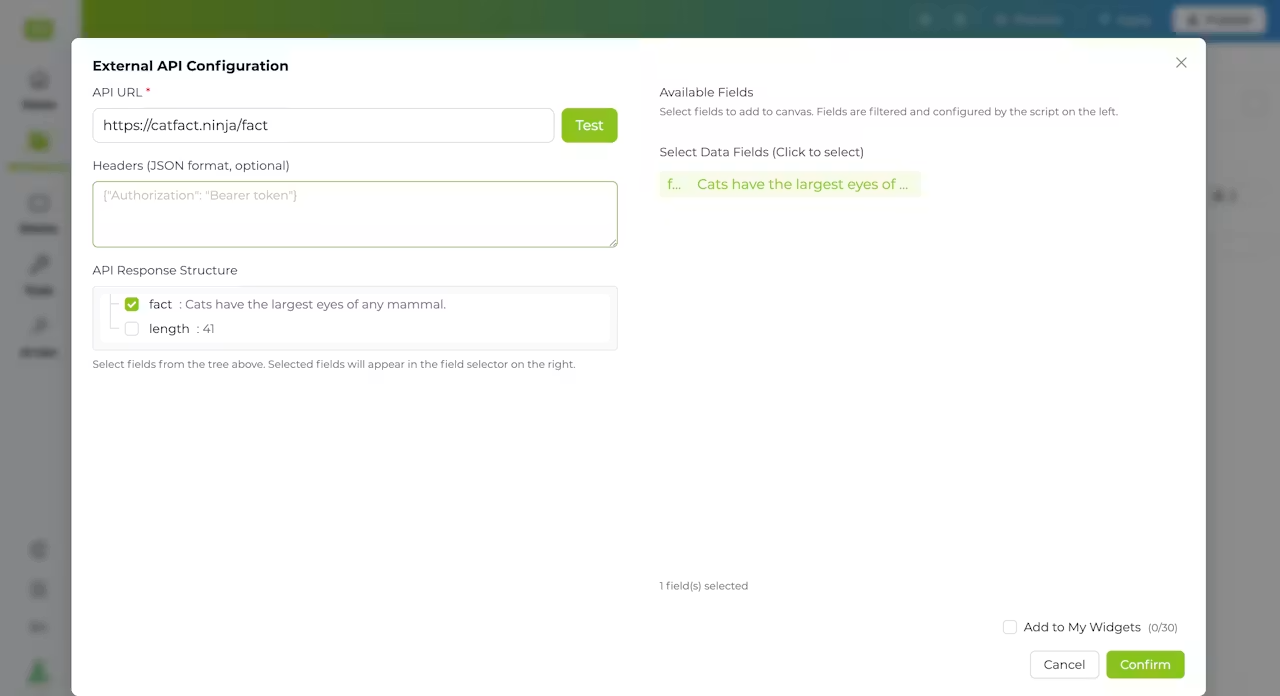
Widgets for the Cat Facts Card: External Data Source to get the random cat facts through https://catfact.ninja/fact API (configuration as below), Rectangle Shape (with black fill and shadow setting as below)
You don't need to do it all over again as you can also duplicate my design here directly.
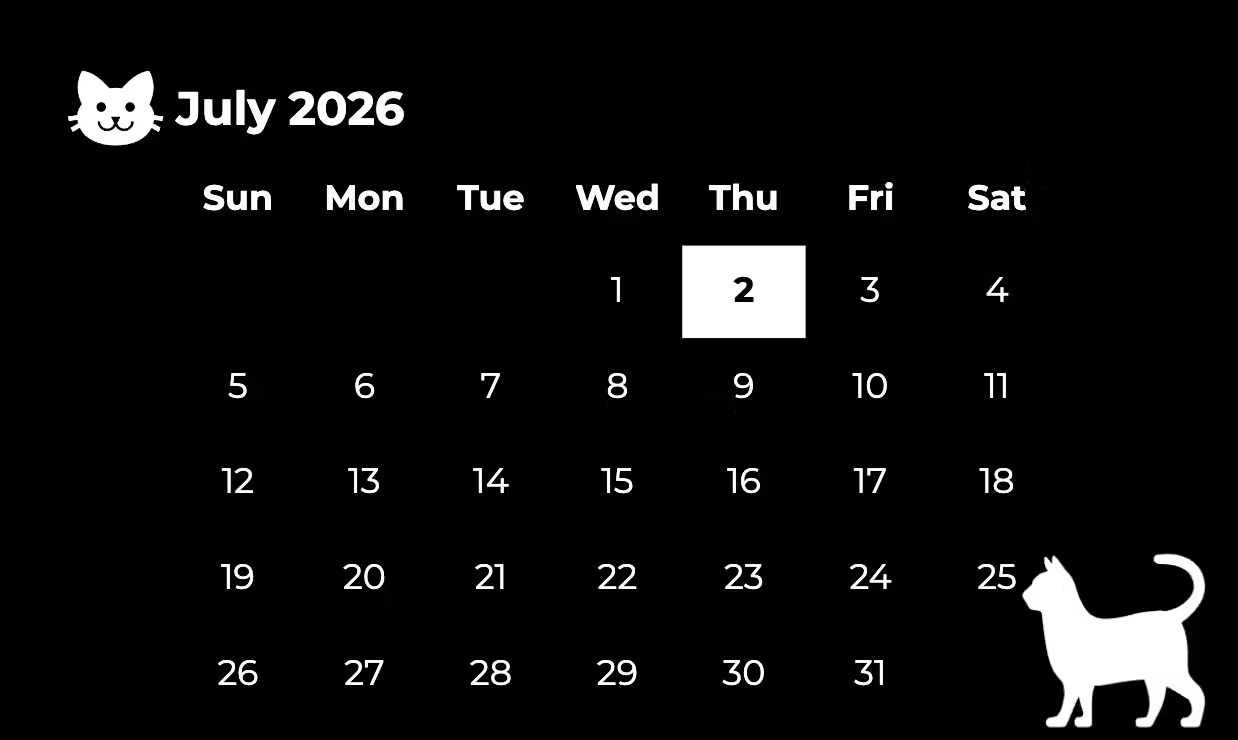
#Design 3: Catlendar
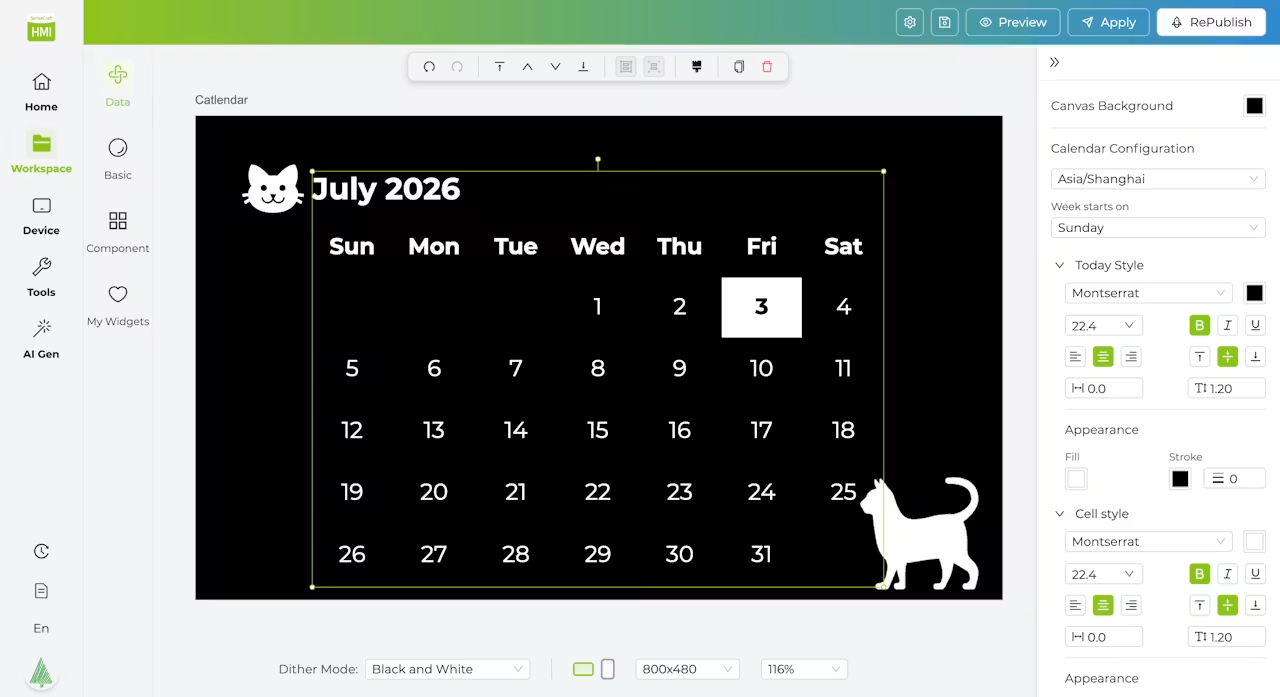
Widgets: Image that I uploaded 2 pictures of the cats (which I found them here); Calendar which is integrated in Seeedash Designer, which I touched a bit on how it looks (See the picture below)
Once again, it's super easy if you want to design such a monthly calendar with SenseCraft Seeedash. But if you prefer not to design from scratch, you can duplicate my design here.
#Design 4: Lucky Cat Flip Clock
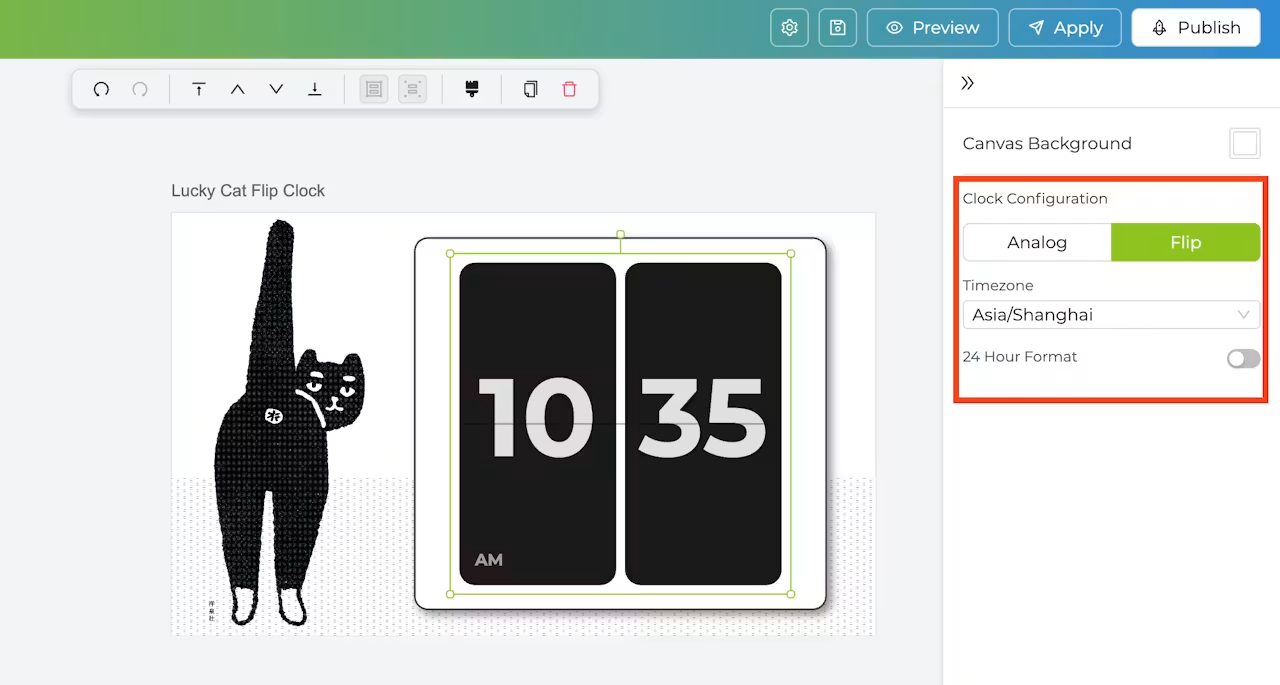
Widgets: Image for the cat and the texture background; Clock for the Flip Clock (you can find it in the component widget); Rectangle Shape (with white fill and shadow setting as below);
BTW, this design is originally from Alex — he published it in the community. I duplicated it and re‑worked it into a Flip Clock. Here is the configured page for the flip clock widget. You can find my final design here.
Deploy the Designs to the Display
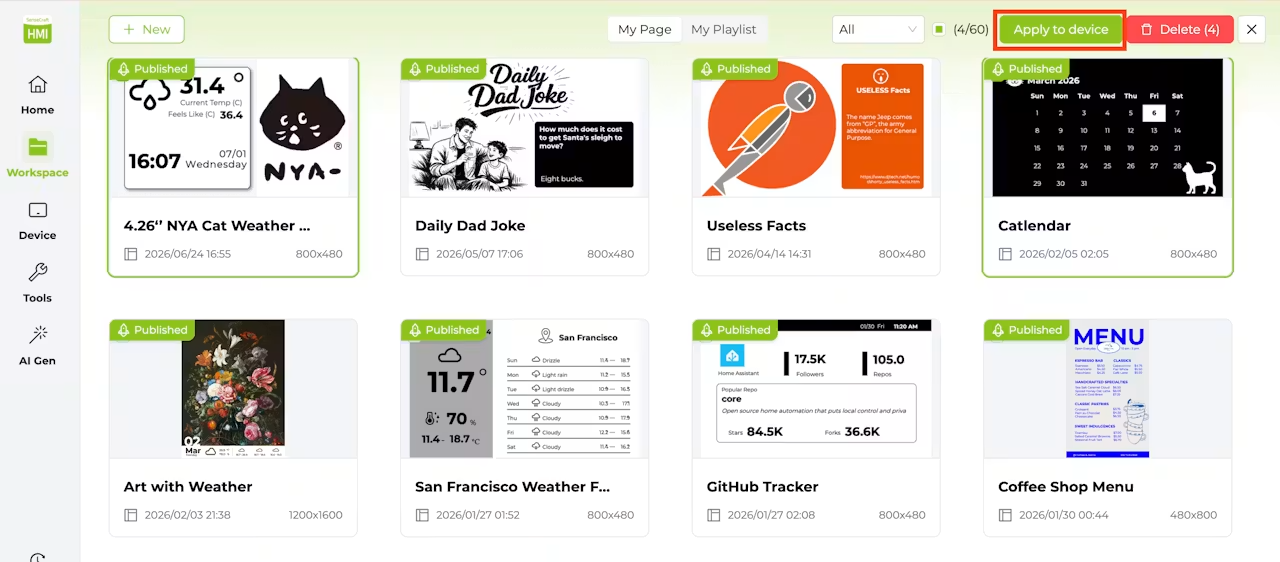
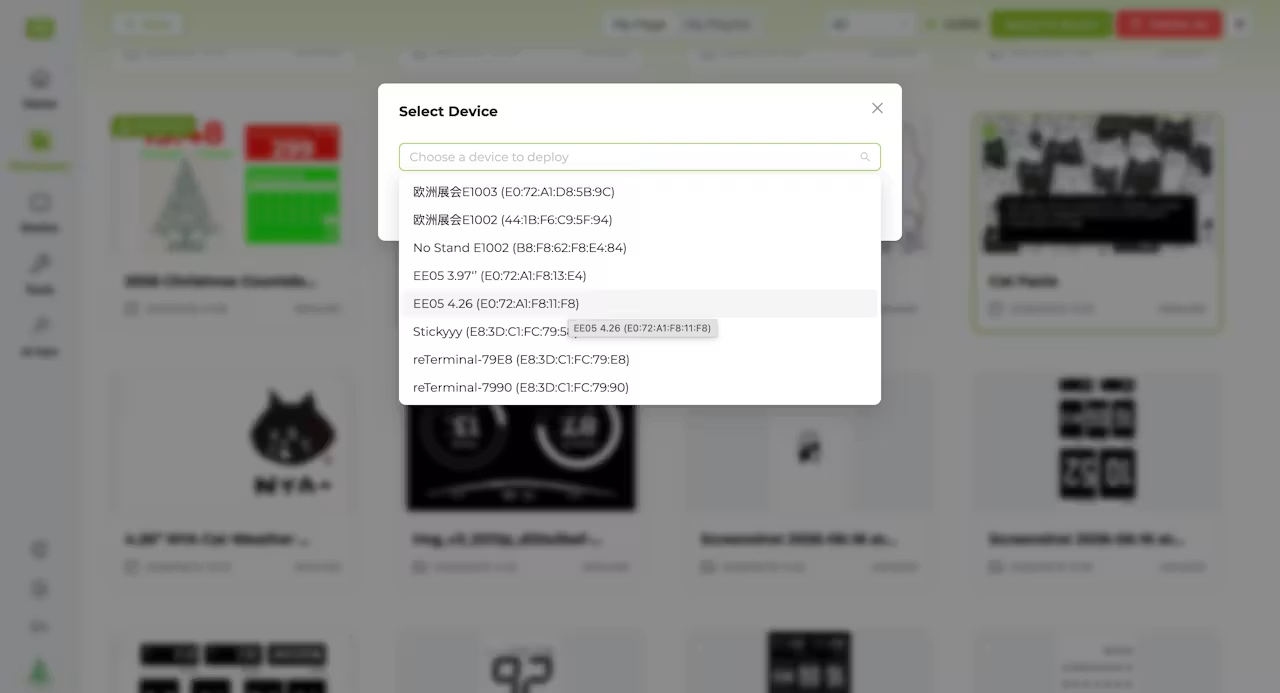
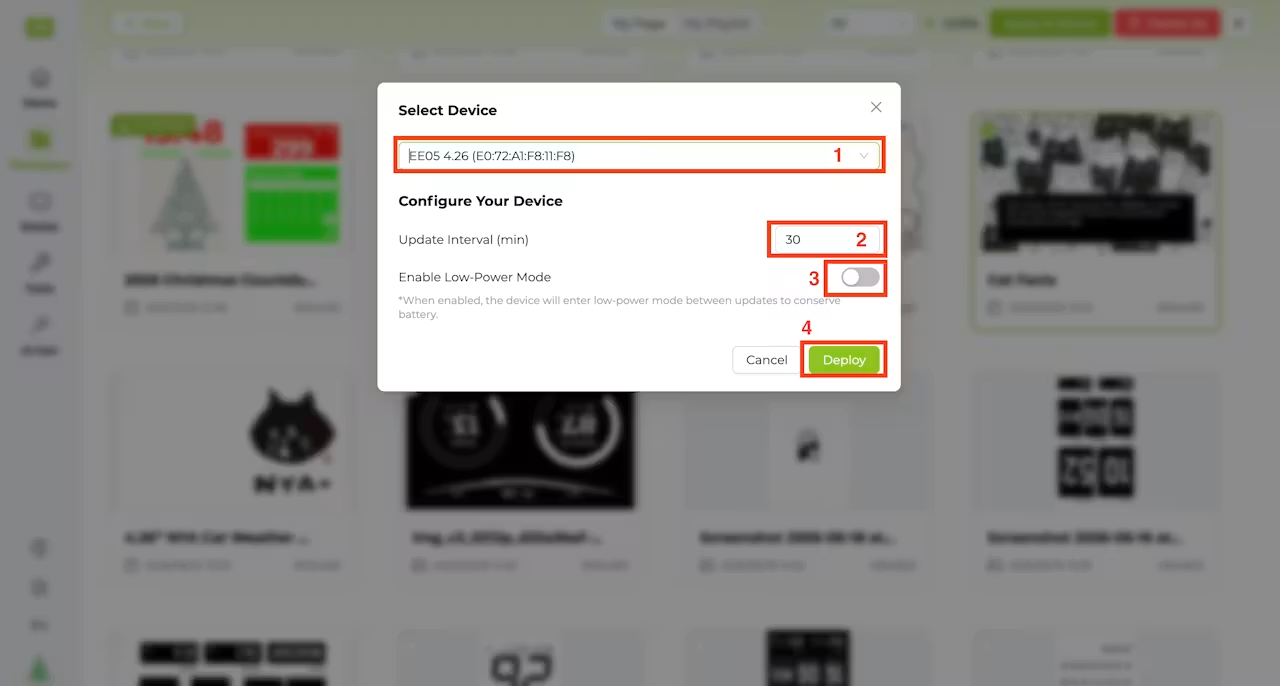
Once you're happy with all your designs, head over to Workspace → My Page and select the 4 designs you want to deploy to your display. Then click the Apply to Device button in the top‑right corner to deploy them with just one click. This will automatically create a playlist that slideshows the 4 designs on your display.
Update Interval means how long you'd love to switch between these designs.
Enable Low-Power Mode: you can check-box it if you want to put your display into sleep to save energy once after it switches a new design. Enabling this means a longer battery life.
And that's it.
Done! Enjoy the Cat Show
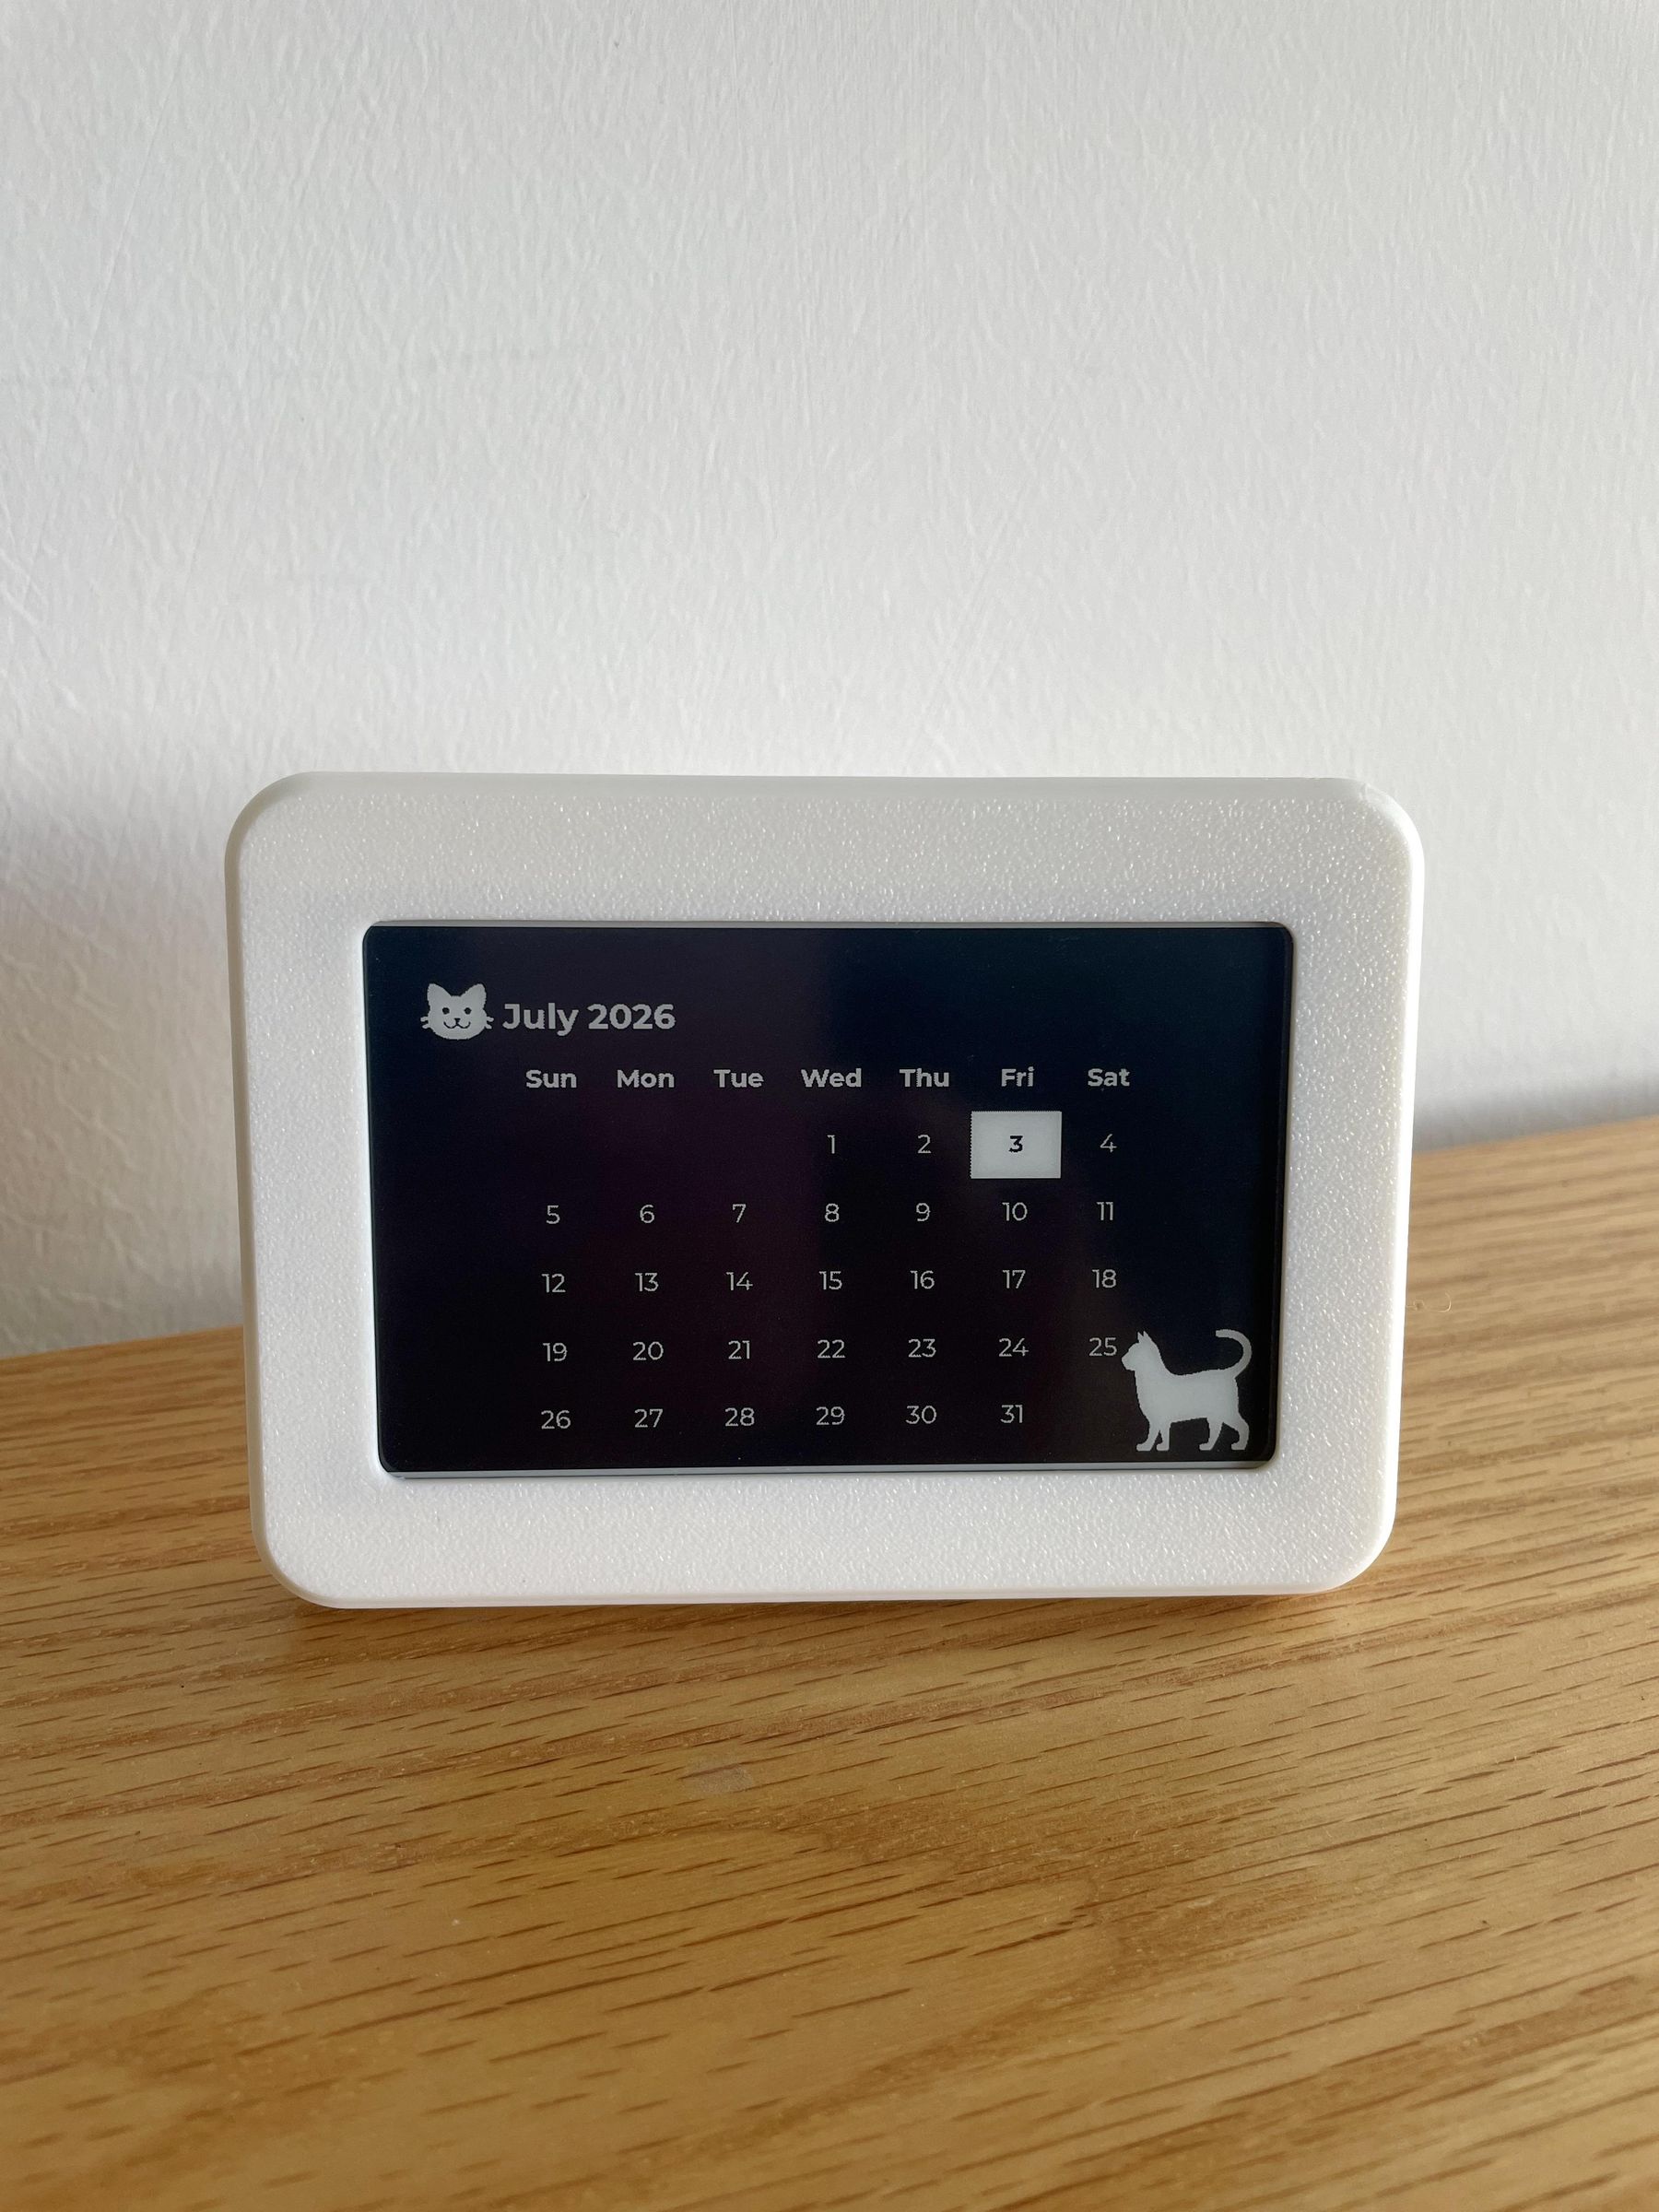
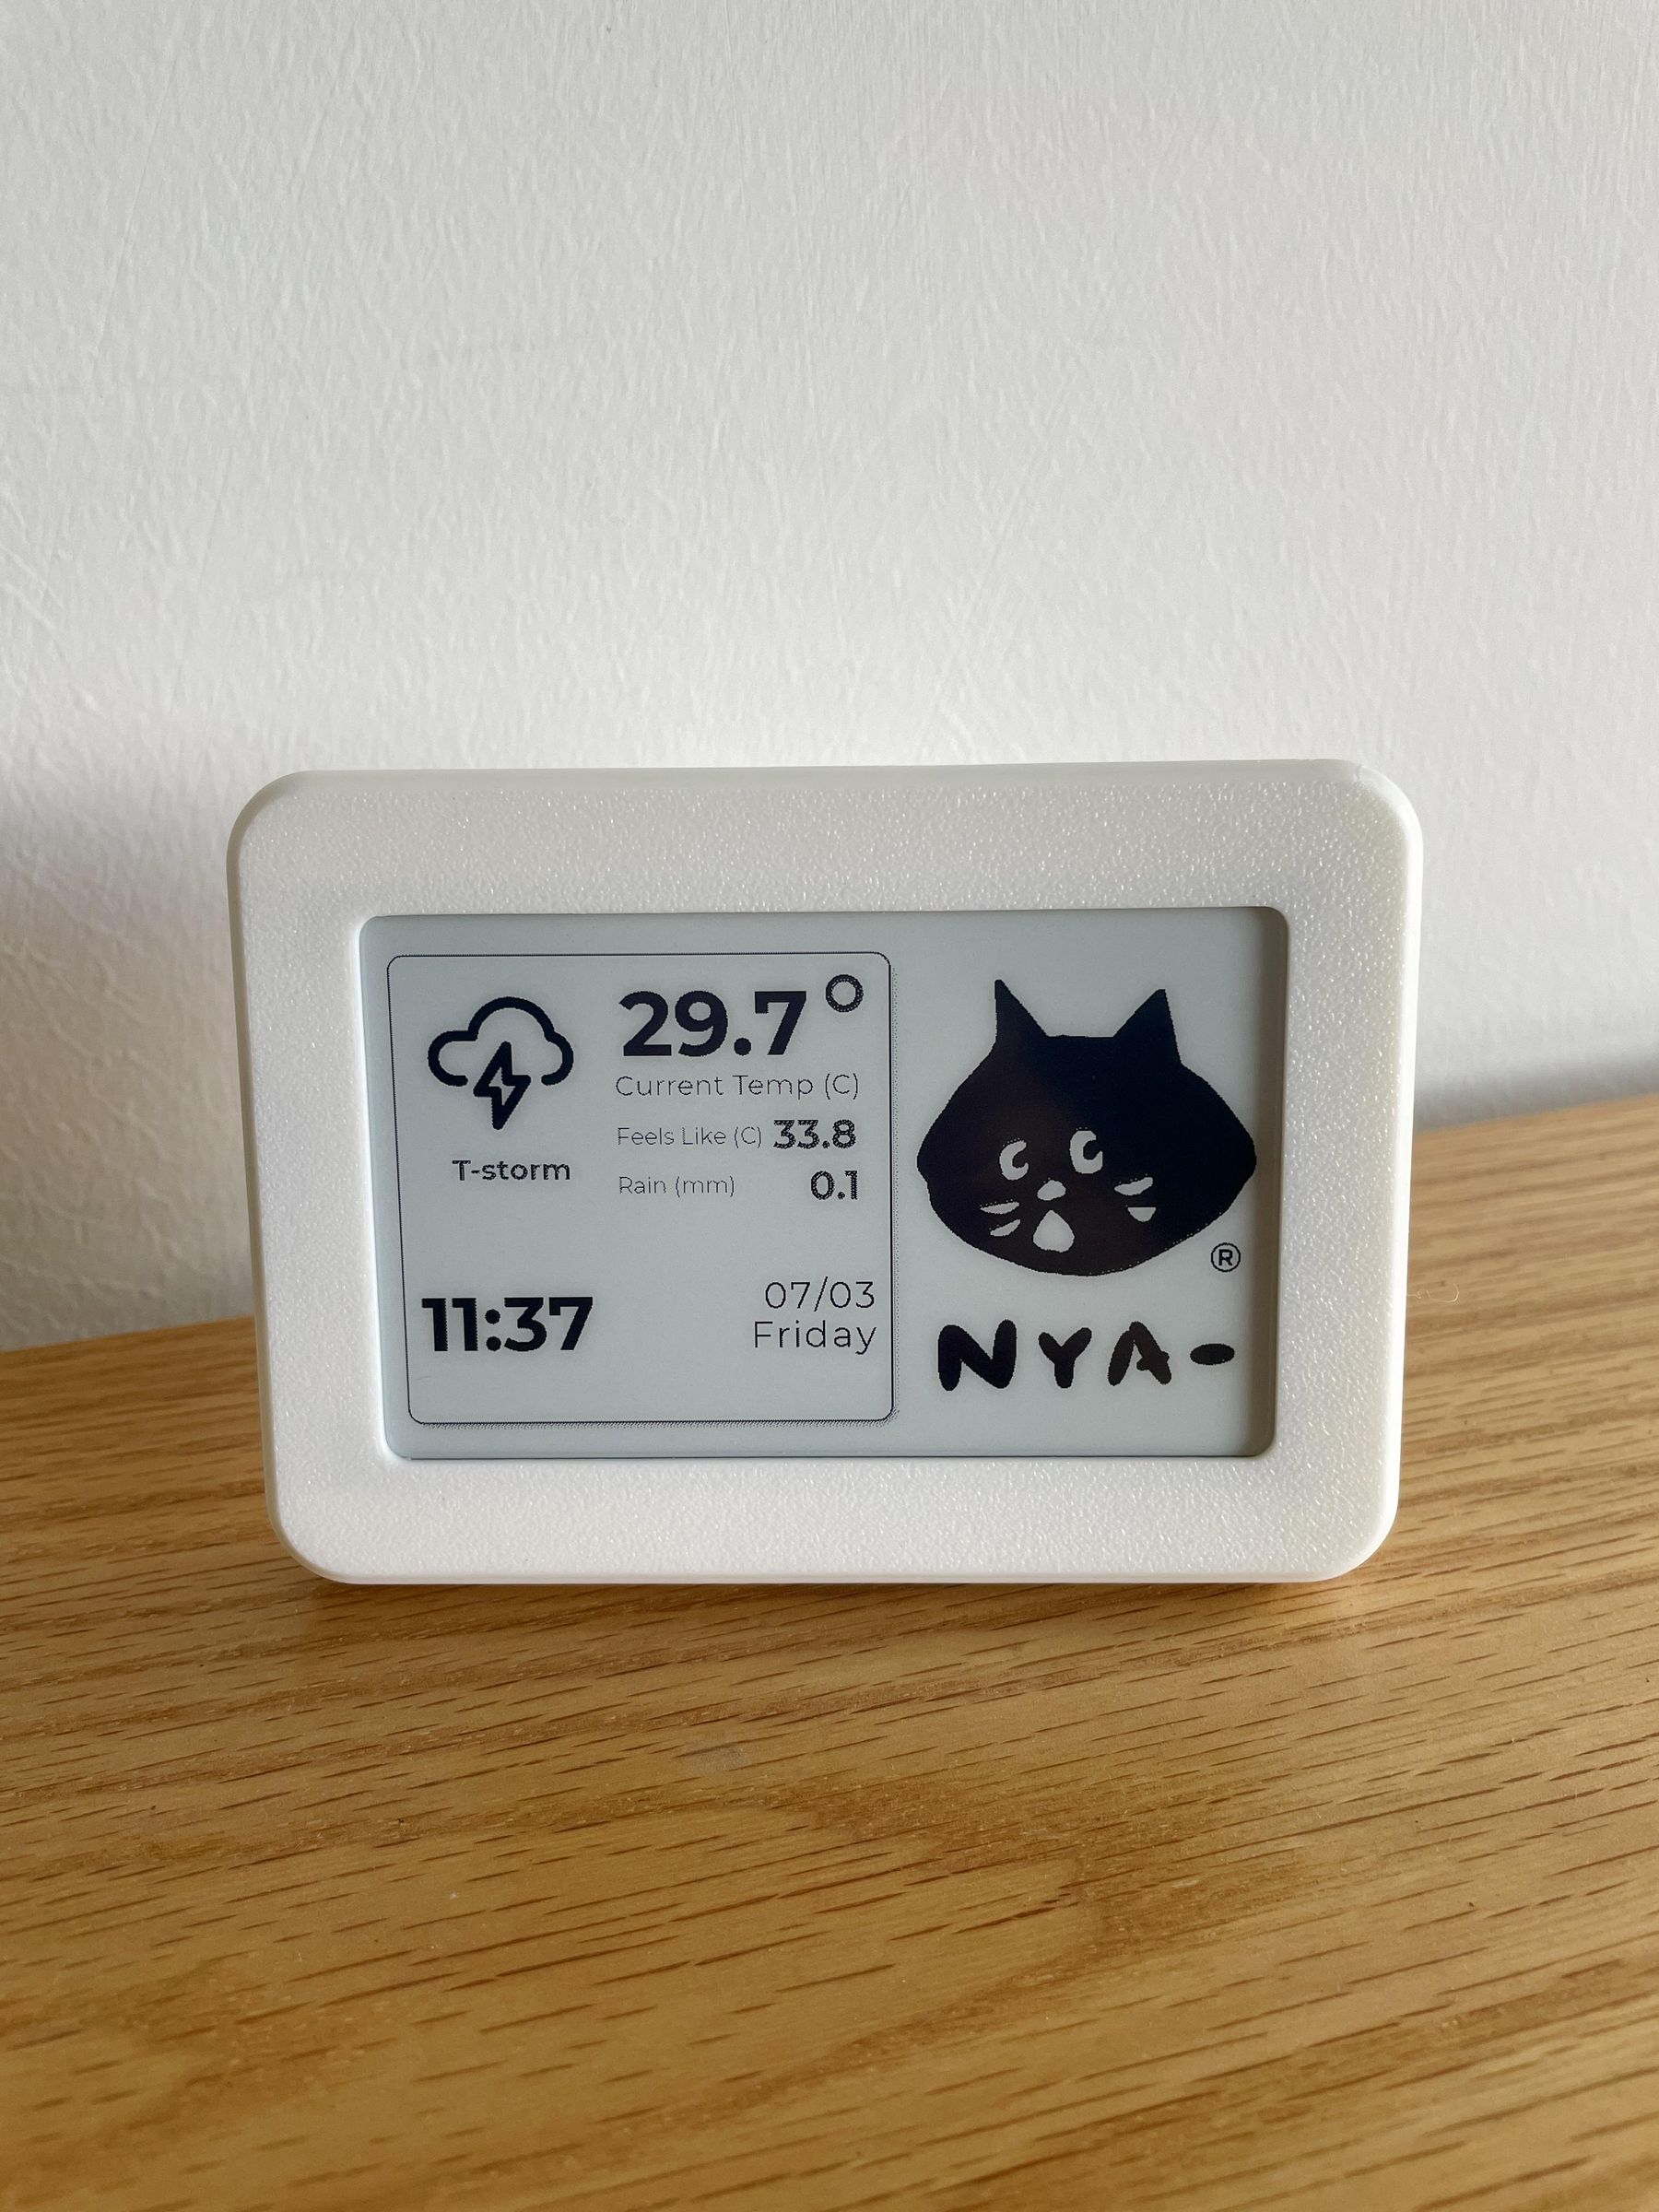
That's all for this project. Let me know what you think and if there is any other dashboard that you'd love to see on my 4.26'' Cattt, comment to let me know.
Until next time.