Cifuentes.Francis_MD5: How to Properly Apply a Gel X Nail Tip
31 Views, 0 Favorites, 0 Comments
Cifuentes.Francis_MD5: How to Properly Apply a Gel X Nail Tip
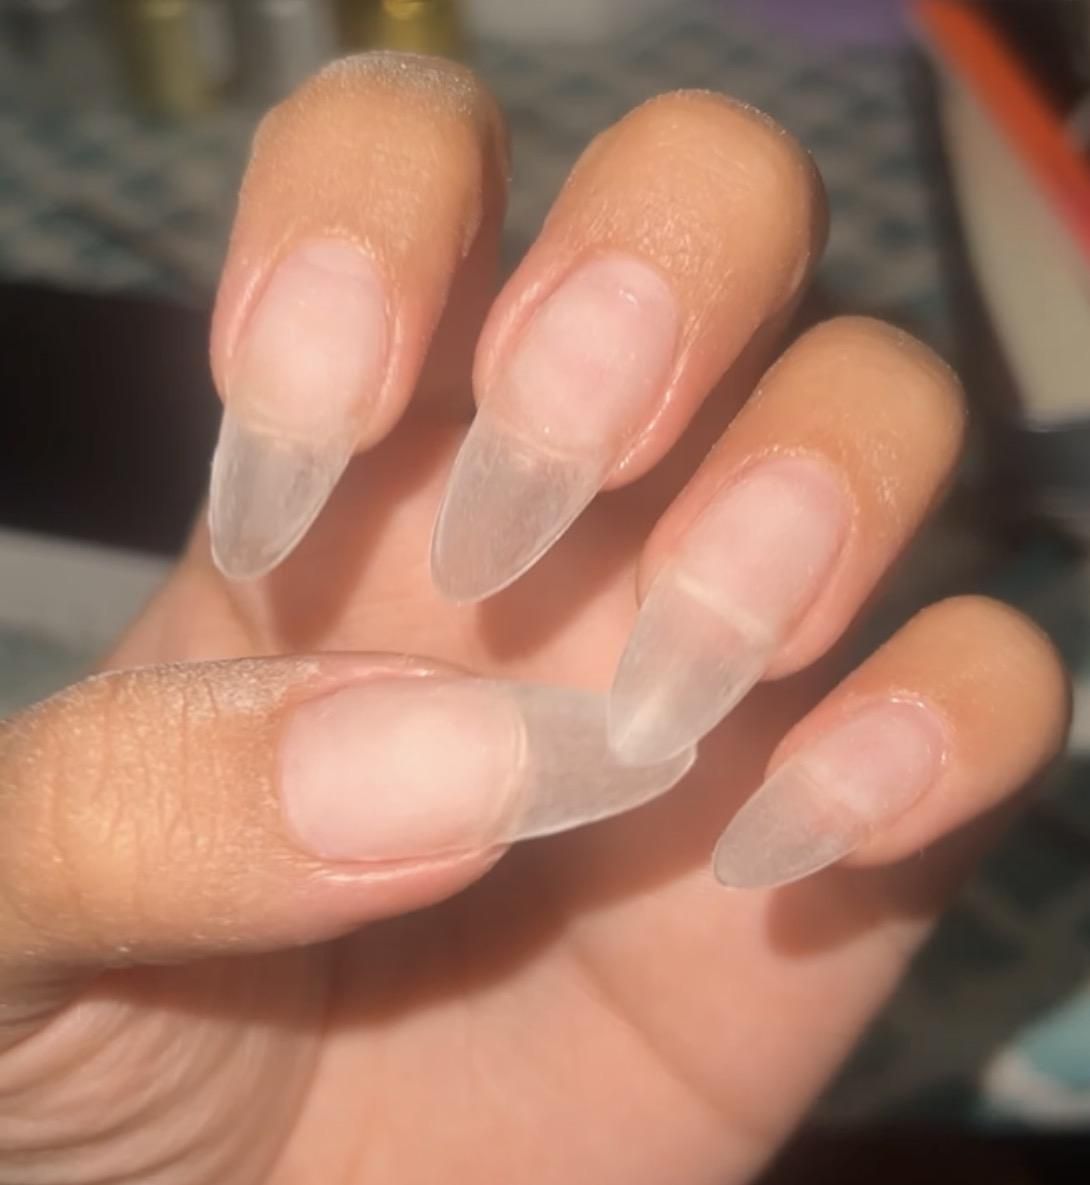
Gel X nails has become one of the most popular nails in this modern age. It’s very easy to learn to do by yourself. However, many self-taught nail tech have been having issues with applying gel, nail tips properly without getting allergic reactions bacteria growth, or their nails fall off easily within a week of just getting them. This guide is here to help you with all the necessary tools and detailed steps on how to prep the real nails and how to properly apply them to have beautiful, long lasting nails.
Downloads
Supplies
- Gel X tips
- Big and Small UV Lamp
- Nail drill + drill bits
- Gel X Nail glue
- nail tip clippers
- regular clippers
- cuticle nippers
- flat paint brush
- nail tip primer
- regular nail primer
- dehydrator
- 100% pure acetone
- nail file
Gather Materials
The first thing that you will do is collect a dehydrator, 2 primers a drill with the sanding band bit and cuticle bit, one full-size UV lamp, one small UV lamp, nail glue, Gel X nail tips, a 100 to 180 grit nail file, Gel X tip clippers, regular nail clippers, cuticle nippers, 100% pure acetone, and one small flat paintbrush. Set them on a flat surface with a towel so no damage is on any furniture.
Downloads
Wash Hands and Nails
Next, you will wash your hands with soap and water and make sure to wash the inside of your nail and outside to remove any sort of dirt. Think of your nails as a canvas. You have to have a clean canvas before you do your artwork.
Downloads
Cut and File Real Nails
With your nail clippers, cut your nails down to a safe short length and file them in order to have smooth, short nails to start off with. Use the 100 grit side of the file and make sure there are no hang nails. Be careful to not cut them down too short.
Cuticle Work
Next, you will push back the dead skin off of the nail plate. Once you have done this, you will use a cuticle nipper to remove the dead skin off. This gets rid of any kind of dead skin that you do not want on your natural nails and will help give the nail plate grip. Then use the cuticle bed with your drill and set it to forward 02. Carefully use this bed around the cuticle lining to make sure that your cuticles are now cleaned up.
Sizing and Sanding
Once you’ve carefully finished your cuticle work, use the sanding band drill bit above the natural nail and give it a rough surface. Be careful with this step as you can hurt yourself with how rough the sanding band is. Set it at forward 01. Then size the nail tips sidewall to sidewall on your natural nail. The nail tips cannot be too big and cannot be too small as this will cause lifting. Once you size them, rough it up with the sanding band drill bit.
Downloads
Dehydrate and Prime
Next, you will use your dehydrator to dehydrate your nails from its natural oils. Once it is applied, quickly apply the nail primer. When applying the primer, rub it on the nail plate to give it tackiness. Once you are done, you can grab the nail tip primer and apply it on the inside of the nail tip where you had just sanded it. All of this is to ensure that your nail tips will not lift or move in the future.
Apply Glue and Cure
Once you are prepped, grab your glue and apply generously on the nail tip and leave a dab of glue at the free edge where it matches with the cuticle lining. Then at a 45° angle, apply the nail tip a little above the cuticle lining. Once you press it, make sure that the glue separates evenly and does not leave bubbles or leaks out and gets onto your skin. Use the small UV lamp in cure for 60 seconds.
Fully Cure
Once you have applied all your nail tips and cured with a small UV lamp, you may then put your whole entire hand in the big UV lamp and cure for another 60 seconds. If you want more reassurance that your nail tips will stick, you can add another 30 seconds.
Downloads
Clip and File Again
After you fully cleared your hand, grab the nail clippers and clip them down to your desired length and follow them to your desired shape. Make sure that the length and shapes look the same and not wonky.
Downloads
Drill and Melt
Lastly, you will grab your sanding band bit drill down where you left a little bit of space between the cuticle lining and the nail tip. Do this with caution. Once you have drilled it down flat, grab the flat paintbrush and dip it in the 100% pure acetone. Apply the acetone with the paintbrush where you had just drilled the nail tip. Acetone will melt the plastic of nail tip to lock the nail tip in.
Congratulations! You have now mastered the art of applying a nailed it properly. You can now paint and do your designs and not have to worry about your nails lifting, allergic reactions, or damage!