Clash of the Knight

Hi there! My name is Makenna Gries and I'm a 3D animator! I am so excited to take you along my step-by-step process of my newest animation project!⚔️
Designed as an exploration of character performance and dialogue animation, this shot has been one of my toughest but most rewarding yet. After weeks of passionate work, I am so proud to share my animation with you all. And now... you can do it too! So, grab your sketchbooks and laptops and follow me!
Supplies
Now for the tools! For this shot I purchased the Leo rig from Wonderwell Studios. This rig has definitely been one of my favorites to animate with, the control and flexibility in body movement and facial expressions is fantastic! You can find and download him here: https://wonderwellstudios.gumroad.com/l/LeoRig
For the software I used Autodesk Maya (either the 2022 or 2024 versions work.) This can either be purchased or downloaded with a student license! Don’t forget to also download Arnold, the rendering program, along with Maya, as this will truly make your animation ✨glow✨ (pun intended:)
As for audio and video editing, I used Adobe Premiere Pro, though other video editors can work.
Finally, don’t forget a sketchbook and phone/camera for note-taking and shooting reference!
Audio Extraction

Let’s collect that audio! As this is a dialogue shot, importing an audio file into your Maya project will be vital in order to sync your animation with the sound.
You can find the audio anywhere (I used YouTube) and can either download the video or copy the link and paste it into a converter website. When converting the audio clip also make sure you save as a WAV file, as this is the file type Maya reads. If you find the audio is too long or contains unnecessary parts, you can import the file into Adobe Premiere Pro or other editing software to make adjustments.
Ready, Set, Reference!

Now that you’ve got your audio, get ready to put your acting skills to action! Shooting reference isn’t necessary for all animation, but is extremely helpful when trying to plan the performance of your character.
After much brainstorming, I decided I wanted to transform the audio into... a weathered and furious knight defying his king! Now, I am NOT an expert in shooting reference, but it's a fun and exciting skill to build!😄
After shooting many takes, I finally found some clips I preferred and cut them together in Premiere. Reference also doesn't need to be perfect, it just needs to give you enough of the right idea to move forward!
Set the Scene


You’ve got your audio, you’ve got your reference, now let’s set the scene! This is where your sketchbook can come in handy to help ideate your composition. I knew I wanted to explore the concept of a knight defying a king, so I created a throne room for the environment.
Disclaimer: I am not a pro modeler😅 which is why I found some great, free assets off the websites Turbosquid and SketchFab!
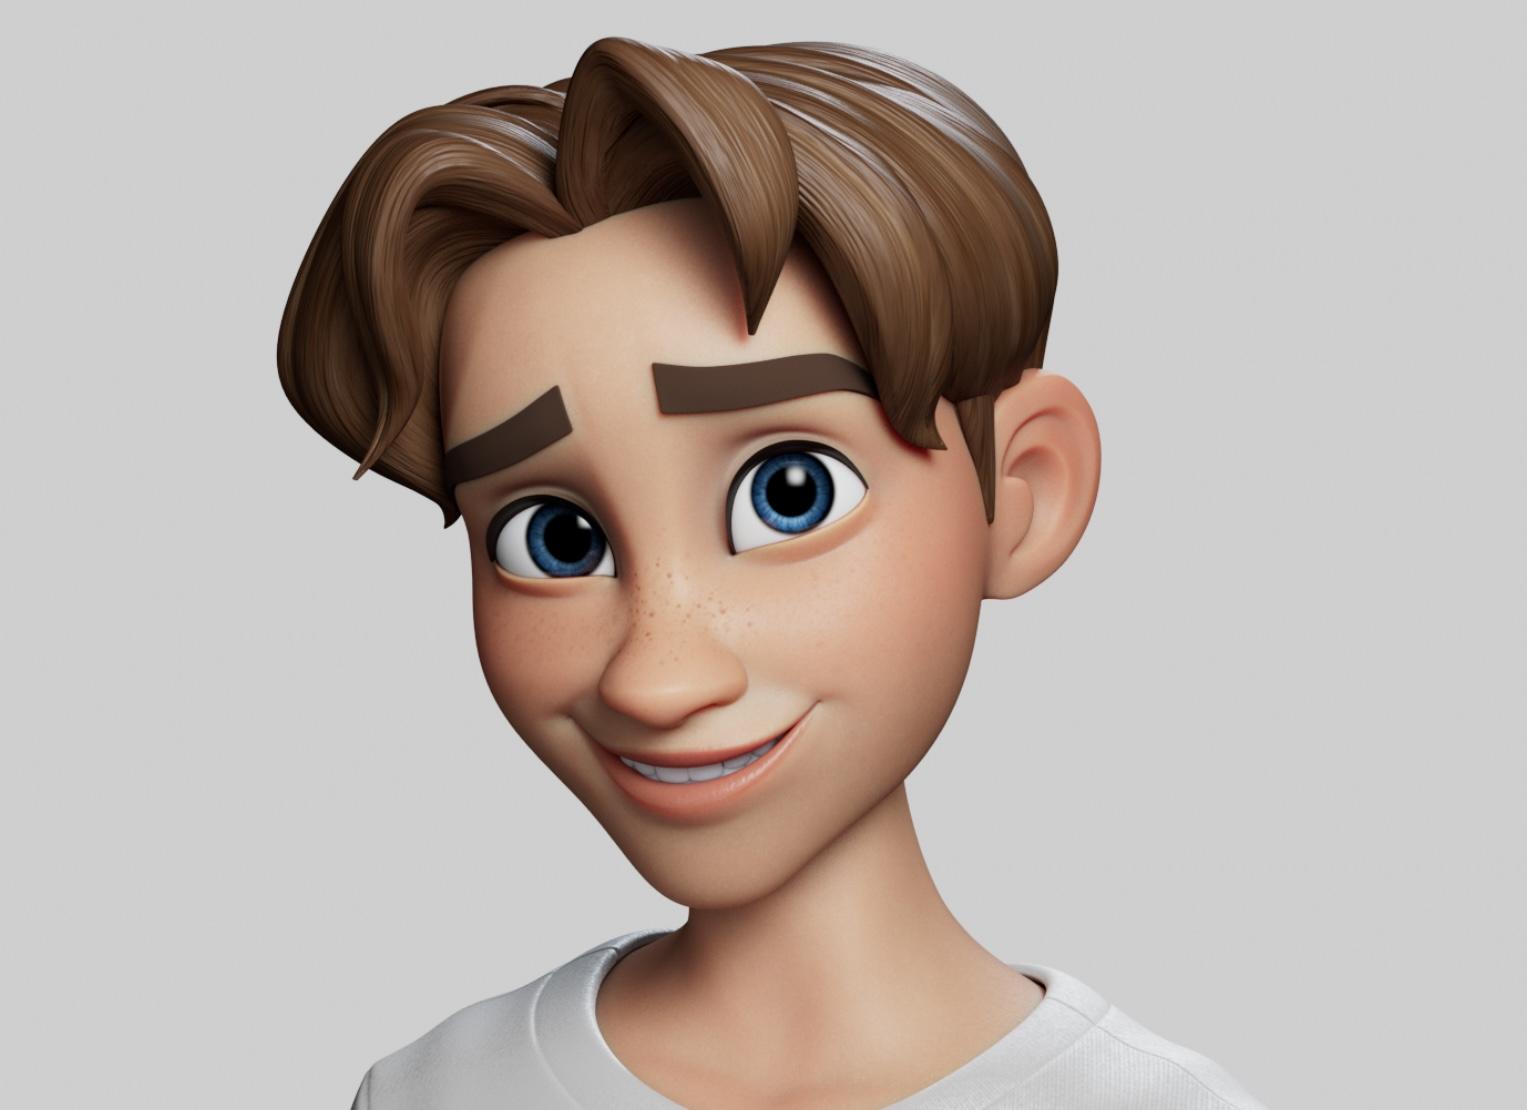
After this, be sure to import Leo into your scene! As he automatically comes in a casual appearance, I did a bit of extra work (thank you Photoshop😄) and illustrated over his skin texture to give it a battered and bruised appearance! Furthermore, I did some texturing over his normal clothing and skin to transform him into a suit of armor. Finally, using Turbosquid, I found a cool sword for Leo to use and BOOM! Your knight has been created! As for the king, I imported another Leo rig, made some color adjustments and added a few extra meshes for his accessories.
Another crucial aspect to laying out your scene is choosing your camera placement and angle. As I wanted both a dramatic and intimate moment with the character, I opted for a medium shot that tilts up as the character moves towards the king. By illustrating a shift in camera/character height, this also alludes to the strength and dominance the knight holds over the king as the shot progresses.
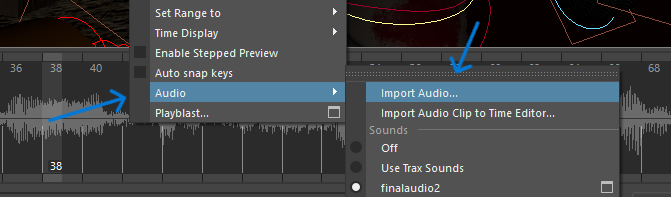
Last but definitely not least, be sure to import your audio into your project by left clicking on the Timeline, selecting Import Audio, and selecting your wav. file!
Blocking


Now that everything’s set, you can finally begin animation! As I choose to work in a pose-to-pose animation process, the first step is blocking. This means — using your reference as a guide — you form the key poses, or main storytelling points, of your animation.
When you're ready to check (playblast) your animation, you can highlight the controls you've used and enter the Graph Editor. Here, be sure to highlight all of your frames and in the Tangents tab, click Stepped. This setting allows you to look only at the frames you've set to make sure your poses are just right!
Although I am showcasing the final product of my blocking here, so many iterations and adjustments have been made. I am fortunate to have completed this project during one of my animation classes, so I received many constructive critiques on my work. Feedback is vital to enhancing your animation, no matter what stage of the process you are in! In fact, by receiving such great advice at this stage, it allowed me to pave a path to the best animation I could make!
Spline It!
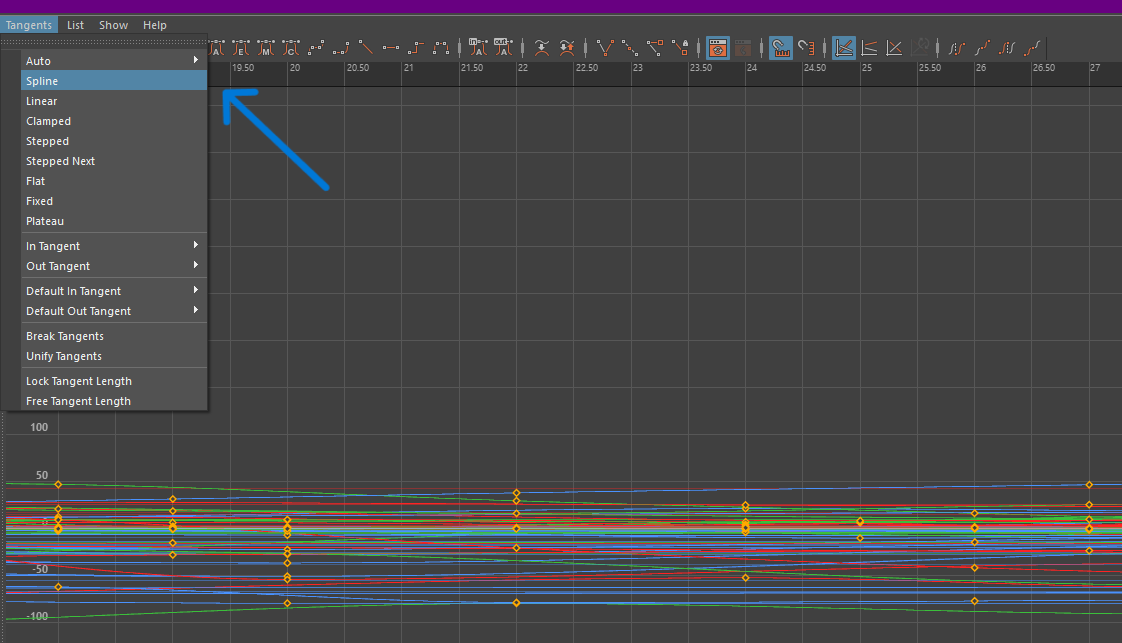
Once you're satisfied with your blocking... spline it! Highlight the rig controls you had animated, return to the Graph Editor, select all of your key frames, and return the Tangents tab to the Spline setting.
During this stage, you'll add in-between poses to help sell your story better. As we're still in the early production stages of animation, this is also a great point to change or readjust some of the acting choices you previously animated. As you can see, I changed Leo's sword motion to swing towards the king instead of rise from his hip. Here is where I also dove into enhancing Leo's motions, from his facial expressions to his body actions. Looking smoother than before, but still a long way to go!
As previously mentioned, when you progress through each stage of work, find a peer, whether a classmate, professor or friend, to review your shot. Feedback is key to improvement!
Almost There!

Now you're on a roll! As you move through each pass of animation, continue to build upon your foundational movements and refine previous animation. As you can see, every adjustment, from the largest arm swing to the smallest eyebrow raise, can make a HUGE impact in your character's overall performance! With each pass I completed, I became more and more detail oriented, looking for ways to best sell the knight's feelings in the shot, as well as make his movements more fluid!
Animation: Complete😎

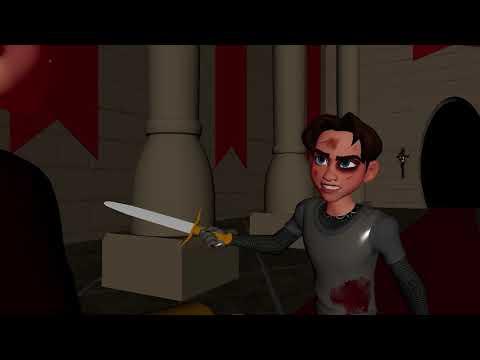
After several passes, many adjustments, and a dedicated work ethic, you have officially completed your animation! YAY! When I had submitted this assignment, it was not a requirement to render the scene, so what you're watching is simply a playblast (with added lights.) Playblasting is great for showcasing animation because it maintains a solid quality with minimal processing time, and you can still add some lighting!
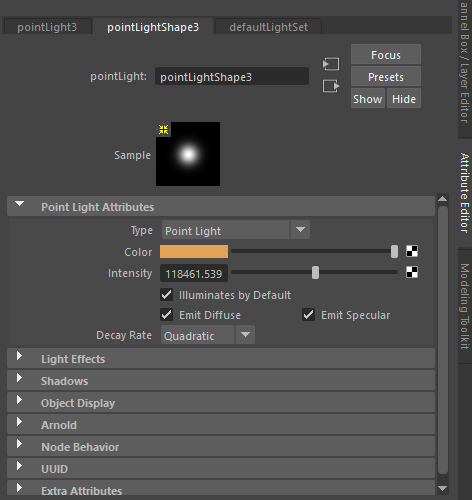
At this stage, I created several directional and point lights to give the scene a medieval, dramatic feel. Whenever you add lights to a scene in Maya, click on your desired light and enter the Attributes editor. Here, you can adjust the intensity, color, and direction of the light! To view your lights, click 7 on your keyboard to turn them on and 6 to return to default lighting.
Render Prep

Now, let's push this shot to the next level! With animation complete, now you can truly bring out your best work by rendering the scene! By rendering your animation, this ensures the best quality in the materials, textures and lighting of the scene! However, make sure you've got the time and battery to do so, as this takes quite a bit of processing power to complete.
Before you begin, make sure your settings are correct by entering the Render Settings tab. When I render my animations, I use the Render Sequence option, meaning each frame is processed individually as an image. You can change the File Name Prefix to whatever you choose, just make sure its easily recognizable in your file! When you enter the Render Settings, be sure to change the Image Type to jpg, as this is the format each frame will render as. Next, change the Frame/Animation ext to name.#.ext. This will be the naming order in which your animation appears in the file you chose. Then, ensure your Start/End frames correlate with your full animation. Since this shot is 80 frames, start frame 1 and end frame 80. By looking above the File Output section, you can view where your sequence will be saved, the naming convention of each image, and the image size.
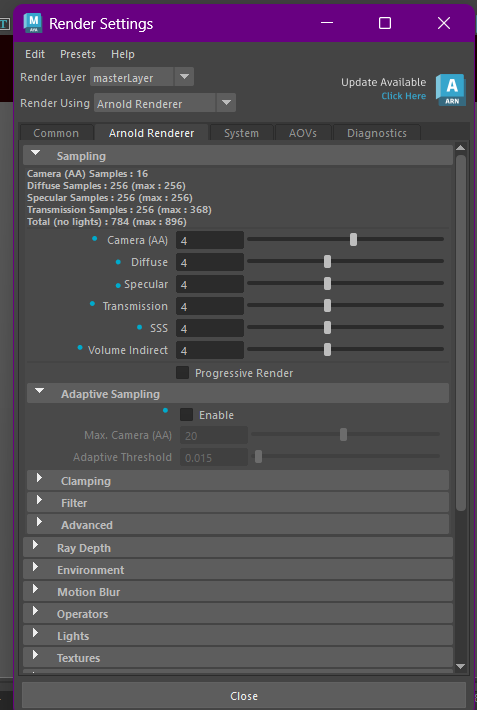
Then, head into the Arnold Render tab and observe the sampling rate of your scene attributes. If your sampling numbers are too low, rendering can create a "grainy" image. By boosting the numbers, this can ensure a higher quality render. Another option is to enable Adaptive Sampling, which also ensures a better resolution. Keep in mind, however, that higher sampling does mean your render will take longer!
Let There Be Light!


After ensuring your render sequence is ready to go, you can test render by selecting the Open Render View button (eye) and another tab will open that renders the frame you are currently on in your shot! When you render you may notice the lights you had set previously in your scene disappear or are extremely dim. Don't worry! Arnold is a pretty powerful program, so if this happens you can return to the Attributes Editor for each of your lights and bump up their intensities! Spoiler: you'll need to bump them up A LOT😂
Once everything is checked and ready to go, begin rendering your animation by clicking the Render Sequence button (s with yellow boxes). When you click this, a separate screen will appear in front of your maya file, showing the frame currently processing (which should be frame 1)!
Now ... we wait. Rendering time can vary depending on the processing strength of your computer, so do not be alarmed if it takes a few hours for this process to complete!
One of the cool things about doing a Render Sequence is that it safeguards your process! So, in the event of a crash or just necessity to close the program, all of the frames you rendered will be saved to wherever you'd previously selected in the Render Settings! You can pick the process up from where you left off by entering the Render Settings and readjusting the start and end frames. Pretty cool right?
With time and patience, your animation will be complete! Be sure to check the file you had saved to and ensure there are 80 images (1 per frame.) At this stage I entered Premiere Pro once more and imported my project. Be sure when you click on your first image that you import as an Image Sequence. By doing this, you only need to click on the first image and the computer will put together the rest of the frames! How awesome is that?! Last but not least, return to your project file and re-upload the wav. file of your audio into Premiere.
The Finish Line

Woohoo! Thanks to dedication, patience, and passion, you have officially completed your animation!🎉
This project holds a special place in my heart, as this is the first (polished) dialogue performance I have ever completed. As an animator aspiring to work in feature-film animation, having the chance to learn both body mechanics and facial expressions is an extremely exciting step in my animation journey! In addition, the generous feedback and support of my peers helped and encouraged me tremendously in reaching my animation's full potential. I cannot express enough how grateful I am to have had their guidance along the progression of this animation! I understand I still have much to learn and grow from, but I couldn't be prouder of how this shot turned out ... and you should be proud of yourself too!
I sincerely hope this Instructable has been a fun, engaging and insightful experience into the process of 3D animation. Stay positive, passionate, and hardworking, and happy animating!❤️