Coding! How to Create Your Own Website
by jeremyc03 in Living > Education
159 Views, 1 Favorites, 0 Comments
Coding! How to Create Your Own Website

The purpose of this guide is to teach a very simple guide to create your own basic website and locally host it to see results. This guide only goes through the basics of creating the website, like file creation, starting code, and basic button clicks. An example of a very simply built website is shown in the image above.
Supplies
To make a personalized website you will need:
- A laptop
- Some type of IDE for coding (Visual Studio Code)
- Any terminal for live-server
Create New Folder for Storage
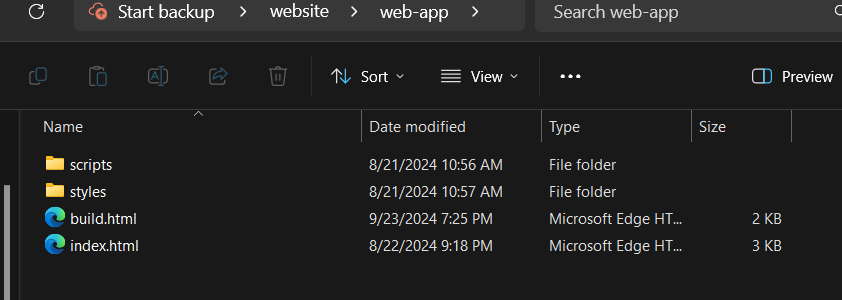
Create a folder to keep track of files with 2 different folders: One called scripts for JavaScript files, and one called styles for CSS files.
Create JS File

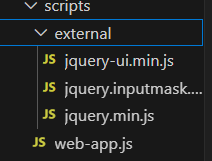
Open your preferred IDE (visual studio code) and navigate to your folder and create a new JavaScript file in the scripts folder. (ex: index.js). If you want to use published code from other user (I.e. JqueryUI), create a new folder in the scripts folder called external to dump those files in there.
Create HTML and CSS Files
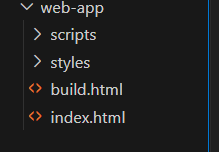
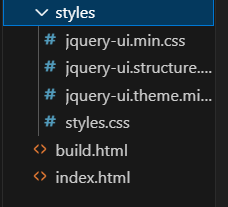
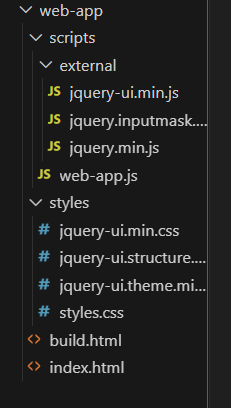
Then create a new HTML file called index (index.html). Then create a CSS file in the styles folder to style your website later. Call this file styles (styles.css). If you find styles online that are public and you want to use them, add them to the styles folder as seen in the second picture. The folder should look similar to the third pic above when all of these three steps have been followed correctly.
Create Simple HTML Code to Start

Although the picture above shows pretty advanced HTML code, it shows all of the necessary starting steps, as well as correct naming conventions. To start, use the same first line and third line. These two are the basics of the beginning. Then right after, create a head and a body as seen in the picture. The head is only used for linking style sheets and JavaScript files into the HTML file. The body is what is seen in the browser. The rest of the page building is up to the creator's preference so do not use any code that's inside of the body. However, as seen in the image, there are a lot of different keywords in HTML that you could use to customize a page. Documentation can be found anywhere online to add in complex HTML elements. One thing to always do is to create classes as seen in the image for things that share the same functionalities, like buttons, and id's for any element that has an action that is only specific to that one thing. This is useful for later when targeting elements to style and use in the JavaScript file.
Target HTML Elements for CSS Styles
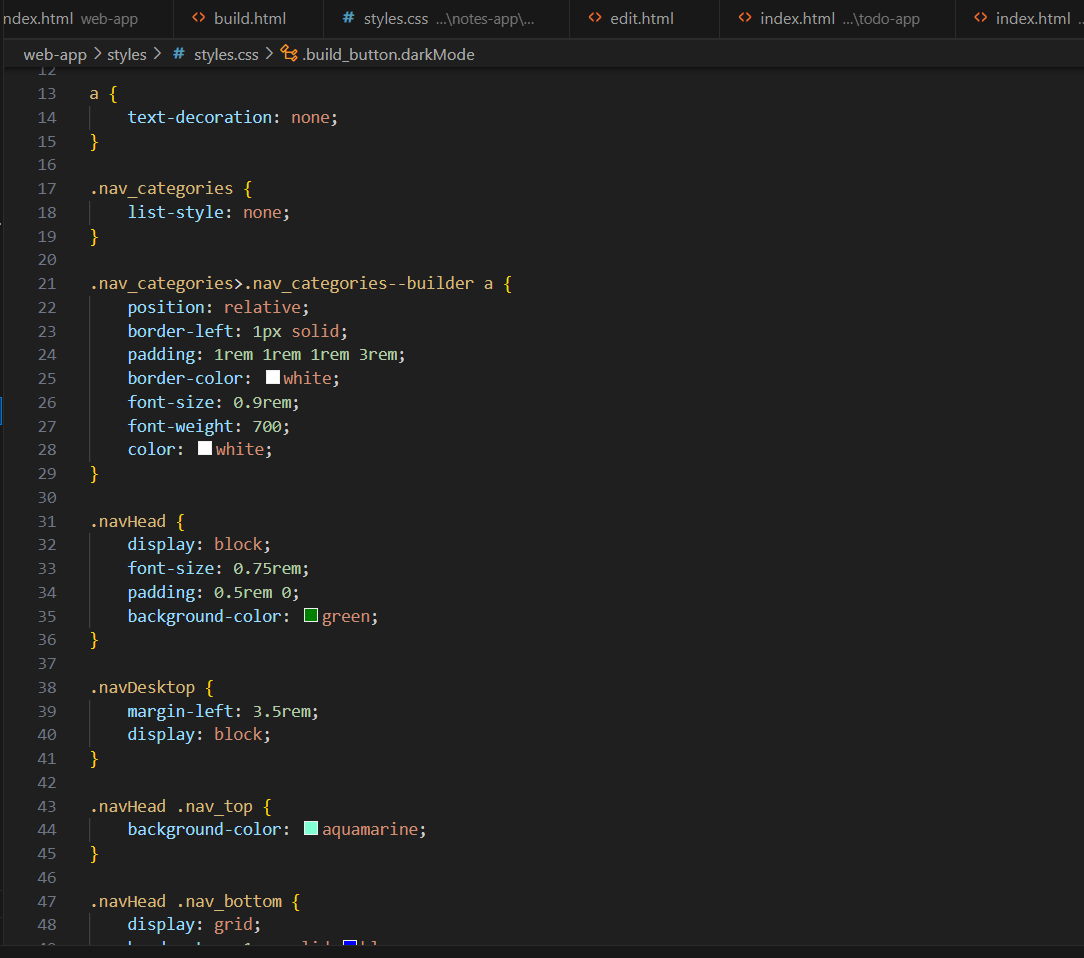
As seen in the picture and discussed previously, you can target any element using the id or class to change any style on it. In CSS files, you can customize generally everything to satisfy any need. In the picture above, I change a lot of the colors and the font sizes within my page. CSS documentation is available online to show you any keyword and styles that you can personally change to fit your website description.
Target HTML Elements for JavaScript Actions
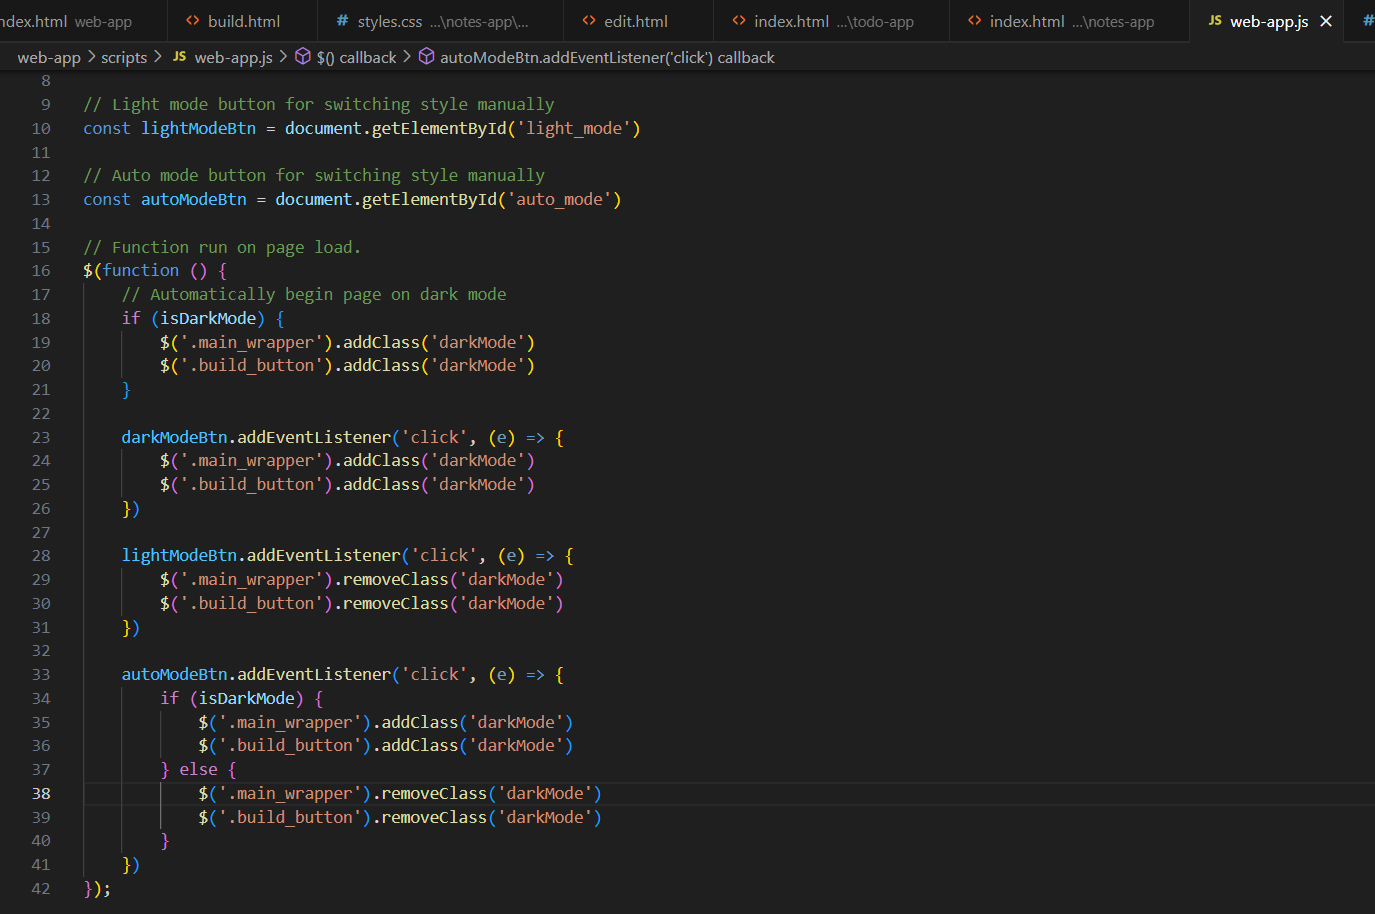
As seen in the picture, you can also target any element using the id or class to make anything perform specific actions. An example of this is the function I created to make my mode buttons switch the color of the page to dark or light depending on user preference. In the JavaScript file, you as a developer can make any page element perform a task, whether that's adding classes into elements to change their style dynamically, or making buttons hold information on presses. JavaScript documentation can be found online to help when creating new functions to perform tasks.
Host Website Locally Using Live-server


First run a fresh terminal. Then run the first two commands shown in the picture to navigate to your website folder. After finding the folder using the terminal, download live-server using the last command shown in the first picture again. Then follow the commands in the second prompt to run your website locally in any browser. As you update your code, any change will be visible right in the browser. This makes it very easy to edit your code to directly see how it changes the output in the browser. After finalizing your website, you can publish it using any website publishing platform. Since live-server only locally hosts your websites, nobody from any other device can access them until publicly published.