Cold Take: a Raspberry Pi That Notifies You the Moment Your Water Peaks in Coldness
by ethan1110lin in Circuits > Raspberry Pi
386 Views, 4 Favorites, 0 Comments
Cold Take: a Raspberry Pi That Notifies You the Moment Your Water Peaks in Coldness
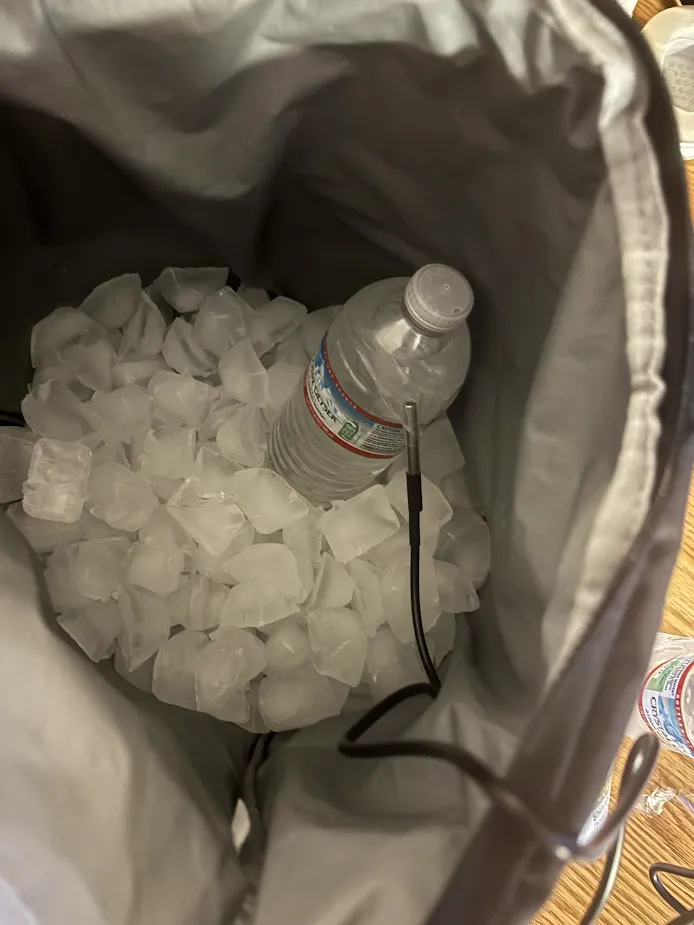
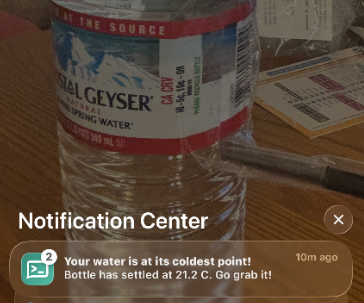
It's summer, the season where gales of wind — originally thought to be cooling instead of hot — blast your house through fans and boiling temperatures rule the world. You run to grab a bottle of water to try to extinguish the feeling, yet find it unsatisfying to drink because of how lukewarm it is. Immediately the fridge comes to mind, a place where all of your problems can be solved. Or not. You place the bottle inside, waiting anxiously for it to become cold; however, every ten minutes you open the fridge hoping for the bottle to be done cooling, to the point where it satisfies your needs, but it doesn’t. Not only is this process inefficient, but also wastes precious cold air that could be used towards freezing the bottle.
So what can you do? Or, as a matter of fact, what can a Raspberry Pi do? As it turns out, quite a lot. This single-board computer — about the size of a wallet — can tell you exactly when your water is at its coldest, no guessing required. Instead of opening the fridge every ten minutes, I strapped a temperature sensor to the bottle and let a Raspberry Pi do the waiting for me.
The sensor checks the bottle's temperature once a minute. But there's a catch: a bottle of water doesn't have a hard "done" point — it just keeps inching toward the fridge's own temperature in smaller and smaller steps, never quite arriving at a certain point. So instead of watching for one exact number, I had the Pi watch the rate of change instead: once the temperature drifts by less than 0.2°C over a 15-minute stretch, and stays that flat for three checks in a row, it's as cold as it's going to get. At that point, the Pi fires off a notification straight to my phone through an app called ntfy — and I can finally grab a nice, cold bottle of water.
Supplies
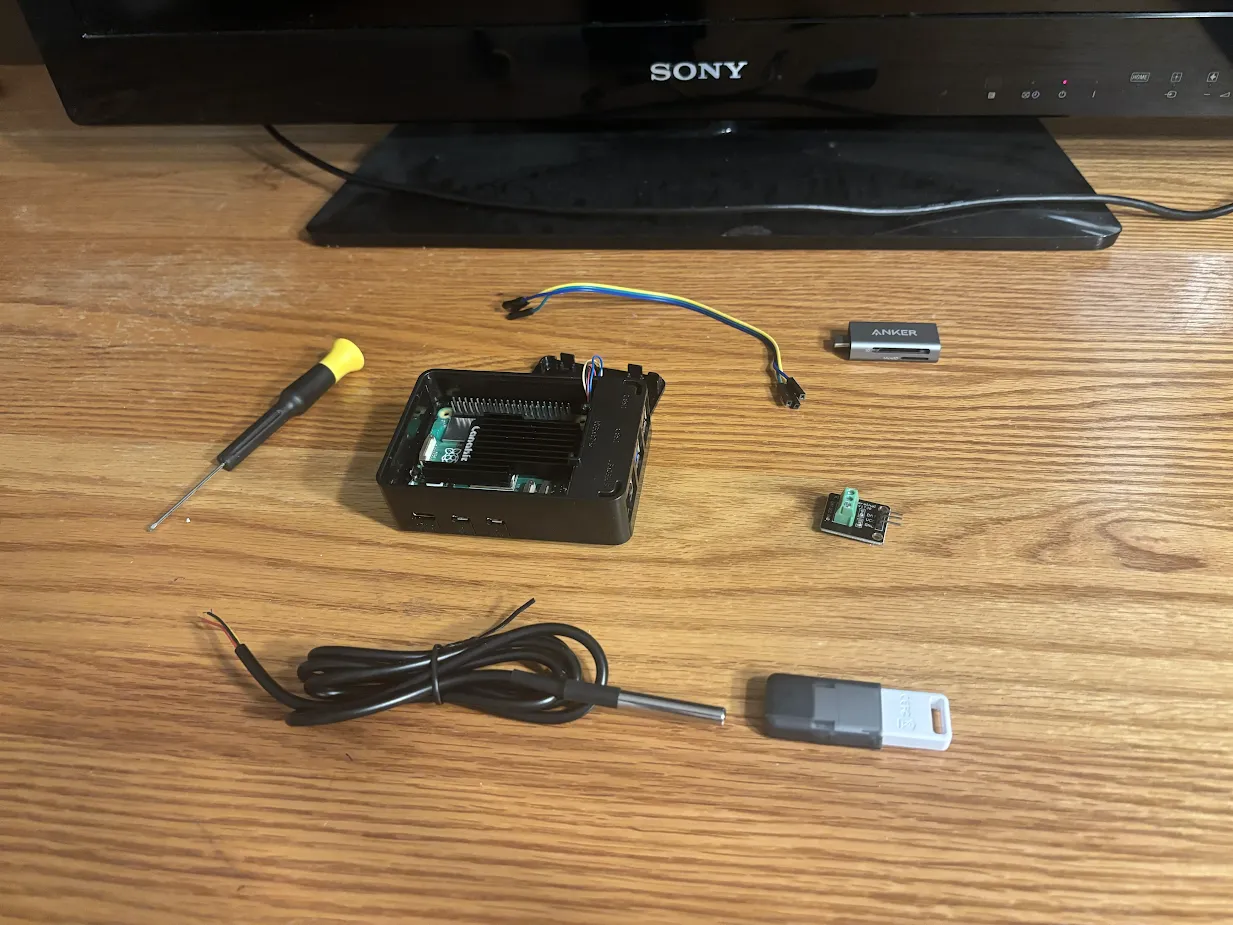
Supplies
- Raspberry Pi 5 (any Pi with a 40-pin GPIO header will work) — I used an [8GB model in a CanaKit case with a cooling fan]
- MicroSD card, 8GB or larger
- USB-C power supply for the Pi
- DS18B20 waterproof temperature sensor probe
- Adapter/breakout board for the sensor
- 3x female-to-female jumper wires
- Electrical tape (to secure the sensor to the bottle)
- A water bottle
Setup the Raspberry Pi
Start by getting an operating system onto the Pi's SD card — Raspberry Pis don't come with one built in. Download Raspberry Pi Imager on a computer, pick your version Pi model and Raspberry Pi OS as the operating system, and select your SD card. In the settings, set a hostname, username, password, and your WiFi info, which will then get inputted into the card.
Access the Raspberry Pi
Put the SD card back into the Pi and connect it to a monitor or TV using a micro HDMI cable. I used a TV which prompted me to select which HDMI input (since TVs often have multiple HDMI ports) — pick whichever input number matches the port you plugged into, and the Raspberry Pi desktop should appear. Plug in a USB keyboard and mouse as well, since you'll need them to work directly on the Pi.
Wire the Sensor
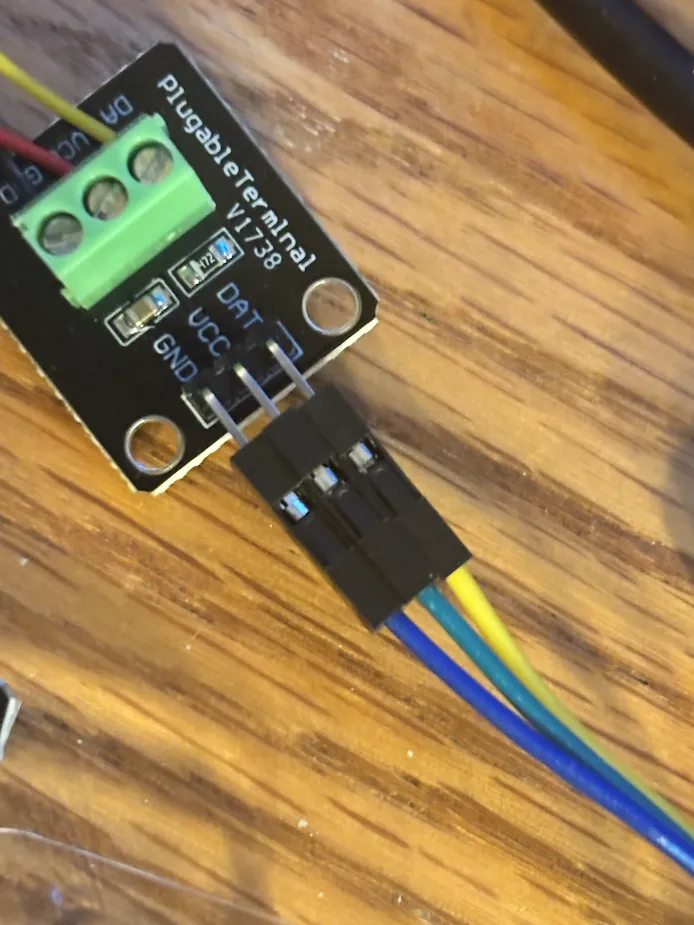
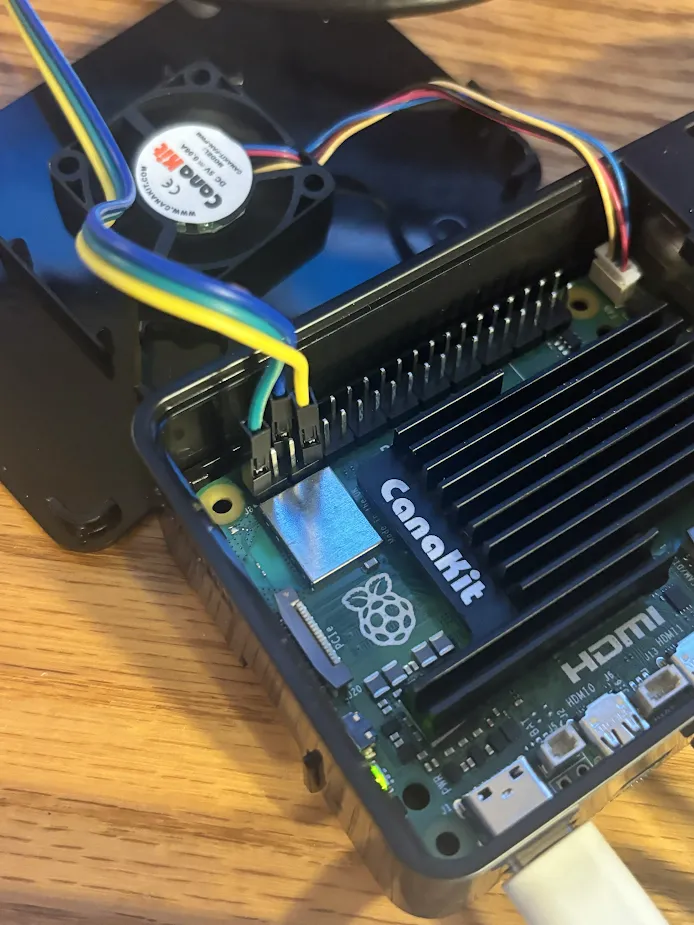
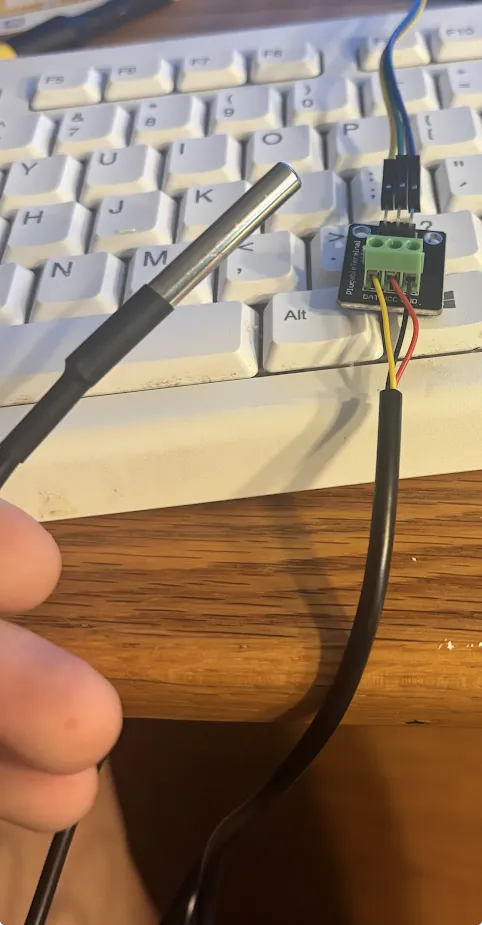
The DS18B20 sensor has three wires: DAT (data), VCC (power), and GND (ground). Using an adapter board makes wiring easier — the probe's three wires screw into the adapter board's terminal block, and the board breaks them back out to three labeled pins. Connect those pins to the Raspberry Pi's GPIO header: VCC to Pin 1 (3.3V), GND to Pin 6, and DAT to Pin 7 (GPIO4).
Downloading the .py File
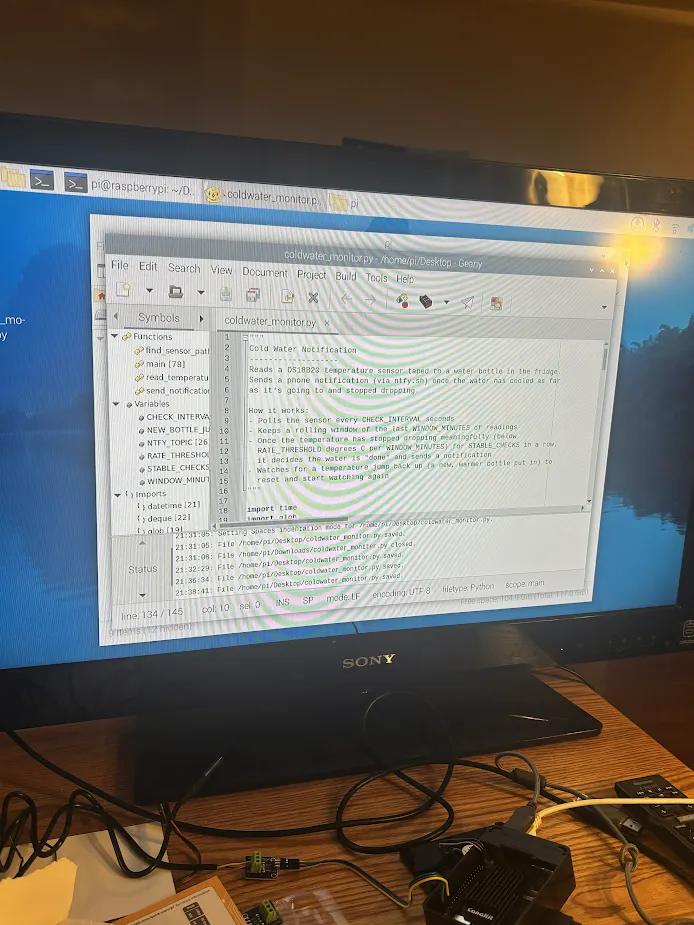
Save this Python script onto a USB flash drive from a computer, then plug that drive into the Pi and copy the file onto the desktop.
Downloads
Enable 1-Wire
Open a terminal and run sudo raspi-config. Go to Interface Options, then 1-Wire and press Yes, finally reboot.
Confirm the Sensor Is Detected
This step is optional, but for me I had to use trial and error because my sensor wasn't working due to the wires being too loose. To check, you first run ls /sys/bus/w1/devices/ in a terminal. A folder starting with 28- means the sensor is wired correctly and detected. Keep doing this till you see it.
Set Up Notifications
Install the ntfy app on your phone, and subscribe to a topic name of your choosing. This will ultimately give you the notification when your water bottle is done cooling.
Run the Script
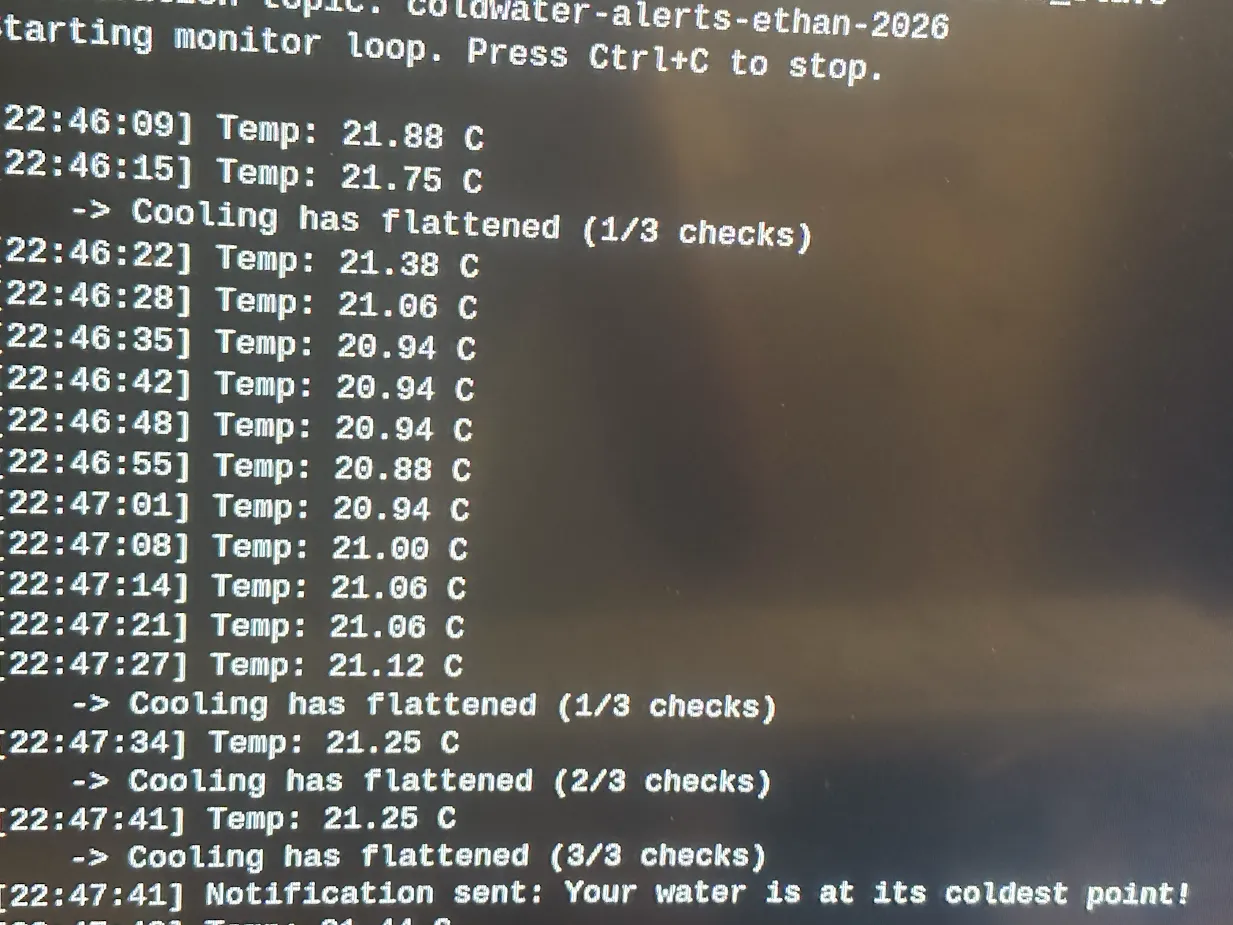
Install the one required library (type in "pip install requests --break-system-packages" on terminal), then run it by typing "python3 coldwater_monitor.py".
Attach the Sensor and Place the Bottle in the Fridge
Press the sensor's metal probe flat against the side of the bottle, then wrap tape around both together so the probe stays in direct contact with the plastic. Place the bottle in a cooling area; however leave the Raspberry Pi in a place where it won't be exposed to the cold air. (Has to be plugged in 24/7 for it to work as it doesn’t have a battery)
Wait for the Notification
Now since everything is done, all you need to do is sit back and relax while the Raspberry Pi is running the show. Once the bottle's temperature flattens out, the Pi sends a notification straight to your phone for you to go and grab your cold drink! And that's it — the coldest water, as soon as possible, no more fridge roulette or anxious waiting.