Converting a Classical Guitar Into a "Frankenstein" Terz Guitar (with Video)
by WilliamD6 in Workshop > Woodworking
1346 Views, 5 Favorites, 0 Comments
Converting a Classical Guitar Into a "Frankenstein" Terz Guitar (with Video)
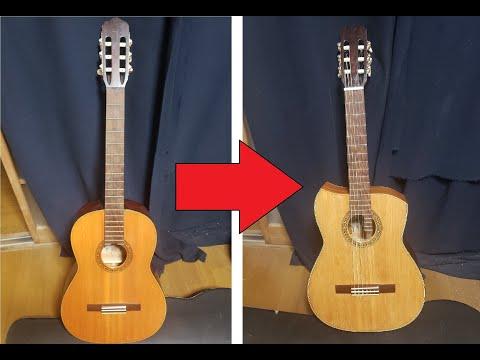
I'll say this right off the bat: This is a pretty silly project that I don't really recommend for most people, and I don't expect anyone will actually do it. I offer it as an example of something I did for fun, and maybe somebody somewhere will get some inspiration for something, even if it's not the same project. I did it mostly to see if it could be done, and actually I'm pretty happy with the results, so I hope you'll at least enjoy looking at it.
So, a terz guitar is like a smaller guitar that is tuned up 1.5 steps (so the same range as a guitar with a capo on the 3rd fret). They were more popular in the 19th century, when they were often used as the higher part in guitar duets with a regular guitar. You don't see them very often these days, although you sometimes see a similar instrument called an alto guitar, and some kinds of music (like mariachi) use higher guitars like requinto guitars. In any case, I have wanted a terz guitar for playing 19th century guitar duet music for some time, but they are not often for sale. So, I decided to try converting a regular guitar into a terz guitar, and this is the result.
Supplies
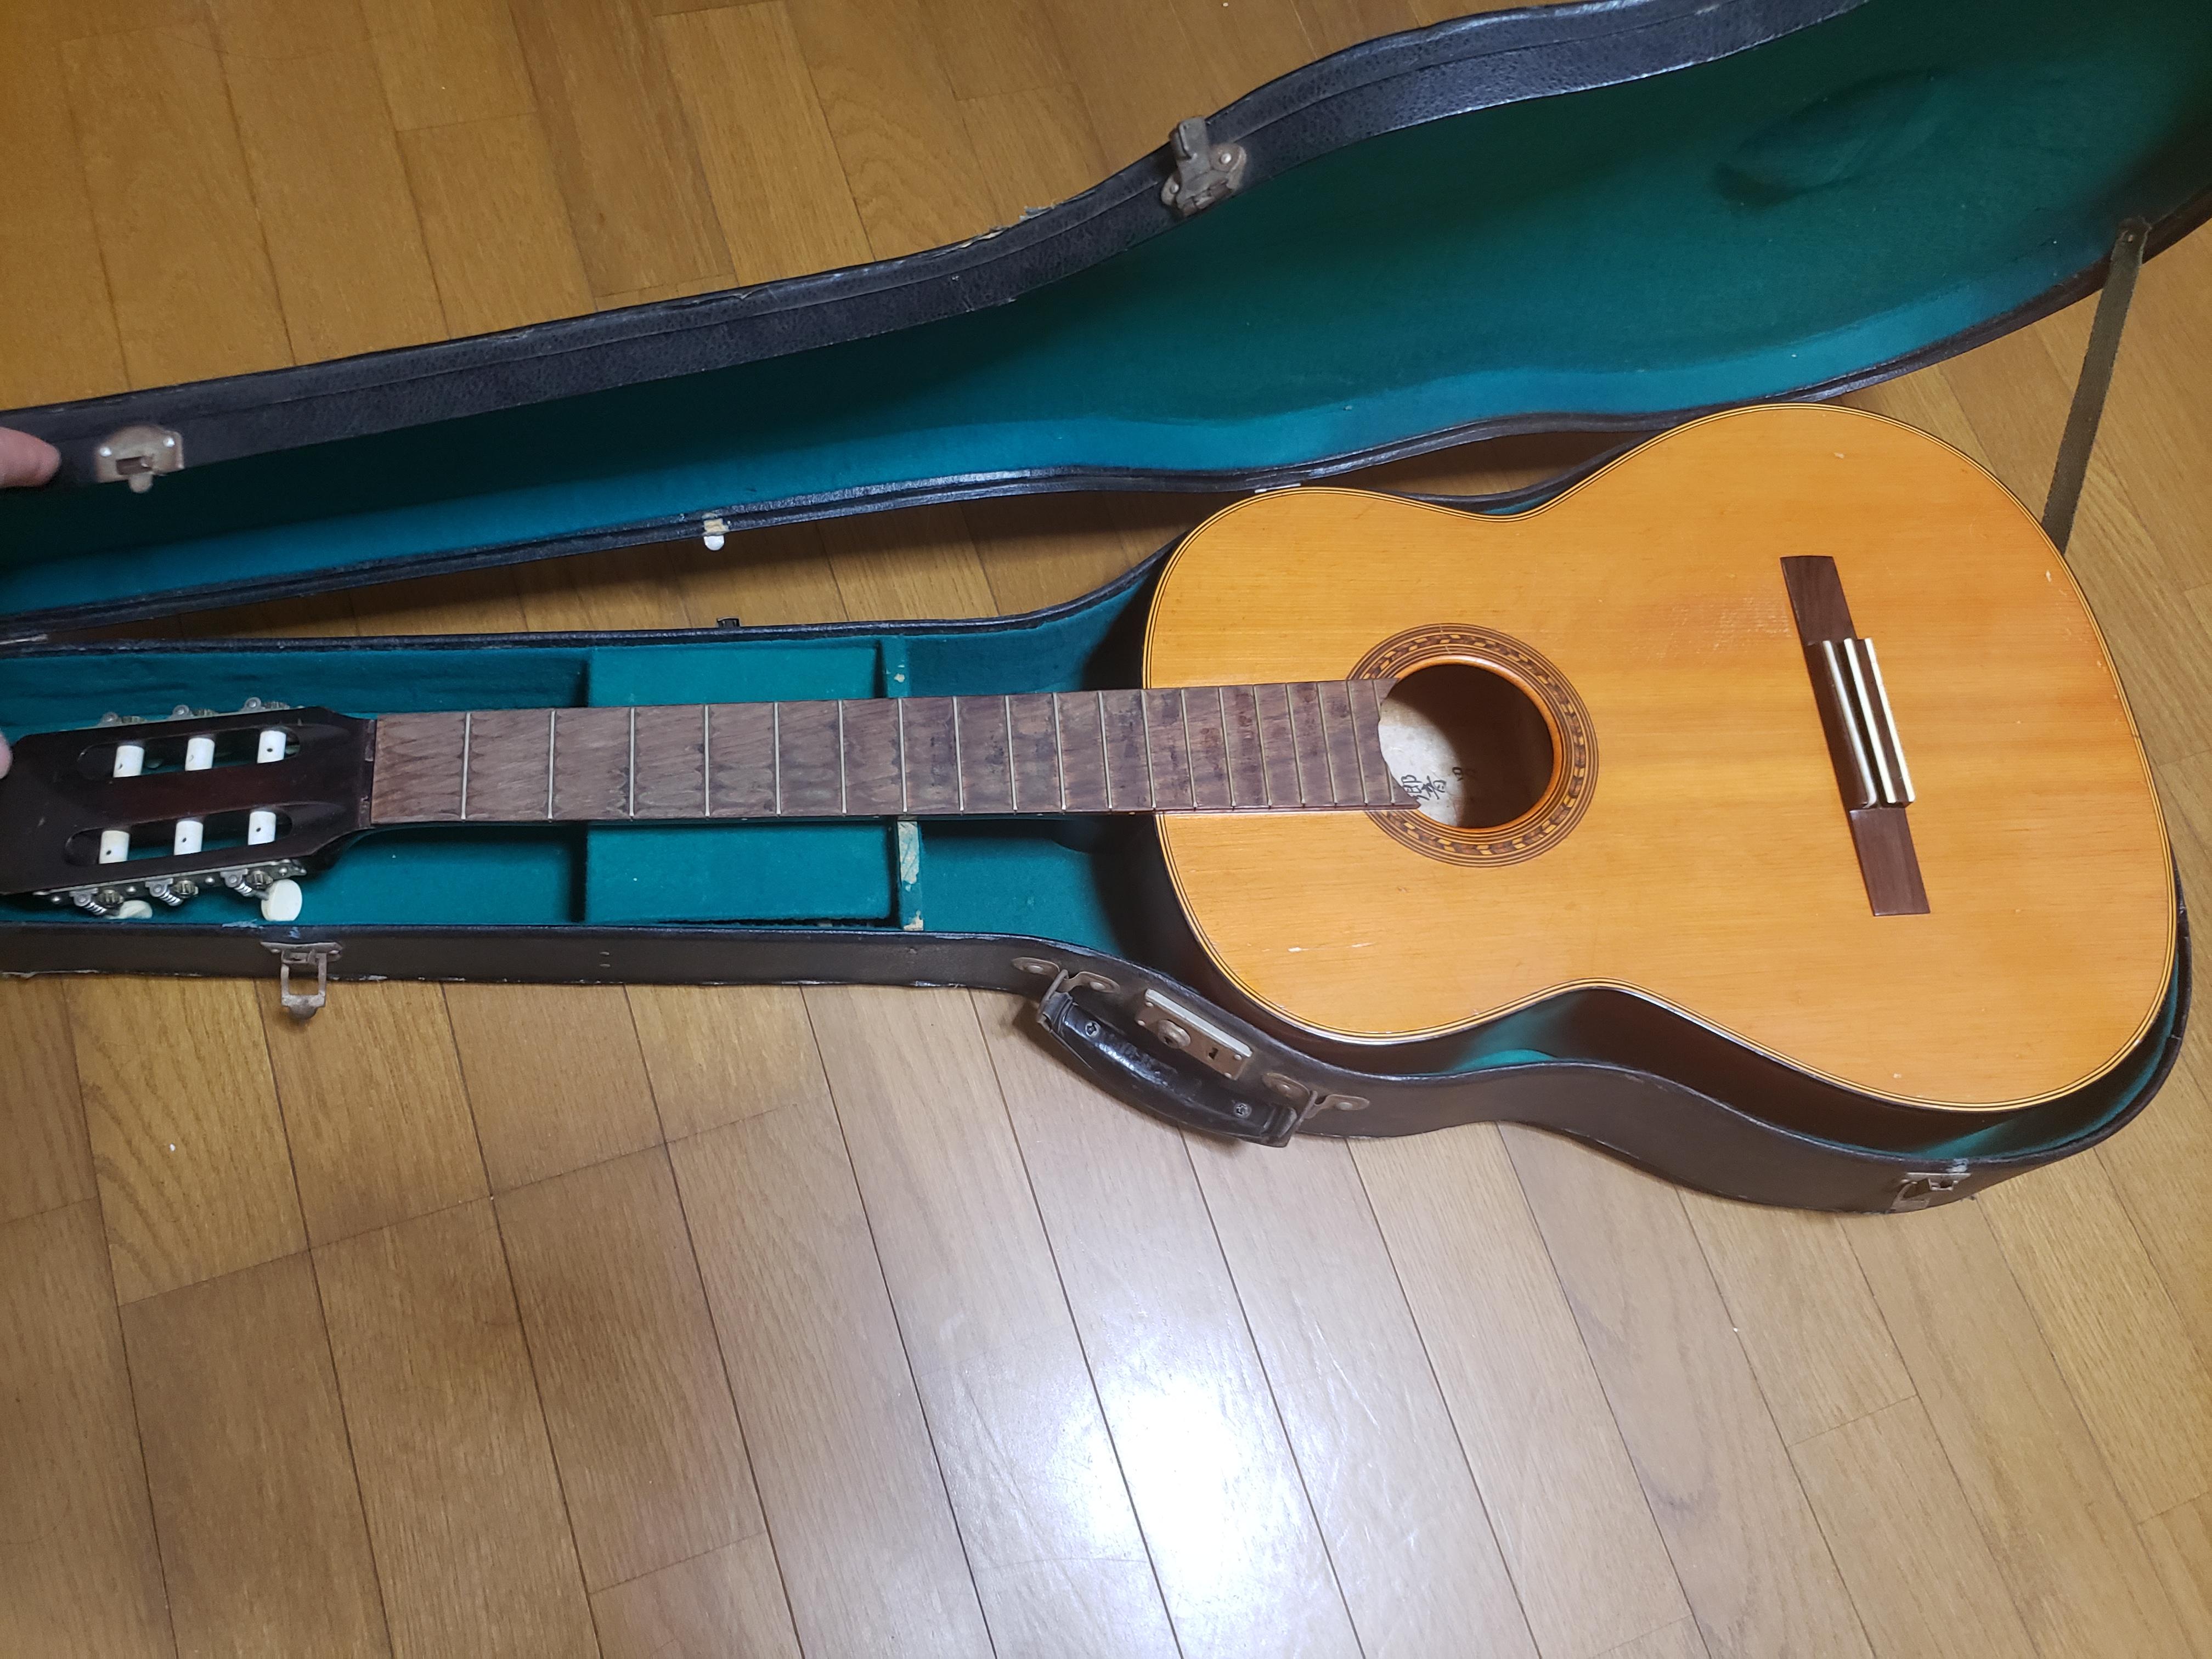
1 cheap guitar that was bound for the junkyard
1 set of new tuning machines
1 bone nut and saddle
1 set of frets
1 set of guitar strings
2 small rectangular blocks of wood (I used beech)
1 small triangular block of wood (also beech)
Some small pieces of metal, screws, etc.
Epoxy, wood glue, JB Weld, superglue
Varnish (came in a few different colors)
Tools: a few different saws, chisels, drill, dremel tool and plunge router attachement, screwdrivers, scrapers, sandpaper
Get a Guitar
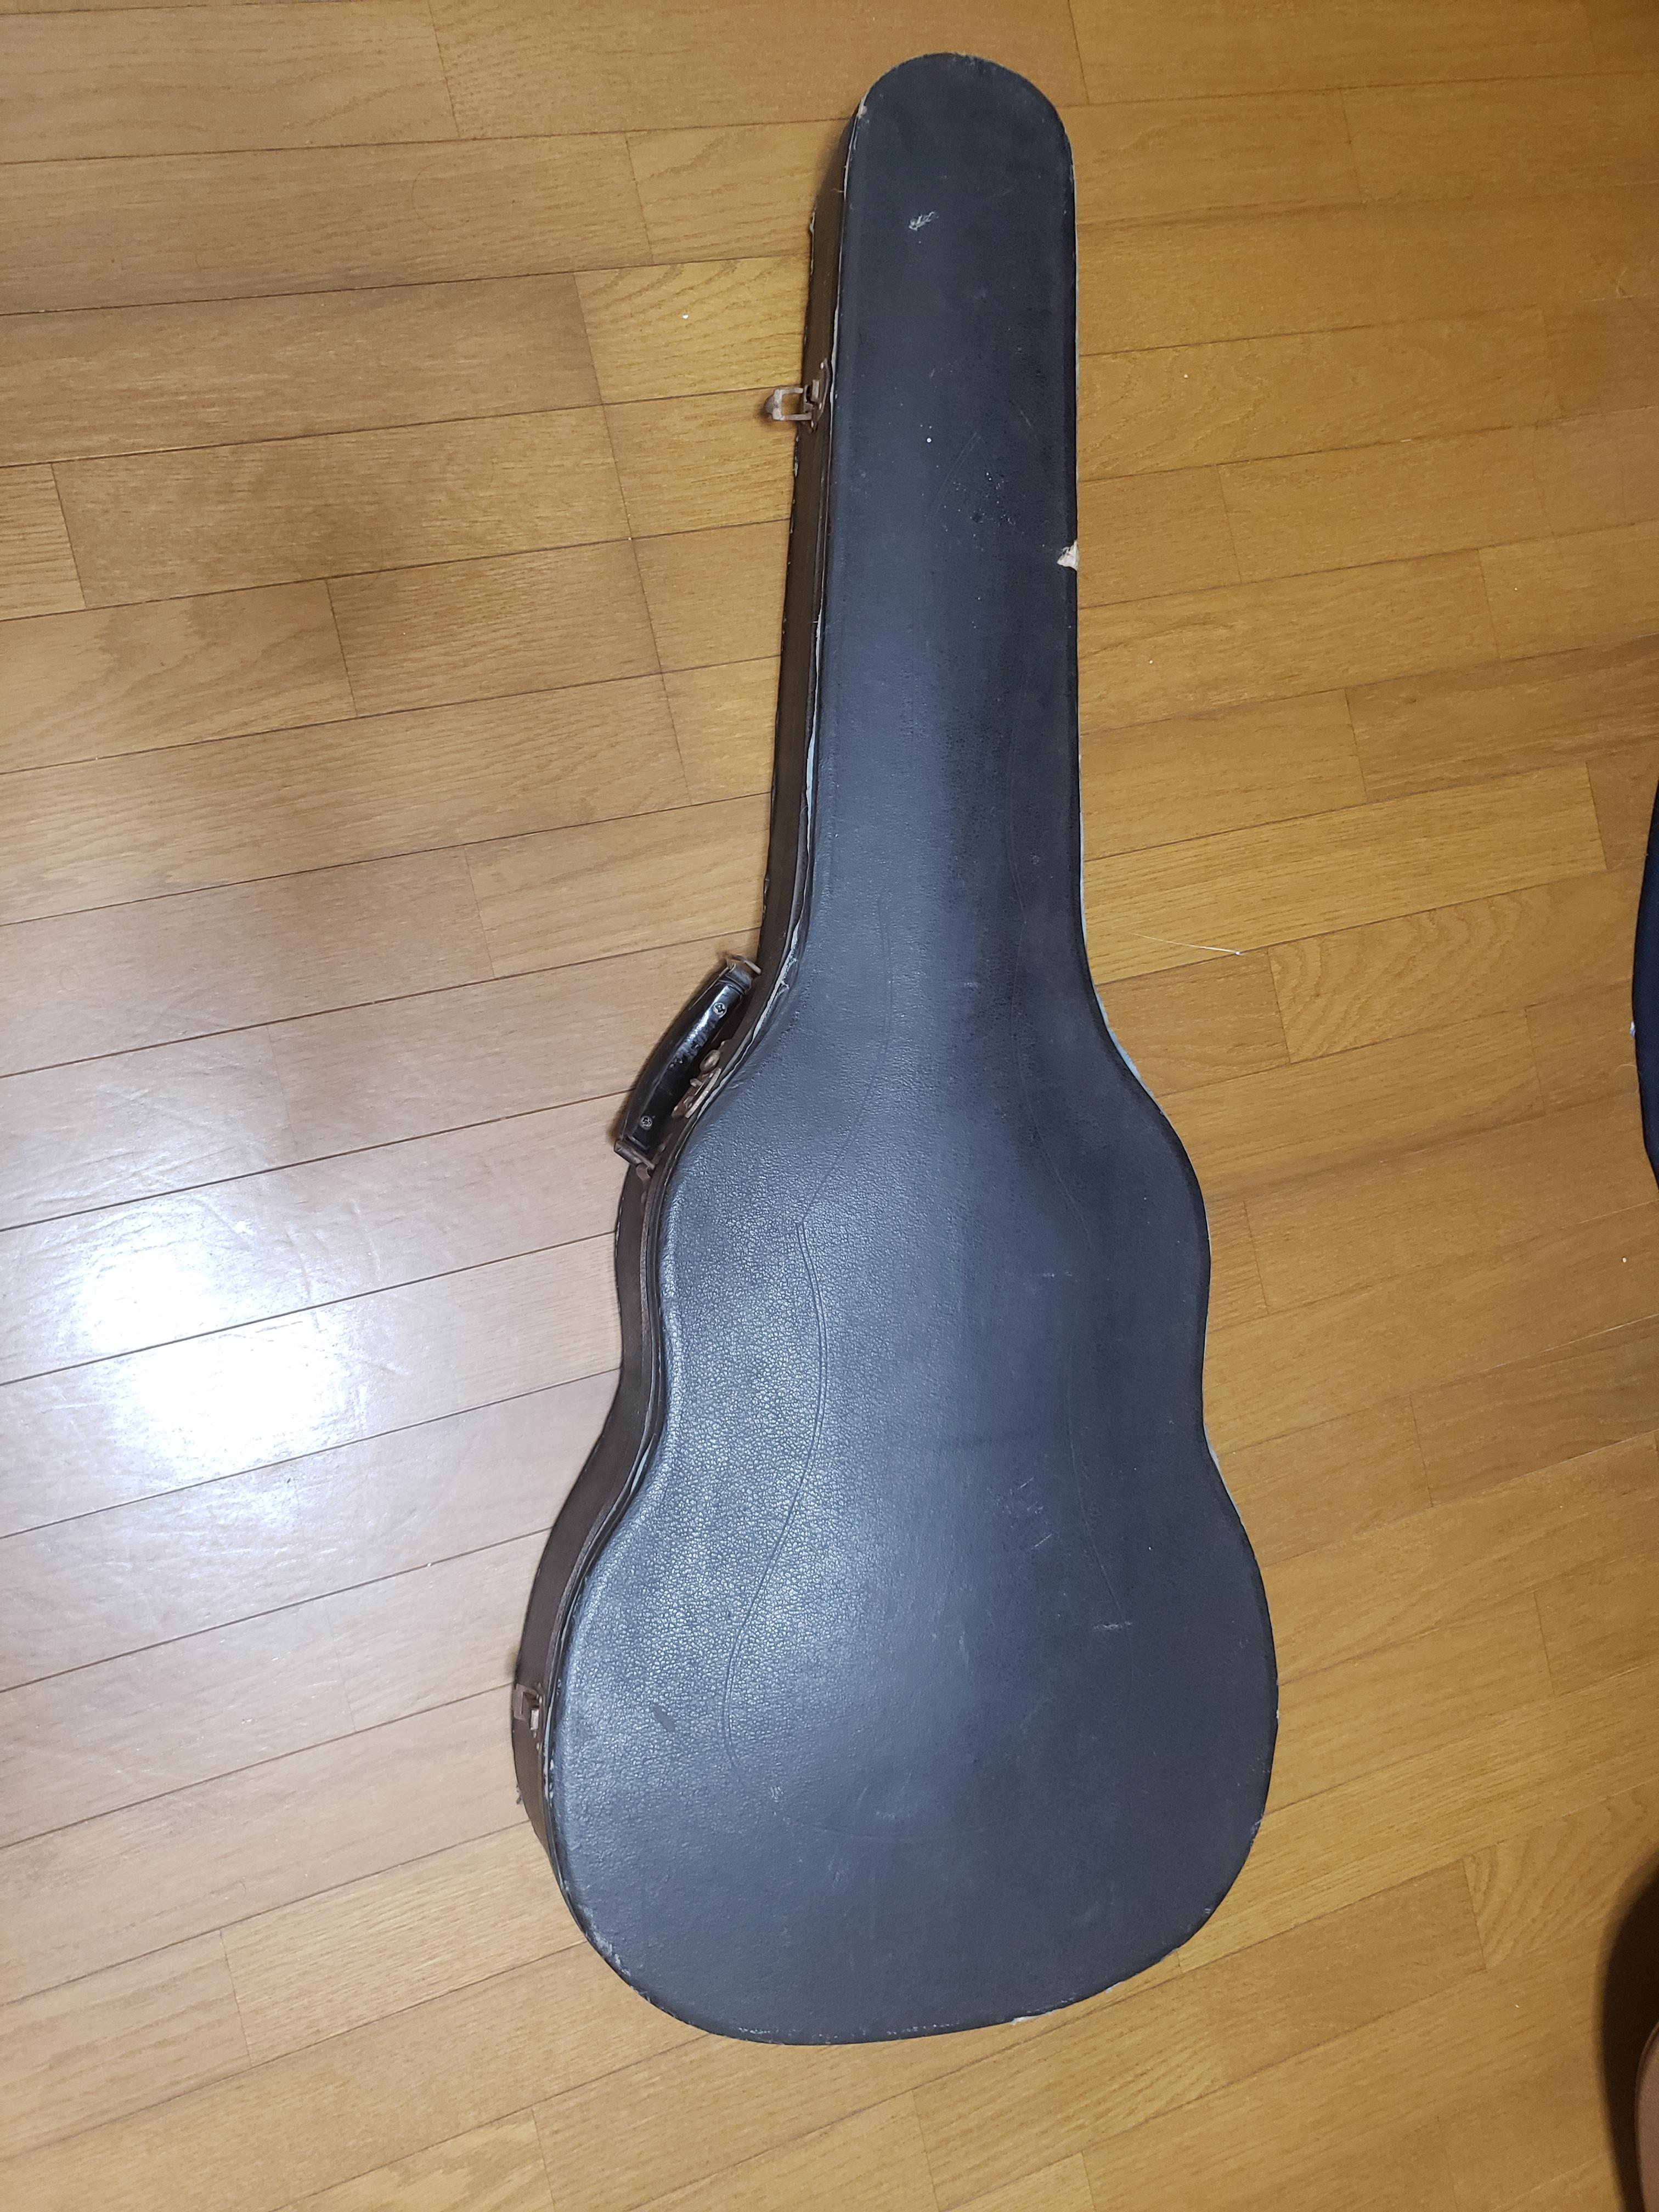
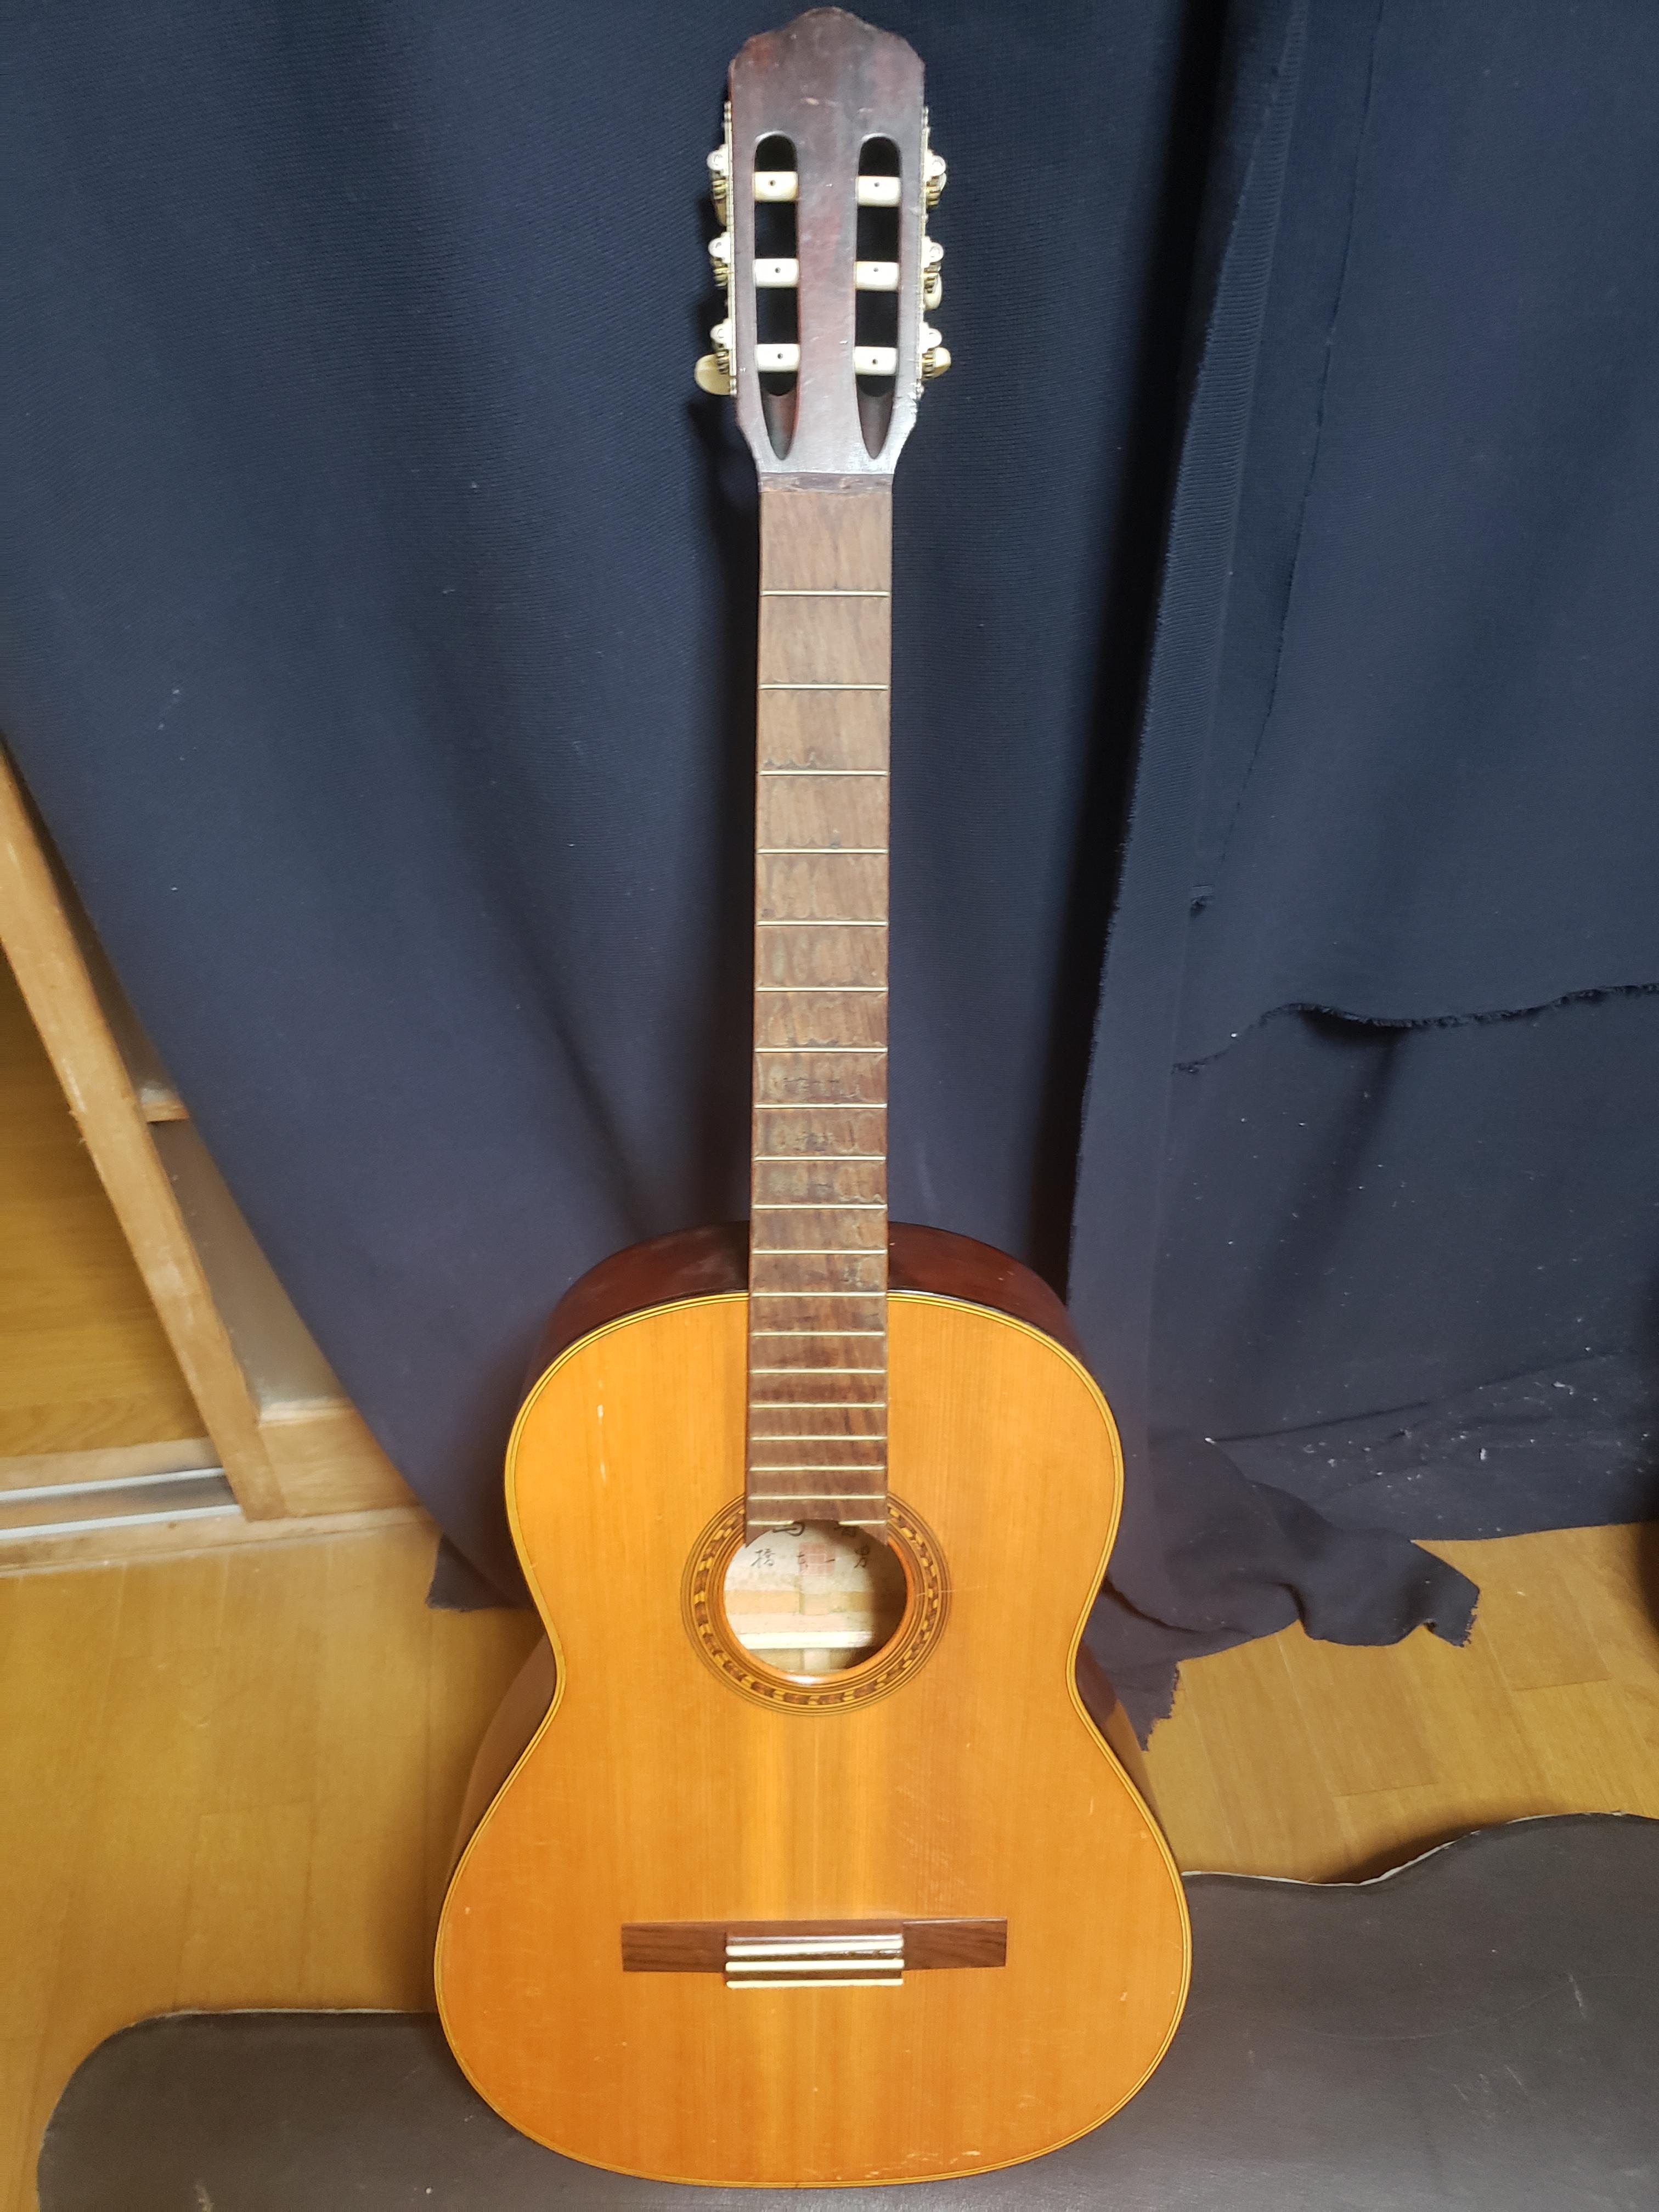
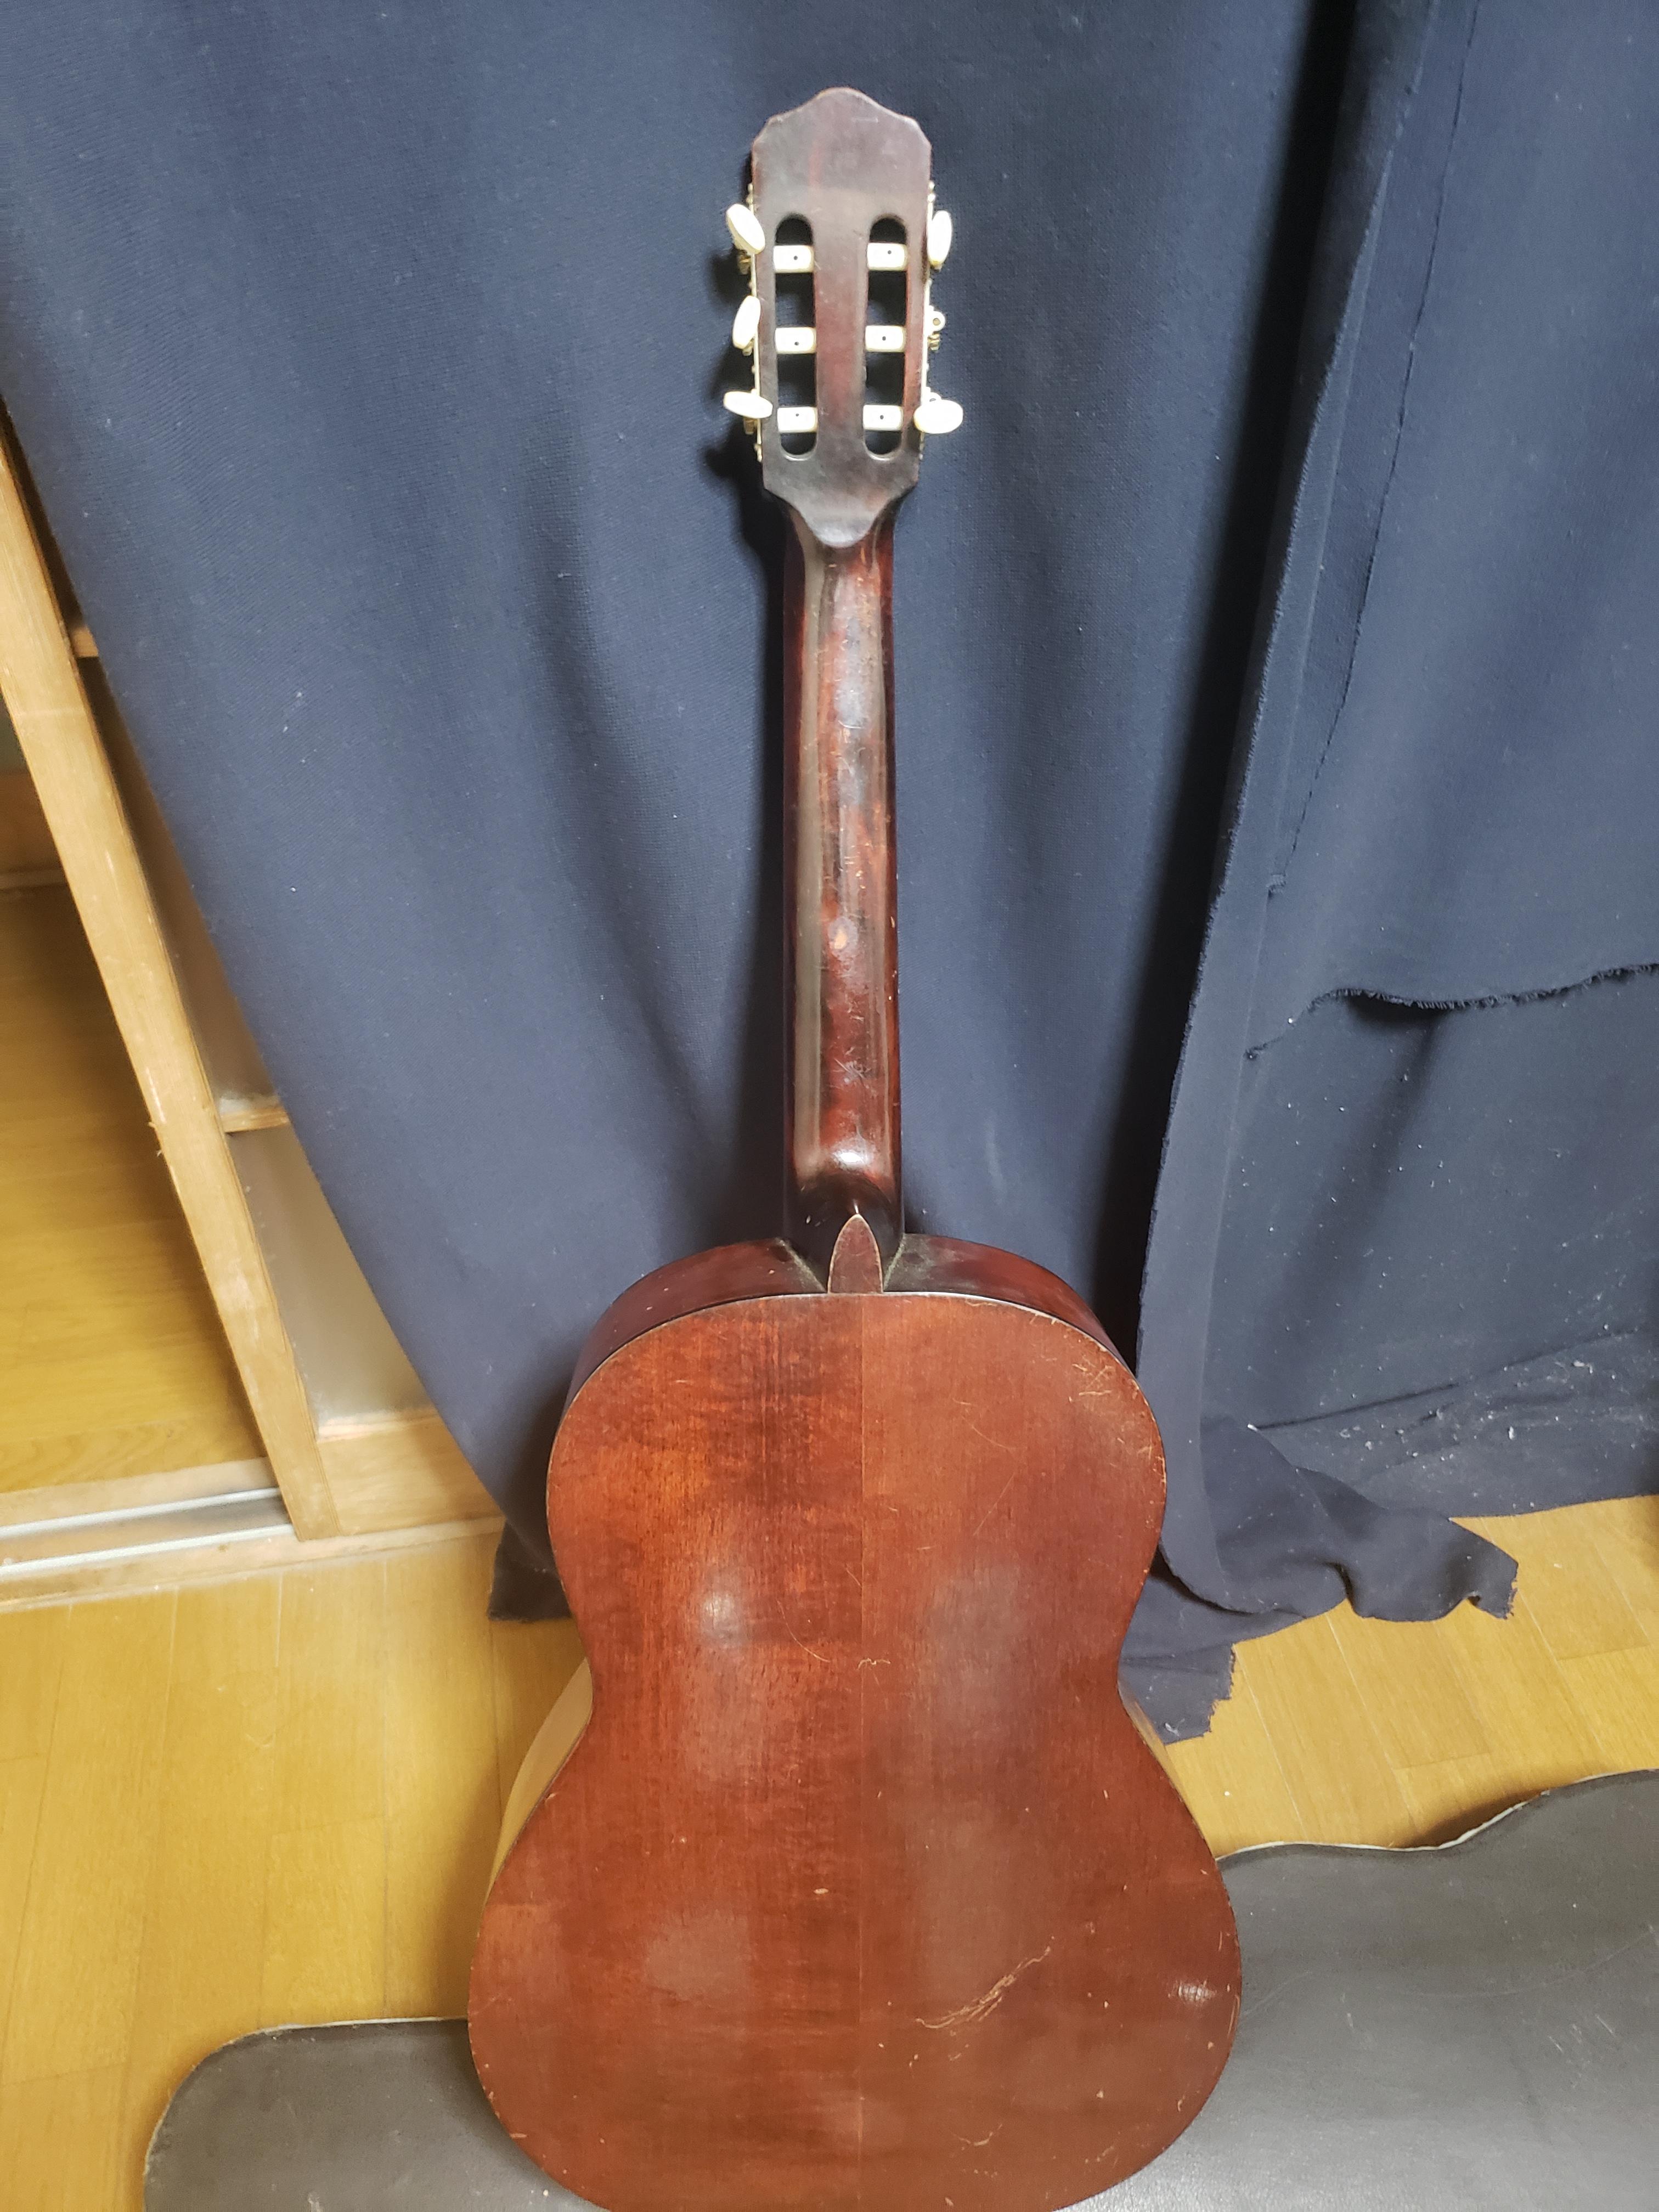
I bought this guitar cheaply on an online auction. I didn't really know what to expect, but it was advertised as a "solid wood" classical that was no longer playable and was being sold as "junk". It turns out to be the guitar model "Ukyou" by Kazuo Hashimoto, probably made in the 1960s in Japan. It wasn't in bad shape structurally, although the finish was very beat up and most of the hardware was broken or missing. It obviously hadn't been played in a long time. It cost around $20 (with a hard case), but the shipping was another $25 or so, so overall it cost something like $45 (USD). It has a solid top and laminate sides and back. I'm not sure what kind of wood was used.
A quick note about this: I did think about the ethics of possibly destroying a guitar for a vanity project, and I didn't want to disrespect another craftsman's work, and especially didn't want to destroy something that might have been an important historical instrument. I don't know if there are big fans of Kazuo Hashimoto or anything out in the world, or if someday his instruments may be respected like Stradivari. But I decided that since this one was being sold as junk that it would hopefully be OK to use it. Just something to think about when doing something like this.
Detailed Planning
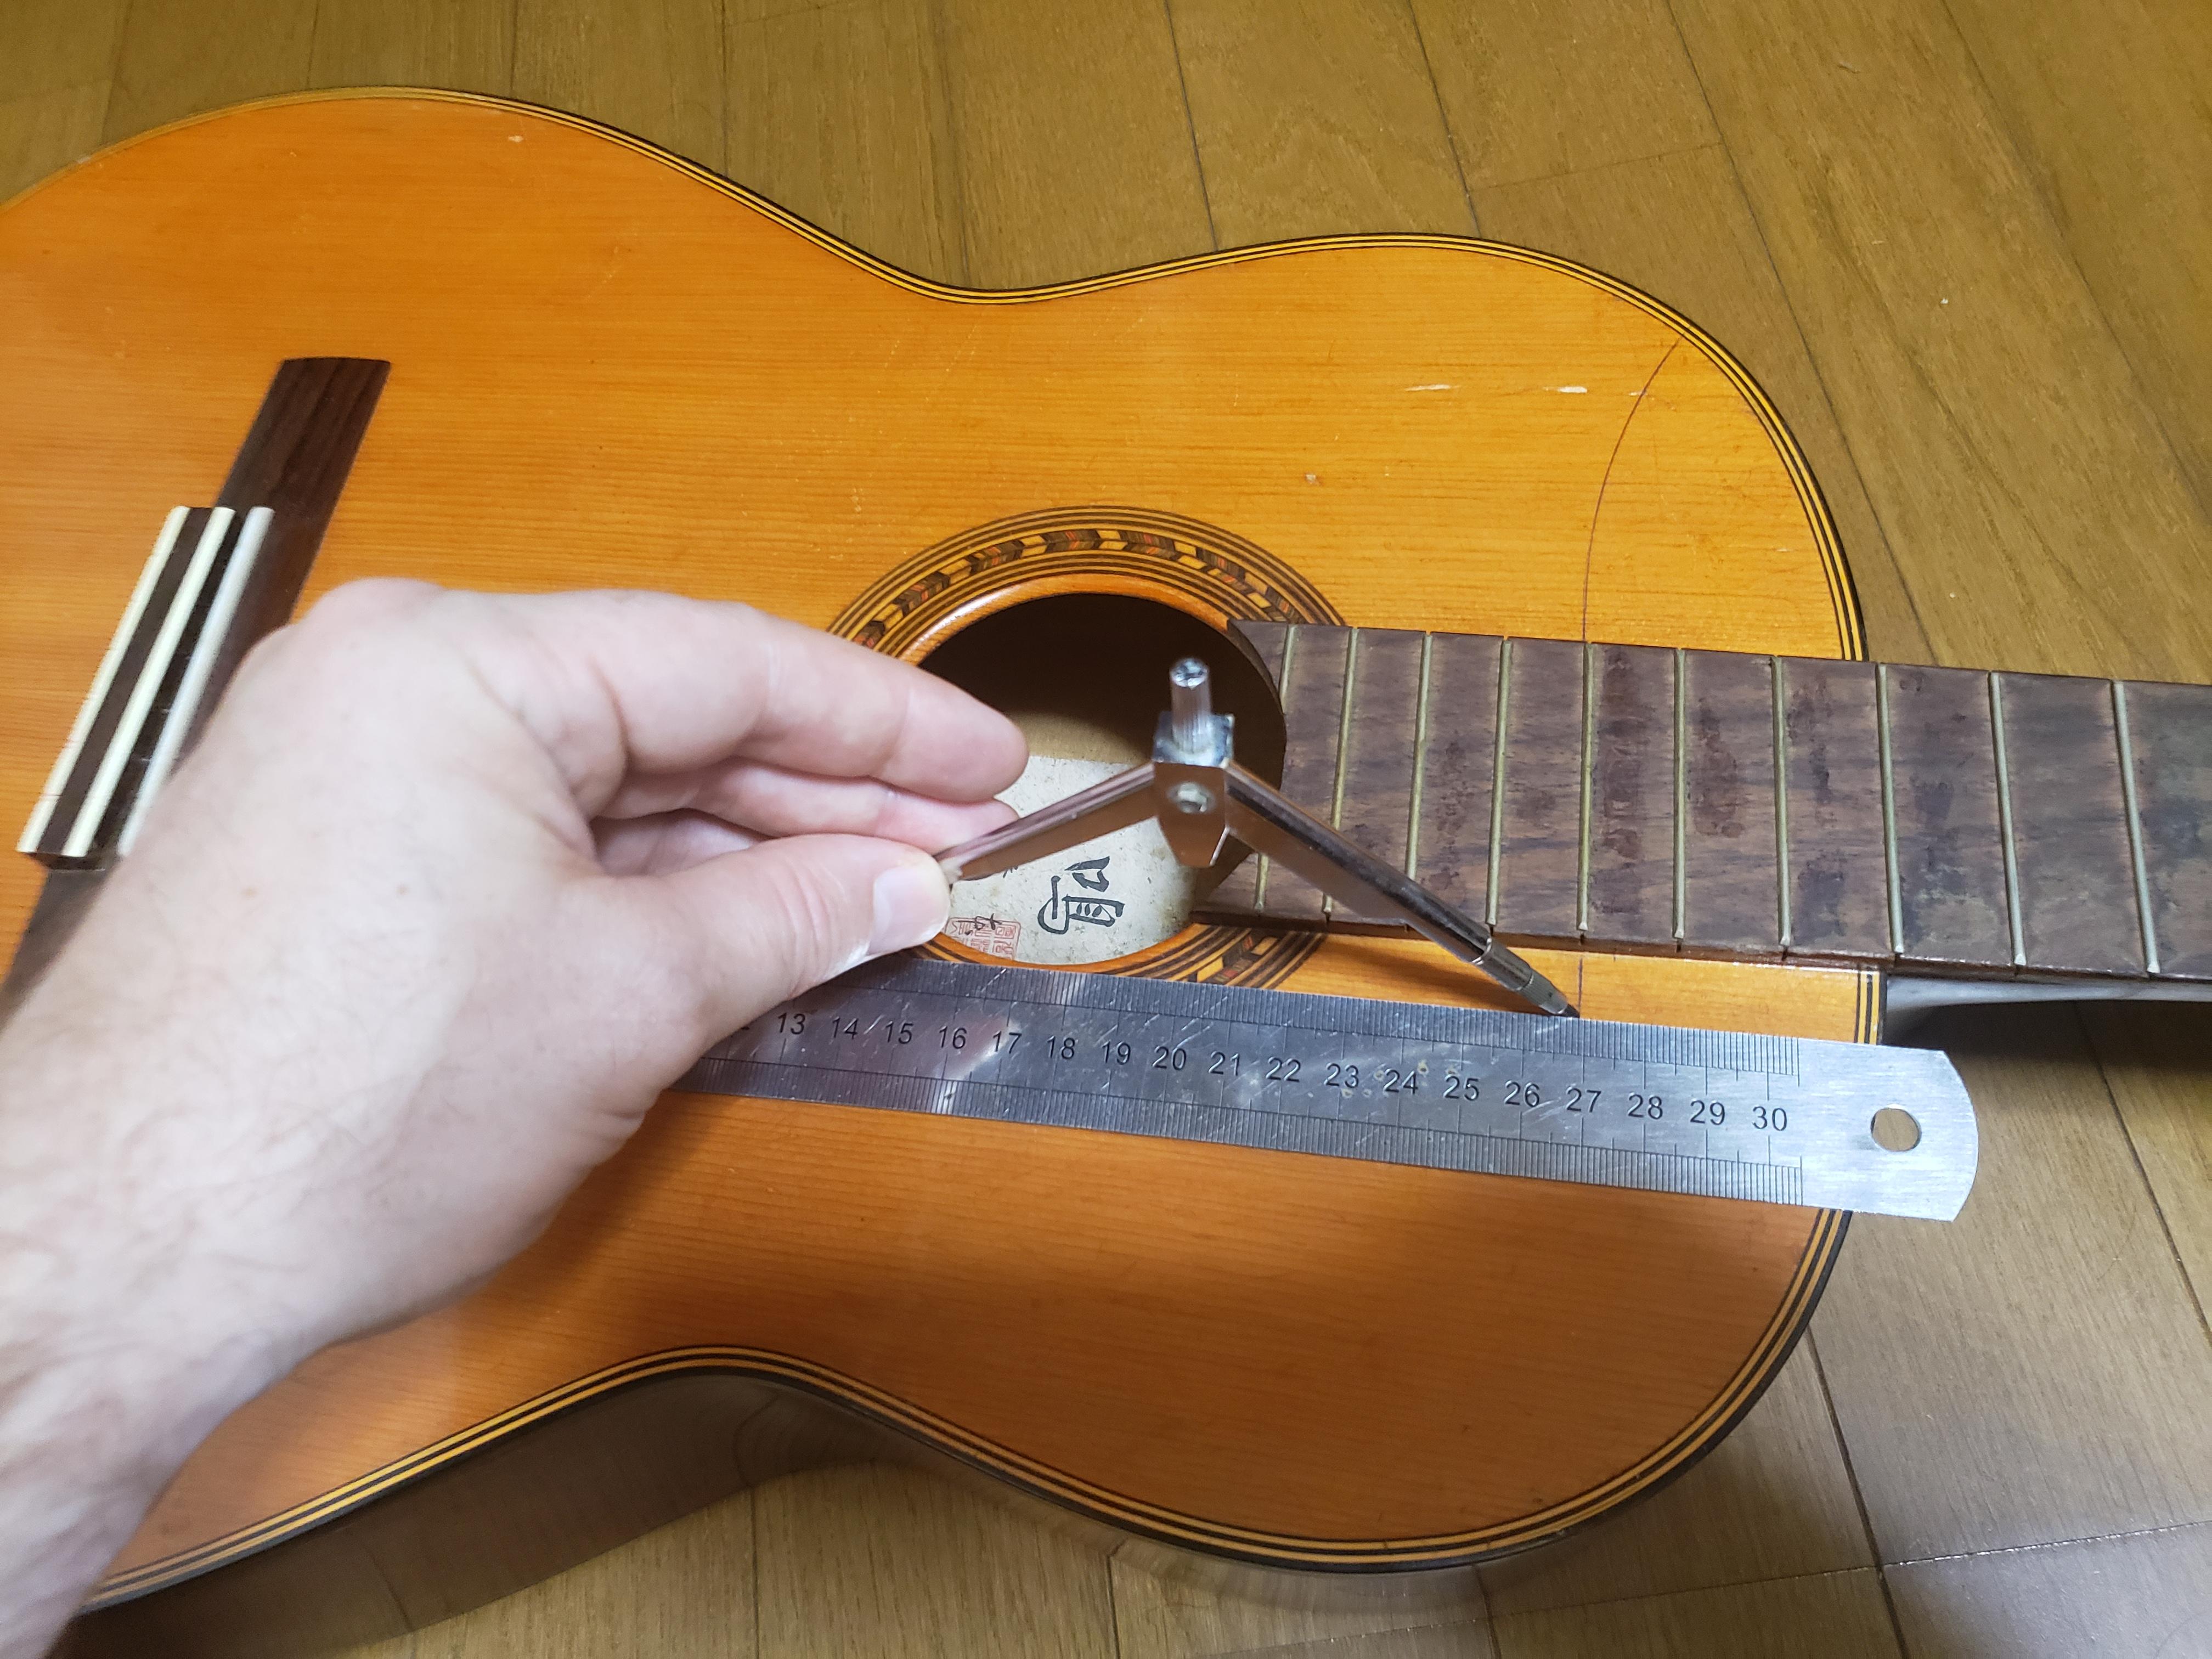
The point of this project is to make this guitar into a shorter-scale guitar, with the nut and headstock starting where the 3rd fret currently is, and with the neck joint at the 12th fret, and higher frets for high notes. This will make playing it like a small guitar, but still with access to the whole neck (unlike using a capo, which makes playing higher notes more difficult).
So, Here's my plan of attack to make this into a terz guitar:
Cut the body so the sides will meet the neck at the current 15th fret.
Cut the head off at the 3rd fret.
Add a new heel block and extend the fretboard over the soundhole.
Cover up the cut body parts with new side wood.
Carve a new heel to replace the missing section of neck (that would be below the current 12th-15th frets).
Put the headstock back on at the new joint (the old 3rd fret position).
Finally, make the guitar nicer and playable: scrape and refinish, replace the frets, add hardware, etc.
Cutting the Body
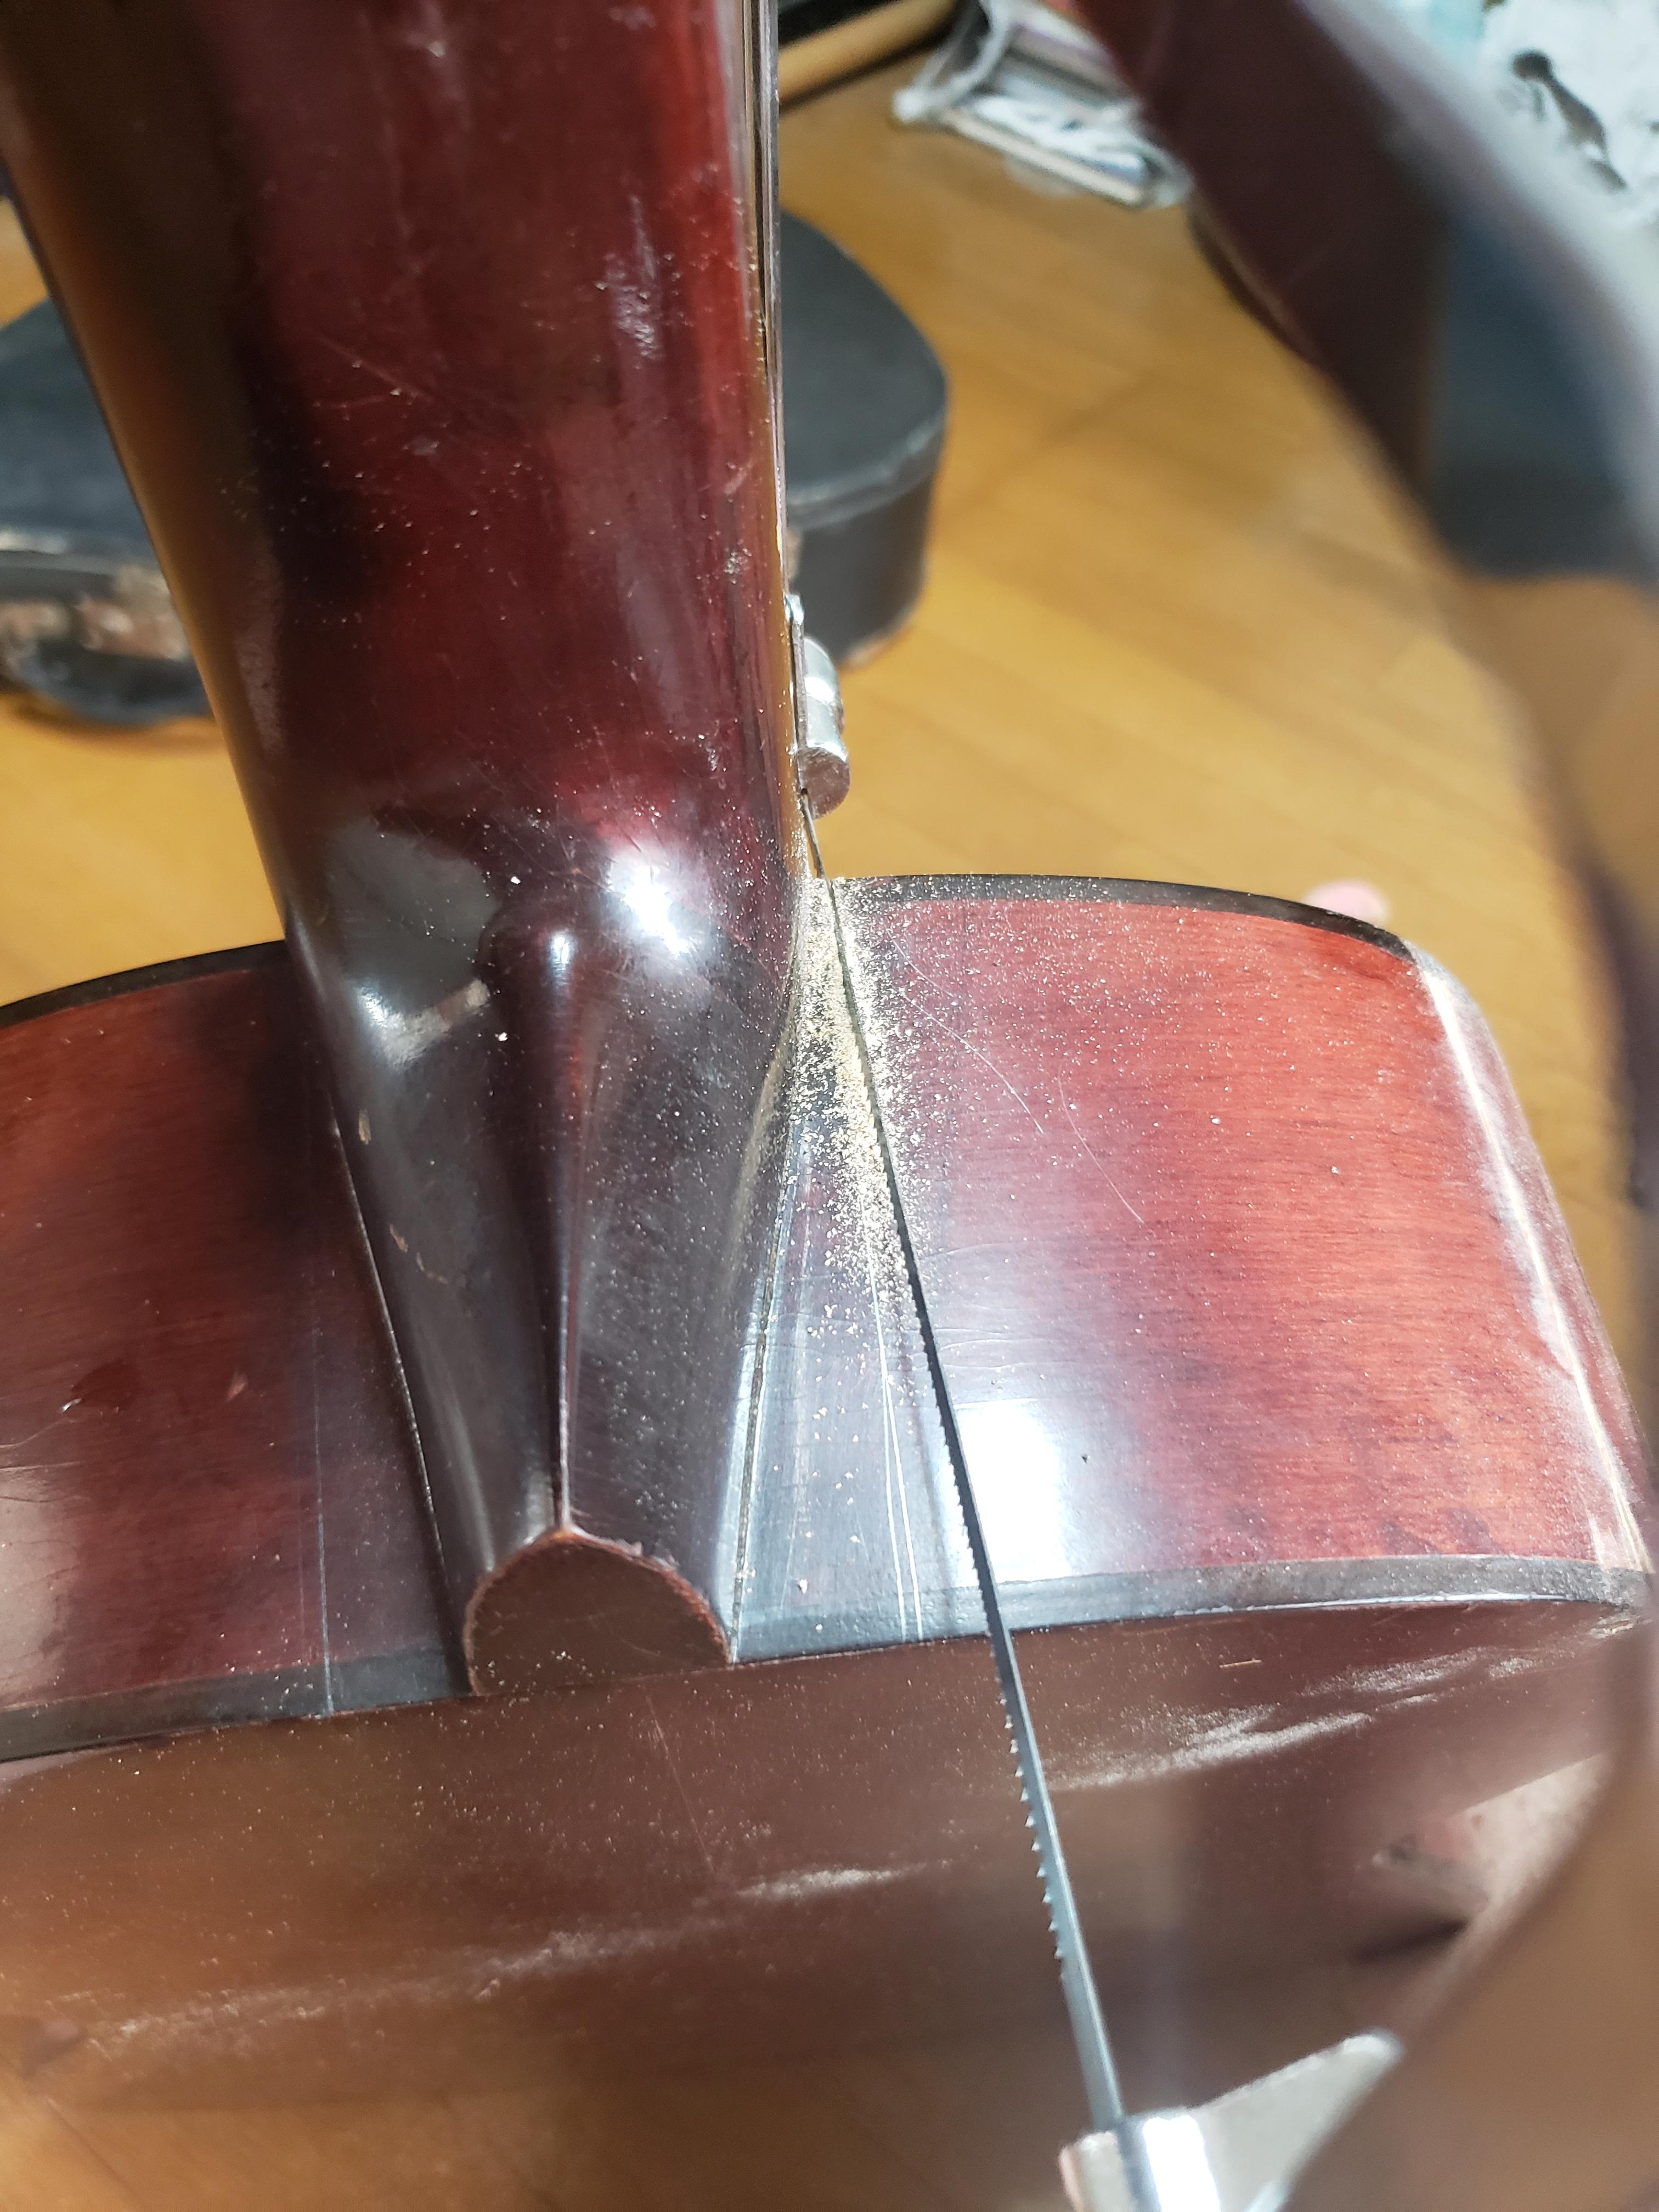
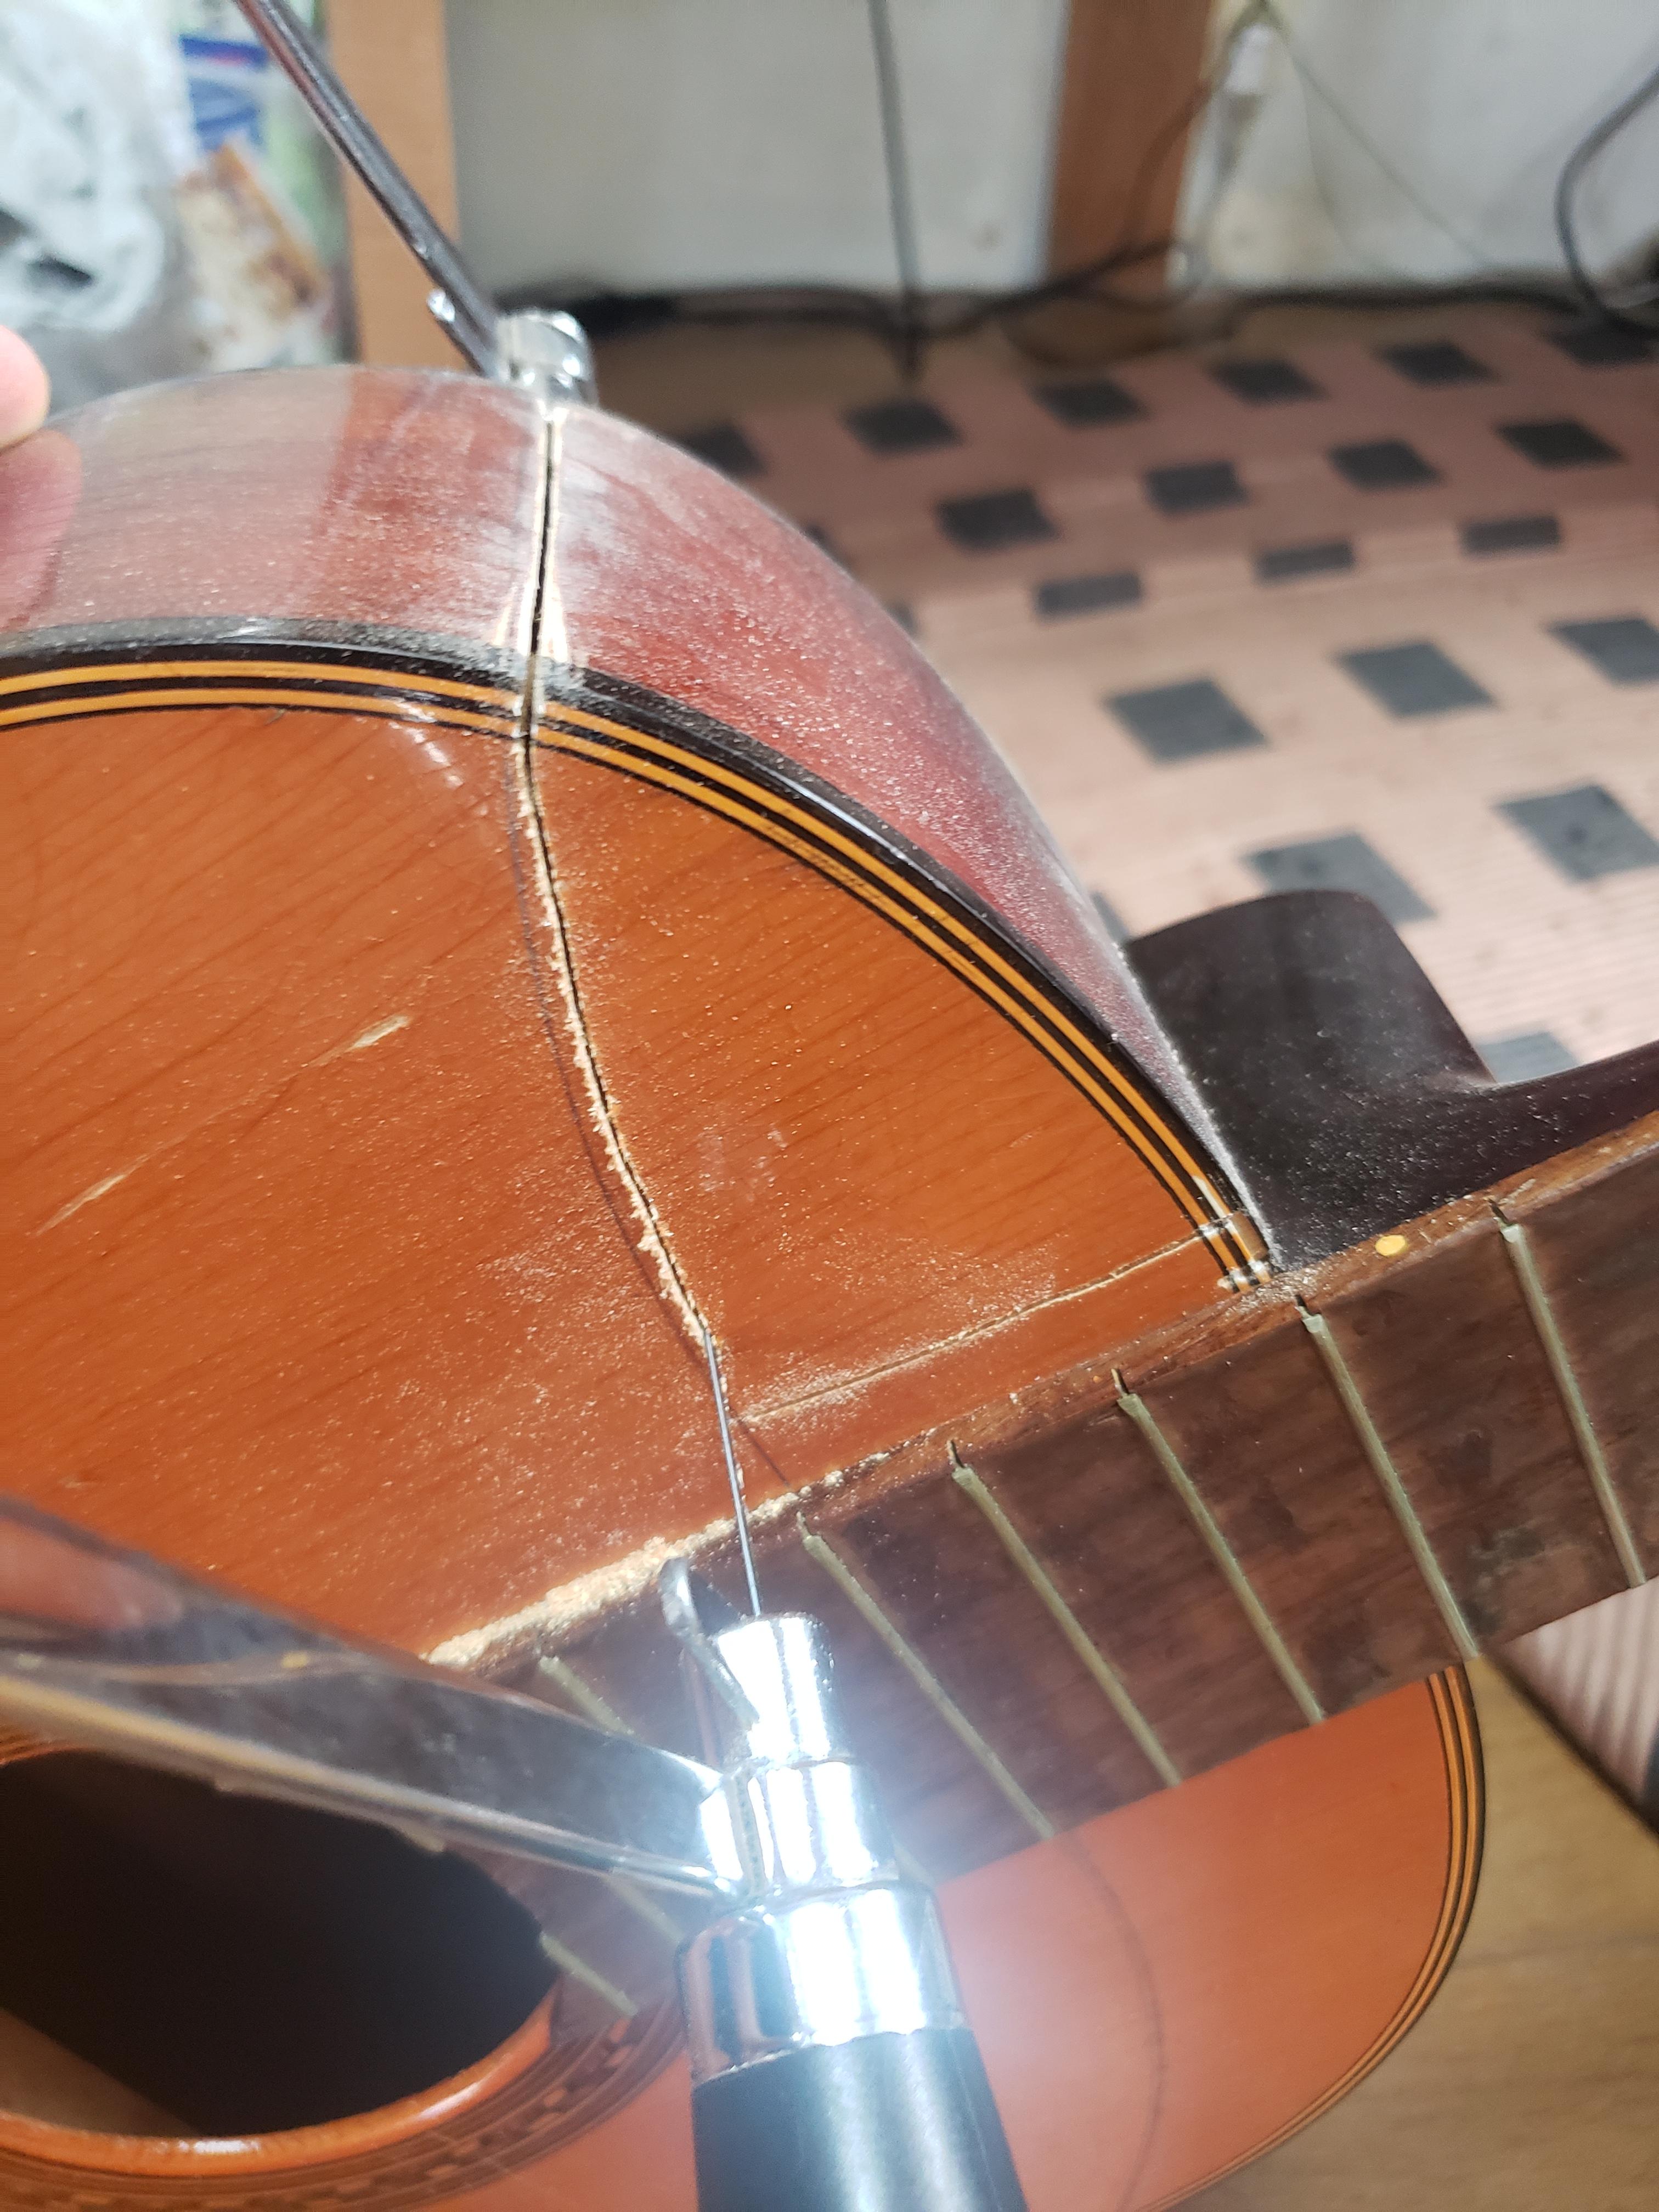
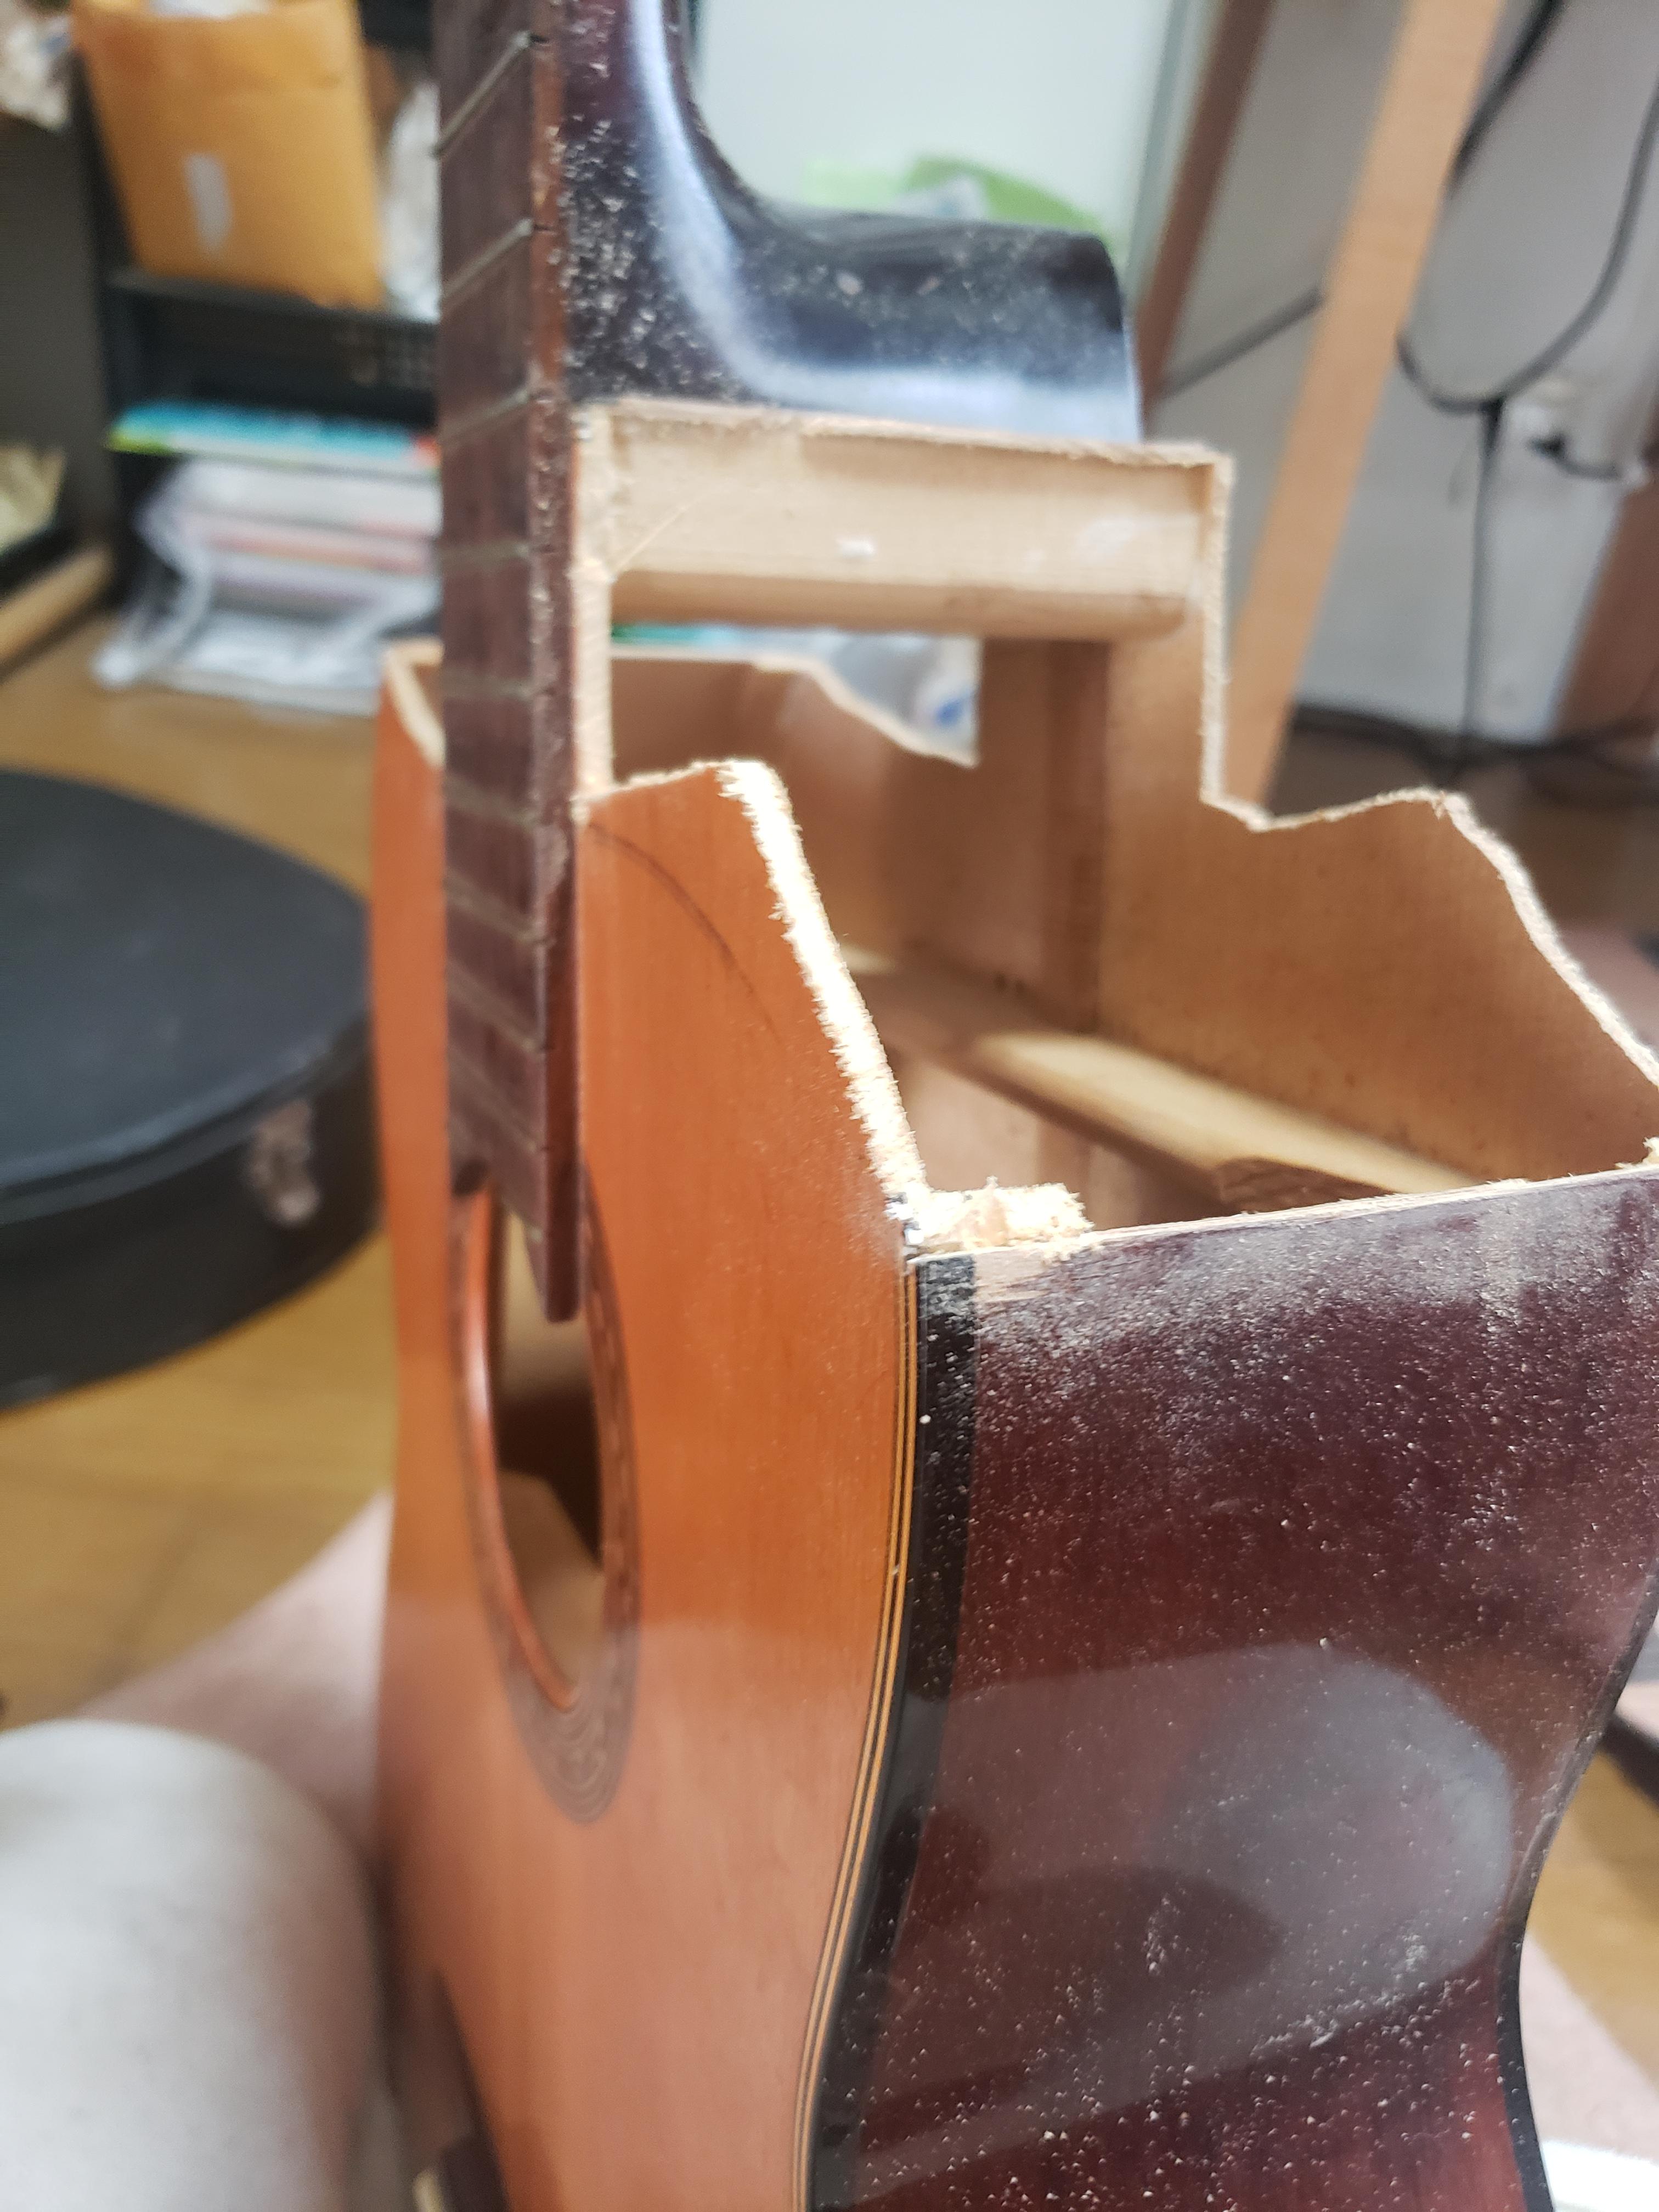
I cut the body on both sides by the neck, so that both sides met the neck at the 15th fret (which will be the 12th fret on the final product). I used a small jigsaw and cut far from the cut lines because it was quite difficult to cut straight through both the top and back at the same time, and it would have been easy to make mistakes. I then pared it down to the correct lines.
I now had access to the inside of the guitar so I would be able to do all the work that needed to be done inside before covering up the gaping holes I had made.
Off With Its Head!
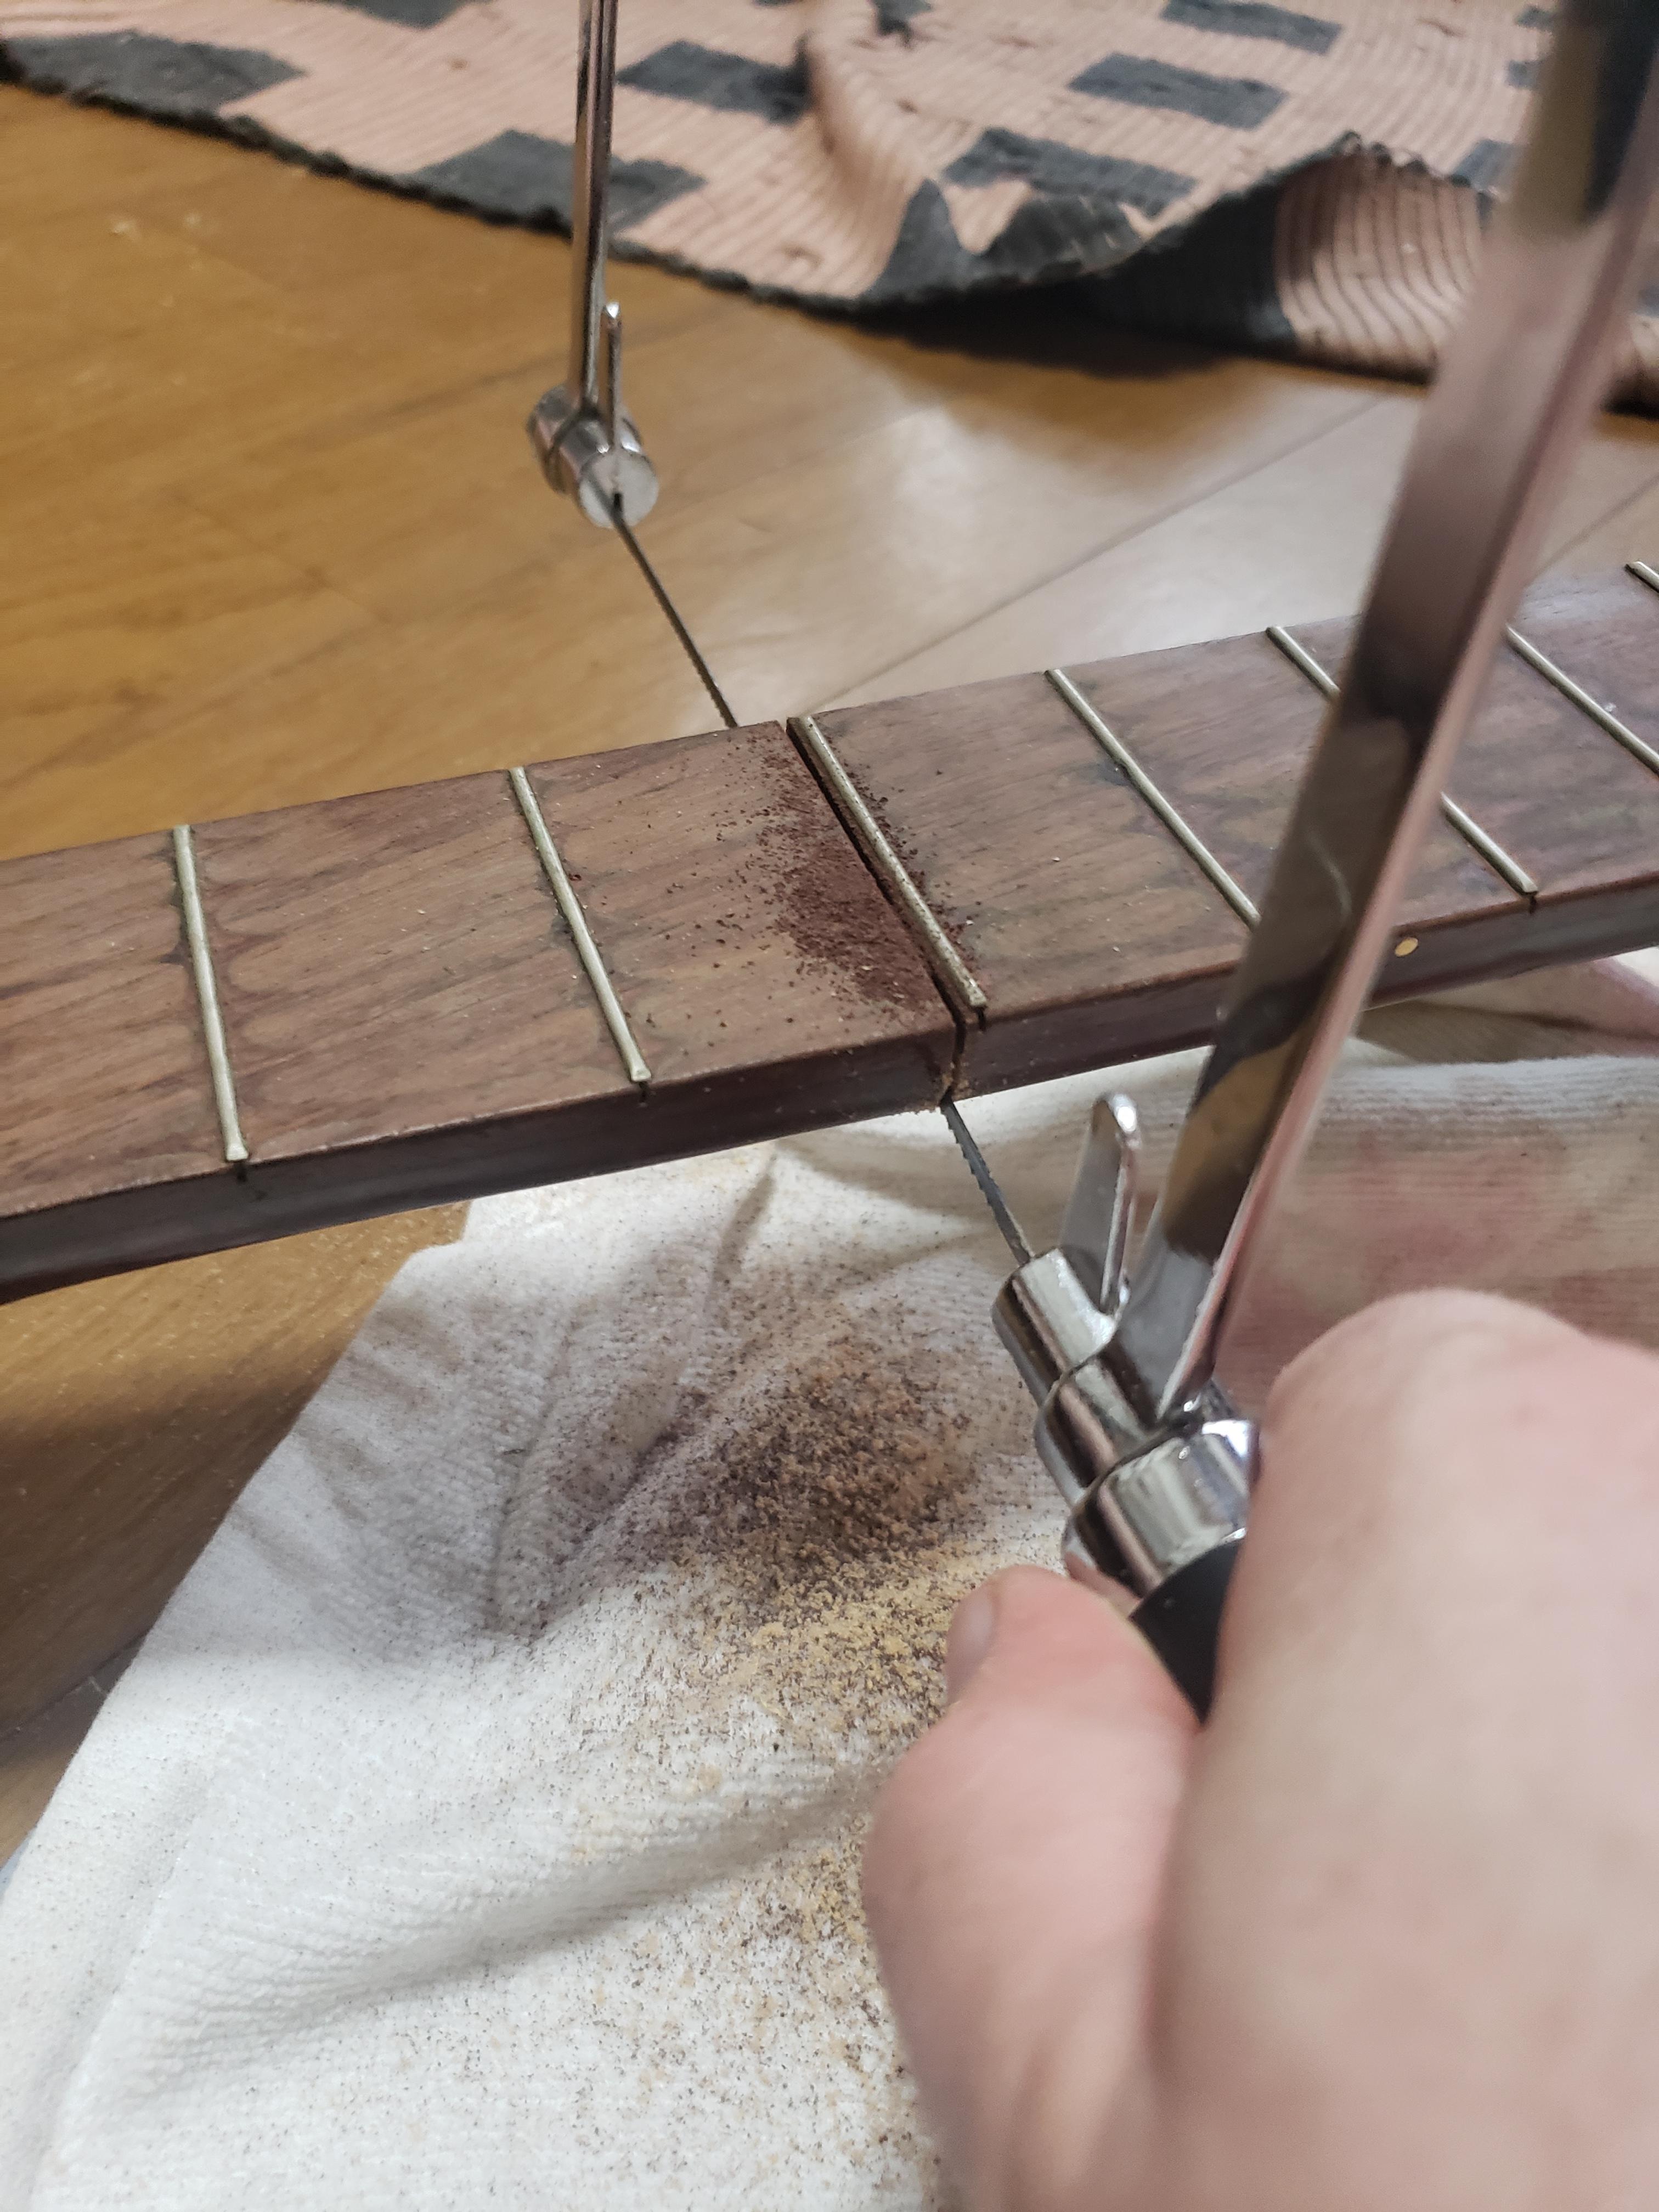
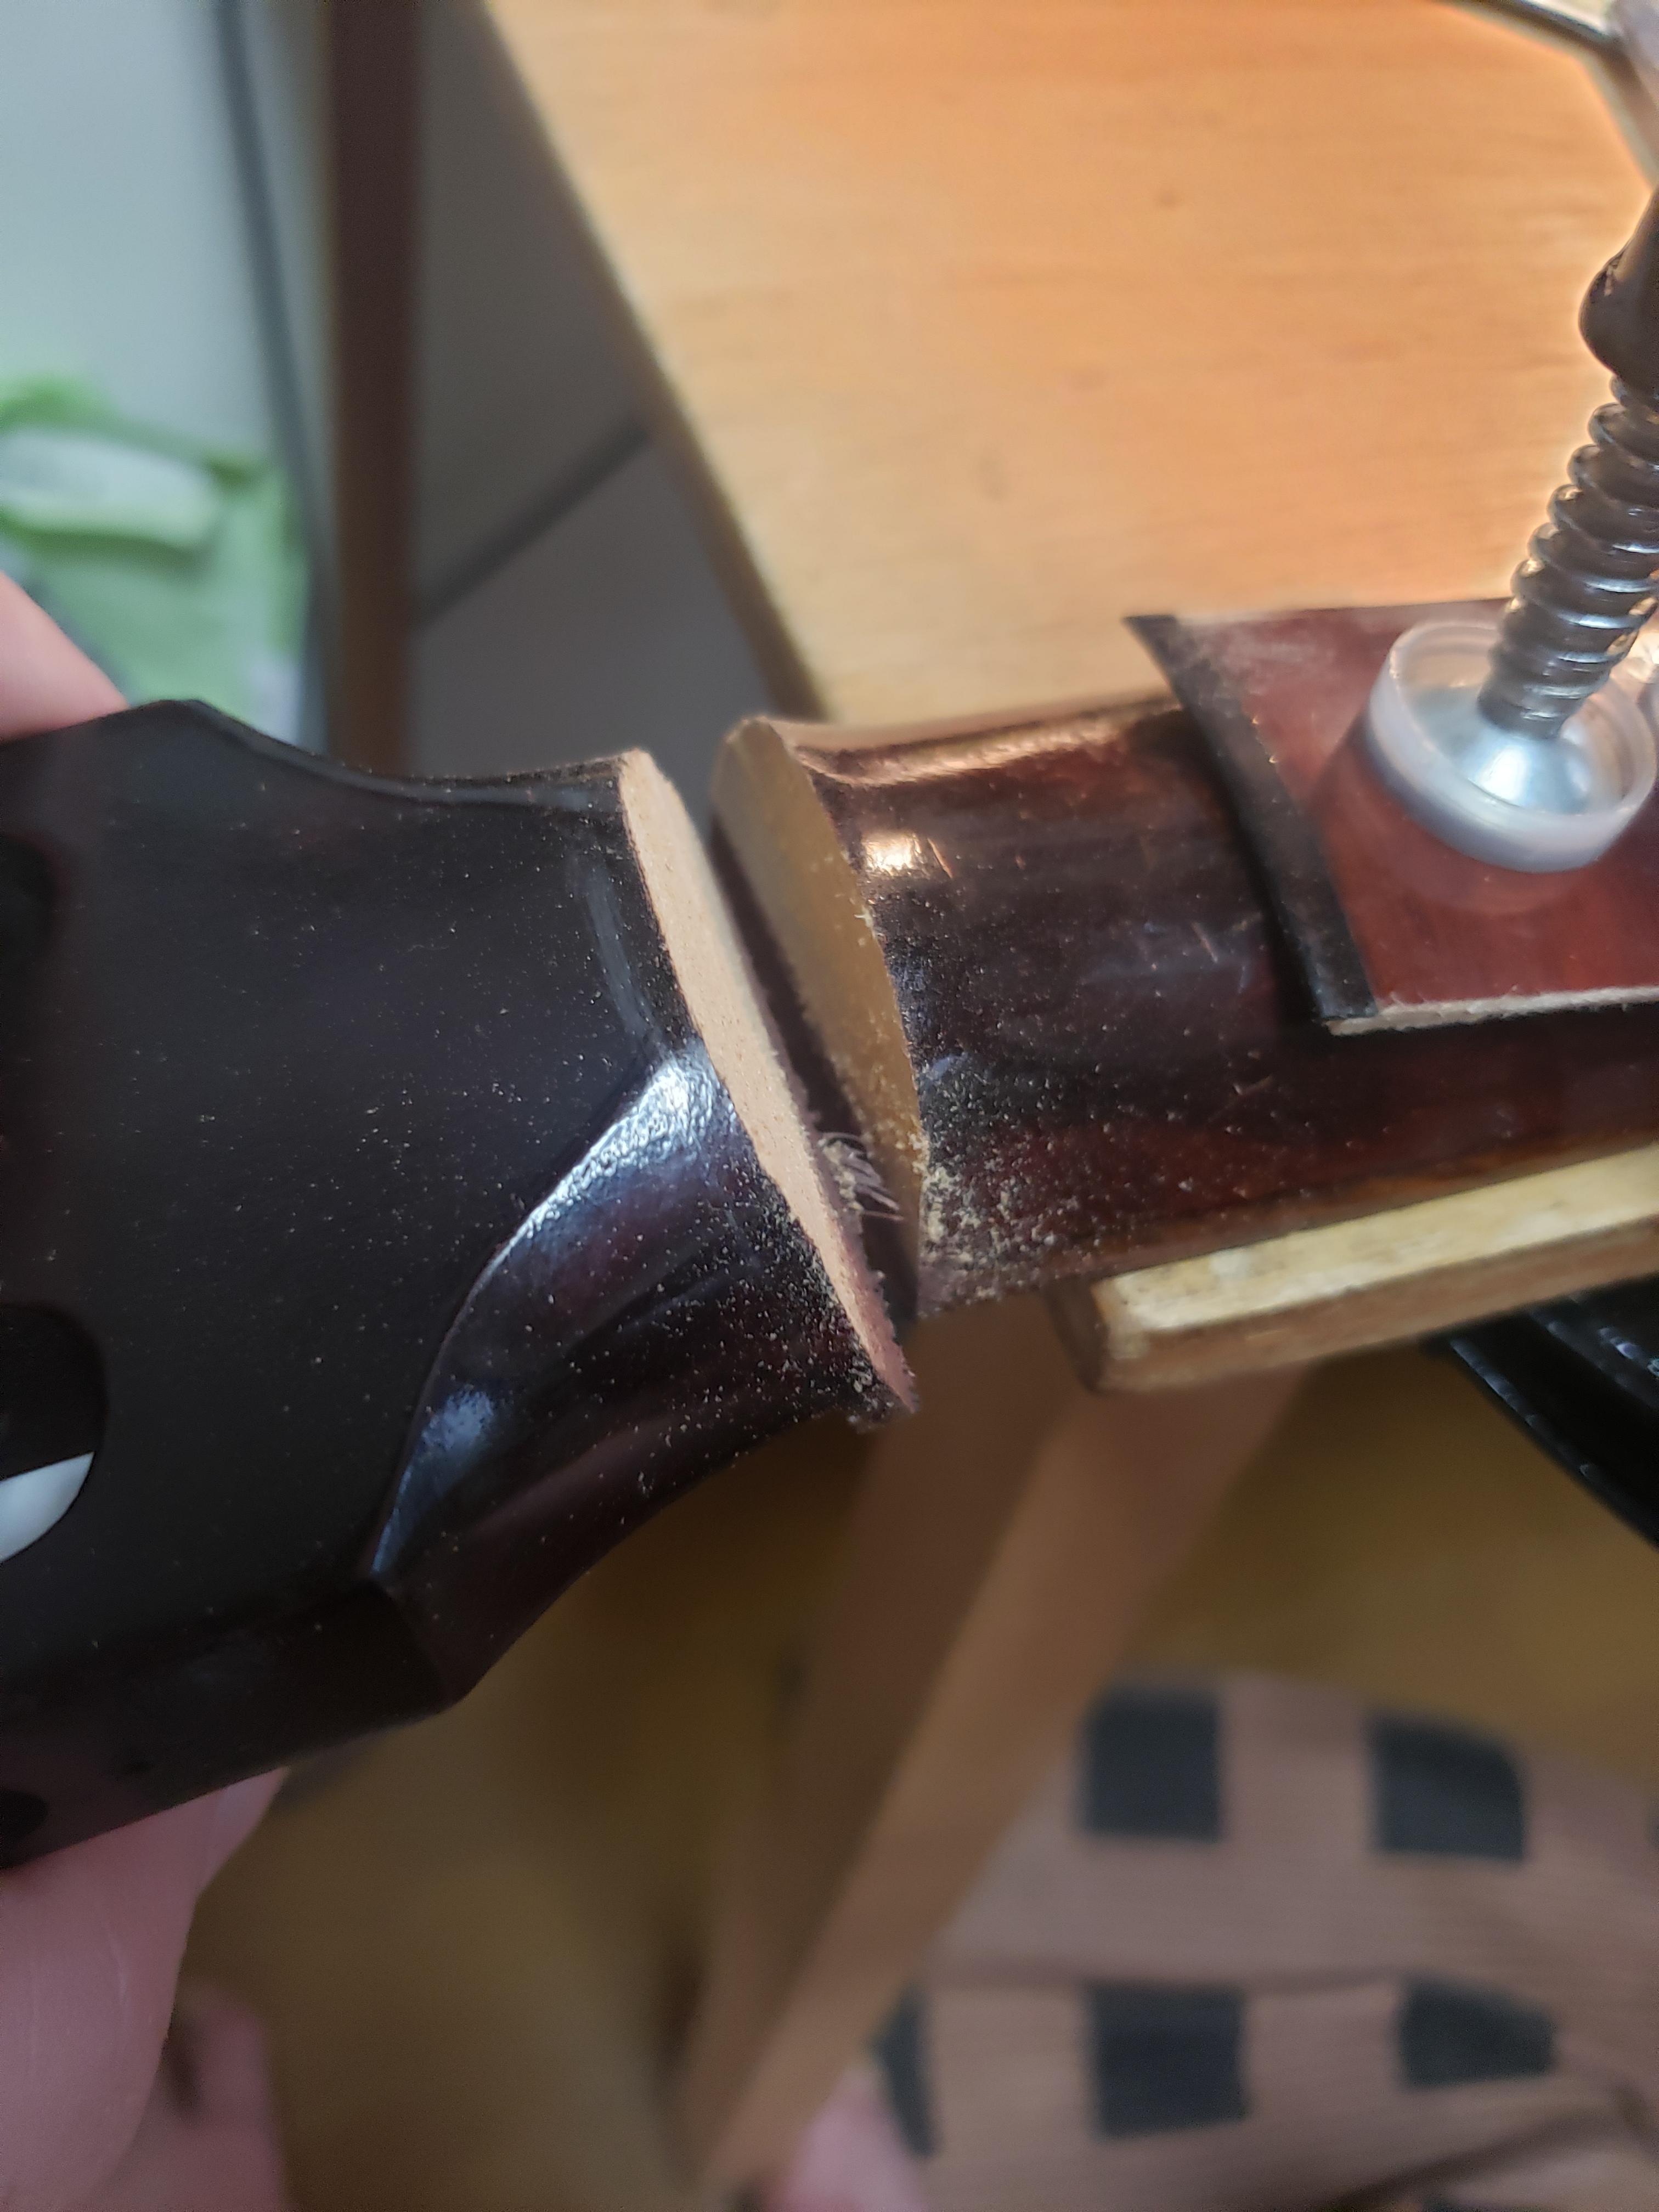
I cut the neck at the 3rd fret using a small jigsaw. I cut a little bit to the headstock side of the fret to allow a little room for error. I did this cut at this point because the shorter neck now made it easier to work with the whole guitar.
Extending the Fretboard
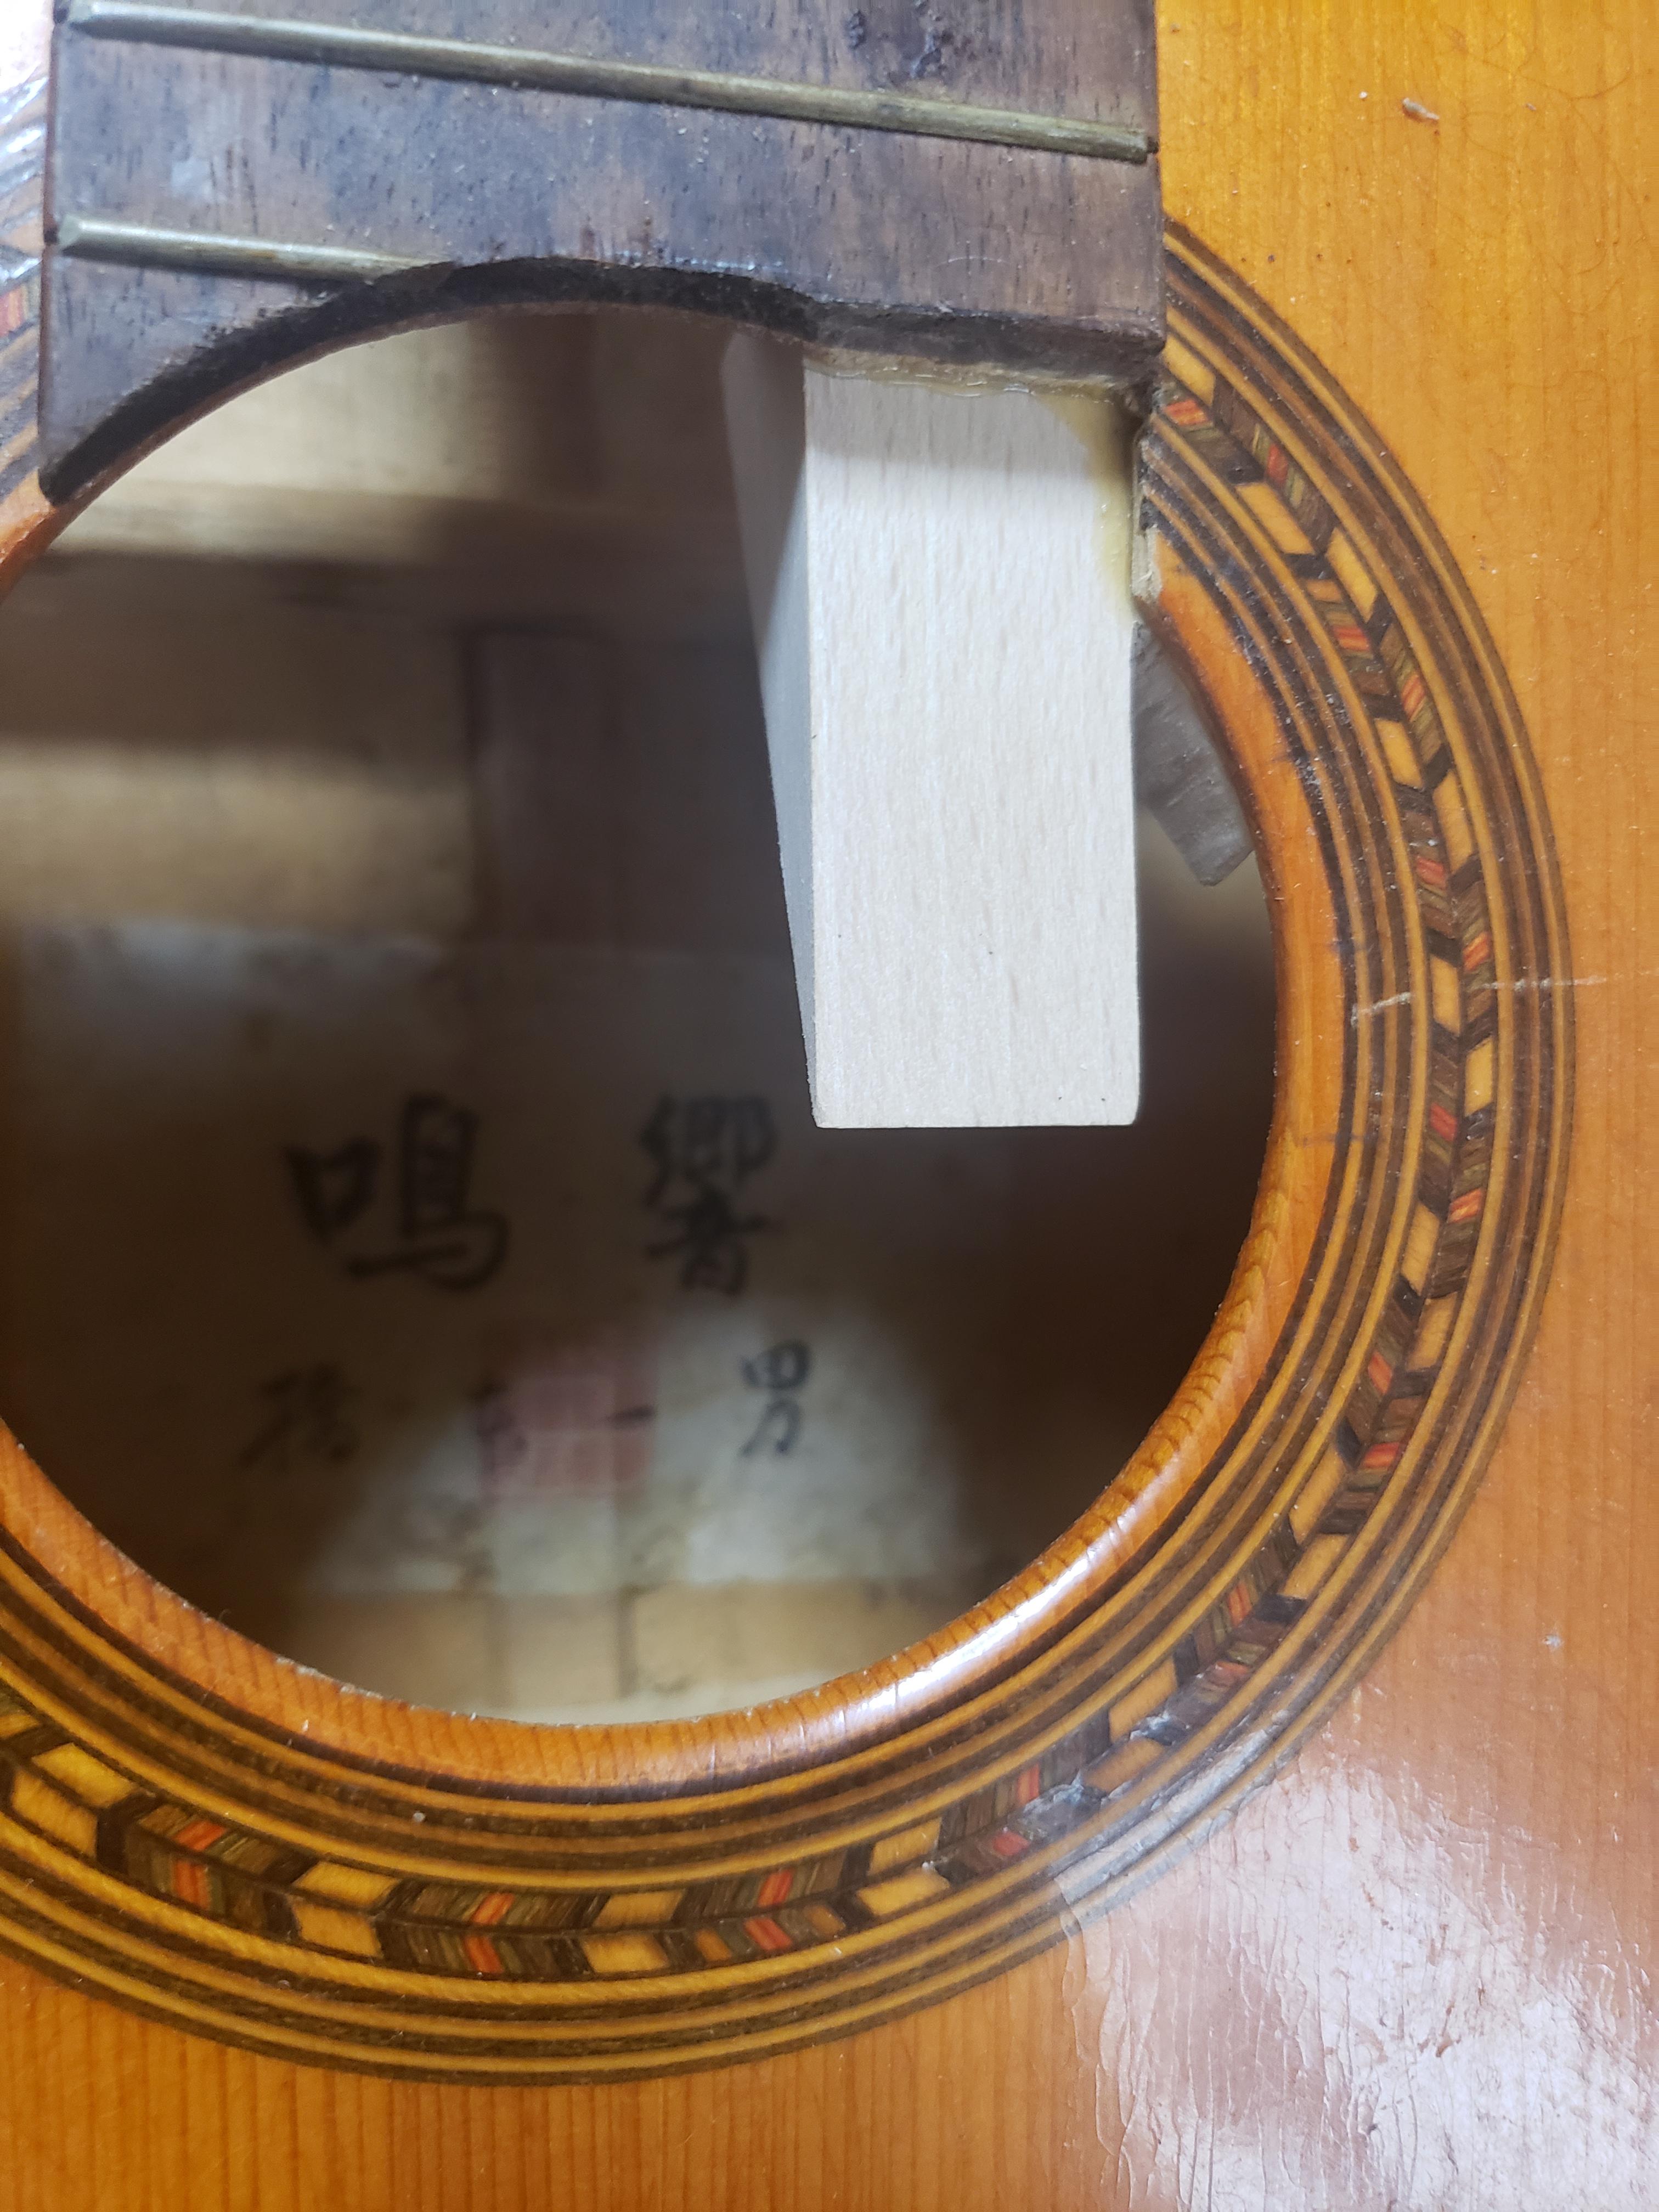
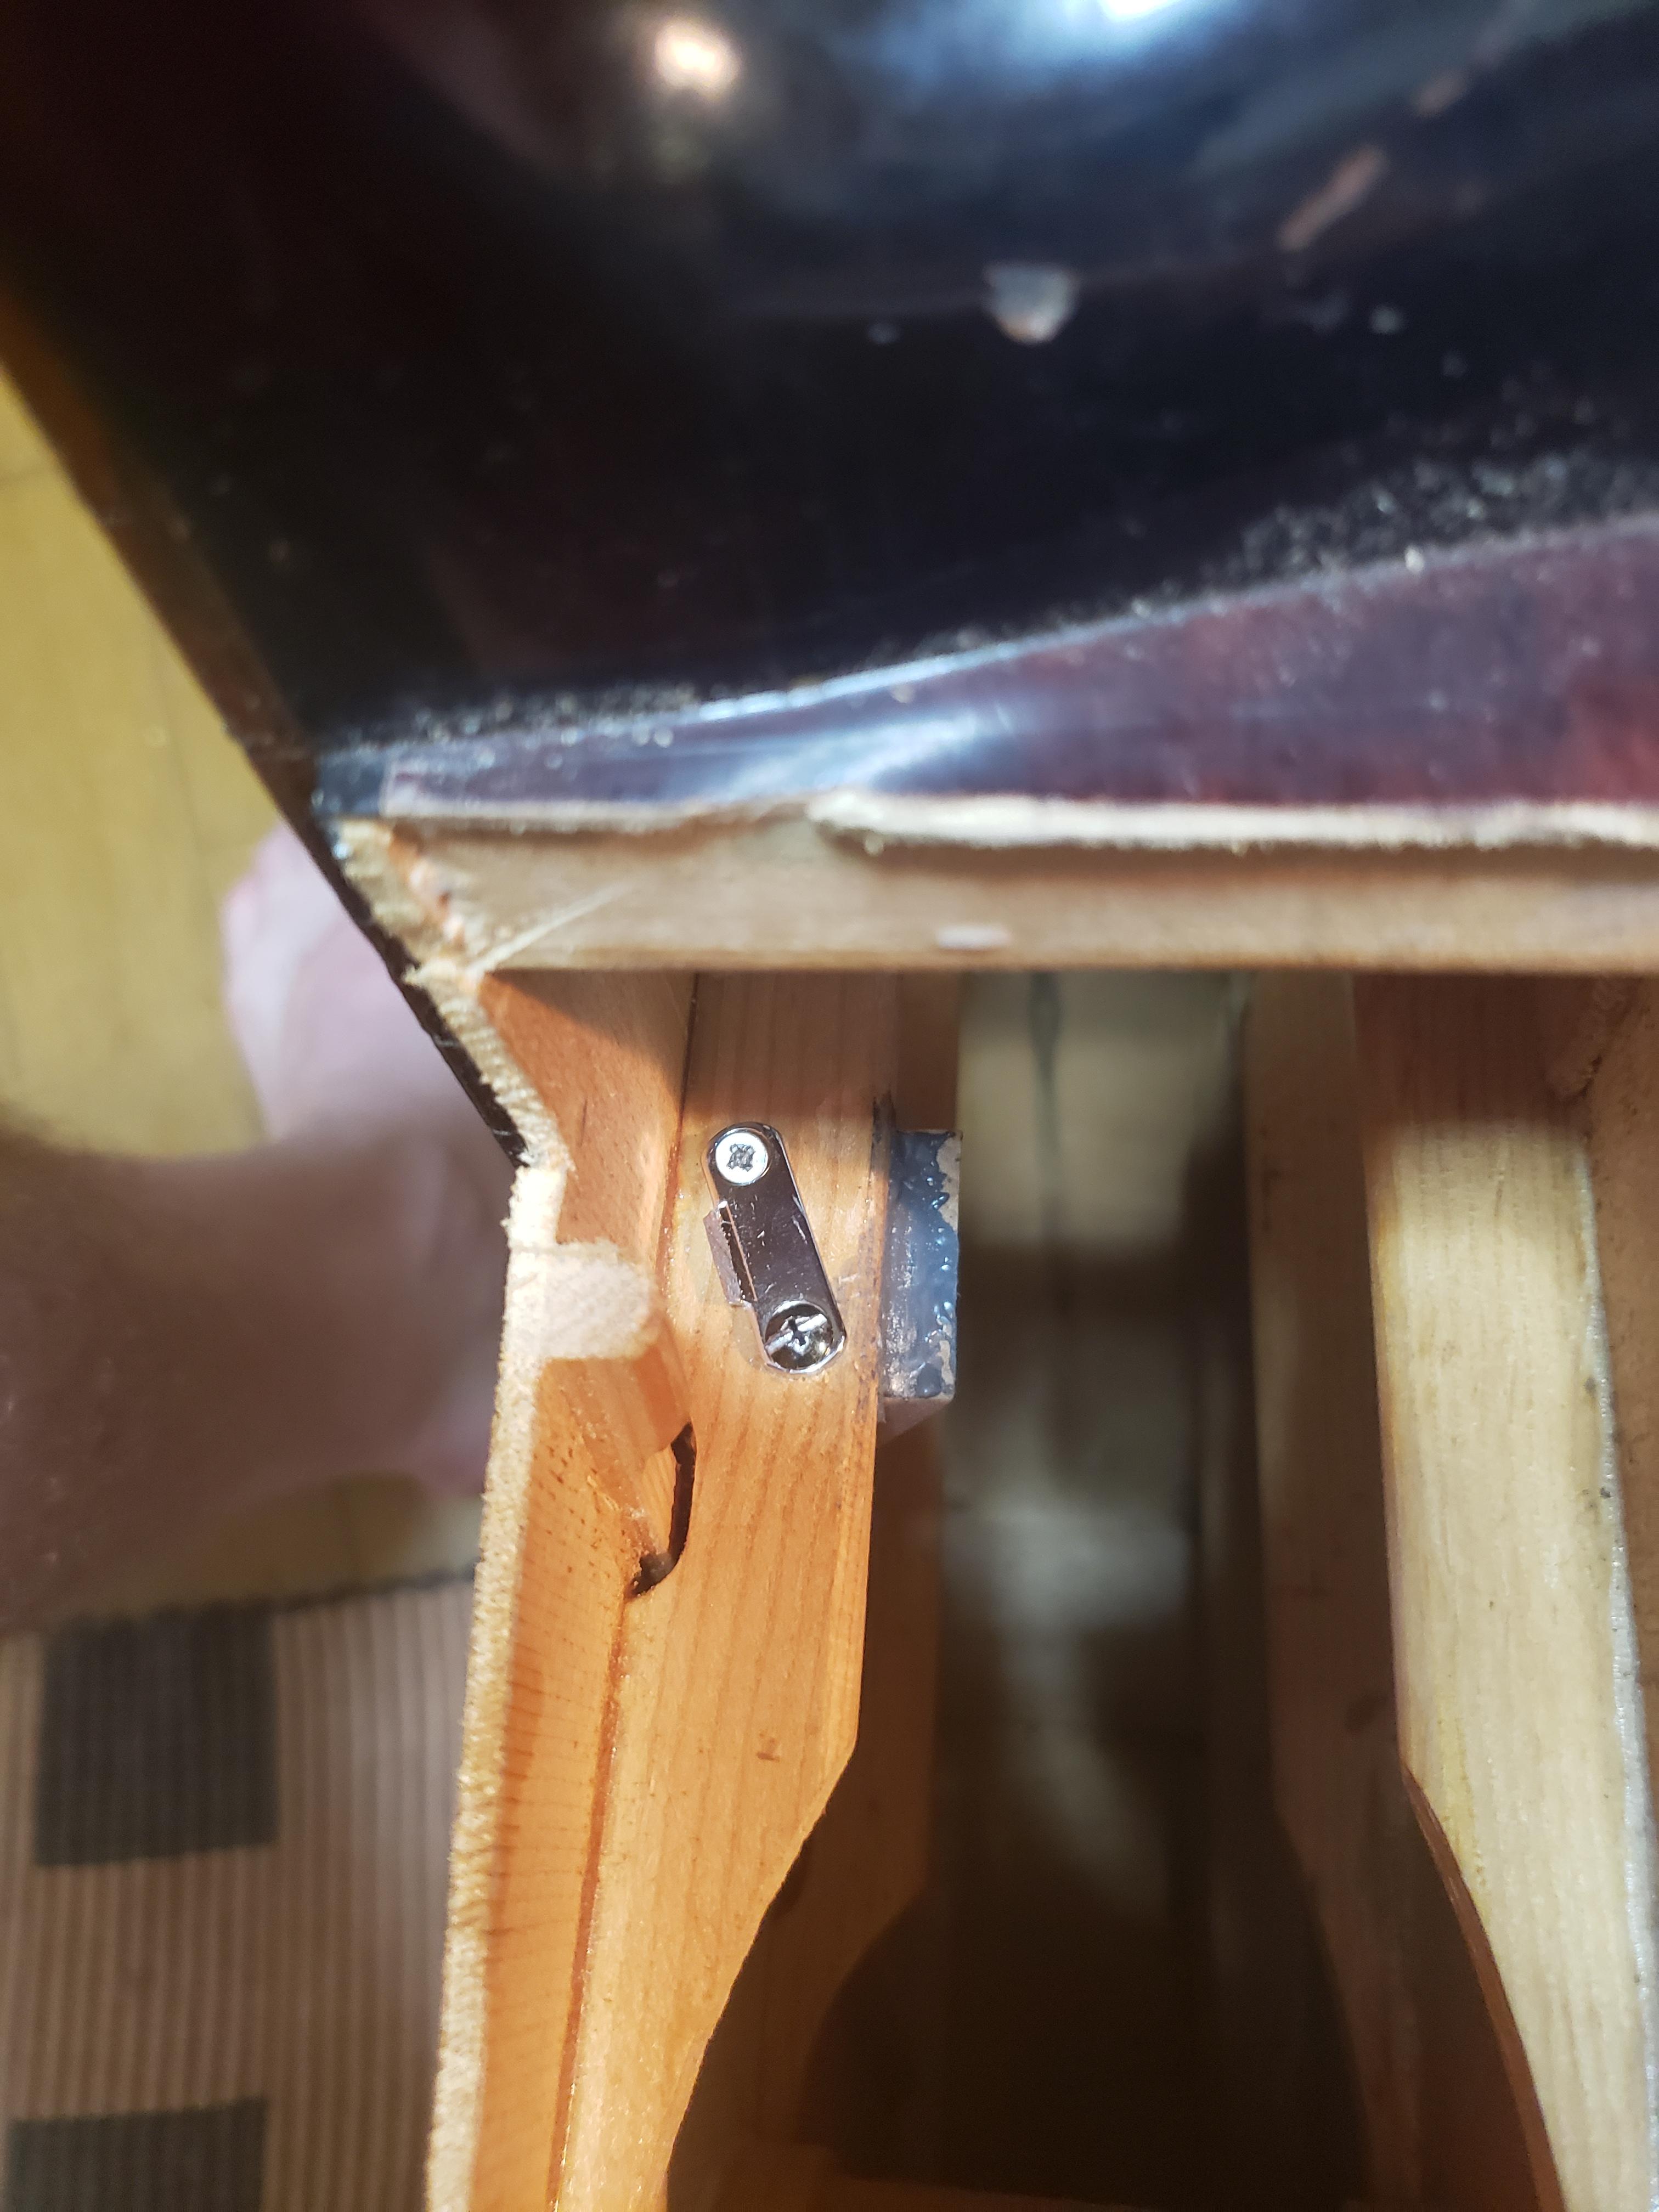
I wanted to add more frets over the soundhole because if you cut off the bottom three frets, the guitar only has sixteen frets. So I added this wedge-shaped block of beech by gluing it to the underside of the front and to the rib that goes across the upper bout.
I decided to strengthen this joint by adding a little metal bracket because it's possible that the fretboard extension could be pushed down on hard. So I put some wood screws with a bracket through the rib (sorry it's a bit hard to see what it is in the picture. This place is not visible through the soundhole so it isn't obvious that there's any metal holding it together here.
New Heel Block
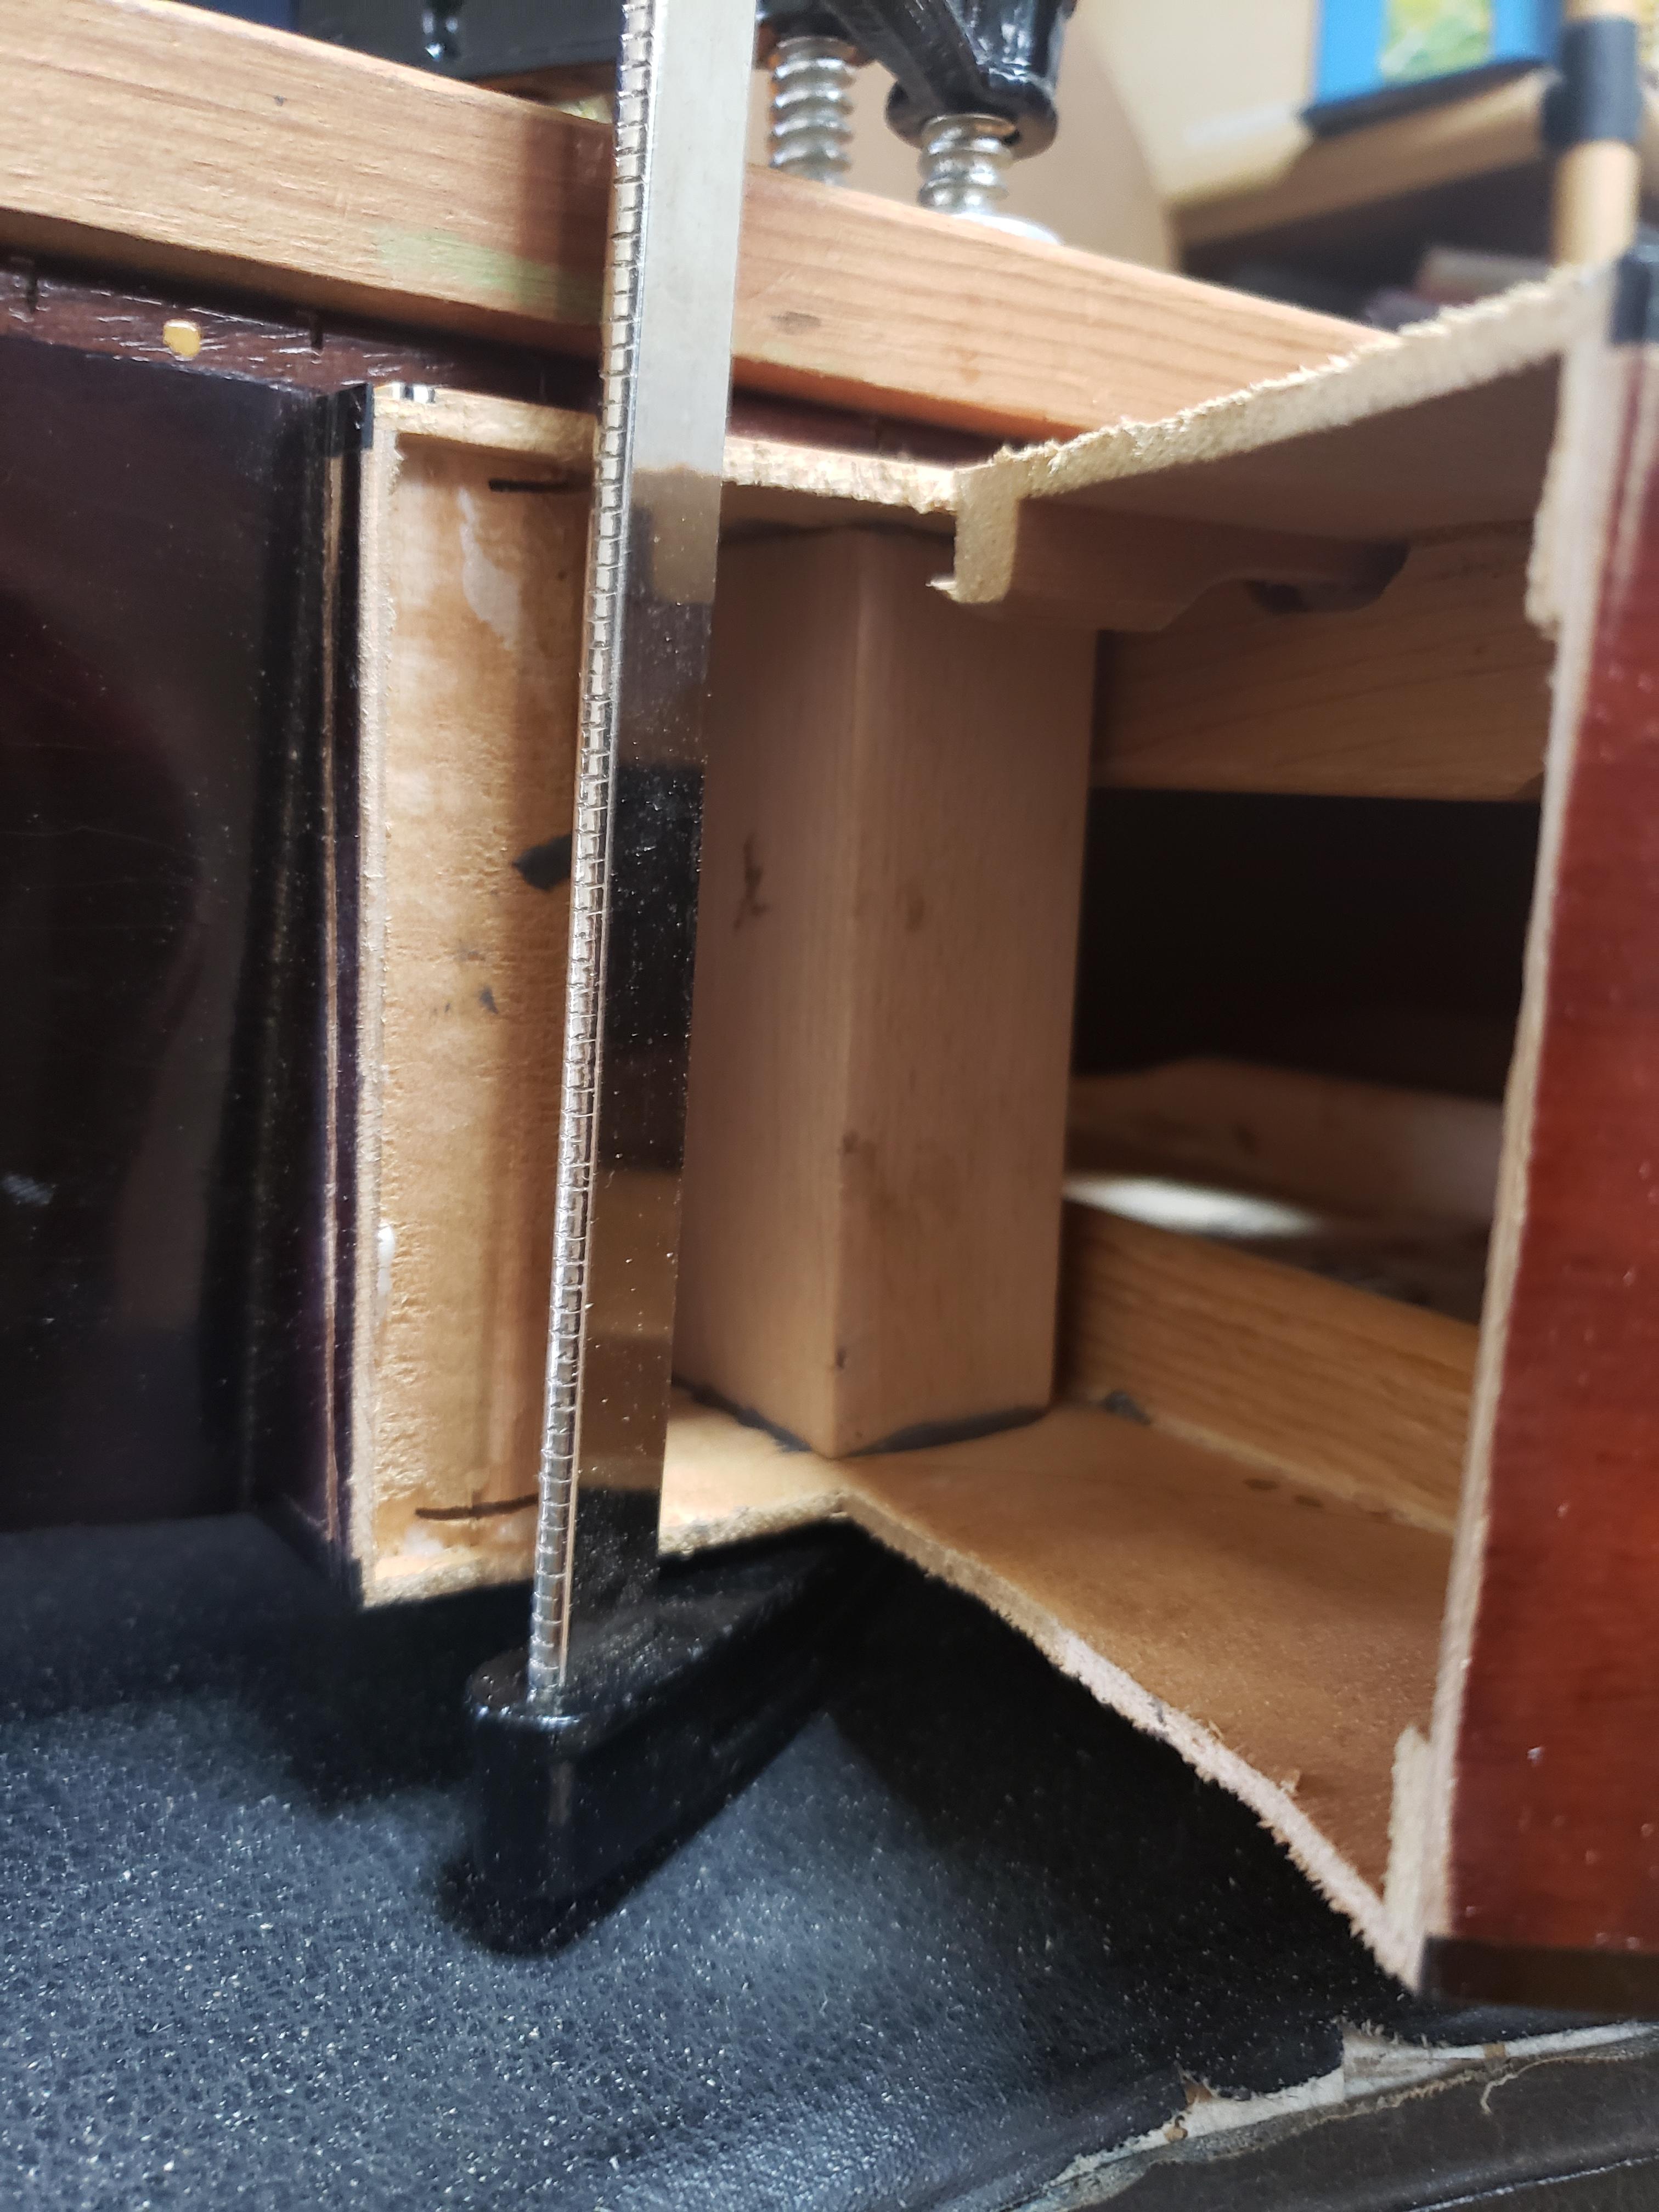
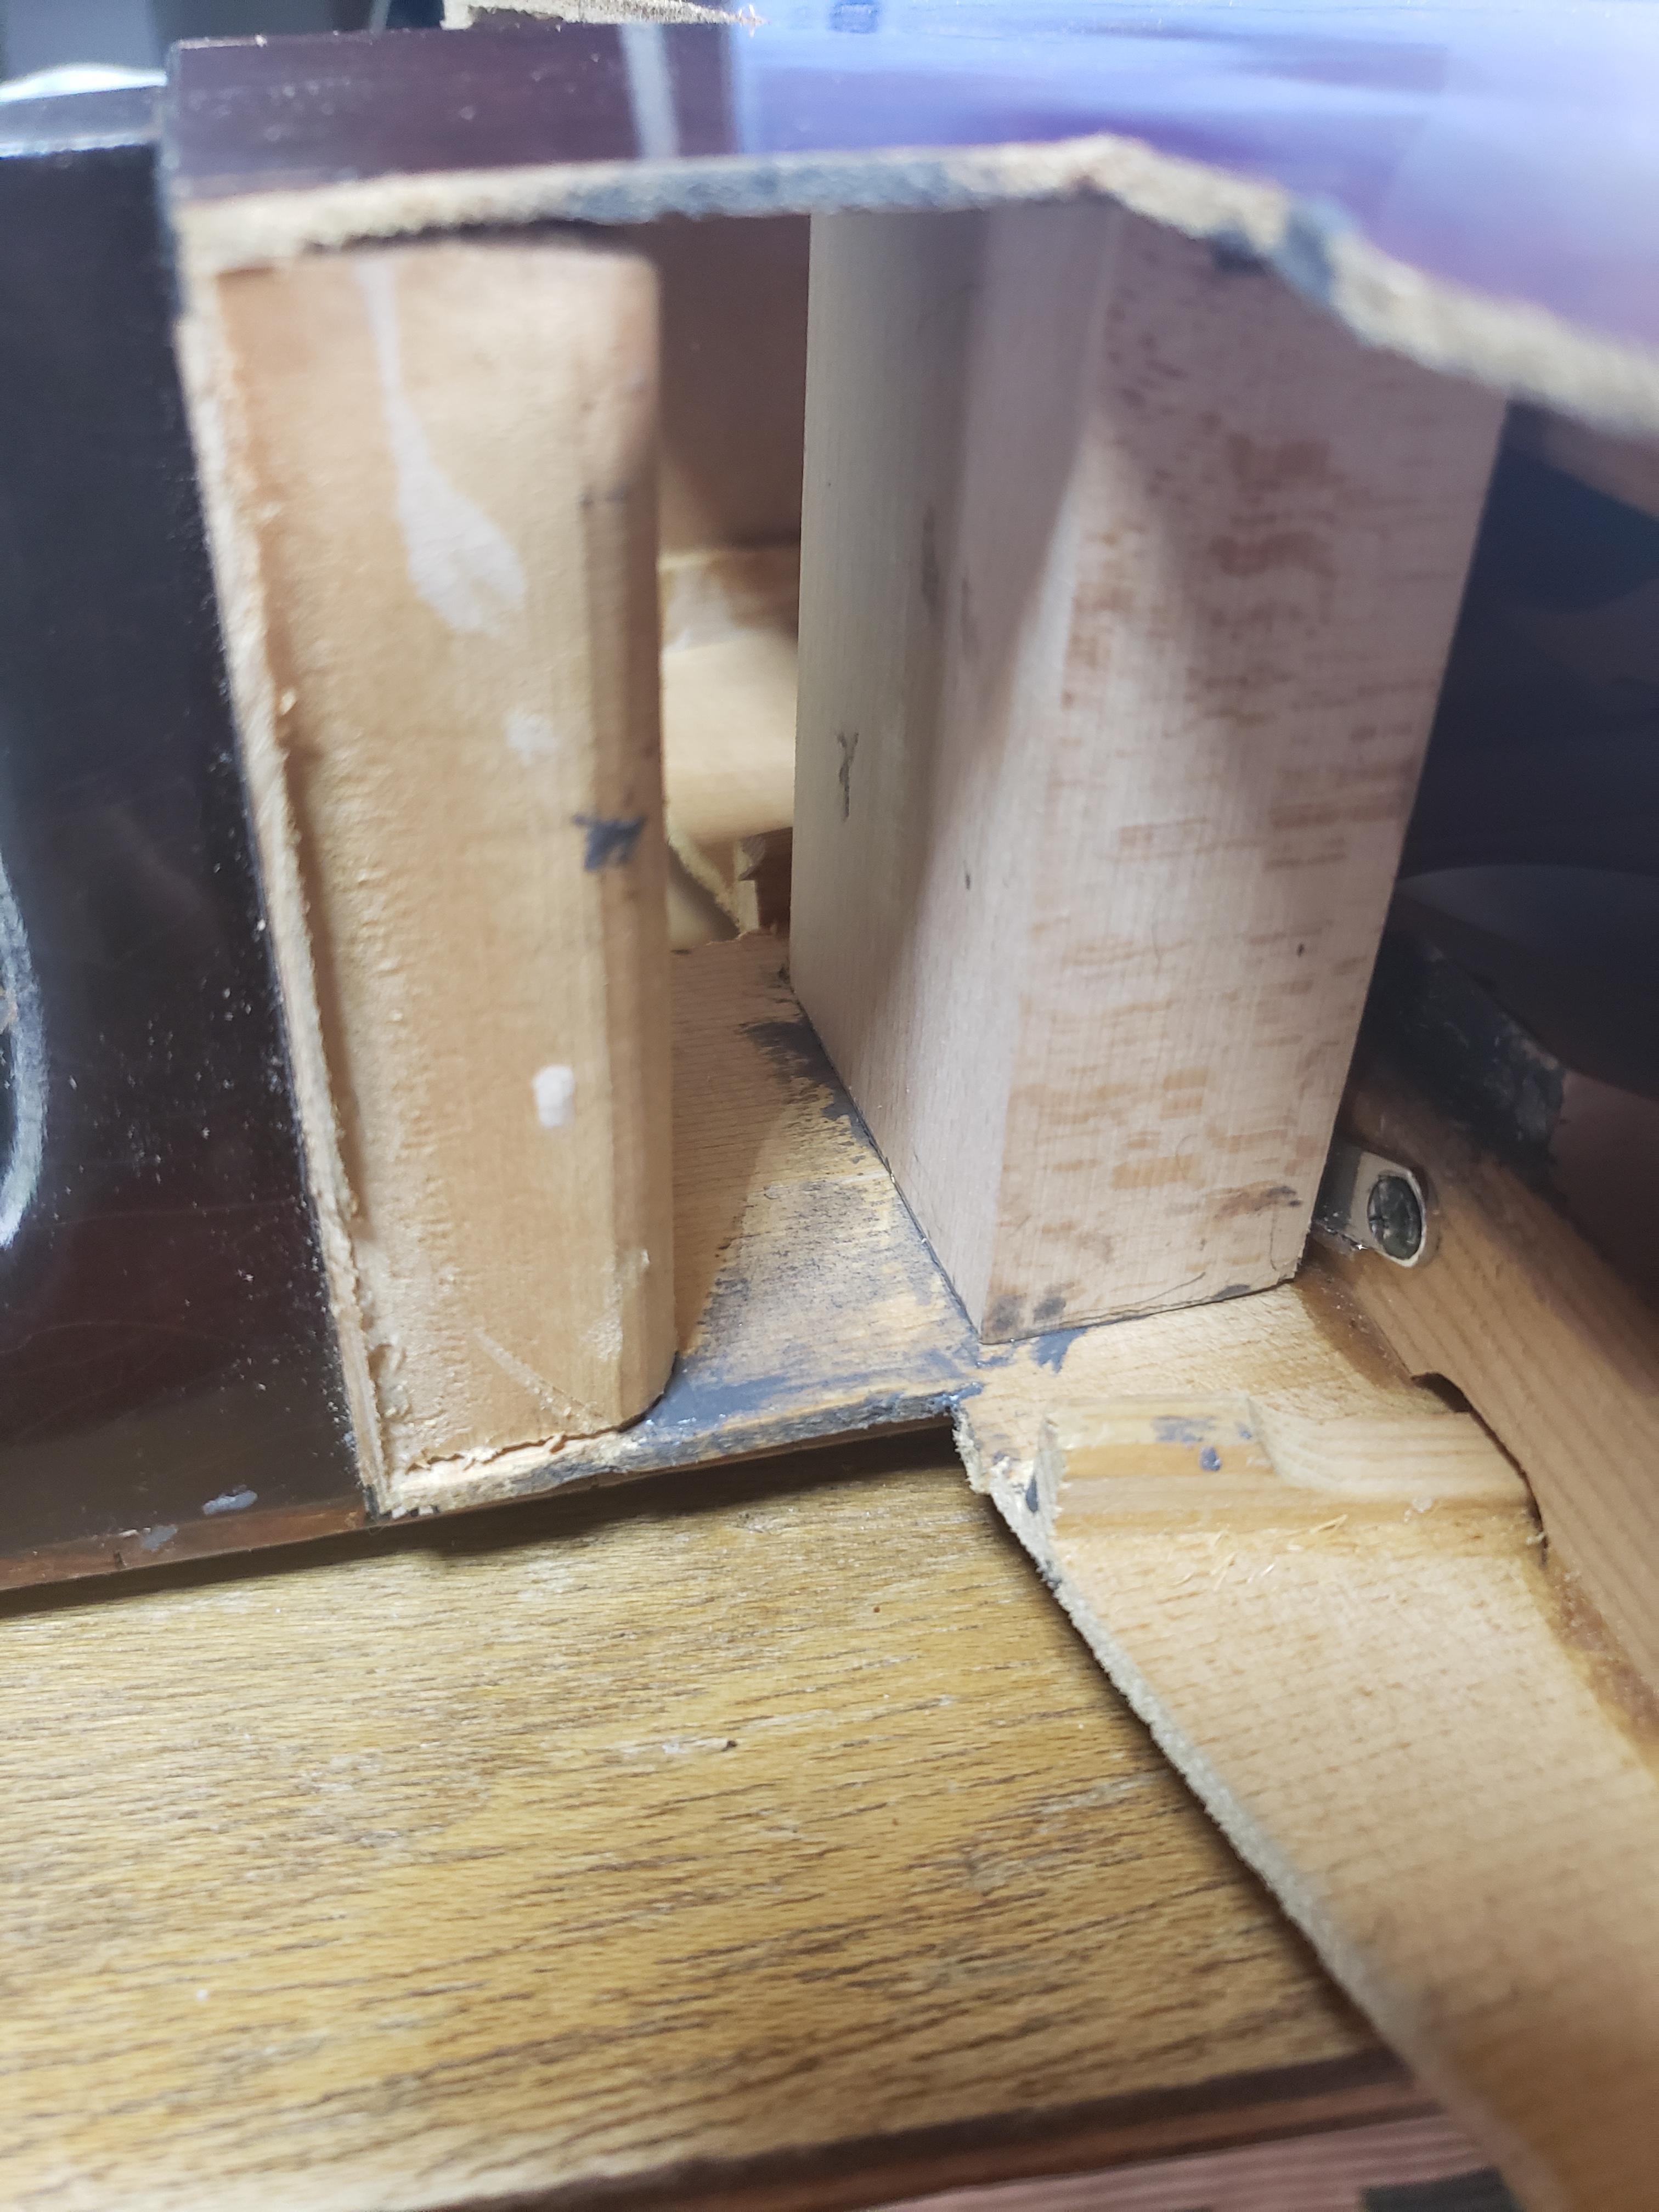
I put in a new block of beech where the new sides are going to attach below the neck. I was trying to keep everything in the same plane here so that the neck angle wouldn't get too out of shape.
Cutting Off the Old Heel
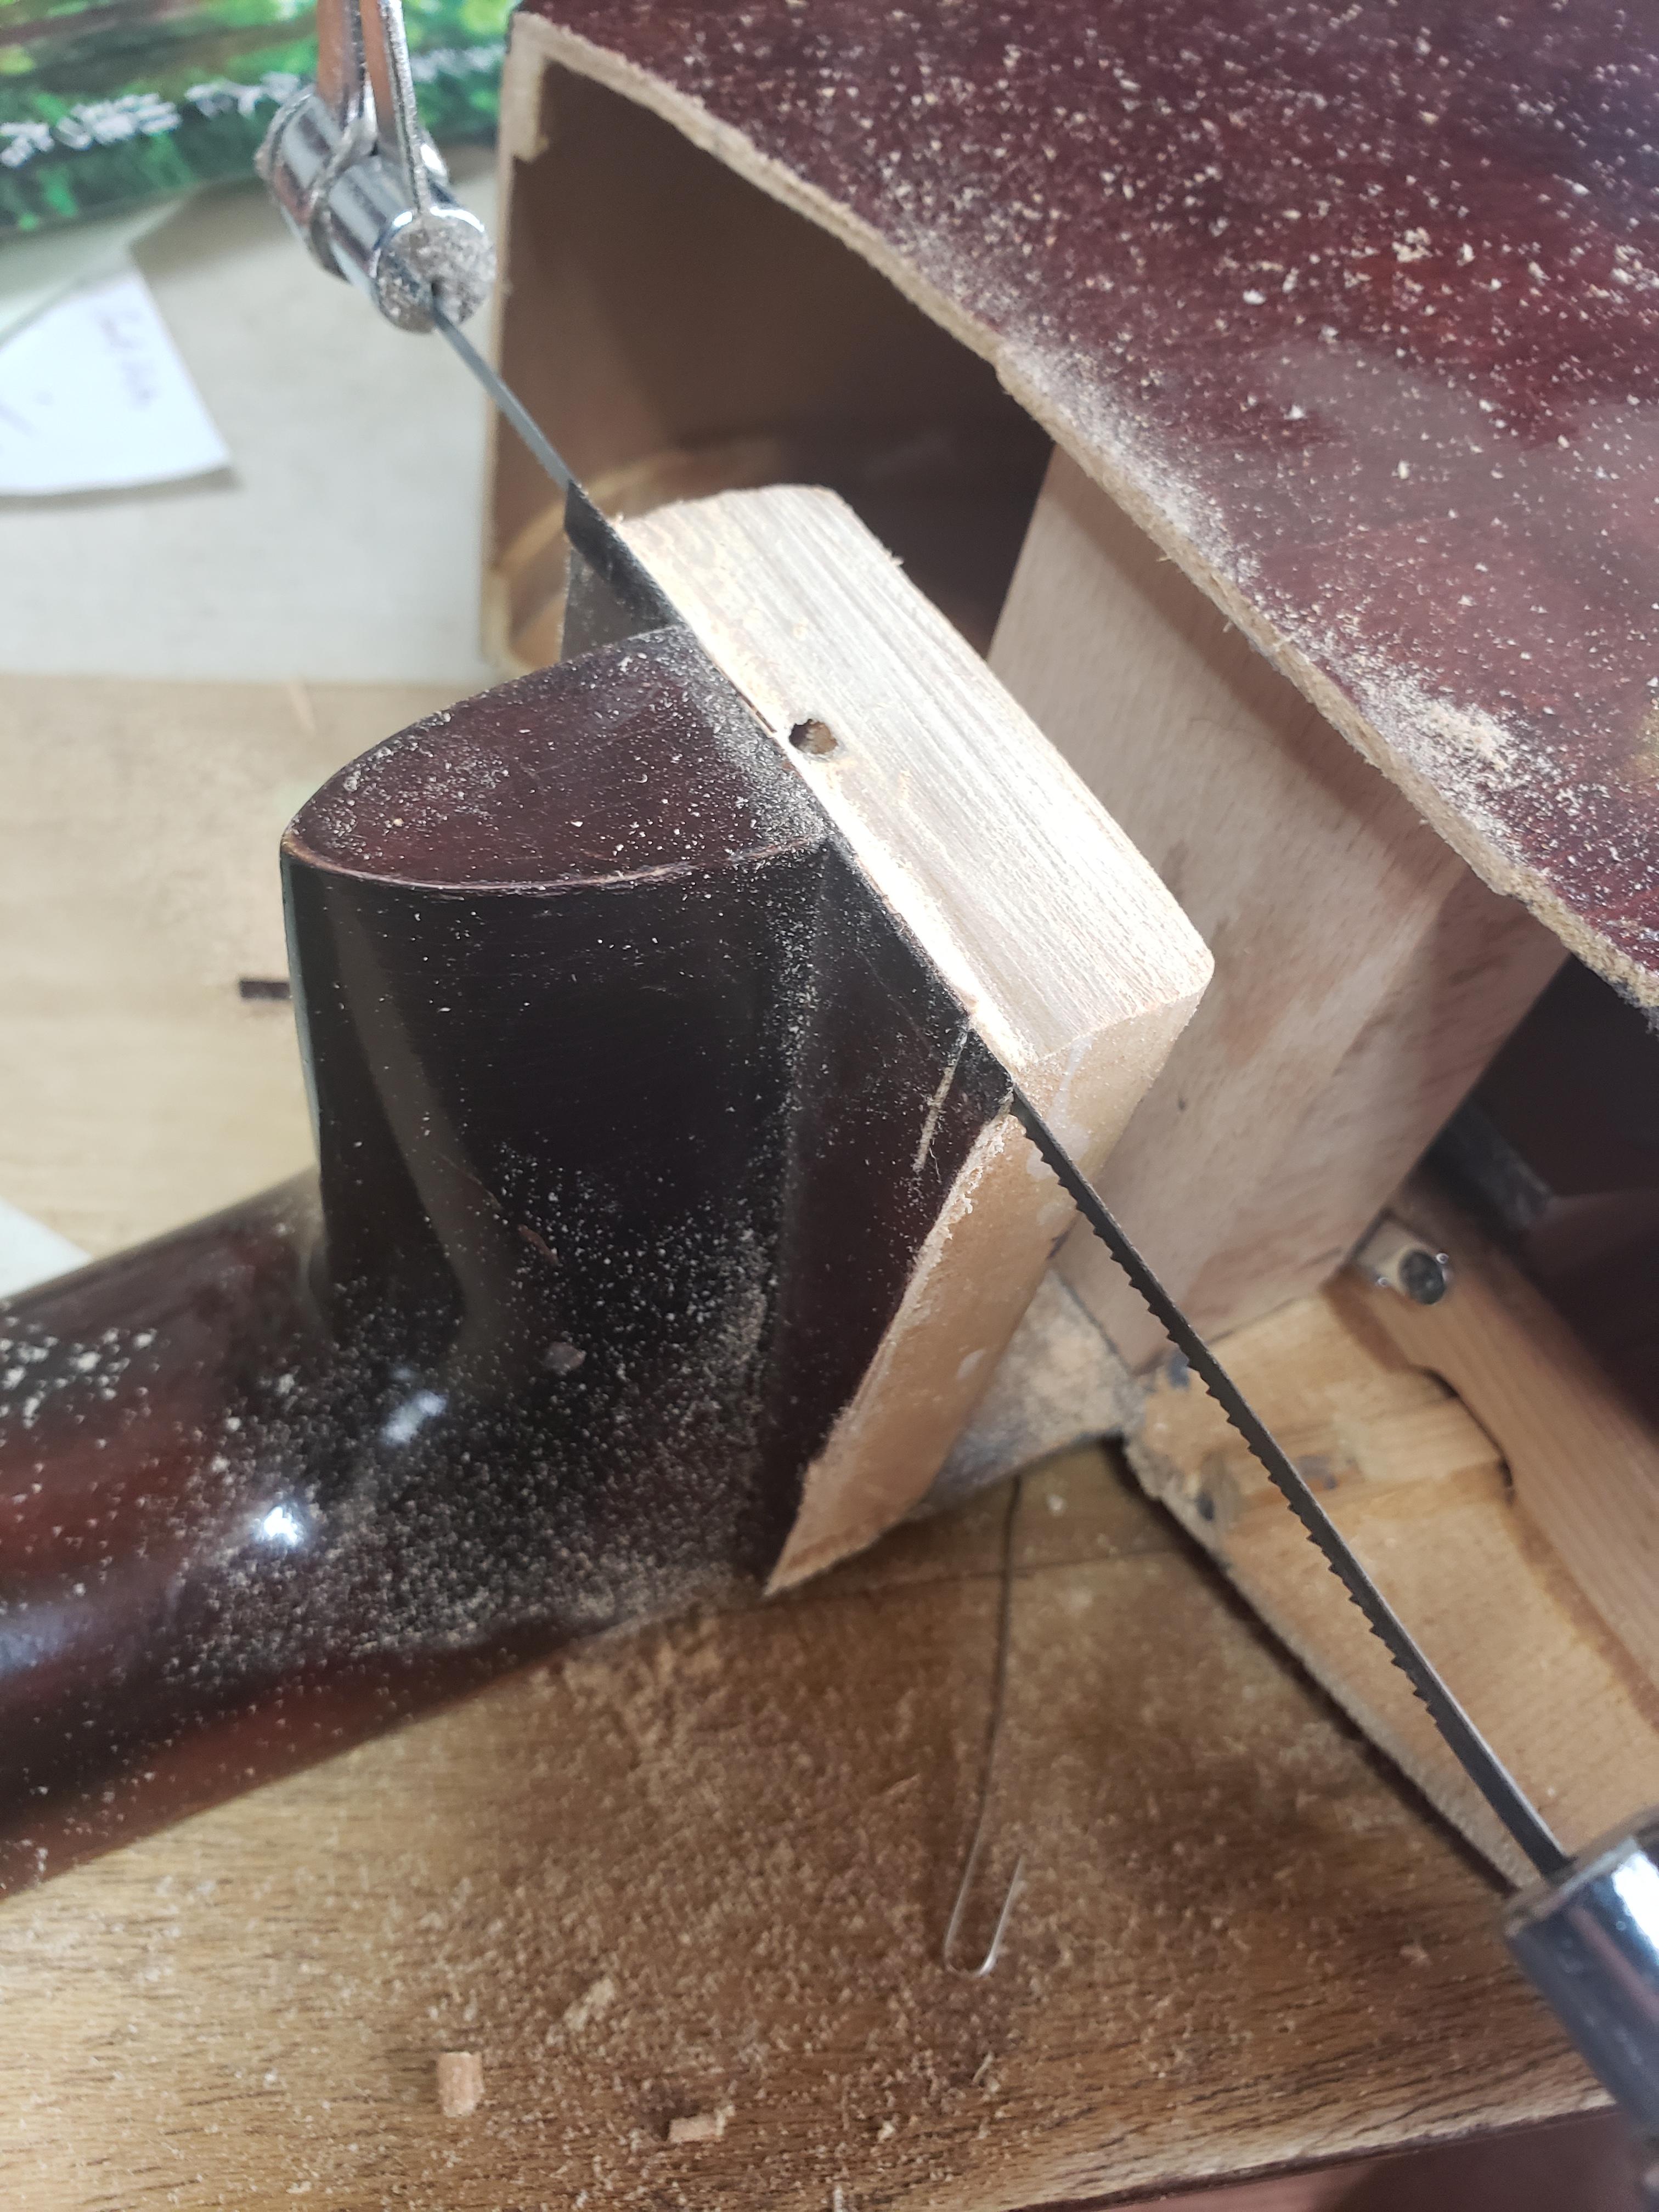
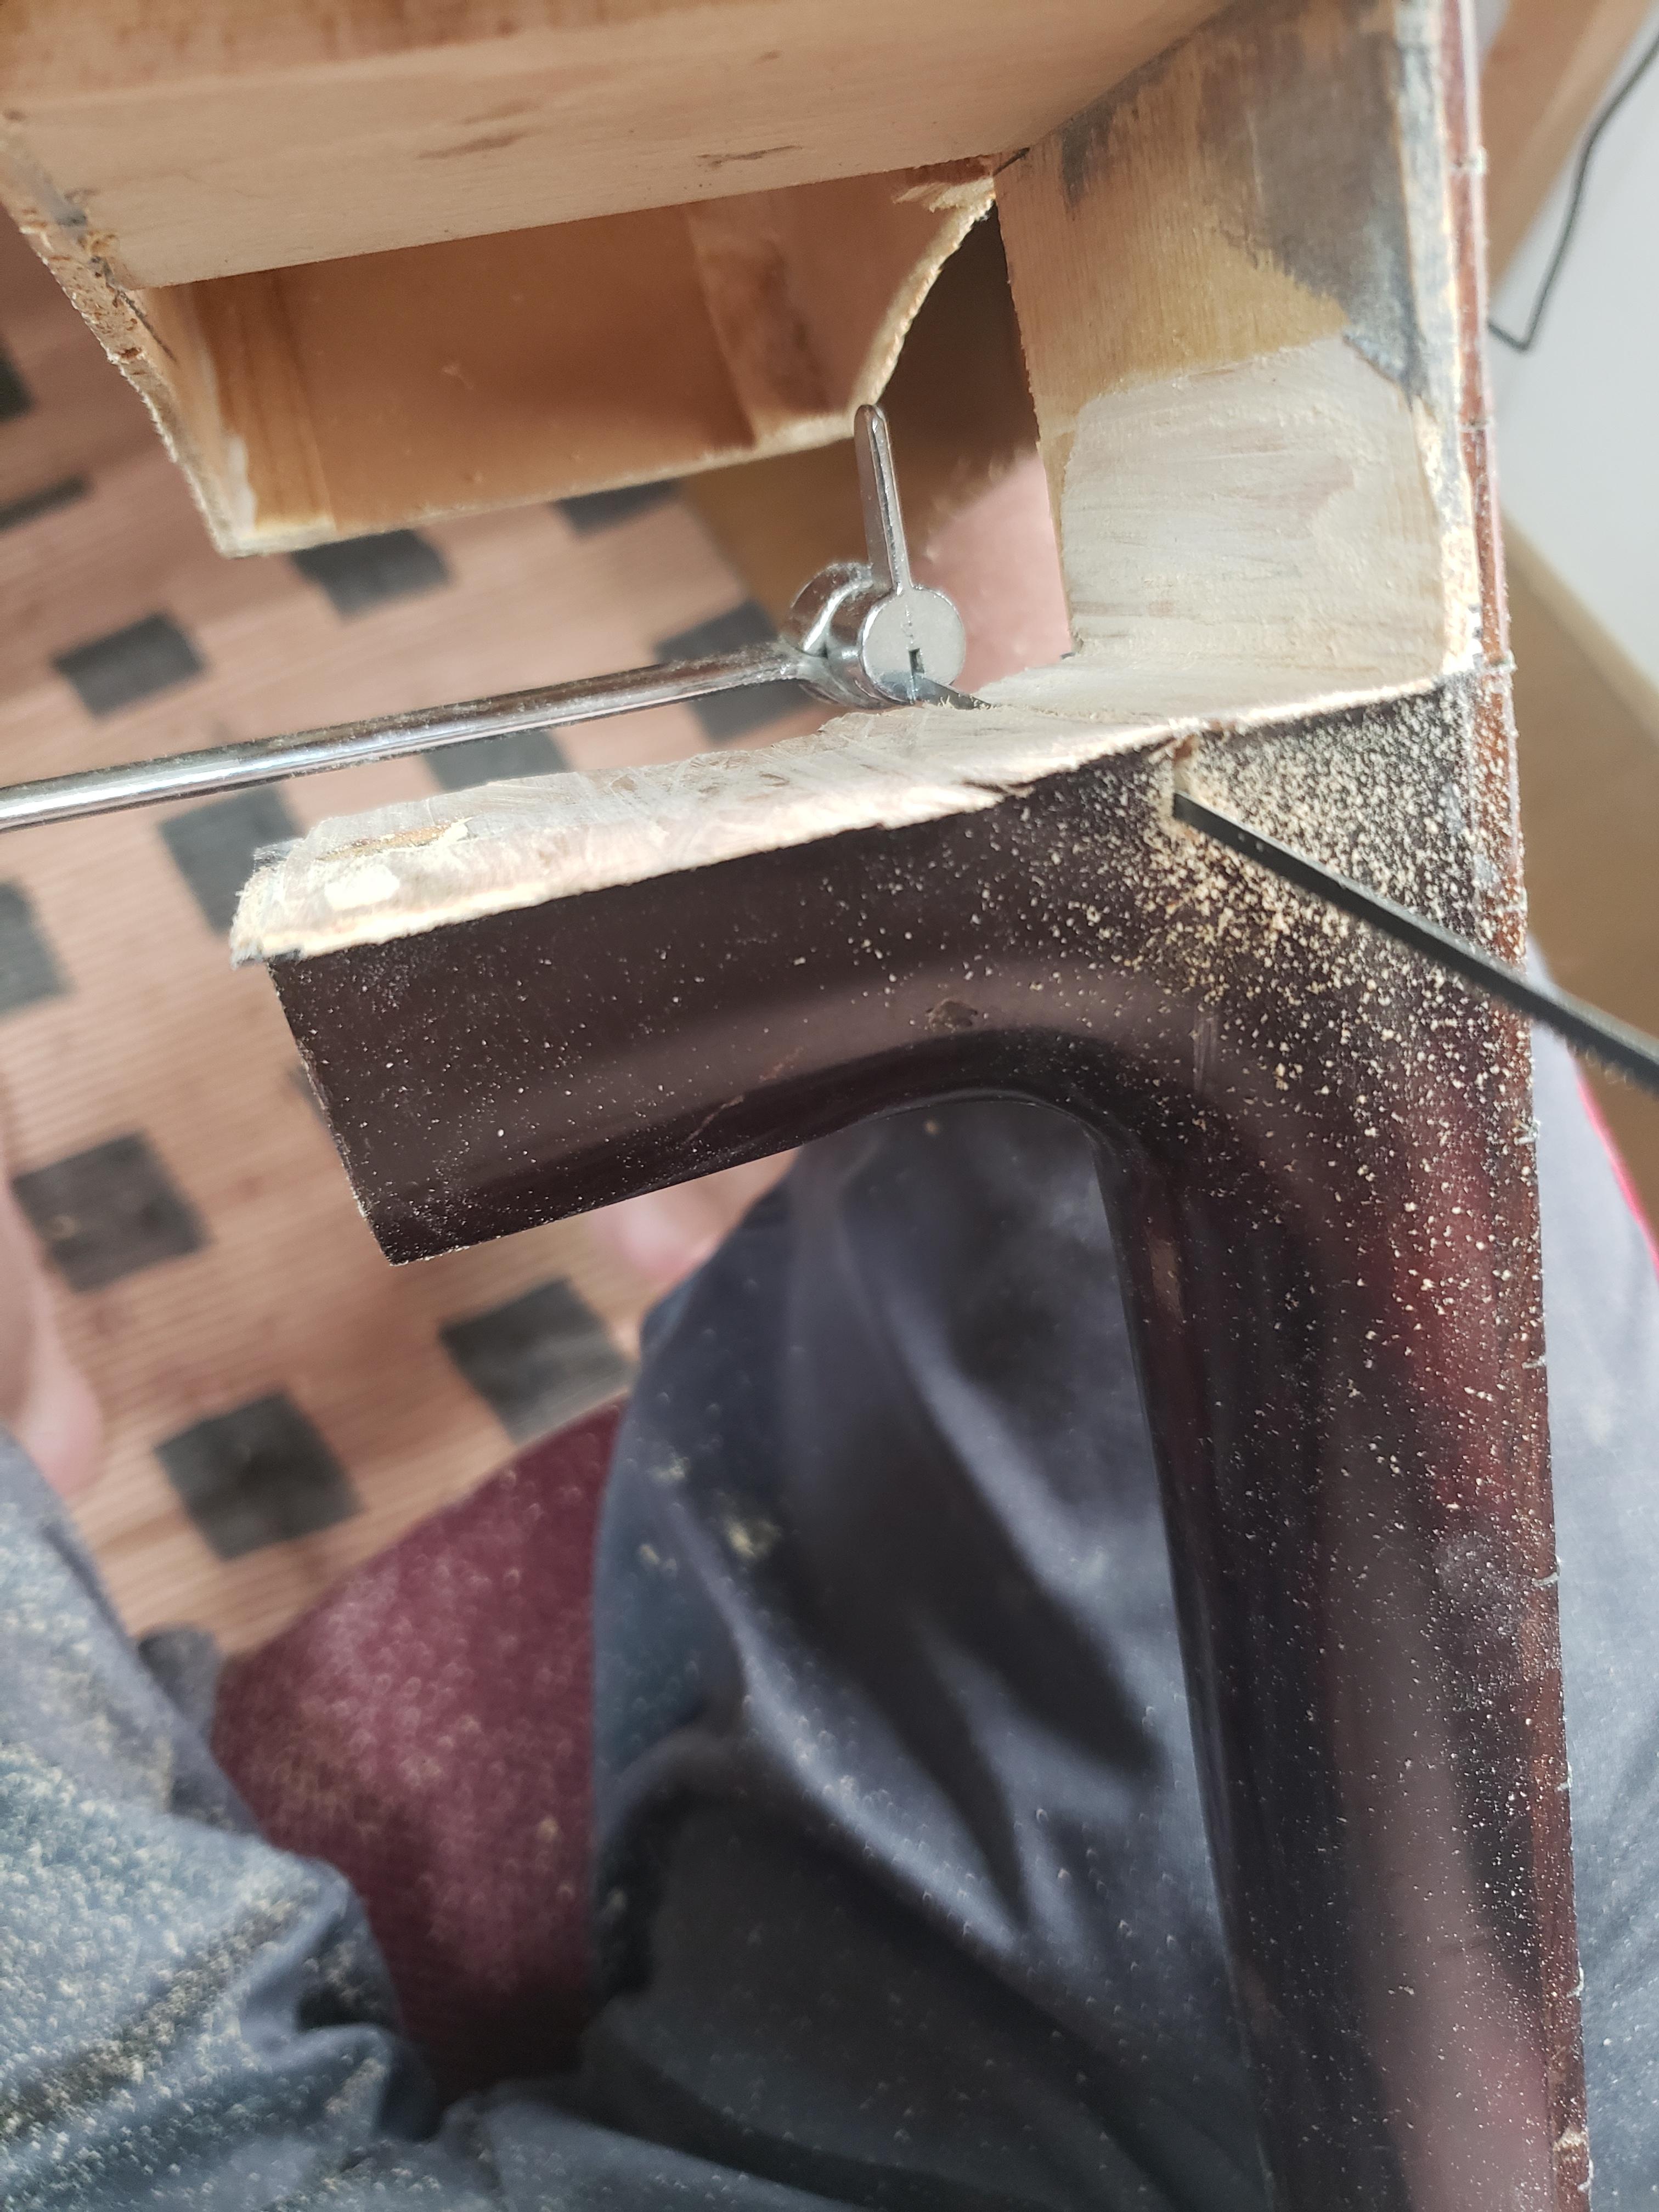
Now that the new heel was bolstered with the new block, I could cut out the old heel block and cut off the heel in line with the neck. I wanted to retain as much of the original guitar as possible in the new build, so I kept the piece of heel I cut off here, and I'll put it in place with the new heel.
Attaching New Side Pieces
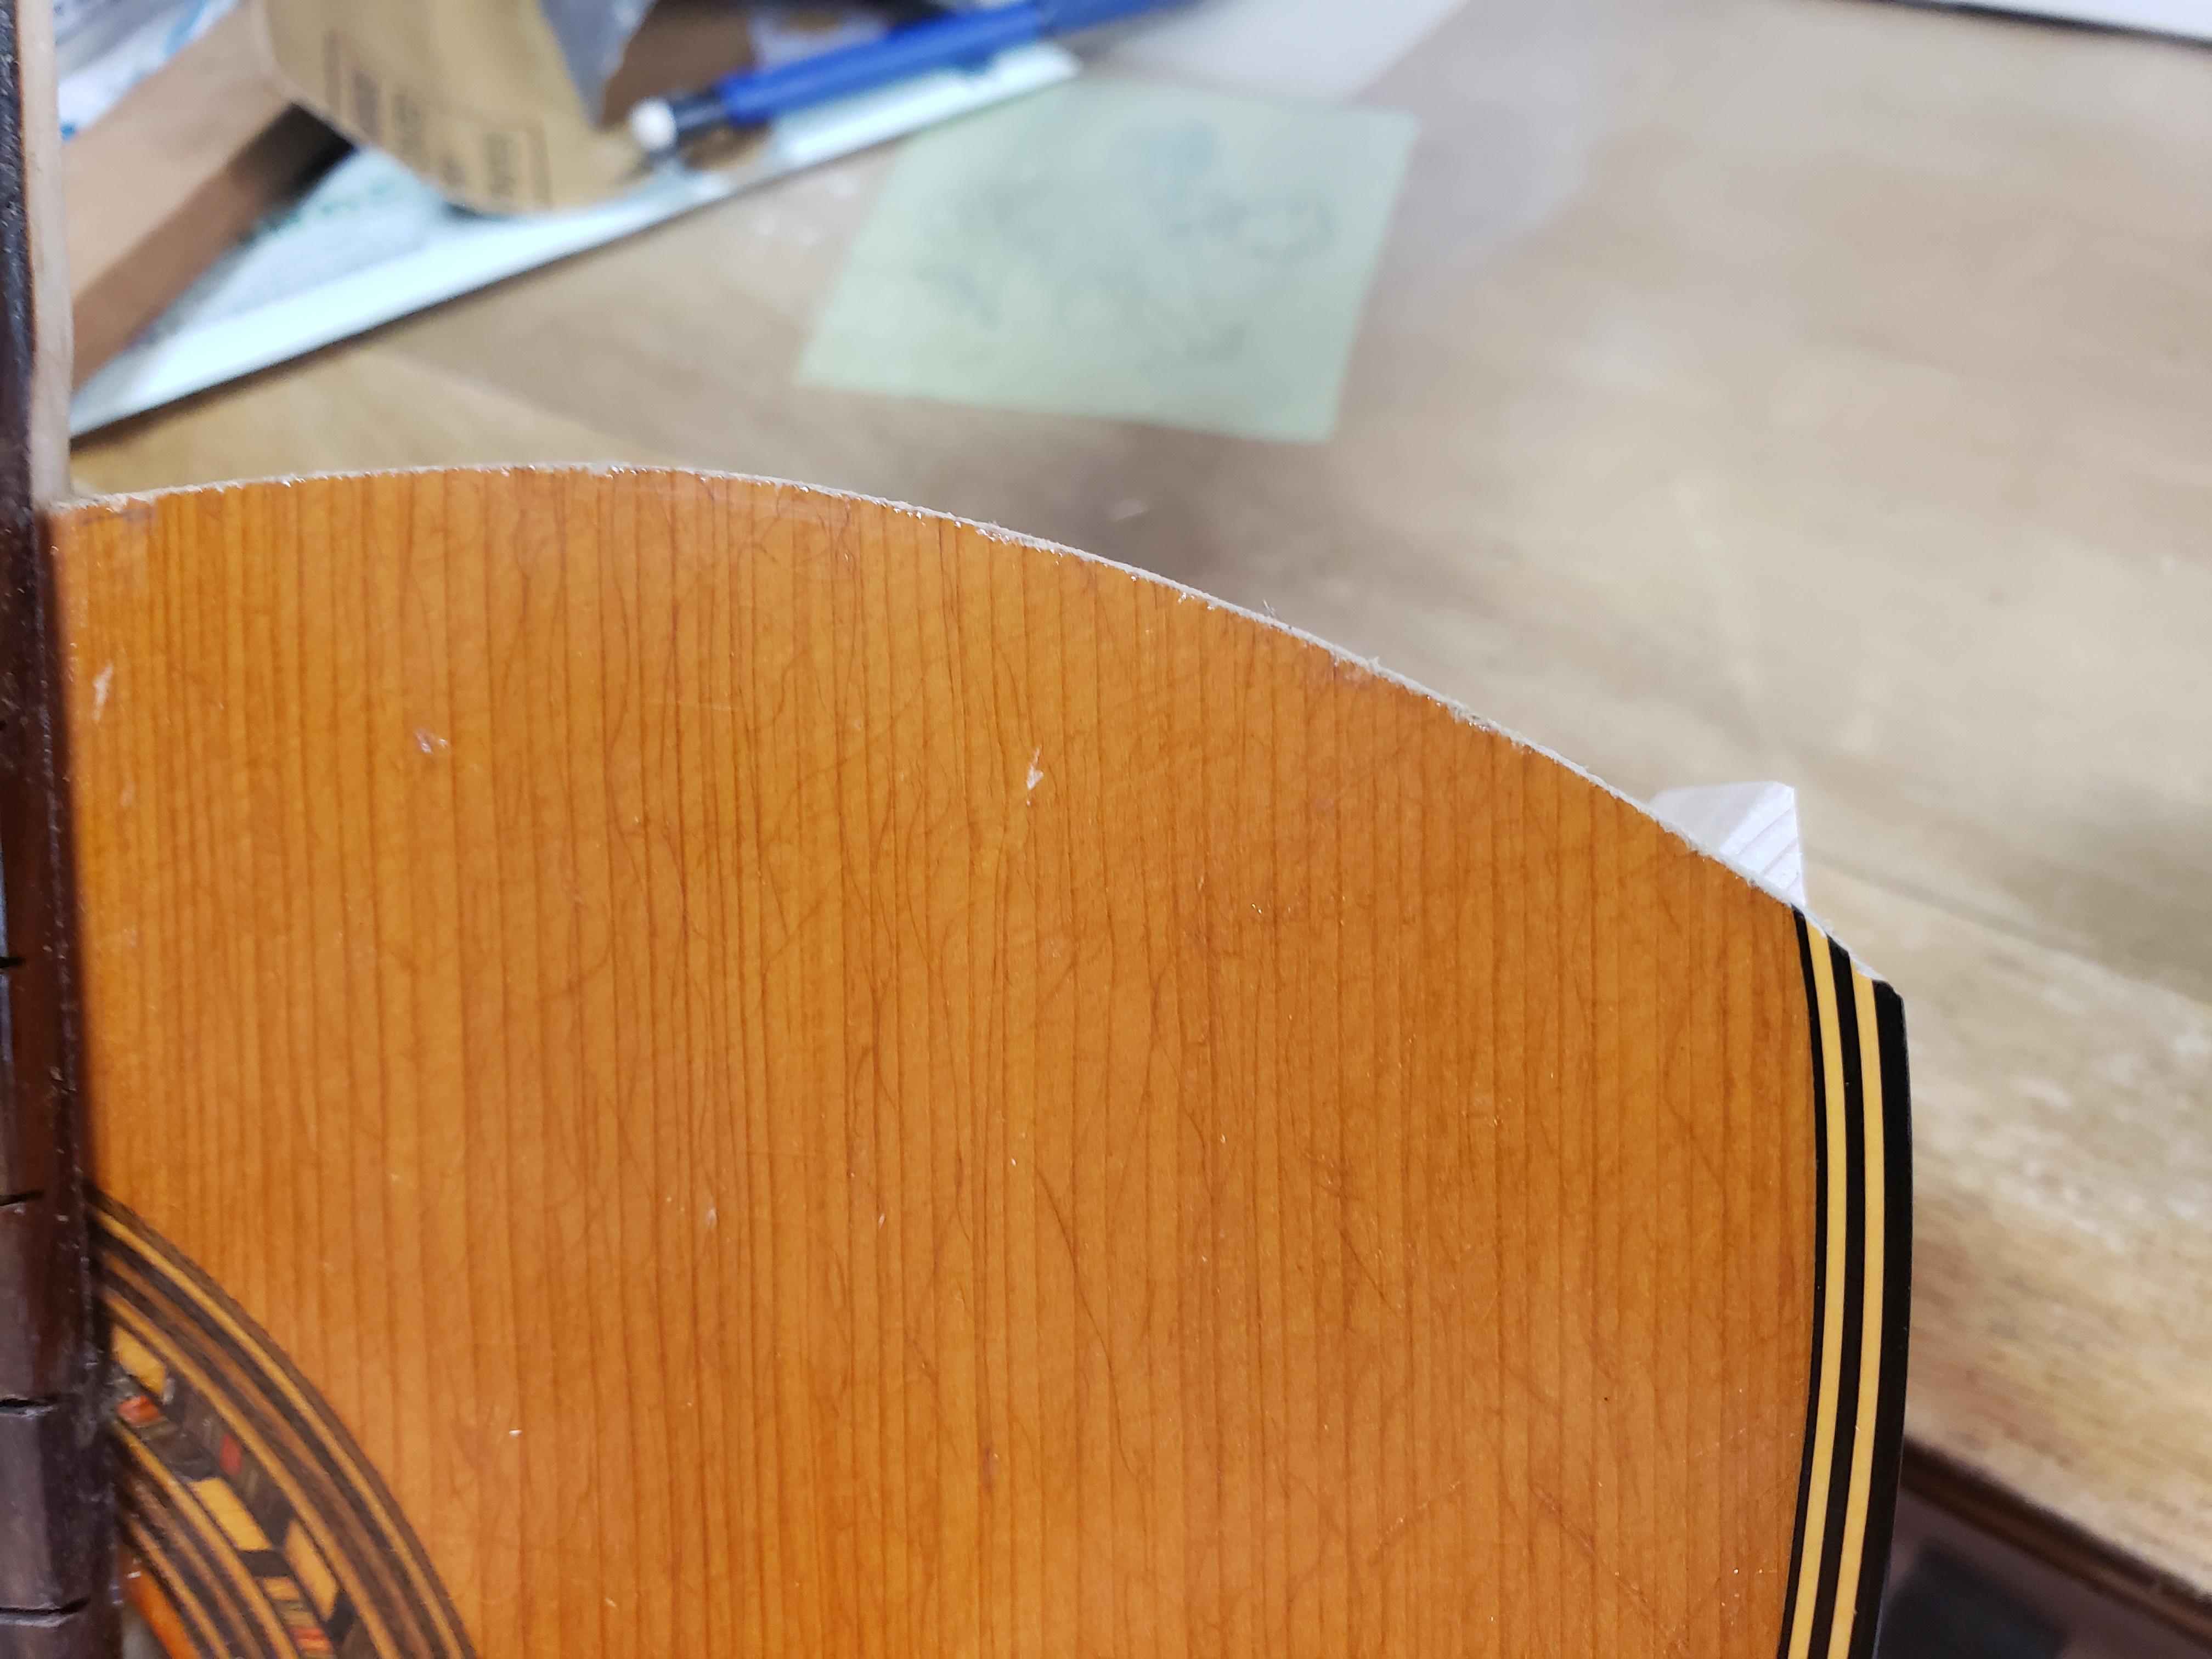
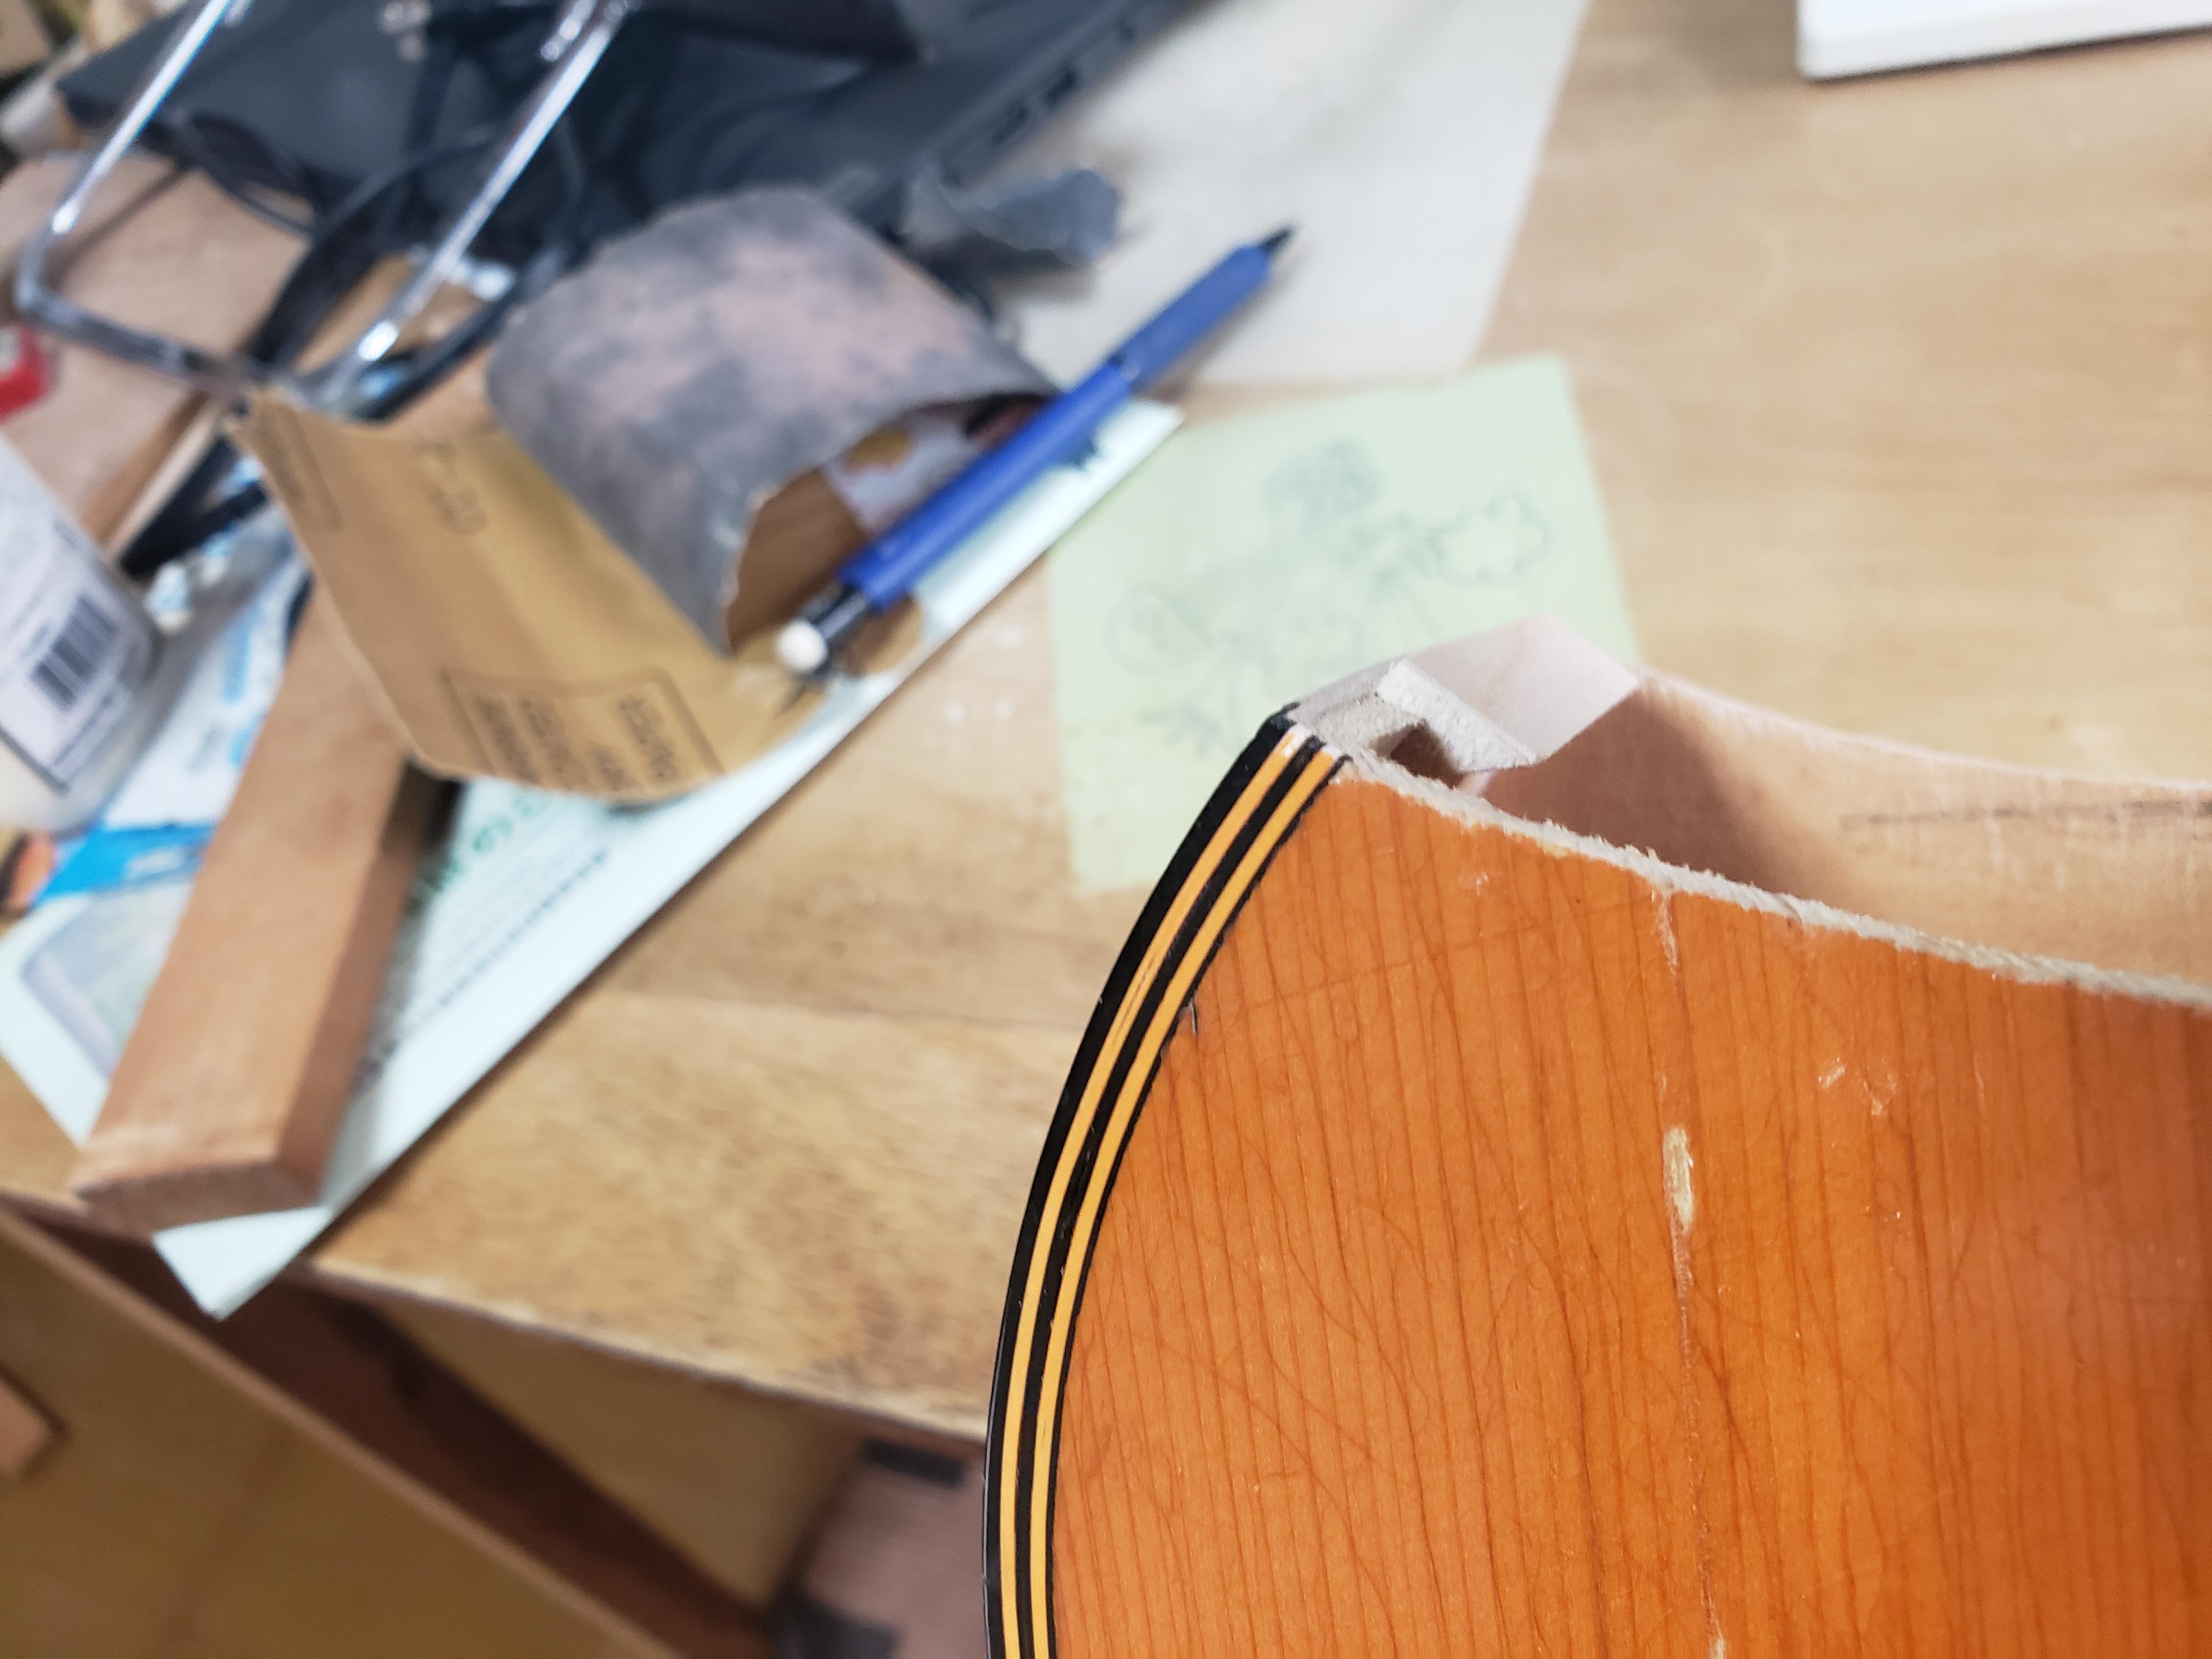
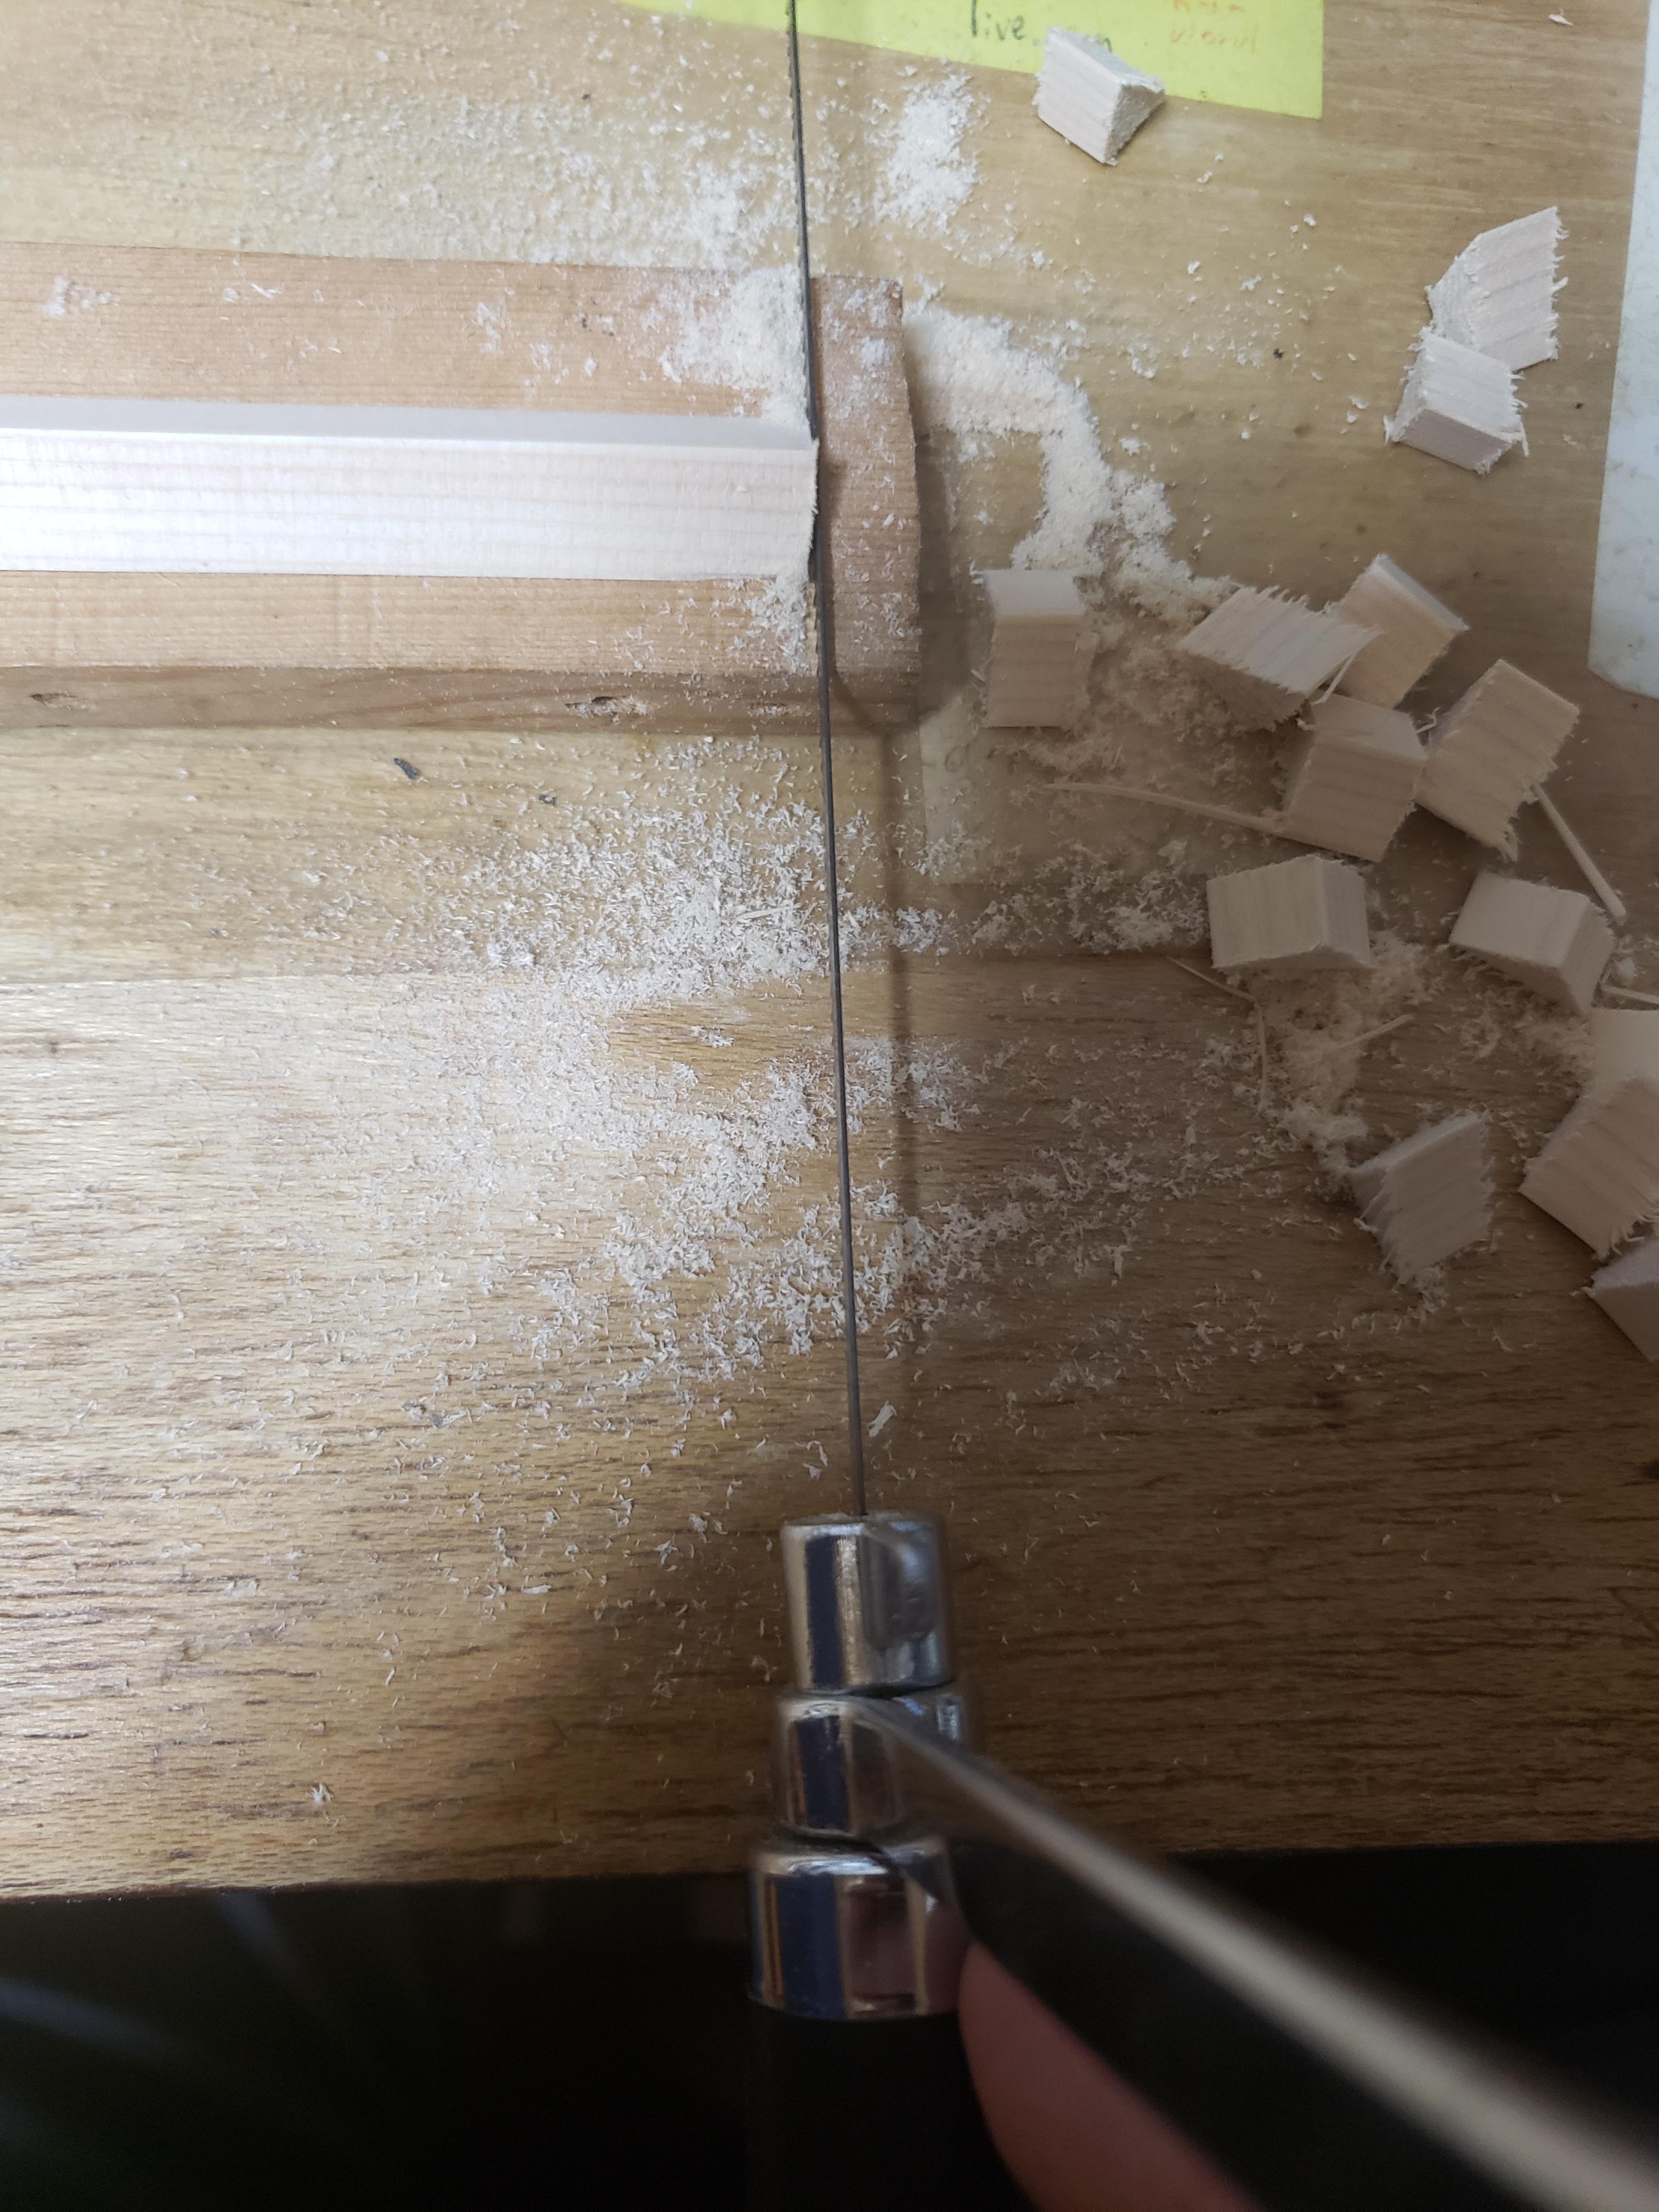
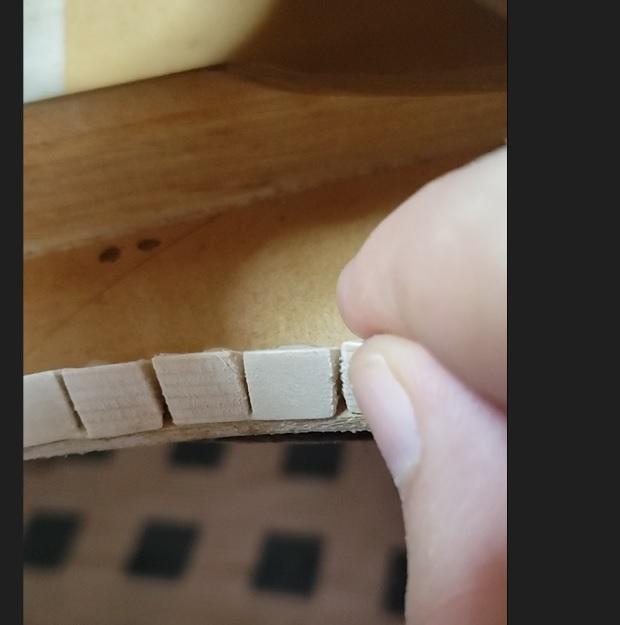
I now pared the new cut body down to the correct lines. I made some dentallones for the curved parts, and used just some flat pieces on the straight edges to increase gluing area. I don't have good pictures of this part, but then I stuck some bent side pieces on both sides.
Bindings
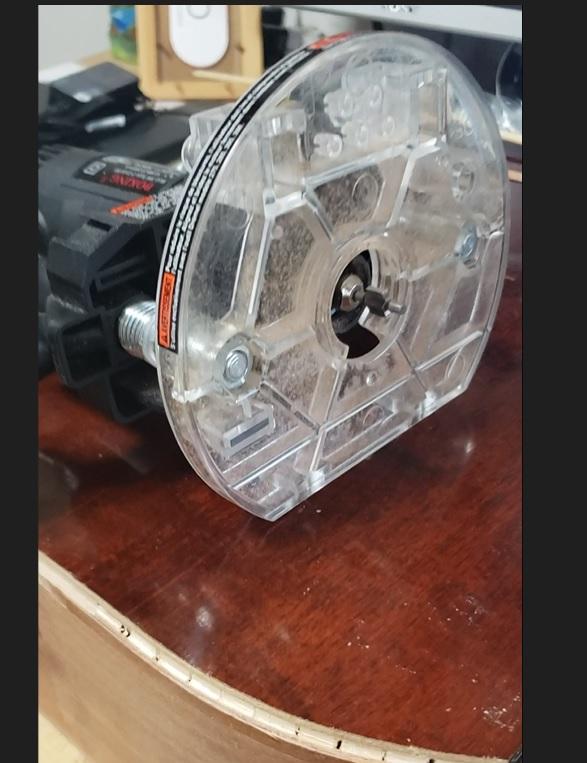
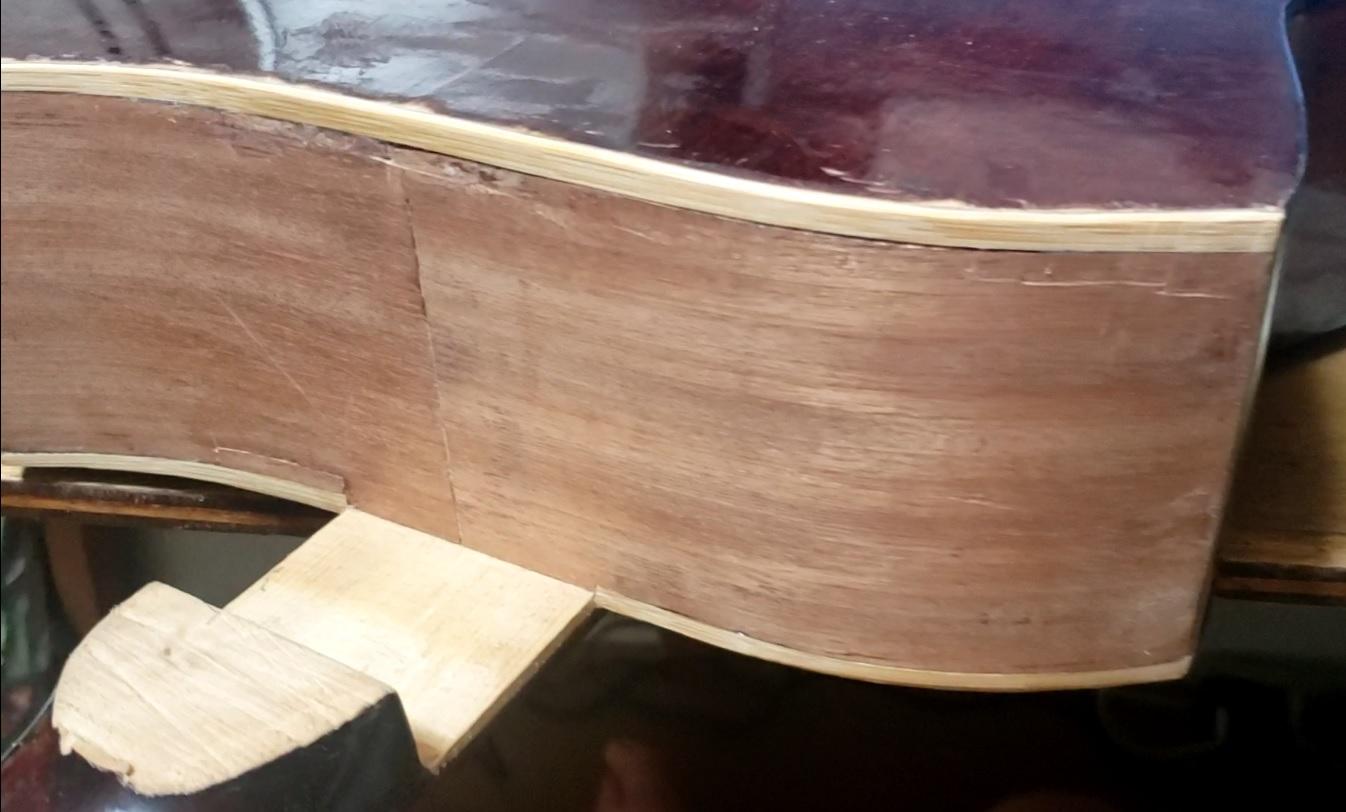
The only power tool I used was my dremel in my plunge router attachement that I use for bindings. I didn't want to bother bending too much wood, and I was able to find some thin bamboo strips that were flexible but still pretty hard, so I used those and it worked pretty well.
The New Heel
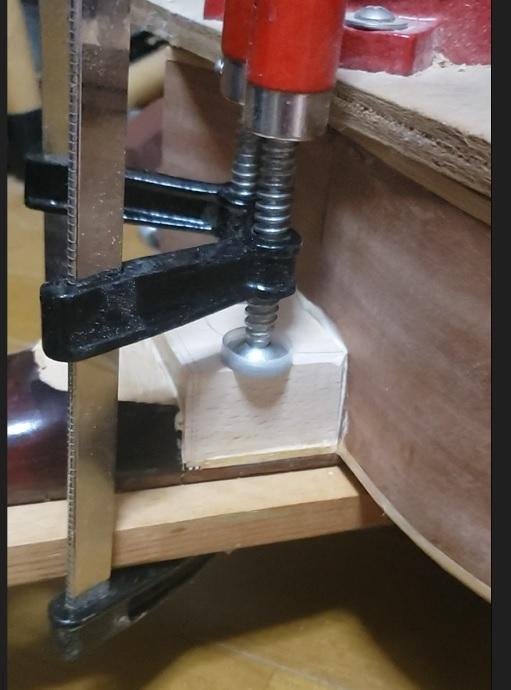
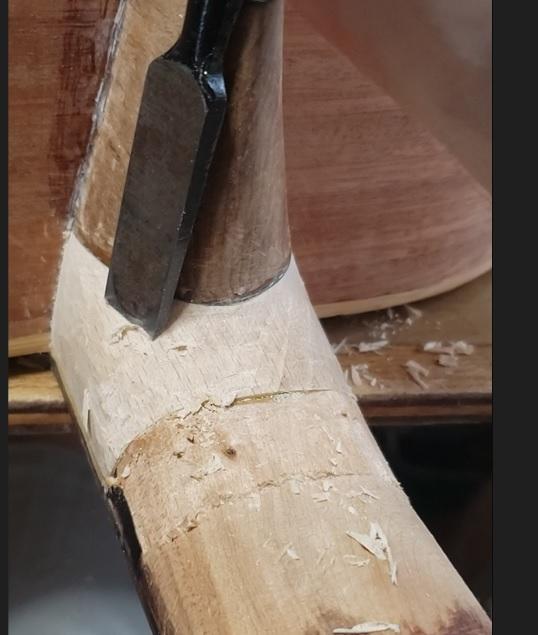
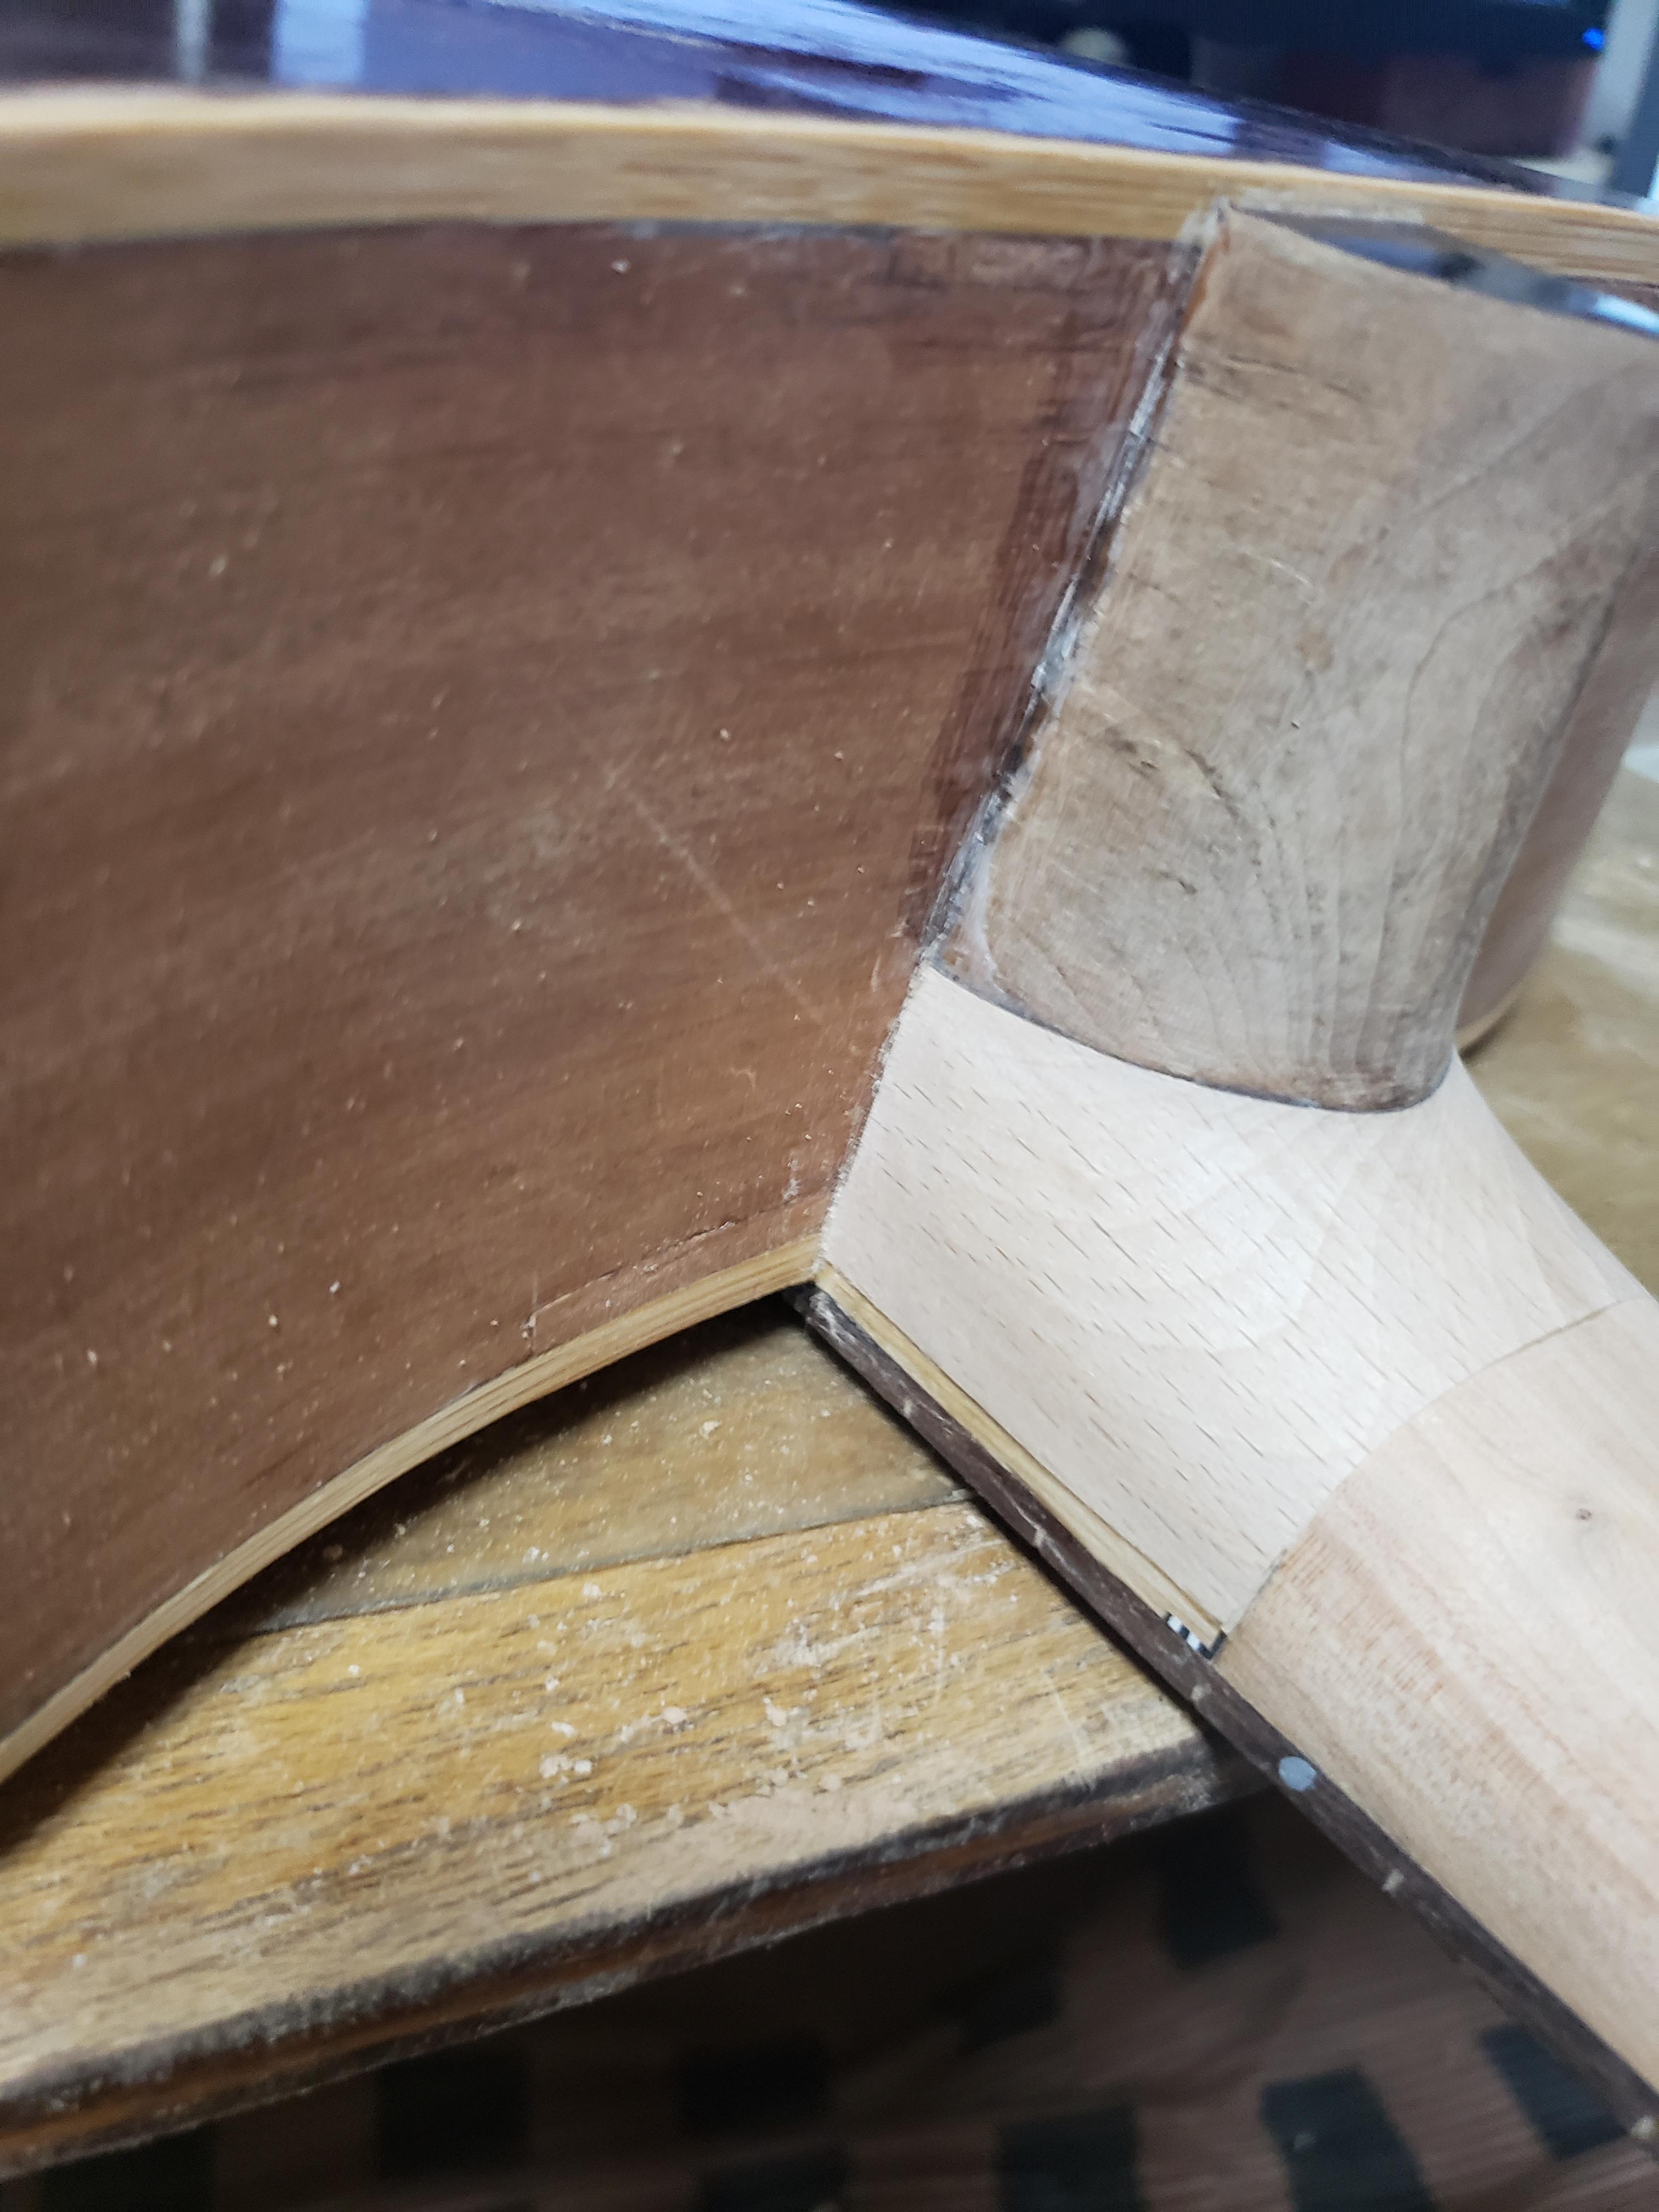
Now I could glue in a new block of wood between the existing neck and the neck joint, and then glue the old heel on top of that to create a whole new heel. I used epoxy for these joints because the fits were not perfect and epoxy fills spaces. Then I carved the new block into a nice heel shape with chisels and knives.
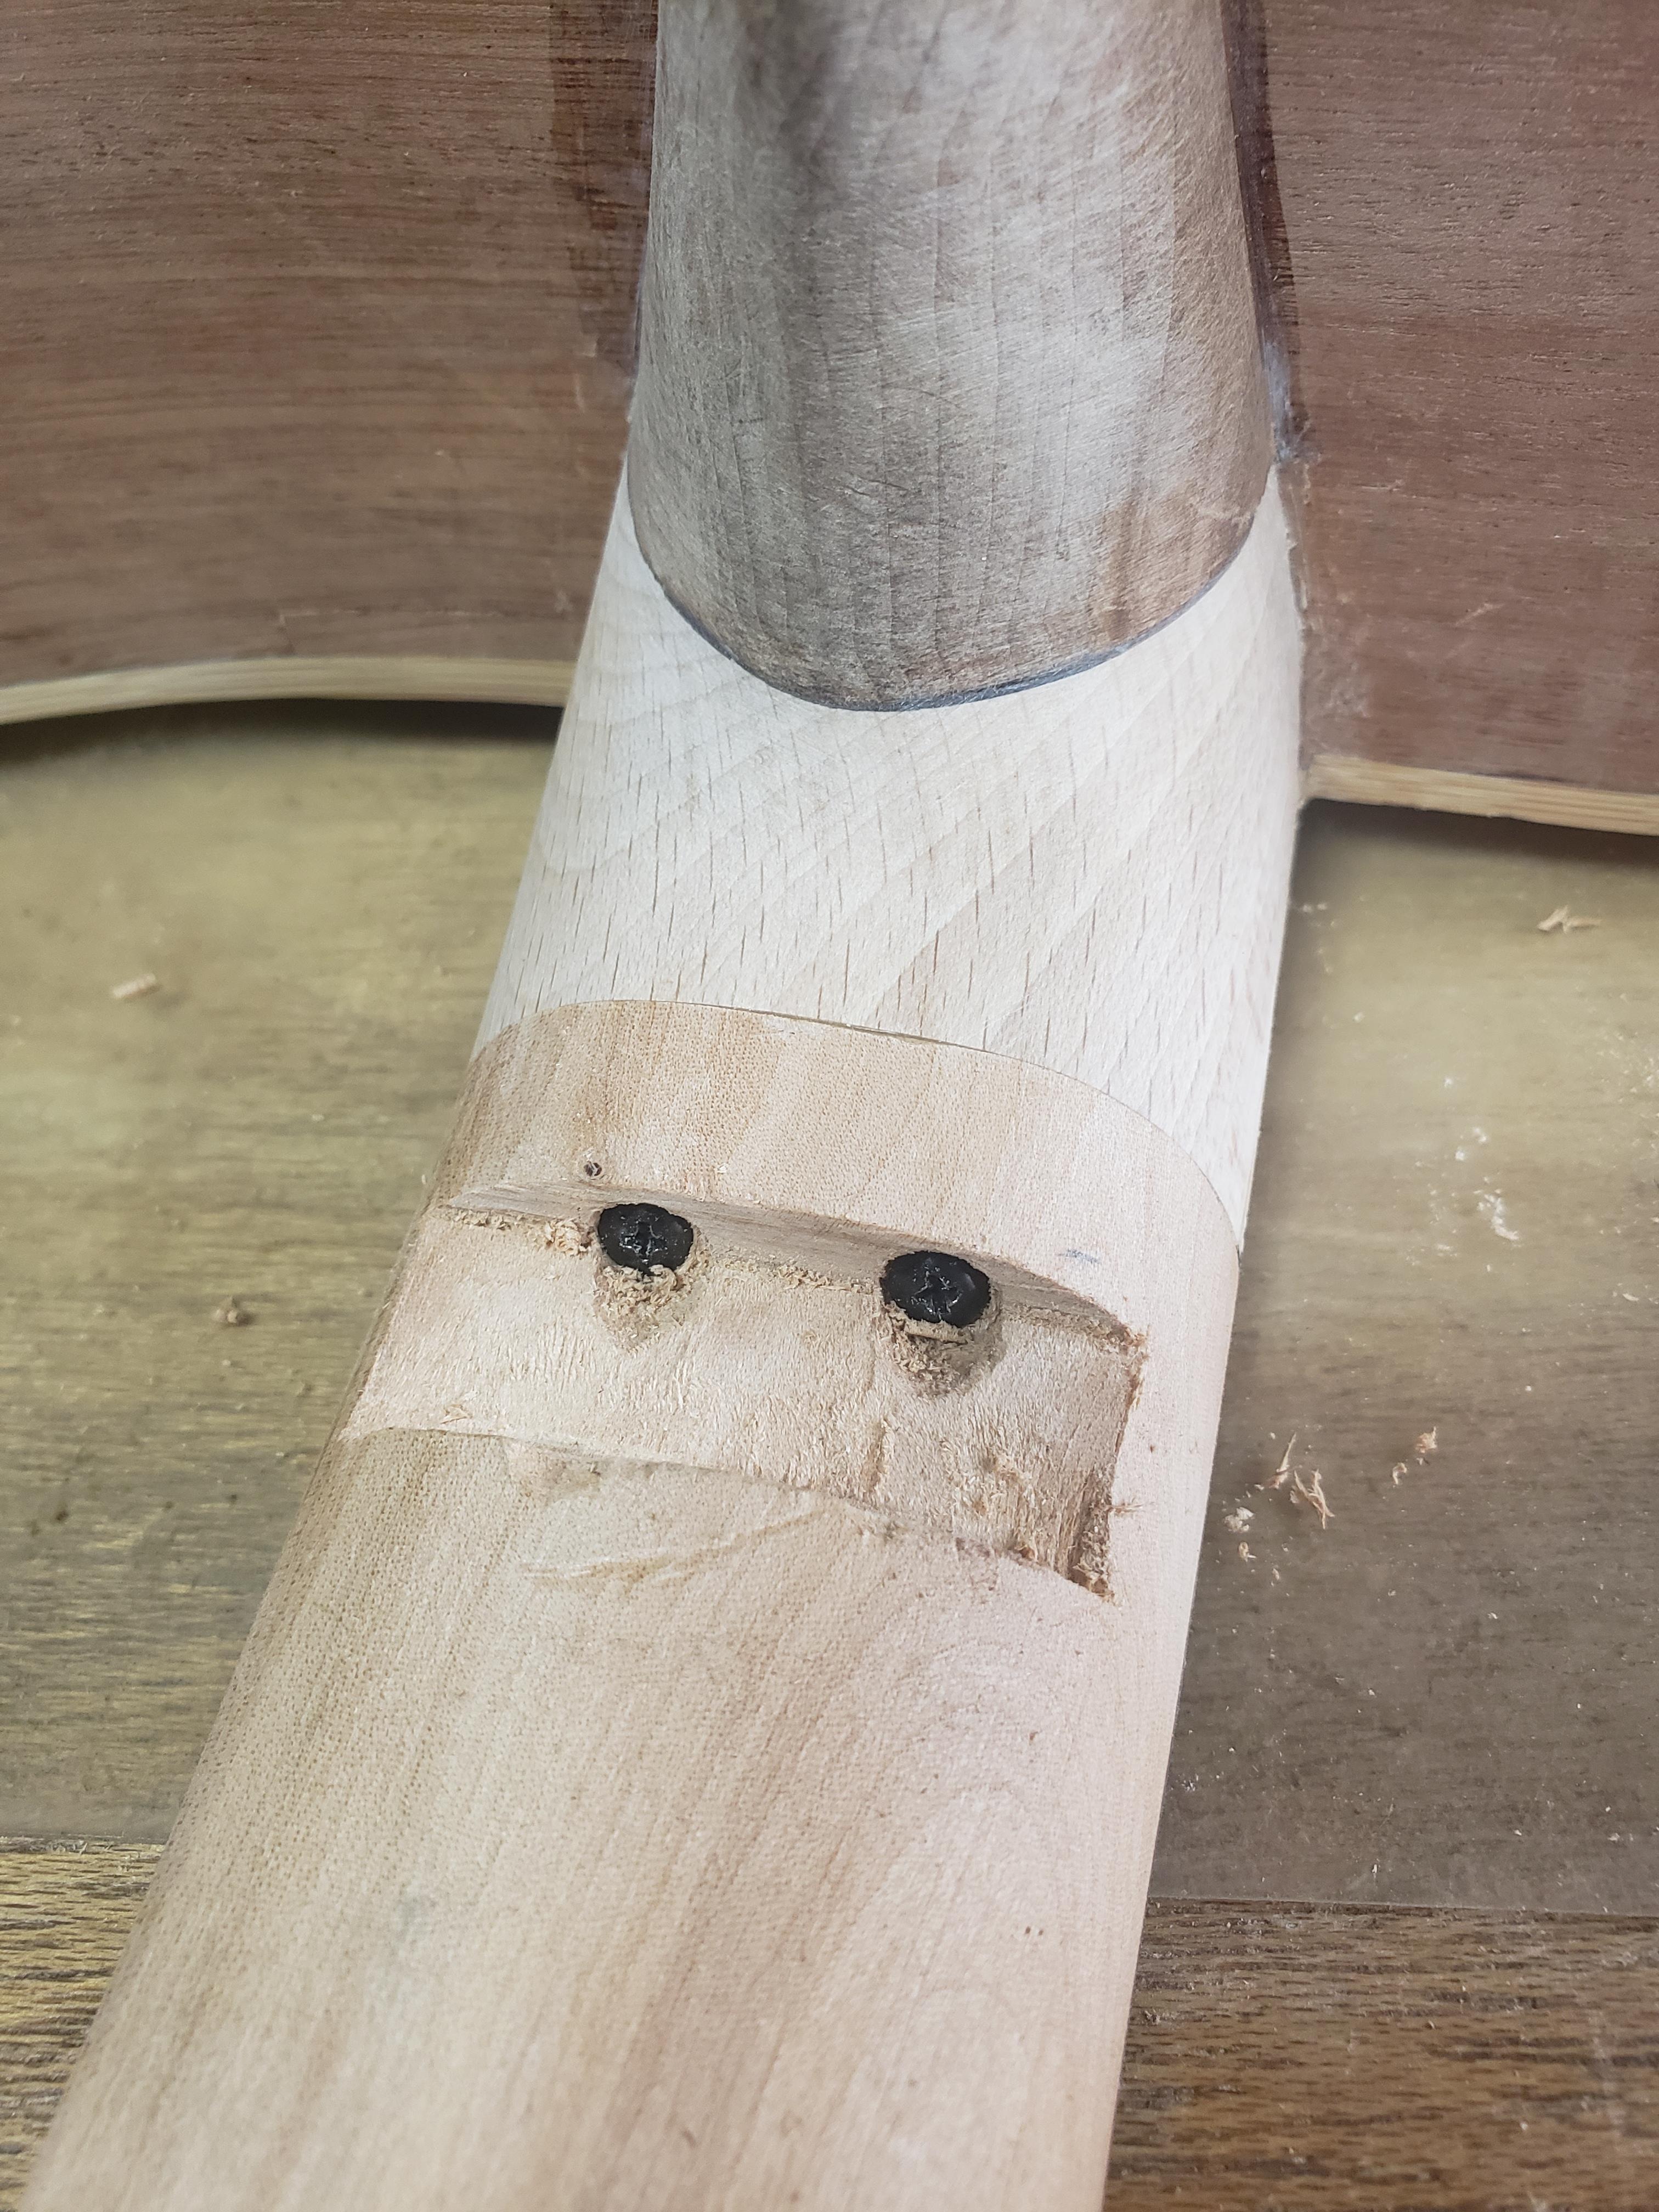
I was a little worried about the strength of the joint between the new block and the old neck, so I decided to strengthen it by sinking two long wood screws under the neck as shown. I don't know if this was necessary, but I think it will at least make it strong enough. I then had to glue in a piece of the old neck to cover where the screws are. I used part of the neck that I cut off (old frets 1-3) for this.
Reattaching the Headstock
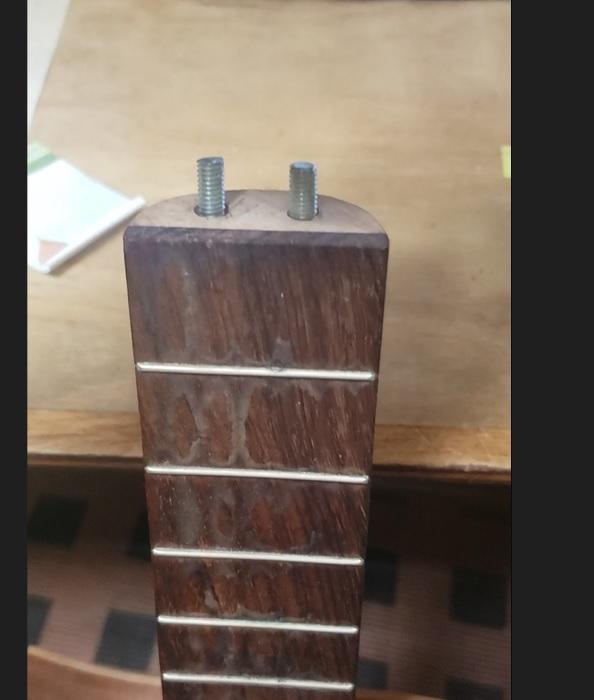
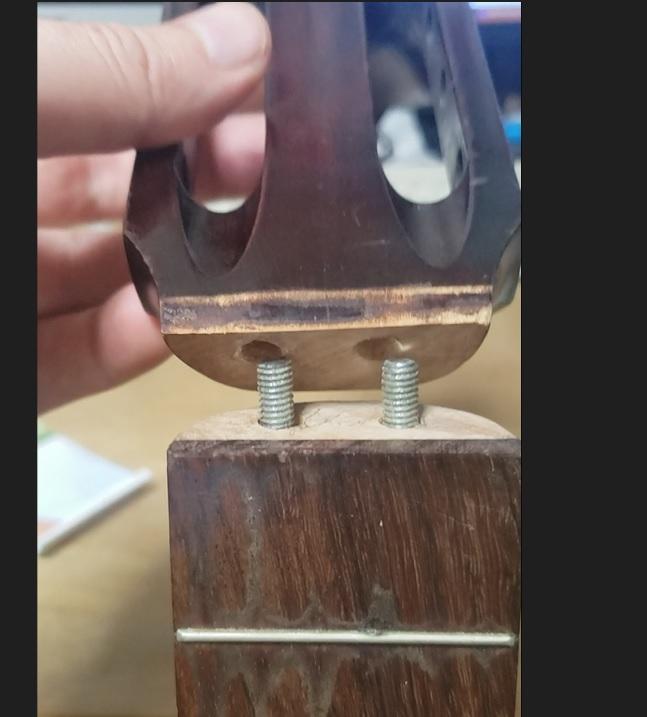
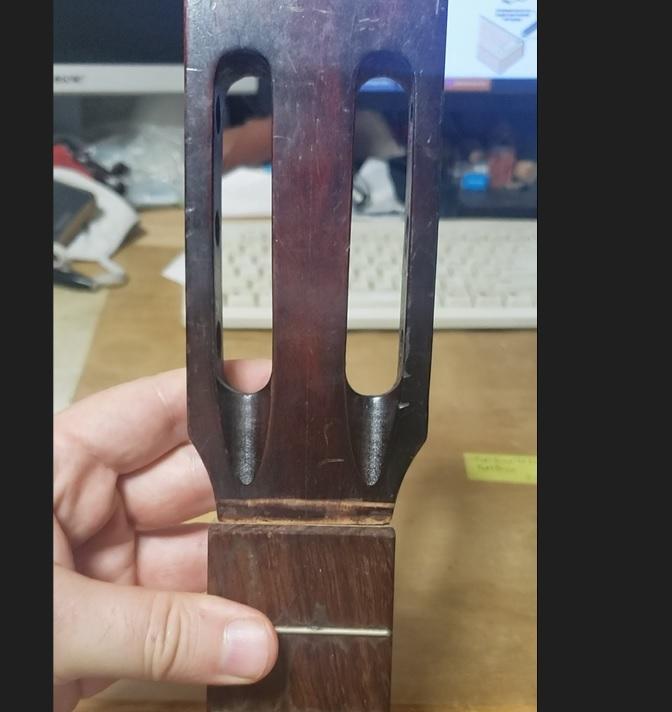
This was the part I was most worried about in the whole project. I wasn't sure how I could get a good strong joint since I was attaching the head with an end-to-end joint with a pretty small gluing area. I found a page online that recommended using metal threaded rod in place of dowels with a good amount of epoxy to make this kind of joint very strong. So I decided to use two pieces of threaded rod and make the holes as deep as possible. I used fast-acting epoxy because there was no way to clamp this joint and I had to just hold it by hand until it set.
It was hard to make sure everything was lined up right and hold it still, but in the end I managed to get it pretty close. There are probably better ways to do this. Anyway, it worked out somehow.
At this point, the structural work of the conversion to a terz guitar is pretty much done. The rest of the work is making the guitar playable and nice-looking.
Finishing, Adjustment, Etc.
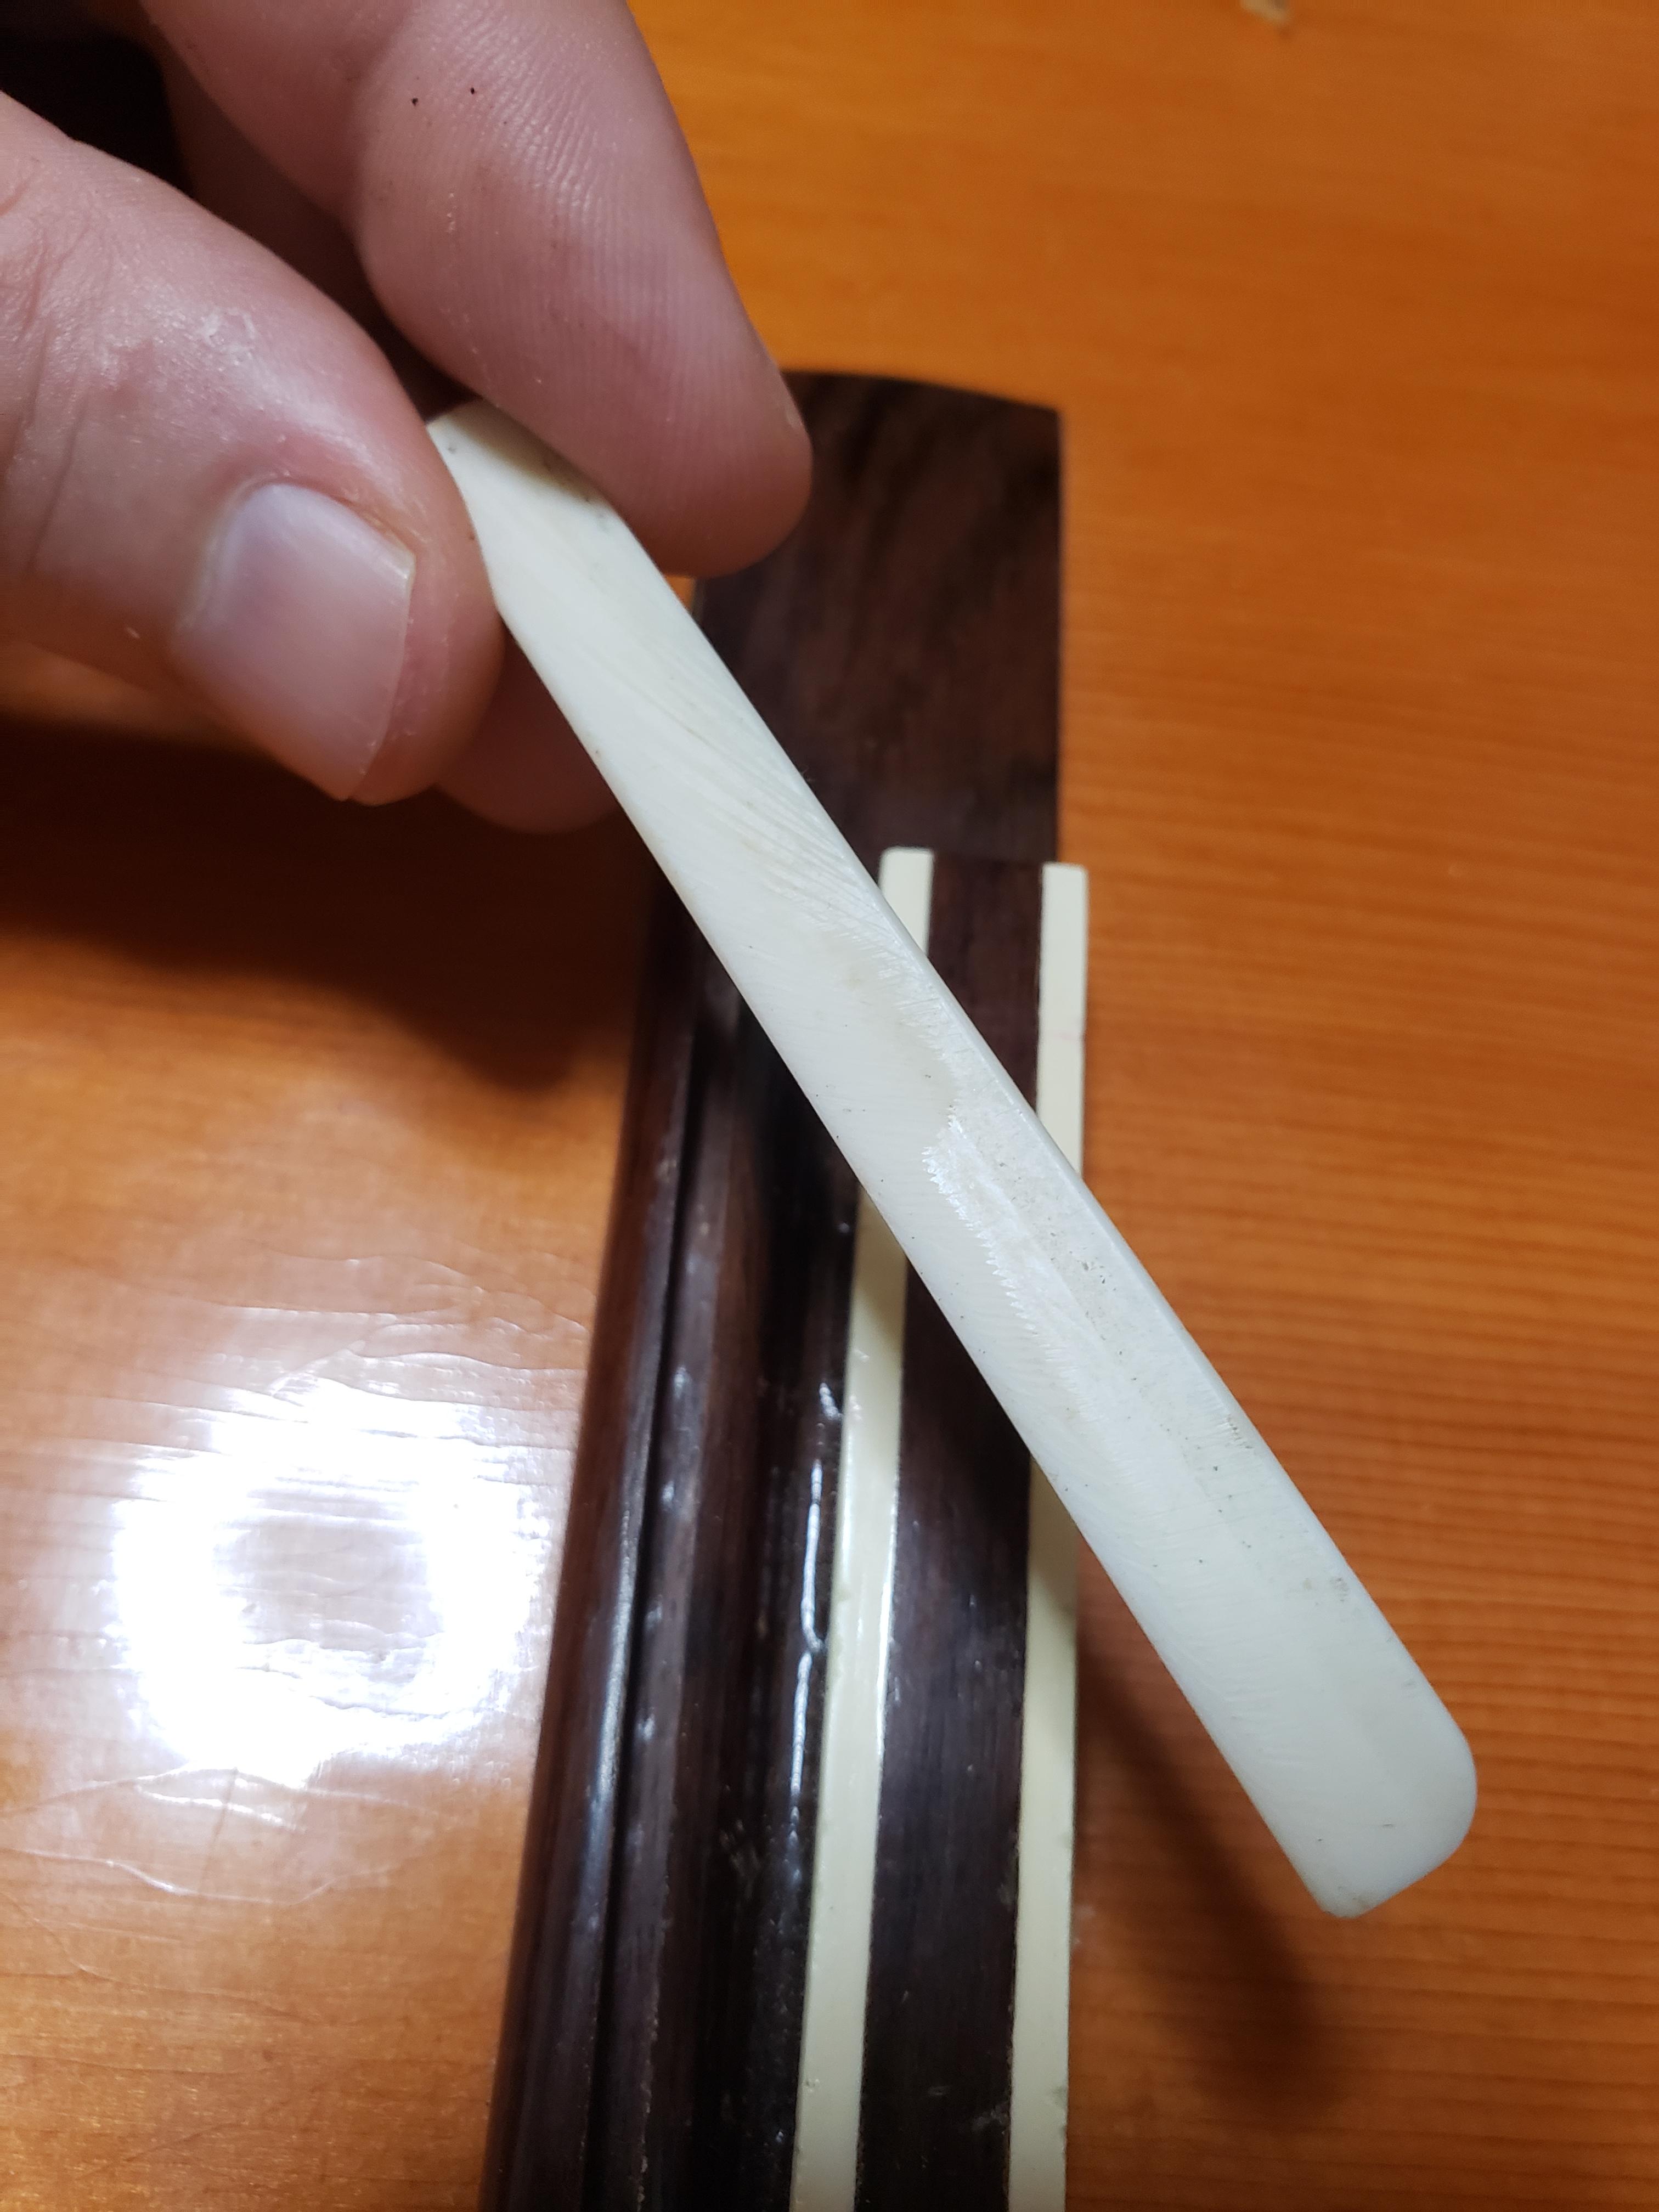
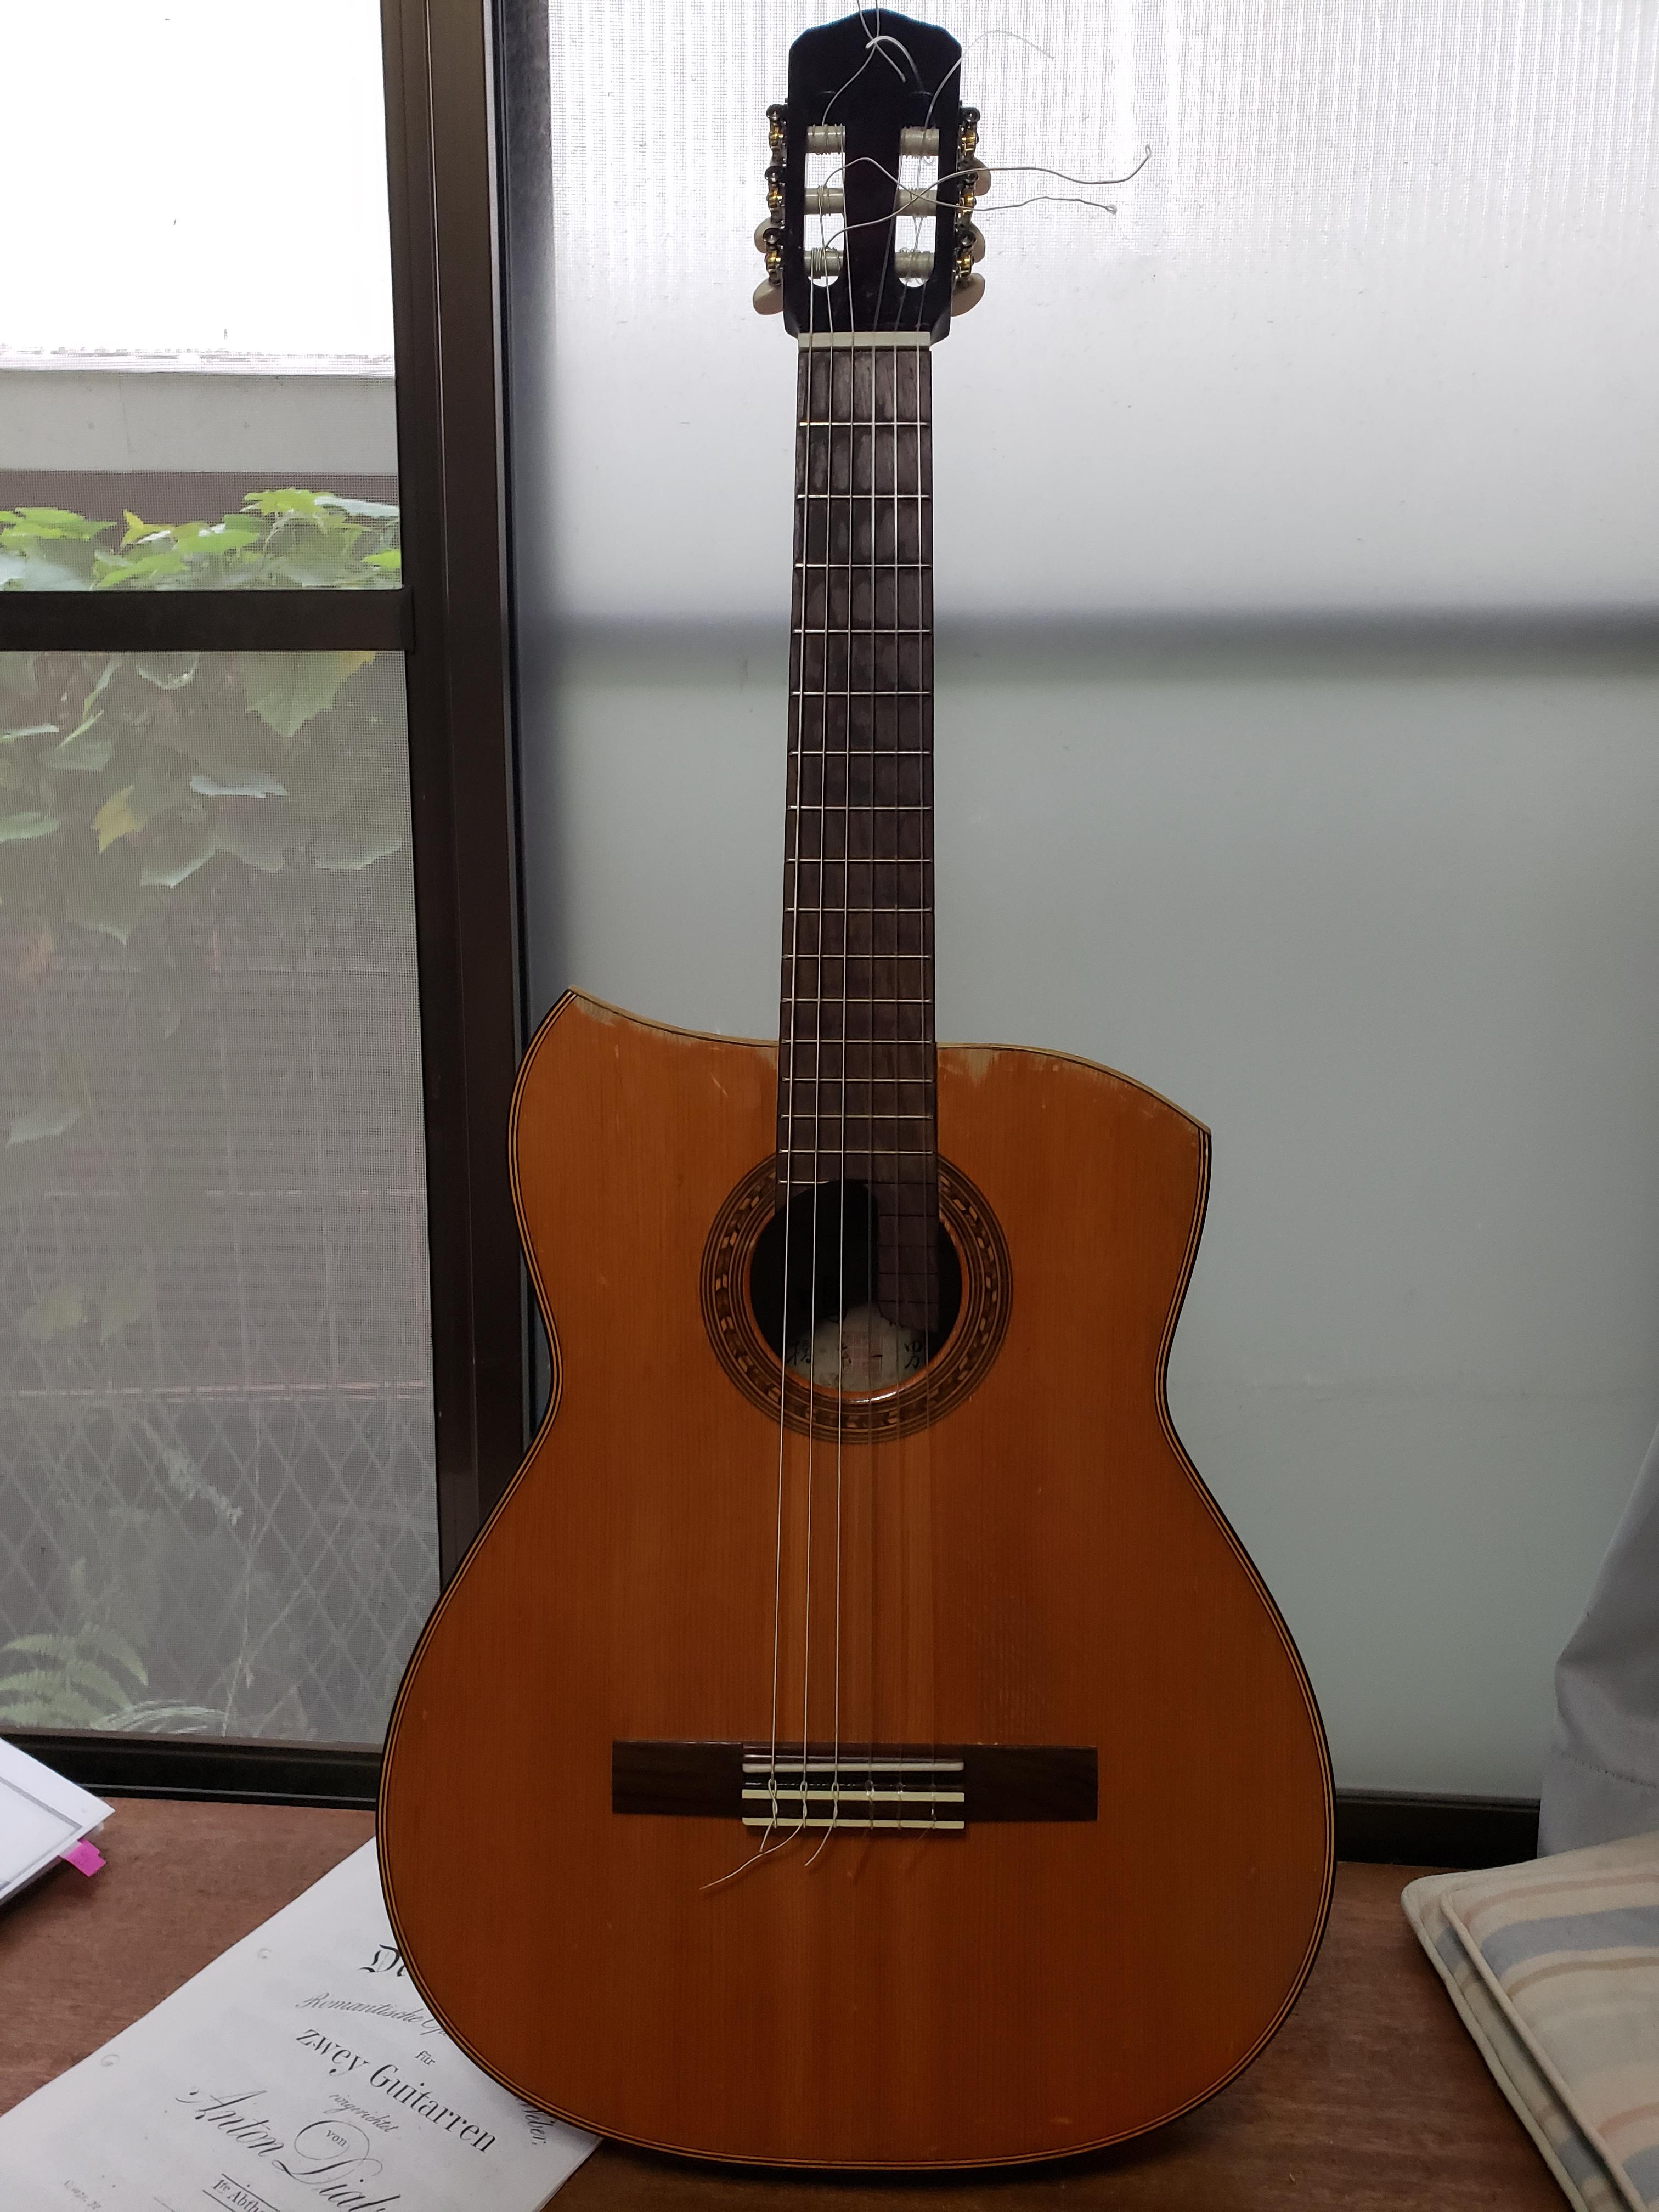
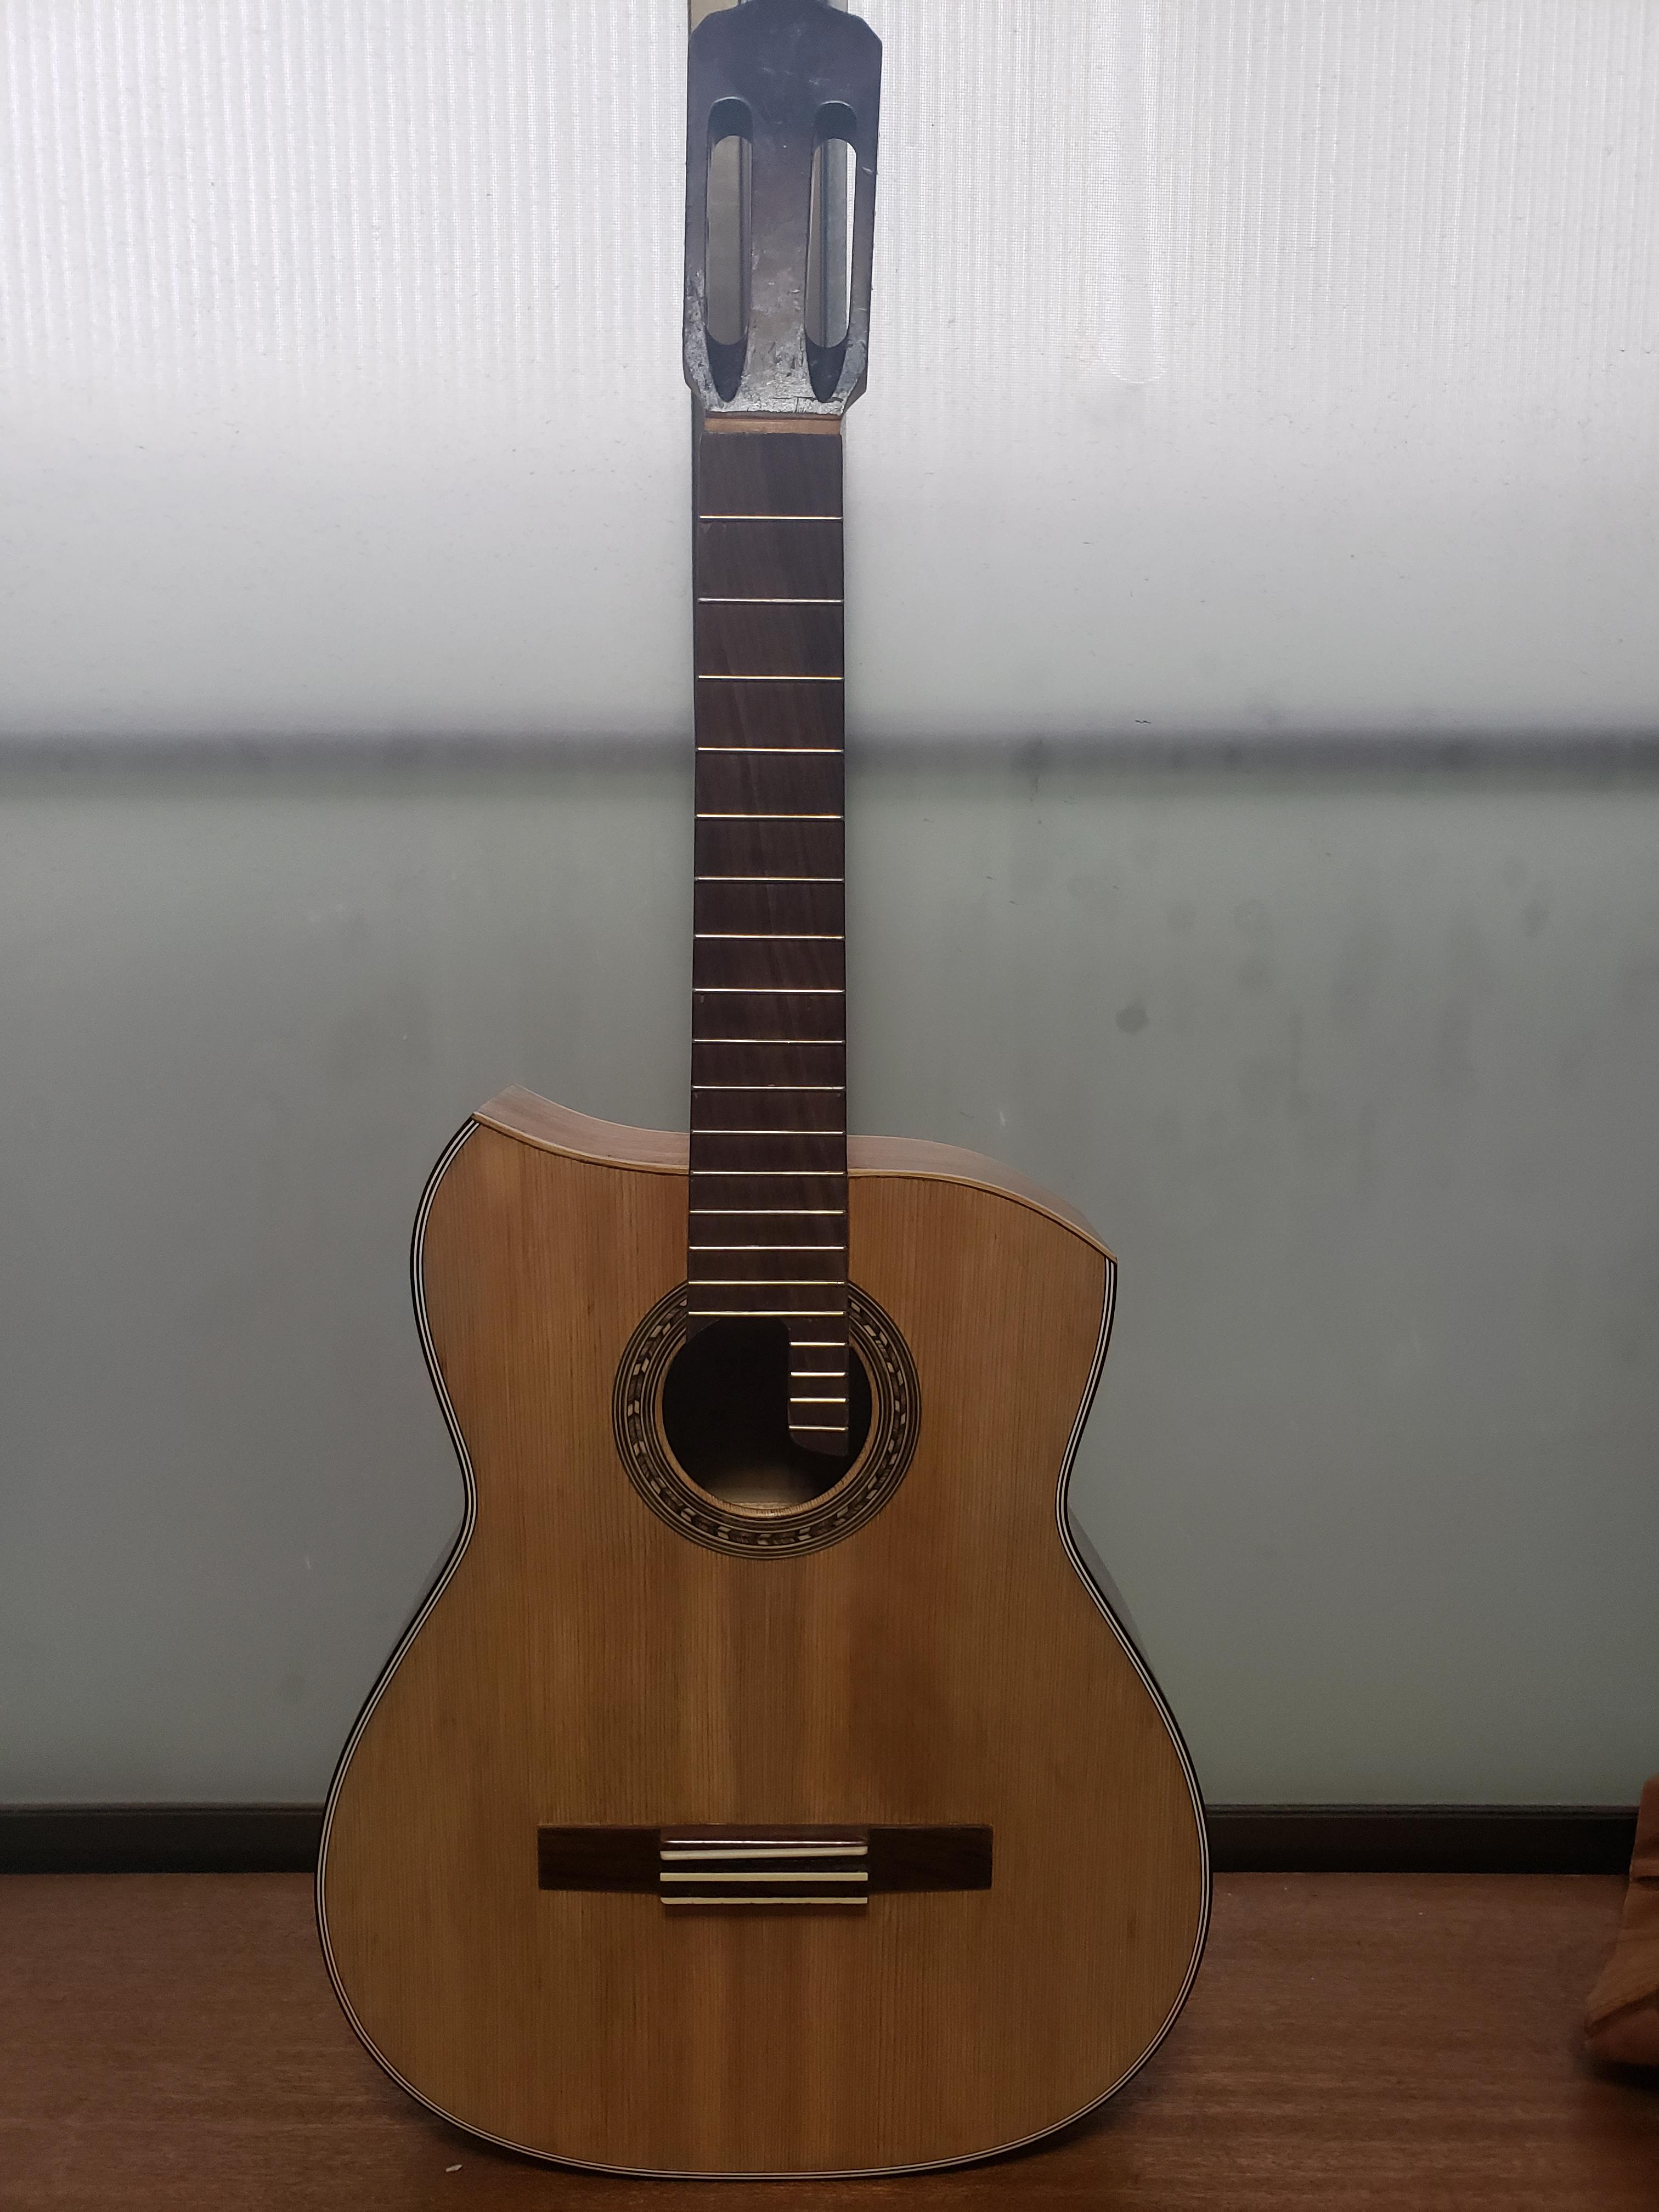
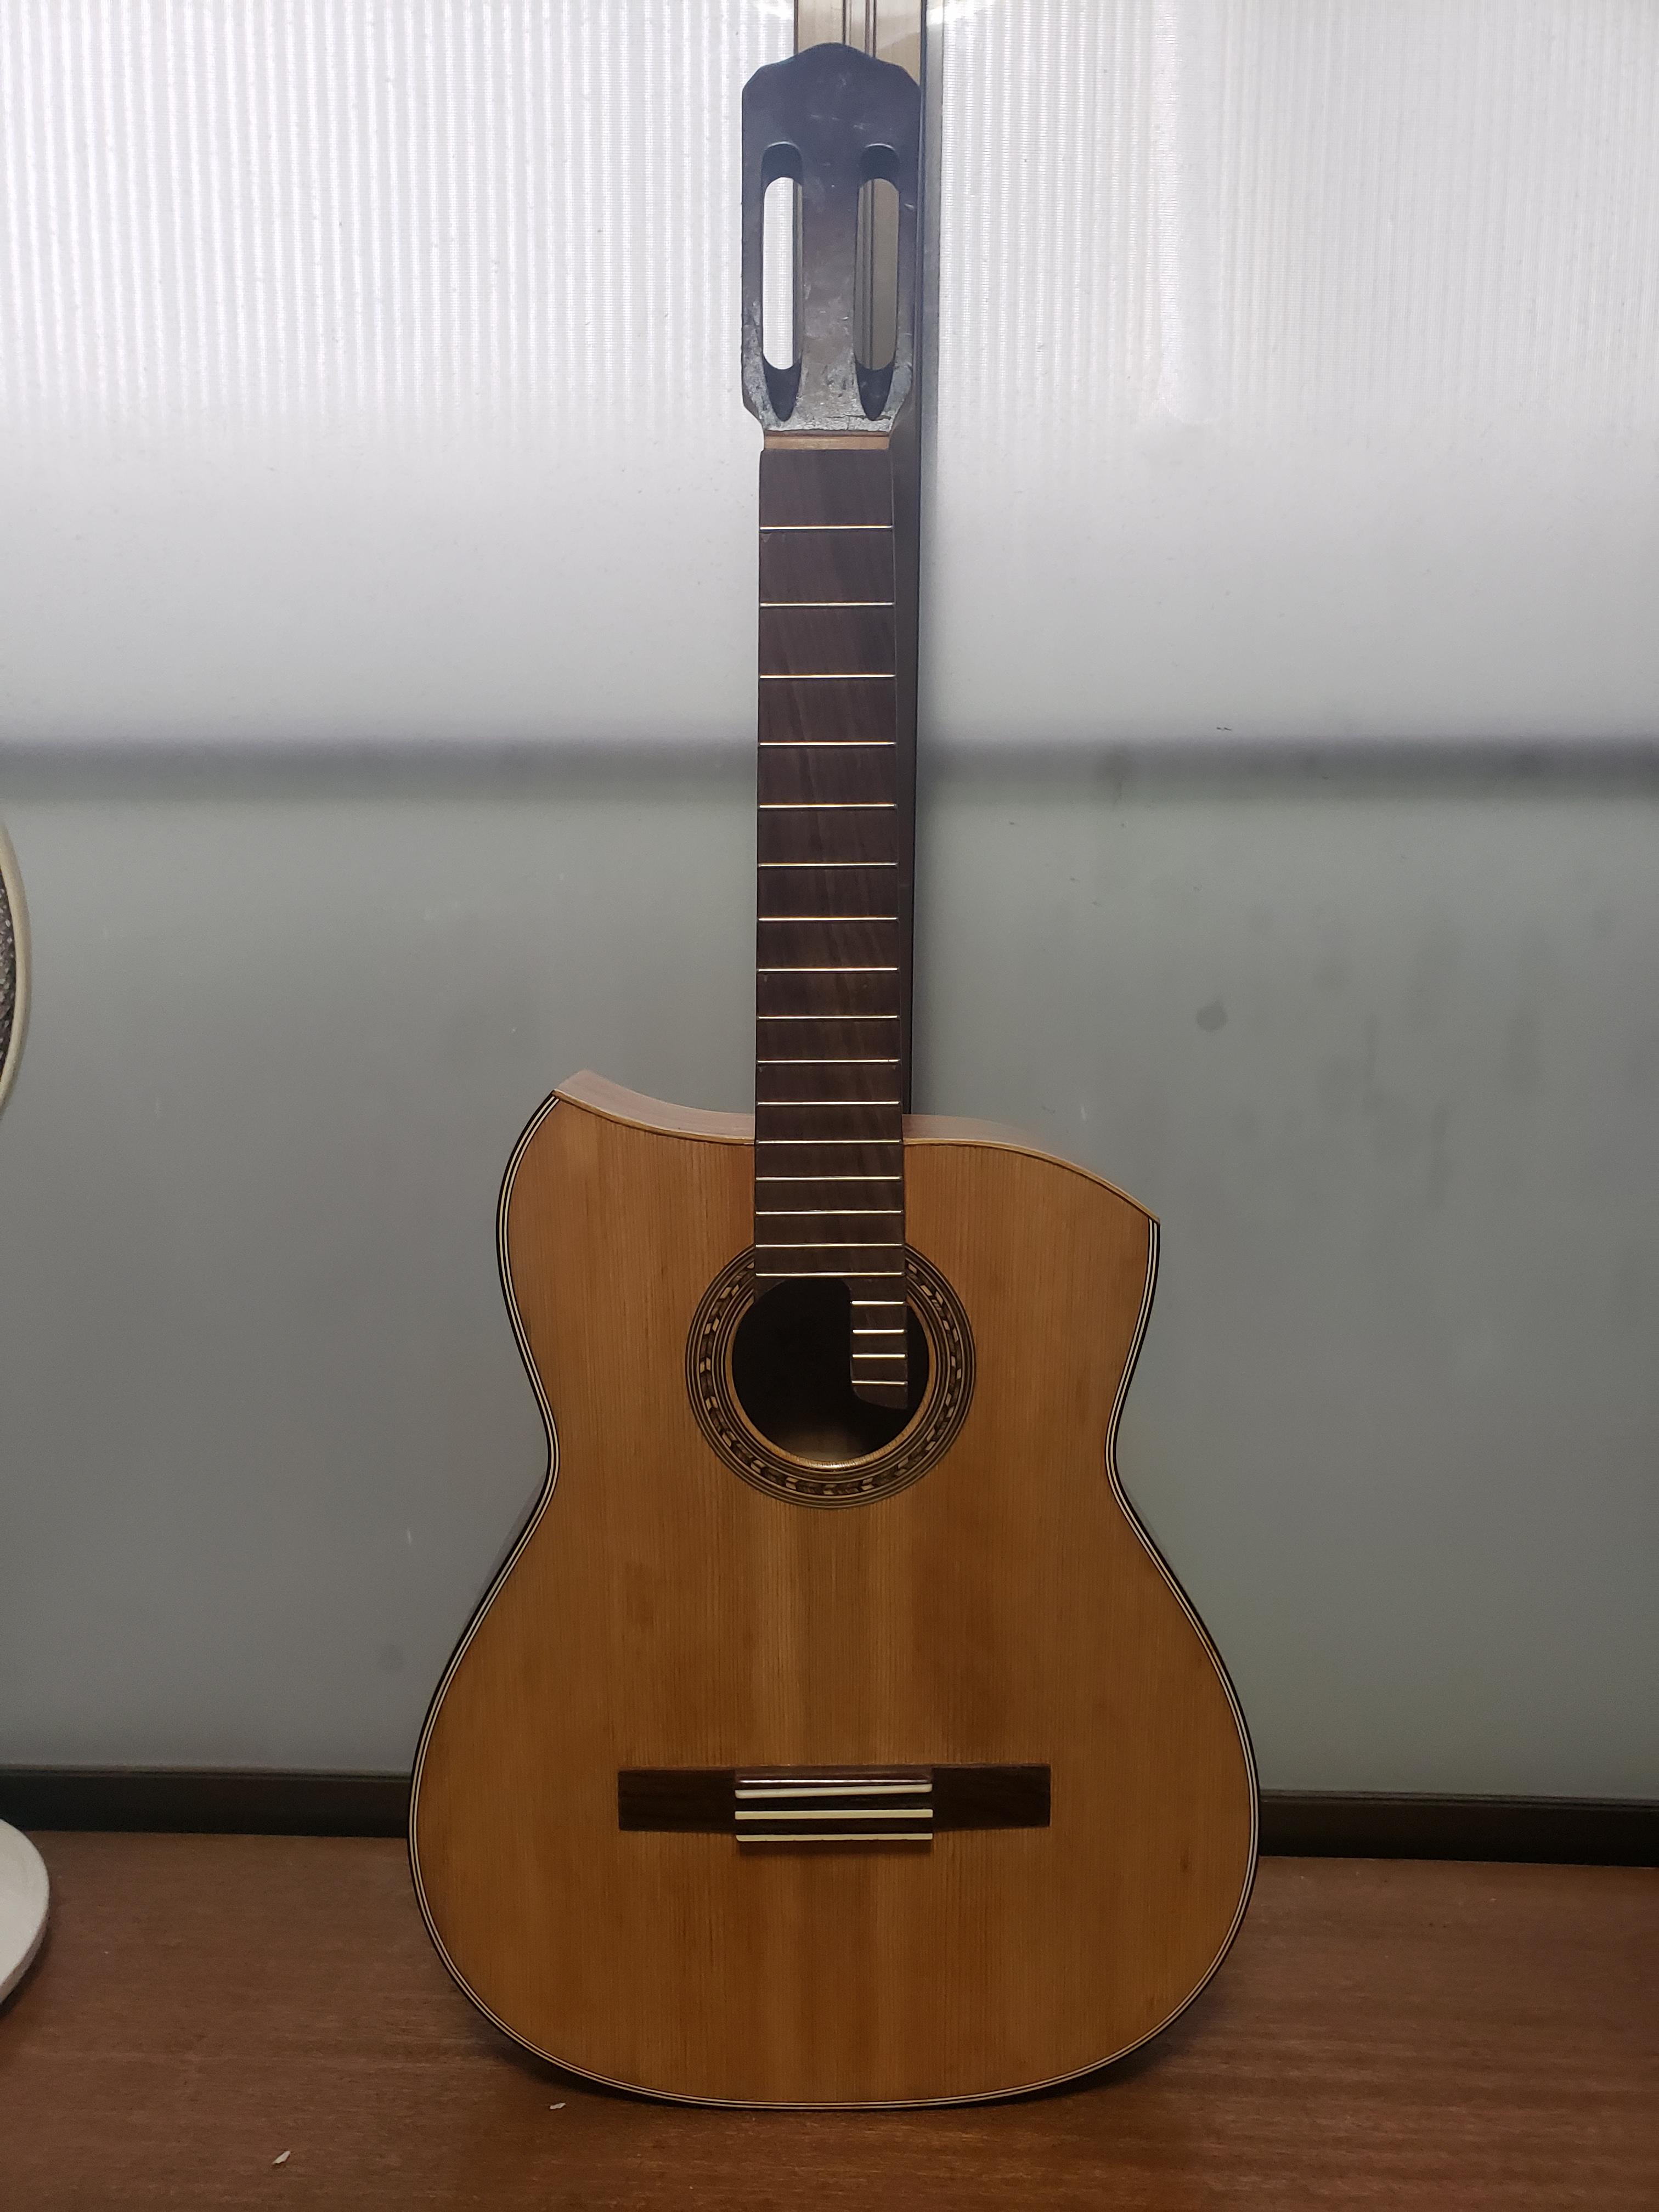
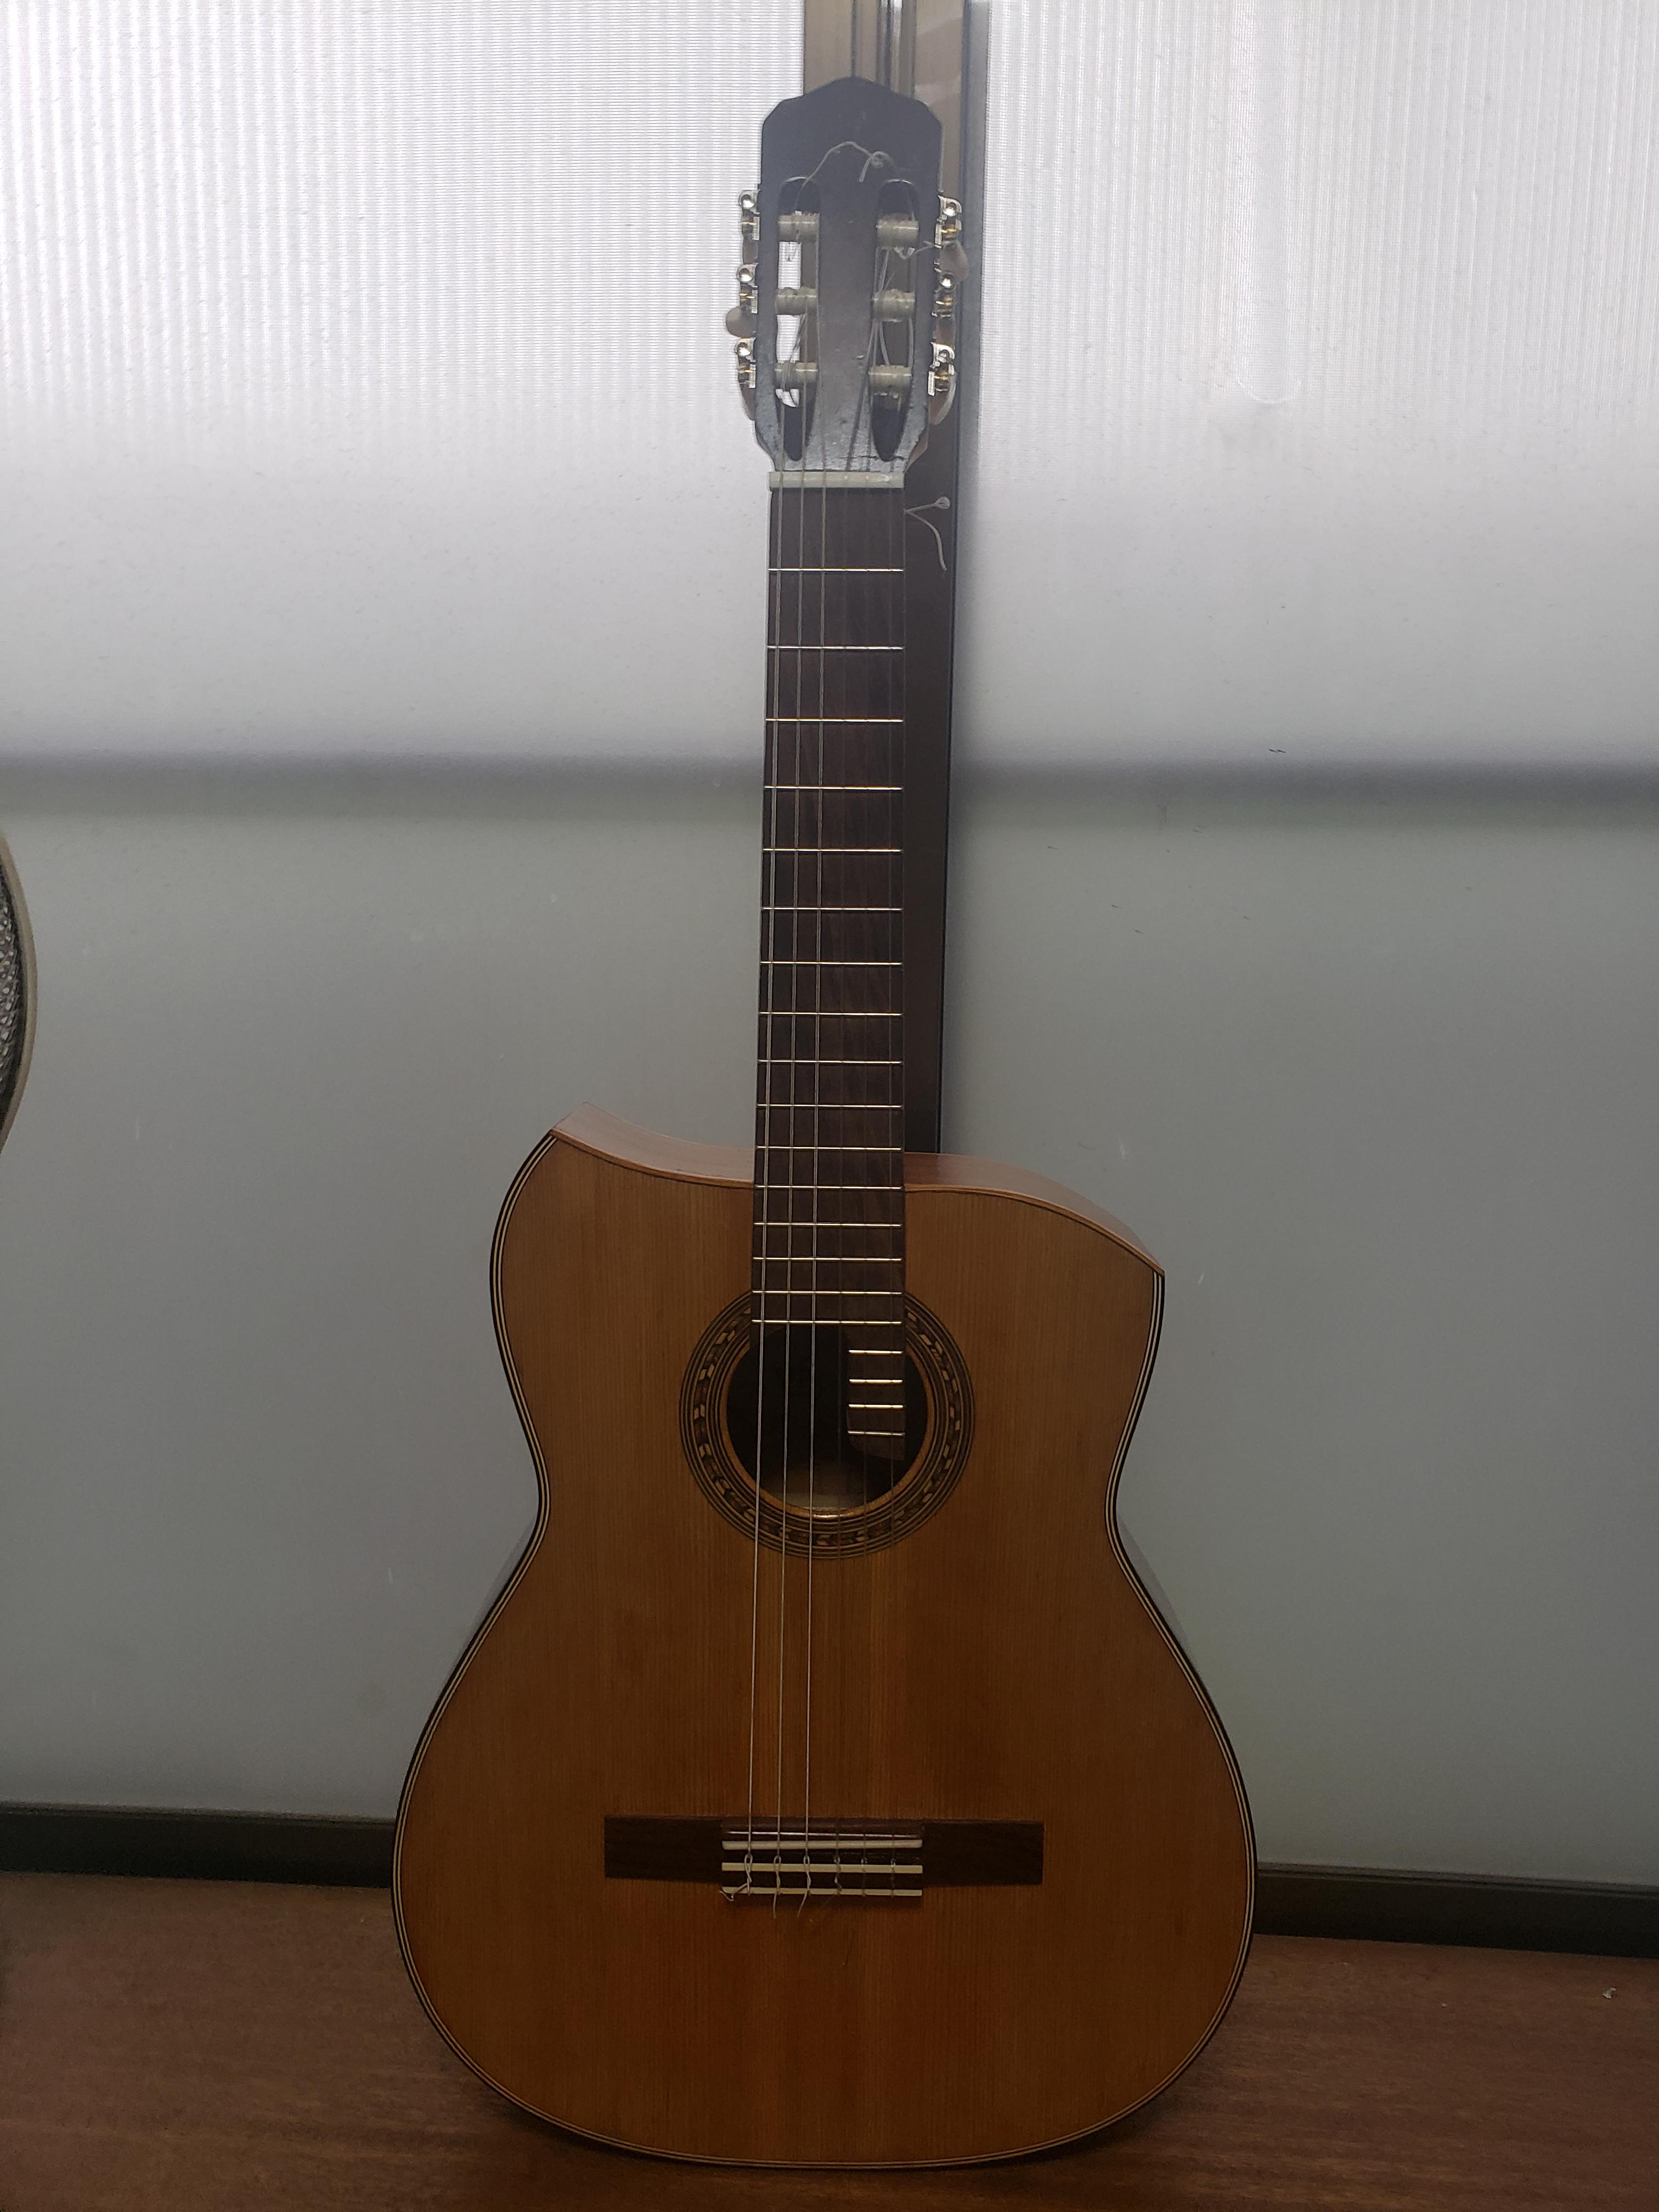
I was going to replace both the nut and saddle, but I found the old saddle was a good bone one, so I kept that original. I did buy a new nut blank and shaped it for the new guitar.
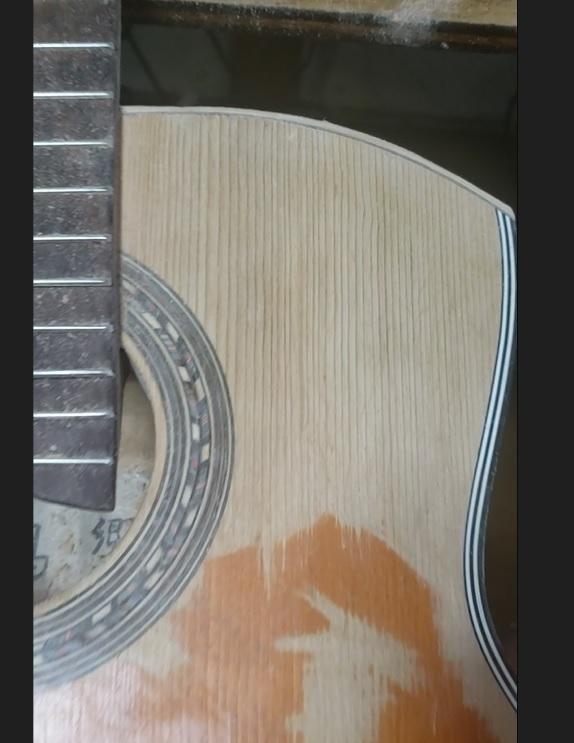
The old finish was an ugly orange color (the first picture above) and had a lot of scratches, and just didn't look good. I managed to get the old finish off with a card scraper and sandpaper, and I found the wood underneath looked really nice and the rosette was also really good quality marquetry. So that was really nice.
I decided to leave the original finish on the back and sides even though there were a lot of scratches, but it would also be much harder to get it off because it's a veneer, and also you don't see the back of the guitar as much.
I finished the front with a few coats of maple-colored brush-on varnish. I know you don't get the nice smooth finish with brush-on like you can with sprayed poly or french polish, but I don't have the equipment for that, and I don't really mind if this guitar isn't completely perfect. Again, I did this largely to see if I could do it. Anyway, it looks much better than before. I also touched up scratches in the back and sides with walnut-colored varnish.
I also did a complete refret because the old frets were tarnished and obviously very old. Other jobs included: cleaning the fretboard, which had decades of grime on it; taking out and coloring over the old side dots and adding new ones at the new 5th and 7th frets; replacing the tuners; and other minor picky little jobs.
The "Frankenstein" Terz Guitar
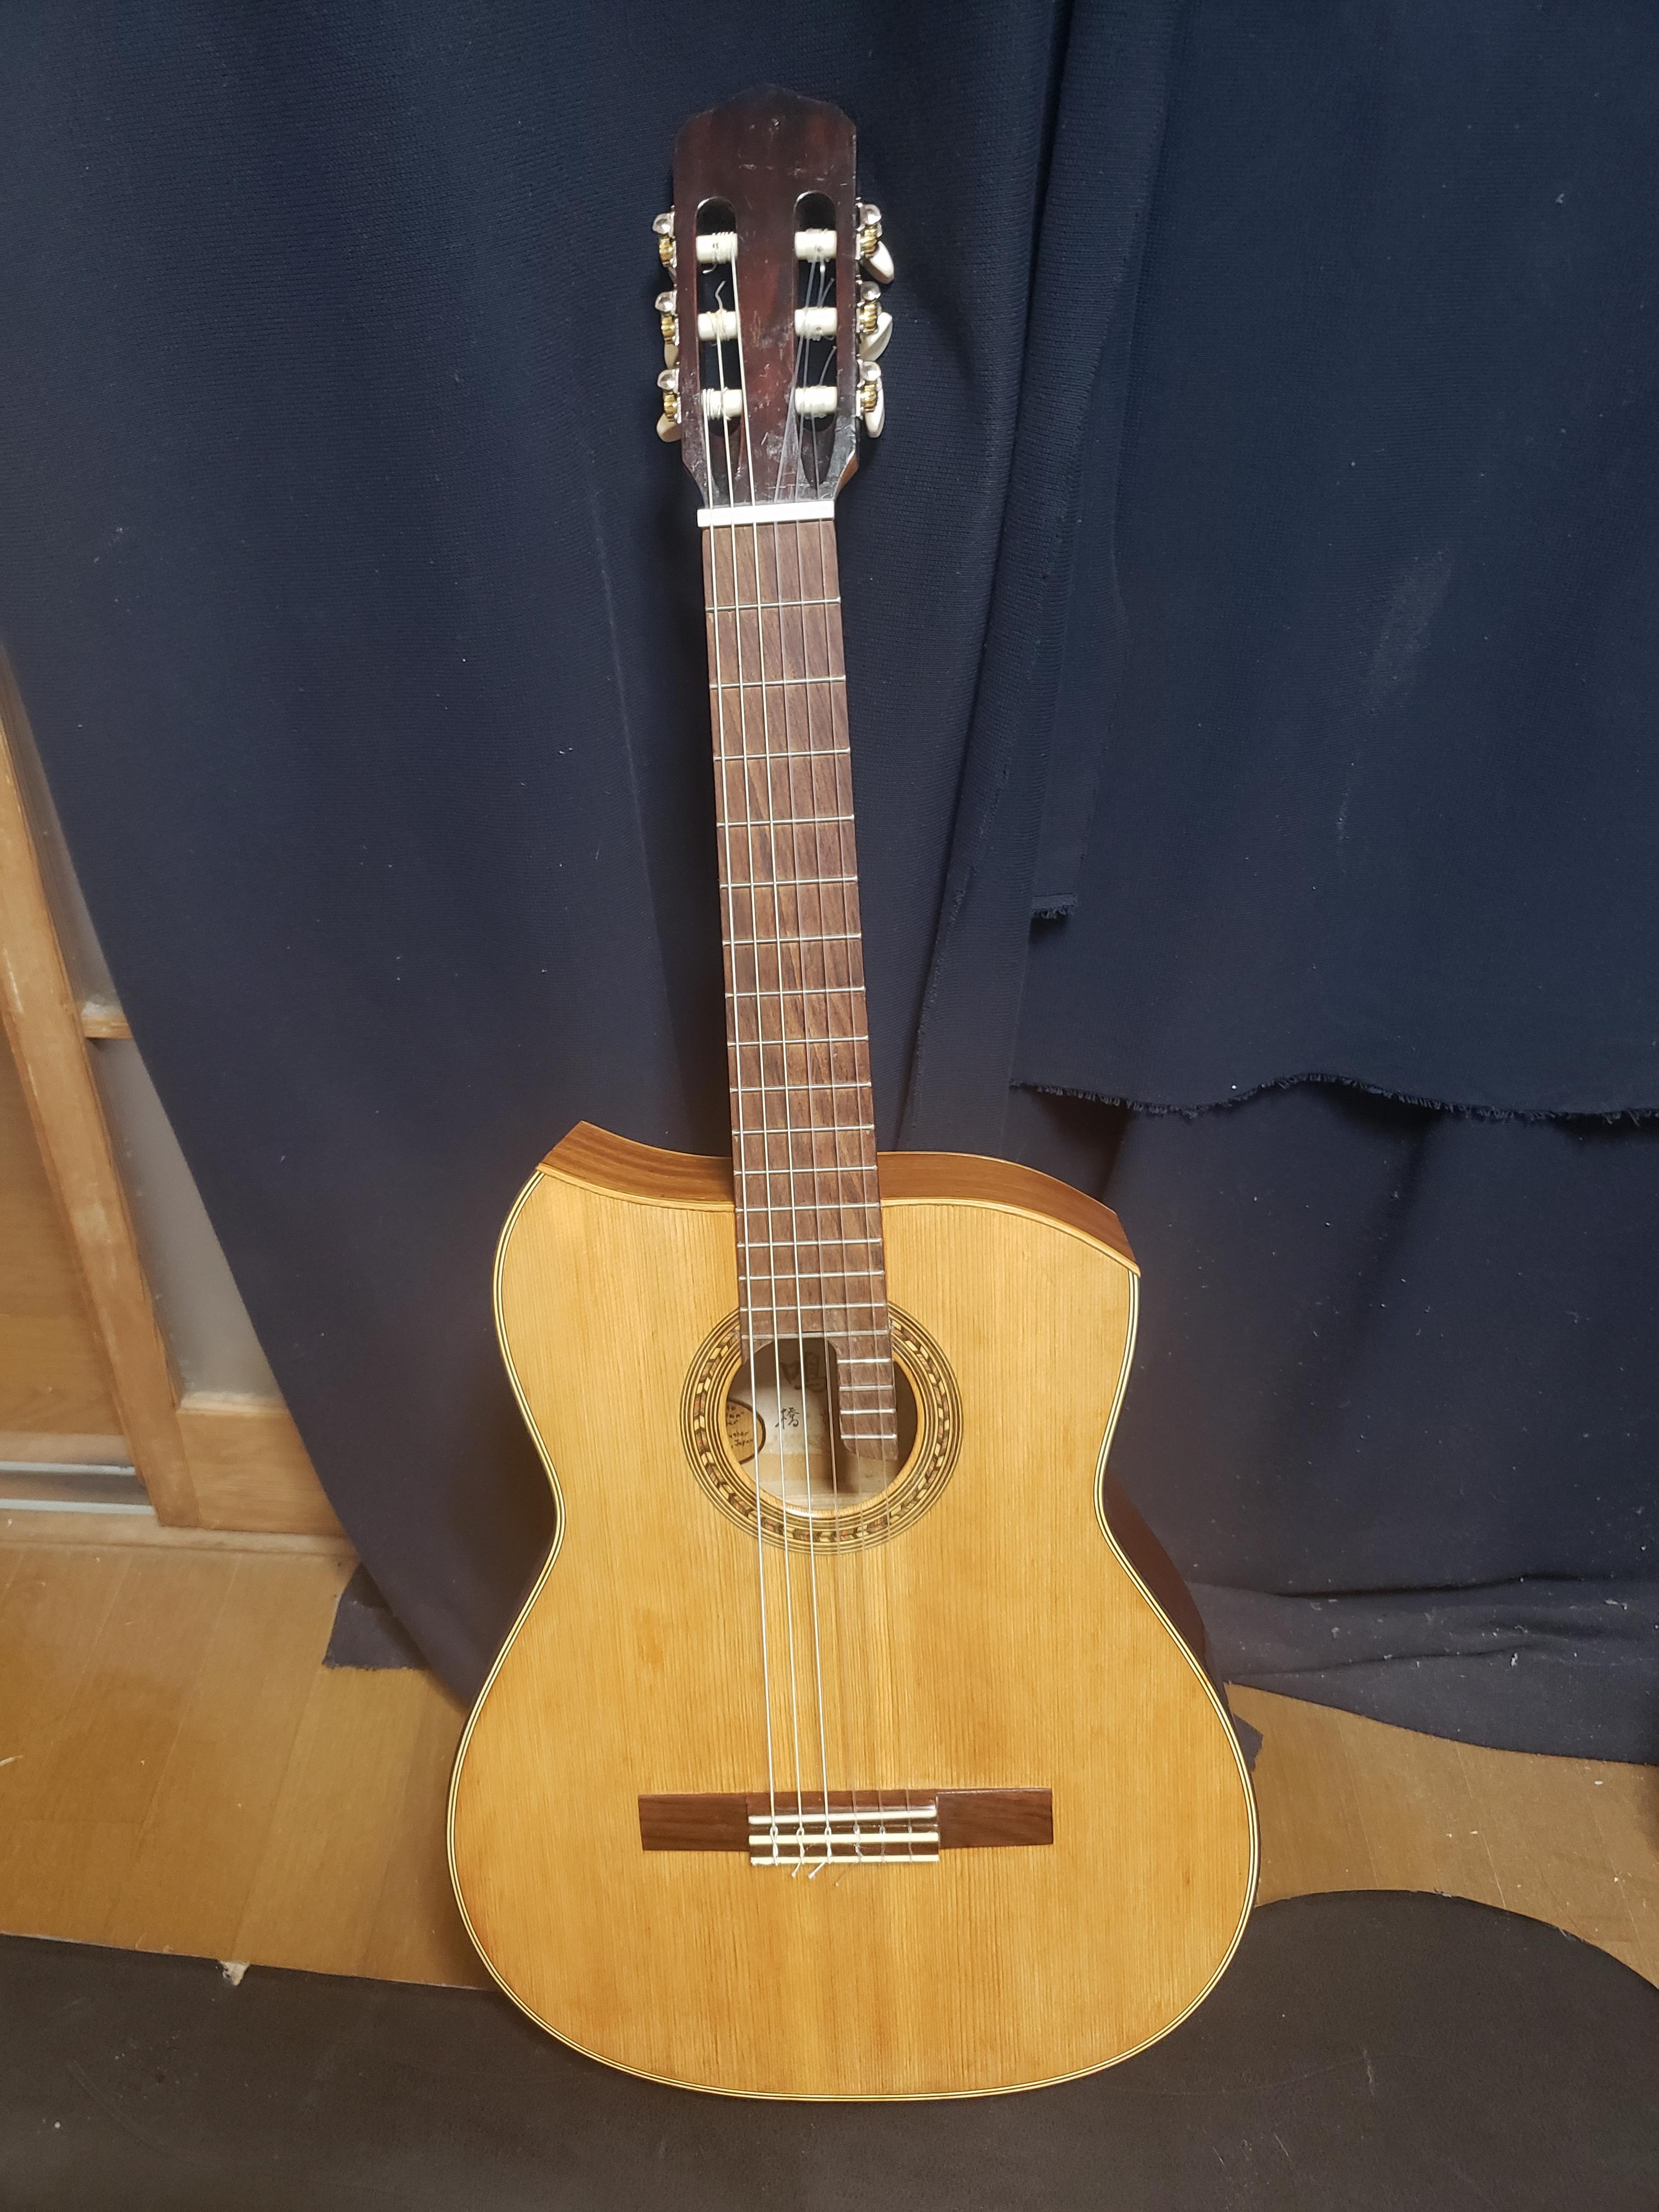
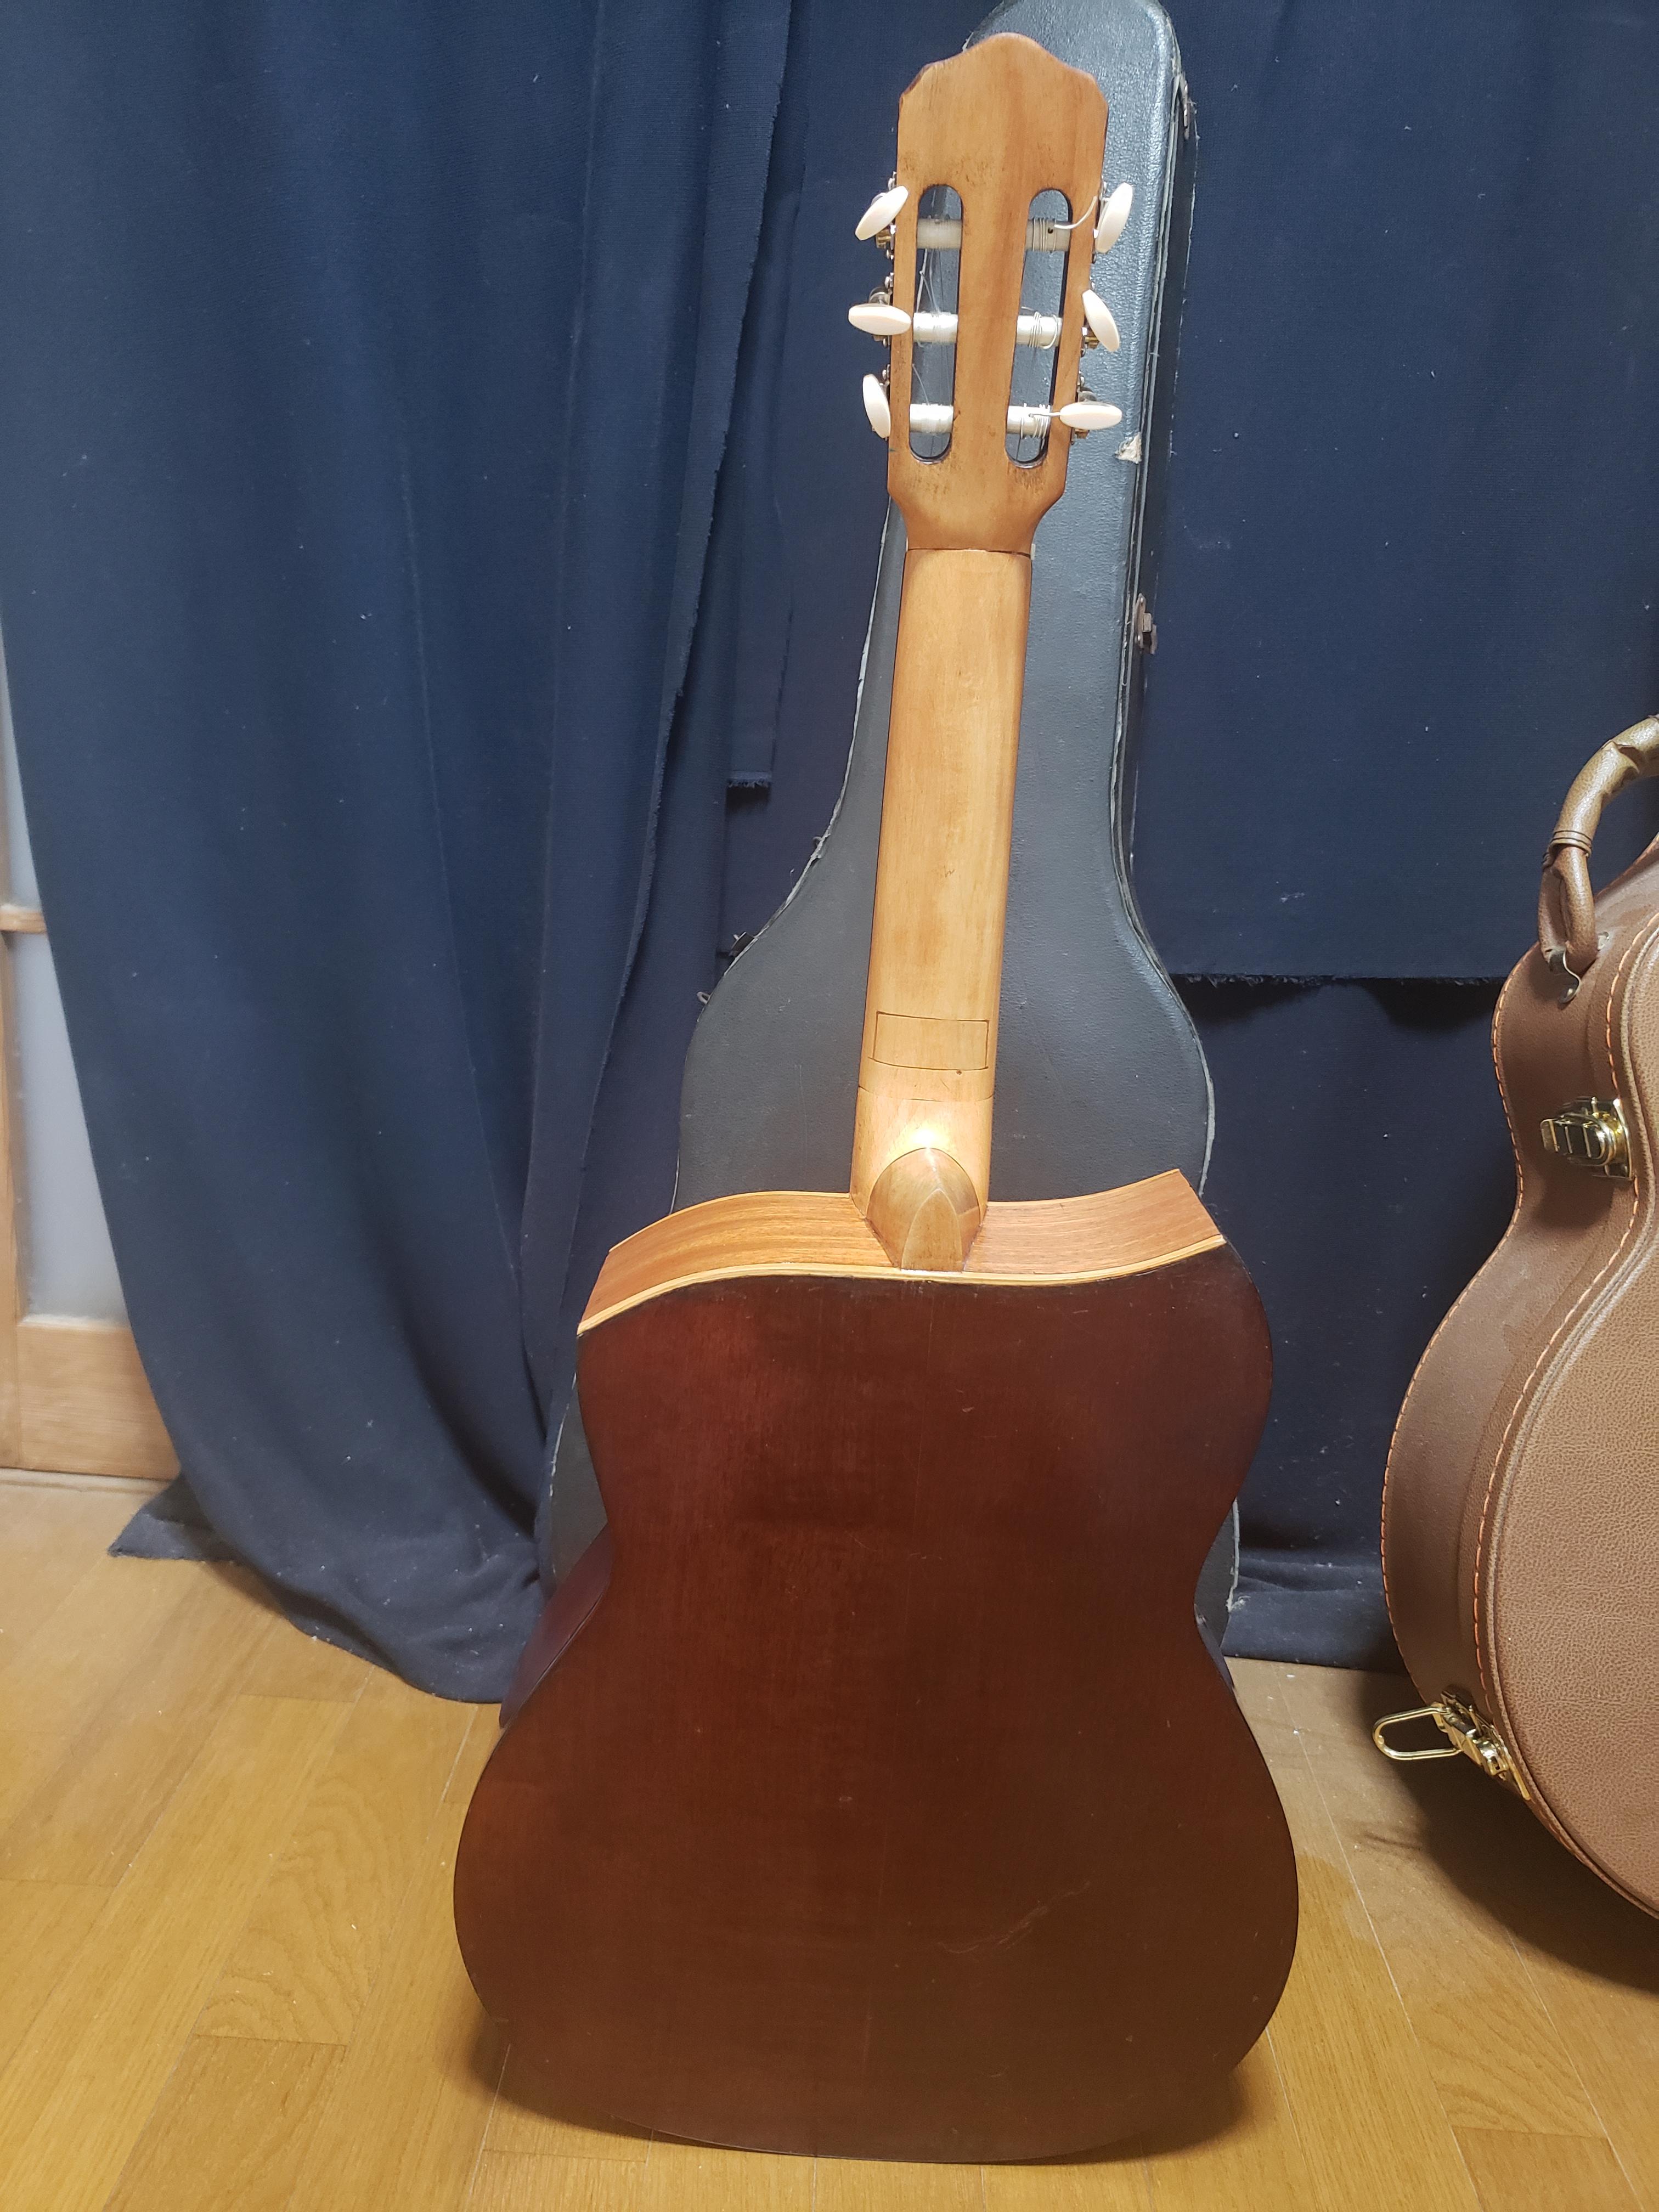
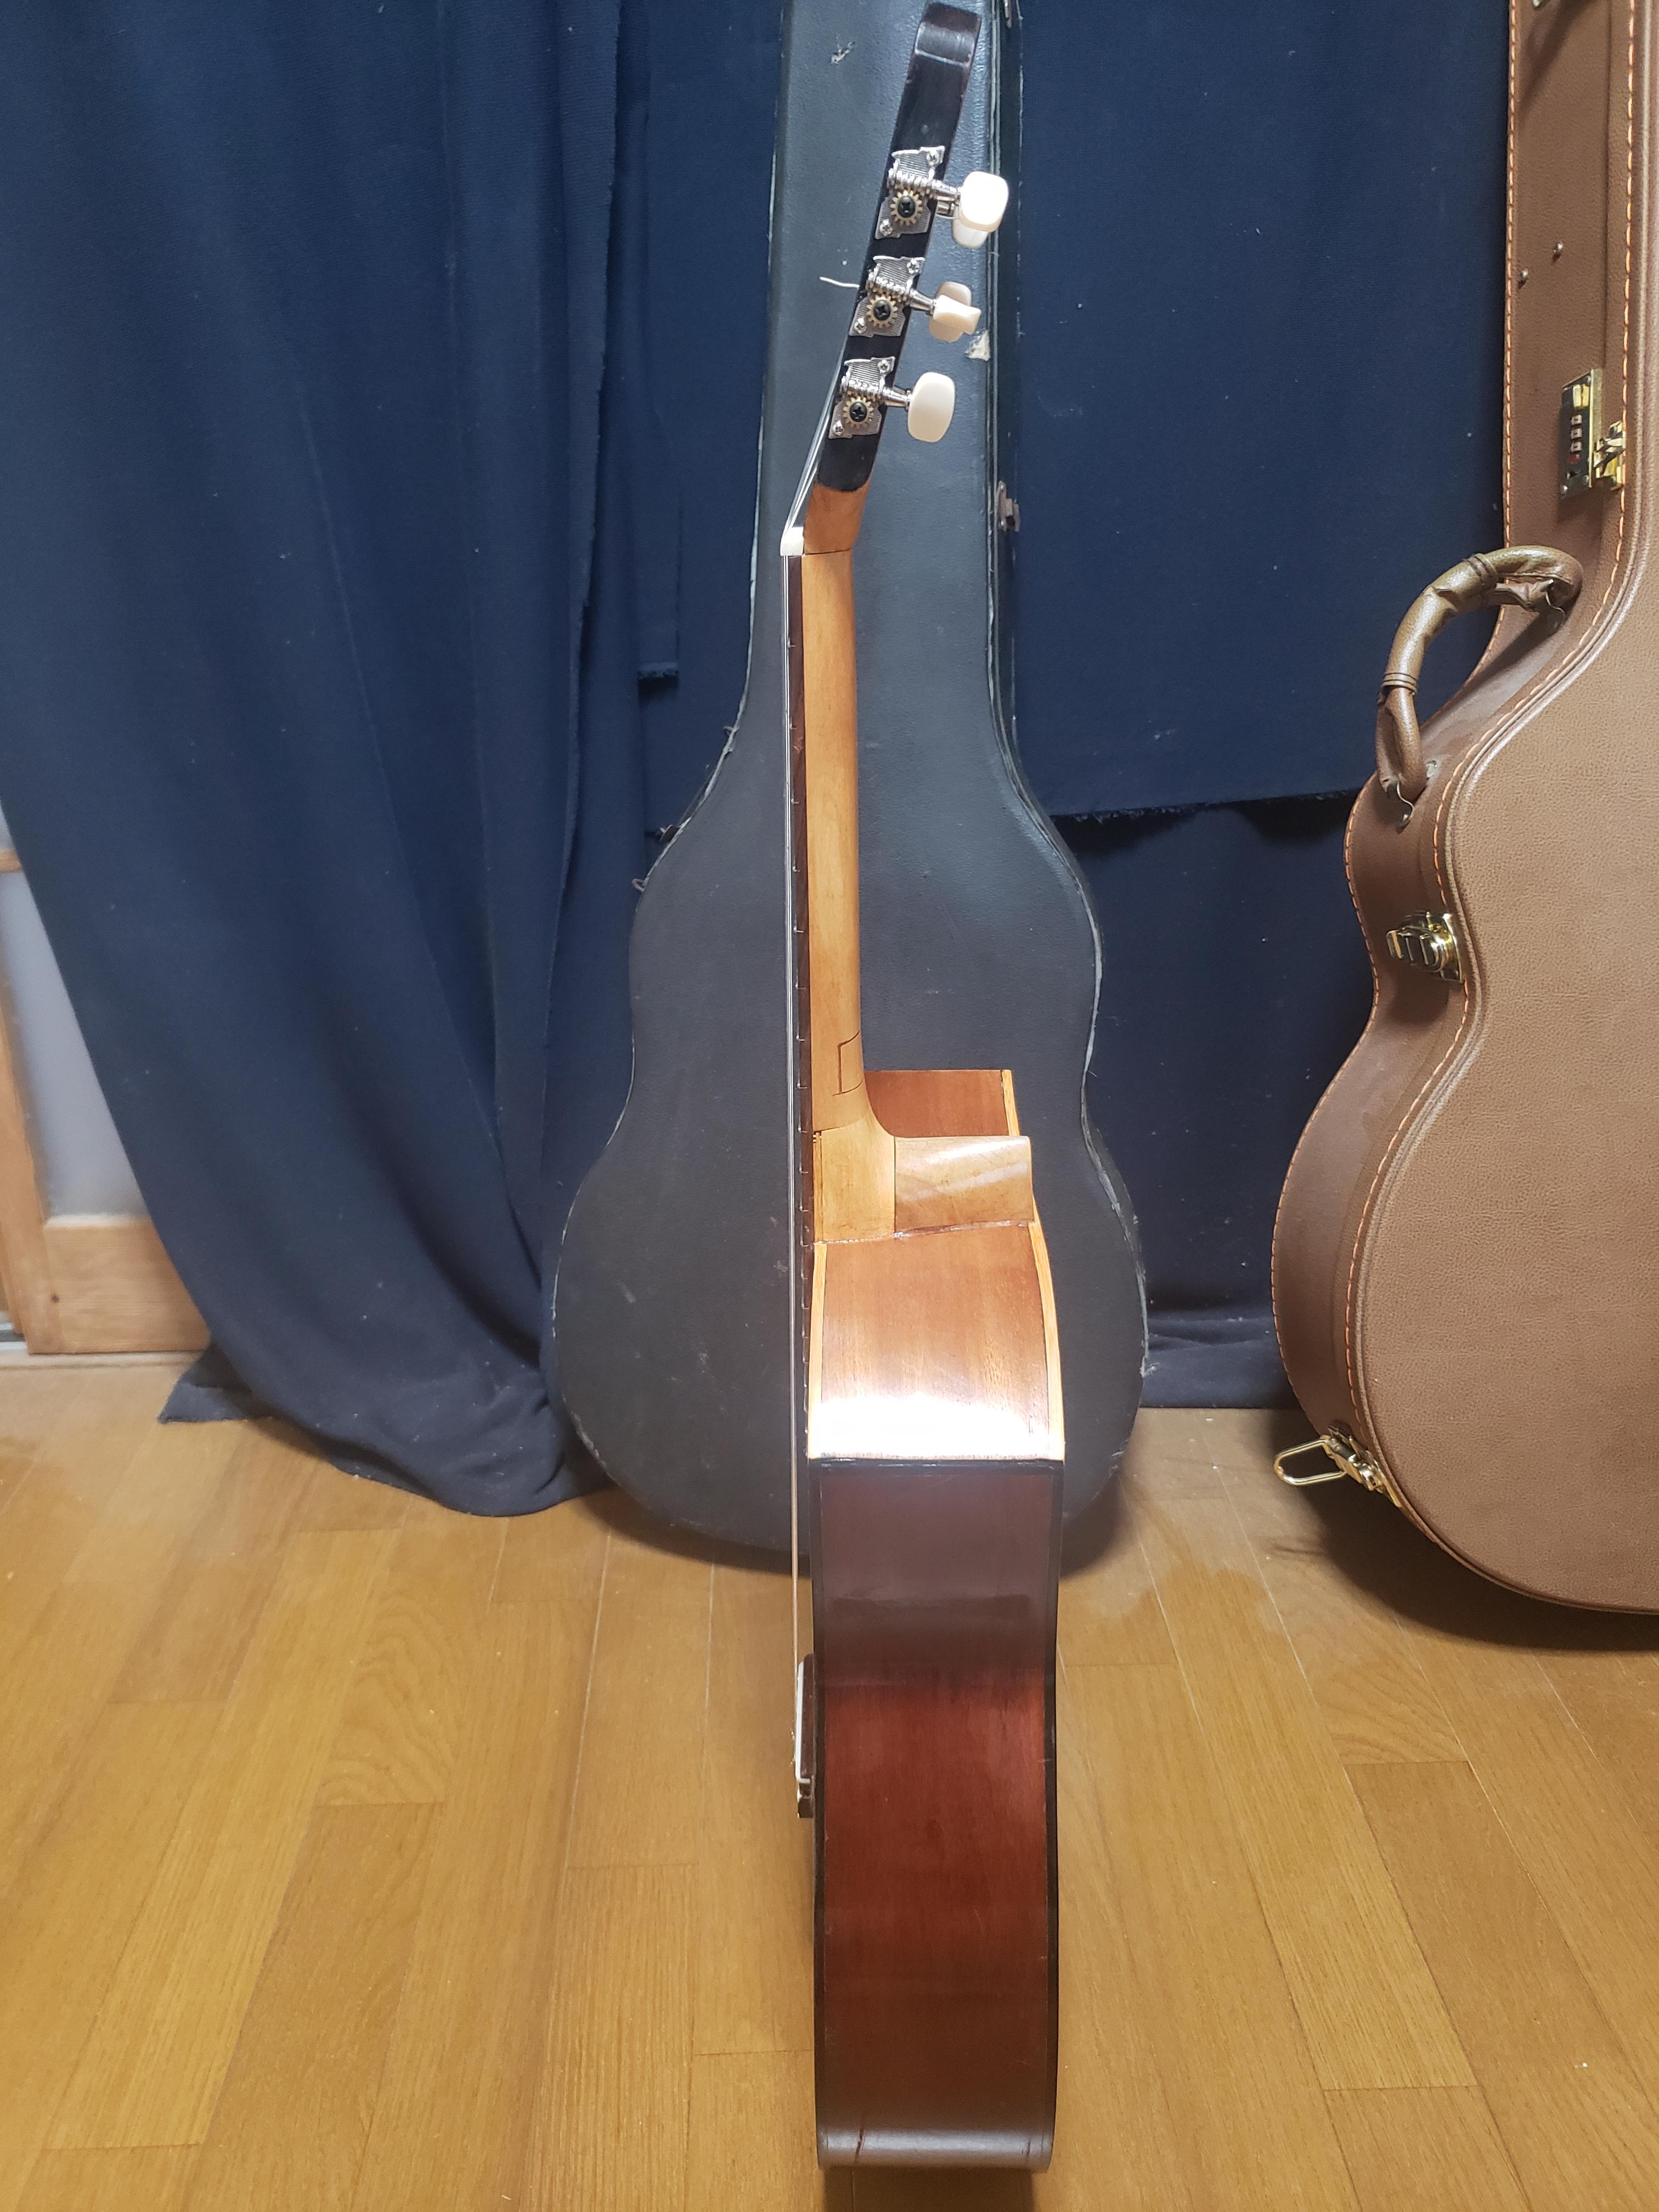
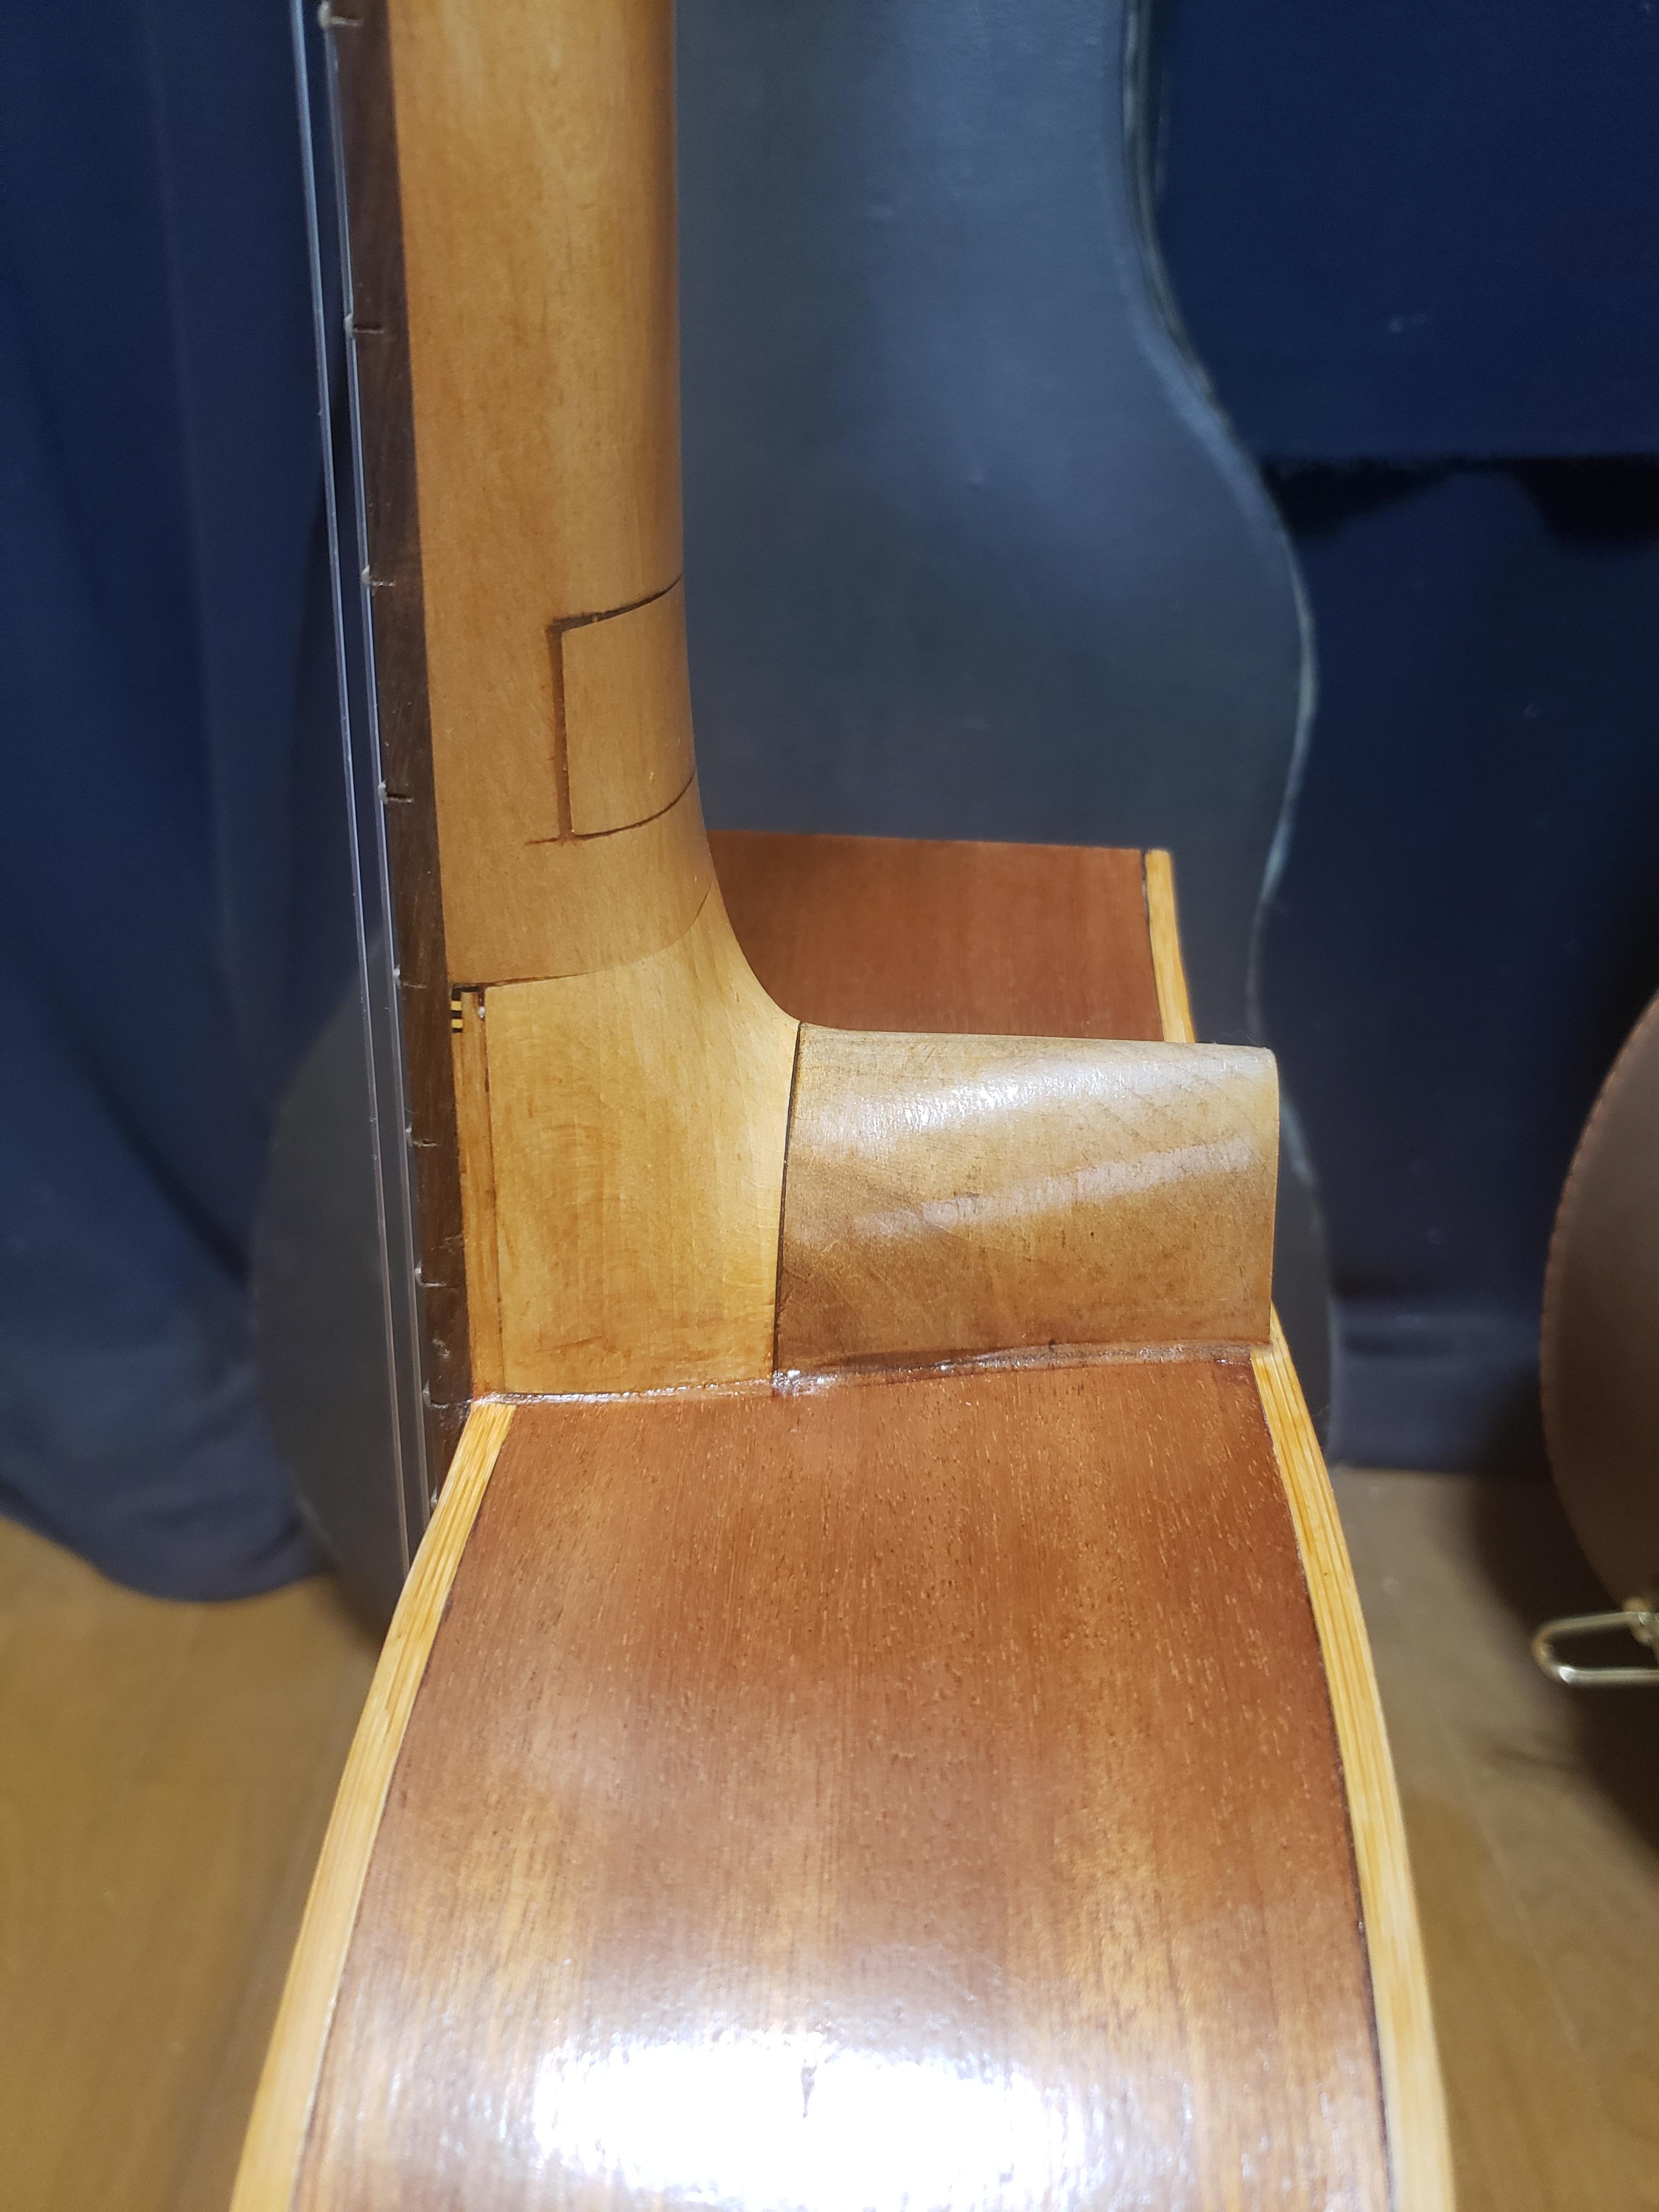
So, this is the final product. I'm calling it a "Frankenstein" terz guitar because it's hacked together from old parts (and also because I used bolts in its neck haha).
I'm pretty happy with how it turned out. There are probably a few things I would do differently if I did it again, but it's a playable instrument. I gave it the asymmetrical shape you can see in the pictures just for aesthetics and so that the contact point on your chest would be about the same as a normal guitar. But actually that sharp point kind of sticks into your sternum when you play it, so it may not have been a good idea. Otherwise, there are a lot of little things that you notice when it's your own project. It's fine.
As mentioned above, I don't really recommend this as a project for most people. Only people who like woodworking and want a terz guitar for some reason would like it. But it was a fun project. I hope at least someone has enjoyed seeing it. I'm going to try to add a video with it being played.