Conveyor Belt or Mini Assembly Line?
by Ufactory in Circuits > Arduino
5445 Views, 9 Favorites, 0 Comments
Conveyor Belt or Mini Assembly Line?

Hey guys, this instructable is going to take you through the installation of conveyor belt. If you got prior experience with uArm, it's good to try this conveyor belt. If no prior experience, it's totally fine and you can get to know both of them now! This simulated assembly line brings much more fun, let's see how the pick-place process works.
Things We Need

Hardware:
1. Conveyor Belt & Color Sensor * 1
2. uArm 30P Bottom Expansion Plate * 2
3. 12V Power Adapter * 1
4. USB Type C Cord * 2 & uArm Power Cord * 1
5. Target Object(Red&Green&Yellow Cube)* 1
6. Ultrasonic Sensor * 1
7. LCD * 1
8. Control Board * 1
9. Material Slide * 1 & Line Finder * 1
10. Connection Plate * 1
11. uArm Swift Pro Stator * 2
Software:
1. Arduino IDE
2. conveyor_belt.ino for Arduino Mega 2560
3. UArmSwiftPro_2ndUART.hex for uArm
Software Installation
1. Download the hex.
2. Download and extract XLoader.
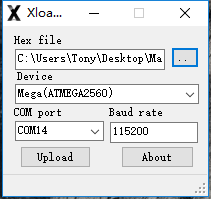
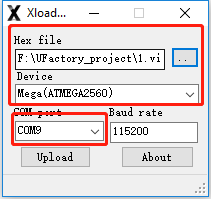
3. Open XLoader and select your uArm's COM port from the drop down menu on the lower left.
4. Select the appropriate device from the dropdown list titled "Device".
5. Check that Xloader set the correct baud rate for the device: 115200 for Mega (ATMEGA2560).
6. Now use the browse button on the top right of the form to browse your hex file.
7. Once your hex file is selected, click "Upload" The upload process generally takes about 10 seconds to finish. Once completed, a message will appear in the bottom left corner of XLoader telling you how many bytes were uploaded. If there was an error, it would show instead of the total bytes uploaded. Steps should be similar and may be done through the command prompt.
Install the Material Slide: Use Connection Plate to Connect the Stator and Material Slide

Install the UArm Stator (with Material Slide): Fix the UArm Stator on the Conveyor Belt

Install Ultrasonic Sensor: Fix the Ultrasonic Sensor on the Conveyor Belt

Install Main Control Board: Fix the Main Control Board on the Base of the Conveyor Belt

Install the UArm Stator: Fix Another Stator on the Conveyor Belt

Connect Ultrasonic Sensor: Insert the Ultrasonic Sensor Cord Into D10-D11 of the Main Control Board

Connect Line Finder: Insert the Line Finder Cord Into D12-D13 of the Main Control Board

Connect Color Sensor: Insert the Color Sensor Cord Into the IIC of the Main Control Board

Connect LCD: Insert the LCD Cord Into the IIC of the Main Control Board

Connect Conveyor Belt: Insert the Conveyor Belt Cord Into the Motor Drive of the Main Control Board

Install UArm Swift Pro: Place UArm Swift Pro on the Stator Tightly


Connect the COM of UArm Swift Pro: Use TYPE-C Cord to Connect UArm Swift Pro and Control Board

Connect the Power Supply of UArm Swift Pro: Link the Two Swift Pro to the Power Terminal

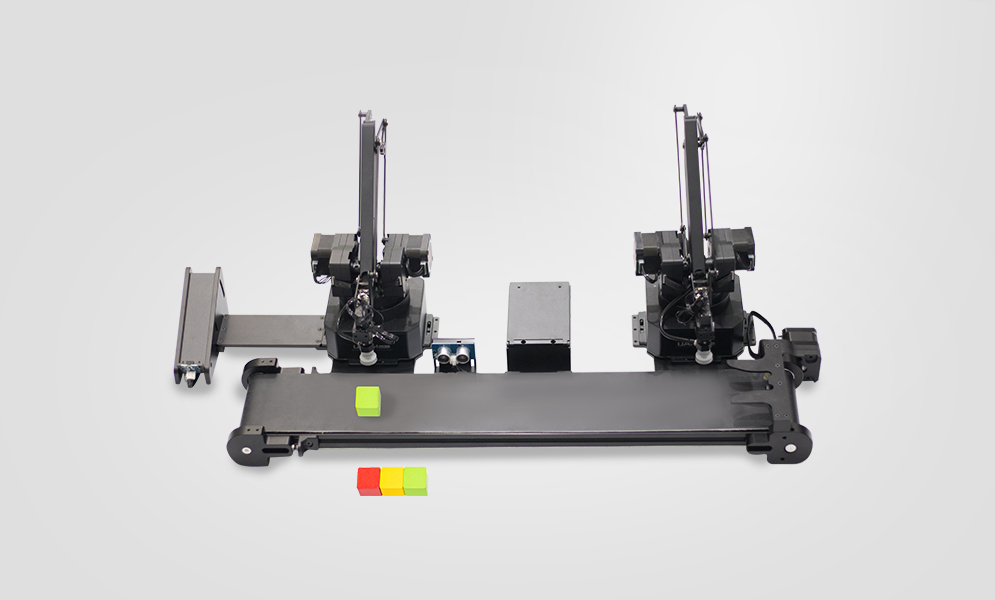
Overview

Operation

1. Press the uArm power button.
2. Use 12V power adapter to power up the whole system.
3. Press the reset button of the control panel to reset the system.
4. Place the color cube on the material slide and wait for uArm to pick it up.
Firmware Reset
In the first step, a special firmware for the conveyor belt is added to the uArm Swift Pro. uArm cannot be controlled by uArm Studio. If you want to control uArm using uArm Studio, please follow the following steps to restore the firmware.
1. Connect the uArm Swift Pro to your computer, open XLoader, and load swiftpro3.2.0.hex.
2. Click the "upload" button to upload the hex to uArm Swift Pro.
Firmware Re-written
The firmware Arduino Mega2560 has been set before it shipped. If the firmware need to be re-written, please refer to the following steps.
Firmware Re-written-1: Download Firmware
Download conveyor_belt.ino for Arduino Mega 2560
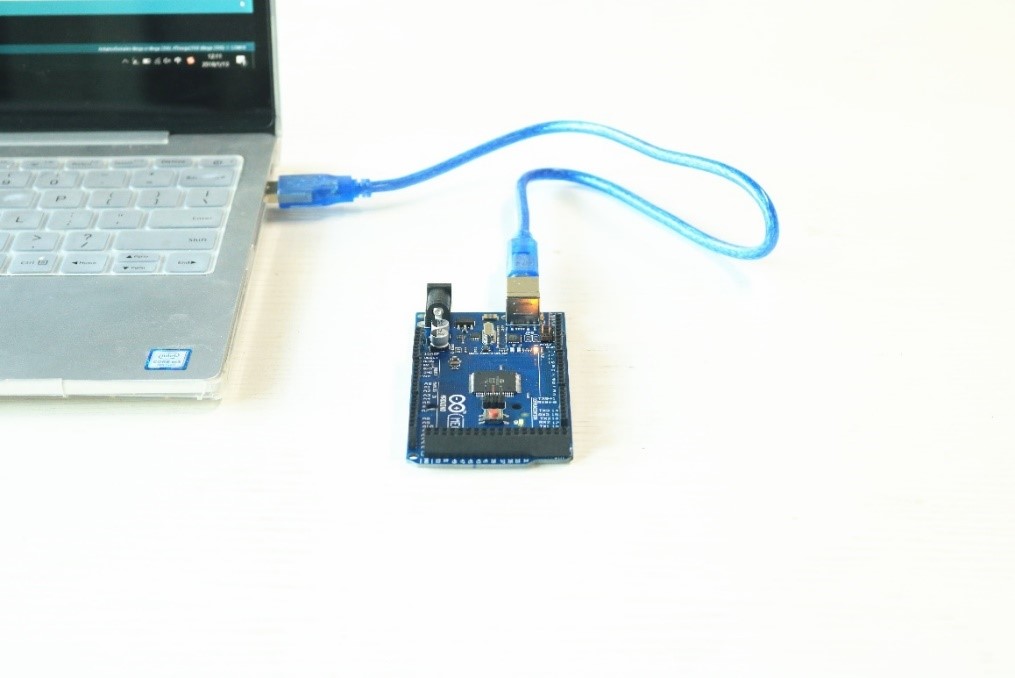
Firmware Re-written-2: Connect Mega2560 to the Computer Via USB Cable
Firmware Re-written-3: Download External Libraries and Import the Library
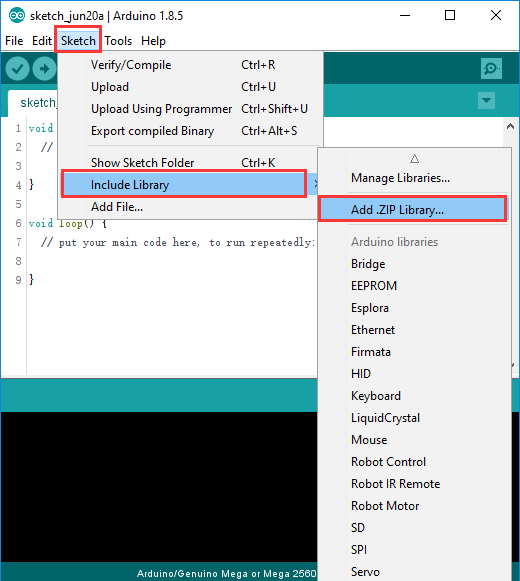
Download External libraries and import the library.
Firmware Re-written-4: Open Firmware in the Arduino IDE
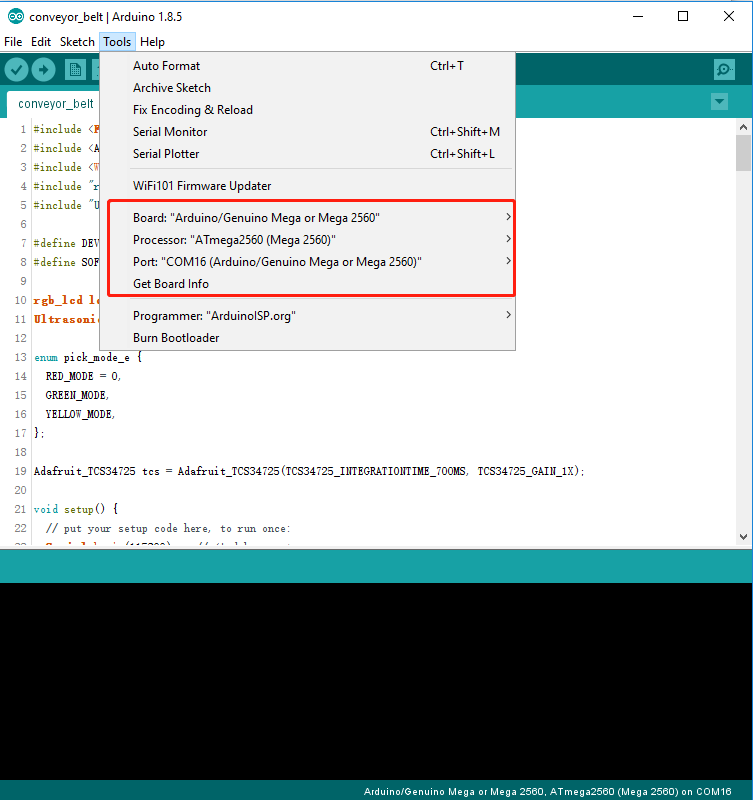
Firmware Re-written-4: Send the Firmware to Arduino Mega2560 With the Parameters

Ok, that's how it works. Thanks for your interests in reading my instructables about how to install the conveyor belt.
Hope you enjoy the playing with uArm and Conveyor Belt! _______________________________________________________
Created by UFACTORY Team
Email: info@ufactory.cc
Facebook: @Ufactory2013
Official web: www.ufactory.cc