Copper City Skyline Wall Art
by thekites in Living > Decorating
9565 Views, 375 Favorites, 0 Comments
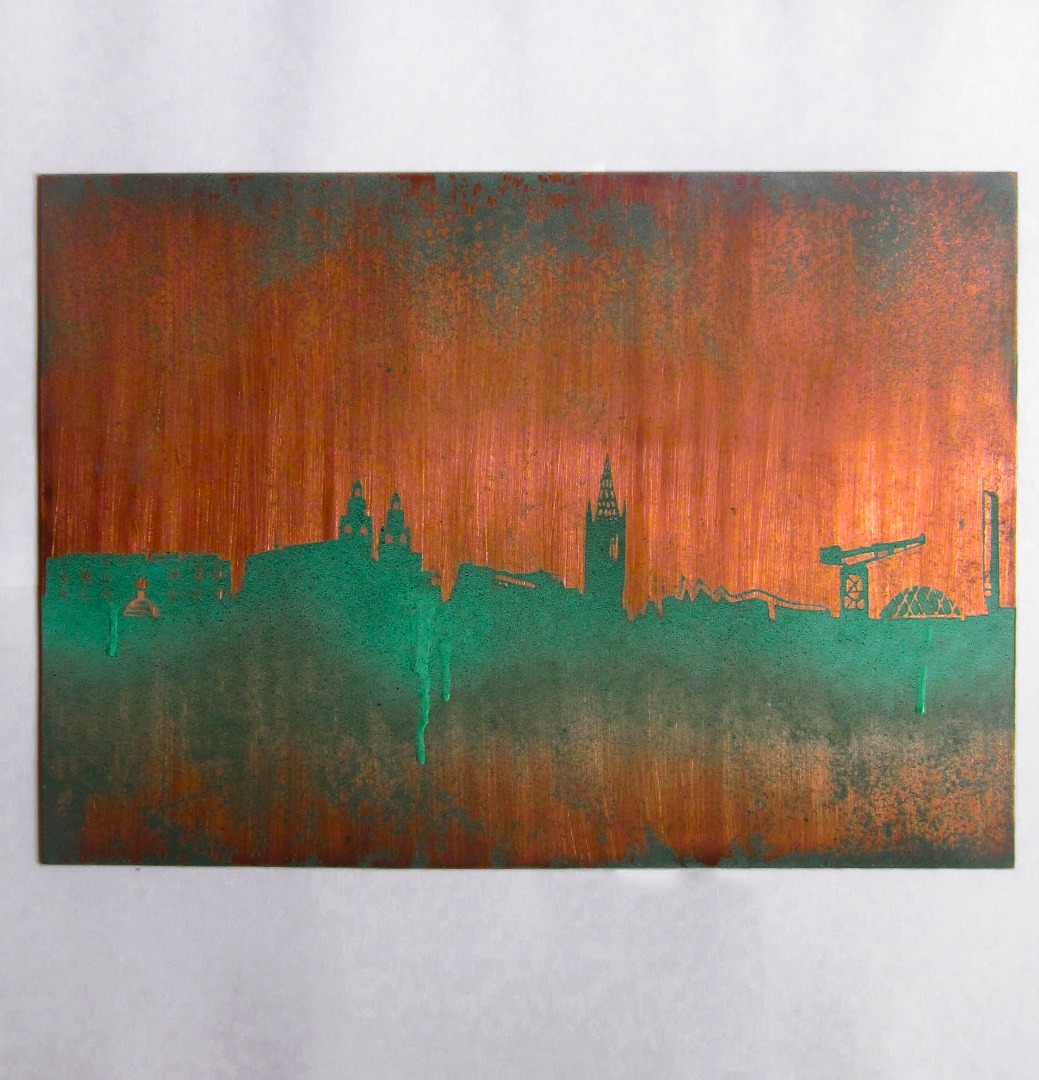
Copper City Skyline Wall Art


I am moving away from my home of the past five years, Glasgow. As a result I have been feeling very sentimental and thought that I would make something to hang on the wall and remind me of my favourite city! I chose copper as the material for this project because the colours fit so well with two prominent features of the city's architecture: sandstone tenements and copper rooftops.
Although I would have liked to use a real patina to colour the turquoise skyline, I discovered by trial and error that the crust which was formed when the copper was exposed to oxidising chemicals (I used Miracle Gro) was very brittle, and crumbled off the sheet. The technique also produced a fairly low resolution silhouette which was missing lots of fine details. To fix these problems, I used a combination of spray paint, acrylic paint and sponges to create a fake patina.
Creating Your Skyline


If you are making a skyline of New York or a similarly famous city, you should have no issues in finding a pre-made high resolution silhouette of your city's skyline. If this is the case, feel free to skip onto the next step!
Sadly Glasgow is yet to reach the same levels of fame, so I had to make my own silhouette. However, this meant I could choose what buildings I wanted to include, which makes the whole thing much more personal!
I have attached the Illustrator file and a JPEG incase you want to use to use this one.
To make my silhouette I used Adobe Photoshop and Illustrator.
1. Use Google Images to find a large image with as clearly defined edges as possible. Use search tools to order by largest images first.
2. Save the image and open it up with Photoshop (free software such as Gimp could also be used)
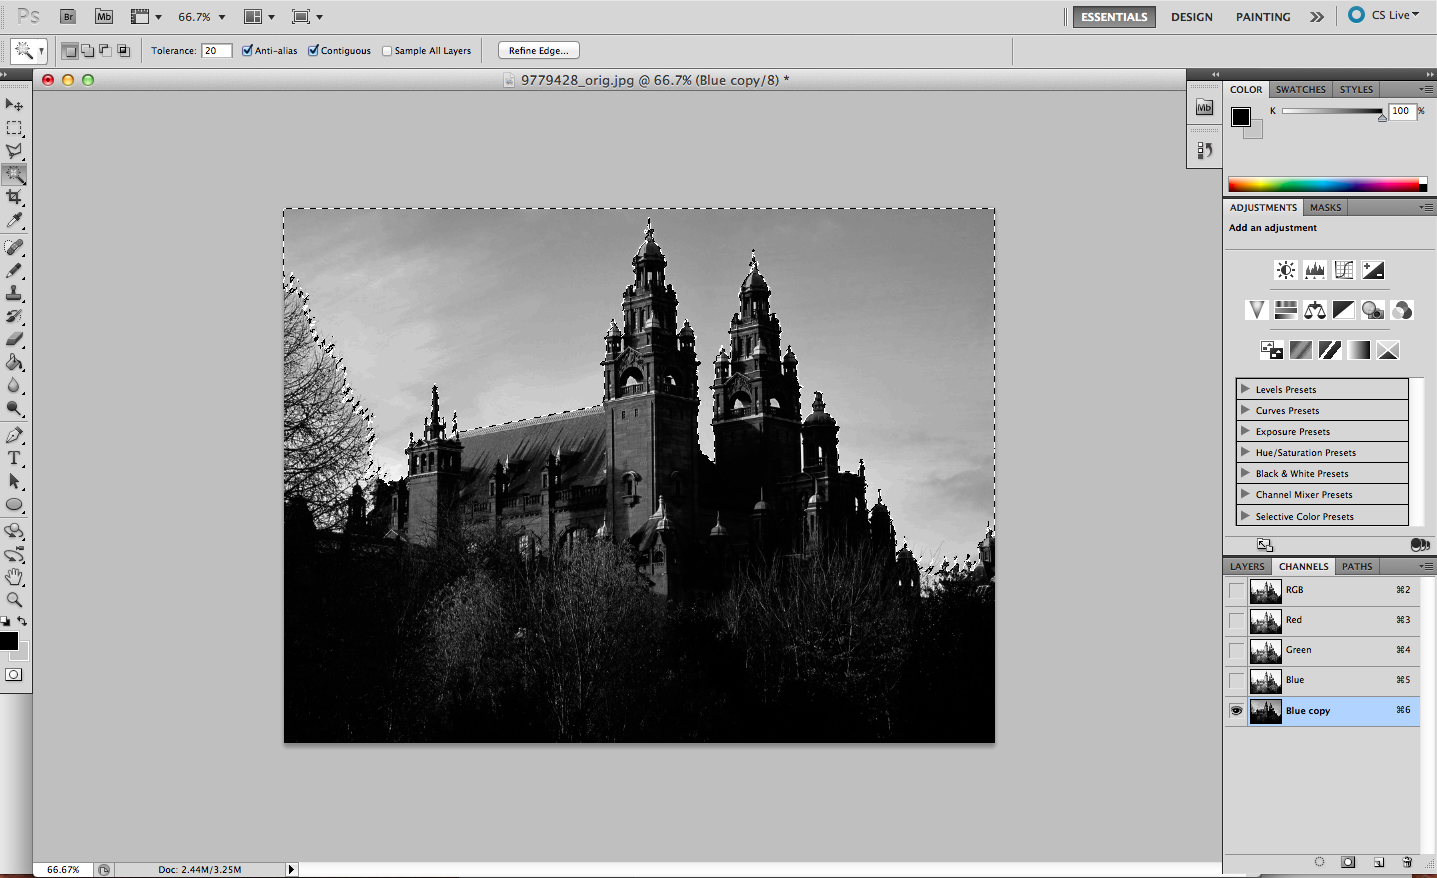
3. Make the photo black and white (Image/Adjustments/Black & White), then mess about with Brightness and Contrast settings until you have something approximating a silhouette. It may be helpful to select and delete the sky using the Magic Wand tool. We will be neatening up all our buildings later using Illustrator, but try and get your image as well defined as possible.
4. Repeat this process for all the buildings you want to include in your skyline, then create a new image and Place each building. Arrange the layers into the desired silhouette, then save and open up the .PSD file in Illustrator.
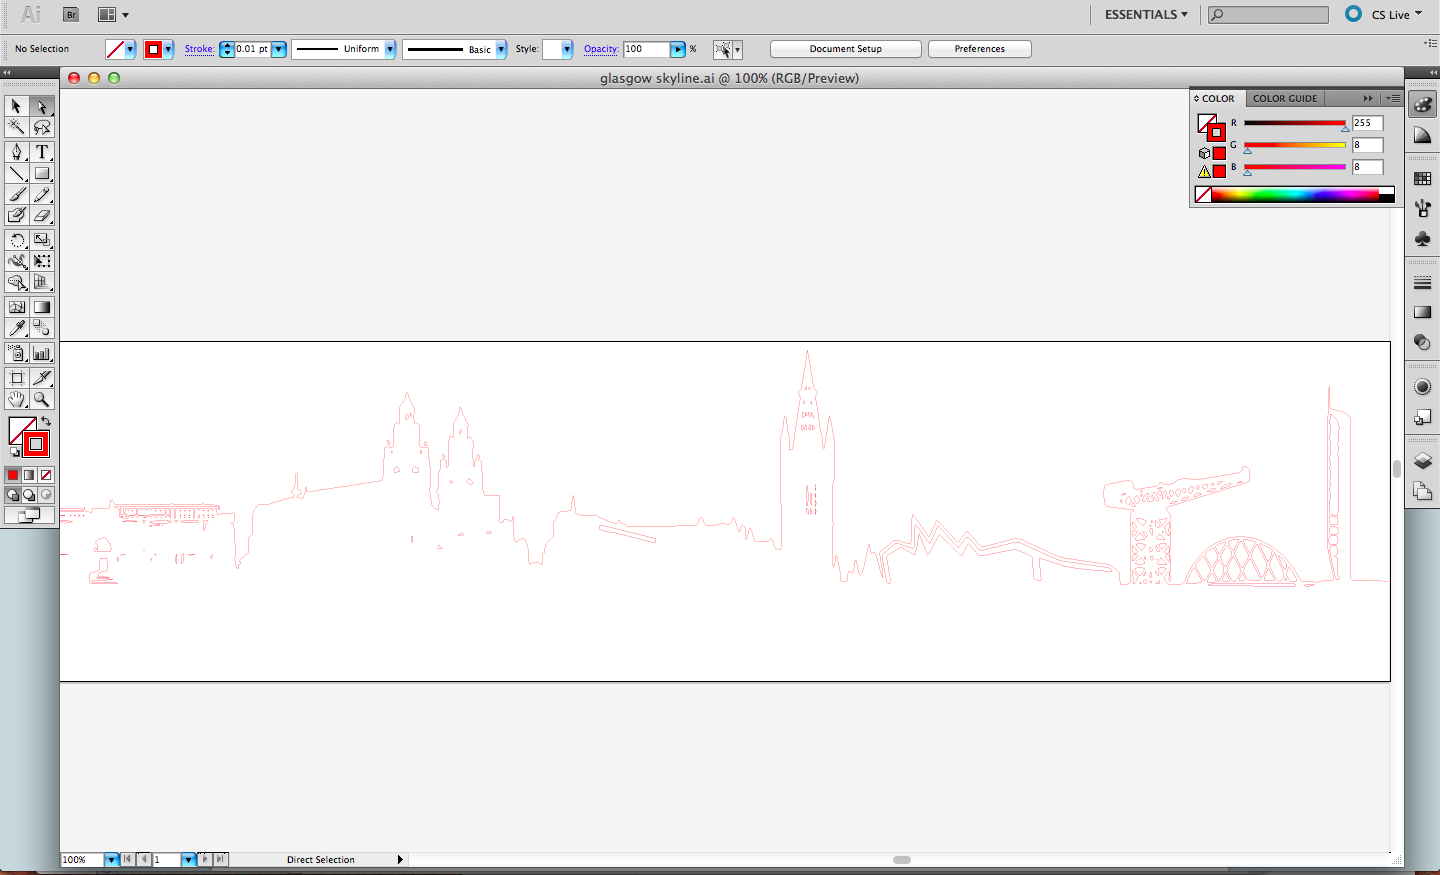
5. Do a live trace of your skyline (Object/Live Trace/Make). This step required a lot of faffing for me, as I kept having to edit my Photoshop image in order to further increase the contrast, or simplify the image in order for the Live Trace to be able to pick up the details. Play about with the Live Trace thresholds to change the level of detail of the trace and get it looking how you want it.
6. Expand the trace (Object/Live Trace/ Expand). You need to get your silhouette in the form of an outline to allow the vinyl or laser cutter to cut out your cityscape. To do this, change the stroke colour of the expanded image to red, and the thickness to 0.01pt. Now deselect the image, then click on the black part of the image. Select similar fill colour (Select/Same/Fill Colour) and press delete. This leaves you with a red outline of your skyline.
Downloads
Weathering the Background


If your sheet of copper has a dull appearance, you can bring the shine back to it using a sponge and a can of coke. I then sanded my sheet in a uniform direction to give the copper a 'tooth' which would pick up the light. I added some scratches using a screwdriver, but any metal tool should work for this.
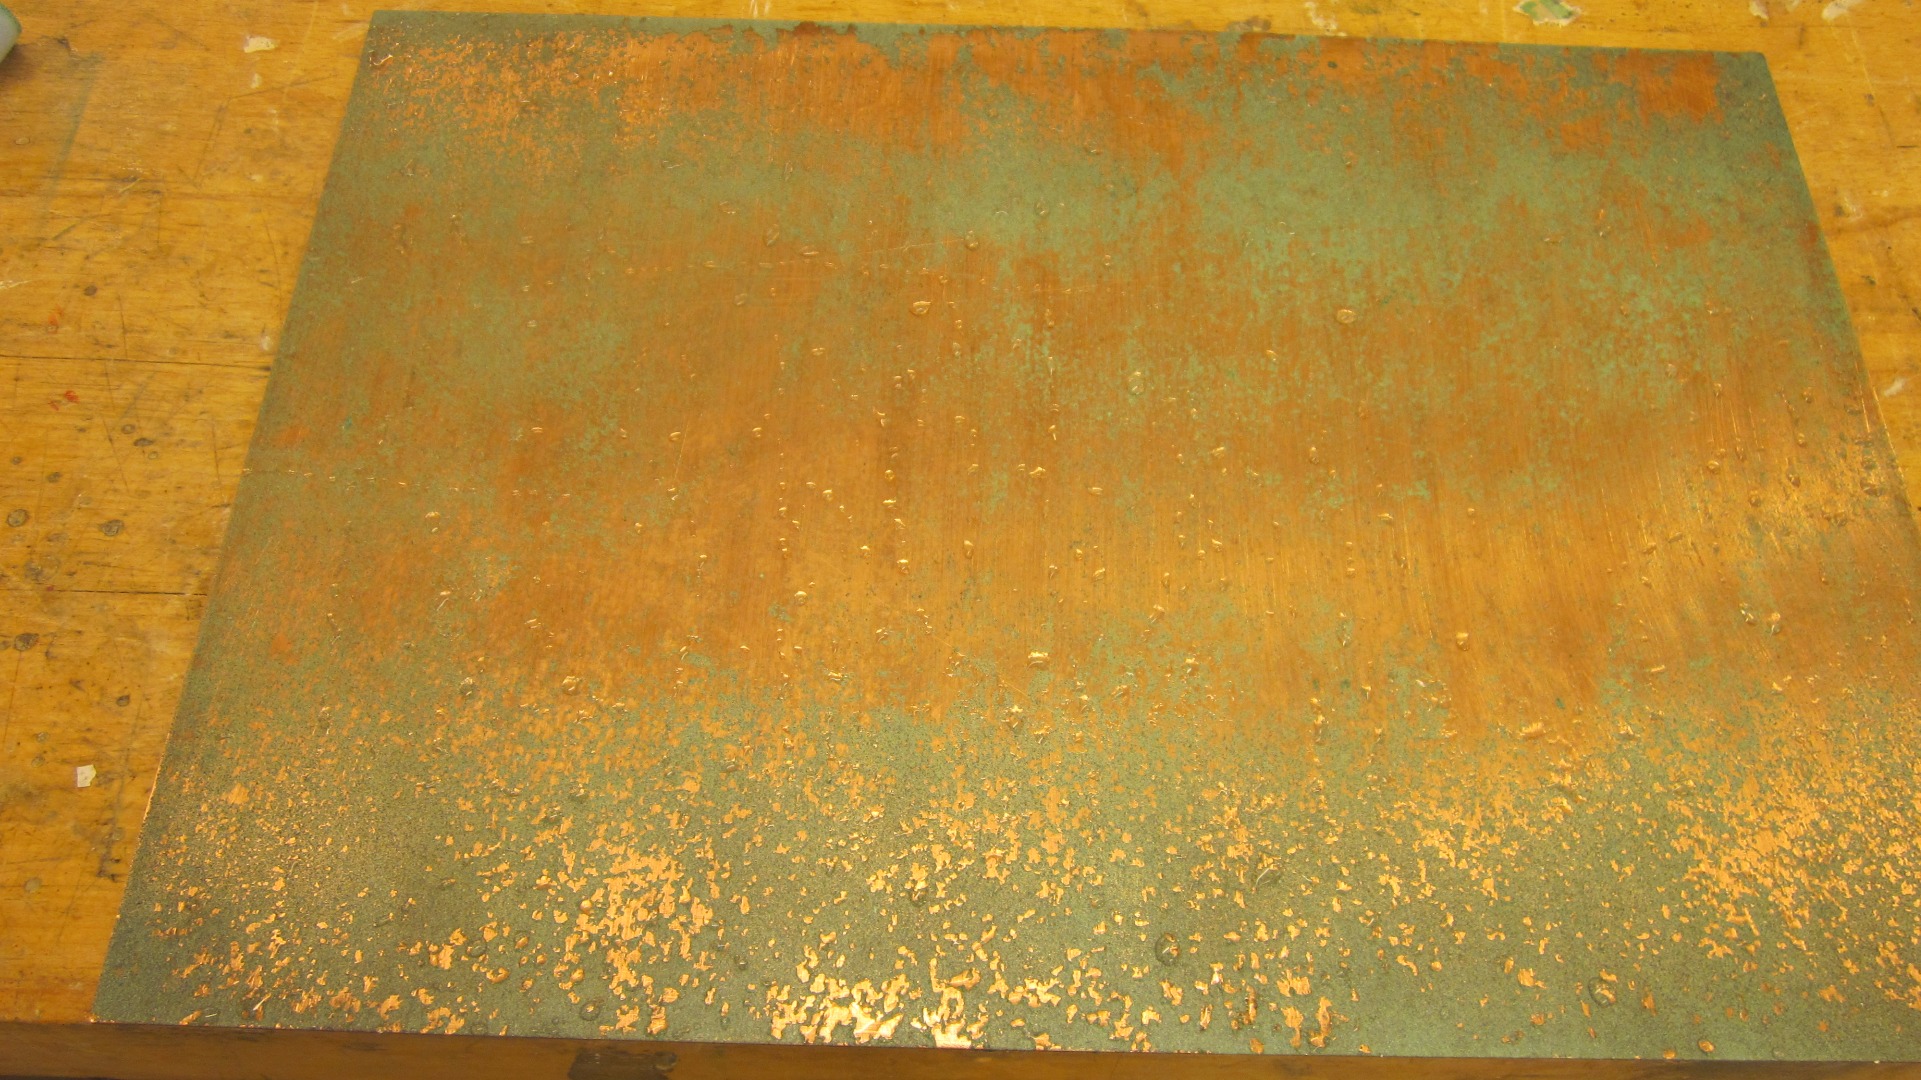
When you have the level of wear that you want, its time to add a light background patina. Spray the entire sheet with a dusting of wax such as Pledge Dust and Protect. This will stop the spray paint sticking to the copper in the patches which contain wax, and leads to a mottled effect.
Once the wax has been sprayed on, gather your colours. I used a light turquoise, dark green, brown and then a very light dusting of dark purple. Hold the cans at least 30cm away from the sheet and cover the entire piece. Aim for an uneven distribution of colour, with some darker patches.
Now take your copper over to a tap and rinse. The majority of the paint will wash away, leaving you with your patina. Seal the paint with a spray lacquer to prevent chips.
Cutting and Placing the Stencil


If you have access to a vinyl cutter, use this to reproduce the silhouette on sticky-backed vinyl. If not, a laser cutter could be used to cut the shape out of thick card, but this would then have to be stuck down carefully onto the copper sheet, and may not give you a very clean edge. The shape could also be transferred onto a light coloured vinyl using carbon paper, and then hand-cut, but this would be a time consuming process!
Once you have your cut silhouette, remove the 'buildings' part of the vinyl, as this makes it easier to visualise which parts you want to transfer onto your metal sheet as a protective mask.
You will now have the 'sky' portion of your scene. I experimented with trying to transfer this onto the copper in a one-r using transfer tape, but the transfer tape was stickier than the copper and so failed to deposit the sticker on the surface. So in the end I just did it by hand which was a faff. Let me know if you have more luck!
Mask off any exposed 'sky' with newspaper to protect it while you spray the skyline.
Spraying and Finishing Touches


For the skyline, you want a much bolder appearance than with the background patina. I used a light turquoise and dark green. Hold the cans slightly closer to the copper than you did for the background, to give you greater control. Again, aim to create a non-uniform distribution of colour for a more realistic patina.
If you want drip marks, spray some turquoise paint into the lid and pour it onto your flat sheet. Carefully tilt the sheet to get the length of drip mark that you want. To blend the drip marks in, simply respray the source of the drip with turquoise paint, then add a dusting of dark green.
Now for the best bit. Wait about 10 minutes, and then begin peeling off the vinyl. Use a scalpel for any finicky bits. If any details are not defined enough for your liking, the paint can be carefully scratched off where desired. I did this for some of the windows on buildings.
And you're done! To hang your piece, mark off a hole at each top corner, then secure the sheet and drill using an electric drill.