Create a Hands-Free Computer Mouse With Your Eyes & Muscle
by Upside Down Labs in Circuits > Sensors
2176 Views, 18 Favorites, 0 Comments
Create a Hands-Free Computer Mouse With Your Eyes & Muscle
.gif)
Have you ever wished you could move your cursor just by turning your head, click using a blink, or trigger a command with a simple jaw clench?
In this project, we build a hands-free Human-Computer Interface (HCI) mouse using the Neuro-PlayGround Lite (NPG Lite). By combining head tracking, eye signals, and muscle signals, the computer can be controlled without touching a mouse at all.
This setup uses:
- IMU motion sensing for cursor movement
- EOG signals for blinks and click actions
- EMG signals for jaw clench commands
The result is a wireless Bluetooth-based control system that feels intuitive, practical, and fun to use.
NOTE : This project is made by Varun Adinath Patil.
Watch the complete tutorial for this project on YouTube.
Supplies
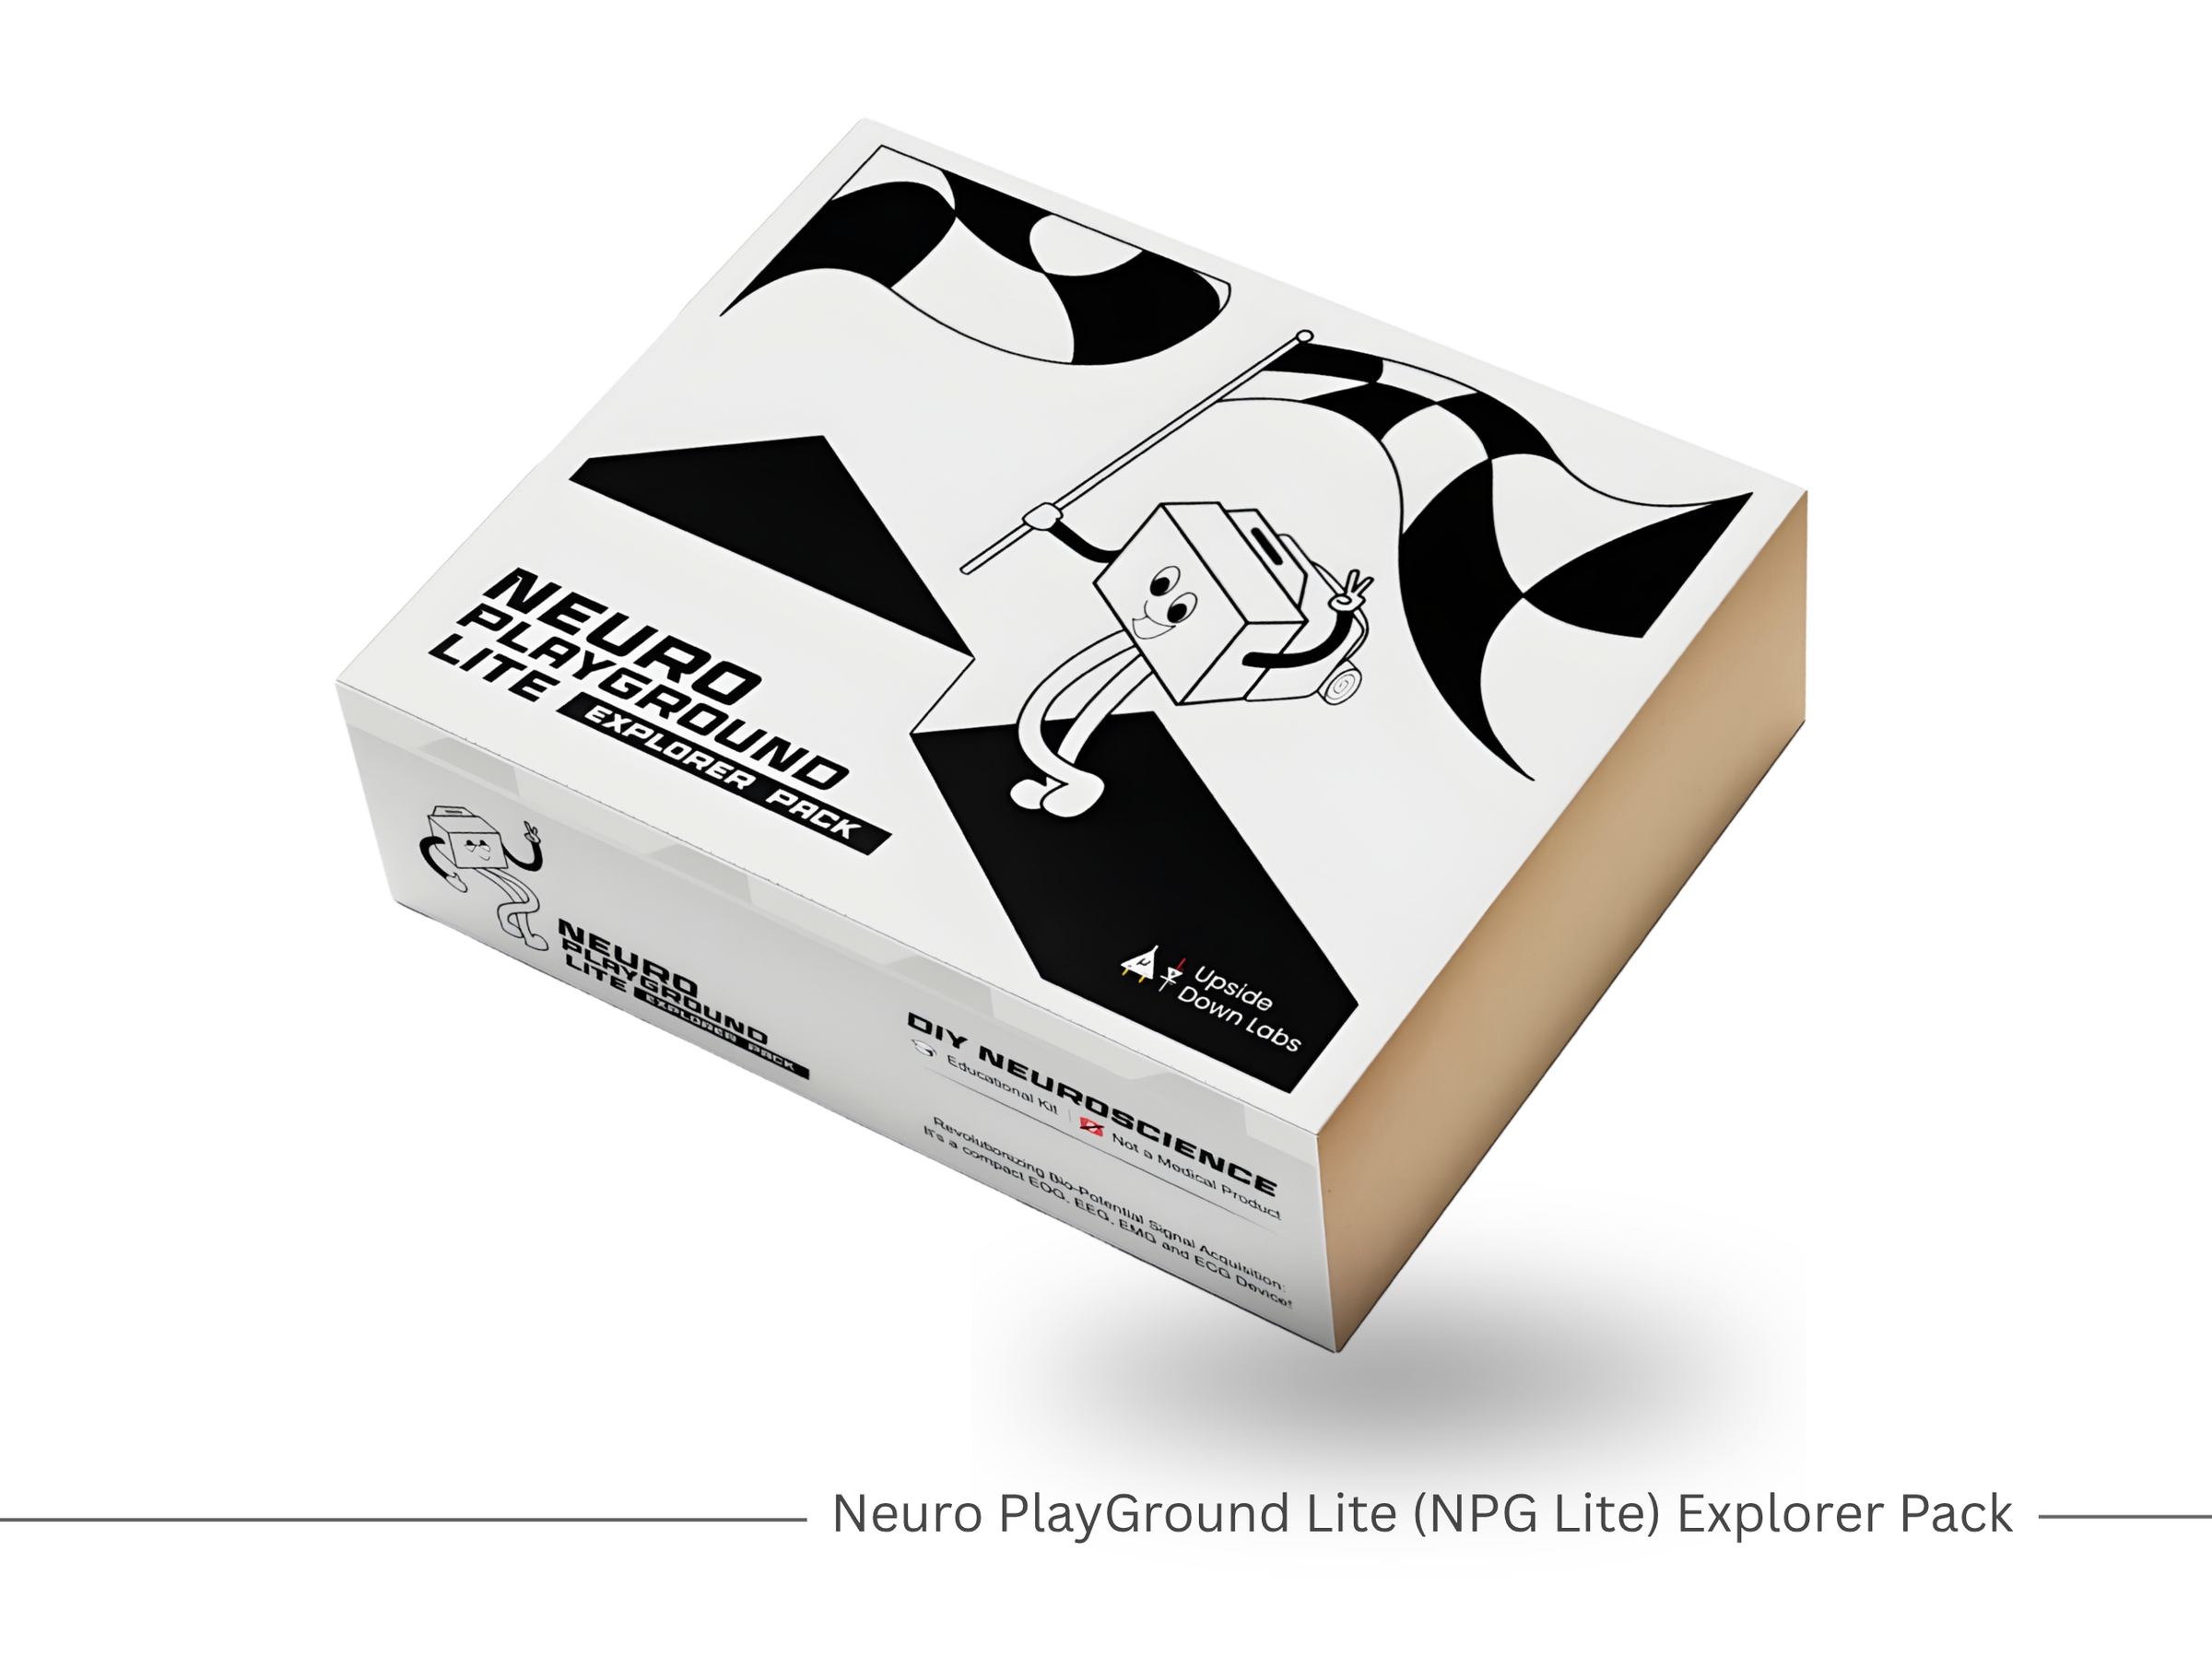
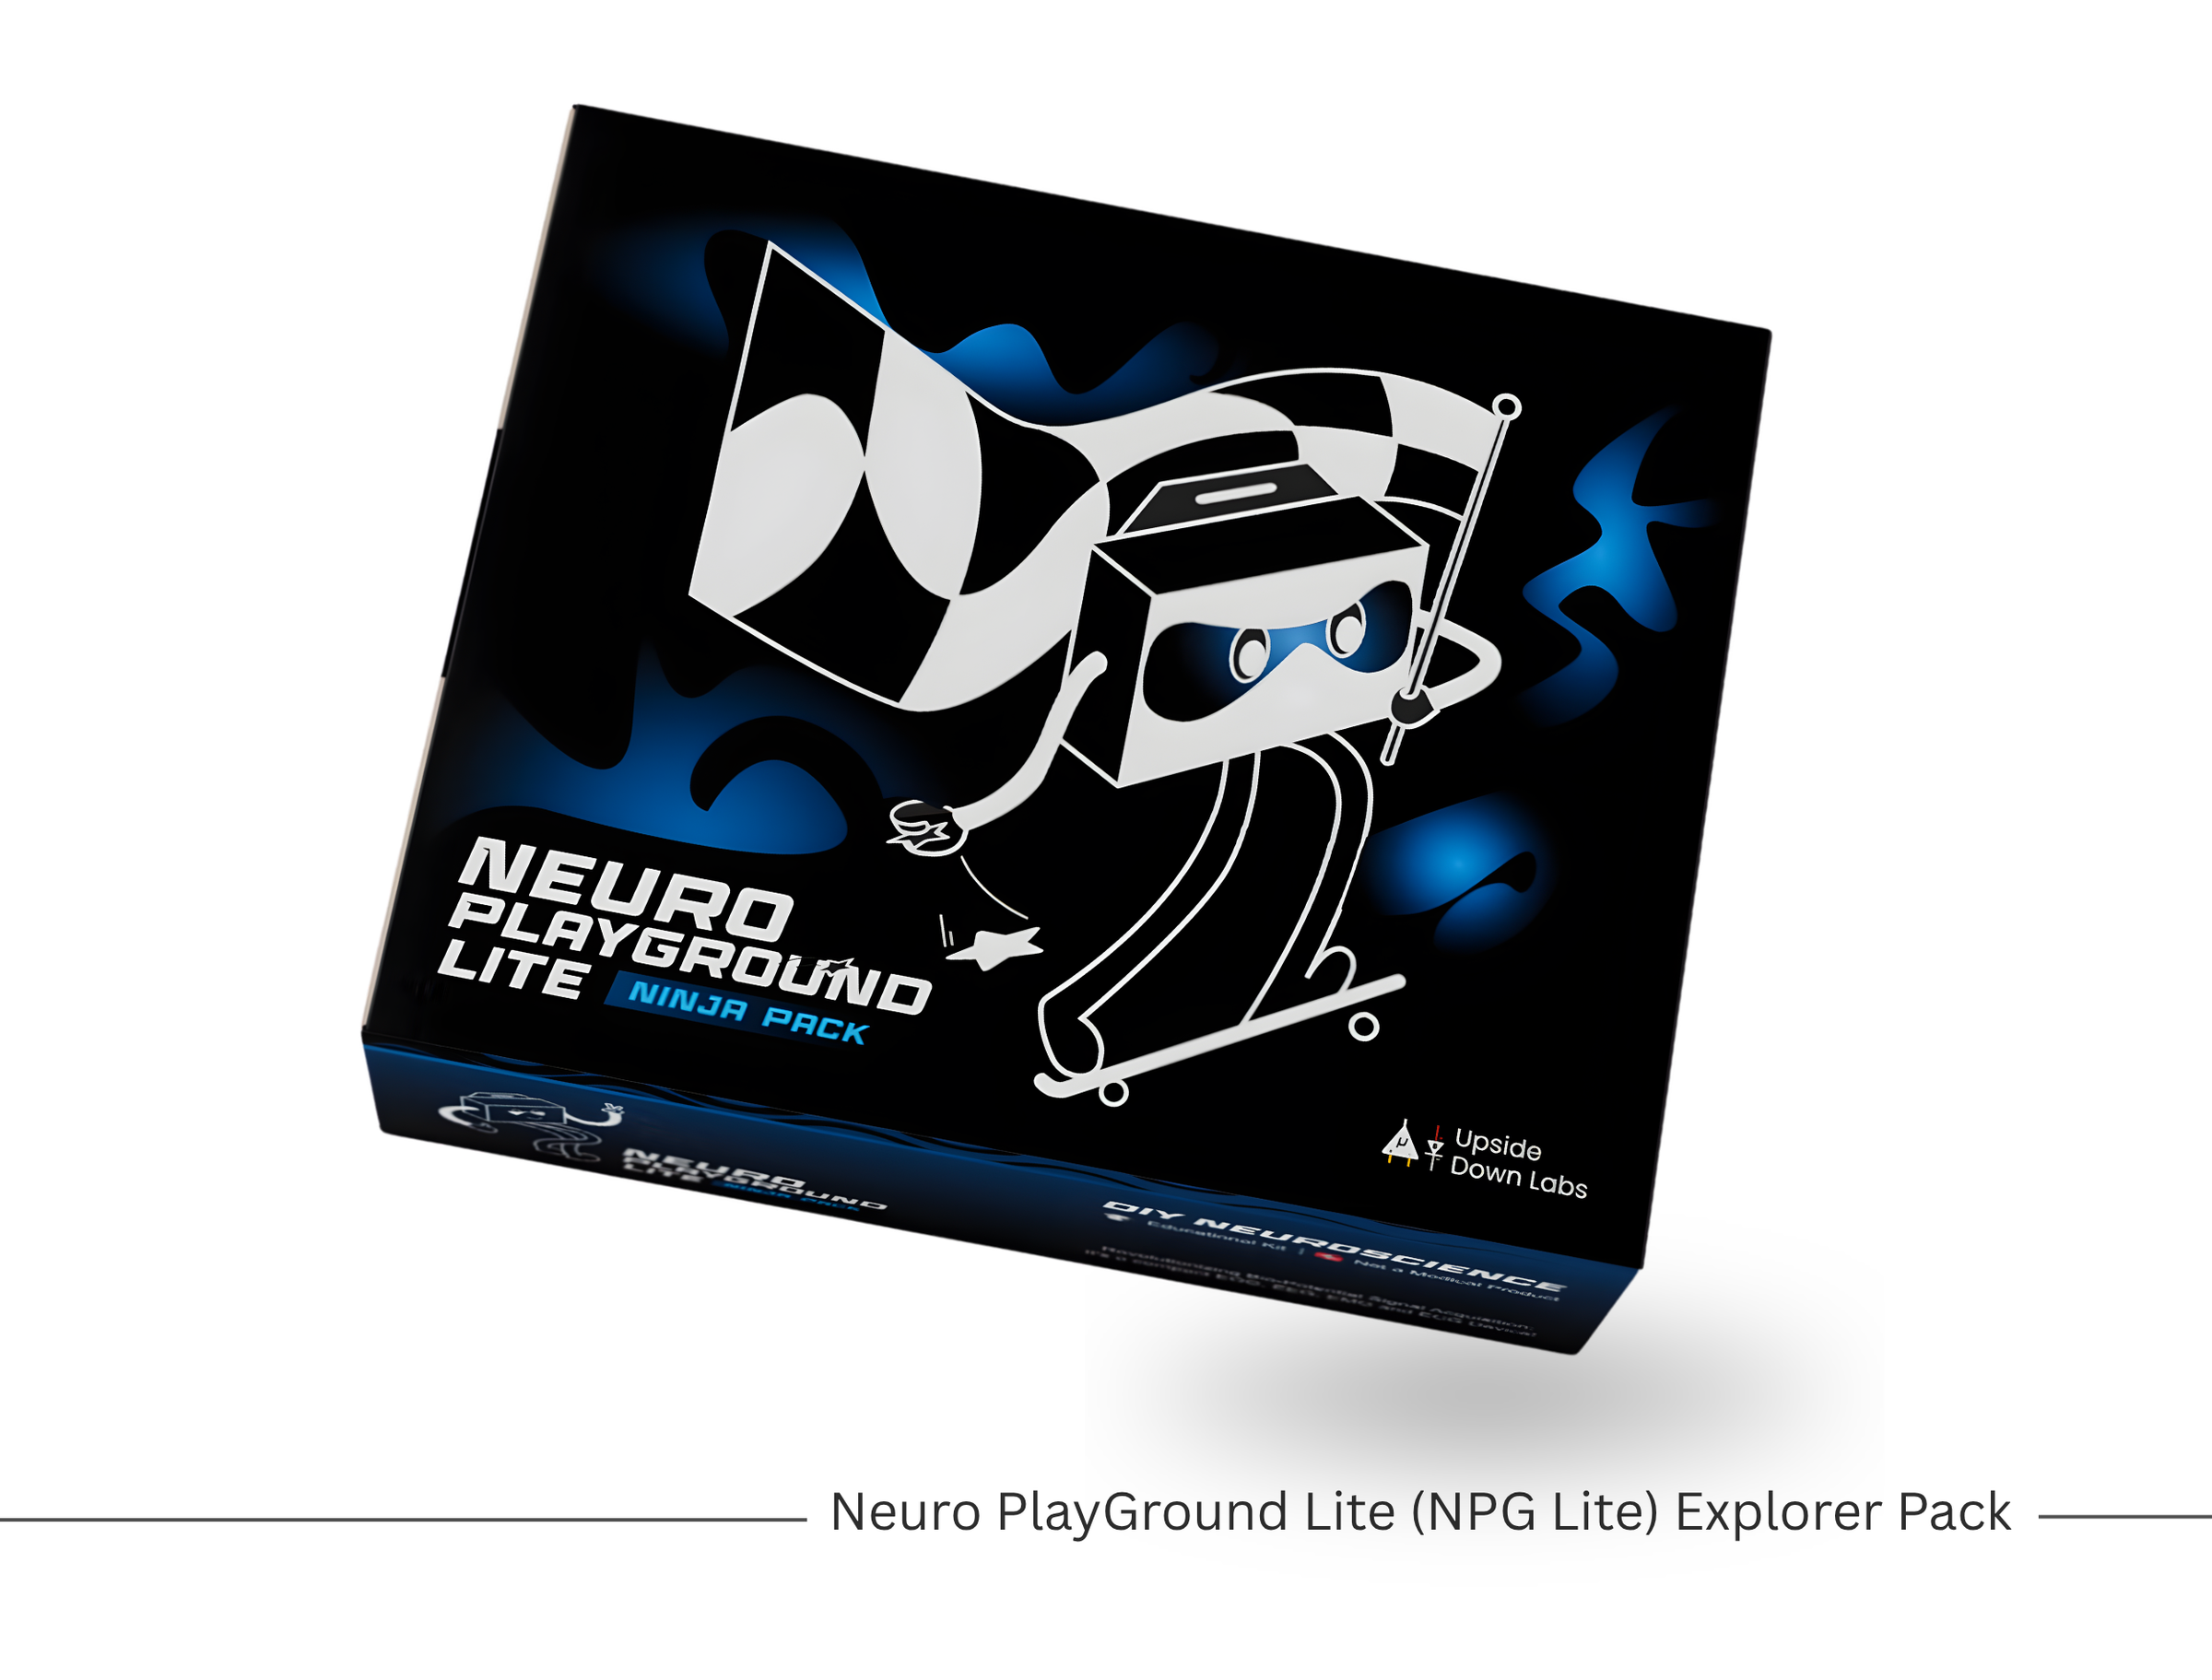
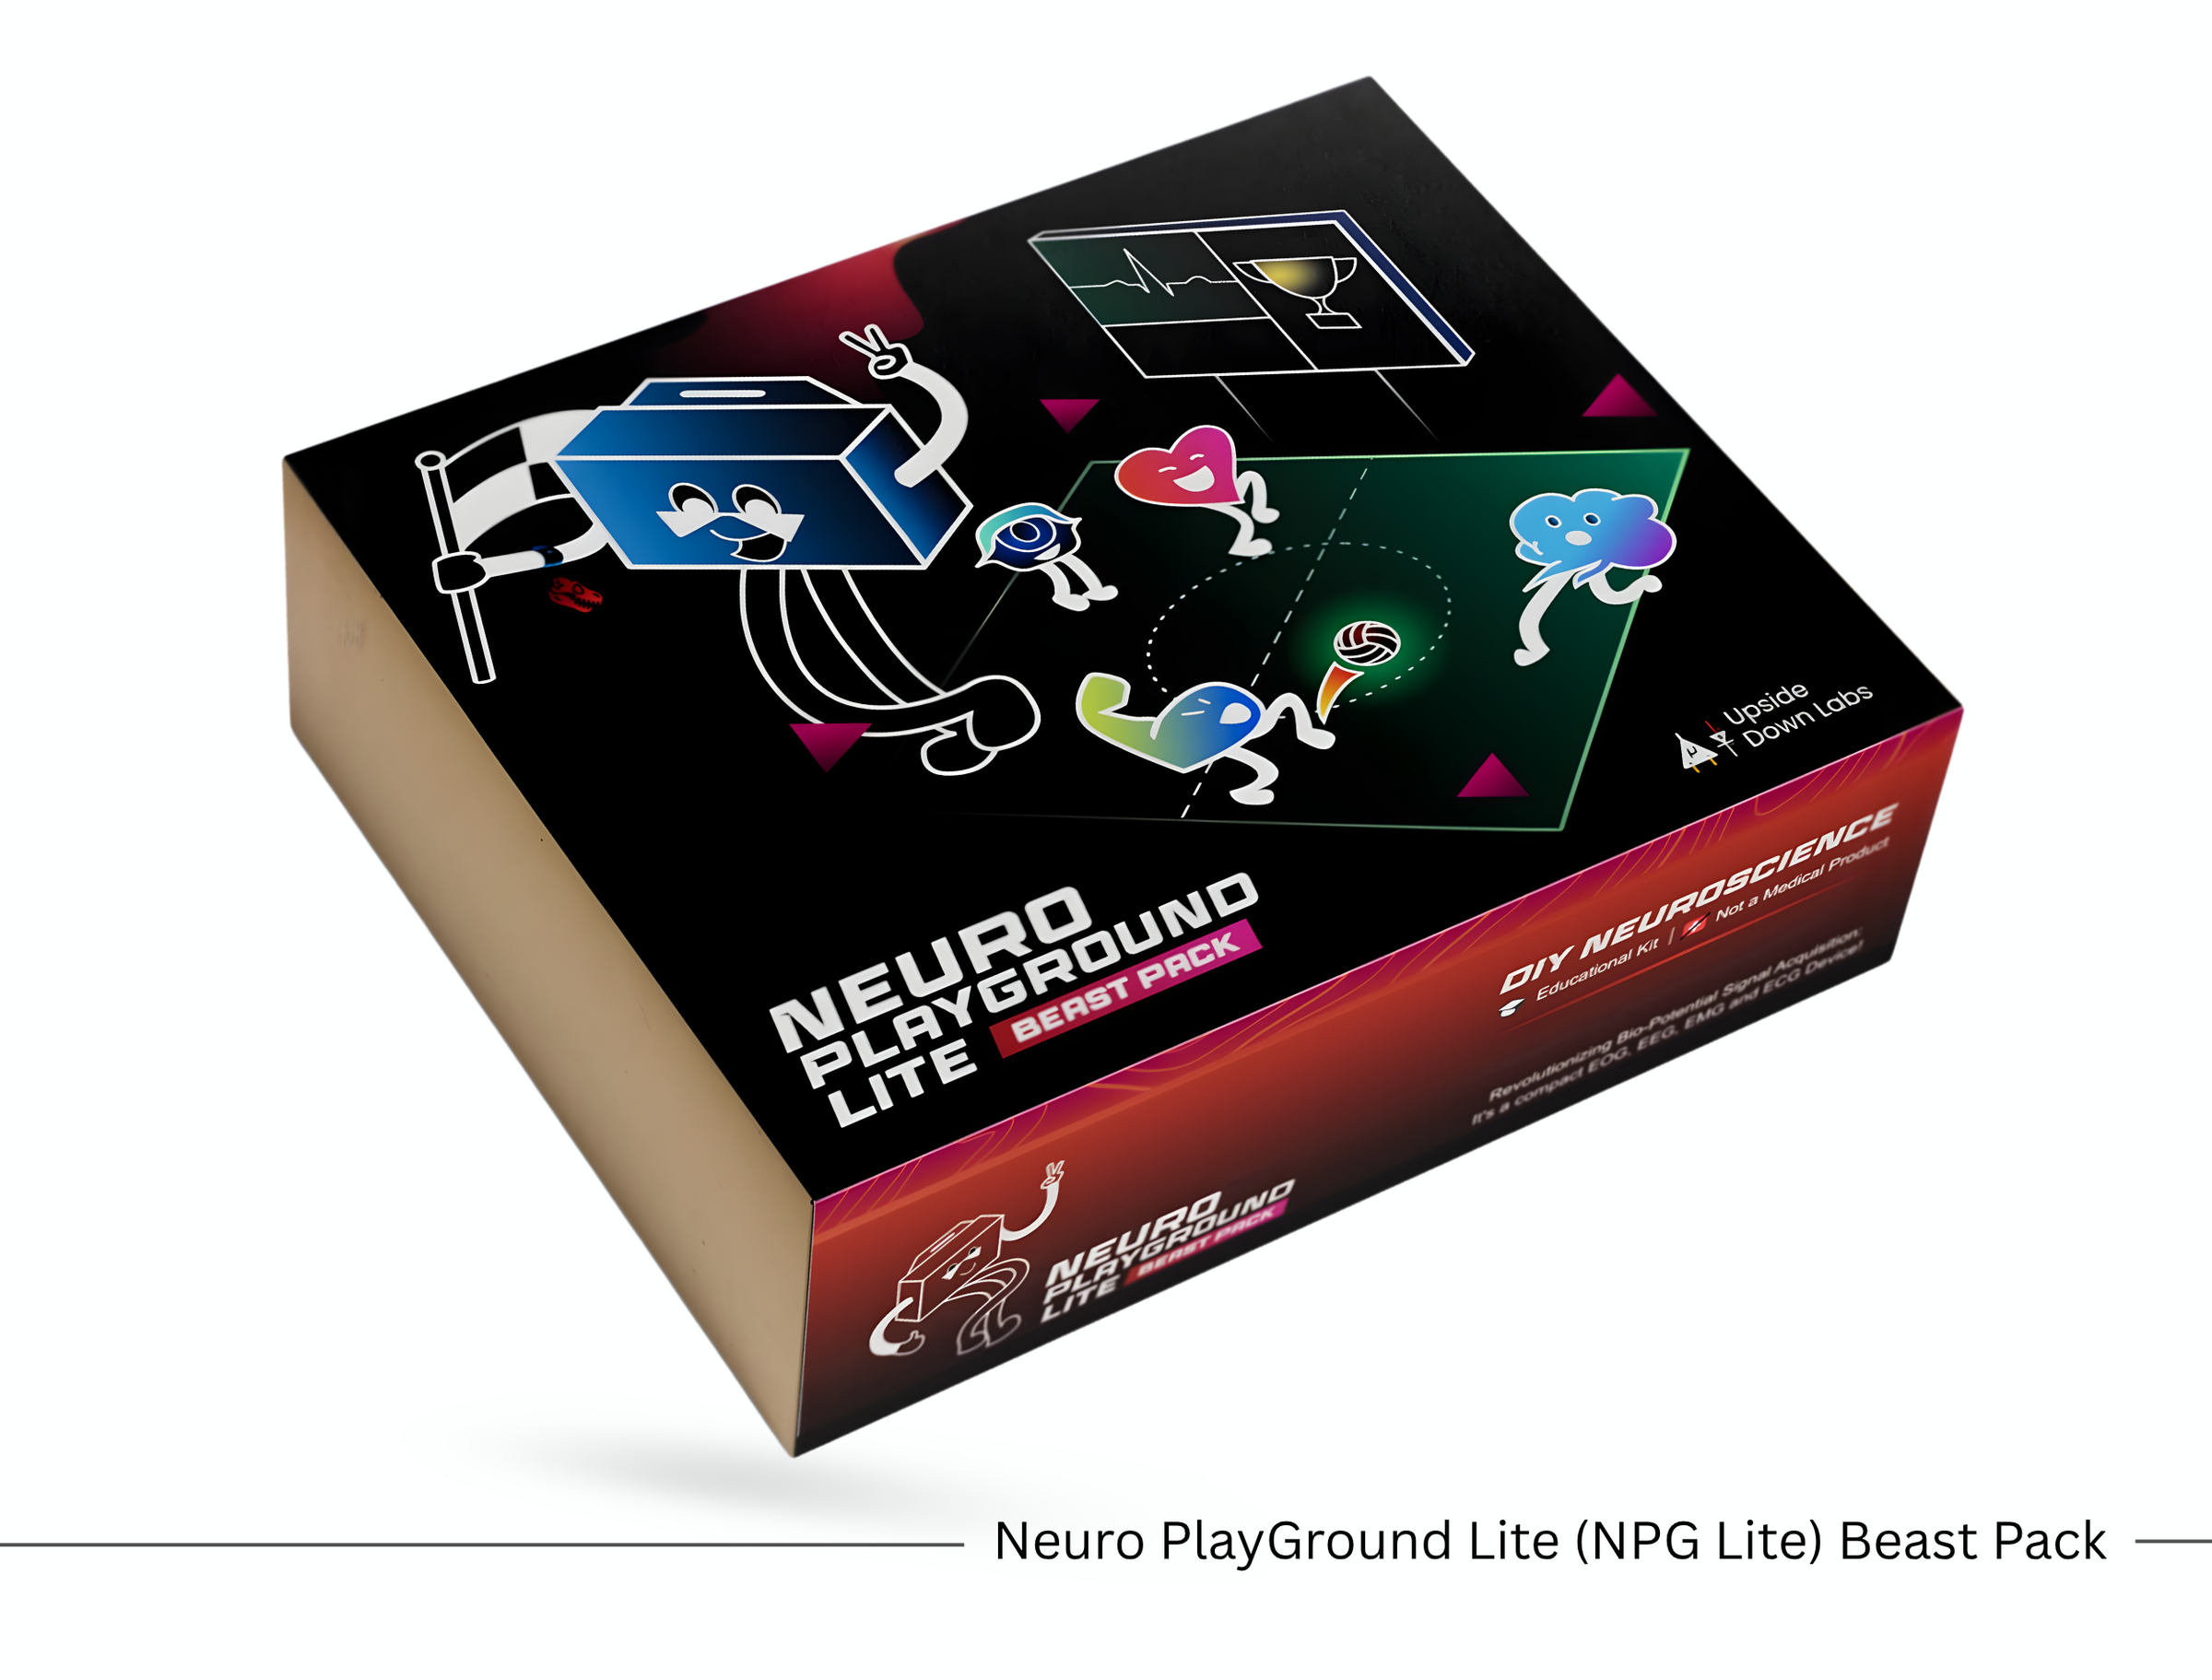
Hardware
- 1 ×Neuro PlayGround Lite (Explorer, Ninja, or Beast Pack)
- 1 × VibZ Playmate
- 1 × MPU6050 or BMI270 IMU Sensor (QWIIC version)
- 3 × BioAmp Snap Cables
- 3 × Gel Electrodes
- 1 × Alcohol Swab
- 1 × Headband
- 1 × USB Type-C Cable
- 1 × Laptop or Desktop Computer with Bluetooth
Software
- Arduino IDE
- ESP32 Board Package (Version 3.2.0)
- Adafruit NeoPixel Library
- MPU6050 Library or SparkFun BMI270 Library
- ESP32 BLE Combo Library (Modified Version)
- NPG Lite Mouse Firmware
- Bluetooth-enabled Windows, Linux, or macOS PC
How It Works?
This project combines two types of input:
1. Head Movement Tracking
We use an IMU (Inertial Measurement Unit) such as:
- MPU6050
- BMI270
An IMU contains:
- a 3-axis accelerometer, which measures tilt and movement
- a 3-axis gyroscope, which measures rotation in X, Y, and Z directions
By mounting the IMU along with NPG Lite on a headband, the system can track head orientation and convert it into smooth cursor movement.
2.Biopotential based Mouse Clicks
Instead of using physical mouse buttons, we use natural body signals:
- Jaw clench → left click
- Double blink → click and drag
- Triple blink → right click
Jaw clenching produces an EMG signal, while blinks produce EOG signals.
Together, these inputs create a complete hands-free mouse experience.
Skin Preparation
.gif)
- Clean the tageted suface area with alcohol swabs.
This removes oil and dead skin, improving signal quality.
Electrode Placement

Measuring EEG using Gel electrodes:
- Connect the BioAmp Cable to gel electrodes,
- Peel the plastic backing from the electrodes.
- Place the cable connected to A0P between the Fp1 and Fp2 positions
- Place the cable connected to A0N on the bony part behind the earlobe on one ear.
- Place REF on the bony part behind the earlobe of the other ear.
Connecting BioAmp Cables
.gif)

Once your skin is prepared, it’s time to connect BioAmp Snap Cables.
Connect 3 BioAmp Snap Cables to
- Positive of Channel 1 to A0P
- Negative of Channel 1 to A0N
- Reference cable to REF
Connect MPU6050
.gif)
Once the snap cables are connected, connect the MPU6050 to NPG lite using the QwiCC port on the VibZ playmate.
Copy the Code
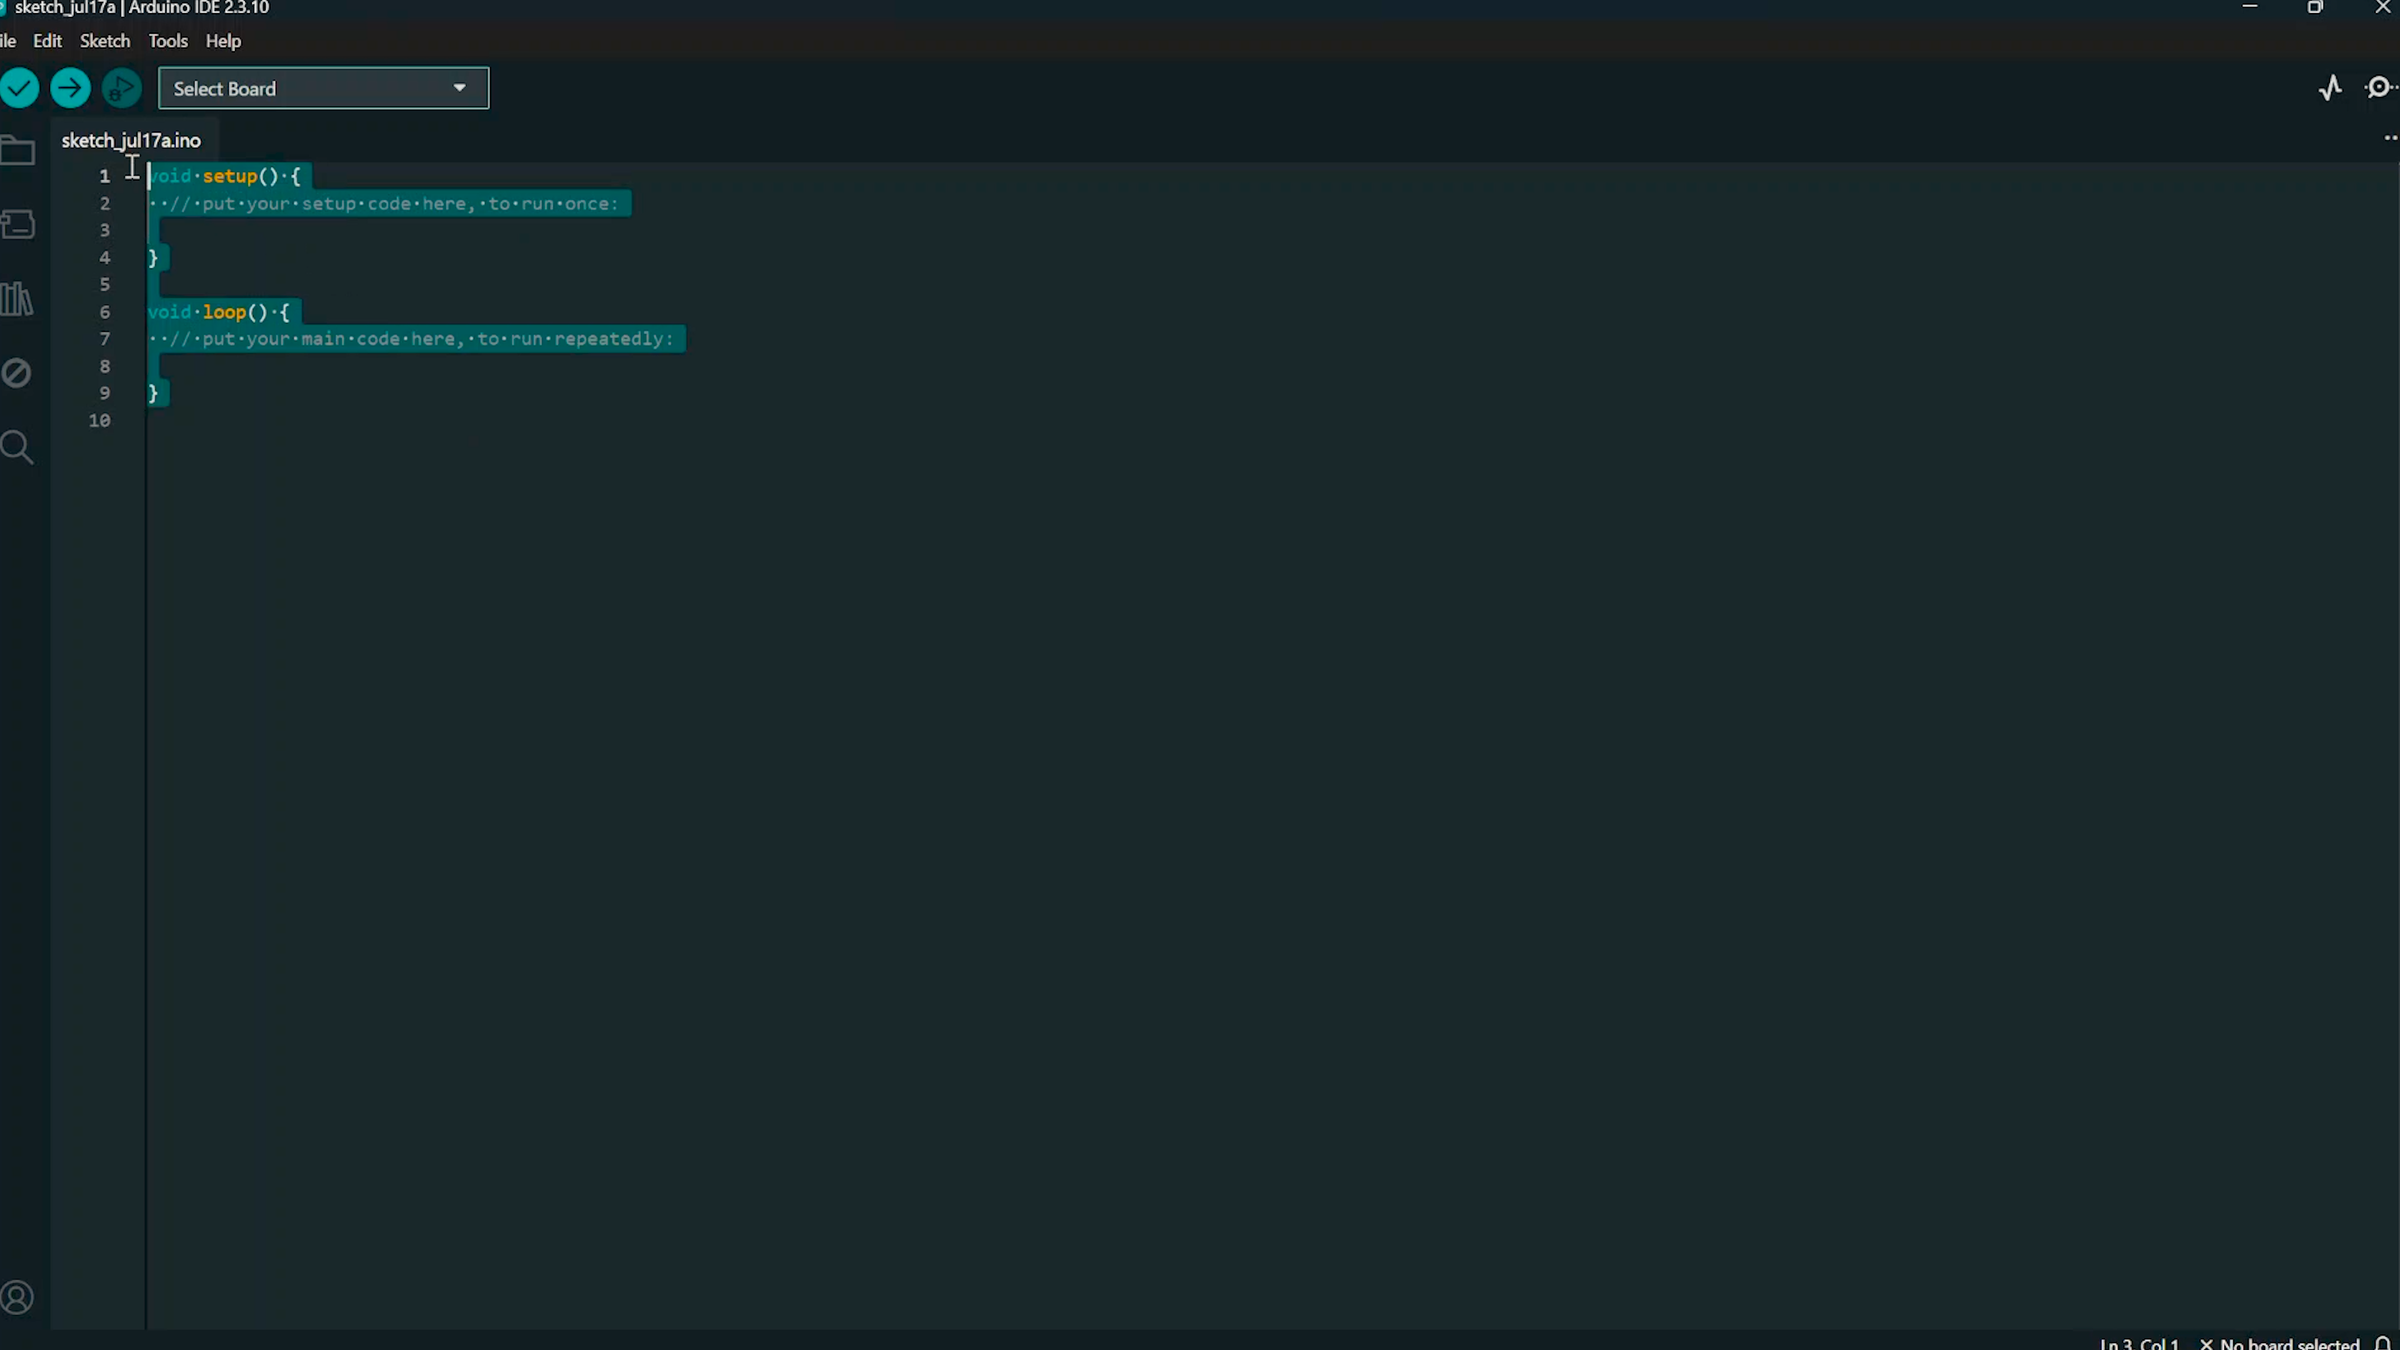
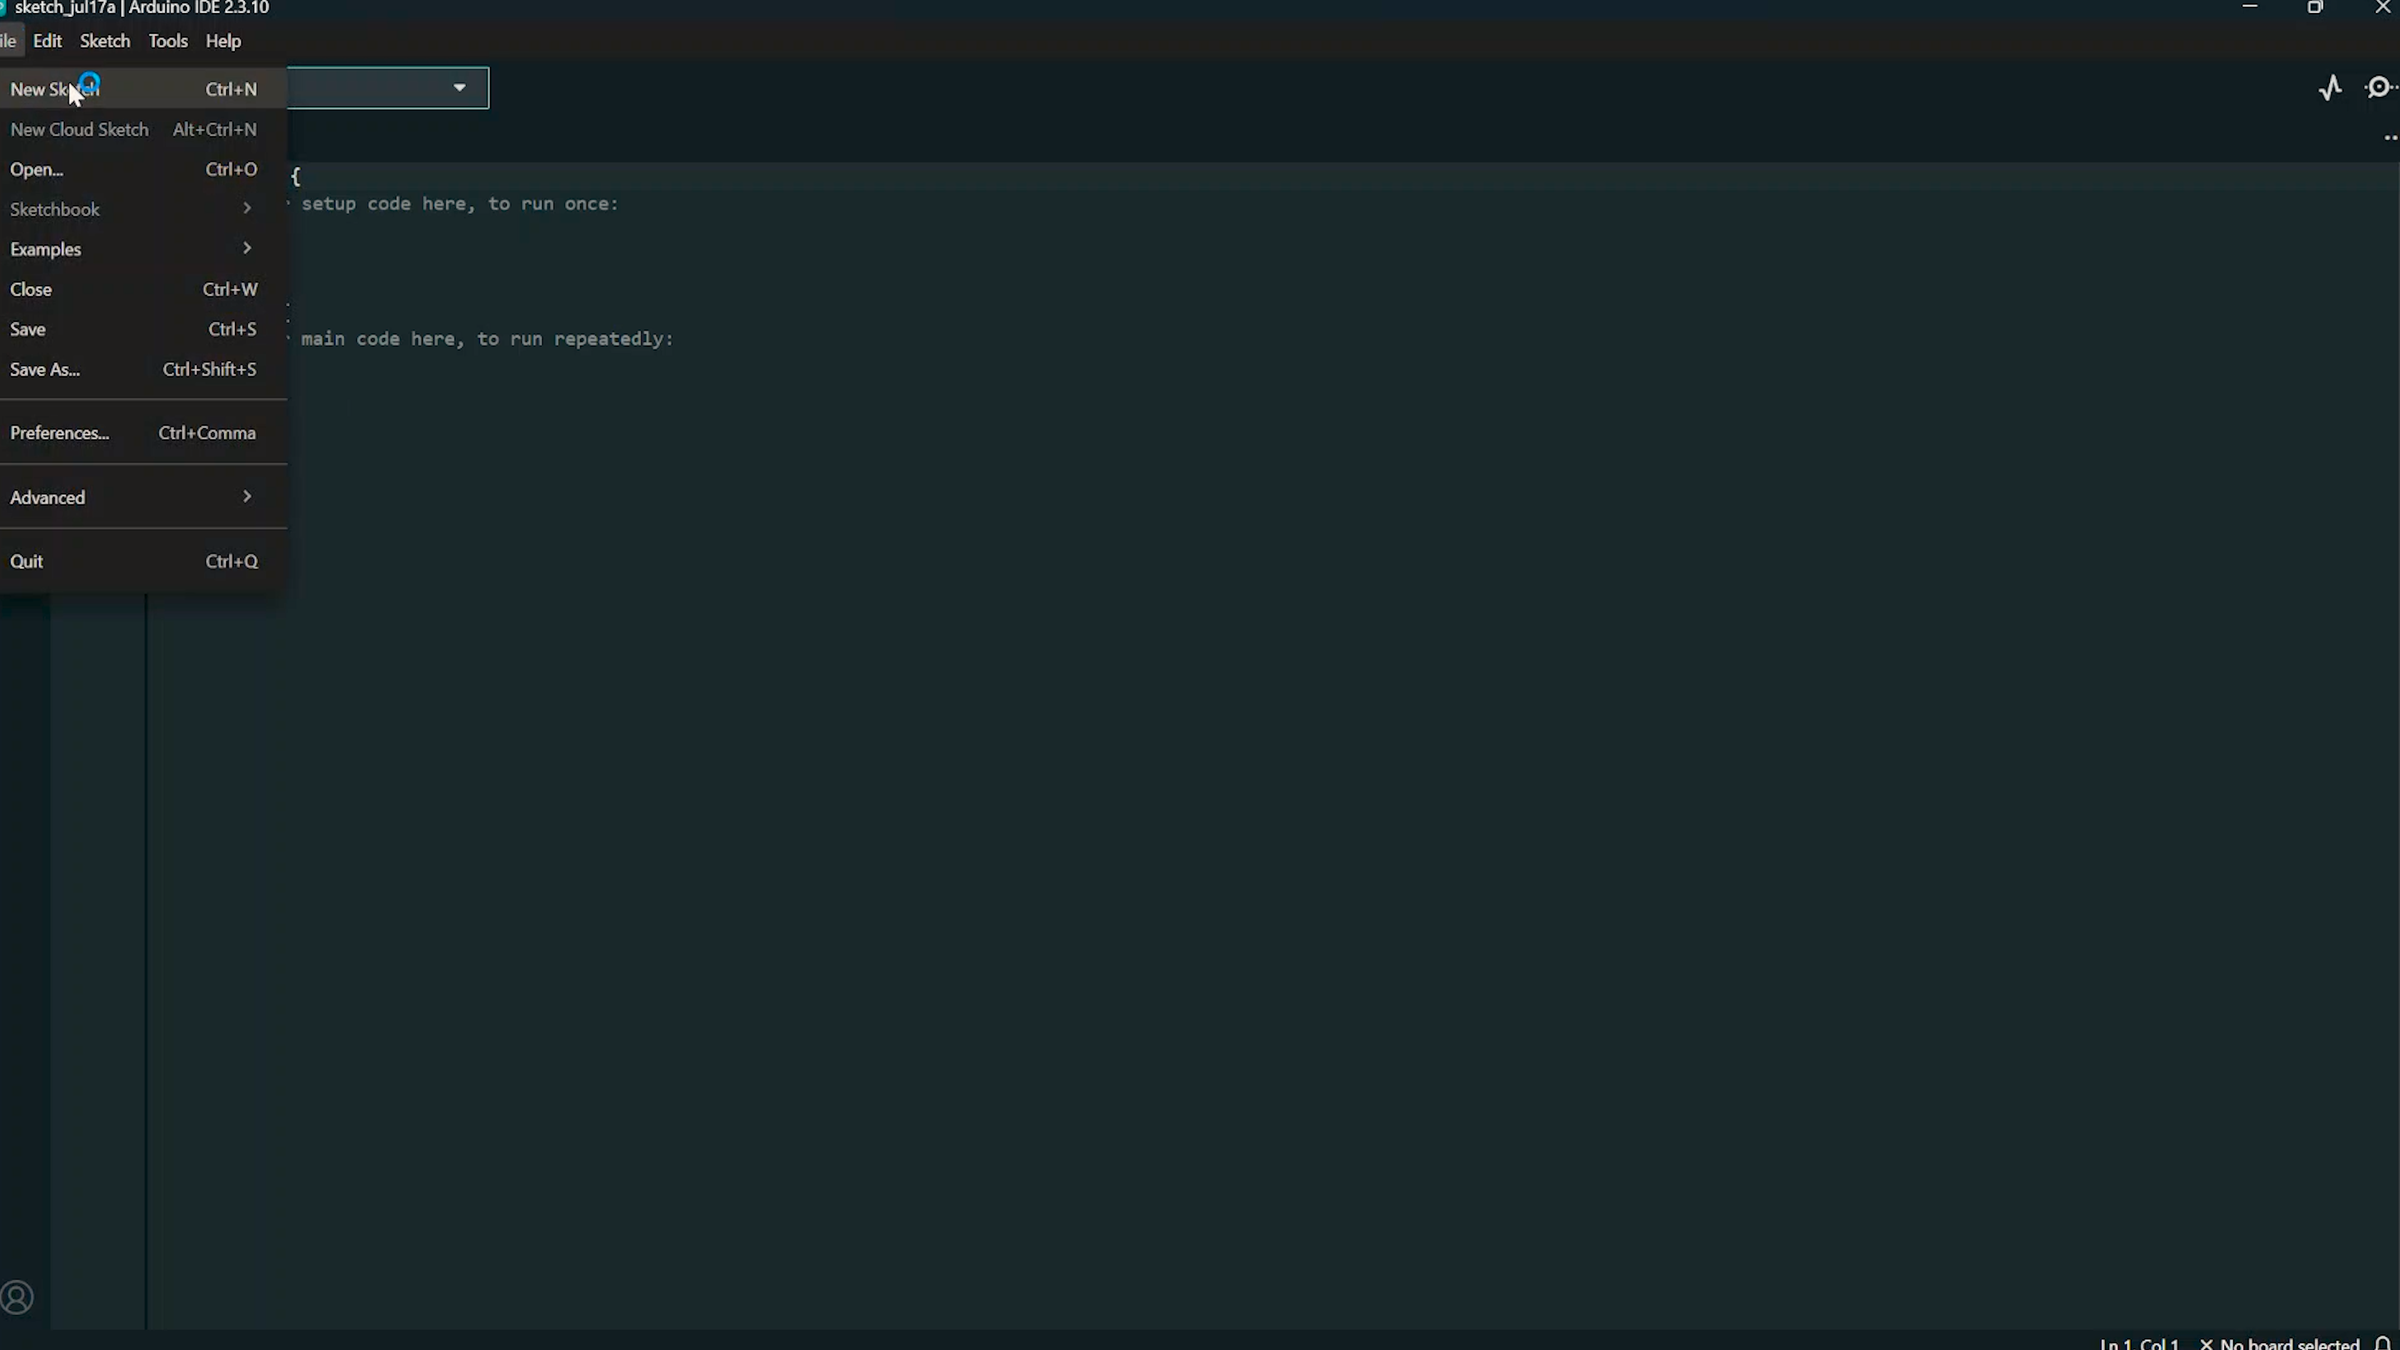
- Power on the NPG Lite
- Turn on the board using the ON/OFF switch.
- Connect it to your computer using a USB Type-C cable.
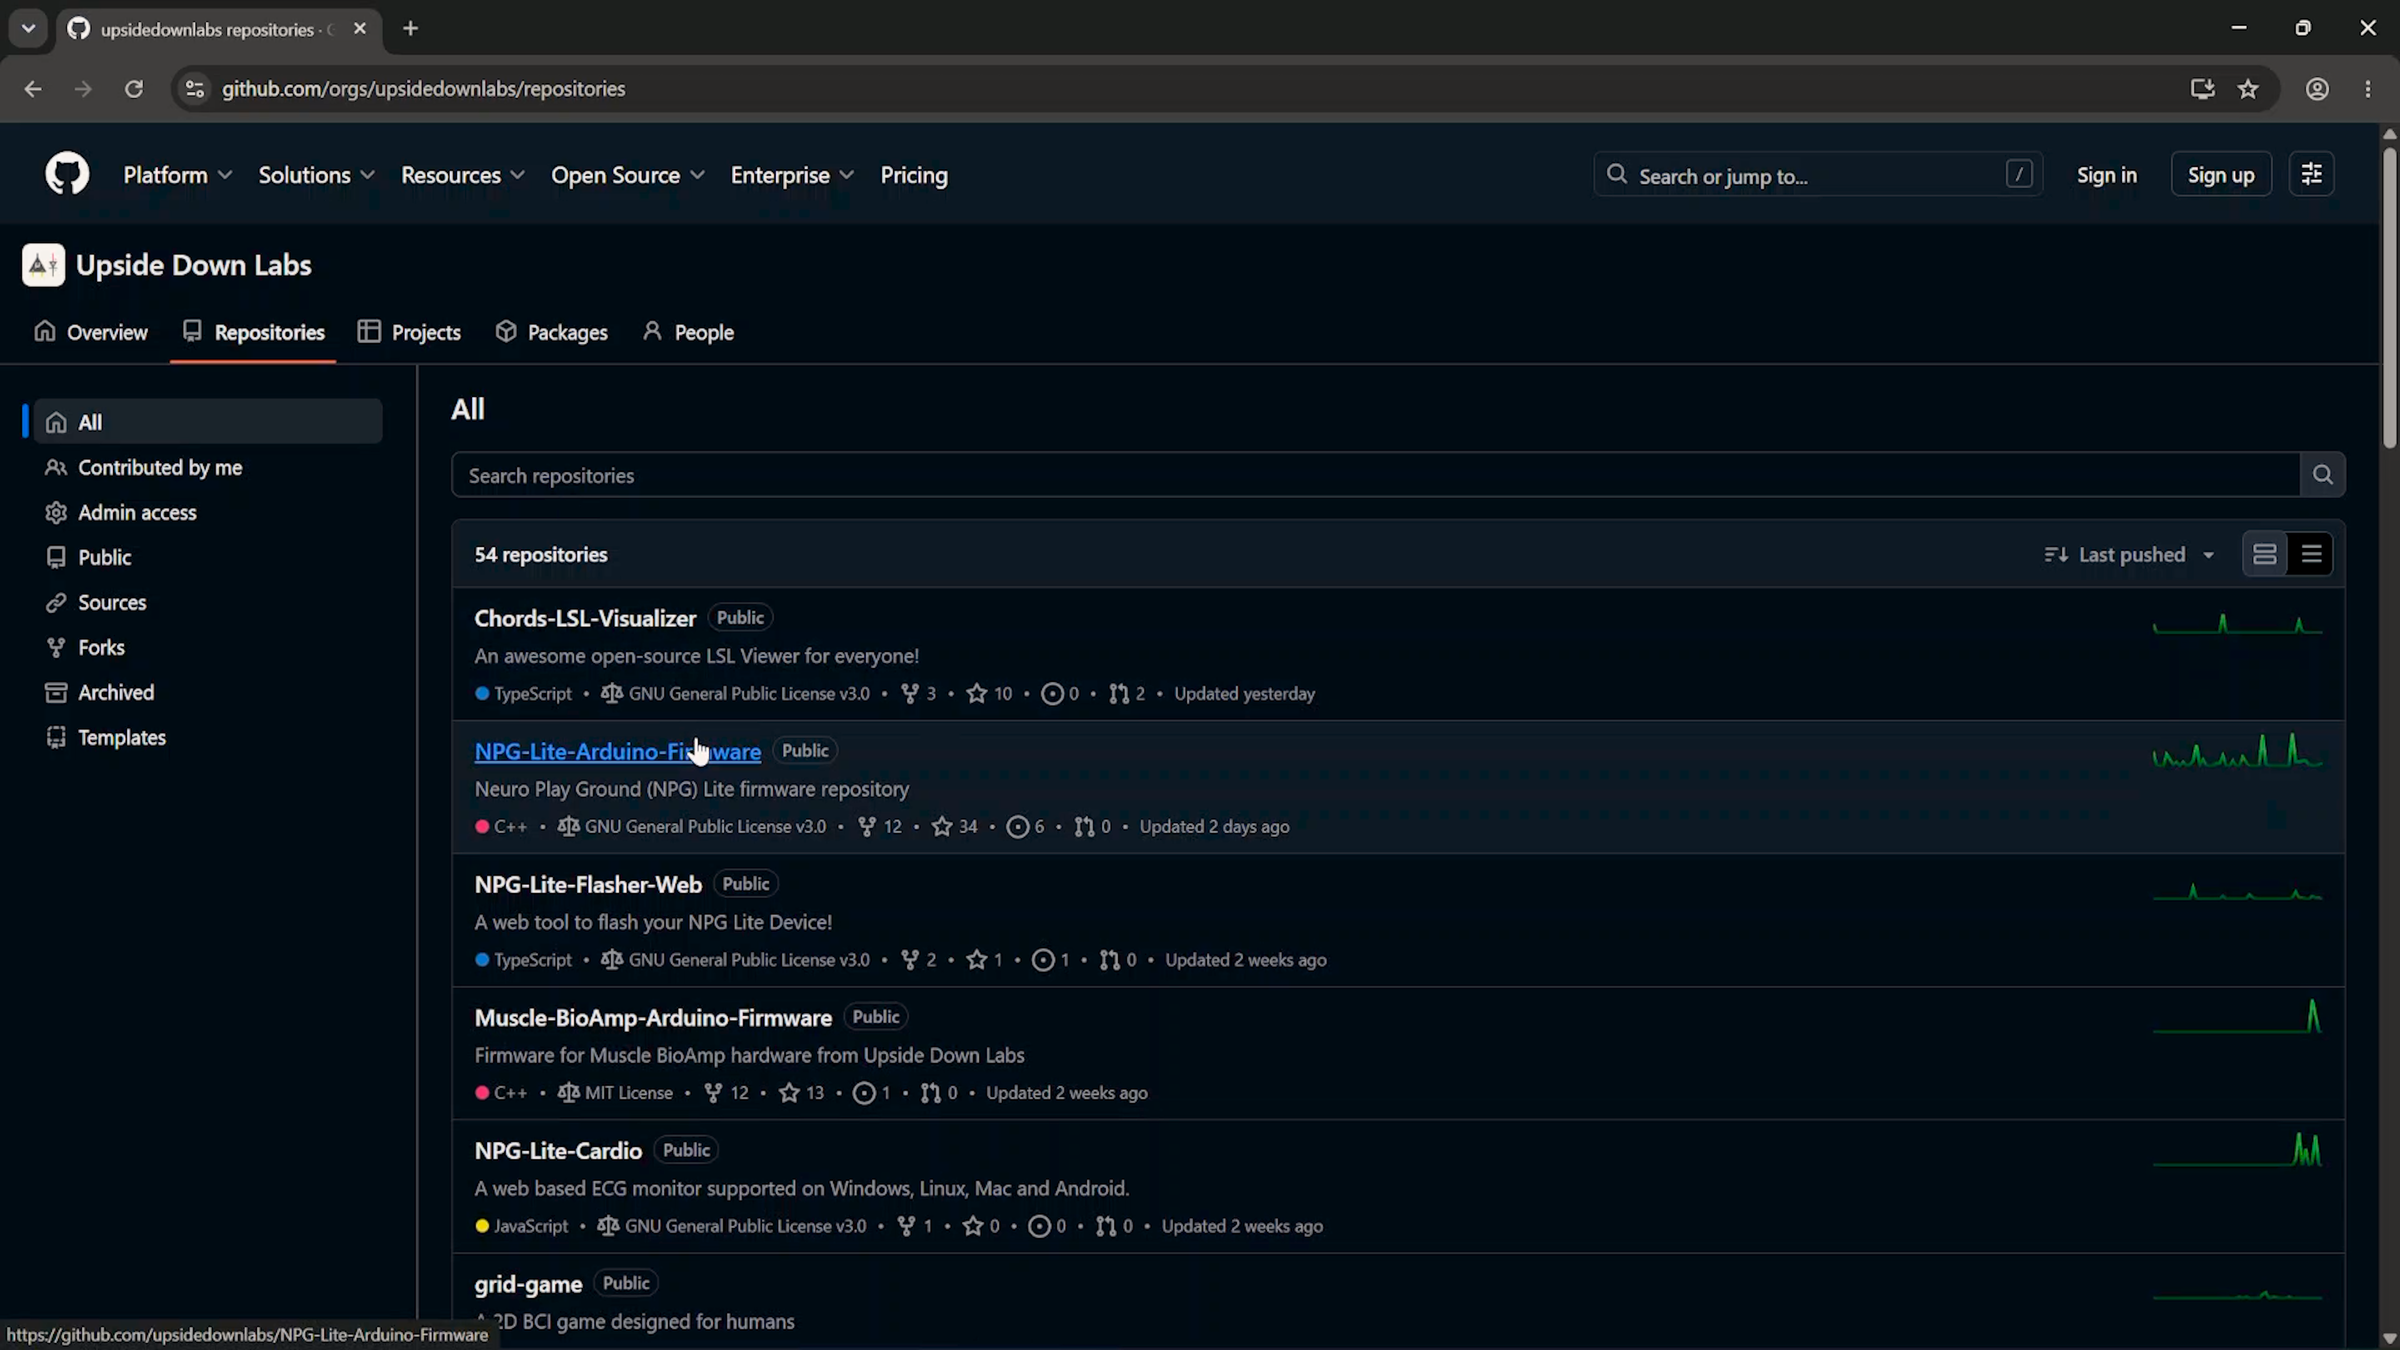
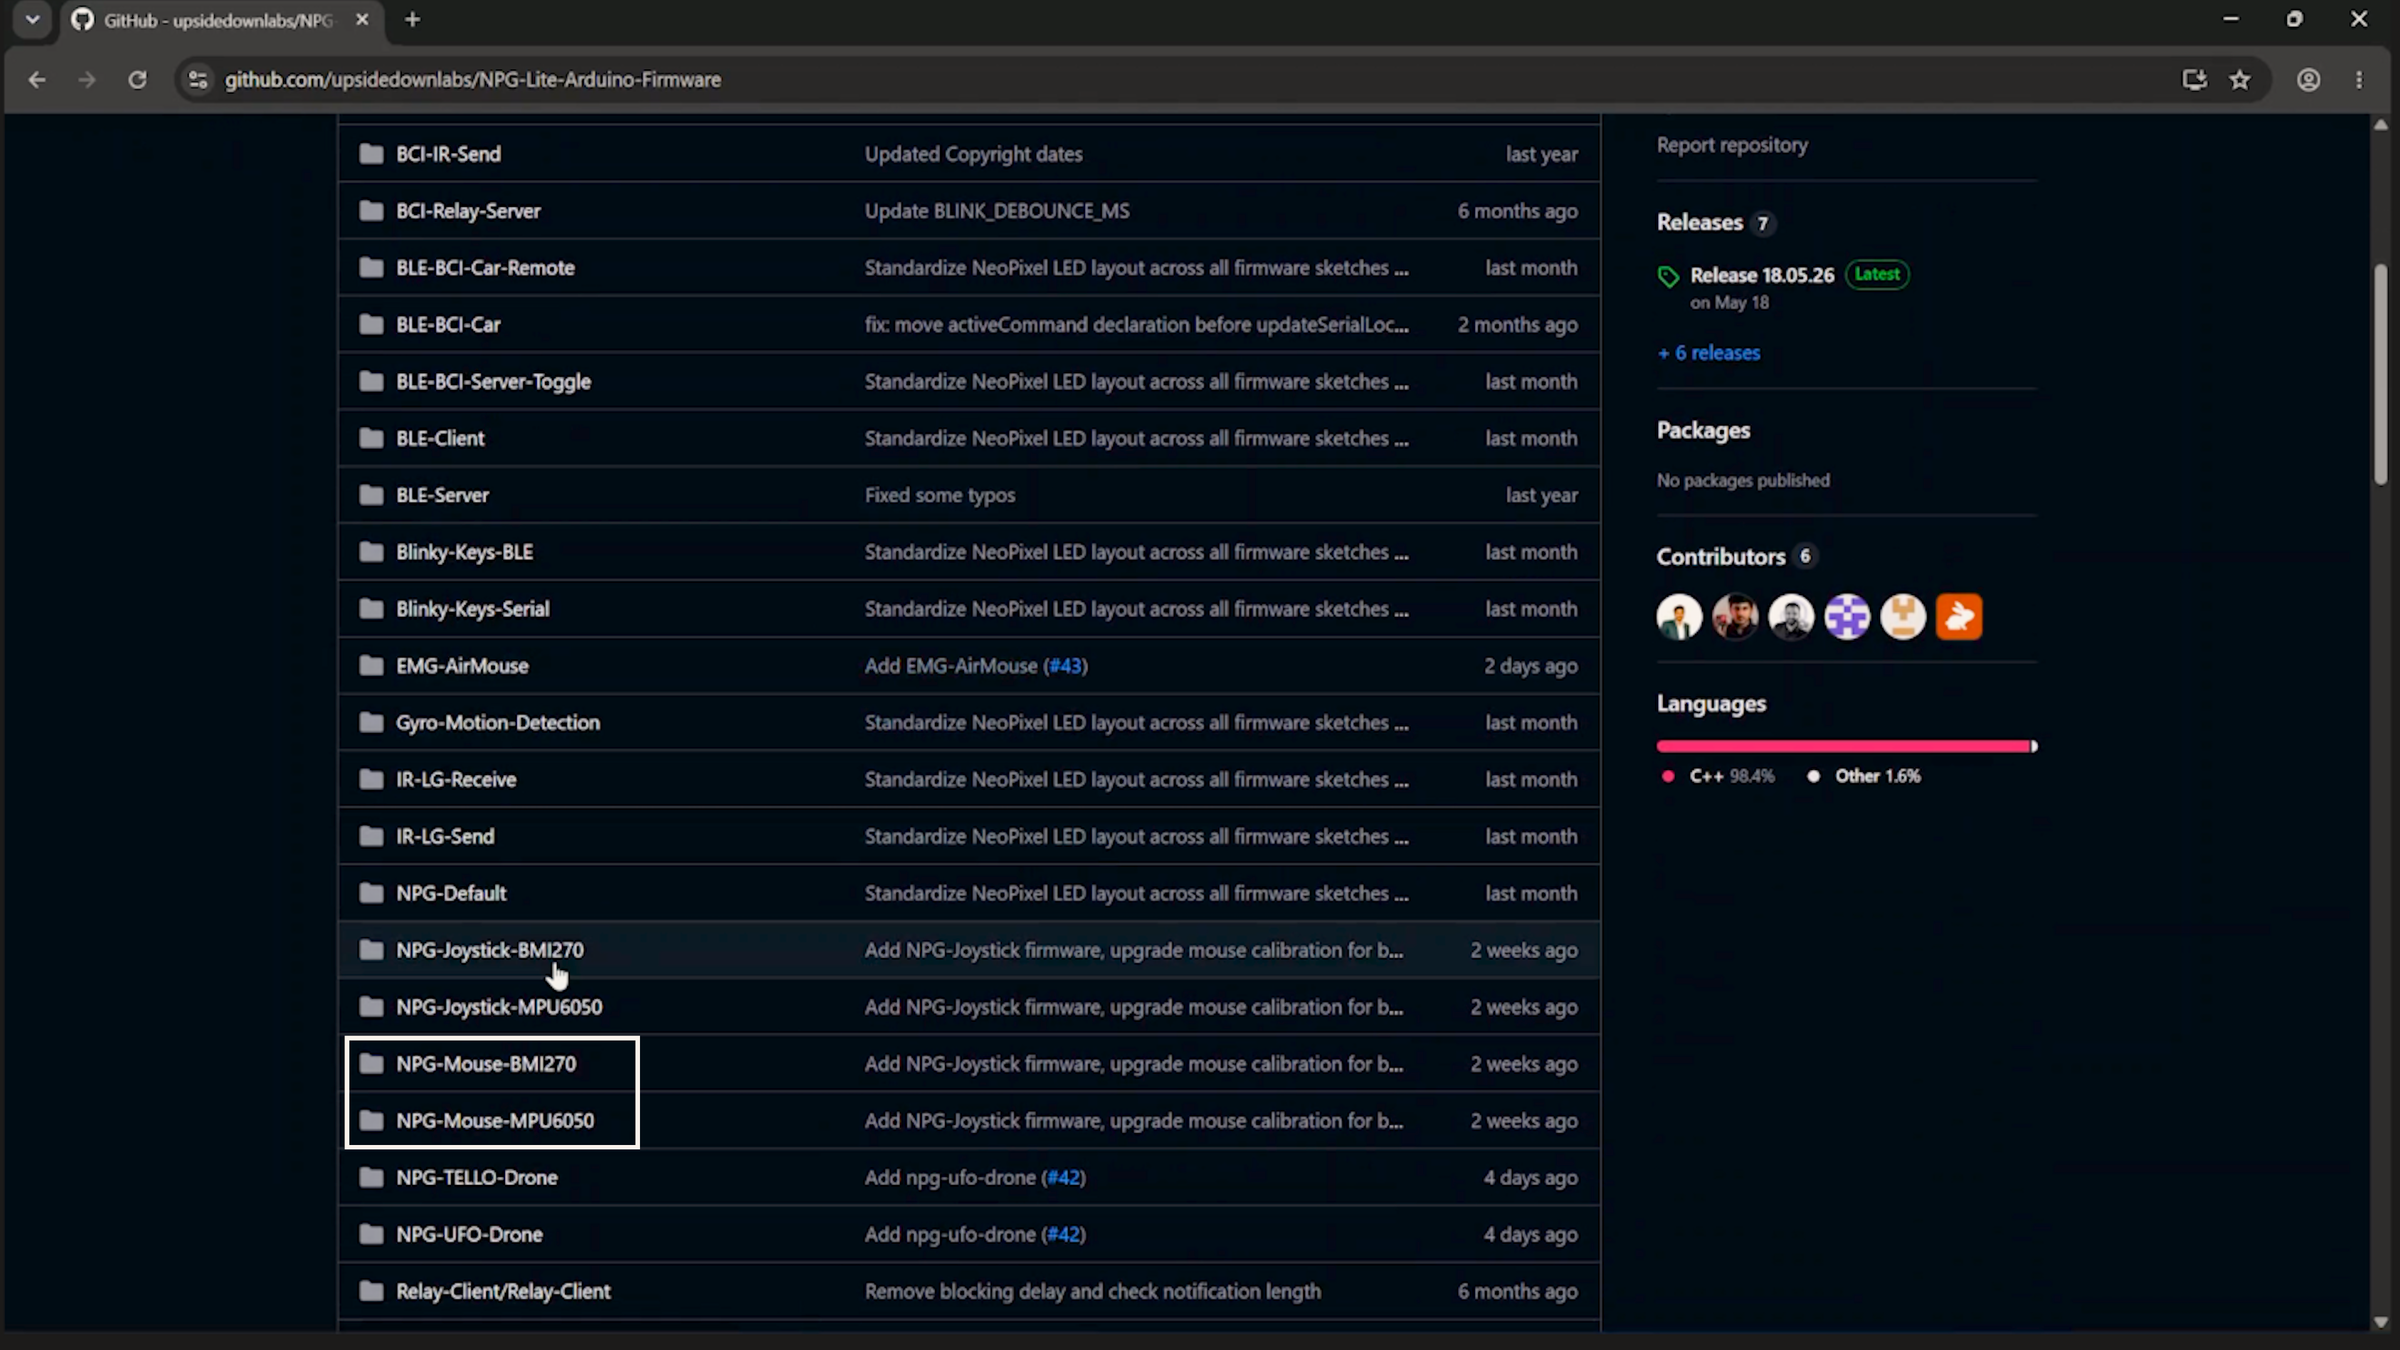
- Download the firmware
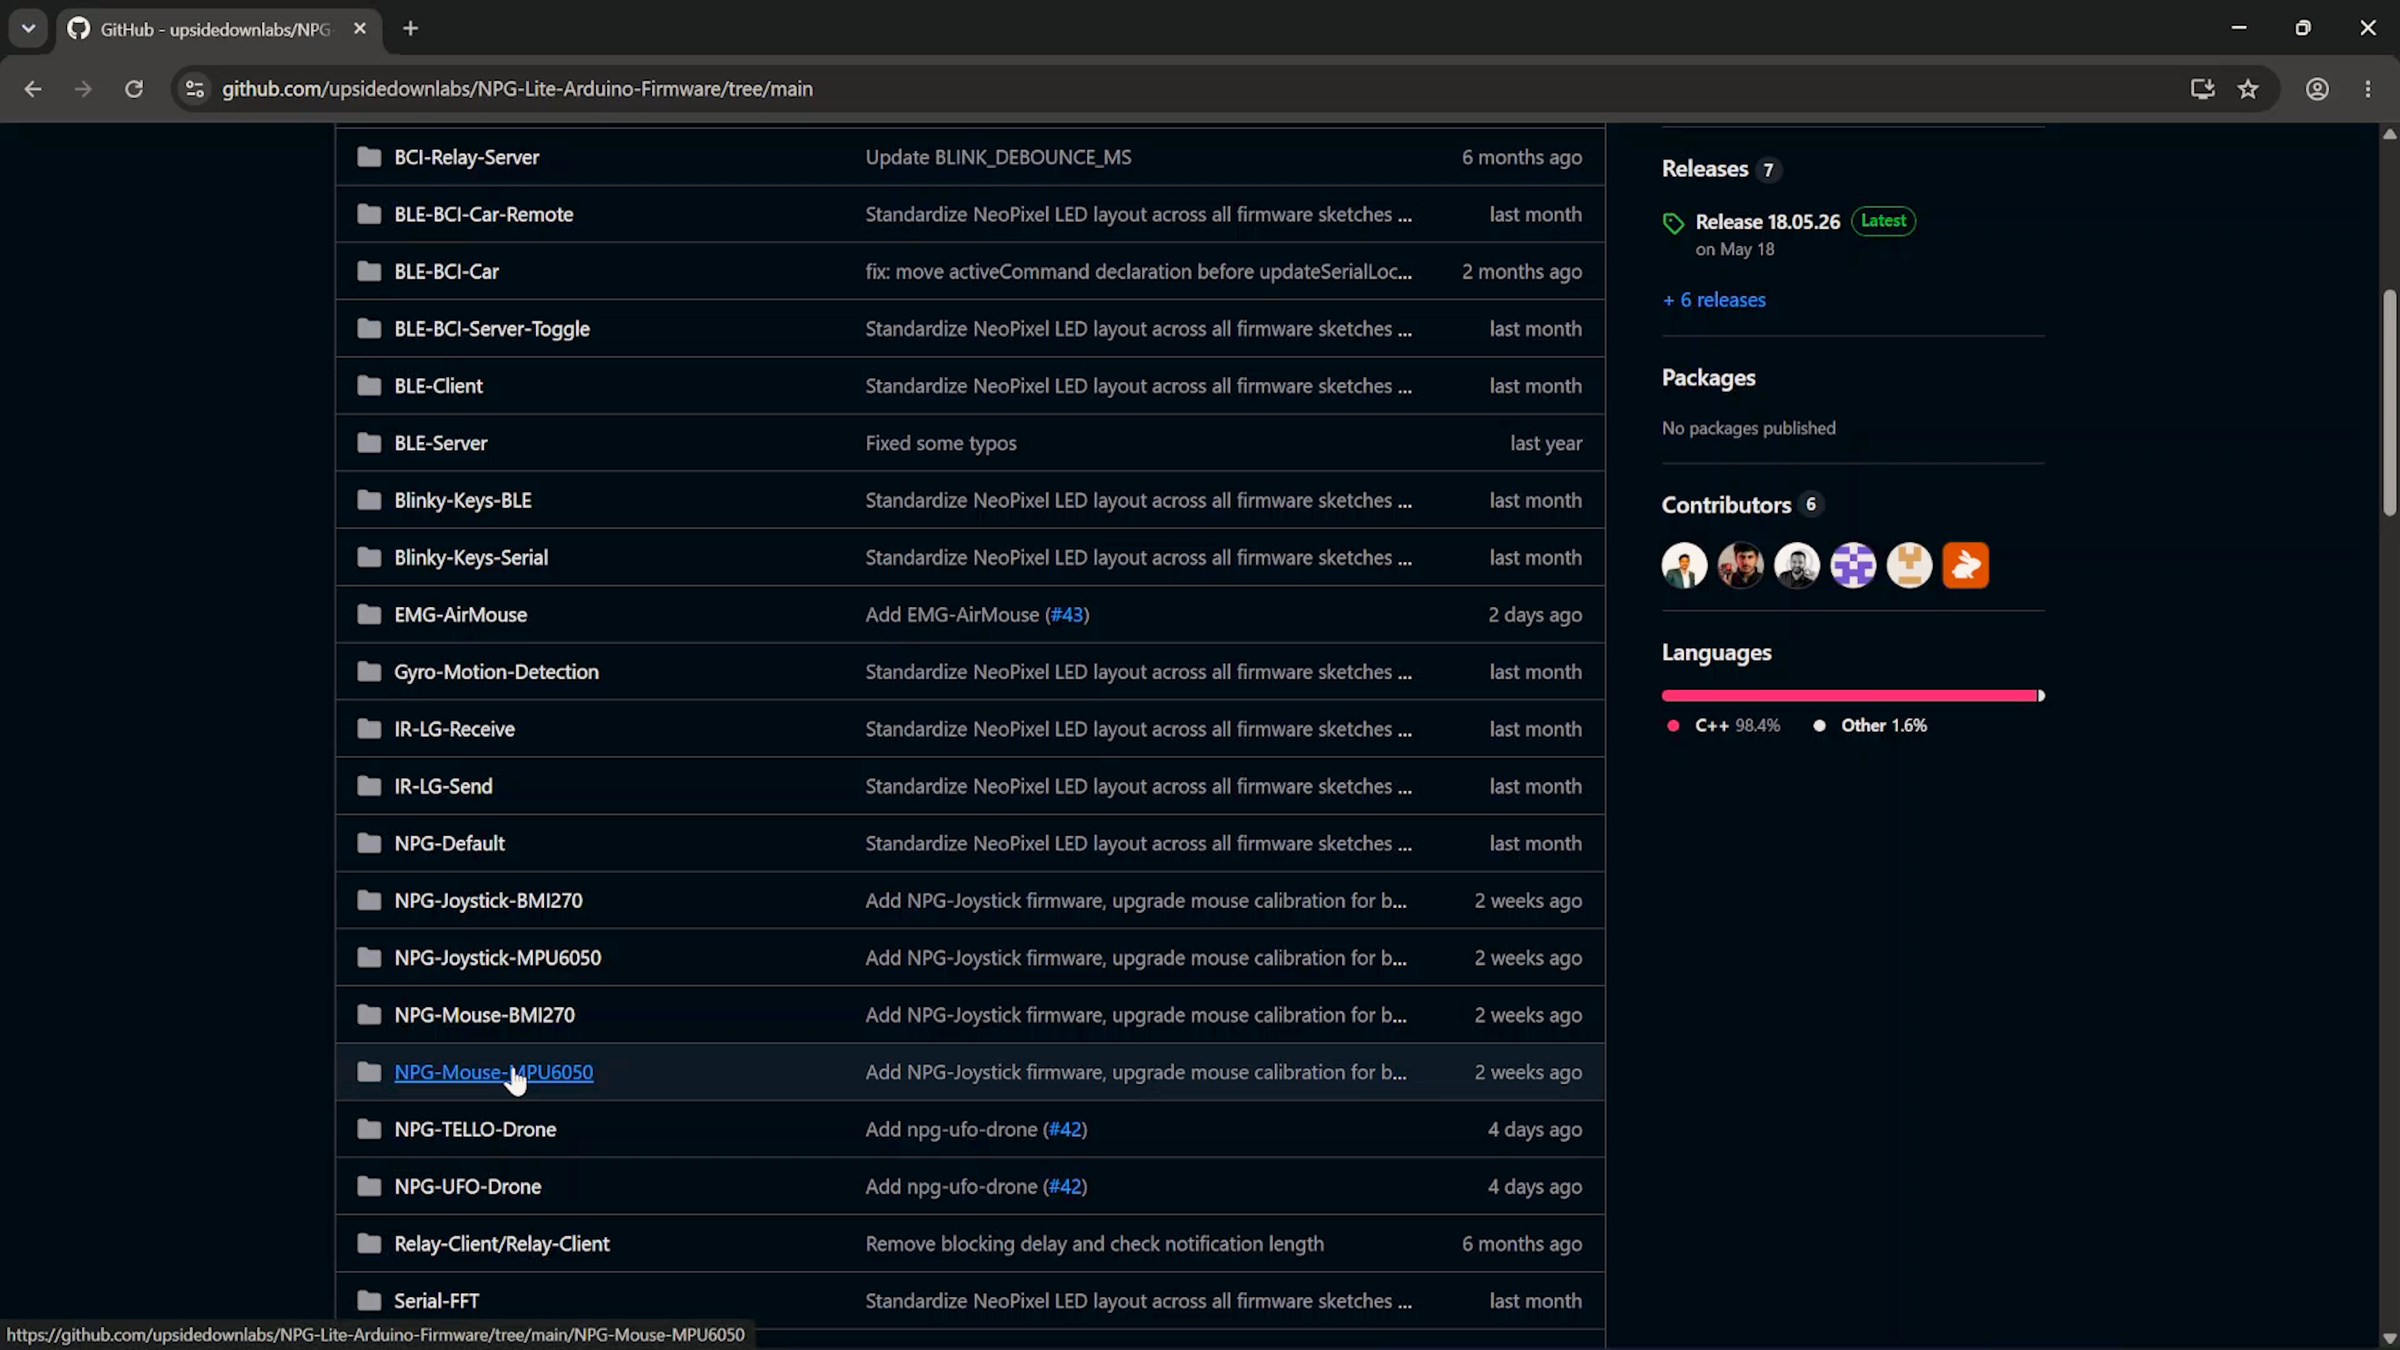
- Open the NPG Lite Arduino Firmware repository on GitHub.
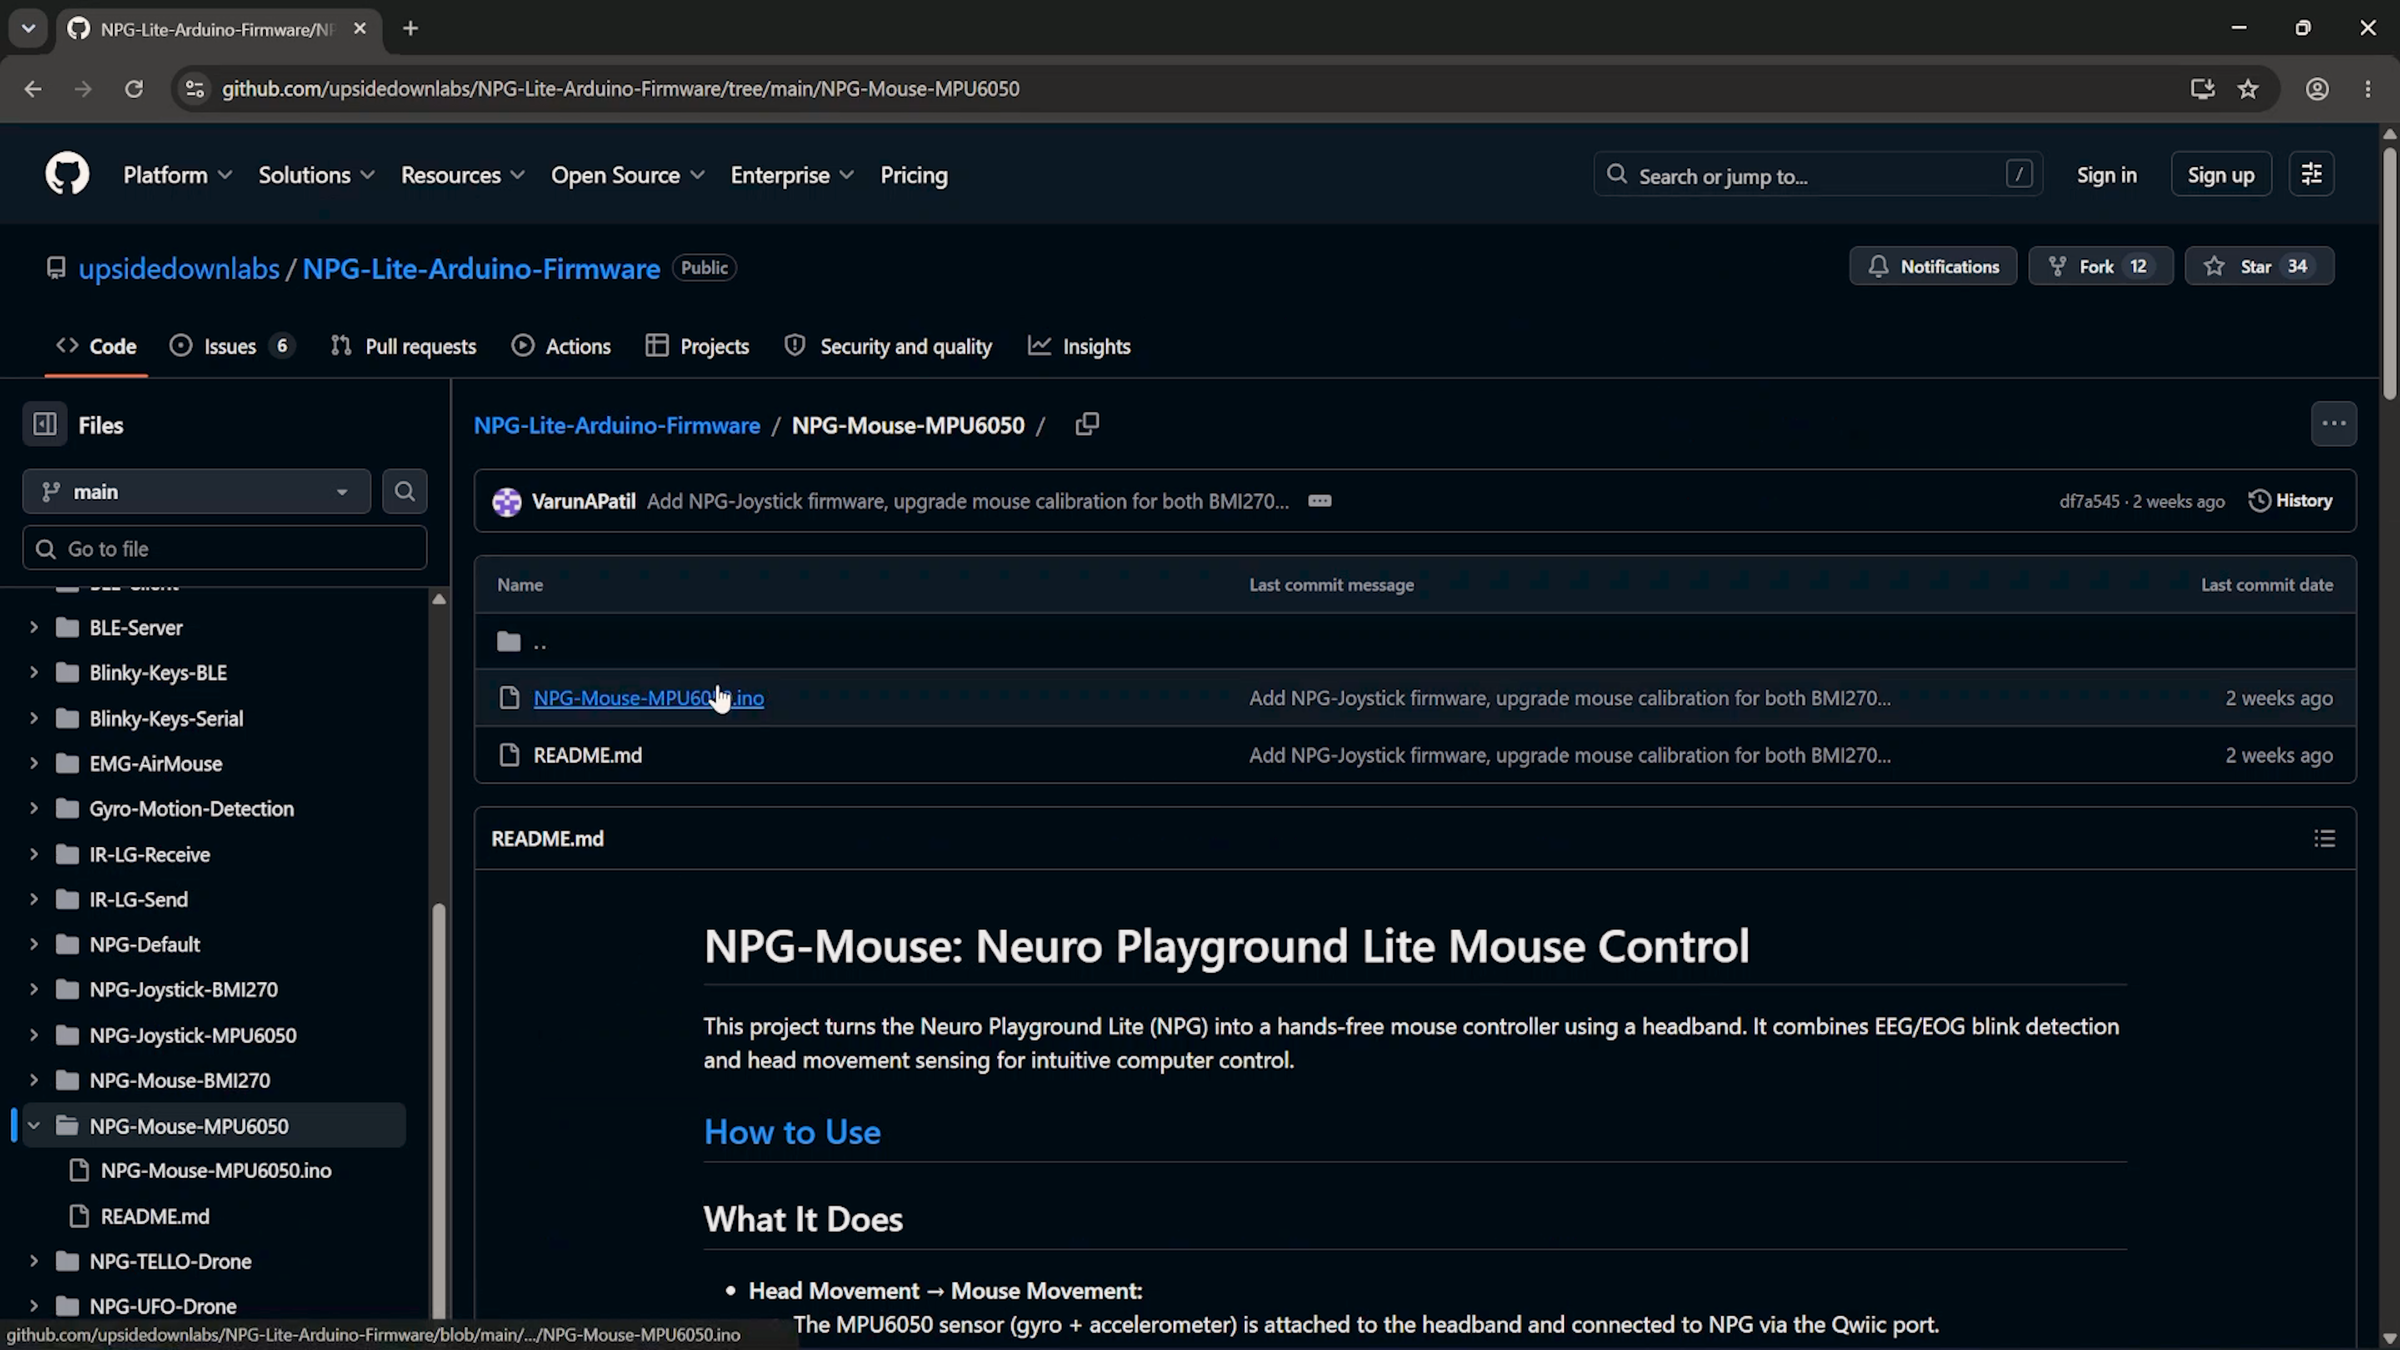
- Choose the firmware that matches your motion sensor:
- MPU6050: NPG-Mouse-MPU6050
- BMI270: NPG-Mouse-BMI270
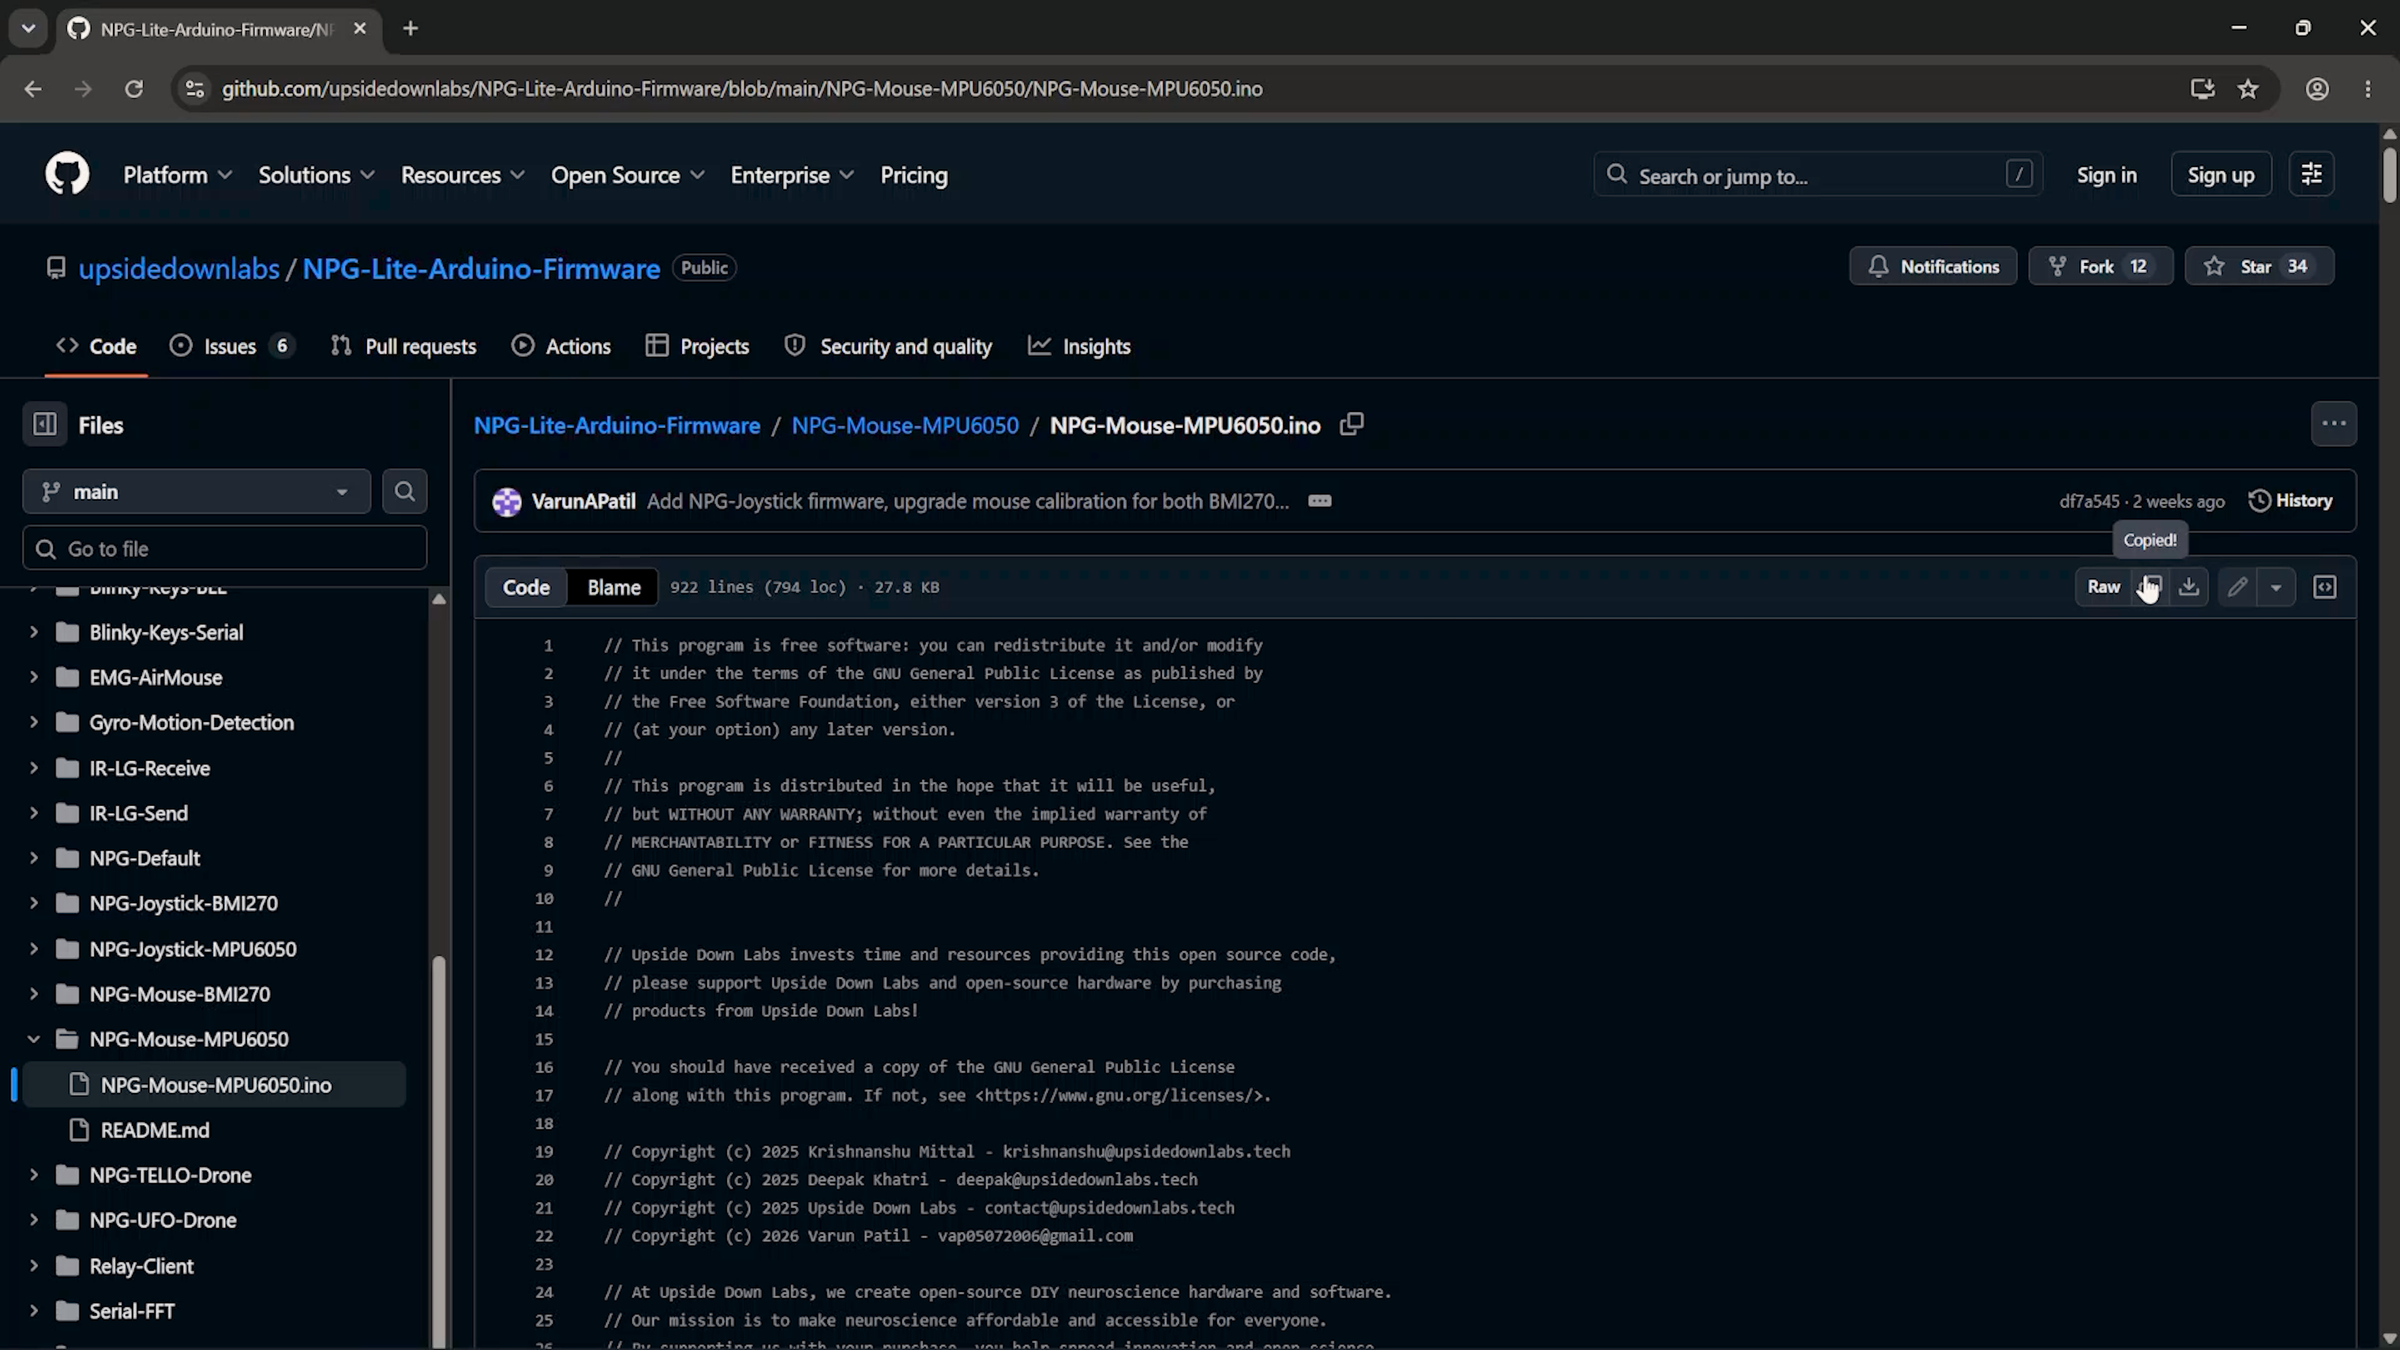
- Copy the sketch
- Create a new Arduino sketch
- Launch the Arduino IDE.
- Create a New Sketch.
- Paste the copied code into the editor
Install Esp32 by Espressif Systems.
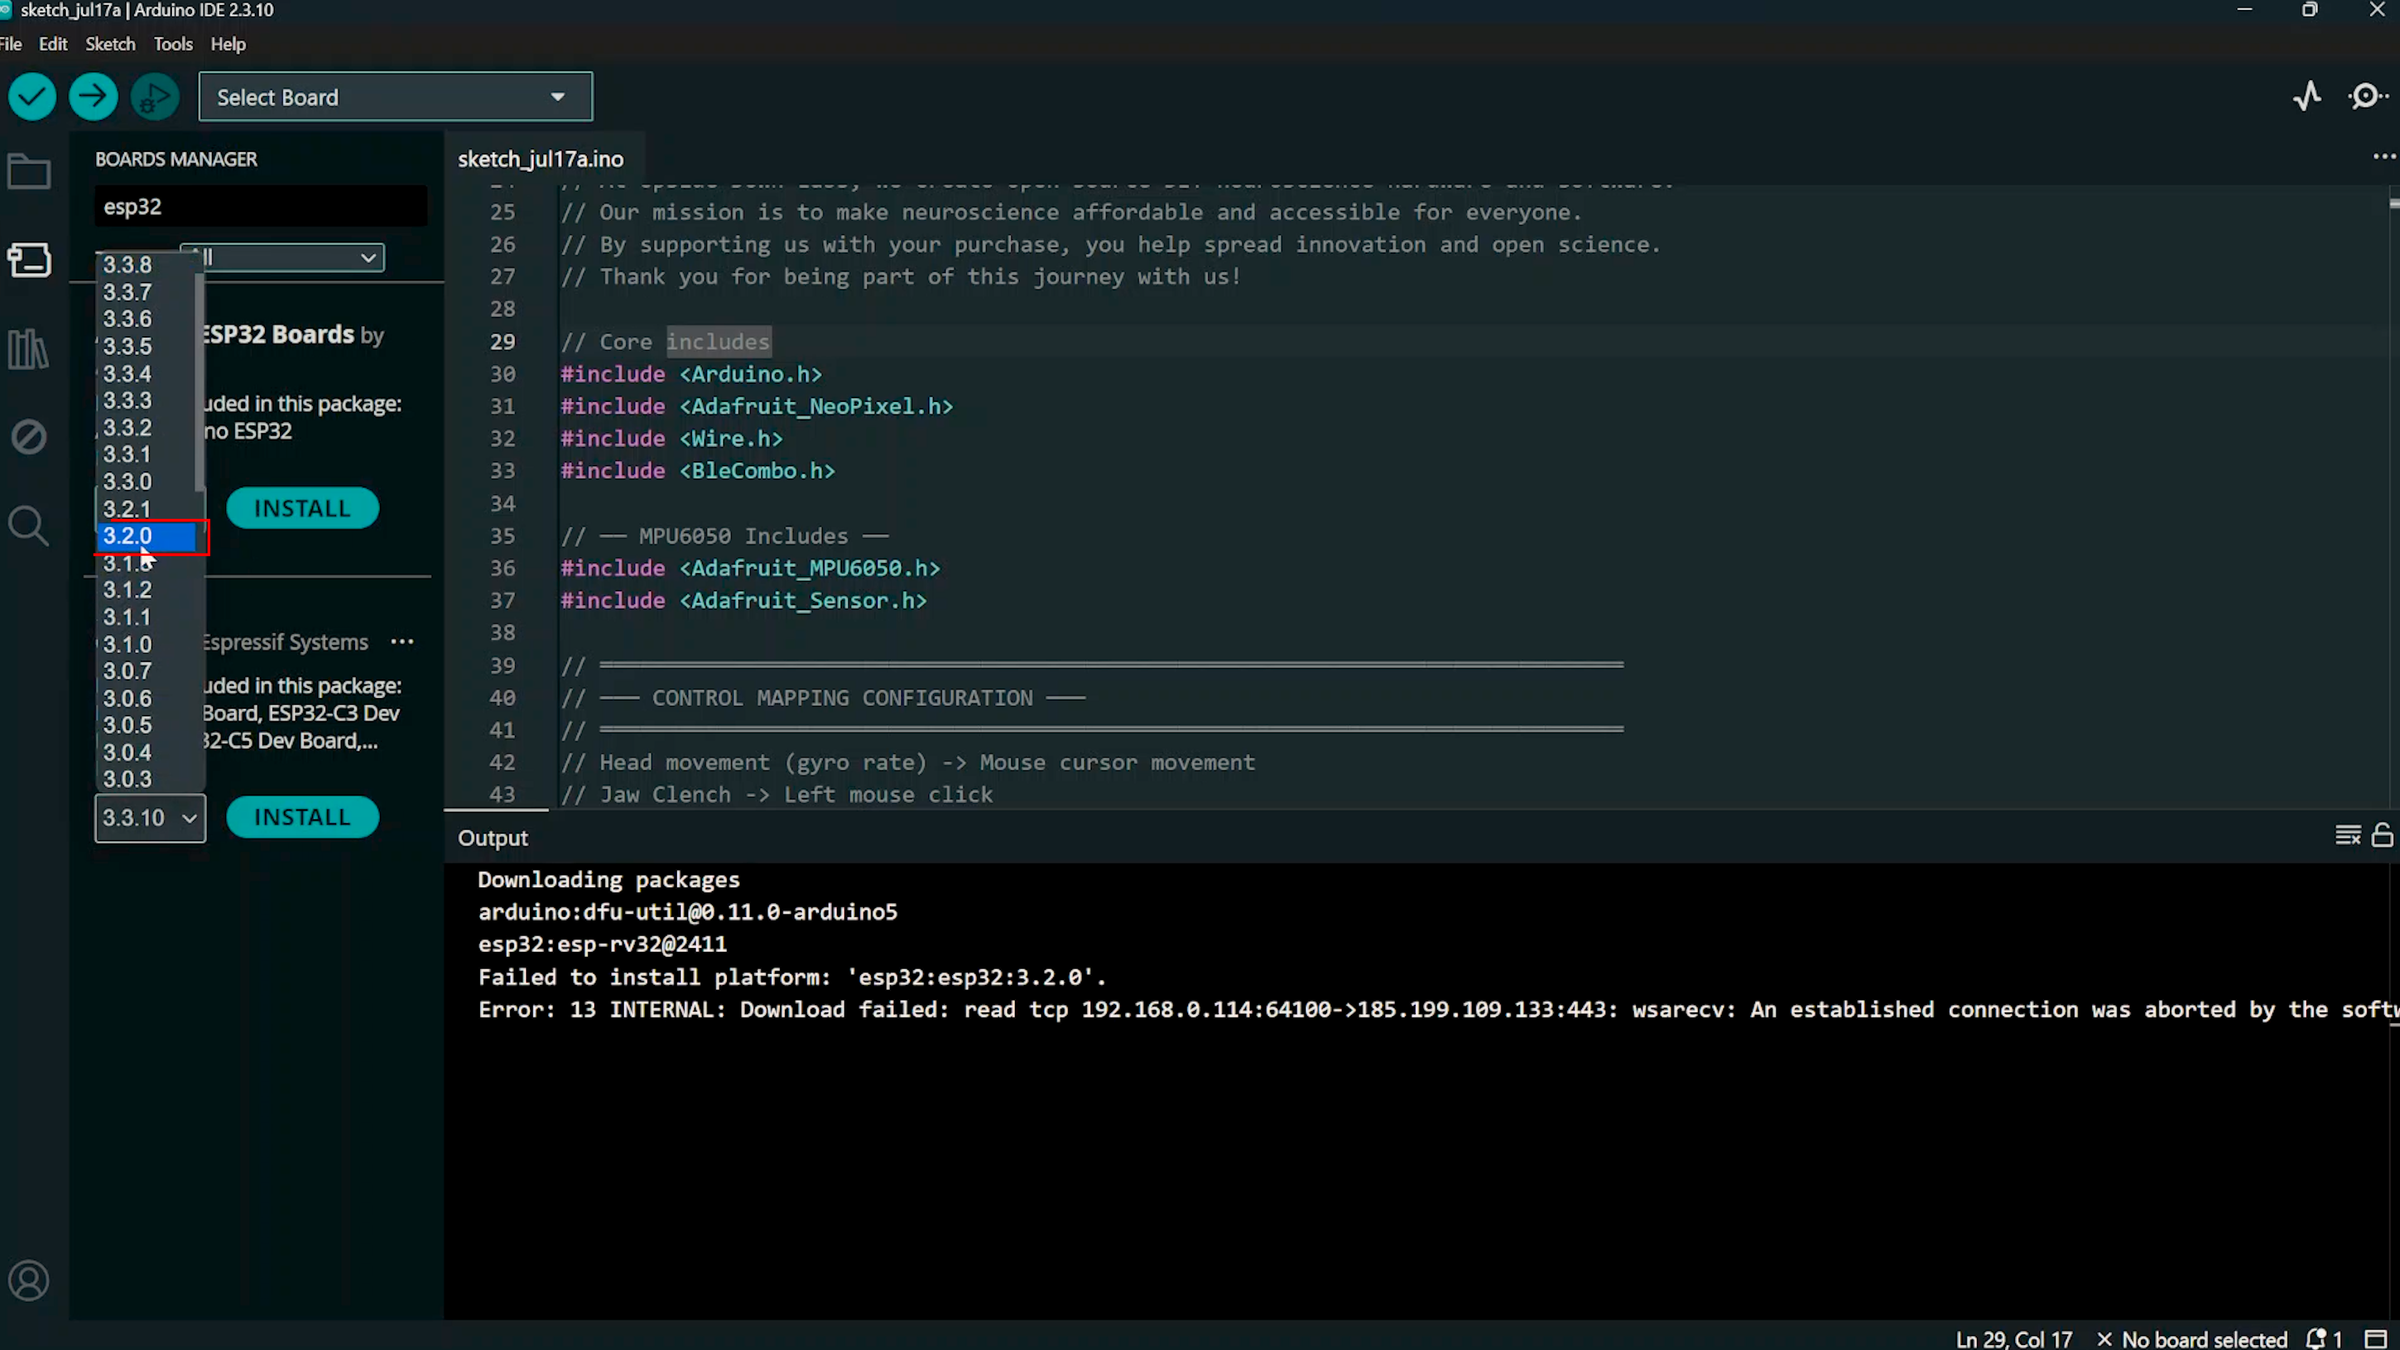
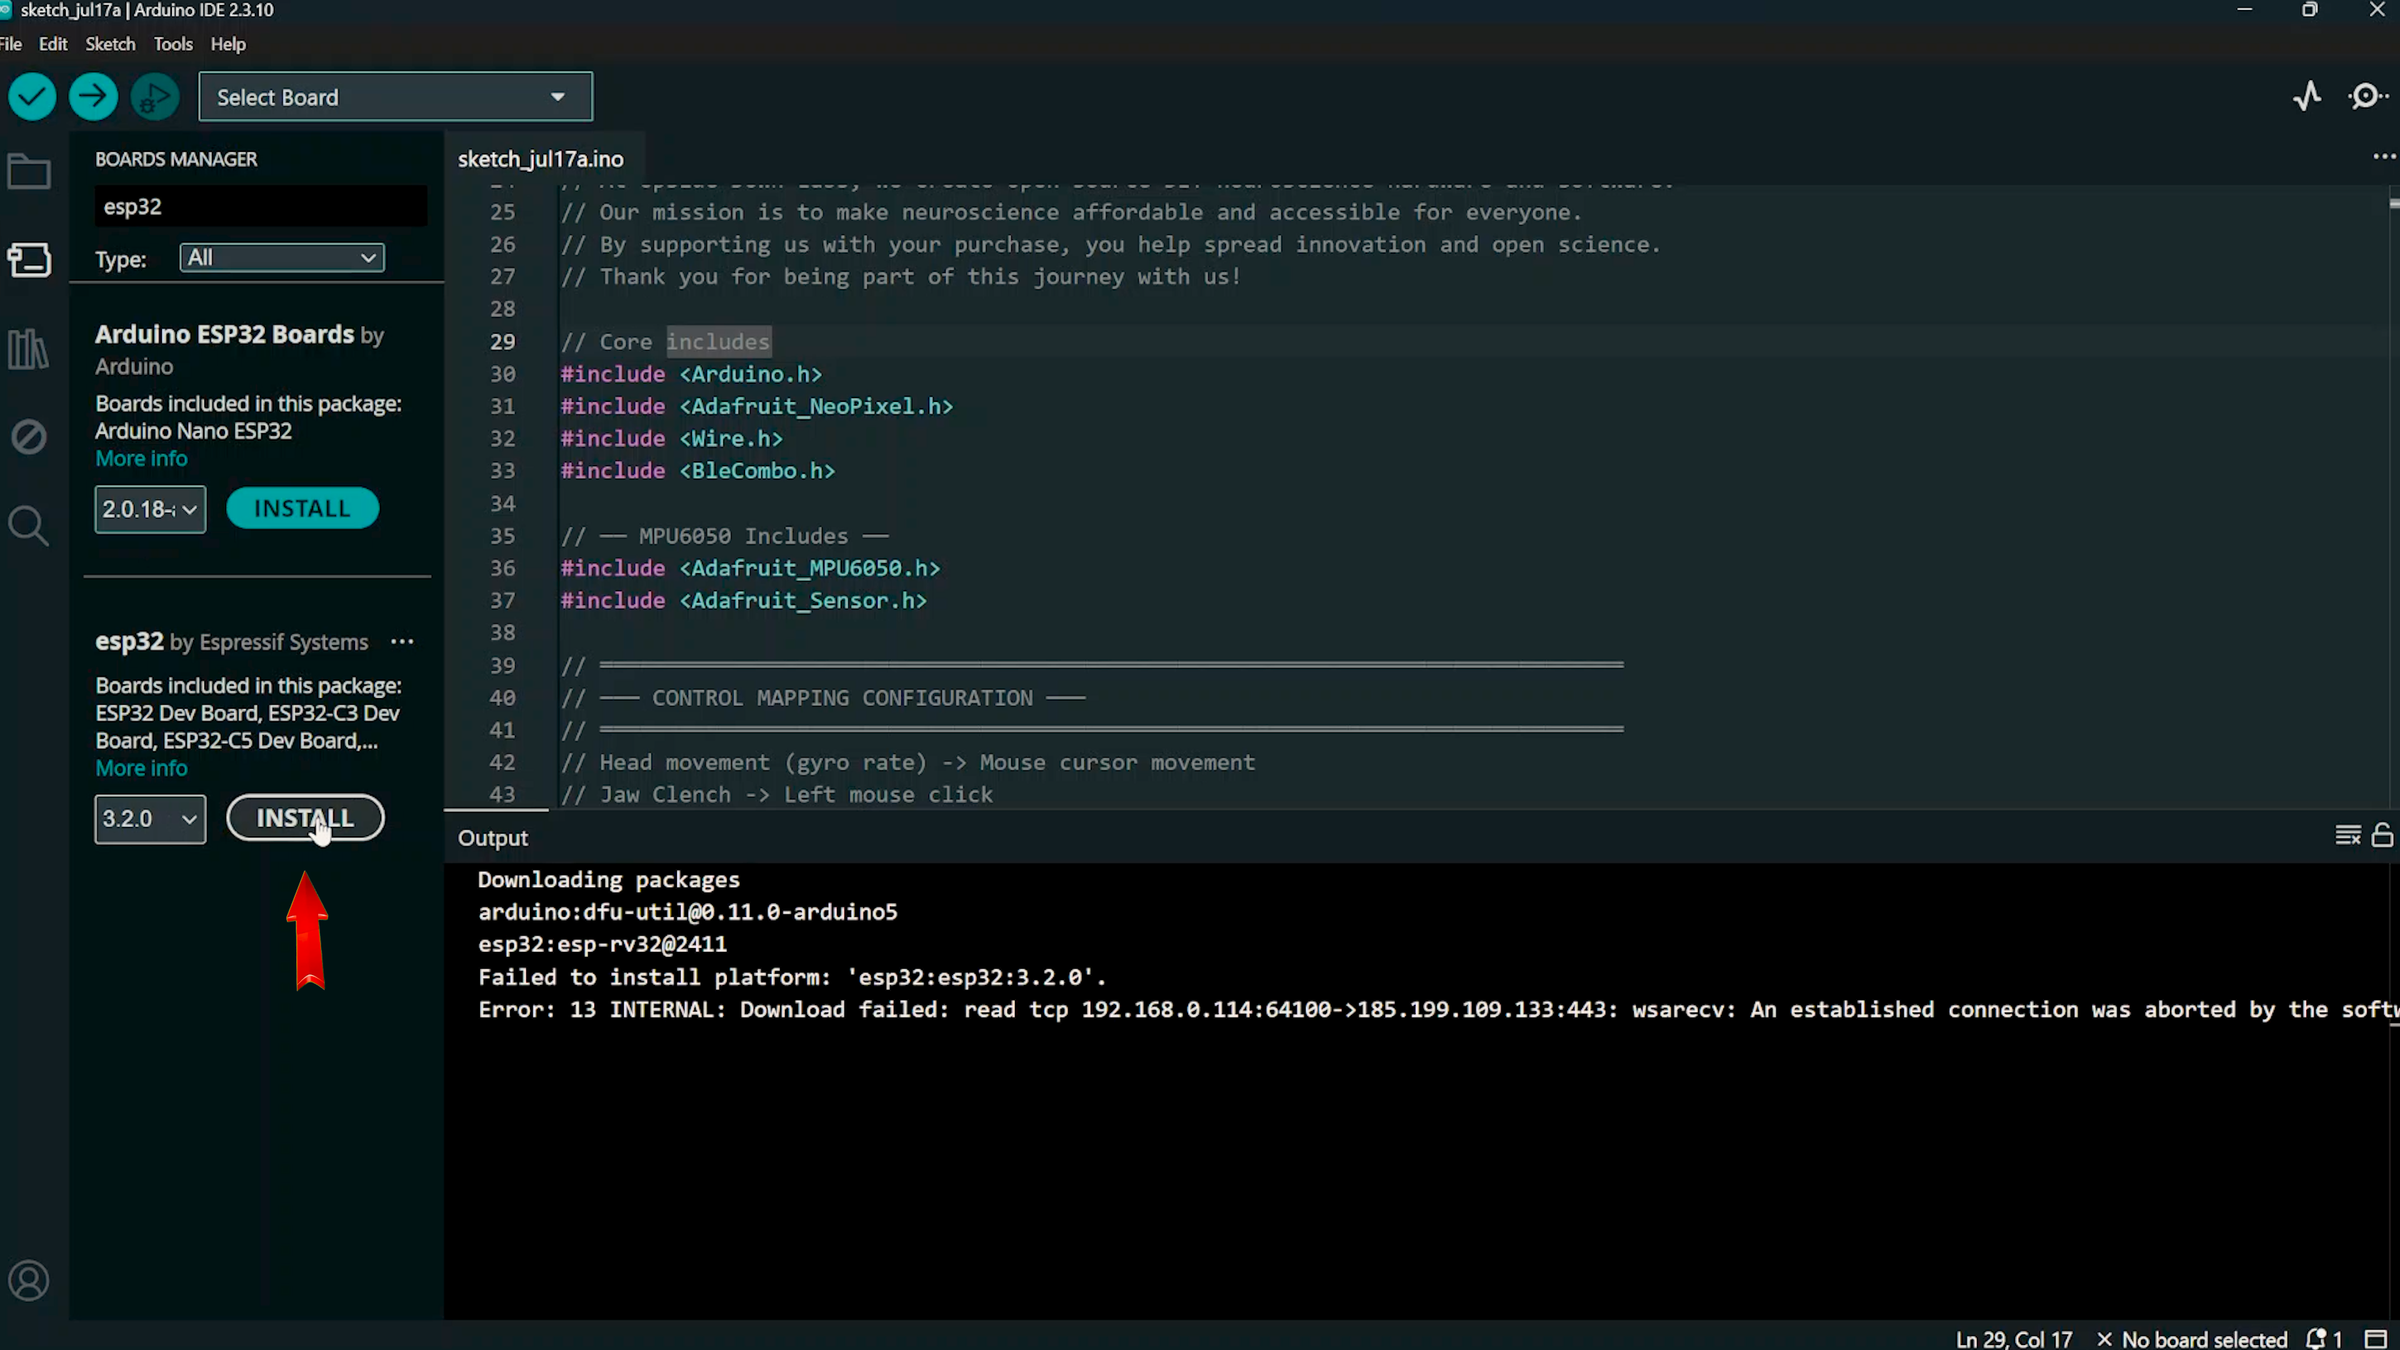
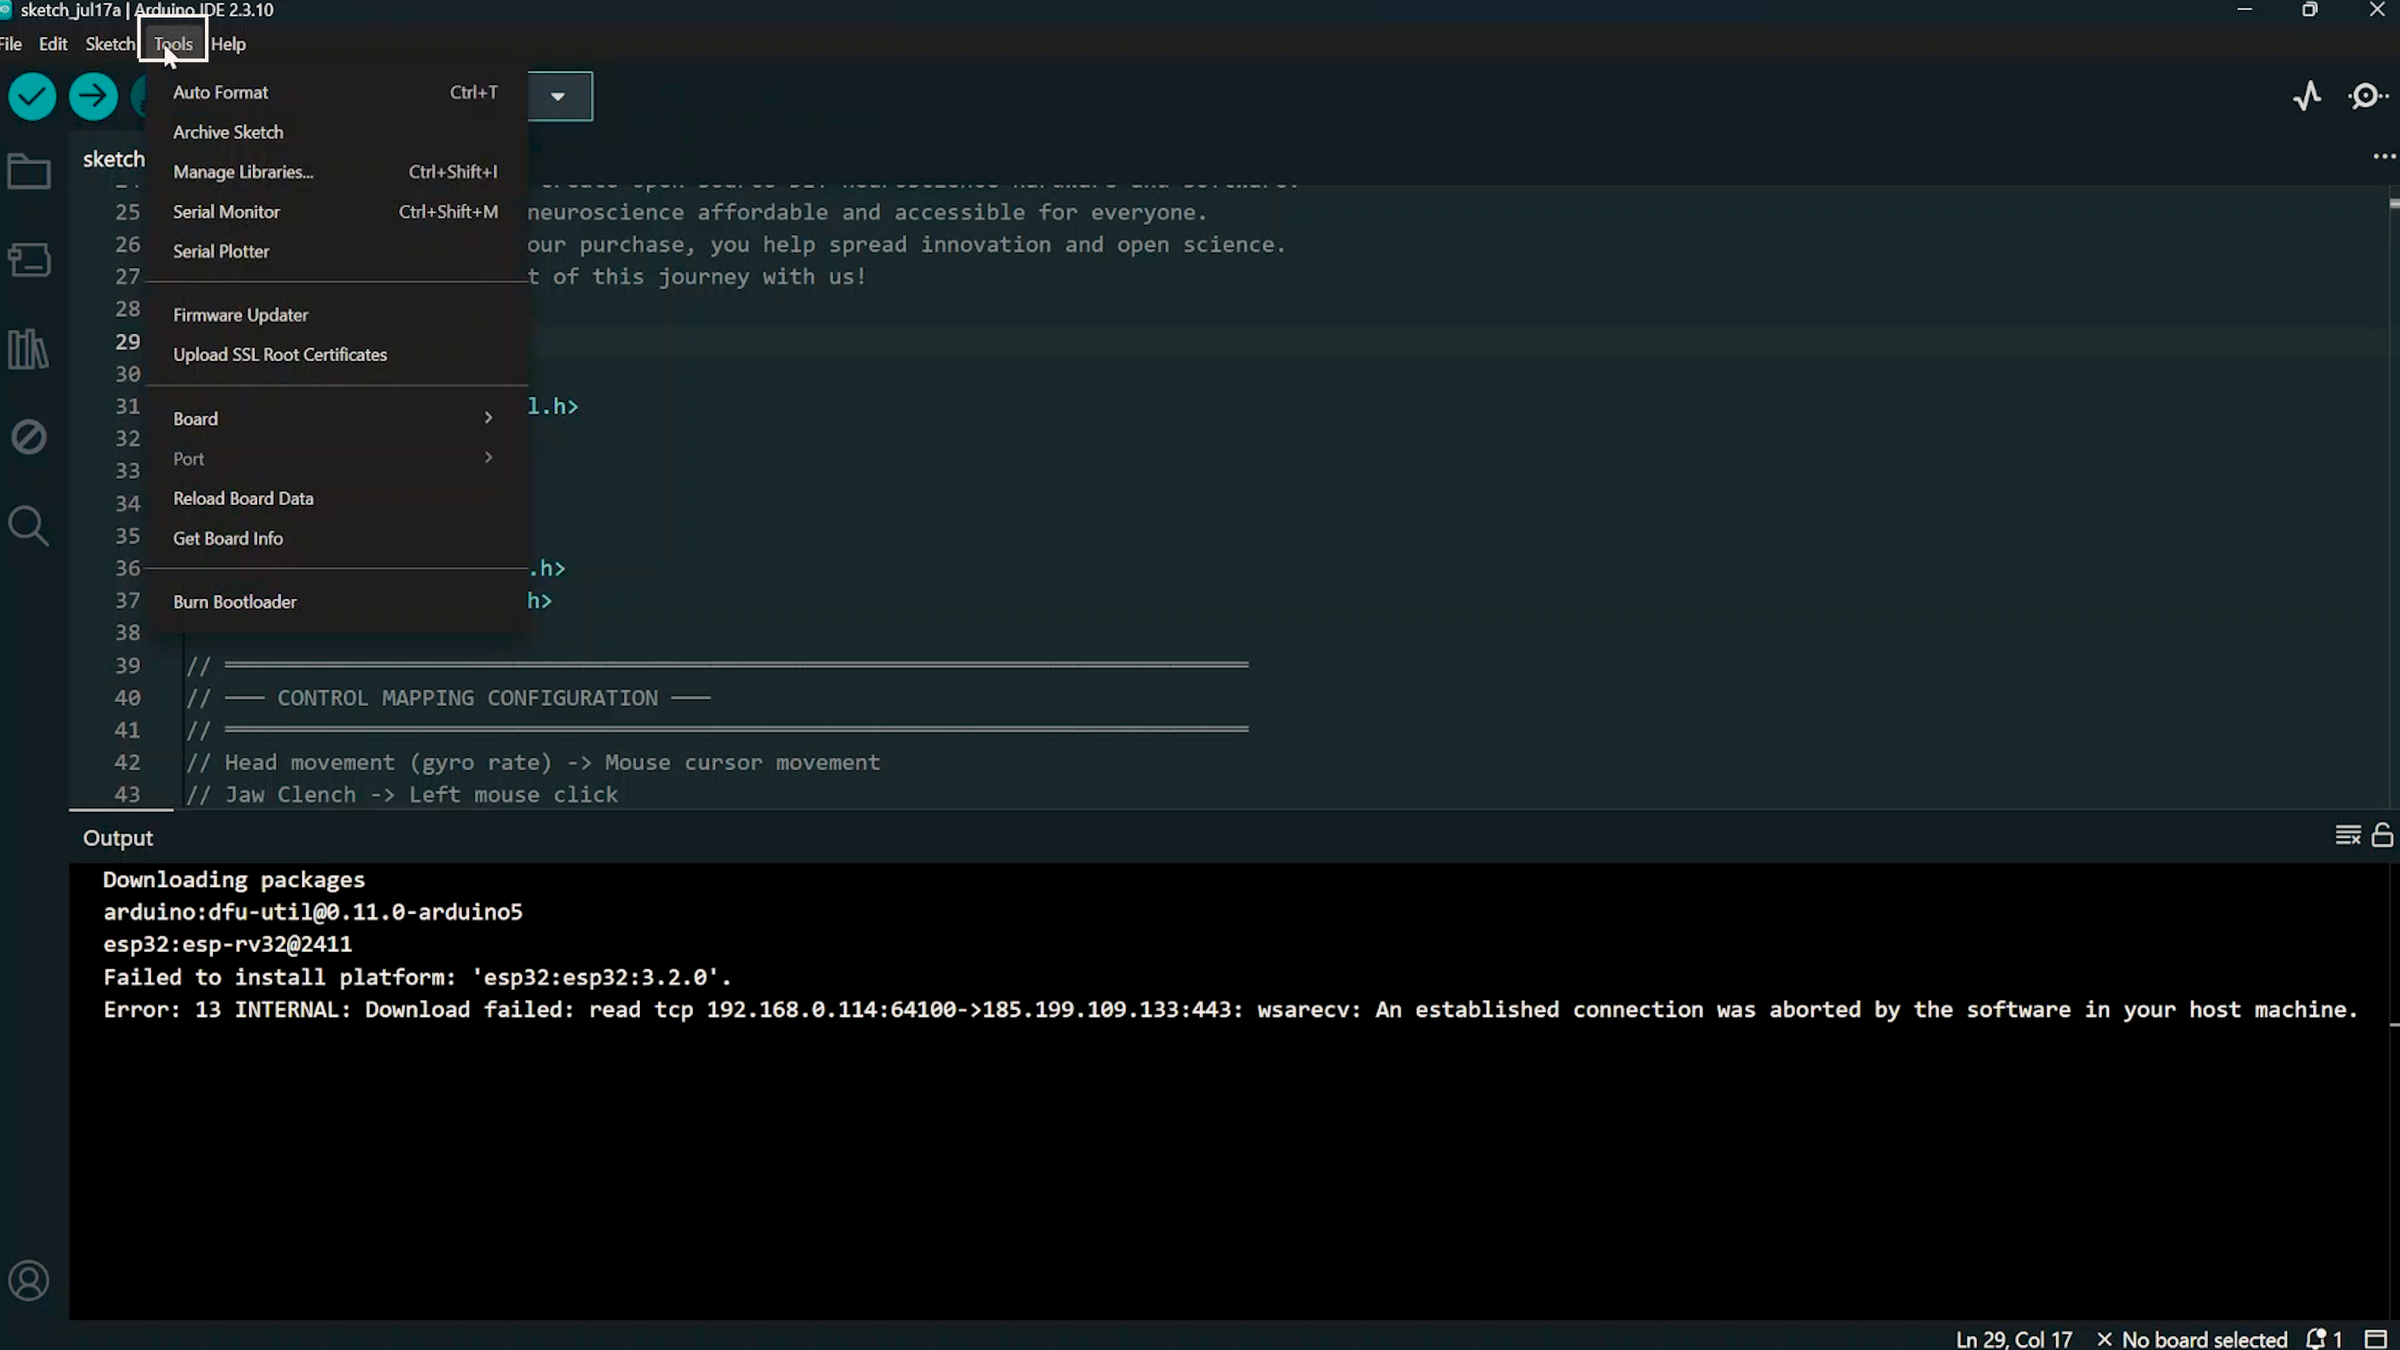
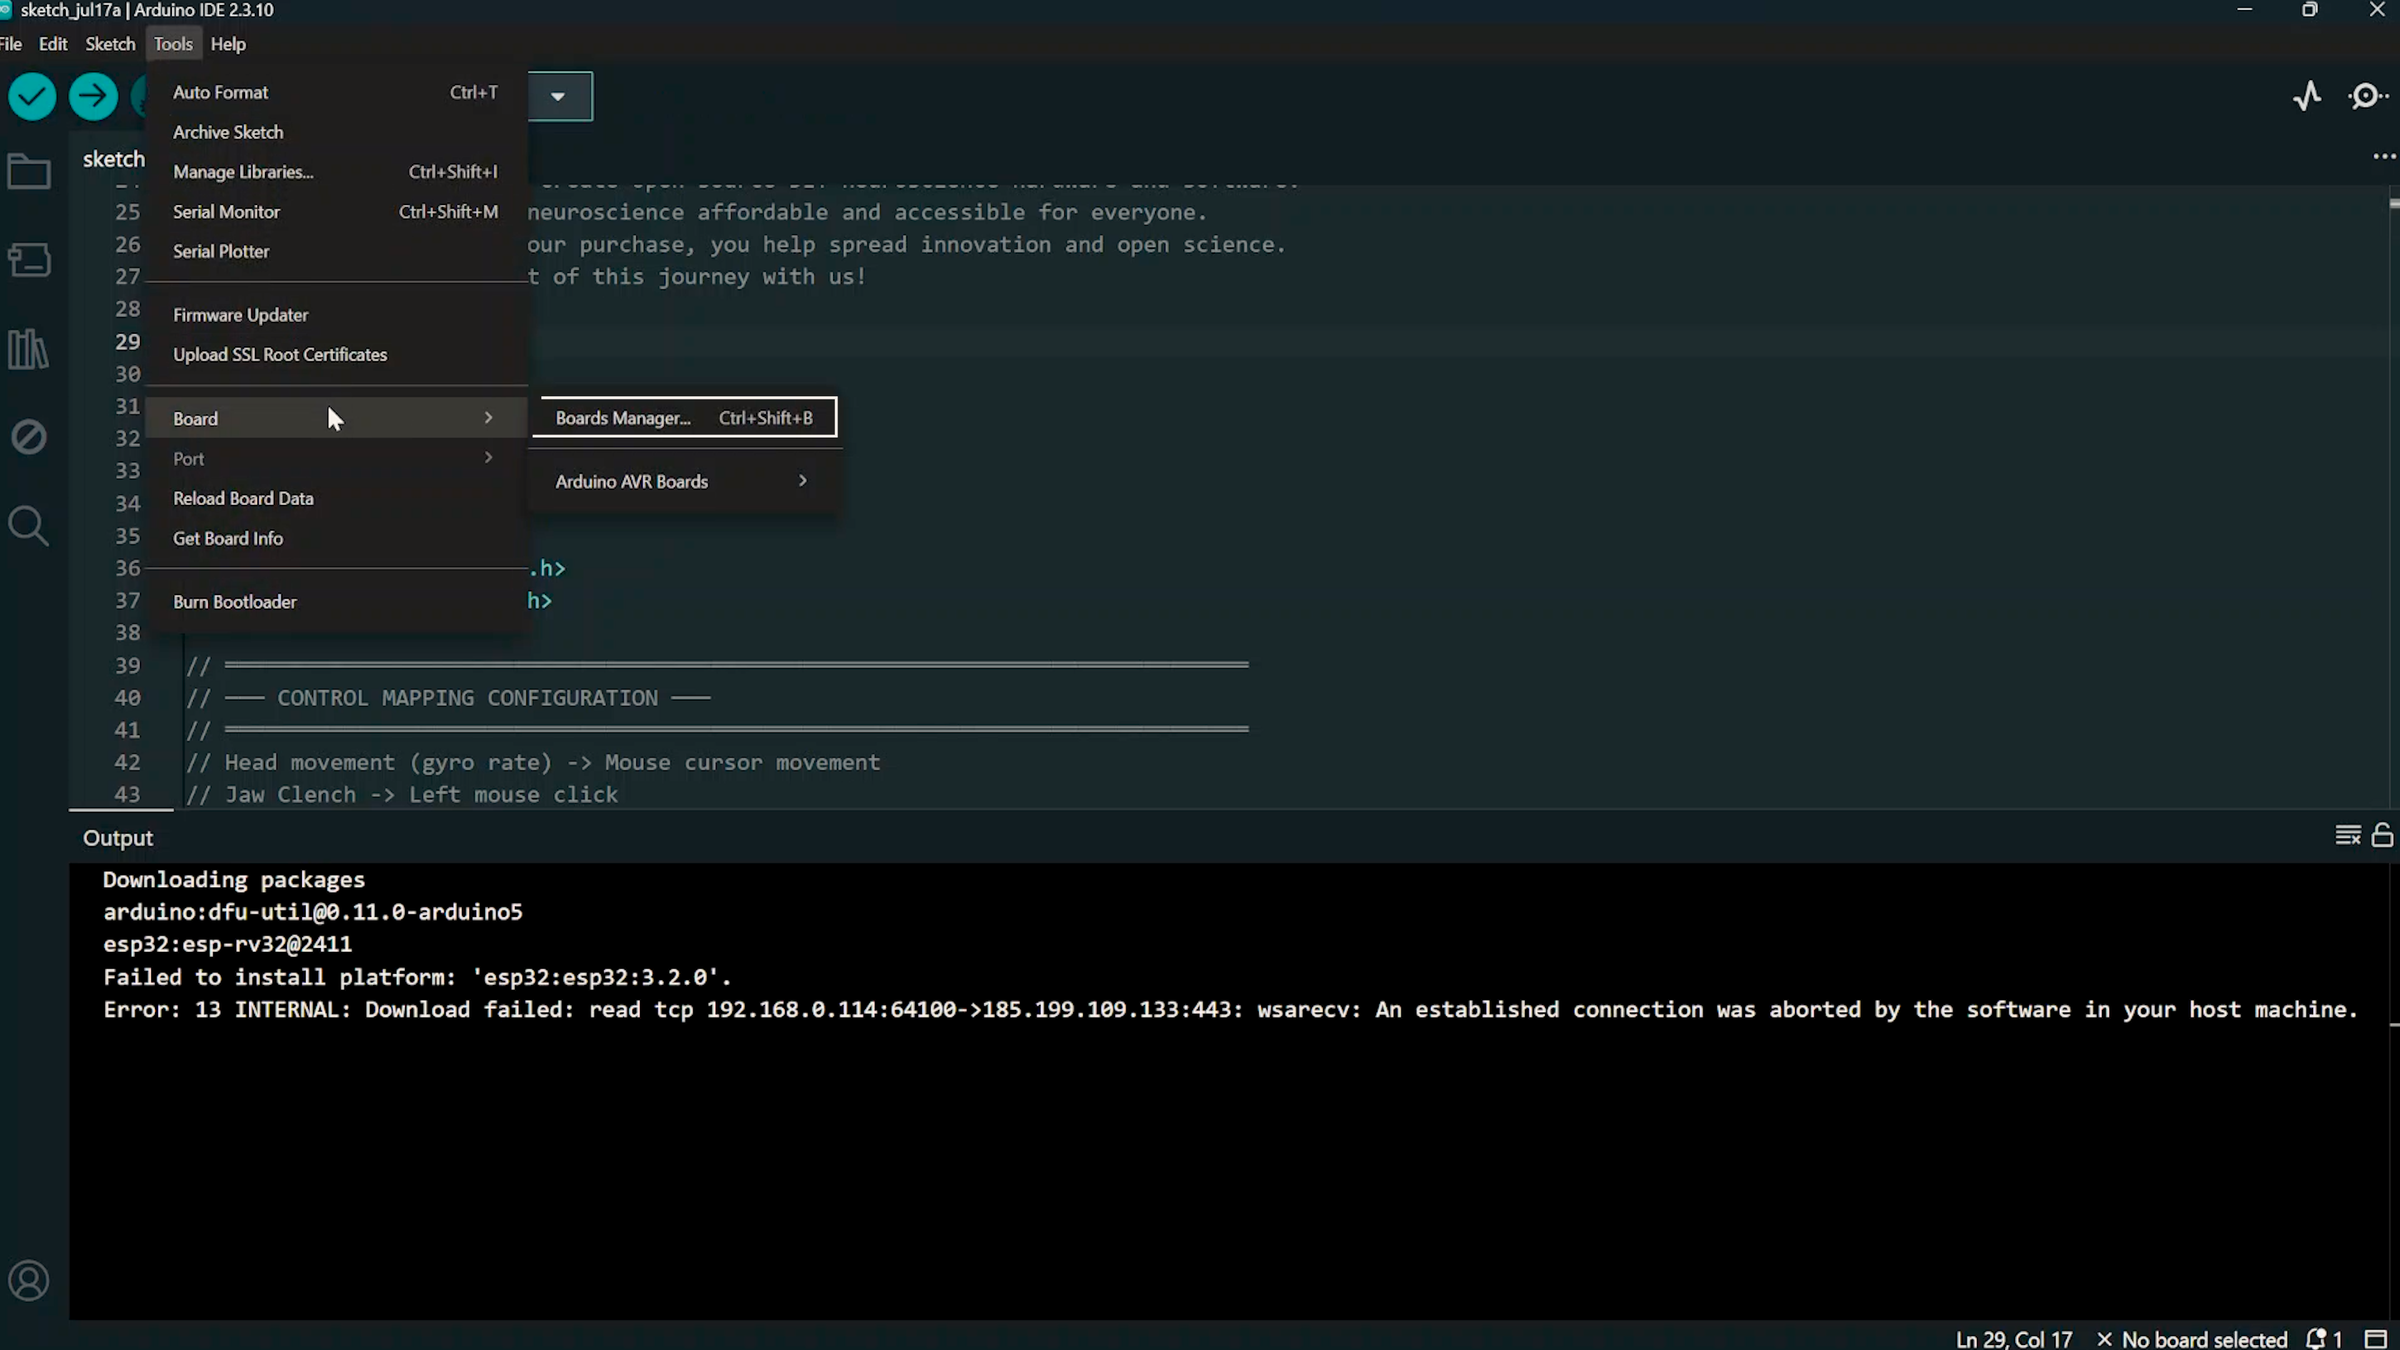
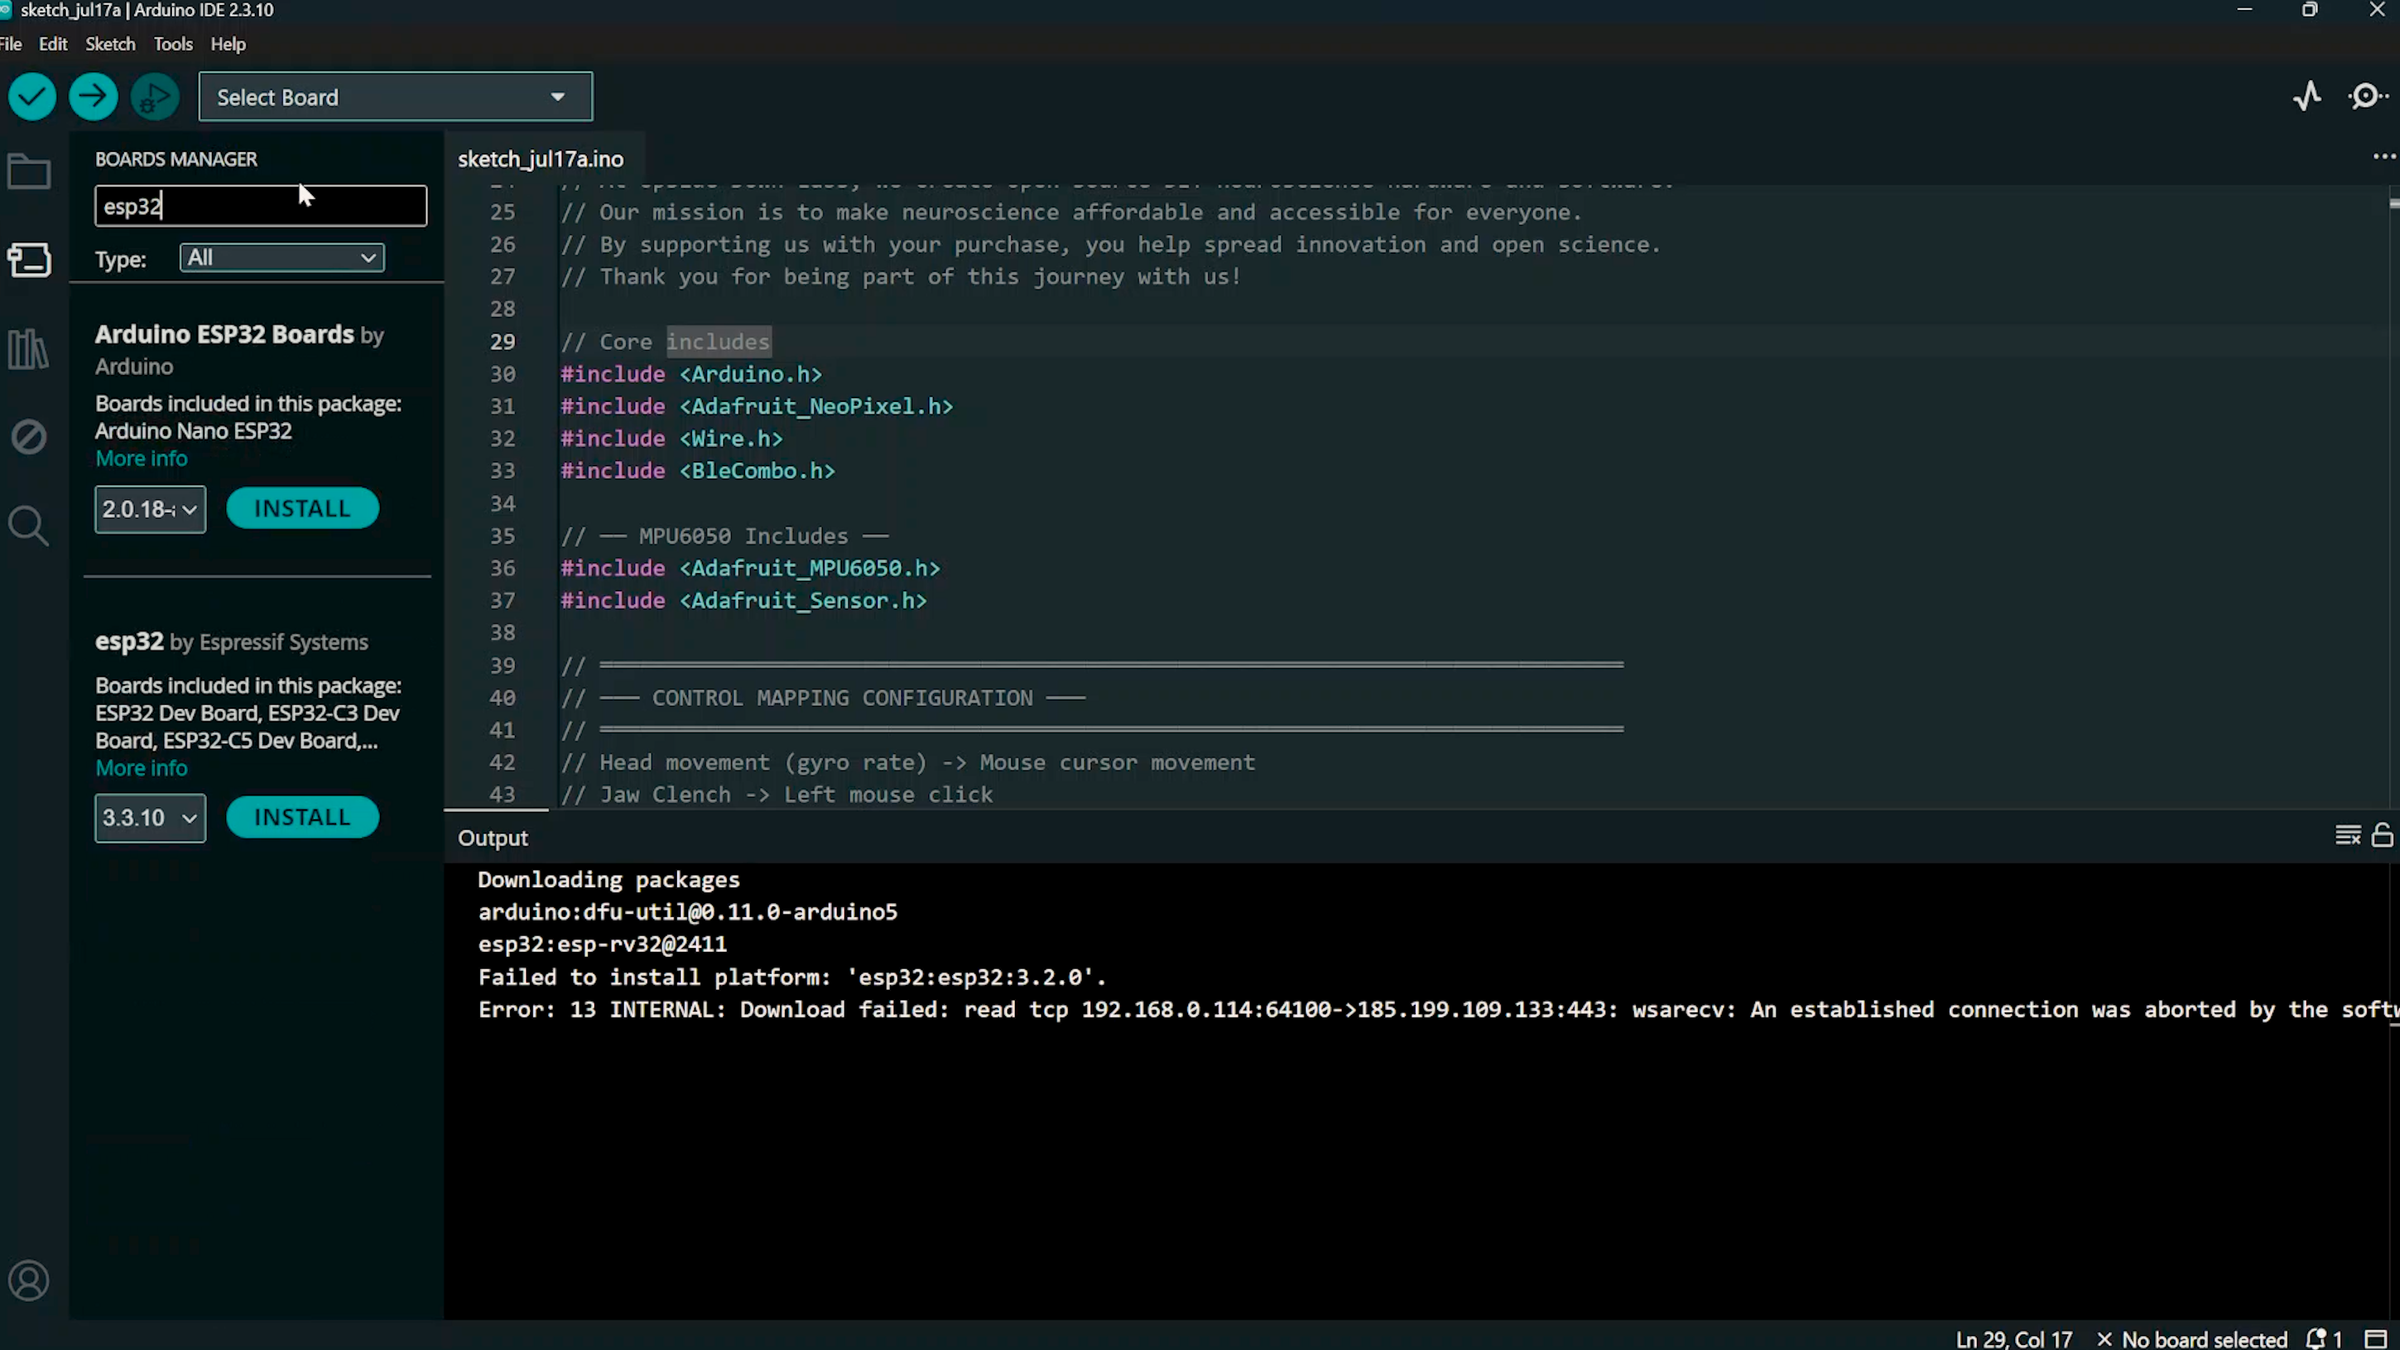
- Install the ESP32 board package
- Open Boards Manager.
- Search for esp32 by Espressif Systems.
- Install Version 3.2.0.
- Important: Do not use newer versions, as they may cause compatibility issues.
Install Required Libaries(adafruit Neopixels)
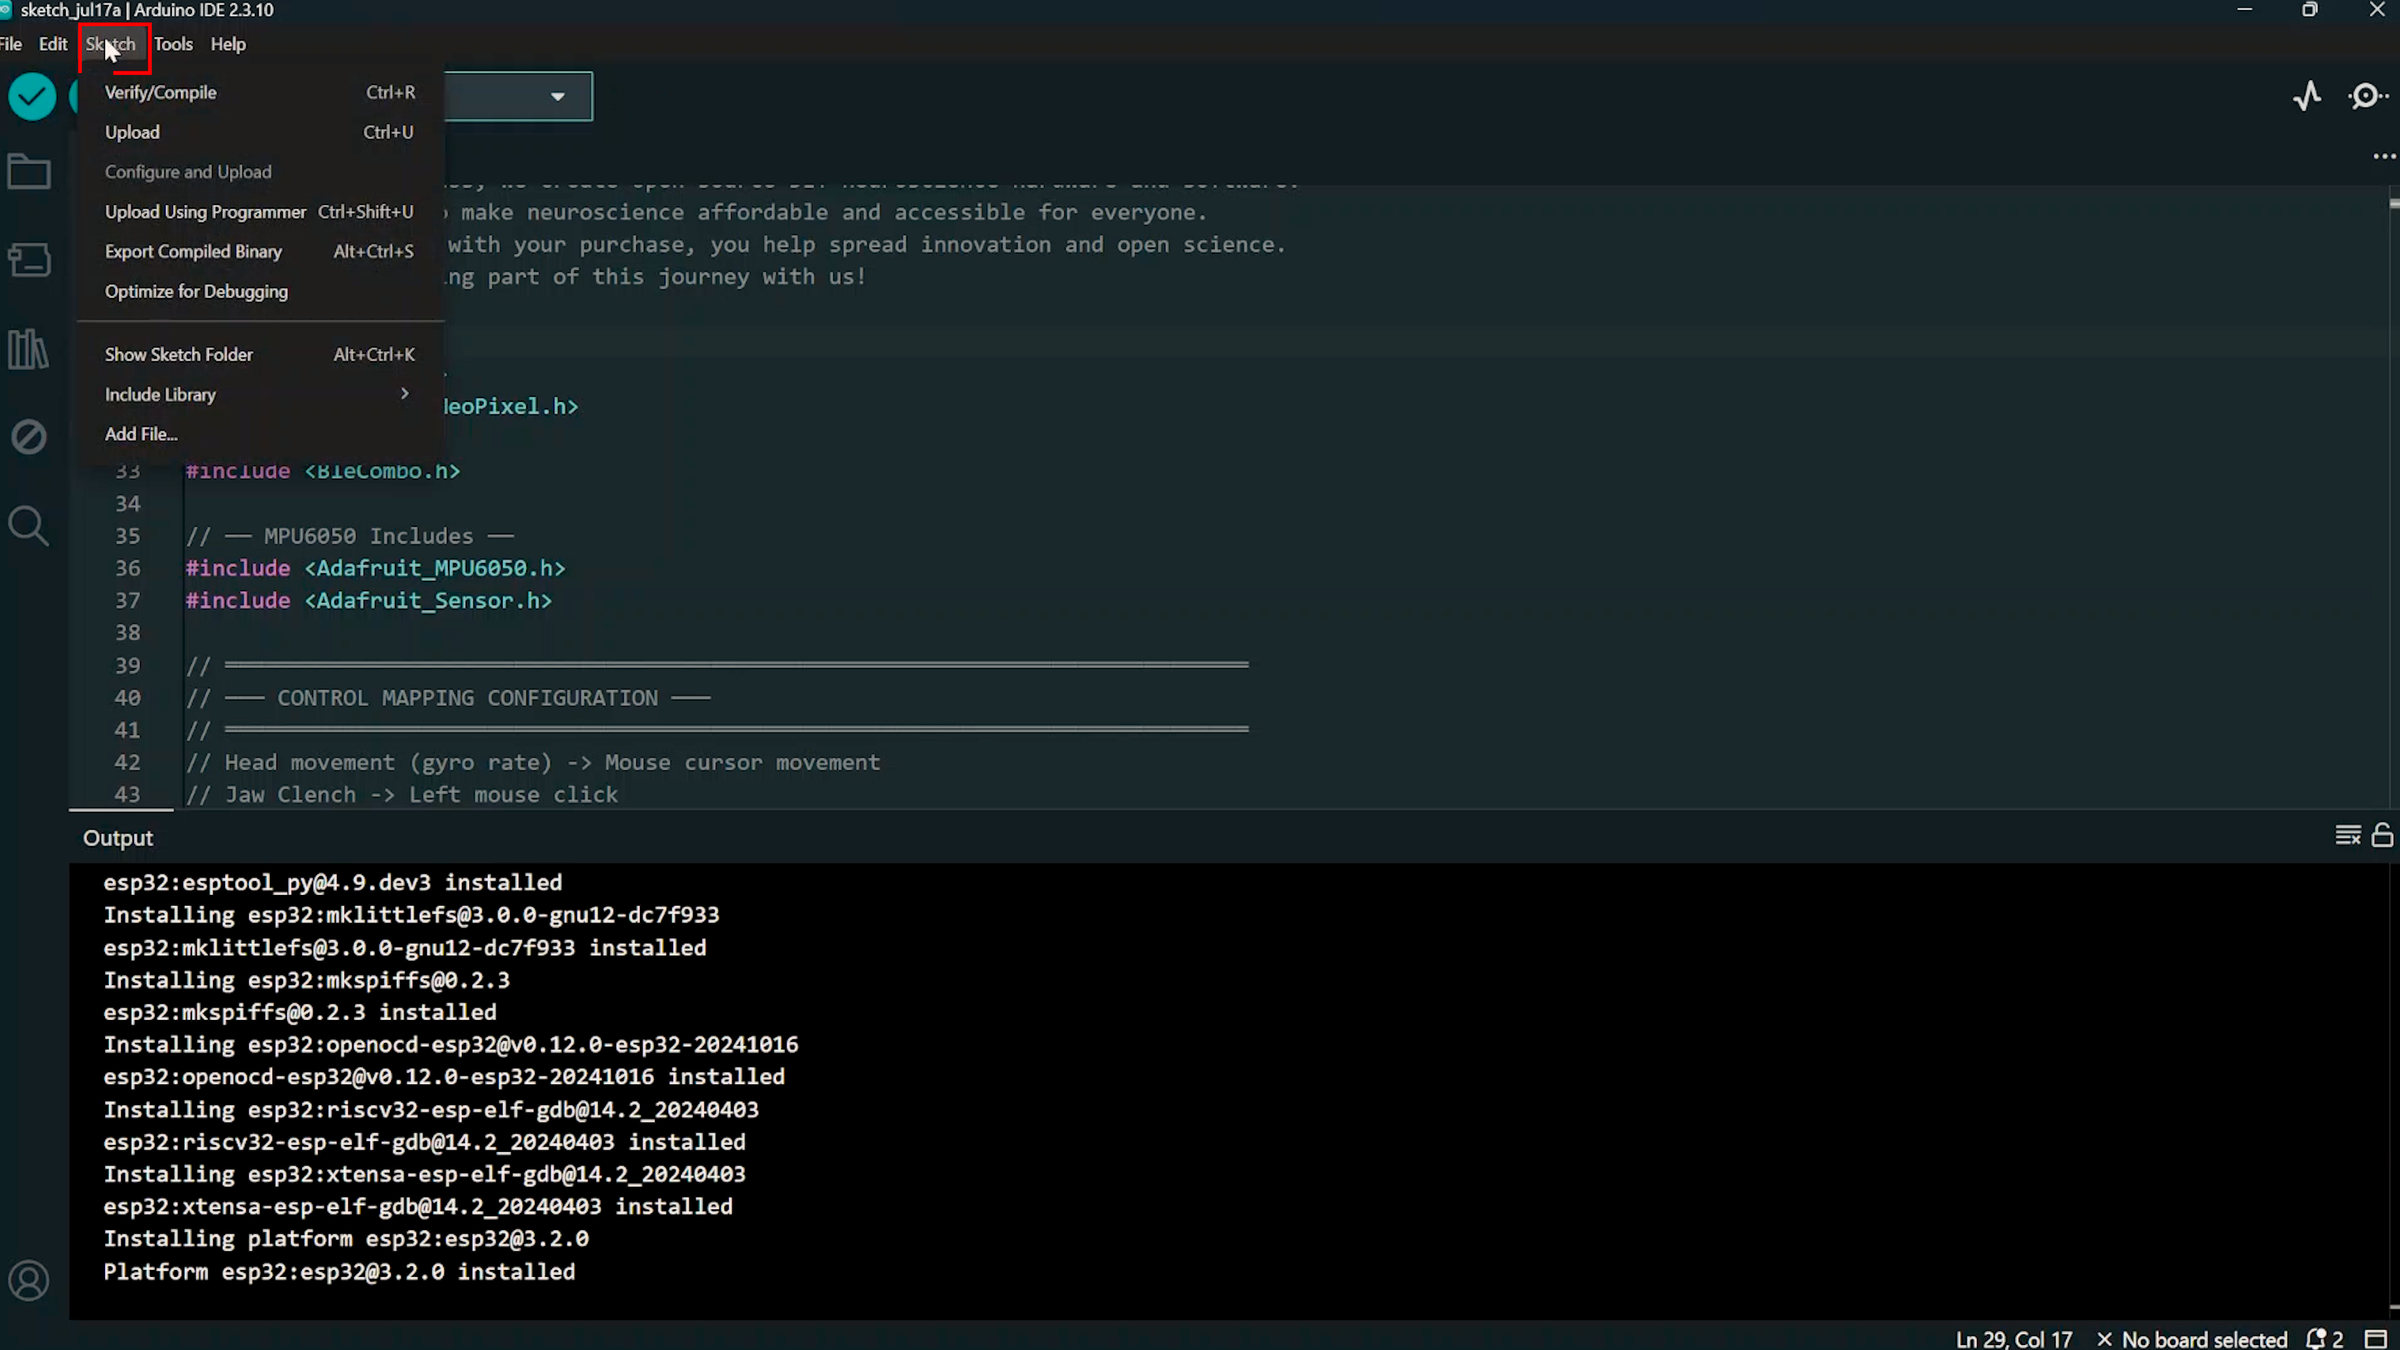
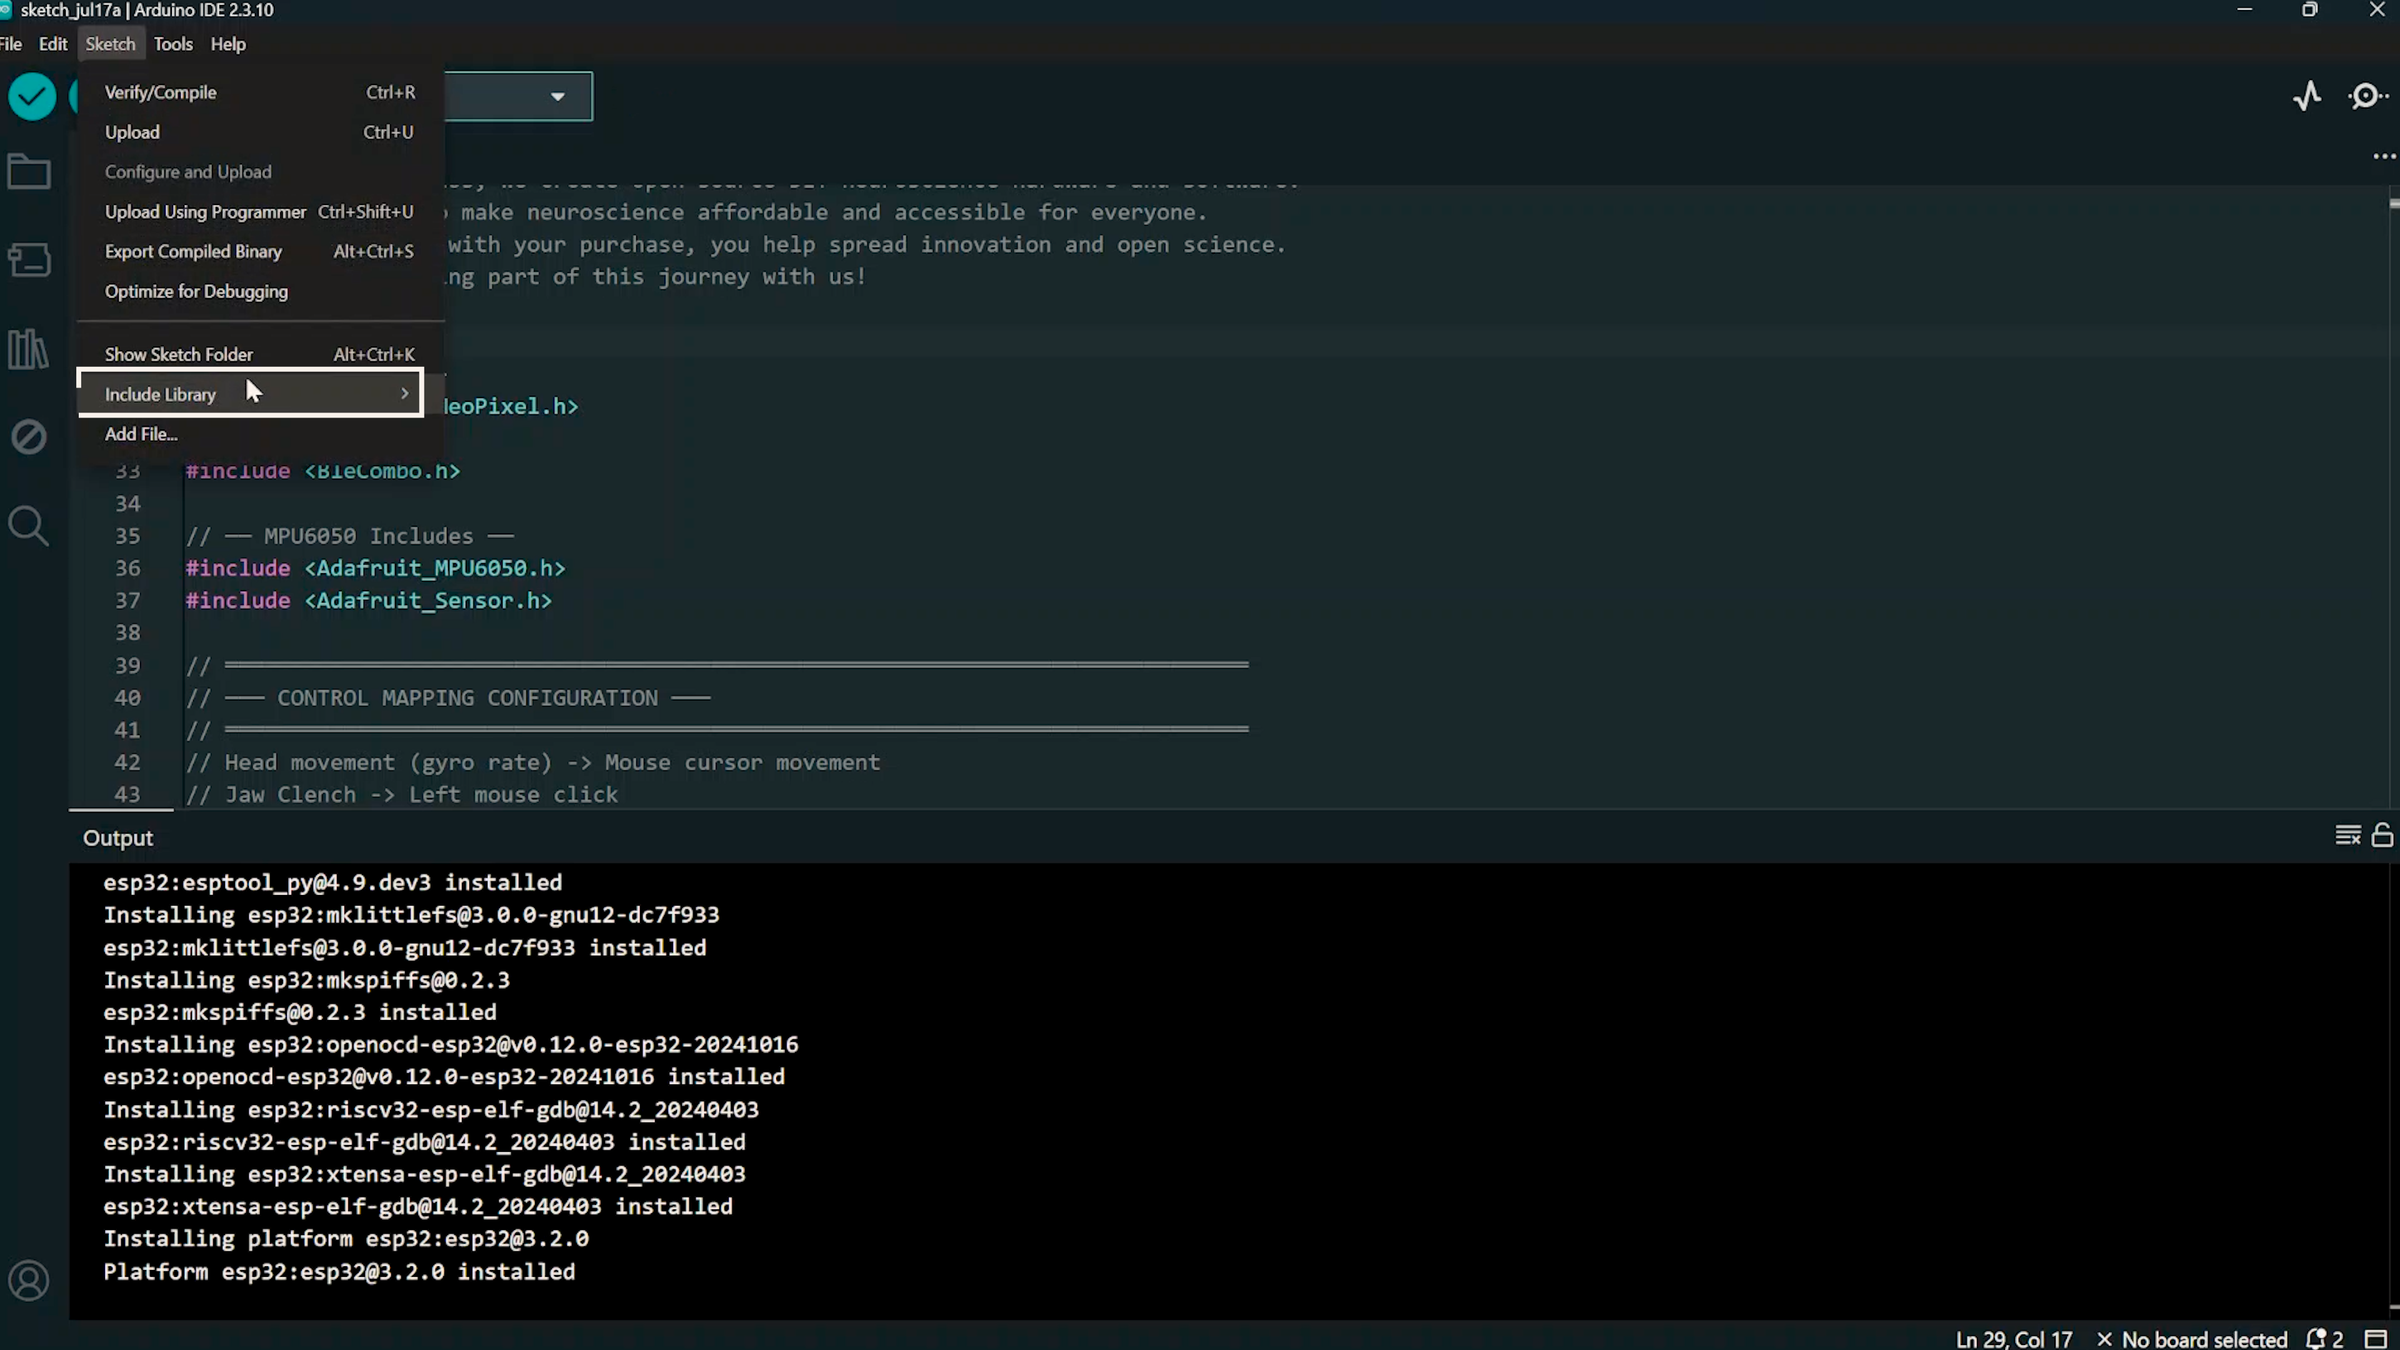
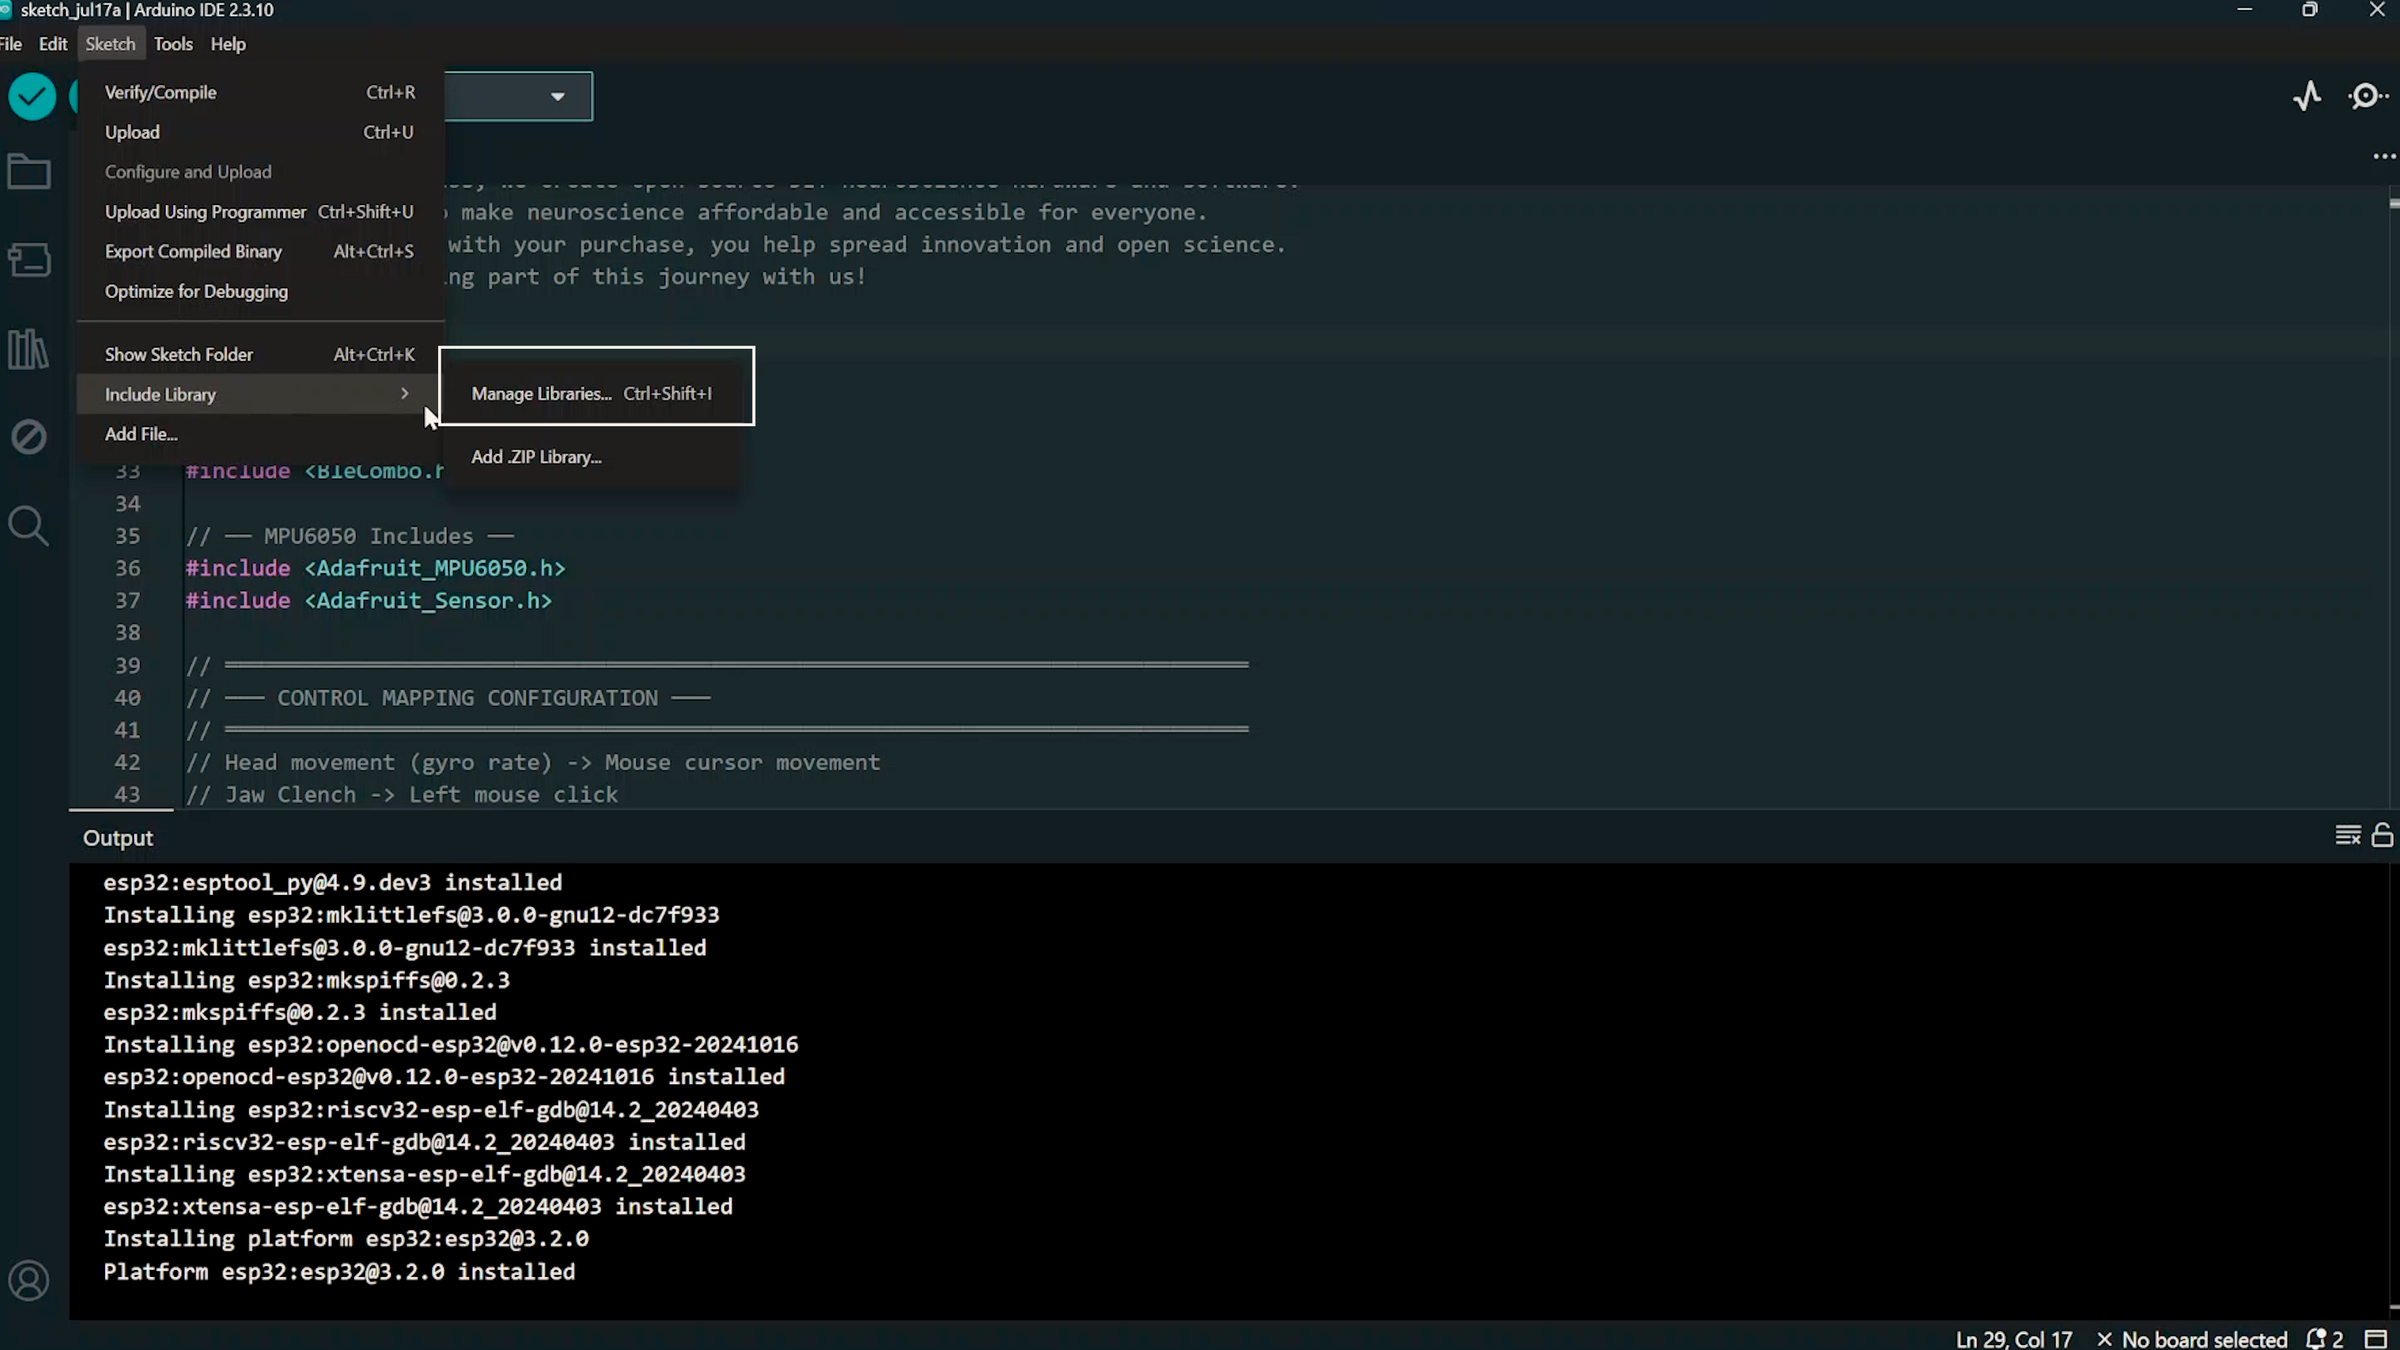
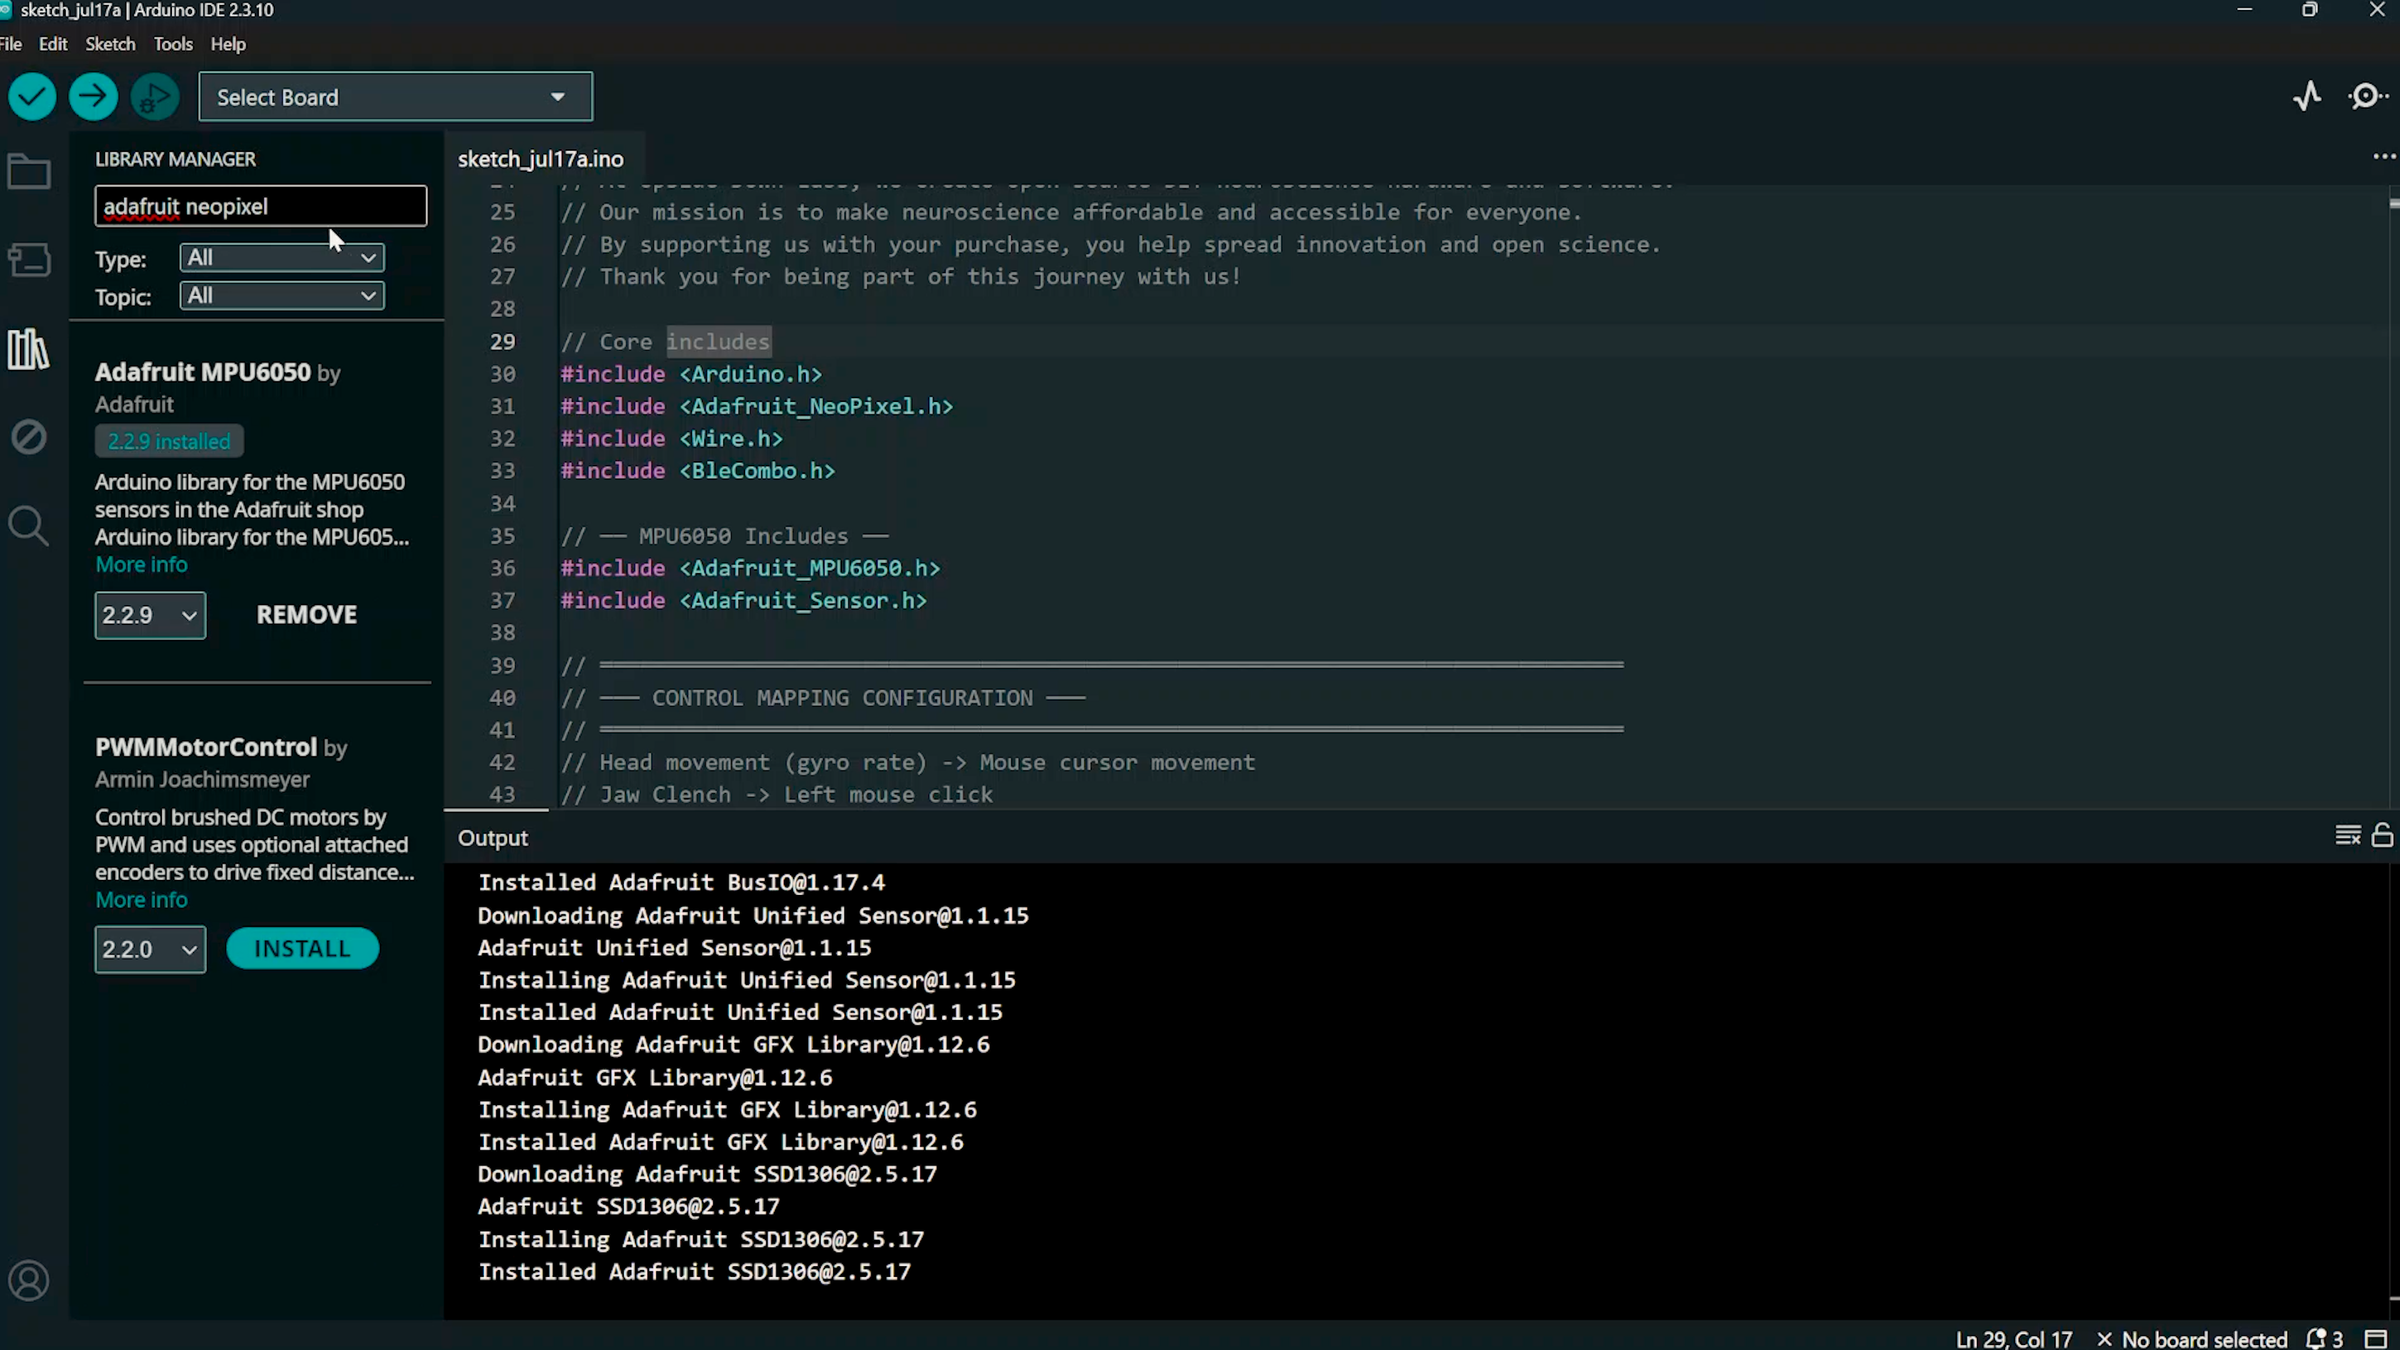
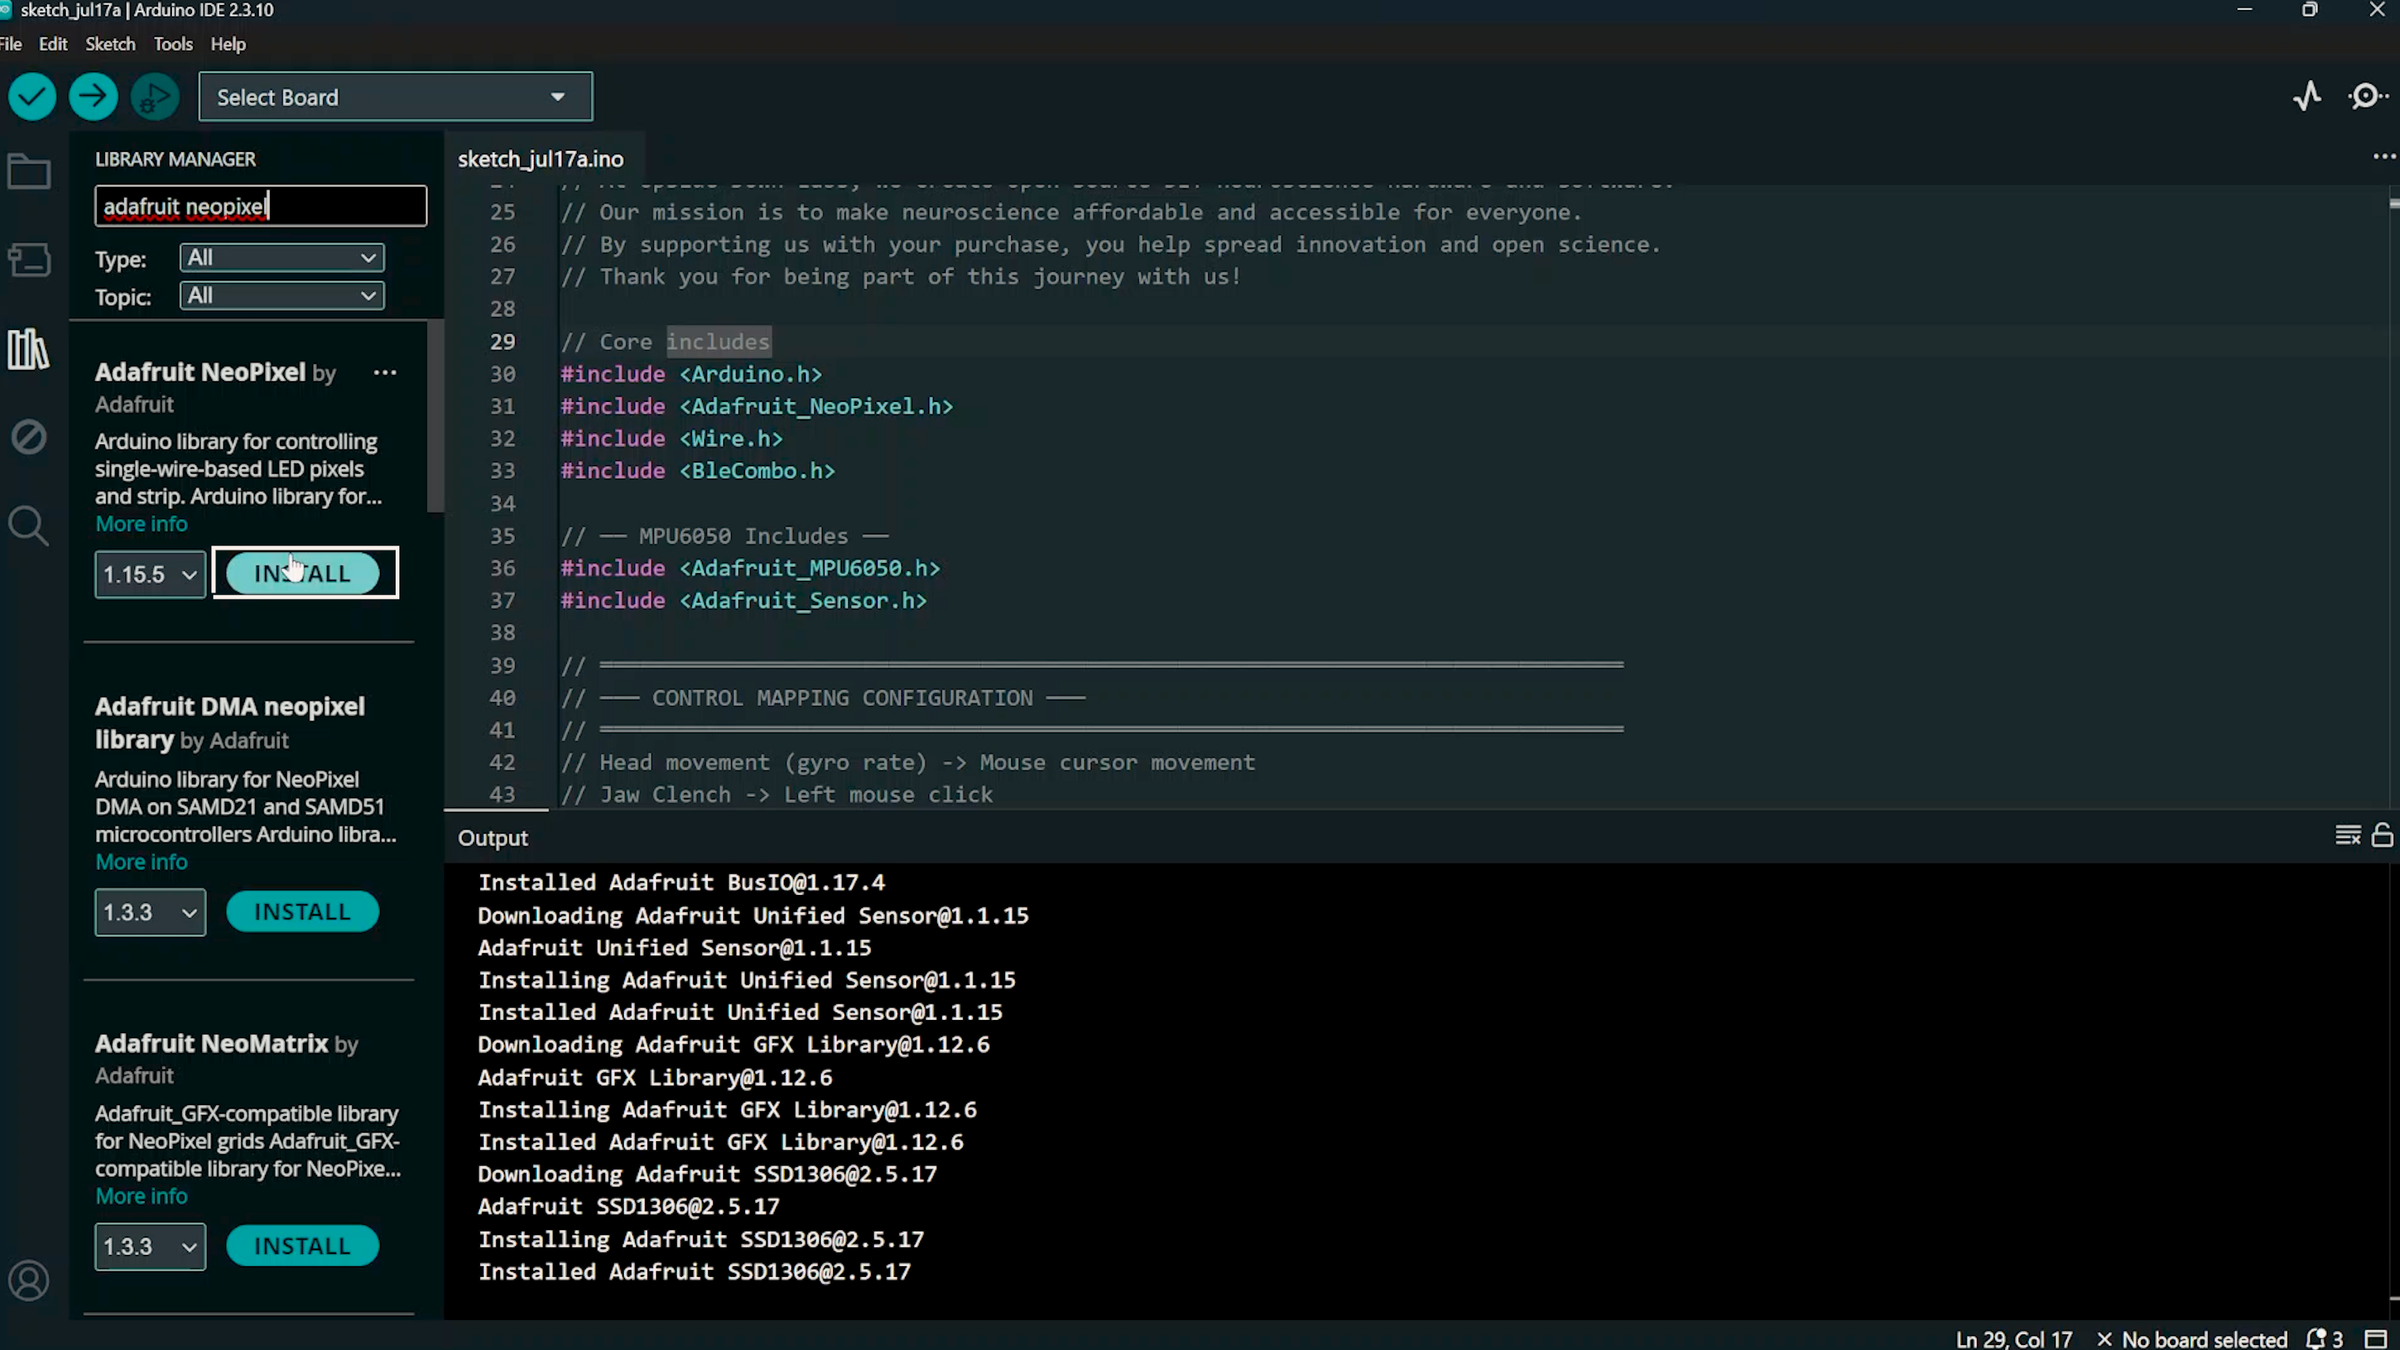
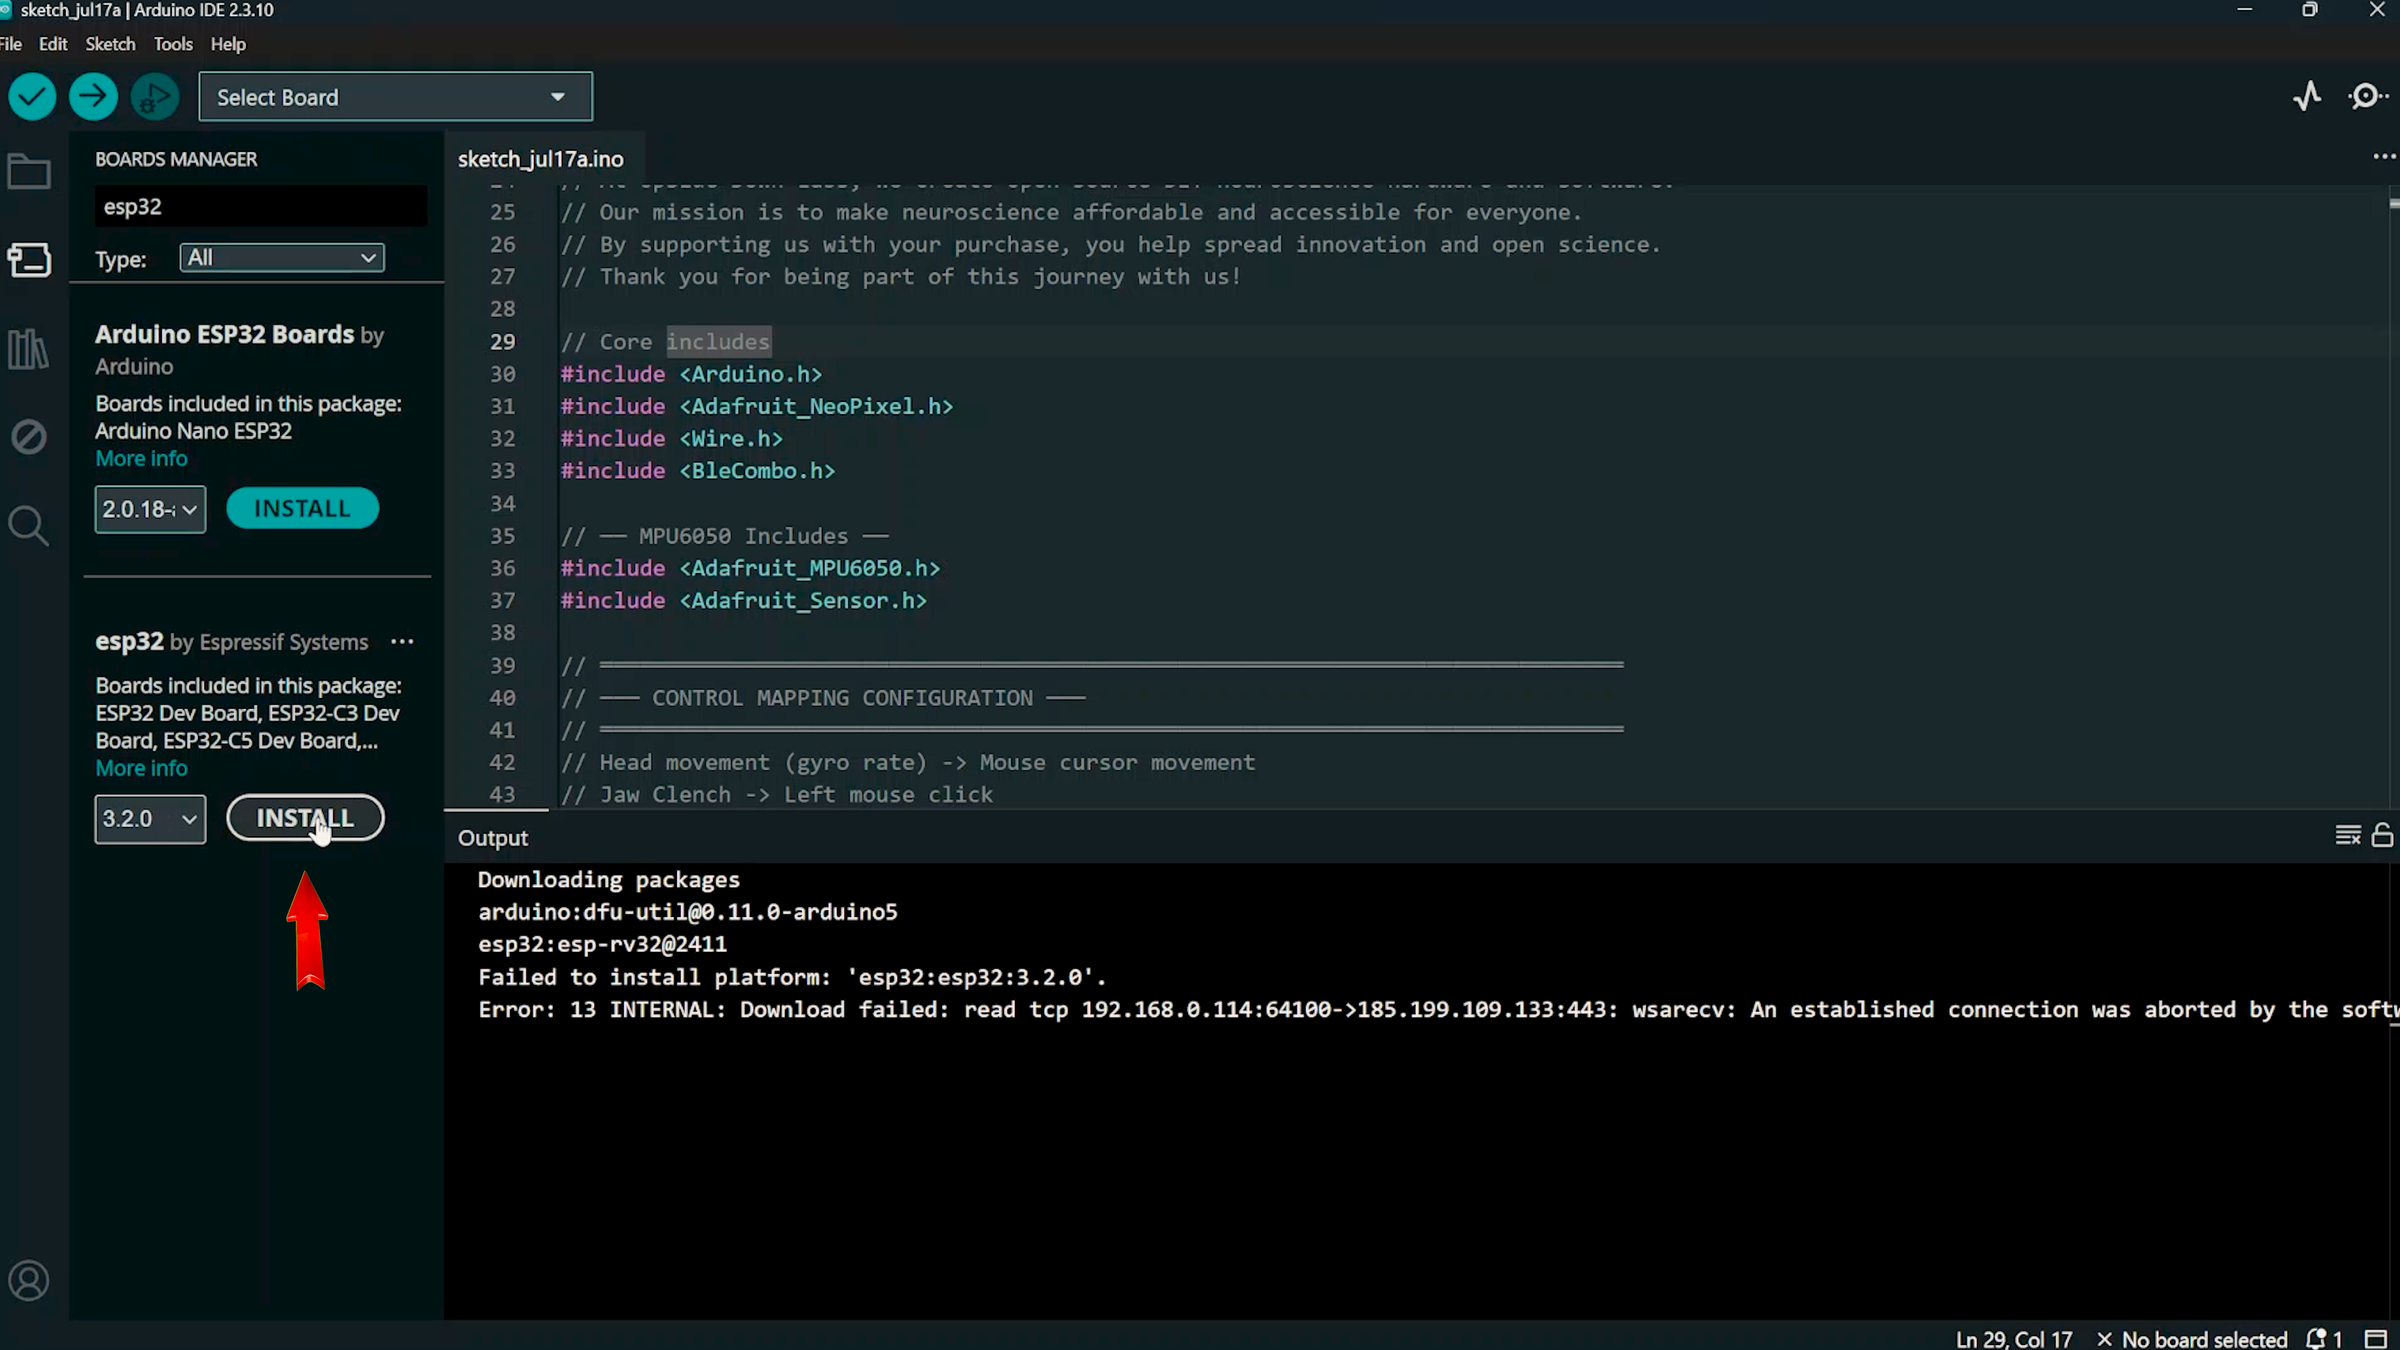
- Install the required libraries
- Install the following libraries using the Library Manager:
- Adafruit NeoPixel
- MPU6050 library (if using the MPU6050 sensor)
- SparkFun BMI270 Arduino Library (if using the BMI270 sensor)
Install ESP32 BLE Combo Library
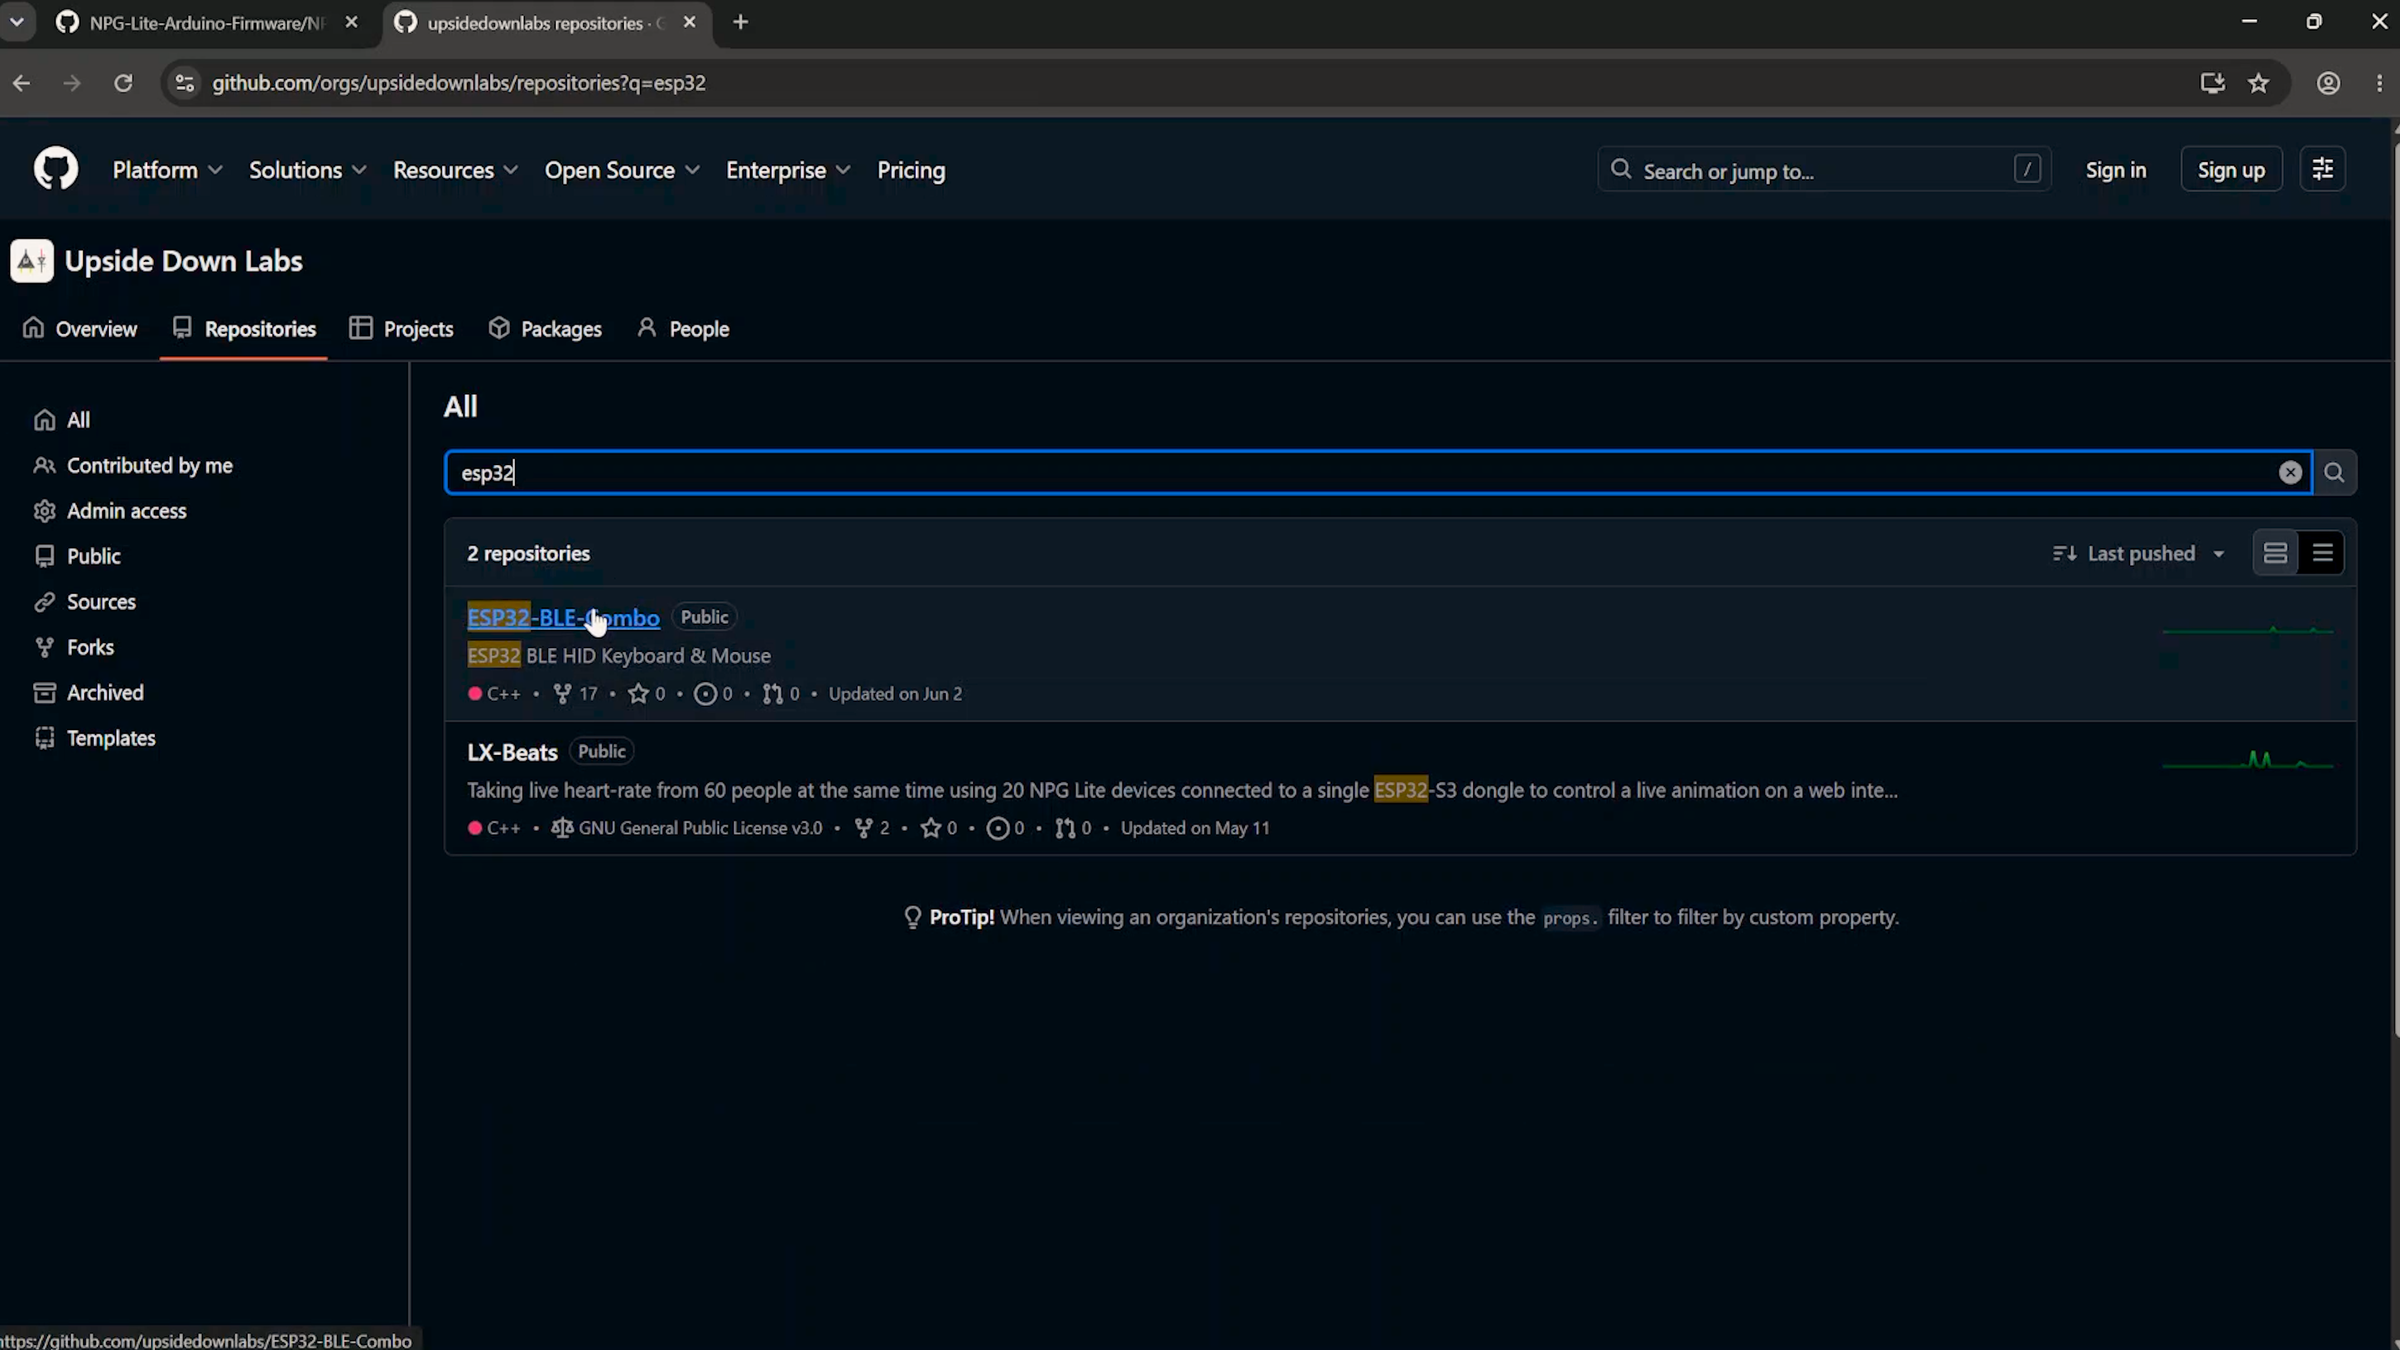
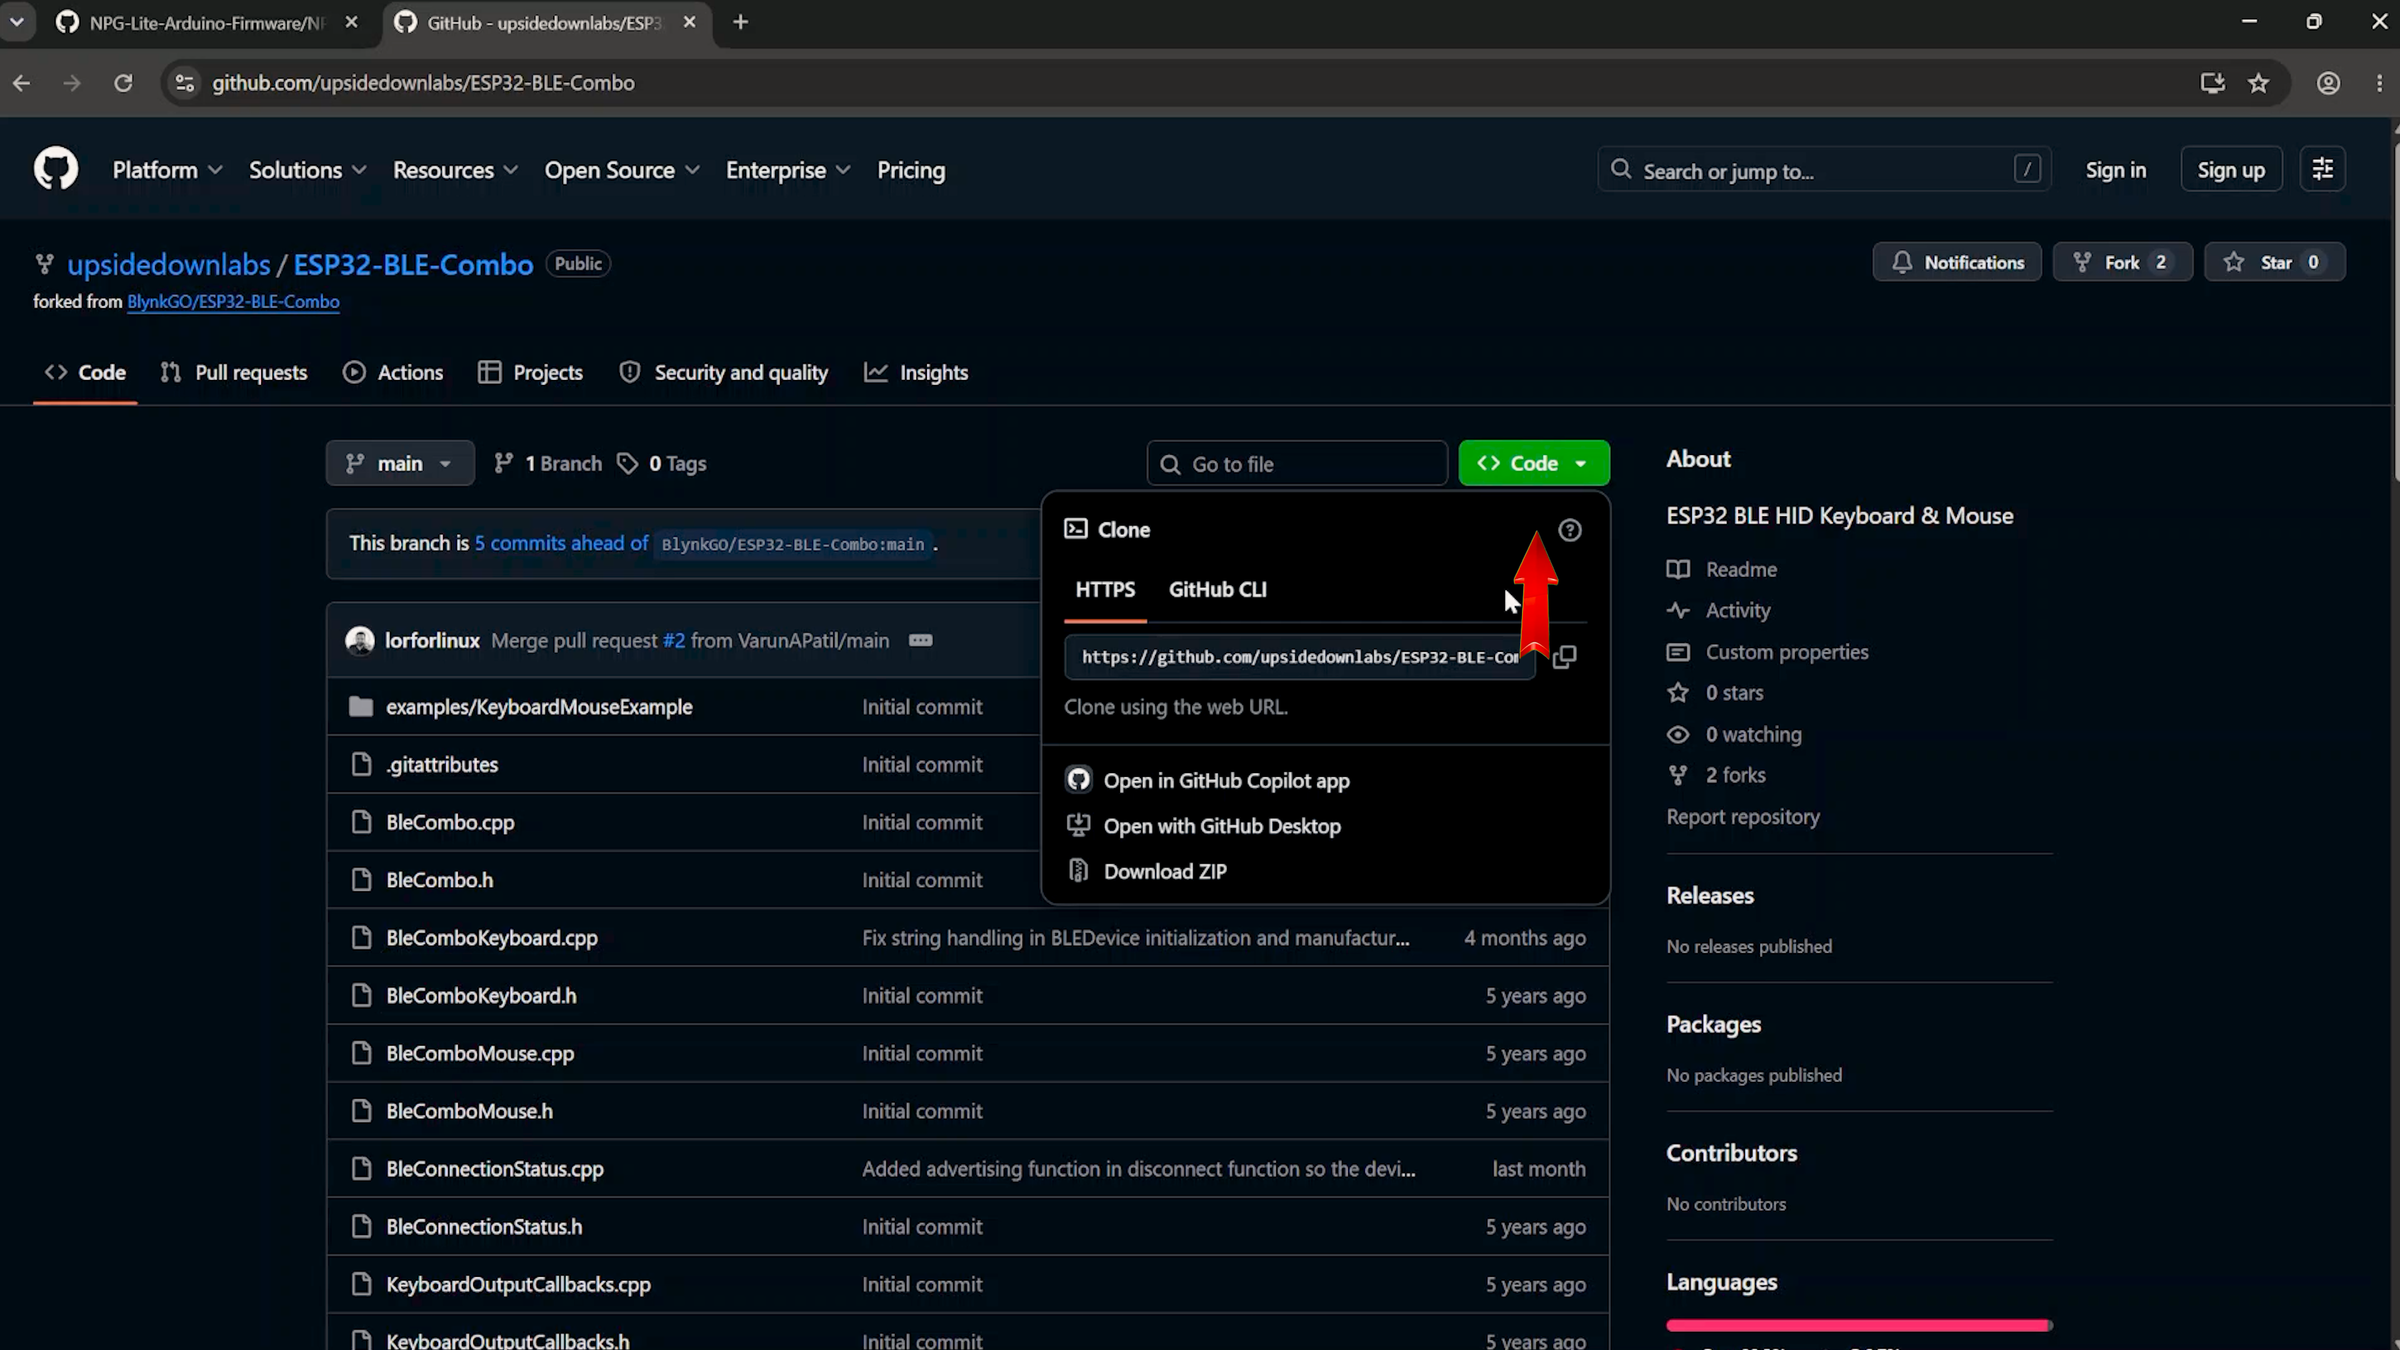
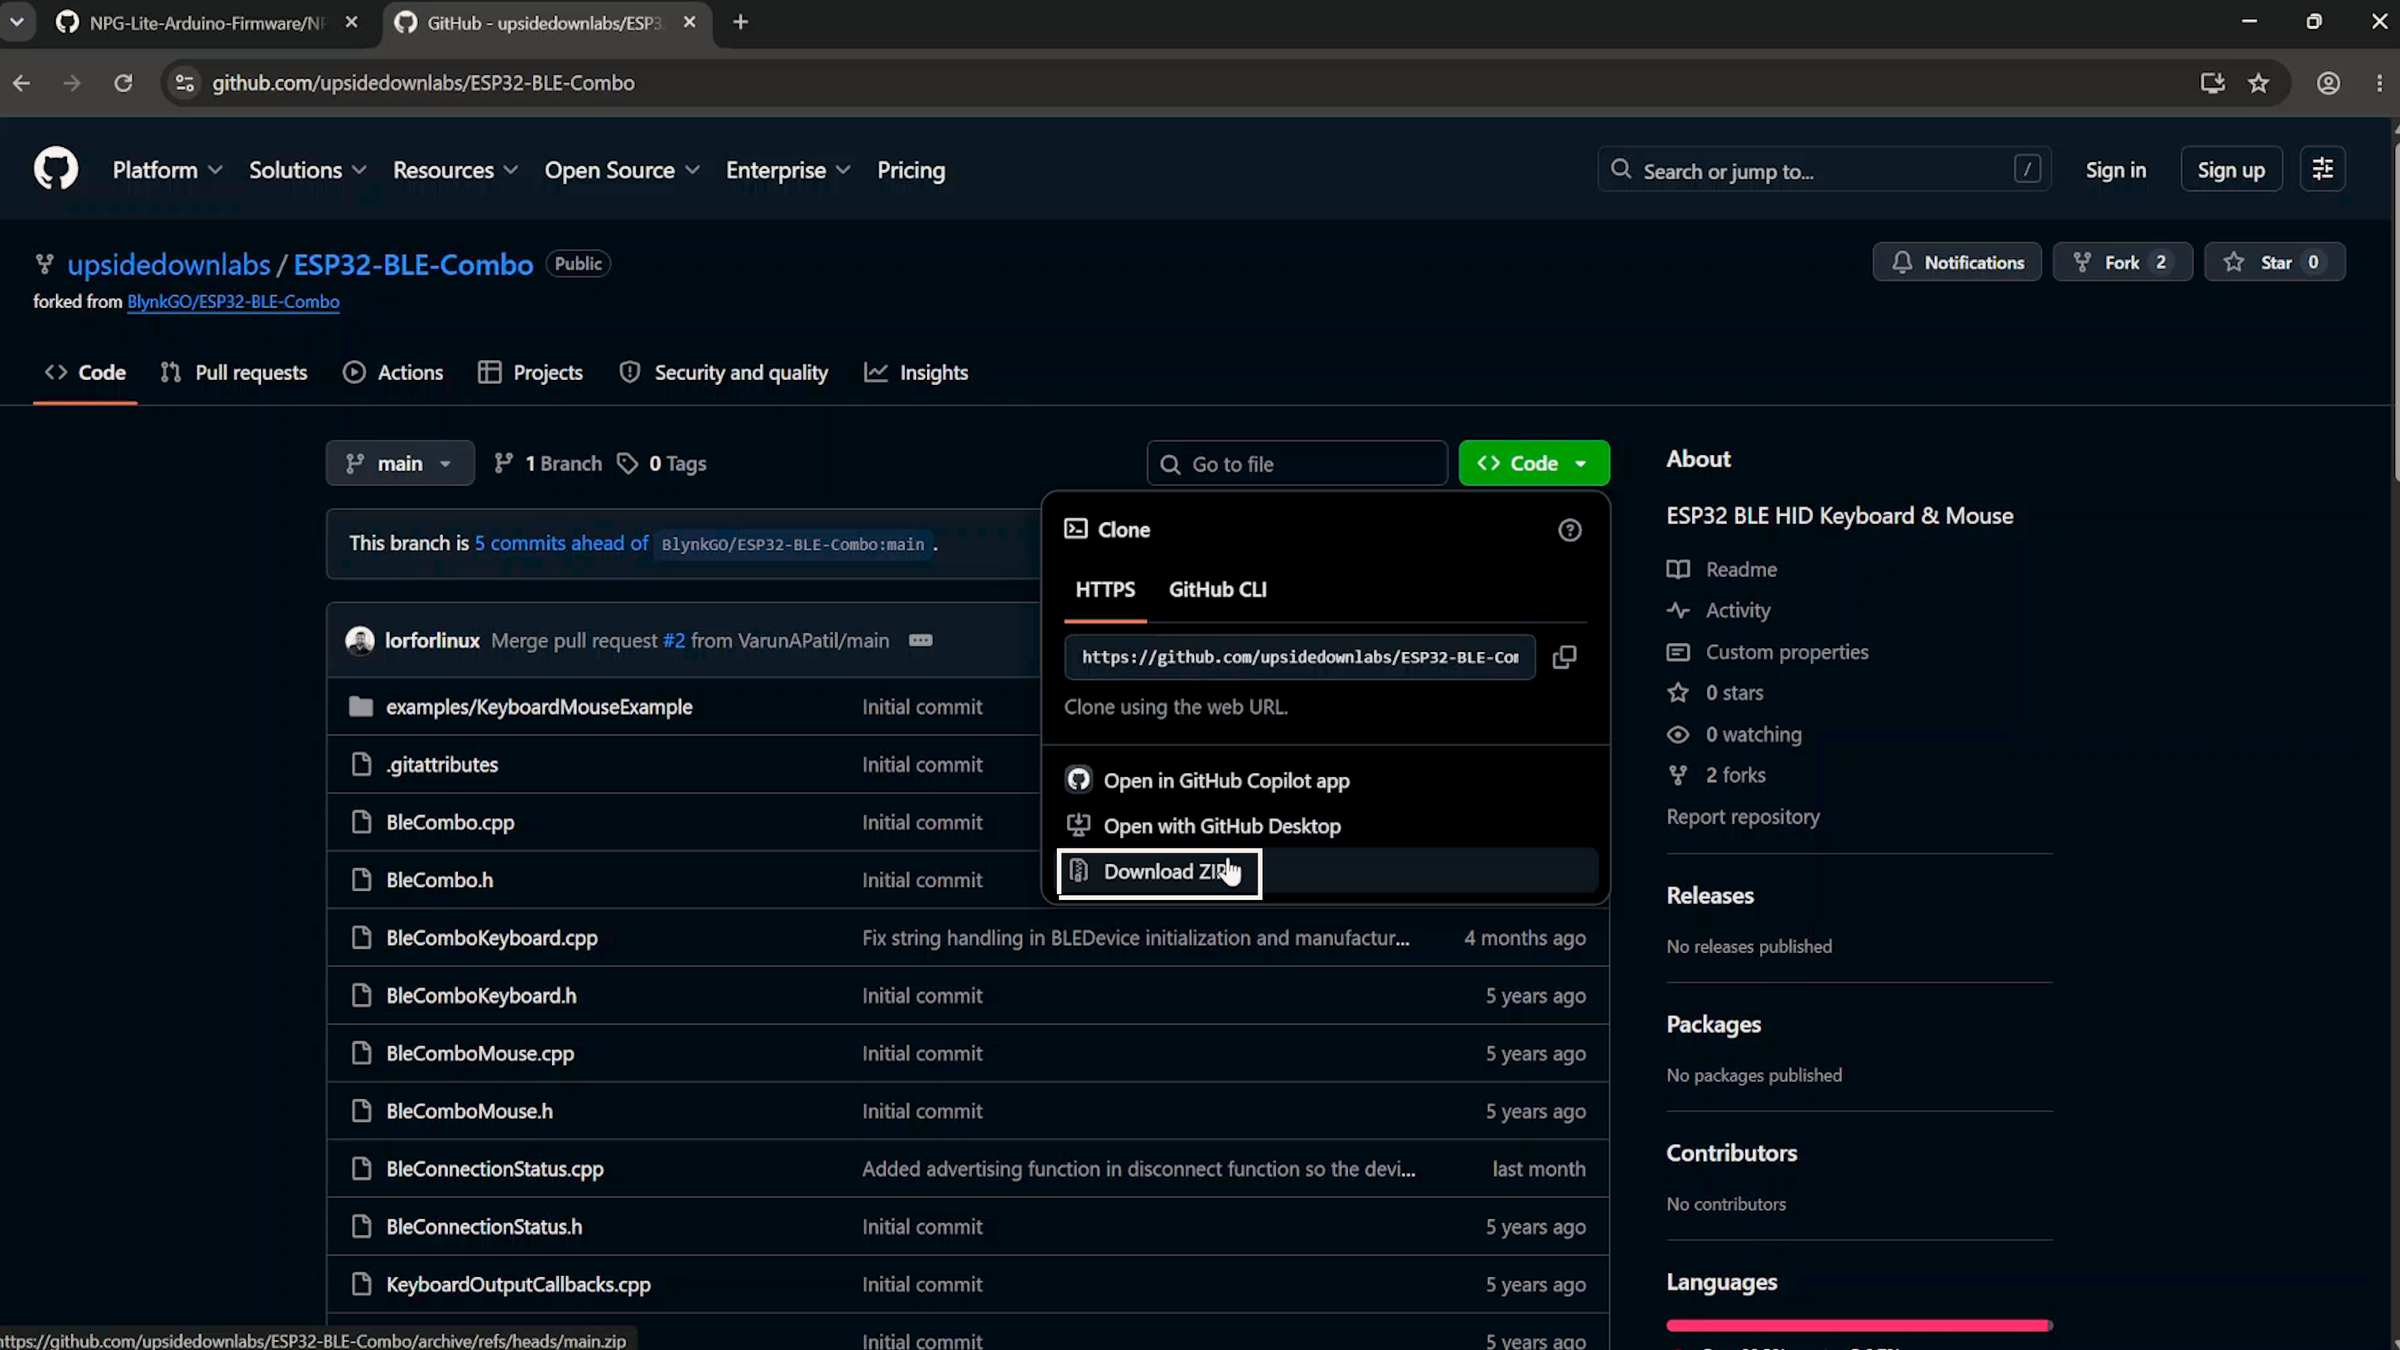
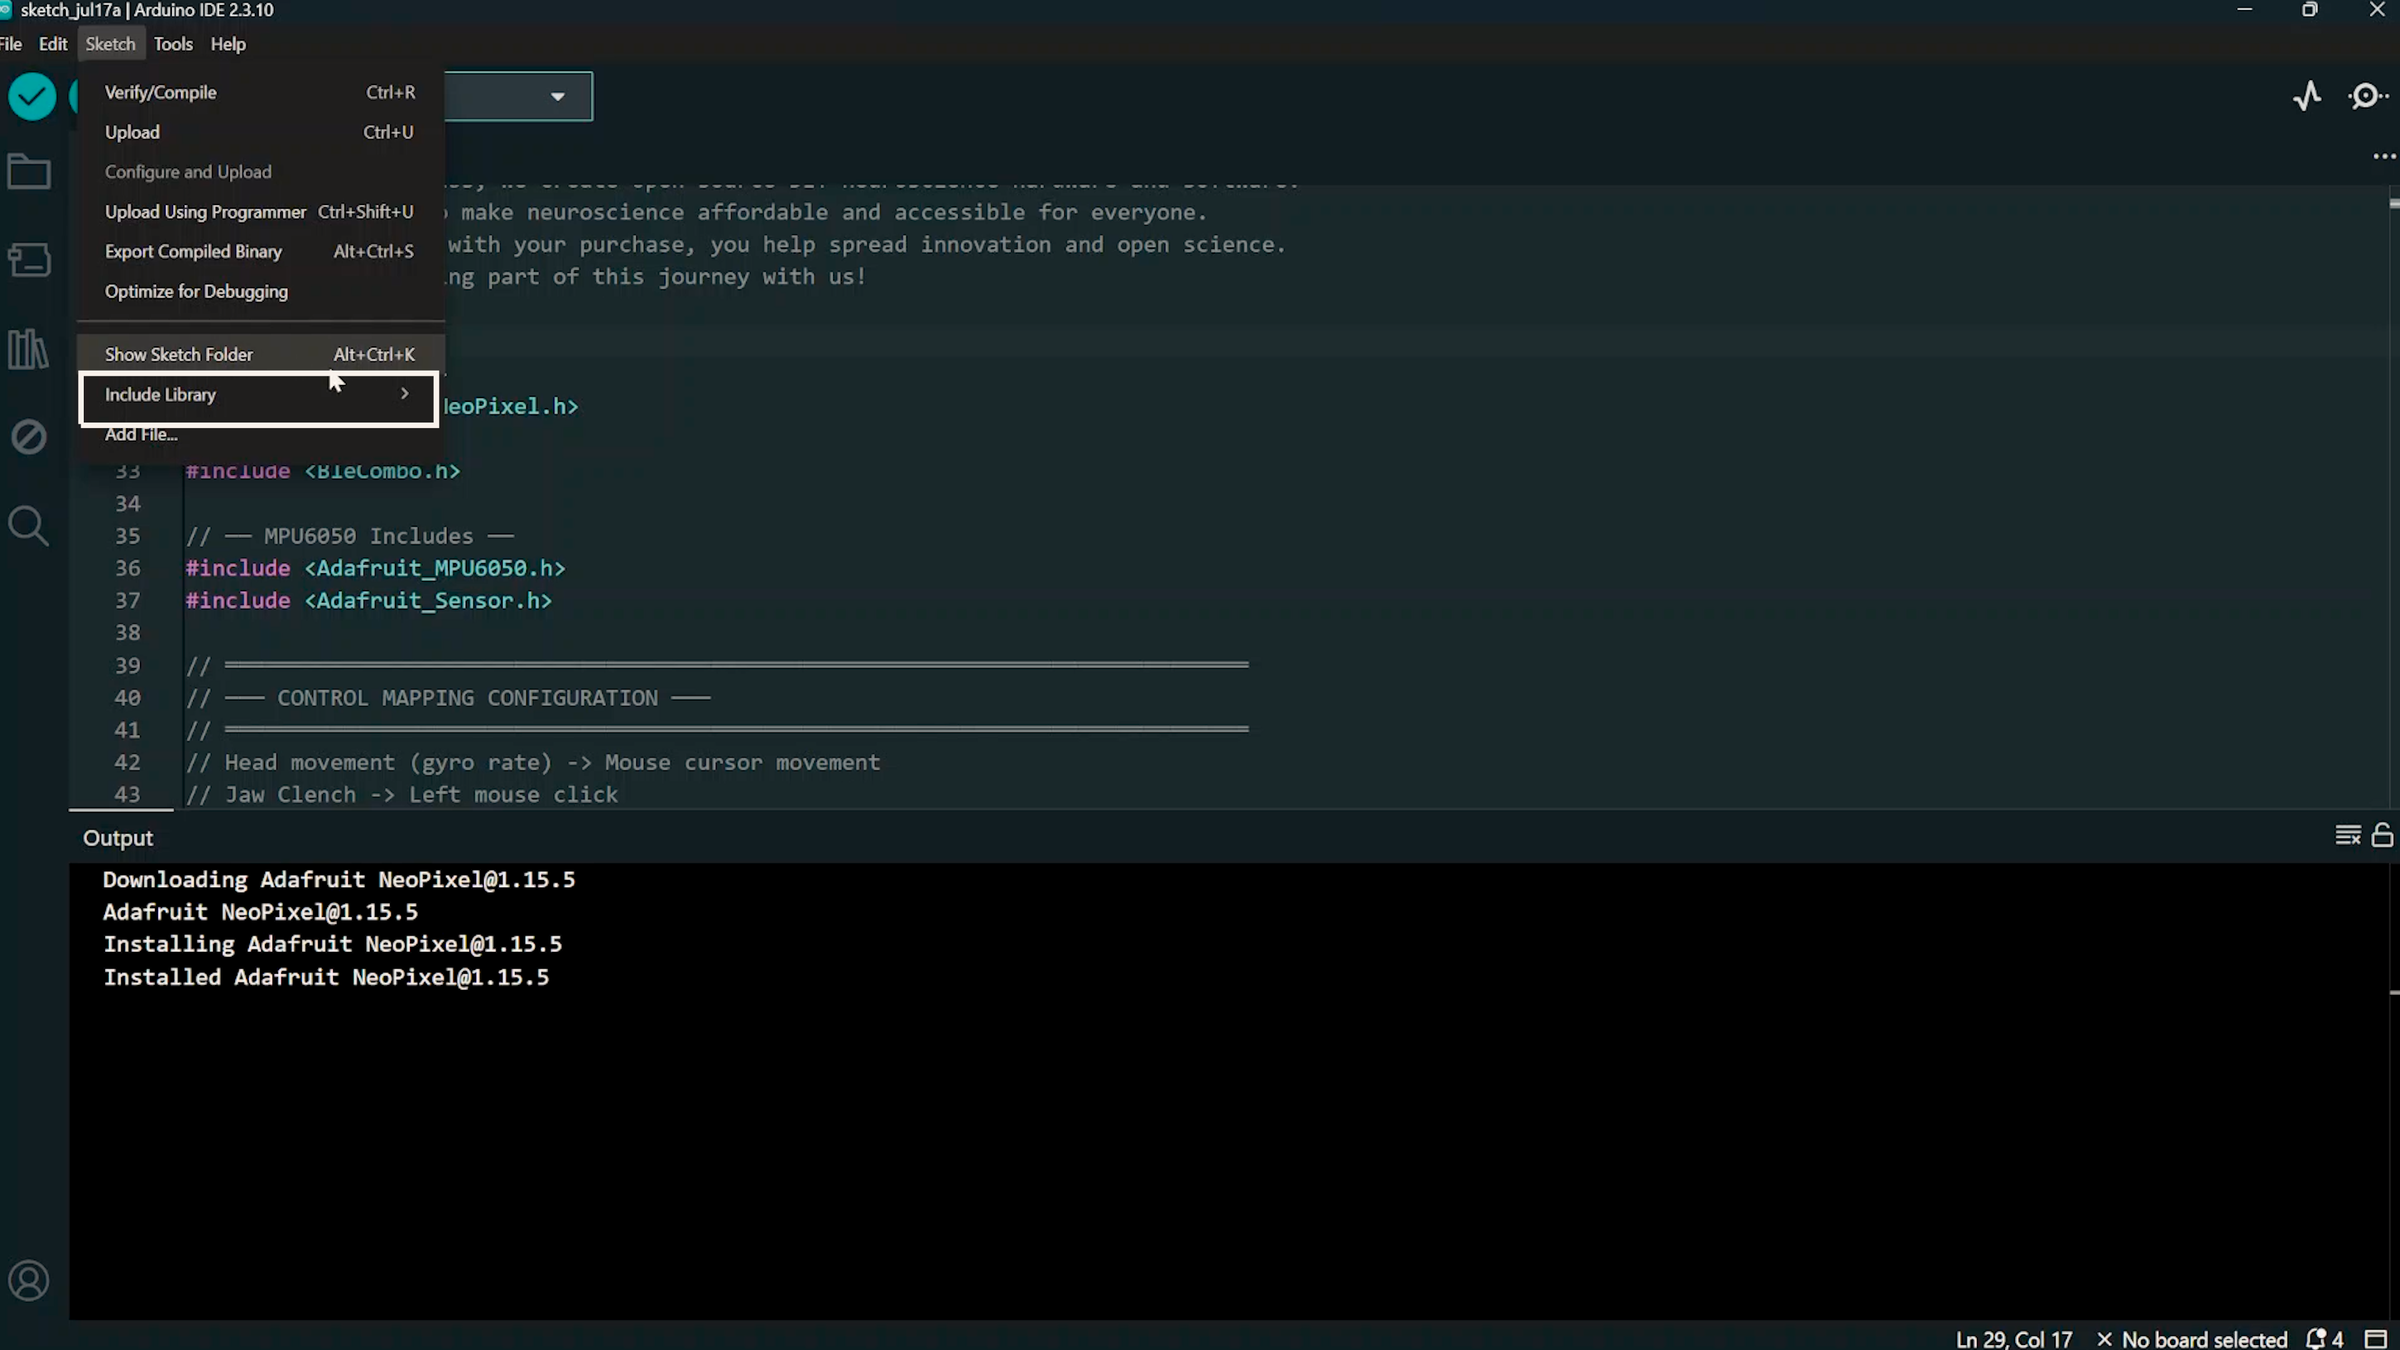
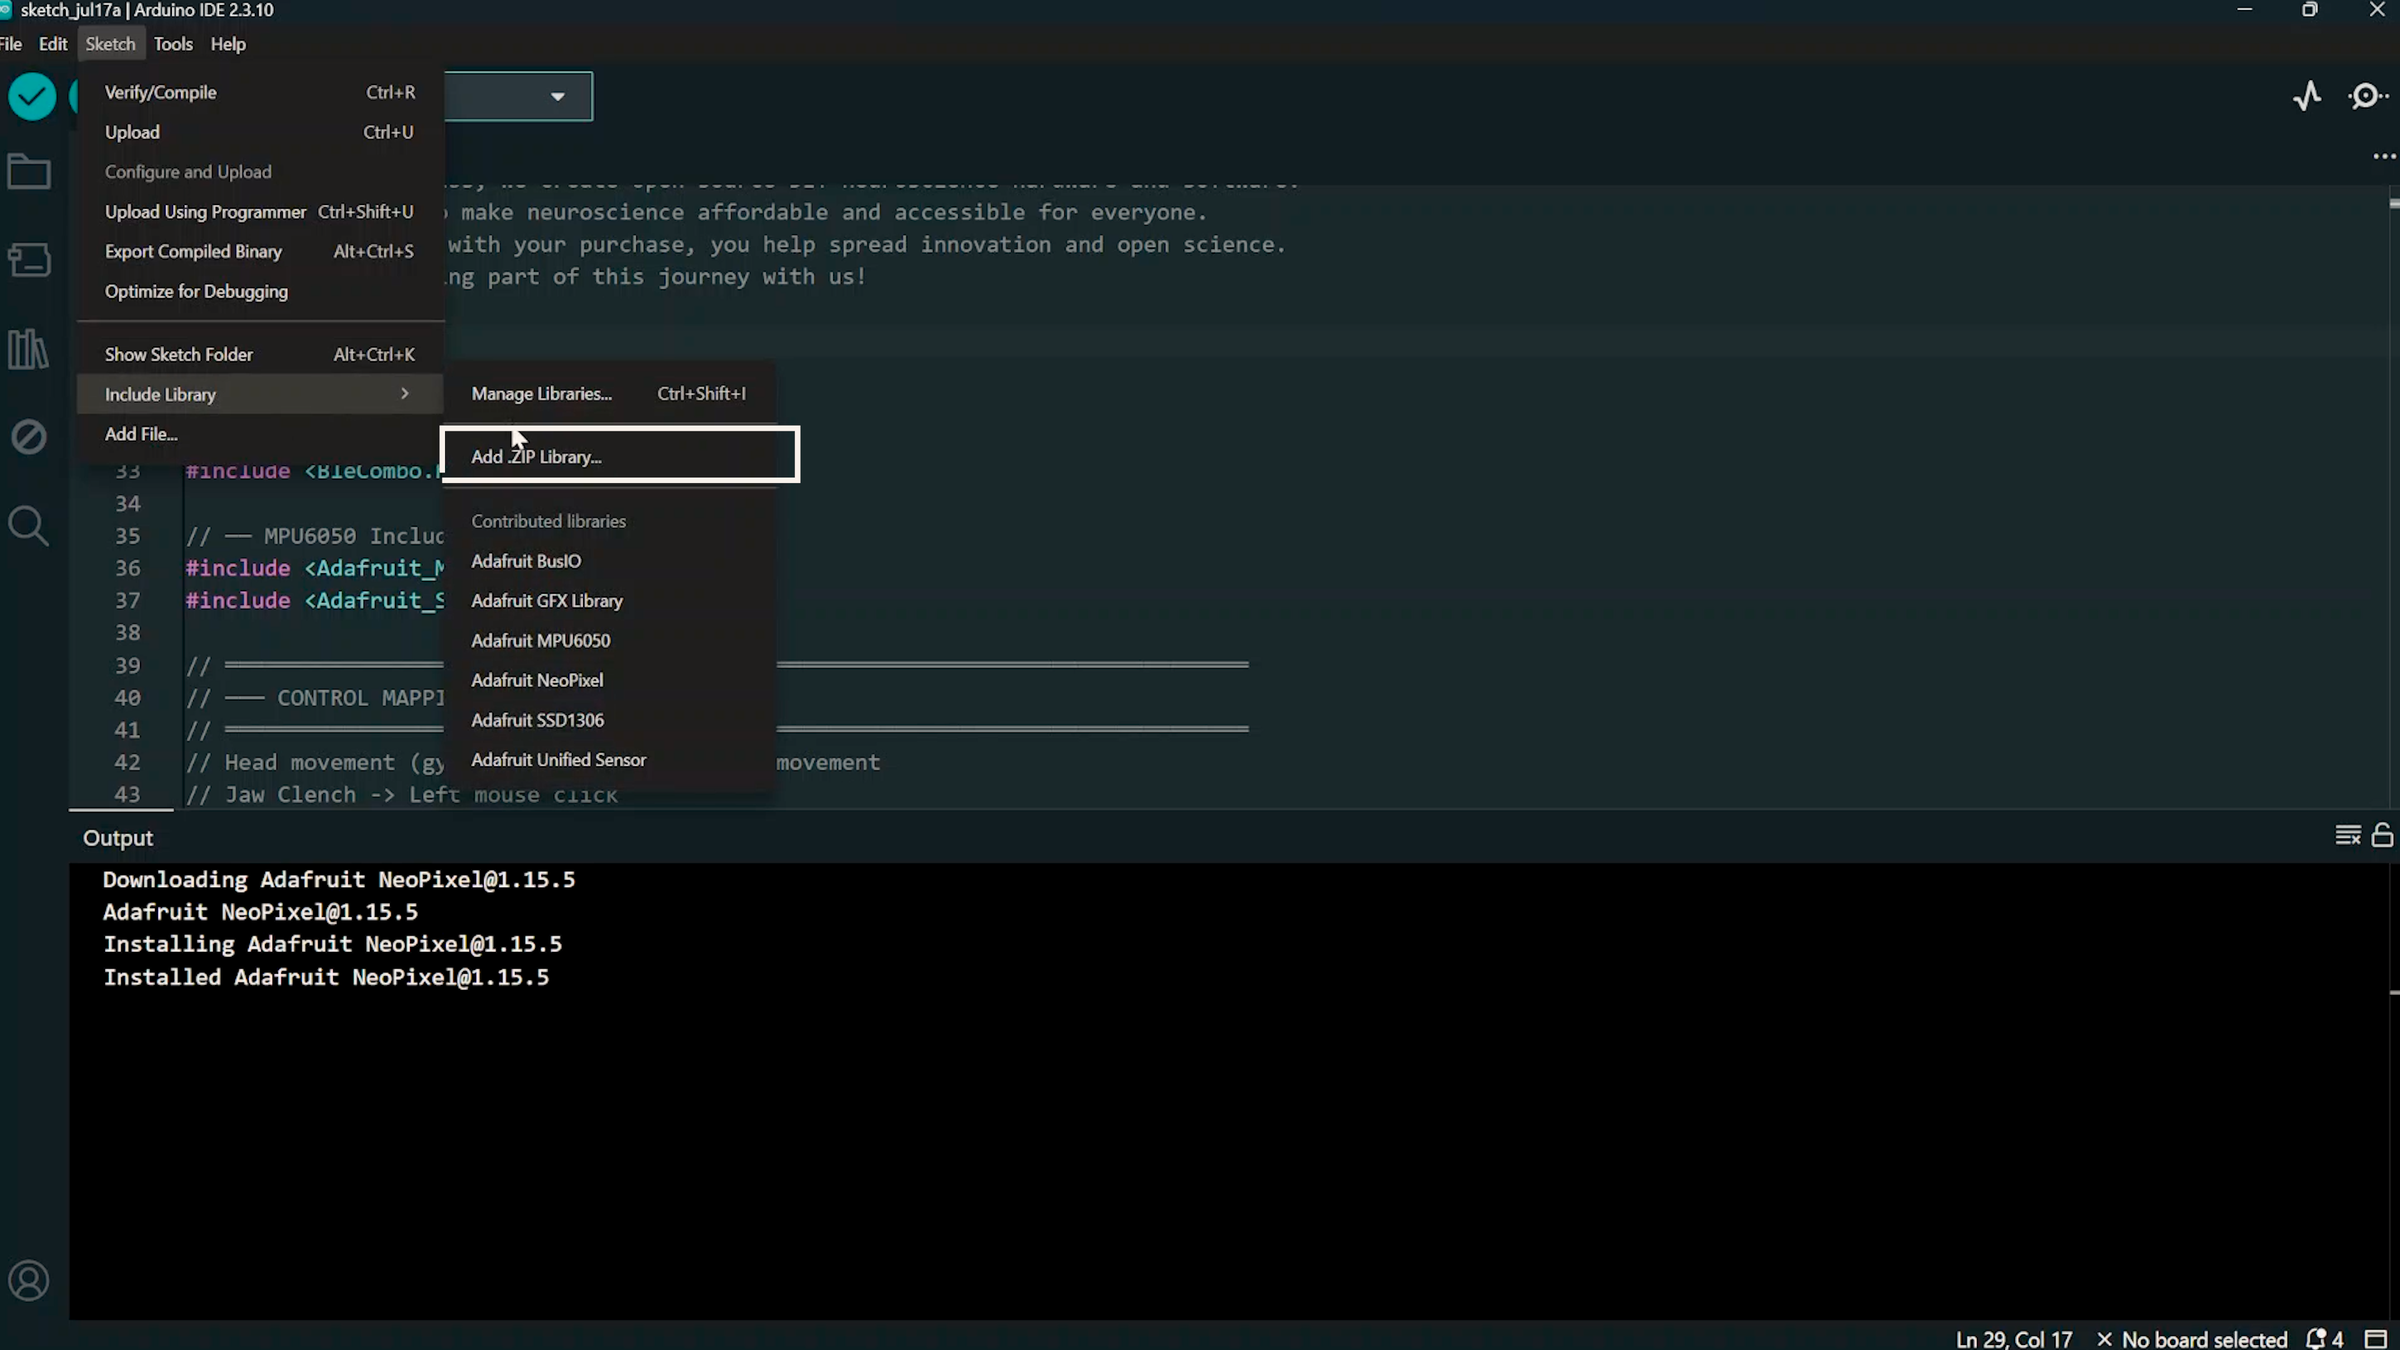
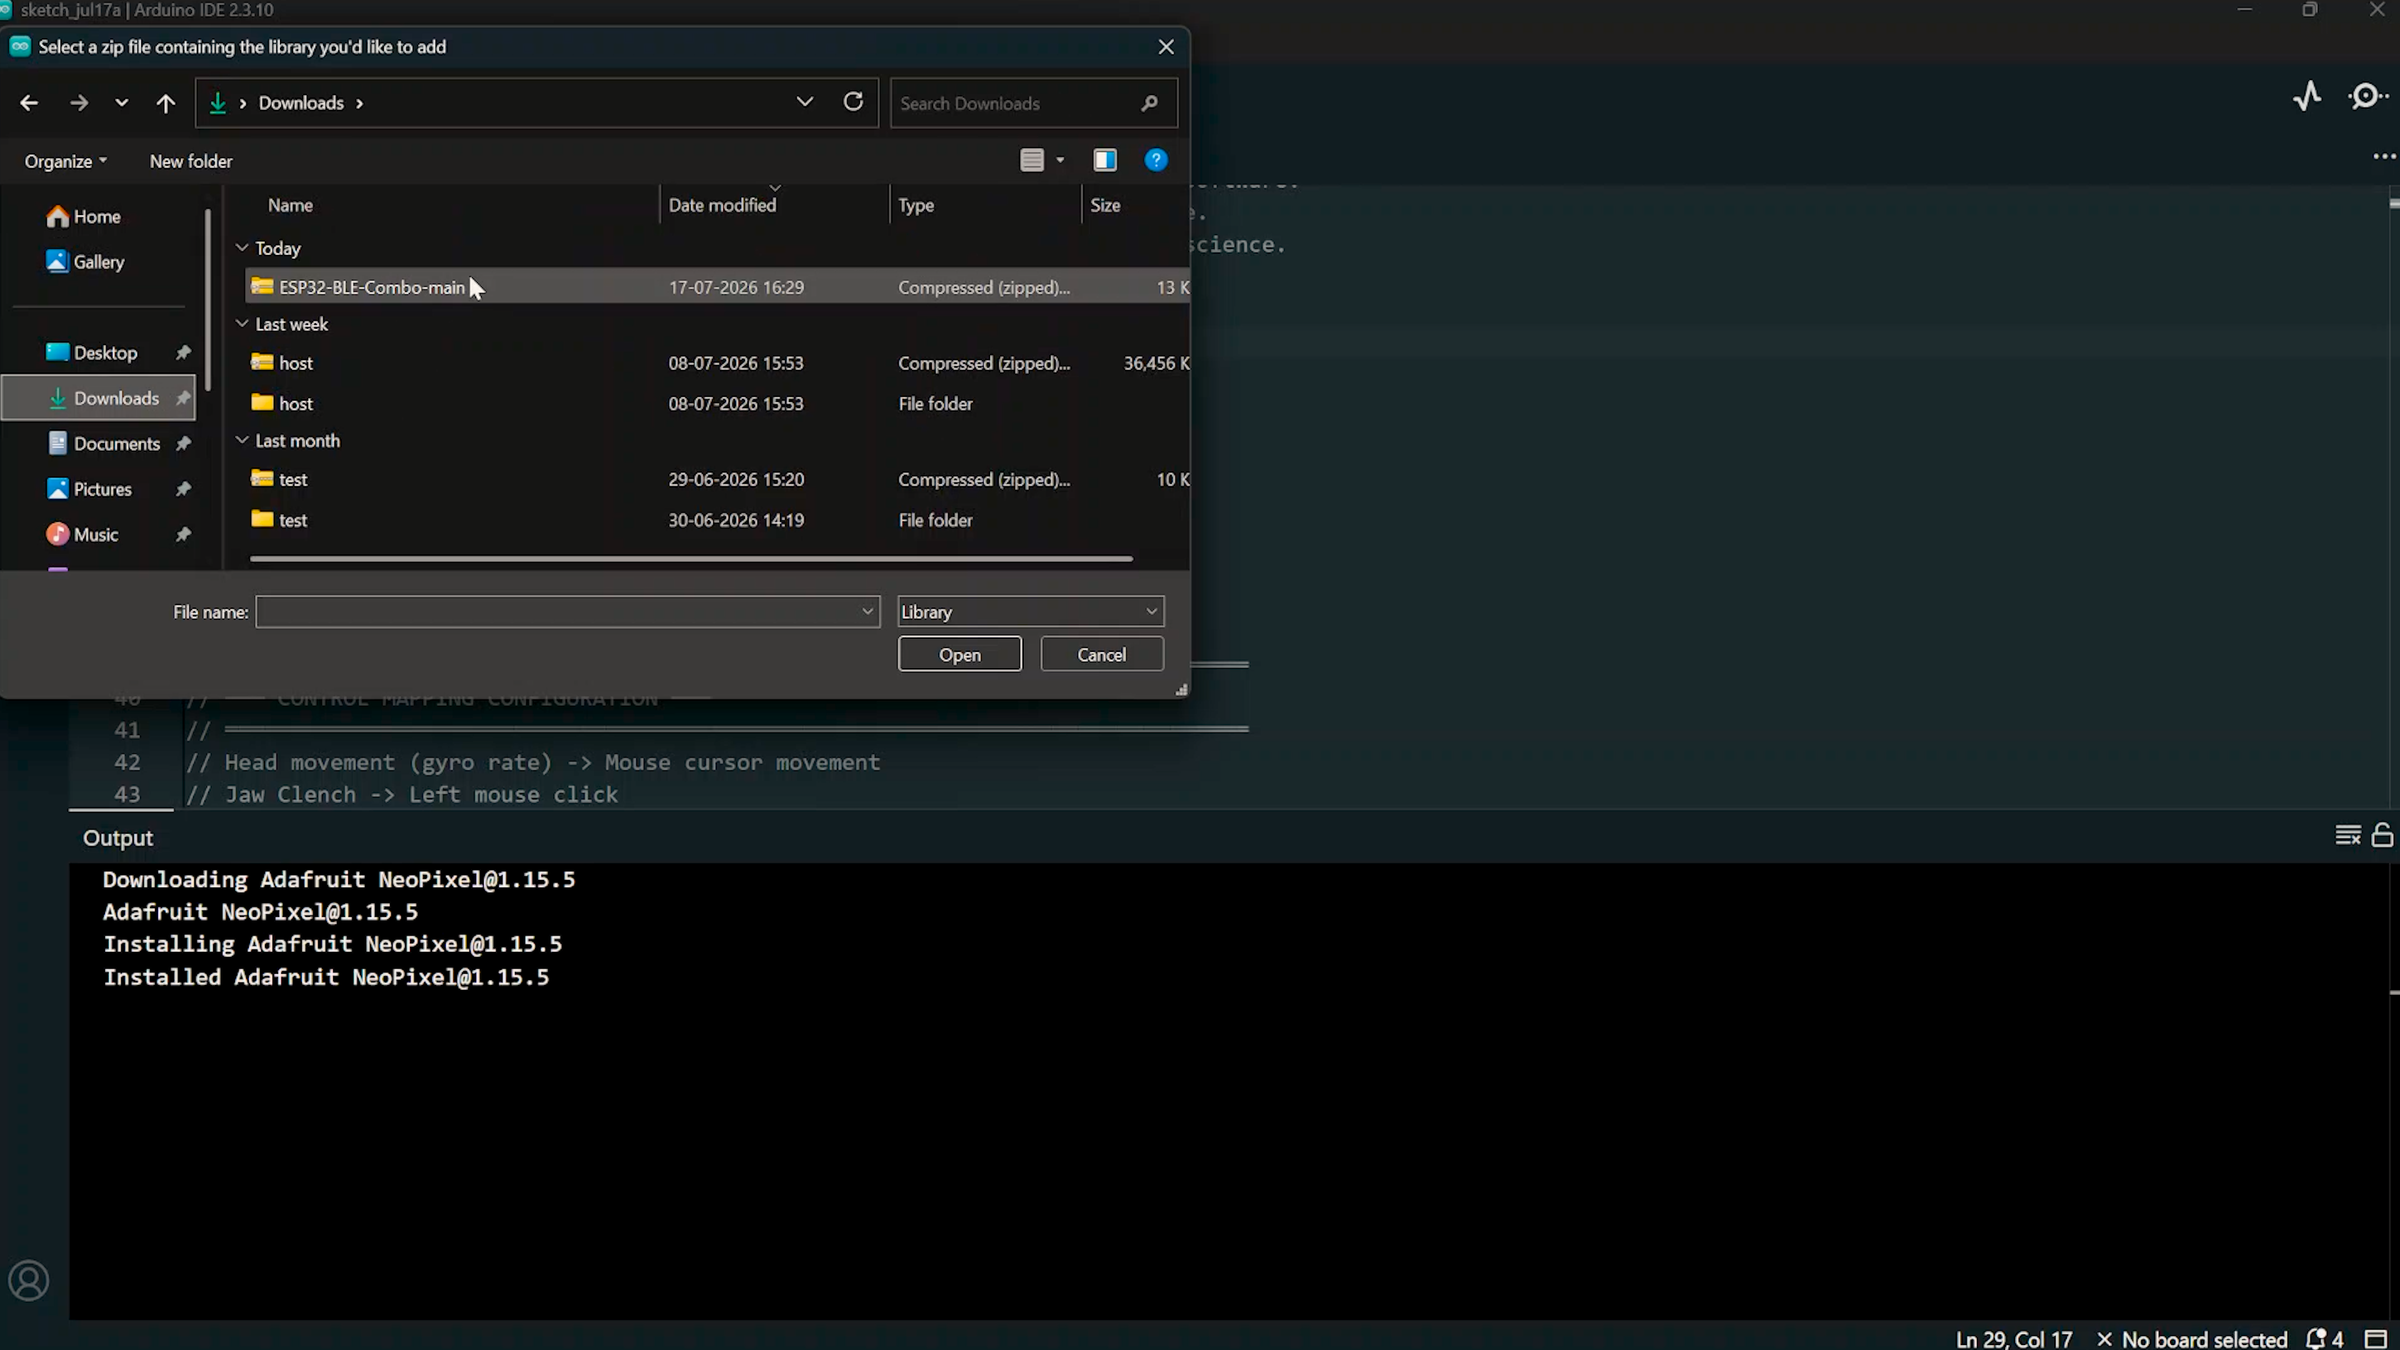
- Install the ESP32 BLE Combo library
- Open the ESP32 BLE Combo GitHub repository.
- Click Code → Download ZIP.
- In Arduino IDE, navigate to:
- Sketch → Include Library → Add .ZIP Library
- Select the downloaded ZIP file and install it.
Upload the Code
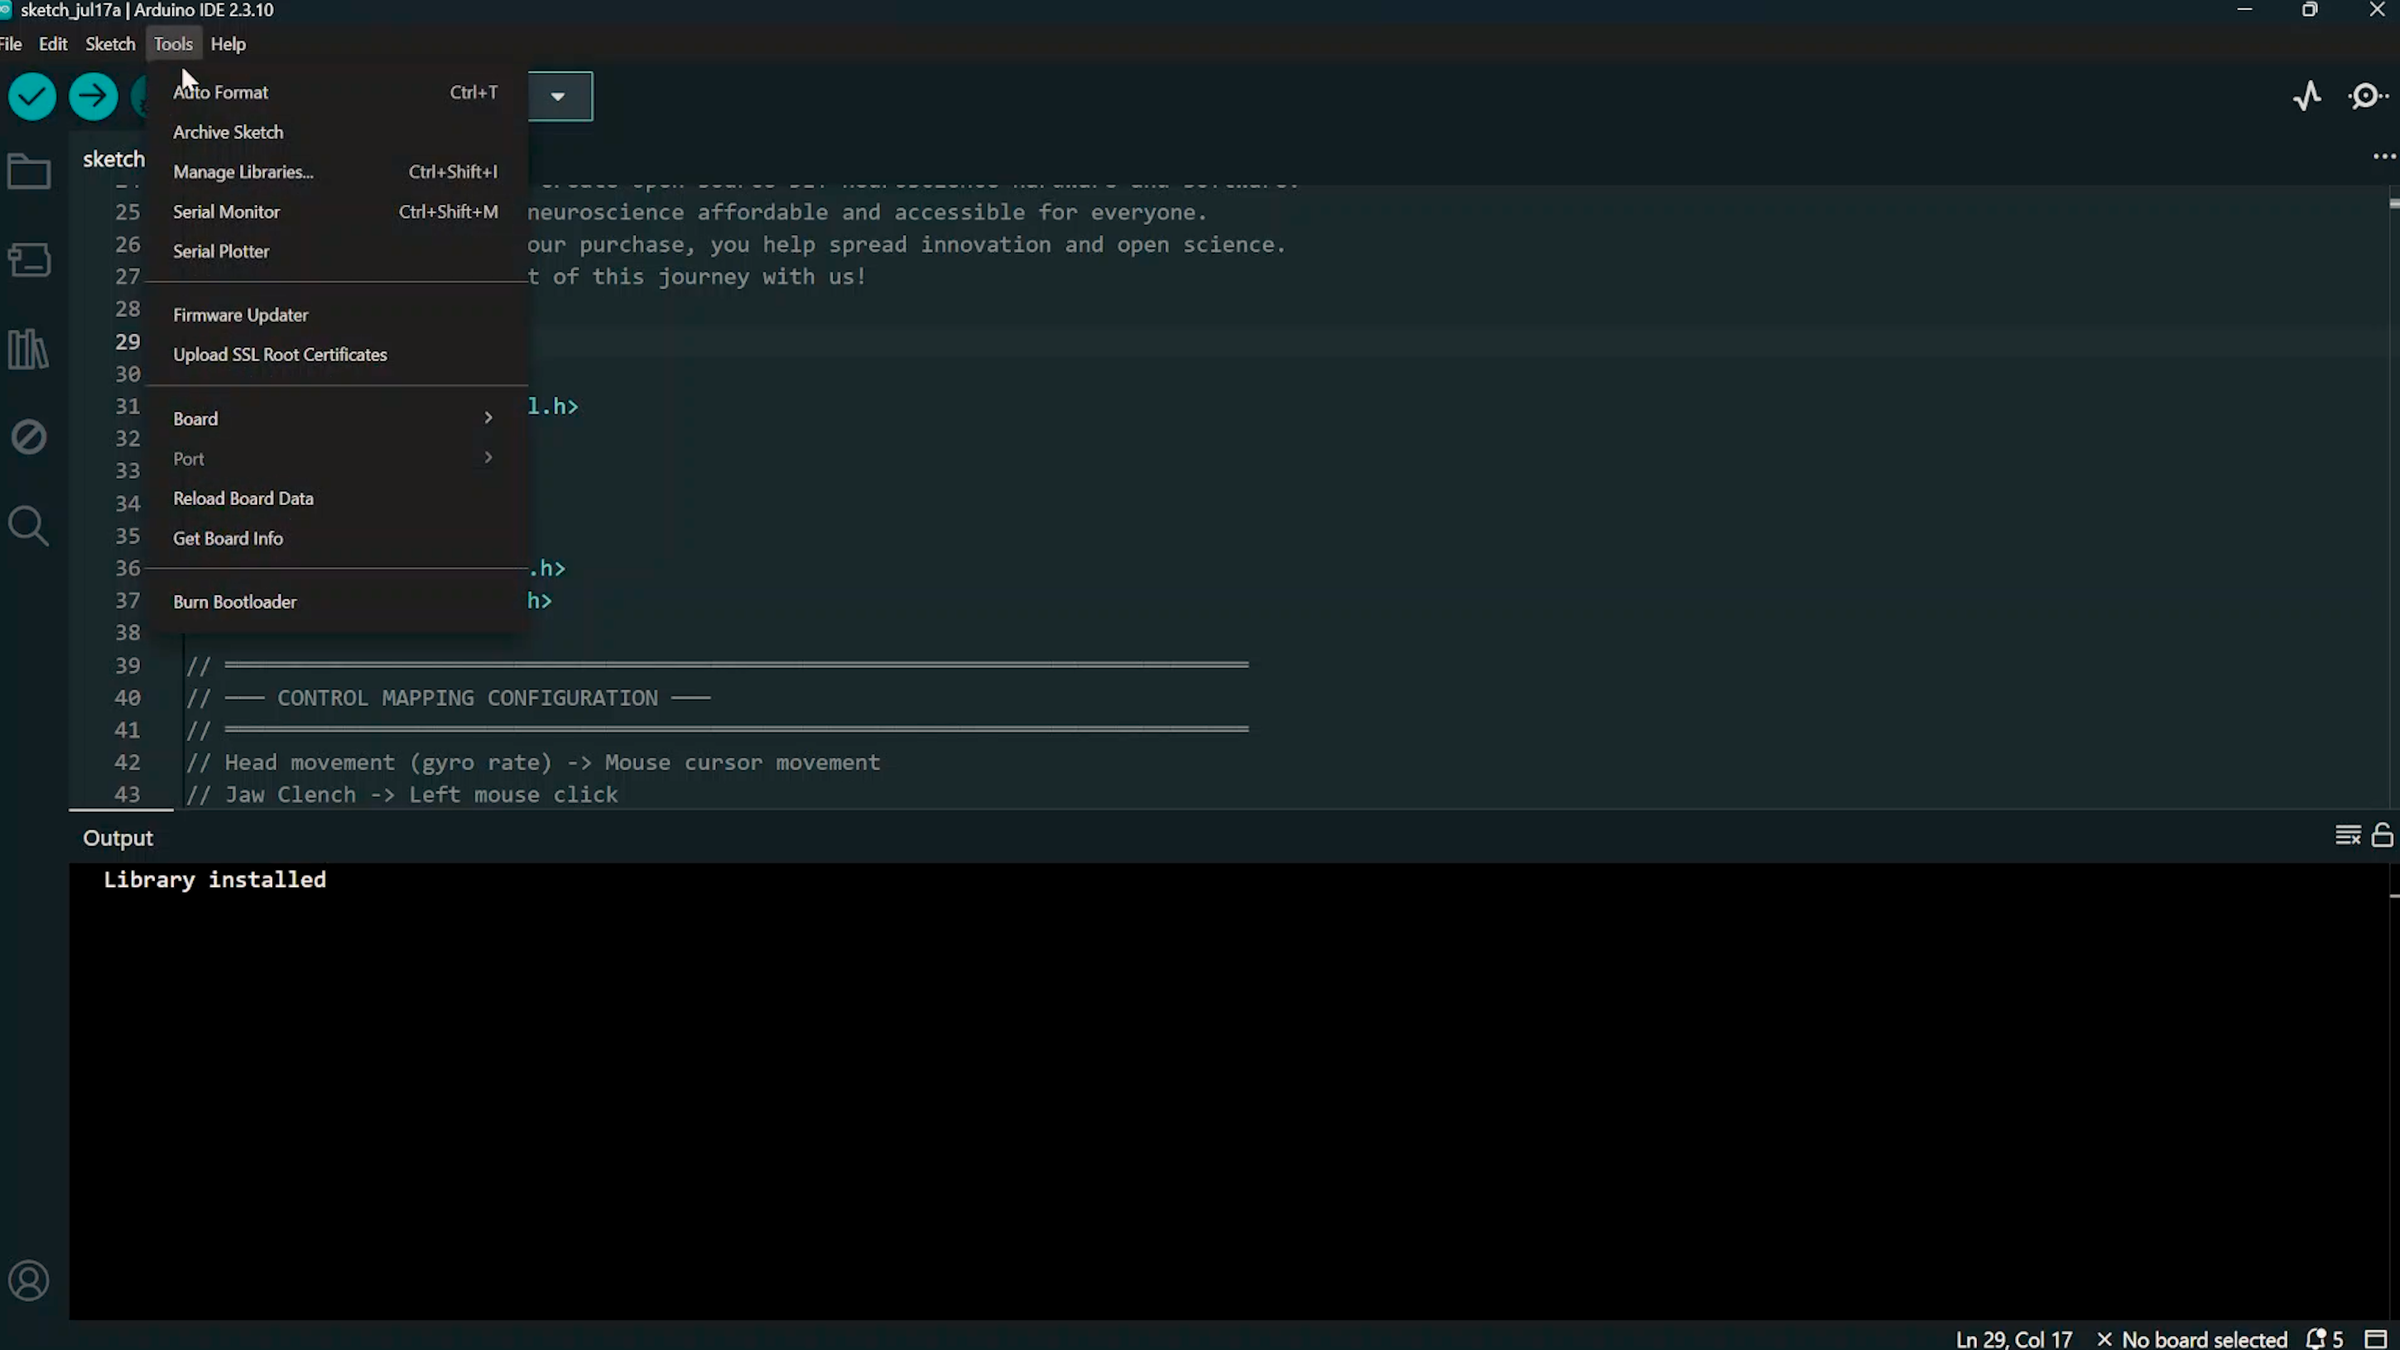
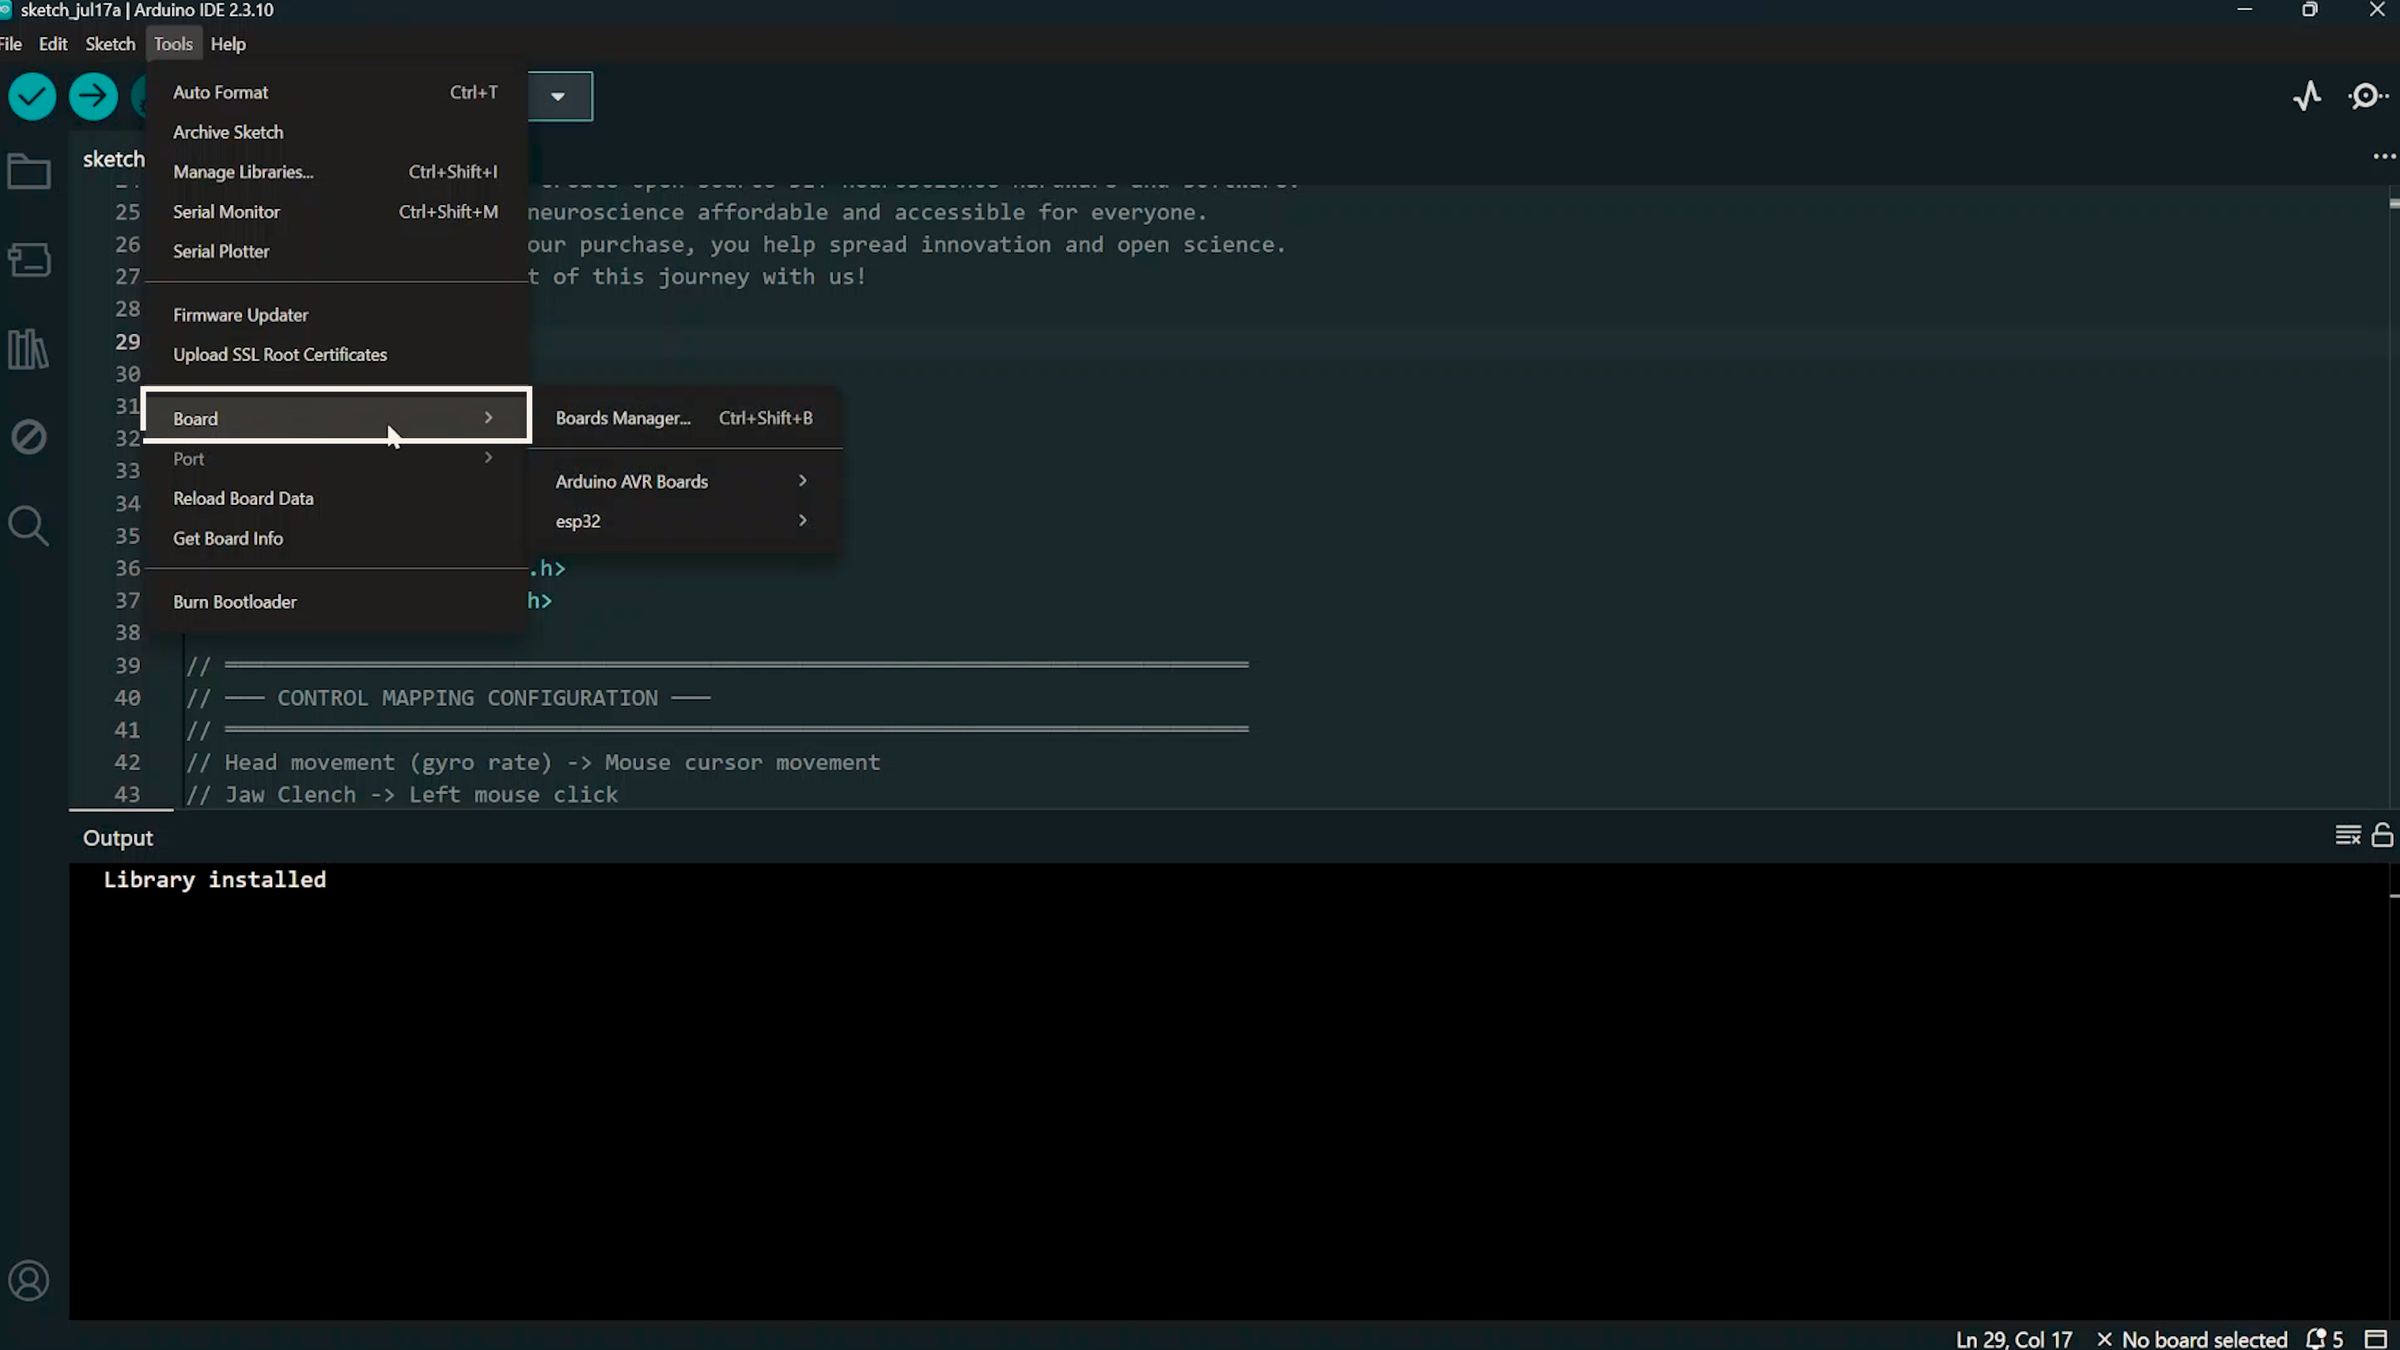
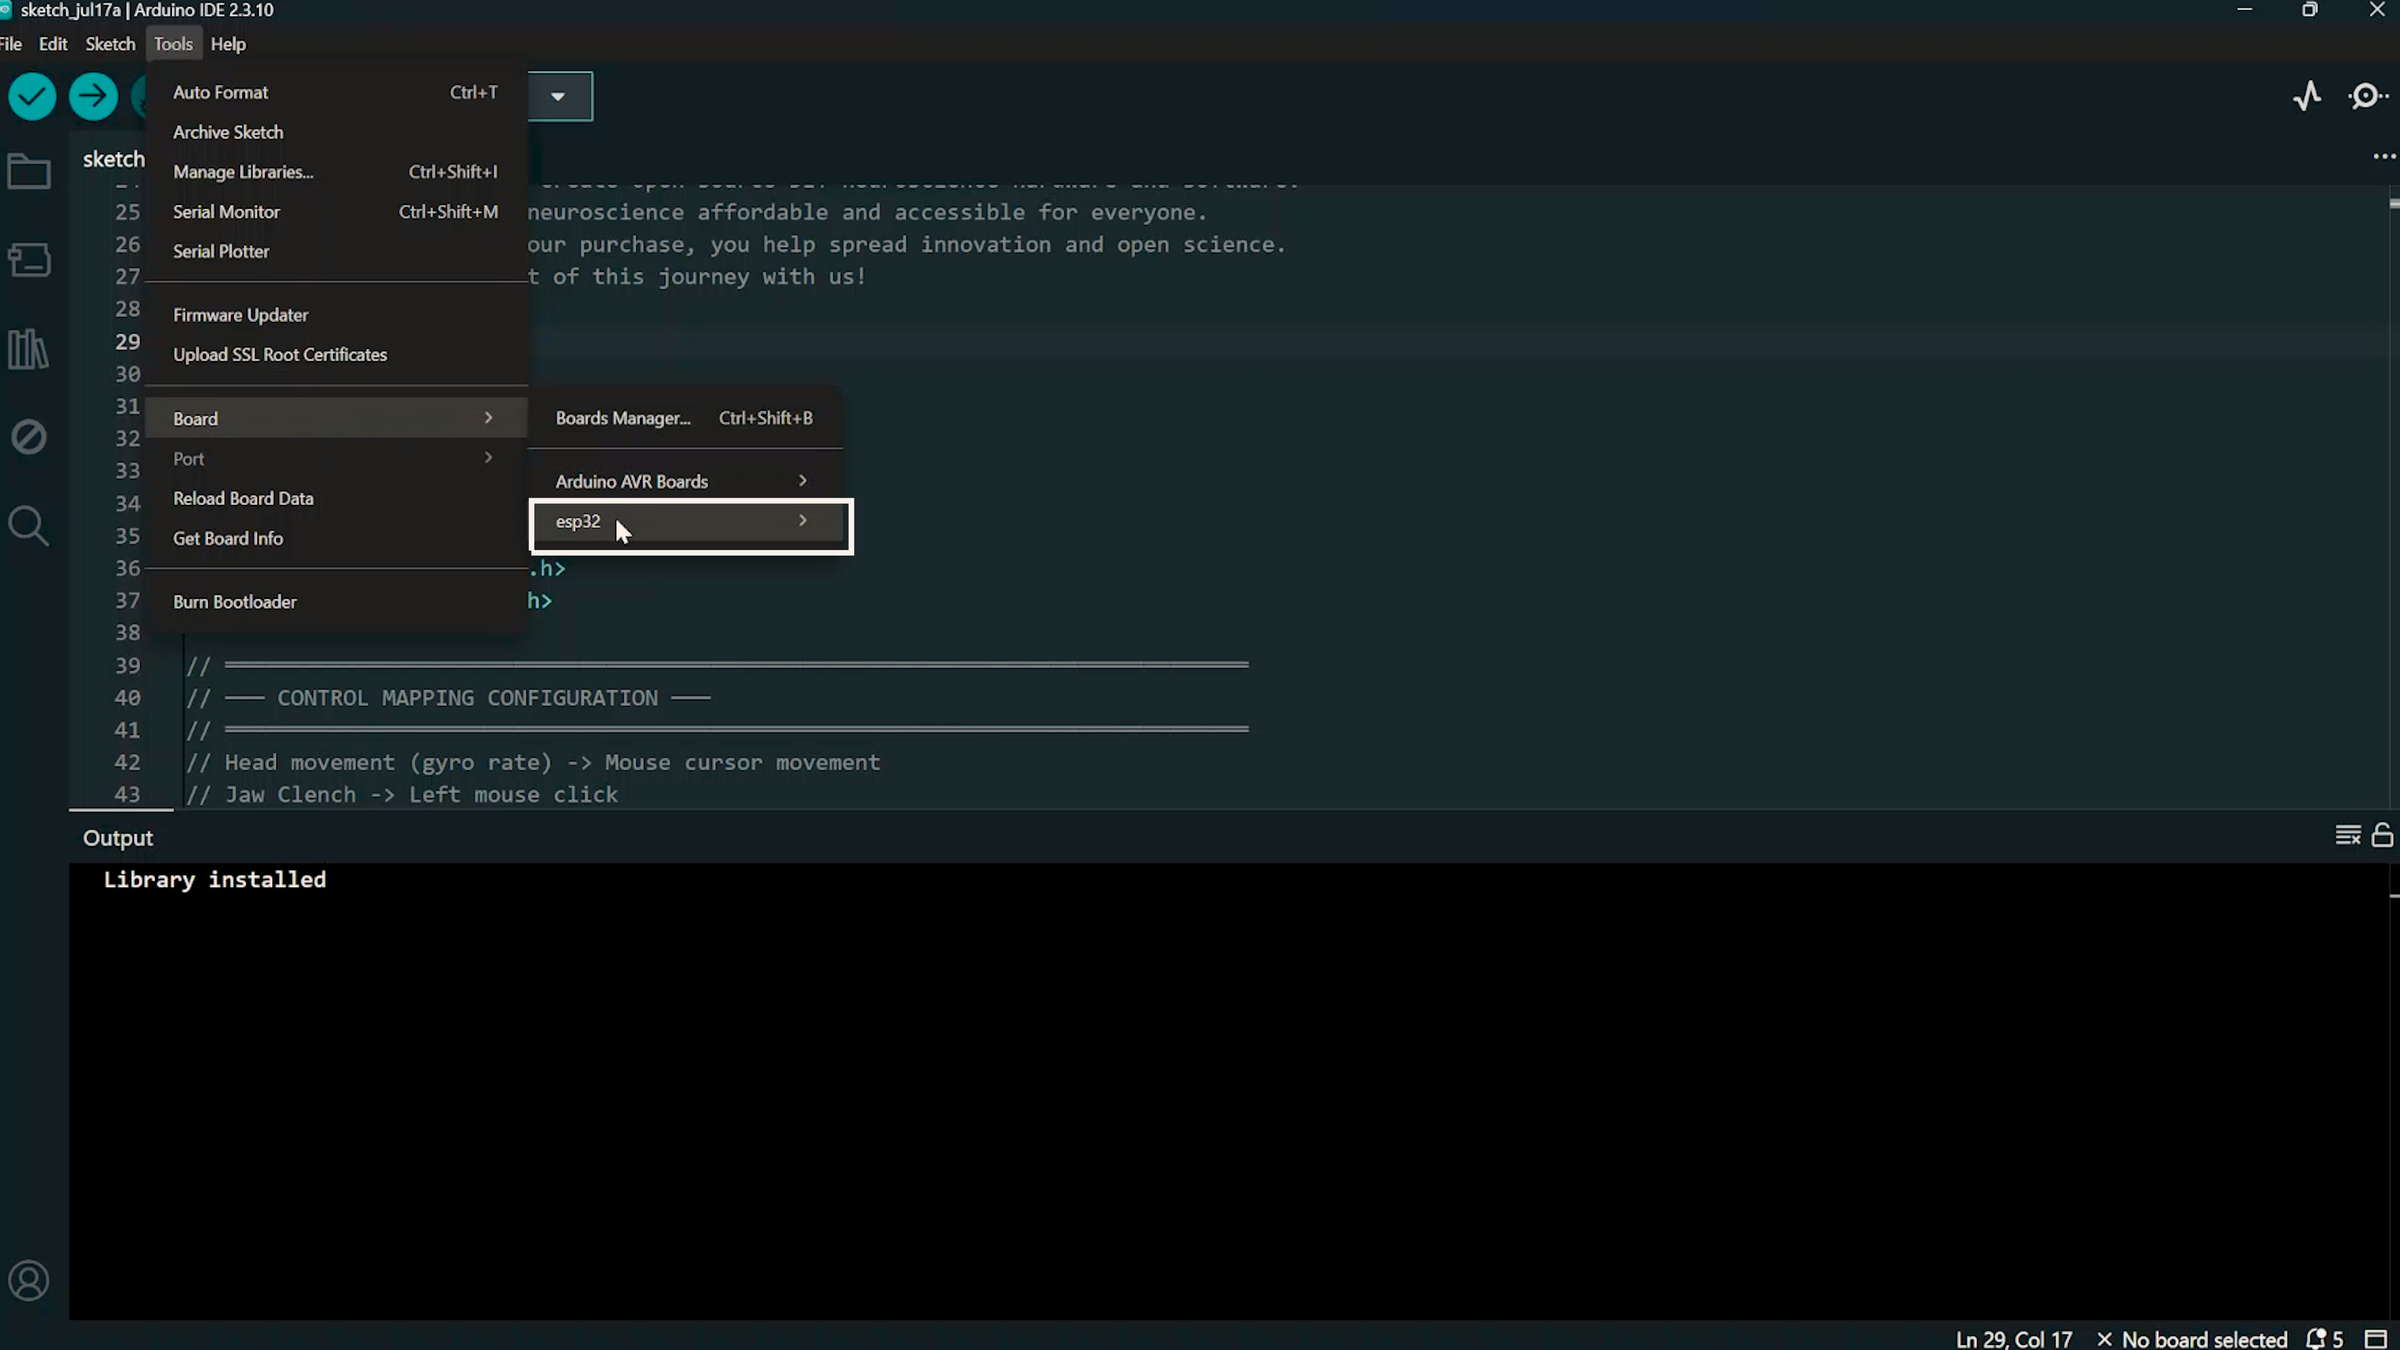
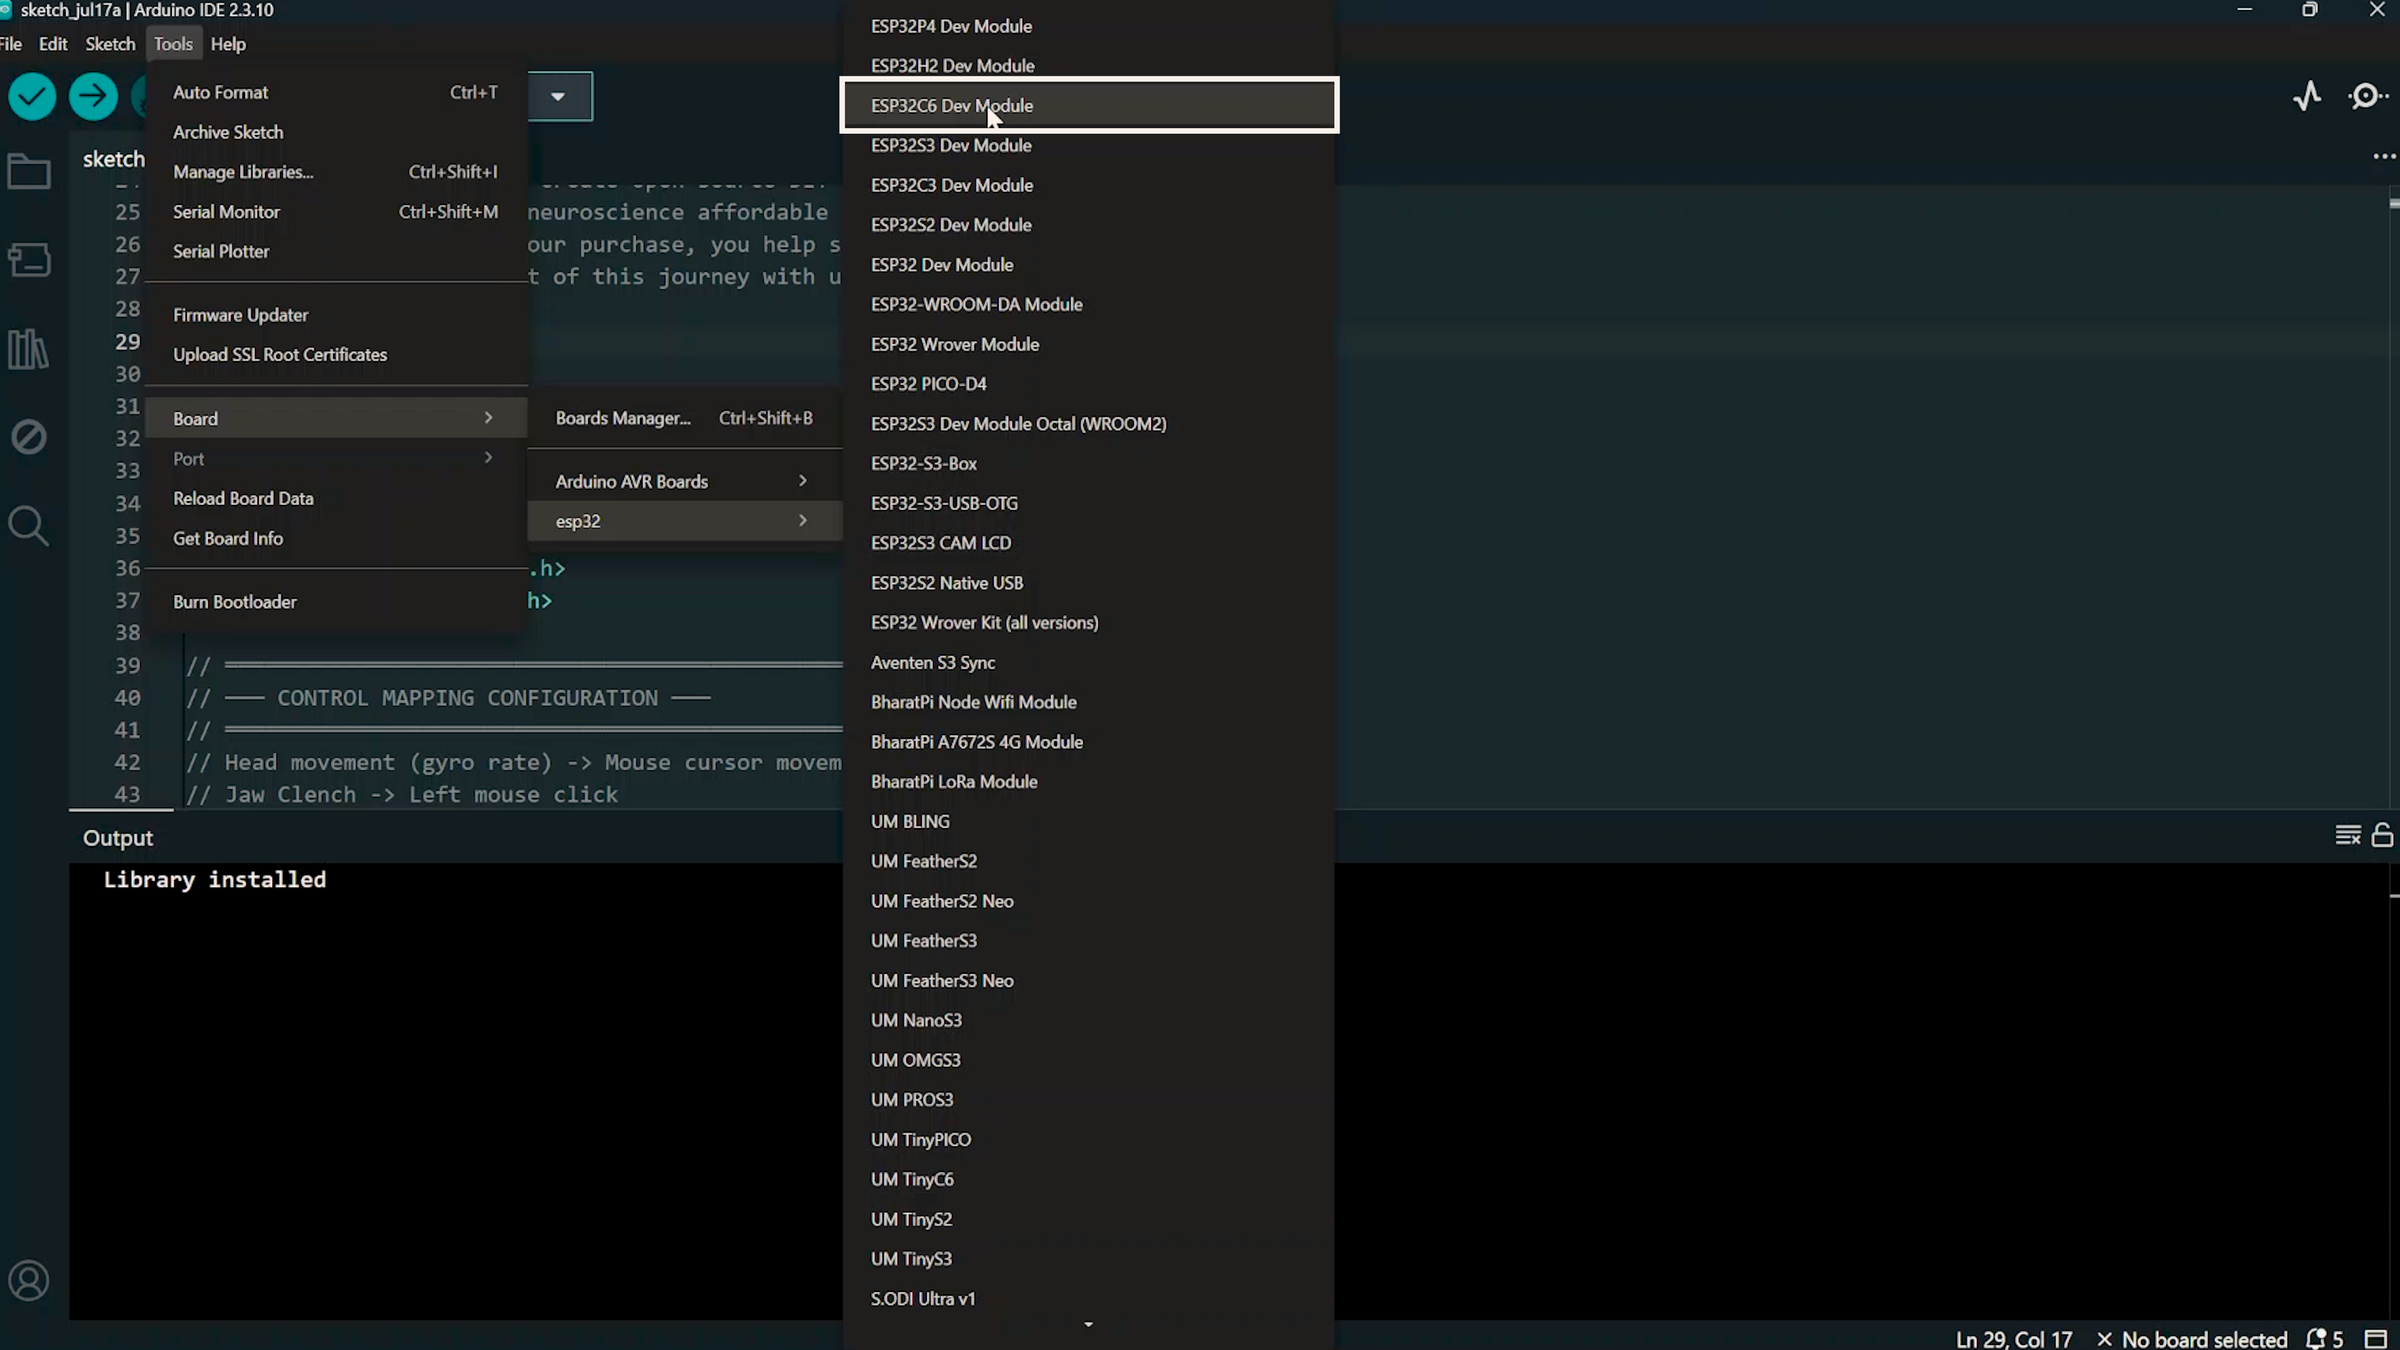
- Select the correct board
- Go to:
- Tools → Board → ESP32 Arduino
- Select ESP32C6 Dev Module.
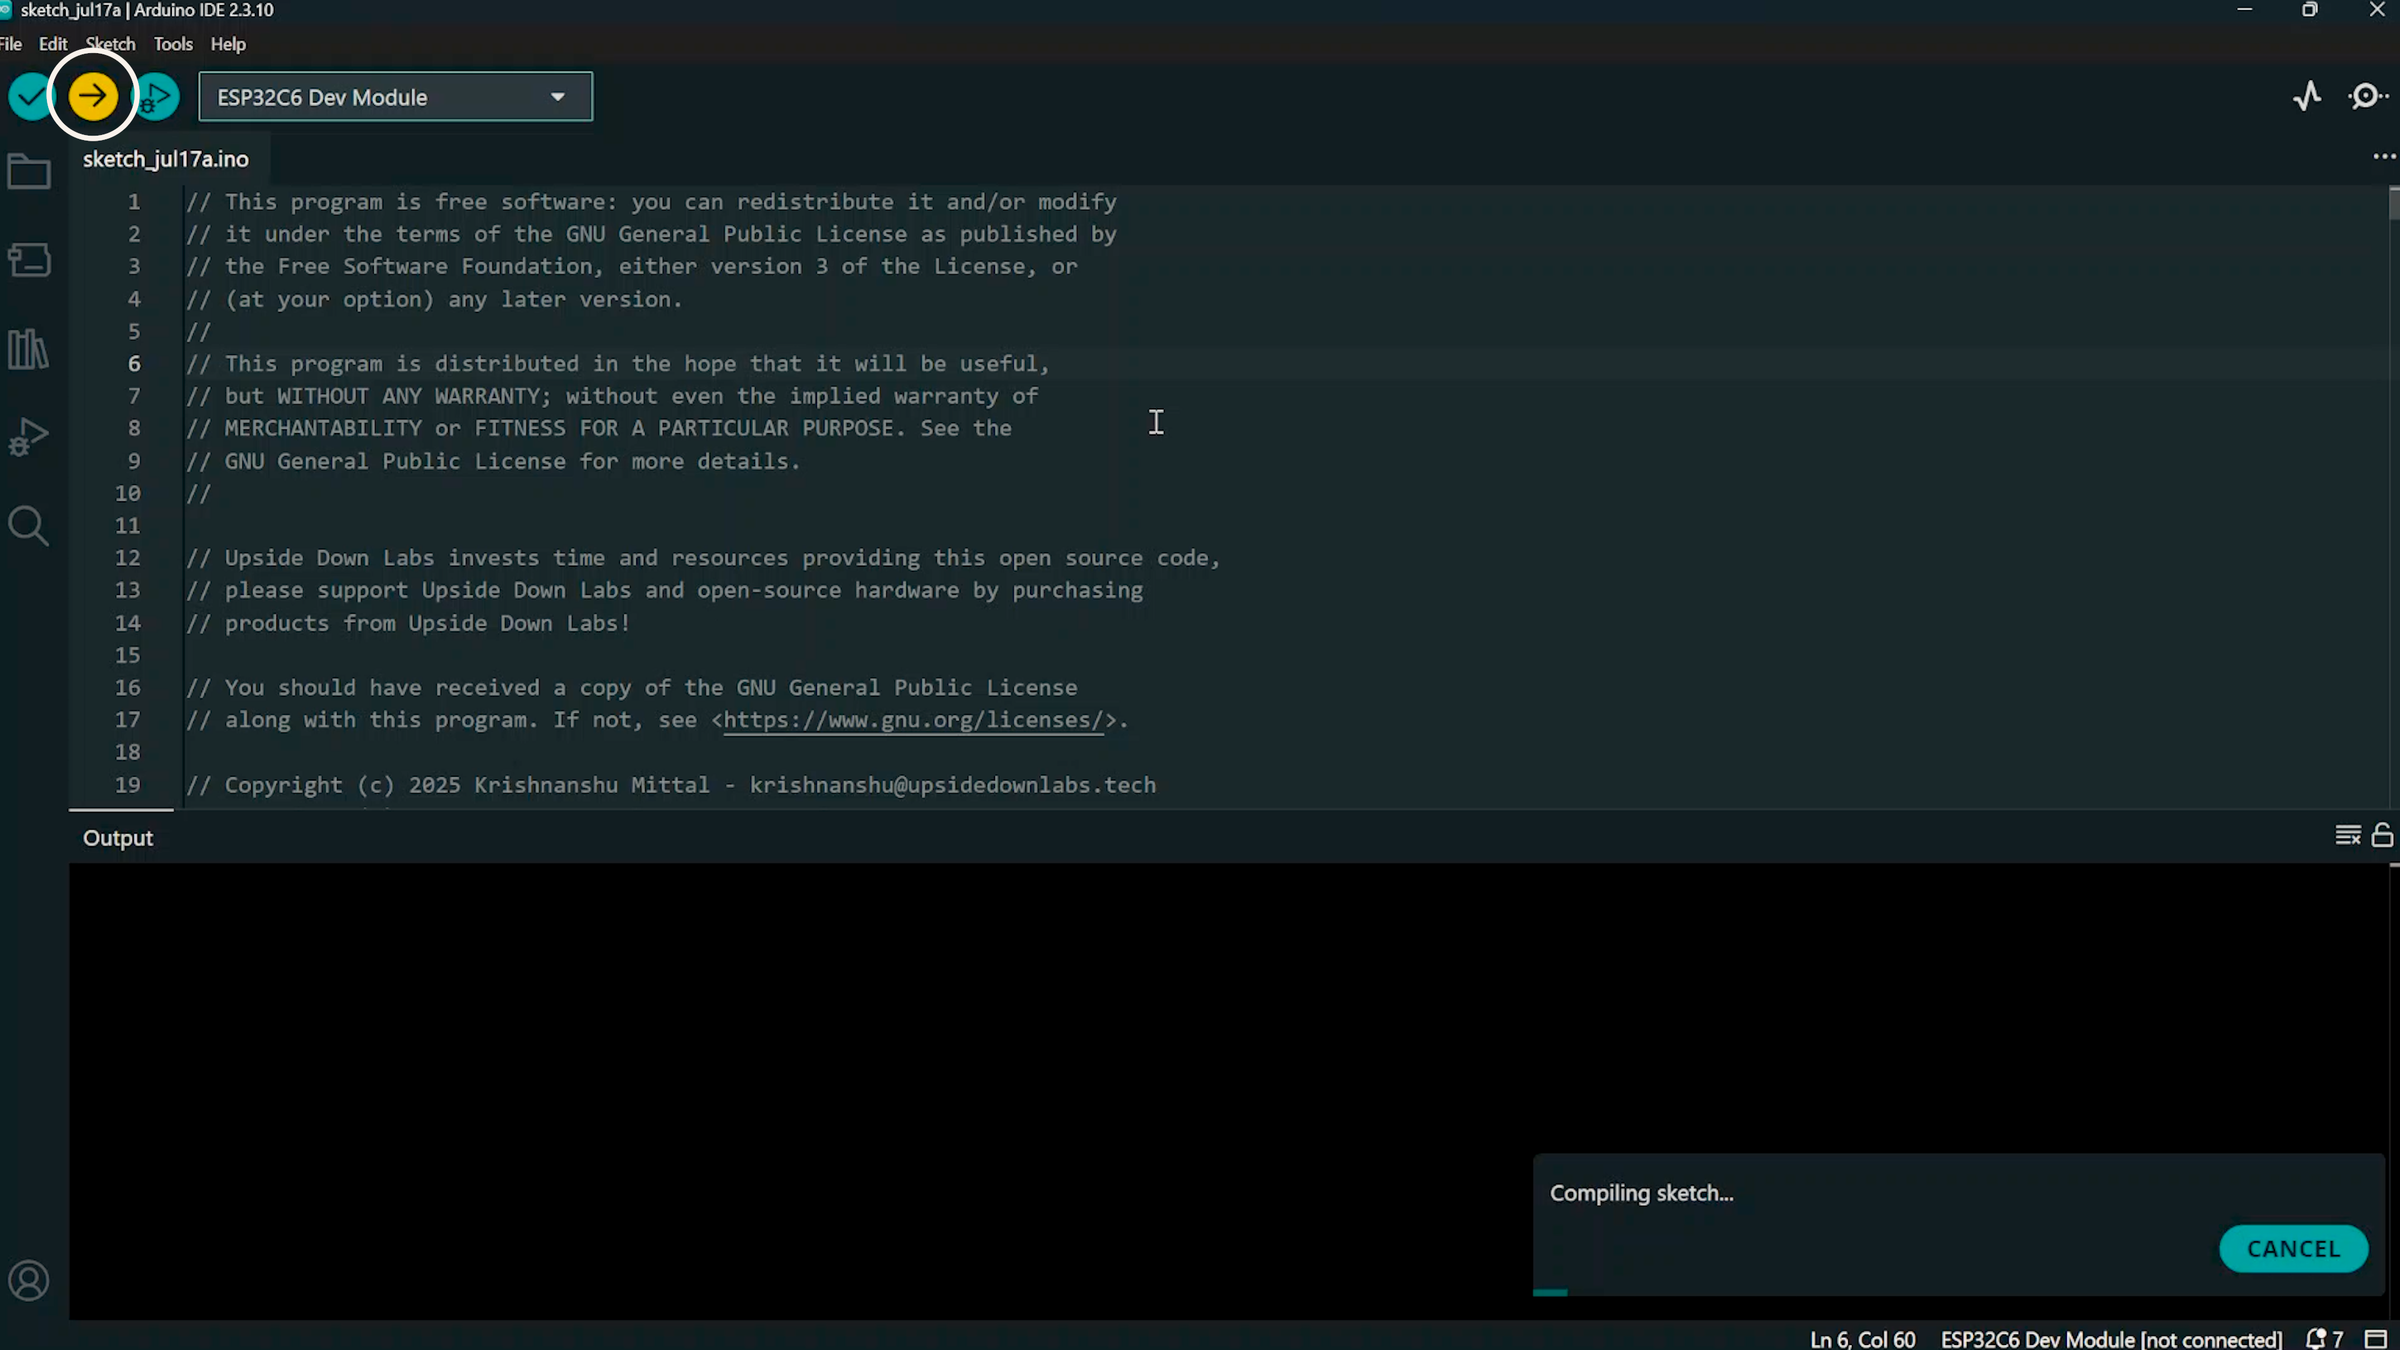
- Upload the firmware
- Verify that the correct board and COM port are selected.
- Click the Upload button.
- Wait until the upload completes successfully.
- Go wireless
- Disconnect the USB Type-C cable.
- Your NPG Lite is now running the HCI Mouse firmware and is ready to connect wirelessly via Bluetooth.
Wear the Headset
.gif)
.gif)
.gif)
.gif)
Insert the NPG Lite into the headband (or your preferred mount).
Wear it comfortably so the IMU stays firmly attached to your head.
Power on the device.
Pair the Bluetooth Mouse
Open your computer's Bluetooth settings.
Choose:
Add Bluetooth Device
Select:
When the connection is successful:
- the board vibrates briefly
- the connection LED turns green
Your wireless mouse is now connected.
Calibration
.gif)
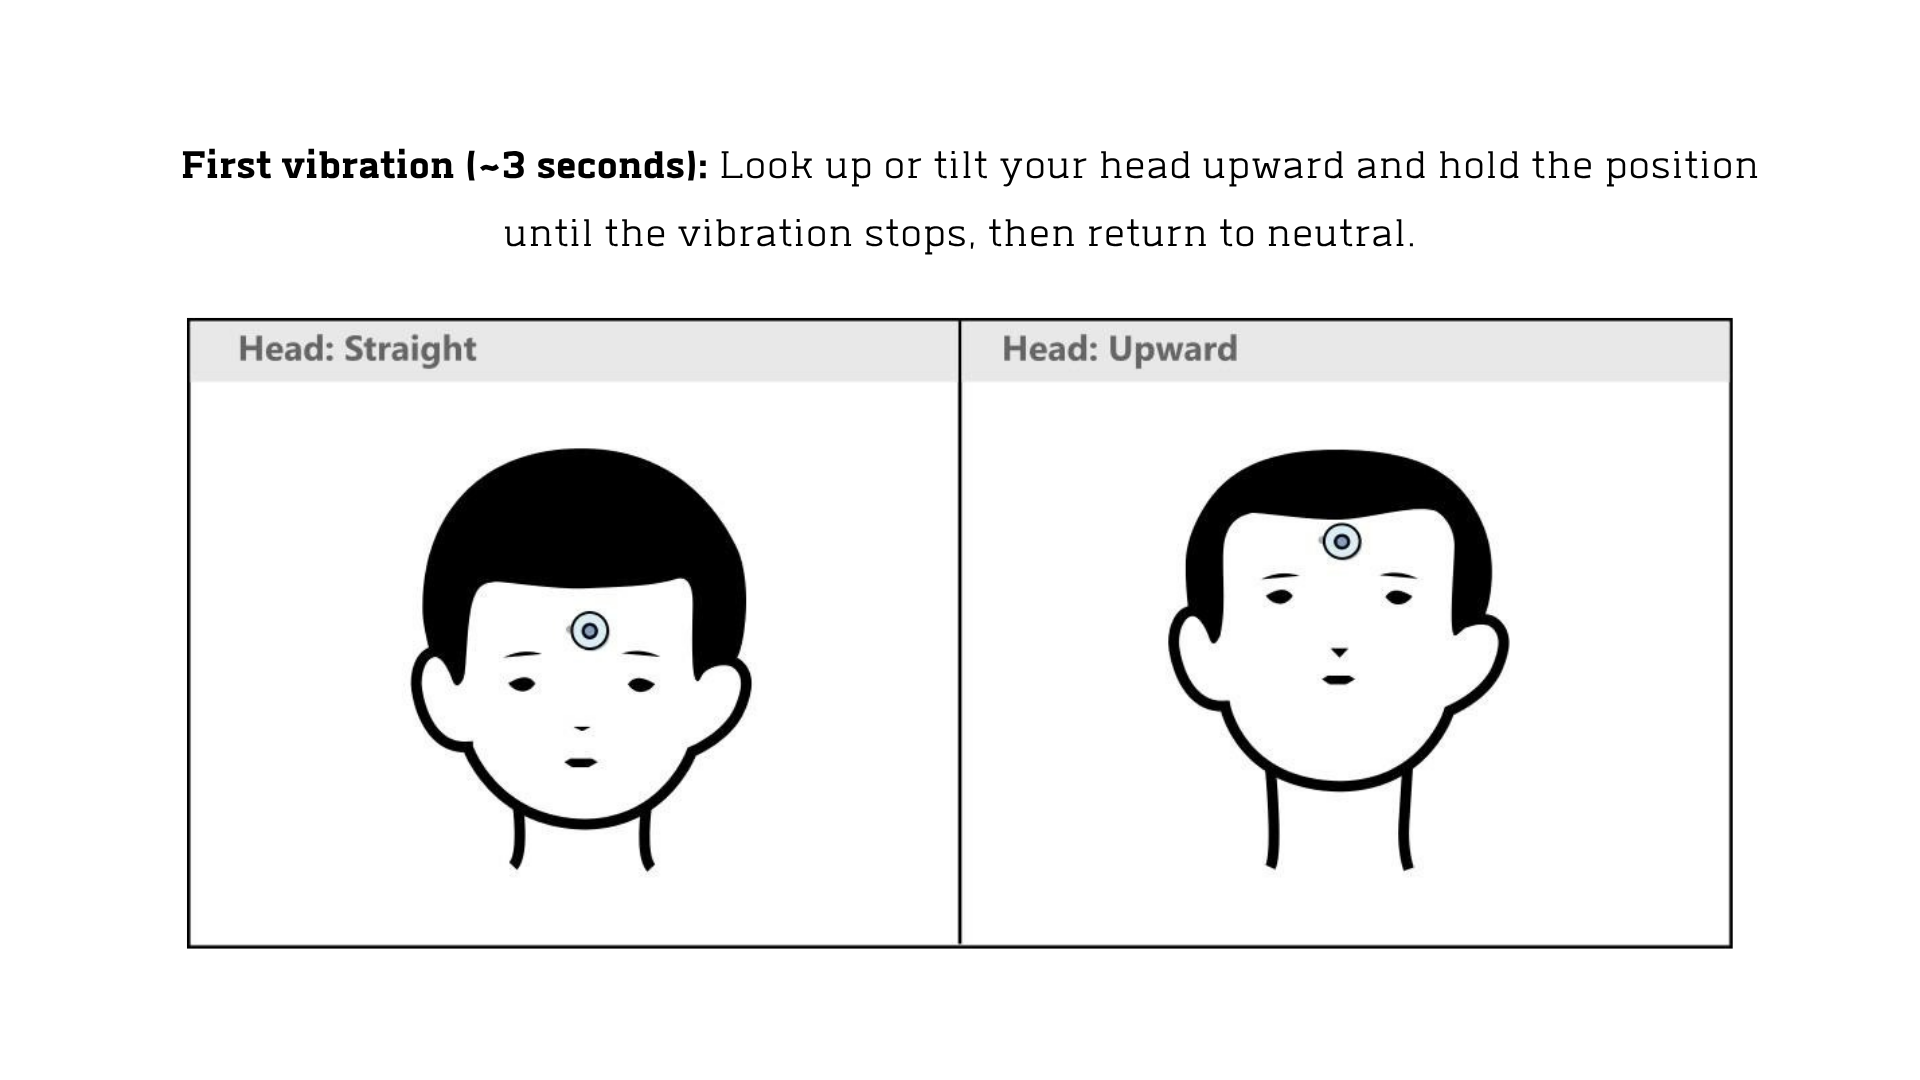
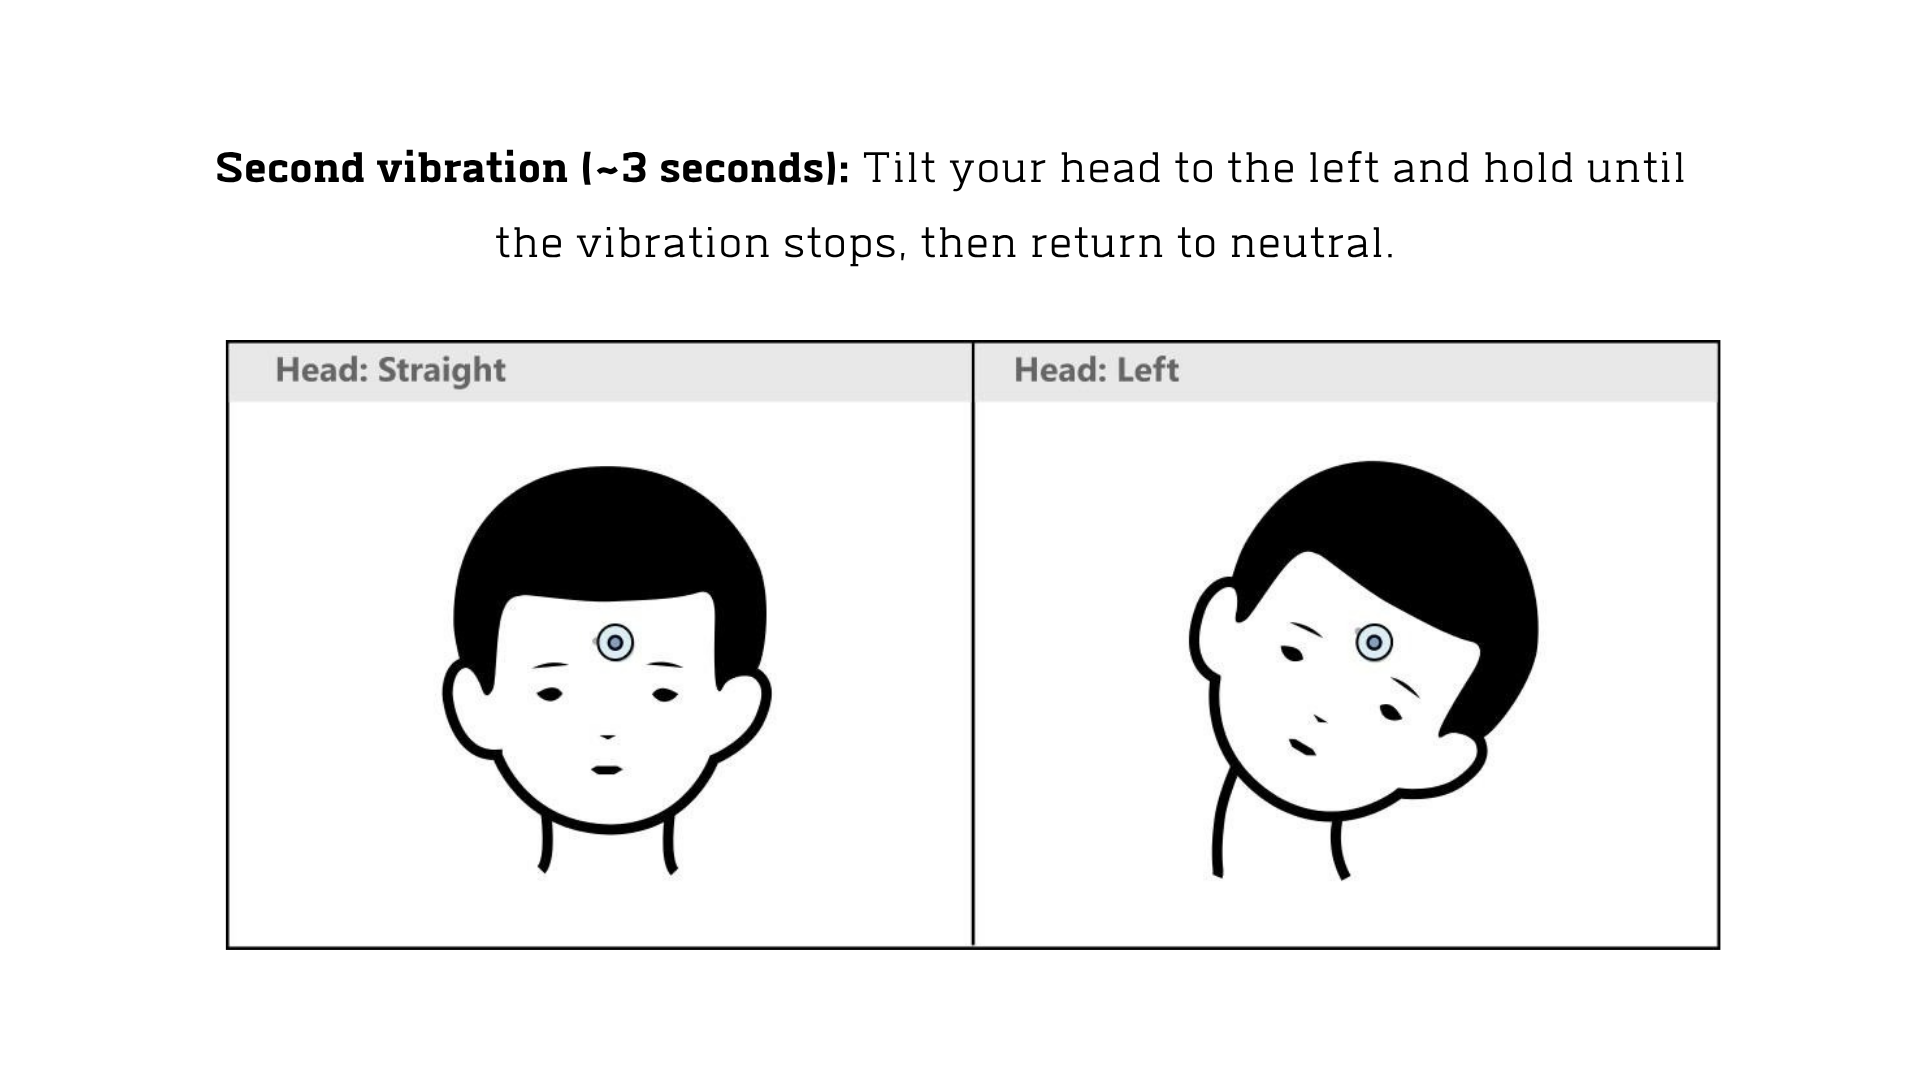
Calibration starts automatically after connecting.
The VibZ Playmate provides vibration feedback during calibration.
Follow these movements:
First Vibration
Tilt your head upward.
Hold the position until the vibration stops.
Return to the neutral position.
Second Vibration
Tilt your head to the left.
Hold until the vibration stops.
Return to neutral.
A final short vibration indicates that calibration has finished.
The cursor should now follow your head movements accurately.
Control Your Computer
.gif)
.gif)
.gif)
You can now operate your PC without touching a mouse.
Cursor Movement
Move your head.
Left Click
Clench your jaw.
Click and Drag
Double blink.
Right Click
Triple blink.
Practice each gesture a few times until it feels natural.
Final Result
.gif)
.gif)
.gif)
Now that you've built a Bluetooth HCI mouse, you can explore many exciting projects such as:
- Hands-free gaming
- Accessibility interfaces
- Smart home control
- Robotic control
- Human-Computer Interaction research
- Brain-Computer Interface experiments
You can also modify the firmware to assign your own gestures and actions.
Video Tutorial
 Lite - DIY Wireless HCI Mouse)
The full step-by-step tutorial for this project is available on our YouTube channel, where we explain every step in detail—from hardware setup and wiring to programming and testing.