DIY Aviator Helmet / Flight Hat From Craft Foam
by LostWax in Craft > Costumes & Cosplay
815 Views, 18 Favorites, 0 Comments
DIY Aviator Helmet / Flight Hat From Craft Foam


Hi, my name is Chris, and I make a lot of things out of foam! For this project I wanted to create an aviator helmet based on the style that became iconic for airmen during World War I, but then add a steampunk design element to take it into the realm of fantastical steam powered technology! I'm thinking sky pirates, airships captains, and intrepid explorers. This pattern only requires a few sheets of easily sourced 2mm craft foam, so it's a super low budget, yet extremely effective project.
All right, goggles down, let's go!
Supplies
- Pattern: When you print it, measure against the print guides to know the scale is correct. ** When printing, make sure scale is set to ACTUAL SIZE** Because I make my patterns to work on both A4 and U.S. letter paper, often Adobe Acrobat will try and shrink the pages a little bit.
- Craft foam: The foam I used was approx. 2mm thick. You will need two 12" x 18" sheets for all sizes except extra large, for which you will need three.
- Very Sharp Knife: If it is not really sharp you will have a terrible time when you are cutting the foam. I use a surgical scalpel or utility knife. Use a brand new blade.
- Hot Glue Gun: I highly suggest a glue gun that has adjustable temperature. If you use a temperature just a little bit higher than the melting point of the glue, you will have fewer burnt fingers, and not have to hold pieces together as long while they cool.
- Super Glue: Helpful for gluing down bits and pieces.
- Gluing Surface: A surface that you don’t mind getting glue on. A silicone baking sheet is great because hot glue doesn’t stick to it.
- Scissors
- Paint Pen or Gel Pen: Used for any markings on the foam.
- Cutting Surface: Somewhere to cut where you won’t be destroying anything.
- Black and Brown Paint: Artists acrylics work reasonable well, though they can crack over time. If you want a really durable, long lasting finish, I would suggest using a flexible paint, such as Plaid FX paints.
- Metallic paint: I used DecoArt Americana Metallics “Antique Brass”
- A Buckle: Try find one you can recycle from some old clothing item- bags, shoes, and belts are good places to look.
- Heat Gun or Blowdryer: Used for heating and forming the foam.
- Iron (optional): Used to add a leather-like texture to the foam. You can see my tutorial on the textured leather technique here: http://youtu.be/45Lxy_2lDw4
- Aluminum foil (optional): used to add texture to foam.
- Leather Punches: I used 12mm, 9mm, 5mm, 3mm
- Contact Cement (optional): I used hot glue in the video, and I think this works great, however, if you are going to be wearing or storing your costume somewhere that will get quite hot, you might want to use contact cement instead.
- Wire: I used some 3mm telephone wire and some 6mm acrylic tubing.
** I have links to a lot of the different supplies I use on my projects here**
Safety First!
Nothing robs the joy of crafting like an unexpected trip to the hospital, so take care of yourself!
- I use hot glue in this tutorial, however I realize that many may choose to use contact cement instead. The fumes from contact cement are toxic, so, if you choose to use it, do so in a well ventilated space and wear lung protection such as a respirator.
- Whenever you heat foam (with a heatgun, blowdryer, or iron) there is potential for the foam to release harmful gases, so use a respirator and do it somewhere with good ventilation.
- Some EVA foam contains a chemical called formamide. There are some people that say there isn't enough formamide in EVA mats to be harmful, and others that say there is. Do your research and come to your own conclusions. At the least, I would say it is a good idea to open your foam mat up and let it sit in the sun for a day or two, as most of the chemical will off-gas from the foam. Or buy foam that is labelled formamide free.
- Sharp knives and hot glue can cause injury. Be sure to use in accordance with the manufacturer's instructions.
Disclaimer: If you rely on the information portrayed in these instructions, you do so at your own risk and you assume the responsibility for the results. You hereby release Lost Wax Designs from any and all actions, claims, or demands that you, your heirs, distributees, guardians, next of kin, spouse or legal representatives now have, or may have in the future, for injury, death, property damage, or any other liability that may result related to the information provided in these instructions.
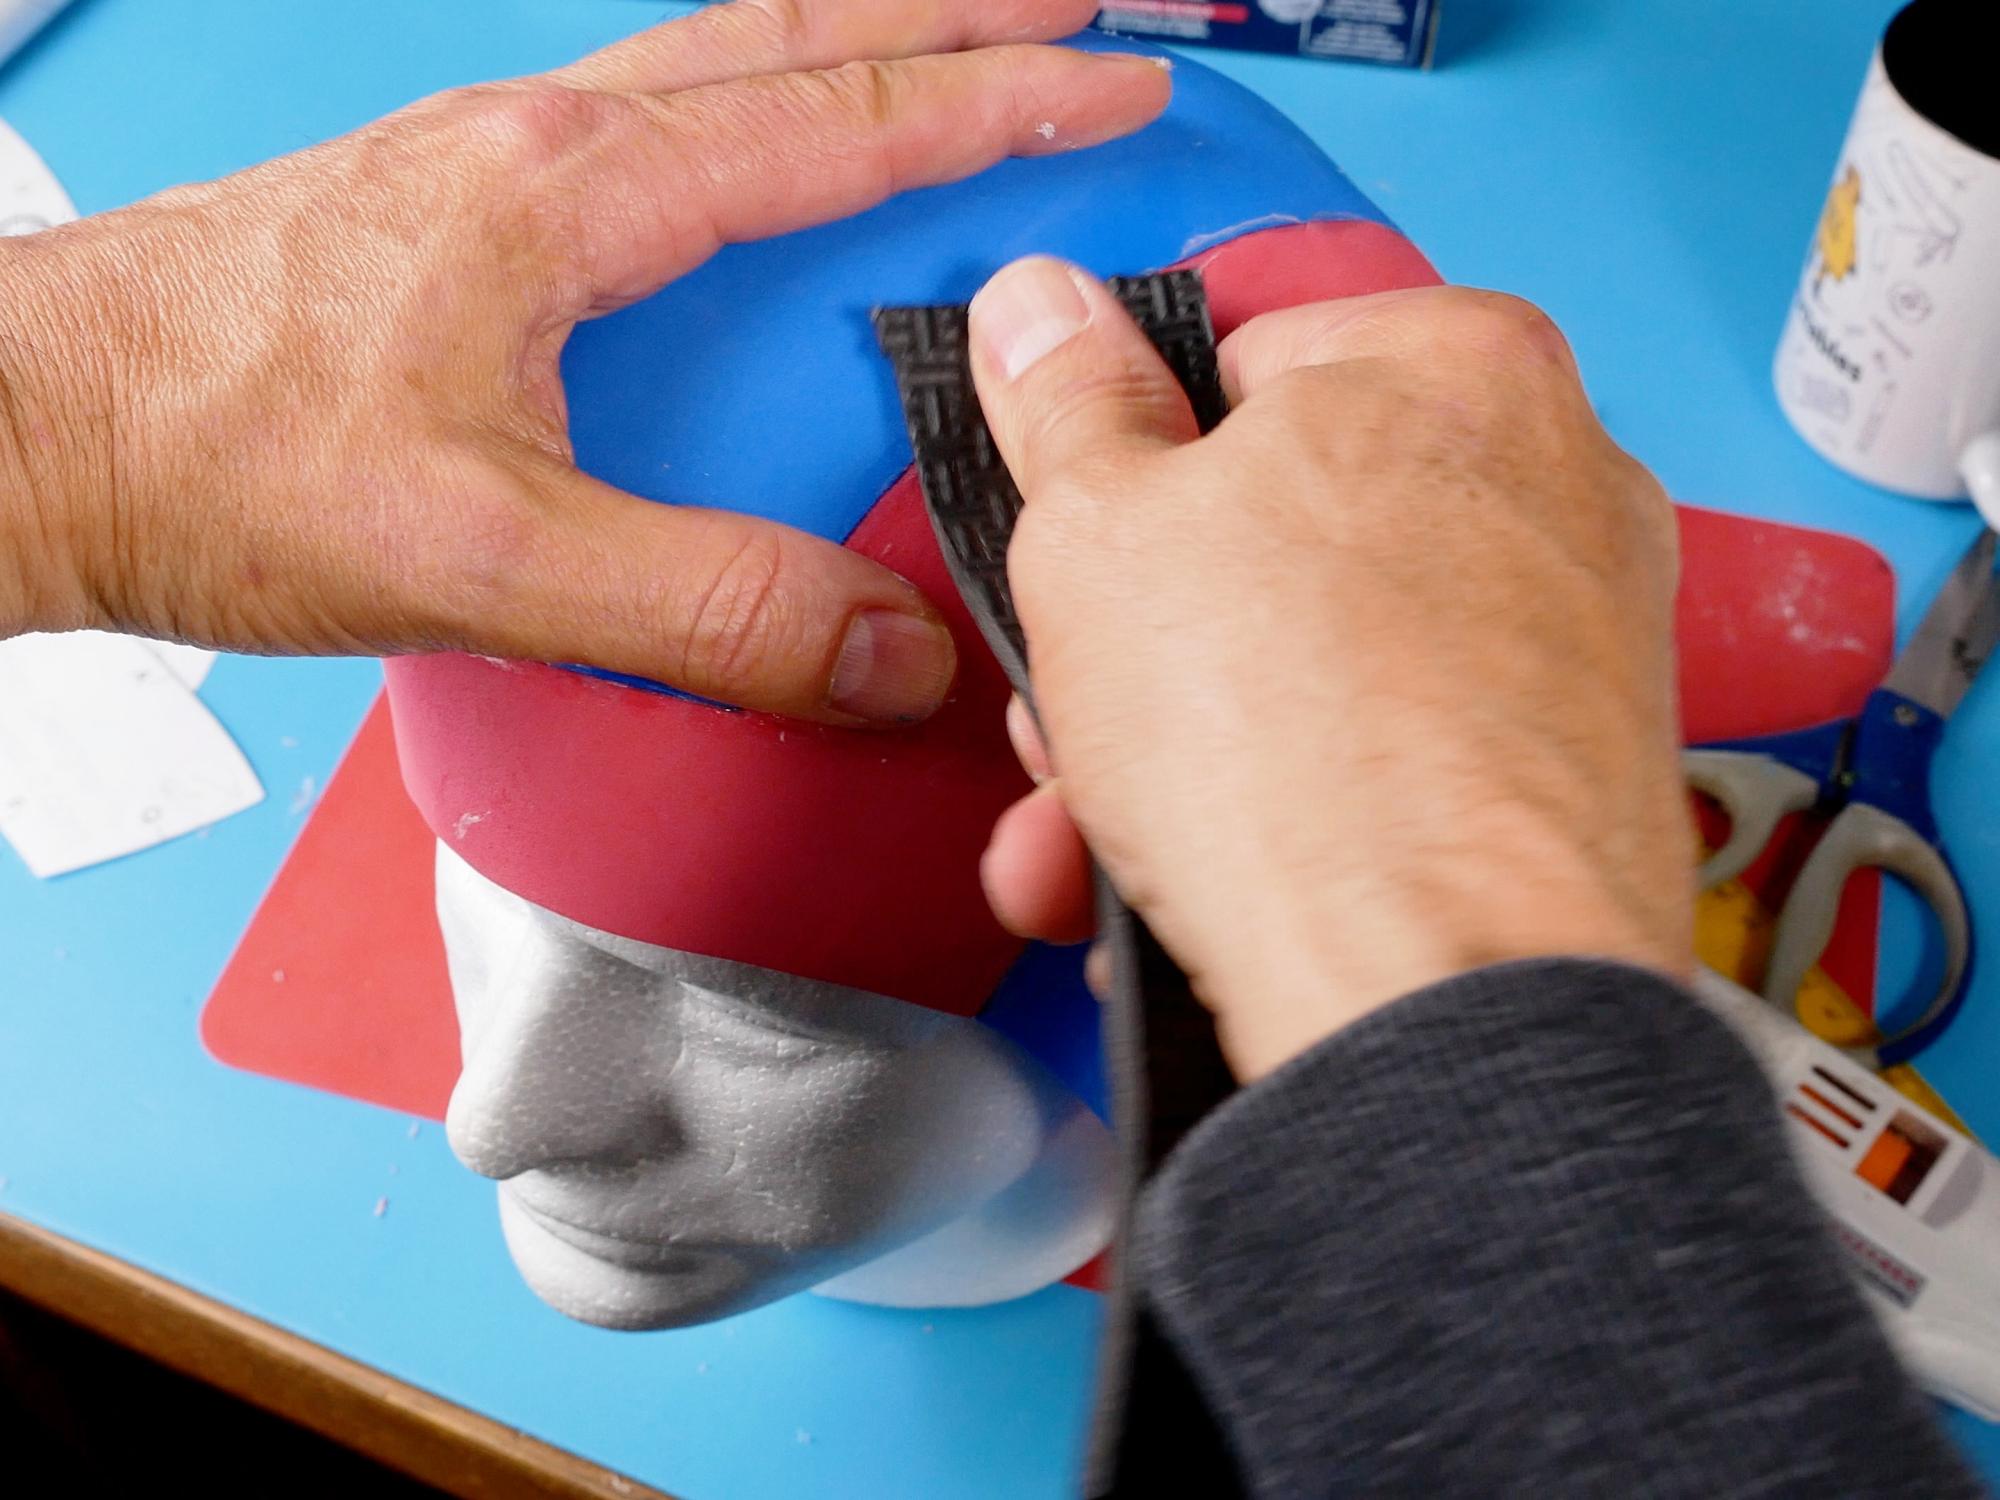
Texture the Foam to Make It Look Like Leather (optional)


Grab an old iron that you don't mind wrecking. Set it to one of it's lowest heat settings
Take a sheet of aluminum foil and scrunch it into a ball to crinkle it up, then open it up again so it is flat-ish. I think it works best if you end up with a double layer of foil.
Set the foil on a sheet of 2mm craft foam and press the iron down on top of the foil. Hold for a few seconds and then lift the iron and foil. The foam should have taken the texture of the foil.
Repeat the process, moving the foil each time to cover a new section of the foam. It's O.K. to overlap with sections you have already textured.
It is possible that heating the foam could release vapours, so it is always wise to heat foam outside or use a proper respirator to protect your lungs.
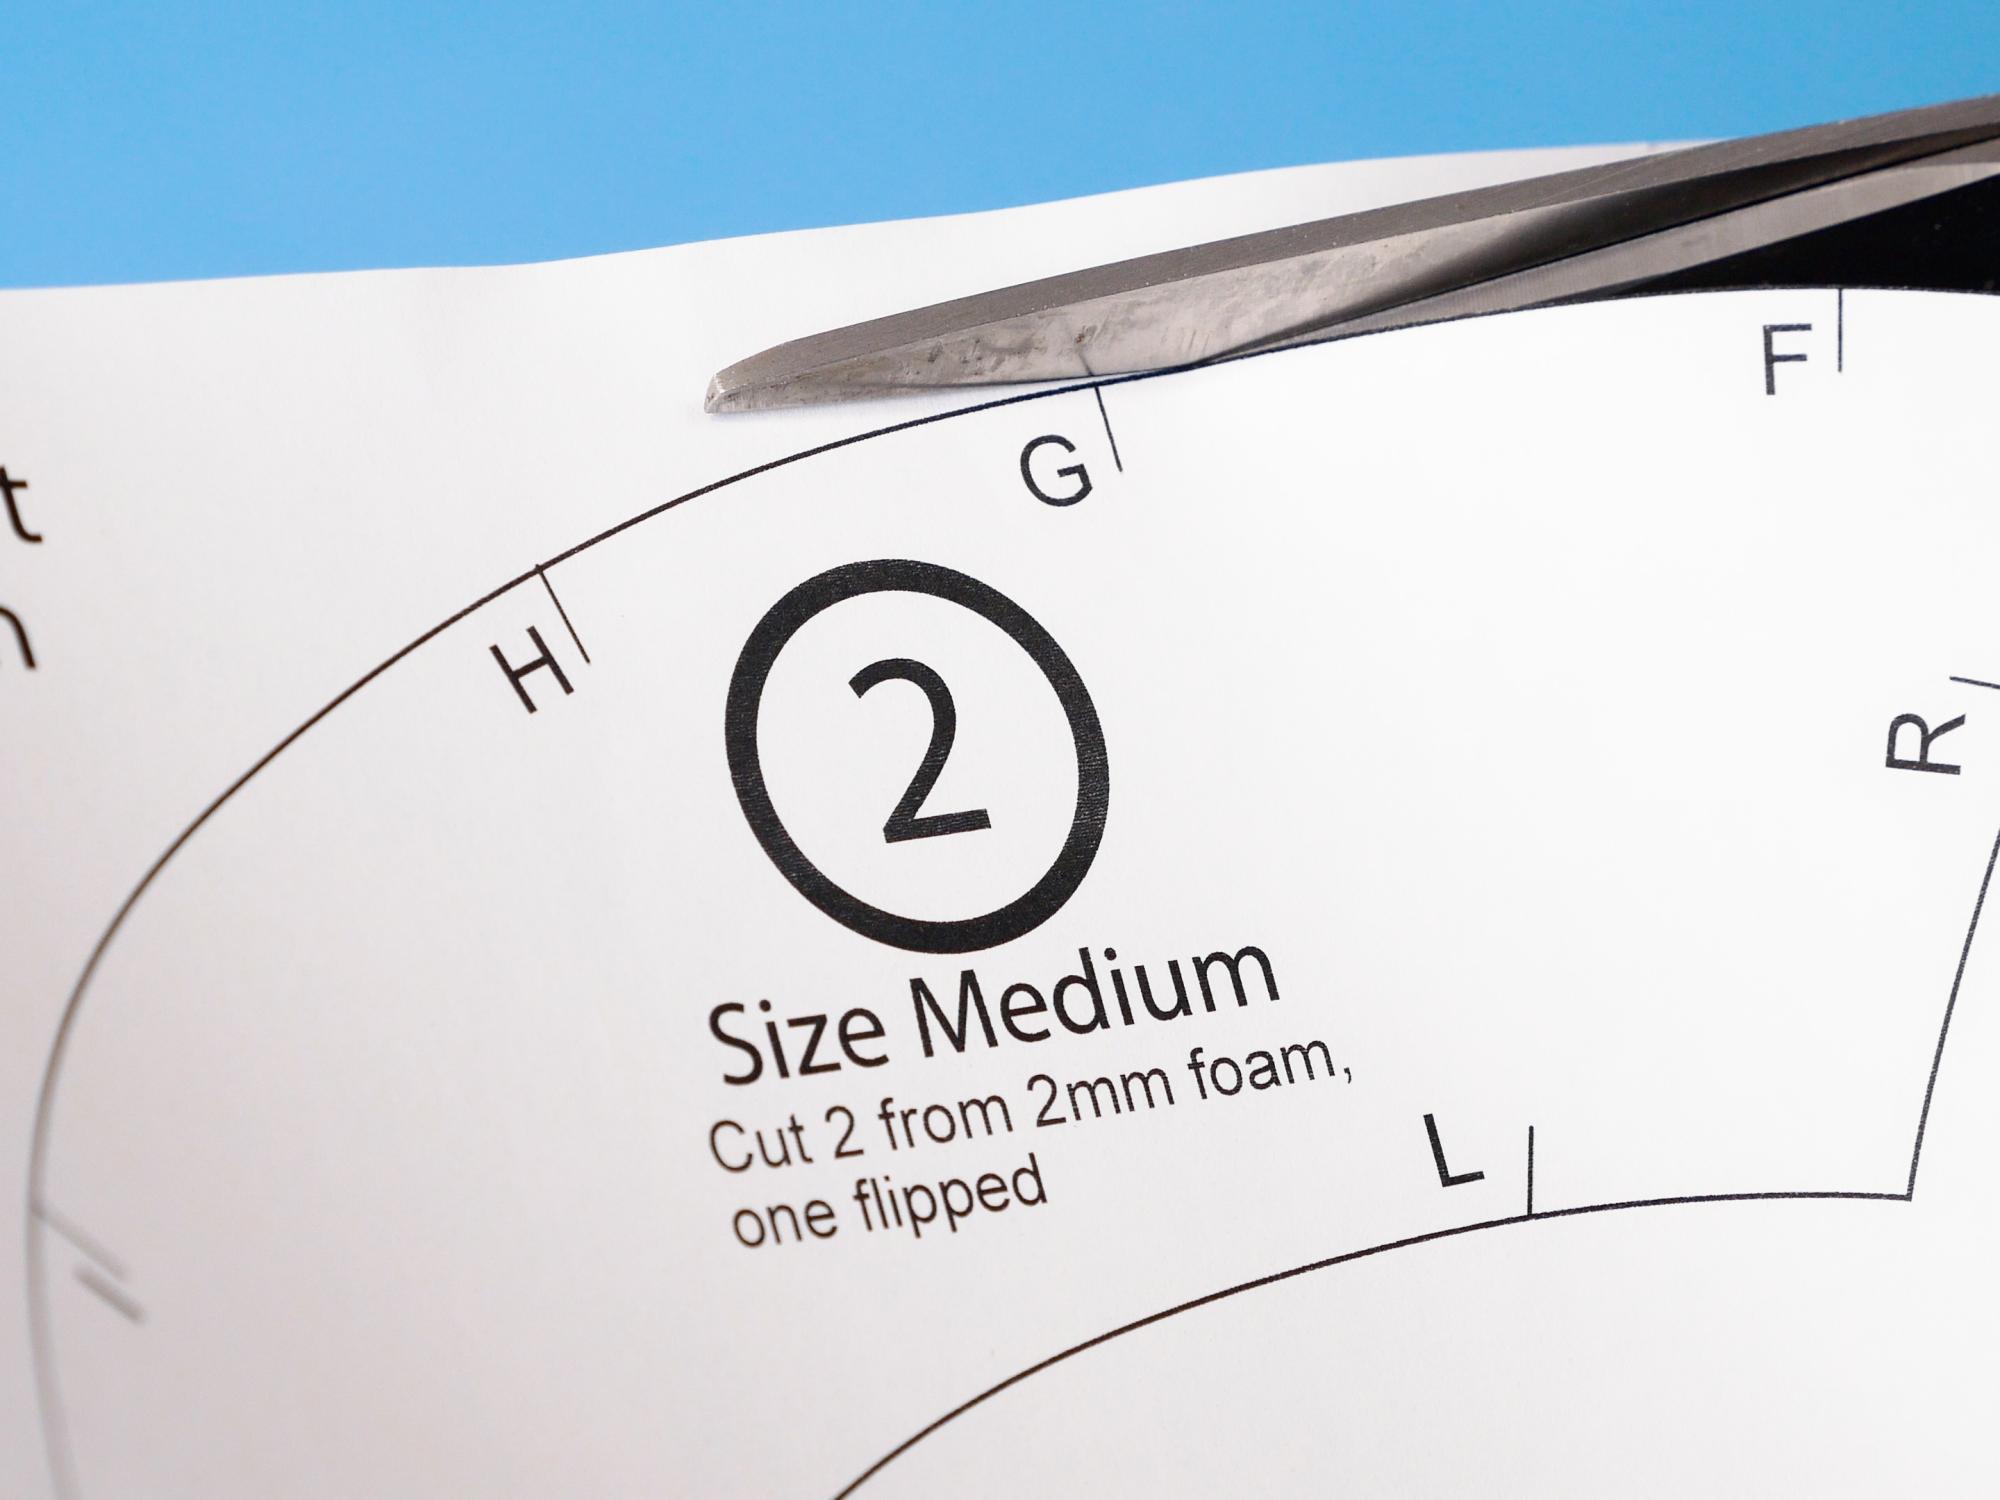
Print and Assemble the Pattern


Print the pattern pages from the PDF. Make sure the scale is set to actual size or 100%. Some of the pattern pieces are larger than one sheet of paper. For these, line up the “+” marks and tape the sheets together. I find it is easier to line up the marks if I hold the papers up against a window or a light table so that the light coming through the window allows me to see through to the lower registration marks.
**Make sure the scale is set to actual size in the settings when you print.**
After printing, measure the print guides with a ruler to verify that they are the correct size.
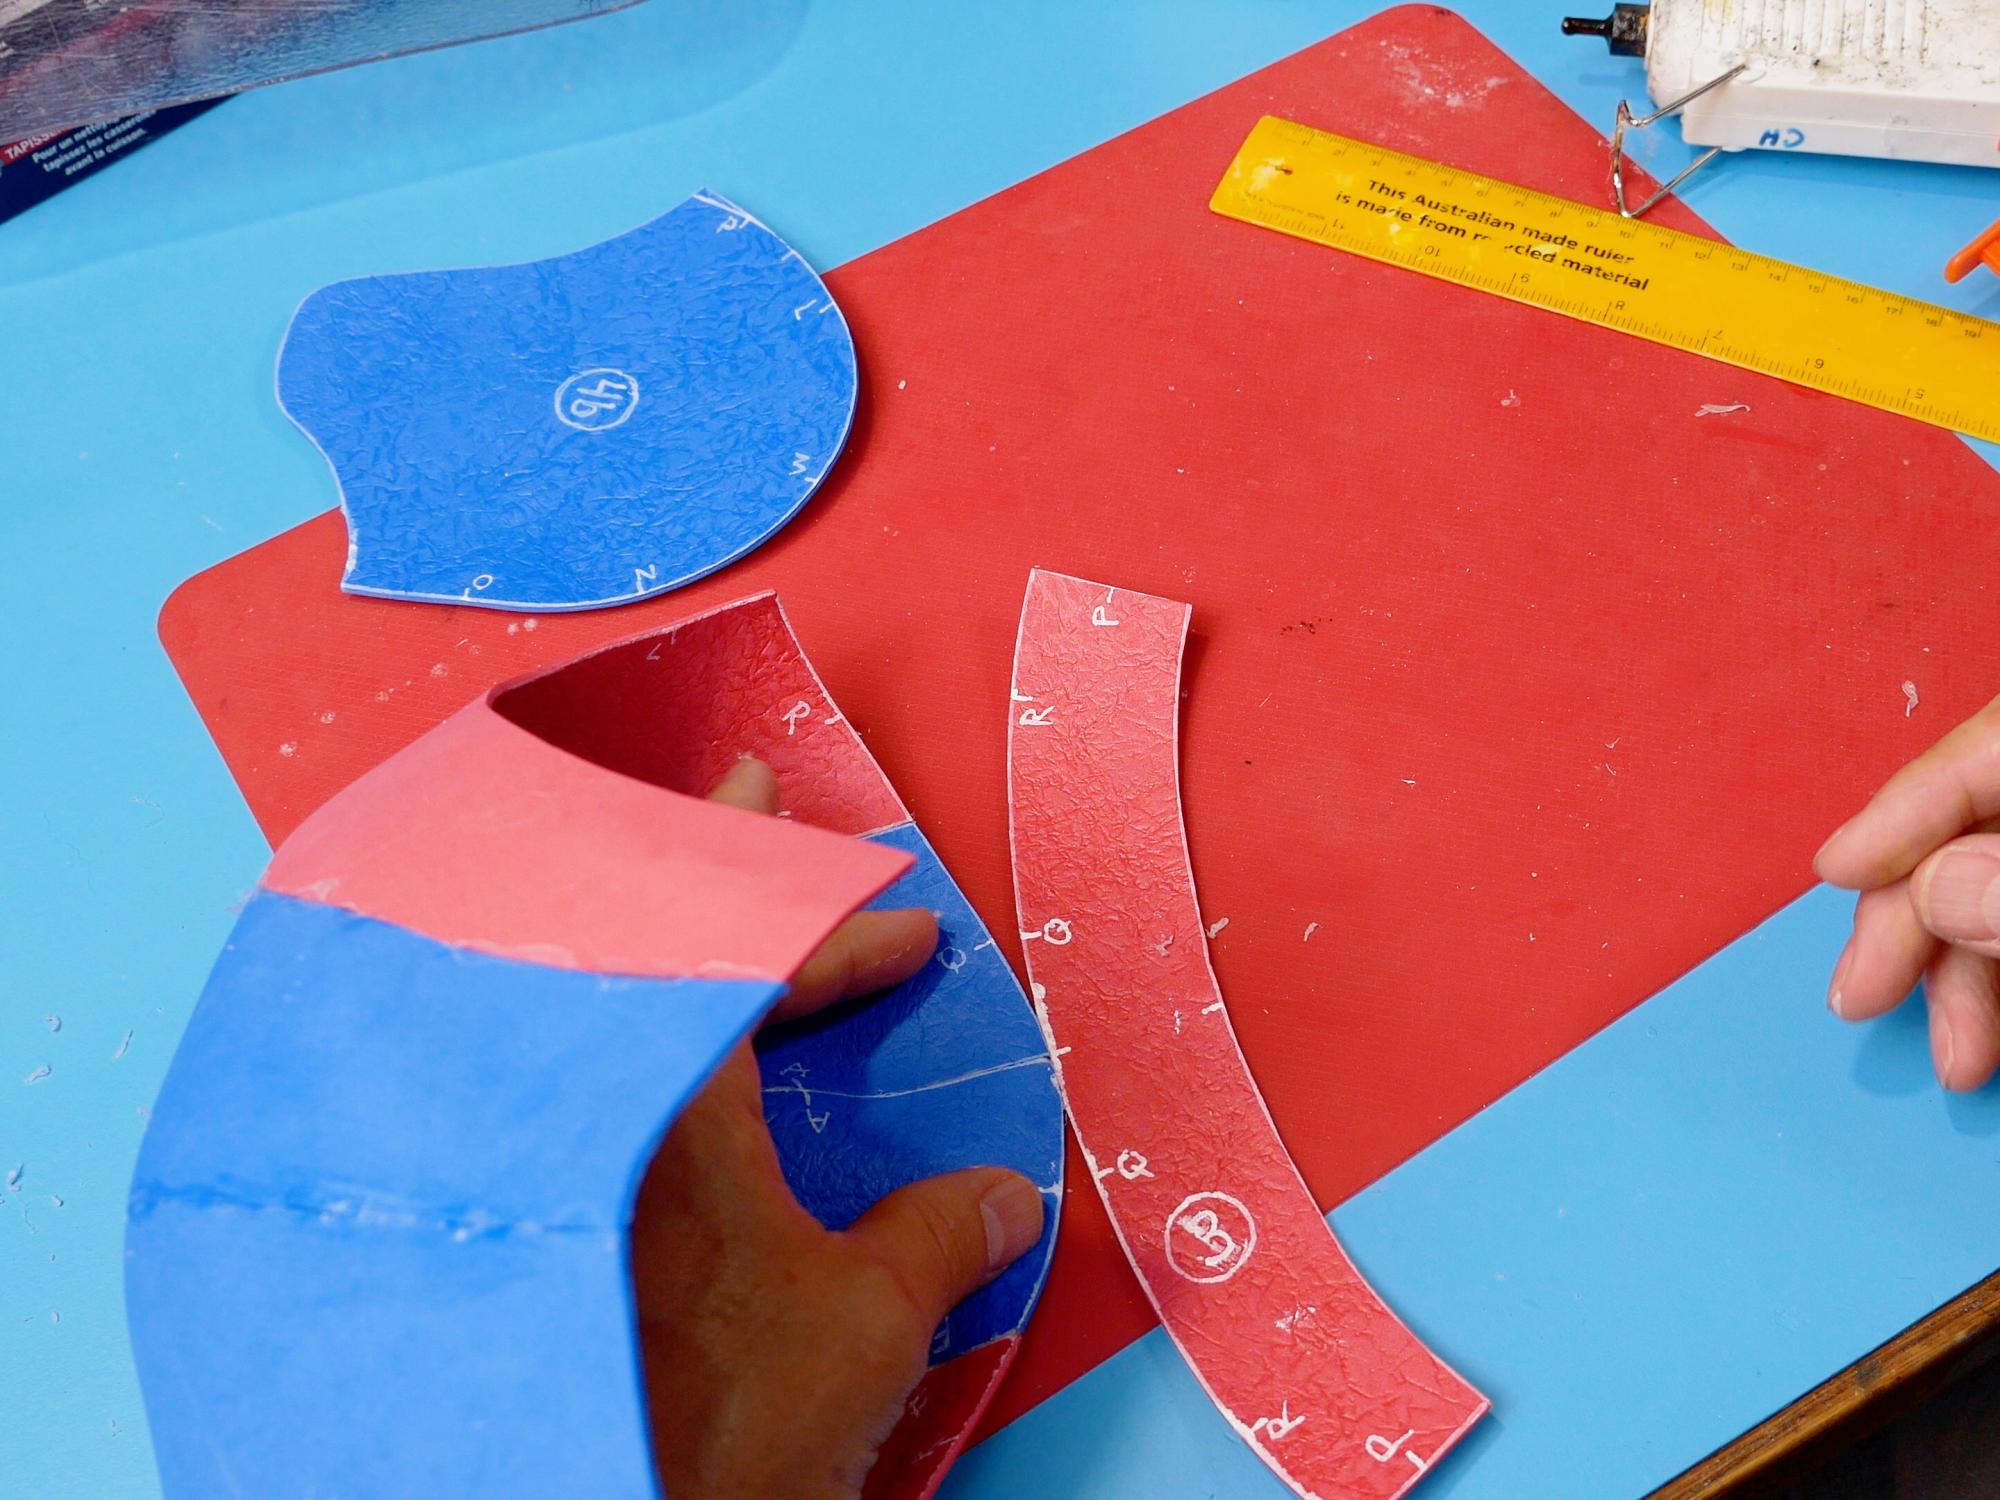
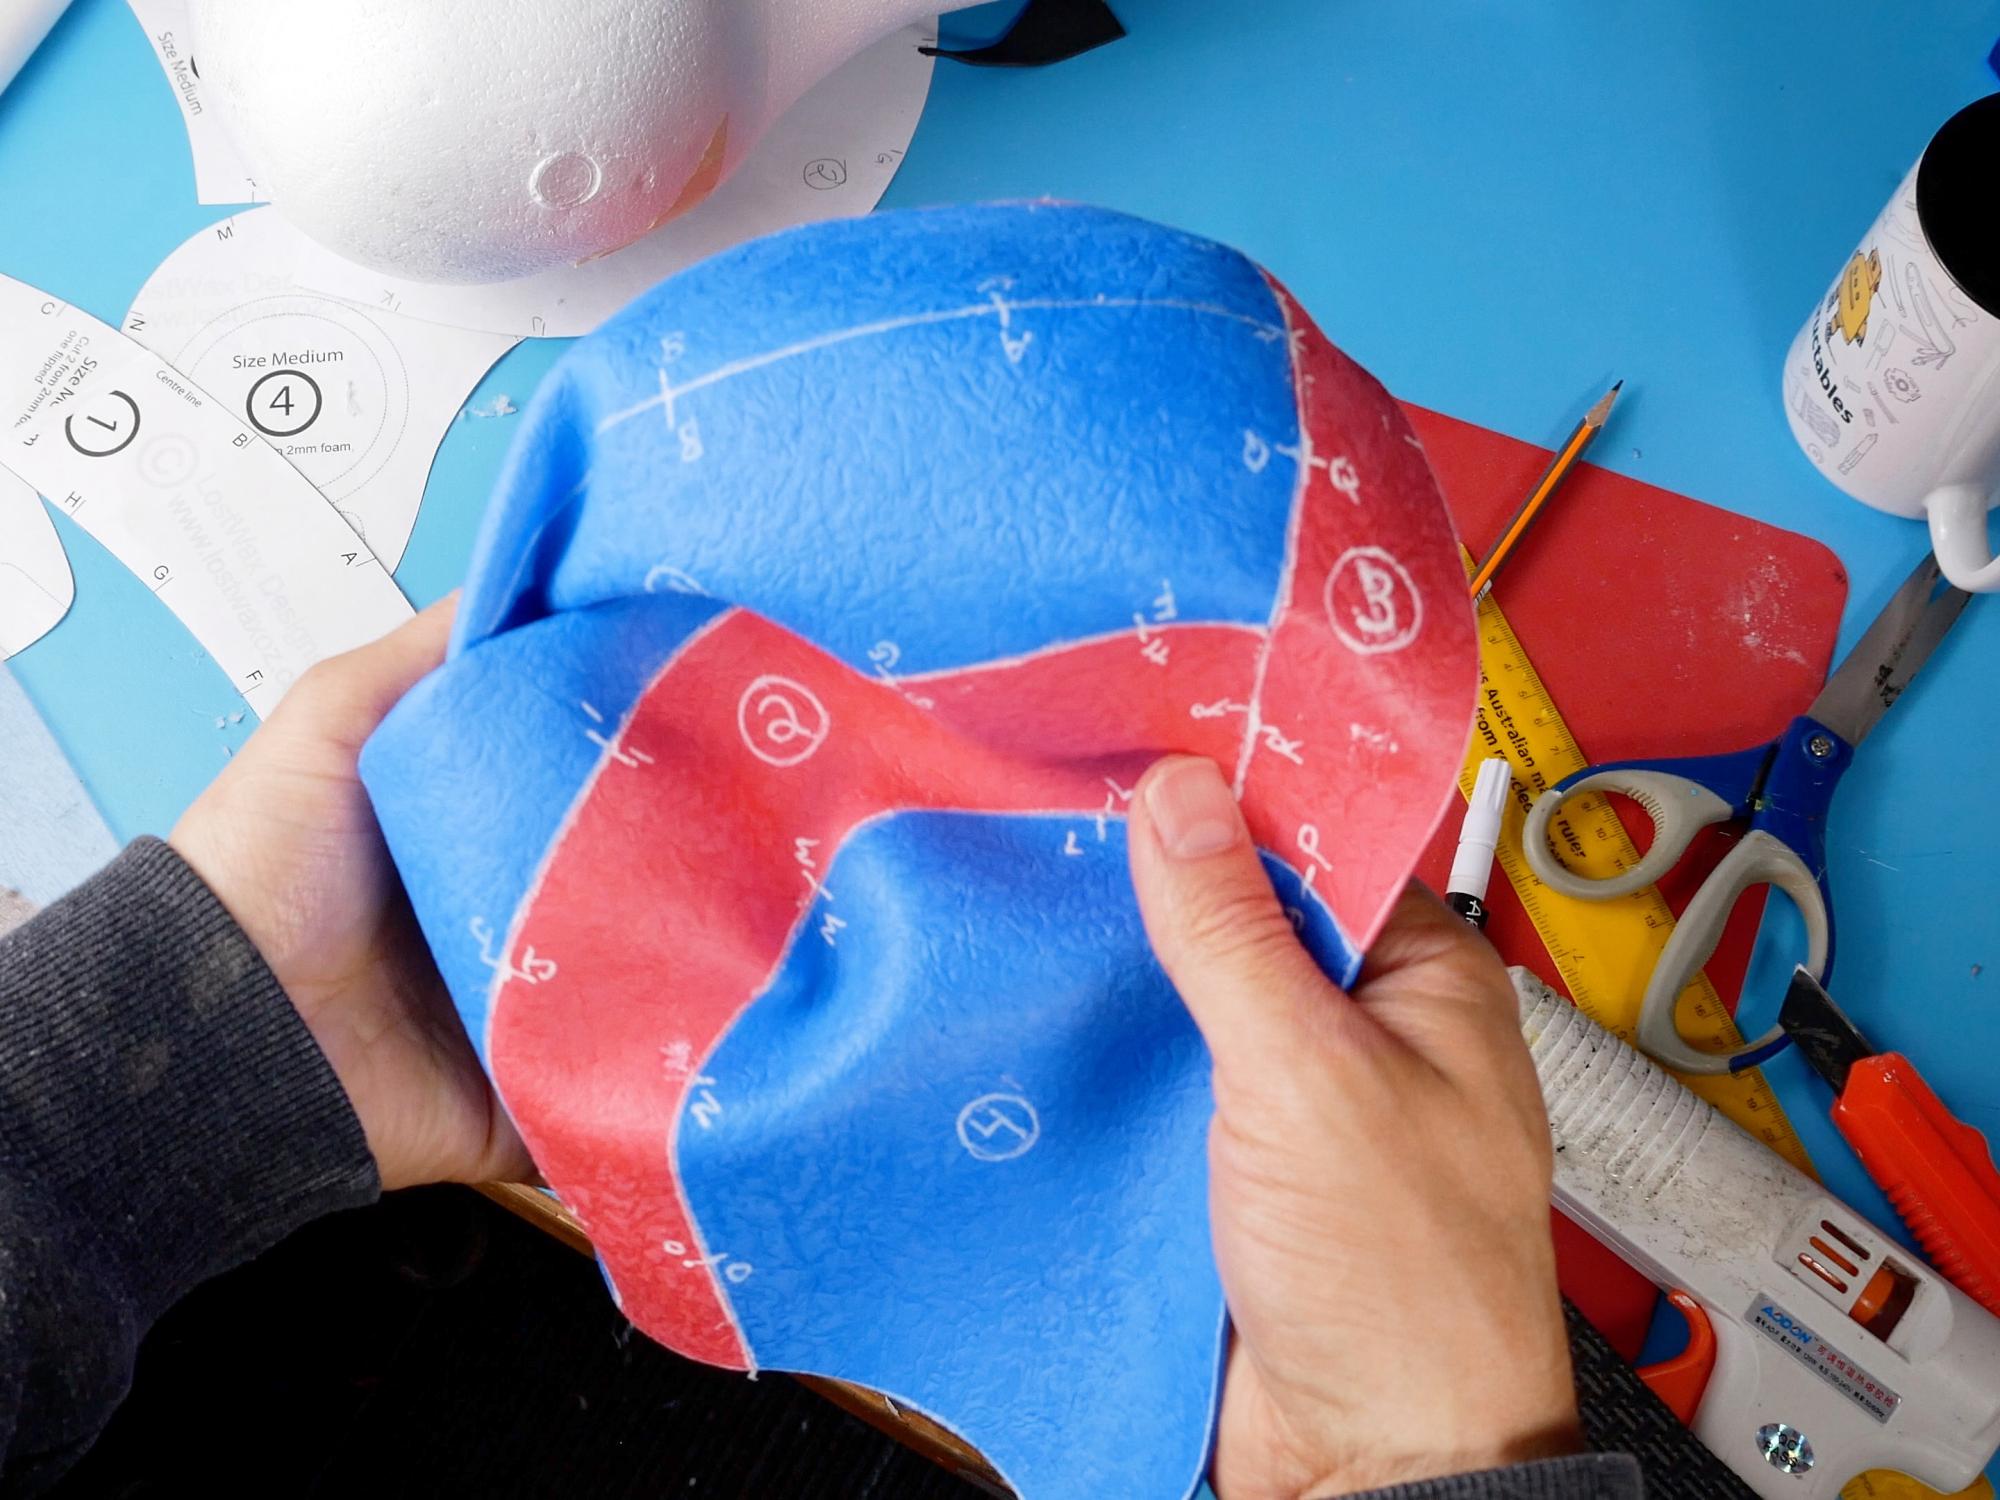
Cut Out and Transfer Alignment Marks

At this point we are just cutting out the main helmet pieces: pieces #1-4
Use scissors to cut out the paper pattern, just barely leaving the black line visible.
You will notice that there are alignment marks on the pattern. For all pattern pieces except piece #3, flip the pattern over, hold it up against a window or light source and trace the alignment marks to the back side of the pattern.
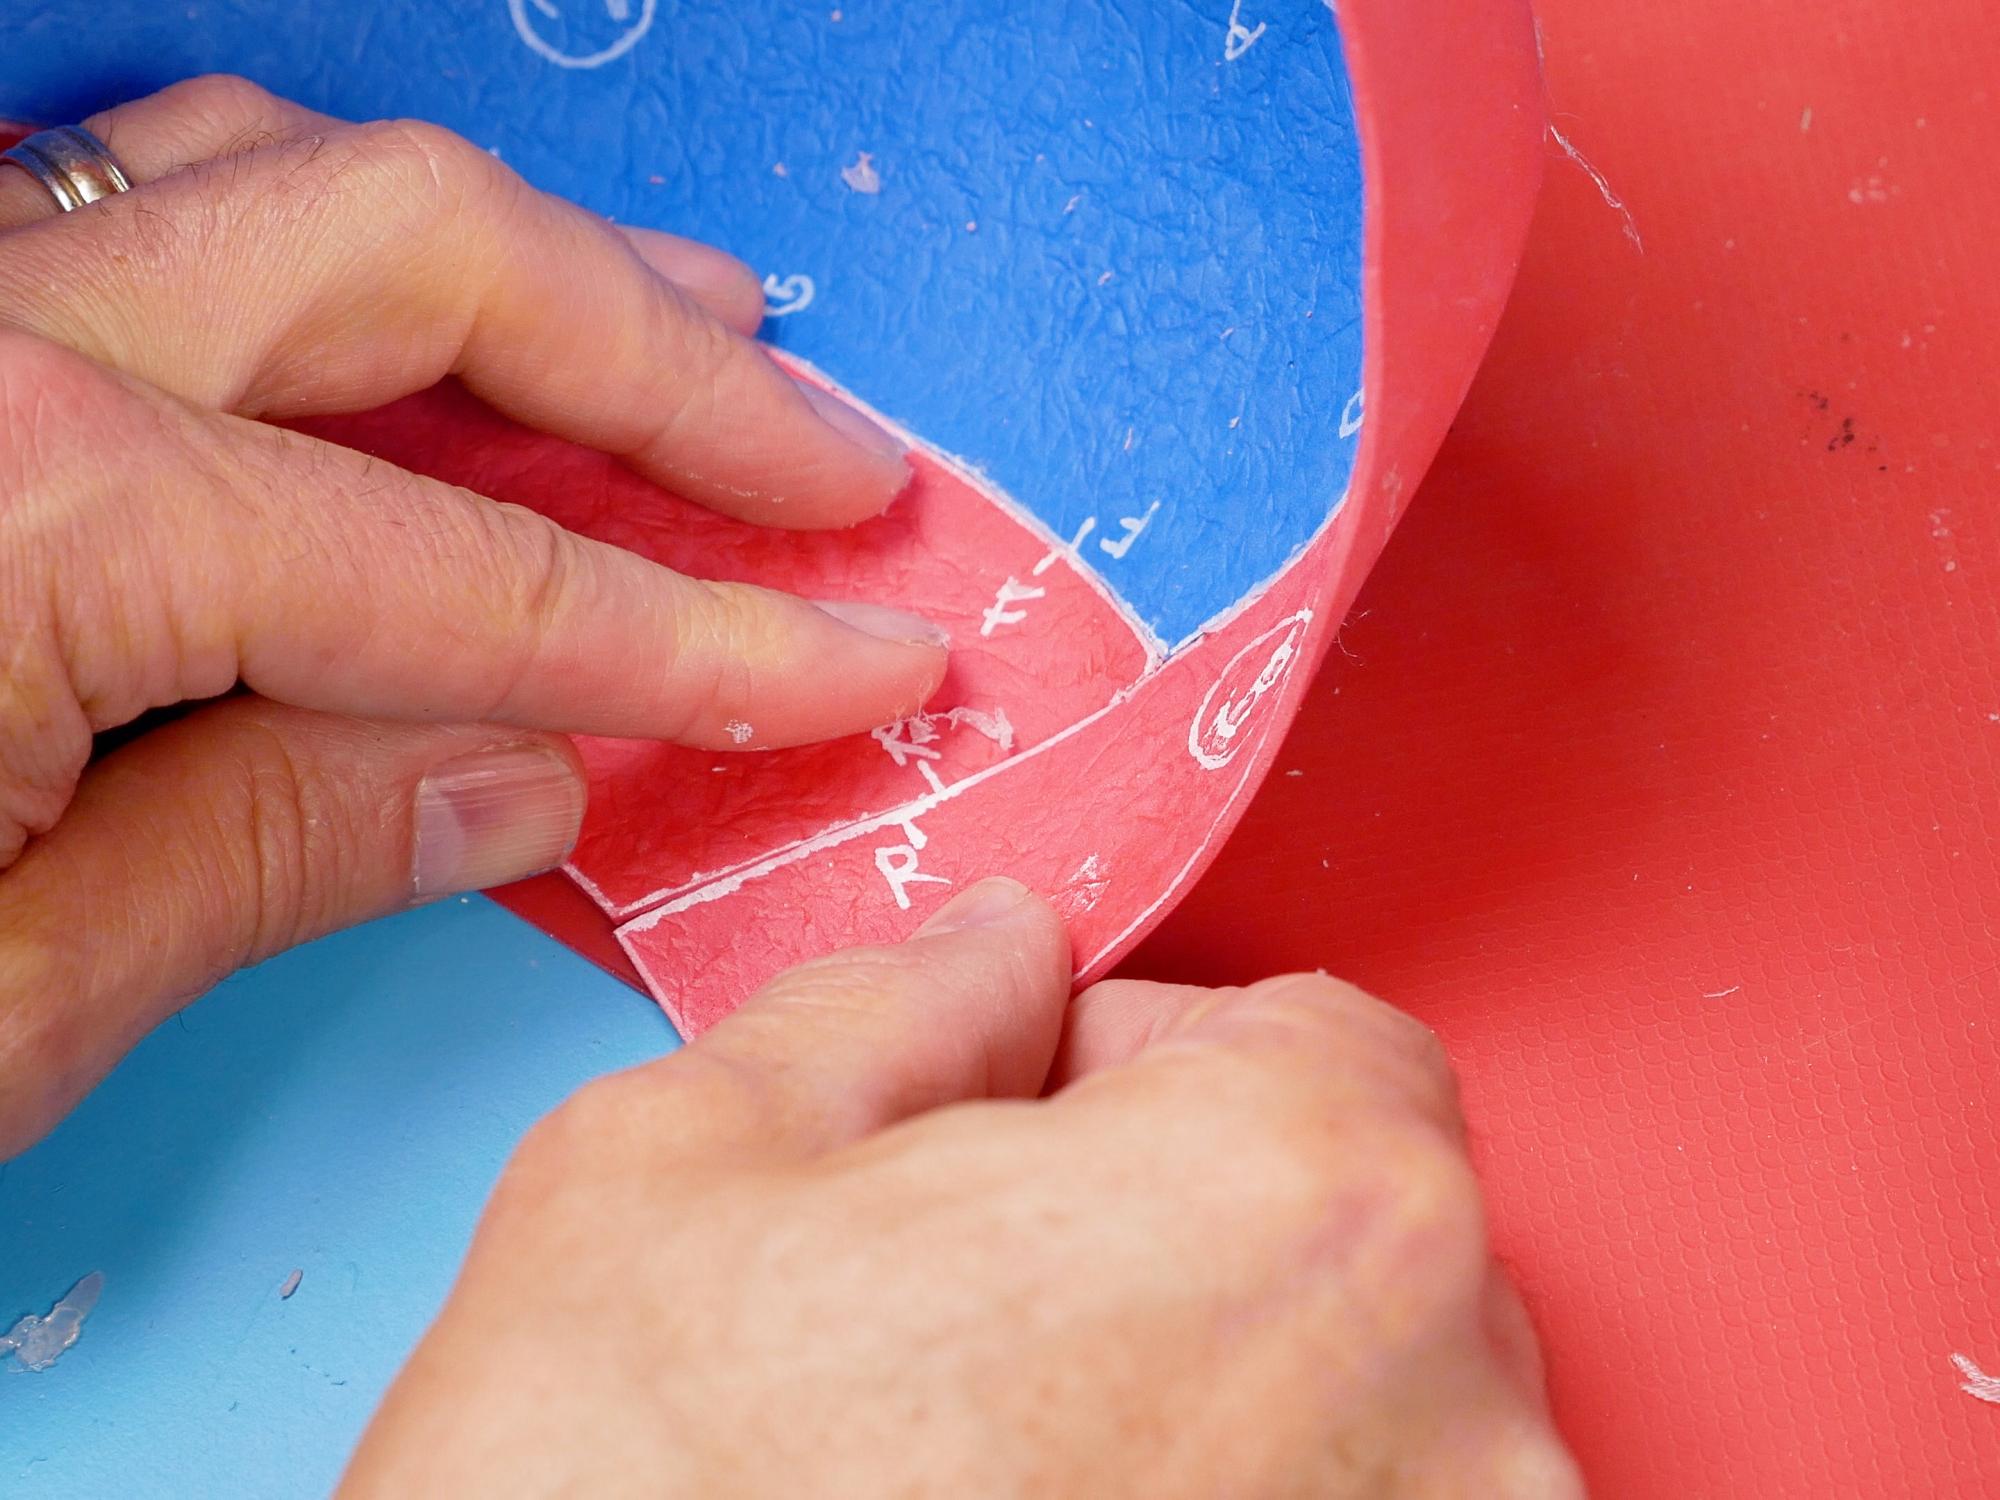
Trace Onto Your Foam


Each pattern piece has instructions on it as to how many times it will need to be traced and whether you will need to flip the pattern piece over for the second tracing. Whenever you trace a flipped pattern piece, it is helpful if you label it with a “B” so that you know which are which.
Carefully trace the pattern pieces onto the foam using either a light coloured gel pen or a paint pen. The reason for this is that standard sharpies or ball point pens seep through whatever paint goes over top of them, which isn’t bad if you are painting a dark colour, but if you are going to make your helmet a lighter colour, you can be sure it will show through. Trust me, it’s almost impossible to cover over!
When you remove the paper pattern, extend the alignment marks to the inside of the traced pattern, and write the letters beside them for reference.
Cut Out the Helmet Pieces


Using your sharp knife, cut directly on the lines. If the cuts look rough, that means your knife is too dull. Either get a new blade or sharpen your knife, it’ll make a ton of difference.
A Bit About Gluing

I use hot glue for my projects now, as I am a bit leery of breathing the fumes that go along with contact cement. It takes a little more practice, but you can still get very good results. The choice really is up to you. If you use quality contact cement, you will end up with a slightly more durable costume, particularly if it will be worn or stored in hot places where hot glue could melt.
One thing that can really make life easier is to use a hot glue gun with adjustable temperature. That way you can turn the temperature down so it is just above the melting point of the glue. You don’t need to hold things as long, there are less fumes, and you don’t get burned as easily!
I like to glue a section about 5 cm long and hold it together until the glue cools. This time can vary depending on how hot your glue gun is, but for me it is about 20 seconds. The number one reason people have problems with hot glue is that they are just not holding the parts together long enough, so, if in doubt, hold the parts a little longer.
** If you do use hot glue to make your helmet, be careful not to leave it in a hot car because the glue will melt, leaving you with a hot mess! **
If you have problems getting clean seams with hot glue, one thing you can do is wait until the seam is cool and them rub along the seam with a piece of scrap foam. This softens the glue and allows you to rub away the excess.
You will also see me sometimes wipe the hot glue off the foam seam before it completely cools. I am able to do this without burning my fingers because my glue gun is set to a low temperature and I have a fair bit of experience knowing how long to wait. I think it produces the best results, but do so at your own risk!
Glue It Down the Center


Starting with piece #1 and #1b, glue the centre seams together. Start at the front and work your way back, making sure the alignment marks line up.
I find that it works best for me if I apply the glue, then press the edges together while also holding the pieces down on a silicone baking sheet. Right as the glue is getting cool to the touch, I press down on top of the seam with a finger. This helps to make the two sides of the seam line up with each other. After pressing down on the seam, I will wipe any excess glue away with a finger.
Do this process in short segments, working your way down the seam.
Using this process will end up with your helmet inside out, but that's okay, we can flip it right side out later!
Glue the Sides


Glue piece #2 to piece #1 and piece #2b to piece #1b
Repeat the exact same process you used for the last step, lining up the alignment marks and working your way back.
Add the Front Band

Glue the front band, piece #3 lining up the alignment marks.
Start in the centre and work out to the sides.
You will note in the picture that alignment mark "R" doesn't line up- I have since fixed that, so it should all work now:)
Add the Ear Segment


Line up alignment mark "P" and work your way to the back.
You may find you have to stretch the foam a little bit in some places to get the marks to line up- that's alright. It's also alright if they don't quite line up perfectly. The main thing is that when you get to the back of the helmet, the two edges end up flush with each other.
Flip It. Flip It Good.


At this point your flight helmet should be all glued together, but inside out.
Now is your chance if you want to clean up any seams that are currently on the outside of your helmet but will soon be on the inside. You can rub them with a piece of scrap foam to clean them up a bit. I found it helpful to put the helmet on a mannequin head for this step.
Carefully flip the helmet right side out.
Fabulous Foam Stretchery


It's pretty cool that we have been able to take some flat sheets of foam and make this three dimensional, rounded helmet. You will notice, however, that in some places, the foam is still trying its hardest to remain flat. To achieve the best possible look, it's worth trying to stretch the foam strategically to make for a rounder final product.
Using a finger or two, in the centre of the front band, stretch from side to side.
There will be a flat spot in the middle of piece #1 and #1b running from front to back. You can heat the helmet up slightly with a hair dryer and then hold the helmet down over a mannequin head, or even your own head. It is really important that you don't heat it too much or all those hot glue seams you lovingly glued, will come apart!
Stretch the foam where it would cover your ears. This just gives a little more room for a comfortable fit over your ears.
Maybe You're Done?
If you're making a classic aviator helmet, you're pretty much done. You might want to add a chin strap, but other than that, you are ready to skip to the painting step.
If you are making the steampunk variation, keep reading.
More Pattern Parts

Cut the patten parts from the extra steampunk parts page that match your pattern size
Trace them onto 2mm craft foam. The foam I use for these parts isn't textured because I want them to look like metal rather than leather.
Make a mark in the centre of each dot around piece #9
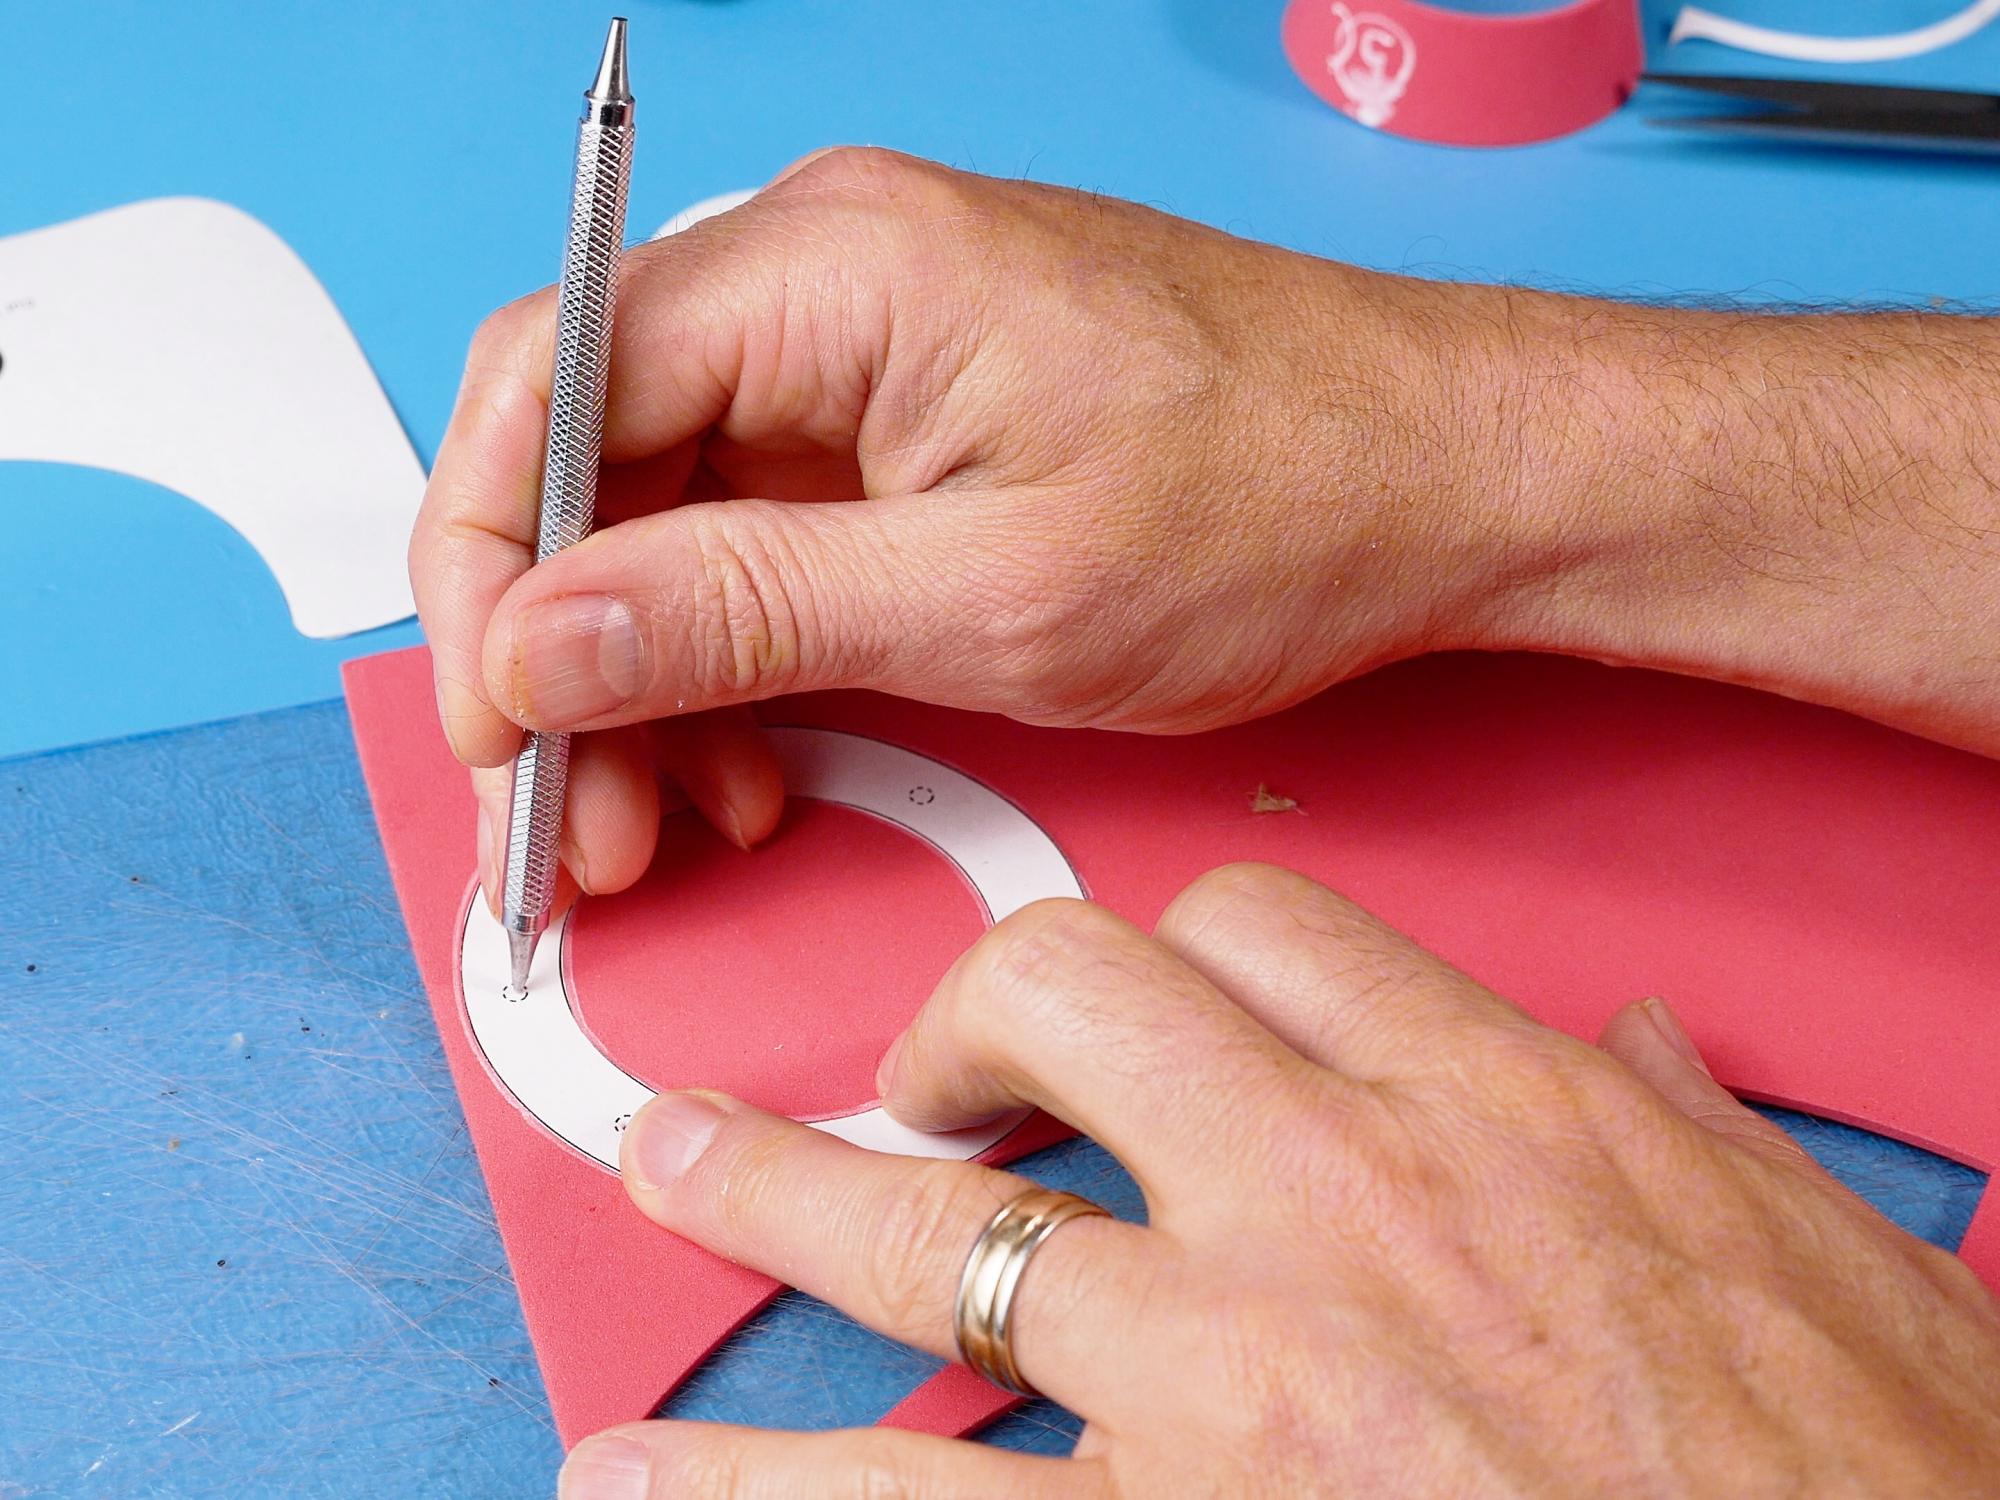
Grills and Truncated Cones


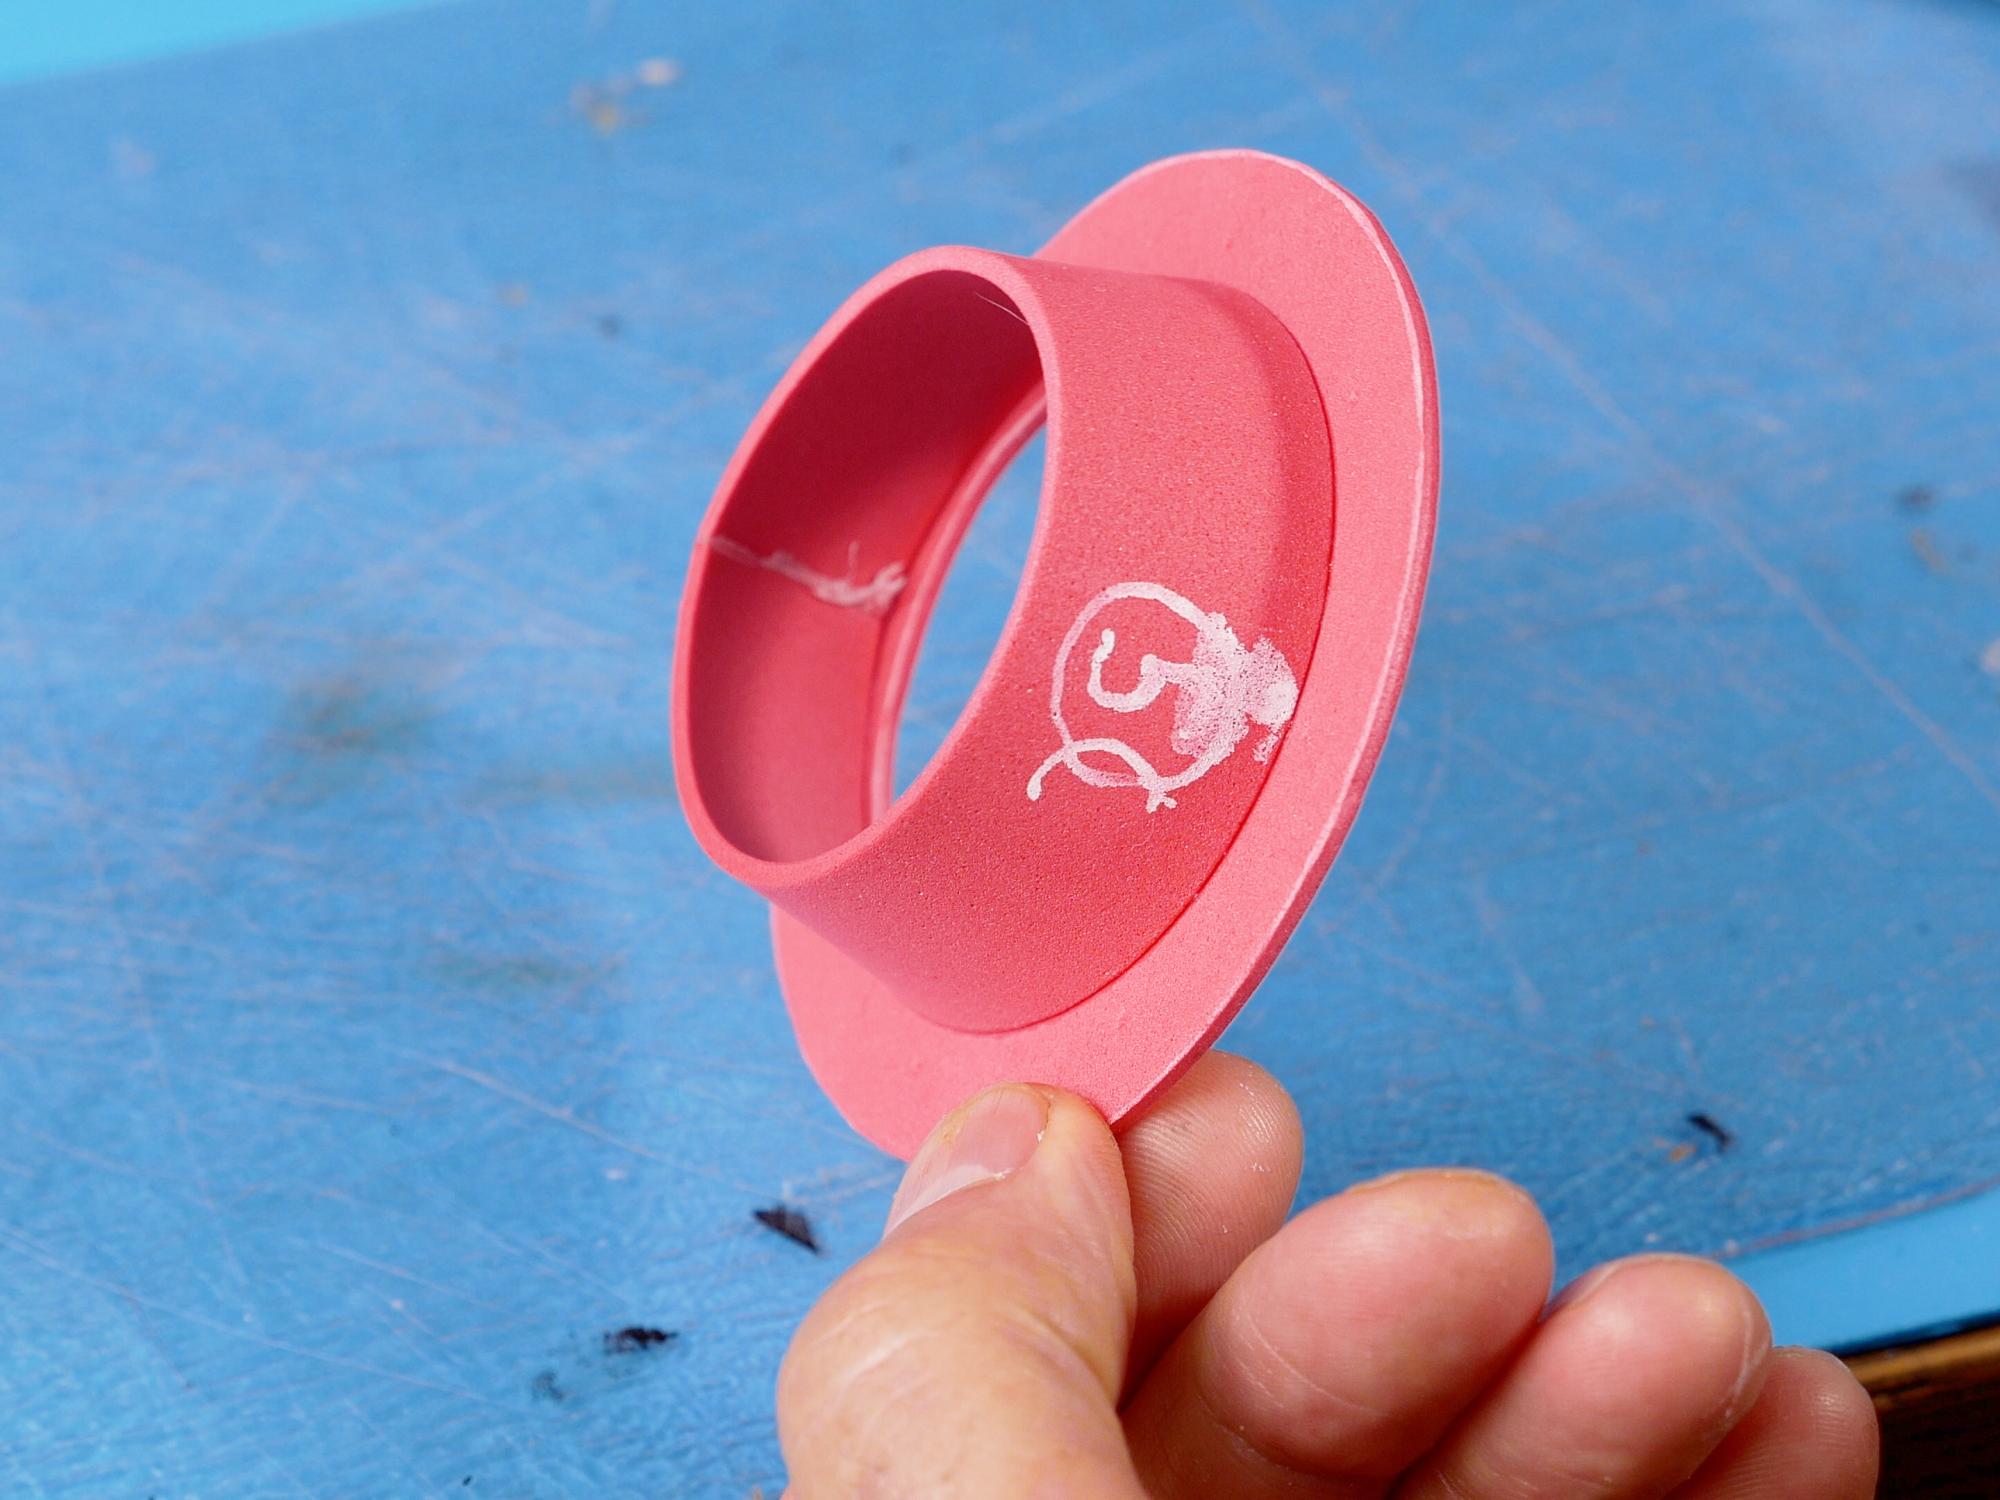
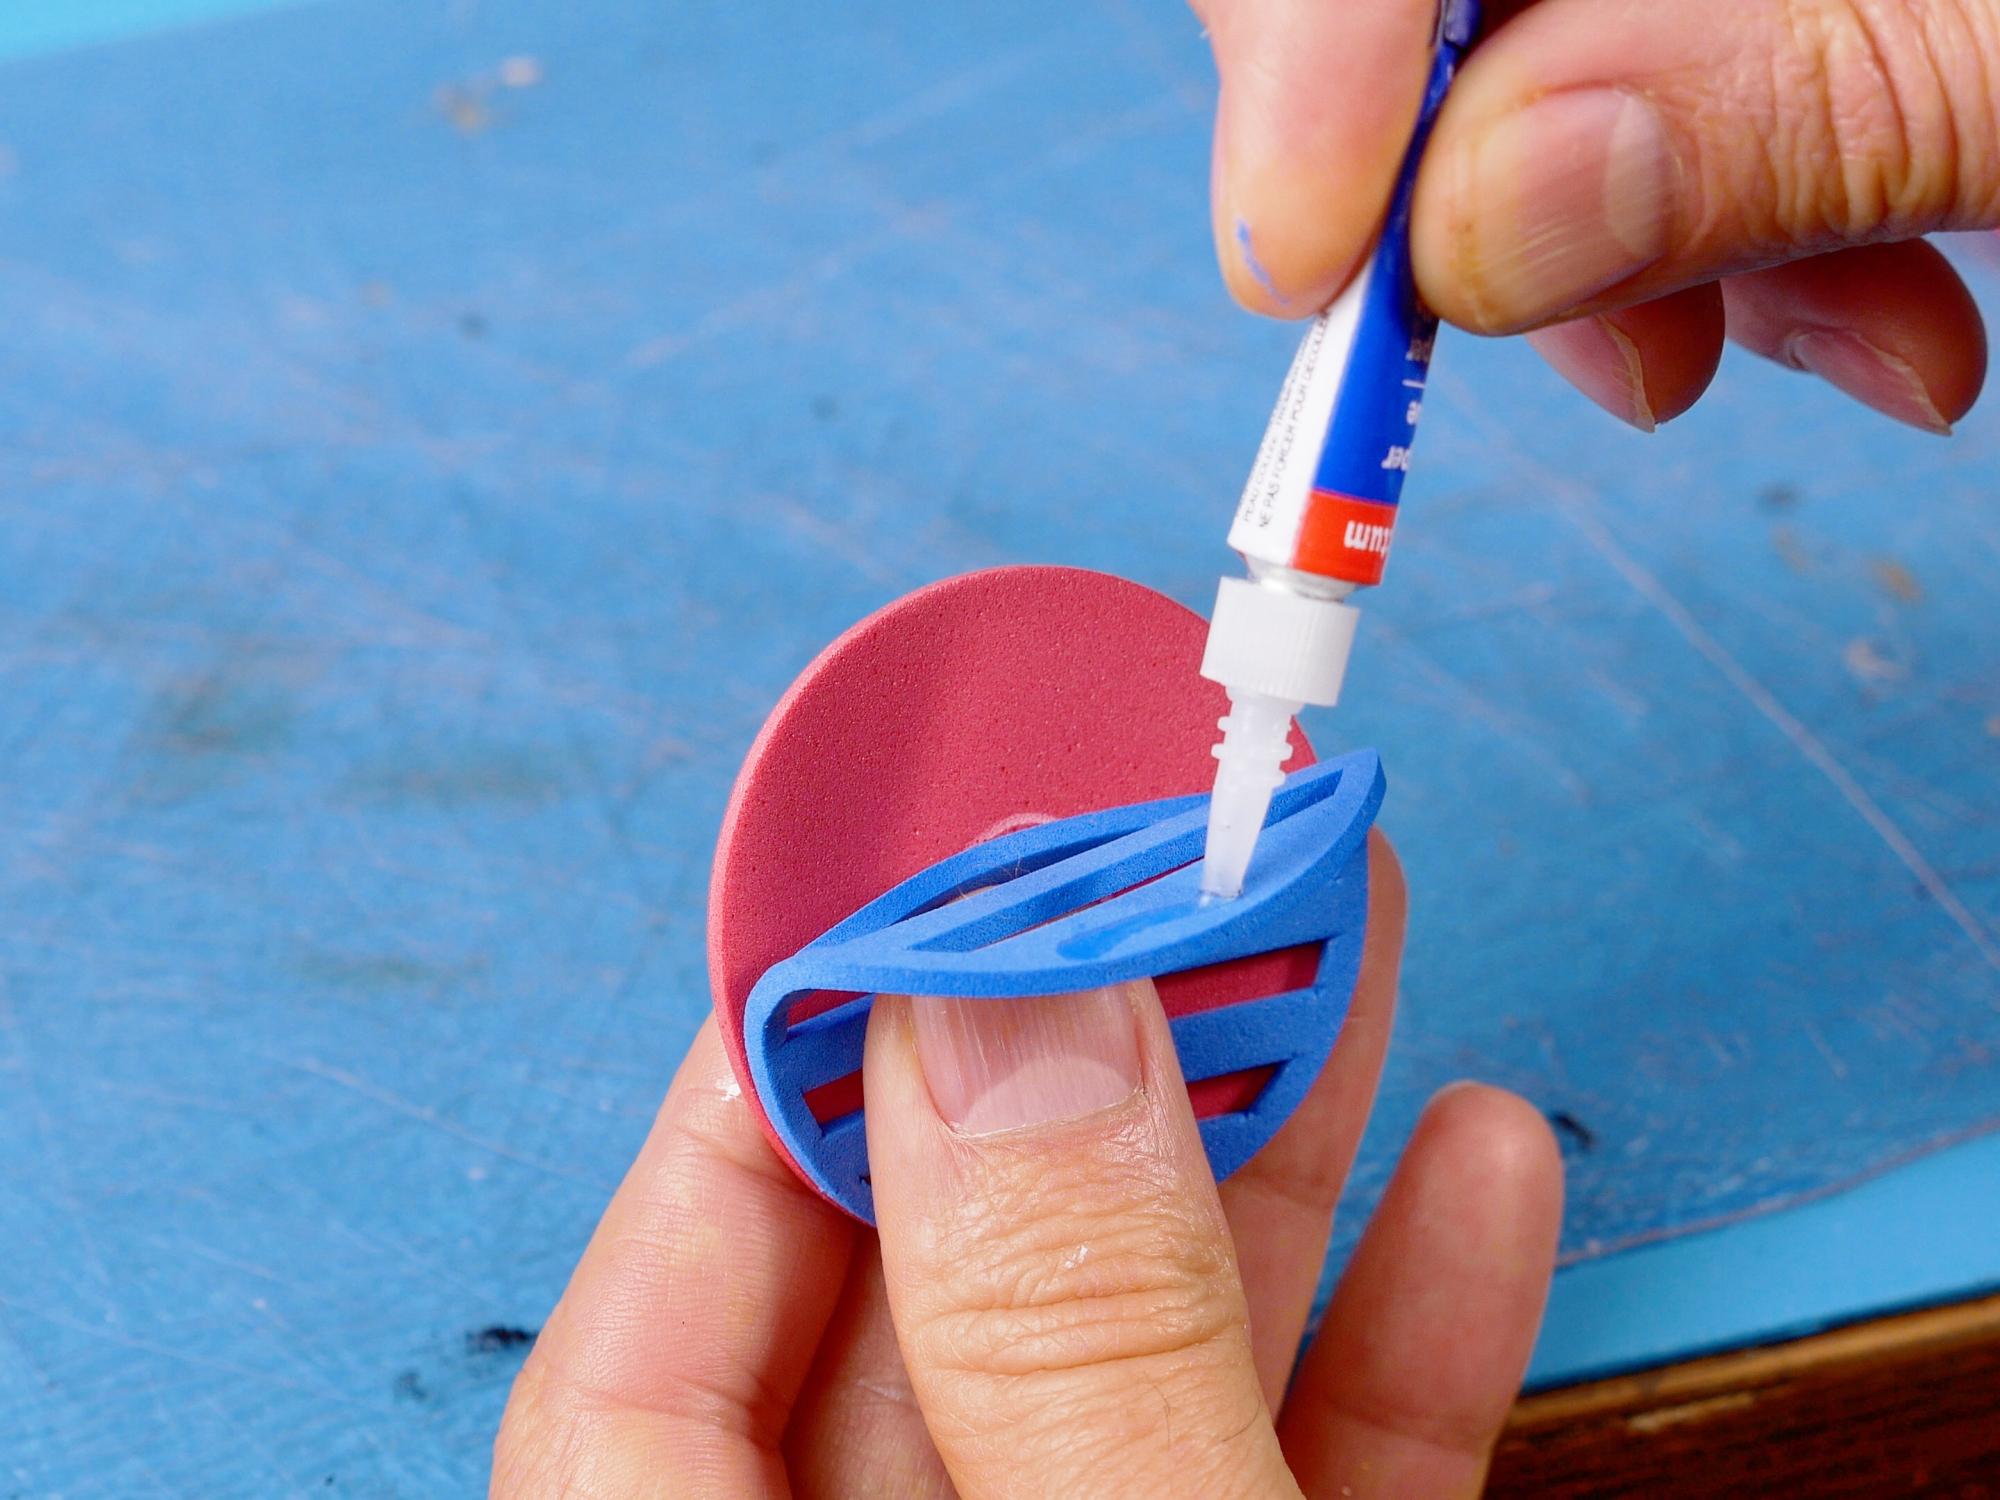


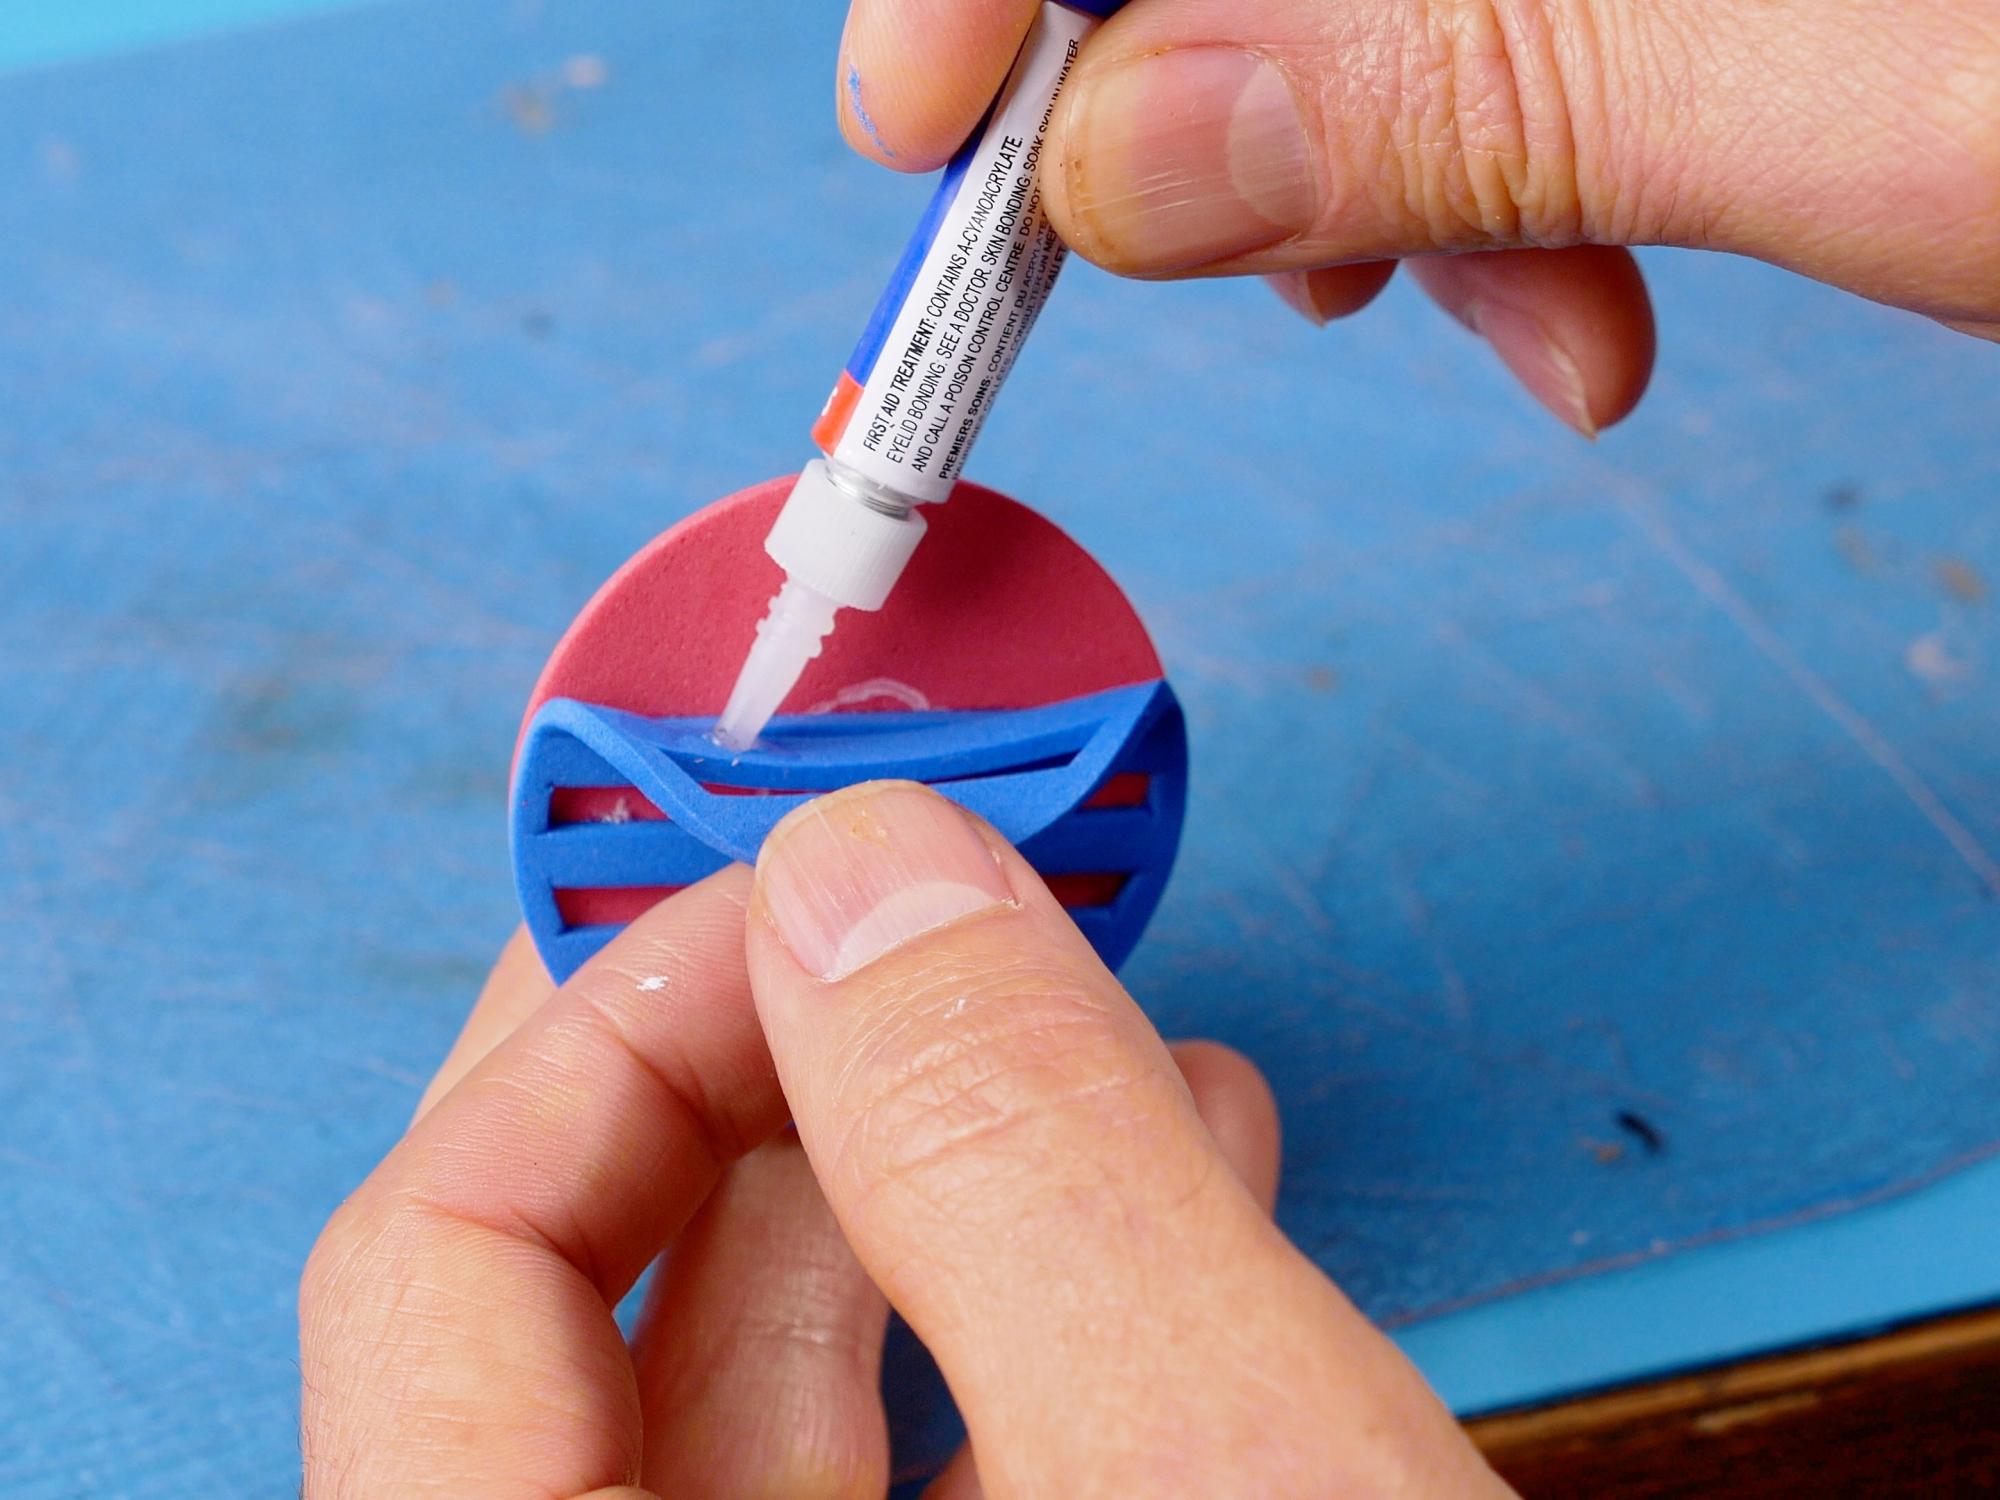
Glue the short edges of piece #5 together to make a truncated cone.
Glue the cone down top of the ring, doing your best to keep it centred. I used super glue so that I could just set it down in one step, but you could also use hot glue or contact cement.
Glue the grille (piece #7) on top of piece #6. I used super glue, applying glue just to the bottom of the grille and then lining it up with piece #6. Once that was in place, I glued each strip of the grille separately as I worked my way up the grille. That way I could keep all the edges lined up perfectly.
Finish the Ear Cap


Glue the finished grille on top of the truncated cone.
Using hot glue, glue a small spot on each side, making sure it is centered. Work your way around on both sides, trying to keep it flush with the truncated cone.
Use a 5mm punch to punch 16 little discs from 2mm foam.
Glue one of these discs over each mark you made around the outside of the ring. Depending on how you glued the cone to the ring, you may need to glue the disc a bit further out or in from the dot so that the disc ends up centred on the ring. I used a small dot of super glue to glue these.
Attach Ear Cap to Helmet


Go back to your pattern piece #4. Cut out along the dotted lines of the larger circle.
Hold the pattern piece #4 up to your helmet and trace the circle onto the helmet. This will help align the ear caps when you glue them.
Think about the orientation of the lines on the grille and do a dry fitting on the helmet. You can make a few marks that cross the ring and helmet so that when you glue, you can quickly line up the ear cap in the same orientation.
Glue the ear caps in place.
The Random Large Flat Piece (RLFP)


Heat up piece #10 with your hair dryer or heat gun and form it around something curved... like a head or something similar. (not totally necessary, just makes it a little easier to glue)
Glue piece #10 on the side of the helmet with the rounded cutout following the curve of one of the ear caps.
Glue some 5mm disks around the outside edges of the random large flat piece (RLFP)
Hose Connectors


For any steampunk accoutrement to work properly, it's gonna need some hoses... for the steam of course. Let's make some attachment points for these hoses.
Punch six 12mm disks and three 9mm disks from 2mm foam.
Glue each of the 9mm disks on top of a 12mm disk.
Punch through the centre of those three disk stacks with a 5mm punch.
Glue two of those hose connectors spaced out a bit on the back side of the ear cap opposite the side with the RLFP
Glue the third hose connector about halfway back on piece #1
Glue one single 12mm disk on the side of the RFLP
Glue three 12mm discs on the ear cap, One on the top, one on the bottom, and one on the back.
Swirly Piece


Every steampunk item needs a bit of adornment that serves no practical purpose, so, let's glue on a decorative swirly piece!
Start gluing at the centre and work your way out to the sides.
Straps and Buckles


Find a buckle. This will determine the width of straps you should use. I think the strap pieces #12 and #13 are a good starting point.
Fold piece #12 not quite in half.
Punch a hole about 5mm in from the fold.
Unfold the strip and use a knife to connect the outside edges of the hole, giving you a slot. This slot will allow for the centre pin of the buckle.
Paint the inside of the buckle strap, but not near the ends where you will be gluing. This saves having to try and paint inside that super awkward space later.
Place the buckle strap on the flap of the helmet, mark the position, then glue it in place.
Glue the longer strap #13 on the other side of the helmet.
Test the length of the longer strap and trim it down if needed.
Make some evenly spaced marks along the strap and punch holes for the buckle.
You can also add a little retaining band to hold the loose end of the strap. Just cut a thin strip of foam, wrap it around the buckle strap and strap and then glue the ends in between the two sides of the buckle strap.
A Few More Straps and Discs


Cut six 12mm disks
Glue one on each end of the strap where it overlaps onto the helmet, to look like rivets.
Glue one on each end of piece #11 and #14.
Paint It Brown


Paint the entire helmet brown.
If you have used colourful foam like me, you will probably want to paint the inside as well!
Give it two to three good coats of brown paint.
Paint It Black..But Just Kinda


Here's where we get the benefit from our aluminum foil texture work in the beginning! This technique takes a bit of practice, so don't fret if it doesn't seem to be working right away. If worst comes to worst, you can always re-paint the helmet brown and start over.
Make sure the brown base coat has had plenty of time to dry- overnight at least.
Put some black paint into a tray. It is best if the black paint is a little thinner than standard artists acrylic paints would be. You can add a little water to thin the paint a bit. I used Artists Loft soft body acrylic paint and didn't thin it at all.
Grab an old rag or t-shirt, cut a piece and fold it up into a pad.
Dip the pad into the black paint and spread it evenly on the helmet. You want to make sure that there's enough paint on the rag to fill all the crevices in the texture, but not too much paint.
Keep rubbing over top of the paint you just spread on. As you go, the rag will start to remove the black paint from the higher surfaces of the texture, but leave the black paint in the valleys. Once you have a look that you like, repeat the process on another section.
If you find that there are spots where you haven't taken enough black off the top, take a clean cloth and put just a drop or two of water on it. Rub that clean cloth over the surface and that should remove more of the black paint- as long as it hasn't had too much time to dry.
Some spots you won't be able to reach with the cloth, so for those, you can use a paintbrush to apply the black paint, and then just use a corner of the cloth or even a Q-tip to remove the excess black paint.
Don't forget to paint the short straps #11 and #14 as well.
Once the textured parts are painted, paint the ear caps and hose connectors black.
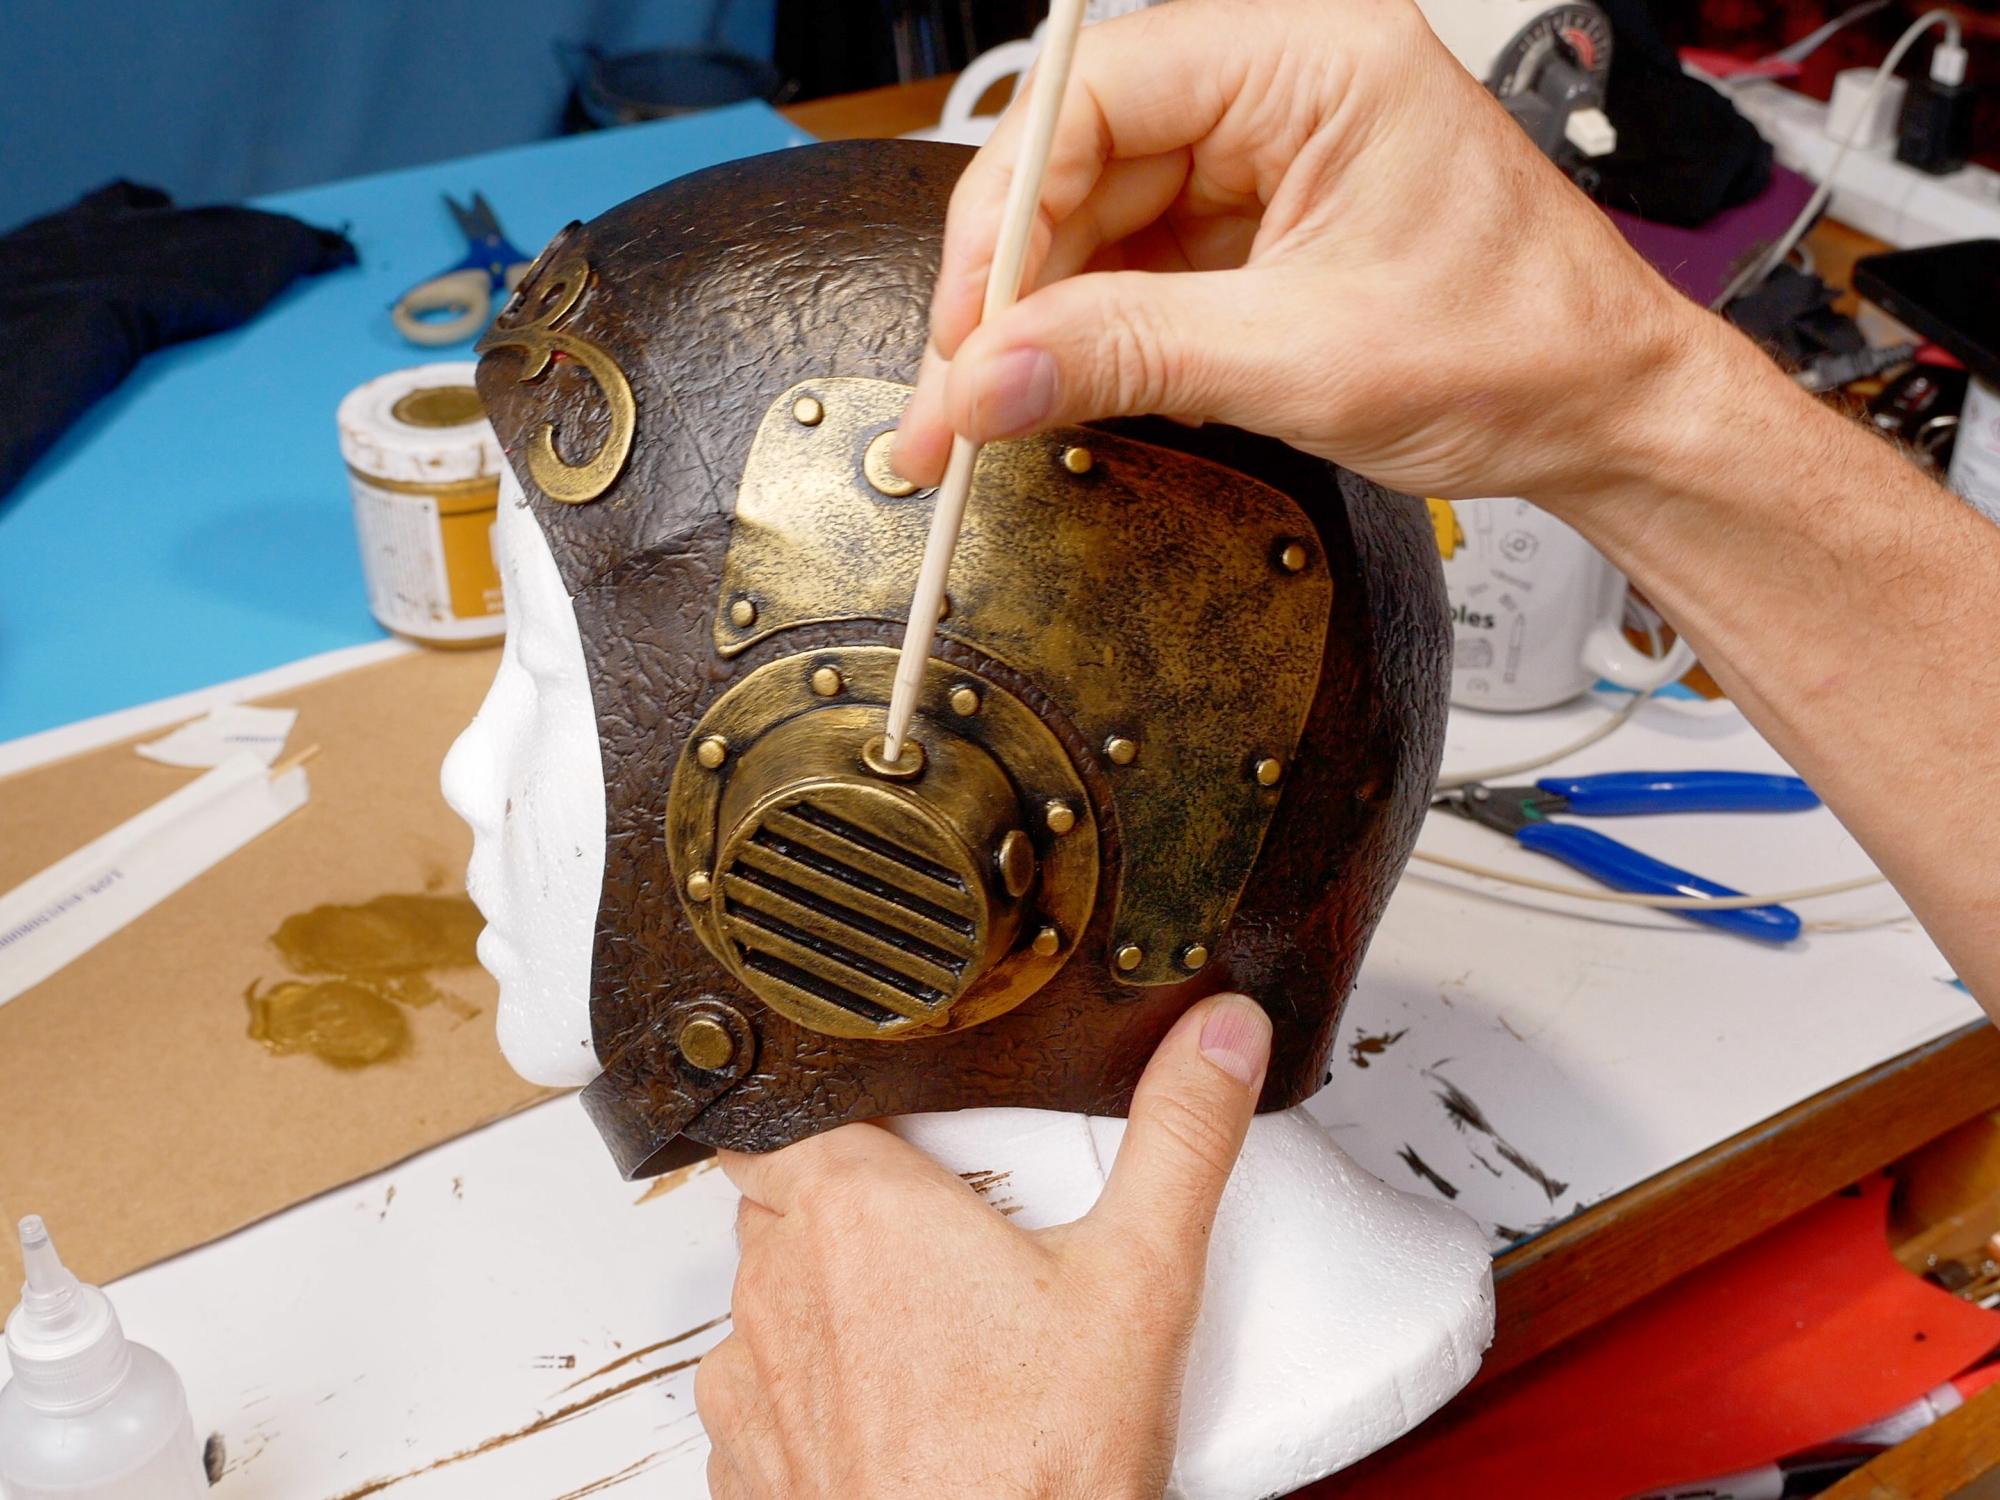
Add Some Highlights


Okay, now it is time to make some of those extra steampunk parts look like they are made from brass.
My favourite metallic paints tend to change over time, but right now I am liking DecoArt Americana Decor Metallics Vintage Brass for the brass colour.
My technique for creating an antique metal look is as follows:
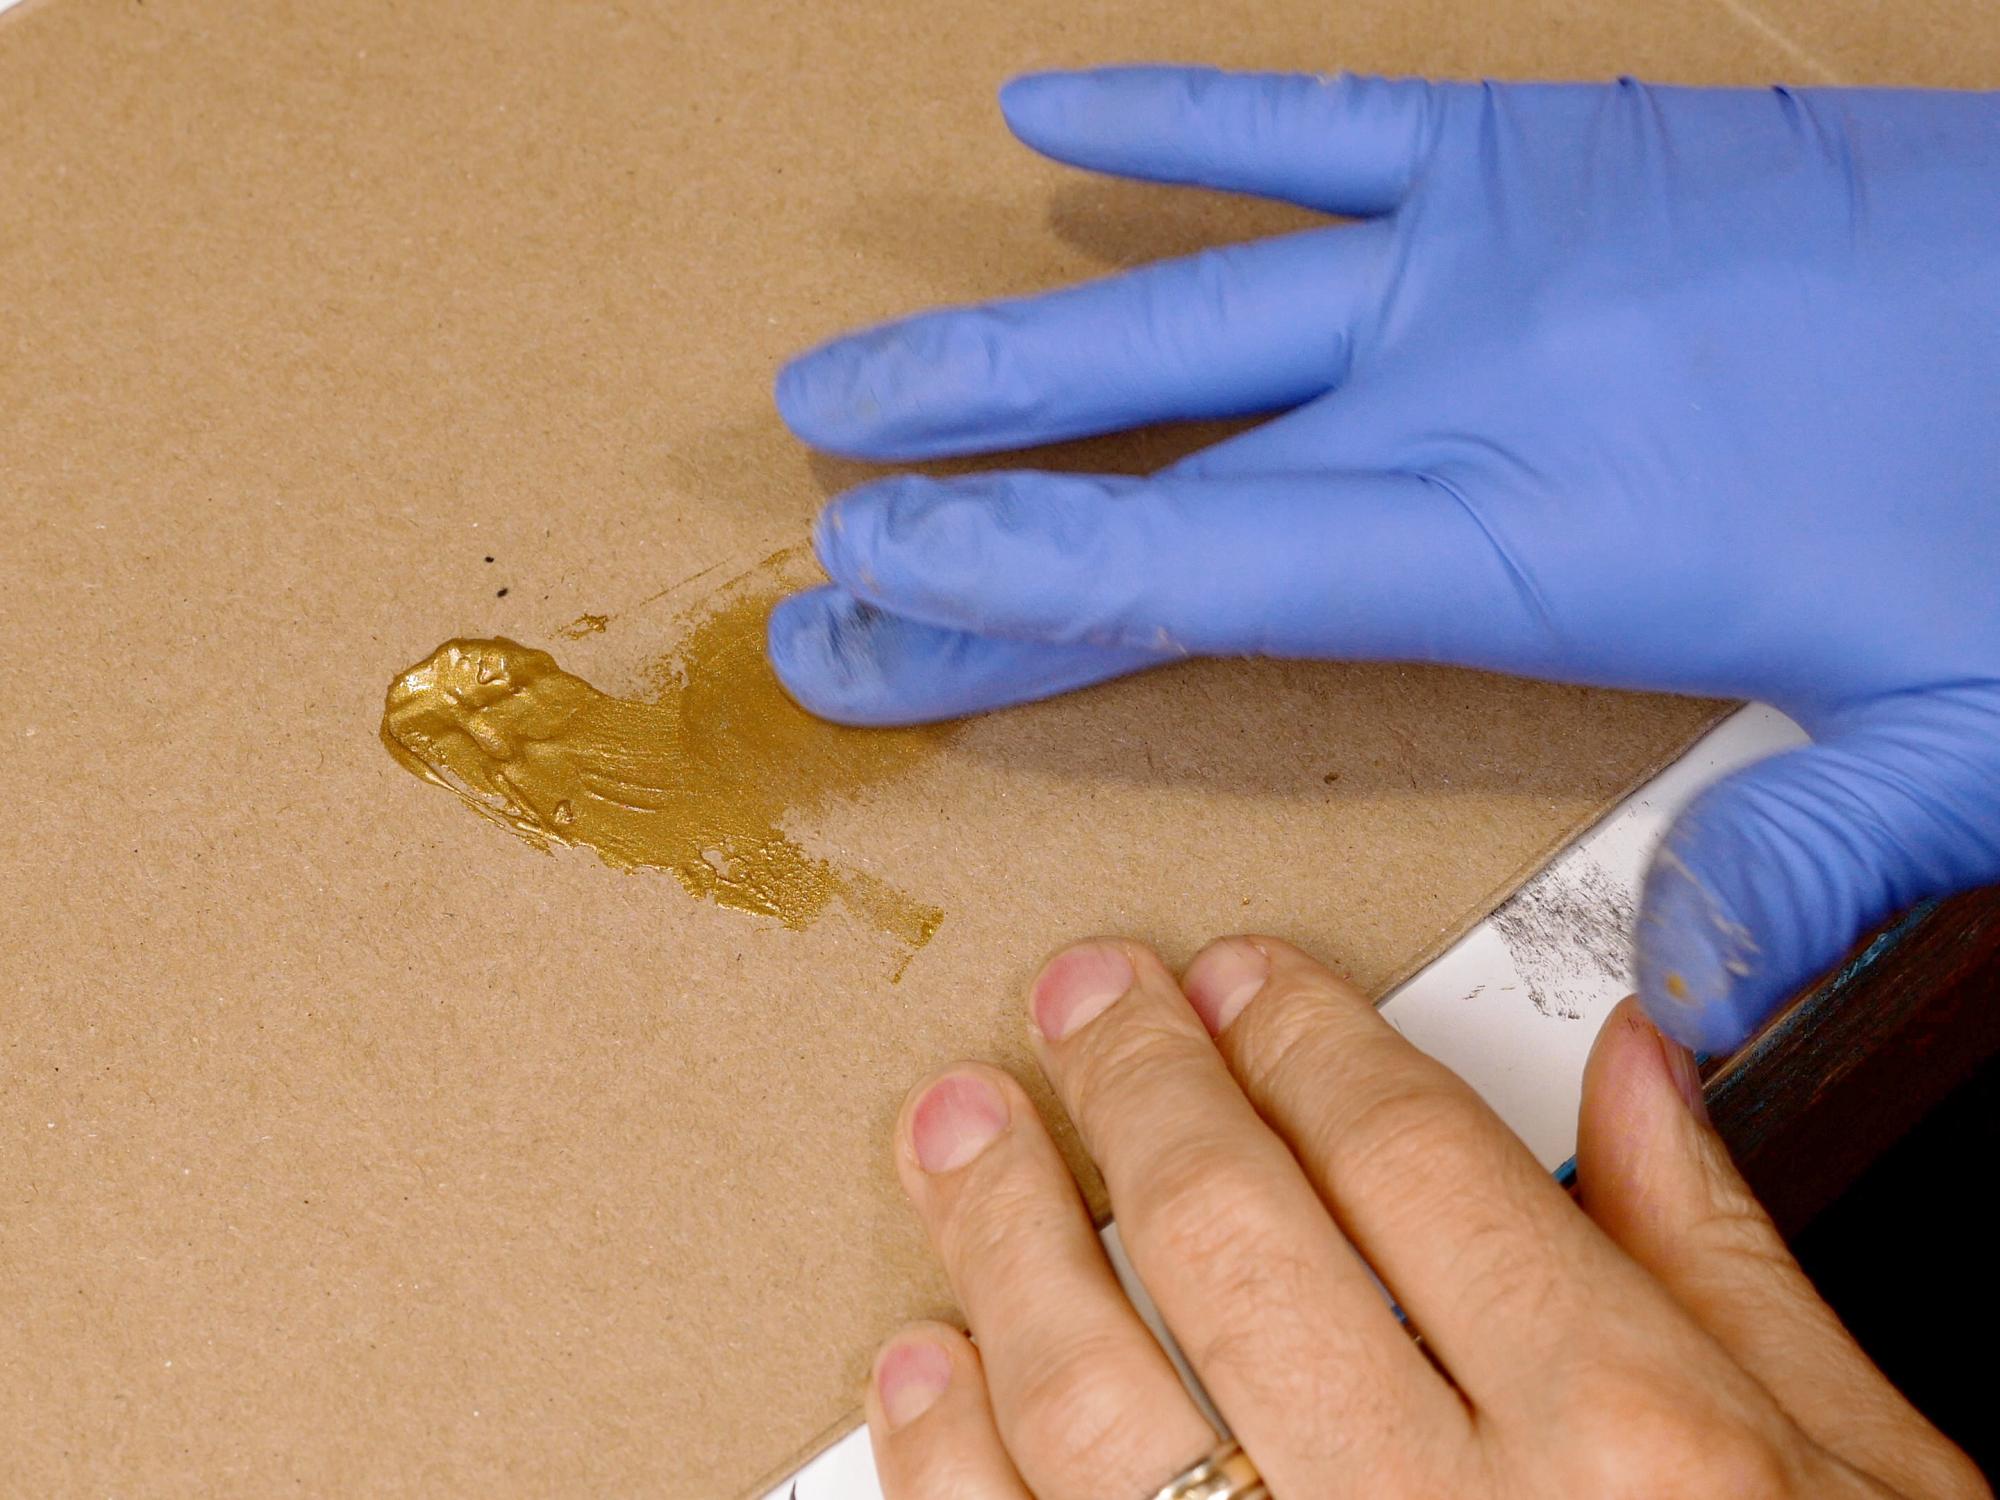
Put on a tight fitting rubber glove. This keeps your hands clean as well as preventing fingerprint smears in your metallic coating.
Put a small blob of metallic paint onto a piece of scrap cardboard.
Dip your fingertip lightly into the paint and then rub it onto a clean section of cardboard. Rub in a circular motion until almost all the paint is off your finger. It is especially important to watch the tip of your finger because paint can build up there, so you want to rub off any accumulation that occurs.
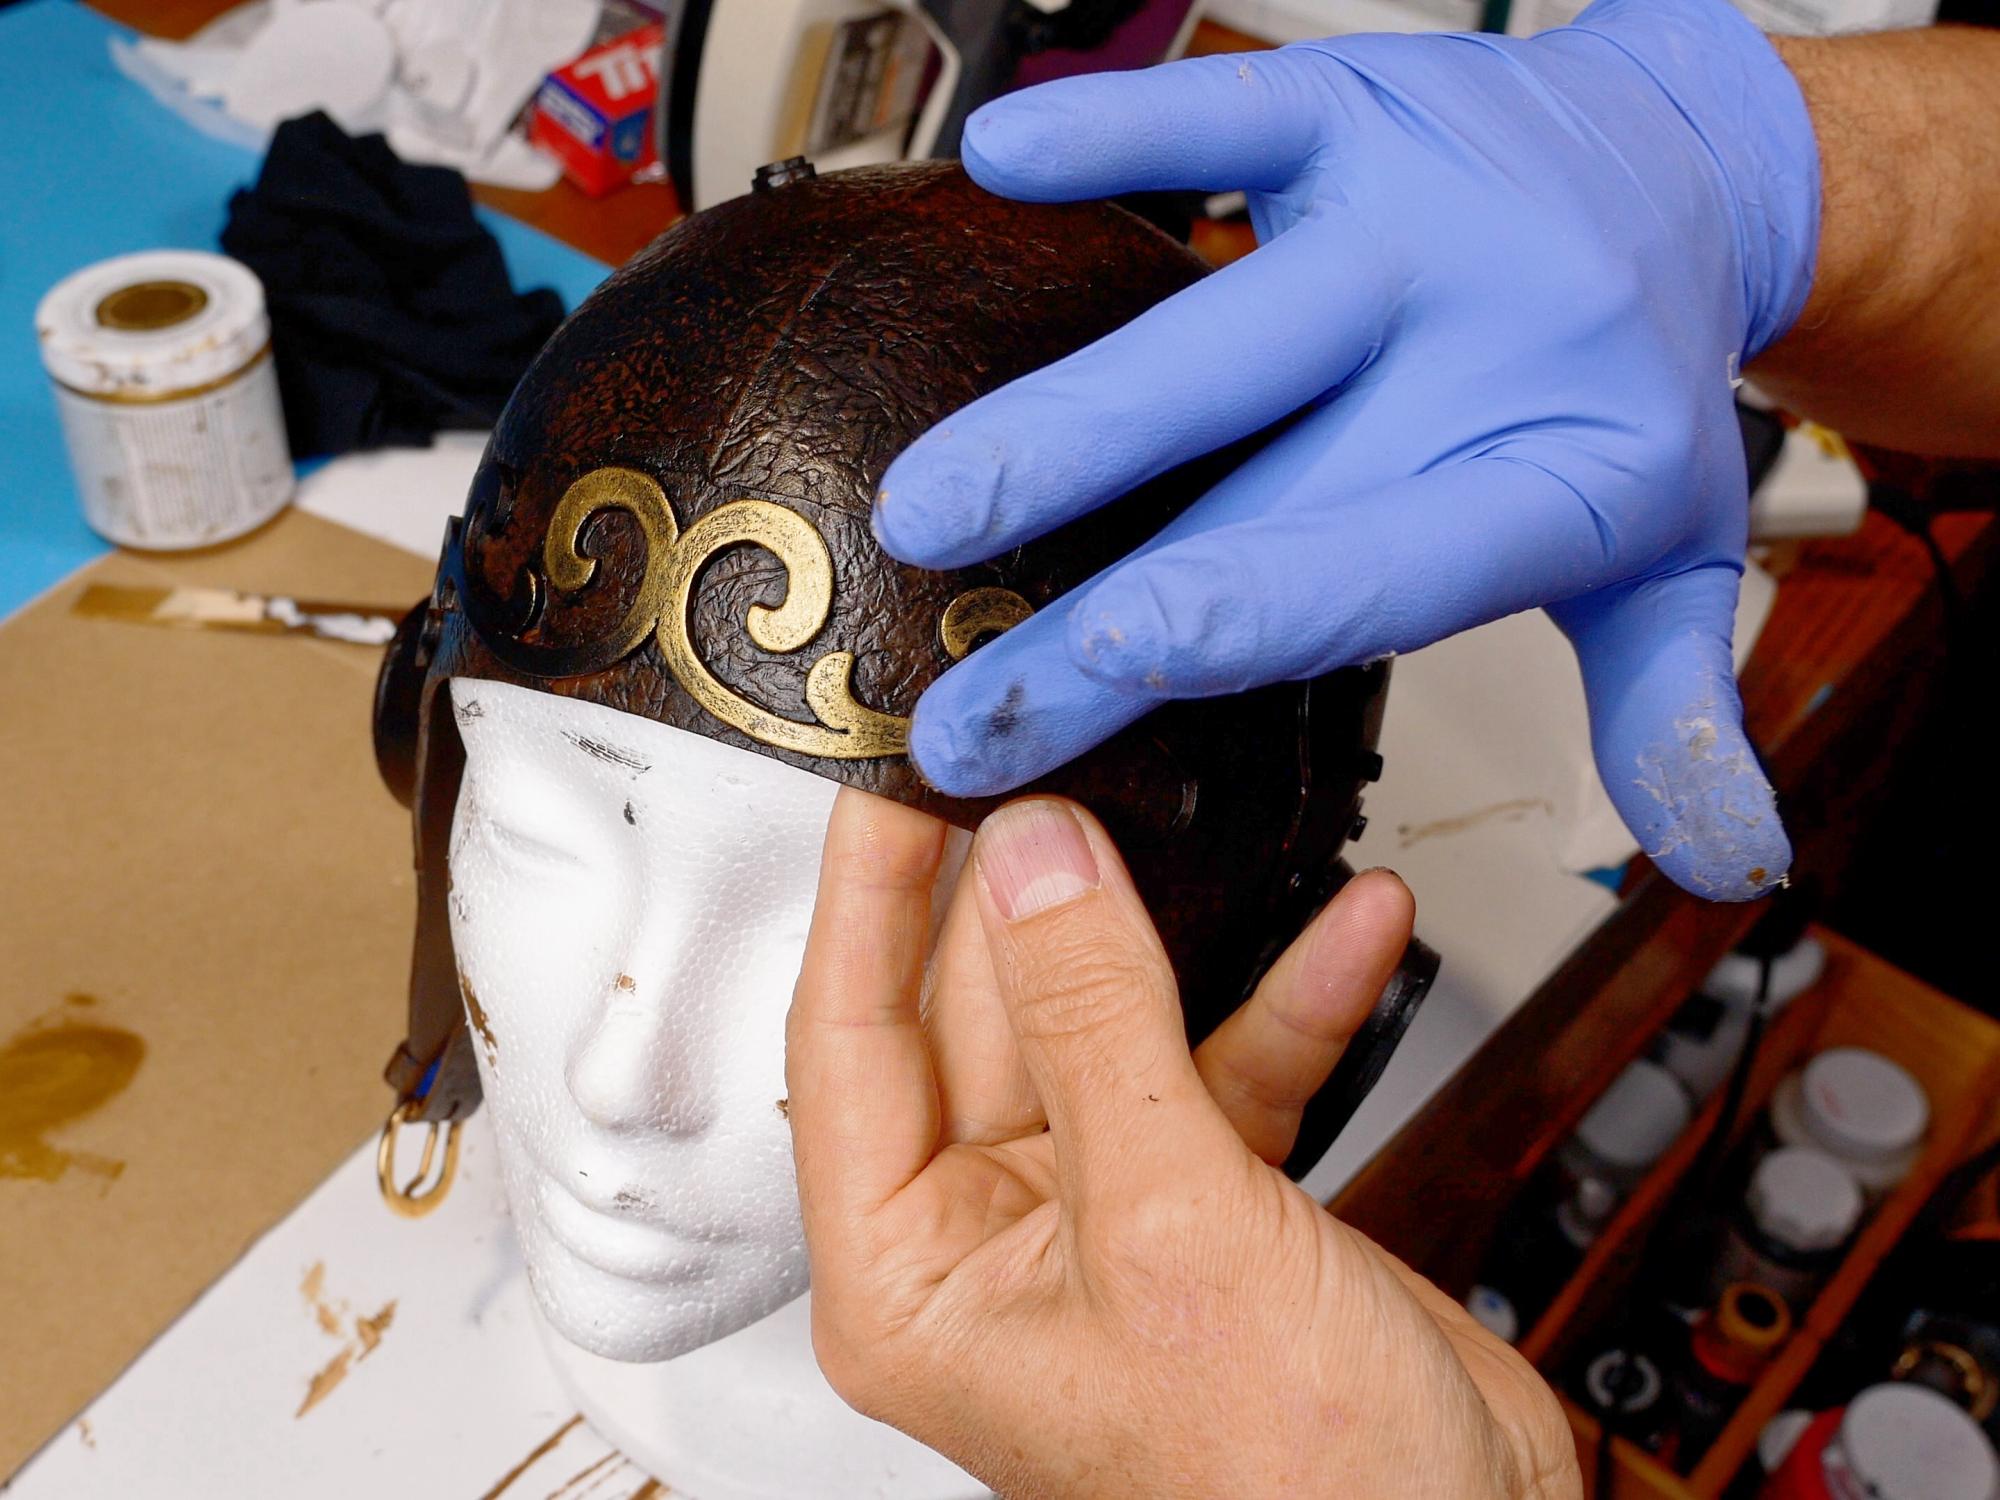
Rub your finger on the foam that you want to paint. Slowly build up the metallic colour, repeatedly going back and getting more paint on your finger.
If there are places your finger can’t reach, you can use a small, dry paintbrush. Dip the brush in the paint and then dab most of it off on the cardboard. Then use a vertical dabbing motion to apply the paint, again building it up slowly. It is good to stay away from inside edges as the antique look requires sections that would get less wear to look darker.
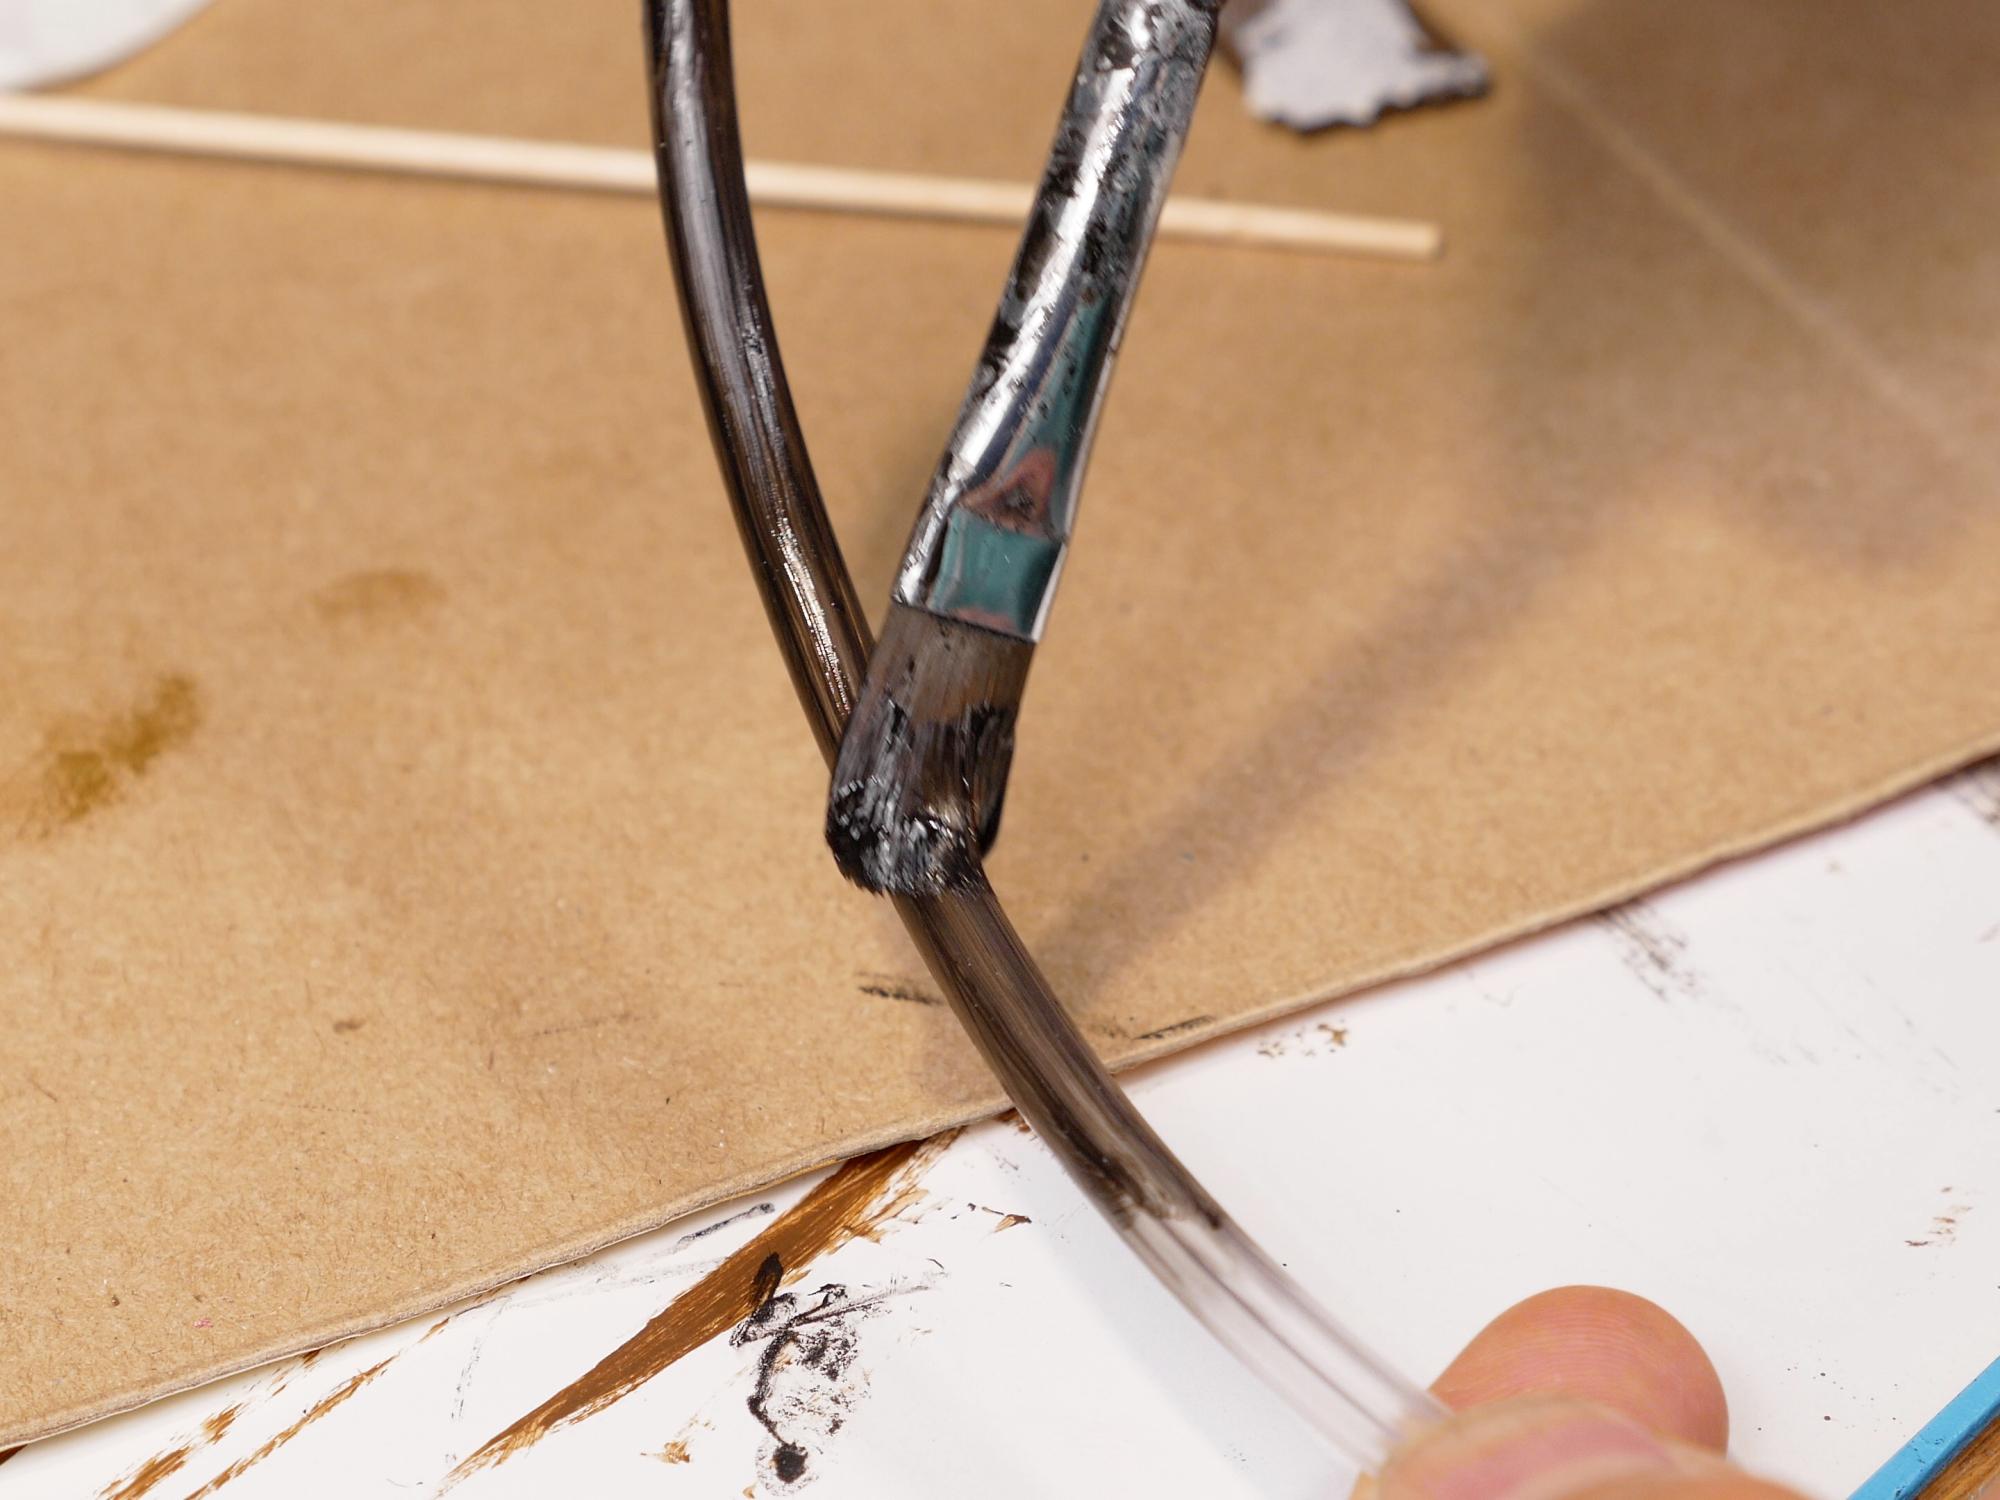
Thin Hoses


Find some wire or something similar to use for your thin hoses. I used some 3.1mm telephone wire I had lying around, but other ideas are line trimmer wire or 3d printing filament (you have to heat both of those to bend them)
Use a skewer to poke hoes in the 12mm disks
Insert a wire that goes from the disk on the side of the RLFP, makes a few interesting bends and then ends up going into the disk on top of the ear cap.
Insert a wire that goes between the two remaining disks on the ear cap.
Glue all the thin wires with super glue.
Thick Hose


Find some tubing to use for the larger hose. I used some 6mm tubing I had in my junk box.
Cut 10.5" length of the 6mm hose.
Paint the thin hoses that are already glued to the helmet black
Paint the thick hose that is not glued to the helmet black, but leave a little bit unpainted on both ends for gluing.
Apply brass paint to all hoses.
Finish It Off


Piece #14 is a strap to hold goggles in place, so if you have a pair of googles (of course you do) test the best location and then glue the ends of the strap down. Make sure to scrape some of the paint off the helmet where the glue will go, otherwise your glue is just sticking to paint, which isn't going to be a great bond.
Glue the larger hose into the holes in the hose connectors. One on top of the helmet, and then your choice from the two on the ear cap.
Figure out the best placement for the hose strap #11 and then glue it down over top of the hose. Make sure to scrape some of the paint away under the glue location.
Done!


Good job! You can congratulate yourself on an impressive costume piece that you can be super proud of!! Because…..you are amazing.
Thanks for hanging out with me!
If you'd like to see more of my projects you can find me here:
Subscribe to my YouTube Channel
Follow me on Instagram
Check out my Pattern Shop