DIY DAB+ Antenna
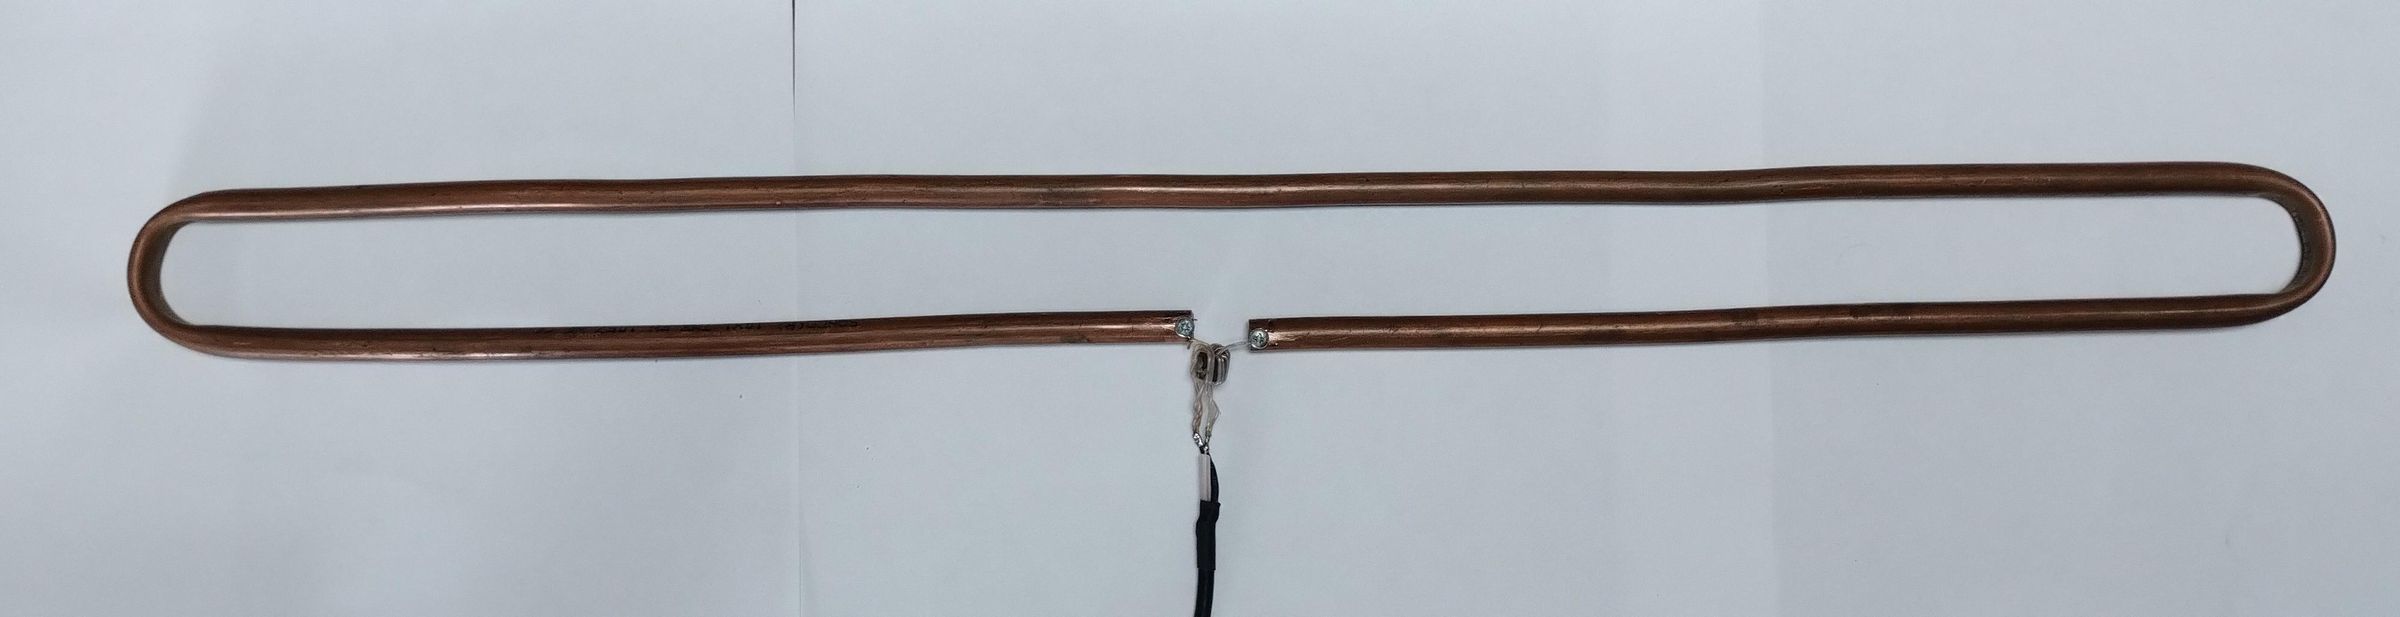
DAB+ radio, or digital radio, has been around in many countries for decades now, but it is not yet country-wide where I live (in southwest France). In my rural area I can now receive DAB stations from a nearby city, but I quickly discovered that, for good and reliable reception, I need a proper antenna.
In France the DAB frequencies are just above the traditional FM radio frequencies : FM = 88 - 108MHz; DAB = 190 - 250MHz (approximately). For FM reception, a antenna called 'folded dipole' works quite well, so I thought I'd have a go at making a folded dipole antenna for DAB reception.
Supplies
You will need :
- Some annealed(*) copper tube, 8 or 10mm diameter, just under 1m50 long.
- A 300ohm to 75ohm balun (see step 7).
- A length of good quality 75ohm coaxial antenna cable, to connect to your DAB receiver.
- A piece of thick scrap wood, about 2m long, at least 8cm wide.
- Two wooden, plastic or metal round 'formers', about 3cm or 4cm diameter. (see step 3)
- Some long wood-screws and large washers, 5mm or 6mm diameter.
(*) Annealed means softened. You generally find annealed copper tube sold in coils, and you can bend and straighten the tube easily with your hands. Perhaps you know a friendly plumber who has a scrap piece just long enough (about 1.50) that he'll give you. If you can't find annealed copper tube, or you have a straight piece of tube (we often call them a bar) that you want to use, I'll tell you how to anneal the tube further down (spoiler alert : you'll need a gas blowtorch, leather gloves, lots of water and someone to help you)
A Bit of Theory (sorry)
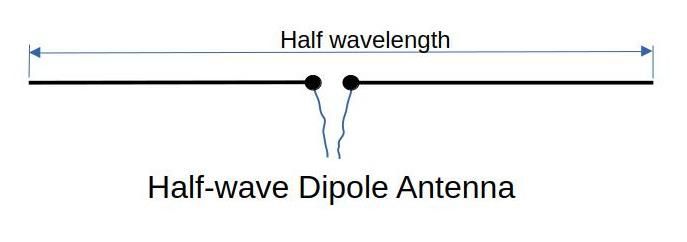
A dipole antenna is simply two equally long conductors with a connection in the middle.
Each half of the dipole is designed to be a tiny bit less than a quarter wavelength long, making the total length just under a half wavelength long. (You can look on the net to find a description and the formulae to convert from frequency to wavelength). For the DAB frequencies in France, the wavelength at the middle-point in the frequency range (i.e. 220MHz) is 1.36m, so the dipole length would become just under 68cm (wavelength/2). You'll need to check in your country/region exactly what frequency range is used for DAB transmissions.
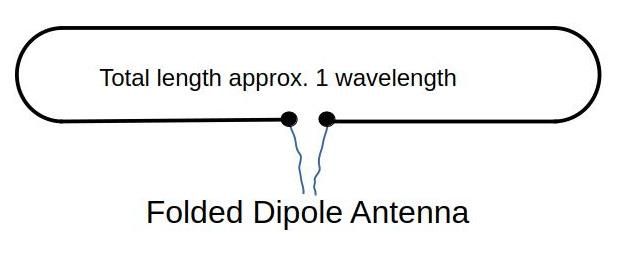
Having two rods is rather unwieldy, however, but radio engineers a long time ago found that a folded dipole would also do the job. For a folded dipole we take a conductor that is 1 wavelength long, and fold it into a sort of squashed loop.
There's a downside, however. The folded version doesn't have exactly the same electrical characteristics as it's straight cousin, so we have to adapt the circuits impedance (a special form of resistance but for alternating signals). This is what the balun does. It's a special sort of transformer that adapts the antenna's impedance to the coaxial down-cable's impedance. Balun is actually a word formed with the words BALanced/UNbalanced, they are often used inside (old) TV sets and FM receivers with "Rabbit Ear" telescopic antennas. In fact, this is exactly where I salvaged the balun you see in the picture.
Cutting to Length
As I mentioned earlier, the wavelength at the center frequency that I'm using is 1.36m. For your region, verify what the center frequency is (halfway value between the lowest frequency and the highest frequency). There are on-line calculators that can do the conversion of frequency to wavelength for you. Ensure you enter the frequency in MHz (megahertz) otherwise you may get a result in 10s of meters long! Generally speaking you should find the length to be between 1m and 2m.
We need to connect our balun in the middle, I decided to leave a 3cm gap for this purpose. So my tube is going to be 1.36-3 = 1.33m long (or 133cm).
Use a plumbers tube cutter (you have to be VERY good with a hacksaw to cut the tube perfectly square) to cut one end of the tube square. Then measure as accurately as possible(*) and cut the tube to length. Did I say that the ends must be SQUARE?
(*) OK, the actual length doesn't have to be perfect. 1 or 2mm of error won't make any difference. But the ends must be square.
Bending Forms
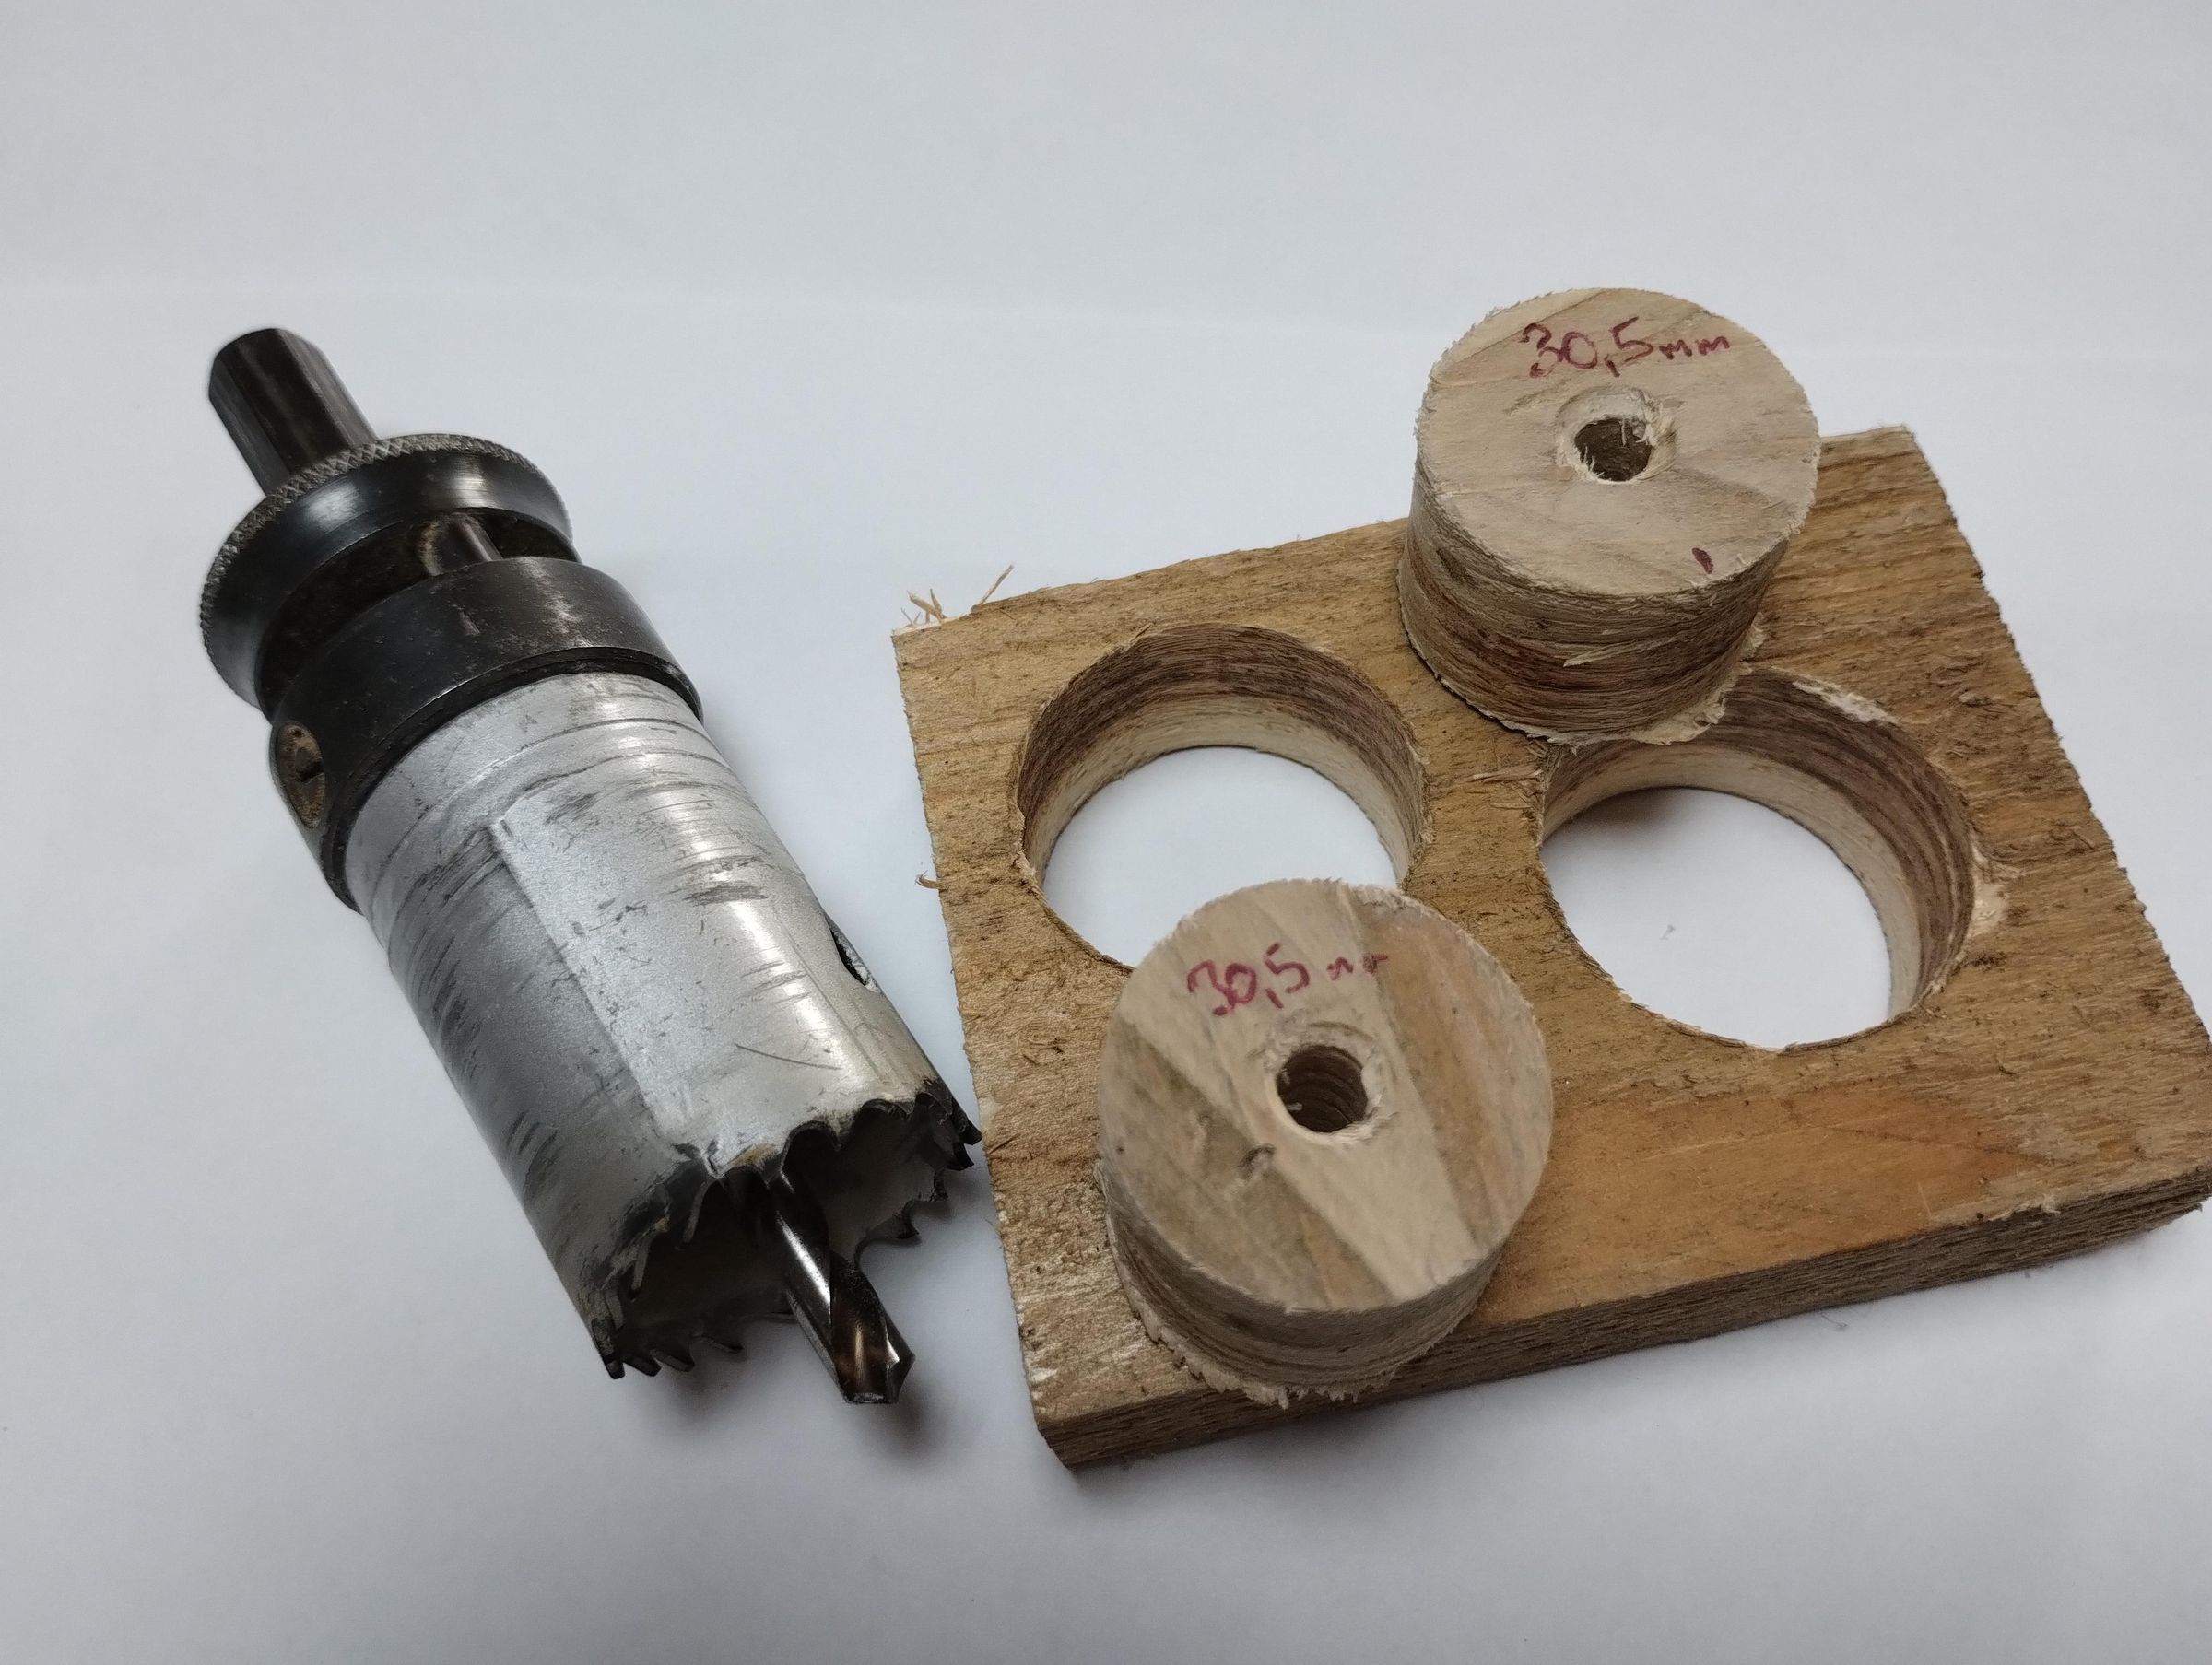
We need two identical round shapes to create the 180degree bends. Use wood, hard plastic, metal - whatever comes to hand. If you have access to a 3D printer you can even print them - but be sure to use an adequate fill ratio to prevent them from crushing. A diameter between 3cm and 4cm is what we need. I didn't have anything strong enough to hand, so I used a circular 'bell' saw to cut two identical cylinders from a thick piece of hardwood. The cylinders are the 'scrap' piece that results from cutting a hole : they're often stuck inside the hole cutter!.
My two cylinders are a fraction over 3cm in diameter - perfect! You'll need a center hole to suit the screws you have chosen. The center hole must be JUST big enough for the screws to pass, otherwise the cylinders won't be correctly centered.
Calculate (or measure with a strip of paper) the exact circumference of the cylinders. In my case the cylinders are 30.5mm in diameter. To calculate the circumference, multiply the diameter by the value of pi. So the circumference of my cylinders is 30.5 * 3.1519; => 95.82mm. We can round this to 96mm or 9.6cm.
Making the Bending Jig
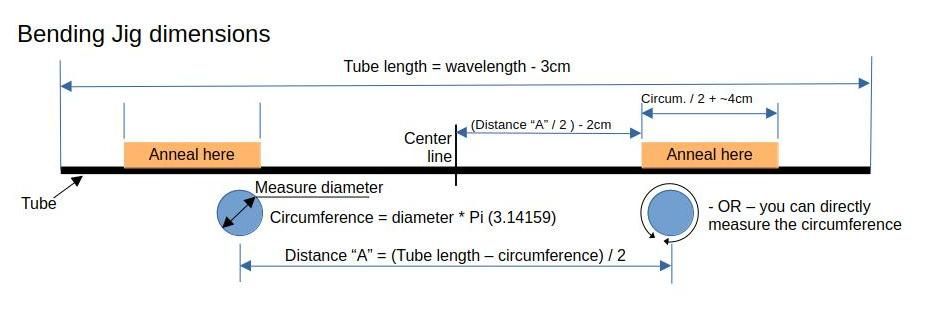
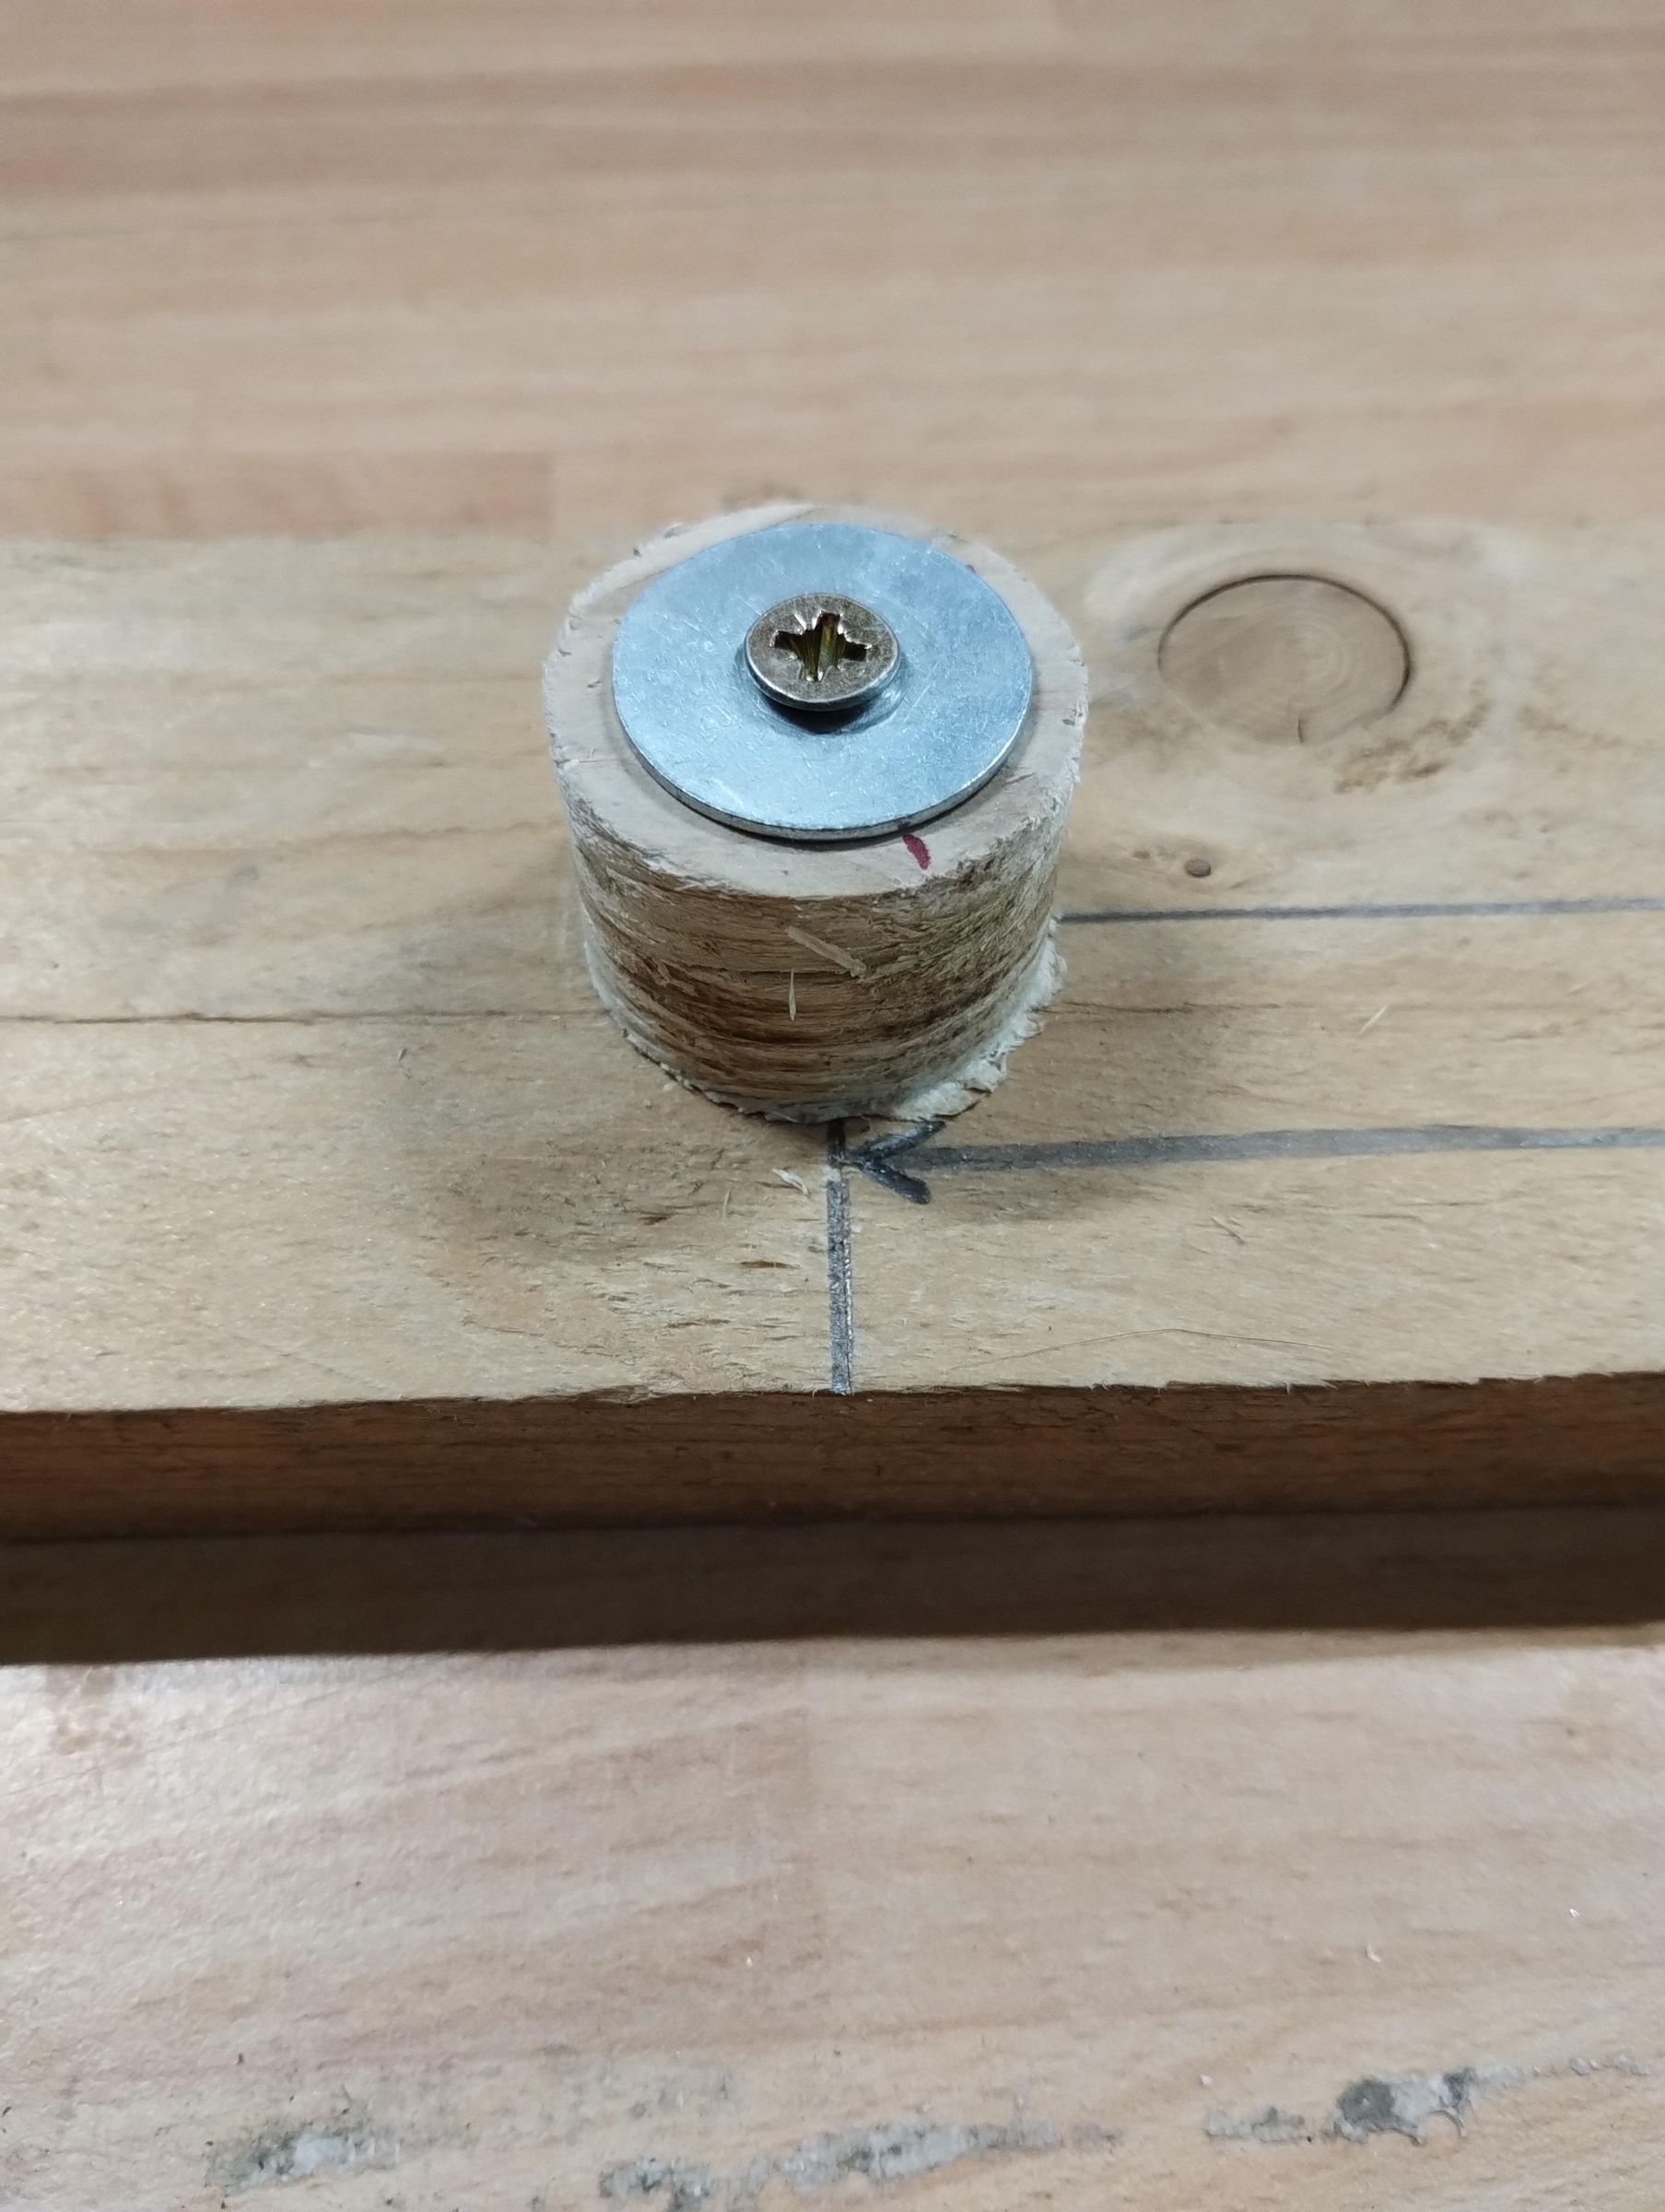
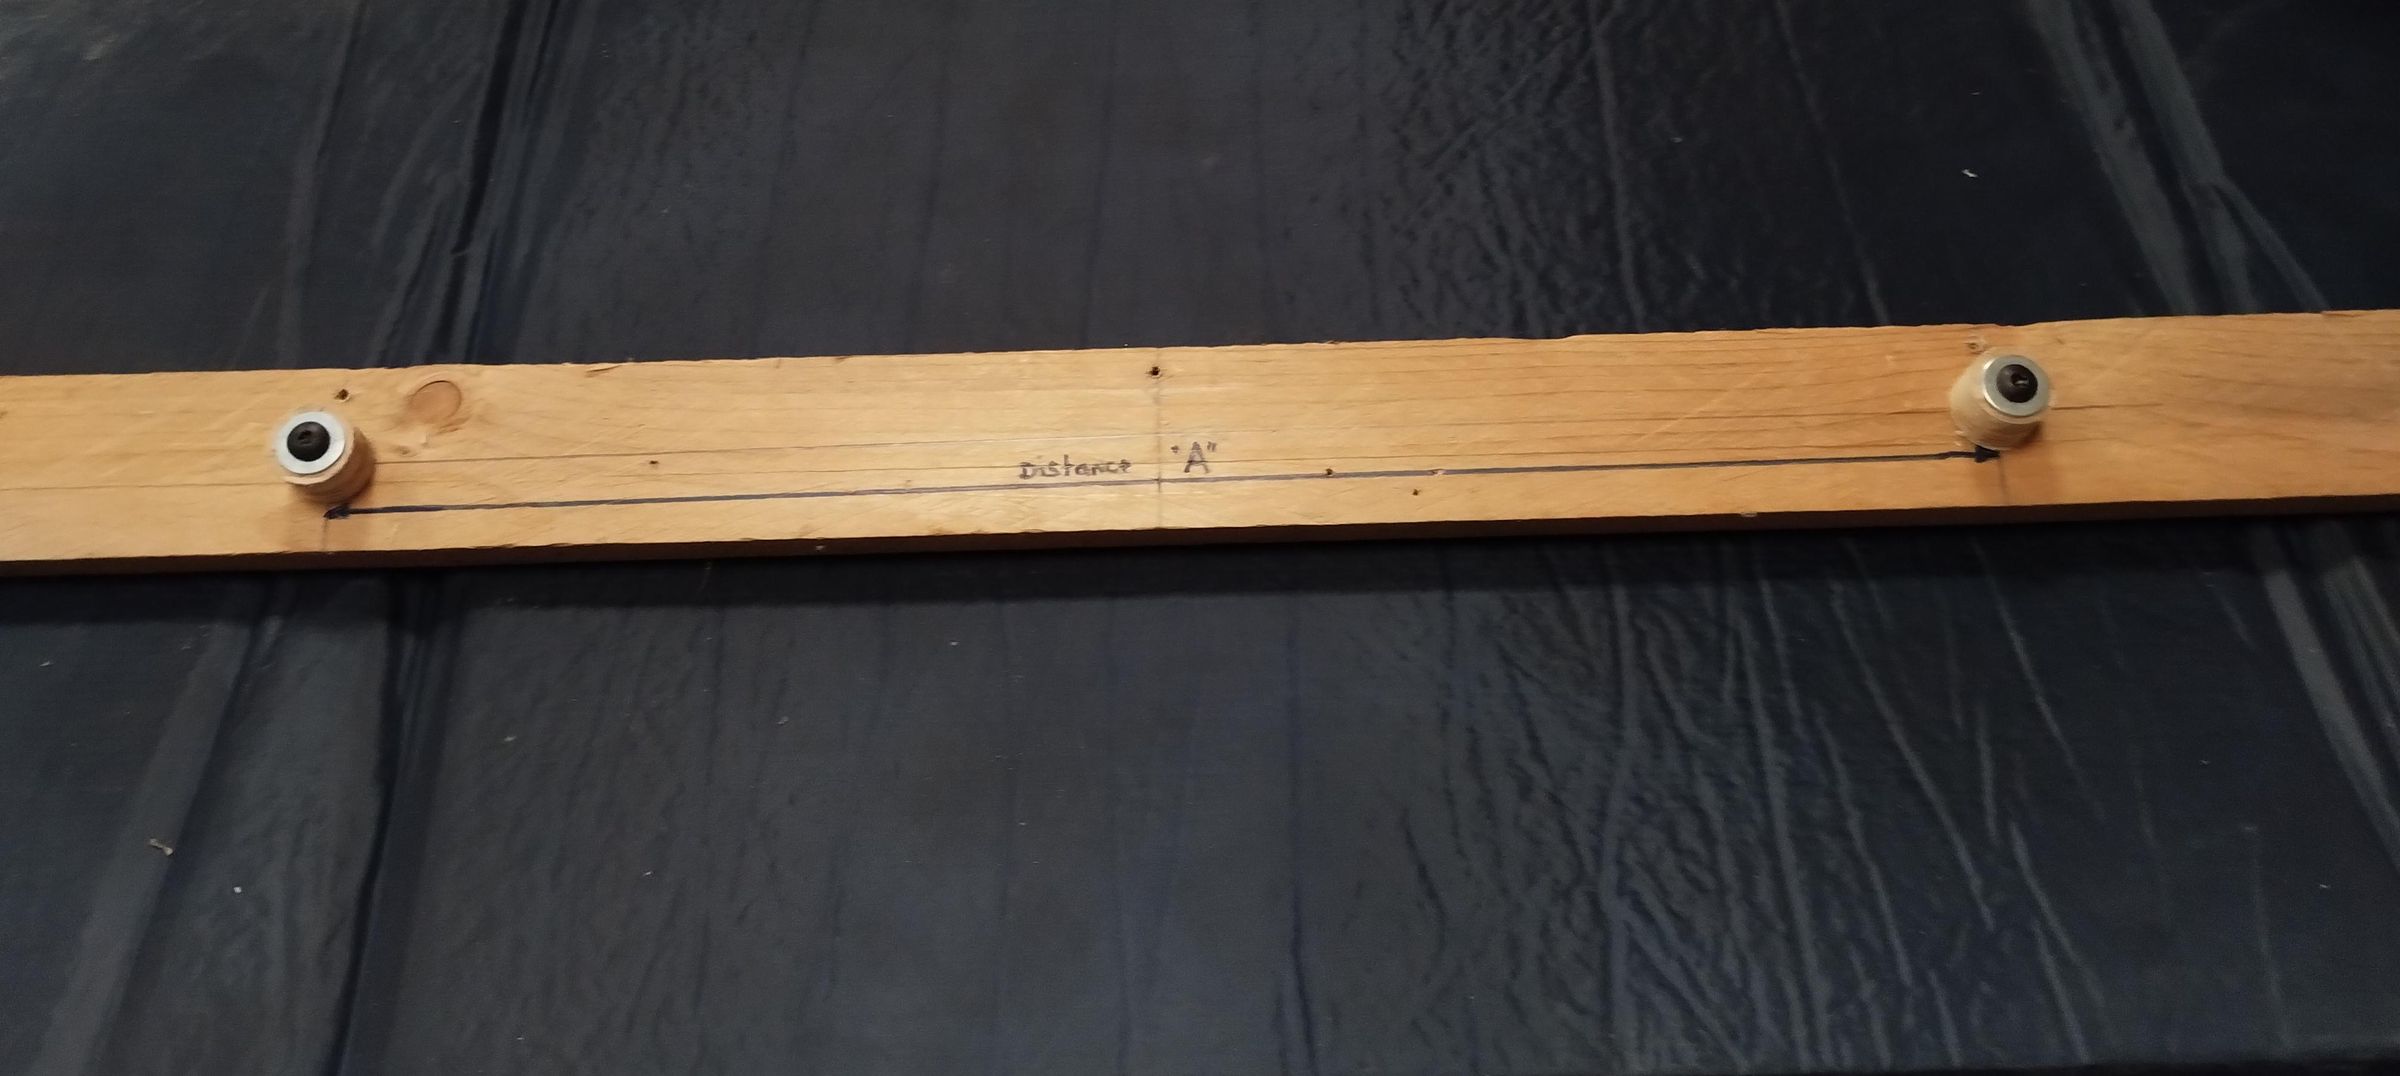
Now we can calculate the lengths and create our bending jig.
The top and bottom parts of the antenna must be of equal length (the gap for connecting the balun counts as part of the bottom length), and on each side we make a 180degree bend - exactly half of the circumference of the cylinders.
So here's the diagram for making the jig. Calculate and note down distance A, using the circumference that you calculated in step 3, above.
On your long piece of scrap-wood, draw a long horizontal center line, and place a vertical line at the center
Mark the length A perfectly centered on the vertical mark. Drill small pilot holes at each end of the distance A, and securely fix the two cylinders using wood screws and large washers.
Annealing
If you already have annealed copper tube, proceed to step 6.
Annealing the tube.
This is a job best done by TWO PEOPLE : one to do the heating, the other to do the quenching (rapid cooling with cold water).
WARNING : copper is an excellent conductor of heat. If you have never tried heating copper pipe before, clamp the pipe in a vice, or at worst, hold it in pliers or vice-grips. The heat will get to your hands VERY quickly, even through leather gloves!
We don't need to anneal the whole length of tube, only the two areas that will be folded. Look at the jig diagram to see the areas of the tube that need to be annealed.
With an indelible marker pen, mark the start and finish of the two areas to be annealed.
This is best done outside, but out of the wind. Fill a 10l watering can with cold water. With the tube correctly supported at one end, use a gas blowtorch to heat the designated area until it becomes RED HOT. Don't overdo the heating, otherwise you'll burn and completely ruin the tube. The experts say "cherry red", but if you see the tube glowing a dull red the result will be good enough for this job.
IMMEDIATELY get the second person to pour LOTS of cold water on the area to be annealed. Attention, there will be lots of steam and spattering of HOT water! Keep pouring until the annealed area is cool. You'll find that the heat will have chased along the tube, you'll need to cool the tube along the whole length. This rapid cooling of the copper makes it soft.
Repeat the process for the second area to be annealed.
Bending (at Last)
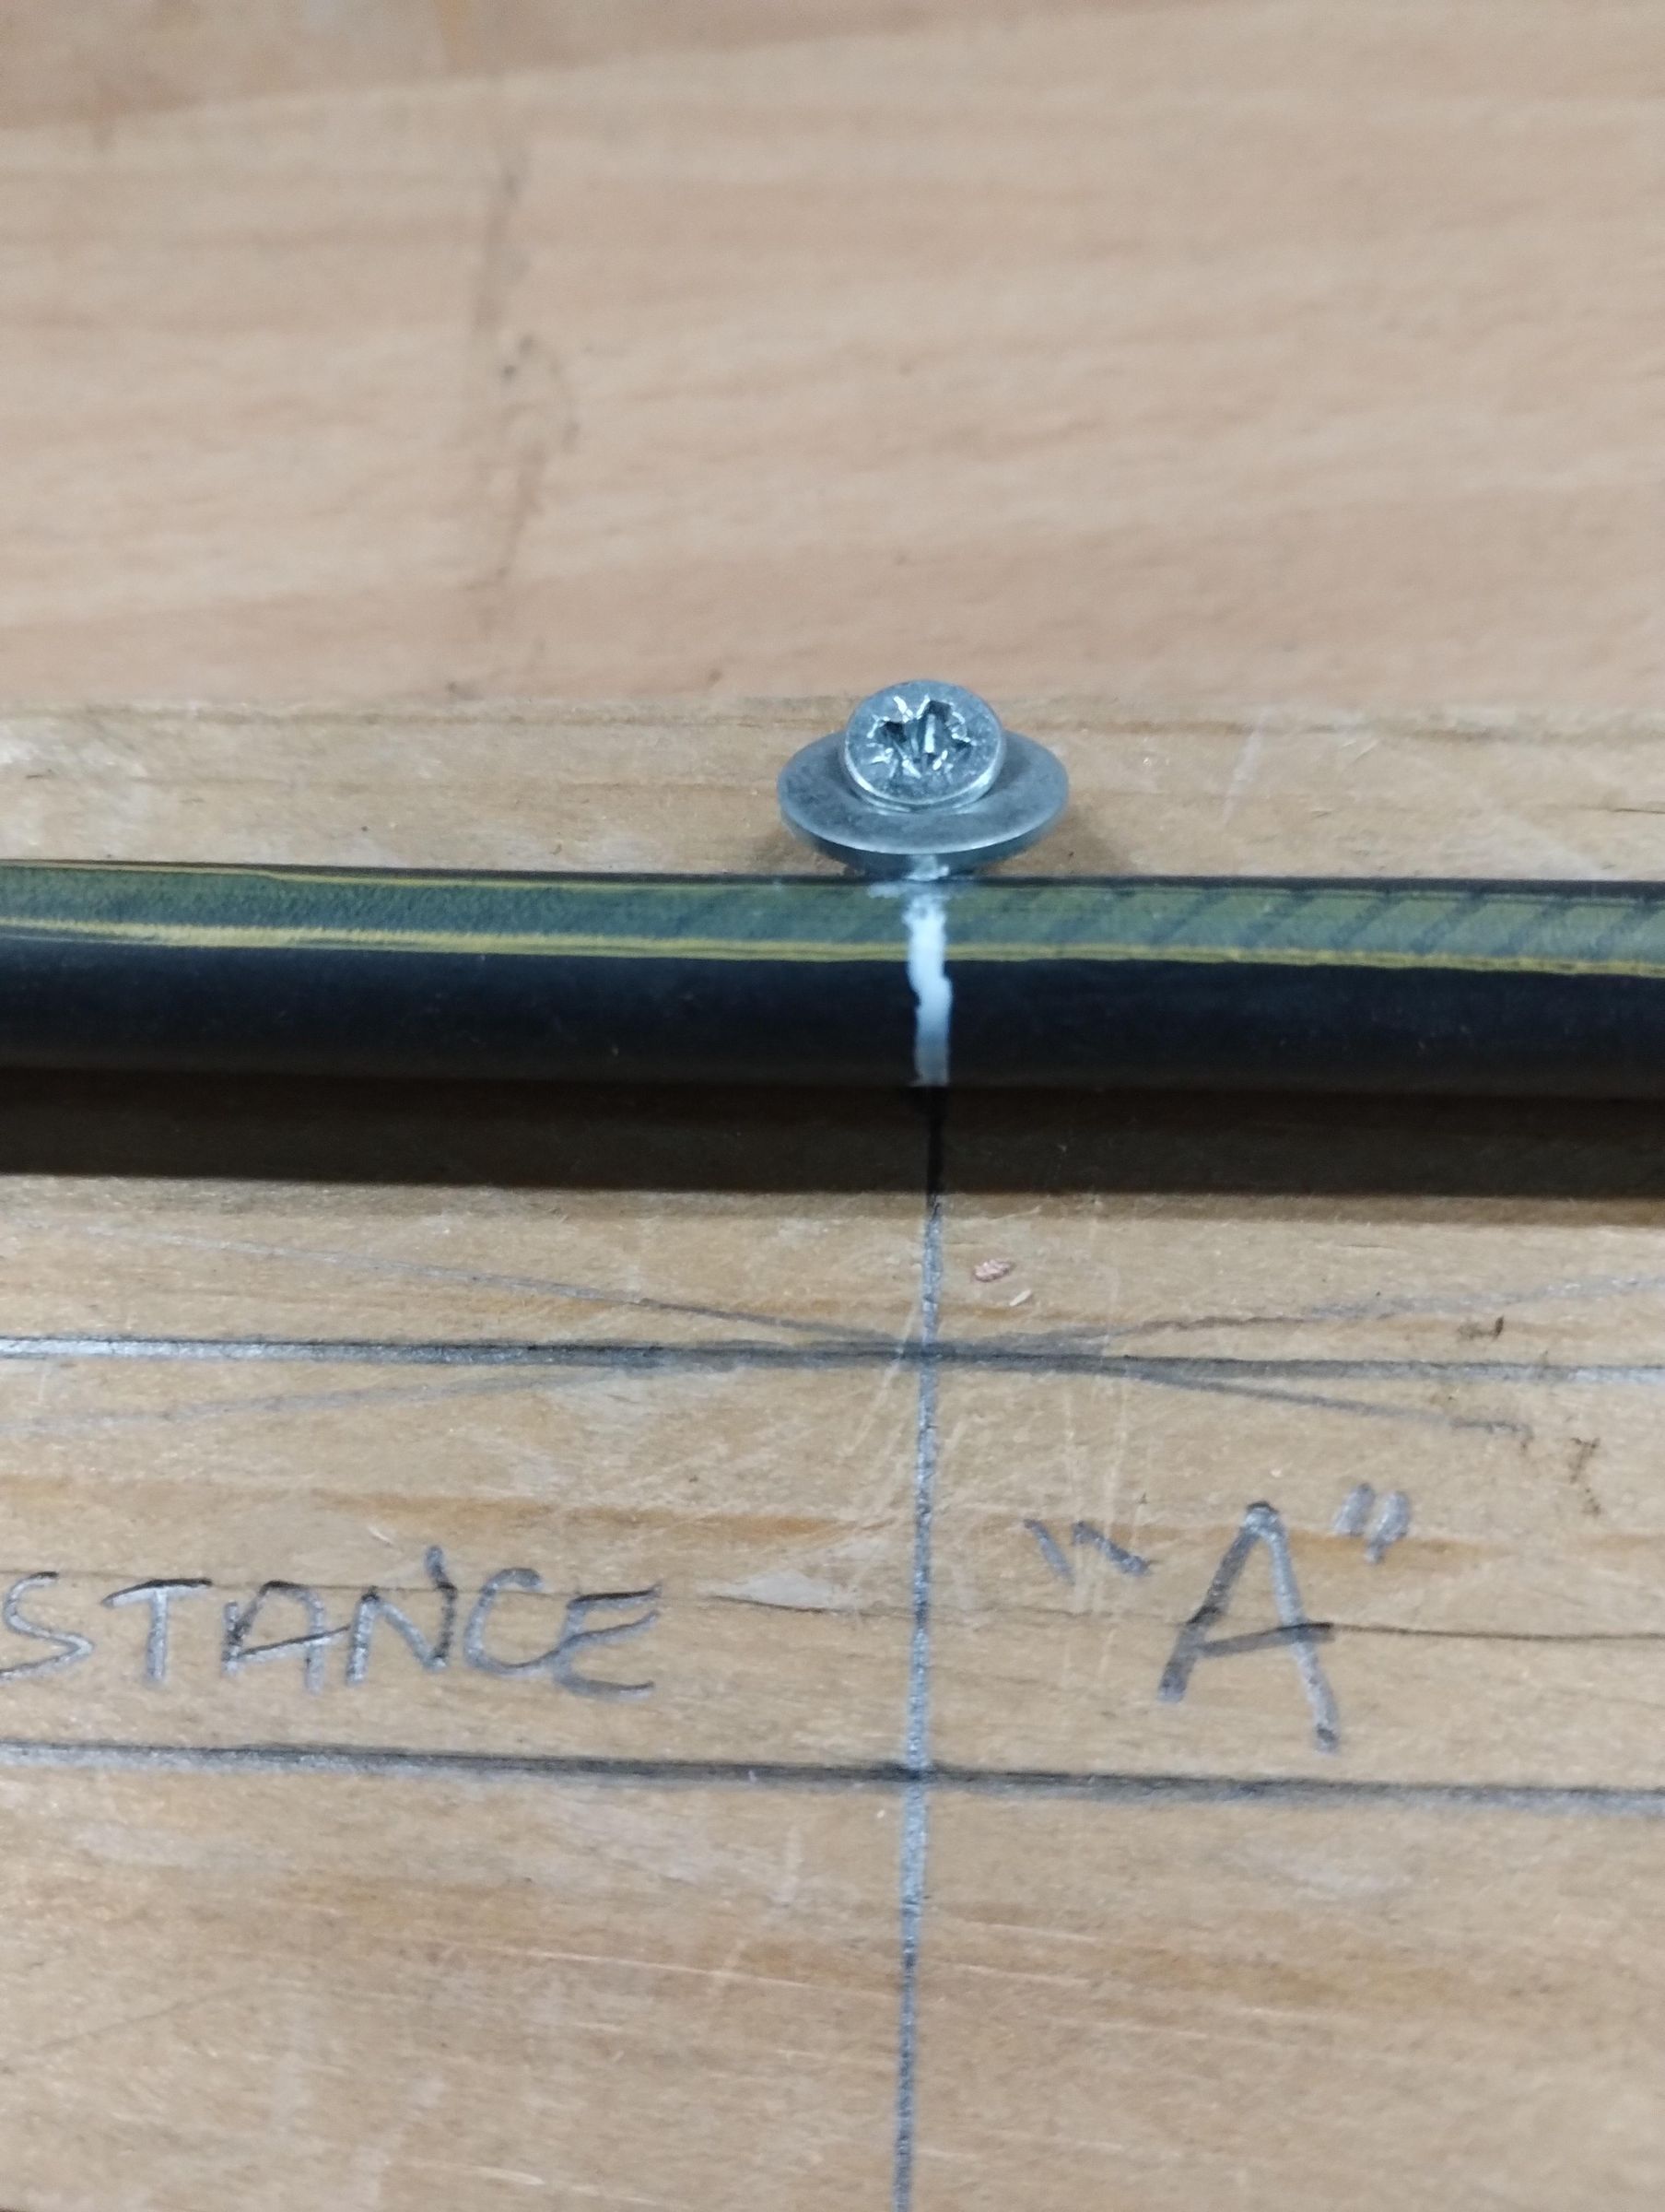
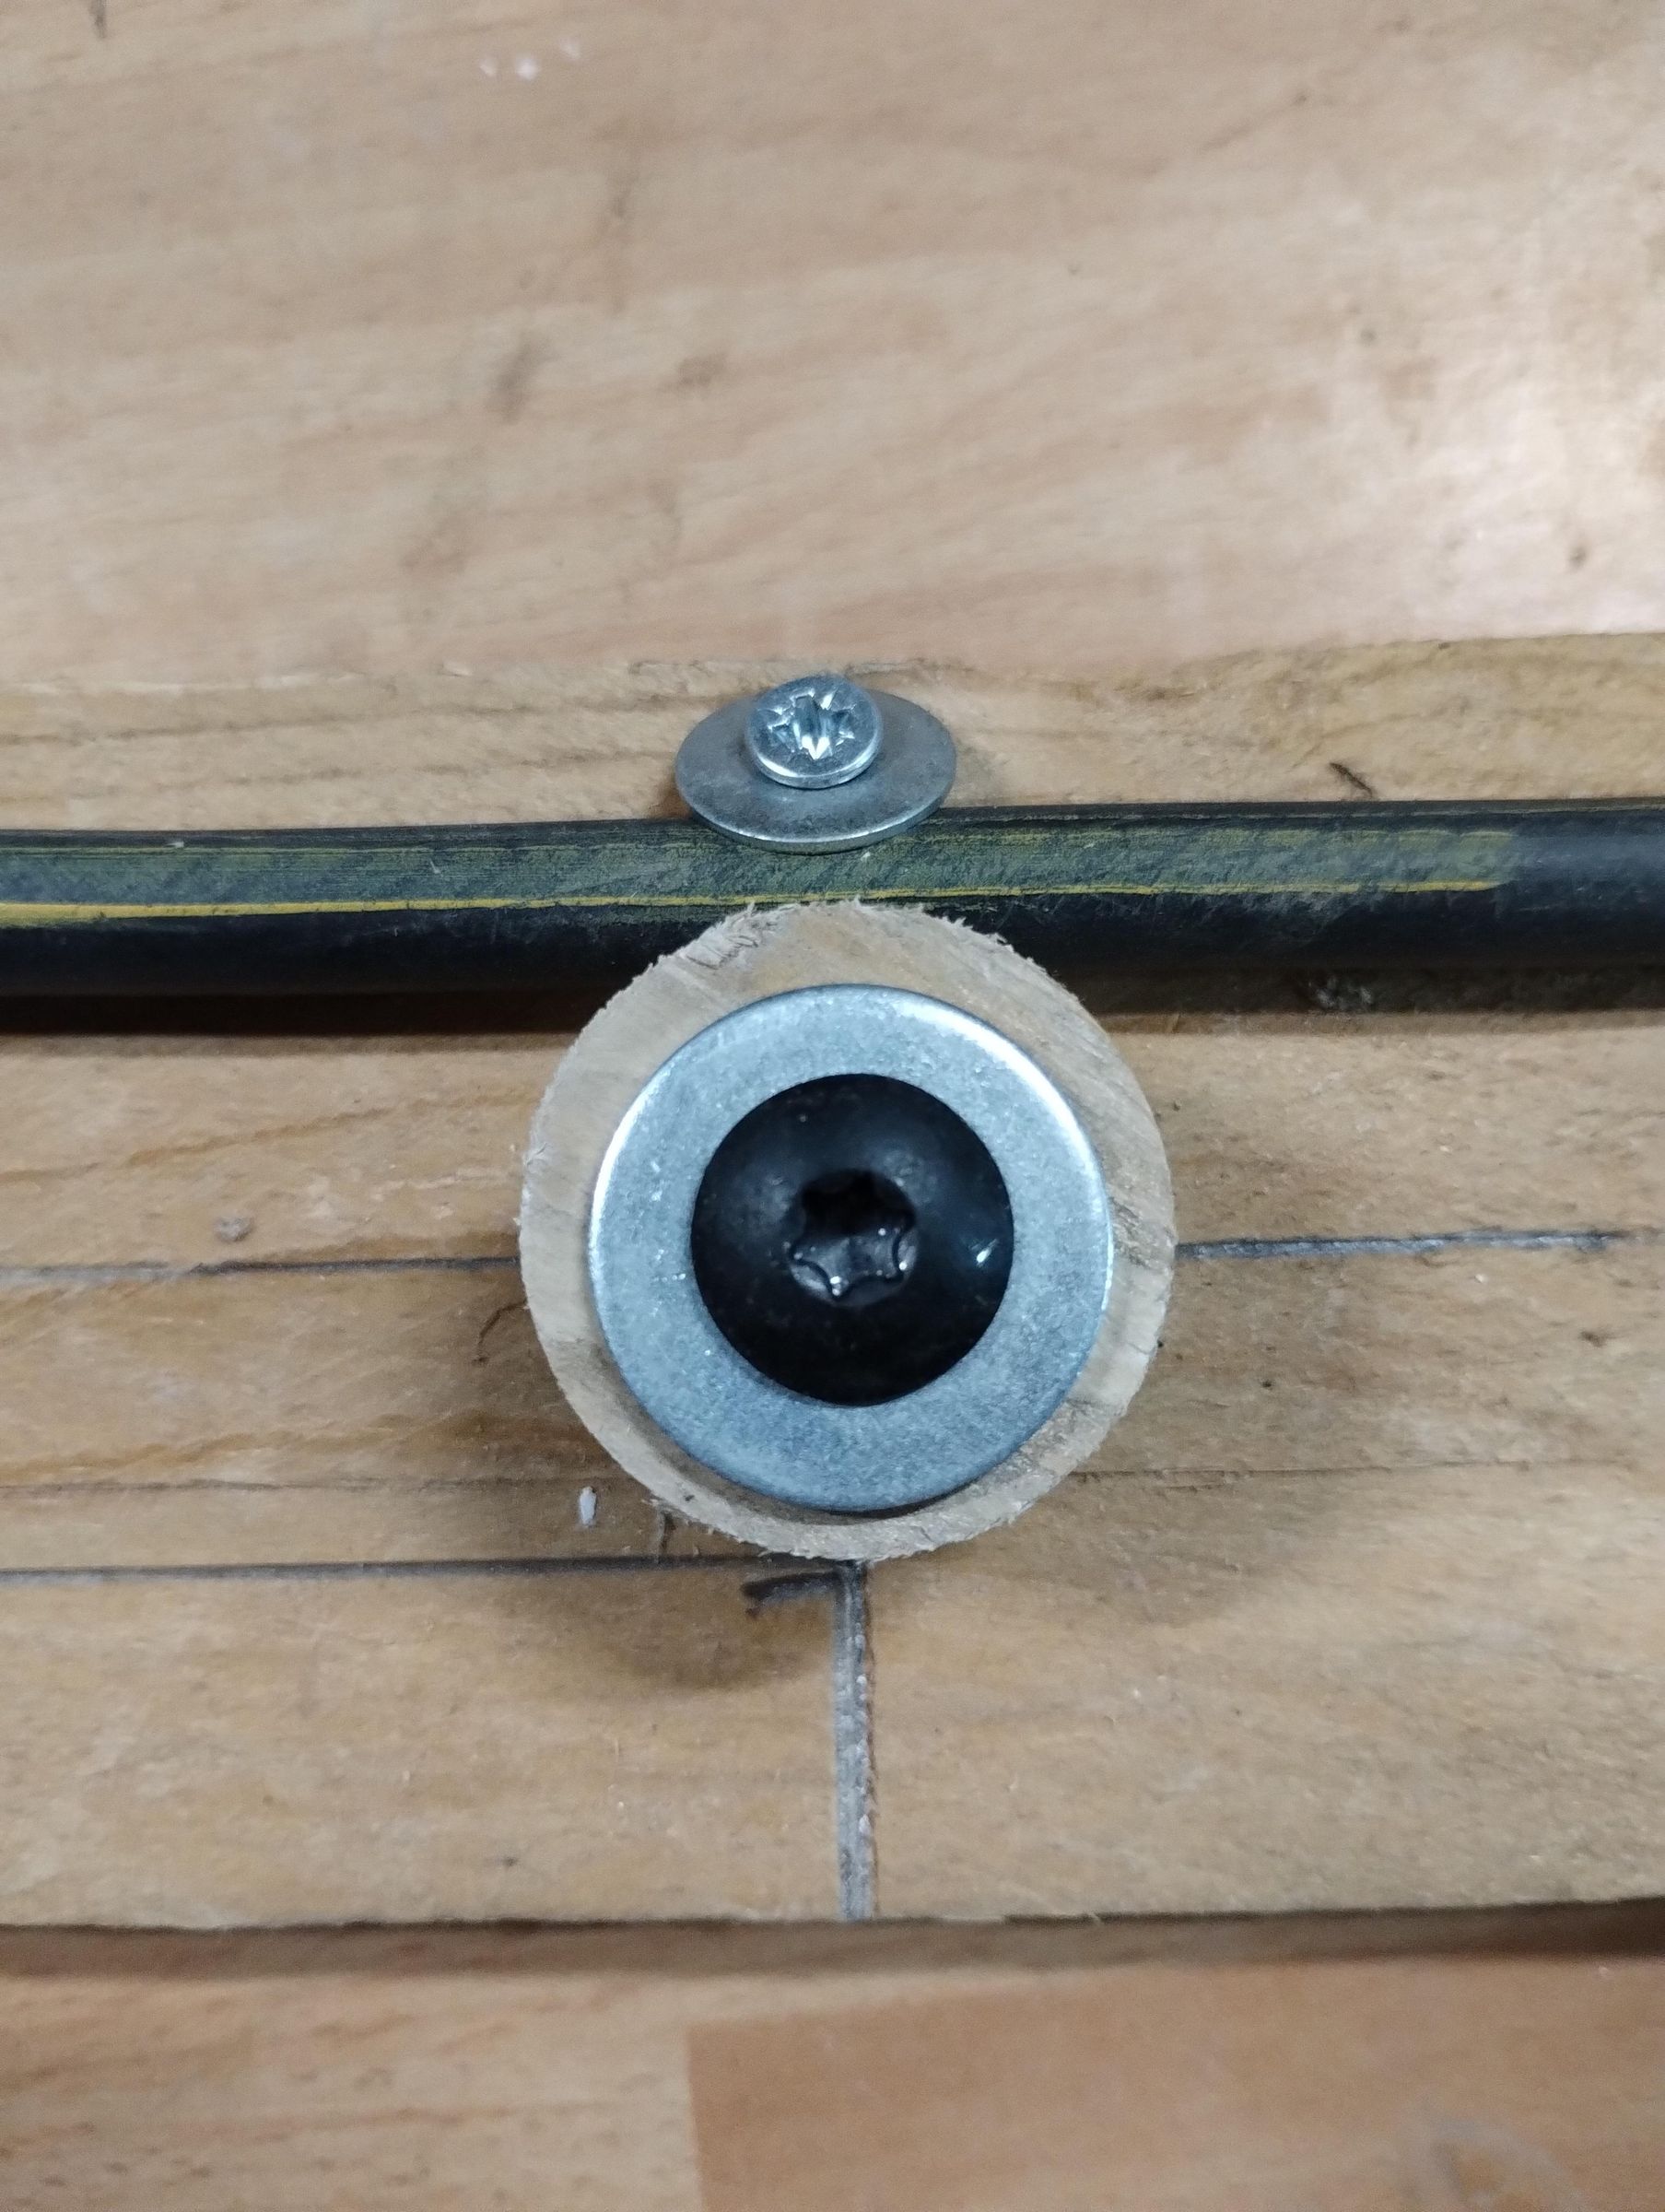
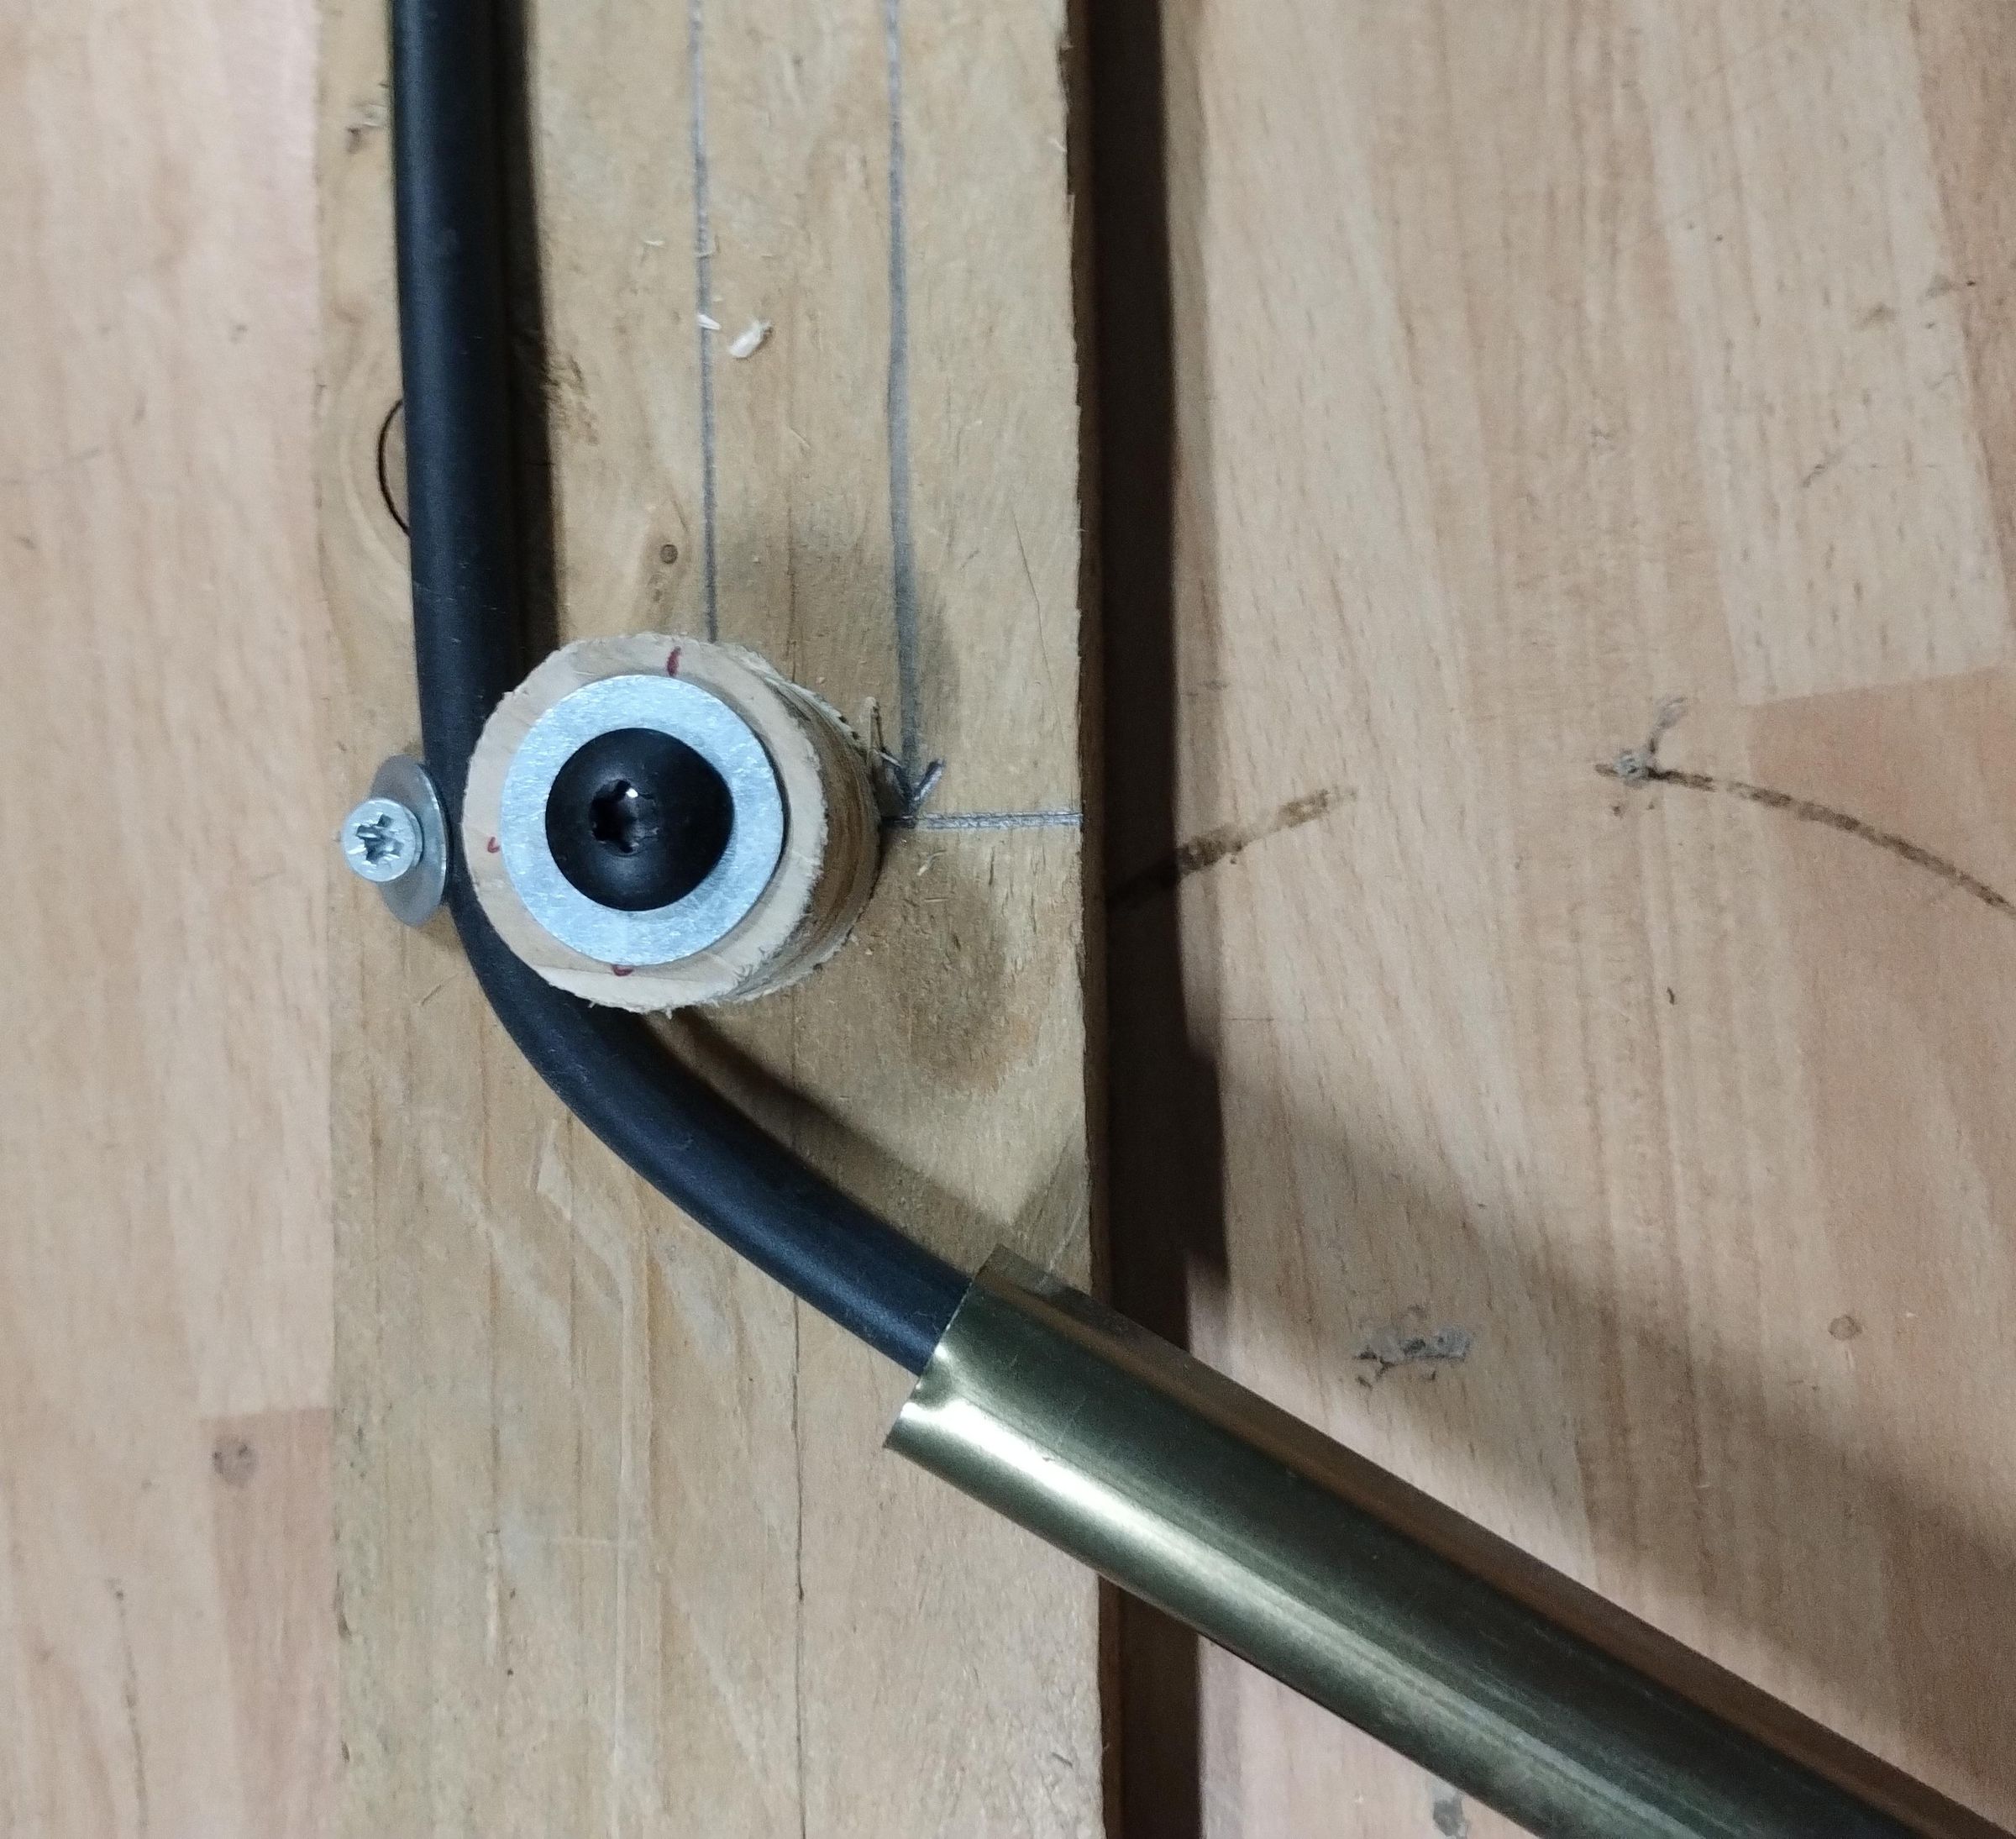
Find, and mark the exact center of your annealed copper tube. If you annealed the tube yourself, now is the time to ensure that the annealed sections correspond to the areas to be bent around the cylinders.
Using a wood screw and large washer, fix the tube at it's center, exactly on the vertical center line. The screw is on the OUTER edge of the tube, to prevent the tube from bending in the middle. Don't crush the tube, but ensure that it can't move. Using the same technique, fix the tube at each side, as close as possible to the two ends of distance A.
Fix the whole jig+tube in a vice, or screw or clamp it to your workbench. Find a piece of straight rod that will fit inside the tube, or a straight tube that will fit outside of the annealed tube, and use it to start bending. Bend in an easy, continuous movement - try not to stop until you've completed the 180degree turn. Go slowly to avoid forming a hard 'kink' instead of the gentle bend we're looking for. Don't worry if the tube 'squashes' around the cylinder - it doesn't matter for radio waves!. Repeat for the other end. Get the two free ends of the tube to line-up as best as possible. The bottom branches should be parallel to the top section.
Remove ALL the wood screws (cylinders included). Carefully remove the cylinders that are likely to be pinched inside the 180degree bends. Now with your hands you can bend the two lower sections to get them aligned correctly. The bent assembly should lay perfectly flat.
Balun Connections
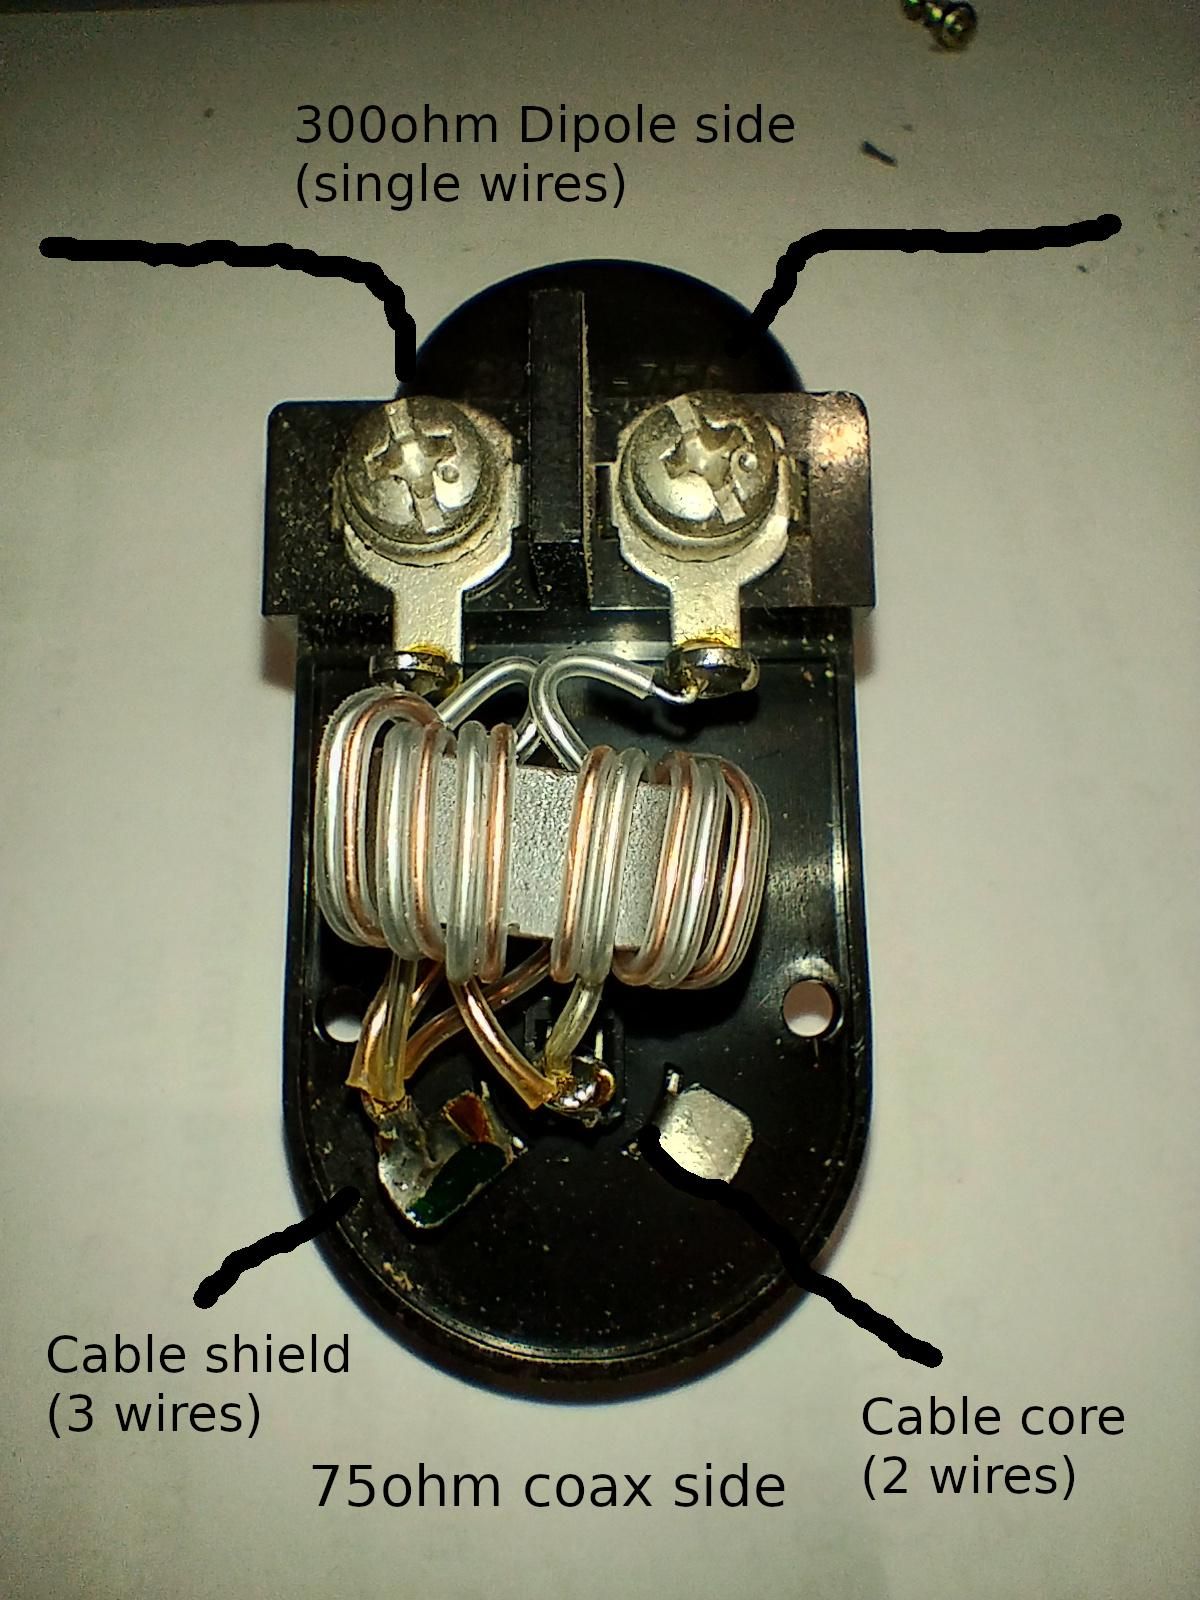
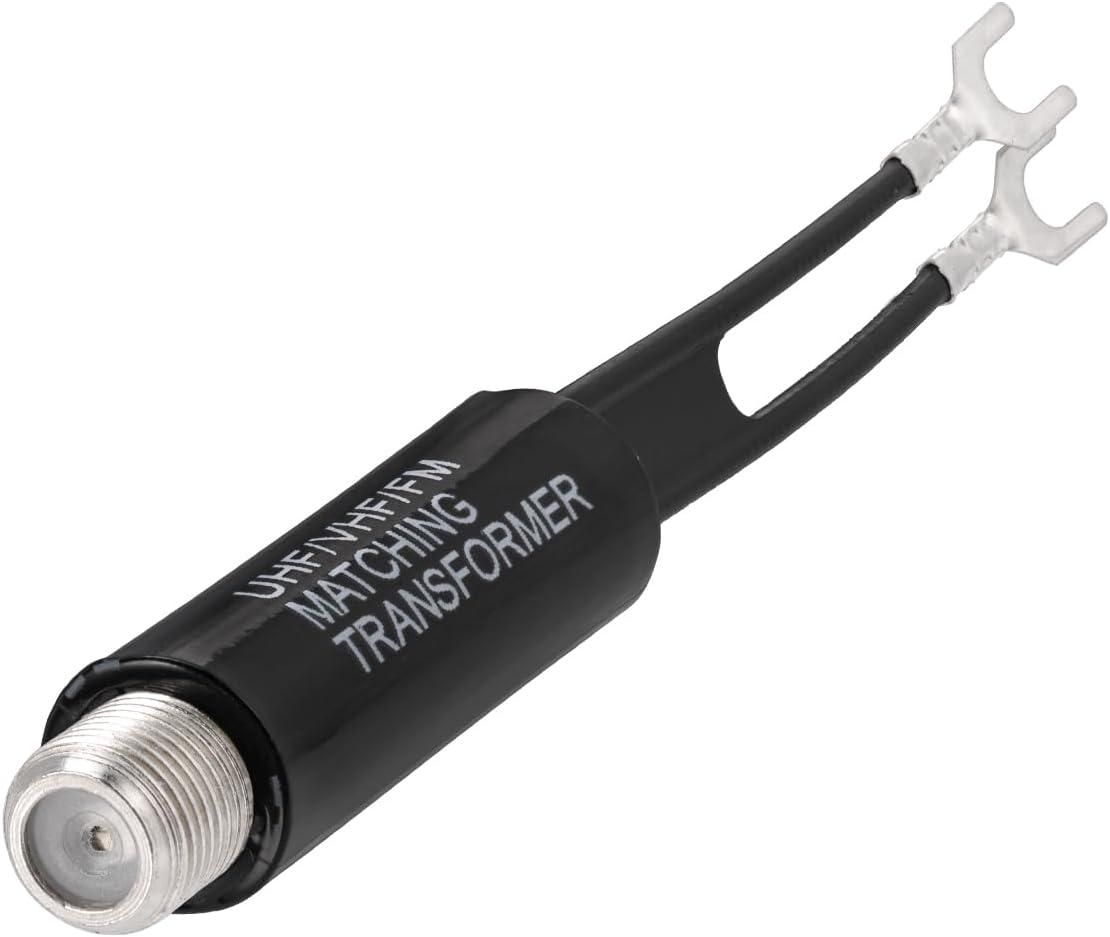
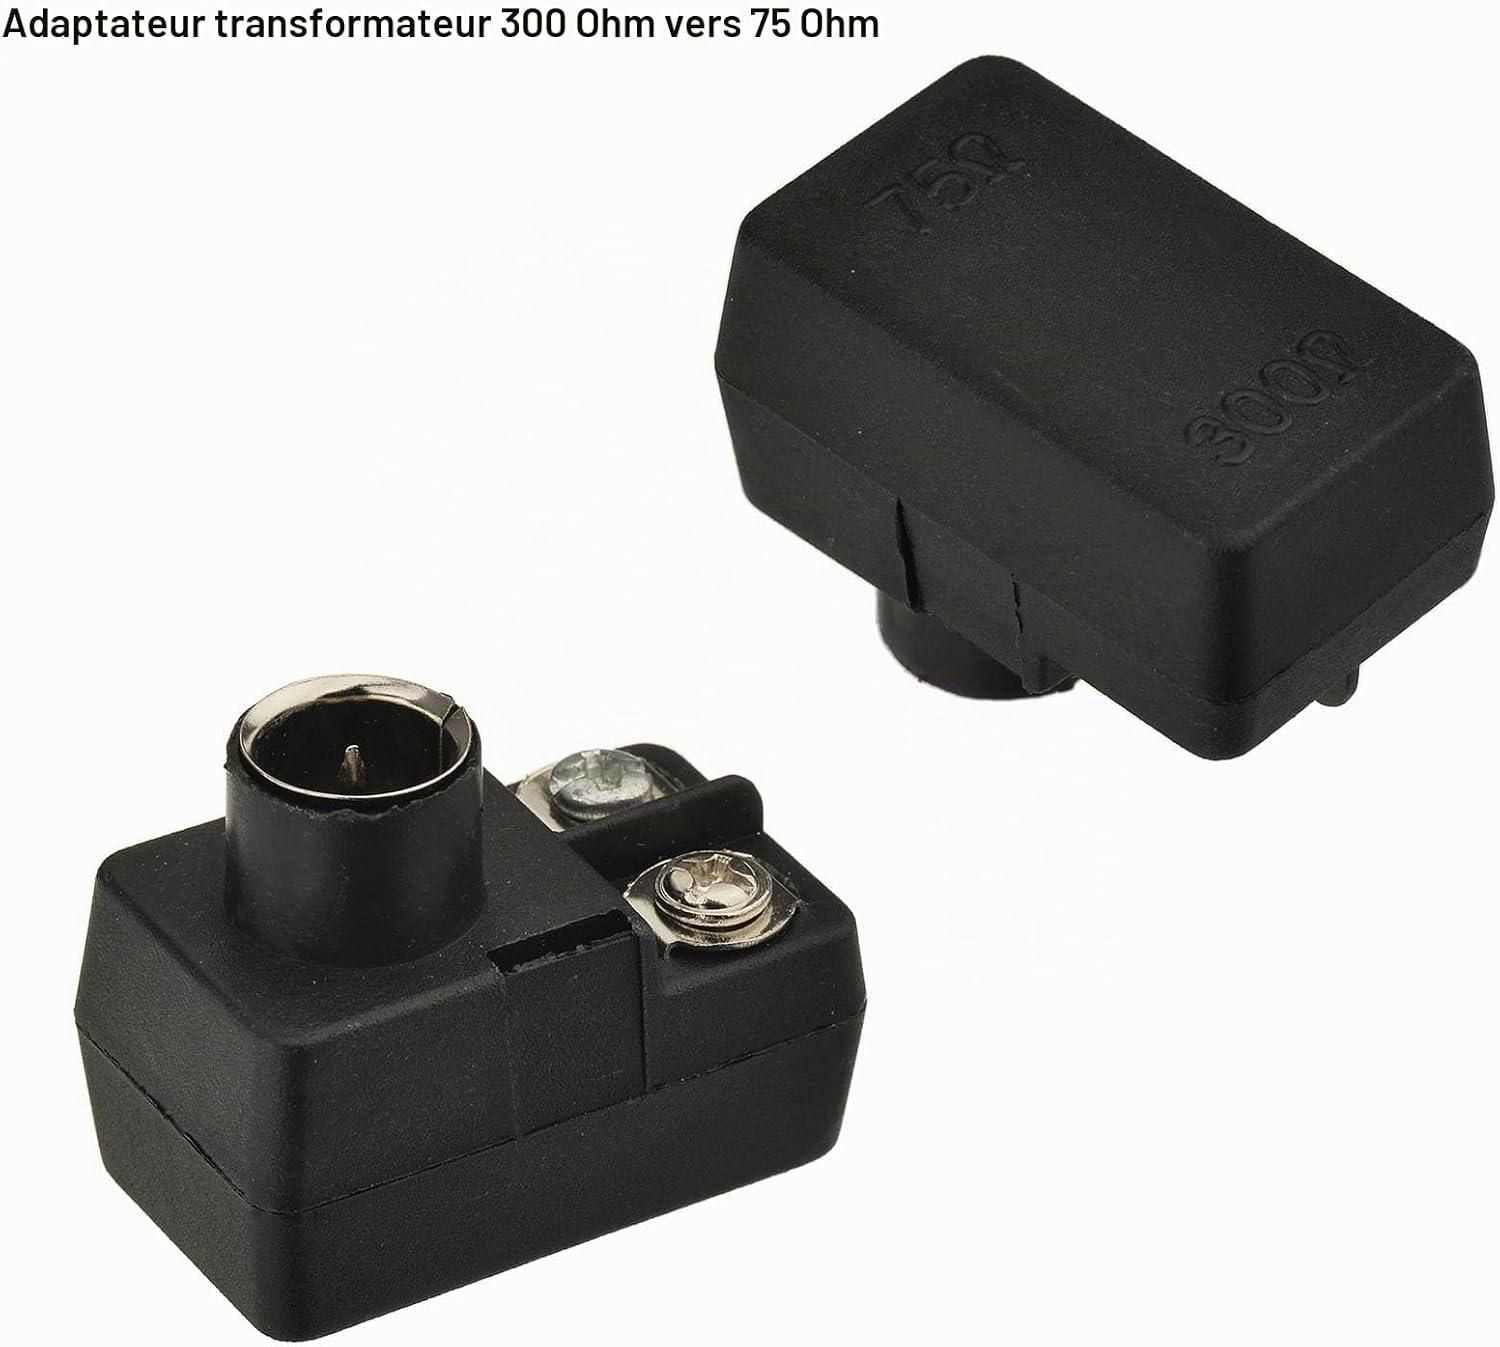
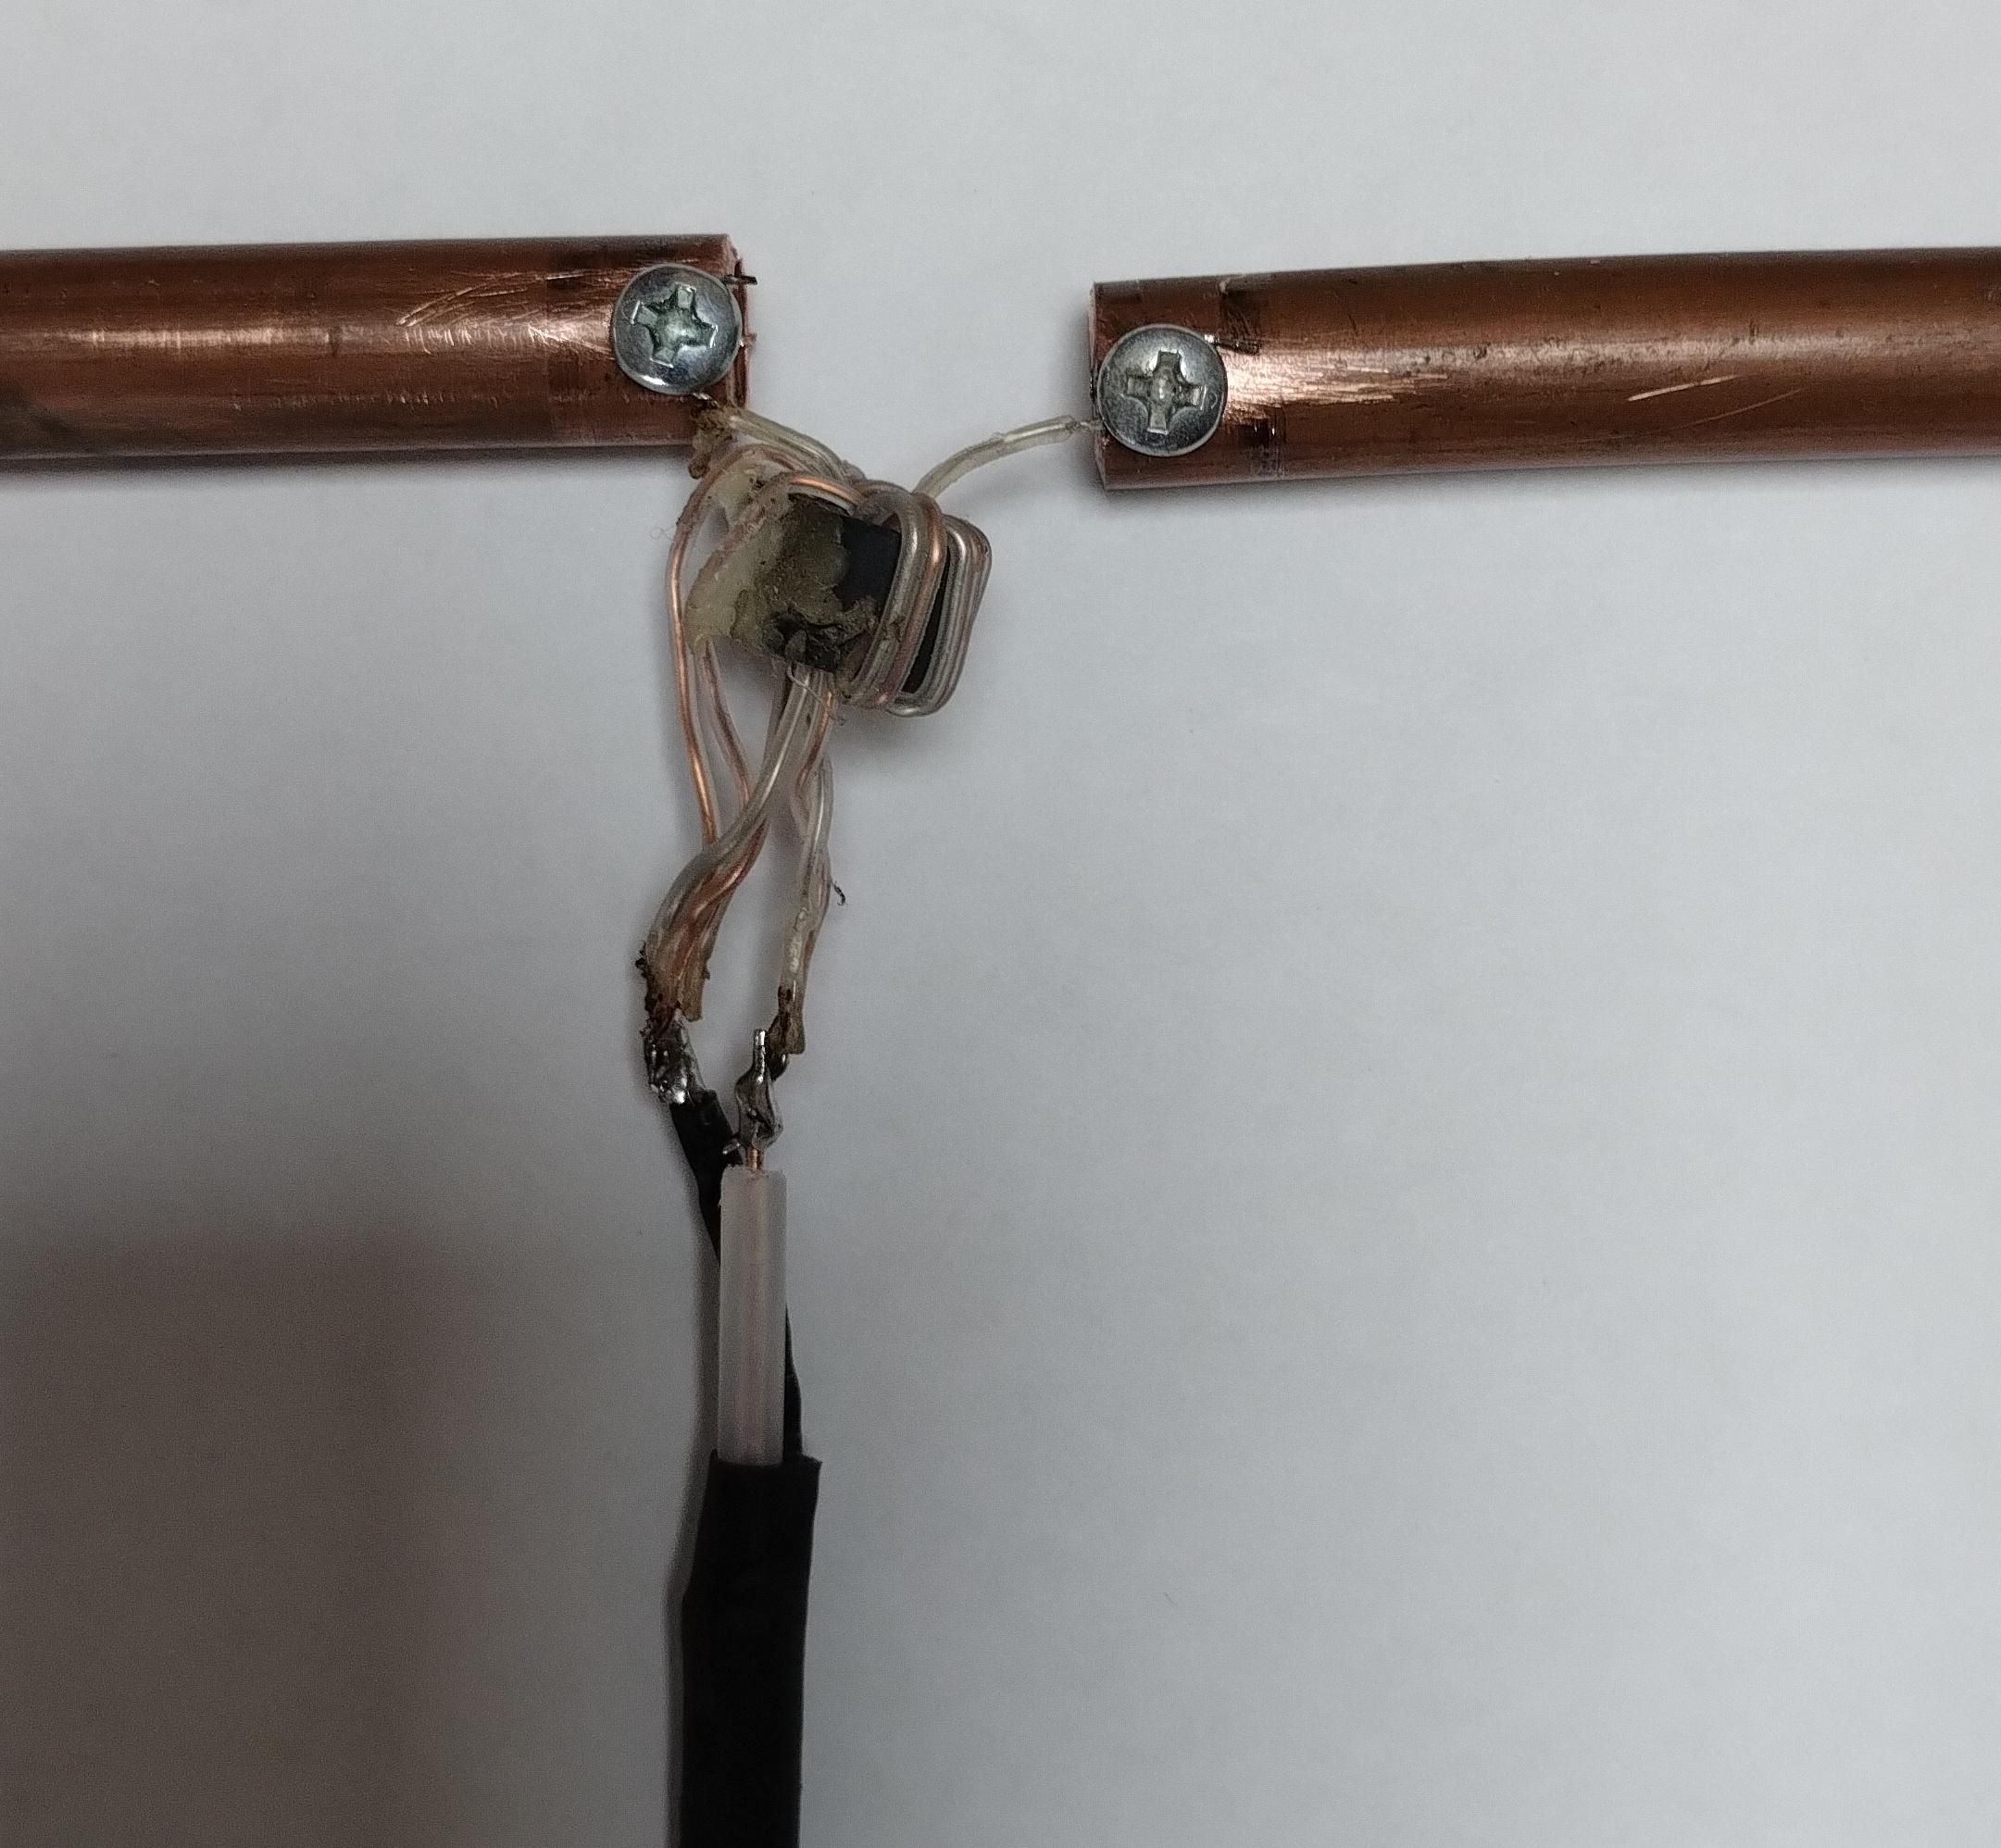
The balun you have may take on several forms. Here are two common forms, (photos taken from Amazon stores). If you take apart an old portable TV set, or a 'table-top' FM radio, the balun will probably be 'naked' and look like the one in my photo. The important thing to look for if you have to buy one, is that it should be 300ohm to 75ohm. The molded one in the photo is perfect and looks neat. The second one has a clip-on case that you'll probably have to remove in order to fit the balun to the tube antenna. In either case you have the coaxial connection ready-made.
Drill small holes (~2.5mm) and connect the two 300ohm mires to the extreme ends of the tube with self-tapping screws. The photo shows the connections if you're using a 'naked' balun,
To reduce losses, solder the 75ohm side of the balun directly to the coaxial cable if there's not already a socket on the balun.
For a lasting result, you should put a case around the balun and connections to avoid corrosion and broken connections.
Connecting and Testing
The other end of your coaxial antenna cable should be fitted with a good quality connector to suit your DAB receiver (usually the small SMA connectors like WiFi antenna, or a type 'F' connector like satellite dishes).
So far we've seen the folded dipole drawn horizontally. Many radio signals, like TV in most countries (if I recall correctly, Switzerland are an exception), are transmitted in a horizontal plane - we say the signals are horizontally polarized. If you look at a rooftop TV antenna, you'll see the horizontal folded dipole just in front of the reflector plates. FM radio is often transmitted in BOTH planes - making it compatible with 'stick' antennas and car radios. DAB+ is transmitted only in the VERTICAL plane. So our dipole has to be installed vertically.
The fixing system is best made from plastic or wood, it can even just be a length of string to suspend the dipole from one end! But avoid metal screws, clips, bolts, etc. for the fixings. For best results, the antenna should be perfectly vertical, away from any metallic objects, and facing the direction of the DAB+ transmitter. By 'facing' I mean that the flat plane formed by the folds should be perpendicular to the direction of the transmitter (just like TV antennas). You may need to experiment to get the best results.
I hope you had fun making your antenna! Happy listening.
Alternatives
You'll have noticed that the photos of the jig and bending steps were made not using copper pipe, but solid-core cable meant for domestic mains wiring. This is because I wasn't entirely convinced that a) the bending process would work correctly; b) the resulting antenna would function correctly! So I had already used and bent my only piece of copper pipe BEFORE I documented this instructable!
In fact, radio being at least 50% witchcraft, the antenna made with the 3-core cable will actually work quite well! The length should be calculated exactly the same as for copper pipe - just solder the three wires together at each end and attach the balun as per the instructions above. The major drawback is that the cable isn't perfectly rigid and it's difficult to keep top and bottom perfectly parallel and aligned. You'll have to shape the cable around a wooden or plastic former and hold it with plastic cable-ties. No metal clips or screws!
This same design can be adapted for FM radio broadcasts (88 - 108MHz) : in this case the wavelength is greater : at 98MHz (center frequency), the wavelength is 3.06m. You notice that the FM antenna will be double the size of our DAB antenna!! For FM broadcasts you should fix or hang the antenna horizontally.