DIY Jigsaw-Based Box Joint (Finger Joint) Machine
by bluesyann in Workshop > Woodworking
359 Views, 5 Favorites, 0 Comments
DIY Jigsaw-Based Box Joint (Finger Joint) Machine
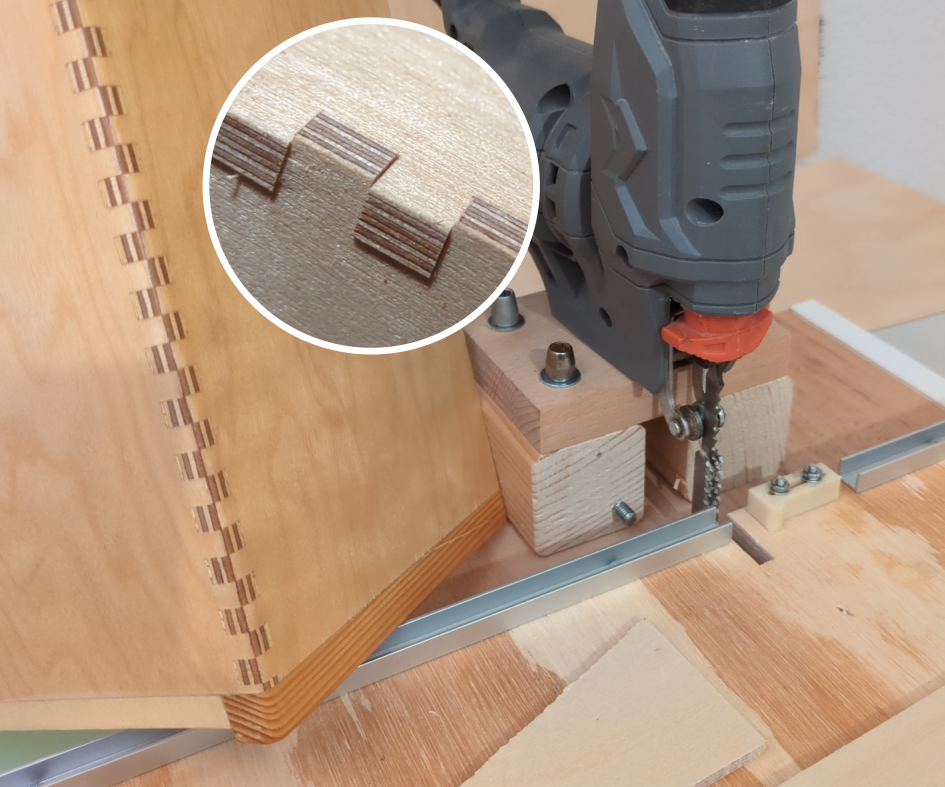
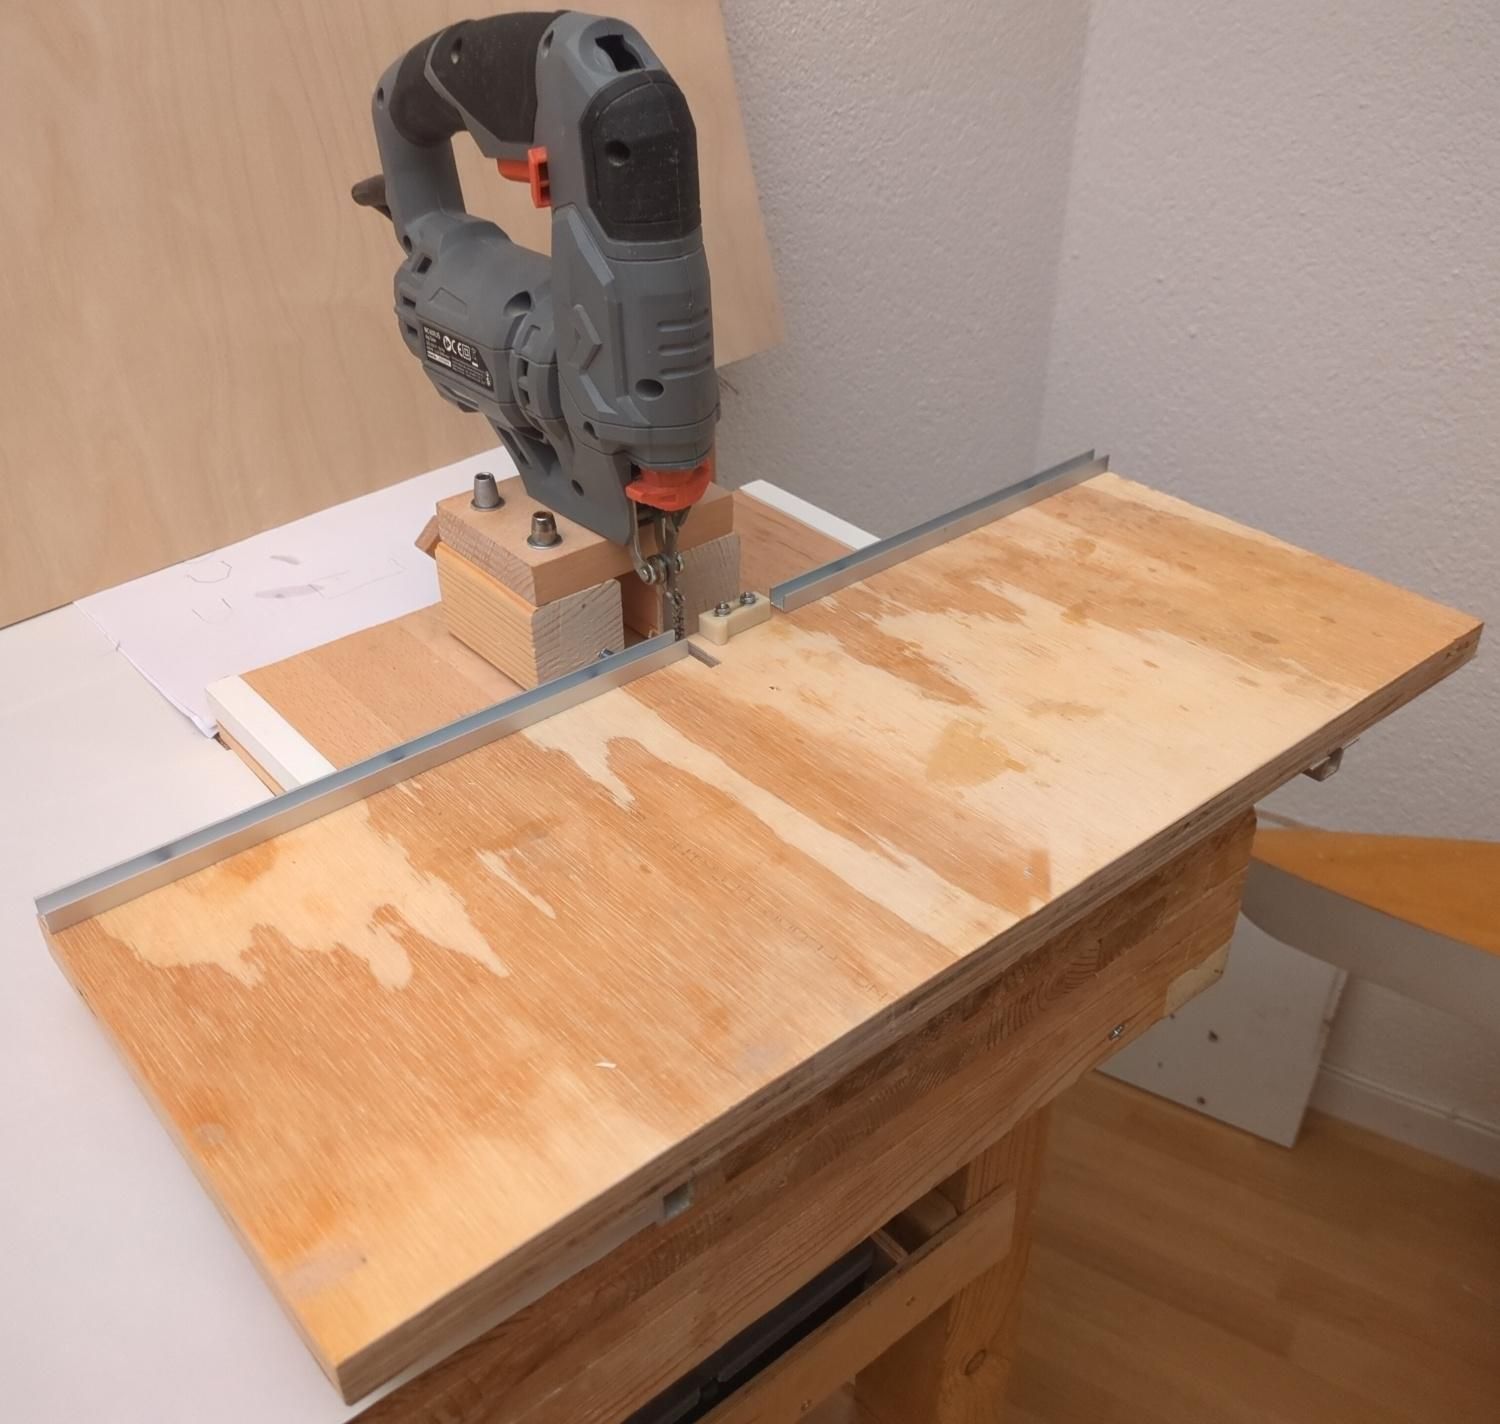
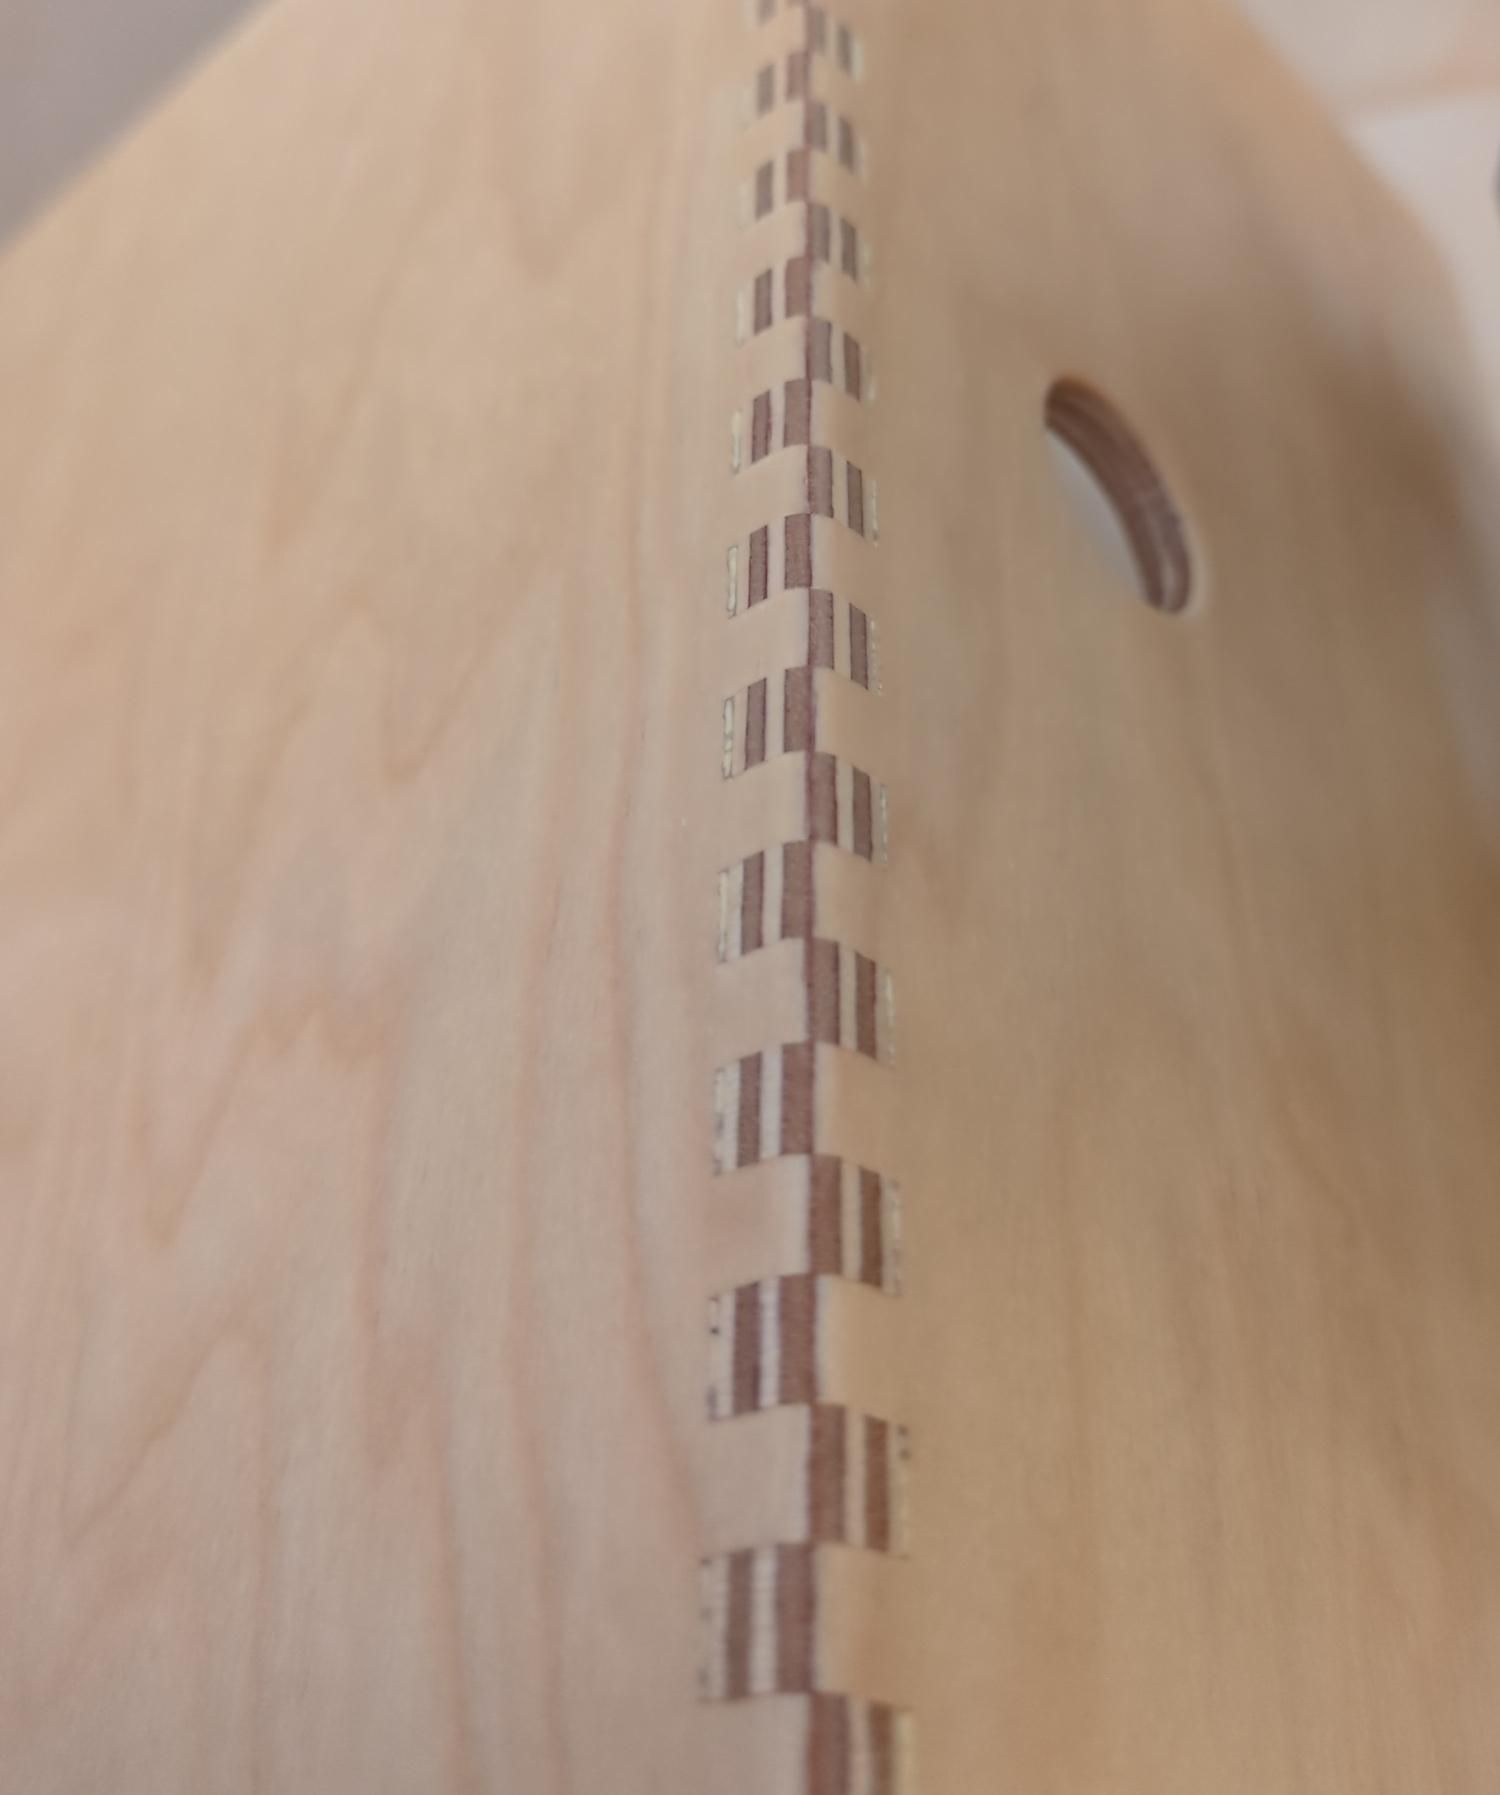
Box joints are fundamental, especially for plywood assemblies. They are strong and produce a visually appealing result.
There are many DIY jig designs online - often based on table saws, router tables, or modified hand tools - a quick search for "box joint" on Instructables returns countless examples. However, these tools can be expensive, dangerous, and noisy, making them impractical for the occasional DIYer, particularly those living in apartments.
This guide provides step-by-step instructions for building a simple, affordable box joint machine using a cheap jigsaw, wood scraps, and basic hardware.
Supplies
Jigsaw
3 jigsaw blades
T-shaped plastic or aluminum profile
L-shaped plastic or aluminum profile
U-shaped plastic or aluminum profile
Wood board: 500×200×20 mm (or similar)
Wood board: 300×300×20 mm (or similar)
Screws, nuts, washers, and threaded rods
Wood scraps of various thicknesses
Drill and screwdriver
Create a Wide Jigsaw Blade
Prepare the Side Blades
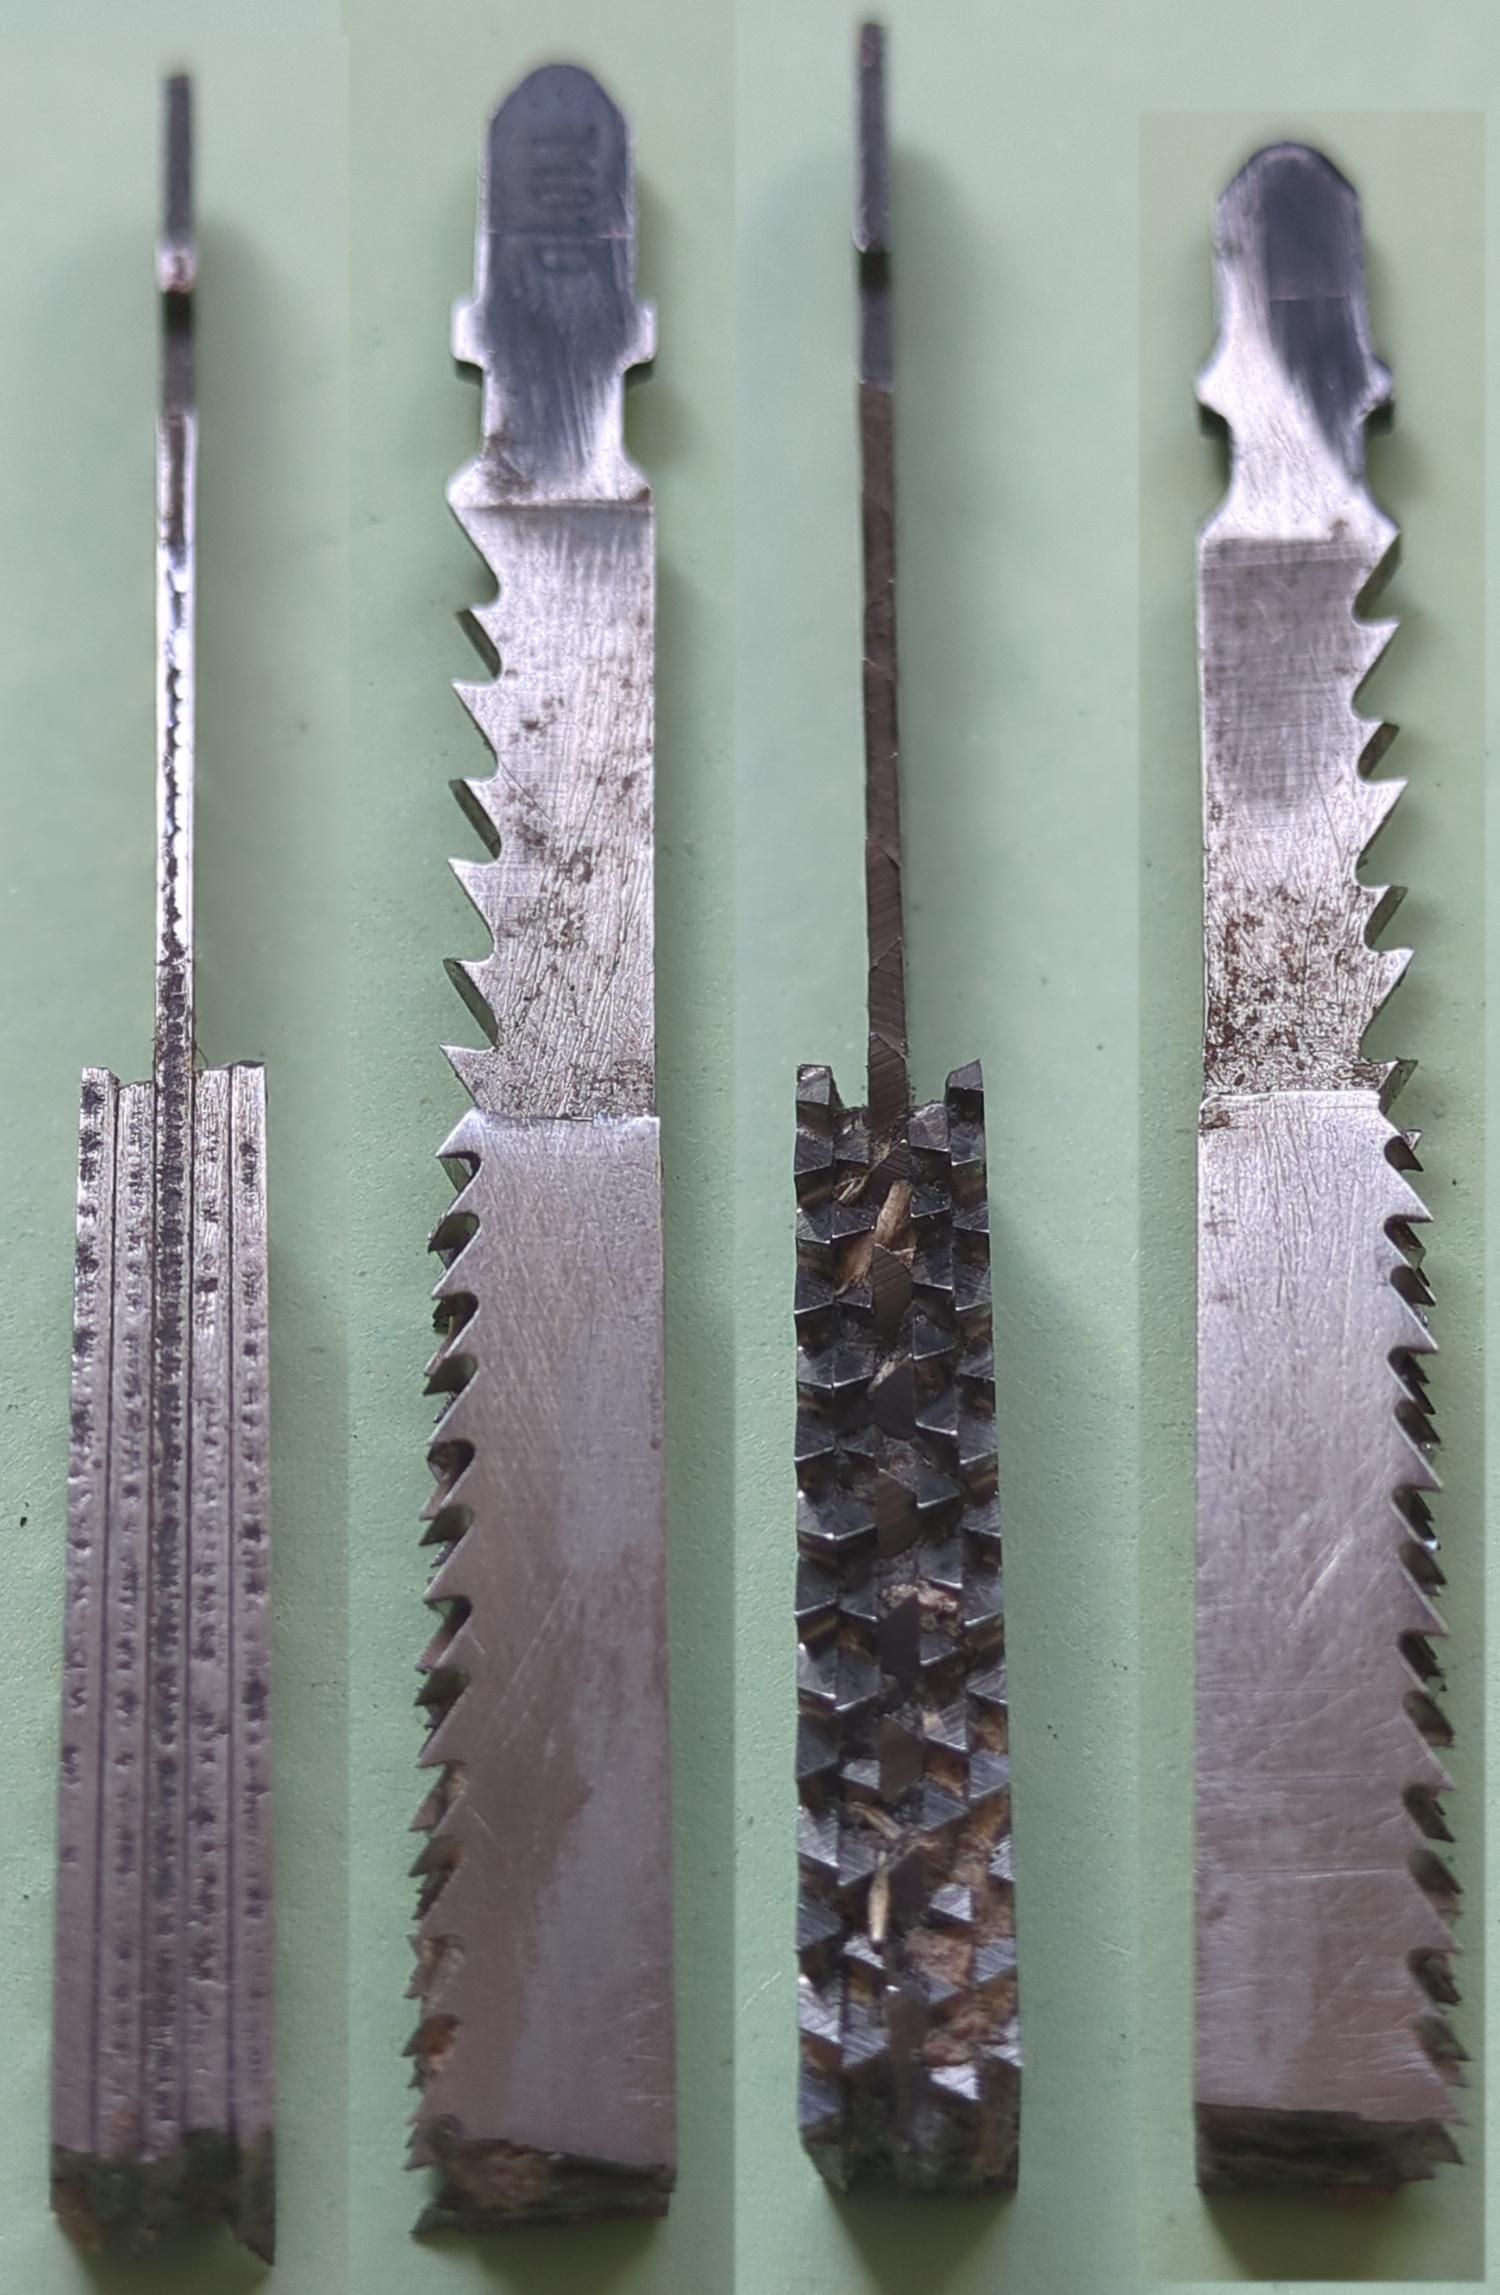
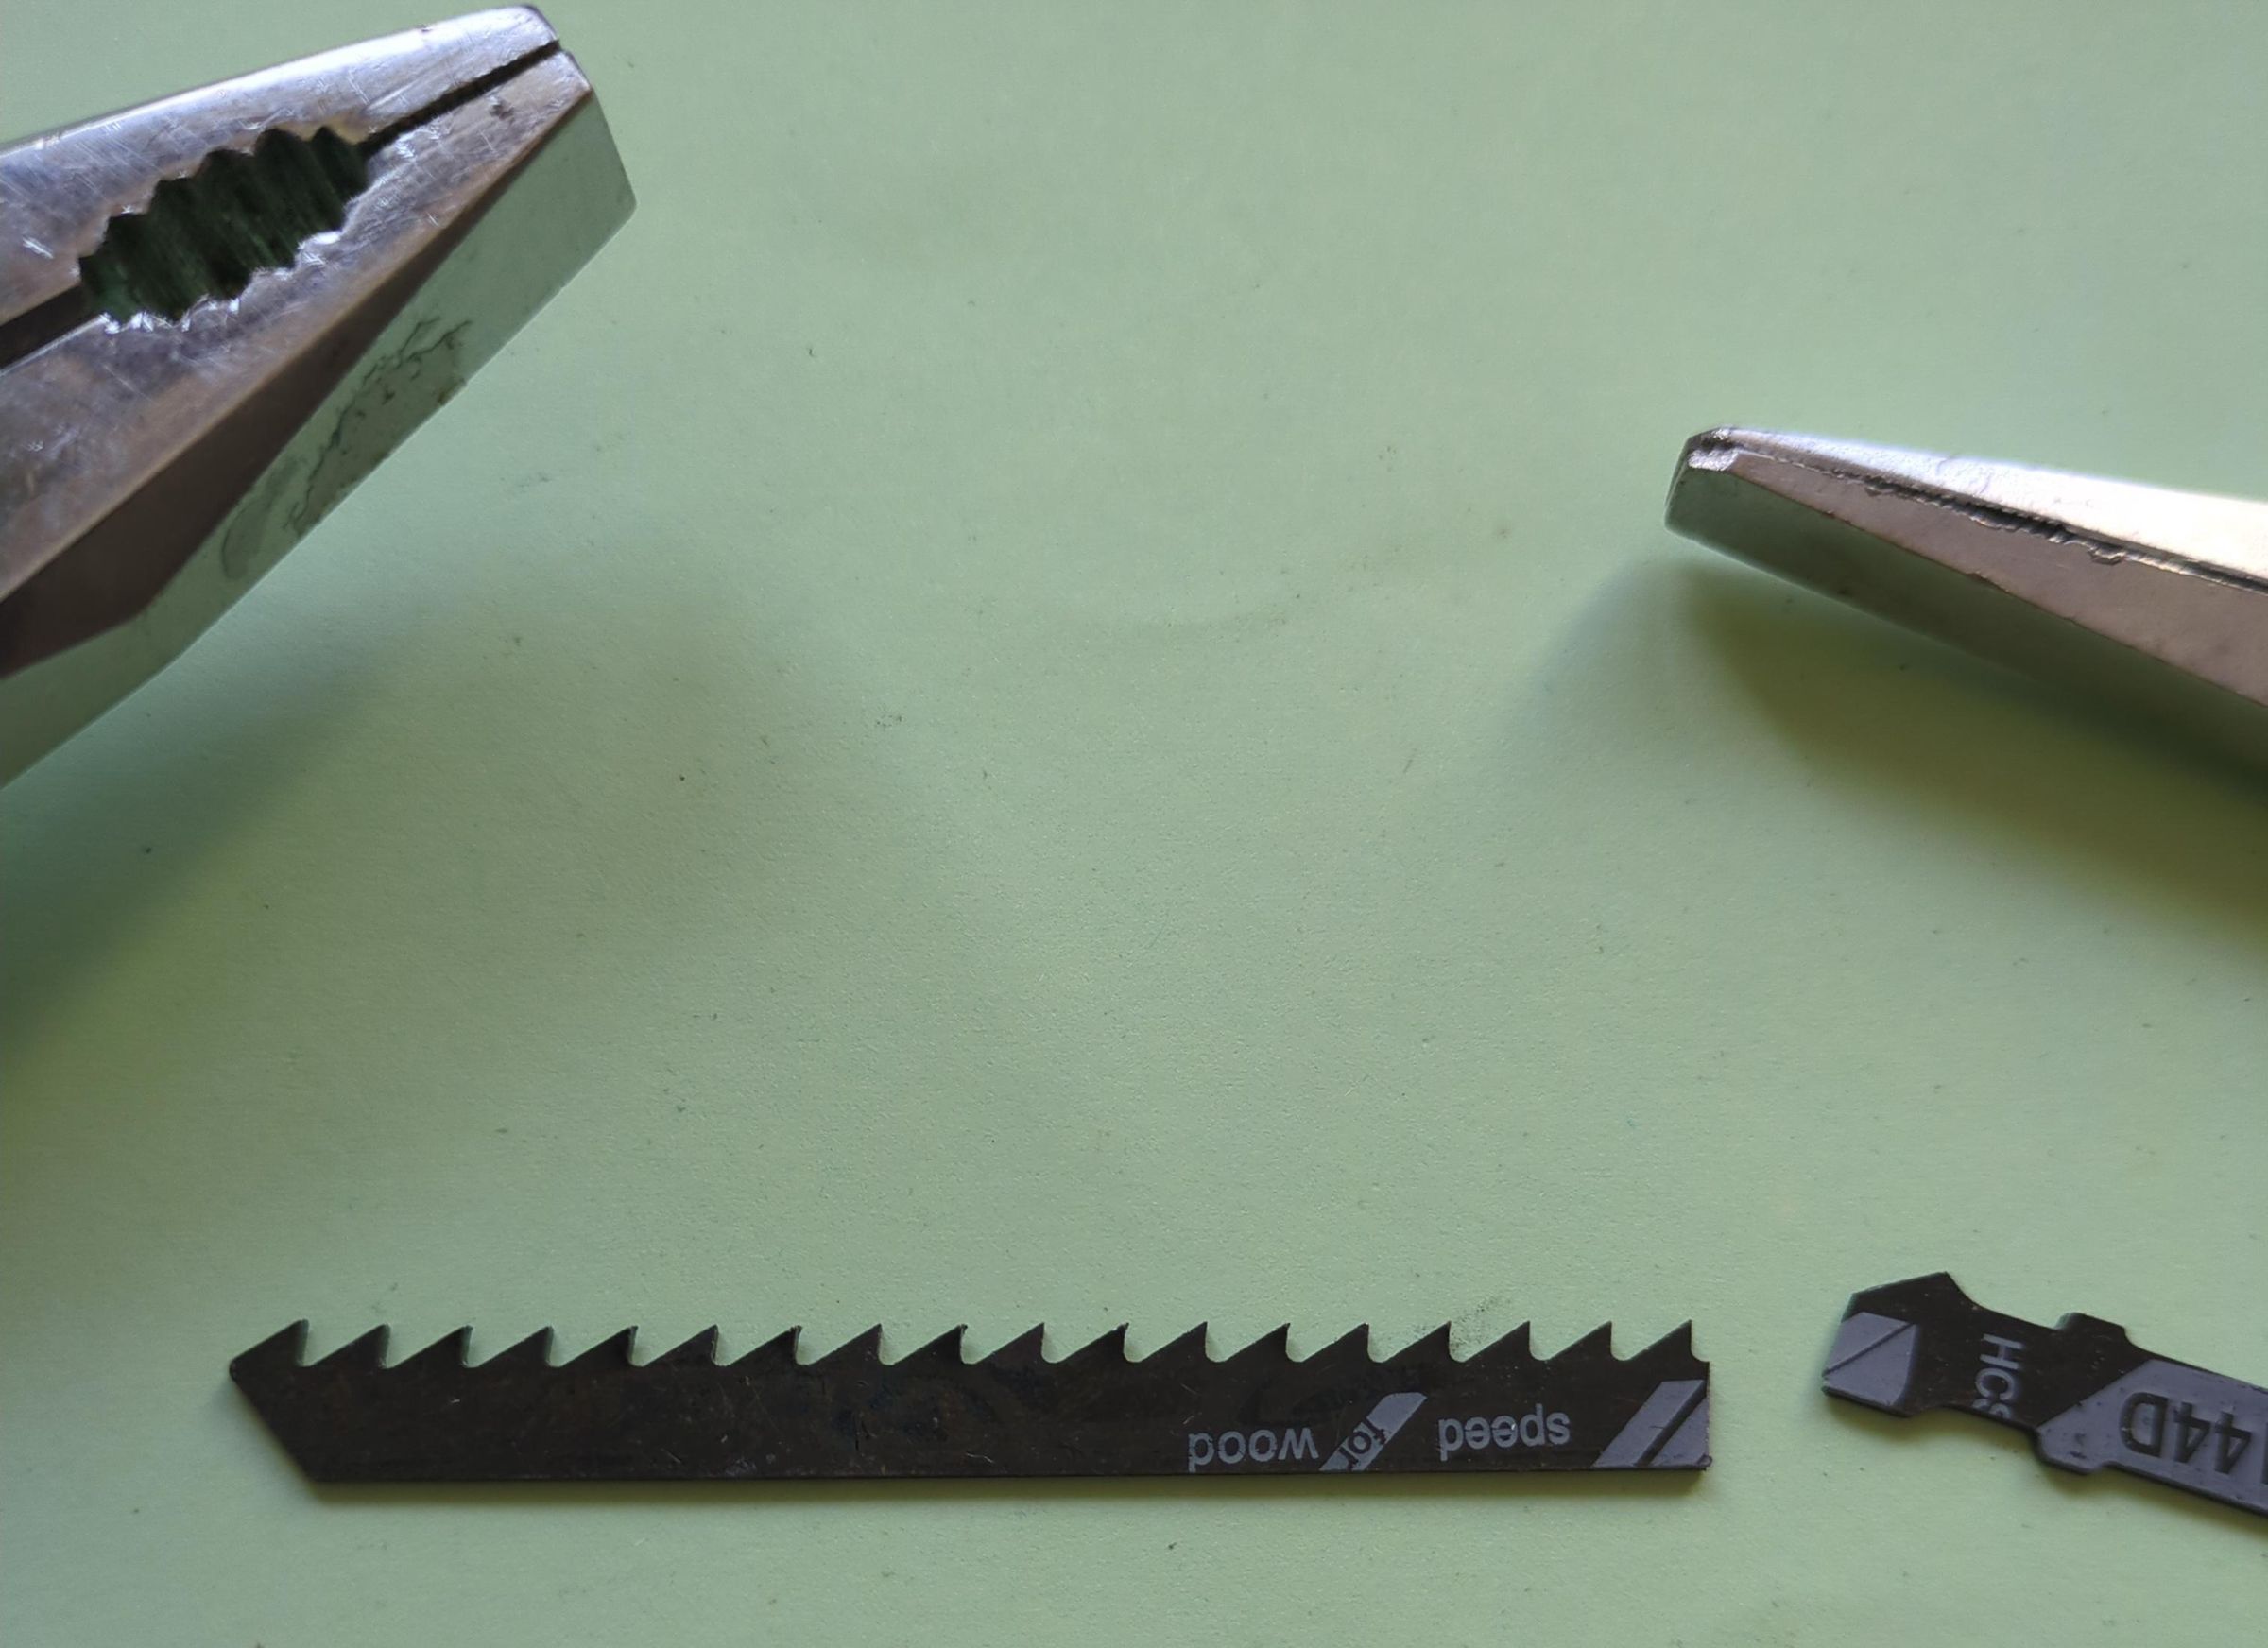
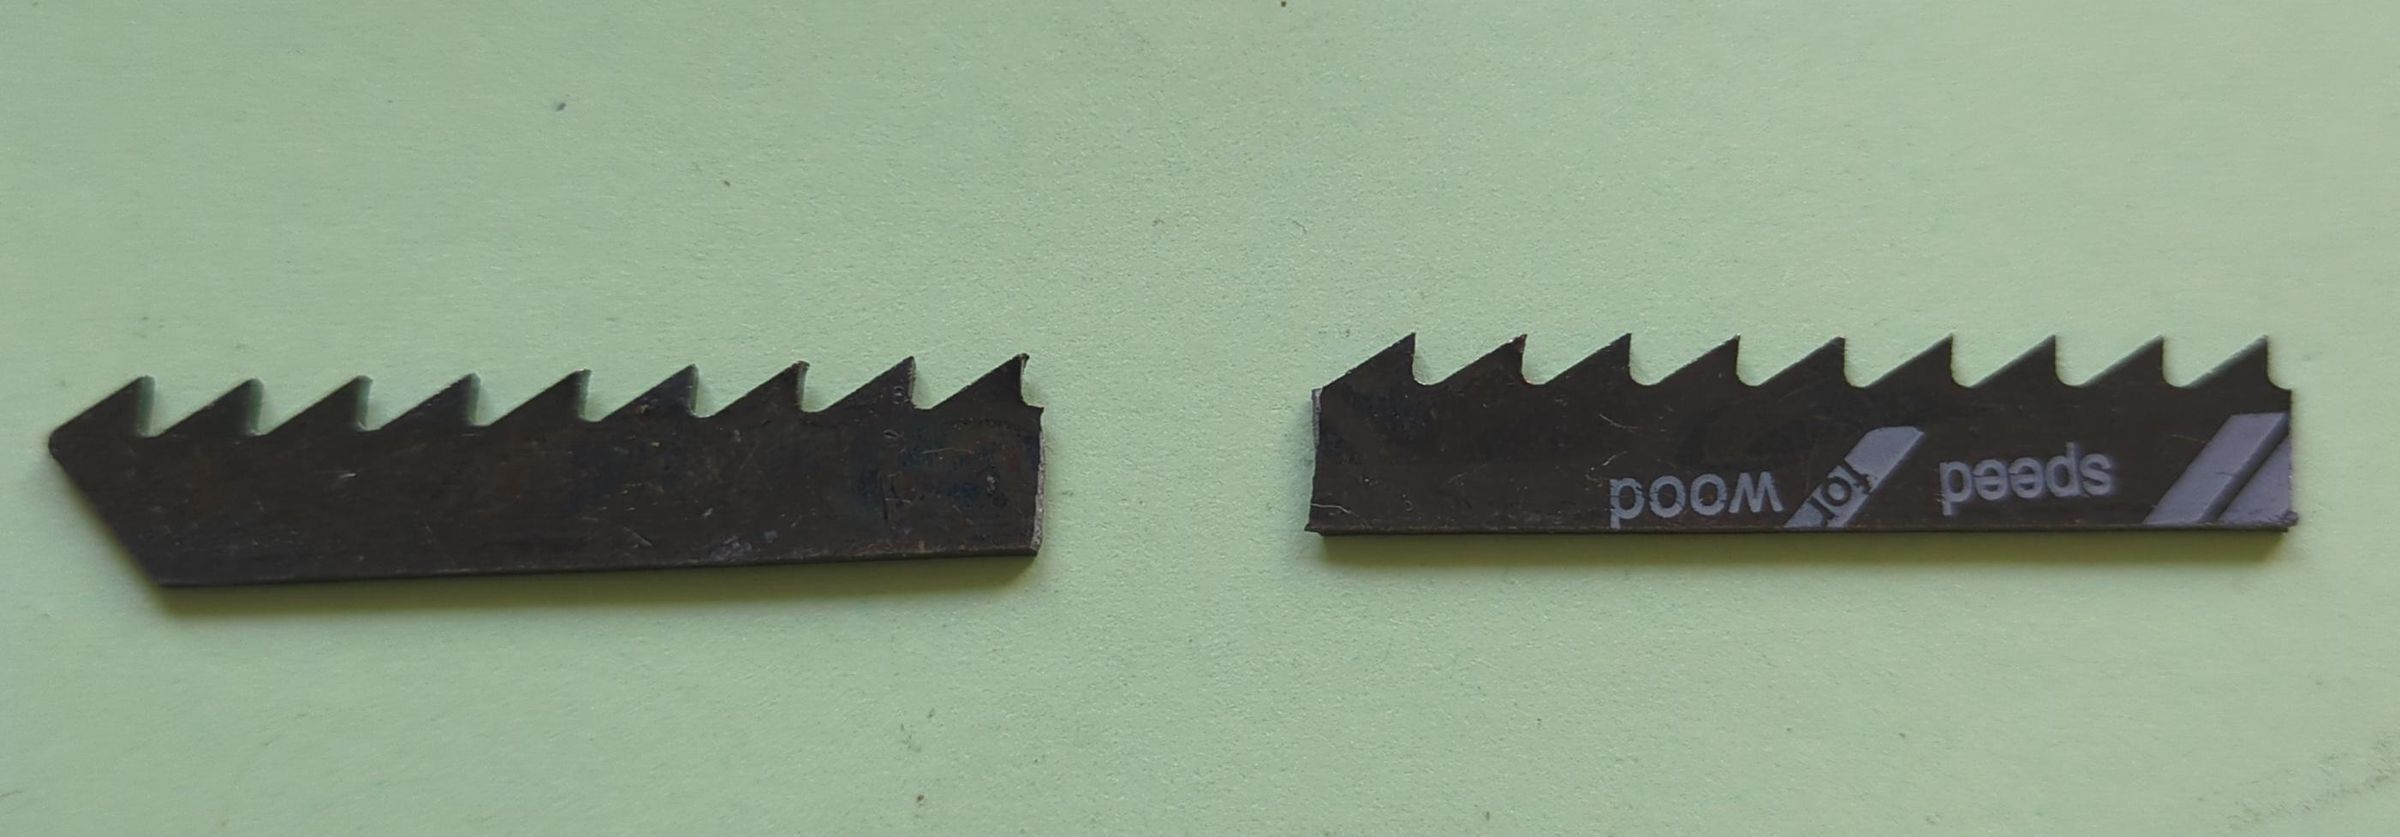
Take a wood-cutting jigsaw blade and remove the handle, keeping only the toothed section.
Cut the remaining blade in half.
Tip: These blades are made of hardened steel, so they can be easily snapped with pliers.
Repeat with another blade to obtain four half-blades.
Prepare the Center Blade
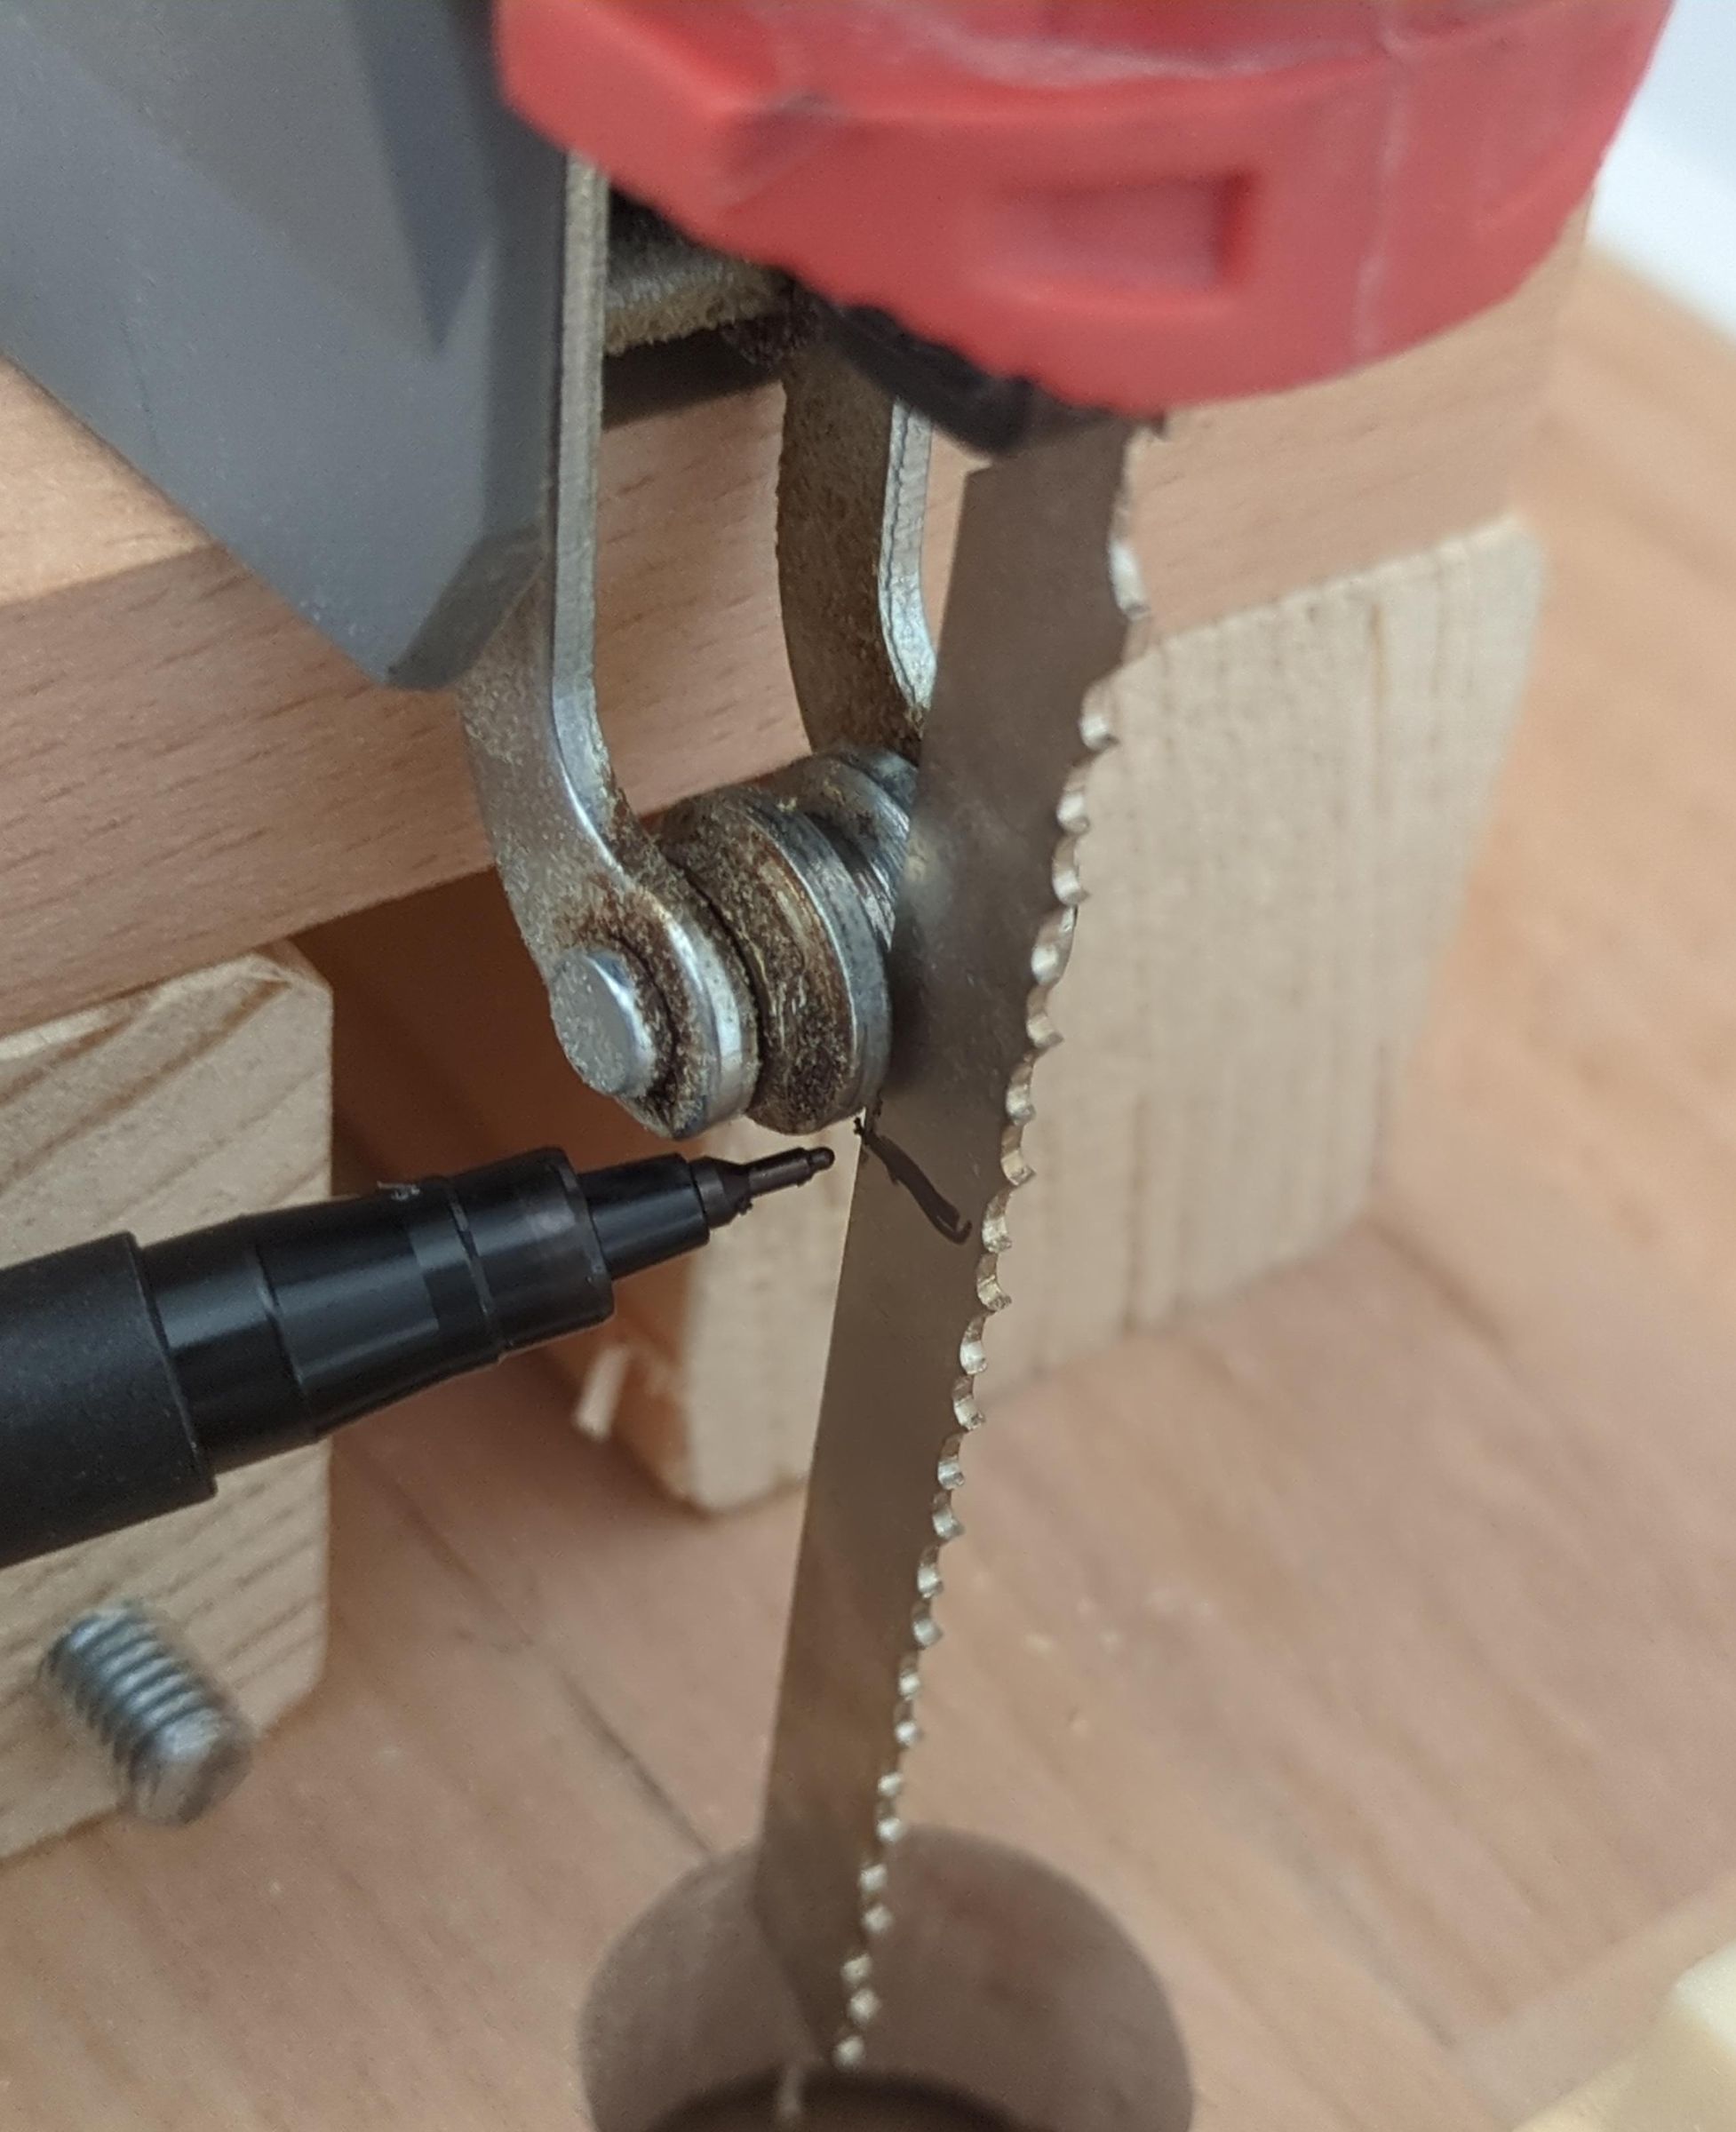
Determine the position of the jigsaw’s guide when the blade is fully raised.
Mount the blade, raise the connecting rod to the top, and mark the guide’s position. This is where the side blades will be attached.
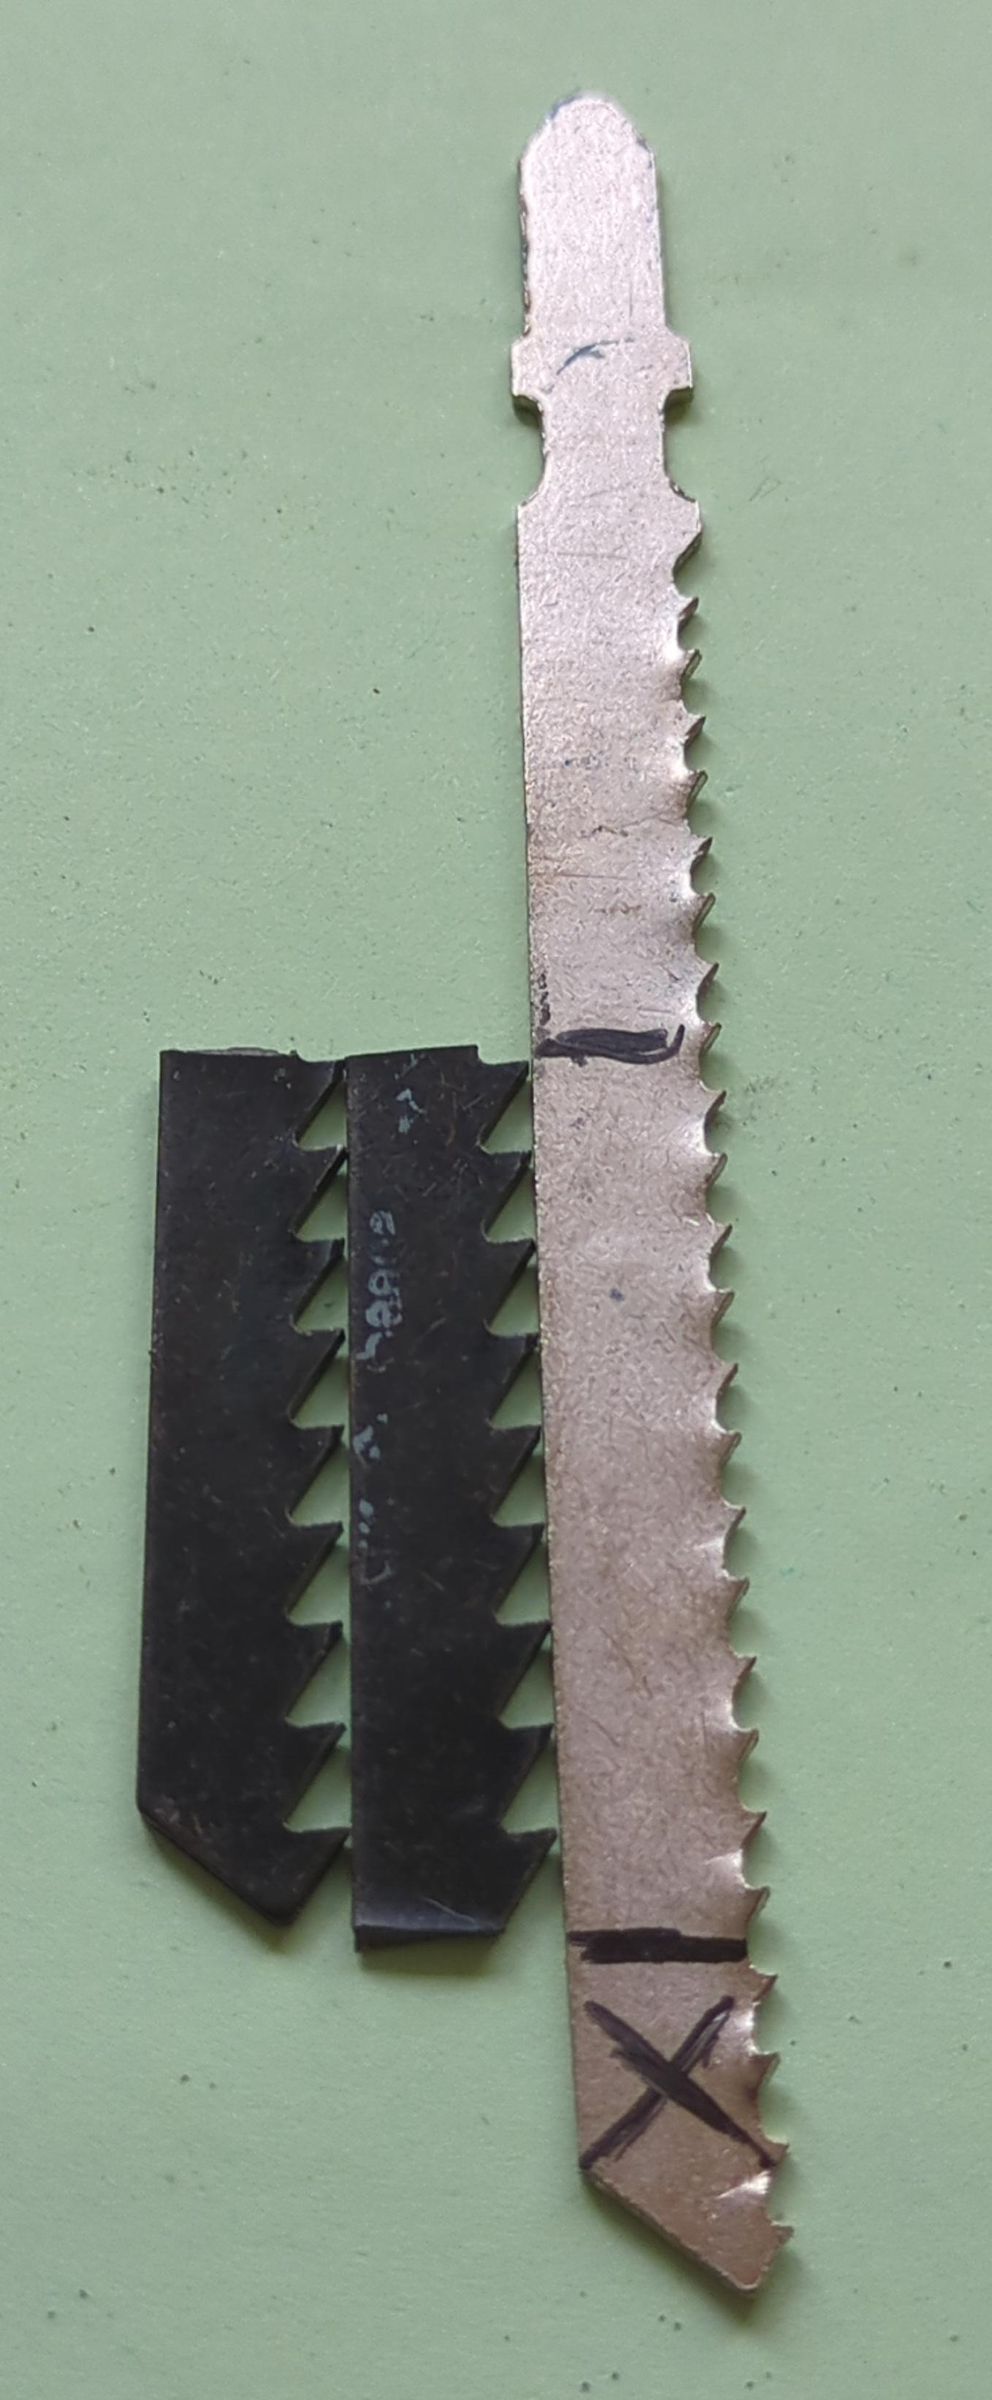
Trim any excess from the center blade.
Glue Everything Together
Sand the blades thoroughly to remove paint, oil, and create a rough surface for better adhesion.
Glue the four half-blades around the center blade using epoxy (the best adhesive for this purpose).
Tips: If the center blade’s teeth point upward, glue the side blades with teeth pointing downward.
For a smoother cut, slightly offset the side blades so the teeth are misaligned.
While the epoxy cures, keep the stack under pressure using a vise or strong clamp.
Ensure the blades remain perfectly aligned.
Prepare the Linear Stage
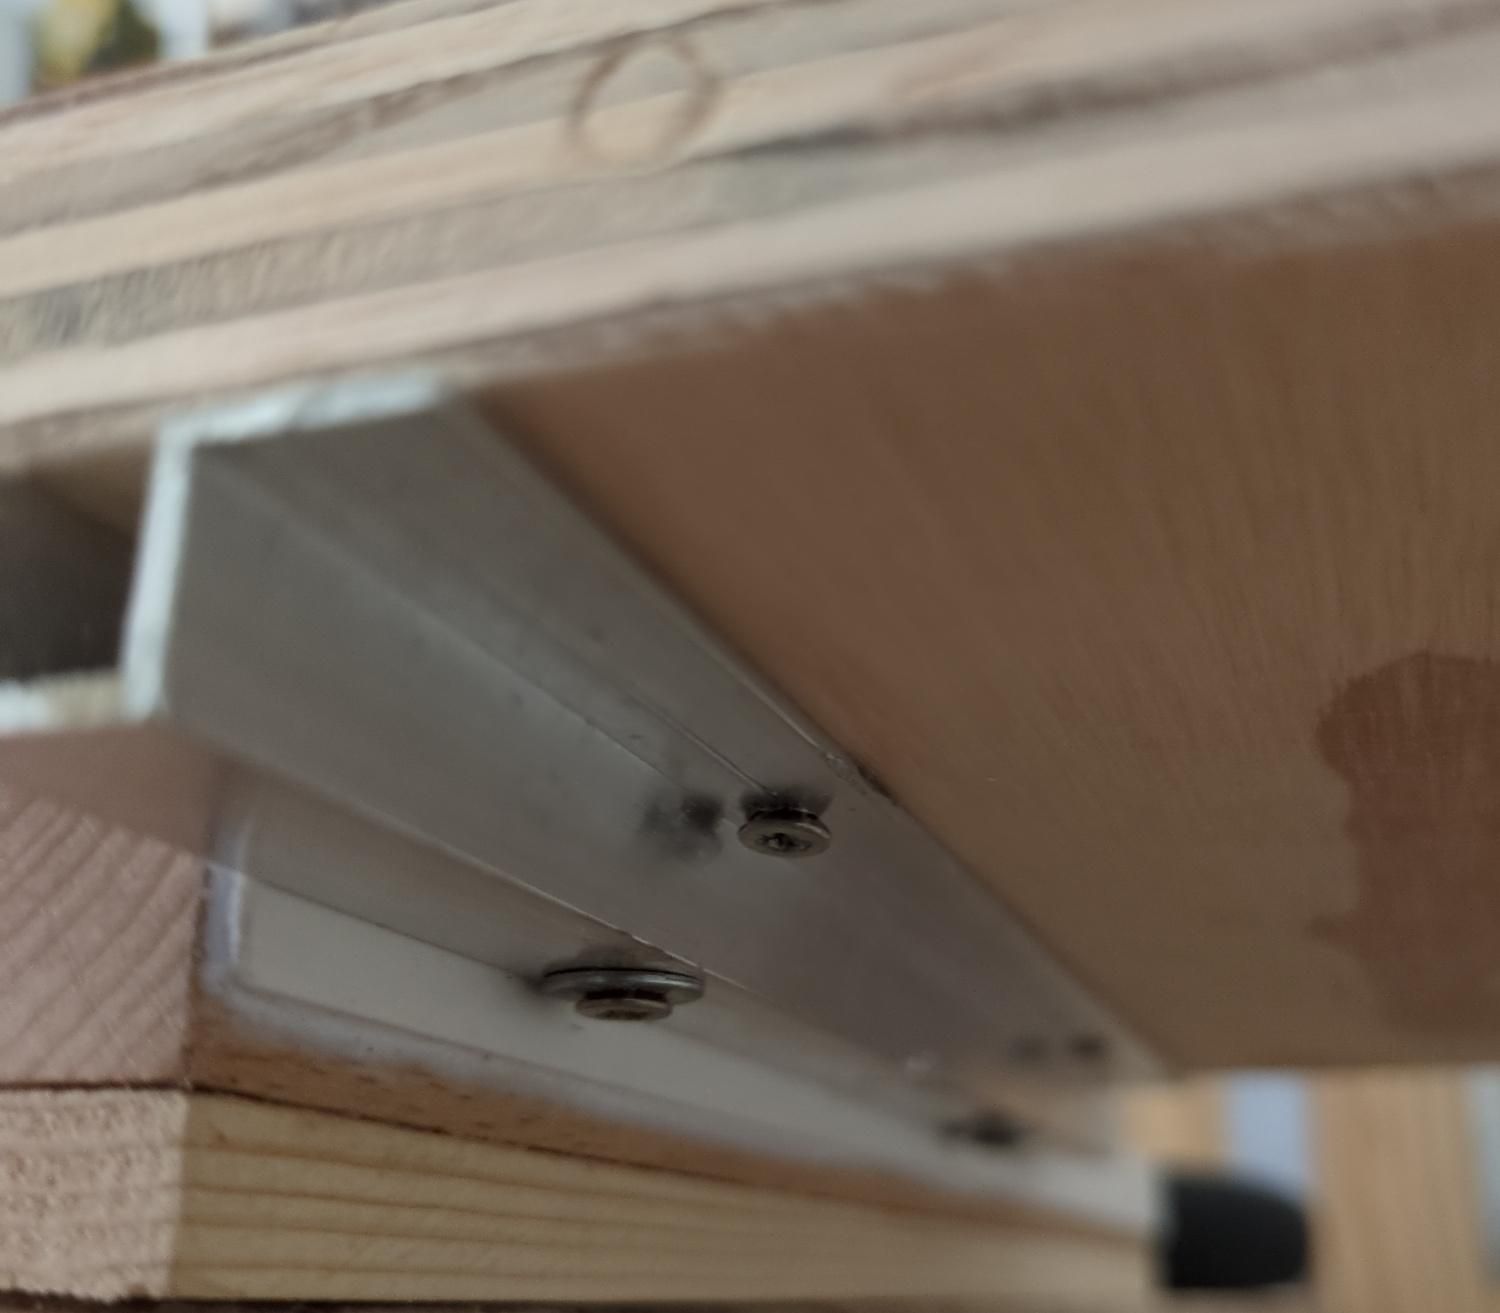
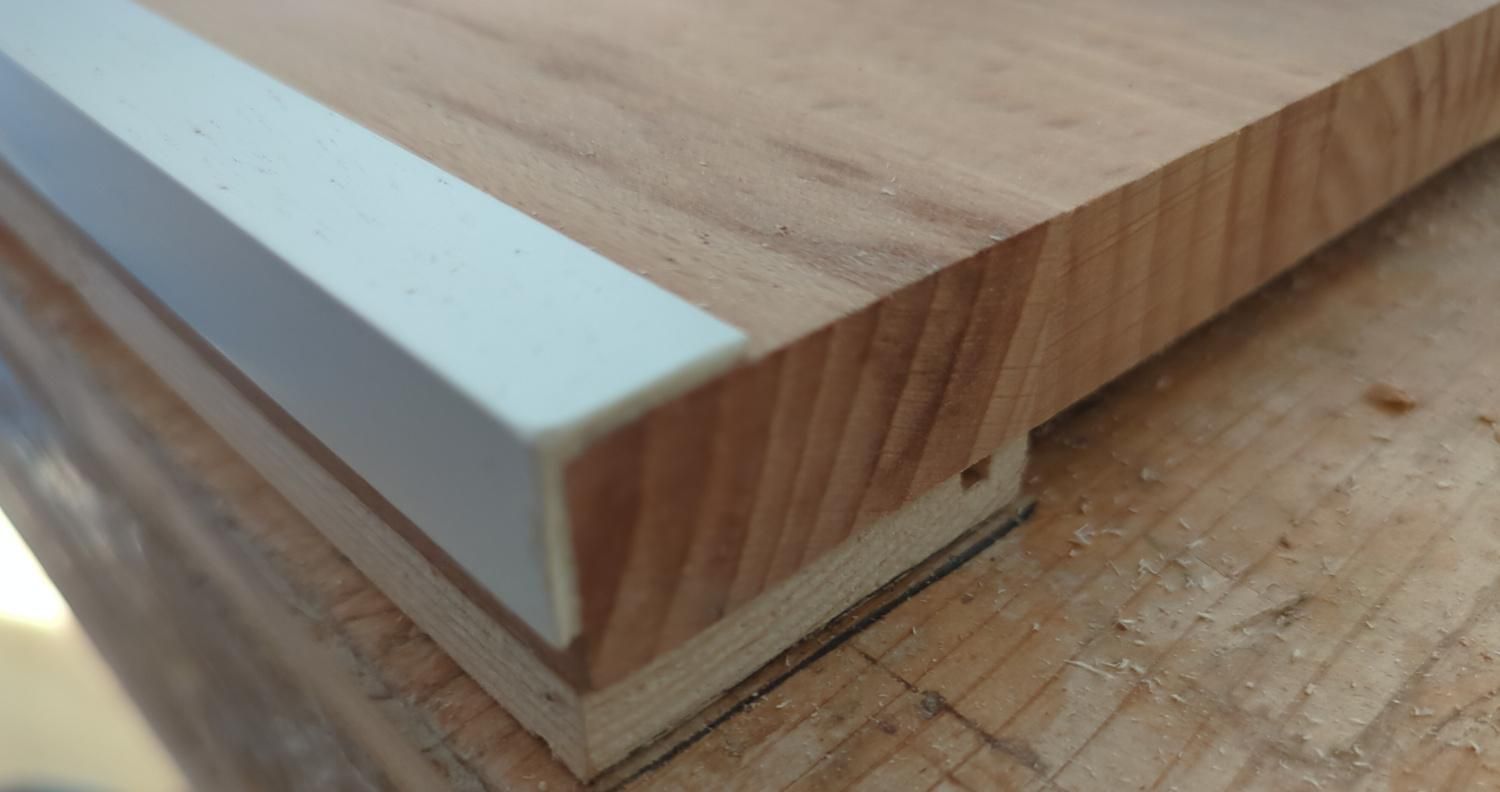
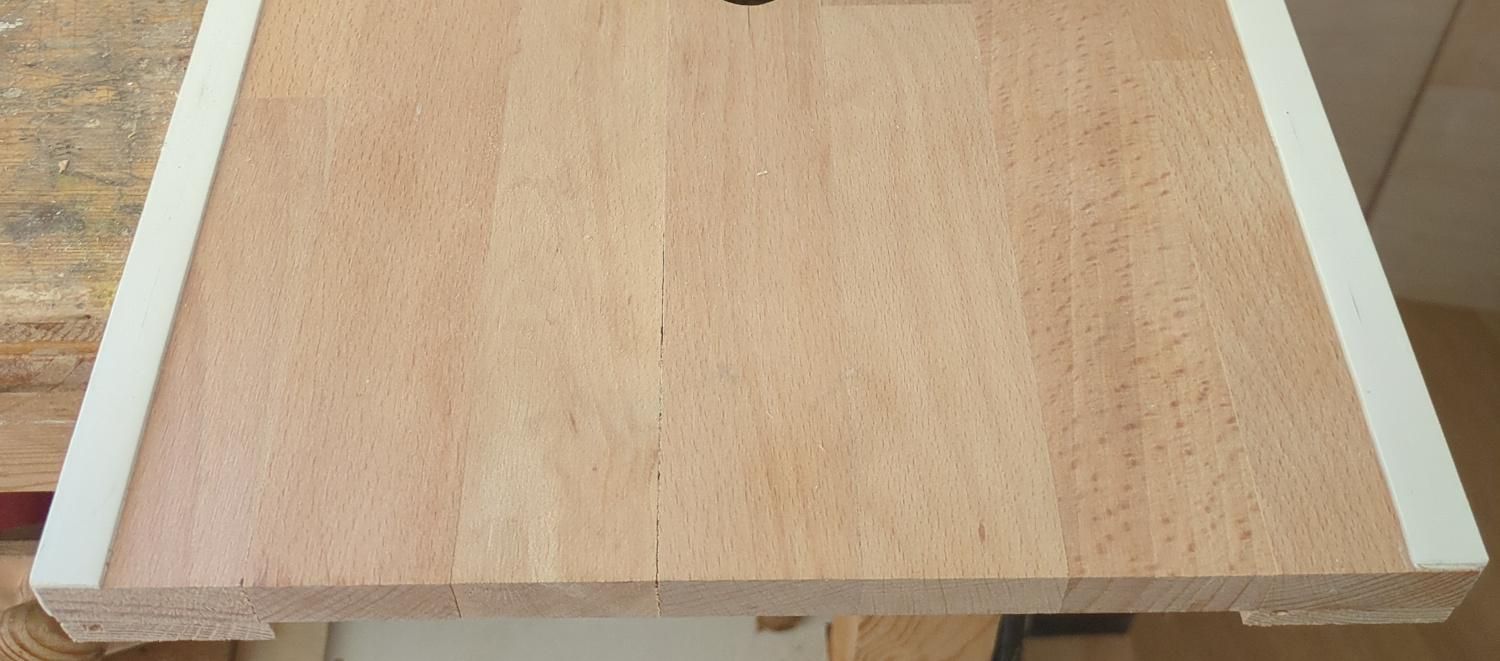
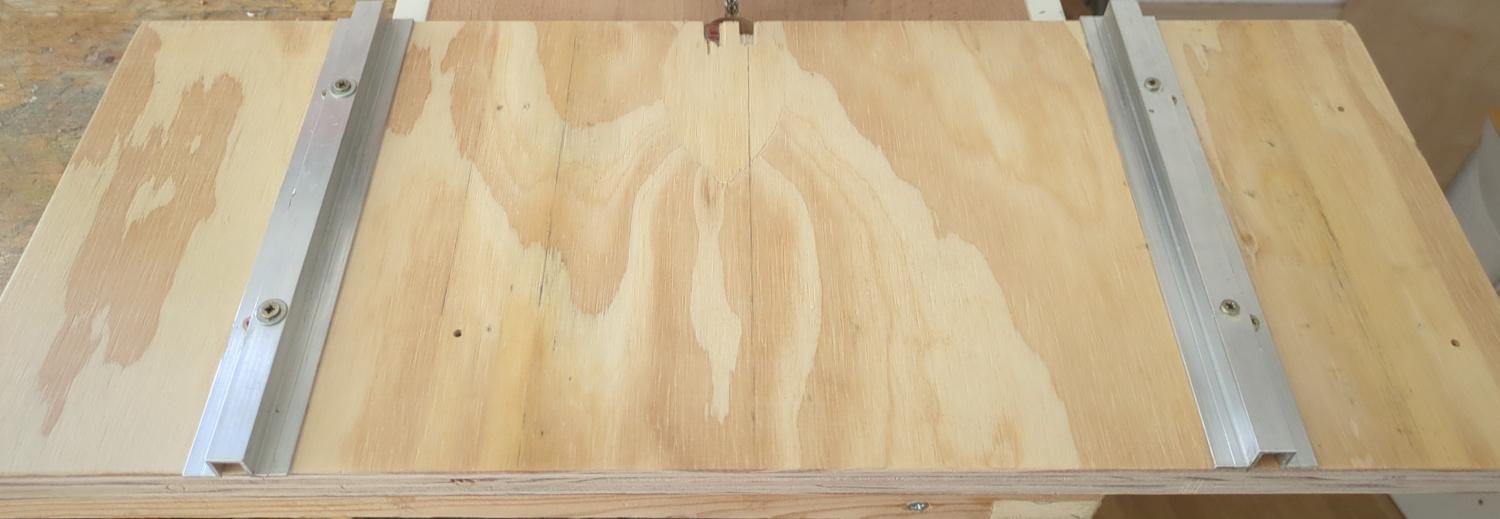
The goal is now to make a rudimentary single-axis linear stage. Use the 300×300 mm board as a base (with clean, parallel edges). Glue L-shaped plastic or aluminum profiles along the two parallel edges using mounting glue. This ensures smooth sliding during operation.
Glue wood strips to the bottom to slightly raise the base, creating clearance for bolts.
The moving stage will be the 500×200 mm board. Screw on profiles so their inner sides fit snugly against the base’s edges. The fit must be tight to keep the stage parallel to the base.
Prepare the Jigsaw
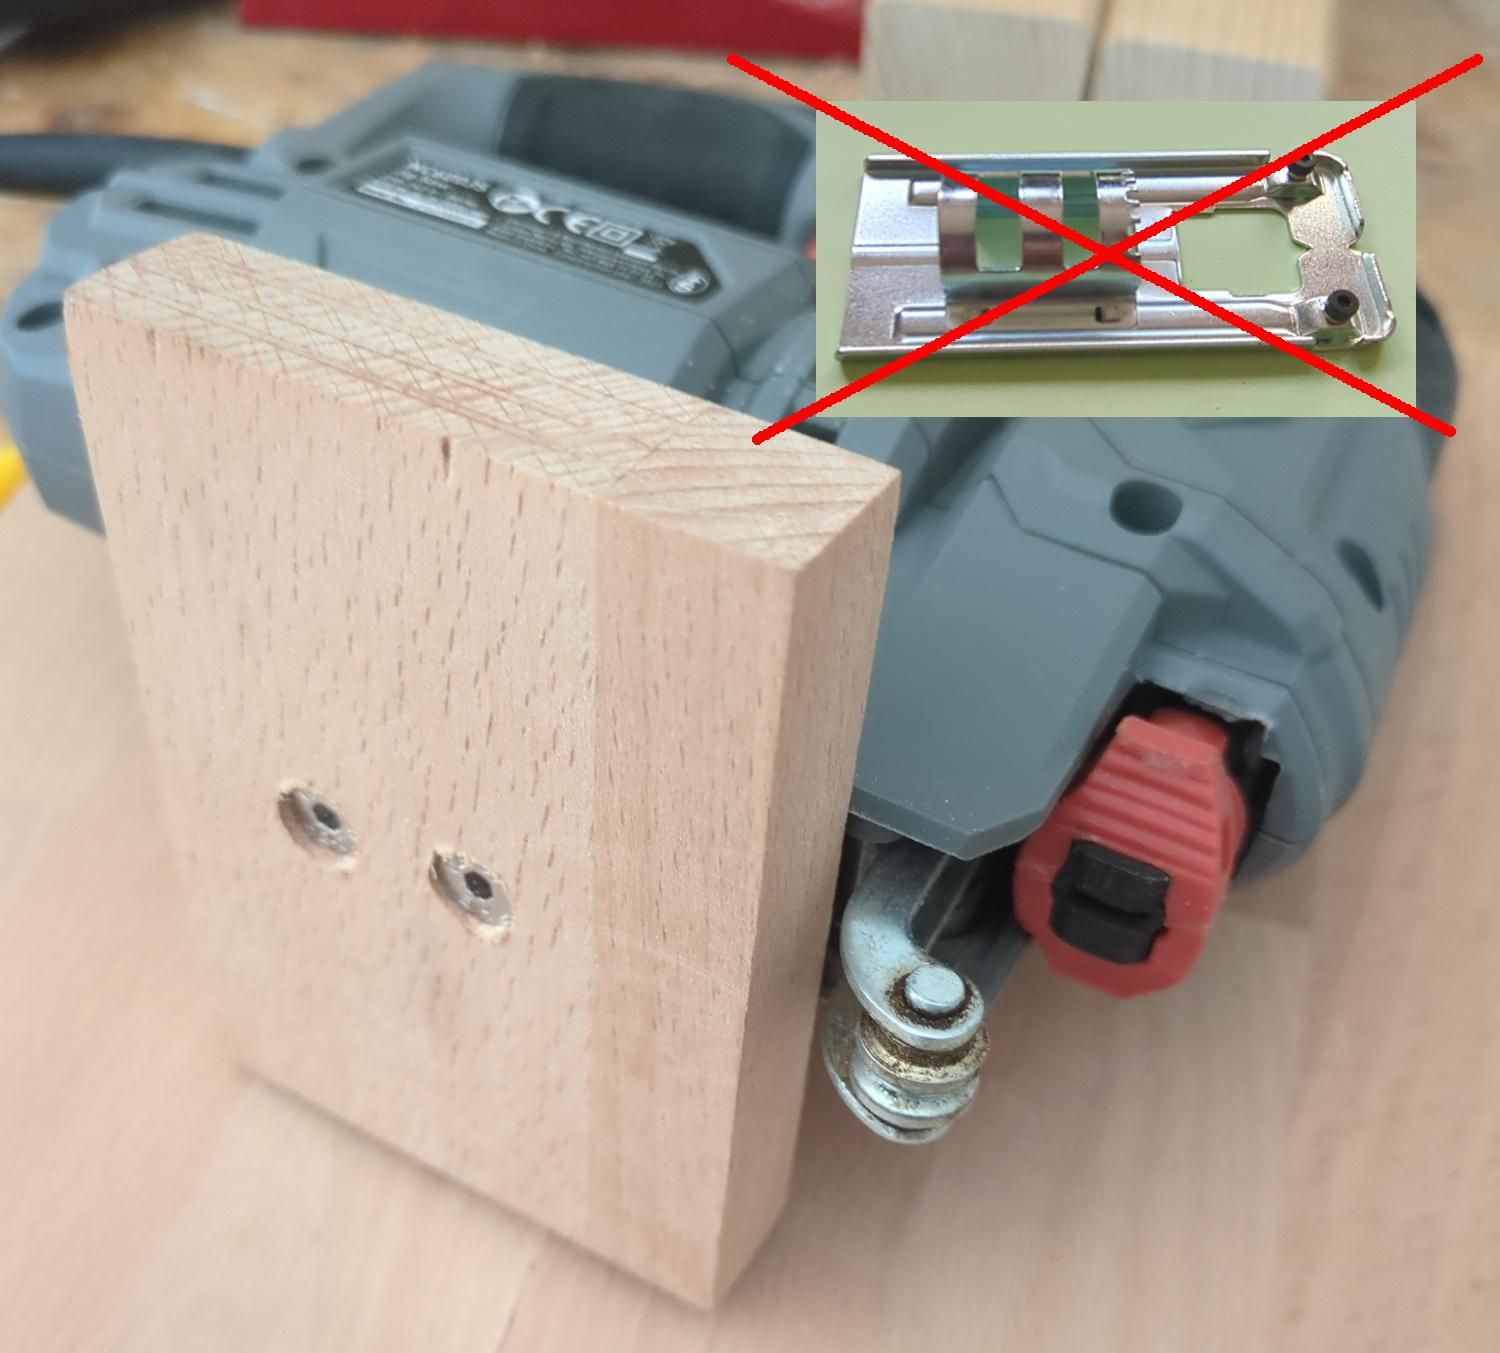
Remove the jigsaw’s foot—it will not be used.
Prepare a sturdy wooden base (e.g., 70×100×20 mm beech) to mount the jigsaw. Any similar size will work, as long as there’s enough space for side bolts.
Securely screw the jigsaw to the base using the original foot mounting holes.
Mount the Jigsaw on the Bench
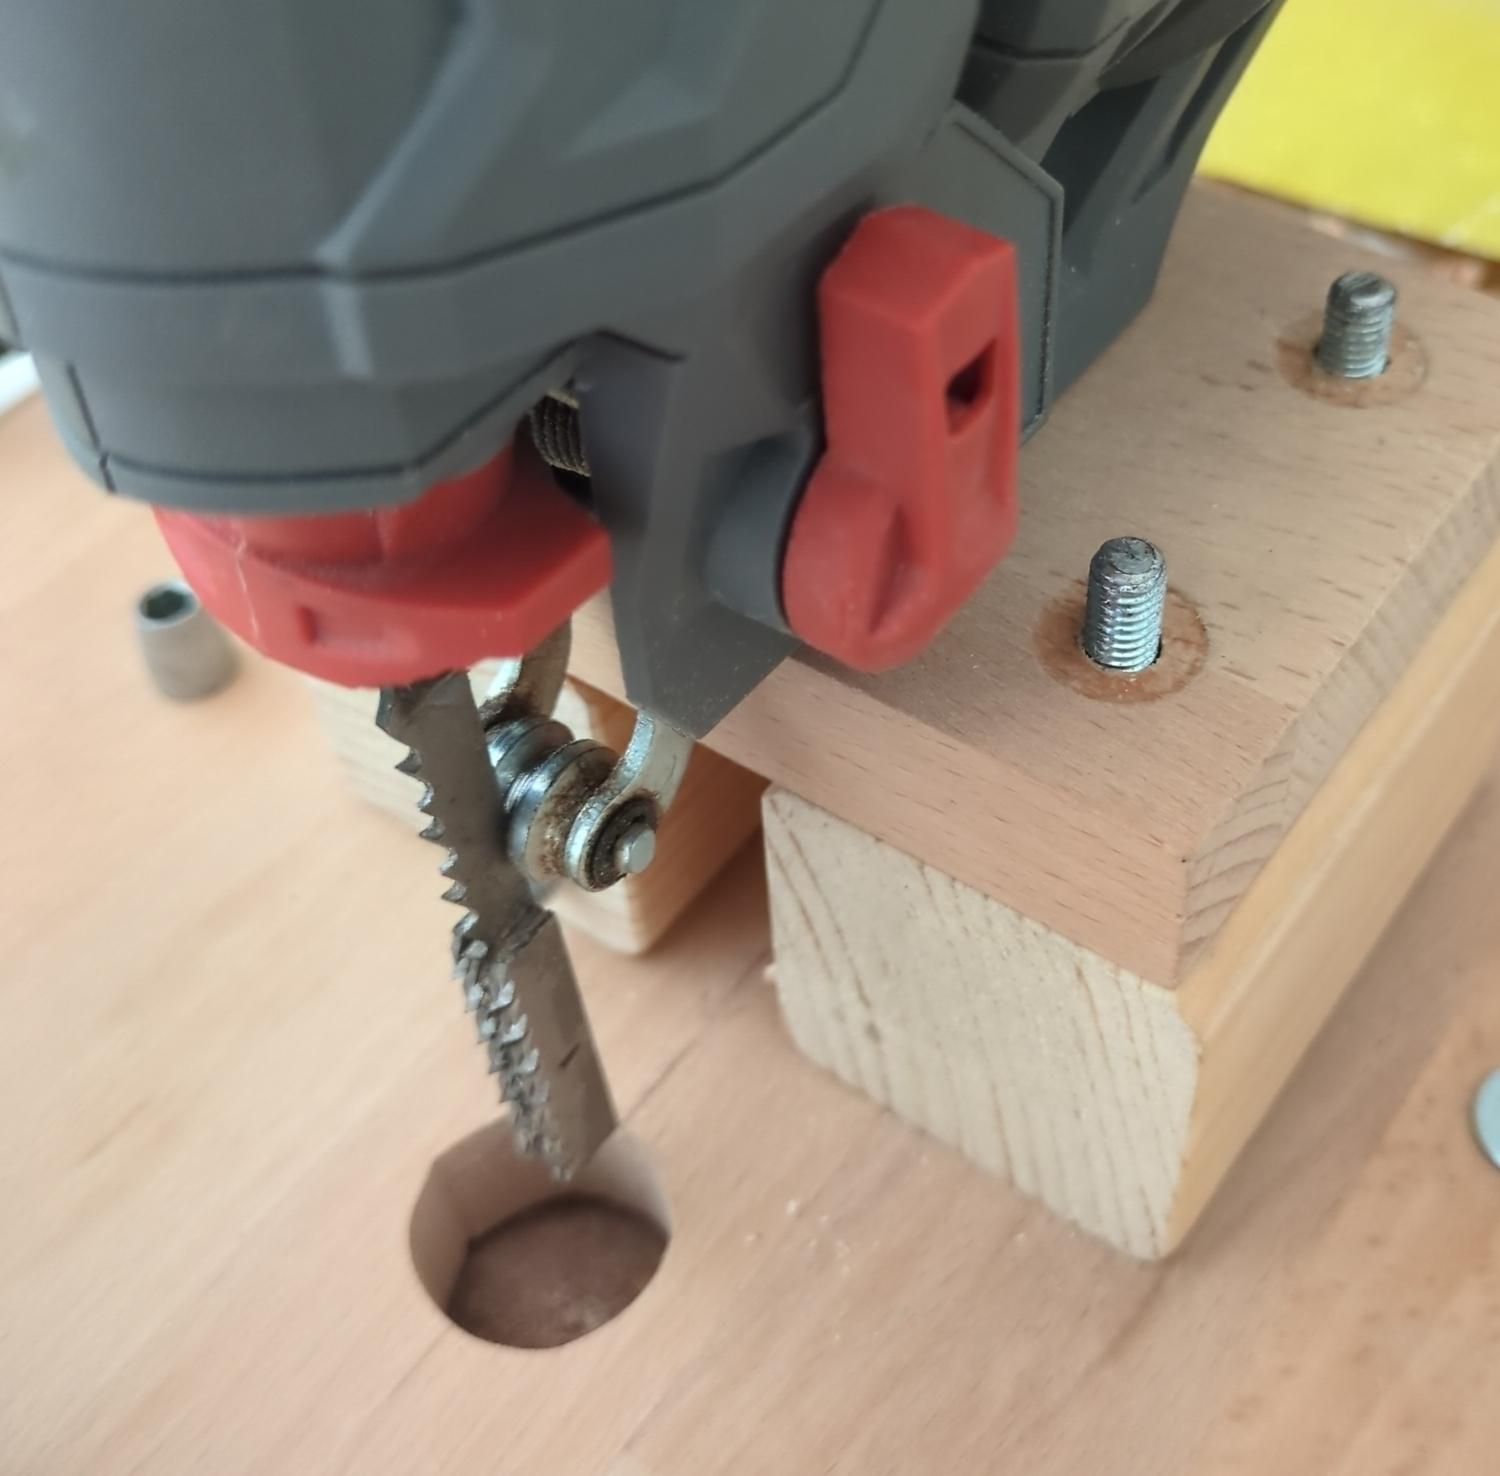
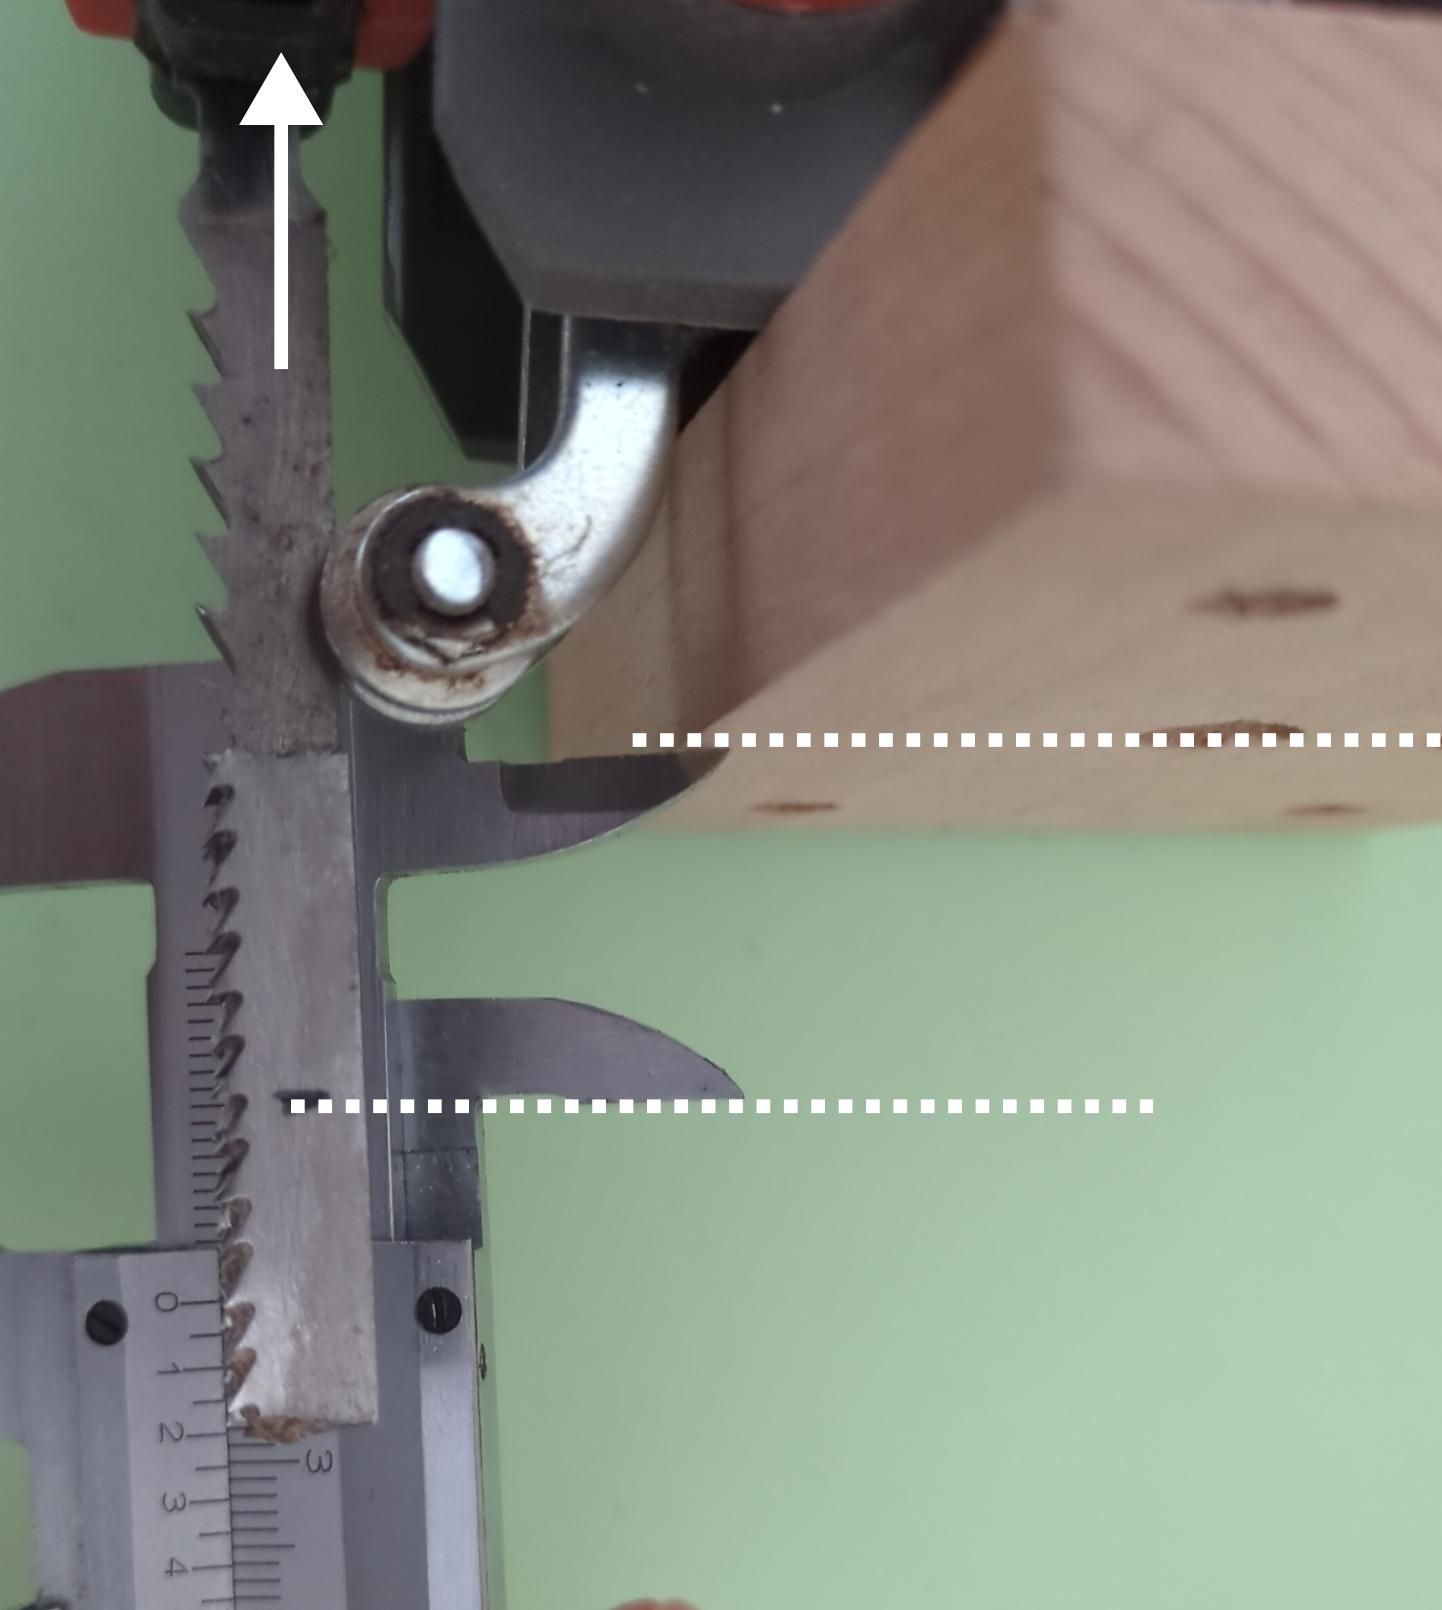
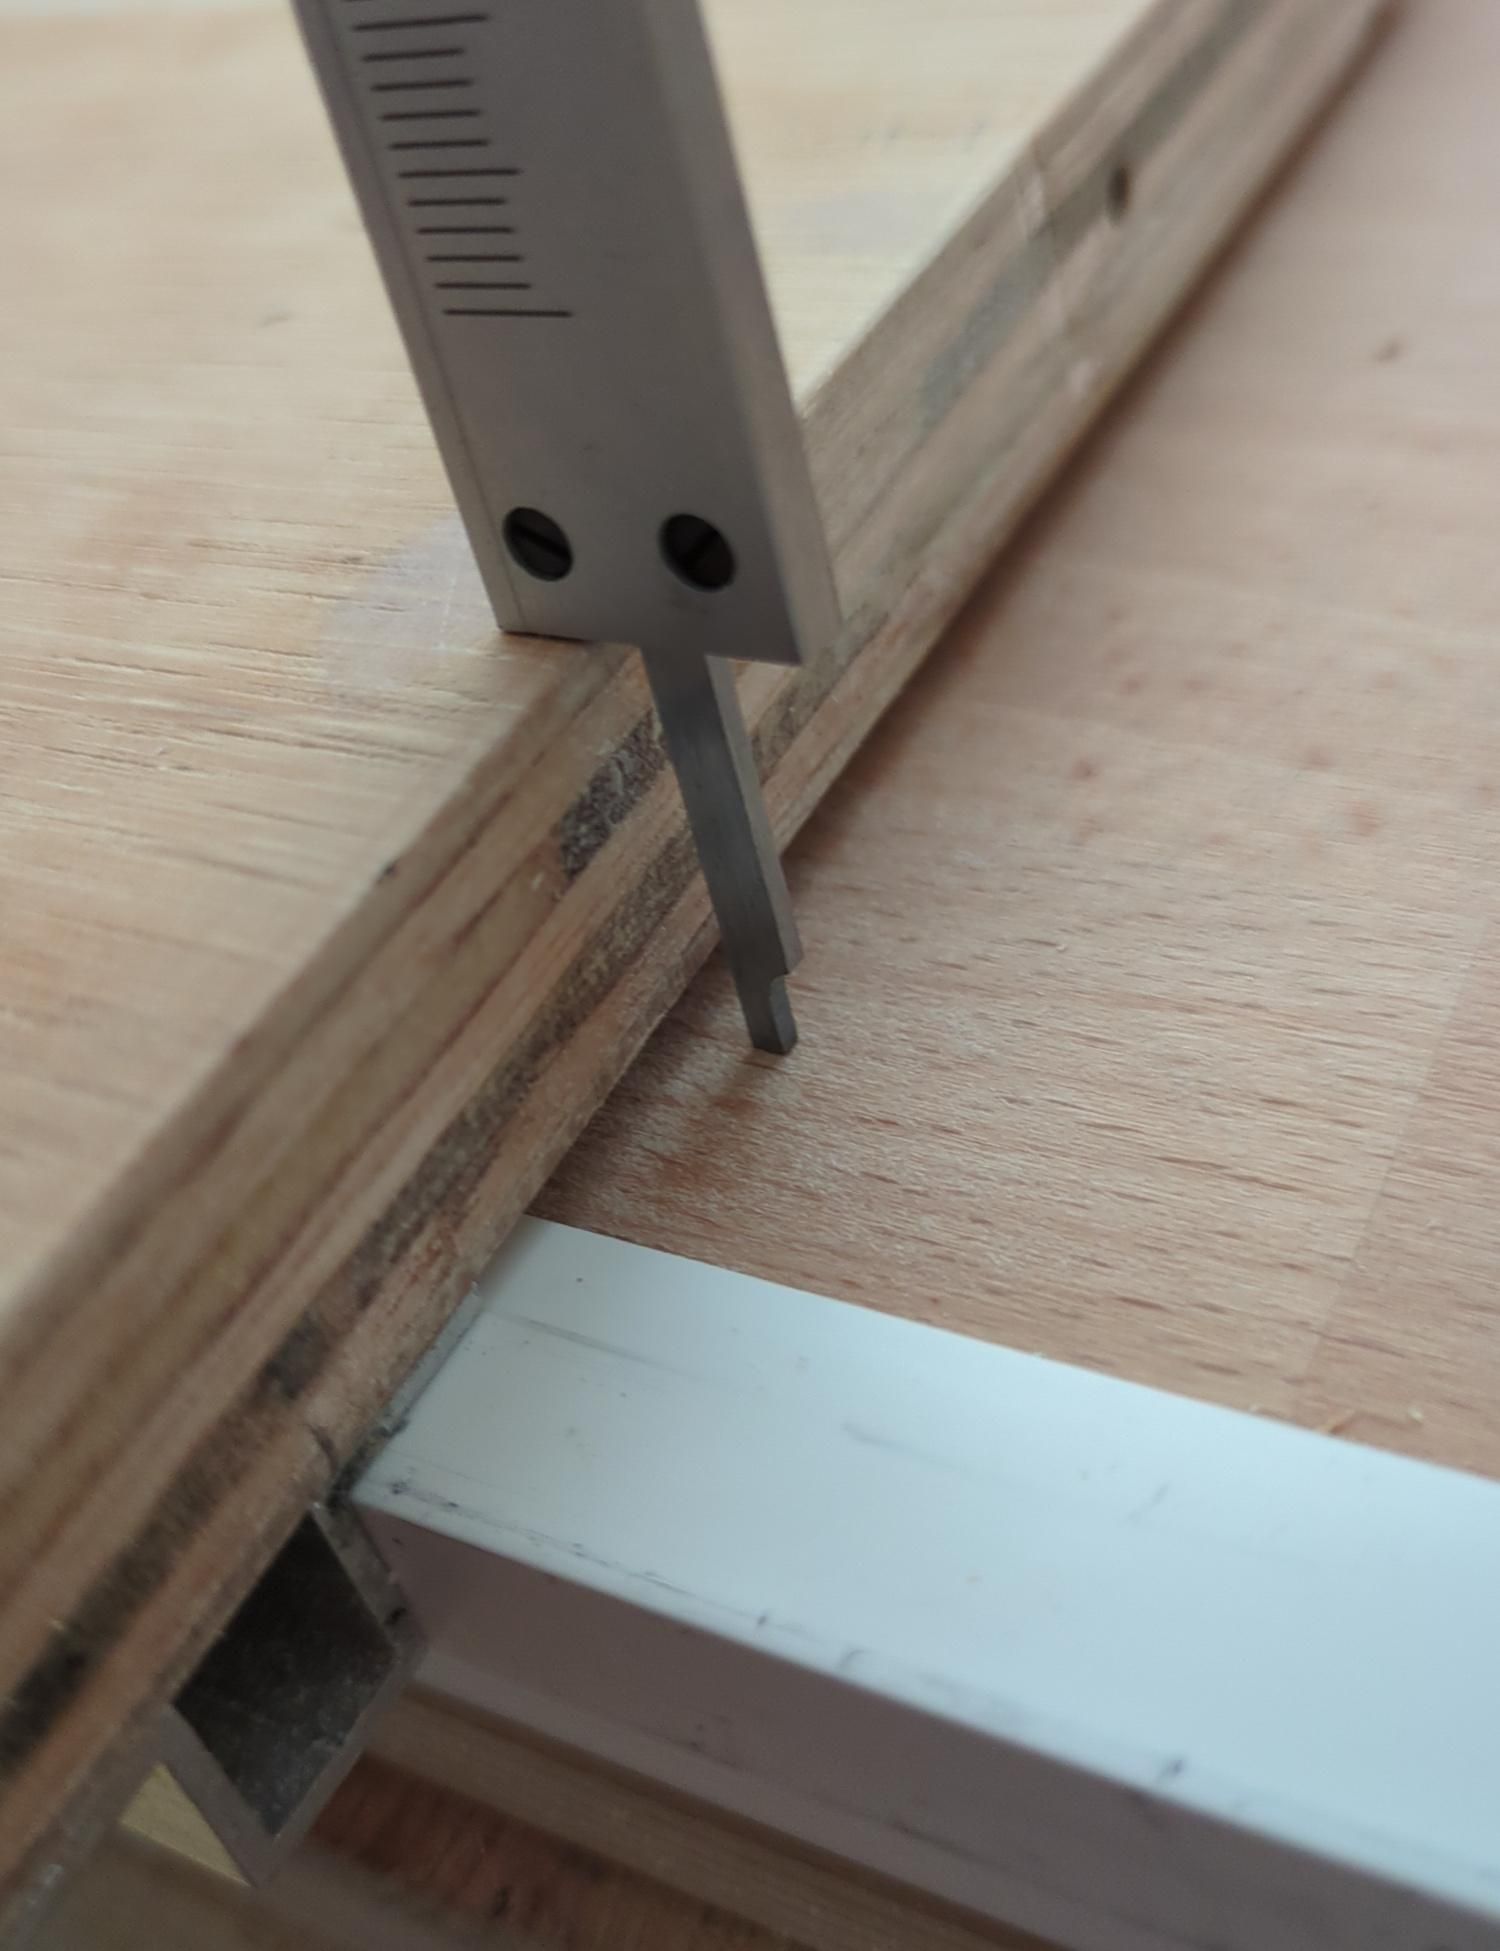
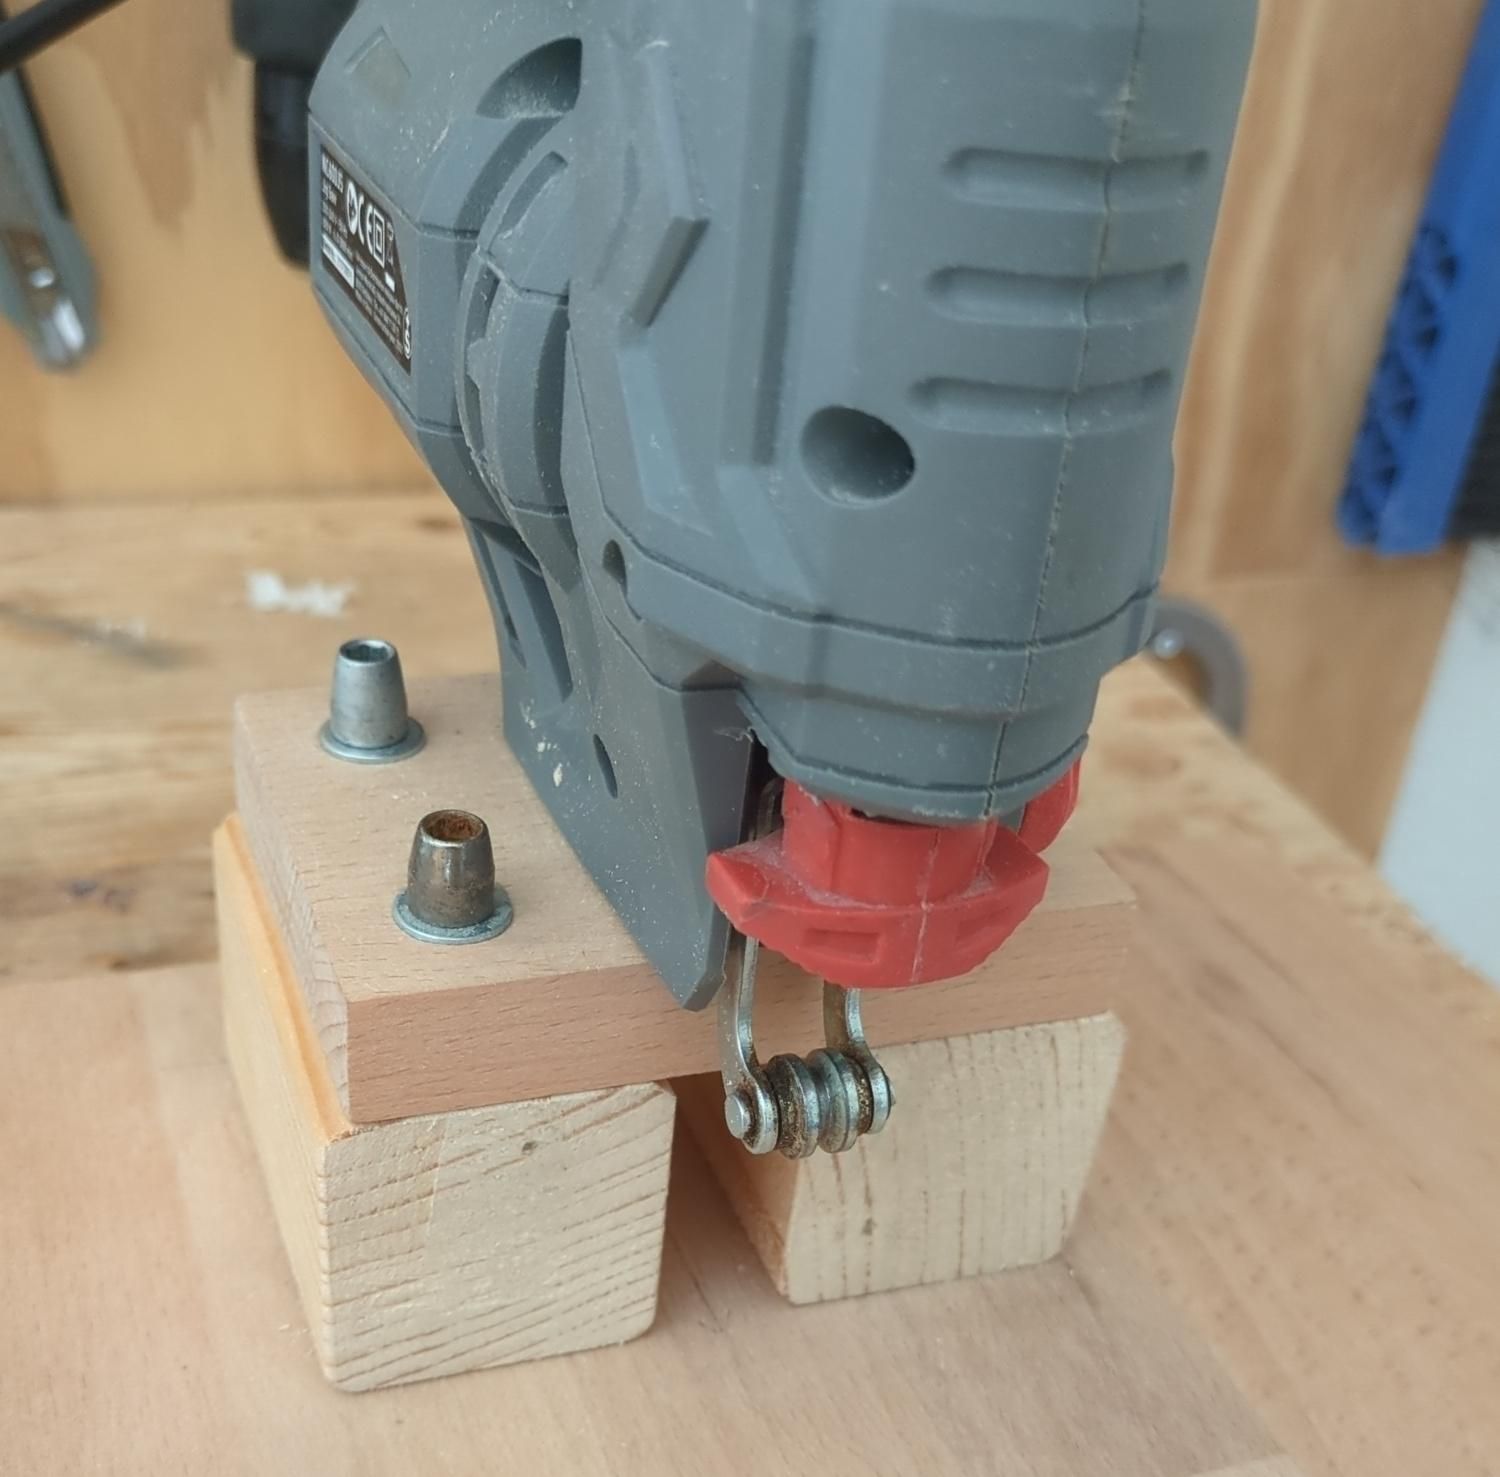
The jigsaw must be mounted at the correct height for proper operation.
With the connecting rod fully raised, measure:
D_blade: Distance from the center of the blade’s thickest part to the bottom of the jigsaw support.
D_base: Distance from the base to the top of the stage.
Mount the jigsaw on supports with a thickness of approximately (D_blade + D_base). For example, if D_blade = 20 mm and D_base = 22 mm, use a 40-45 mm support.
Assemble the machine with the support and base using four threaded rods or long bolts. Ensure it is sturdy enough to handle the jigsaw’s force and vibrations.
Check where the blade rests on the base and drill a hole to avoid obstructing the blade’s movement.
Prepare the Stage
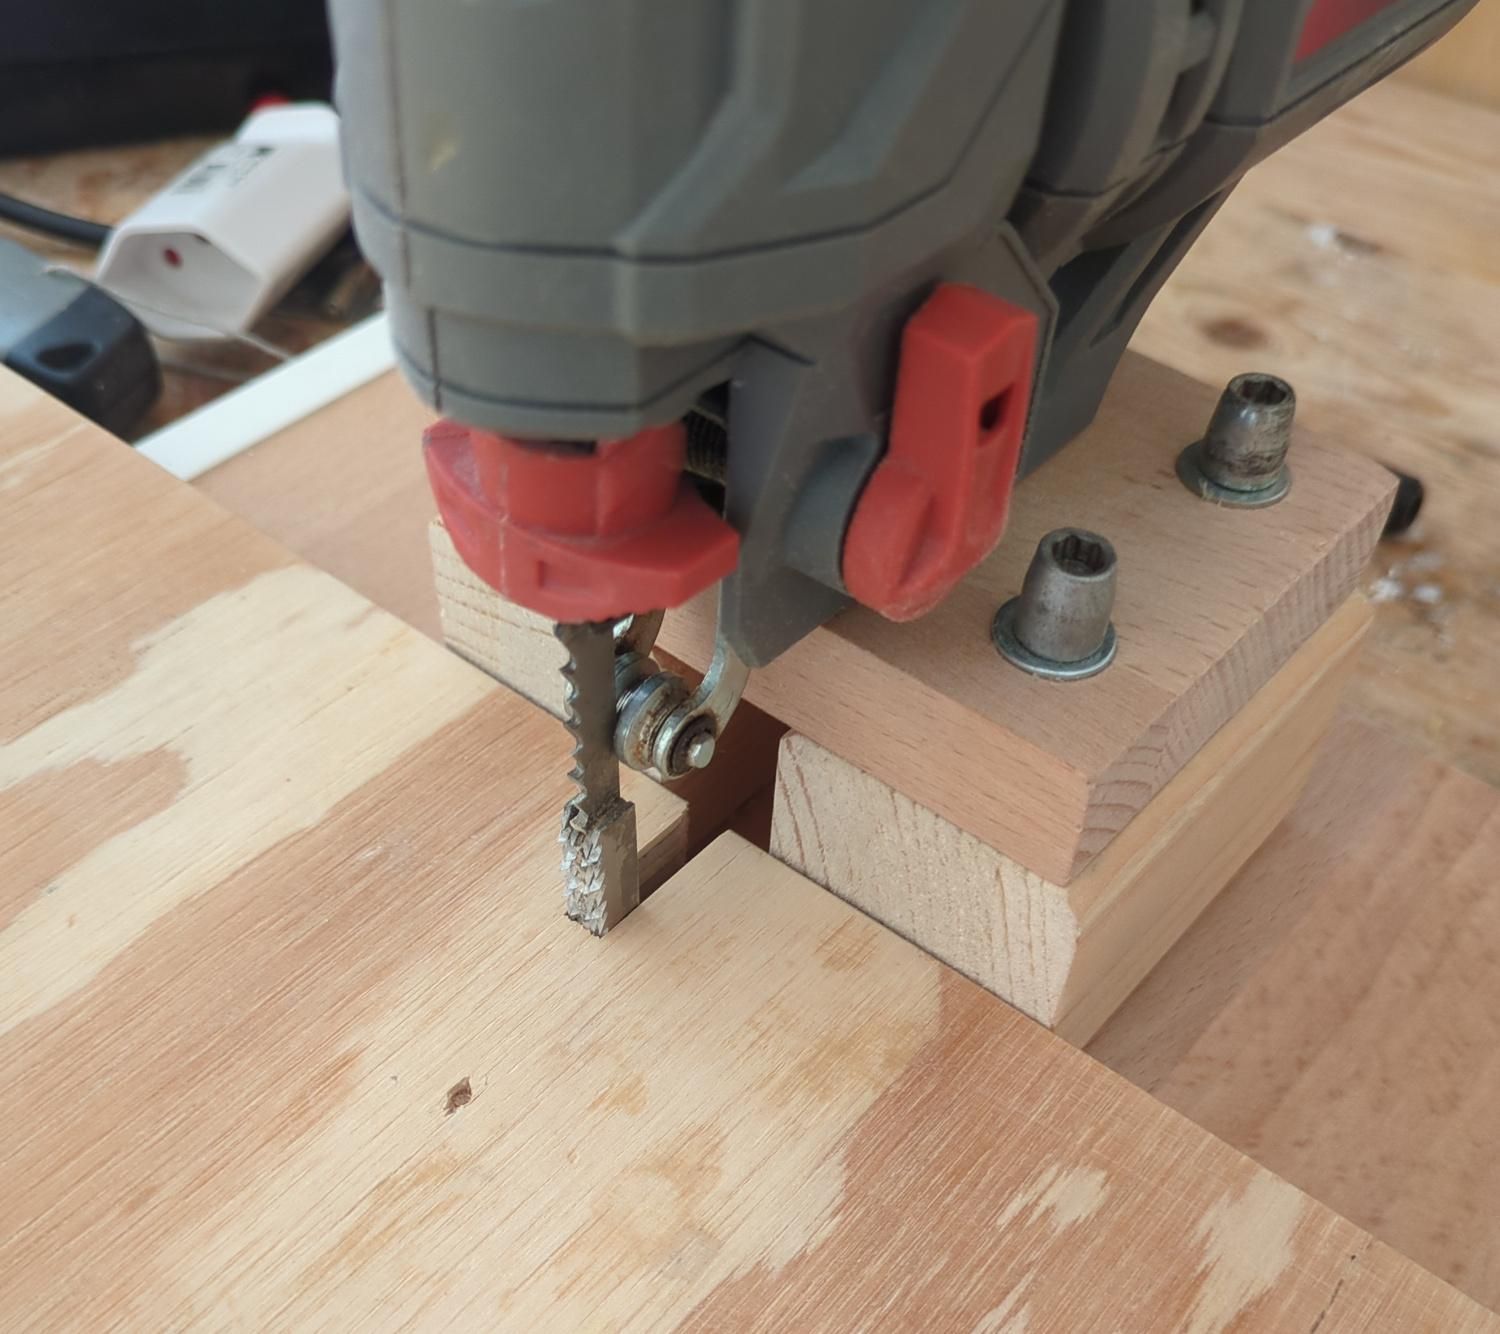
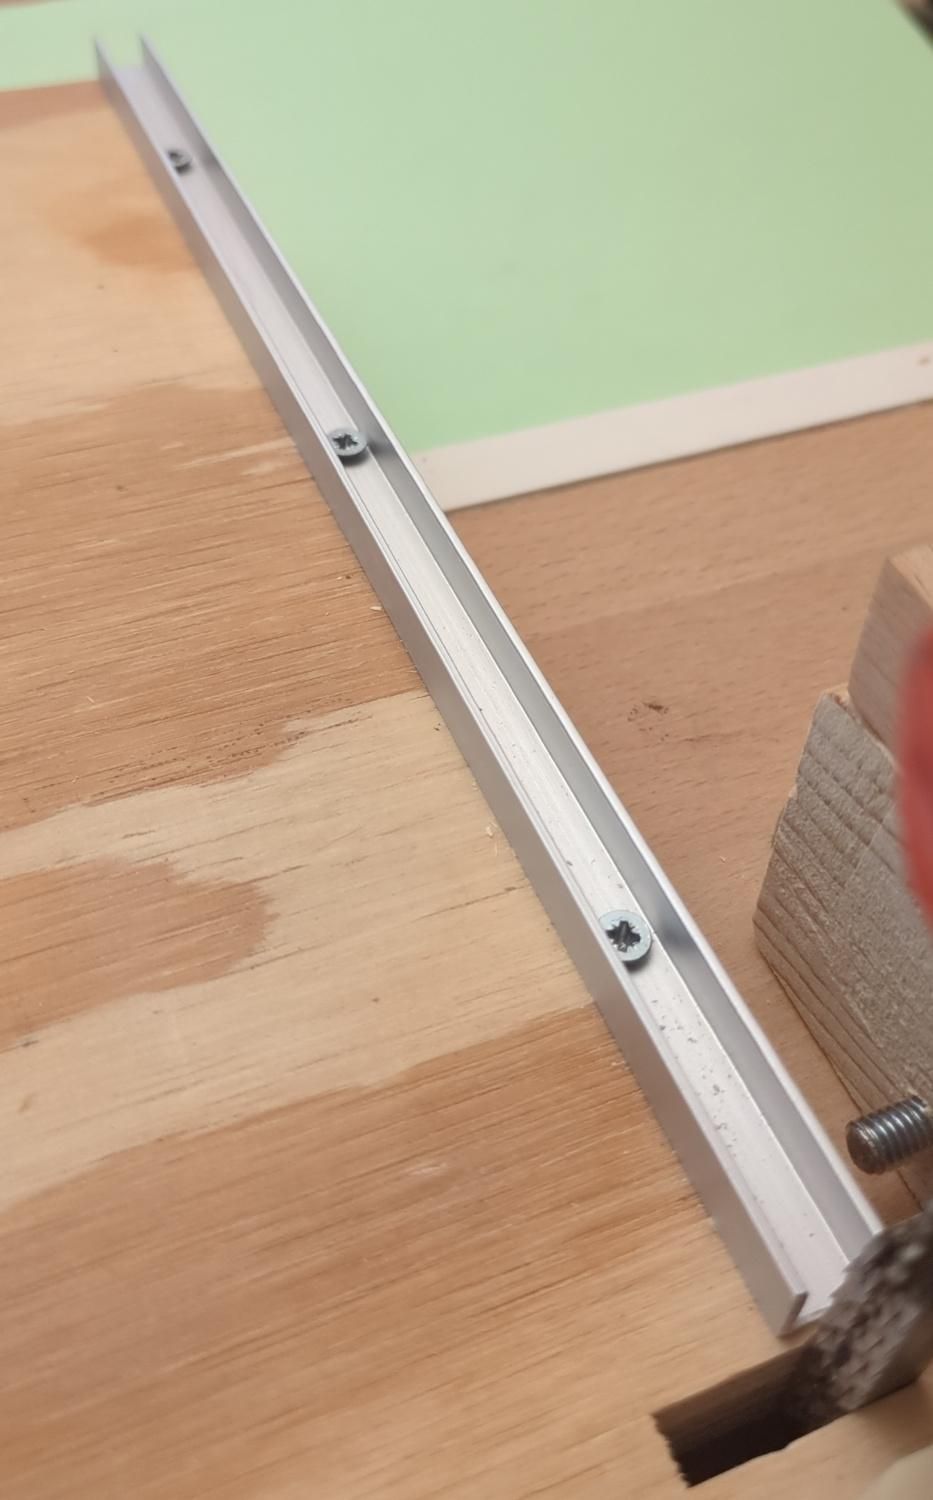
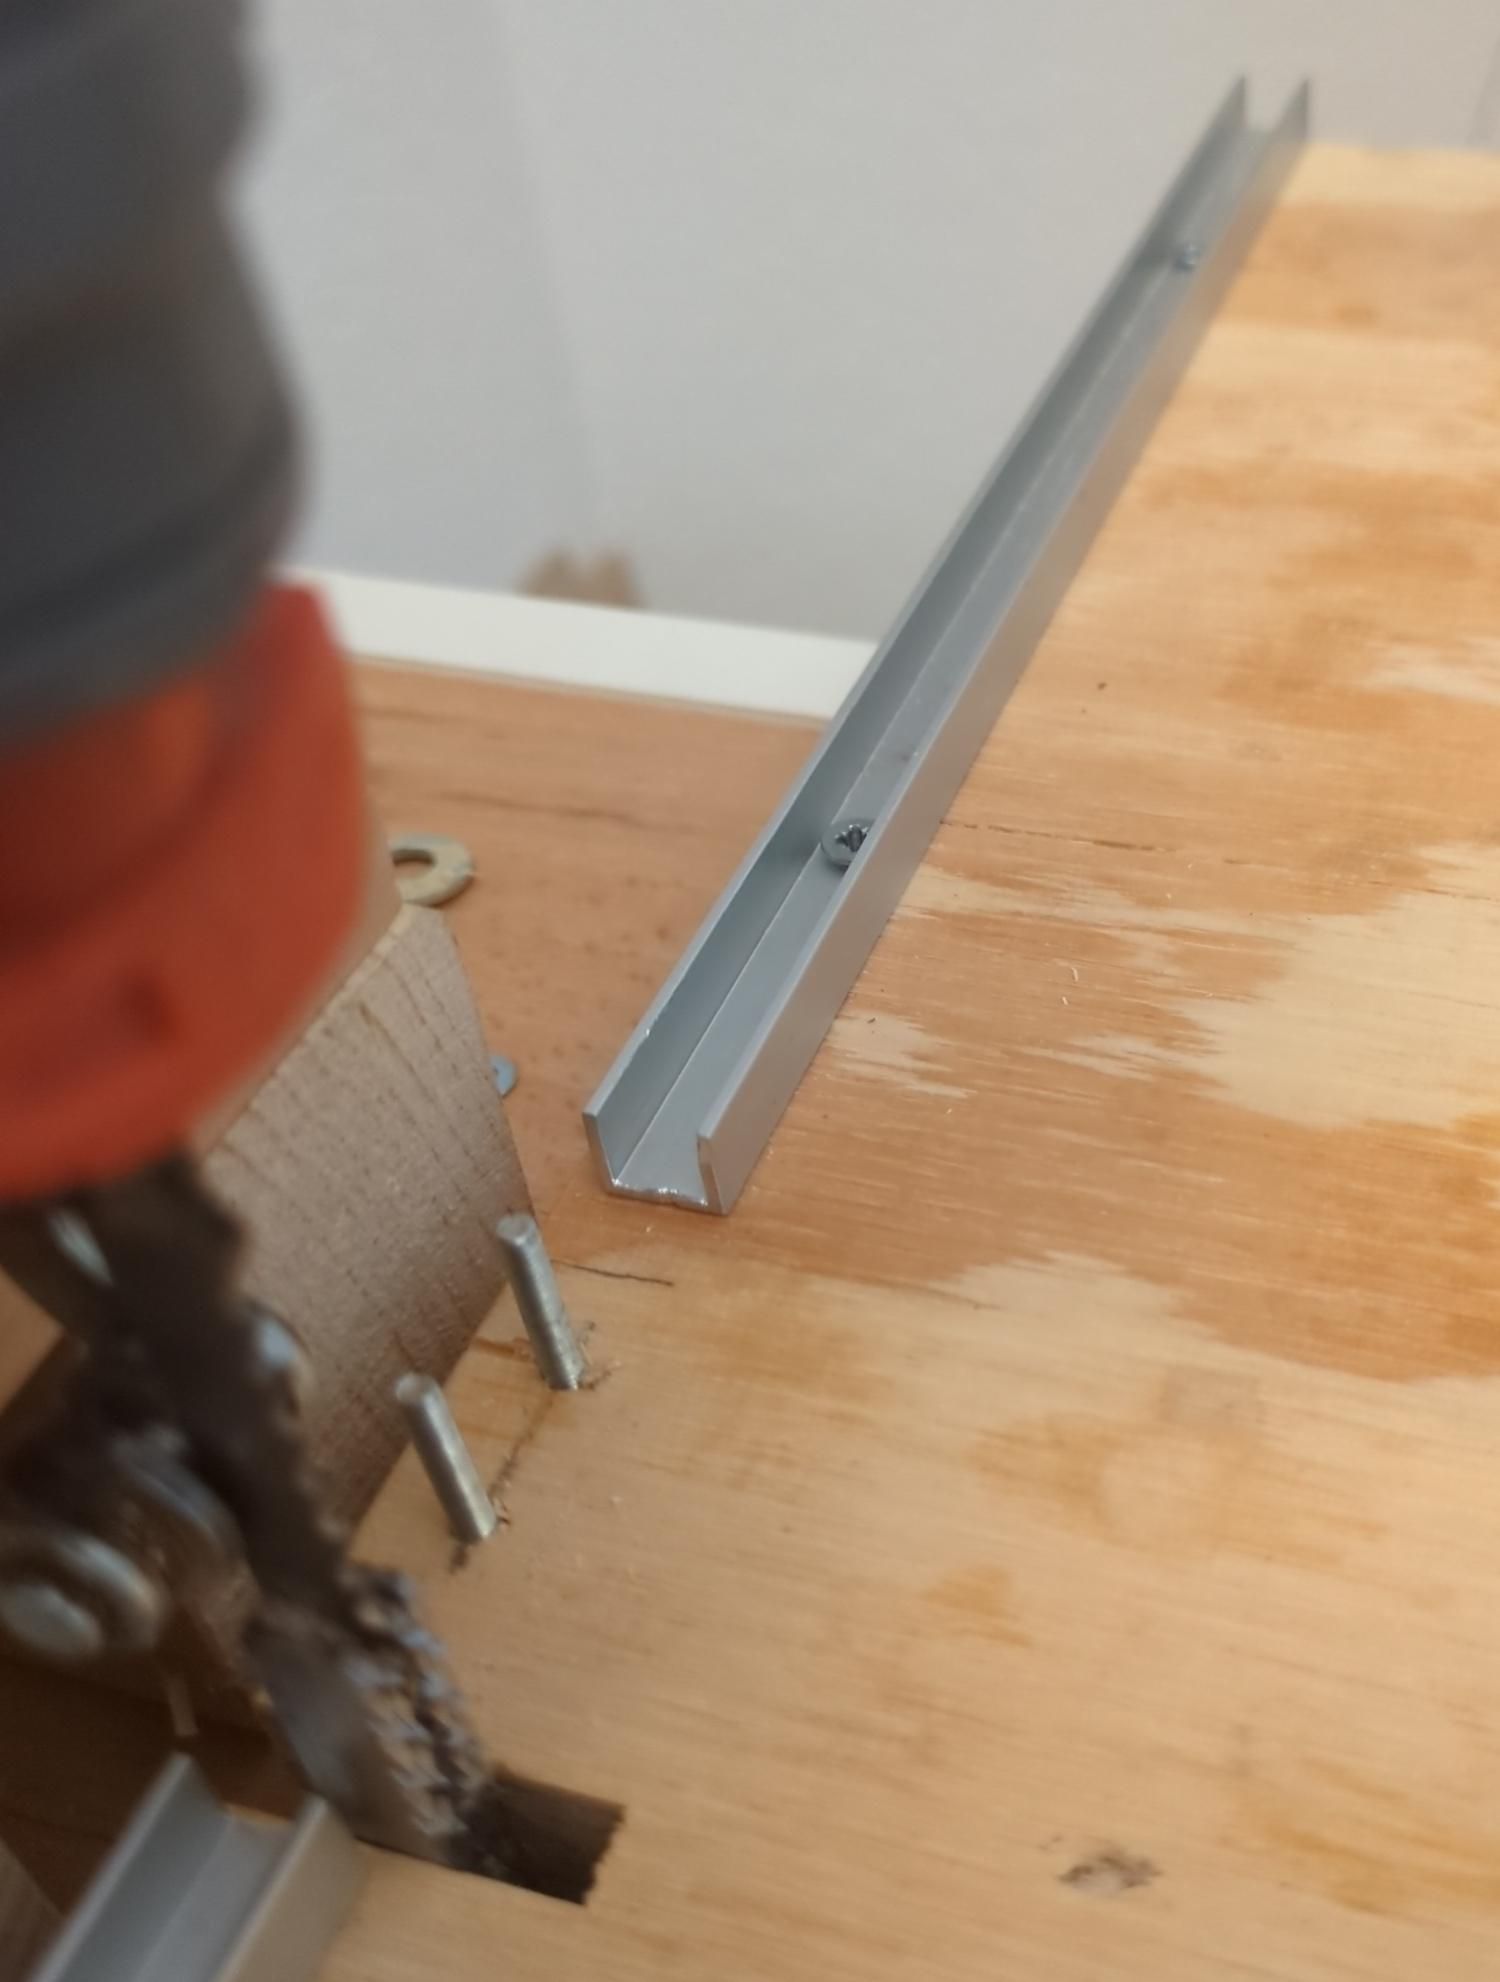
Once everything is fixed, insert the blade, turn on the jigsaw, and gently push the stage until it reaches the jigsaw support. This creates a reference slot on the board.
Attach a plastic/aluminum profile or wooden bar along the left edge of the stage. This will serve as a support point for cutting wood.
Add a similar stop on the right side, leaving a 40 mm gap to insert the jig. Ensure both stops are as aligned as possible.
Finger Length Adjustment Screw
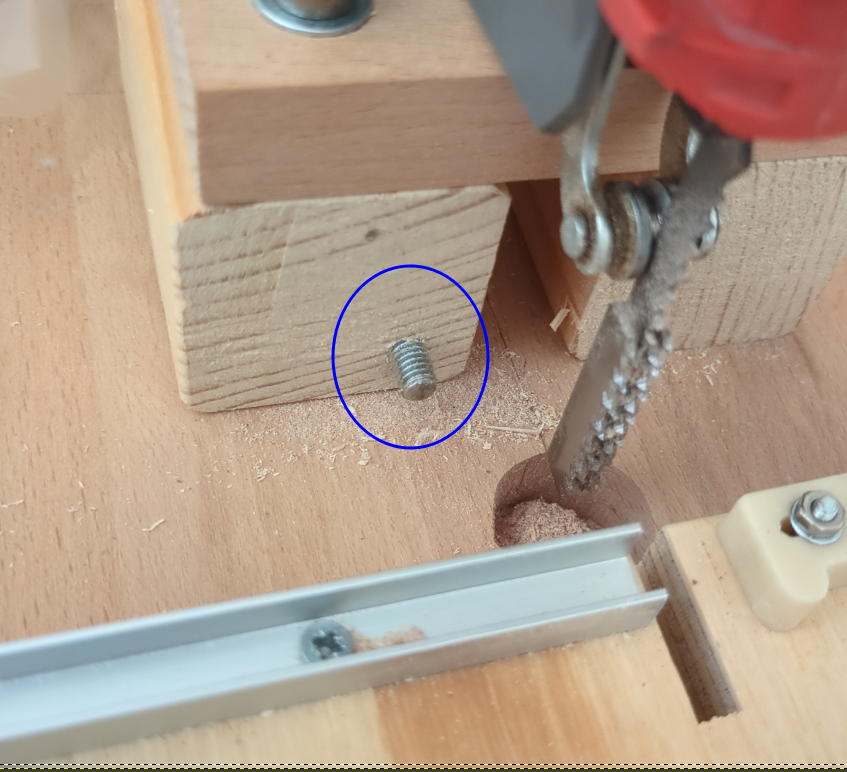
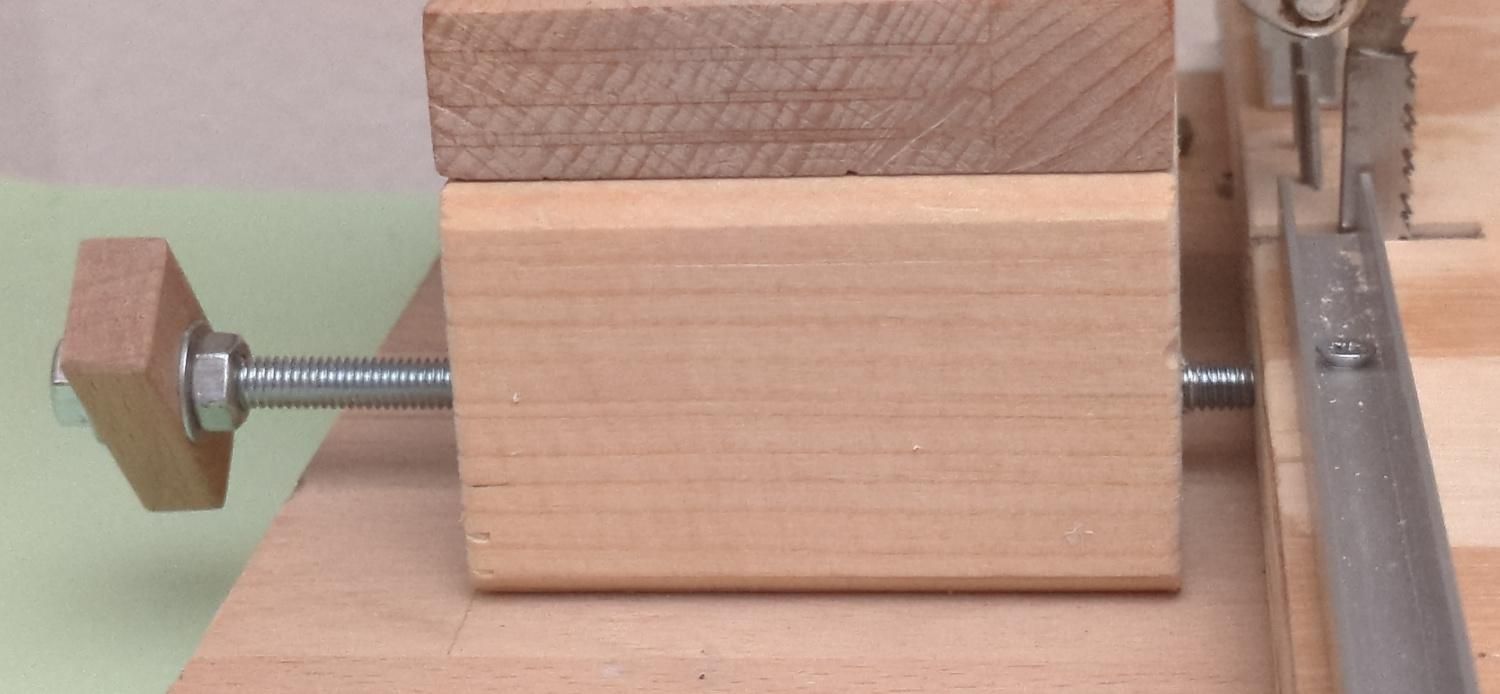
The stage needs an adjustment screw to set the joint depth (finger length), which must match the wood thickness.
Drill a hole through the jigsaw support and insert a threaded rod (the hole should be slightly narrower than the rod to eliminate the need for a nut).
Tip: Secure the rod in a drill to screw it through the support, moving it back and forth to create a clean thread. Add a small handle for easier adjustment.
Make a Jig
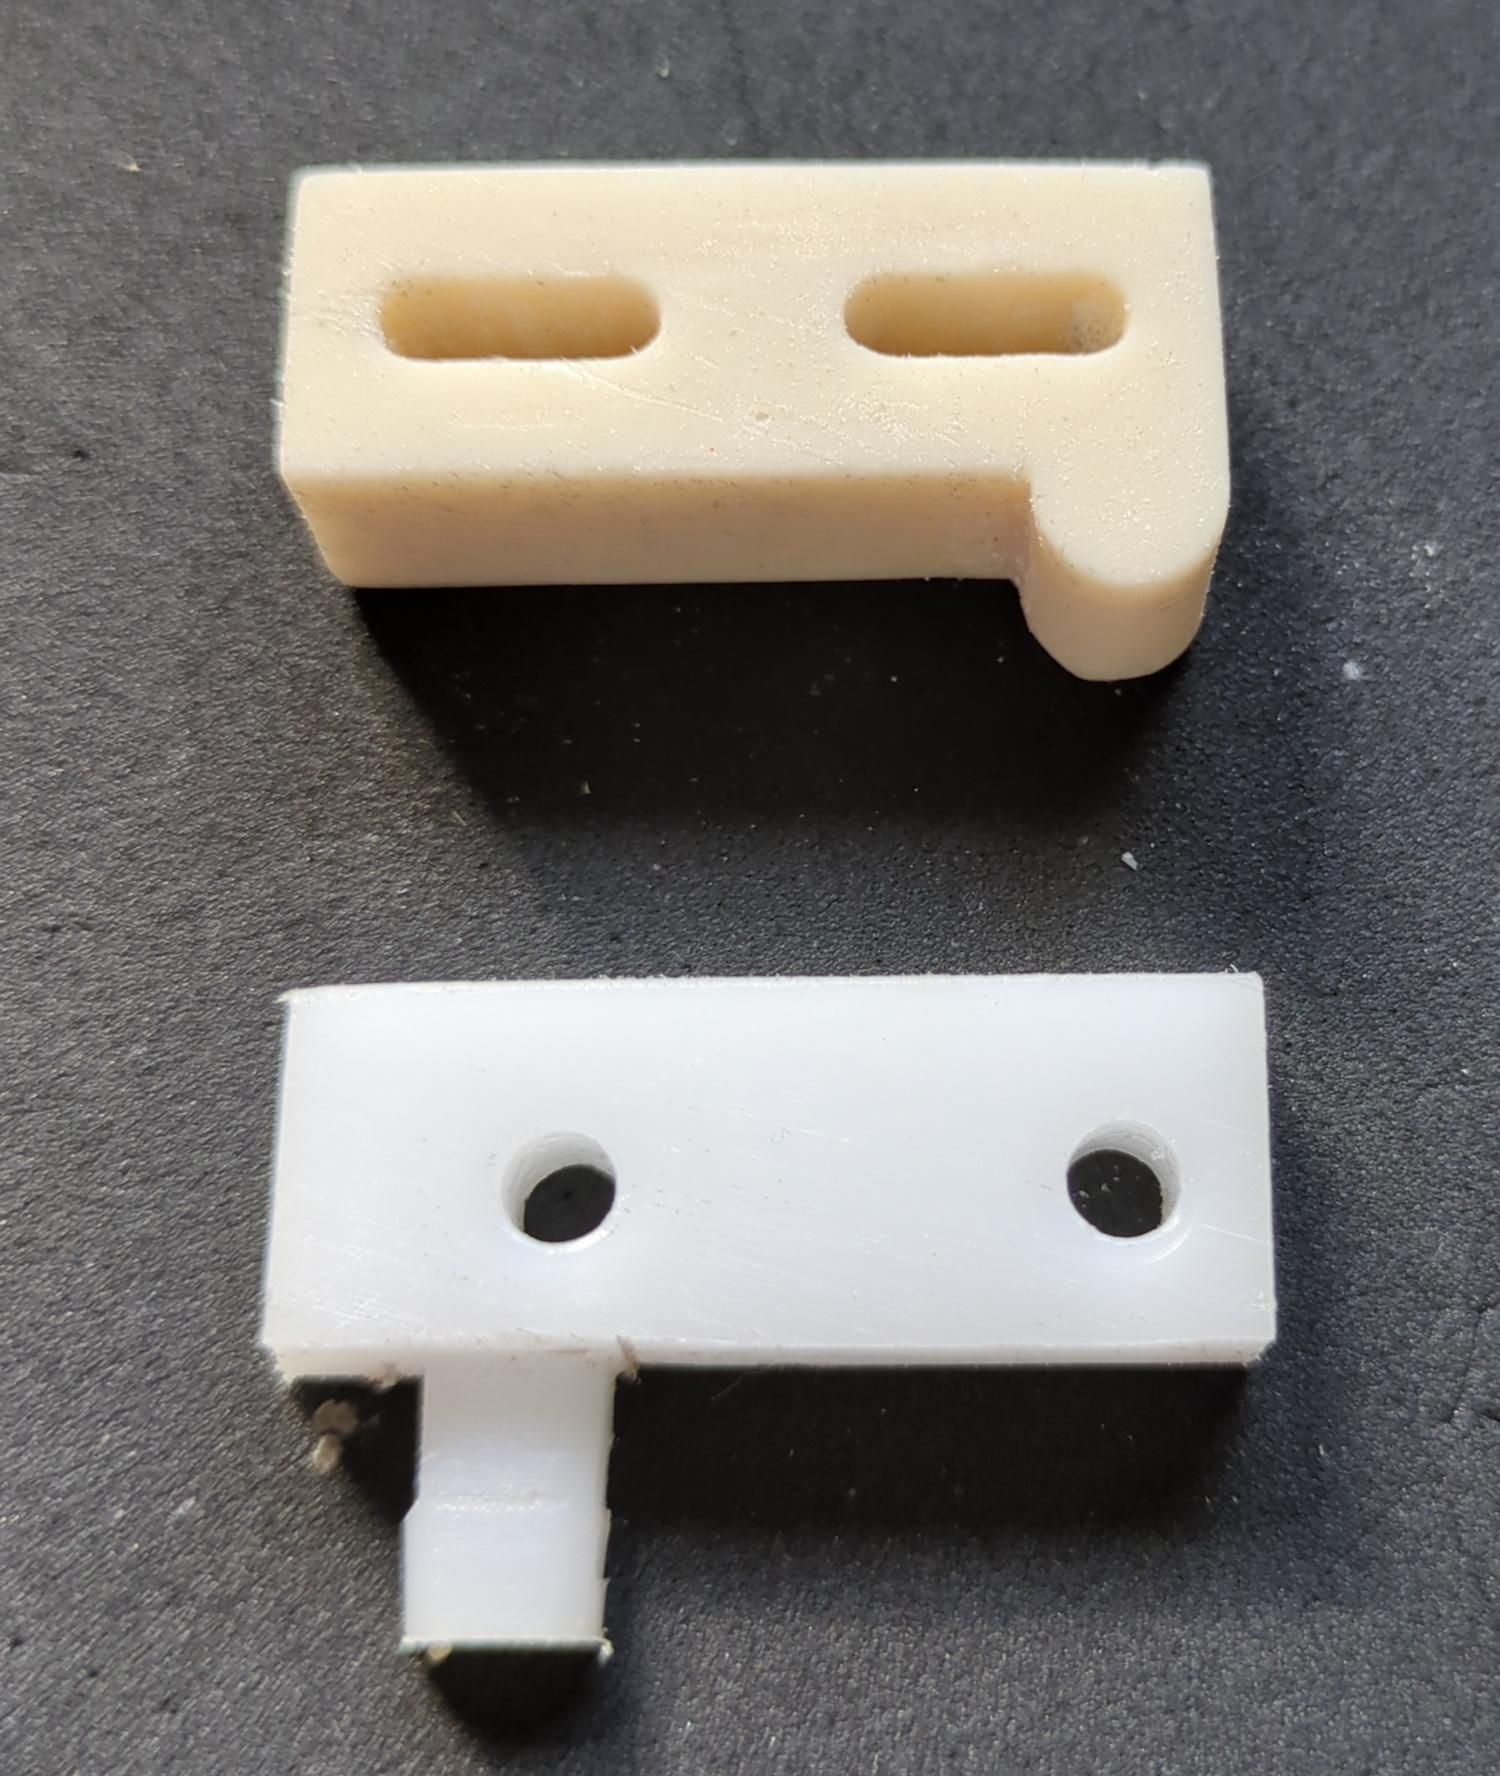
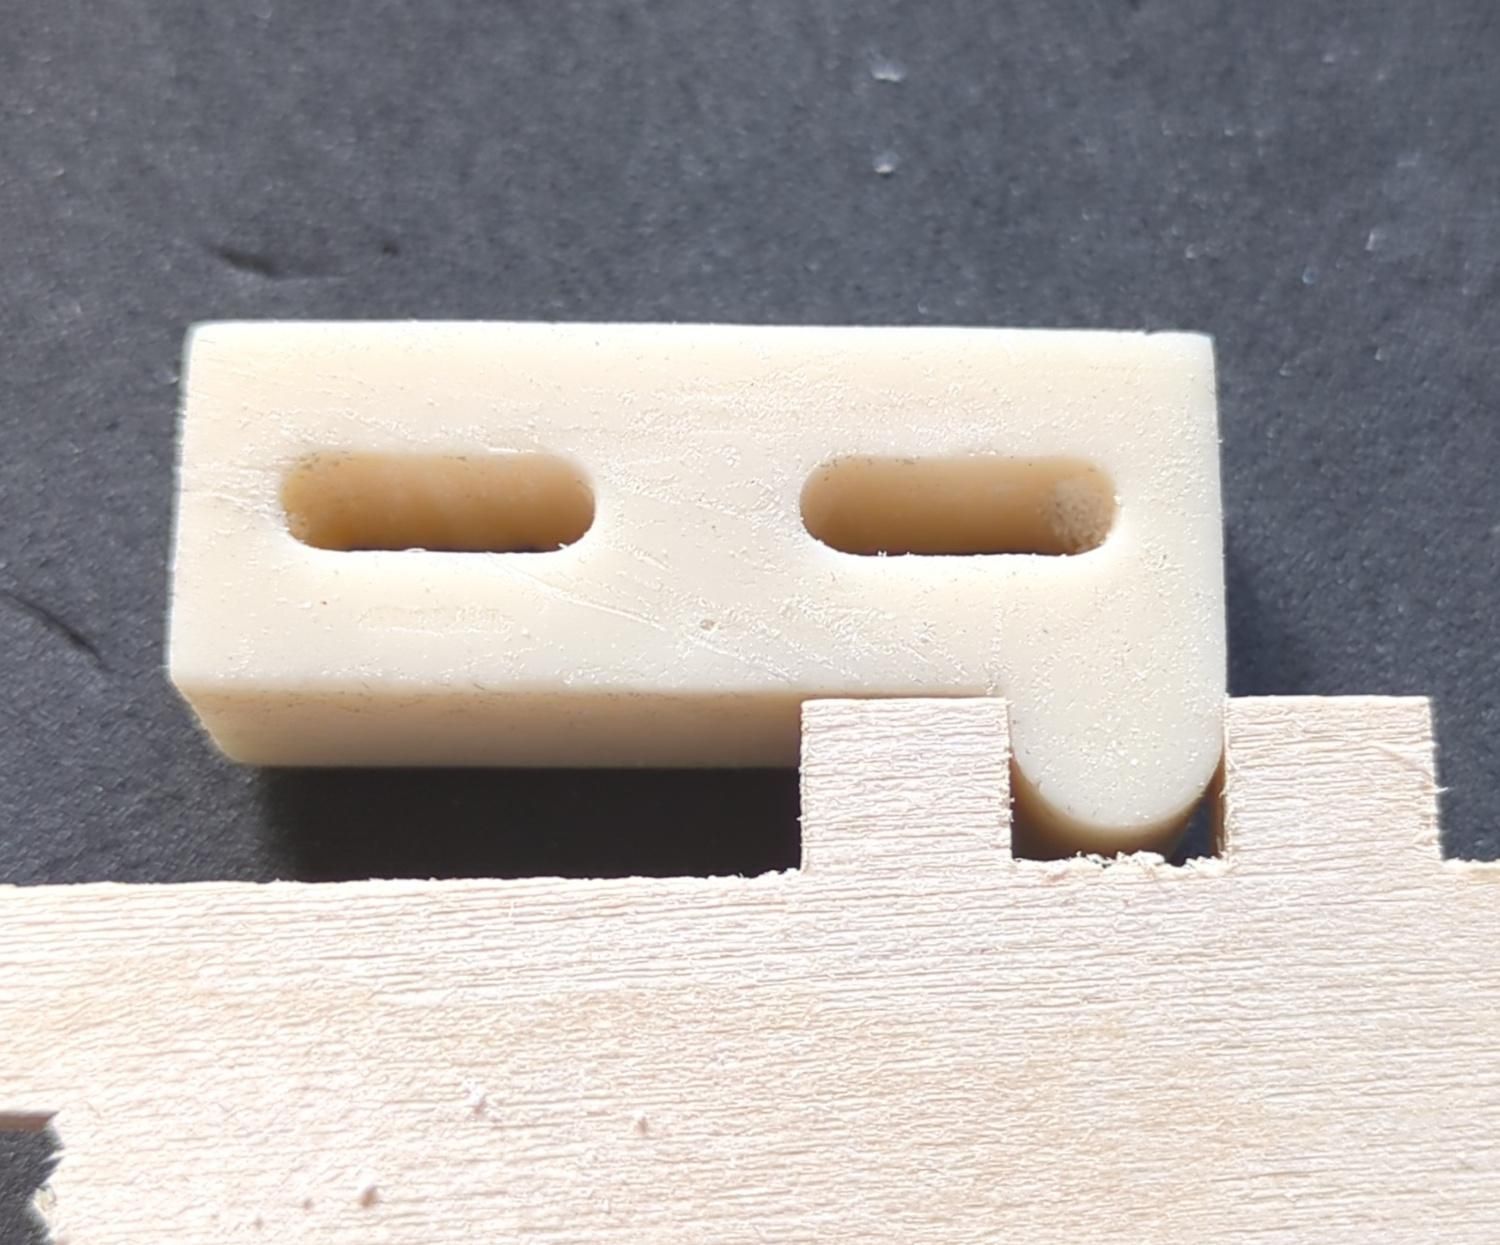
The jig sets the spacing for the box joint fingers. It must be adjustable since several iterations will be required to get the perfect tuning. The jig tooth must fit tight in the gap between two fingers, that is set by your jigsaw blade.
The first version i've done was a simple plastic piece cut with a saw and filed, but it’s difficult to adjust. A 3D-printed jig is recommended. Here is a parametric design made with OpenScad that you can adjust to your setup:
https://github.com/bluesyann/openscad_shapes/blob/main/box_joint_bump.scad
Below is the .stl file I've used, if you feel lucky you can try to use it as it is! If you modify the design, the two critical parameters are:
Downloads
Install the Jig
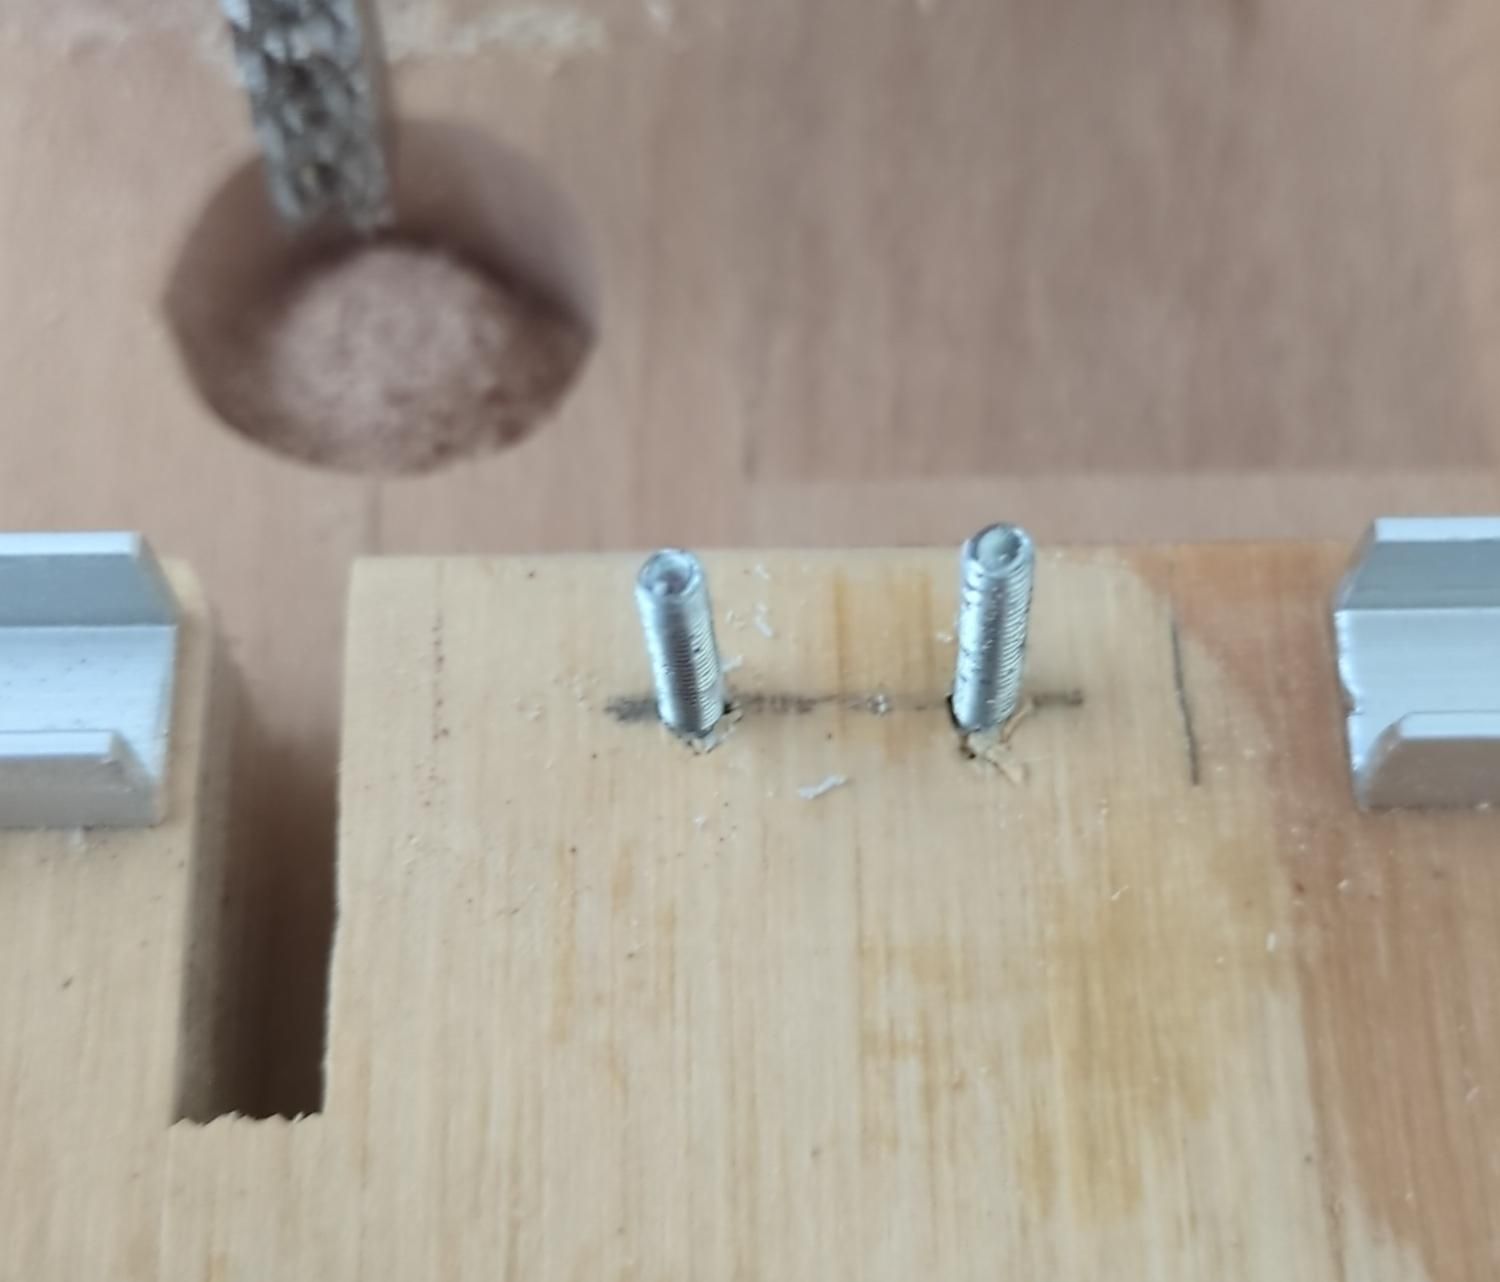
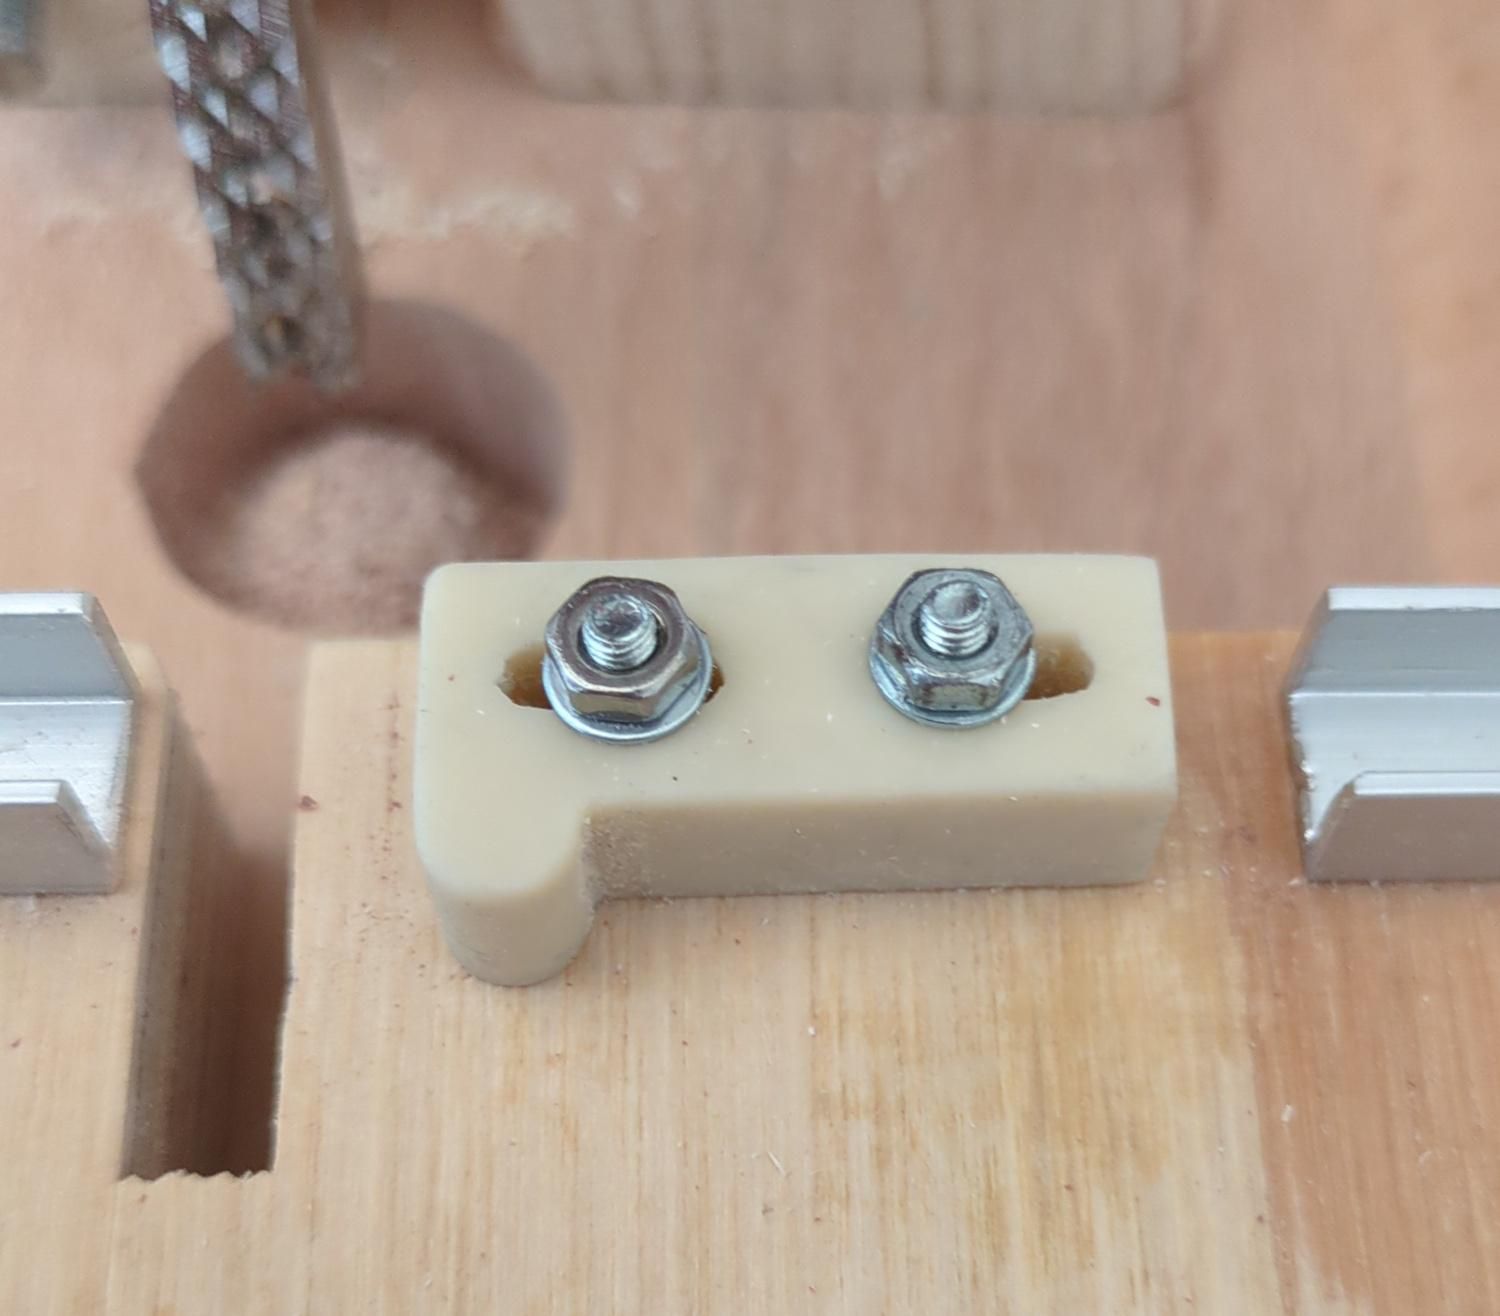
Secure the jig with two bolts, aligned with the two stops bars. Leave a gap roughly equal to the blade’s width between the blade and the jig. If you slacken the nut it must be able to mode sideways for fine-tuning.
Secure the Machine to Your Workbench
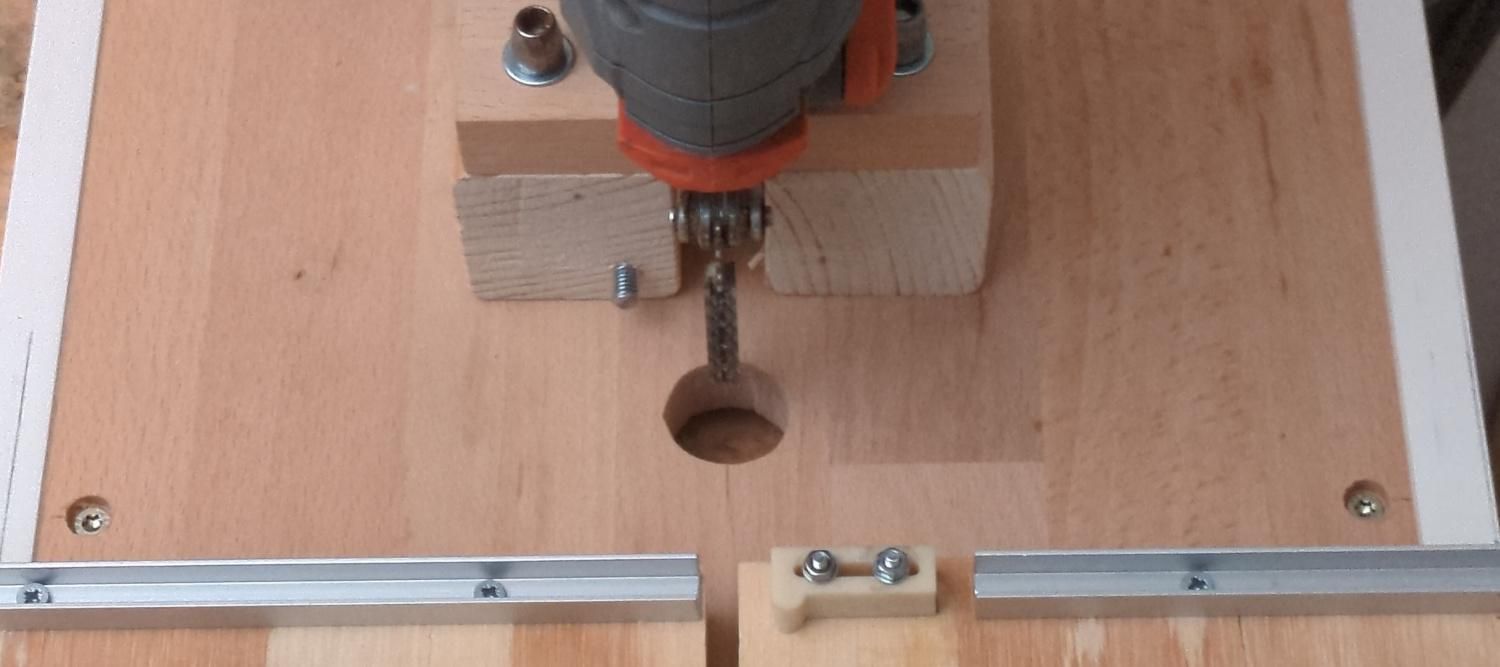
The build is lightweight, so it’s strongly recommended to screw it to your workbench (two screws do the job).
Tip: Countersink the screw holes to prevent the screws from protruding and interfering with the stage.
Tune the Cutting Depth
Cutting Depth
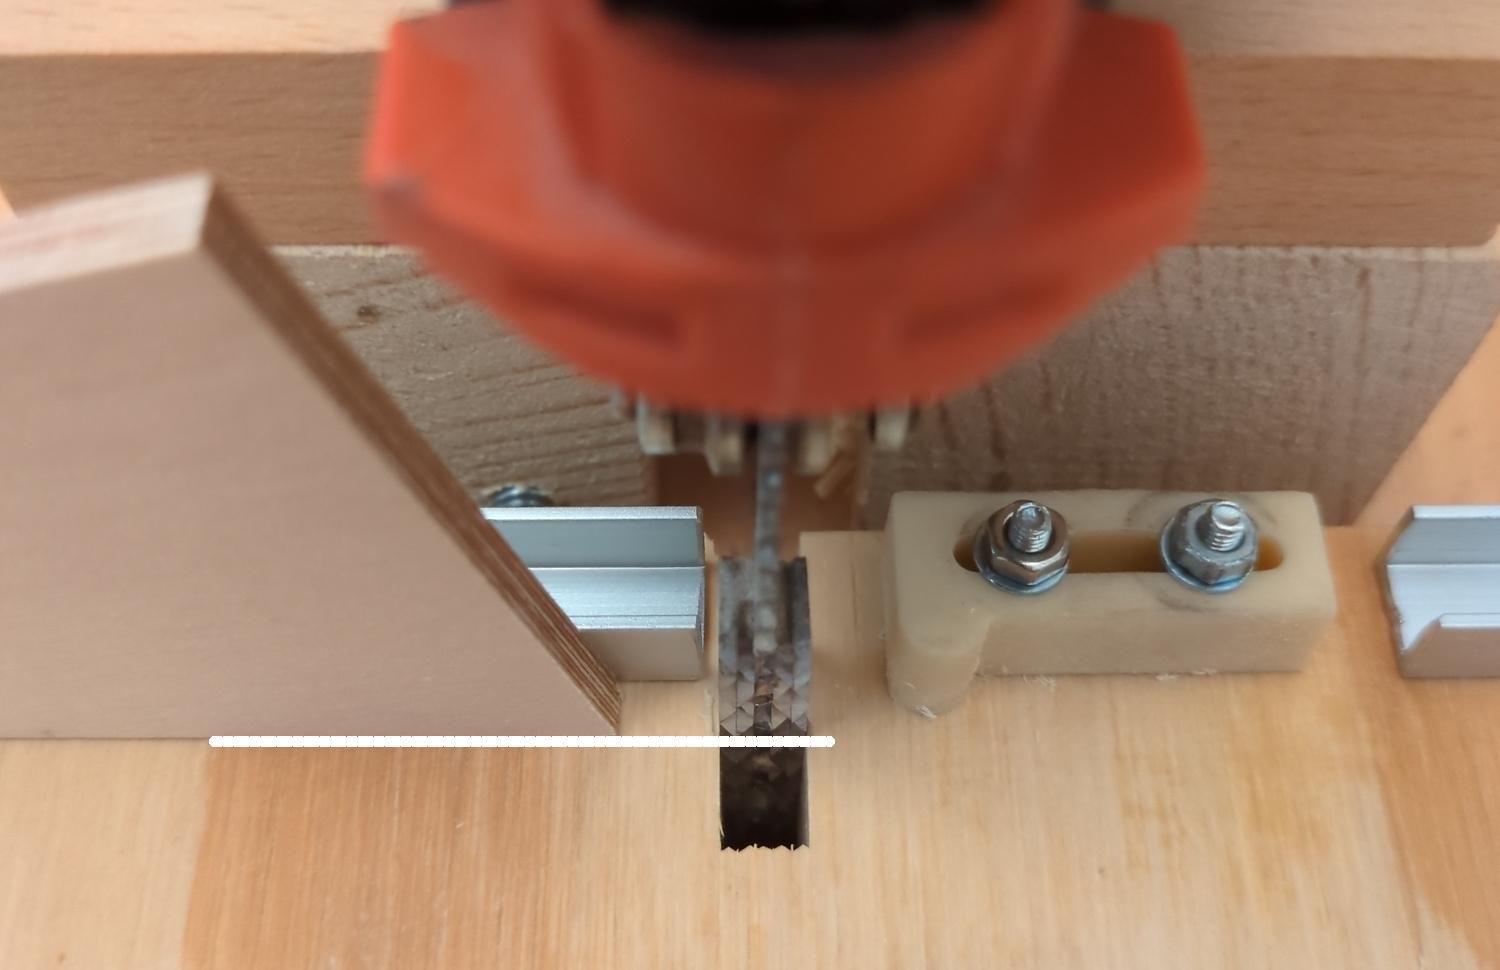
With the machine off: Start by matching the cutting depth to your wood thickness.
Push the stage down to the stop.
Place a sample of the wood you intend to use vertically against the reference groove (as shown in the image).
Adjust the threaded rod until the blade teeth reach the position corresponding to the wood’s thickness.
Tune the Jig Position
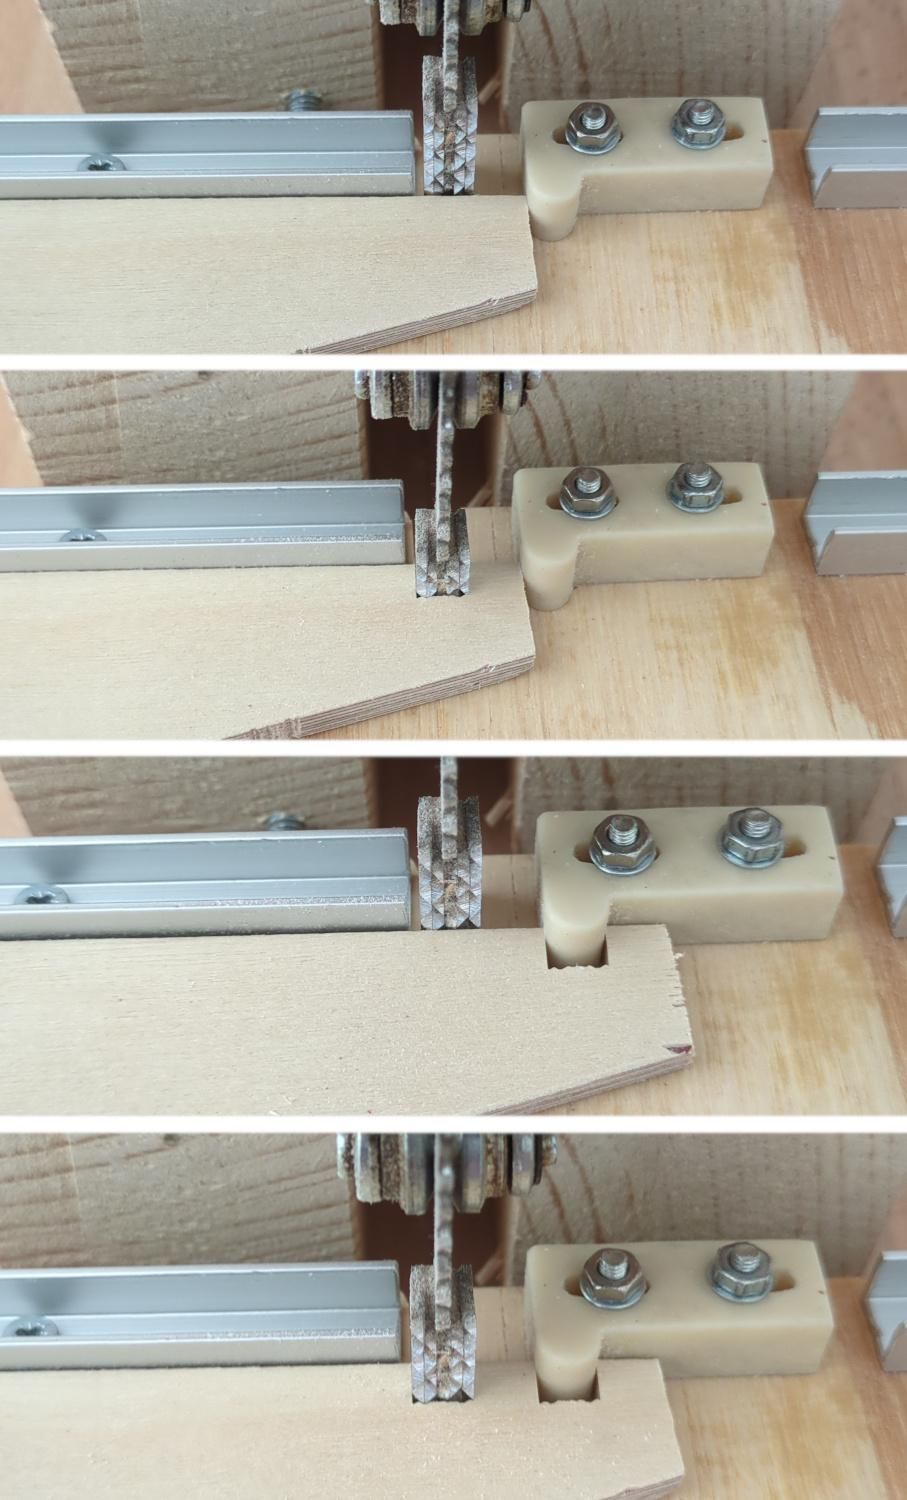
Jig Position
Turn the jigsaw on (medium speed is recommended; use the built-in dimmer if available, or an external speed controller).
Place a sample against the jig and cut the first finger.
Retract the stage to release the blade, then align the new groove with the jig's tip to cut the next finger. Repeat this process.
Use this method to create several fingers on two samples to test how they fit together.
Troubleshooting:
Problem 1: Fit is too tight
If the parts are difficult to assemble, move the jig closer to the blade to make the fingers slightly narrower.
Problem 2: Fit is too loose
If the fit is too loose, move the jig away from the blade to widen the fingers.
The ideal fit is achieved when the two parts interlock with no effort but no clearance.
Tip: For long joints (over 50 mm), spreading the wood glue will take a while. By this time, the wood may swell, making assembly difficult. In such cases, intentionally loosen the joint to ensure an easy fit.
Tips
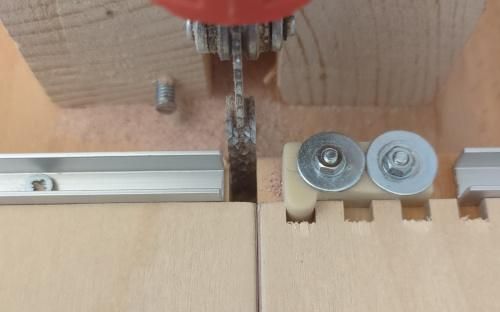
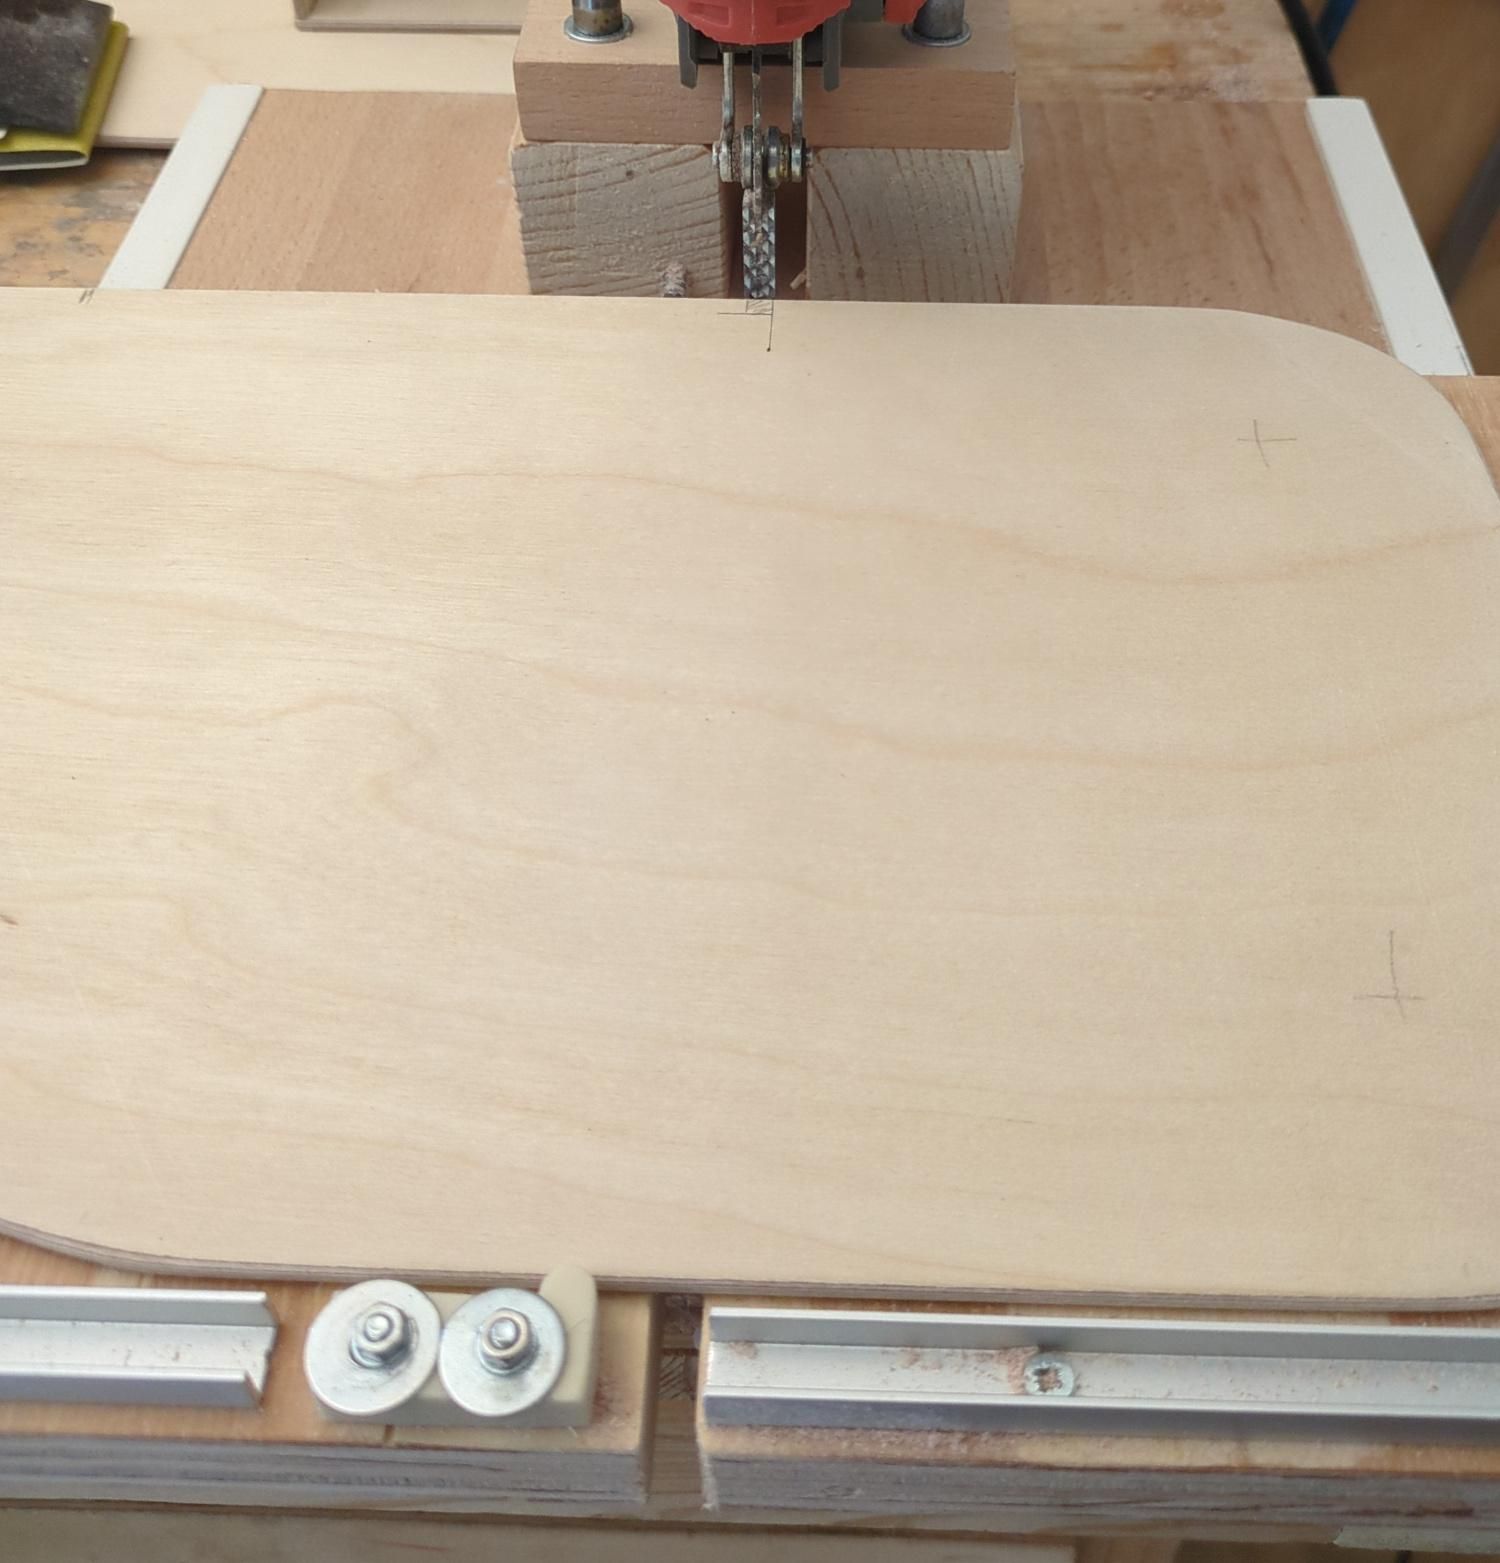
Tip 1: To start cutting the complementary board, place a finger of the first board on the jig and use it as your point of support.
Tip 2: If you need to make a joint shorter than your board (for example, to connect a smaller board), you may need to start away from an angle. In this case, flip the stage and make the first cut without the jig. Then, flip the stage back to its original position and finish the joint using the regular method.
Conclusion
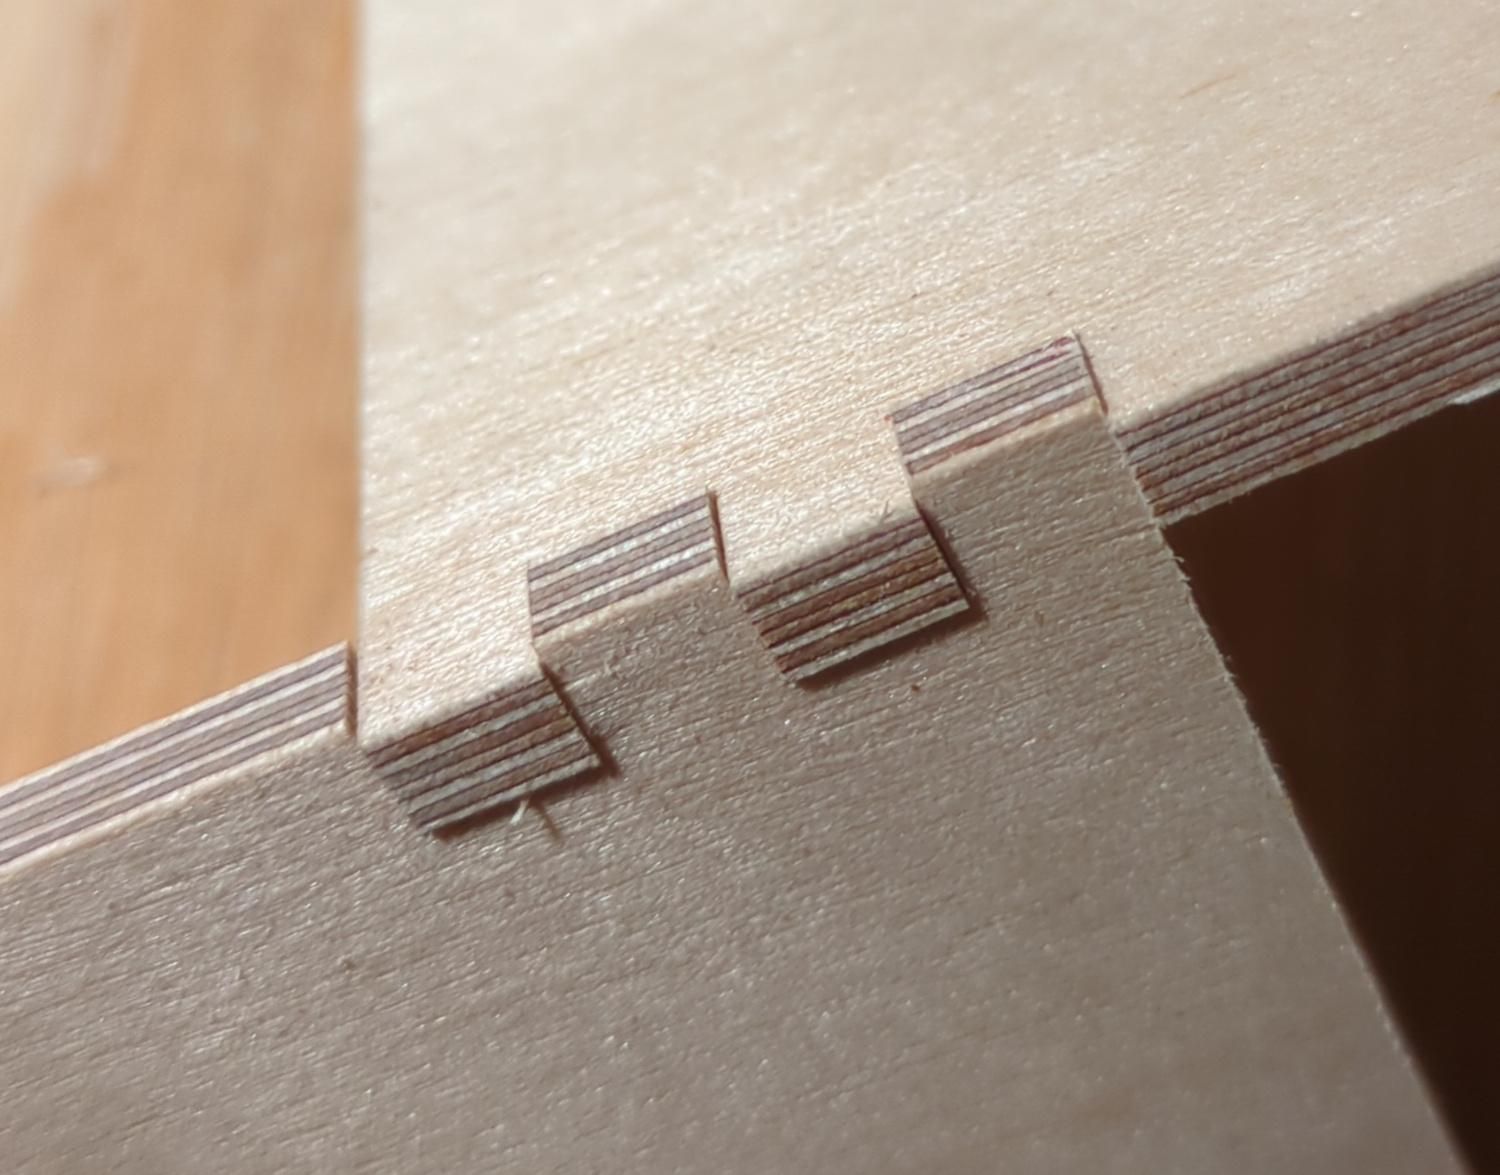
You now have a budget-friendly, DIY box joint machine that lets you create perfect, professional-looking joints at home! This design avoids the cost, noise, and safety concerns of traditional tools, making it ideal for hobbyists and weekend woodworkers, even in small spaces like apartments.
Getting Started
Practice on wood scraps to familiarize yourself with the machine’s tuning and operation. Experiment with different wood thicknesses and joint sizes to see what works best for your projects. Use your new machine to build anything from simple boxes and drawers to intricate furniture pieces!
Final Touches
After cutting, sand the joints lightly to remove any burrs or imperfections.
Apply a finish (oil, varnish, or wax) to enhance the appearance and protect the wood. The result can be truly stunning-clean, precise, and ready for assembly.
Happy building with your new machine! If you have any questions or want to share your results, please pop a message!