DIY Realistic Arm Cut Wound for Halloween (Using Wheat Dough & Cotton)
by Priyanshu2206 in Craft > Costumes & Cosplay
45 Views, 0 Favorites, 0 Comments
DIY Realistic Arm Cut Wound for Halloween (Using Wheat Dough & Cotton)


Hello all
are you Looking for a way to shock everyone this Halloween? Here’s a super realistic DIY arm wound effect made from simple materials you can find at home. No need for expensive SFX makeup — just creativity, patience, and some everyday items like wheat dough, paint, and cotton.
This realistic cut effect took me a whole day to design because I wanted it to look *different from the usual fake wounds*. The result? A spine-chilling, bloody arm cut that’s guaranteed to make people scream! 😈
Supplies

Supplies You’ll Need
* Wheat grain dough (acts as fake skin)
* Cotton
* Fake solid red powder (you can also use red poster color or eyeshadow)
* Skin color paint
* Needle and thread (for stitches)
* Brush or sponge (for blending)
* A bit of water and glue (optional, for adhesion)
* Small container for mixing
Prepare the Base Skin

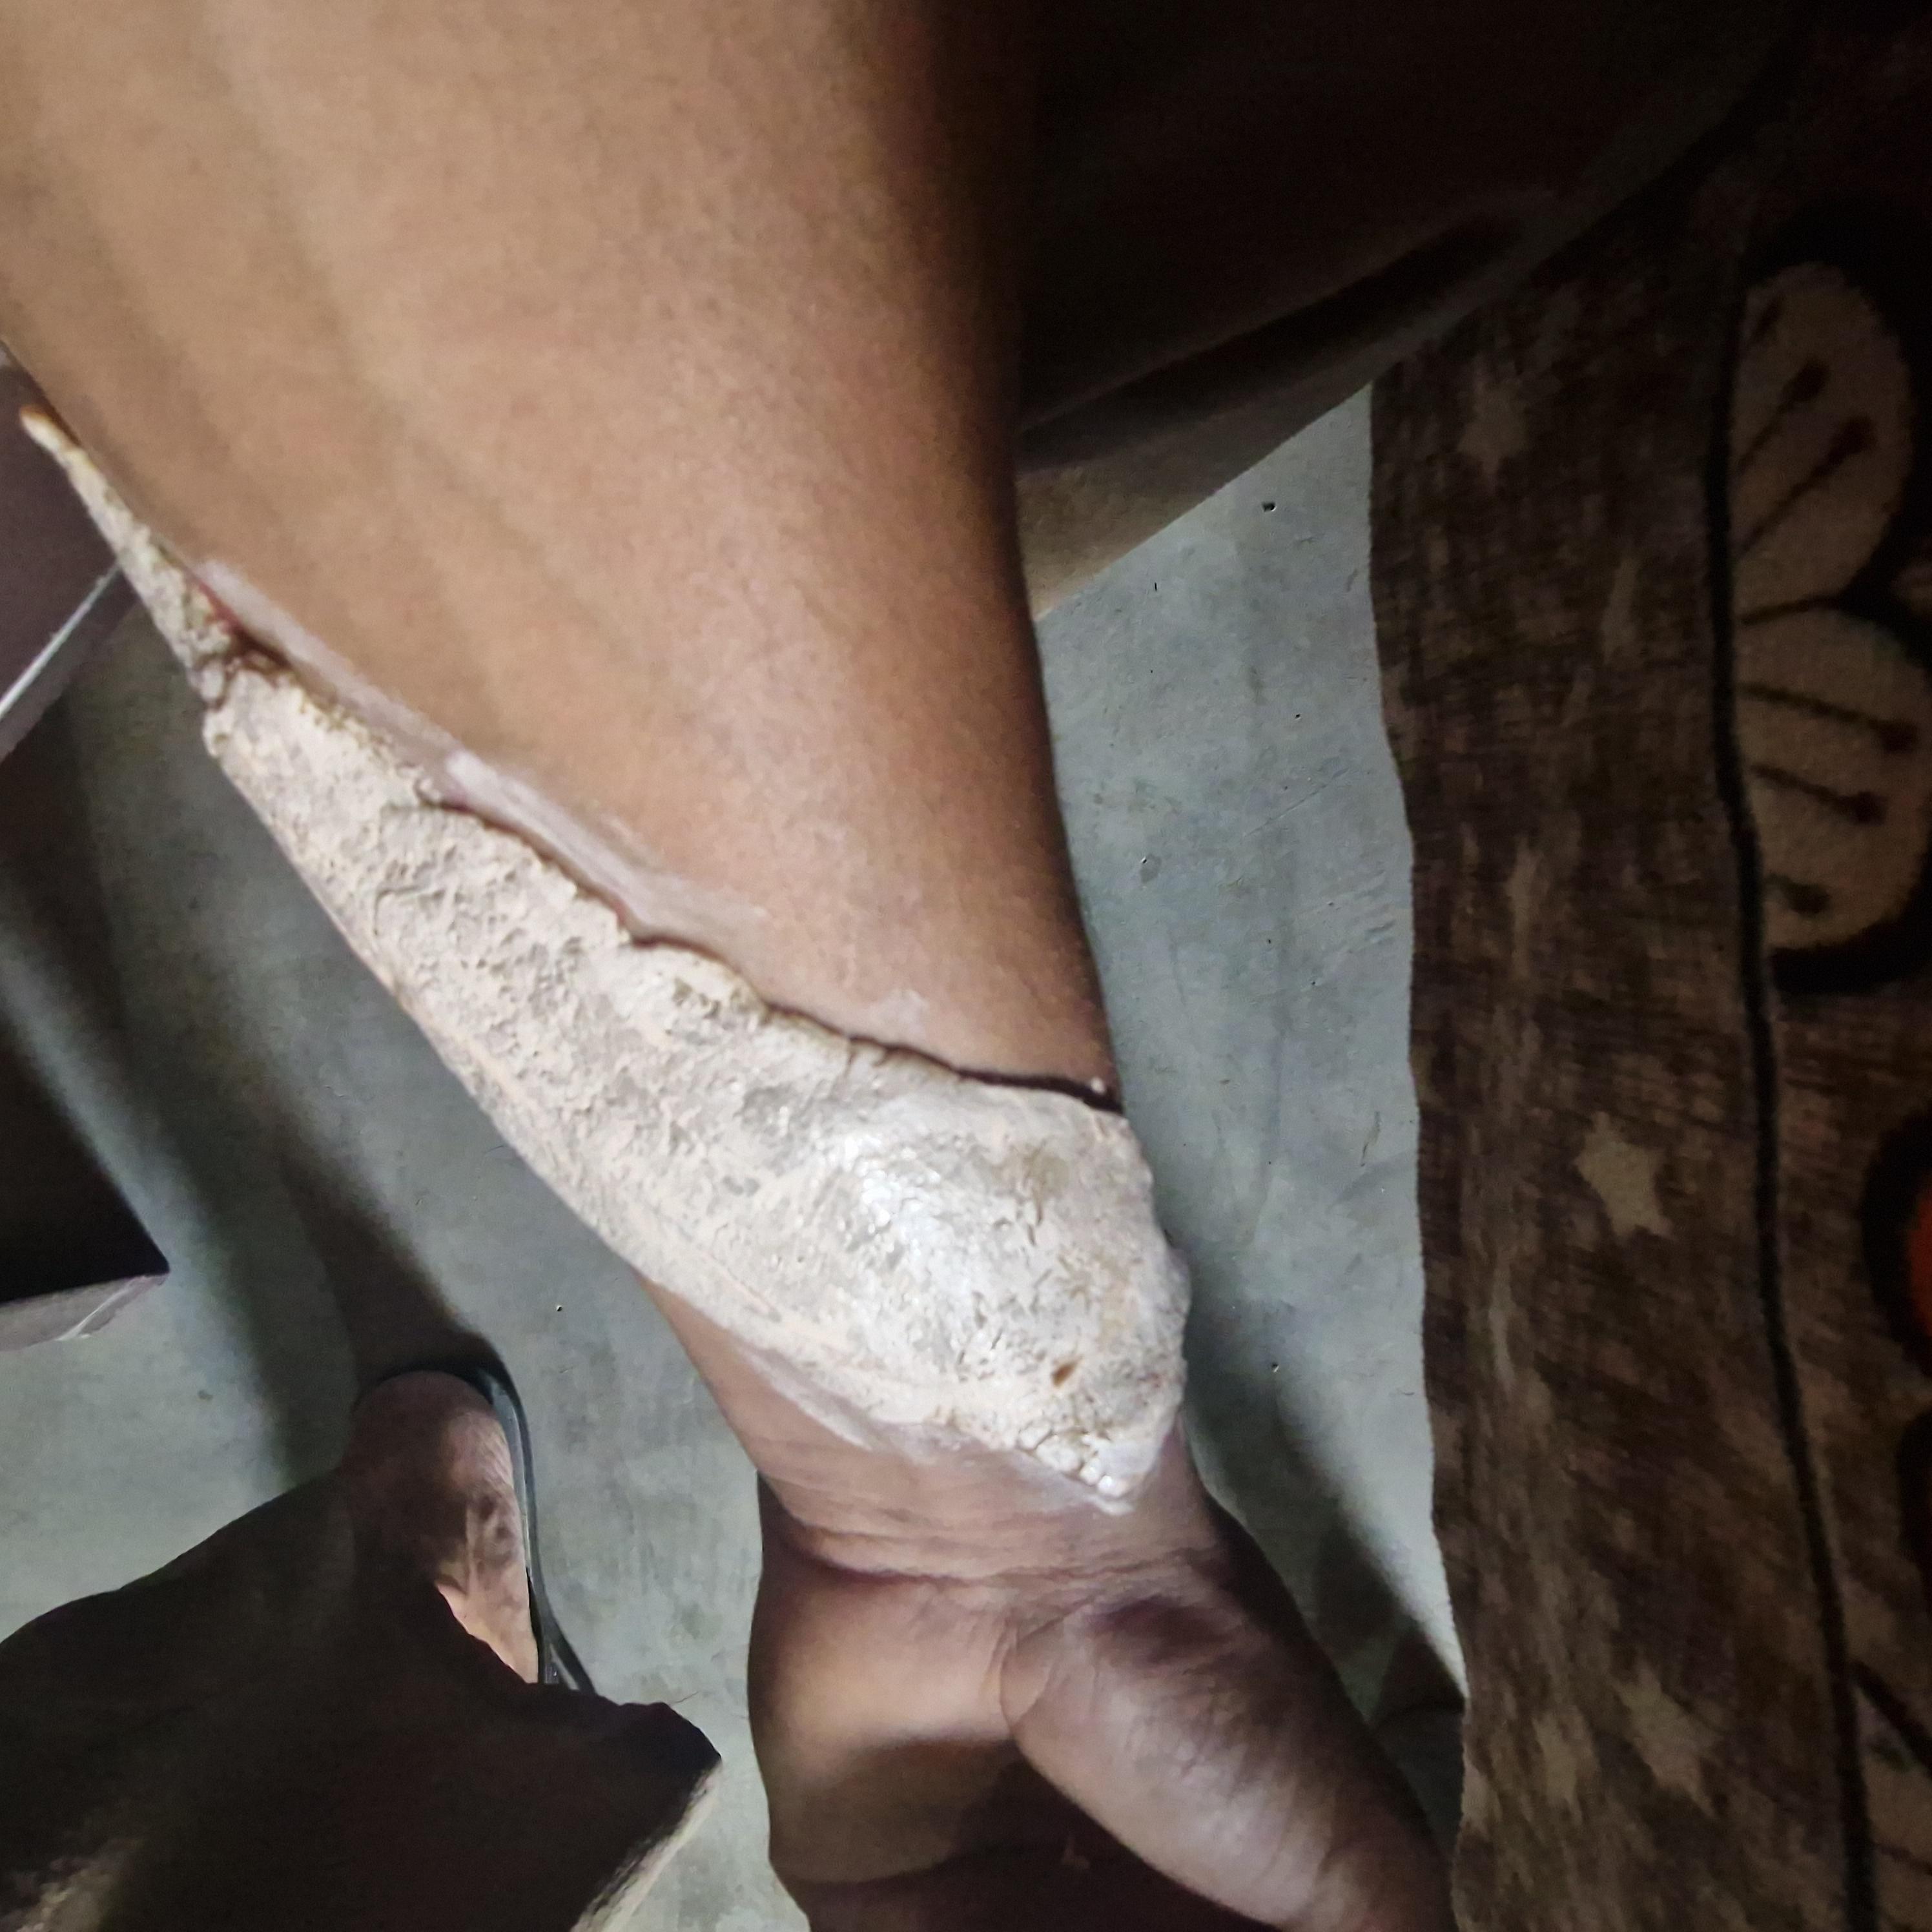
Step 1: Prepare the Base Skin
Take some wheat dough and roll it into a thin layer.
Place it on your forearm where you want the wound to appear.
Shape it to match your arm’s contour — make sure it looks like real skin texture.
You can slightly moisten it to help it stick better.
Downloads
Add Depth and Texture


Step 2: Add Depth and Texture
Now take some cotton and press it gently into the “cut” area.
This gives volume and texture to your wound.
You can pull some cotton fibers out slightly to mimic torn flesh.
Downloads
Stitch It Up With White Thread


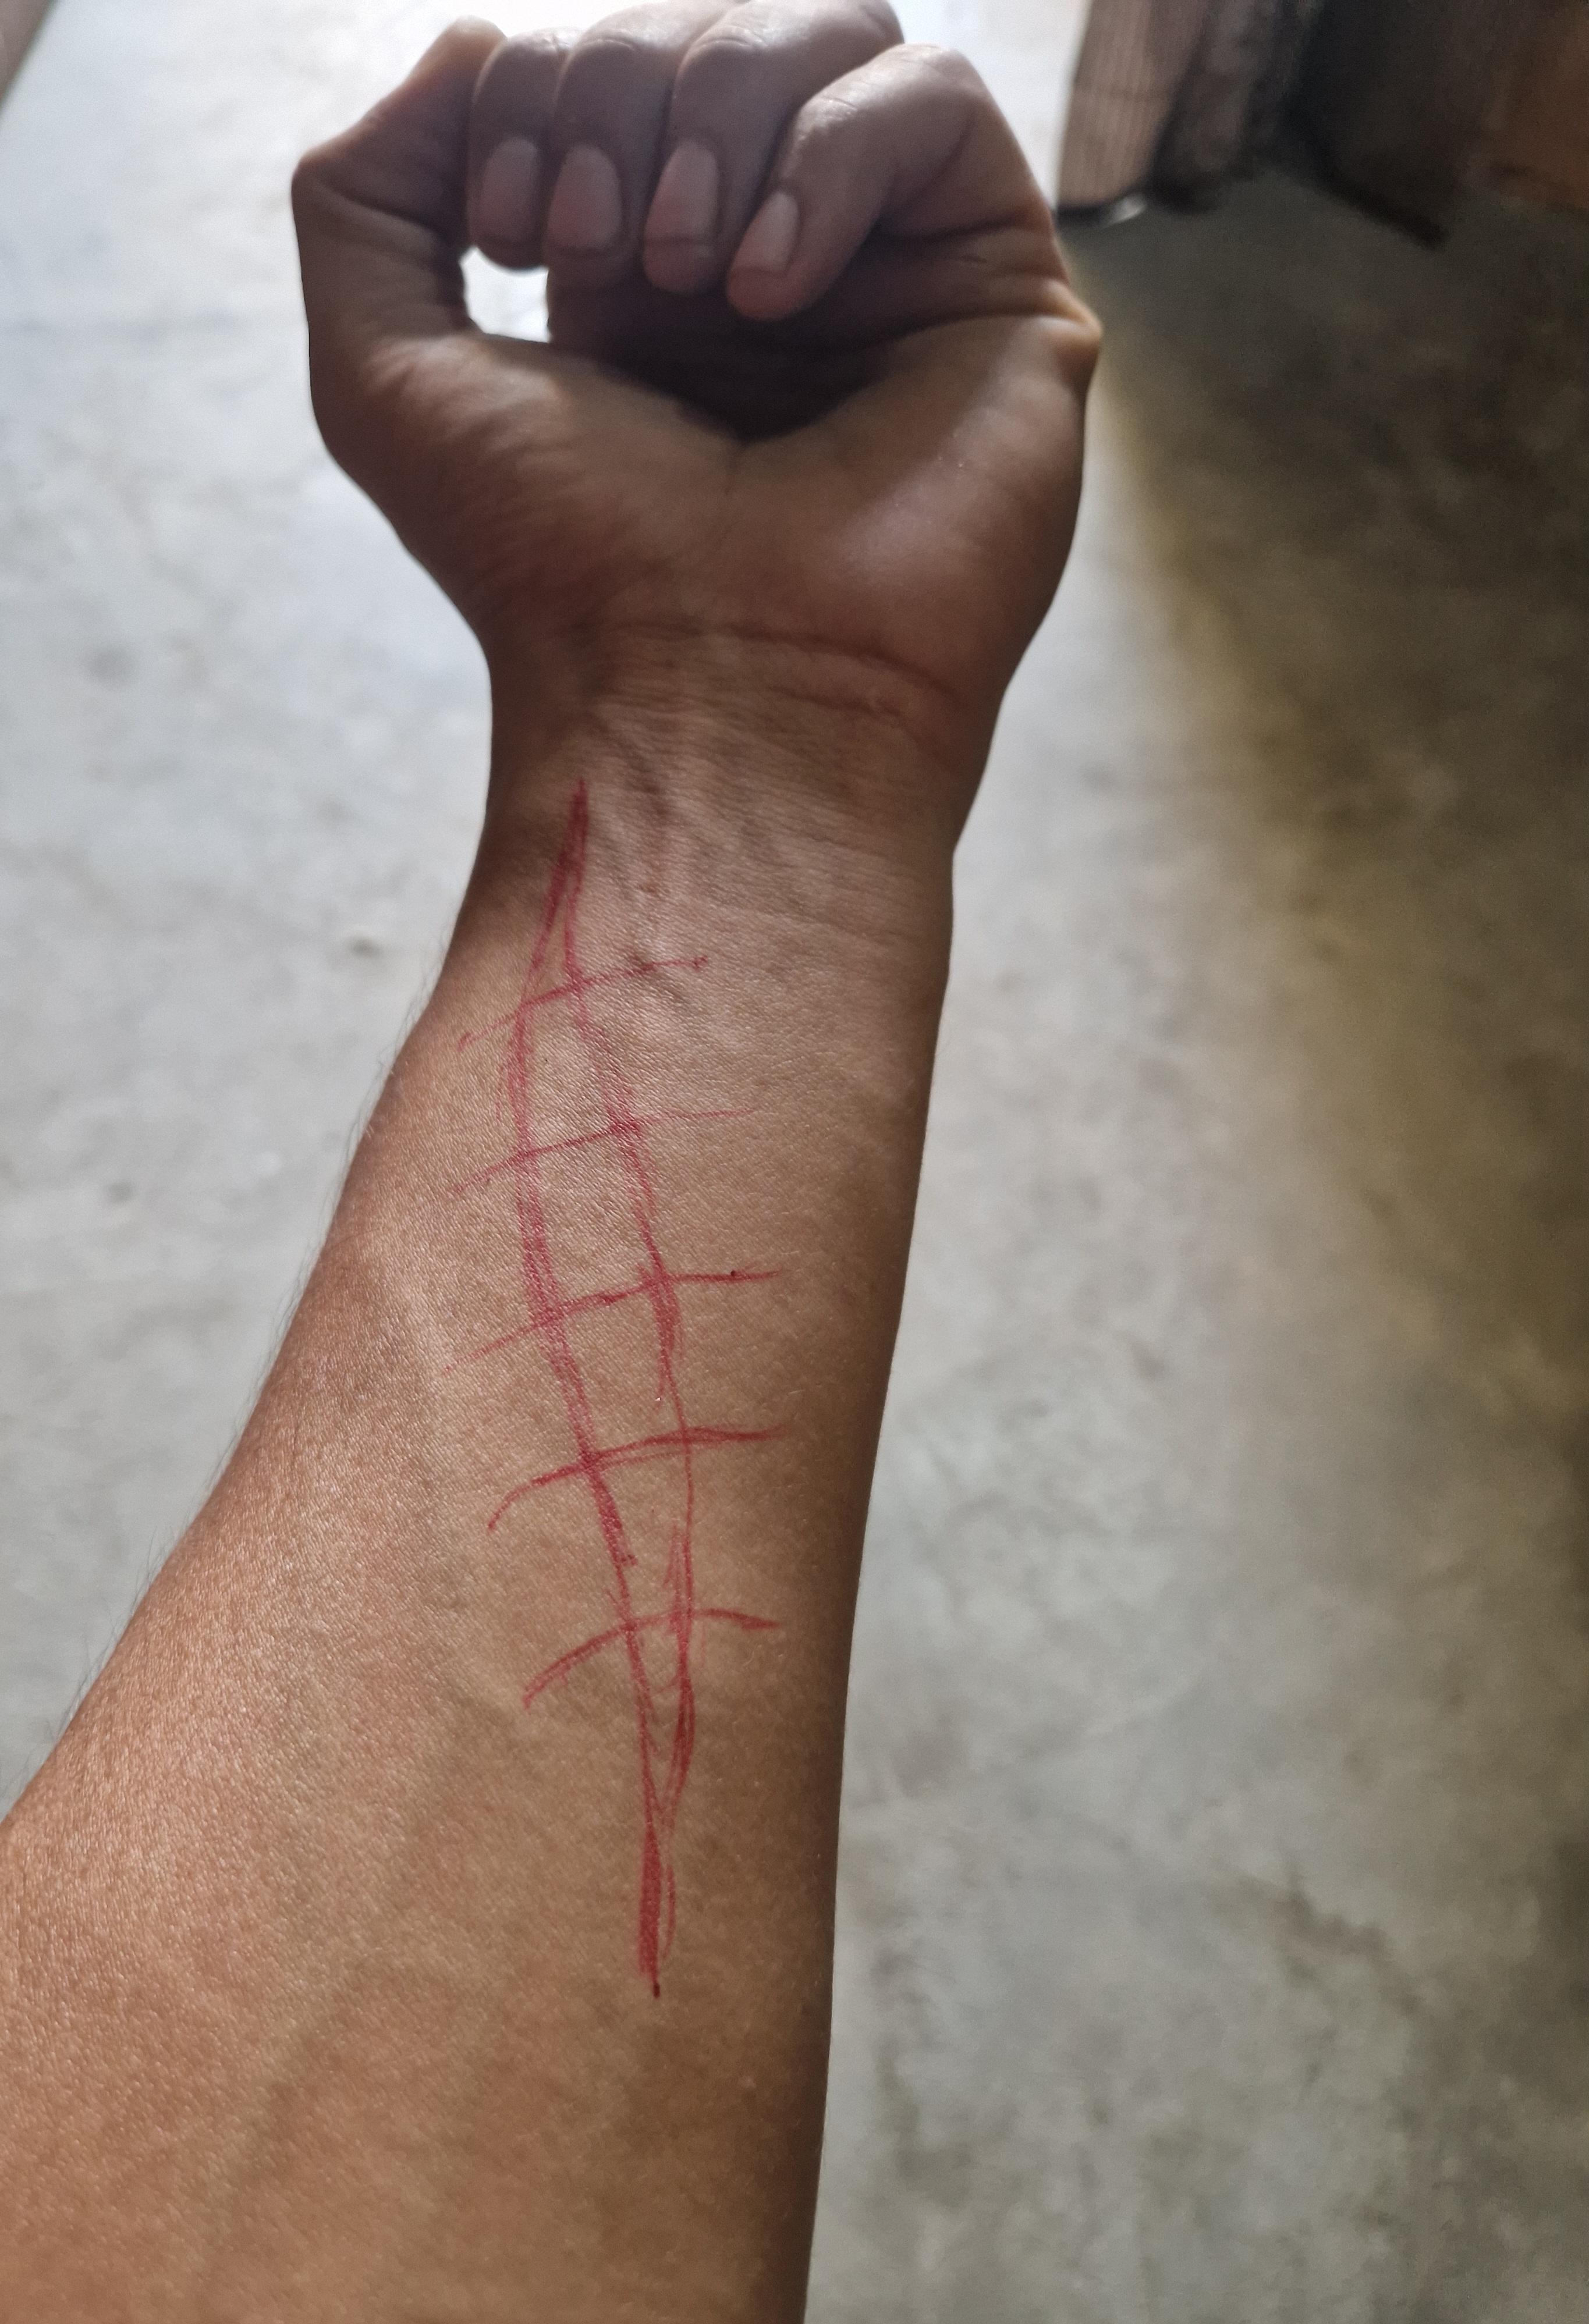
Step 3 Stitch It Up (Optional but Awesome!)
Take a needle and thread(preferably white and black )and stitch a few parts of the wound.
Be careful to pass only through the dough, not your skin!
This gives a terrifyingly real surgical stitch look.
Downloads
Final Touches


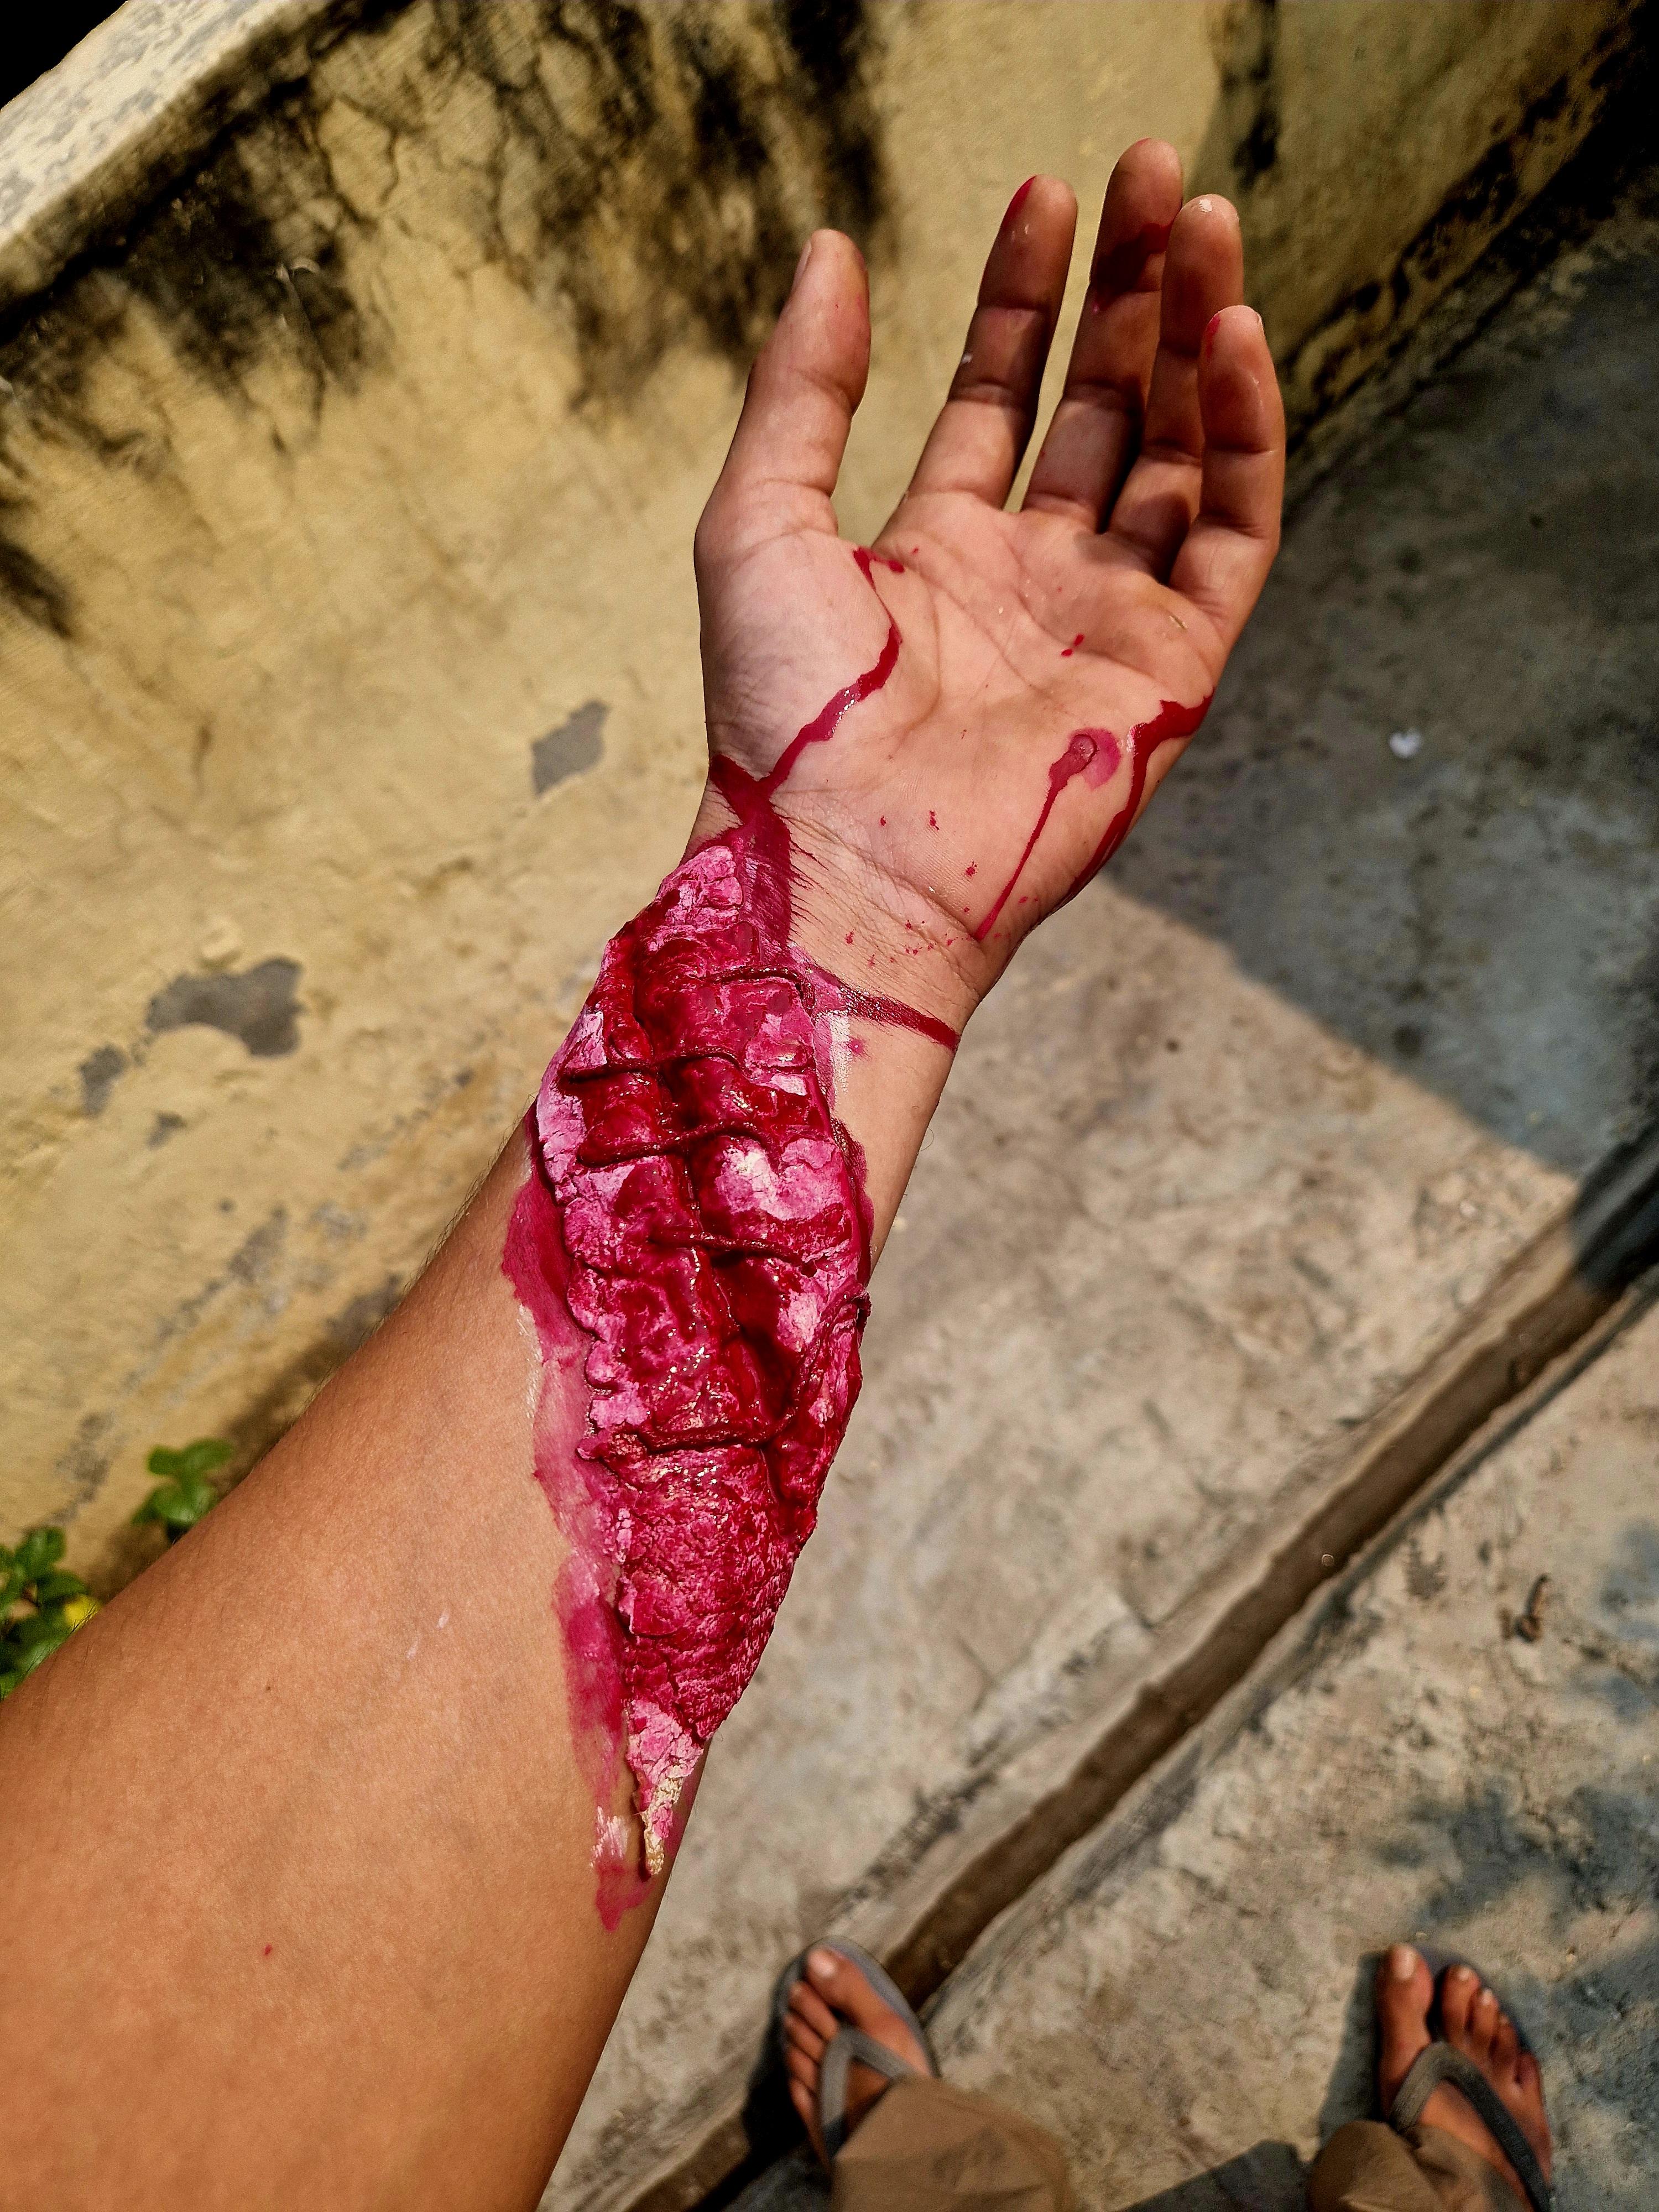

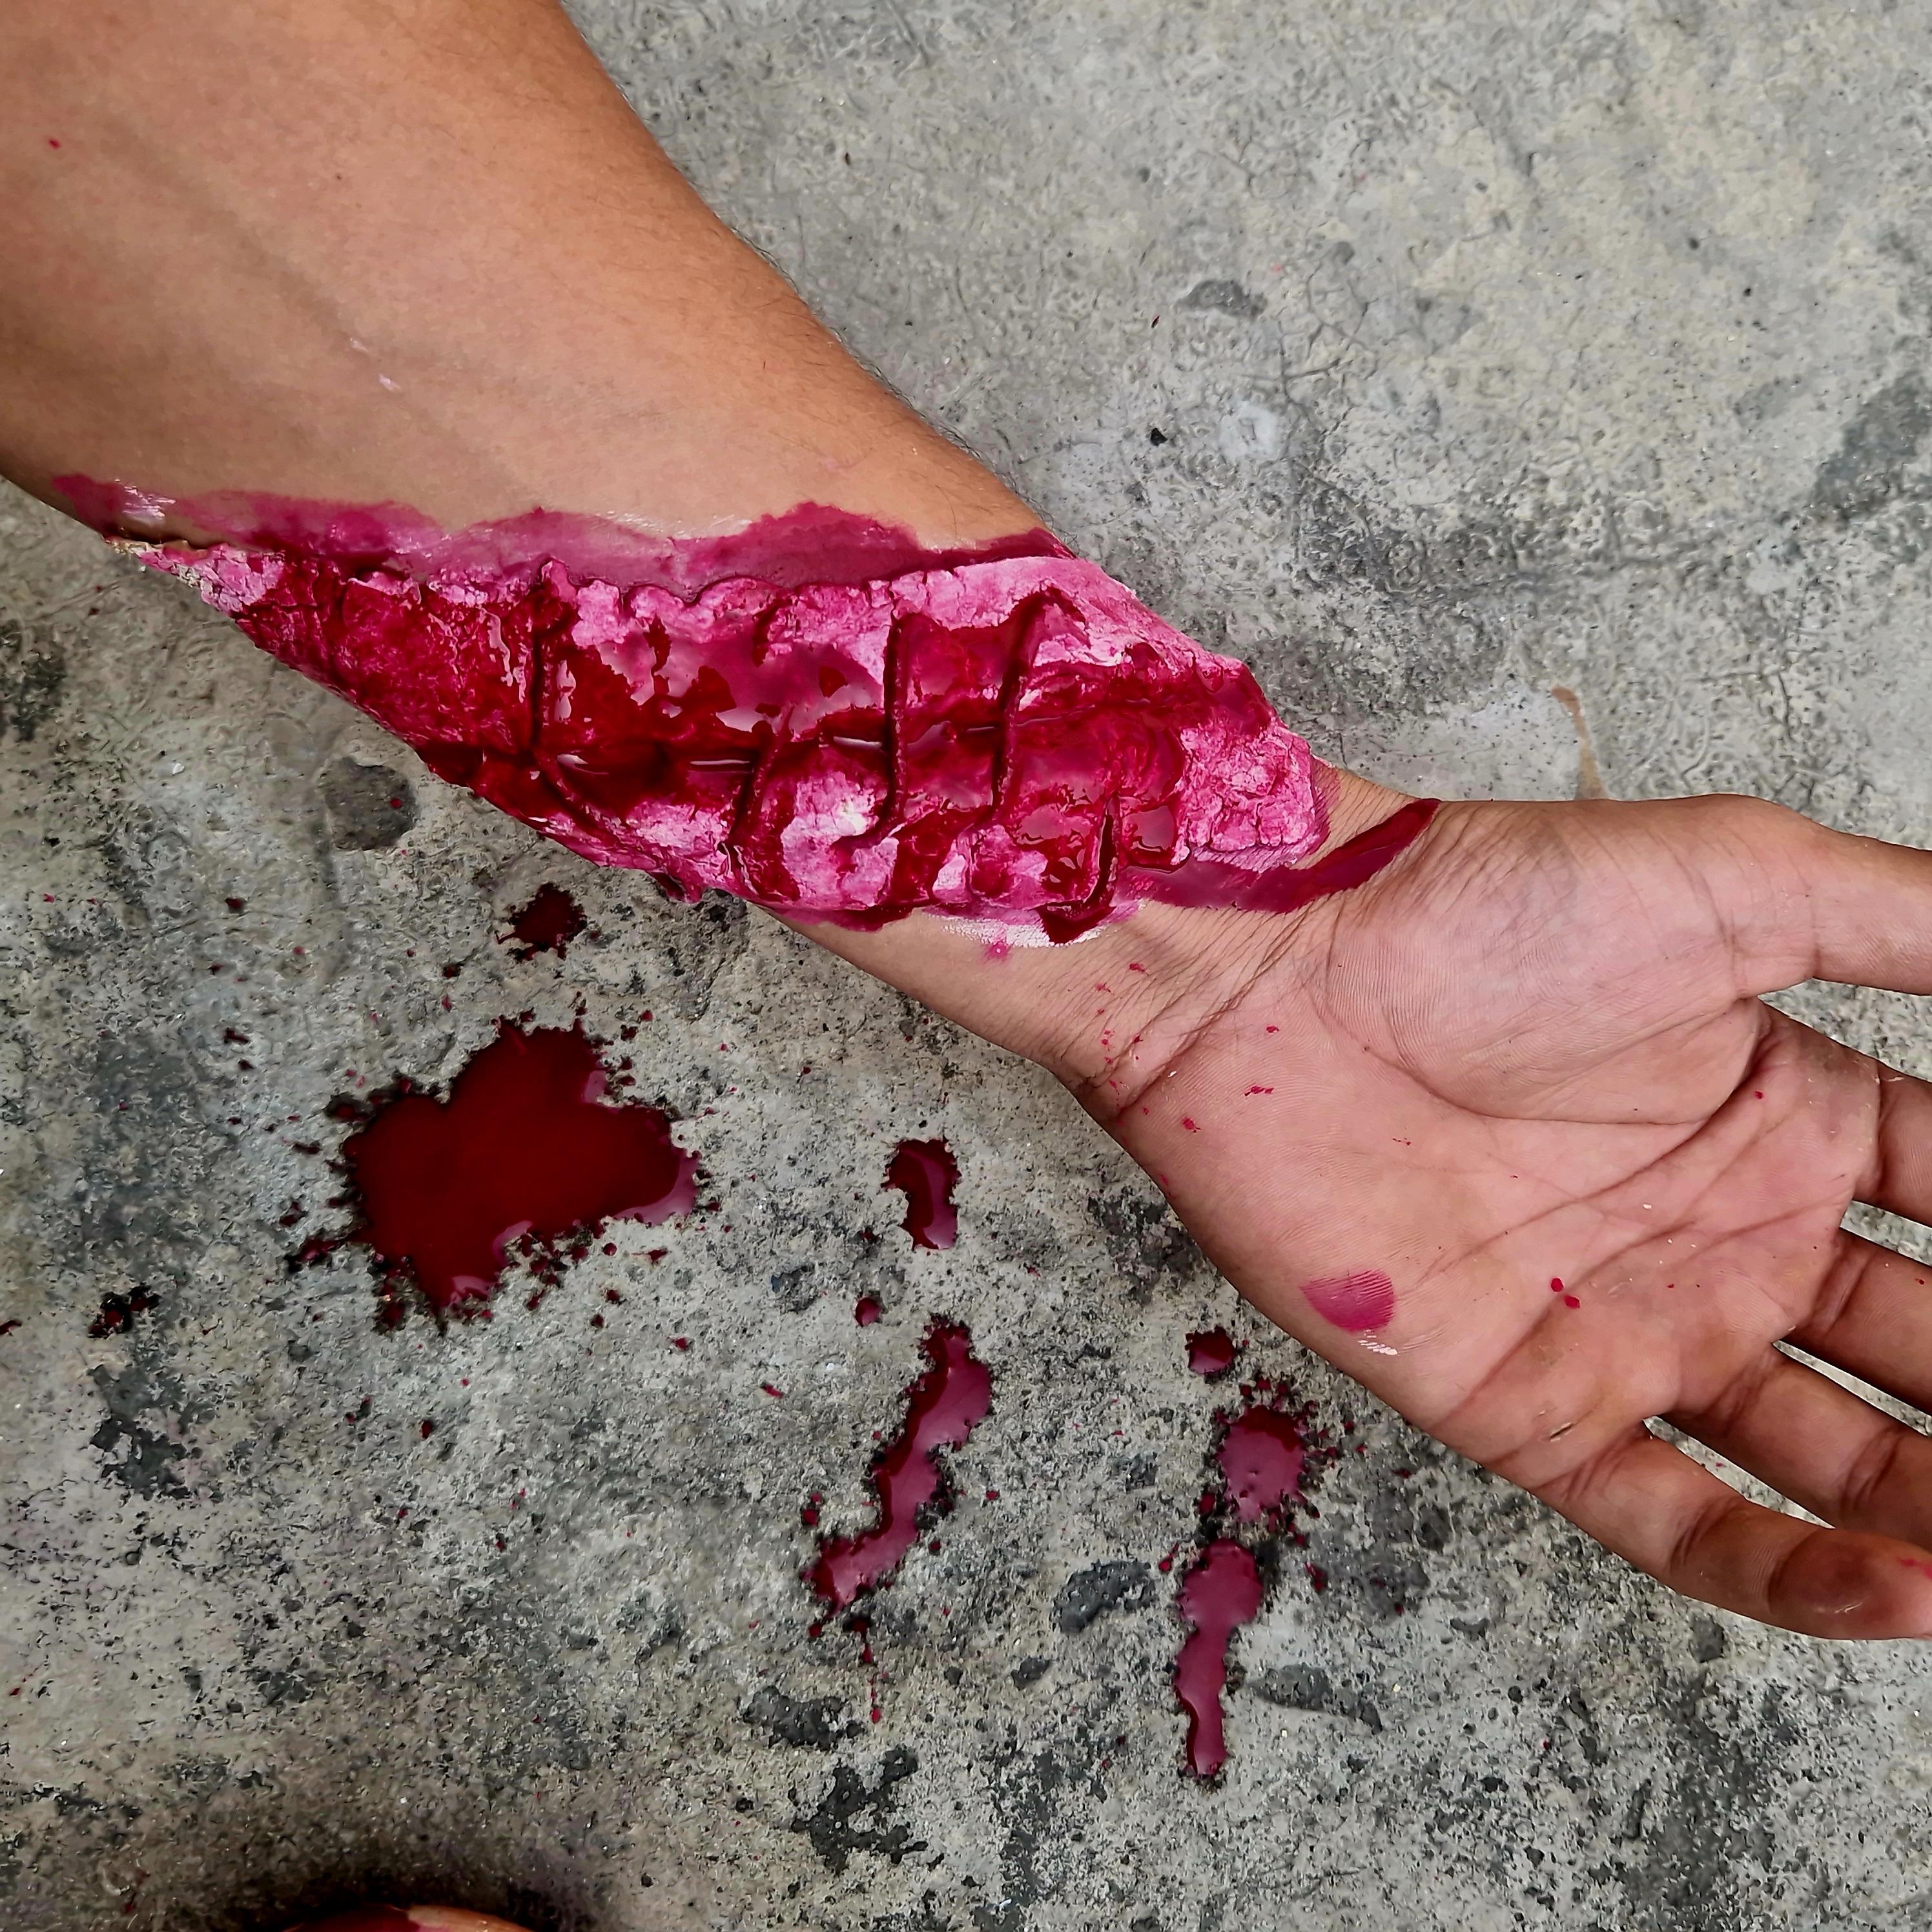
Step 4: Final Touches
Let everything dry properly.
Once dry, you can move your hand slightly to test the flexibility.
The more light and shadow play on it, the more realistic it appears.
Now your realistic cut wound is ready for Halloween! 🎃
Use it for a zombie costume, survivor look, or even as a prop for a scary short film.