DIY Recycled Cardboard Space Rally: Interactive Rotating Board Game
by miranda_sarmi in Design > Game Design
134 Views, 3 Favorites, 0 Comments
DIY Recycled Cardboard Space Rally: Interactive Rotating Board Game
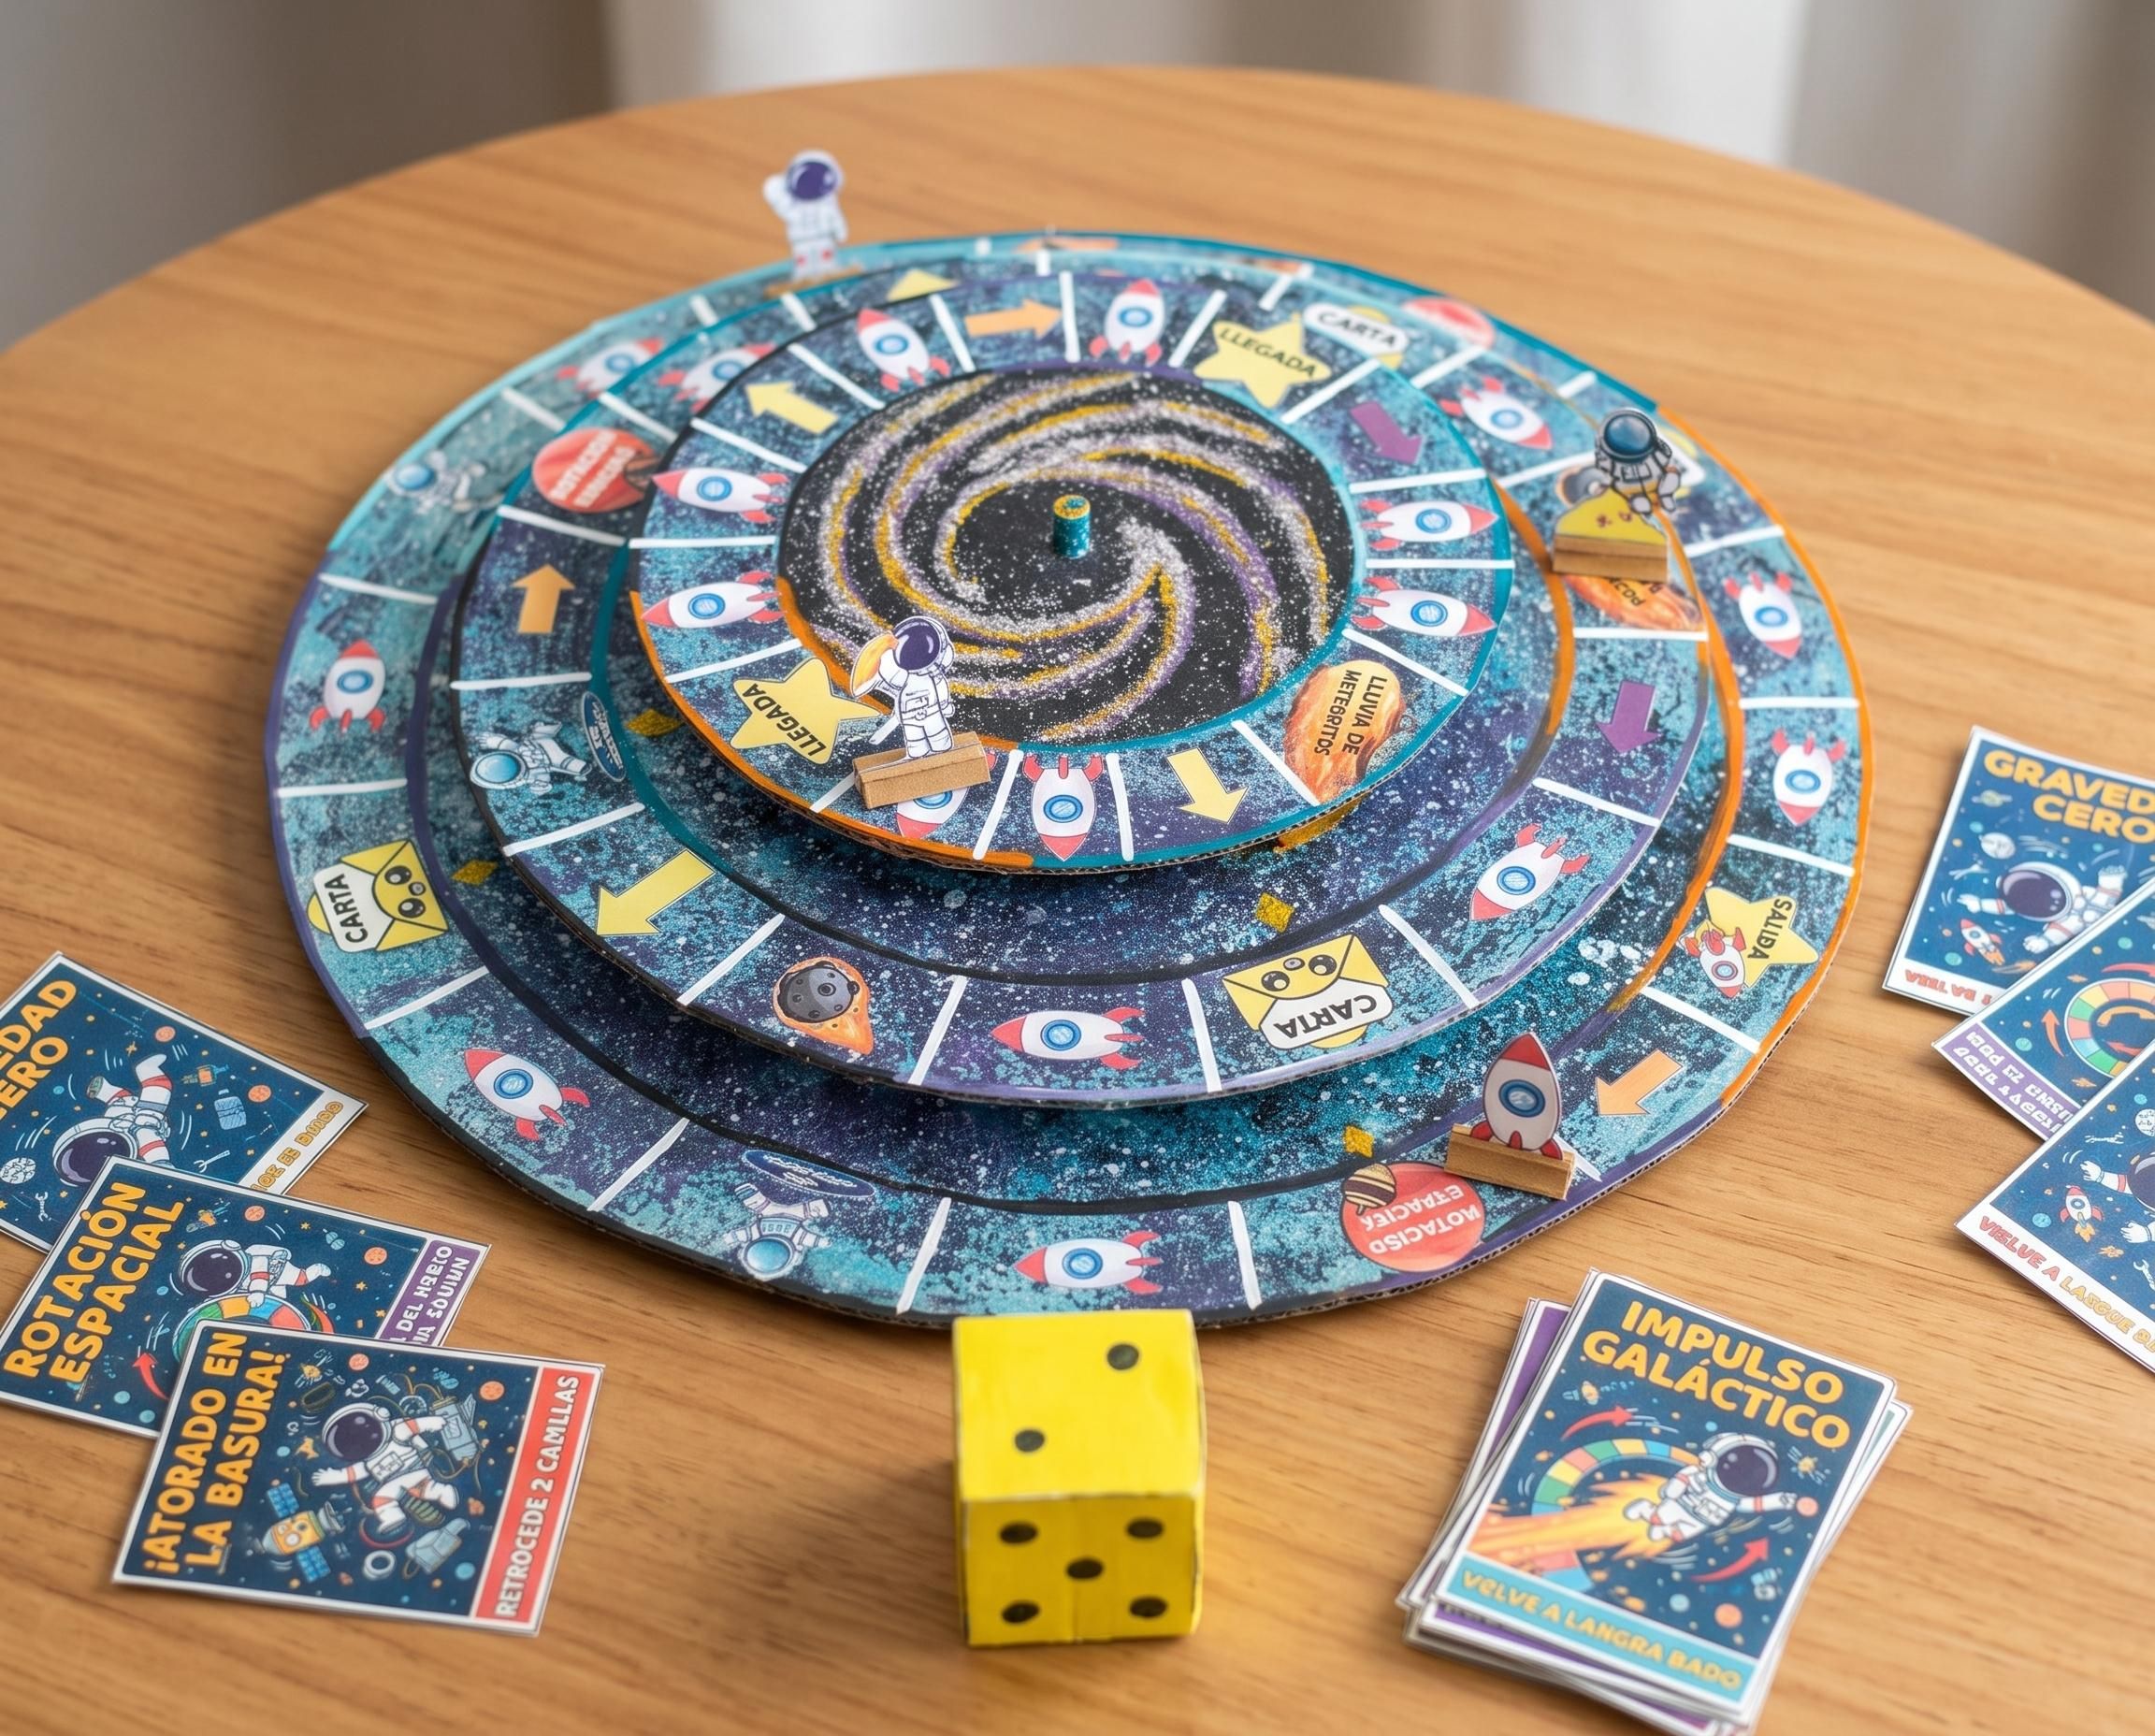

In this tutorial, we will create an interactive space-themed board game made almost entirely from recycled materials such as corrugated box cardboard, straw cardboard (chipboard), scrap paper, and paints.
Instead of letting these materials go to waste, we can upcycle them into a multi-tiered, rotating orbital game board where players navigate space anomalies, shift galaxy paths, and race to reach the central Black Hole!
Supplies
.jpeg)
Materials:
- Recycled Corrugated Cardboard: Shipping boxes or cereal boxes (medium-thick and firm).
- Straw Cardboard / Chipboard (Cartón Paja): For structural stability and smooth rotation layers.
- Recycled Paper / Scrap Paper: For drawing cards, player tokens, templates, and sketch blueprints.
- Paints: Acrylics or poster paints (Dark blue, purple/violet, black, white, yellow, and assorted colors).
- Glitter / Sequins: Gold, silver, and blue (to create stars and galaxy spiral textures).
- Central Axis: A small paper tube, an old pencil, or a wooden stick / skewer.
- 1 Die (6-sided): Can be reused or made from cardstock/paperboard.
- Clear Tape or Contact Paper: To laminate cards and tokens.
Tools:
- Scissors and Utility Knife / Cutter.
- Craft Glue / Liquid Silicone.
- Ruler and Compass (or circular plates/bowling objects of various diameters).
- Markers and Toothbrush (for star spattering effect).
Cutting the Mechanical Board Structure


.jpeg)


.jpeg)

.jpeg)


The game board consists of concentric layers elevated at different heights that fit inside one another and rotate around a central axis.
- Circular Base (Main Support):
- Cut one circle measuring 13 in (33 cm) in diameter out of corrugated cardboard.
- Outer Ring Spacers (Level 1 Elevation):
- To elevate the Outer Ring and create a 3D effect, cut small stacked cardboard blocks/spacers measuring 0.8 in (2 cm) in height.
- Wrap or line their edges with paper or tape for a clean, aesthetic finish.
- Glue these spacers onto the base disc to support the Outer Ring level.
- Outer Ring (Level 1):
- Cut two 13 in (33 cm) diameter circles (one from corrugated cardboard and one from chipboard/straw cardboard).
- In the center of this disc, cut out a square opening of 2.75 x 2.75 in (7 x 7 cm).
- Middle Ring Spacers (Level 2 Elevation):
- Cut stacked cardboard spacers measuring 0.6 in (1.5 cm) in height to elevate the Middle Ring above the base.
- Wrap these spacers for neatness and glue them in place around the central area.
- Middle Ring (Level 2):
- Cut two 9.8 in (25 cm) diameter circles (one corrugated cardboard, one chipboard).
- Cut a 5.9 in (15 cm) diameter circle hole in the middle to create the ring inner boundary, and cut a 2.75 x 2.75 in (7 x 7 cm) square hole in the central core.
- Central Disc (Level 3 / Black Hole):
- Cut two 6.7 in (17 cm) diameter circles (one corrugated, one chipboard).
- Cut one additional 4.3 in (11 cm) diameter circle from chipboard to elevate the central region.
- Central Axis Tube:
- Roll a piece of paper or craft a cardboard tube measuring 2.35 in (6 cm) in height and 2.75 in (7 cm) in diameter (or adapt using a small central peg) so that it passes through all central cutouts.
- Insert the central axis tube into the center of the base disc. This alignment ensures the middle ring rotates smoothly without shifting off-center.
Painting Galactic Artwork and Drawing Spaces


.jpeg)

.jpeg)
.jpeg)
.jpeg)

.jpeg)
.jpeg)
.jpeg)

.jpeg)
.jpeg)

.jpeg)


.jpeg)


- Galaxy Texture Effect:
- Paint all three levels with a base blend of deep metallic blue, violet (mixed with blue, red, and white), and black.
- Use a dry brush or sponge to dab subtle highlights for movement. Dip a toothbrush or stiff brush into white acrylic paint and flick the bristles to create a milky way starry splatter.
- Black Hole Spiral Center:
- Apply diluted glue to the central disc and sprinkle silver, purple, and gold glitter to simulate a dense star cluster swirling into the core.
- Drawing the Game Spaces:
- Outer Ring (Level 1): Divide into 16 spaces using bright paint or white markers.
- Middle Ring (Level 2): Divide into 15 spaces.
- Central Disc (Level 3): Divide into 15 spaces encircling the final destination / Black Hole center.
- Icon Distribution Across Spaces (~1.2 in / 3 cm Icon Height):
- Outer Ring: 1 Start Star ("Salida"), 1 Small Orange Arrow, 2 Space Rotation Planets, 6 Rockets, 2 Jump-In Astronauts, 2 Envelope Cards, 1 Small Purple Arrow, 1 Meteorite, 1 Meteorite Shower ("Lluvia de Meteoritos").
- Middle Ring: 2 Large Yellow Arrows, 1 Small Orange Arrow, 1 Small Purple Arrow, 1 Space Rotation Planet, 5 Rockets, 1 Jump-In Astronaut, 2 Envelope Cards, 2 Meteorites, 1 Meteorite Shower.
- Central Disc: 2 Small Yellow Arrows, 1 Small Orange Arrow, 1 Small Purple Arrow, 8 Rockets, 1 Meteorite Shower, 2 Finish Stars ("Llegada").
- Rotation Alignment Markers:
- Paint 4 gold/yellow guide stars spaced at 90° intervals on the Outer Ring starting from the Start space.
- Paint 4 matching guide stars at 90° intervals on the Middle Ring so players can easily re-align the rotating ring after triggering a space rotation.
Crafting Player Tokens and Event Cards


.jpg)


- 3D Spaceships and Astronaut Tokens:
- Draw 4 unique characters on recycled scrap paper: 1 Rocket, 1 Astronaut holding a planet, 1 Astronaut sitting on a star, and 1 Wave-greeting Astronaut.
- Color with markers, laminate with clear tape for durability, and glue a small cardboard base strip to the bottom so they stand upright on the board.
- Space Event Cards:
- Cut 18 rectangular cards measuring 3.15 x 2.35 in (8 x 6 cm) from scrap paper or thin cardboard.
- Laminate with clear tape or contact paper.
- Write challenge prompts such as:
- "Zero Gravity! Roll the die again."
- "Space Rotation! Rotate the middle ring 90° clockwise to shift the path."
- "Wormhole! Jump directly to the next inner ring."
- "Stuck in Space Debris! Move back 2 spaces."
- "Meteor Shower! Lose 1 turn."
- "Galactic Boost! Move forward 3 spaces."
- "Orbital Timeout! Skip this turn."
Building the Custom Paperboard Die


- Drafting the Net (1.57 x 1.57 in / 4 x 4 cm):
- Draw 6 connected squares measuring 1.57 x 1.57 in (4 x 4 cm) each on yellow cardstock or cardboard. Include 0.4 in (1 cm) glue tabs along the outer edges.
- Adding Dots:
- Draw traditional die pips (1 to 6) in black marker on each face.
- Cutting & Folding:
- Cut along the outer solid outline (preserving the tabs). Crease firmly along all interior fold lines using a ruler edge.
- Assembly:
- Apply glue to the outer side of each tab, fold inward, and hold for a few seconds until set.
Downloads
Rules and Gameplay Mechanics

.jpeg)


Objective:
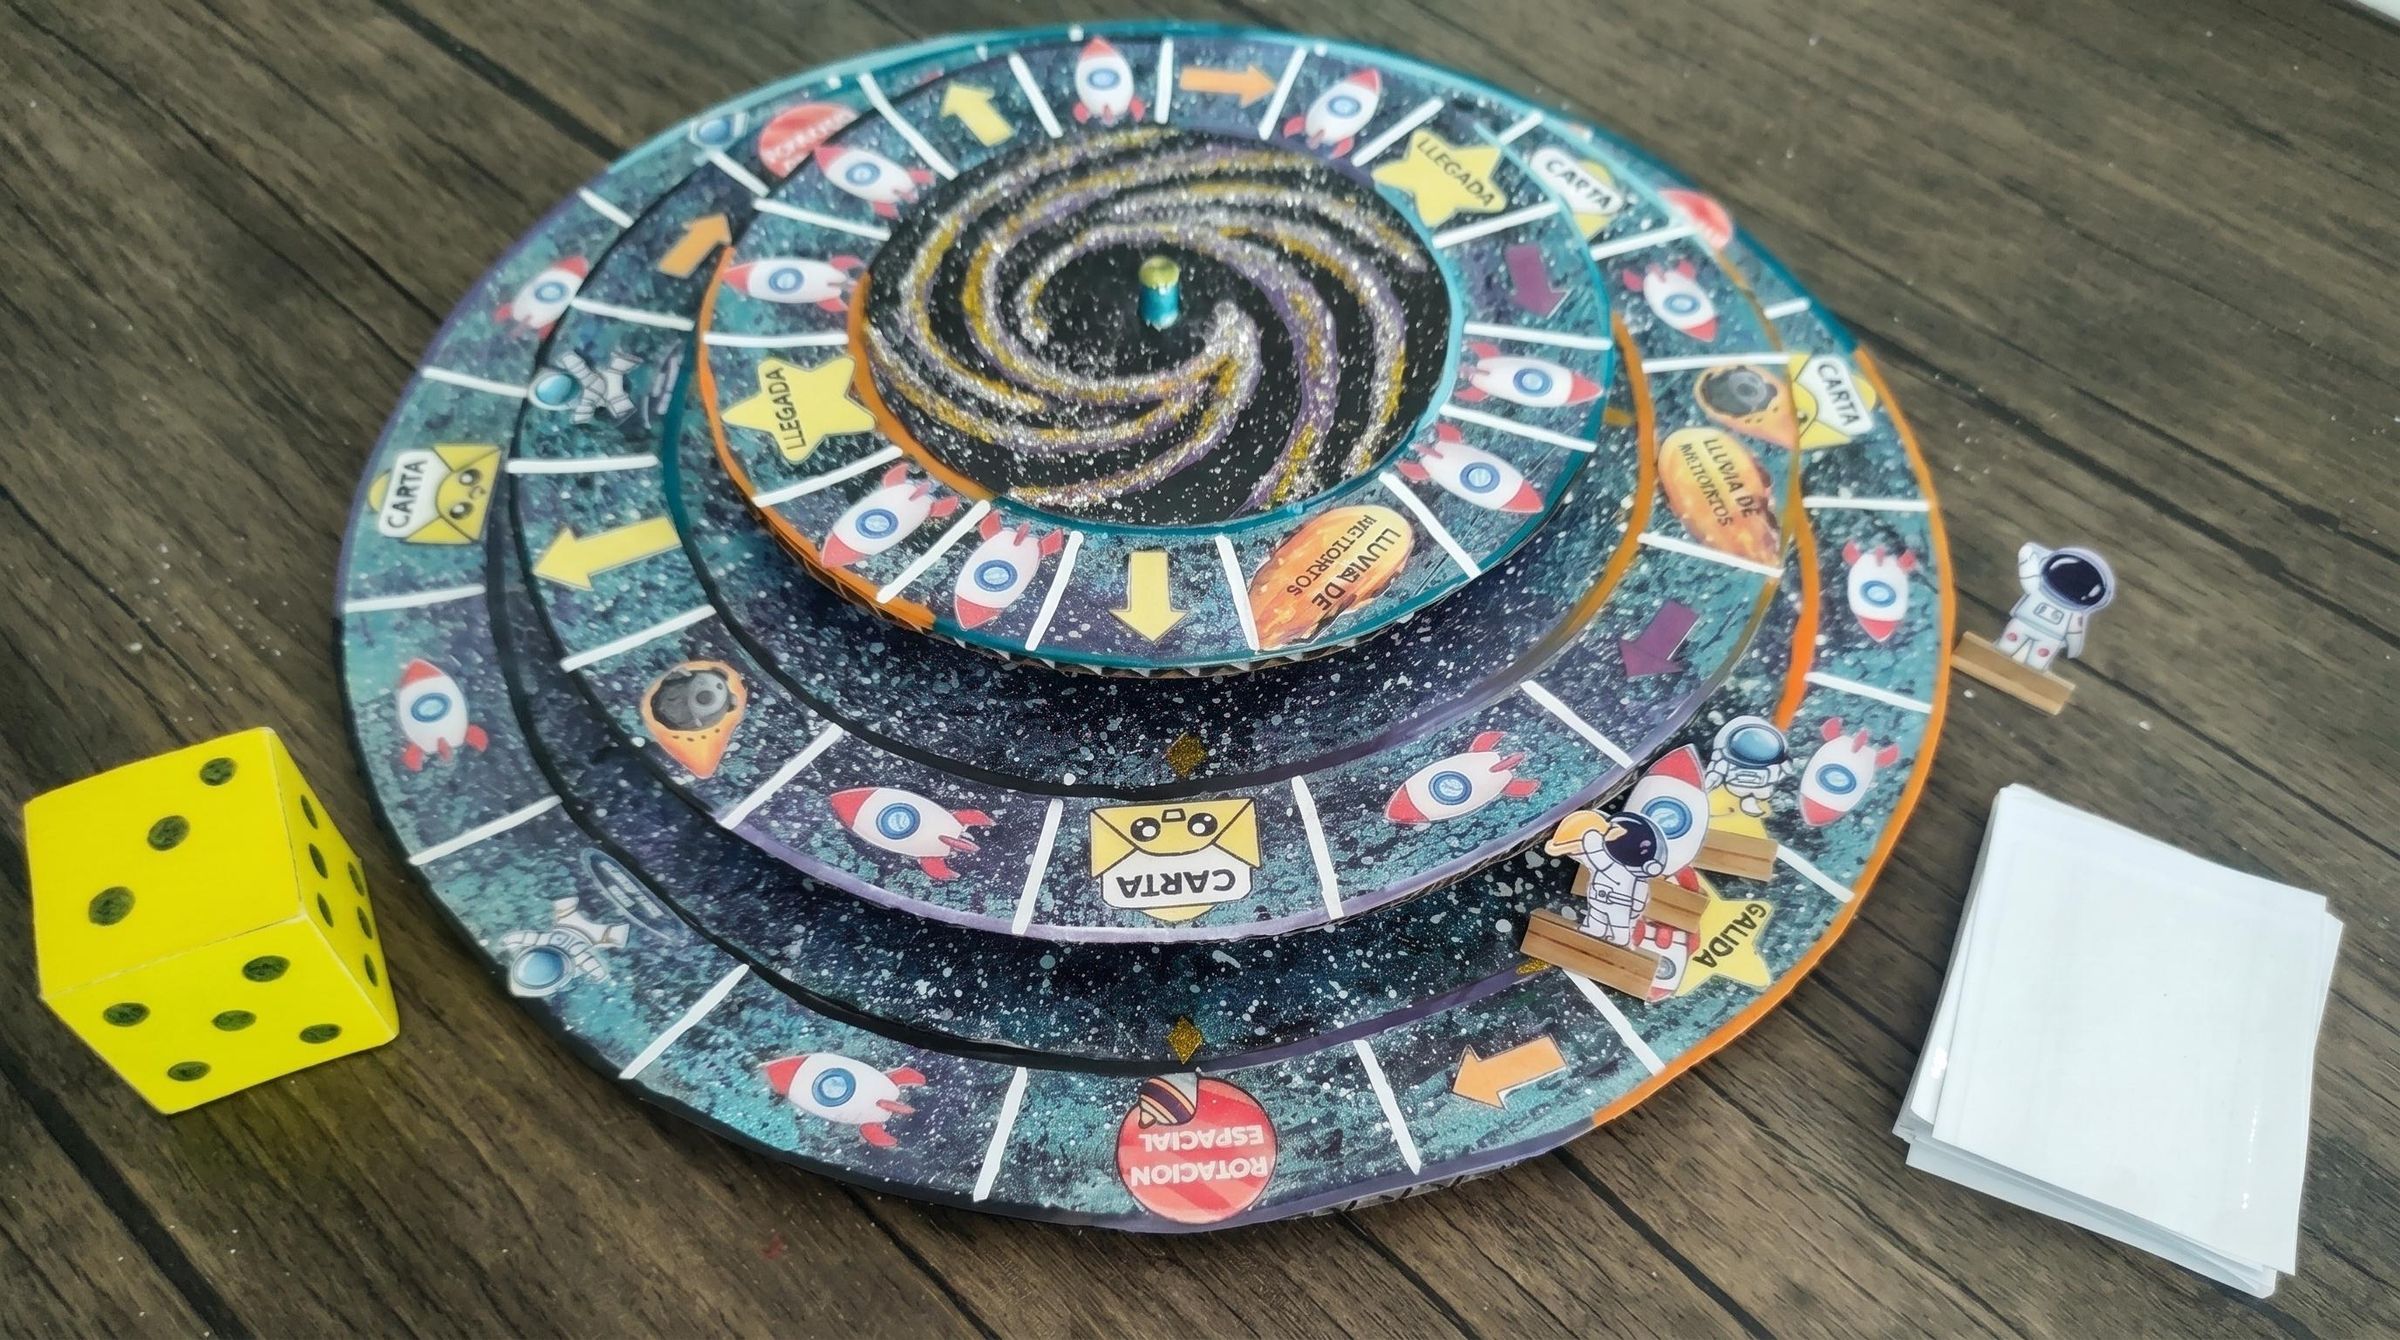
Be the first astronaut to navigate the rotating orbital rings, overcome space anomalies, and land inside the central Black Hole.
Game Setup:
- Place the game board on a flat surface. Align the rotating rings using the painted guide stars.
- Shuffle the Space Event Deck and place it face-down next to the board.
- Each player selects a token and places it on the Start Star ("Salida") space on the Outer Ring.
- Players roll the die; highest roll goes first.
On Your Turn:
- Roll the die and move your token forward the exact number of spaces following the orbital path arrows.
- Space Rotation Icon: Rotate the Middle Ring 90° clockwise, shifting board connections for all players!
- Jump-In Astronaut Icon: Move your token inward from the Outer Ring to the Middle Ring, or from the Middle Ring to the Central Disc.
- Card / Envelope Icon: Draw an Event Card and immediately resolve its instruction.
- Meteor Shower Icon: Lose your next turn.
- Yellow Arrow Icon: Sends your token back outward to the previous outer ring.
Winning the Game:
The first player who lands by exact die roll on one of the Finish Stars ("Llegada") and enters the center of the Black Hole wins the expedition!