DIY Payment Sound Box: AI-Powered Payment Assistant
by techiesms in Circuits > Electronics
140 Views, 0 Favorites, 0 Comments
DIY Payment Sound Box: AI-Powered Payment Assistant
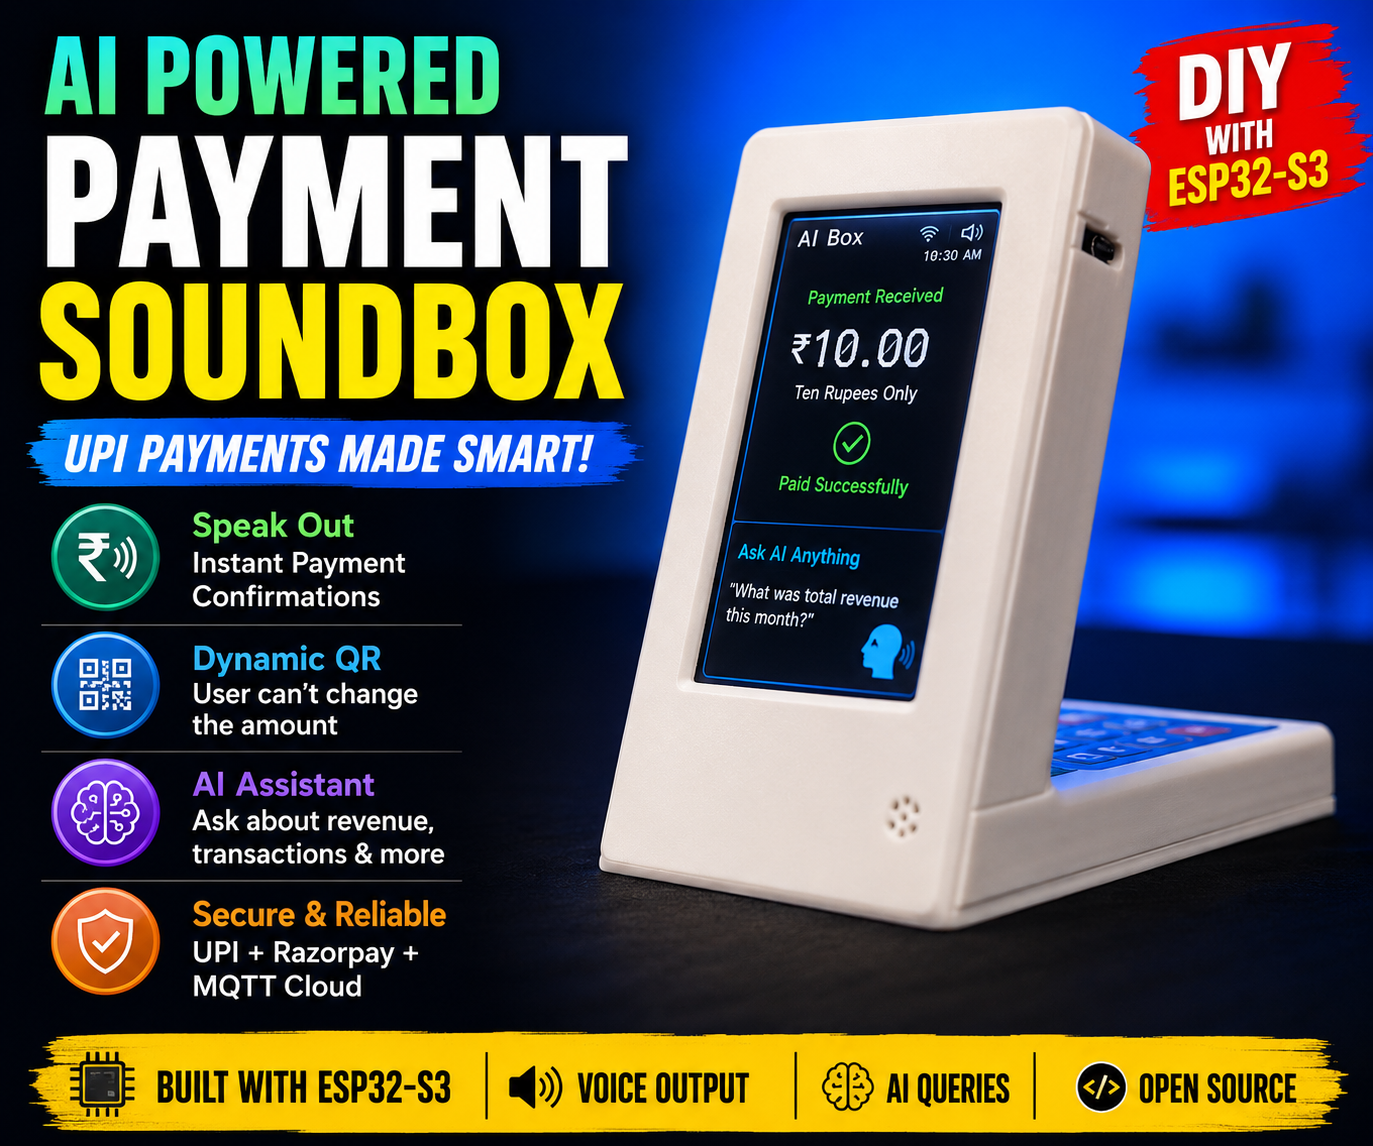

In this project, you will learn how to build your own DIY AI-Powered UPI Payment Soundbox, a smart payment speaker and business assistant based on the ESP32-S3 board. This compact device can be placed on a shop counter or desk and works as a personal financial assistant that can track transactions, generate custom QR codes, and answer business questions through its microphone and speaker.
The AI Soundbox can accept instant UPI payments and immediately announce the received amount to confirm transactions. It can also generate secure, dynamic QR codes for any specific amount using an attached keypad so that customers cannot alter the payment value. With its built-in artificial intelligence, you can ask it natural language questions about your sales history such as checking your overall monthly revenue and it will fetch the data and speak the answer back to you.
Supplies
Main Electronics:
- 3.5" TFT LCD Display — Used to display transaction amounts, user interfaces, and the generated QR codes.
- ESP32-S3 Module (16MB Flash / 8MB PSRAM) — The main microcontroller responsible for handling calculations, Wi-Fi connectivity, and cloud API communication.
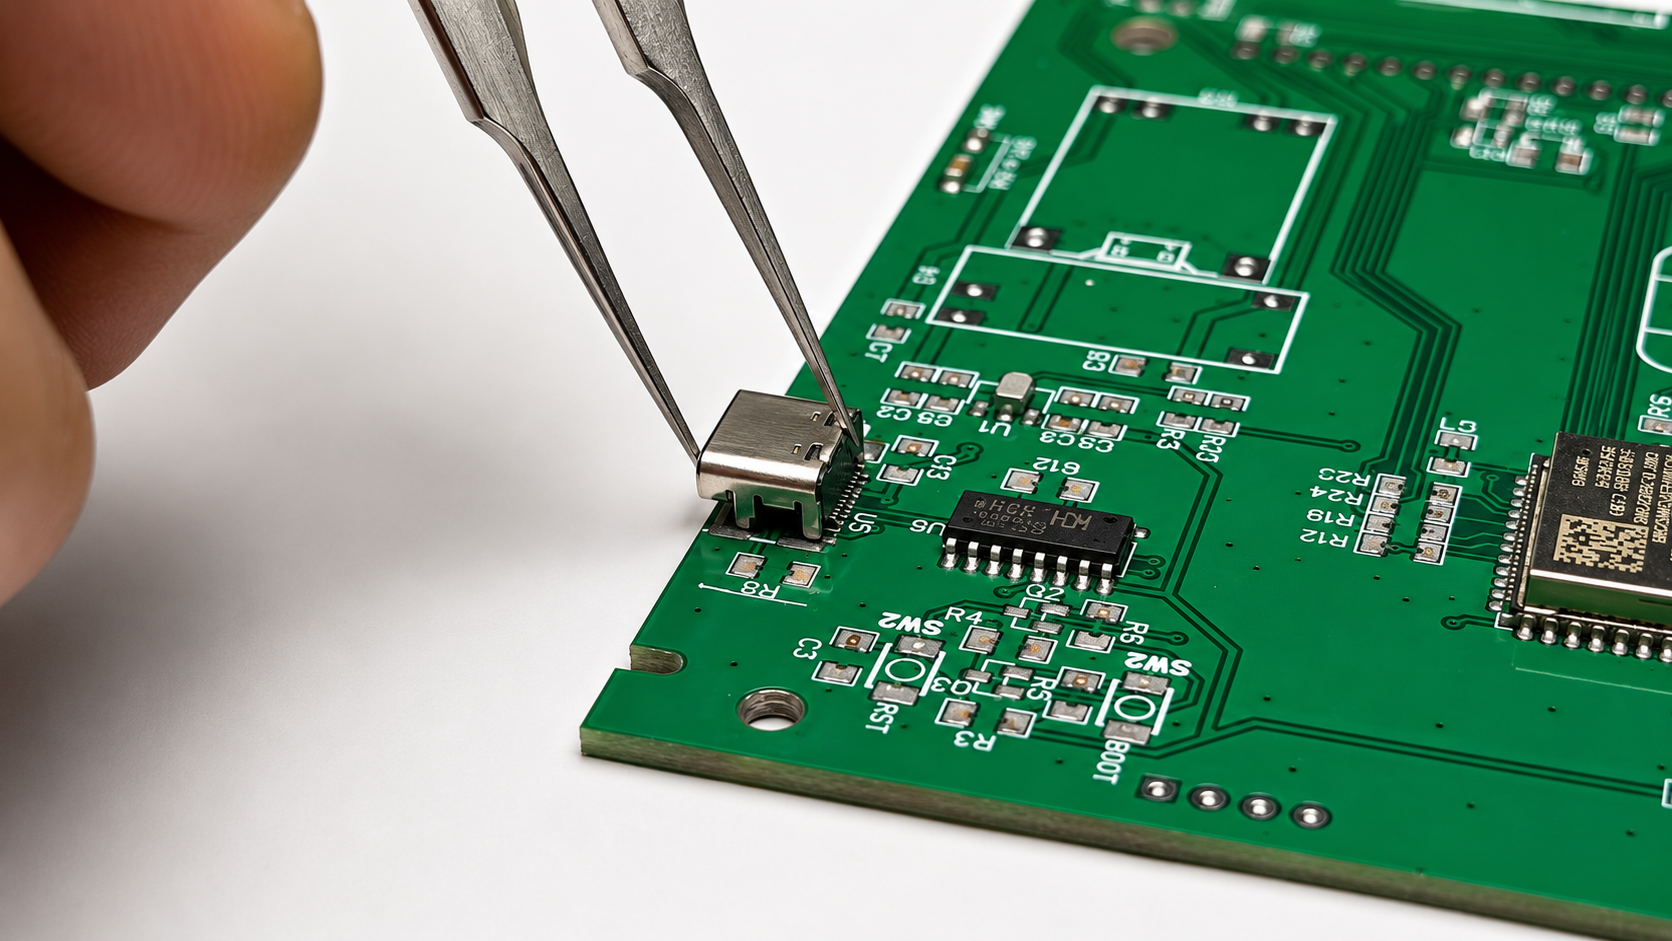
- MAX98357 I2S Amplifier Module — Converts digital audio from the ESP32-S3 into clear analog output for the speaker.
- INMP441 I2S Microphone — An omnidirectional microphone used to record voice commands for the AI assistant.
- 4x4 Hex Keypad — A matrix keypad used to manually enter transaction amounts.
- Cavity Speaker — Compact audio driver optimized for clear voice feedback and transaction announcements.
Power Management:
- TP4056 Charging Module — Handles the safe charging and protection of the lithium battery.
- 5V Boost Converter Module — Steps up the battery voltage to a stable 5V required to power the TFT display.
- 3.7V Li-Po Battery — Portable power source to make the soundbox completely wireless.
PCB & Assembly:
- Custom PCB — Designed to mount the display, microcontroller, and back-end modules securely.
- Tactile Pushbutton — A dedicated external button held down by the user to trigger voice recordings for the AI assistant.
- JST Connectors & Jumper Wires — Used to interface the external keypad and hardware components to the main board.
- Screws — Hardware used to securely fasten the internal electronics and the enclosure panels together.
Enclosure:
- 3D Printed Case — A custom-designed multi-part enclosure inspired by commercial payment boxes to house all components cleanly.
PCB Design and Layout
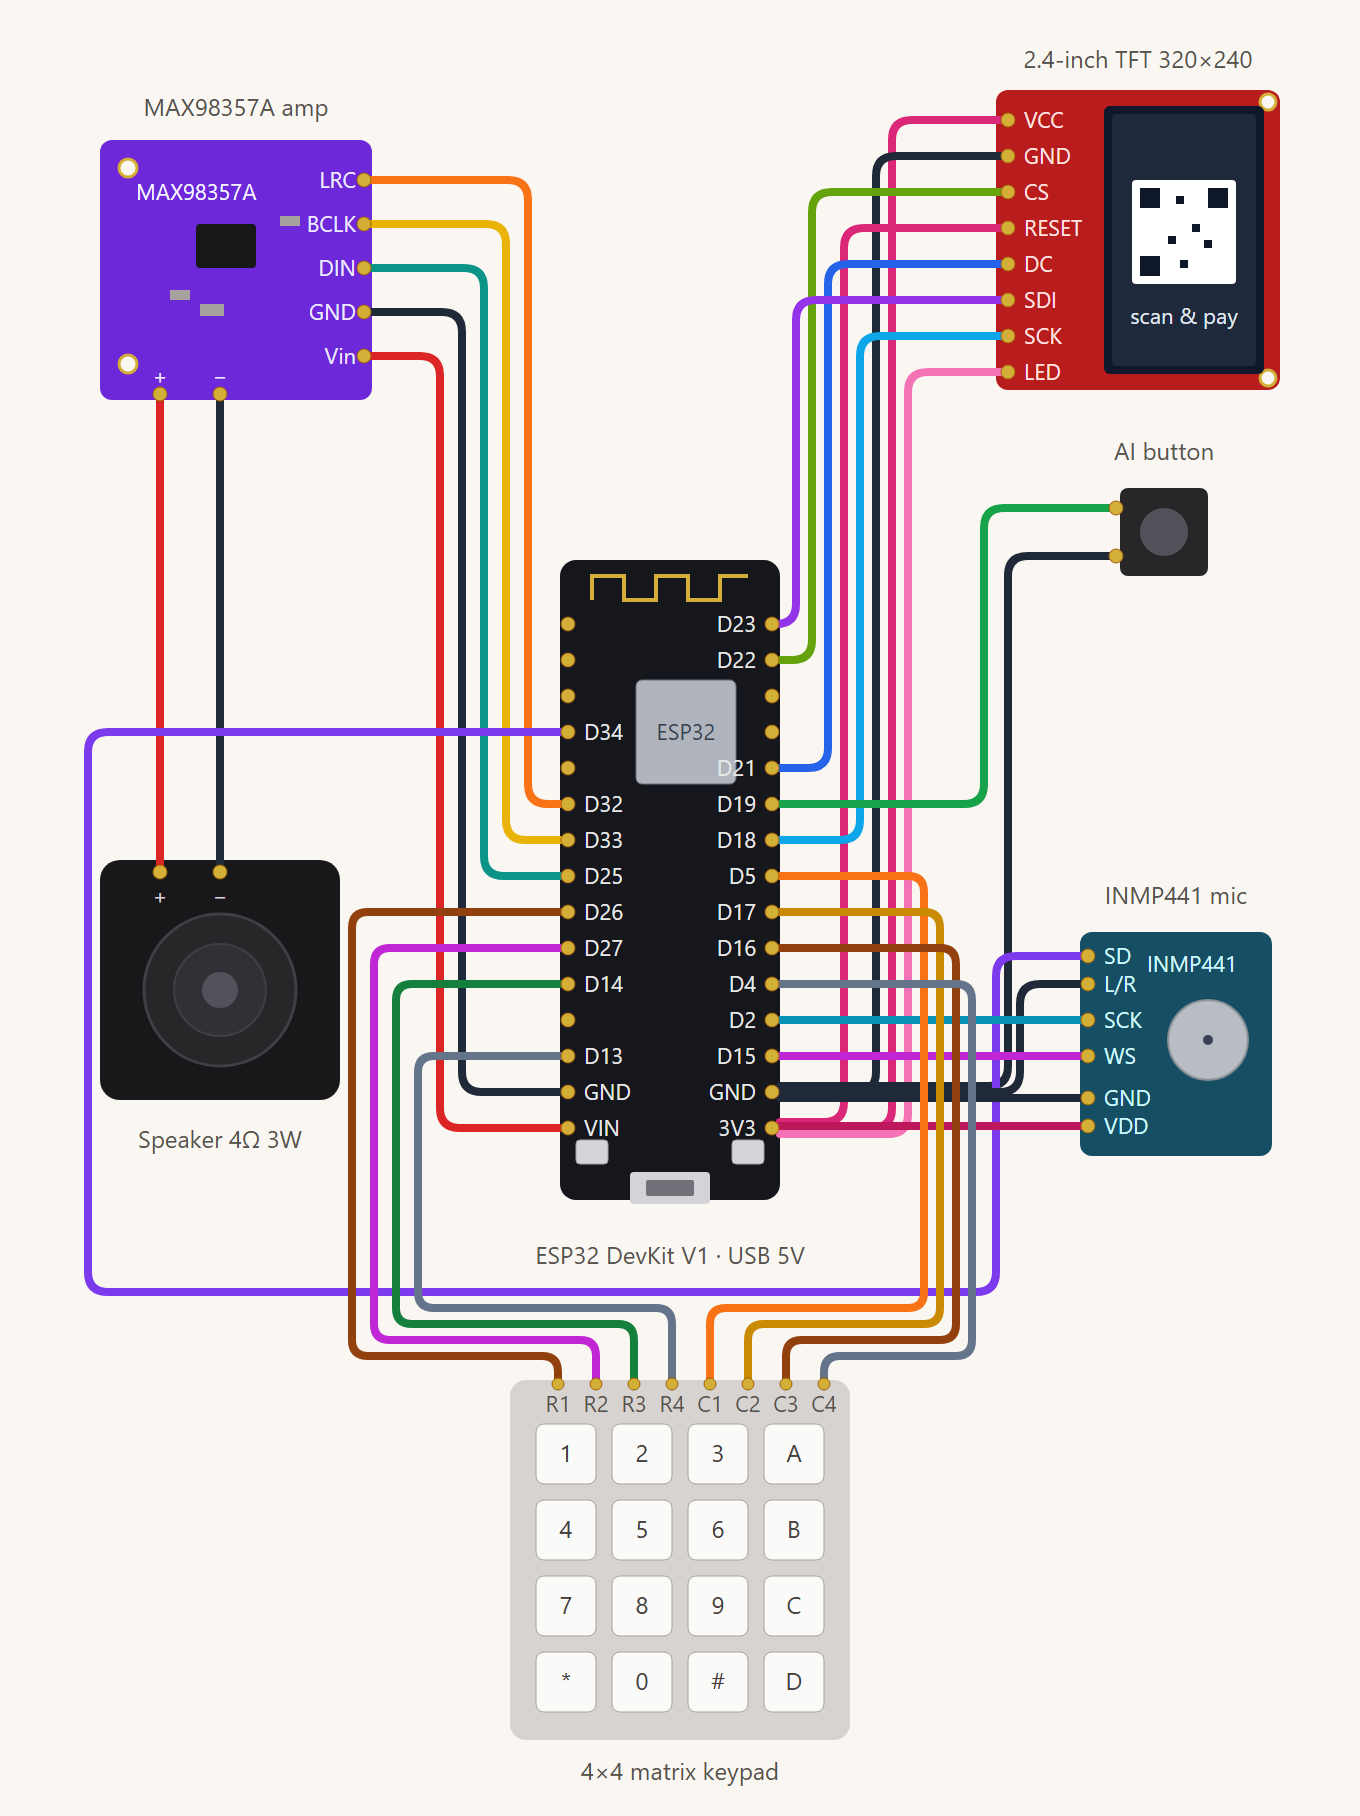
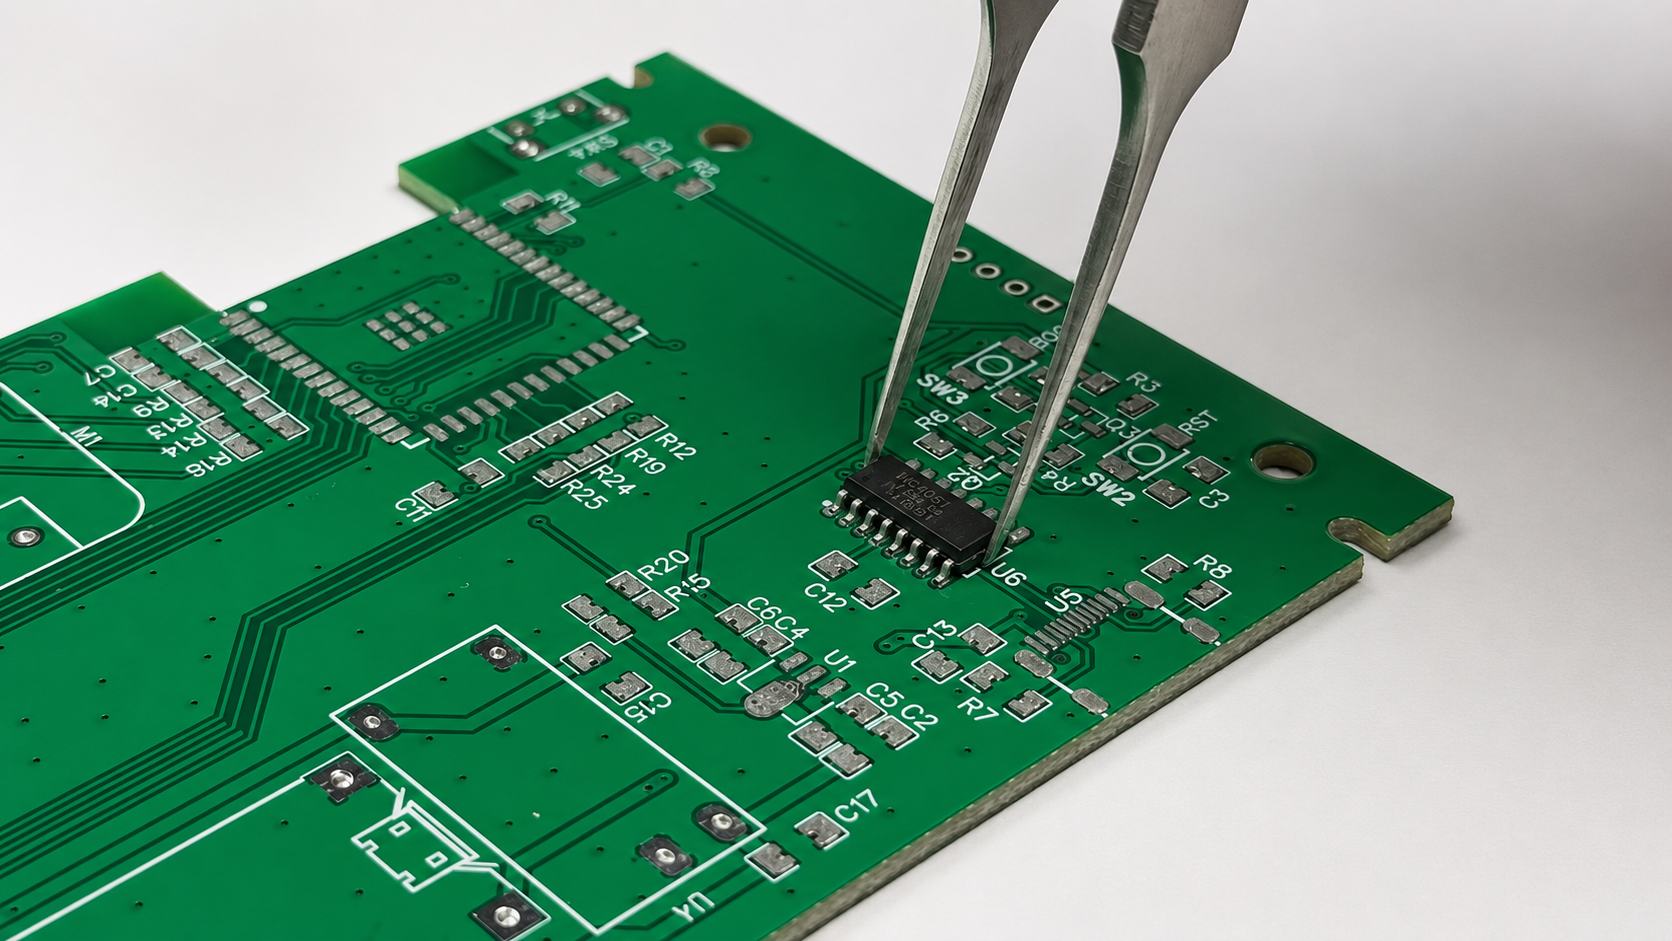
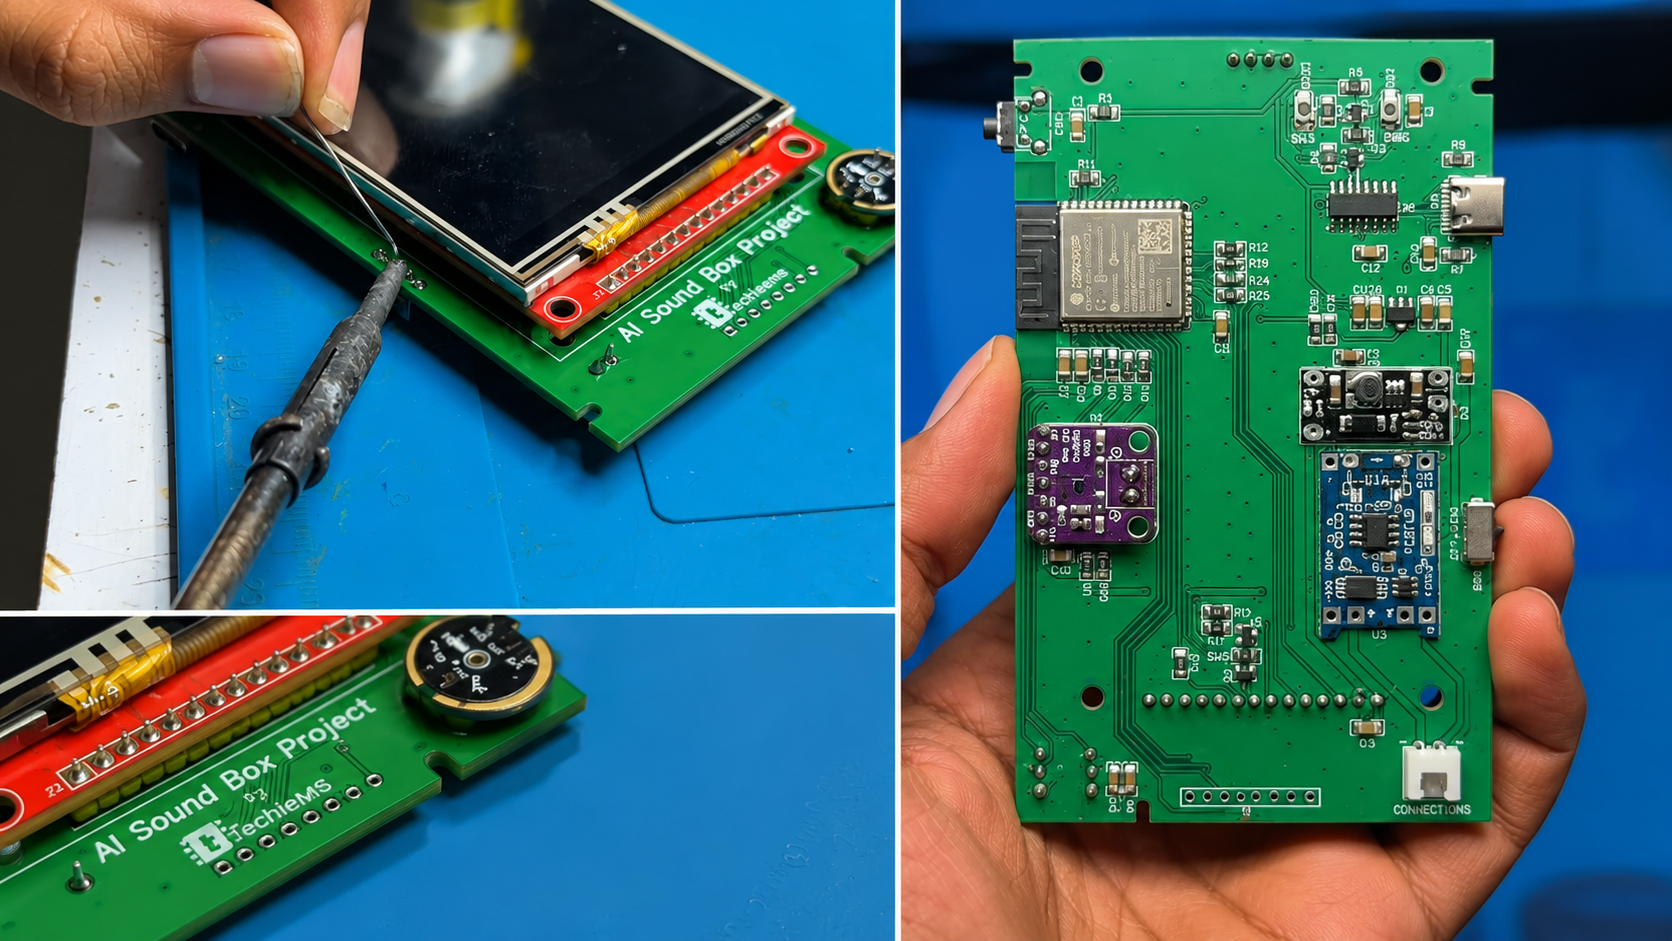
To keep our AI payment soundbox as neat and compact as possible, we designed a custom PCB. We used a double-sided layout strategy to maximize space and keep the wiring completely hidden:
- Top Layer: The 3.5-inch TFT LCD screen and the INMP441 microphone are mounted on the front side for clear visibility and neat voice pickup.
- Bottom Layer: The main ESP32-S3 module, power regulators, and supporting audio amplifier chips sit securely on the back side.
- External Ports: We integrated a standard JST connector into the board design so the 4x4 hex keypad can simply plug in from the outside.
- AI Action Trigger: A clean tactile push button is positioned right on the side of the board to easily trigger voice recording loops.
Once all the connection tracks and circuit pathways were fully traced and checked, we generated the final Gerber files for production.
Sponsored by NEXTPCB:

Our custom boards were manufactured by NEXTPCB. Their professional fabrication setup makes it incredibly easy to get high-quality prototypes for multi-layered electronic builds.
NEXTPCB offers excellent manufacturing solutions including:
- Quick-turn PCB prototyping
- Full turn-key PCB assembly (PCBA)
- Advanced multi-layer board fabrication
- High-density HDI PCB options
- Flexible and rigid-flex board layouts
- Reliable SMT assembly lines
Their online DFM checking tools analyze your files instantly to find any design issues or track overlaps before production starts. For this build, we uploaded our Gerber files and ordered a custom matching stainless steel stencil to ensure a perfectly clean solder application.
Flashing the Firmware
Custom Web Flasher Tool:
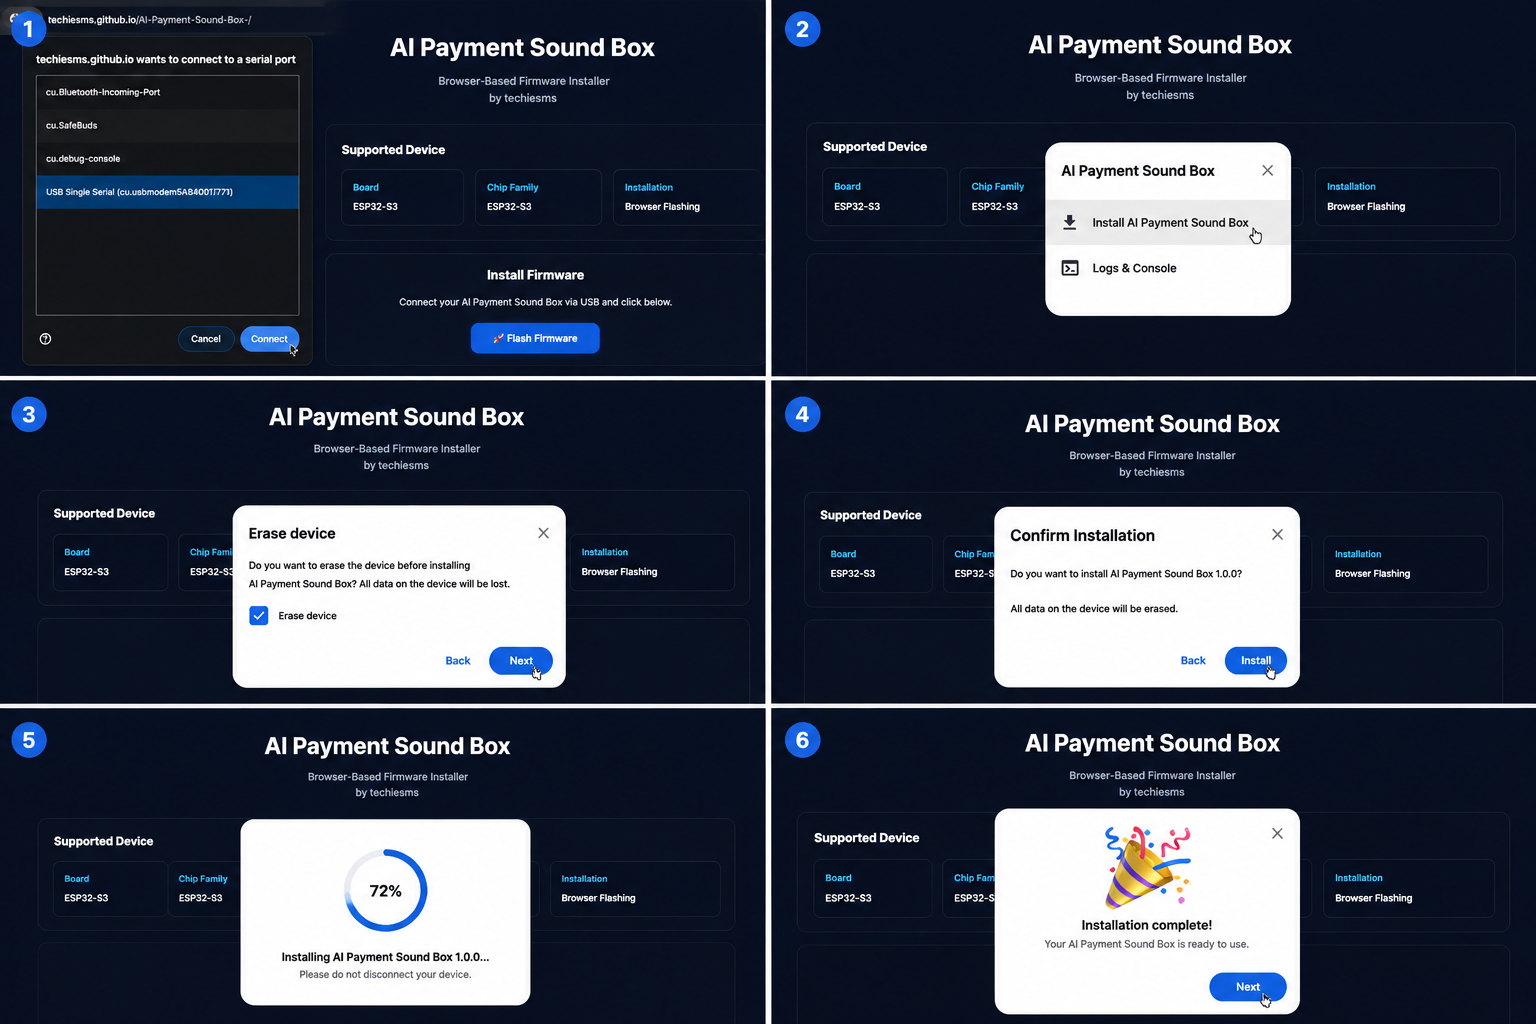
To make setting up the AI Payment Soundbox as convenient as possible, a custom web flasher tool was developed. This eliminates the need to download heavy IDE software, configure specialized libraries, or manually install board packages. The entire firmware installation process is done directly through a compatible web browser with a single click.
Step-by-Step Flashing Instructions:
- Open the Flasher Tool: Navigate to the custom web flasher link provided in the project repository using a standard browser (such as Chrome or Edge) that supports WebSerial.
- Initiate the Installation: Click on the Flash Firmware button on the interface.
- Connect your Microcontroller: Connect your ESP32-S3 board to your computer via a USB data cable. Select the corresponding COM port from the browser's device list pop-up and click Connect.
- Select the Firmware Package: Choose the Install AI Payment Soundbox option from the main menu.
- Perform a Clean Flash: Ensure you select the option to Erase previous firmware before initiating the installation. This wipes older configurations and prevents memory conflicts.
- Complete the Process: Wait a few moments for the installation tool to finish flashing. Once completed successfully, the boot user interface will automatically initialize and display on your 3.5-inch TFT LCD screen.
Initial Setup Mode:
After the firmware is successfully flashed and the soundbox is rebooted, the device will automatically enter configuration mode to link your cloud infrastructure:
- Access Point Details: The device hosts its own temporary Wi-Fi network to let you upload parameters.
- SSID Network Name: AI box setup
- Network Password: 12345
Connect your laptop or smartphone to this network to automatically pull up the localized portal page. This portal is where you will input your local Wi-Fi credentials alongside your third-party API keys (including OpenAI, 11labs, Adafruit IO, and Razorpay) to activate the operational features of your soundbox.
Firmware & Cloud Configuration
Initial Device Setup:
Once the firmware has been flashed successfully and the soundbox reboots, it will automatically enter its localized configuration mode to let you link your Wi-Fi network and essential cloud credentials.
- Connect to the Access Point: On your laptop or smartphone, scan for available Wi-Fi networks and connect to the temporary hotspot created by the microcontroller:
- Network Name (SSID): AI box setup
- Password: 12345
- Open the Configuration Portal: After connecting, a configuration web page should launch automatically. If it does not open, manually open your web browser and navigate to the following IP address:
- 192.168.4.1
- Connect to Local Wi-Fi: Click on the Configure Wi-Fi button. The portal will scan for nearby networks. Select your local Wi-Fi network from the generated list, type in your network password, and proceed to the API keys section below.
Integrating Cloud APIs & Credentials:
To make the automated payment tracking and AI voice assistant features function, you must input the corresponding API keys from your cloud accounts into the portal fields:
- OpenAI API Key: Navigate to platform.openai.com, generate a new secret key, and paste it here. This manages the LLM language processing and final text-to-speech engine.
- 11labs API Key: Go to 11labs.io to grab your API token under your profile settings. This platform acts as the core cloud tool to translate your recorded microphone speech into text.
- Razorpay Credentials (Key ID & Key Secret): Log into your Razorpay Business Dashboard, head to Account Settings -> API Keys, and generate your live credentials. These allow the ESP32-S3 to securely pull historical transaction lists and handle exact date ranges via natural voice requests.
- Adafruit IO Integration (Username & Active Key): Log into io.adafruit.com and click the yellow key icon on your dashboard to copy your MQTT server credentials.
- Important Feed Note: Ensure you have already created a data feed explicitly named "amount" inside your Adafruit IO dashboard. This feed serves as the MQTT broker channel where incoming Razorpay payment webhooks are pushed straight to the microcontroller.
Saving and Verification:
- Save Configurations: Scroll down to the bottom of the portal page and click the Save button.
- Automatic Reset: The portal will securely transmit the credentials into the ESP32-S3's EEPROM memory, and the soundbox will automatically restart.
- System Check: The device will connect to your Wi-Fi router and ping all four cloud platforms to verify active status.
Once the handshake is fully validated, the soundbox will announce its readiness through the cavity speaker:
"AI box ready. Enter an amount on the keypad or hold the button to ask me about your transactions."
How It Works
How It Works & System Architecture
This project is our own version of an AI-powered payment soundbox, inspired by PayTM. The system combines custom hardware and cloud APIs to handle instant UPI payments, create dynamic QR codes, and answer voice questions about transaction history.
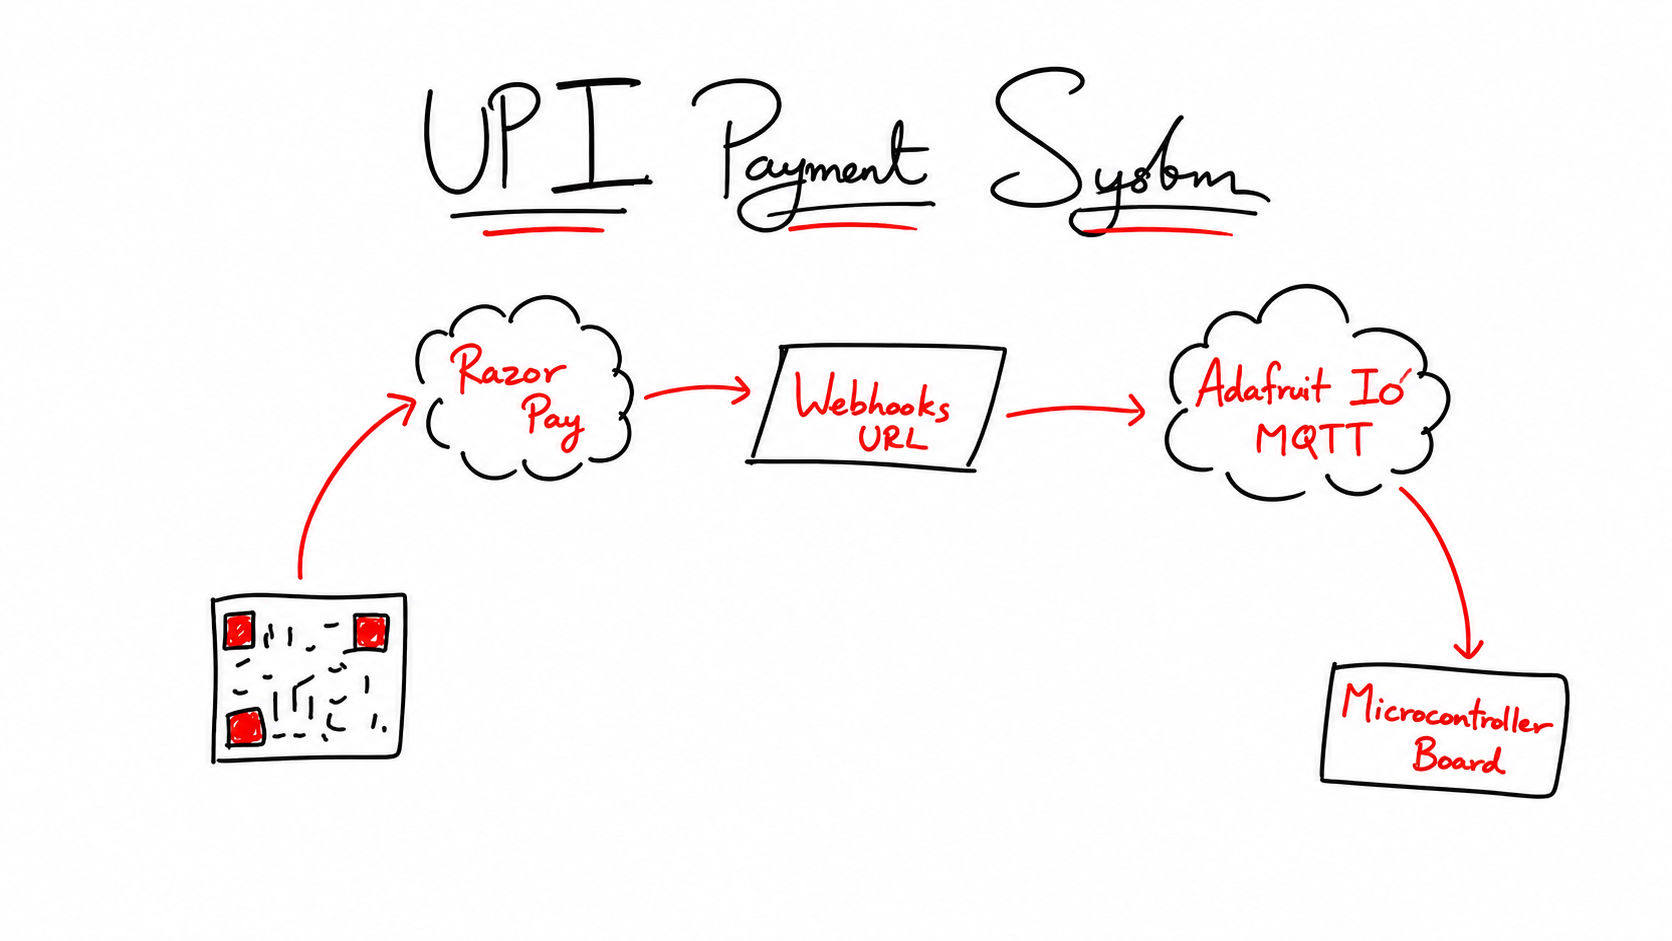
1. Instant UPI Payment System
The core payment process works smoothly through the following workflow:
- The Setup: The device features a 3.5-inch TFT LCD display to show custom payment details and QR codes. To process payments, the merchant uses a 4x4 hex keypad connected via a JST connector to input values.
- The Gateway: When a customer scans the QR code and sends money via UPI, the payment is immediately captured by the Razorpay cloud server.
- Data Routing via Webhooks: Razorpay runs a pre-configured webhook URL the moment the payment clears. This instantly forwards the transaction details to the Adafruit IO MQTT server, which we use as our messaging cloud.
- Local Announcement: The ESP32-S3 microcontroller is connected directly to the Adafruit MQTT server and catches the new payment entry within a second. It refreshes the screen display and pushes audio out through the MAX98357 amplifier module and an 8-ohm cavity speaker, instantly announcing: "Payment received: 10 rupees."
2. Keypad & Dynamic QR Codes
The keypad allows the shopkeeper to toggle between two distinct operational modes:
- Regular Mode (Open QR): Pressing "B" on the keypad opens a standard static QR code. Customers scan this code and manually type any amount they want on their smartphones.
- Dynamic Mode (Fixed Amount): The merchant can input an exact billing value (like 1.23 rupees) and press "D". This generates a unique dynamic QR code. When scanned, the customer's phone automatically locks to that exact amount, ensuring it cannot be changed or edited from their side.
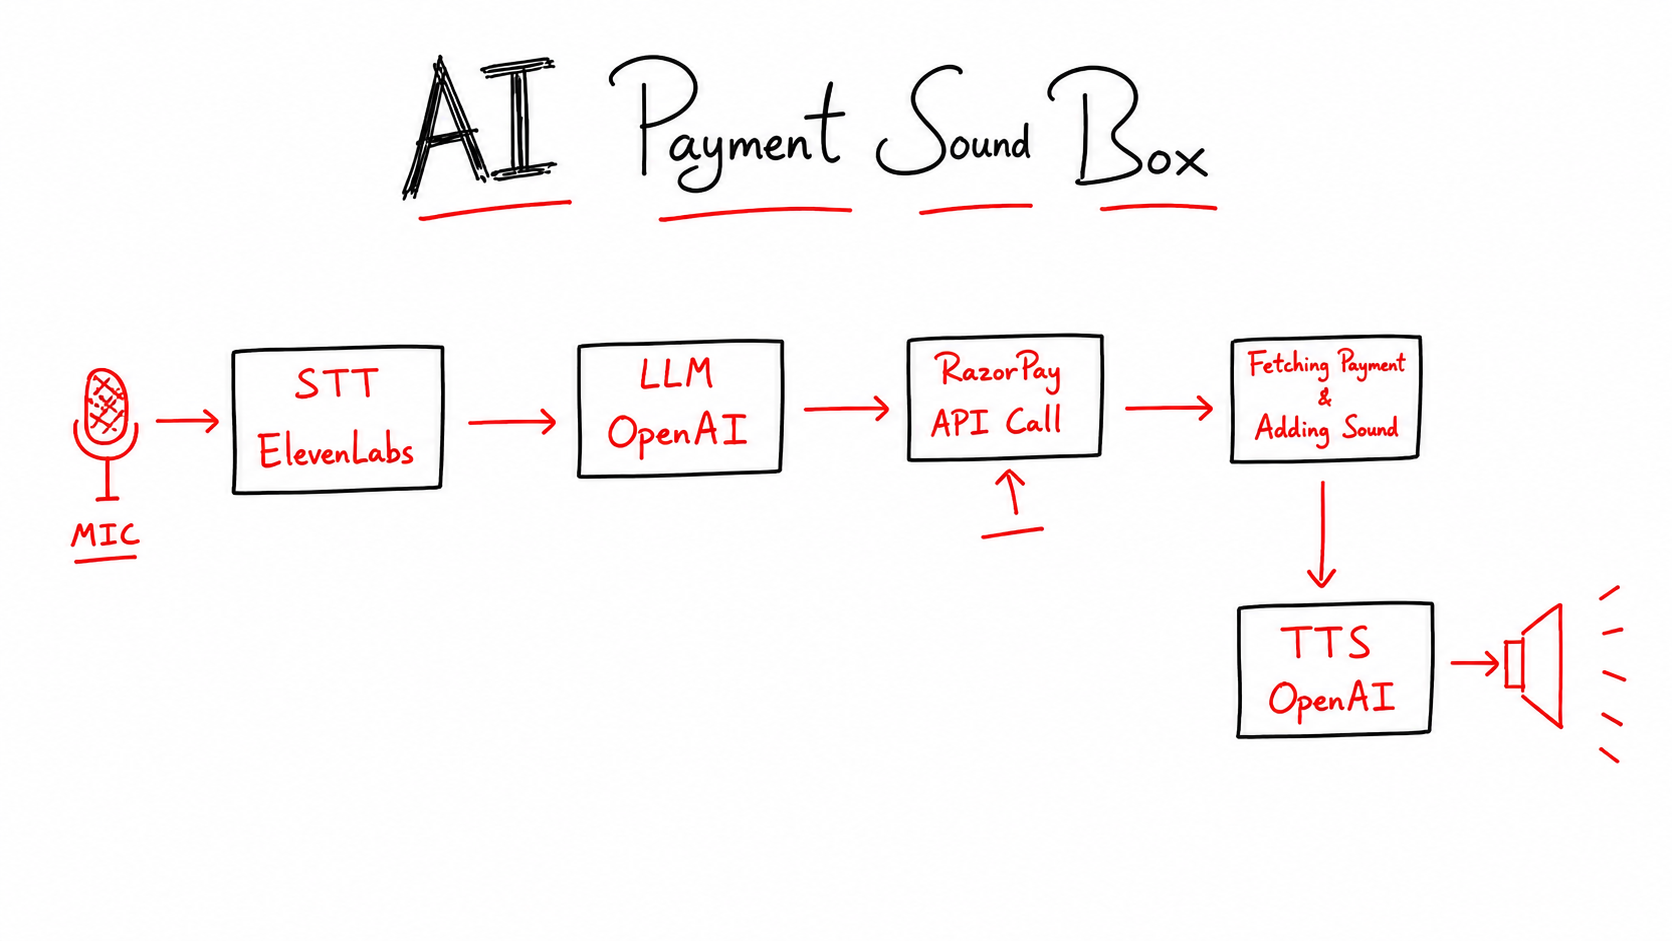
3. Built-In AI Voice Assistant
Instead of just speaking out new amounts, this version includes an external side-mounted AI push button to review total records and overall business data using natural language:
- Voice Recording: The user holds down the AI button and speaks a query (such as "What was the total amount received this month?") directly into the INMP441 microphone.
- Speech-to-Text: The recorded audio clip is sent straight to the 11labs API, a cloud platform that converts the microphone's speech records back into regular text strings.
- LLM Query Parsing: This text string is sent to OpenAI. The AI processes the natural language prompt, converts contextual time frames (like "this month" or "last quarter") into strict Unix timestamps, and builds a dedicated data link formatted for Razorpay.
- Data Pull & Math Calculations: The ESP32-S3 uses that custom timestamp link to query the Razorpay API. It downloads a raw JSON document containing all matching sales records, then parses it using the ArduinoJson library to add up total transaction numbers and net revenue.
- Audio Response: The final calculated answer (e.g., "Total amount received is 32,263 rupees") is sent through OpenAI's Text-to-Speech (TTS) engine, transforming the text back into a natural voice output played directly through the soundbox speaker. Because it runs on 11labs, the assistant fully understands and responds to multiple languages, including English and Hindi.
4. Custom Hardware, PCB, & Power Layout
The entire circuit is built on a custom, neat, and compact double-layer PCB. The top layer houses the main display screen and the microphone, while all supporting electronics are mounted on the back. The brain of the unit is an ESP32-S3 module with 16MB Flash and 8MB PSRAM to manage the display graphics and data streaming buffers.
To make the unit portable and wireless, the entire assembly is powered by a lithium battery, managed by a TP4056 charging module, and paired with a 5V boost converter to provide steady power to the display screen. Everything is enclosed inside a custom 3D-printed case designed to look like a premium commercial payment box.
3D Printed Enclosure
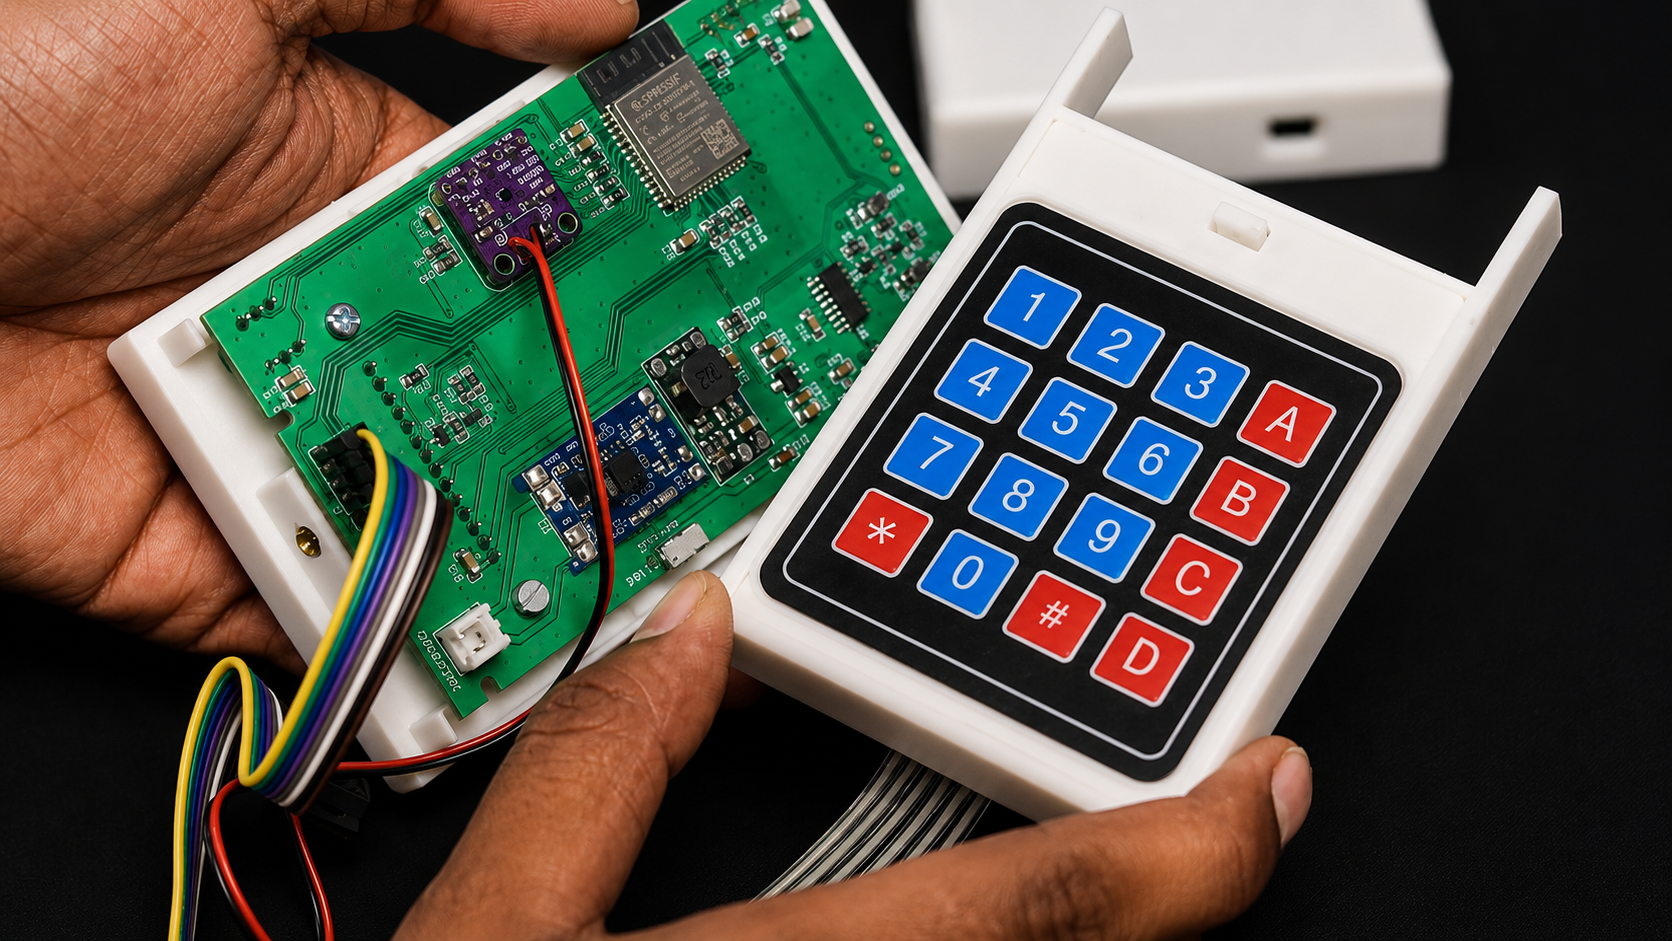
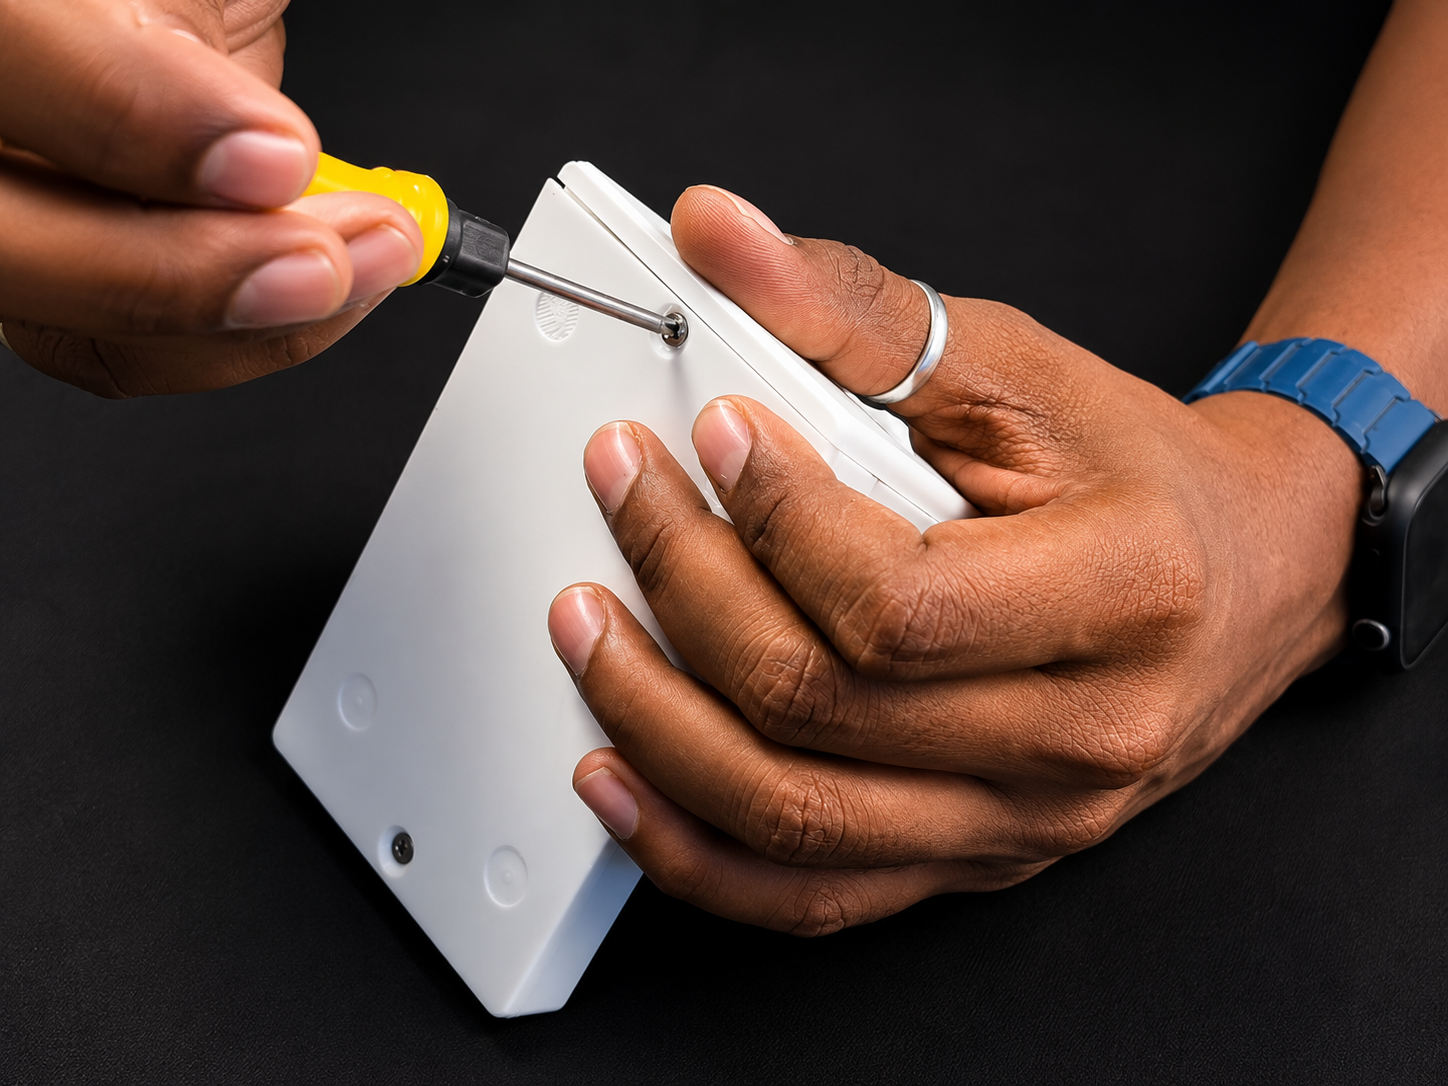
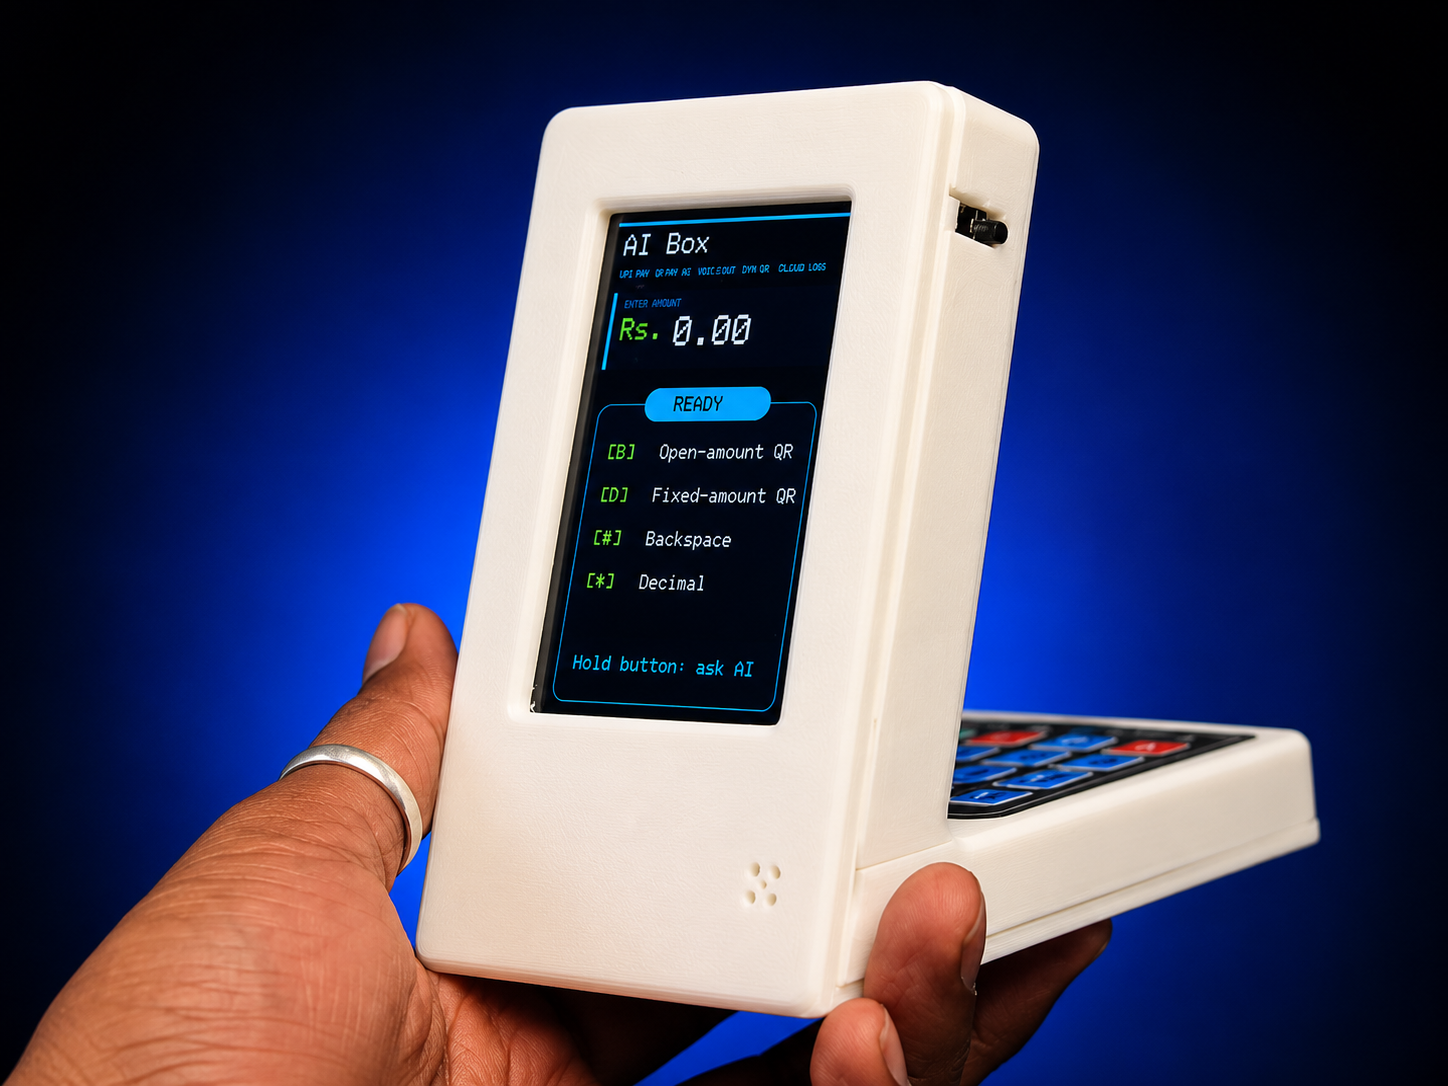
The 3D printed case for our AI soundbox was designed to give it a neat, professional look just like the commercial boxes you see in stores.
Design and Printing:
- Aesthetic: The shape and look match standard shop payment boxes closely so it feels like a finished product.
- Material: We 3D printed the body in multiple sections using clean white filament.
- Timing: It is always best to print and assemble the box after checking that the firmware works and the display screen turns on properly.
Assembly and Internal Layout:
The parts fit tightly inside different sections of the case to keep the setup clean and avoid messy wires:
- Front Section: Holds the main custom PCB and the 4x4 hex keypad securely. These two pieces connect directly using simple jumper cables inside.
- Back Panel: Features a small molded slot built to hold the cavity speaker snugly in place so the sound projects out well.
- Bottom Section: Designed as a flat base compartment to keep the lithium battery safe and properly tucked away at the bottom.
- Fastening: Once all the parts are placed inside, the pieces line up perfectly and screw together to lock everything into a single solid unit.
The final build gives you a solid, portable device complete with a clean 3.5-inch screen on the front for QR codes and a handy push button on the side to talk directly to the AI.
Testing
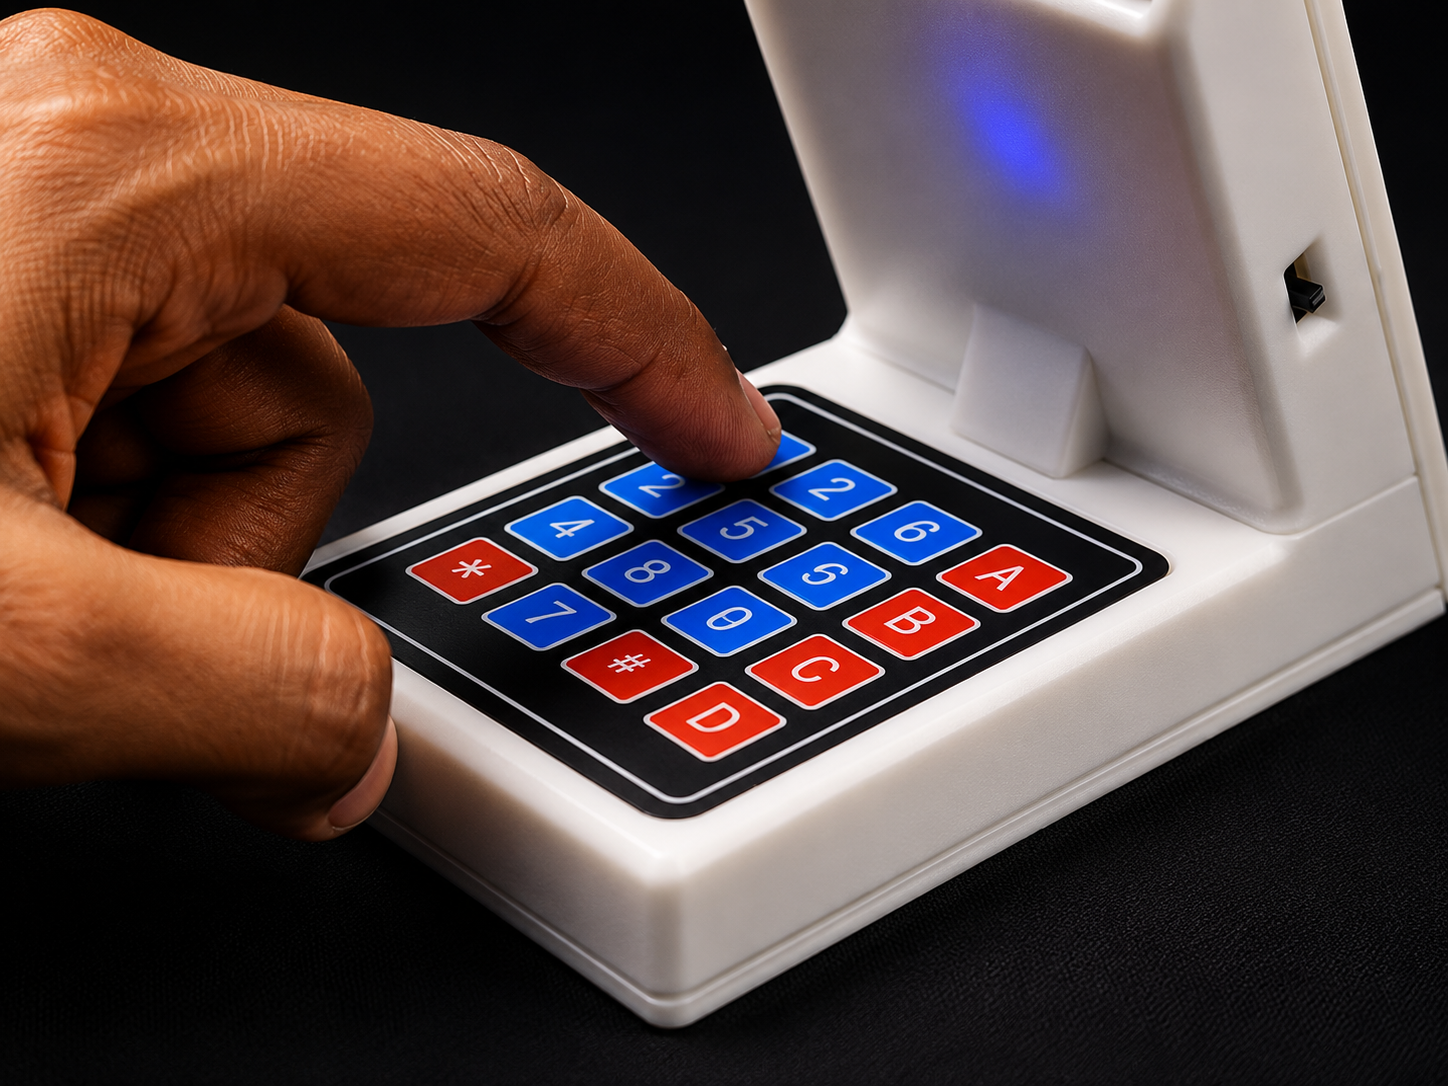
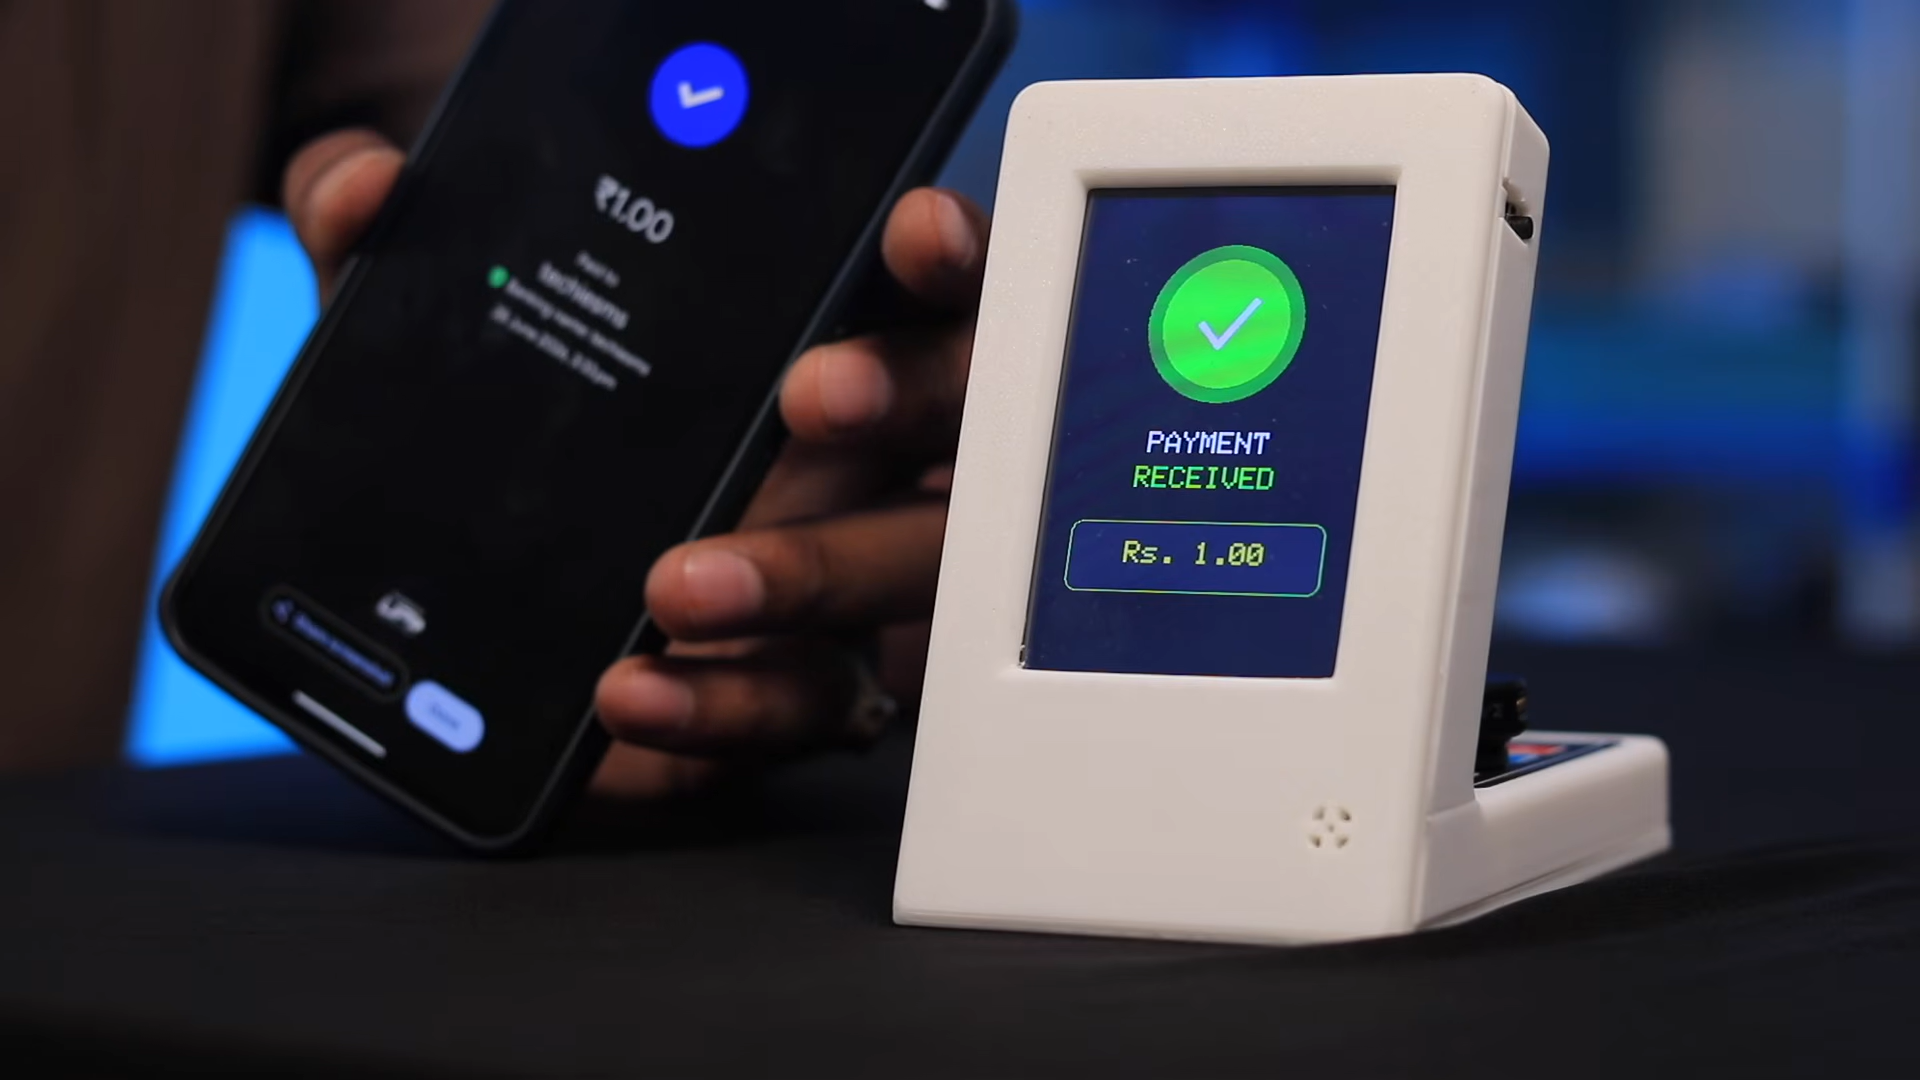
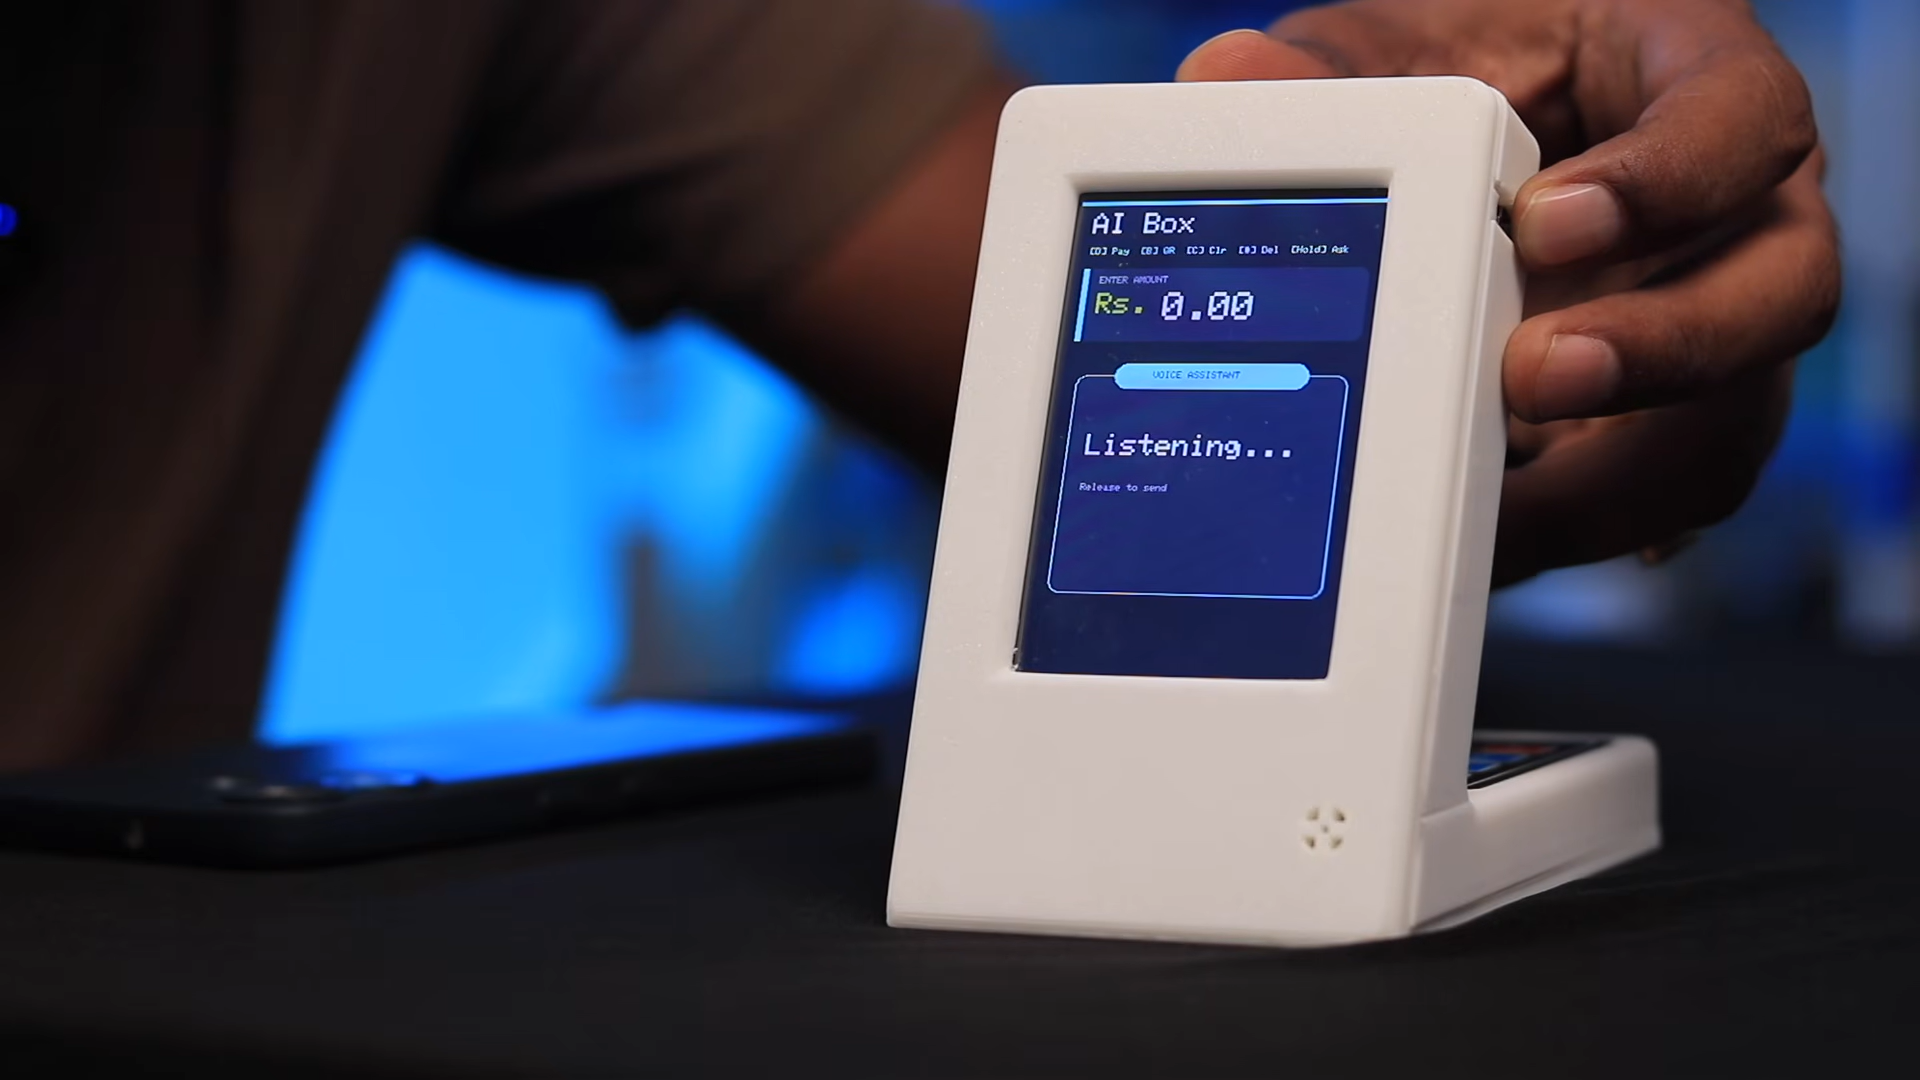
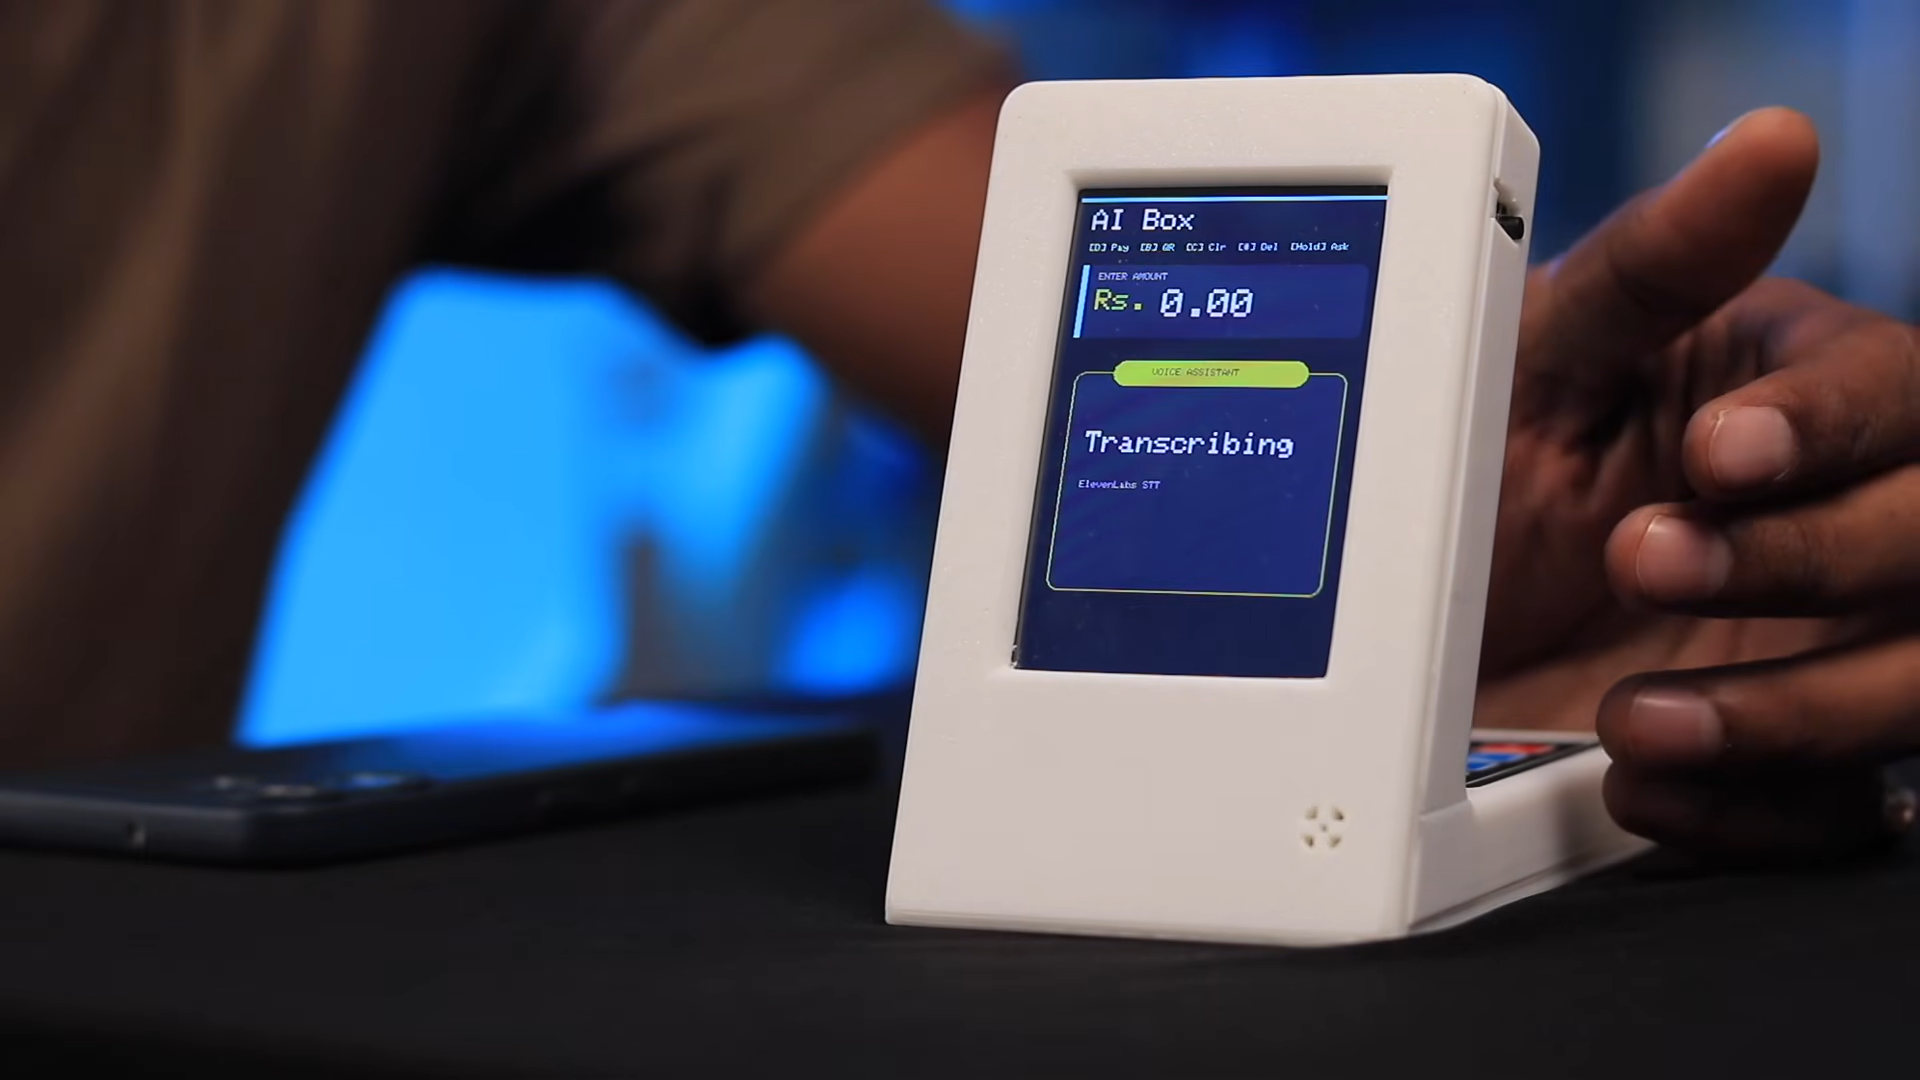
The testing phase involved running a complete demonstration to check how well the soundbox handles payments, creates QR codes, and processes AI voice requests.
1. UPI Payment Testing:
We tested two different payment situations to check the speed and accuracy of the system:
- Regular QR Code: Pressing the "B" key on the keypad opens a standard QR code on the screen. The customer can scan this and type any amount they want on their phone. Testing with a simple 1-rupee payment showed that the screen updates in just 1 to 2 seconds, followed by the voice announcement: "Payment received: 1 rupees."
- Fixed Amount (Dynamic) QR Code: This feature lets the shopkeeper type an exact bill amount (like 1.23 rupees) using the keypad and press the "D" button. When scanned, the customer's phone automatically locks onto that exact amount of 1.23 rupees, so they cannot change it. The payment syncs and announces over the speaker in about one second.
2. Built-in AI Capabilities Testing:
We also tested how well the system understands spoken questions using the side-mounted AI button:
- Basic Queries: Holding down the button and asking, "What was the last transaction amount received?" worked perfectly. The system checked the latest Razorpay data, found the last payment of 1.23 rupees, and spoke the exact date and time it arrived.
- Complex Date Ranges: We tested the box with broader questions like, "Can you tell me the total amount received in the last quarter?" The system easily understood the word "quarter," converted it into the correct date range, checked the transaction records, and announced a total revenue of 89,641.23 rupees across 68 transactions.
- Multi-language Processing: We even tested the AI in Hindi to ask for the previous month's total sales. The system successfully understood the Hindi voice request and gave a clear summary confirming 4,790 rupees received across 11 transactions.
3. Performance and Stability Observations:
The connection linking the Razorpay server, the Adafruit IO MQTT broker, and our ESP32-S3 board turned out to be very stable and quick. The screen updates almost instantly when a payment goes through. Even though the cloud processing can sometimes cause a very slight delay before the voice announcement starts playing, the entire data pipeline works smoothly and efficiently.
Conclusion
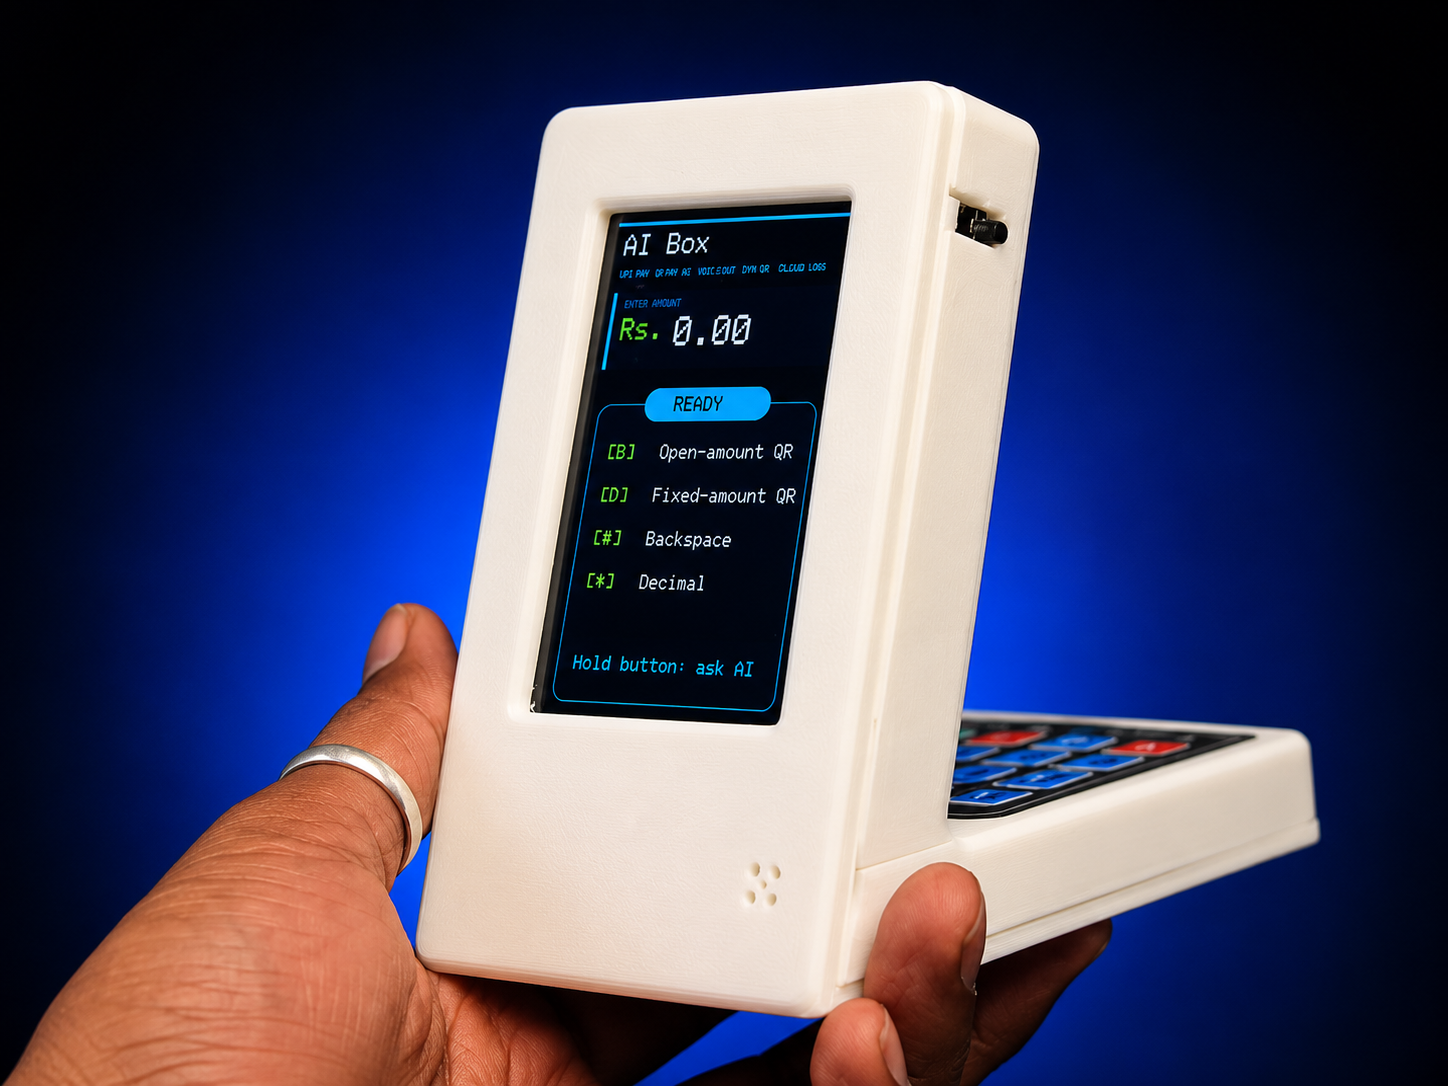
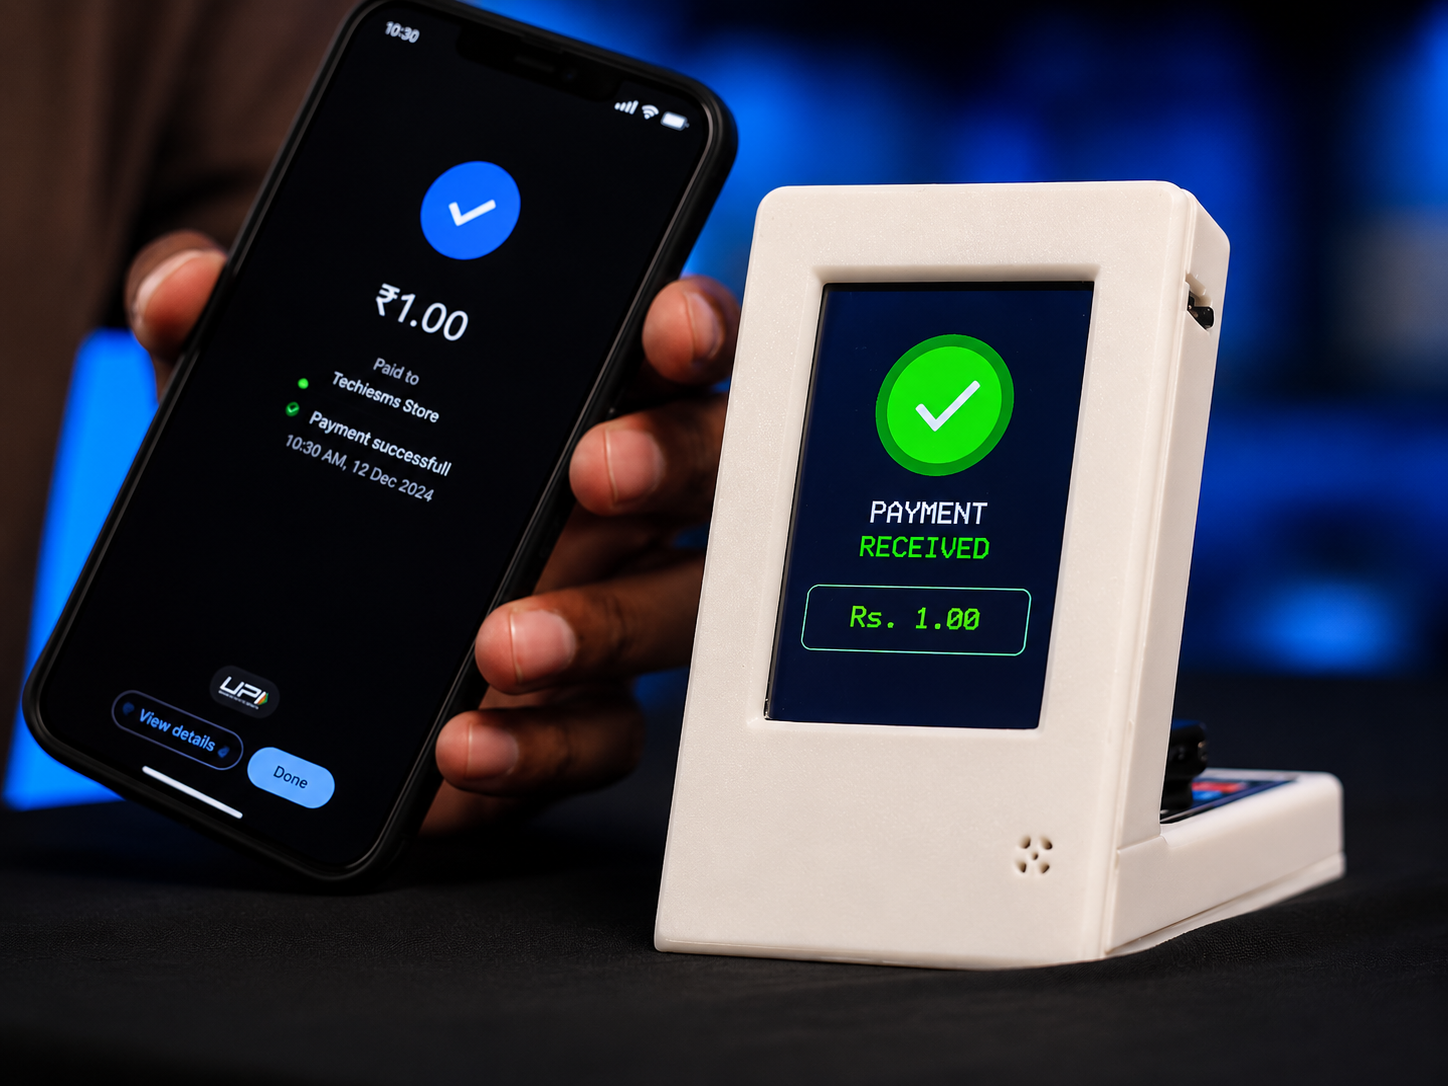
This project successfully demonstrates how consumer hardware, microcontrollers, and modern cloud APIs can be combined to build a functional, smart business assistant inspired by commercial payment technology. By utilizing the ESP32-S3, a custom PCB, and a 3D-printed enclosure, the DIY AI Payment Soundbox successfully bridges real-time transaction tracking with advanced natural language processing.
Through the integration of the Razorpay API, Adafruit IO MQTT, 11labs, and OpenAI, the device is capable of:
- Providing instantaneous auditory and visual confirmations for open-ended UPI payments.
- Compiling tamper-proof, fixed-amount dynamic QR codes directly from a hardware keypad.
- Parsing complex transaction data through spoken multi-language voice queries (supporting English, Hindi, and more).
While this particular version relies on a Razorpay business account and multiple third-party API configurations, making direct replication a challenge for students without commercial credentials, the underlying architectural blueprint highlights the immense potential of ambient AI computing in everyday tools. It serves as an excellent foundation for future iterations aimed at simplifying backend processes and making smart transaction tracking accessible to everyone.