DIY USB Penmouse/Mousepen
by MikB in Craft > Digital Graphics
27553 Views, 158 Favorites, 0 Comments
DIY USB Penmouse/Mousepen

This instructable is for making an optical USB mouse into a pen style Mousepen. Or Penmouse.
My starting point was from seeing this instructable but wanting to improve the mechanical design a little and add the left-right click switches back.
It's also an entry in the "Before and After" up-cycling competition:
Before: Cheap plastic mouse with failing scroll-wheel.
After: Useful digital art tool that doesn't cost a fortune!
Reason for the Project
Freehand detailed drawing/artwork with a mouse is harder work than with a pencil. I usually end up sketching with a pencil/pen and scanning the result in, before continuing digitally from there.
I sat and thought about why. Why is drawing with a mouse hard? The two main blockages I came up with were ...
1) The area the mouse roams over.
On paper: Size is size. You can traverse the whole A4/A3 sheet to fit the drawing in.
With a mouse: My screen is 540mm diagonal, yet I'm drawing in a box around 45mm diagonal. I didn't realize it was so tiny. That is like trying to draw on a large postage stamp. It means that tiny errors, tremors, sticking/mistracking of the mouse are magnified.
2) The muscles used to move the mouse.
When writing/drawing on paper: Fine control comes from flexing two fingers and a thumb, medium control from wrist/hand rotation, and coarse control from arm movement.
When holding a mouse: Your fingers are usually in a locked position for operating buttons, and sprawled over the mouse. This takes away the finest level of control. Your wrist and arm do most of the work. It's like when a child writes/draws with a pen held in a fist!
Fixing the Problems
The area the mouse roams over can be fixed in software, by changing the speed response. But holding the mouse more like a pen would help things along on the fine control front.
I used a cheap optical mouse (£2) and a bingo marker pen to create a pen-mouse/mouse-pen. To keep the sensor flat to the paper, even when the pen is angled naturally, I needed a flexible joint -- and found one in the form of a camera-stand for an old NISIS USB camera. This allows the pen body to be moved with the fingers like a real pen.
Parts


- HM3303A Optical Mouse, unbranded £2
- Bingo Marker (Fat pen)
- Bic Biro (Skinny pen)
- 38 SWG Enamelled copper wire
- 2 x momentary push buttons
- 3 x nylon washers
- Polymorph
- Scotch Tape
- PVA glue
- Superglue
Disassemble Stand/Fit Pen Body

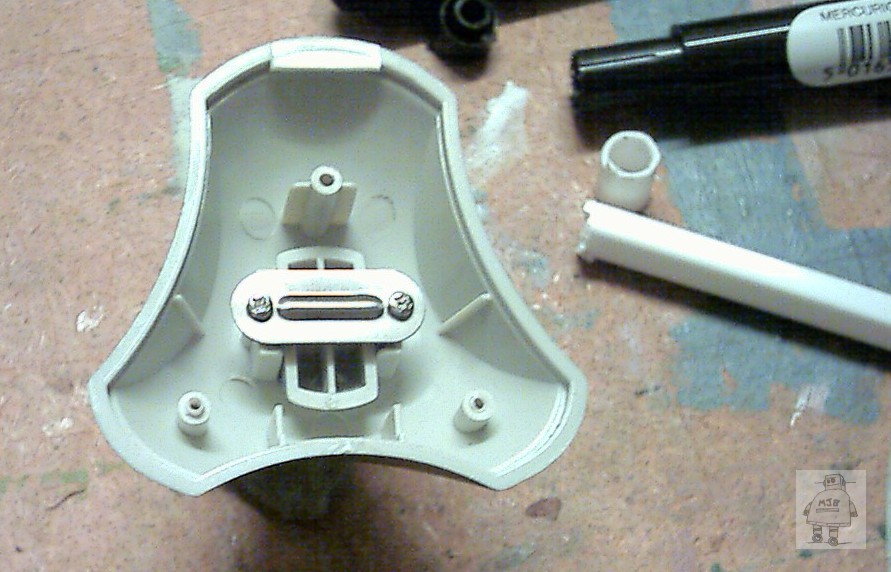

The stand has a lead weight in the bottom, remove this. Also slacken off the two screws holding the metal plate to allow the joint to pivot easier, in normal use for the camera this joint is stiff and "positionable". Loosen it so it slides more freely.
The camera holder comes off if you release the plastic peg inside it.
The diameter of this grey peg fits neatly into a cheap biro, which in turn fits into the open end of the bingo marker. So a small "adaptor" was made from a piece of a biro pen.
Chop Up the Mouse


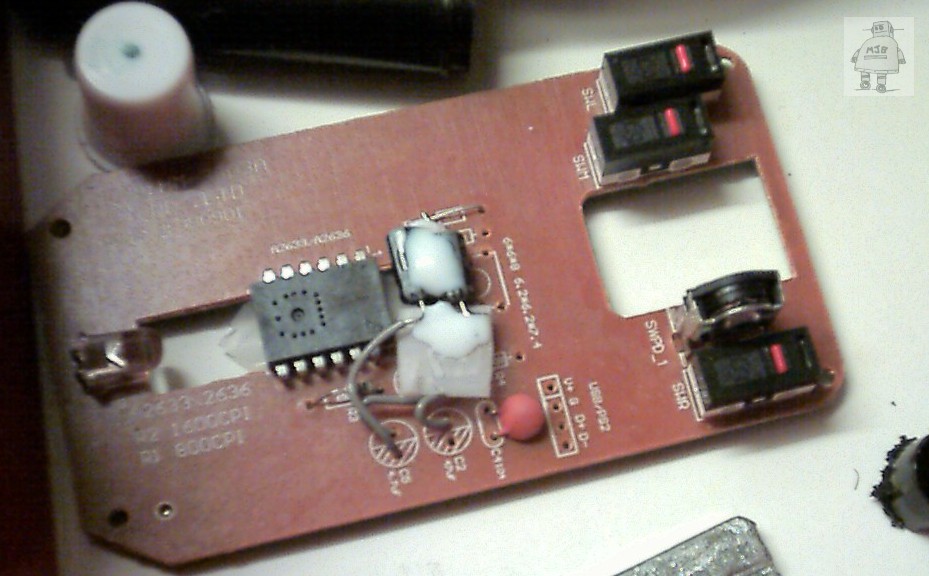

Well, probably note down all the connections and the circuit diagram first, otherwise it will never work again :)
There were two ways to trim the pcb, I chose the one which left all the needed components and USB attachment point on the weird triangular piece. The mouse buttons and scroll wheel are gone either way.
The two electrolytic capacitors stand too tall. I de-soldered these and wired them back in, insulating the legs and gluing them down with PVA glue.
Cover the optical sensor! I used Scotch Tape to stop dust getting into the pinhole sensor.
The board was attacked with a drill, and the sawn/sanded to clean up the edges. Although many tracks were cut through, only a ground line (0v) needed to be replaced with a short wire link. All other lost tracks were redundant OR went to the switches. This was good luck :)
The scroll wheel and middle mouse button were abandoned. Only left and right will be implemented.
Rebuild Base

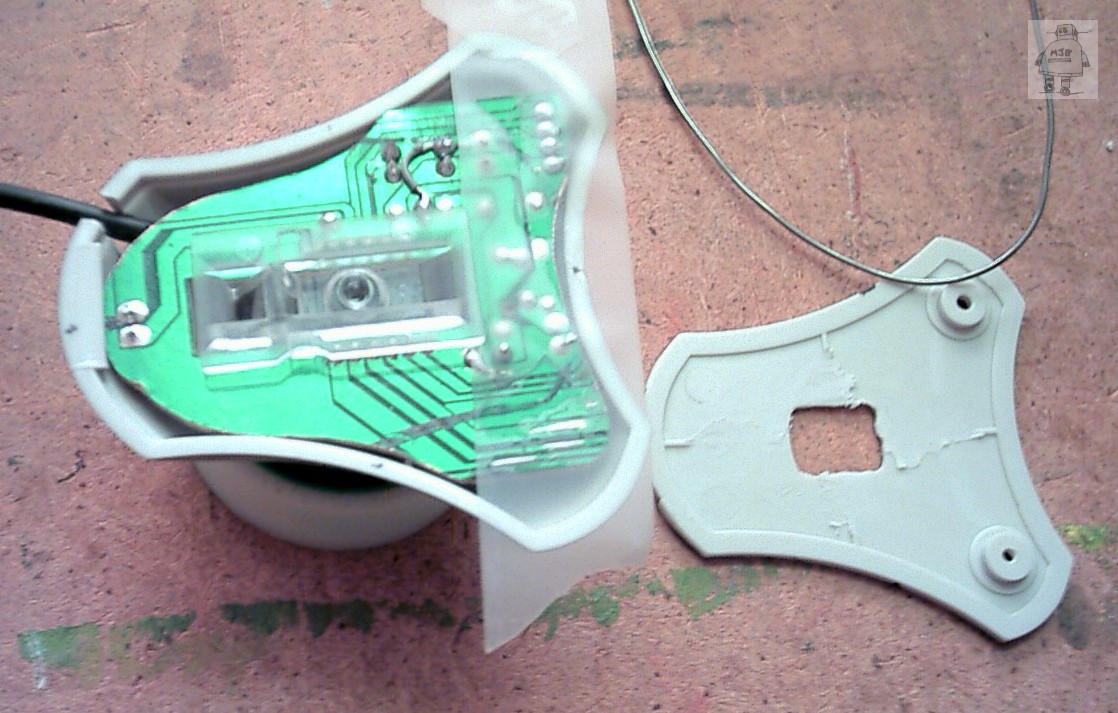
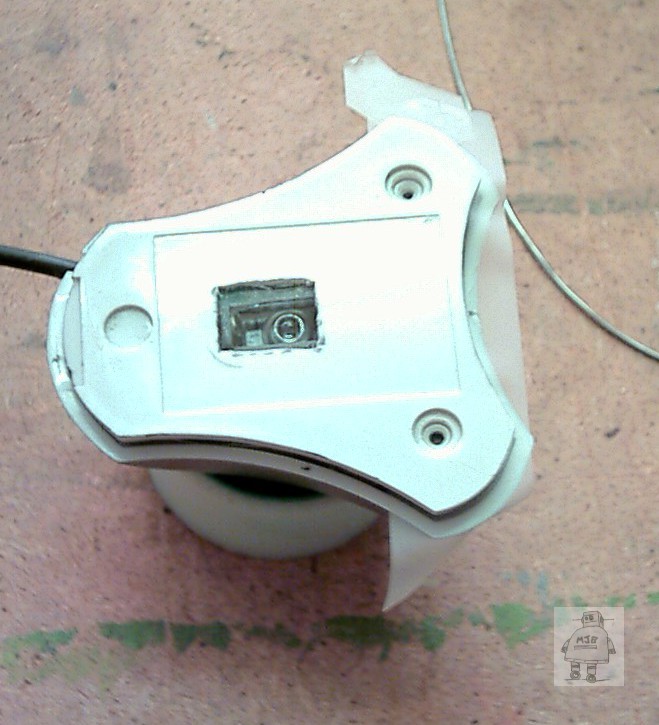
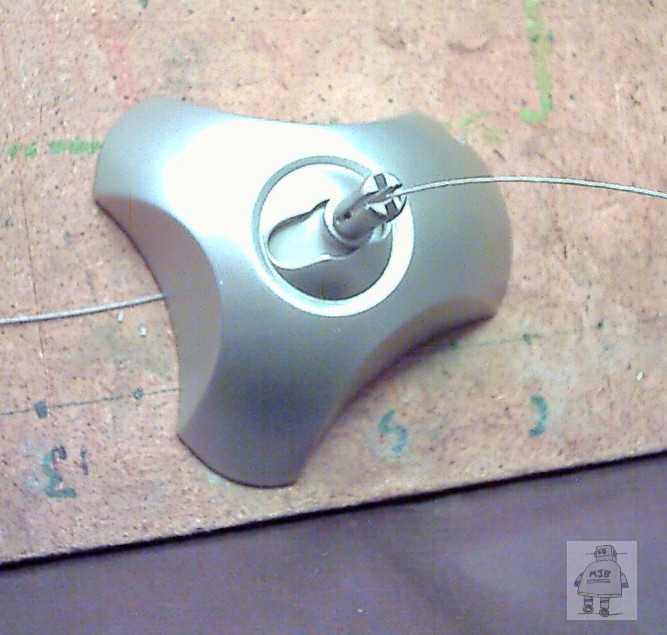

The optical block -- without modification -- drops in to place, and I used the base of the stand as a template to work out the cutting pattern/template for cutting the mouse's base up (later).
To wire the buttons down into the body, I drilled a fine hole through the plastic of the joint, and threaded a wire through to check clear passage.
Build Pen Body

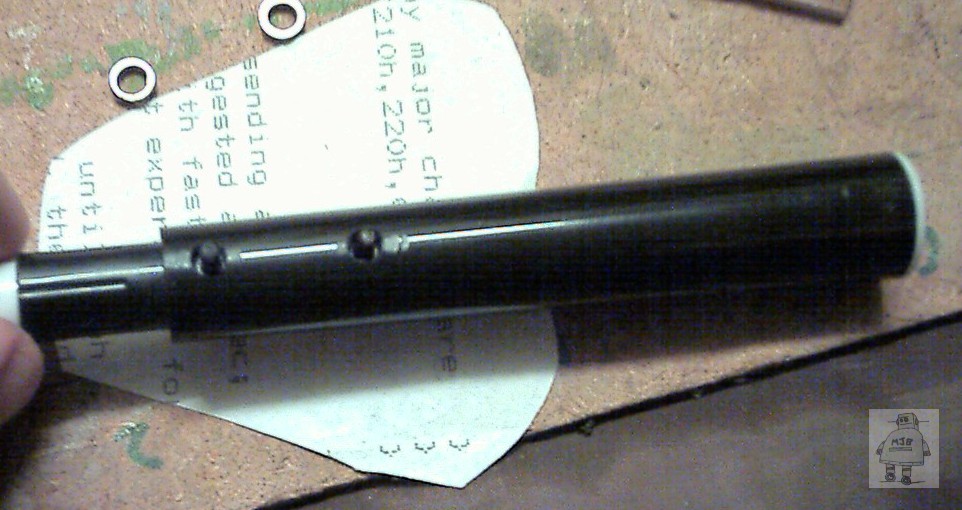
The position of the two buttons was found by holding the device, and seeing where my index finger naturally lies.
That's the "left" click. Above that, by about 0.75" is the "right" click button.
The buttons are mounted into the pen body: Small holes allow the actuators through, larger holes, which are a tight fit on the switch body, allow them to push in from the back.
A third hole, between the switches, takes the wiring into the pen body.
These switches are superglued in place.
Wire in the Switches
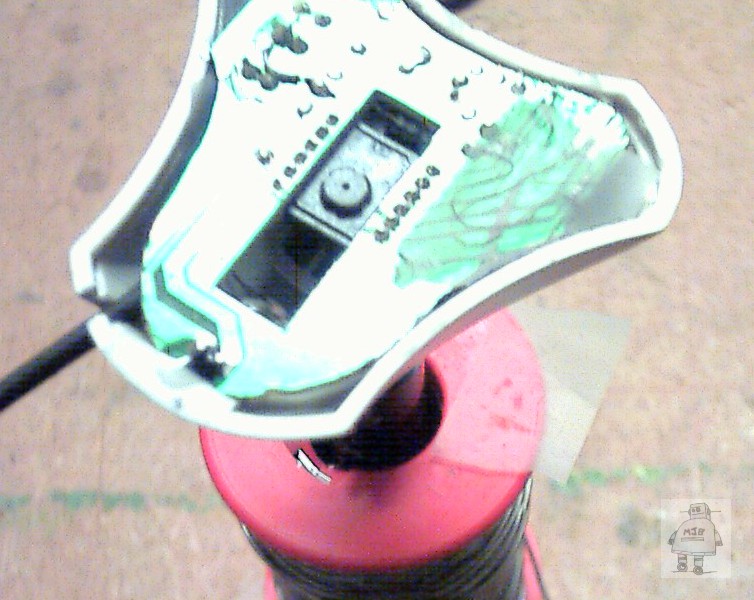
The enamelled copper wire is used to connect one side (of both switches) to ground, and one wire from each switch to the left and right mouse button tracks.
These wires are then threaded through the pen body, through the joint, and coiled up onto the PCB, where they are soldered down, and taped in place.
Securing Things and Finishing Off
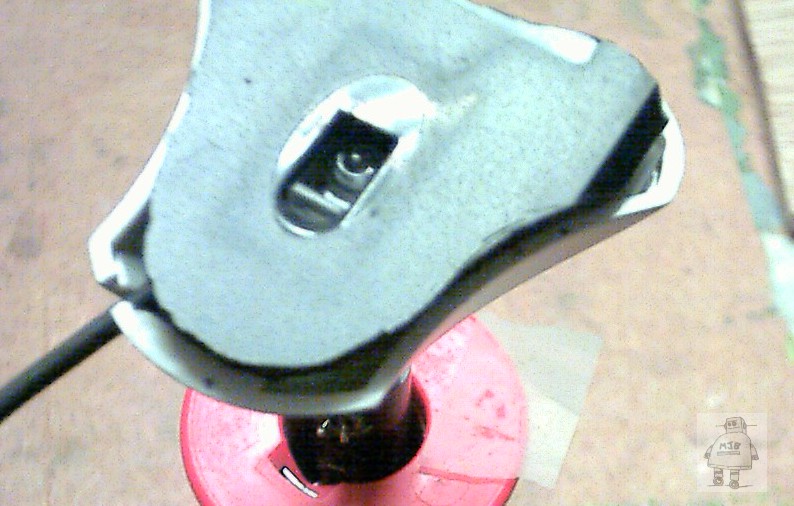

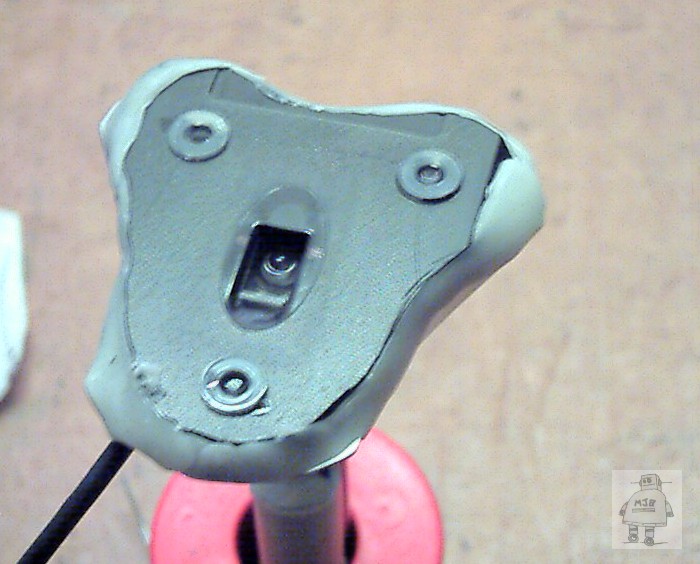
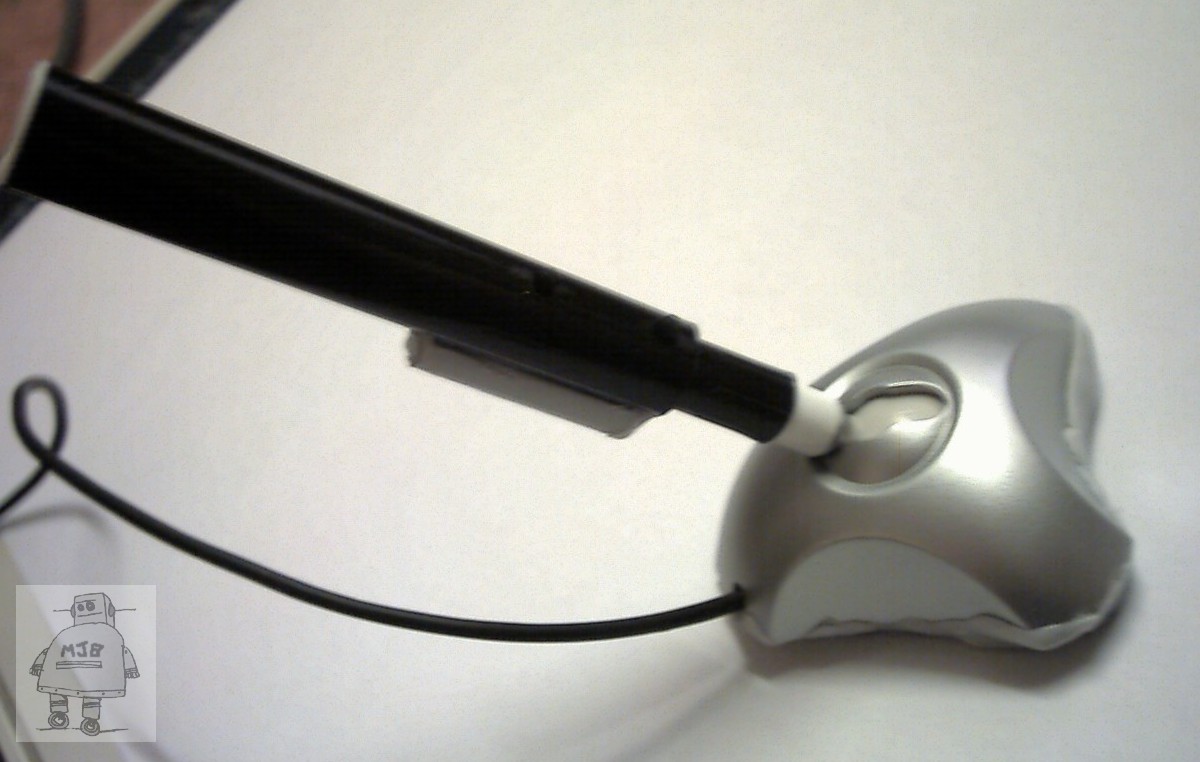
The original mouse base was cut closely to match the shape of the base, using the template from above.
The buttons are very exposed at the back, so a short piece of plastic tube was bonded over to protect them. This also helps keep the pen pointing "forward" when held.
The base originally skated on four cheap shiny stick-on labels. These were lost in the mouse-base butchery. So I used three nylon (slippy) washers glued in place.
The mouse base and case are closed together, almost neatly, with Polymorph mouldable plastic, which was extruded into a long sausage and pressed into place before smoothing it over.
Software Adjustments 1
I use this device under Linux, with GIMP (bitmap) and Karbon (vector) tools. No settings are needed in the applications, but to slow the mouse "speed" right down, while keeping resolution needs a tweak.
Additionally, this tweak was put into a "udev" rule, so that it is applied whenever this mouse is plugged in.
Note that this tweak only affects the named mouse device, so you can use a regular system mouse AS WELL as this device, they both work.
Manual adjustment/first time setup :-
I use the device name, not the id number, as the name of the device is fixed in hardware, and assigned id numbers may change!
Find the NAME of your mousepen device, by typing
xinput list
Example output
 Virtual core pointer                         id=2    [master pointer  (3)]
   Virtual core XTEST pointer               id=4    [slave  pointer  (2)]
   SIGMACHIP Usb Mouse                      id=10   [slave  pointer  (2)] <-- system mouse
   HID 04f3:0103                            id=9    [slave  pointer  (2)]
    USB OPTICAL MOUSE                       id=11   [slave  pointer  (2)] <-- the mousepen
 Virtual core keyboard                        id=3    [master keyboard (2)]
     Virtual core XTEST keyboard              id=5    [slave  keyboard (3)]
     Power Button                             id=6    [slave  keyboard (3)]
     Power Button                             id=7    [slave  keyboard (3)]
     HID 04f3:0103                            id=8    [slave  keyboard (3)]
Note there is a spurious space before "USB OPTICAL MOUSE", yes, you actually need that space if you have the same cheap mouse I used!
Then get the name of properties you can alter with
xinput list-props " USB OPTICAL MOUSE"
Example output
Device ' USB OPTICAL MOUSE':
        Device Enabled (128):   1
        Coordinate Transformation Matrix (130): 1.000000, 0.000000, 0.000000, 0.000000, 1.000000, 0.000000, 0.000000, 0.000000, 1.000000
        Device Accel Profile (250):     0
        Device Accel Constant Deceleration (251):       1.000000 <---------- THIS ONE
        Device Accel Adaptive Deceleration (252):       1.000000
        Device Accel Velocity Scaling (253):    10.000000
        Evdev Axis Inversion (254):     0, 0
        Evdev Axes Swap (256):  0
        Axis Labels (257):      "Rel X" (138), "Rel Y" (139)
        Button Labels (258):    "Button Left" (131), "Button Middle" (132), "Button Right" (133), "Button Wheel Up" (134), "Button Wheel Down" (135), "Button Horiz Wheel Left" (136), "Button Horiz Wheel Right" (137)
        Evdev Middle Button Emulation (259):    0
        Evdev Middle Button Timeout (260):      50
        Evdev Wheel Emulation (261):    0
        Evdev Wheel Emulation Axes (262):       0, 0, 4, 5
        Evdev Wheel Emulation Inertia (263):    10
        Evdev Wheel Emulation Timeout (264):    200
        Evdev Wheel Emulation Button (265):     4
        Evdev Drag Lock Buttons (266):  0
In amongst that lot is the property you need to change -- number 251. But let's stick with names.
To reduce the mouse speed, meaning you mouse over a larger area, use factors larger than 1.0 ... e.g.
xinput set-prop " USB OPTICAL MOUSE" "Device Accel Constant Deceleration" 8.0
For my mousepen, with 8.0, I get about an A3 sheet's worth of mousing now to cover the whole screen!
Software Adjustments 2
If your Linux system uses udev, then you can do the above step automatically every time you plug in :-
Create a file in /etc/udev/rules.d/ called 68-mousepen.rules and put something like this in it :-
# Set mouse sensitivity reduction for optical mouse-pen
ACTION=="add", SUBSYSTEM=="usb", ATTRS{idVendor}=="15d9", ATTRS{idProduct}=="0a4c", RUN+="/usr/local/bin/mousepen"
You will need to use lsusb to find the vendor:productcode numbers for your particular mouse.
Bus 007 Device 001: ID 1d6b:0001 Linux Foundation 1.1 root hub
Bus 003 Device 005: ID 15d9:0a4c This Is Your Mouse <---- this one!
Bus 003 Device 004: ID 1c4f:0034 SiGma Micro
This udev rule means that whenever a USB device is plugged in that matches your mousepen, run the named script.
And then create /usr/local/bin/mousepen, owned by root, and executable (chmod 700 /usr/local/bin/mousepen), with the following contents
#!/bin/tcsh
setenv DISPLAY ":0.0"
setenv XAUTHORITY "/home/YOURHOME/.Xauthority"
( sleep 5 ; xinput set-prop " USB OPTICAL MOUSE" "Device Accel Constant Deceleration" 8.0  ) &
The XAUTHORITY line needs to point to your home directory to pick up that file. Otherwise it won't work!
The final line returns straight back to udev, allowing it to get on with creating the USB device, but hangs around here for 5 seconds before attempting to set it up. This delay is important, otherwise the mouse hasn't yet been "found" and again, it won't work.
Result!



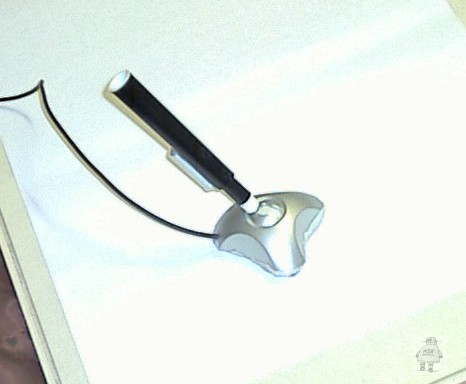

As I hoped, it's much easier to draw on a larger area, with something that feels more like a pen!
Curves have fewer "jaggies" in them. Shading-style motions work better too, closer packed and more even.
It's not as good as a real tablet, but for just over £2 and less than a day's work, I think it's good value!