DOOM 1993 Custom Arcade Machine With Laptop Display
by Oliver Bridger in Workshop > Woodworking
1074 Views, 10 Favorites, 0 Comments
DOOM 1993 Custom Arcade Machine With Laptop Display

DOOM 1993 custom arcade machine
Calling all gamers, tinkerers, and nostalgia enthusiasts! If you’ve ever felt the adrenaline rush of battling demons in the original DOOM game, this project is your ticket to arcade paradise. As a fellow student from Simon Langton Grammar School, I share your passion for the golden age of gaming—the pixelated realms where imagination collided with cathode-ray tubes. This design brings all of your arcade dreams to life for a fraction of the price, whilst retaining the retro and classic feel. In this Instructable, you can show off your fusion 360 skills to design the machine for you. In my build, I used old wood and my laptop screen as the display to avoid waste and to maximise the inclusivity of the design. Throughout you will use many techniques to produce a stunning blast from the past! The design incorporates a raspberry pi, buttons, and a joystick, and along the way hopefully you will develop your knowledge and skills in fusion, woodworking, and electronics.
Why DOOM? Why Now?
Picture this: The '90s—a prehistoric era before the luxury of tech we have today, and BAM!, DOOM burst onto the scene, and suddenly, every basement became a demon-infested battleground. But wait, you missed it! The cacophony of shotgun blasts, the eerie soundtrack, and the adrenaline rush—gone in a blink. Now is your chance to relive the golden era of gaming in the most epic way possible!
The journey ahead
1) Design a unique doom arcade machine, in mine I made it compact and table top, however, I also made a fusion model of a full sized version!
2) Utilizing spare wood and glue, bring your dreams to life!
3) Wire it up - download DOOM 1993 to your raspberry pi and connect buttons and joysticks for the full experience.
4) Game away! Finally after all of these years you can relive the glory days (and nights!)
Supplies
- Raspberry pi 2 or later (I used a raspberry pi 3b)
- At least one joystick and buttons (raspberry pi compatible)
- An analogue - digital converter
- Jumper wires (M-F)
- Resistors
- Wood (your choice of thickness)
- A display - I used my laptop screen
- Wood glue and/or screws
- 10k resistors
- A breadboard
- 1-2 metals hinges (optional)
- HDMI capture card (optional)
- A raspberry pi expander module (optional)
Material Research

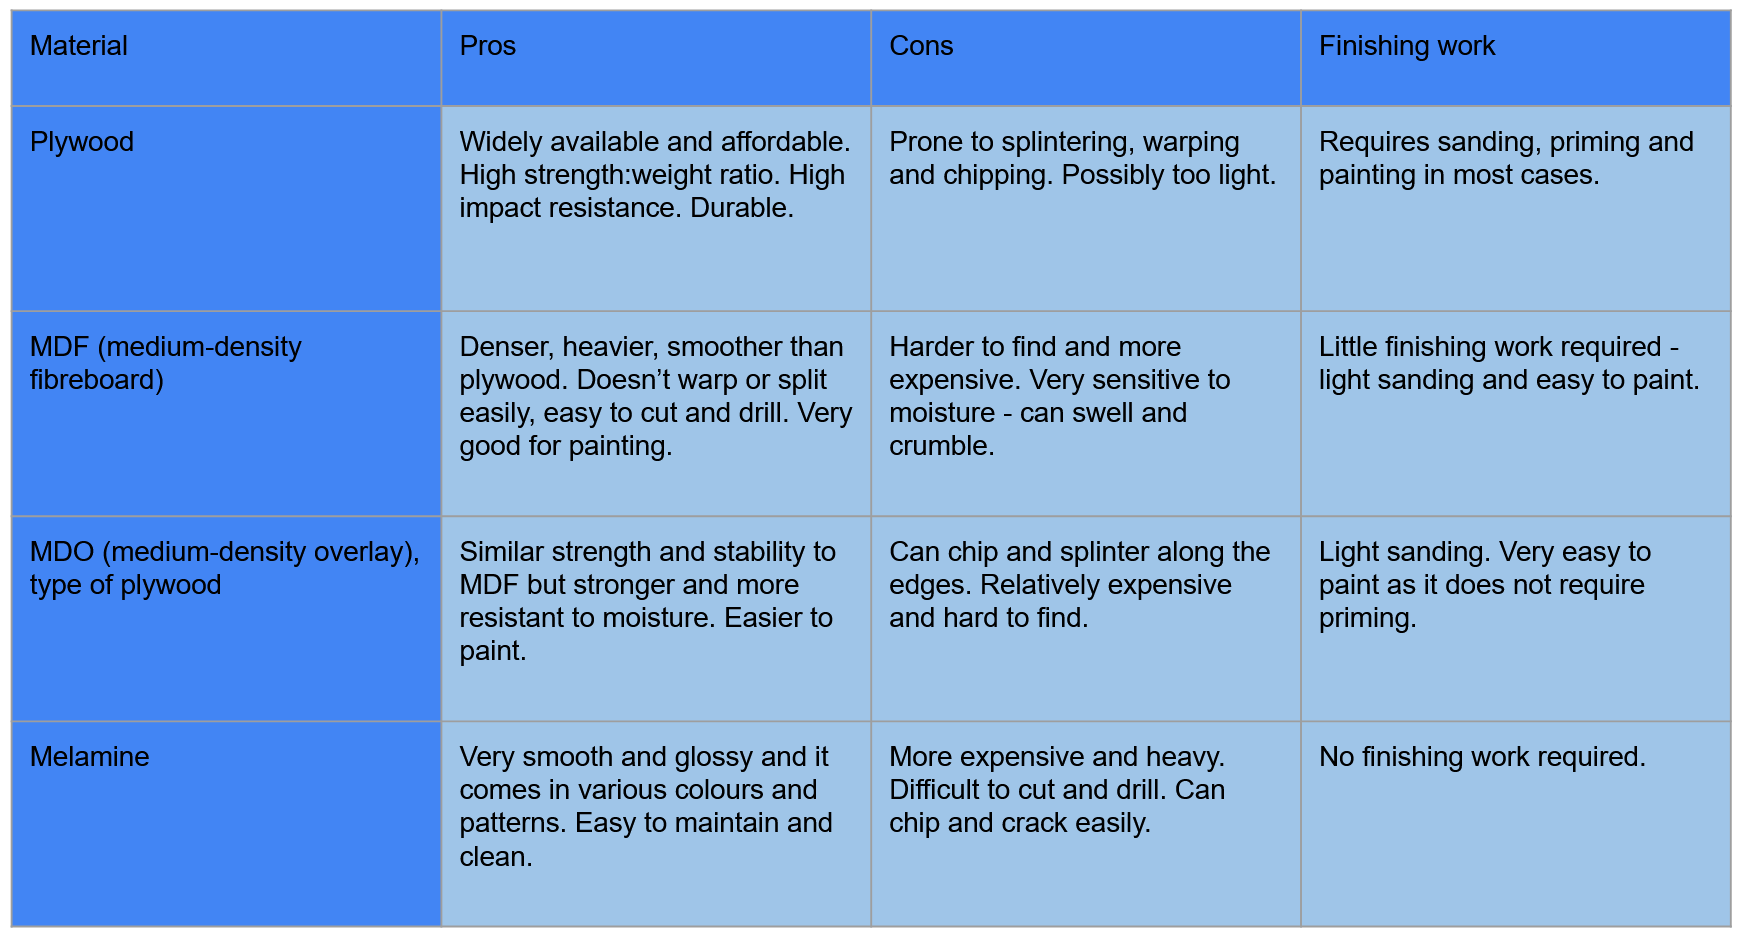
There are a number of options for the type of wood you use, however, I chose plywood as I had plenty of spare off cuts of it, it is very durable and easy to cut. If you are going to buy the wood, the table above shows the different characteristics of different types of wood. Use it to decide the wood that is best for your design. I would say that the best wood to use is MDF as it is a good balance between cost and quality. Remember whatever type of wood you choose it should be reasonably thin - mine was around 5mm but there is definitely room to go thicker.
Designing in Fusion 360


The design features many of the useful tools that fusion provides (Extrude, decal, split etc) If you are making your own version, a CAD model makes the building process significantly easier as you can use it as a template to follow, but also it locates any potential problems with your design before you build it - for example, in my build I discovered that there would not be enough room for all of the electronics, so in the build I extended the back to allow for room. Remember to organize your timeline and make components. Some tips for fusion:
1) When you are applying decals, you can unselect chain faces to keep the image exclusive to one face, however if you want it on 2 faces but not a third, hold control and select the two faces you want, then deselect chain faces.
2) You can use the animate window to see your arcade machine come to life, for example I made a quick animation of one of the buttons being pressed.
3) If you separate all parts of your machine into components it makes things such as applying appearances much easier.
4) Extruding is arguably the most used tool in fusion, so to quickly open it simply press E on your keyboard for ease of access.
5) When rendering, there are loads of useful features you can use such as adding background environments. You can also add the LED light appearance to one part of your model and then turn down the brightness for it to illuminate your model in a truly unique way, like in the attached image.
Have fun!
Build the Base


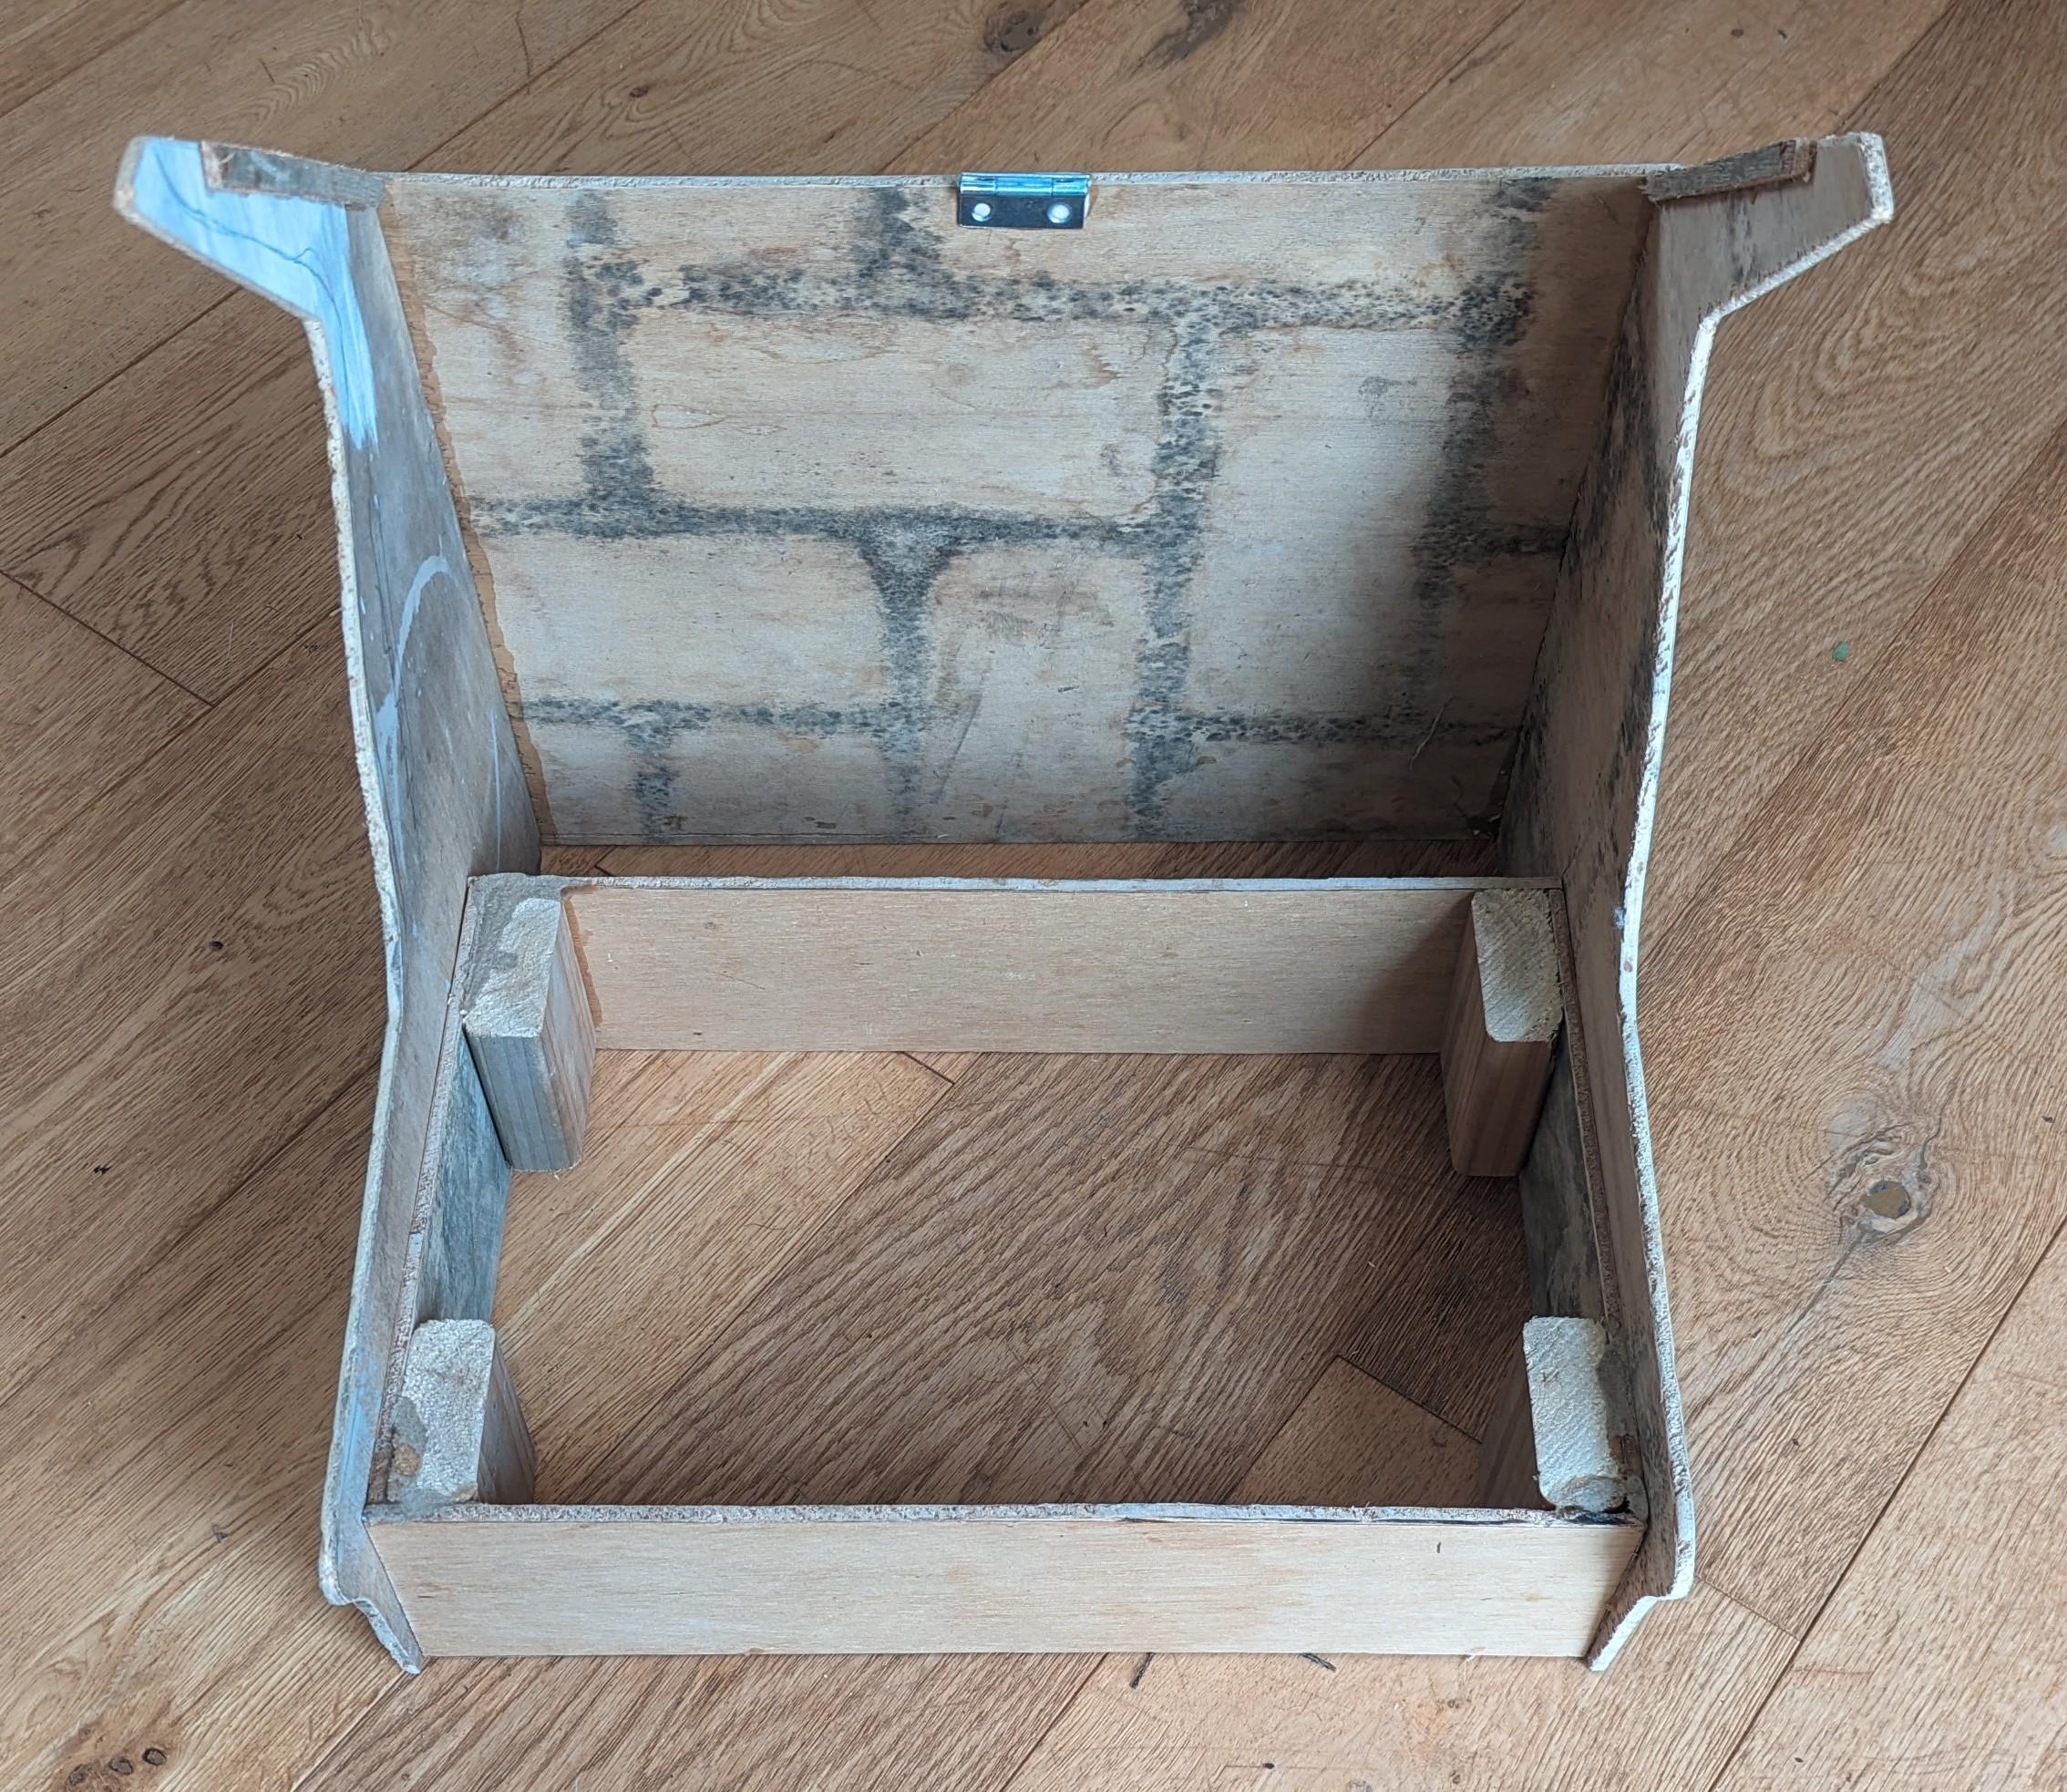
Using a saw, cut 2 pieces of 400x100mm wood and 2 pieces 250x100mm. Make sure to sand down your wood once you have cut it for a smooth finish. Assemble these 4 pieces into an open top box, with the 100mm as the height. TIP: You can use thick cuts of wood in order to glue/screw the wood pieces together easily at 90 degree angles. When using glue to stick together pieces of wood, I would recommend washing the wood before hand with a damp cloth so that the glue sticks well and more permanently.
Cut and the Side


In this stage you can get creative and design the perfect shape for your tastes. My shape just overreaches the edges of the box for a classic aesthetic. In this stage you will find that the easiest way to achieve your shape is to cut a jagged outline with a saw and then file and sand it down to the final shape. Make 2 copies (1 for either side). Once you are happy with the shape I recommend using wood glue to stick the sides to the box, however if you are careful screws work fine as well. If you use glue, clamp the sides to the box until the glue is fully dried. If you are using a laptop as the screen, leave room behind the box to place it by extending the sides beyond the back of the box.
The Back of the Cabinet


Now cut a 420x320mm piece of wood to act as the back panel for the cabinet. Once it is cut you can use wood glue once more to stick it to the back. At this point, you now need to consider if you are using a laptop as the display, if you are you will need to screw in a small metal hinge to the back panel so that the laptop can be inserted and removed easily without damage.
Assembling the Roof

.jpg)

Now it is time to cut the roof. Using a saw and sand paper (as per usual) cut a 420x200mm piece of wood. If you are not using a laptop as the display you can stick the piece directly on to the cabinet. However, if you do want to use a laptop, attach the piece to the second half of the hinge with screws so that the top can be opened and the laptop taken out.
Propping Up the Laptop

This stage is only for those using a laptop. You can make the stand as complex or sophisticated as you like - I chose the ultimate simplicity of just a block of wood for it to be rested against, however another option could be stilts or another means of holding the laptop in place.
The Control Panel
.jpg)


Now for the control panel. Before sticking this down, you may want to drill appropriately sized holes for the buttons and joysticks to sit in (if you find this order easier). For this you need to cut and sand a thin wooden rectangle of 400x200mm and use wood glue to stick it to the side panel. The tip for this is too cut the slithers of wood, one for each side, and glue them on to the side panel at the angle you want, for the control panel to sit on. Ensure the wood isn't touching the laptop so that it doesn't scrape the laptop as it is removed.
The Screen Border


This step involves some ambiguity depending on the size of your (laptop) display. My display was 14" and the dimensions for such a size are in the picture above, however, if you have a different size display you will need to adapt the dimensions. The tip from the previous step applies here, you must use slithers of wood to be able to stick this to the side panels. Now, that is it! The cabinet is built.
Aesthetics


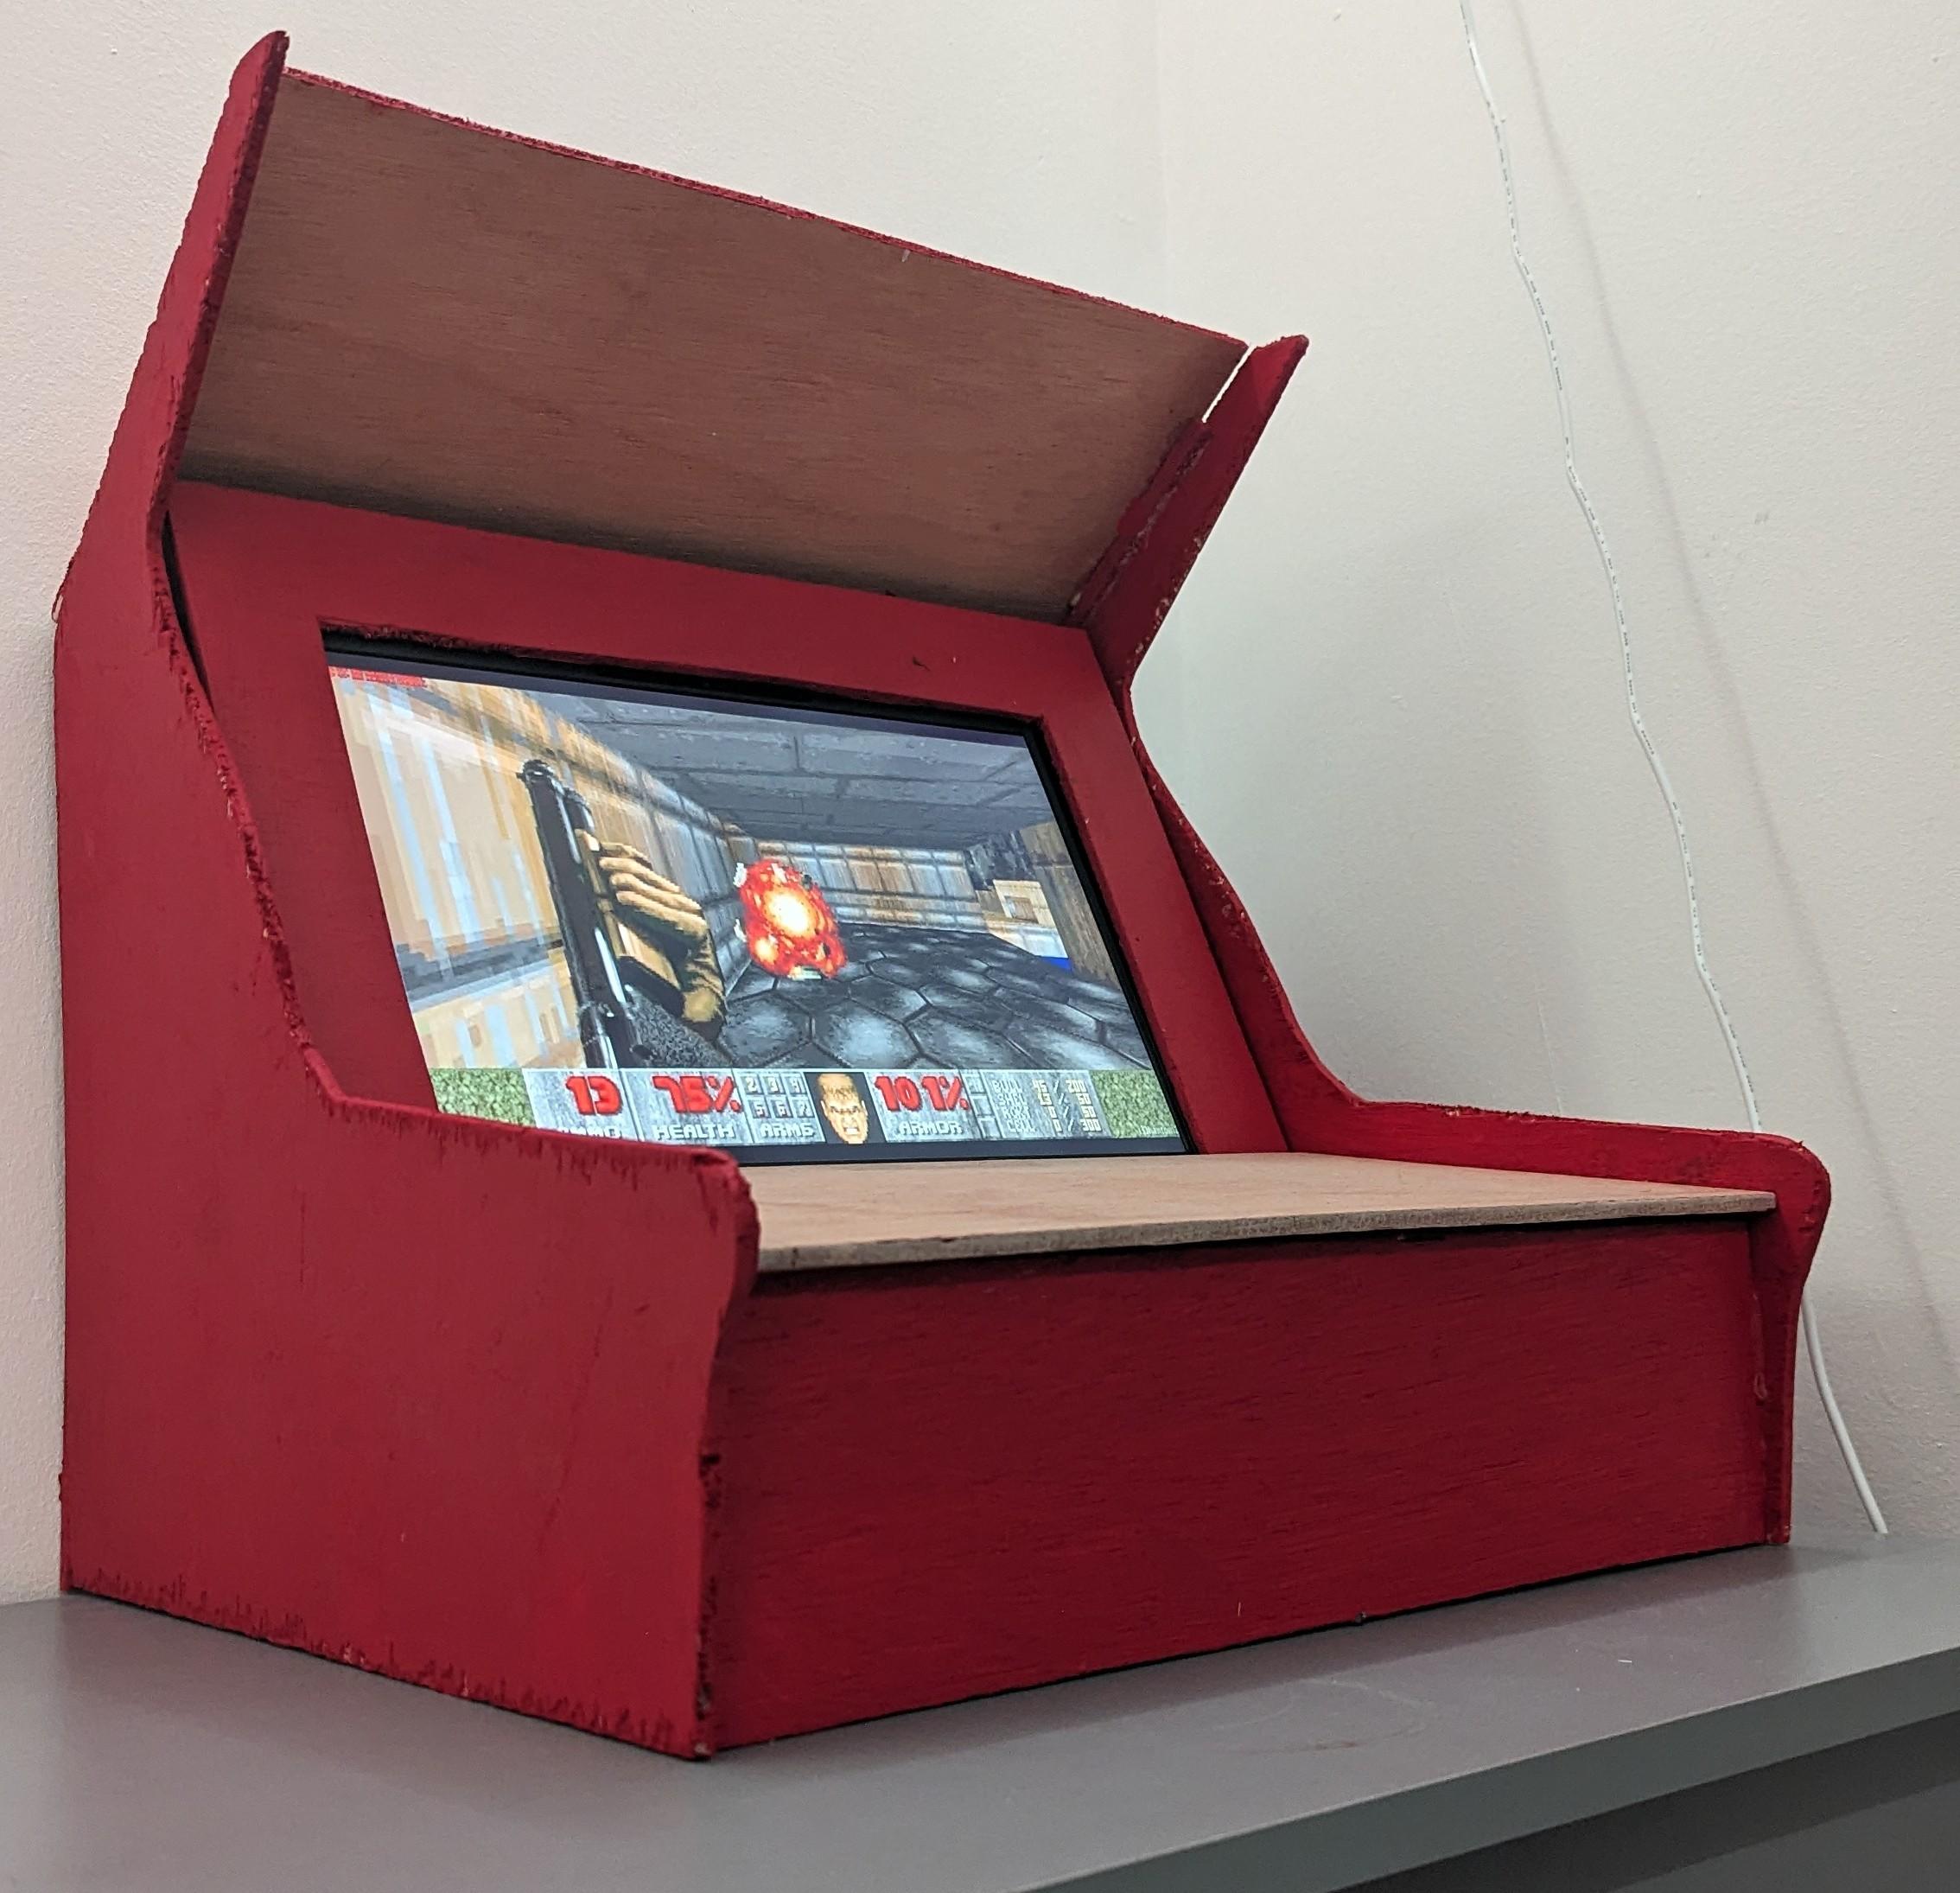
In my build I decided to paint the cabinet red as it is a primary colour of DOOM, another alternative would be black or any colour of your choosing. In the future I could get the images in my CAD professionally printed on. If you would like the images from my CAD to print on they are above. You could also implement LED lights onto the design for a classic arcade feel.
Downloading DOOM
Now that we have finished the cabinet, it is time for the electronics. On your raspberry pi, navigate to the terminal and enter the following:
sudo apt install chocolate-doom
sudo wget http://www.doomworld.com/3ddownloads/ports/shareware_doom_iwad.zip
sudo unzip shareware_doom_iwad.zip
chocolate-doom-setup
Note: each line is a different prompt to enter, enter one line and wait until it is fully completed.
Now use the screen that appears to configure display, sound, keyboard, mouse, and game controller. Then select "save parameters and start DOOM".
You can run DOOM from the terminal with the prompt
chocolate-doom -iwad DOOM1.WAD
Or alternatively you can navigate to Menu > Games > Chocolate DOOM
Full credit and instructions on https://www.makeuseof.com/tag/run-doom-raspberry-pi/
Using Your Laptop As a Display for Your Raspberry Pi


This step is only relevant to those using a laptop for the display output. This is a useful tutorial on how to complete this step, however, there are other tutorials online that you can use as well.
Setting Up the Electronics

With chocolate doom installed on the raspberry pi, now we do the wiring, I used this tutorial on how to connect and use a joystick on a raspberry pi. Raspberry pi's are only compatible with digital signals not analogue signals that joysticks produce, so the DAC is required. For the buttons, you can use this tutorial : https://learn.adafruit.com/retro-gaming-with-raspberry-pi/adding-controls-hardware. Ensure all connections in your breadboard are secure, and that you have used a 10k resistor as if not the components could be damaged by too high current. You can decide the type and colour of your joysticks depending on your colour scheme, I am going for a red theme as it is a main colour in DOOM. You can configure the joysticks and buttons back in the menu by once more using the prompt:
chocolate-doom-setup
Looking to the Future


This project is very open ended and this is only just the beginning should you decide. However, as with all projects it will require maintenance, if you run into issues make sure you check all physical connections. Other ways of trouble-shooting is disconnecting your joysticks and buttons and trying the game with mouse and keyboard to try to identify the issue. Replacing wires could also fix issues. I also designed a full size version of the arcade machine in fusion which featured a coin slot, except it used the iconic DOOM key cards to turn on instead of coins (pictured above). You could also add LED lights and professionally print images on the side of the cabinet - the possibilities are endless. Equally, the versatility of the raspberry pi means that many other games are available to play on the arcade machine. Another possibility is that you could build a stand which converts it from desk top to full size. But, for now, have fun! You are free to enjoy the golden era of gaming, I hope you have enjoyed the project as much as I have!