DTF Printing a Custom Canvas Tote Bag With HTVRONT D2 Printer & Oven
by cre8tivmindsllc in Craft > Fashion
62 Views, 0 Favorites, 0 Comments
DTF Printing a Custom Canvas Tote Bag With HTVRONT D2 Printer & Oven
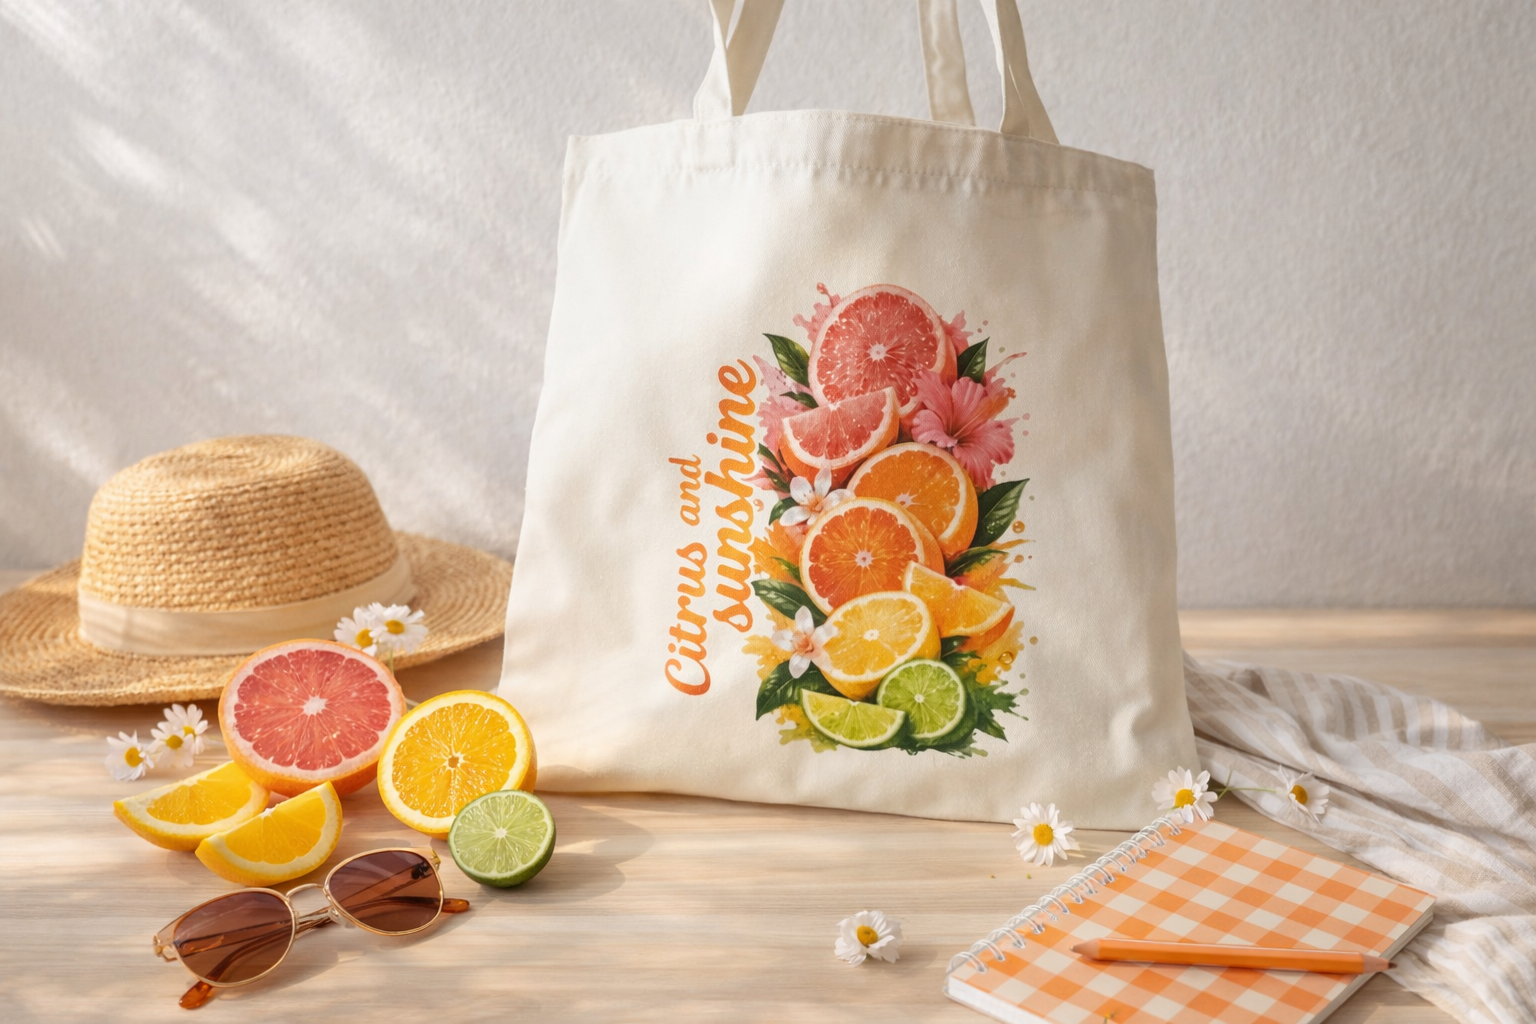
When HTVRONT invited me to try their new D2 DTF Printer & Oven Bundle, I was excited to finally give DTF printing a try.
This is my very first time using a DTF printer, so if you’ve been putting it off because it seems intimidating, you’re in the right place. Follow along as I share my experience, the settings I used, and everything I learned along the way so we can learn together.
I've wanted to try DTF printing for a long time. The idea of printing a full-color design with beautiful gradients, tiny details, and vibrant colors without cutting or layering vinyl, honestly sounded amazing. But, like many crafters, I had heard the same concerns over and over: DTF printers can be difficult to maintain, white ink clogs easily, and the software can feel overwhelming when you’re first starting out.
Honestly, those concerns are what kept me from trying DTF printing sooner.
When HTVRONT invited me to review their new D2 DTF Printer and Oven Bundle, I decided it was finally time to jump in and see what the process was really like. Since this was my first experience using a DTF printer, I wanted to document every step so others exploring the idea for the first time could follow along with confidence.
In this Instructable, I'll tell you how I created my Sunset Gradient Citrus Stack design and applied it to a canvas tote bag using the HTVRONT D2 DTF Printer. I'll share the printer settings I used, the curing and heat press settings that worked for me, and a few helpful tips I picked up along the way.
Whether you're completely new to DTF printing or you're researching your first printer, I hope this guide helps make the process feel a little less intimidating.
Disclosure: HTVRONT provided the D2 DTF Printer and Oven Bundle for this review. As always, all opinions, settings, and results shared here are based on my own experience.
What Is DTF Printing?
If you're new to DTF printing, don't worry, it's much simpler than it sounds.
DTF stands for Direct to Film. Instead of cutting multiple layers of heat transfer vinyl, your design is printed directly onto a special transfer film using DTF inks. While the ink is still wet, adhesive powder is applied, cured in an oven, and then heat pressed onto your fabric.
The basic process looks like this:
- Create the design
- Print your design onto DTF transfer film.
- Cover the wet ink with adhesive powder.
- Cure the powder in a DTF oven.
- Heat press the transfer onto your project.
- Peel away the film to reveal your finished design.
One of my favorite things about DTF is that you can print colorful artwork with gradients, shadows, and fine details in a single transfer. There's no weeding, no layering multiple colors of vinyl, and no pretreating your fabric. Once I finished my first project, I immediately understood why so many crafters are making the switch.
Why I Chose the HTVRONT D2
Before this project, I spent a lot of time researching DTF printers. One thing came up over and over again; people worried about white ink clogging the printhead and the amount of daily maintenance required to keep a printer running properly.
That's one of the reasons I was excited to try the HTVRONT D2.
The feature that impressed me the most was its automatic white ink circulation system. As long as the printer remains plugged into a dedicated outlet, it continues circulating the white ink, even when the printer is turned off. That helps reduce one of the biggest concerns many beginners have when getting started with DTF printing.
Important: The D2 should remain plugged into a dedicated outlet at all times. Even when the printer is turned off, it continues running its automatic maintenance system in the background.
Another feature I appreciated was the IdeaStudio software. Instead of learning separate design and RIP software, everything is combined into one program, which made the learning process much easier than I expected.
The D2 also prints up to 13 inches wide, giving you plenty of room for larger projects like tote bags, adult T-shirts, sweatshirts, and gang sheets without feeling limited.
Most importantly, I found the overall setup to be much easier than I anticipated. Within a short time, I had the printer assembled, the ink filled, and I was printing my very first design.
Supplies
Supplies
Before we get started, here's everything I used to make this project. If you purchased the HTVRONT D2 Printer and Oven Bundle, you'll already have most of what you need.
Equipment
- HTVRONT D2 DTF Printer and Oven Bundle
- HTVRONT A3 DTF Oven
- Heat press (any flat-platen heat press will work)
- Windows computer (Windows 10 or later required) (Does not support MAC)
- IdeaStudio software (free download)
- USB cable (included with the printer)
Materials
- Canvas tote bag
- DTF transfer film (330 mm roll)
- DTF adhesive powder
- DTF ink set (CMYK, White, and Cleaner)
- Parchment paper or butcher paper
- A high-resolution PNG design with a transparent background (I used my Sunset
- Gradient Citrus Stack design.)
Note: The HTVRONT D2 Printer and Oven Bundle includes the DTF ink, transfer film, adhesive powder, and cleaner solution. You'll just need to supply your own heat press, parchment paper, and blank tote bag.
Unbox and Set Up Your Printer


I have to admit, I expected setting up a DTF printer to be much more complicated than it actually was. Once everything was out of the box, the setup was surprisingly straightforward.
Start by placing the printer on a sturdy work surface with enough room behind and in front of the machine for the film to feed smoothly. Since the printer measures approximately 34" × 27" × 13", make sure you leave a little extra space around it before moving on.
Next, remove all of the shipping materials before turning the printer on.
Remove the shipping restraints
- Remove the four screws from the rear panel and install the film roll holder.
- Open the printer and remove any foam blocks or cardboard inserts.
- Avoid moving the print carriage by hand.
Once everything is unpacked, install the transfer film.
Install the transfer film
- Slide the film roll onto the rear roll holder.
- Feed the leading edge of the film through the rear slot.
- The film should feed into the back of the printer and exit through the front.
Important: One thing to know before setting up your workspace is that the D2 should remain plugged into a dedicated outlet at all times, even when it's turned off. This allows the automatic white ink circulation system to continue running, which helps keep the printer ready for your next project.
Fill the Ink Tanks
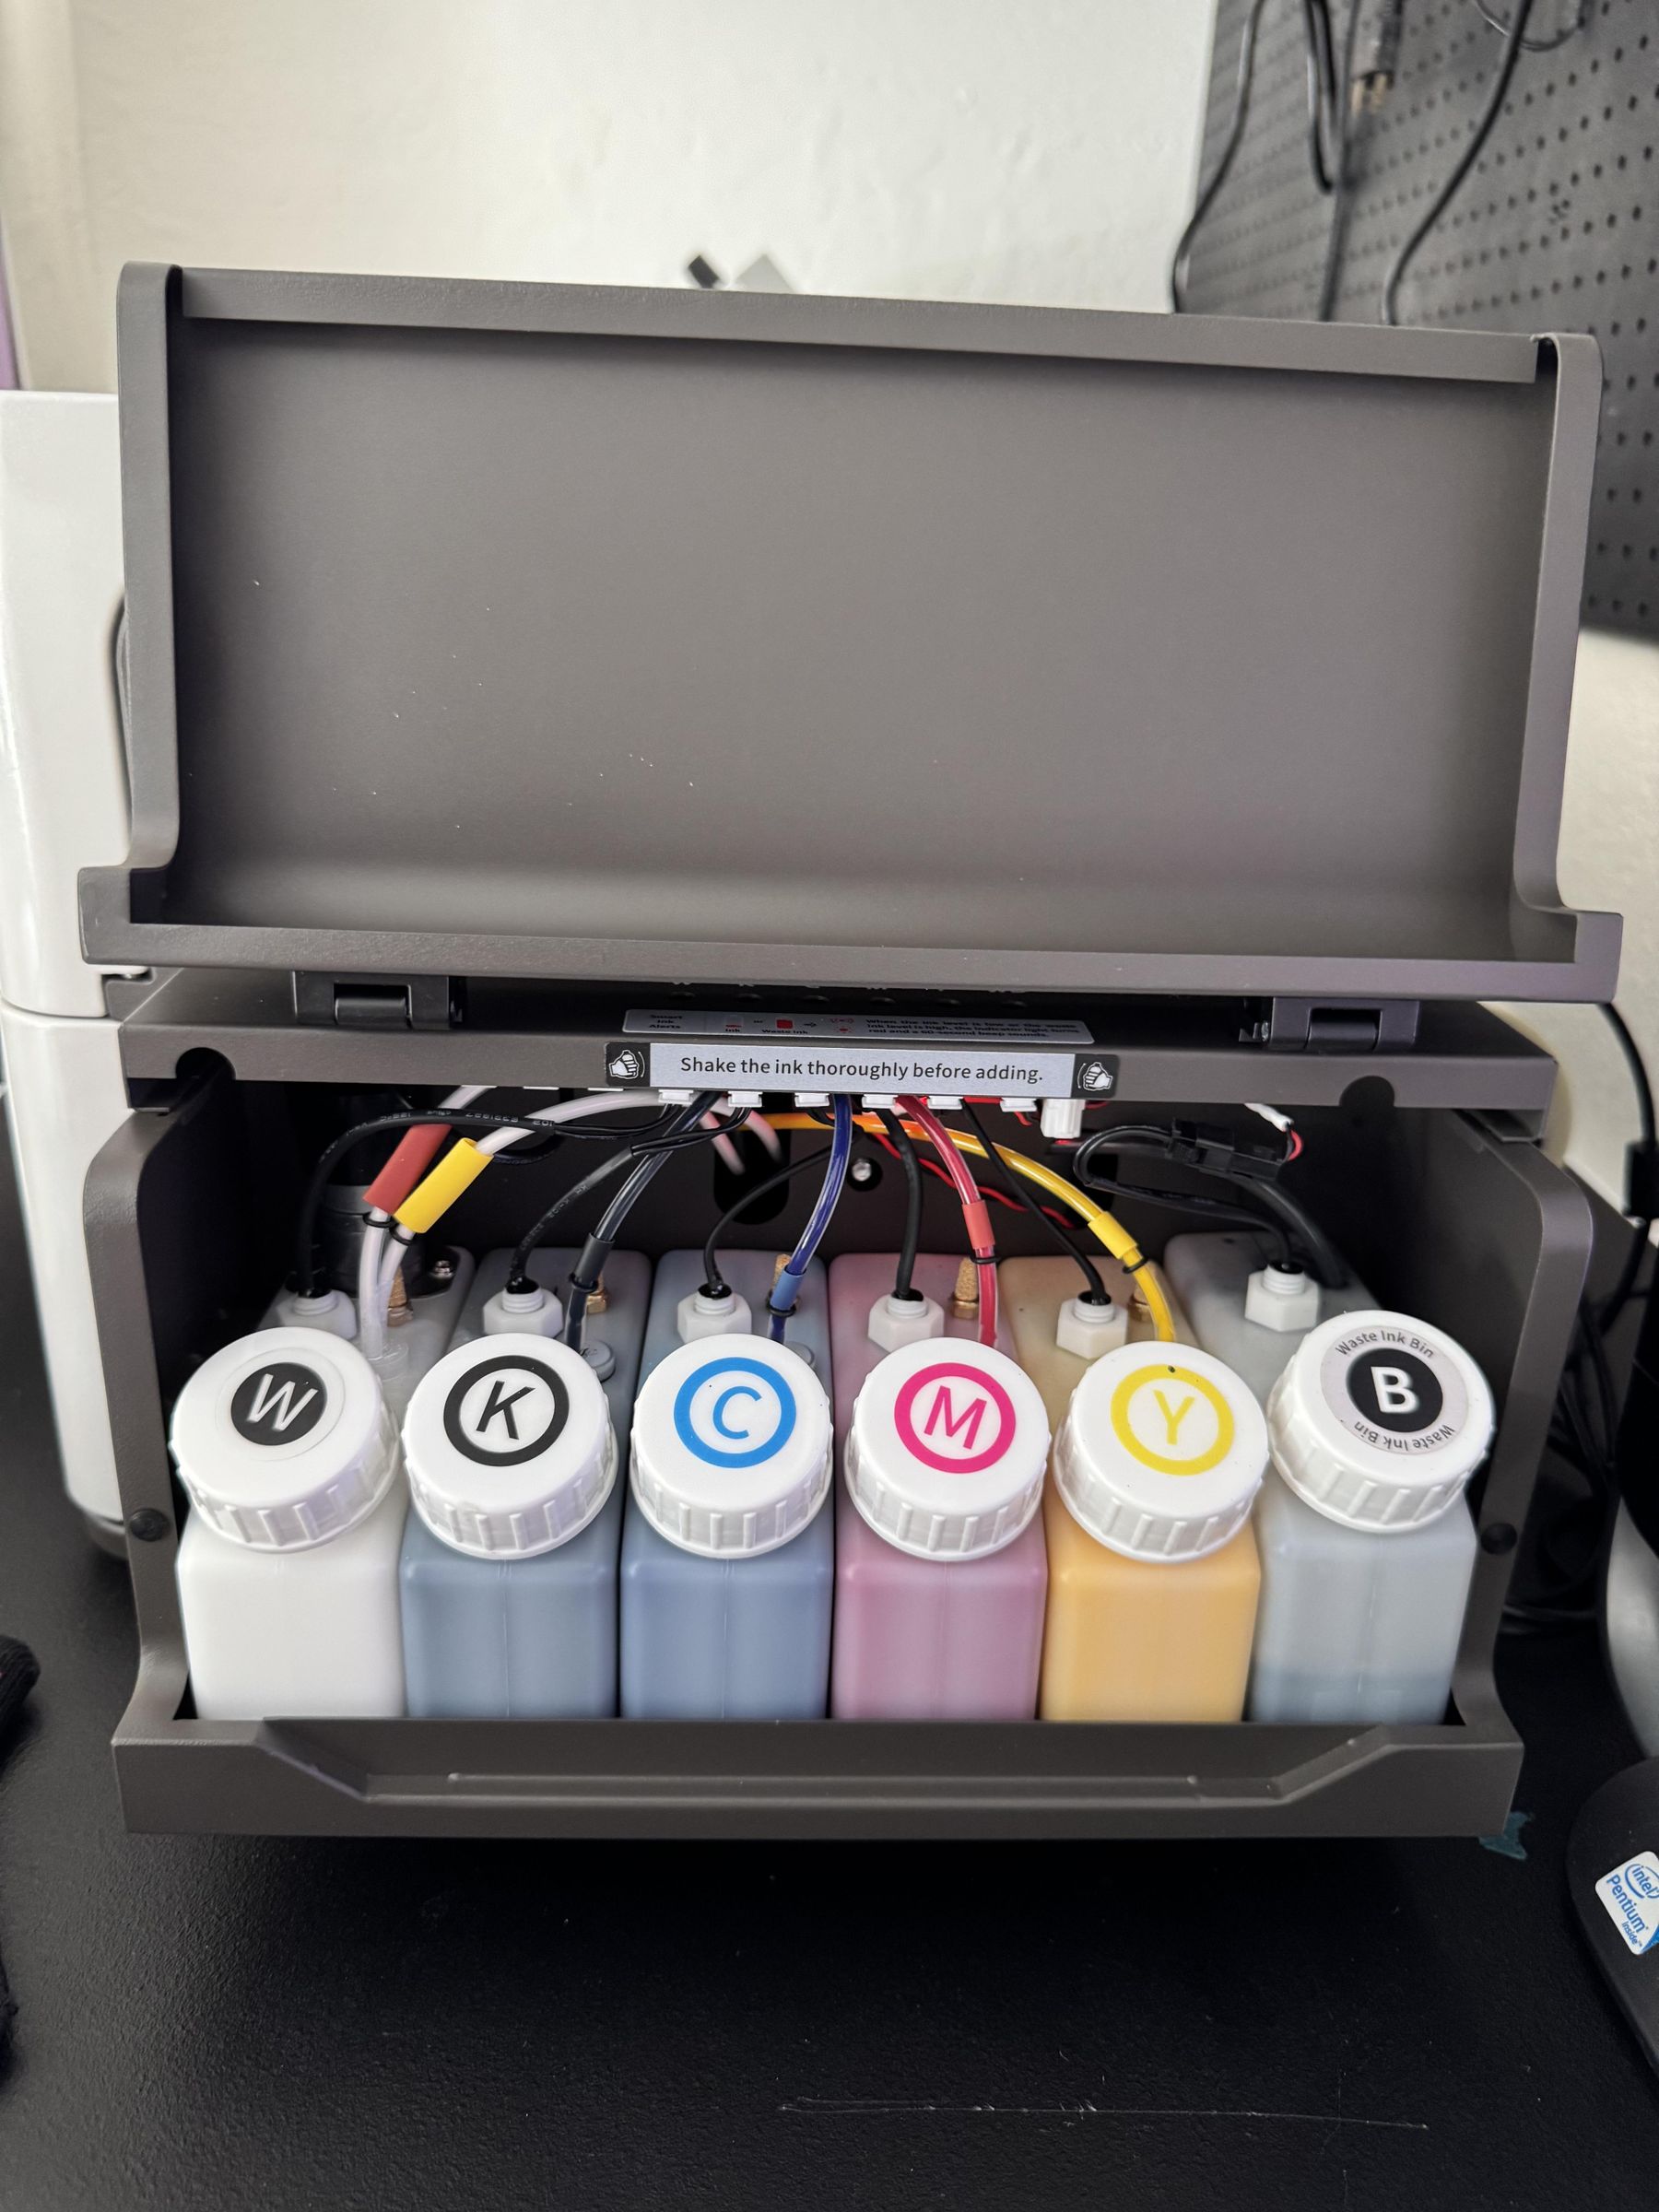
One thing I really liked during setup was that the ink tanks were already installed inside the printer. Instead of installing cartridges, all I had to do was fill each tank with the matching ink.
Open the ink compartment and you'll see each tank clearly labeled to match the bottles included with the printer.
Fill the tanks in this order:
- White
- Cyan
- Magenta
- Yellow
- Black
The final tank is labeled Waste.
Important: DO NOT pour ink into the Waste tank. It's designed to collect waste ink during the printer's automatic cleaning cycles and should remain empty.
As you're filling the tanks, pour the ink slowly and stop at the fill line. Overfilling can make cleanup messy.
Once all of the ink has been added, use the printer's touchscreen (or follow the setup wizard in IdeaStudio) to run the Initial Ink Fill. This process charges the ink system and prepares the printer for its first print. The time can vary depending on the printer’s initial setup process, so I recommend allowing the printer to complete the full cycle before moving on to your nozzle check.
💡 Pro Tip: Scan the QR code included in the box before you begin. HTVRONT provides a step-by-step setup video that walks you through the entire process. Between the video and the printed manual, I found the initial setup very beginner friendly.
💡Pro Tip: One of the features I was most interested in learning about was the white ink maintenance system. White ink is known to require extra attention in DTF printing, and the D2 includes automatic white ink circulation and maintenance features designed to help reduce settling and clogging issues. Keeping the printer plugged in allows these maintenance features to continue running, which helps keep the printer ready for your next project.
Install IdeaStudio and Run a Nozzle Check

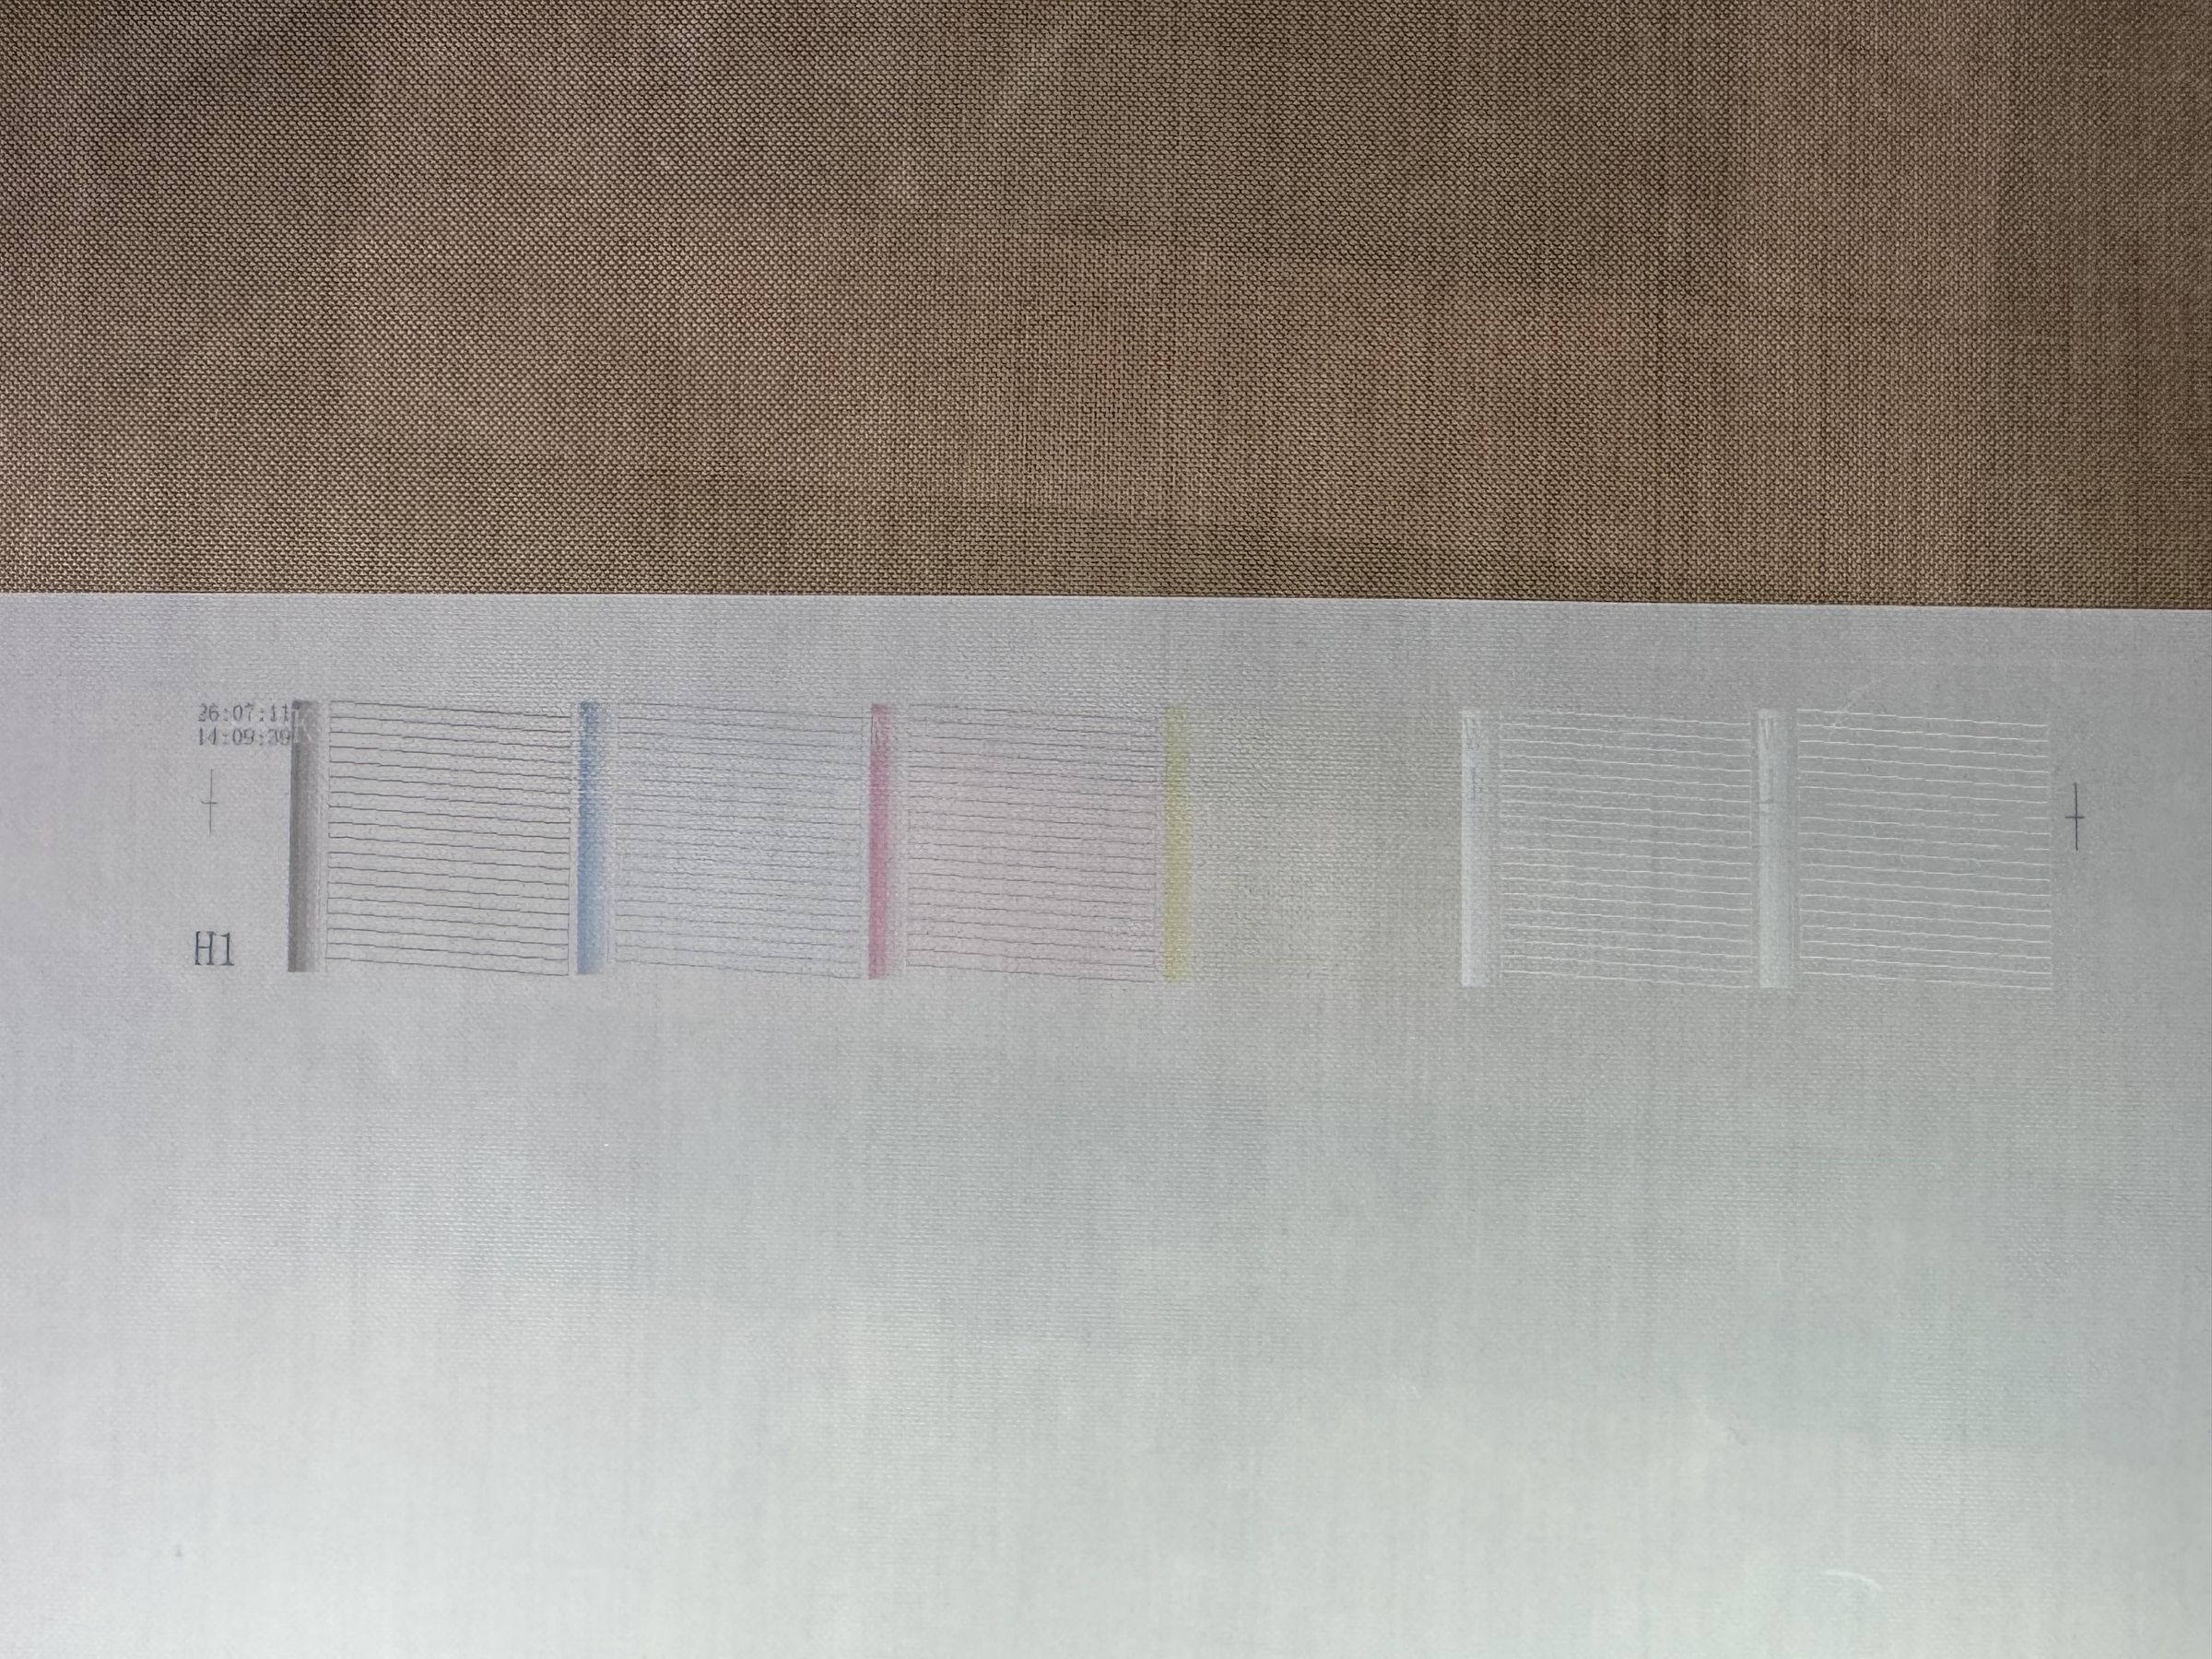
With the printer ready to go, it's time to install the software.
Download IdeaStudio from HTVRONT's website and install it on a Windows computer.
Important: At the time I created this project, IdeaStudio for the D2 DTF Printer was only available for Windows 10 or newer. If you're using a Mac, you'll need access to a Windows computer before you can use the printer.
Once the software is installed:
- Connect the printer using the included USB cable.
- Open IdeaStudio.
- Allow the software to detect the printer.
- If a firmware update is available, install it before continuing.
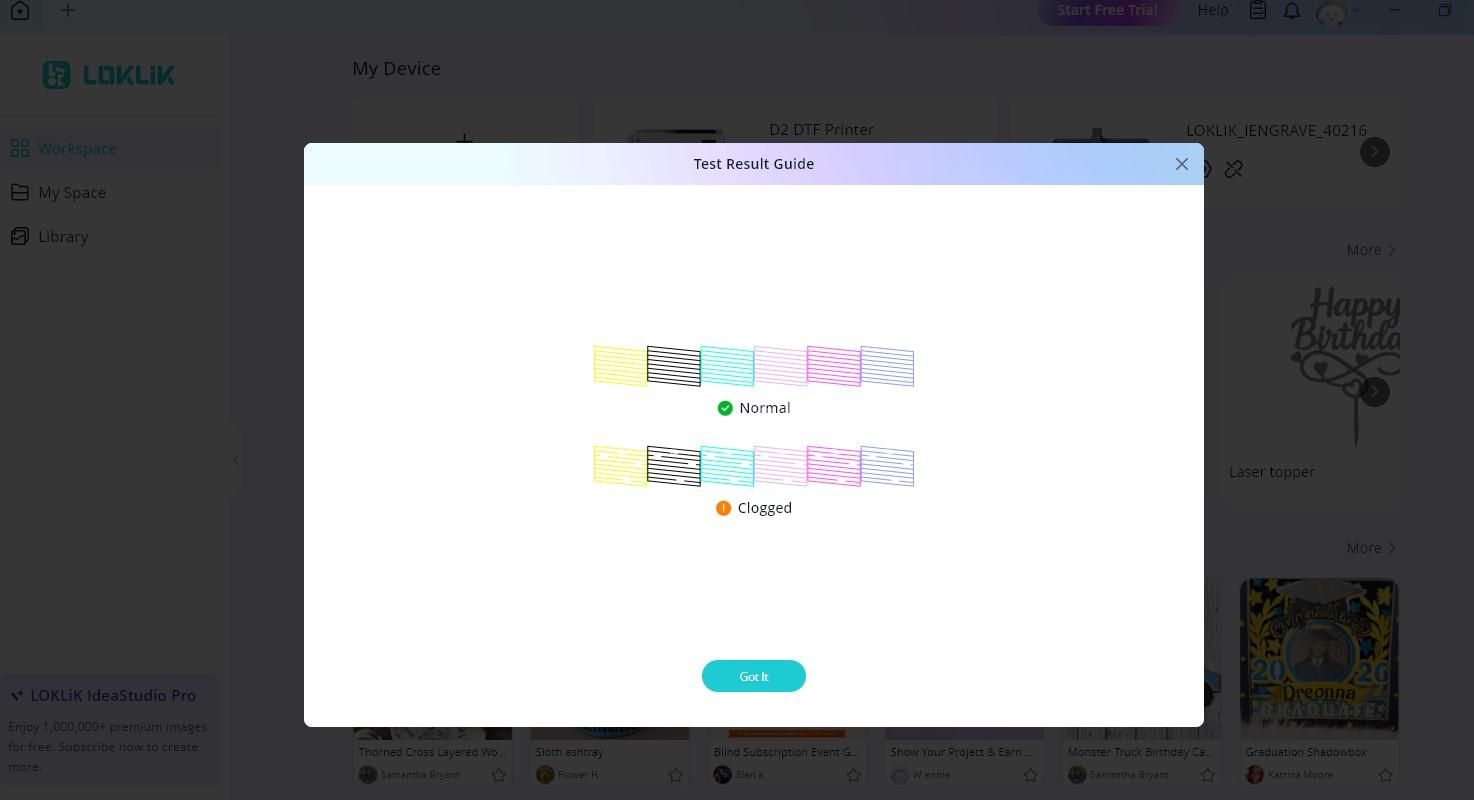
Now it's time for one of the most important setup steps; a nozzle check.
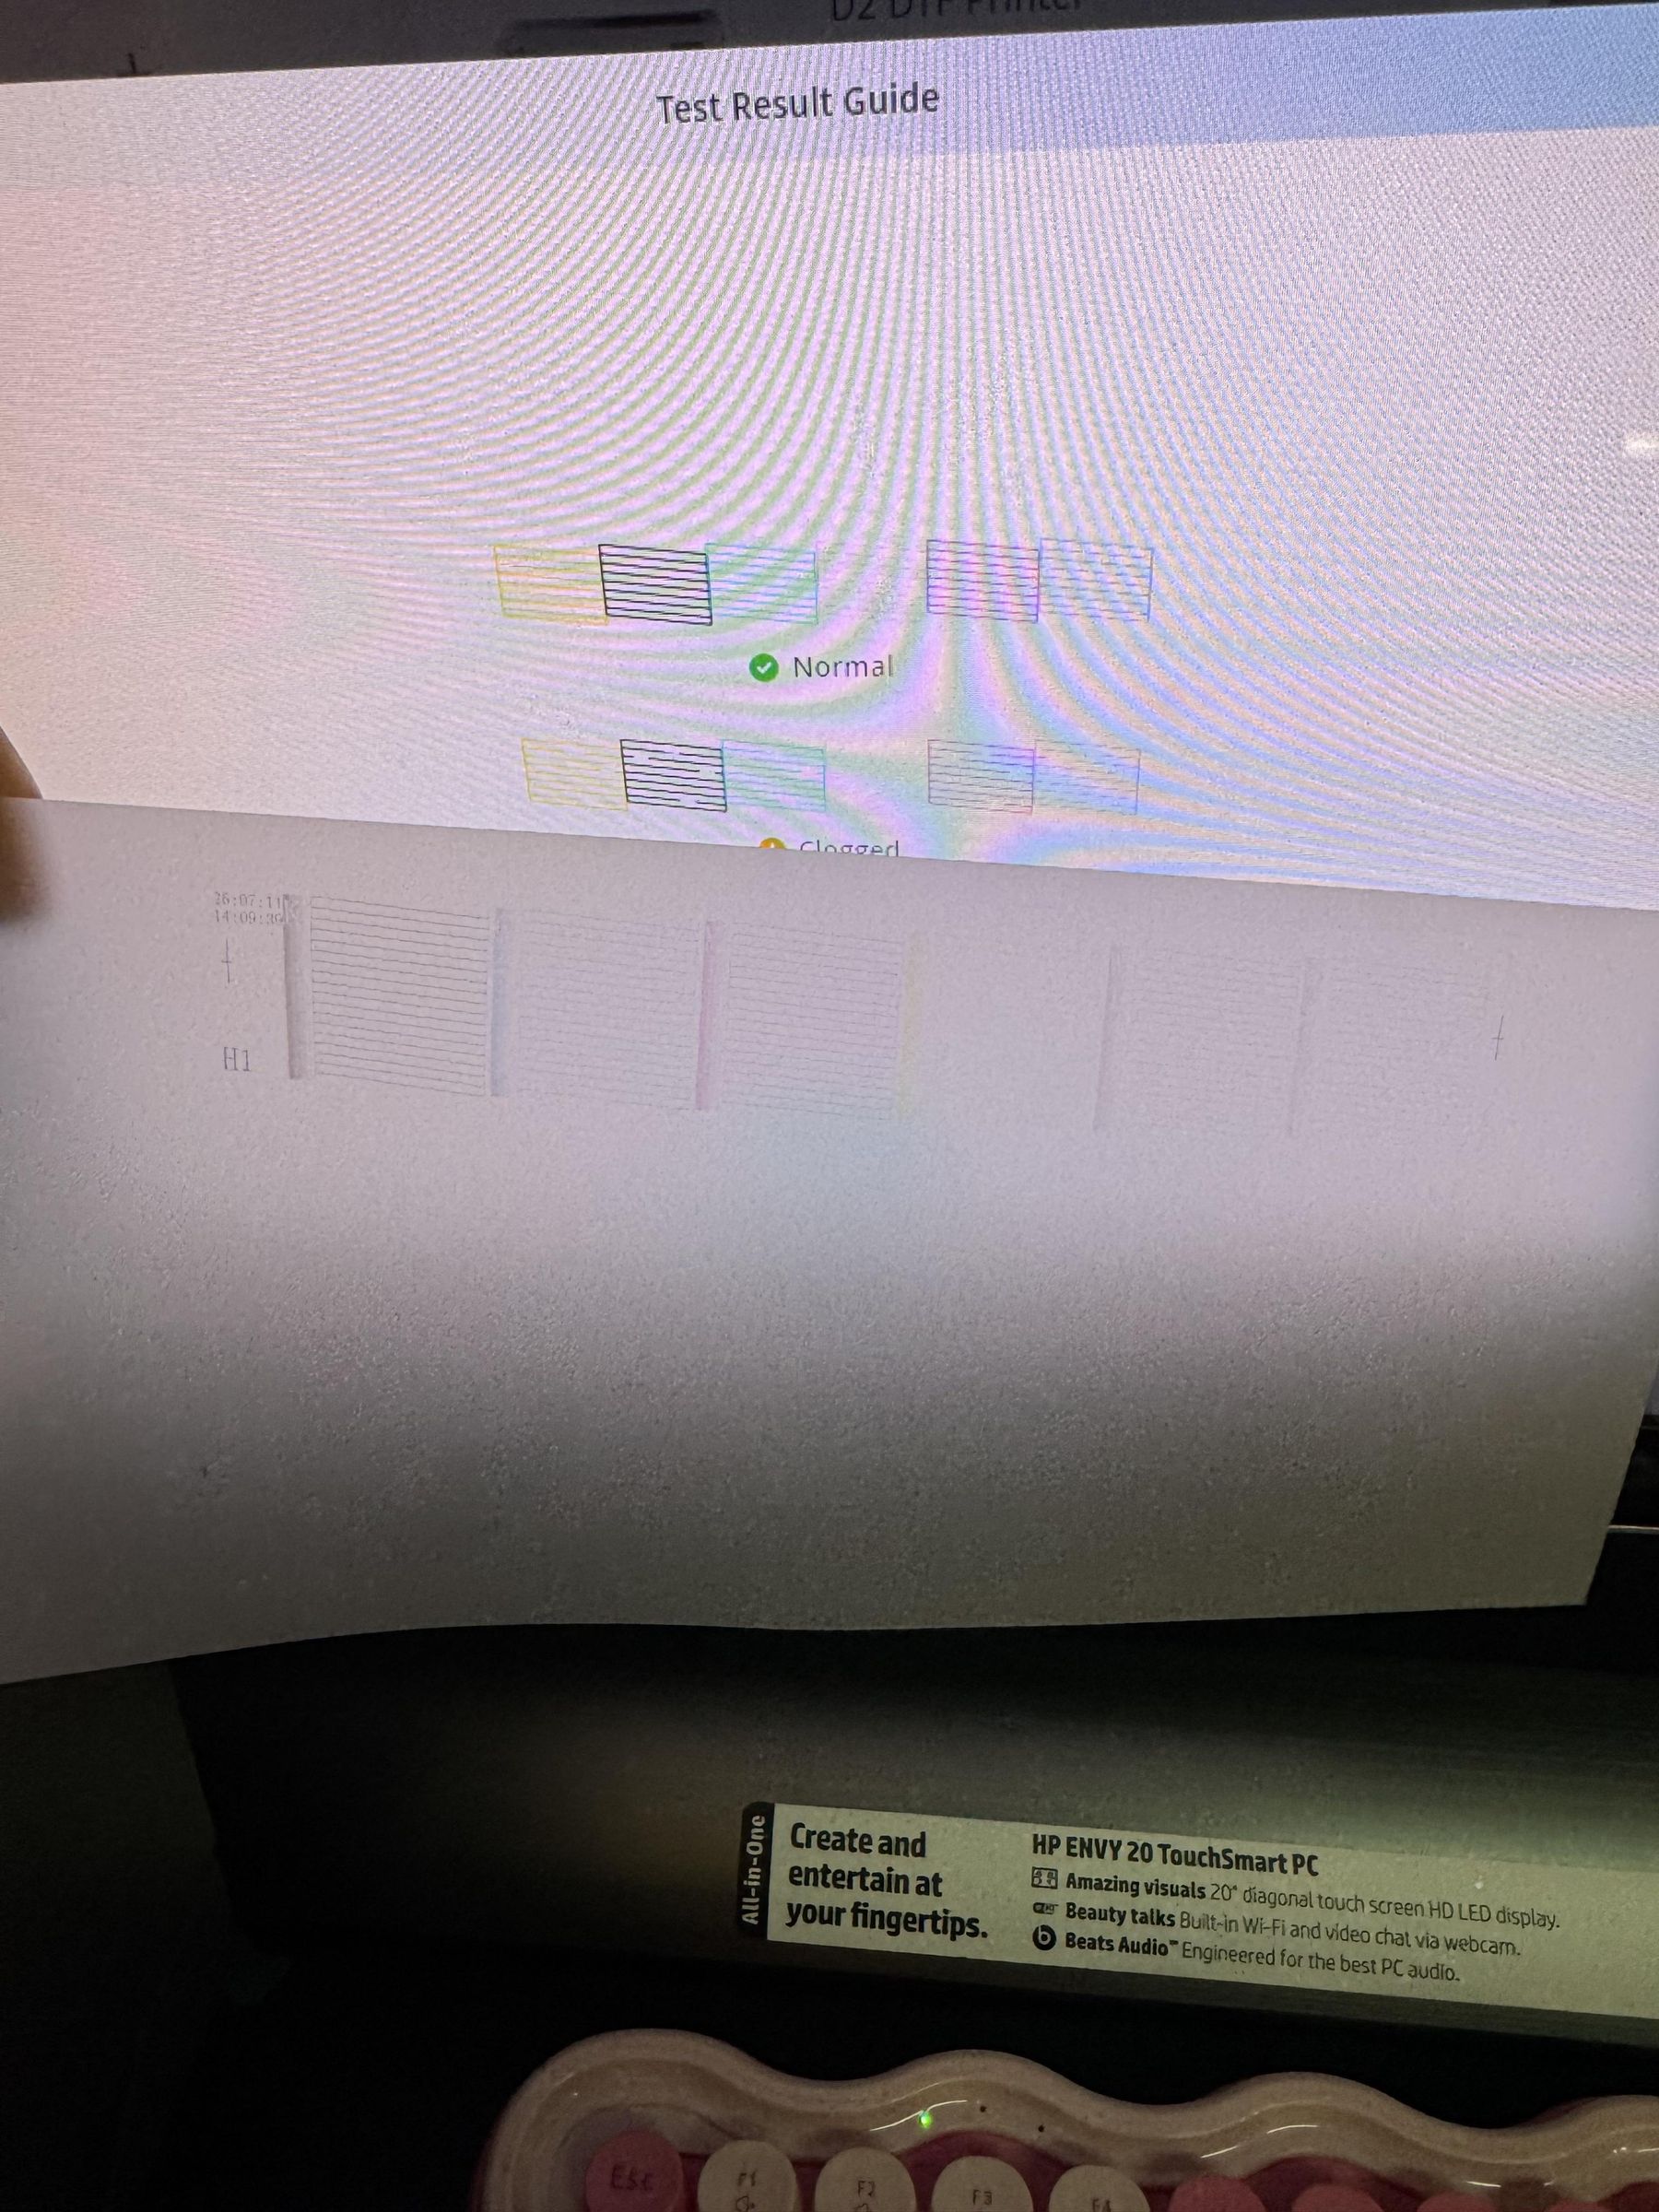
Inside IdeaStudio, go to Maintenance > Nozzle Check and print the test pattern onto the transfer film.
Take a close look at the printed lines.
Every color should print clean, straight, and without gaps.
If you notice missing lines, don't panic. Simply run a standard cleaning cycle and print another nozzle check. It's completely normal for a brand-new printer to need one, two or more cleaning cycles before everything is perfect.
💡 Pro Tip: Save your first few nozzles check prints. They become a great reference later if you ever notice a change in print quality.
Create Your Design in Canva
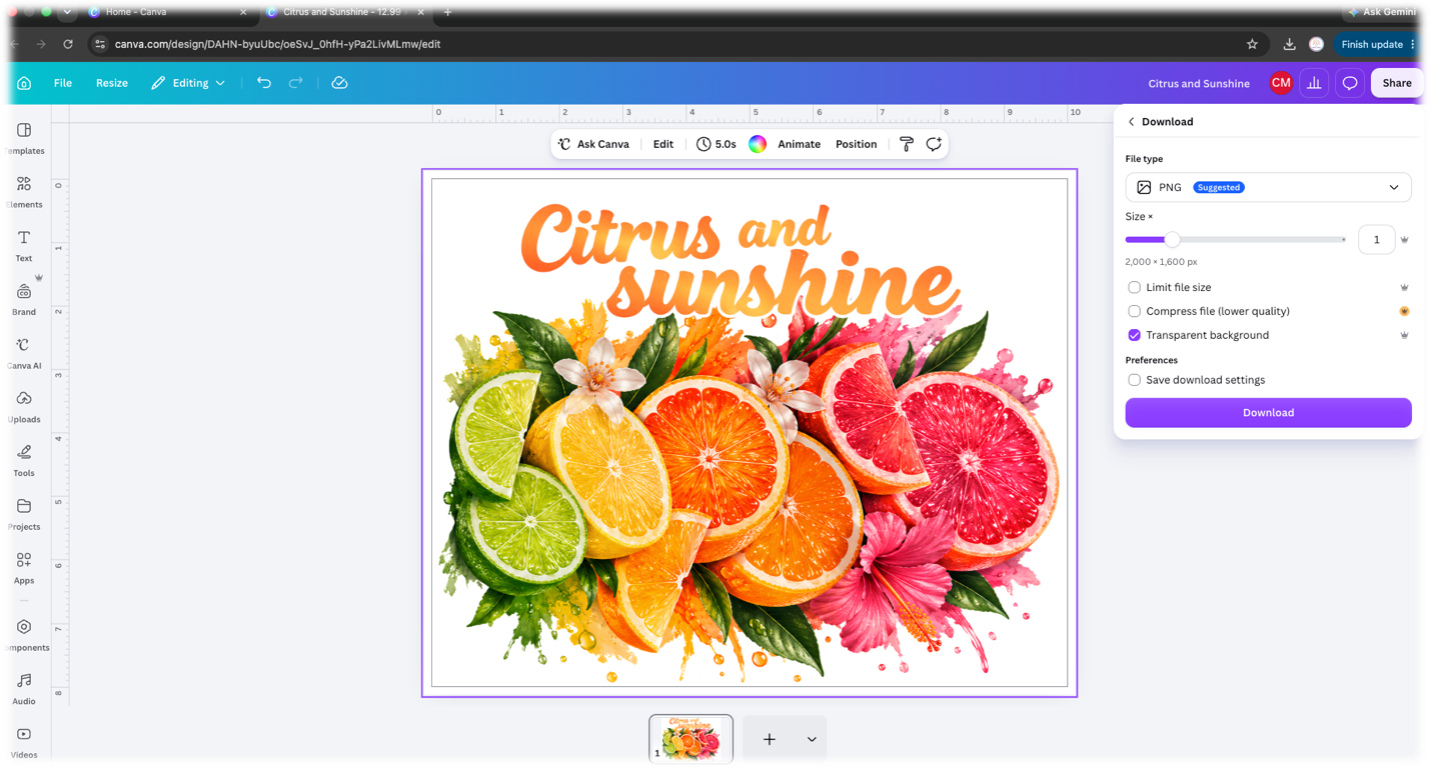
For this project, I created my Sunset Gradient Citrus Stack artwork using AI as a starting point. After that, I brought the design into Canva Pro to clean it up, make a few adjustments, and export it as a high-resolution PNG for printing.
Here are the settings I used:
- PNG file with a transparent background
- 12" × 12" canvas
- 300 DPI minimum (I exported mine at 600 DPI for even sharper details)
- RGB color mode
Exporting from Canva
- Open your finished design.
- Click Share.
- Select Download.
- Choose PNG as your file type.
- Enable Transparent Background.
- Click Download.
- Save your file with a name that's easy to recognize, such as Citrus_Stack_DTF.png.
A few design tips for DTF printing
- Don't mirror your artwork. IdeaStudio automatically mirrors the design before printing.
- Avoid extremely thin lines that may disappear during printing.
- Gradients and blended colors work beautifully with DTF, so don't be afraid to incorporate them into your designs.
Import Your Design Into IdeaStudio
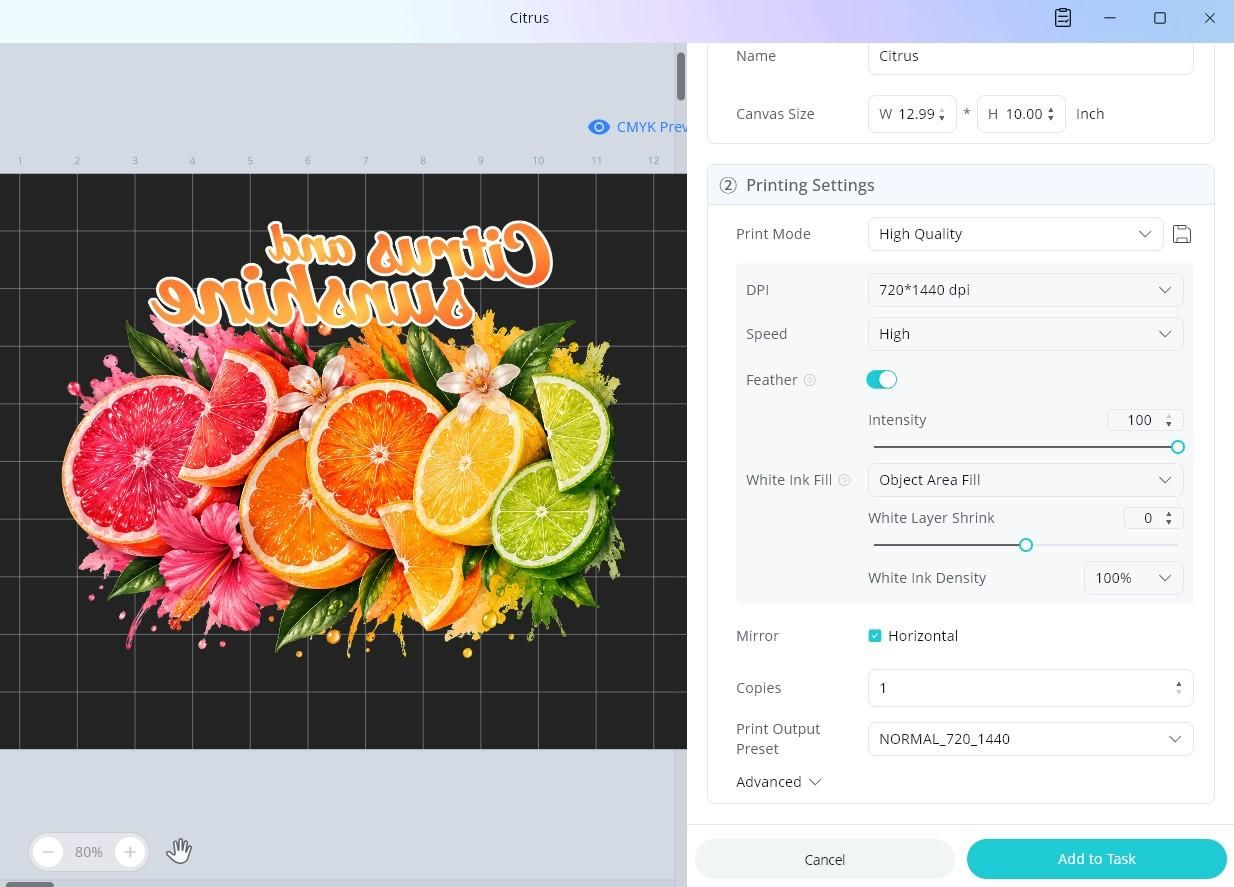
Now that your artwork is ready, it's time to bring it into IdeaStudio and prepare it for printing.
Open IdeaStudio and create a new project. Import your PNG by either dragging it onto the workspace or selecting File > Import.
Resize your design to its final print size. For my tote bag, I used a 10" × 10" design.
If you're printing more than one design at a time, take advantage of Smart Nesting. It automatically arranges your artwork to help reduce wasted transfer film.
These are the print settings I used:
- Printer: HTVRONT D2
- Print Quality: High (720 × 1440 DPI)
- Media Type: DTF Film
- White Ink: Object Area Fill Enabled
- Mirror: Horizontal
The Object Area Fill setting tells the printer to apply white ink only behind your artwork instead of flooding the entire sheet with white ink. This gives your finished transfer better color while reducing unnecessary ink usage.
Before sending the job to the printer, take a minute to double-check everything.
- Open Print Preview and confirm your design is centered correctly.
- Make sure Object Area Fill is enabled.
- Verify that enough transfer film is loaded to complete the print.
- When everything looks good, click Add to Task.
Print Your Design
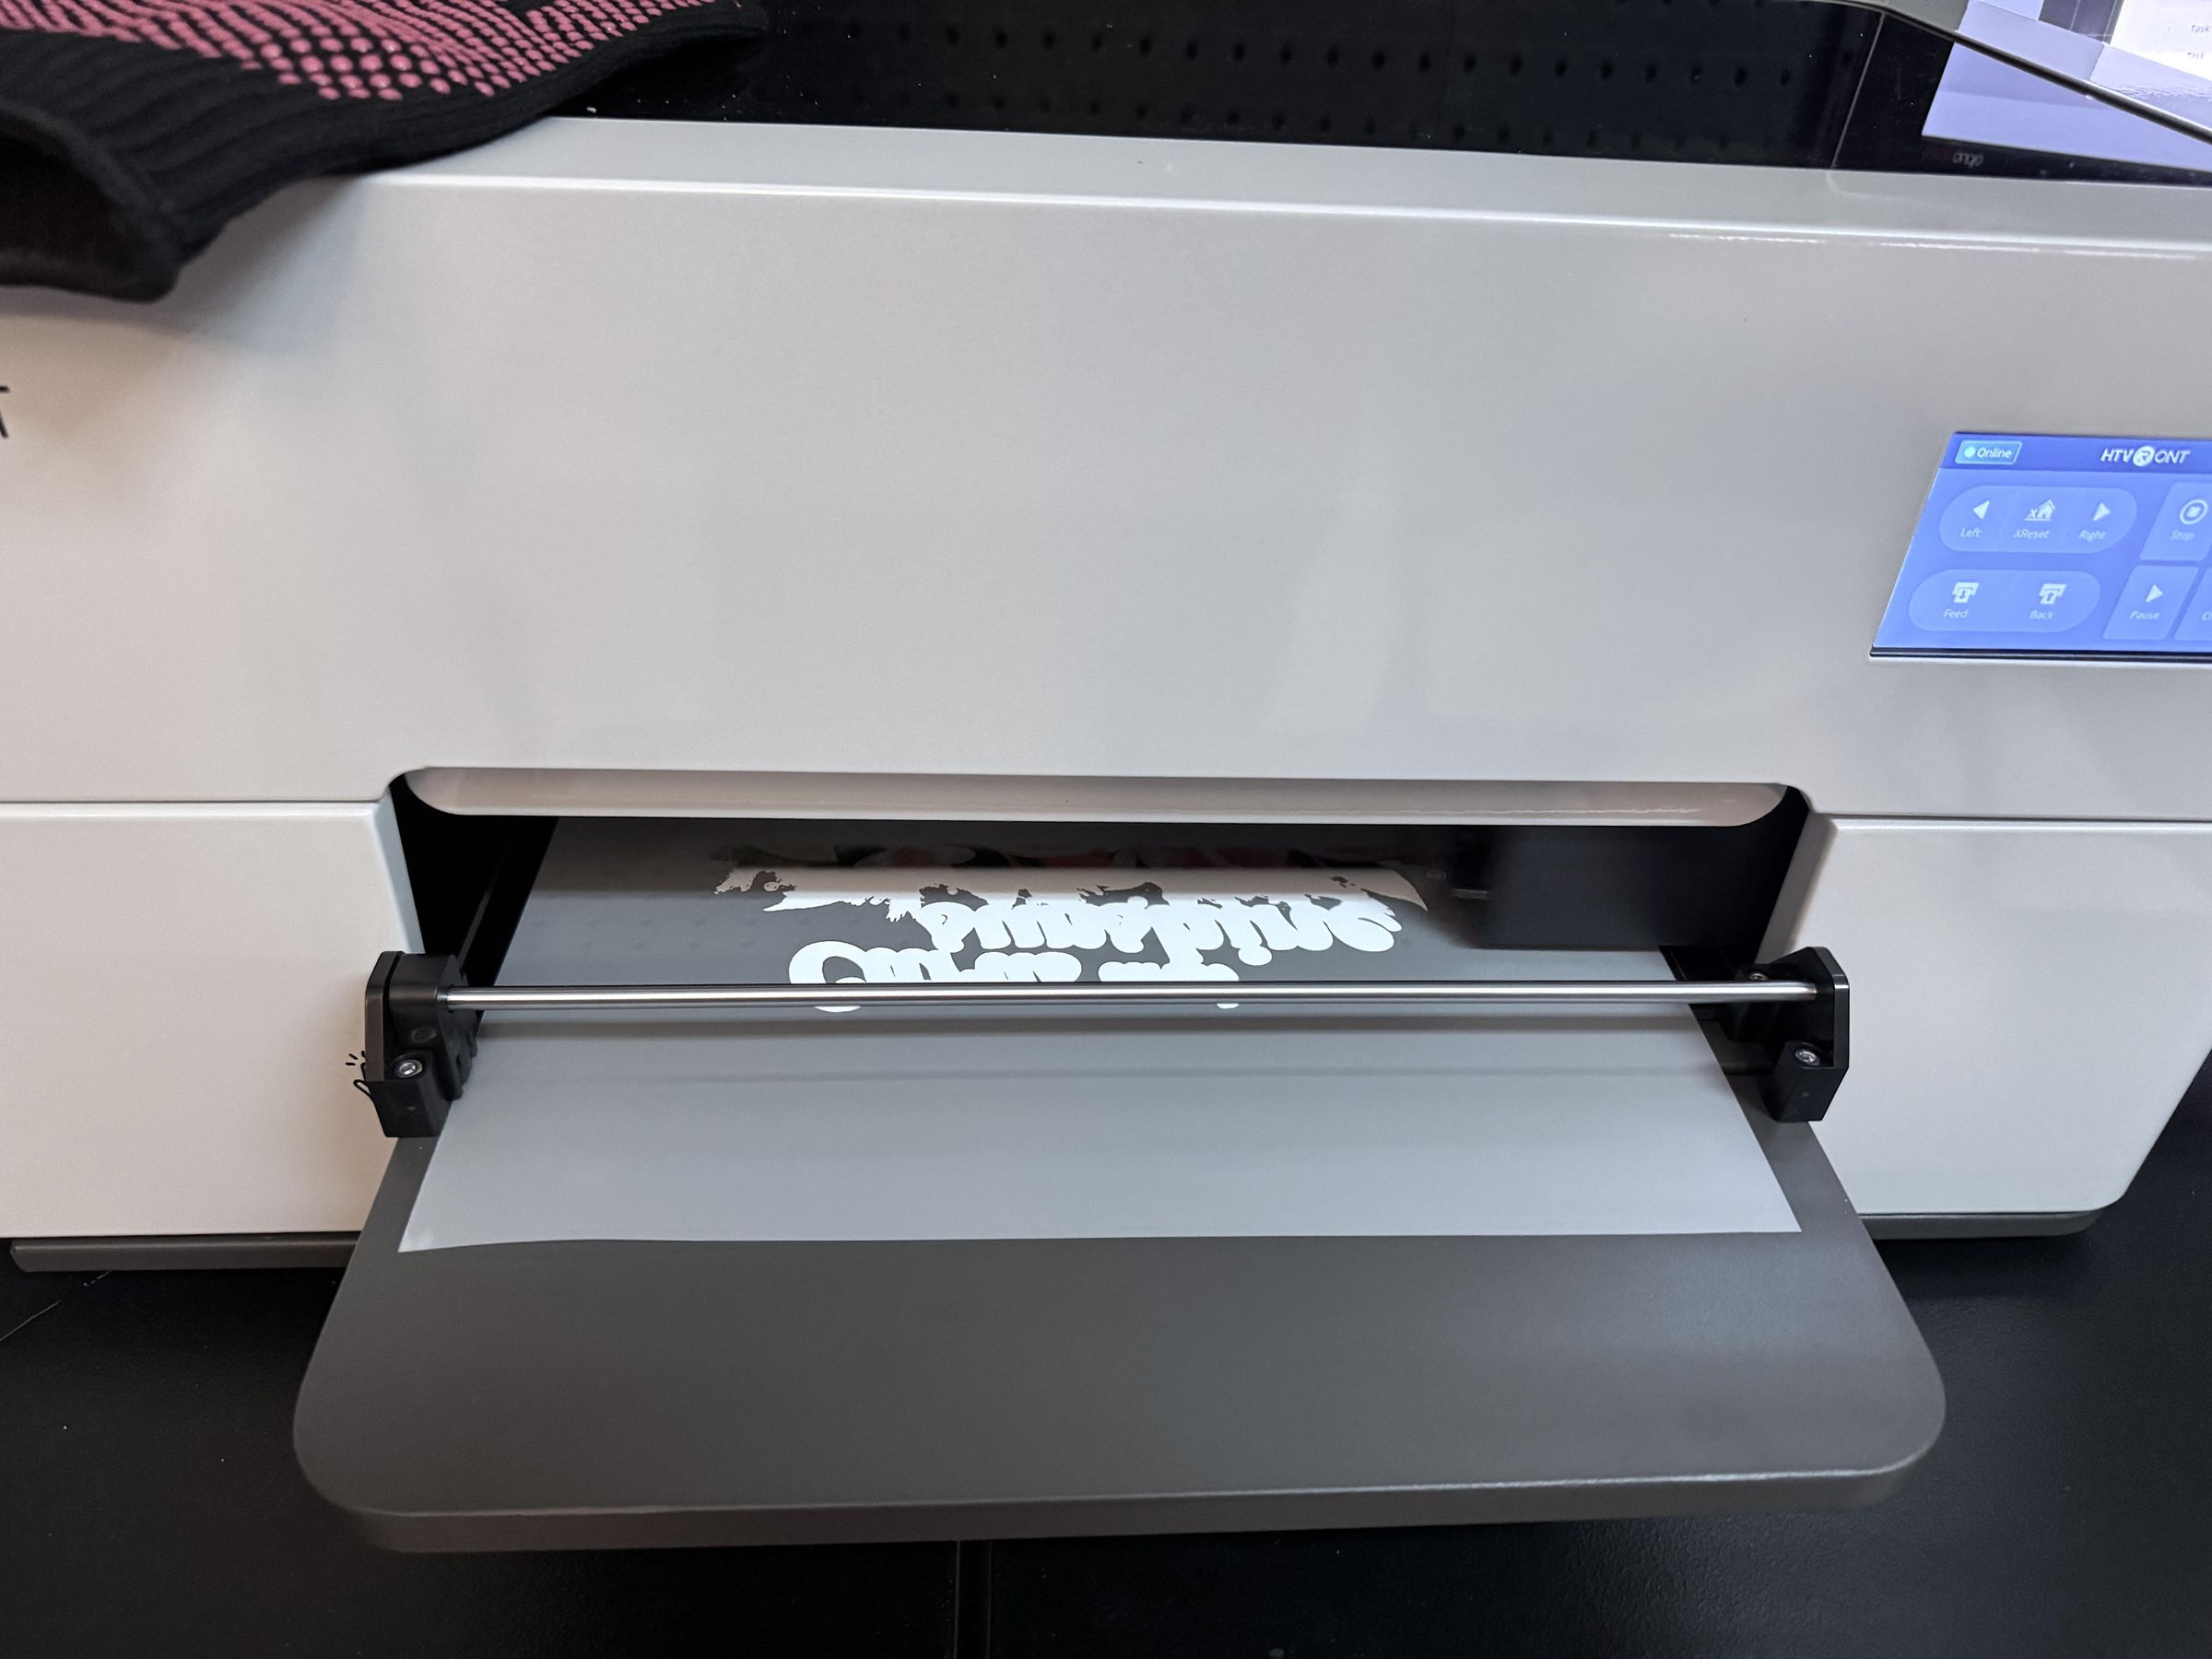
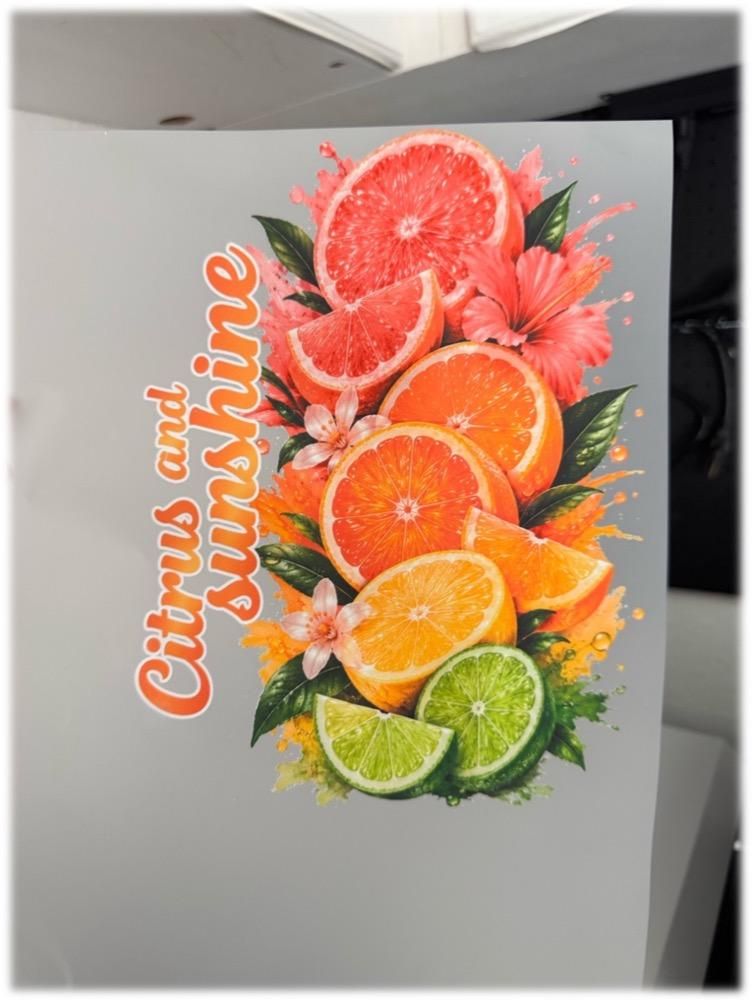
This is where the fun really begins.
Click Print and let the D2 do its thing.
The printer works in two stages.
First, it prints all of the CMYK colors. Then it makes a second pass to apply the white ink underneath your design.
Watching the second pass was actually pretty cool because you can see the printer building the transfer layer that will eventually bond to your fabric.
My 10" × 10" design took about 11 minutes to print using the High-quality setting.
When the print finishes, the film will exit from the front of the printer with the wet ink facing upward.
Important: Resist the urge to touch the printed surface. The ink is still wet and can smear very easily. Handle the film only by the edges and move on to the next step within about a minute.
Apply the Adhesive Powder
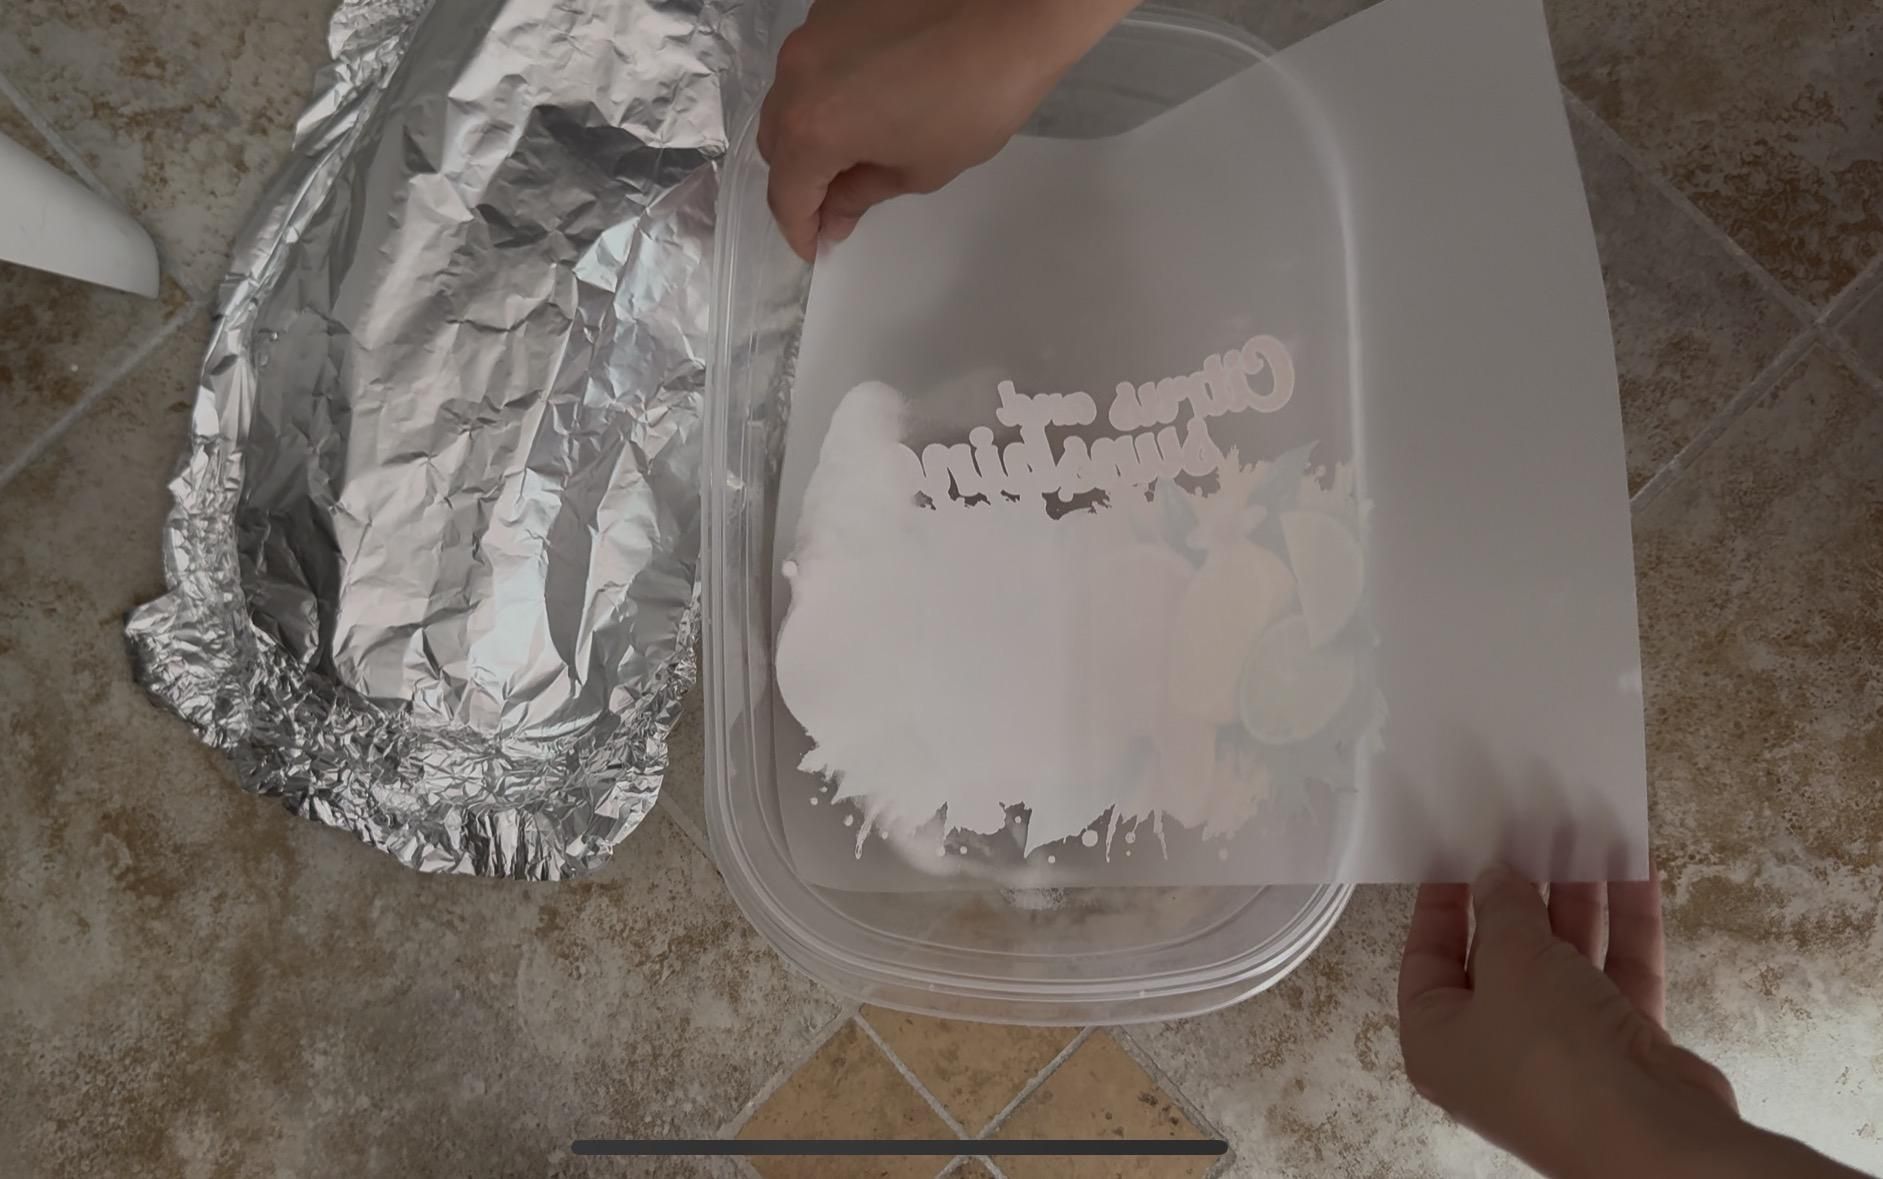
As soon as your print finishes, it's time to apply the adhesive powder while the ink is still wet.
I like to place my transfer over a catch tray so I can easily collect and reuse any excess powder.
Generously cover the entire printed design with powder, then gently tilt and rotate the film until every printed area is evenly coated.
Once everything is covered, shake off the excess powder.
You're looking for a thin, even layer with no bare spots and no heavy clumps.
One thing you'll notice is that the powder only sticks to the printed areas. The clear parts of the film should stay clean.
💡 Pro Tip: DTF powder is extremely fine and can become airborne very quickly. I recommend working in a well-ventilated area and wearing gloves if you have sensitive skin. If you print regularly, a dust mask is also a good idea.
Cure the Transfer
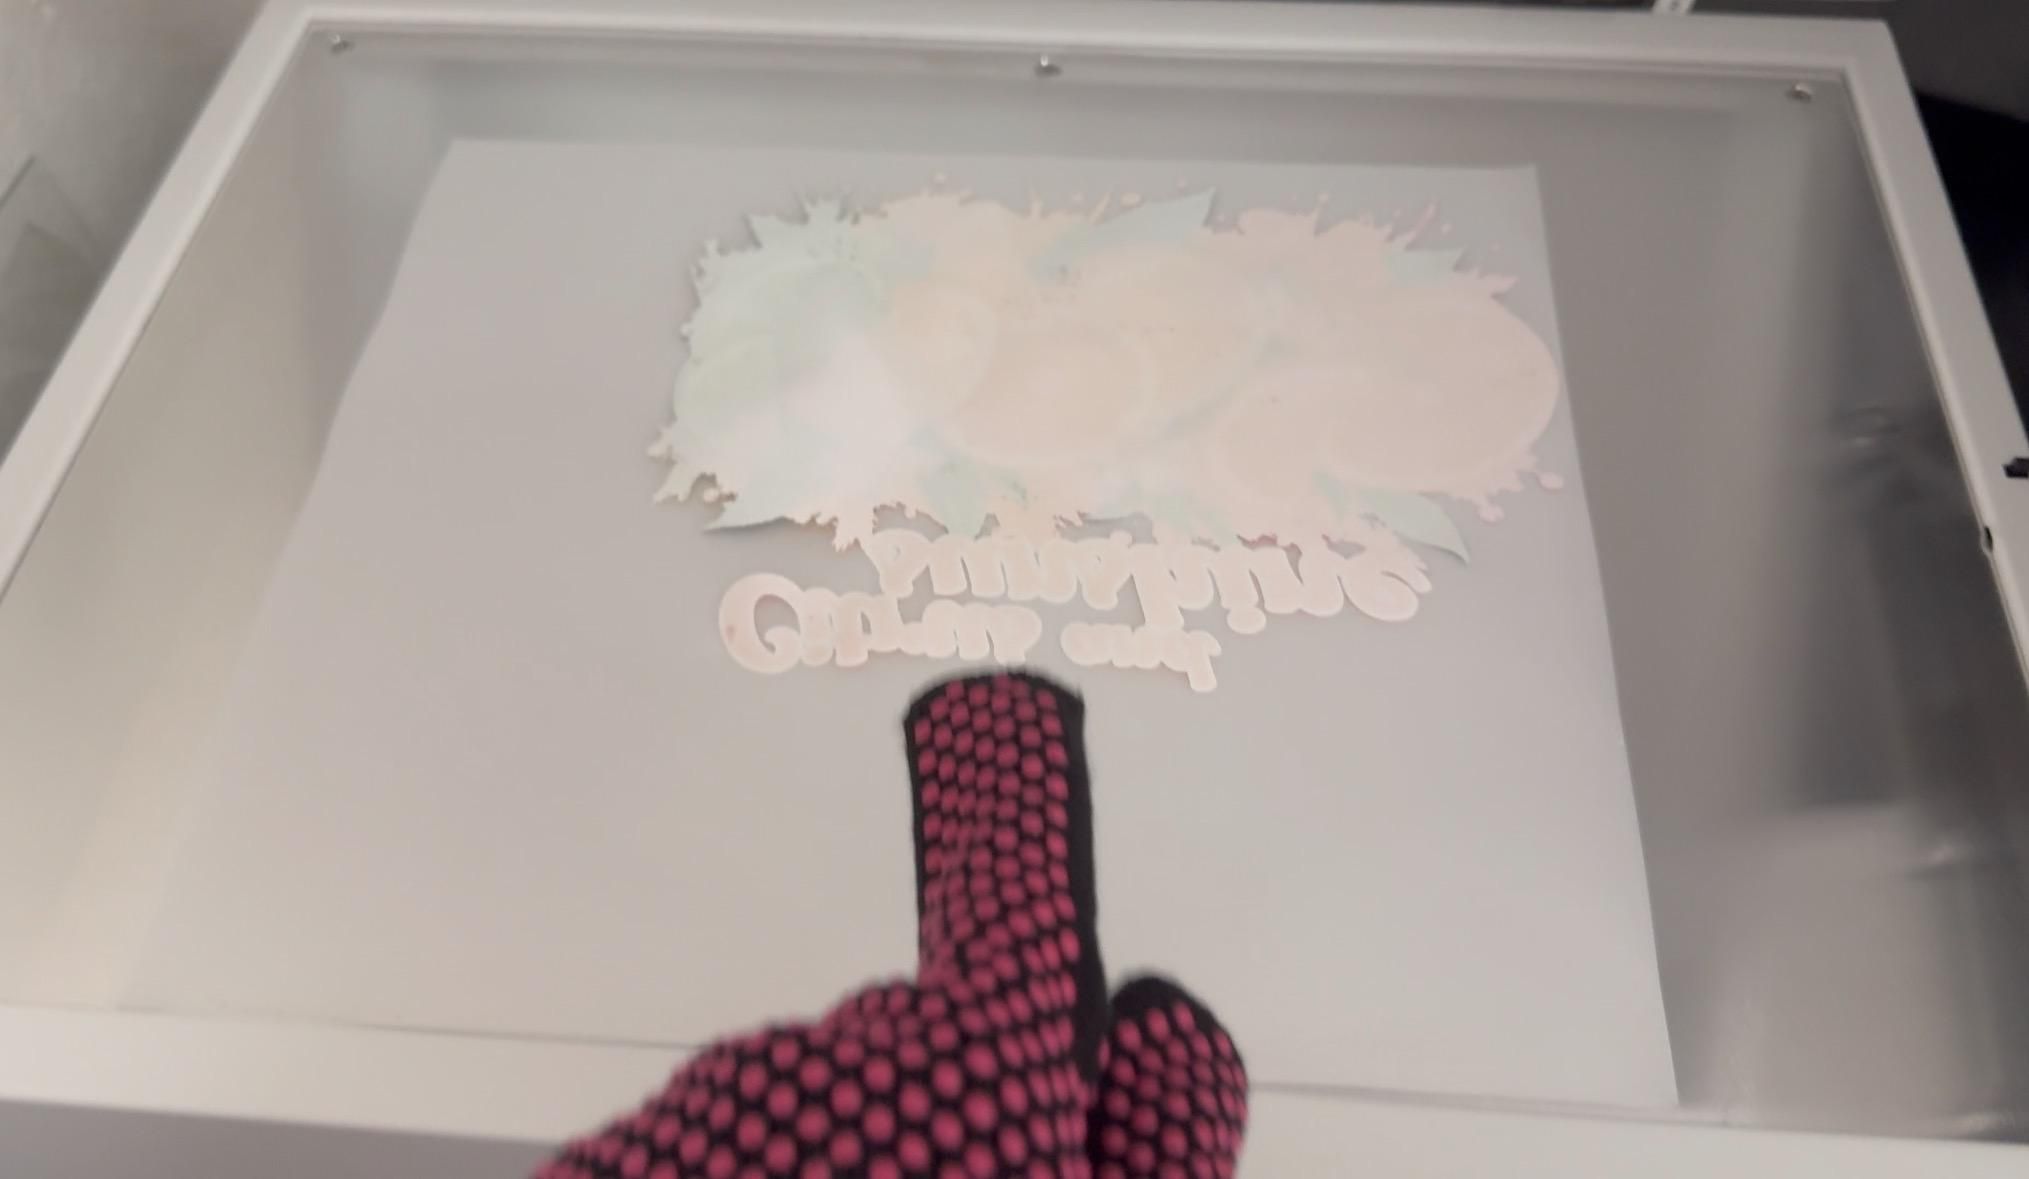
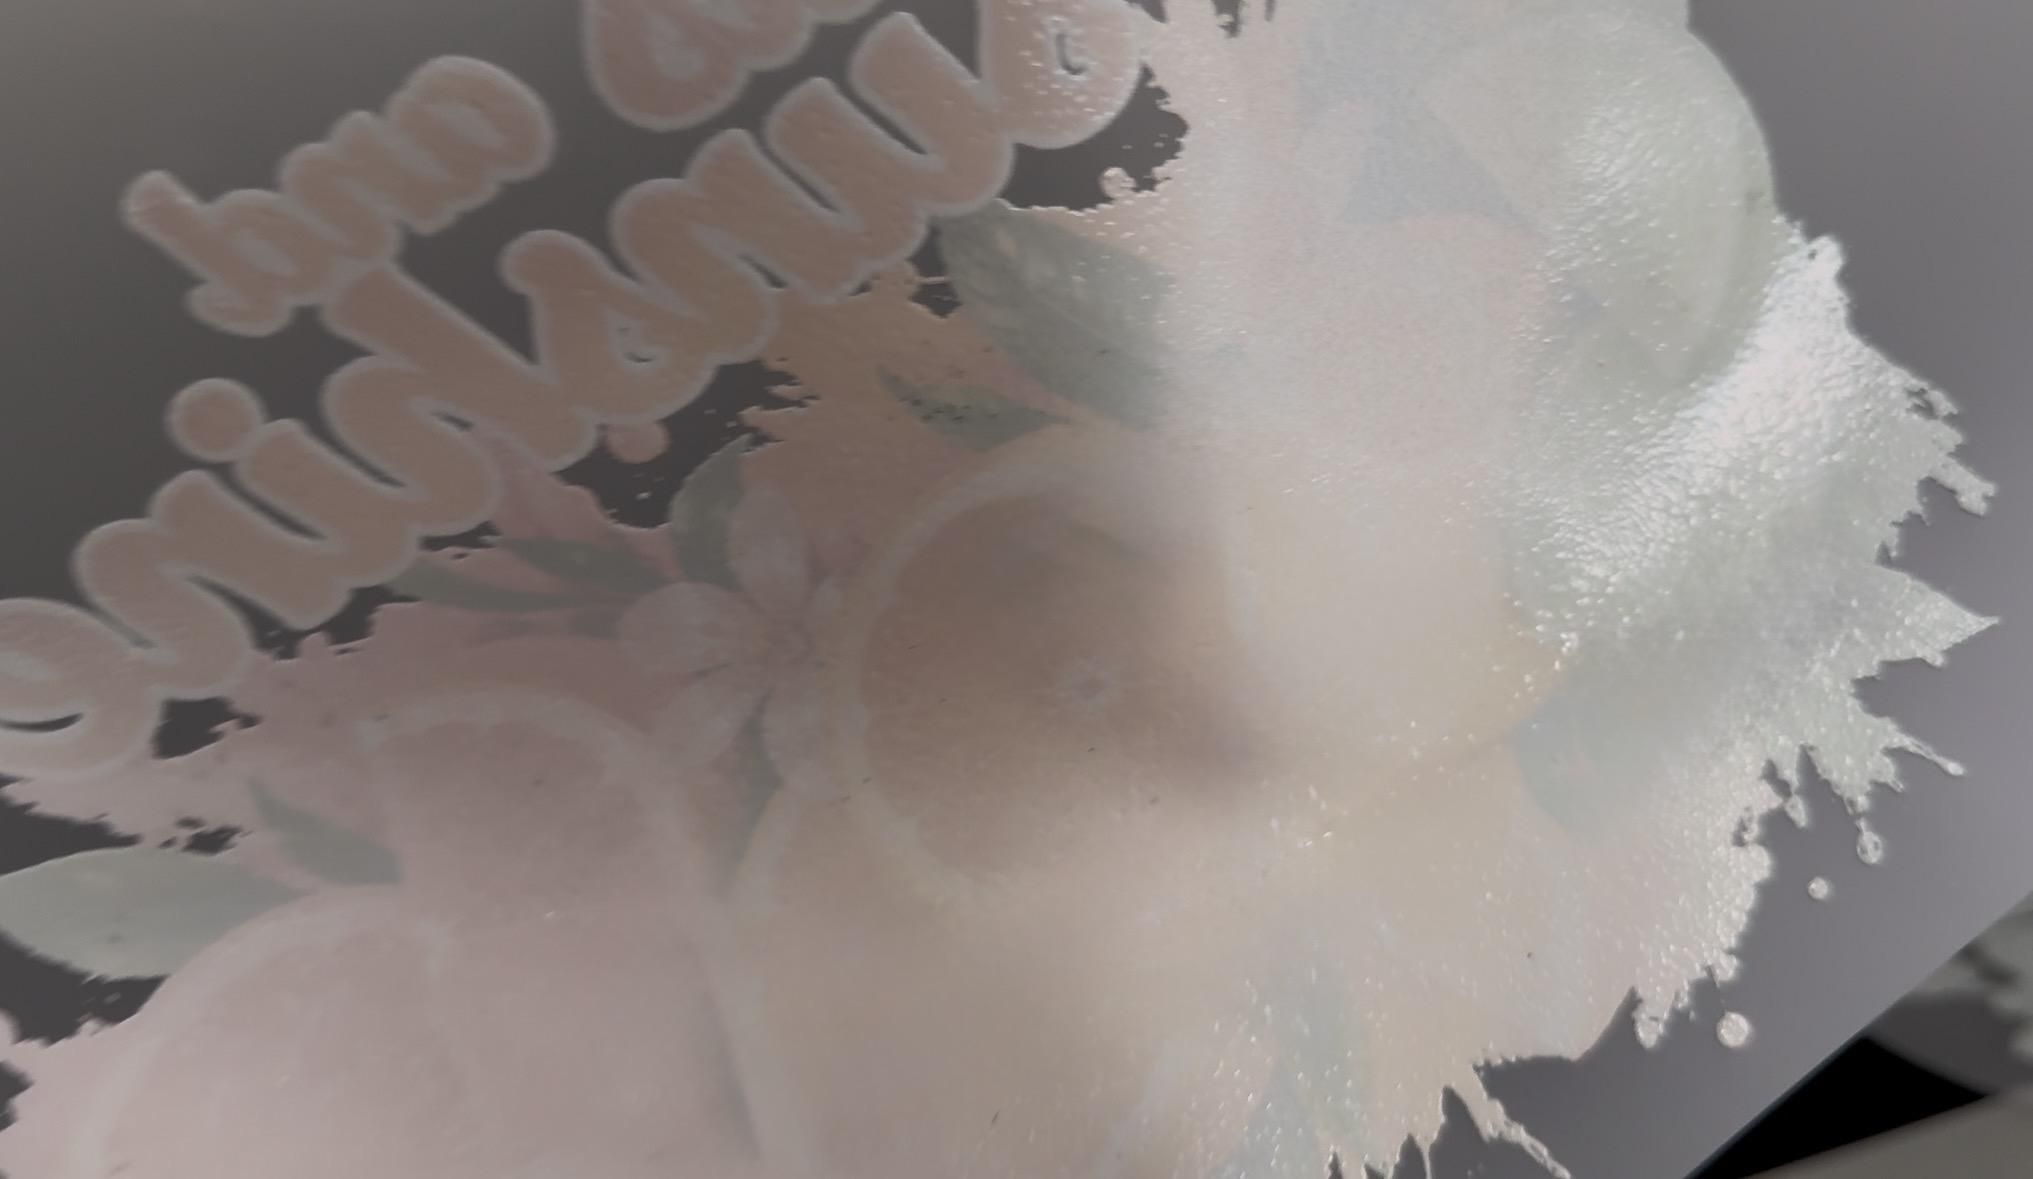
Now it's time to melt the adhesive powder so it permanently bonds to the ink.
Place the transfer inside the HTVRONT A3 DTF Oven with the printed side facing up.
These are the settings that worked well for me:
- Temperature: 290°F (143°C)
- Time: 150 seconds
Keep in mind that every workspace is a little different. Room temperature, humidity, and even different brands of powder can affect curing times, so don't be afraid to make small adjustments if needed.
Once the timer finishes, carefully remove the transfer using heat-resistant gloves and allow it to cool on a flat surface for about 3–5 minutes.
A properly cured transfer should have a smooth, slightly glossy appearance. The powder should no longer look chalky, and the film should feel flexible instead of brittle.
Important: Under-curing can cause the transfer to peel after washing, while over-curing may make it brittle. Always use your powder manufacturer's recommendations as your starting point.
Prepare the Tote Bag
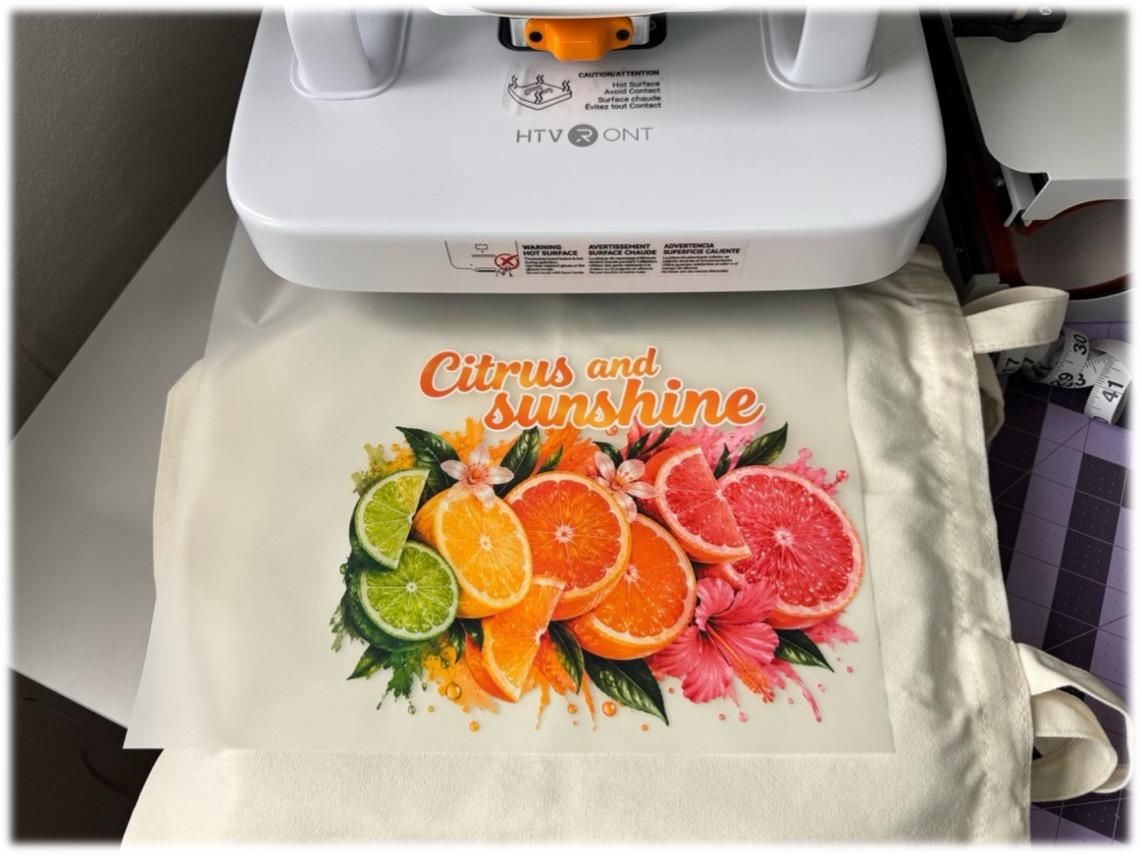
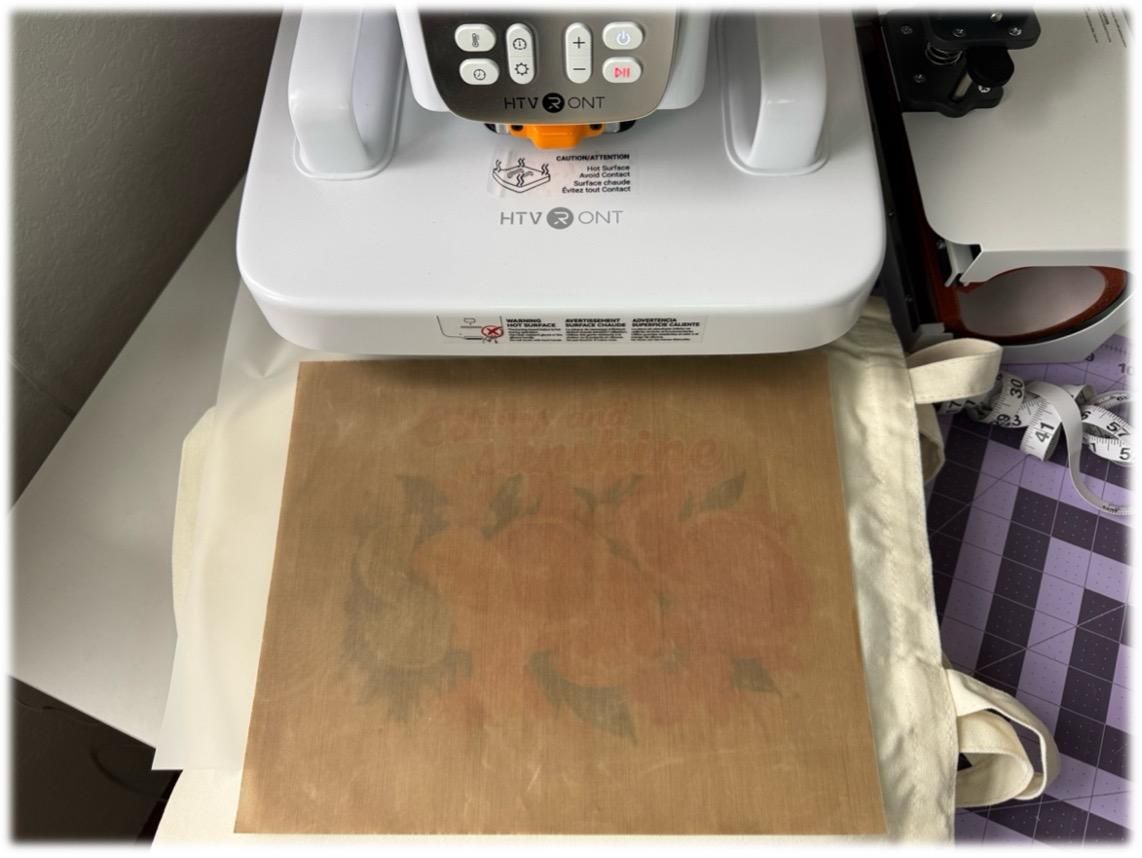
Before applying the transfer, I always pre-press my blank.
This quick step removes moisture and wrinkles from the fabric and helps create a better bond.
Pre-Press Settings
- Temperature: 310°F
- Time: 5–8 seconds
- Pressure: Medium-High
Cover the tote with parchment paper while pre-pressing.
Once finished, allow the tote to cool before positioning your transfer.
Place the cured transfer white printed side down onto the tote.
Take a moment to center the design using a ruler or measuring tape. Once you're happy with the placement, smooth the transfer flat to remove any wrinkles or air bubbles.
If necessary, secure it with a small piece of heat-resistant tape before covering everything with parchment paper.
💡 Pro Tip: If you're working with a new type of fabric, do a small test press first. Spending a minute testing can save you from ruining your finished project.
Heat Press the Design
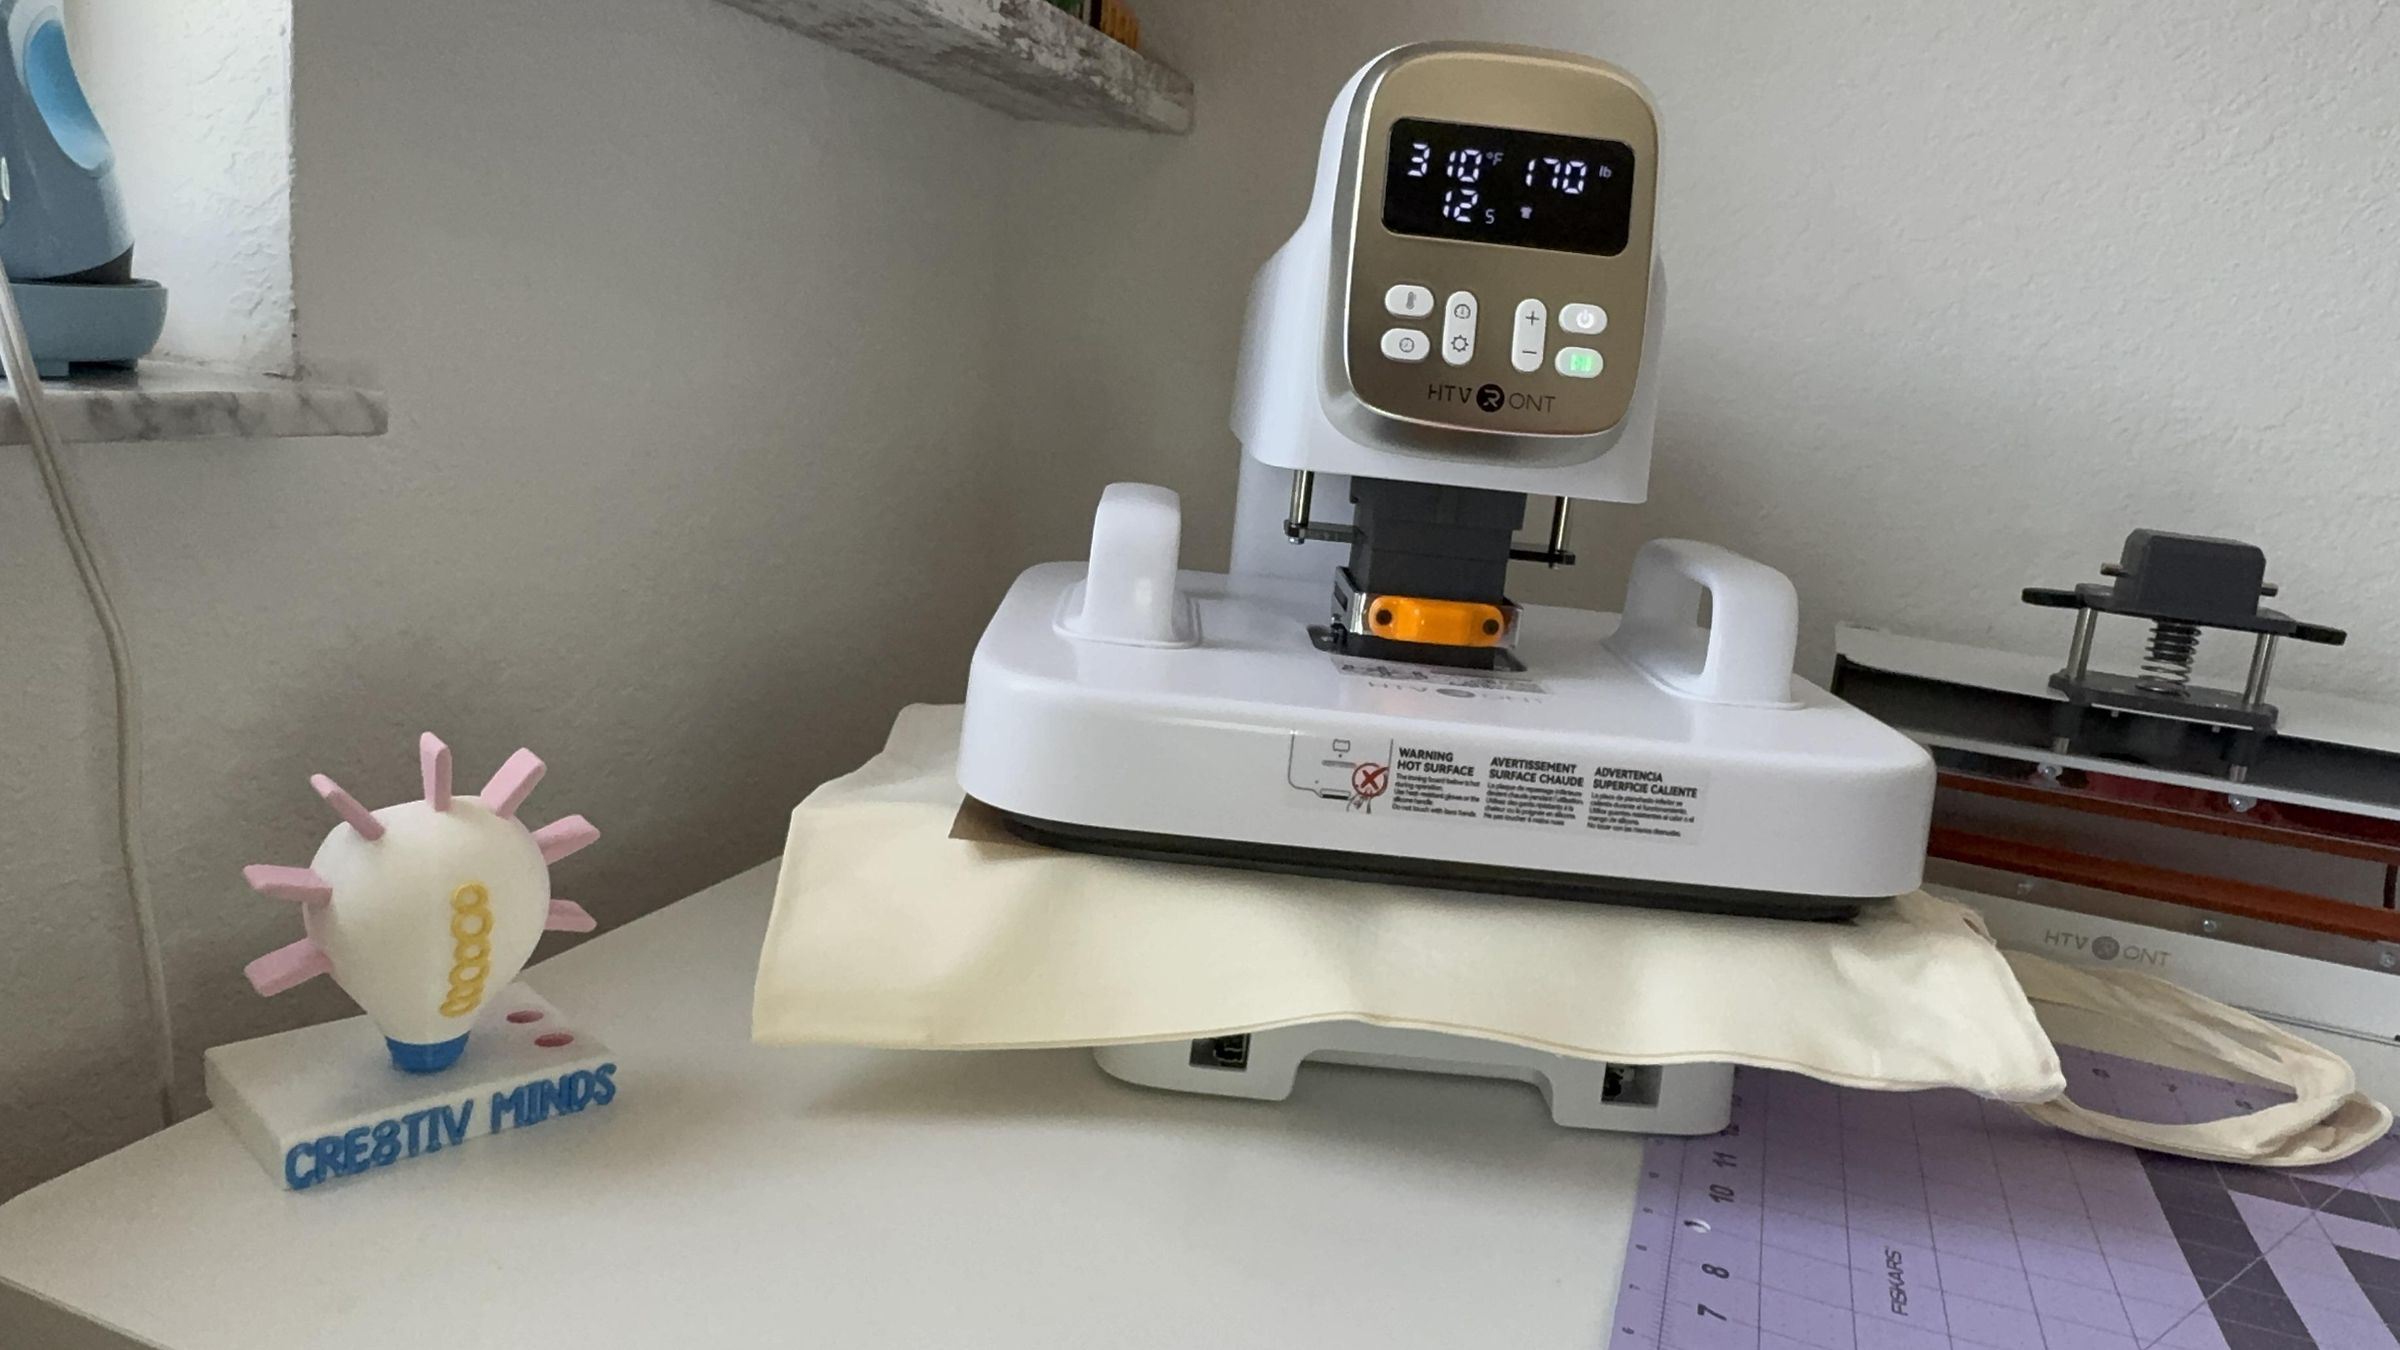
This is the moment everything comes together.
For my canvas tote bag, these settings worked perfectly:
- Temperature: 310°F
- Time: 15 seconds
- Pressure: Medium-Firm
Cover the transfer with parchment paper and close the heat press.
Try not to shift the tote while pressing. Consistent pressure helps produce a clean transfer from edge to edge.
When the timer finishes, remove the tote and allow it to cool before peeling.
Peel the Transfer
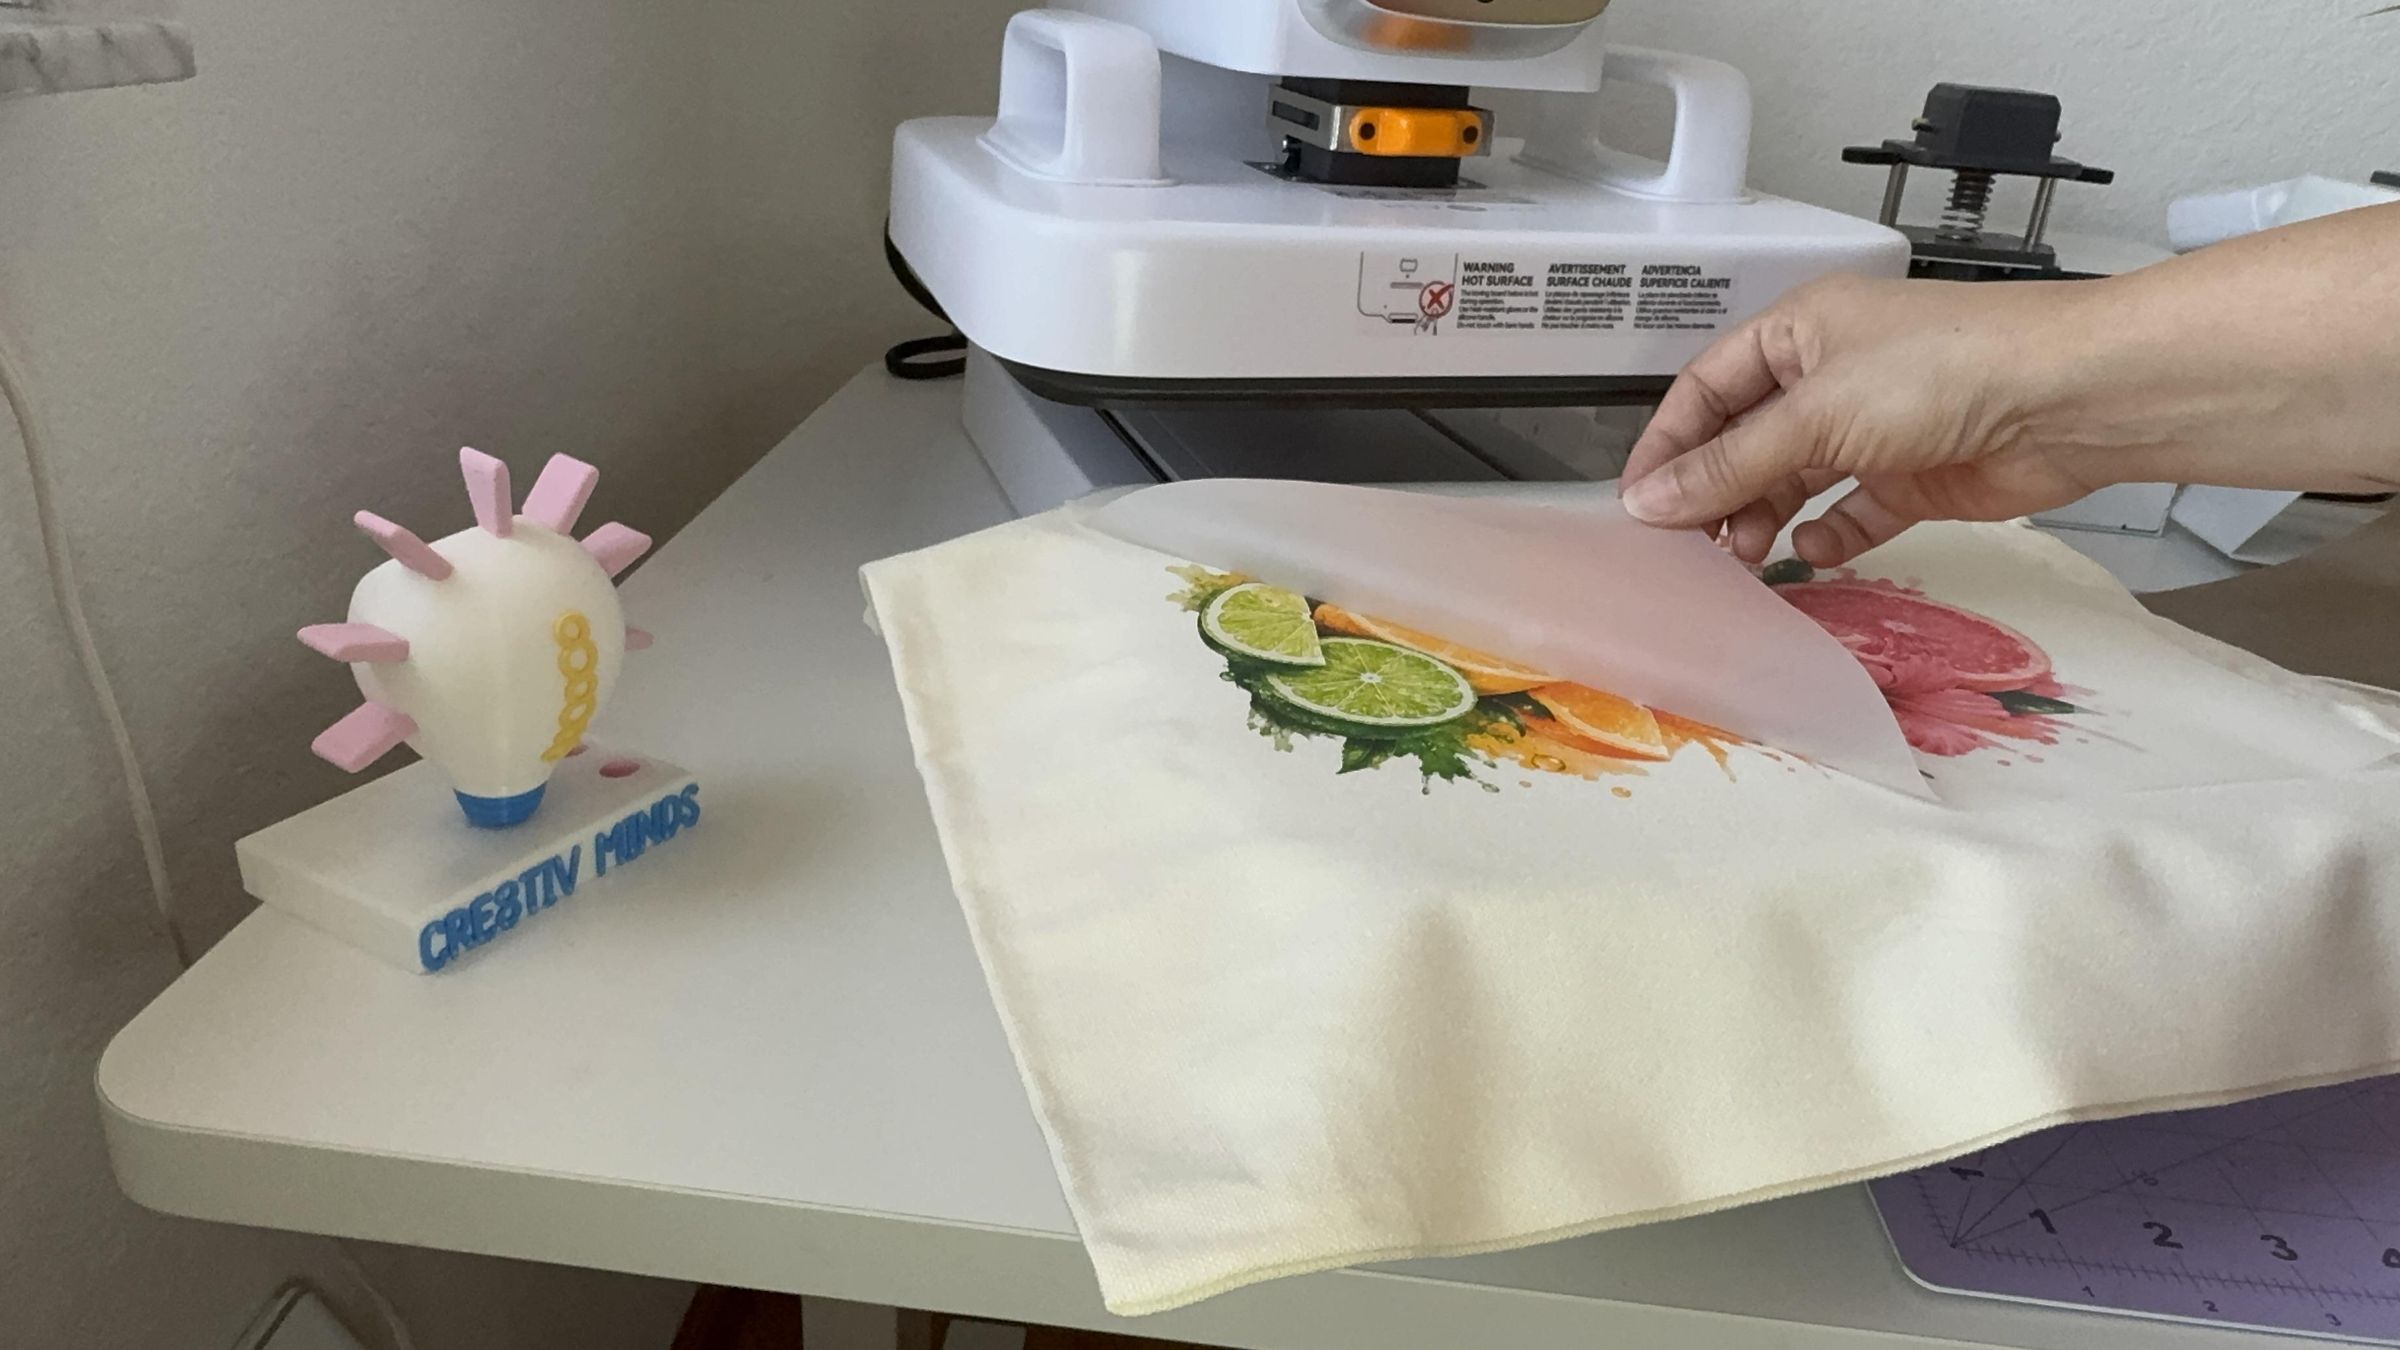
Once the transfer has cooled for about 10–15 seconds, slowly begin peeling from one corner.
The trick is to peel low and slow.
Instead of pulling straight up, keep the film almost parallel to the fabric while peeling back in one smooth motion.
As you peel, watch the transfer to make sure every part of the design is releasing cleanly.
If you notice any area lifting with the film, simply stop, lay the transfer back down, and press it again for another 5 seconds before trying again.
Thankfully, my Citrus Stack design peeled beautifully on the first try. Even the soft gradients transferred perfectly without lifting.
Final Press
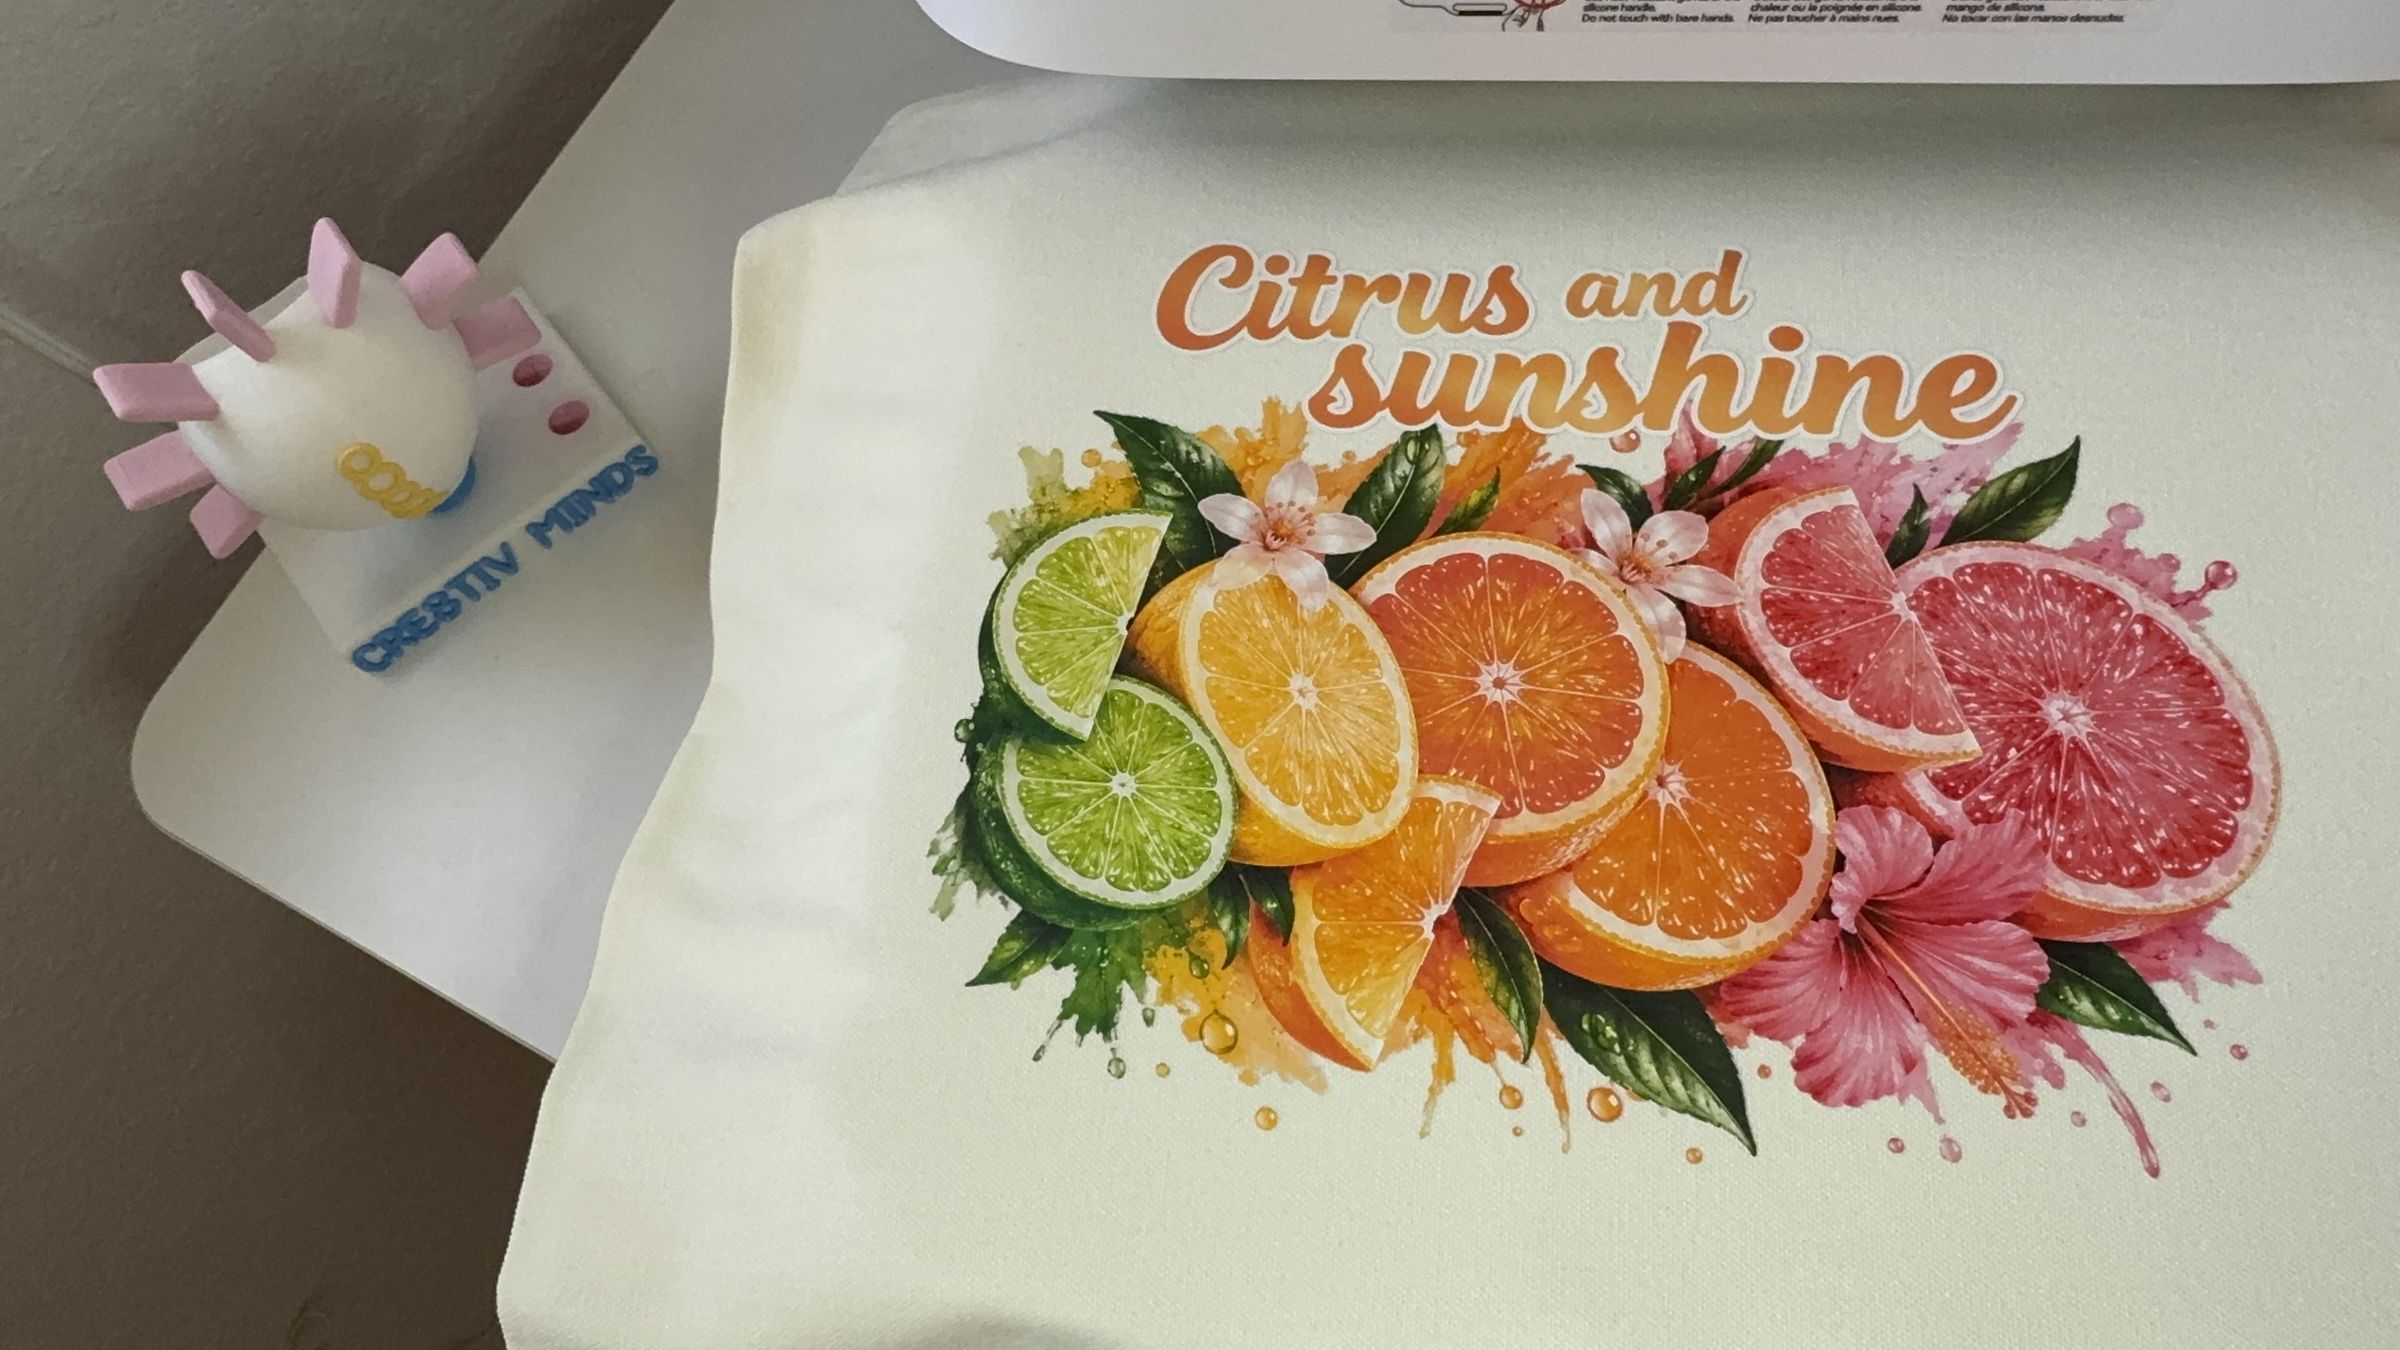
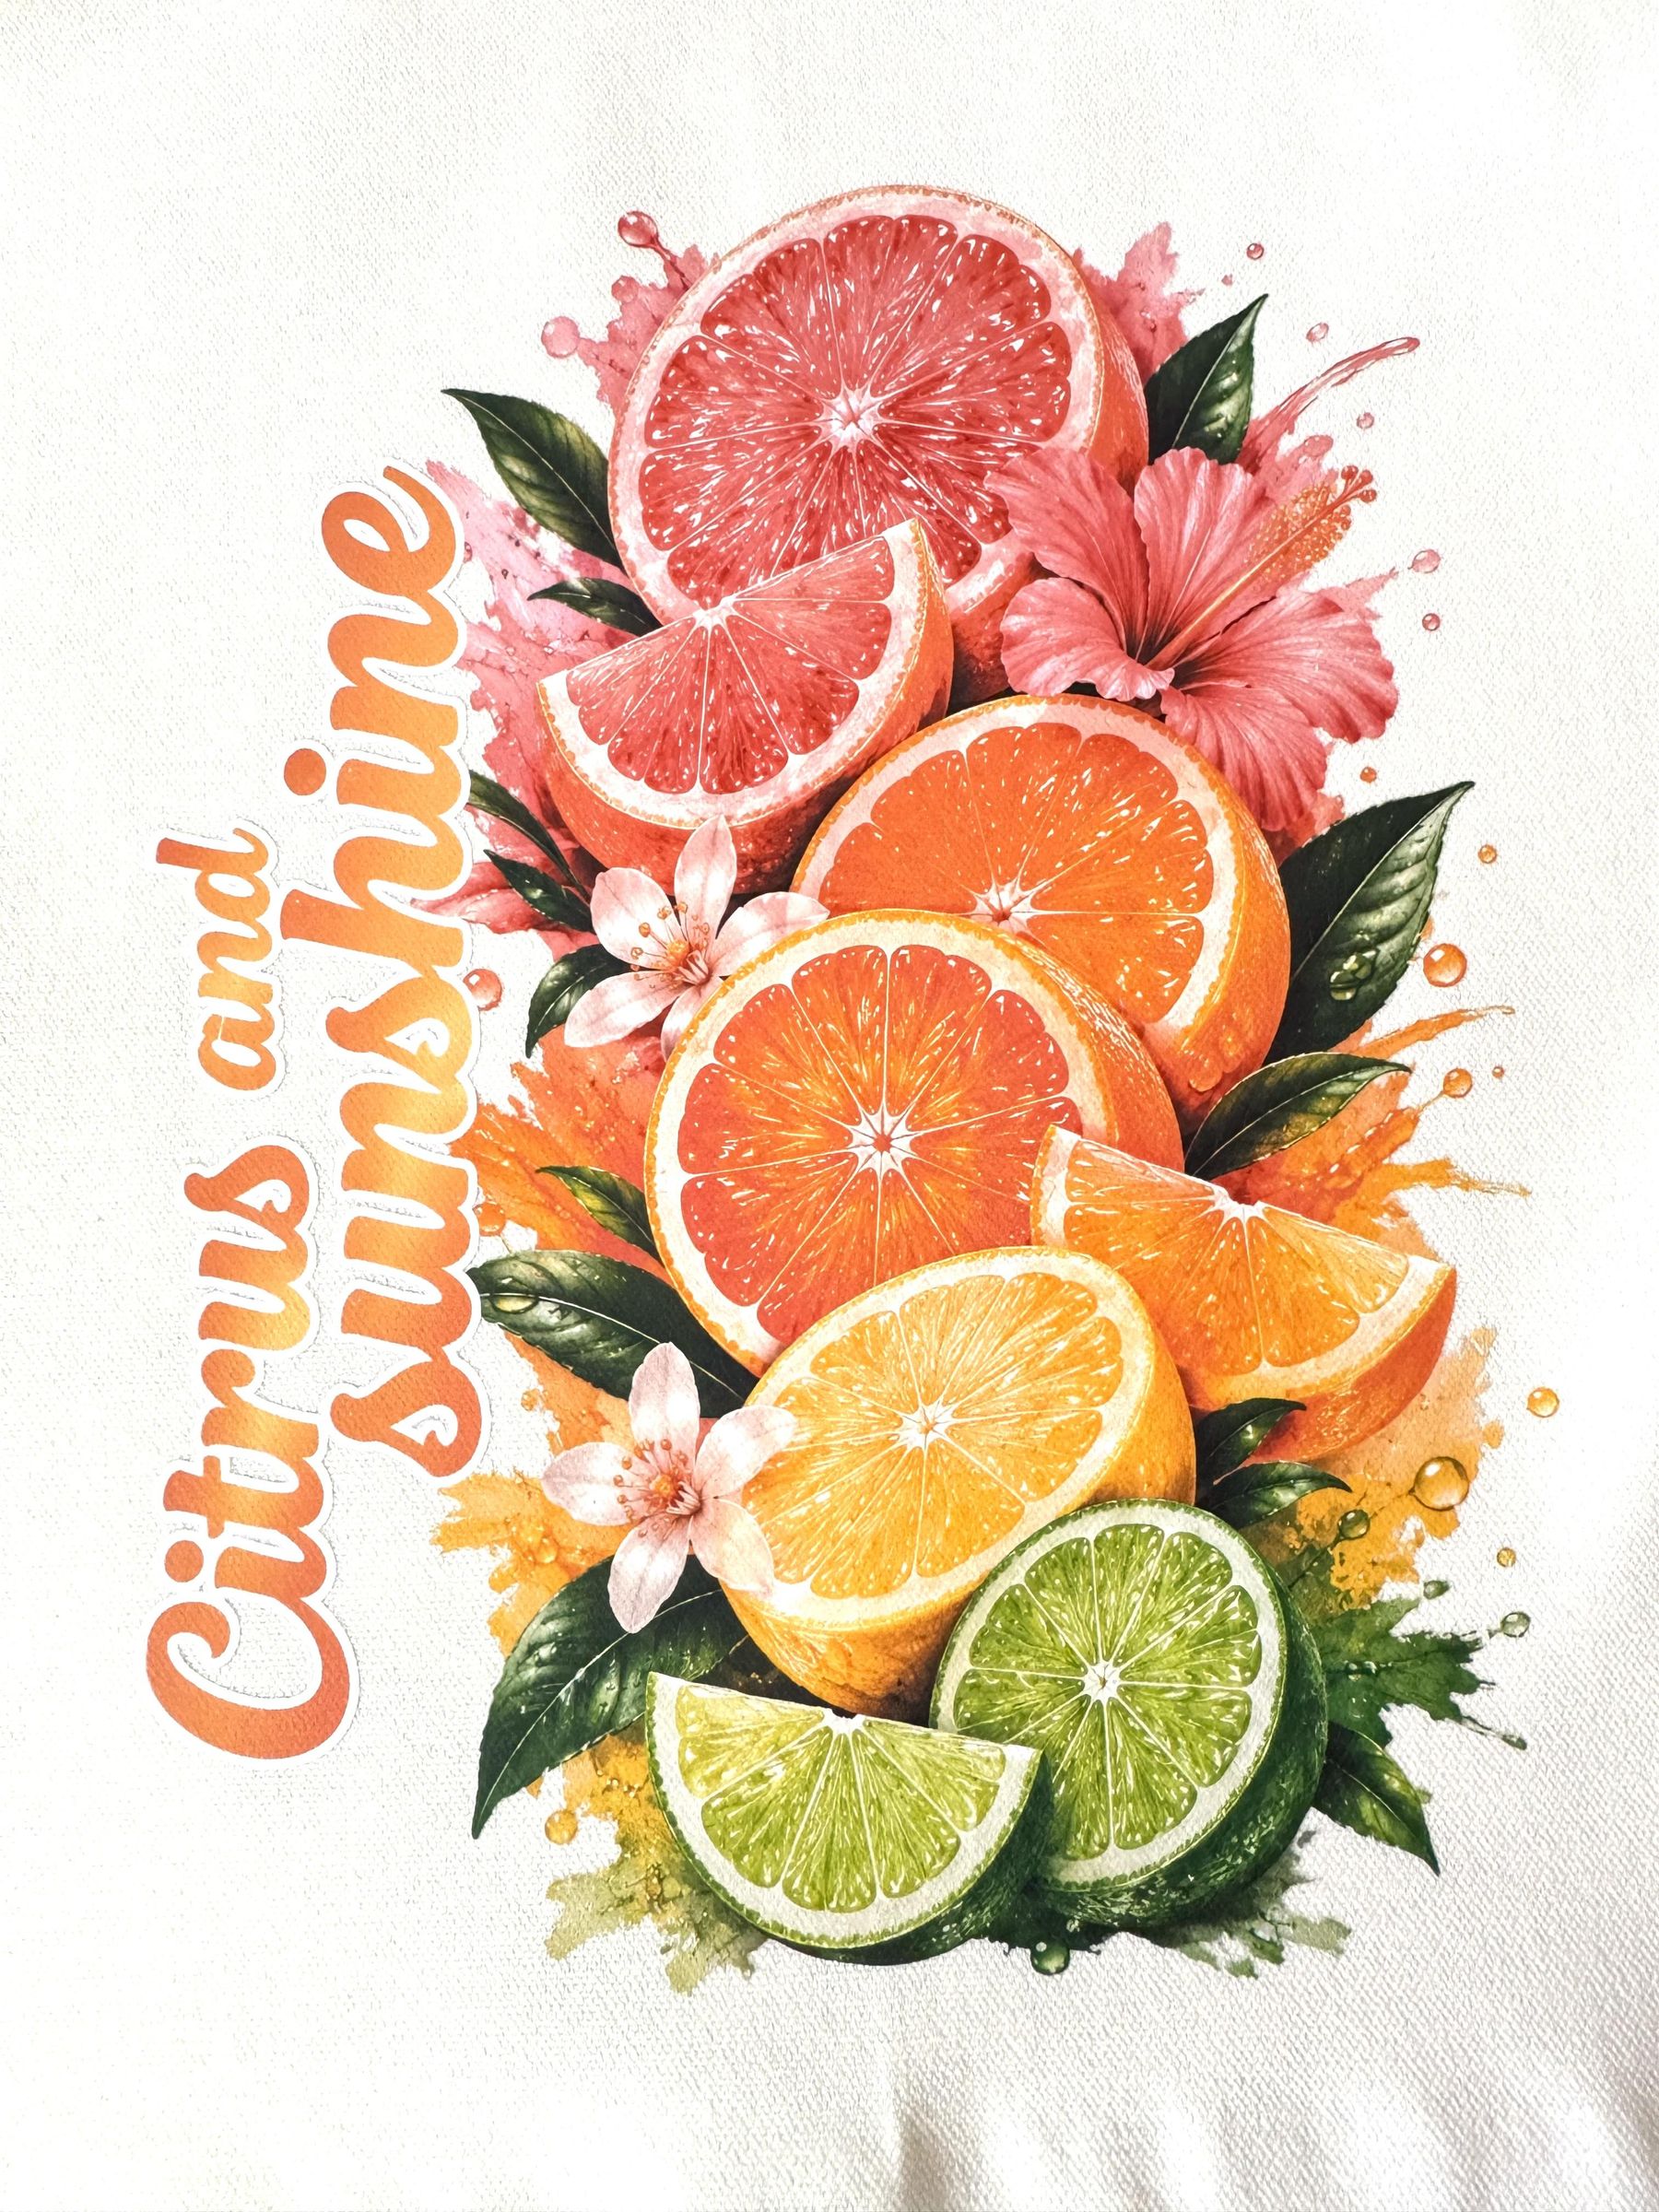
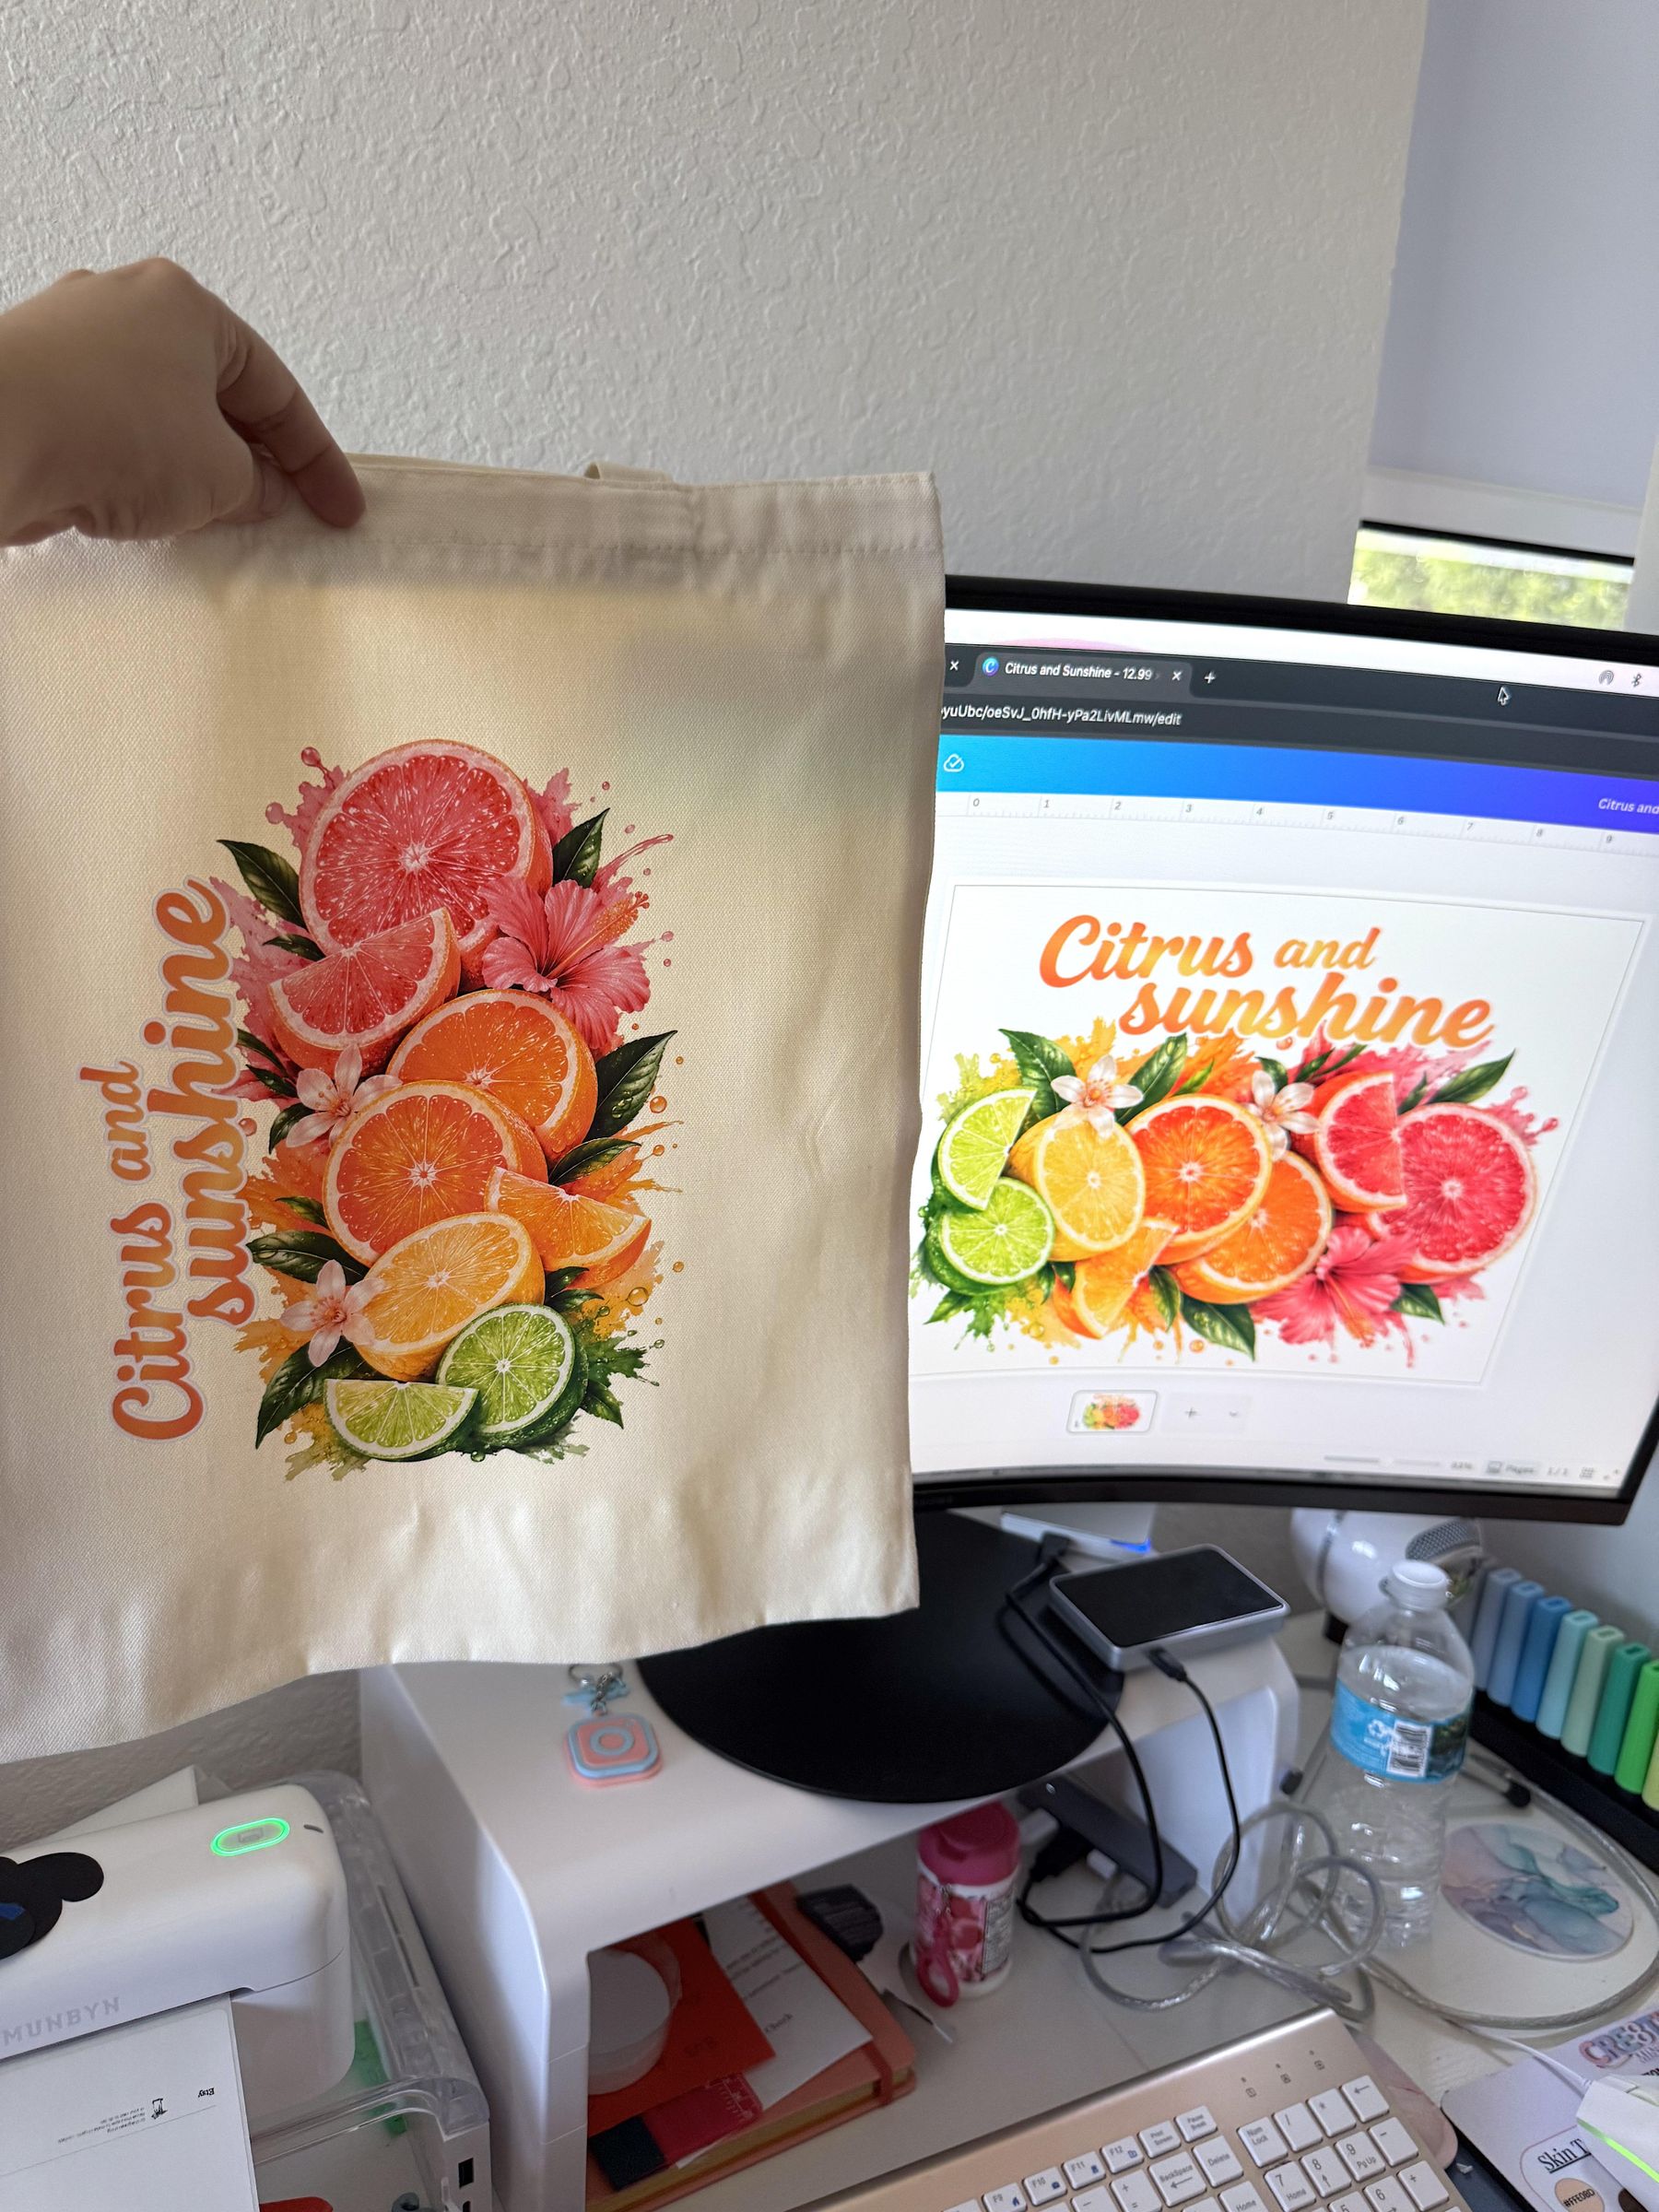
After removing the carrier film, I always like to give the design one final press.
This helps lock down the edges and improves long-term durability.
Cover the design with parchment paper or a Teflon sheet and press again using:
- Temperature: 310°F
- Time: 8 seconds
Allow the tote to cool completely before inspecting your finished project.
A successful transfer should have:
- Smooth edges with no lifting.
- Bright, vibrant colors.
- A soft, flexible feel.
- Smooth gradients without streaks or banding.
If you notice a tiny edge lifting, simply cover that area with parchment paper and press it again for another 5 seconds.
That's it, the custom Sunset Gradient Citrus Stack tote bag is finished!
Care Instructions
Now that the tote bag is finished, you'll want to take care of it so the design stays looking its best.
For the best results, wait 24 hours before washing to allow the adhesive to fully cure.
When it's time to wash your tote:
- Turn the bag inside out before washing.
- Machine wash in cold water on a gentle cycle.
- Avoid bleach or harsh detergents.
- Tumble dry on low heat or hang to dry.
- If ironing is needed, avoid ironing directly on the design. Place parchment paper or a pressing cloth over the artwork first.
With proper care, your DTF transfer should stay vibrant and flexible through many washes.
Troubleshooting Quick Reference
If something doesn't come out exactly as expected, don't worry. Most DTF issues are easy to fix with a small adjustment.
Transfer lifting after peeling
- Increase your press time by about 5 seconds.
- Make sure you're using firm, even pressure.
- Double-check that your transfer was fully cured before pressing.
Colors look dull
- Verify that Object Area Fill is enabled for the white ink layer.
- Run a nozzle check to make sure every ink channel is printing correctly.
Gradients look streaky or banded
- Run a standard cleaning cycle in IdeaStudio.
- Print another nozzle check and look for missing lines in the CMYK channels.
Film isn't feeding correctly
- Make sure the film roll is seated properly on the holder.
- Check that the leading edge is feeding straight through the rear slot.
IdeaStudio doesn't recognize the printer
- Confirm the USB cable is fully connected.
- Try another USB port.
- Restart both the printer and IdeaStudio.
Most issues are quick to solve, and once everything is dialed in, the printing process becomes very consistent.
Final Thoughts
I have to admit; I was a little nervous before trying DTF printing for the first time. Like a lot of crafters, I'd heard stories about constant maintenance, clogged printheads, and a steep learning curve. That's honestly what kept me from investing in a DTF printer sooner.
After completing this project, I can say my experience was much easier than I expected.
From setting up the printer to peeling the finished transfer, the entire process felt approachable; even as a first-time DTF user. My Sunset Gradient Citrus Stack design transferred beautifully, the gradients stayed smooth, the colors were vibrant, and even the smallest details printed cleanly.
The features I appreciated the most were the automatic white ink circulation system and having everything managed inside one software program. Those two things removed a lot of the intimidation I had associated with DTF printing.
One thing I was especially curious about was how the D2 would perform after sitting unused for a few days. White ink maintenance is one of the biggest concerns many people have when considering a DTF printer, and I wanted to see how the printer would handle a short break between projects.
After completing my first prints, I went three days without printing or turning on the printer. When I returned, I powered the D2 back on, ran a nozzle check, performed one quick cleaning cycle, and was ready to print again without any issues.
As someone who creates projects in batches and doesn’t always print every single day, having a printer that can sit for a few days and be ready when I need it is a huge advantage. The automatic white ink circulation and Sleep Care Mode features gave me peace of mind and helped reduce the maintenance concerns I had going into DTF printing.
Of course, like any printer, proper care and maintenance are still important. No machine is completely maintenance-free, but based on my experience with the D2, the features designed to help manage white ink maintenance made the process feel much less intimidating.
If you've been thinking about adding DTF printing to your crafting or small business, I hope this tutorial gives you the confidence to take that first step. My goal wasn't just to show you the finished tote bag; it was to show that the process is something a beginner can absolutely learn.
I'd love to know what you create! If you make this project or try DTF printing for the first time, feel free to share your results or ask questions in the comments. I always enjoy seeing what other makers create.
Thank you so much for following along, and happy crafting!
Disclosure: This Instructable was created in partnership with HTVRONT. The D2 DTF Printer and Oven Bundle were provided for review. As always, all opinions, settings, and results shared in this tutorial are my own.